

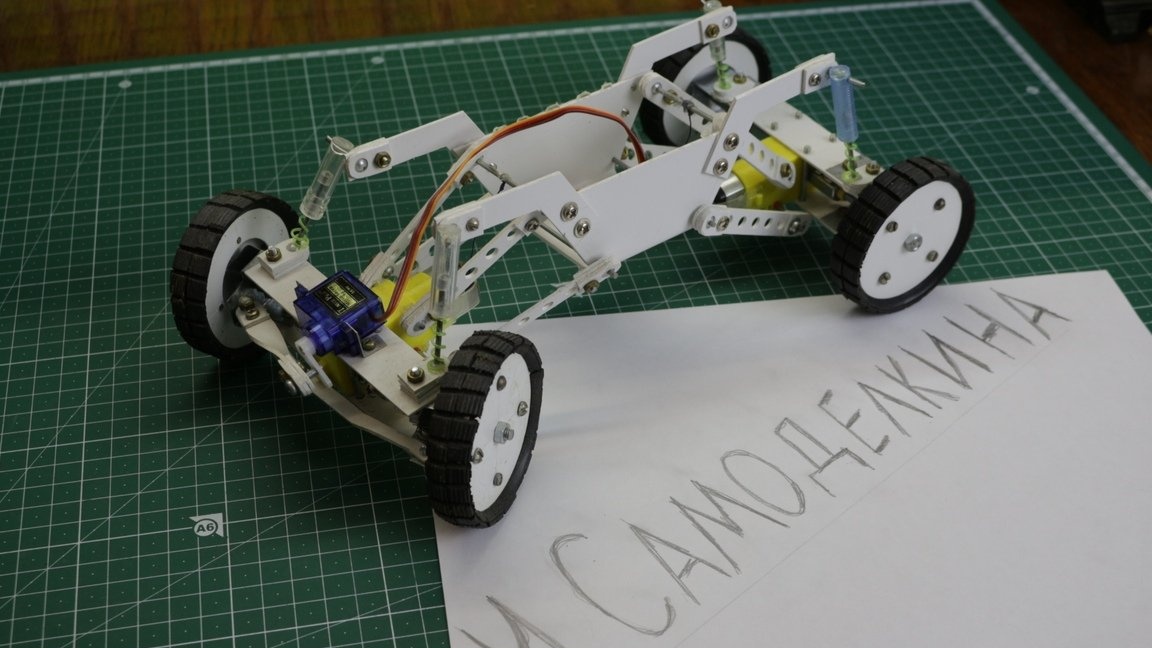
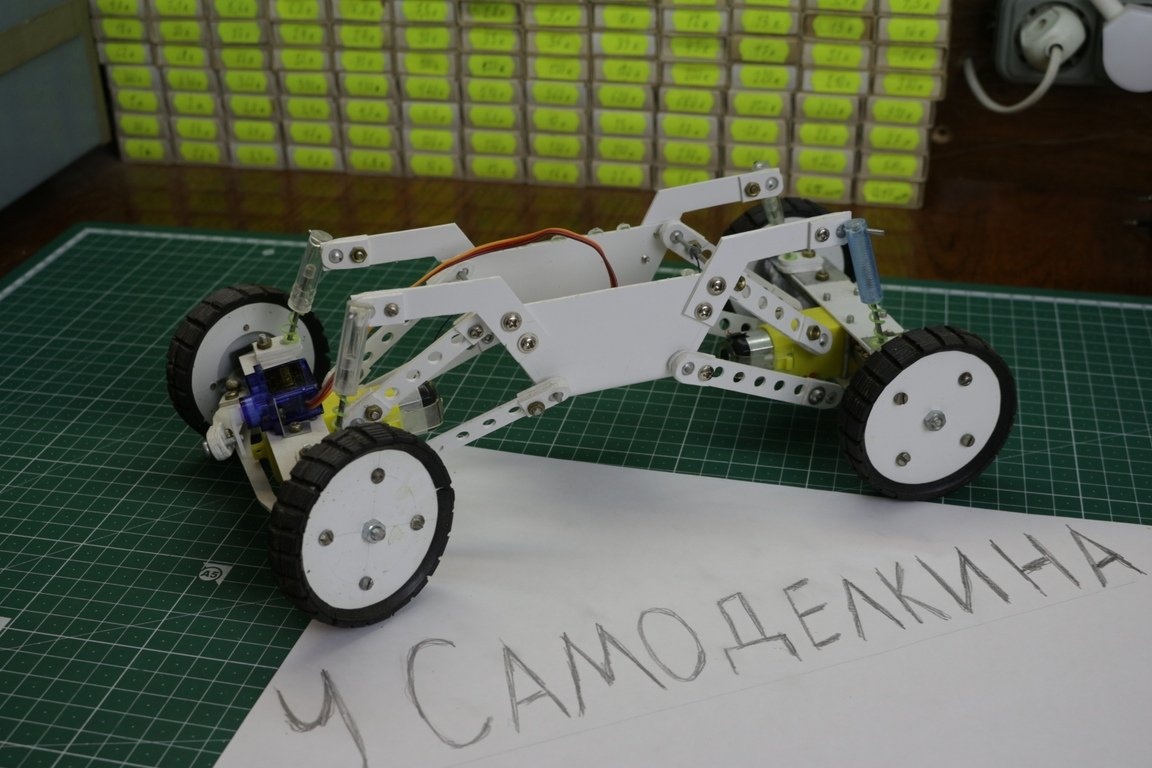
If all the materials and tools are at hand, you can make it in a couple of evenings and please the child with a wonderful toy.
So we need:
1. PVC pipe of rectangular section 60x200mm, sold in hardware stores
2. Sheet metal 0.5 mm thick
3. Beads with a diameter of 6 mm with a hole with a diameter of 2 mm
4. Dowels with a diameter of 6 mm
5. Screws of different lengths and M3 nuts
6. M6 nuts 15mm long
7. Rubber plumbing rings with a diameter of 60mm
8. Two yellow Chinese gears
9. Bicycle spokes with a diameter of 2 mm
10. Servo SG-90
11. Equipment R / C
12.4 pens
Of the tools you will need a screwdriver, scissors for metal, a hacksaw, screwdrivers, a knife, a ruler, an awl, drills, a file.
Glue is better to use Cosmofen or a glue gun.
Immediately make a reservation on the equipment. I used the Arduino platform, but you can install discrete from Chinese cars or proportional to the type of FlySky FS GT3B. If equipment from Chinese cars will be used, then the servo drive will have to be converted into a conventional gearbox. To do this, open it carefully by unscrewing the screws, remove the control board and solder the wires (black and color) directly to the motor. Then assemble back.
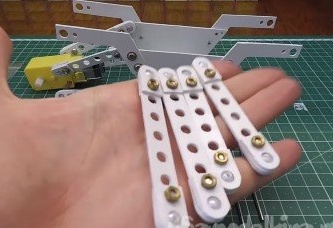
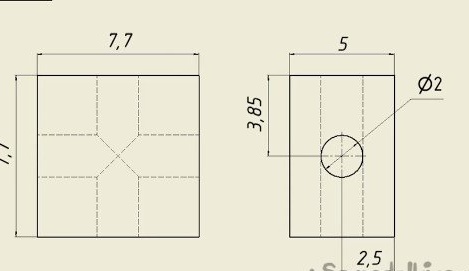
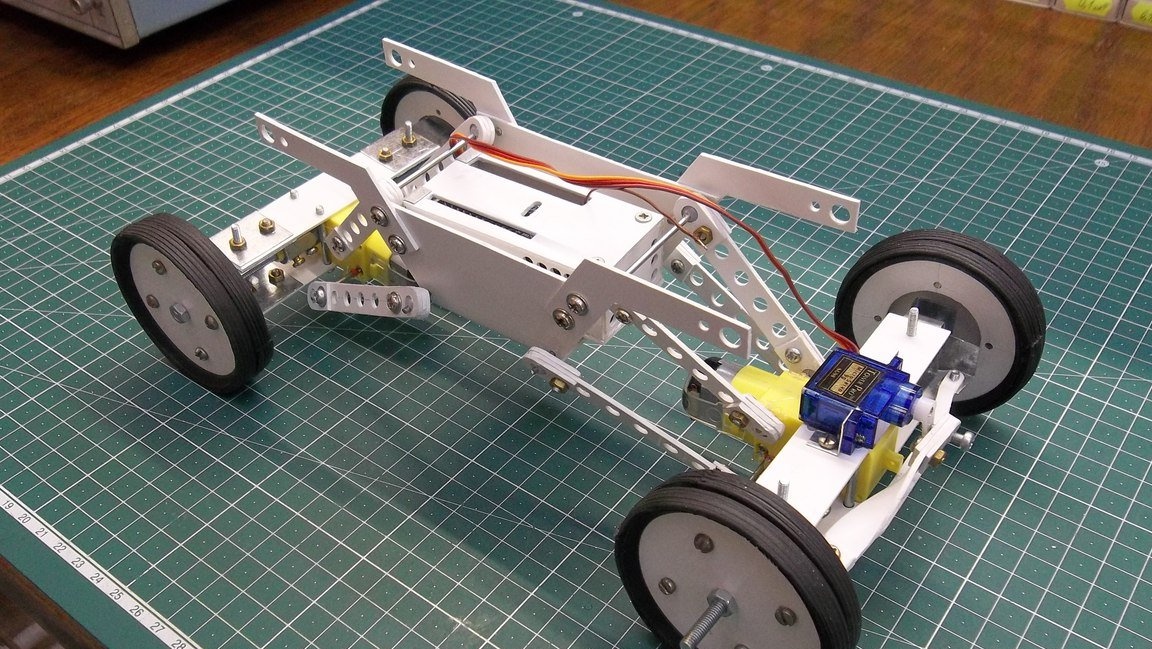
Before tackling the crawler directly, you need to check yourself for perseverance and patience by making ball bearings for it. They actually allow the crawler to be one. You will need 26 of them. we will make them from PVC plastic and beads. We get plastic by cutting out flat sections from the pipe. It will come in handy for other details. Each of the supports consists of three such details:
Two of these at the edges, and the inner should have a diameter of the bead. All three are fastened with an M3 screw.
It should be like this:
We align the edges with a file, so that everything turns out smoothly and beautifully. And so 26 times ...) It will be more accurate to say that we need only the side parts, the role of the internal ones will be performed by levers. And only for shock absorbers it will be necessary to manufacture four such supports. Chamfers can be made with a drill of a larger diameter.
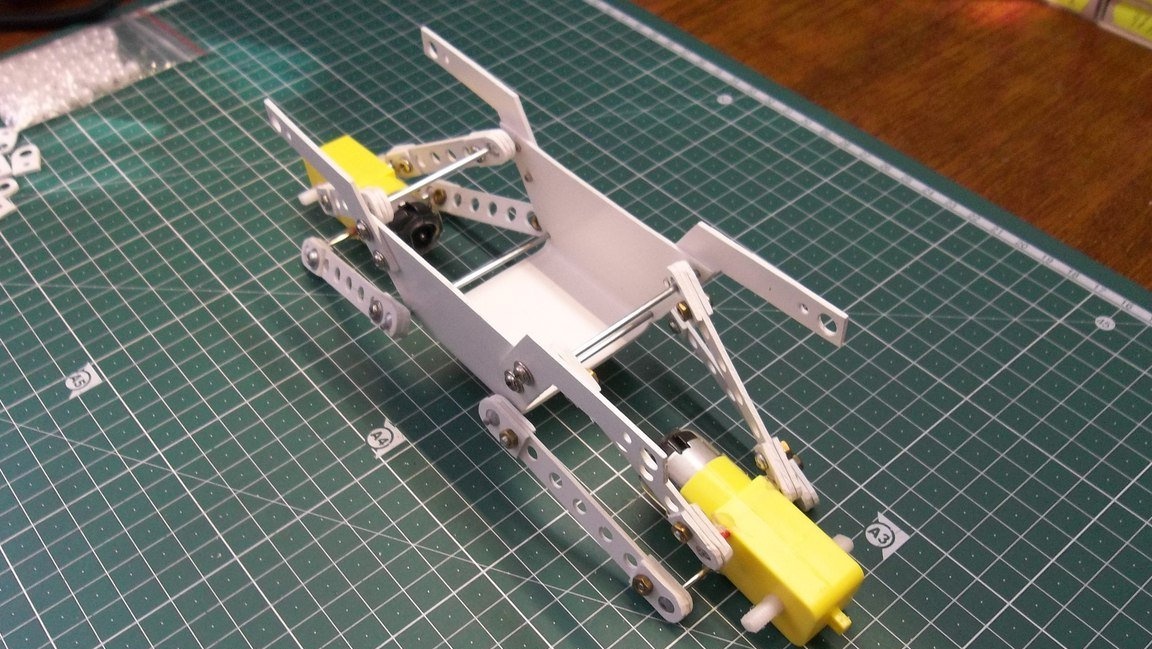
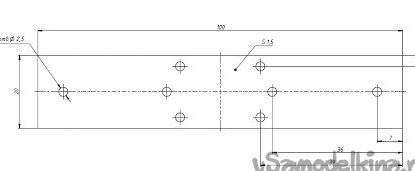
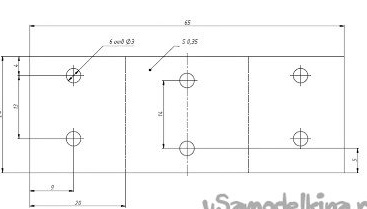
Overpowered? Perfectly! We are going further. Let's make a frame. The shape of the pipe is such that it allows you to cut the frame out of it without resorting to bending procedures.You just need to put our drawing on the sides and use a hacksaw and scissors to carefully cut it.
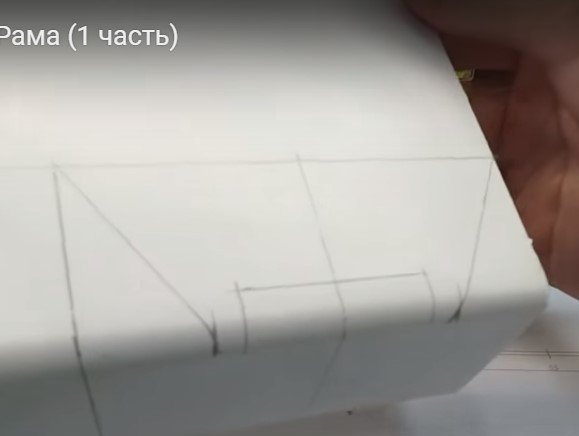
Here is the drawing:
In these places, drill holes for levers and shock absorbers.
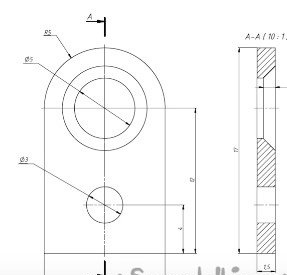
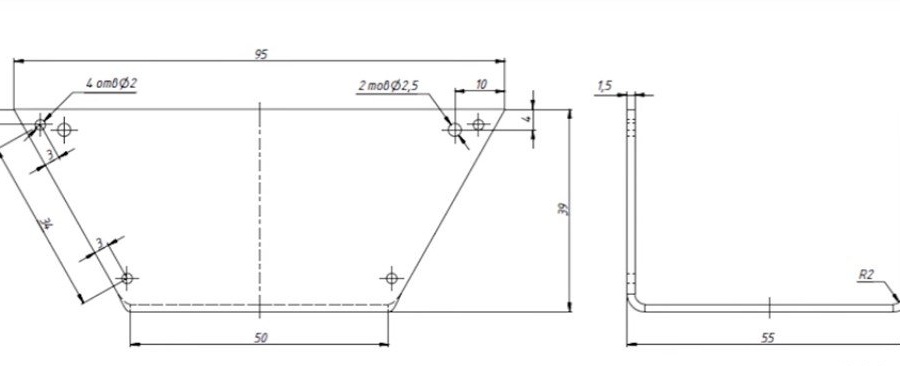
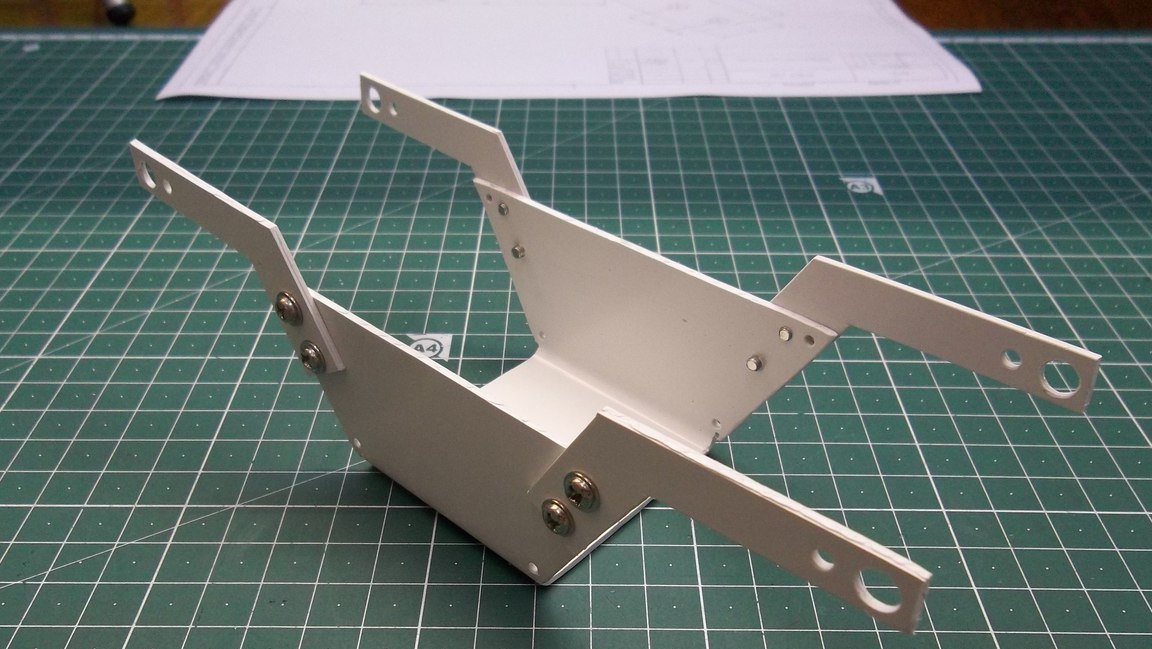
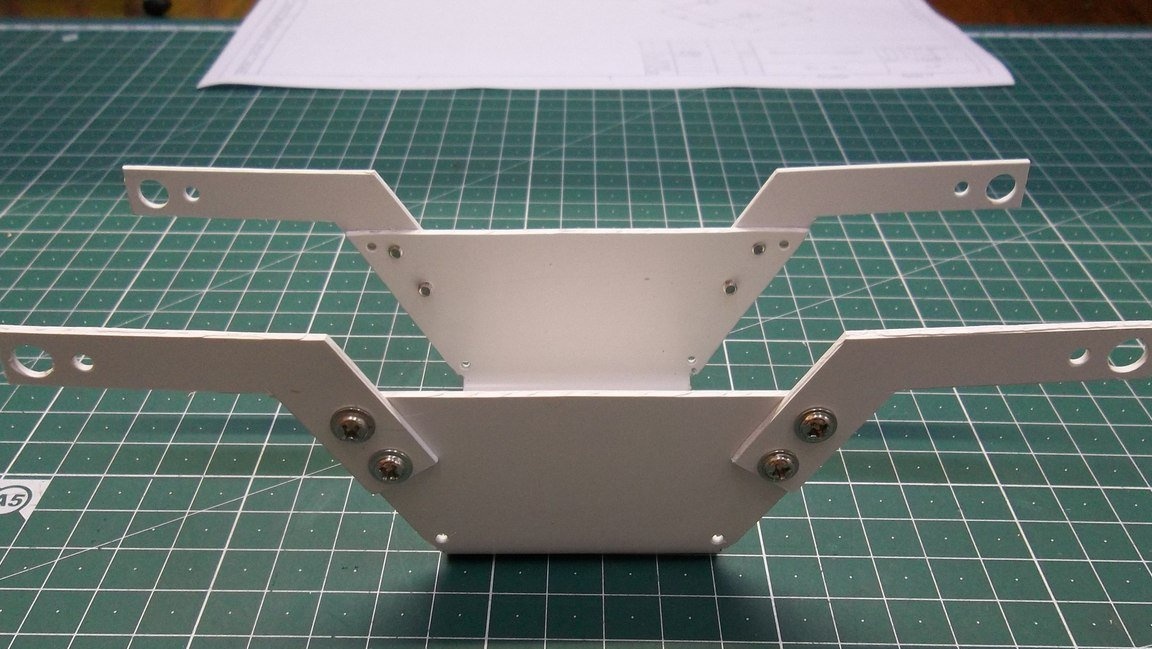
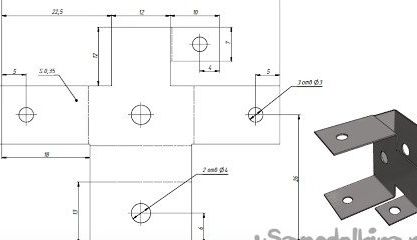
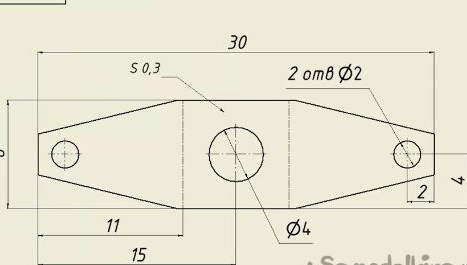
Next, you need to make 4 brackets for shock absorbers. We also make them from PVC plastic according to these drawings:
The upper pair of holes serves as the middle plate for ball bearings. Cut, we get:
We screw them to the top of the frame with M3 screws, screwing them into the 2.5mm holes. In this case, the nuts can not be used, the screw itself will thread the plastic, while the connection is quite strong. It should be like this:
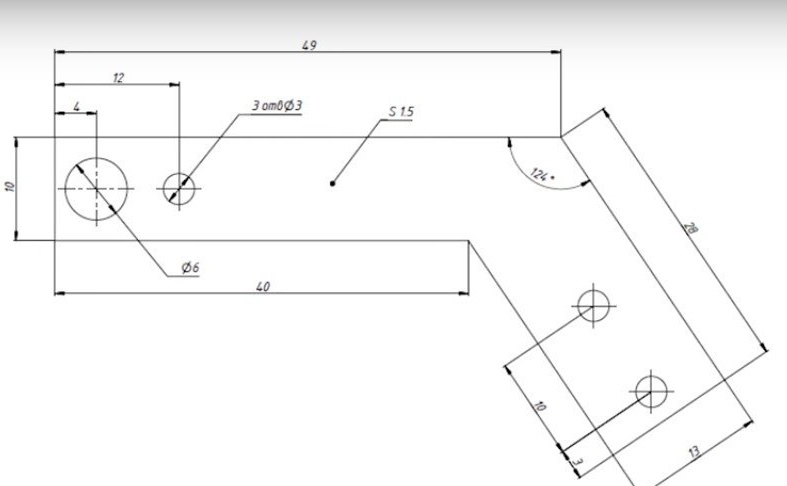
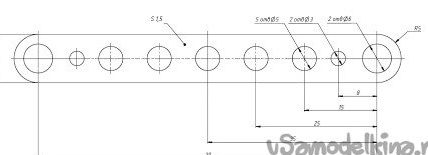
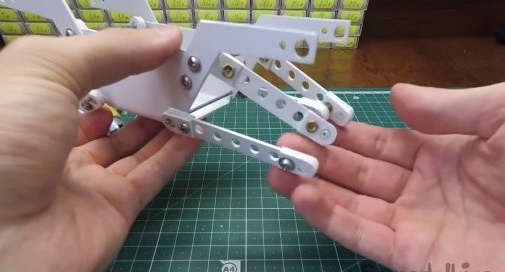
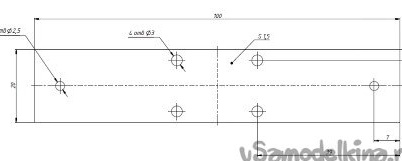
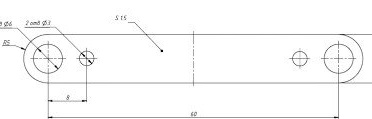
Next, do the upper and lower suspension arms. We use the same PVC plastic, mark, drill, cut out. Here is a drawing for the lower levers:
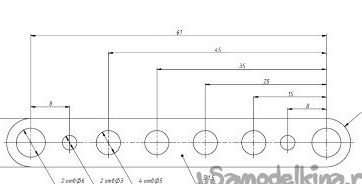
The upper arms should be slightly shorter. Here is a drawing for them:
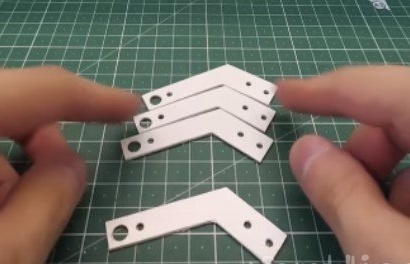
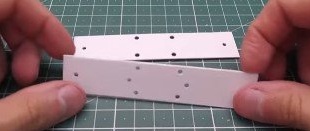
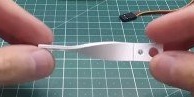
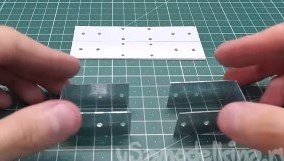
We get these details:

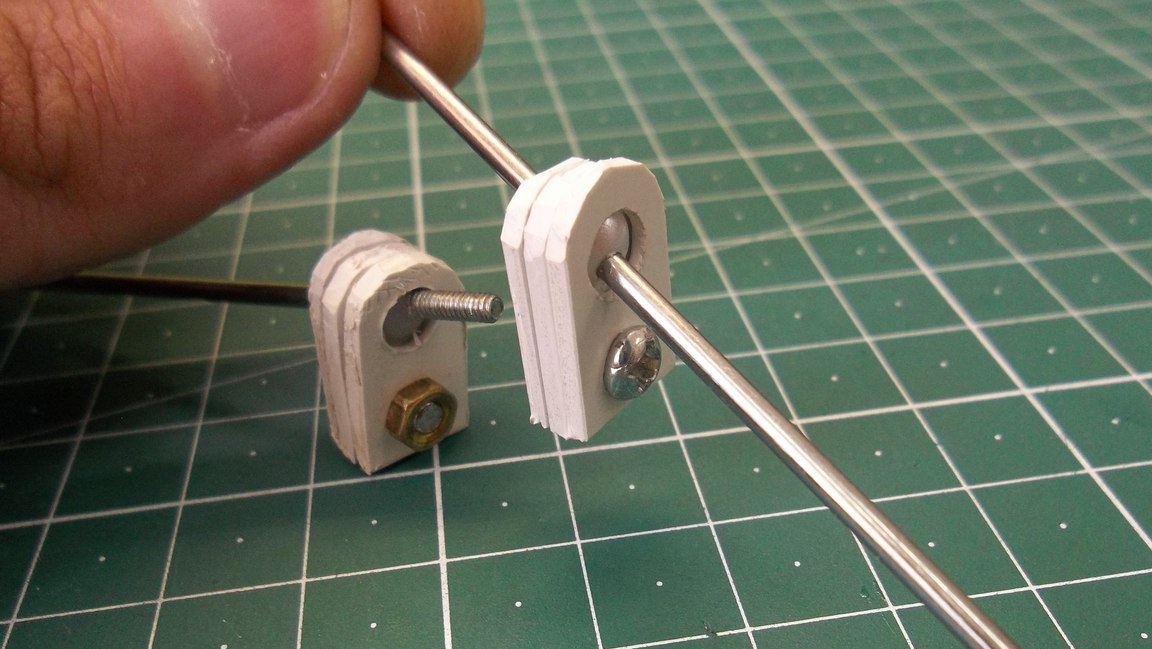
At the ends of the levers should be ball bearings. Using the previously cut sidewalls, insert beads into the outer holes, cover with sidewalls, fasten with M3 screws. We get:
Trim the edges and file the sharp edges with a file.
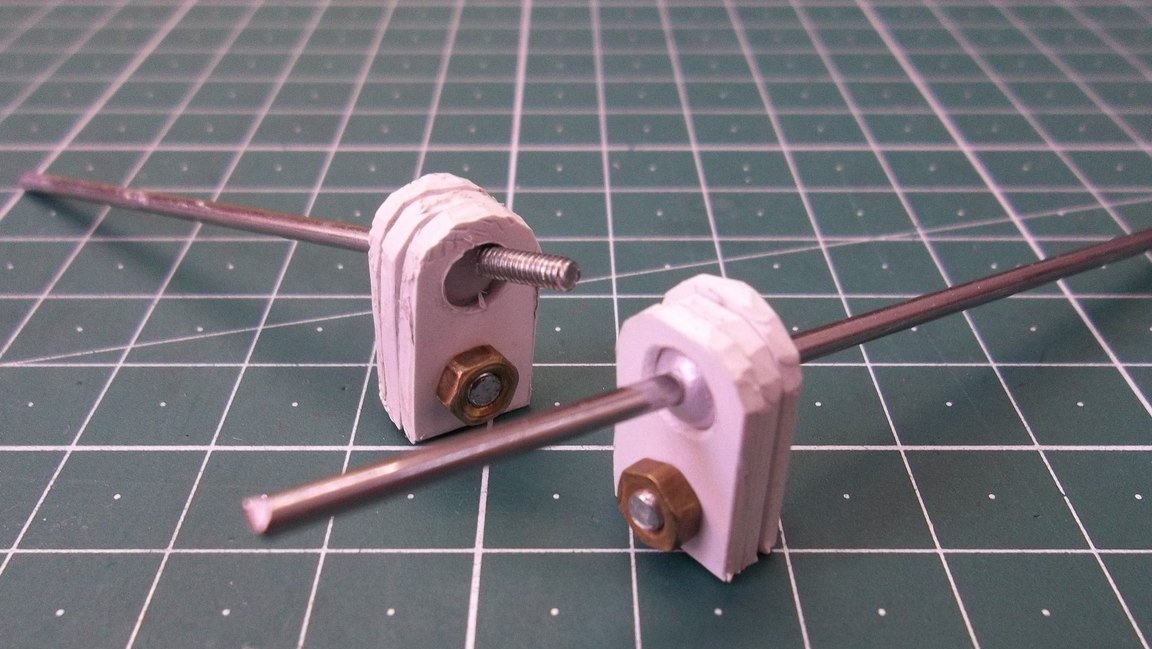
From a bicycle spoke we cut two pieces 57 and 70 mm long. They will serve as axles for leverage. We put them into the beads of the levers and insert them into the pre-drilled holes with a diameter of 2 mm. The knitting needles should sit tightly in the holes, otherwise you can drop a little glue there. We move the beads closer to the body. They also should not crawl along the axis. If this is not so, you can make small serifs on the axis or again drop a bit of glue.
We get the following picture:
To the fixed levers you need to attach the yellow Chinese gears. They have holes where you can insert the axis of the levers. The only problem is that they are much larger in diameter. This problem is solved by inserting tubes of a suitable size, or you can simply fill them with hot glue. We get this:
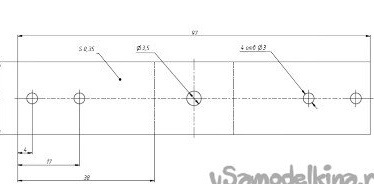
Now let's make bridges. For the front axle, you need to mark and cut two parts according to these drawings:
From tin, according to the drawing, we cut and bend the hubs:
From the same tin and pieces of a bicycle spoke we make cardans. For the universal joint, you can use any material that is at hand. Drawings for cardan here:
We bend, in the middle we put on the M4 screw, insert the square of the cross and hammer the studs from the knitting needle. We get cardans:
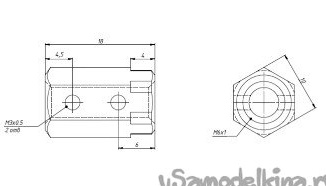
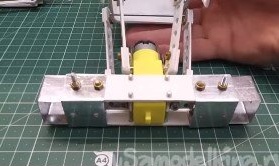
Now these cardans must be connected to the gearbox. To do this, use the nut on the M6 and the dowel. We cut the inserts of the required length from the dowel, and drill two 2.5mm holes in the nut and cut the M3 thread into them. They will be needed to fix the shafts.
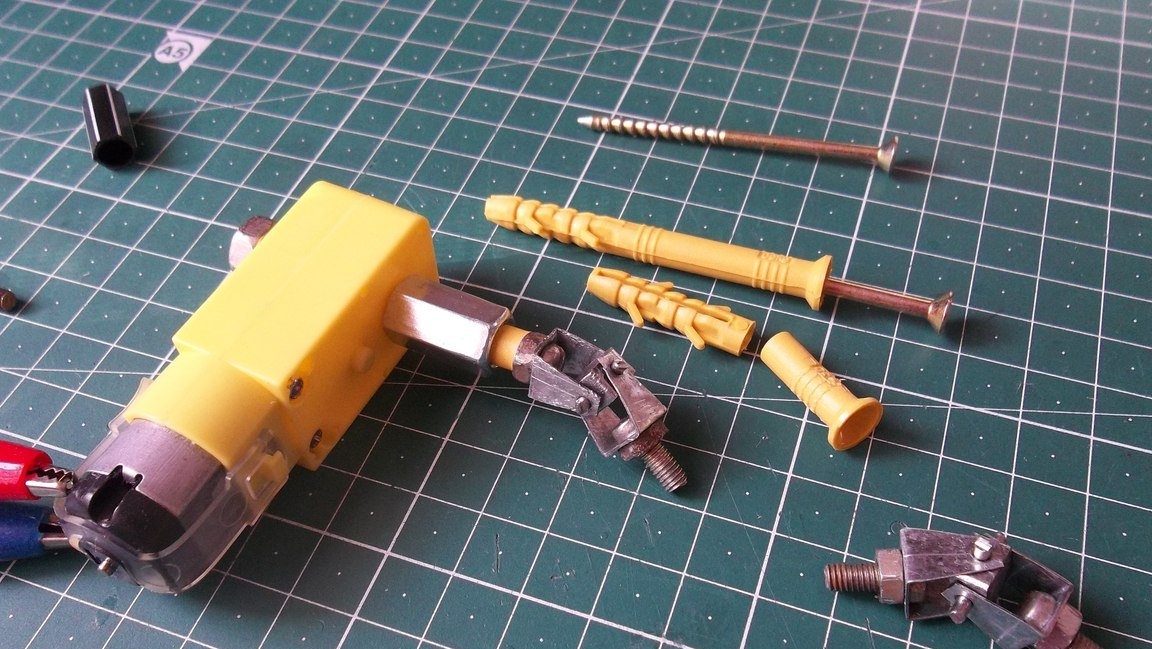
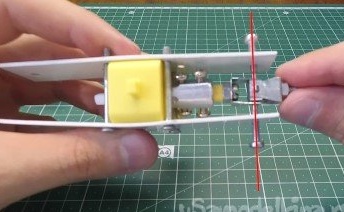
Having secured the cardans in this way, we tighten the prepared strips around the gearbox with four M3 screws. At the edges we apply the hubs, inserting the axles of the wheels into them and fasten them with screws as axes of rotation. Nuts can be used with nylon inserts so that they do not loosen. It should be like this:
Important note: we make the insert from the dowel so long that the axis of the universal joint cross coincides with the axis of rotation of the hubs. This is necessary for the correct operation of the cardan when cornering.
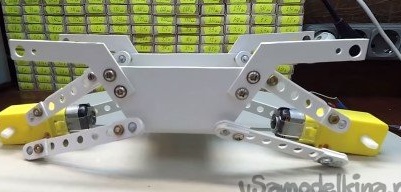
The turn of the rotary mechanism has come. We cut the connecting rail from PVC:
We connect both hubs to it:
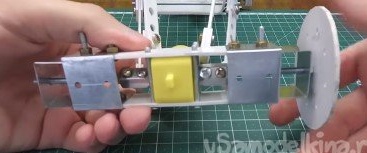
Using two corners of tin, we fix the servo drive from above:
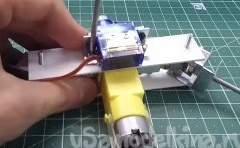
From the same PVC we cut the steering rod and make ball joints at its ends according to the already developed technology:
We give it a 90 degree helical bend and fasten one end to the right hub with the connecting plate, and fasten the other end to the servo rocker:

The front axle is ready. Let's take care of the back. For it, the same PVC plates will be needed and, due to the lack of cardans, slightly different metal parts. We make them according to these drawings:
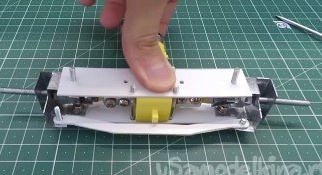
According to the already known method, we make inserts from the dowel, insert long screws into them (there are no cardans), tighten the plates around the gearbox, insert hubs and additional stiffeners along the edges. It will all look like this:
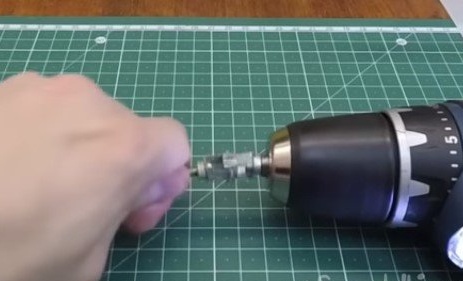
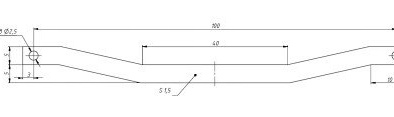
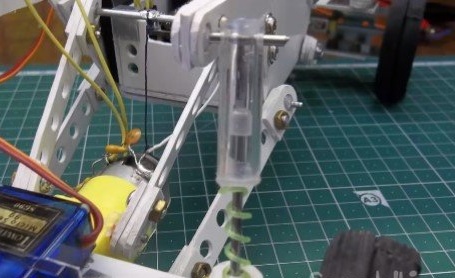
Well, so that our bridges do not hang loose, we will supply them with shock absorbers. We will make them from fountain pens and bicycles. A detailed description of how to make them is in this video:
We fix one end of the shock absorber to the bracket, and the second through the ball bearing to the axis of the hub. Like this:
Well, the last thing left to do is put our crawler on its feet.That is, make him wheels. Construction stores sell rubber plumbing washers with a diameter of 60 mm with a gutter inside.
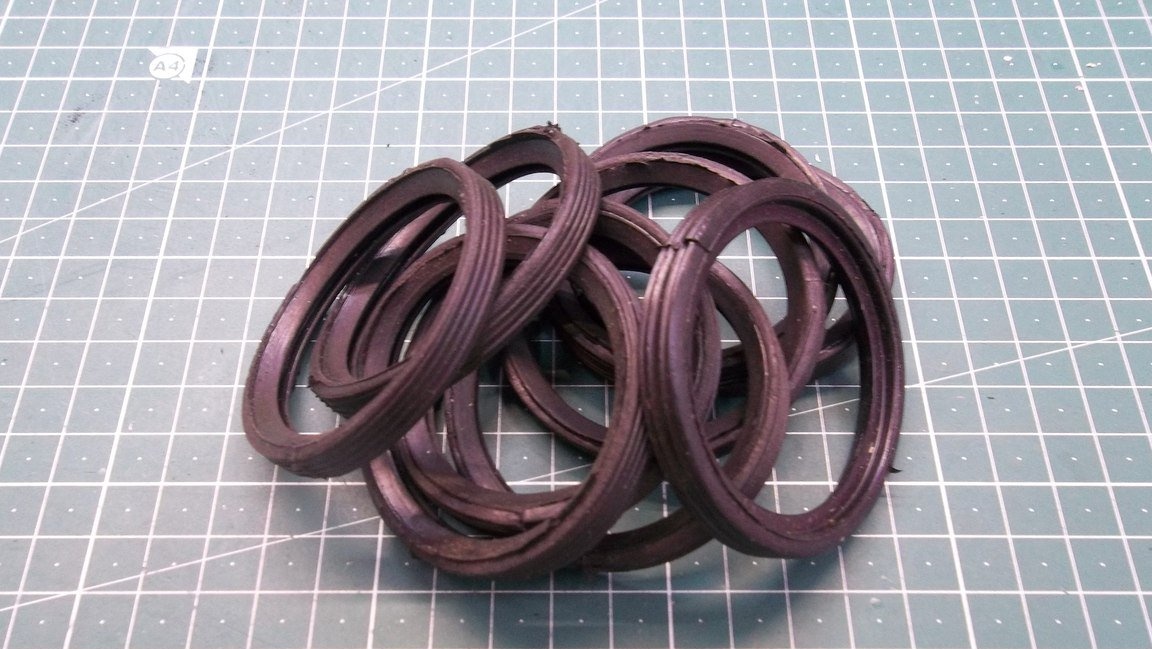
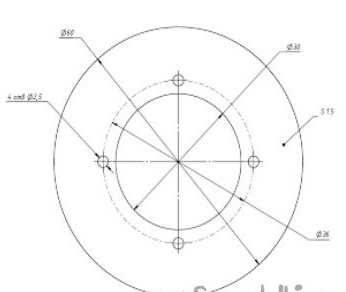
We will use them as tires. We will cut the disks from our beloved PVC according to these sketches:

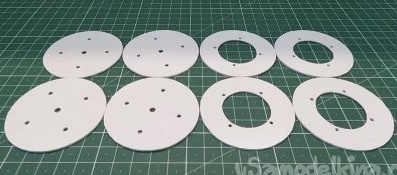
Tires are quite thin, so make the wheels double by tightening them with screws:
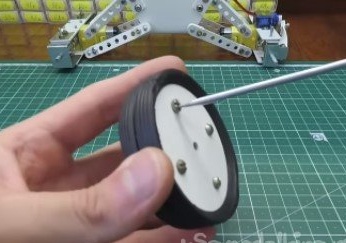
For better cross-cut with a hacksaw, we will make cuts, thereby obtaining an improvised tread. We fasten the wheels to the axles and the crawler is almost ready!
It remains to provide him with control electronics. The issue with her was discussed above, so we put the equipment we have there.
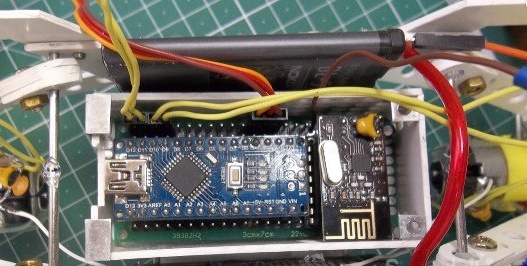
The most suitable phone battery.
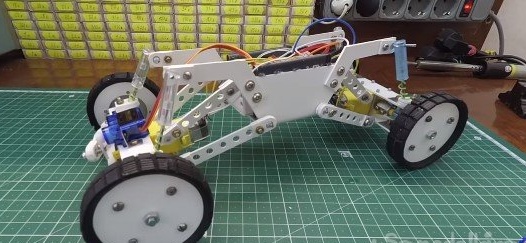
You can start the test!

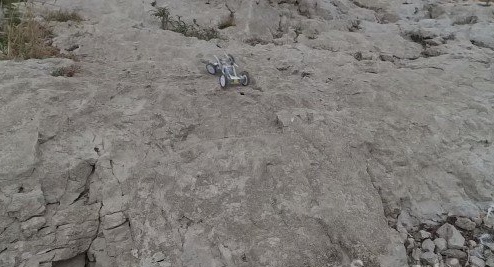
Tests have shown amazing cross-country ability and flexibility of suspensions. There were almost no obstacles for him! Make such a toy for your child and his gratitude will not be borders! Good luck