

Hello again. This time, I propose to return a little to childhood, namely to the fourth grade of the high school of Soviet times, at a natural history lesson and make an amusing and useful optical device called a periscope. I was forced to make it by the need to find a wire embedded in a suspended ceiling. Moreover, it was necessary to see this wire in order to hook and drag it through the mounting profiles. In general, this homemade allows you to look where you need eyes like a crab, retractable on the stems, and not only for the suspended ceiling, but also in the ventilation duct or duct with plumbing pipes. I foresee offers to use a miniature video camera with a monitor, but, firstly, it is cumbersome and inconvenient, secondly expensive (the device will not often be needed), and thirdly, the acquisition of such a camera is fraught with problems with the law.
For the manufacture of a periscope, the following materials will be needed:
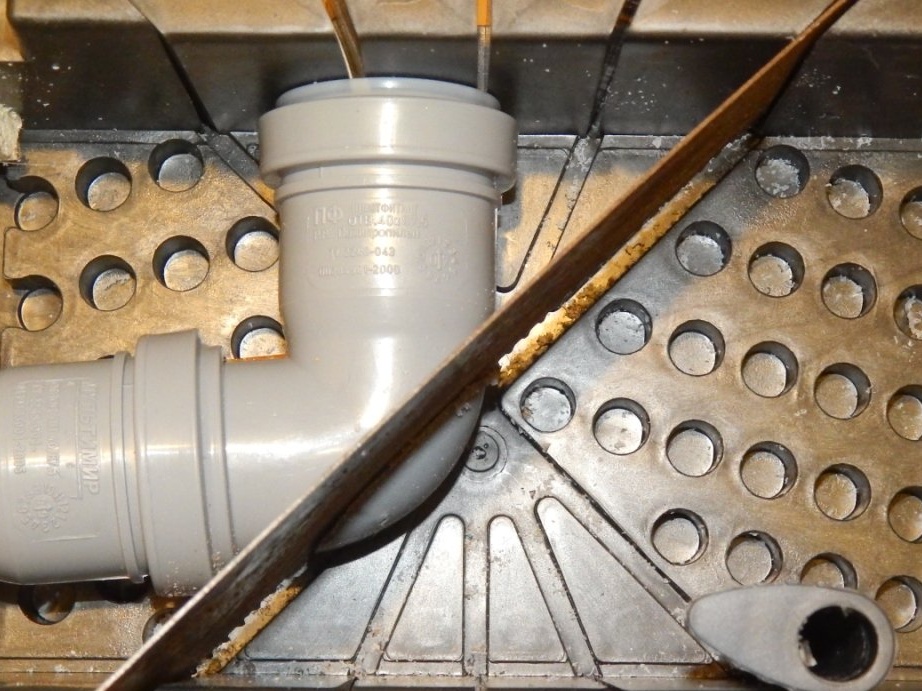
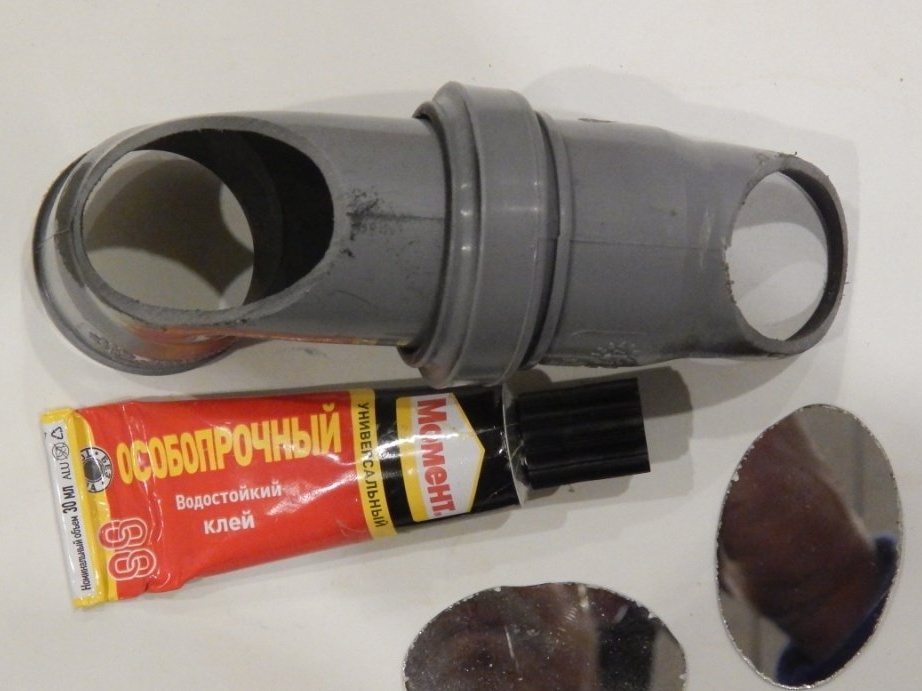
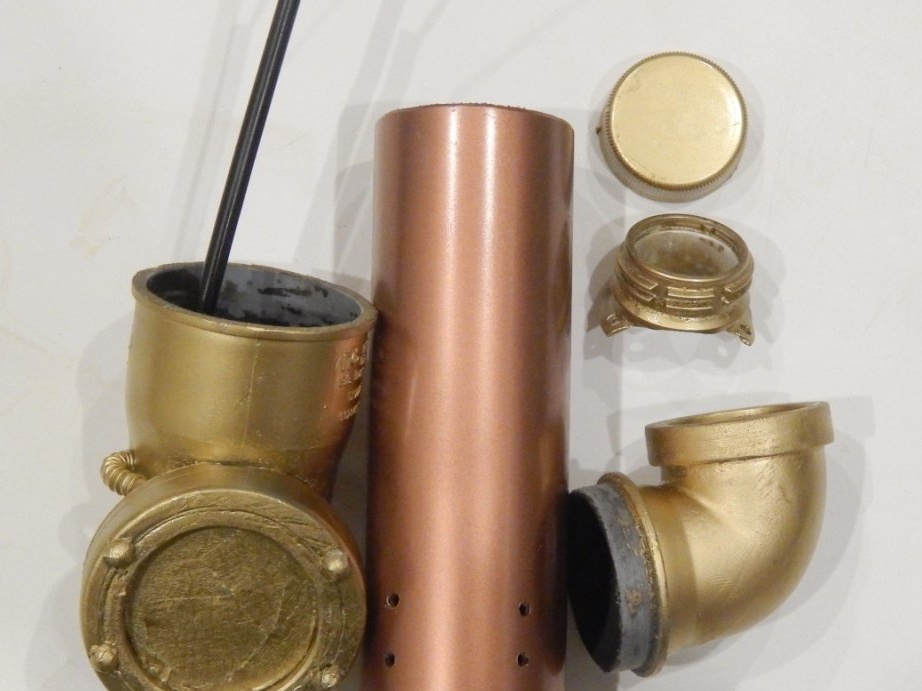
1. Plumbing PVC corners 90 ° ø40 and ø32 mm.
2. Pipe piece ø40
3. Powder mirror mirror (the more important the finer the better)
4. Thin glass (organic can)
5. The neck of a plastic bottle
6. The inside of the Chinese LED flashlight
7. "Cold welding"
8. Adhesive for PVC (I recommend COSMOFEN PLUS-S)
9. Clay "Moment 88"
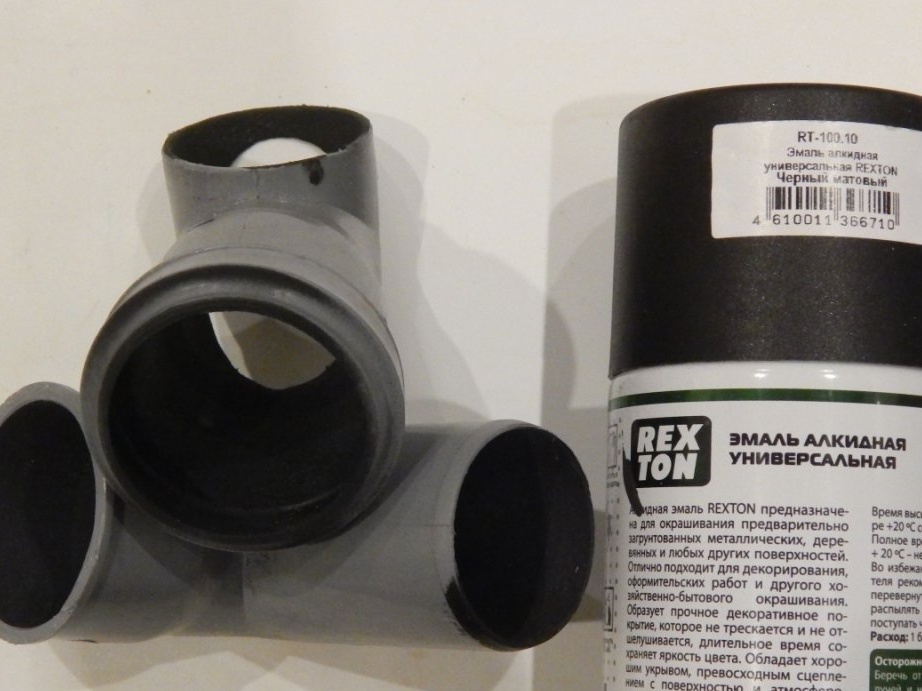
10. Paint (optional, does not affect work)
Instruments:
1. Miter box
2. Hacksaw
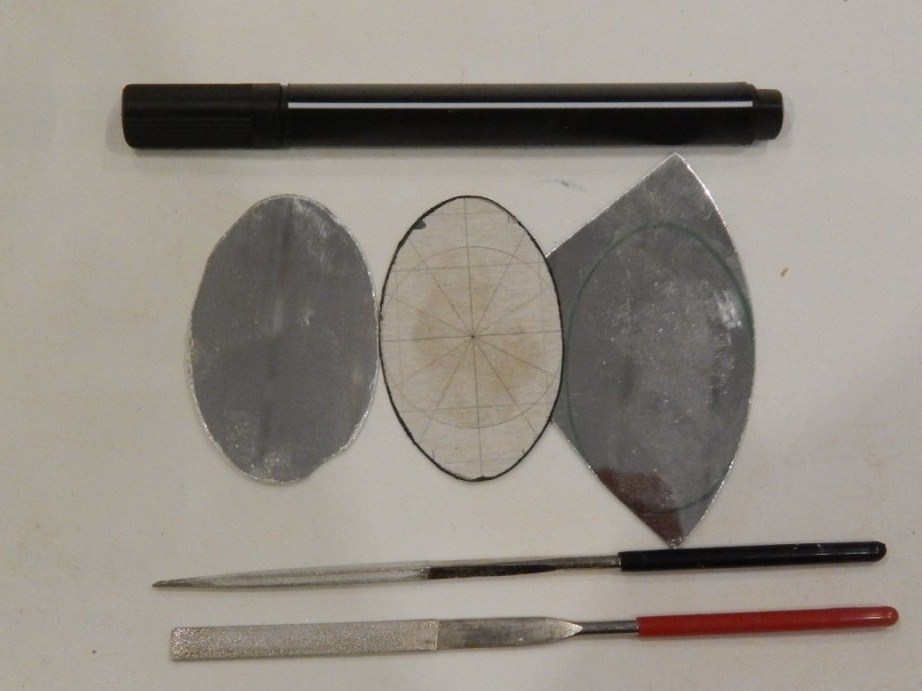
3. Diamond files
4. Sandpaper of different grit
5. Soldering iron with accessories
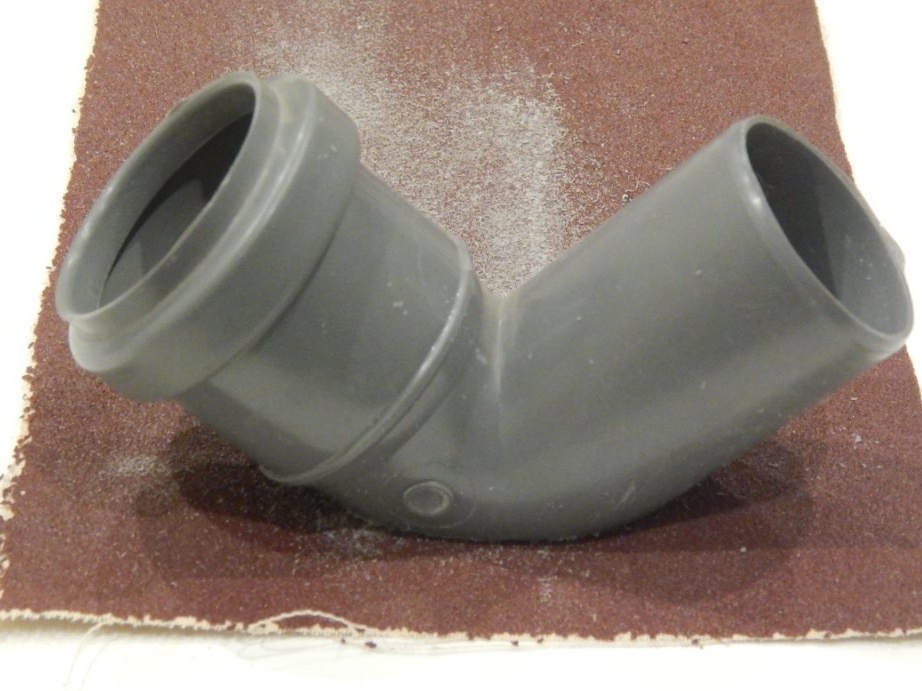
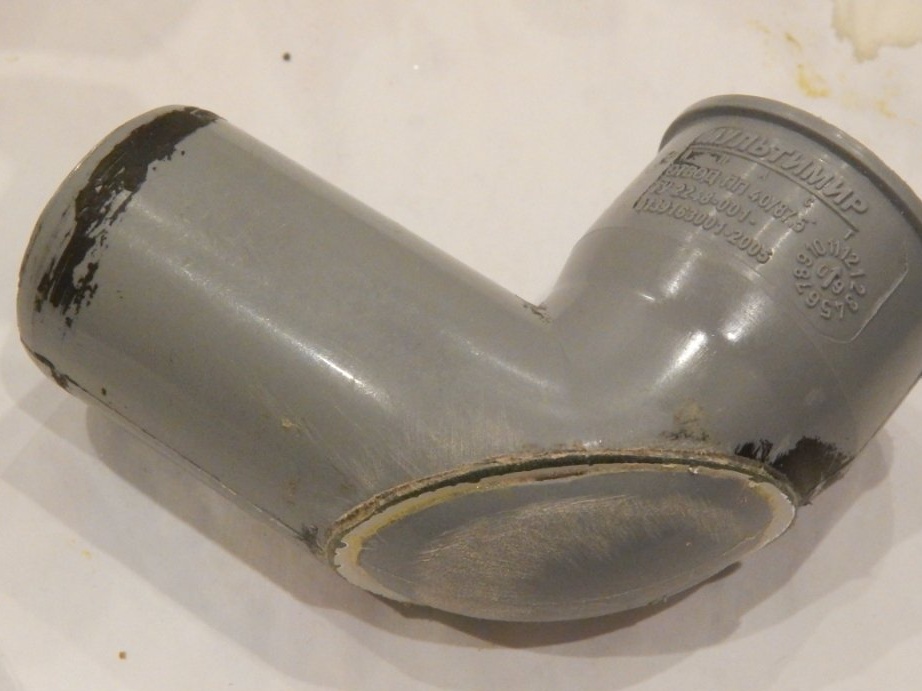
At the plumbing corners, using a joiner's miter box with a hacksaw for metal, we cut off the top of the corner at 45 °. Naturally, having previously marked the boundaries of the cut with a marker (we transfer the internal point of the pipe joint to the external, diametrically opposite, part of the pipe).
There is another option for marking the cut without using a miter box: we draw a template for an ellipse of a corner section (a template is needed to cut mirrors)
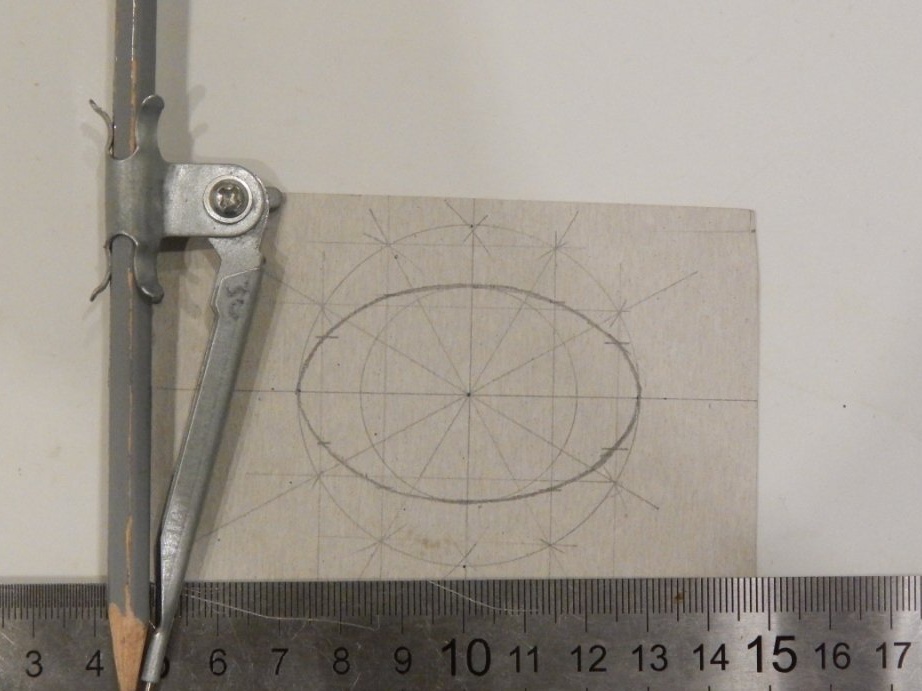
We also transfer the intersection point to the outside. Put on the cut out ellipse pattern on the corner.
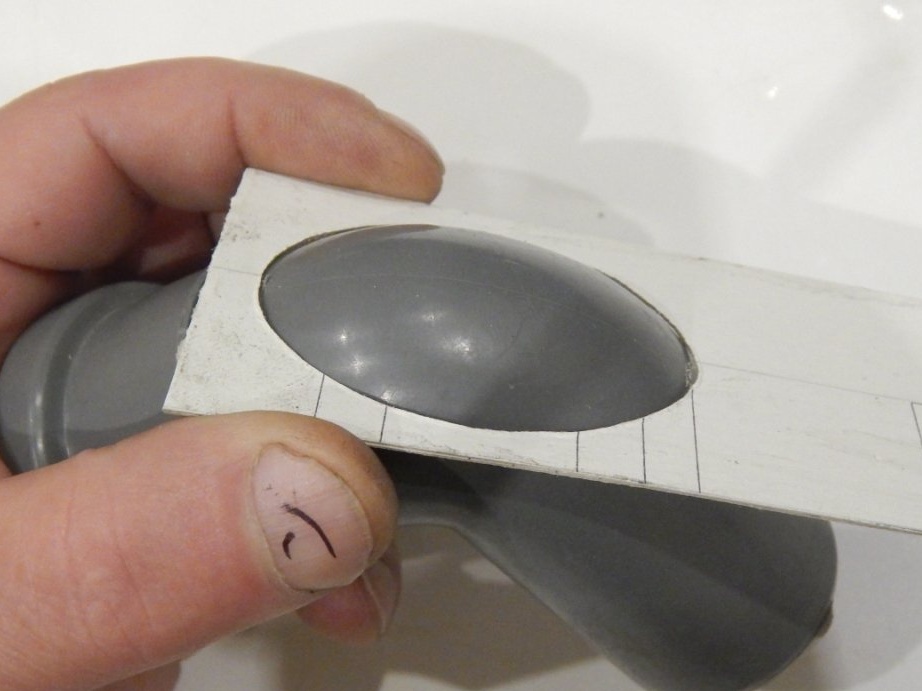
combining the major axis and the larger diameter with the outlined points and a marker, we outline the cut line.
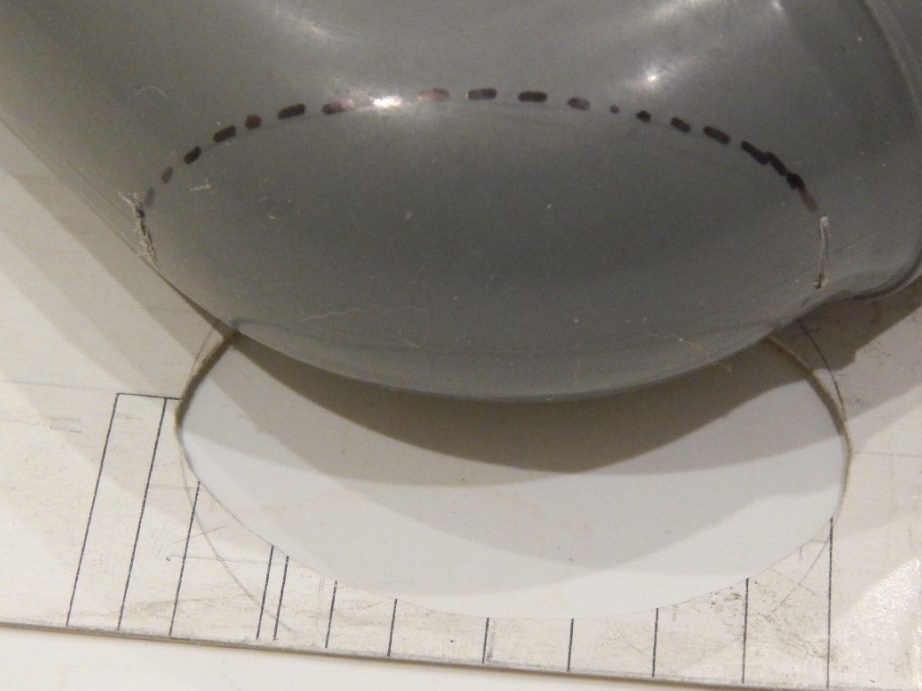
The cut plane is processed with sandpaper.
Mirrors are cut with a diamond file, according to the pattern. We make a scratch on the mirror, and then we break off the contour of the ellipse with pliers. The final fine-tuning of the size will be made after gluing
To eliminate unnecessary glare, the inner surfaces of the pipe and corners are painted with matte black paint.
We glue the mirrors with Moment 88 glue with good adhesion and ductility.
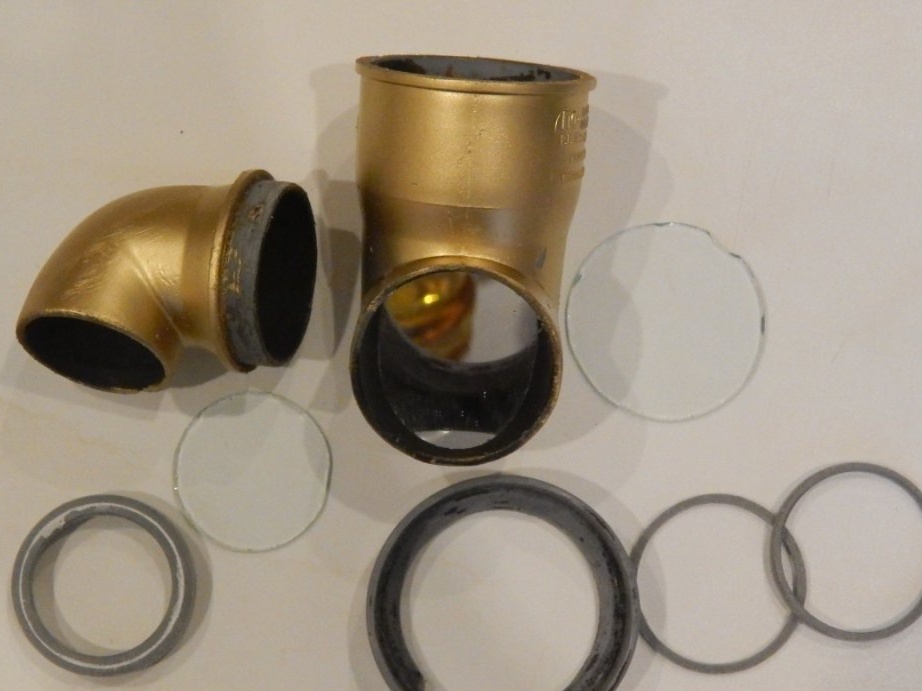
Glue the cut off part of the corner from the back side of the mirror “to its place”.
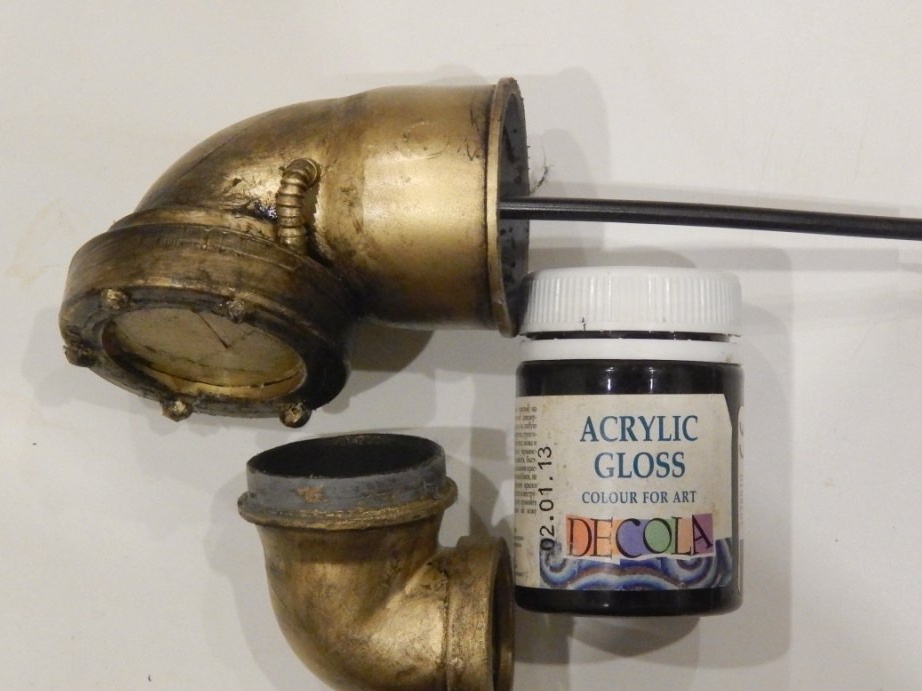
By and large, this is already an excess, which does not affect the operation of the device in any way, but still I want to do it beautifully. Therefore, in order to restore the original appearance of the corners, we align the shape with “cold welding”, which, after hardening, is processed with sandpaper to the desired size.
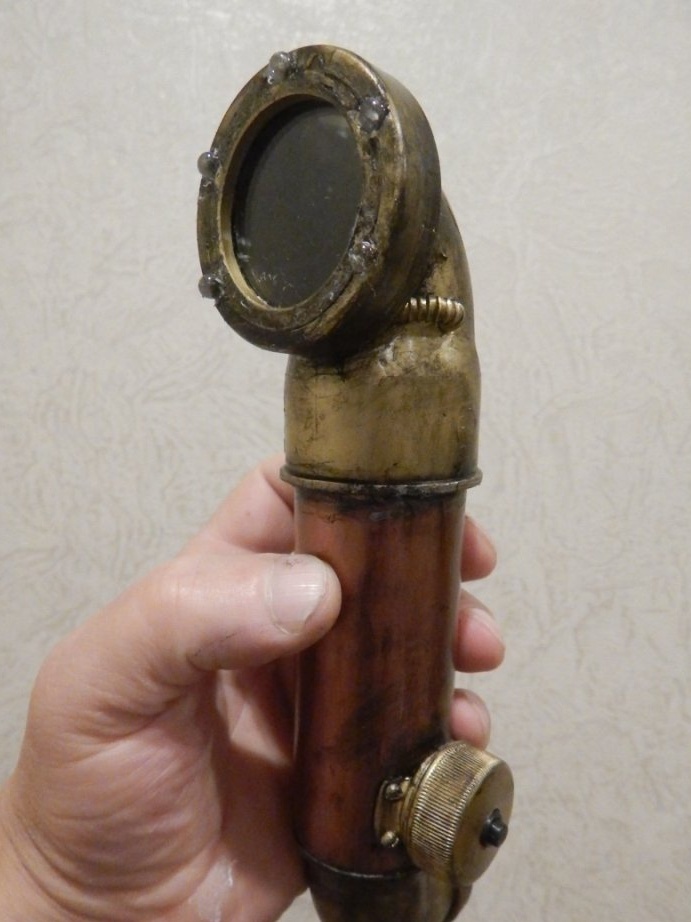
Around this stage of my work, I had the idea to try my hand in such a direction as Steampunk, and stylize your periscope "like an old man." Therefore, do not be surprised that bronze paint will slip on the next details.
To protect the insides from dust, as befits an optical device, you need to make the lens and eyepiece from a simple transparent glass (organic, but it is more prone to scratches). We make the frame for them from what was cut off from the corners. We cut the rings of the desired diameter and length with a hacksaw.

We glue the received details with Cosmophen.
To look into the inter-ceiling dark space, you just need to highlight it. And it is advisable to illuminate with the optical device itself, because it is supposed to hold the periscope with one hand and catch the wire with the other with a hook. So there’s no place (the hole for the spotlight is only 65 mm.) Or an extra hand for a separate flashlight is not provided, therefore, we equip our device with backlight.
Of course, there are a lot of lighting options, but on the basis of considerations of frequency of use (from case to case) and simplicity of design (the absence of any driver), I settled on a cheap Chinese flashlight from Fix Price, bought five years ago. The flashlight was designed for attaching to the visor cap, and I used to illuminate the visor magnifier. Then he lost the battery cover, and he was safely lying in a distant trash box that was not yet ripe for discharge. A distinctive feature of this flashlight was the use of two lithium CR2032 batteries to power directly, without a driver and a limiting resistor, five LEDs connected in parallel. I described the device in such detail in order to immediately explain that it worked, works and, I hope, will work. The batteries last for at least an hour of continuous operation (no more than 15 minutes will be required), the LEDs did not burn out and did not degrade during operation, by the way, I just took them from a former flashlight.
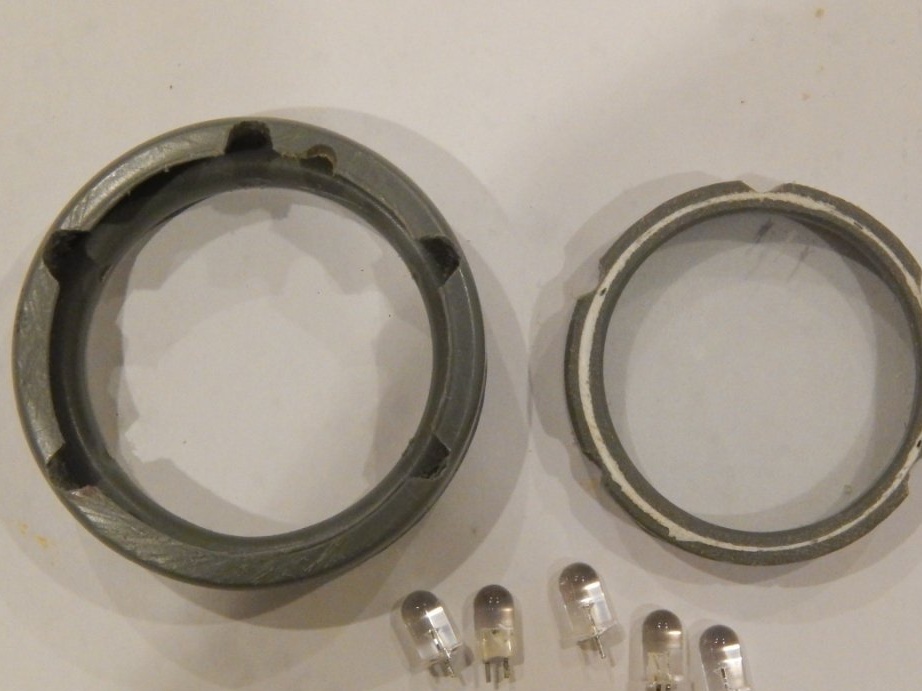
We place the LEDs around the lens in the housing, which consists of a wide cropping of the same elbow (where the rubber band was inserted) and the glass holder of the lens.
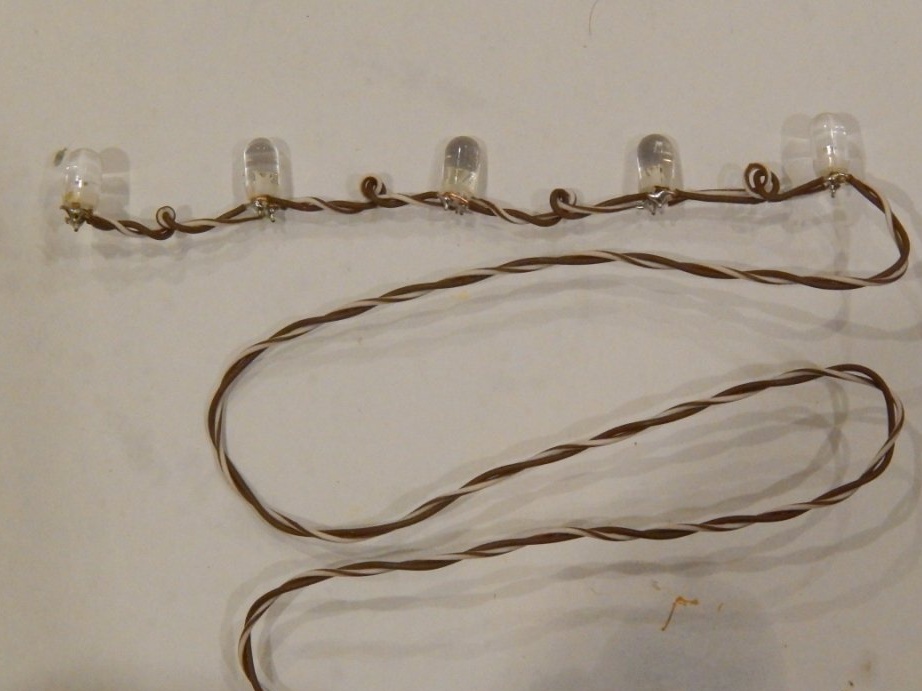
We solder a garland of LEDs connected in parallel.
LEDs have a small skirt at the bottom of the case, so you have to cut it with a file to shove them into the resulting case.
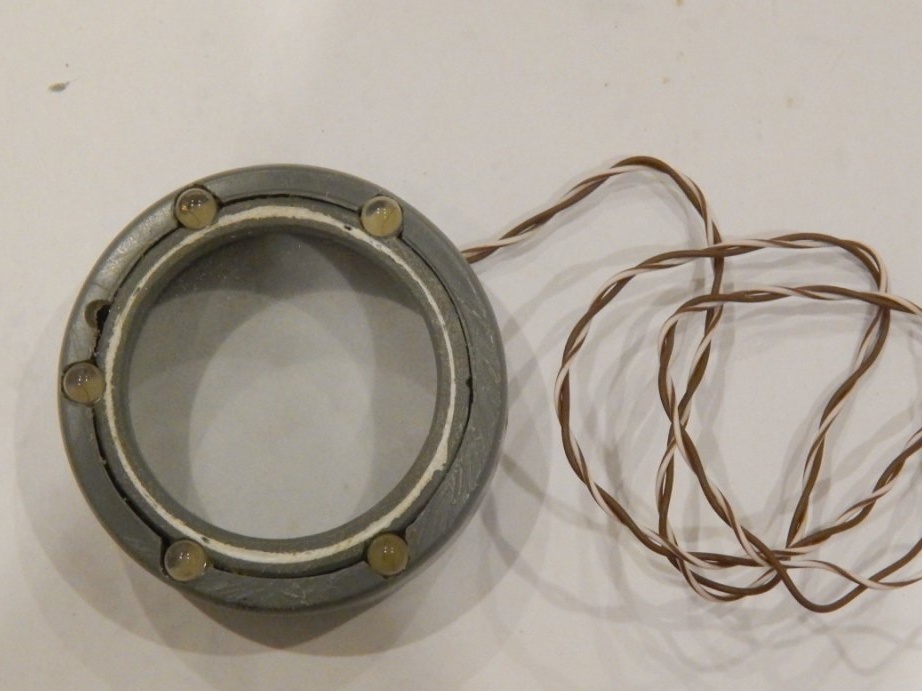
We glue the entire lens construction with liquid plastic, namely: we insert a garland of LEDs into the backlight housing, grease with glue, immediately insert the lens glass holder into it, insert the glass, and we put the entire structure on the corner greased with glue.
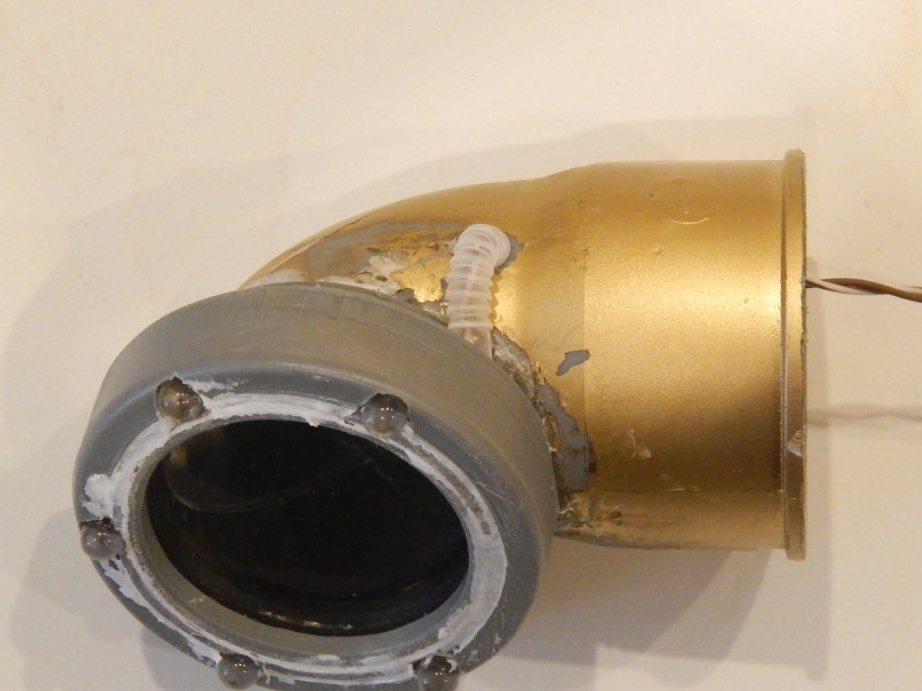
The backlight wire is worn in the corrugation taken from the cocktail tube, and we pass it into the corner through the hole corresponding to the diameter of the tube.
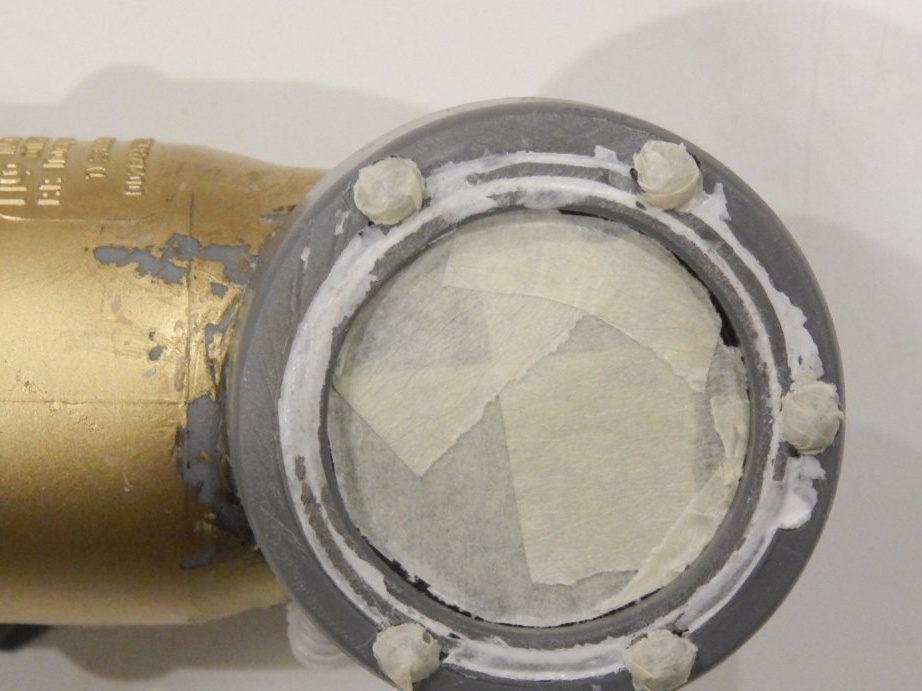
Before painting the lens and eyepiece glass, as well as the LEDs, glue with masking tape.
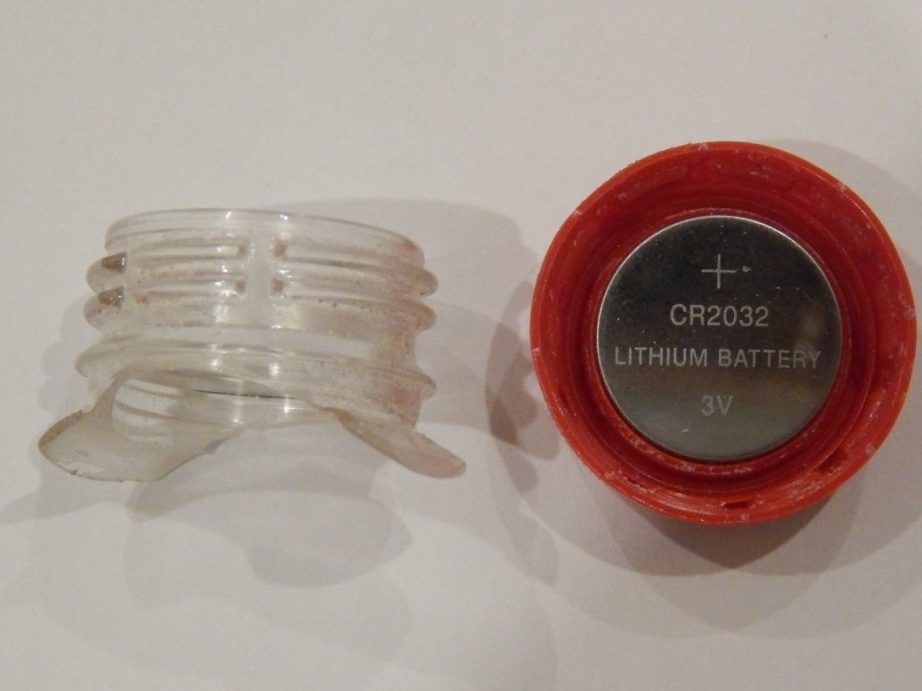
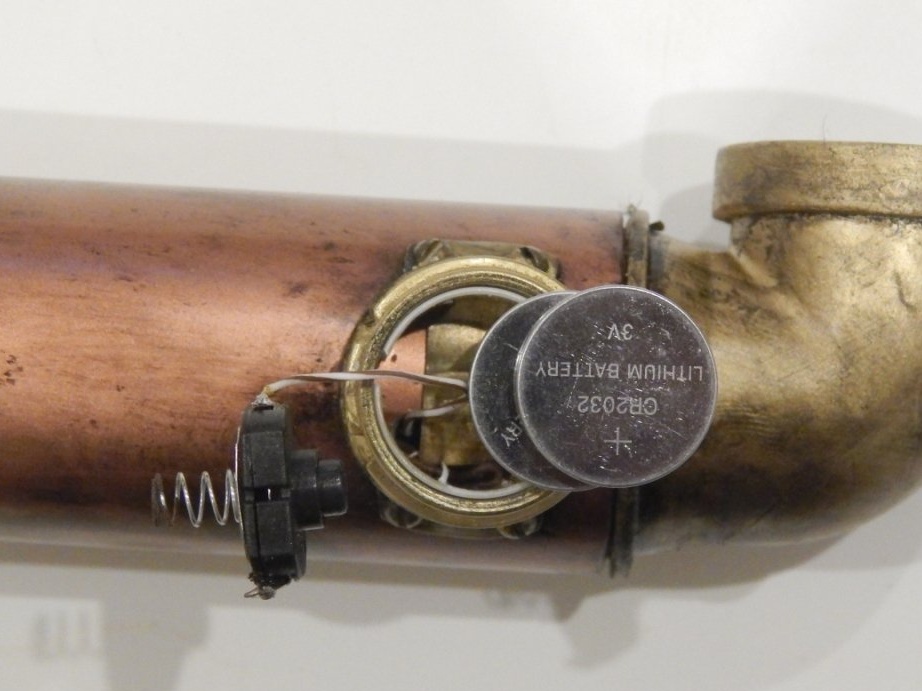
The power supply compartment is made from the neck of a plastic bottle, the inner diameter of which is 21 mm. Suitable to accommodate two CR2032.
Before the final assembly, we inspire beauty, paint the parts individually with a paint imitating metal.
Black acrylic paint imitate patina.
Install and assemble the power compartment. We solder a brass plate to the wire going to the LED cathodes, connect the anode wire to the batteries through a push button switch with a soldered spring contact. Power wires pass inside the periscope tube, threaded into a black-colored cocktail tube. This does not interfere with observation.
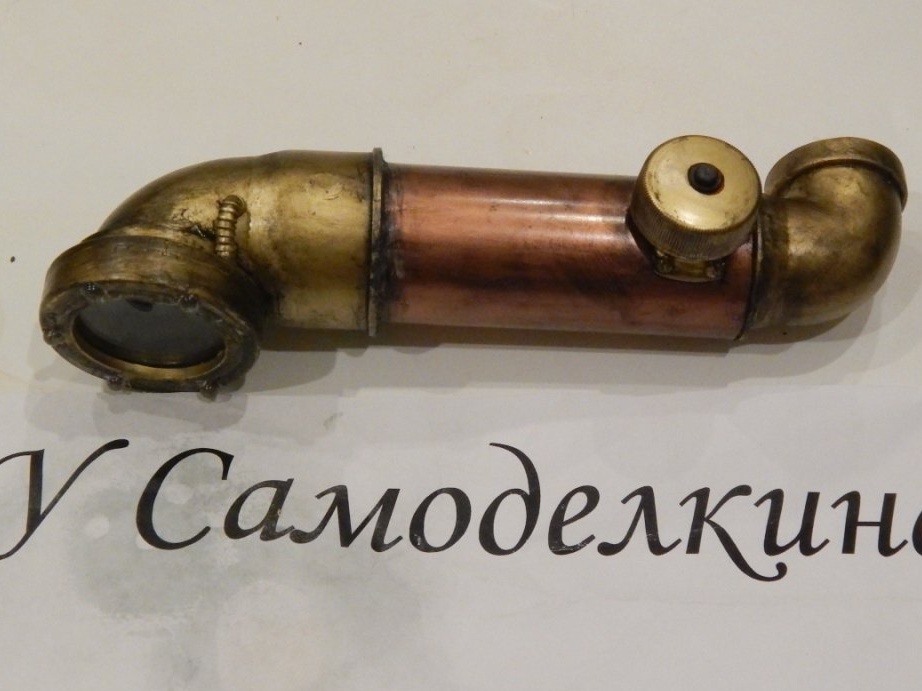
Finally, our device looks like this:
And now a few shots through the device with a few explanations:
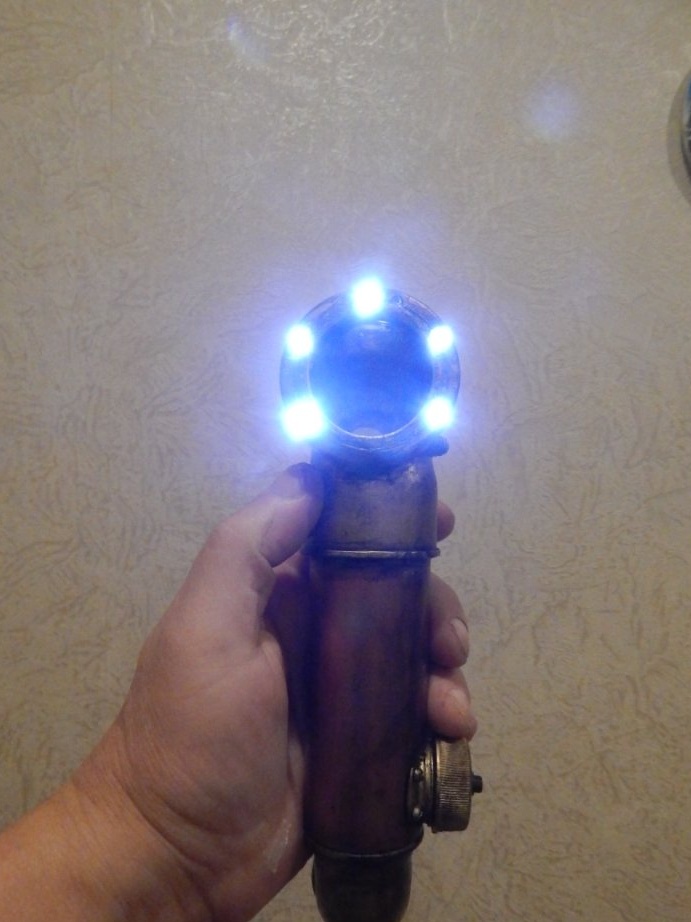
This is how the backlight looks.
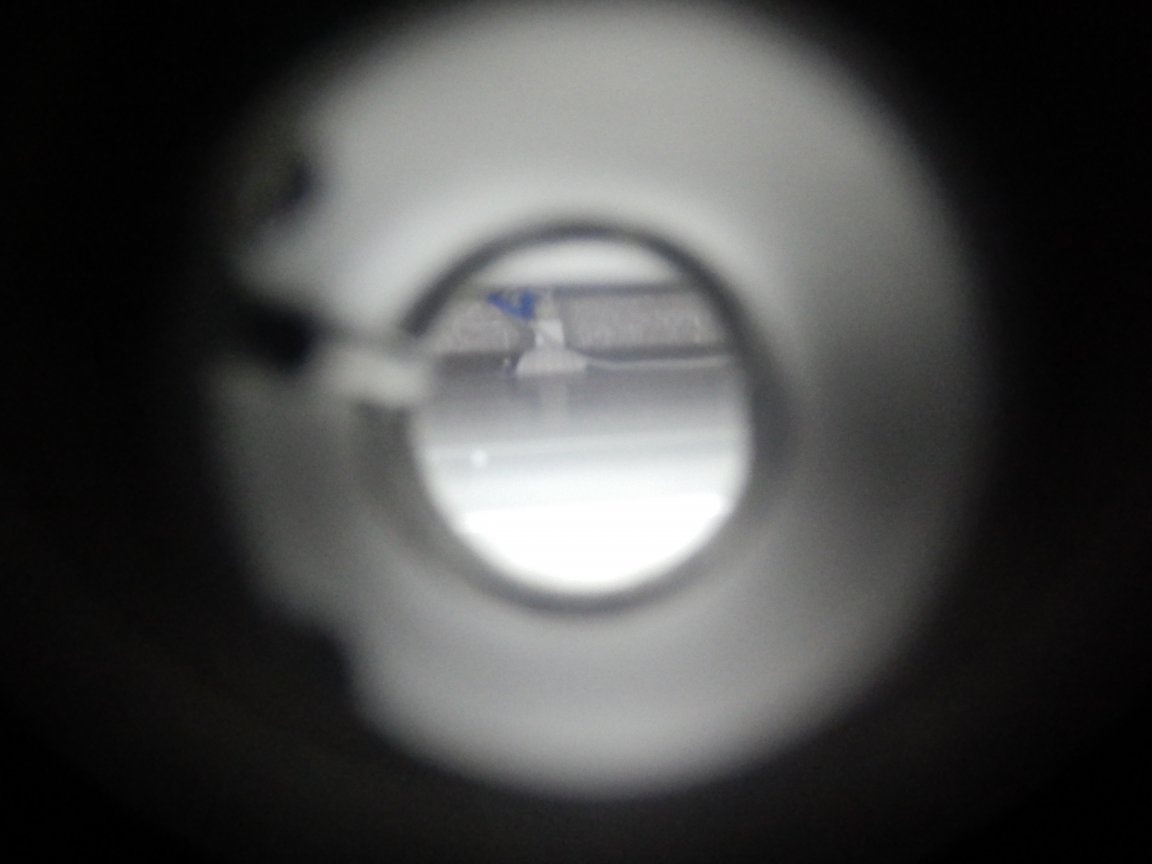
And this is the purpose of manufacturing a periscope: it looks like the space behind the suspended ceiling with the backlight on. The distance to the lamp is about one and a half meters, the lamp itself is clearly visible, the wire suitable for it, and even the blue electrical tape.
More informative purpose of the device can be seen here:
This video shows a demonstration of working with the product in "conditions close to combat."