
This power supply will be useful for many things. For example, when it is not possible to sit next to a desktop power supply (or is not easy to do), such as testing a small DC motor, reactivating a battery using BMS, turning on an autonomous Arduino etc ...
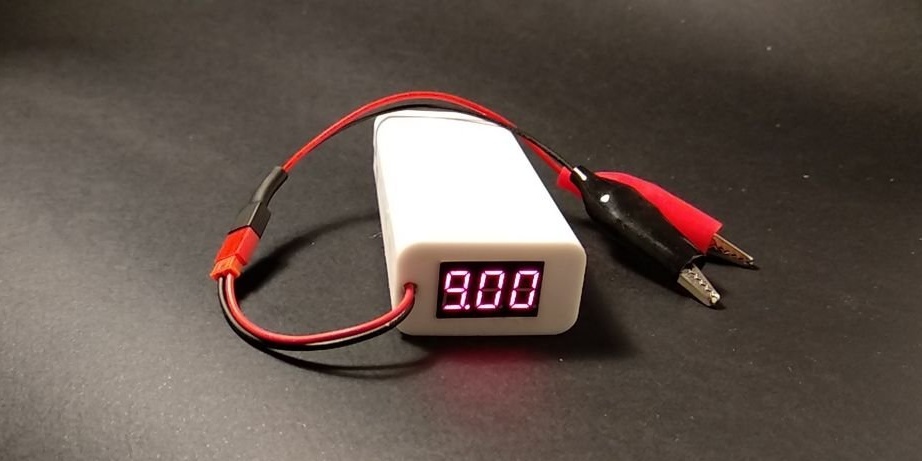
This modification adds a DC connector, so you can easily integrate adapters into any connector, for example, T-dean, XT, dupont, rectangular 9 V batteries, crocodile clips.
Step 1: Components
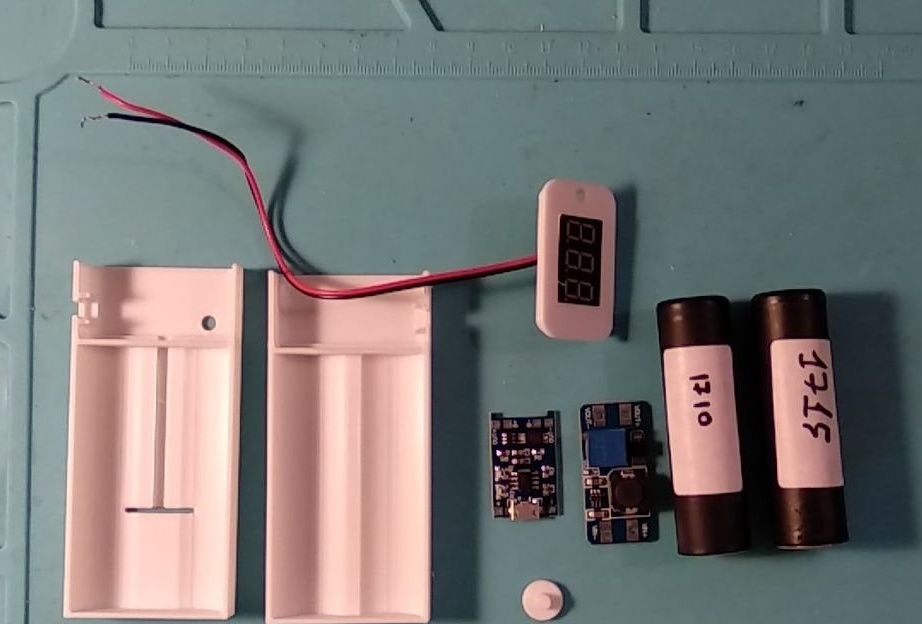
To create this power supply, you need a few details:
A pair of 18650 batteries
TP4056 module
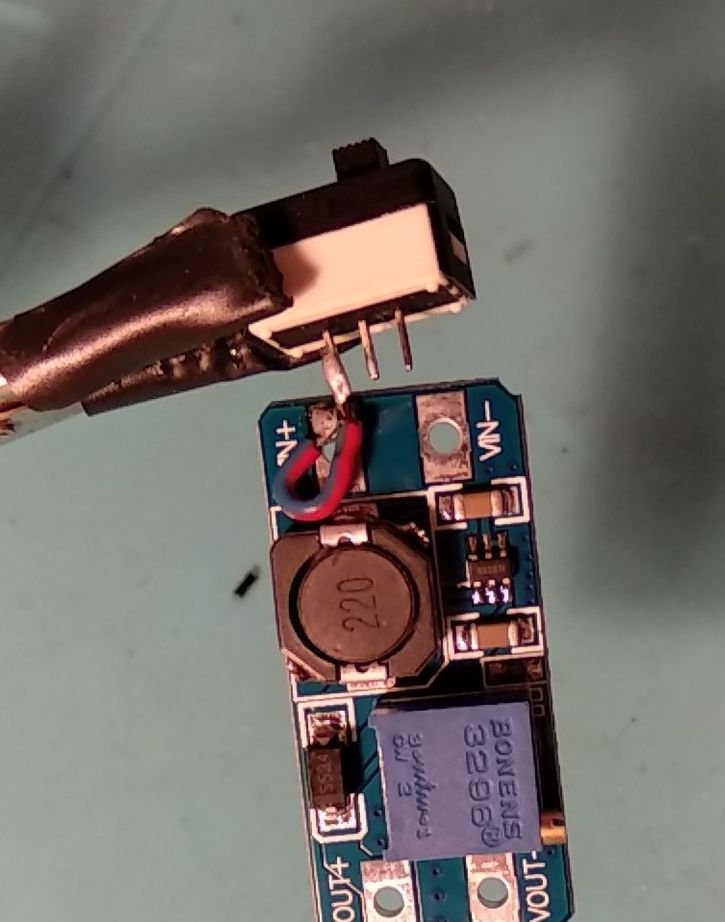
Boost DC-DC Converter (Boost)
Small digital voltmeter
Small switch
DC jack
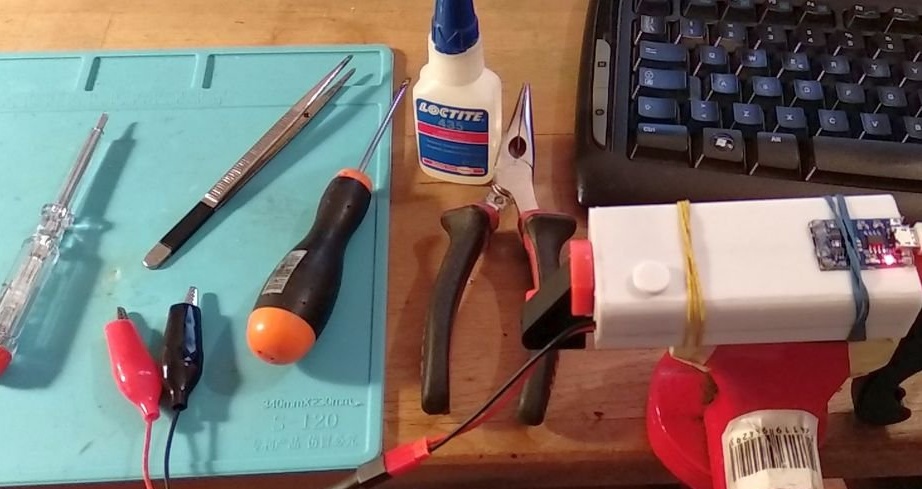
Step 2: Tools
Soldering iron
"Third hand"
Tin solder
Multimeter
3D printer
Step 3: Wiring
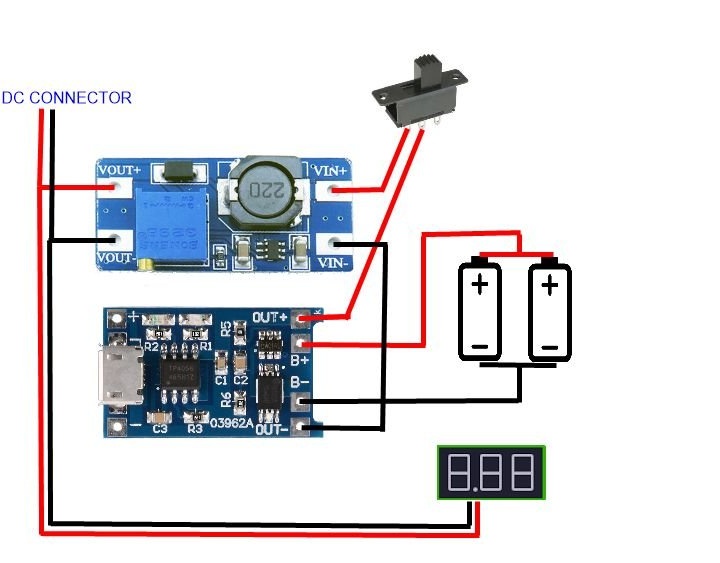
The connection diagram is quite simple, it consists of the following steps:
- connecting two 18650 batteries (in parallel) to the pads on TP4056 (B + and B-)
- connection of the negative output TP4056 OUT- to the increasing negative input VIN-
- connection of the positive output TP4056 OUT + to one contact of the switch
- connection of the 2nd contact of the switch to the positive boost input VIN +
- connecting the output pad to the DC connector and to a small voltmeter (observe the polarity!)
The only difficulty is that you have to deal with a small space for components and a short cable length.
Step 4: Electric Filling


Warning:
It is necessary to use a small screwdriver to calibrate the voltmeter before sealing the case with glue, otherwise there will be no precise voltage adjustment. The tuning resistor is shown in the image with a red arrow.
USB is not the only charging option, you can also use TP4056 +/- input pads, which accept a voltage of 4 to 8 V. The typical supply voltage is still 5 V (for example, via USB), but it would be interesting to know what you can use to recharge this device. For example, an old charger for mobile phones, released before the USB era, with the replacement of its original connector with another, compatible with the one that can be soldered on the TP4056 input panel.
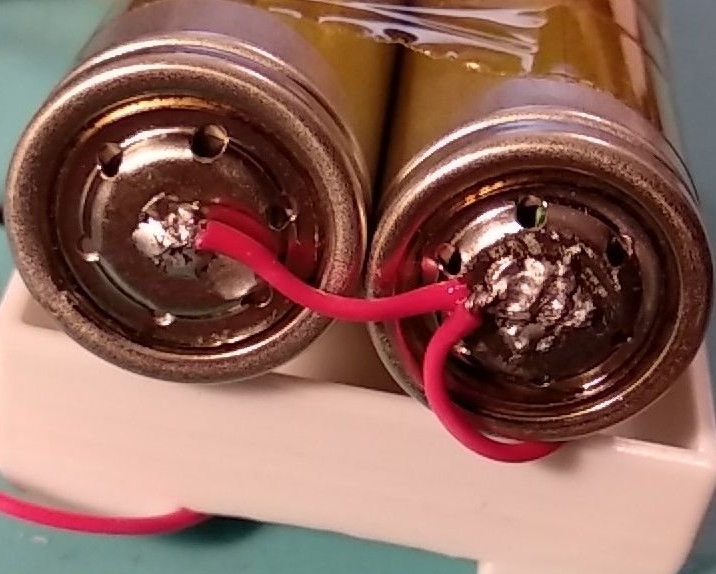
Before connecting the batteries in parallel, they must be balanced in terms of voltage. Otherwise, one battery will be discharged, charging the other as fast as it can, and this may be higher than the safe charging / discharging speed.
This is dangerous!
Do not forget that 18650 lithium-ion batteries are life threatening!
Soldering these batteries is quite dangerous, as they cannot stand overheating and explode. Therefore, it is desirable to solder them by spot welding or, as an option, make a special box for the batteries. Boxing can be printed on a 3D printer. It should be understood that boxing will take some place, which will affect the dimensions of the device.
Maybe someone guesses why two batteries were used. Not one, not three, but two.
The advantages of two batteries instead of one are pretty easy to understand. Two batteries connected in parallel have additional capacity, so you can use old and inefficient batteries. TP4056 is configured to protect the cell with good performance, and this can lead to aging of the worn cell. The TP4056 standard has an output current limit of 1.2 A. This is not much, but it can lead to heat if elements with high internal resistance (old and / or worn) are used. With two parallel batteries, a current of 1.2 A will be divided. Of course, it is not recommended to use old batteries, but this is the “least of evils”.
So why not three or four batteries? Two is the recommended maximum number to be connected to one TP4056. What for? Due to the safety of the charge. Not to mention the time it would take to charge 4 3000 mAh batteries connected in parallel with a current of not more than 1 A.
TP4056 has a mechanism that stops the charge. After the DC phase (CC), the TP4056 will switch to the constant voltage (CV) phase and check the current consumption to determine whether the charge should continue or not. There is a threshold current of 25 mA, which is the limit between a fully charged cell and one that can receive energy. The battery will not stop receiving current on its own, so this threshold current must be monitored.
Also, the supplied voltage may not be exactly 4.20 V, but maybe a little more, according to the technical data sheet TP4056. Therefore, it is not possible to simply apply a stable voltage to the lithium battery.
How can TP4056 determine if it is charging from one or ten cells? No way! Therefore, he will have no idea if he recharges, for example, five batteries connected in parallel, or correctly charges one. So far, five hypothetical batteries adsorb 5 mA each, which is much less than 25 mA rated as safe, for the TP module everything is going right, but it is not!
Step 5: Performance homemade

In this homemade product, two restored 1700mA / h batteries are used, therefore only 3400mA / h and 3.7V. The maximum current for these batteries is limited by the TP4056 current protection, which is 1.2A for most of the modules. If you use repaired batteries, you should make sure that they can more or less cope with 1.2A.
Since the output of the power supply is variable, it is reasonable to calculate how many watts of power it can provide. It is safe to consume 4 watts, but when the elements are discharged, the limit is likely to be 3 watts: the maximum current multiplied by the minimum voltage of 1.2 A x 2.5 V = 3 watts.
Please note that this does not depend on the quality of the battery, but on the ability of the TP4056.
With these batteries, you can have an output of 5 V 800 mA, at least a couple of hours, with new ones should be the same output power, but for 6-7 hours.
Step 6: Assembly the housing
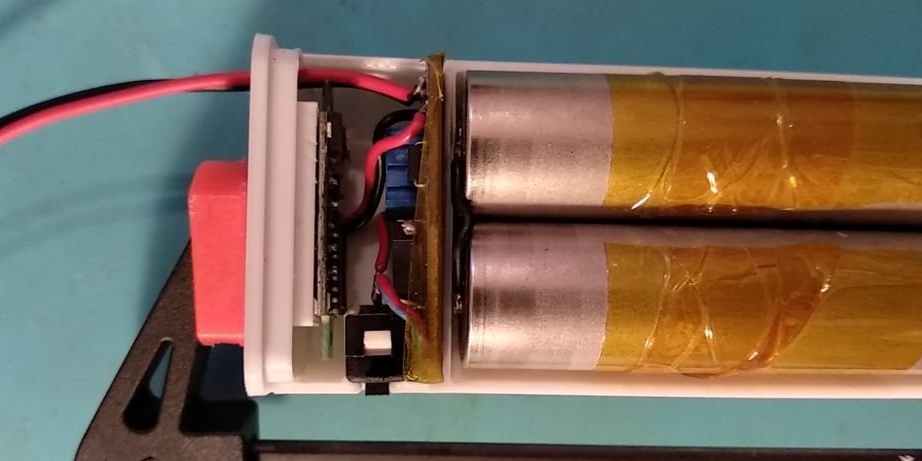
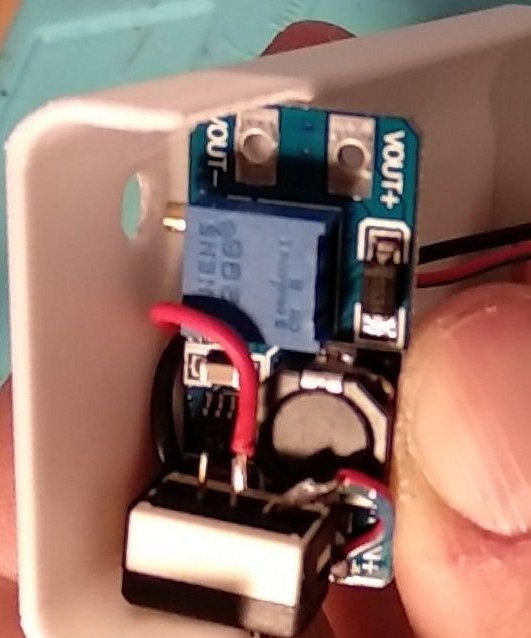
The assembly of the case is clear from the photographs, so it makes no sense to describe the same process.
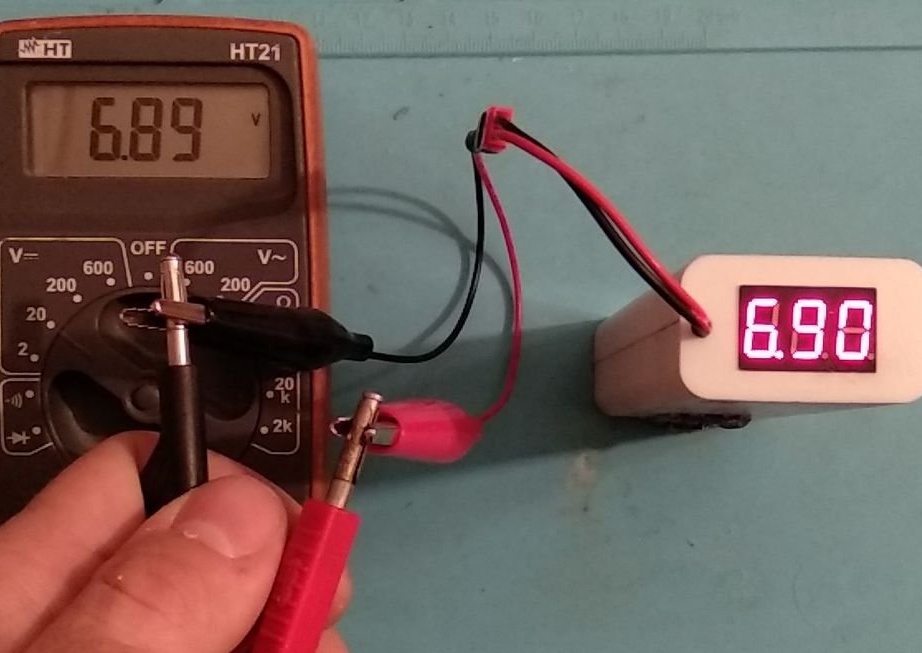
After assembly, you must turn on the device and verify that everything is working correctly. Then proceed to sealing the housing. A few rubber bands and a small clamp are ideal for this task.
Step 7: operate the device
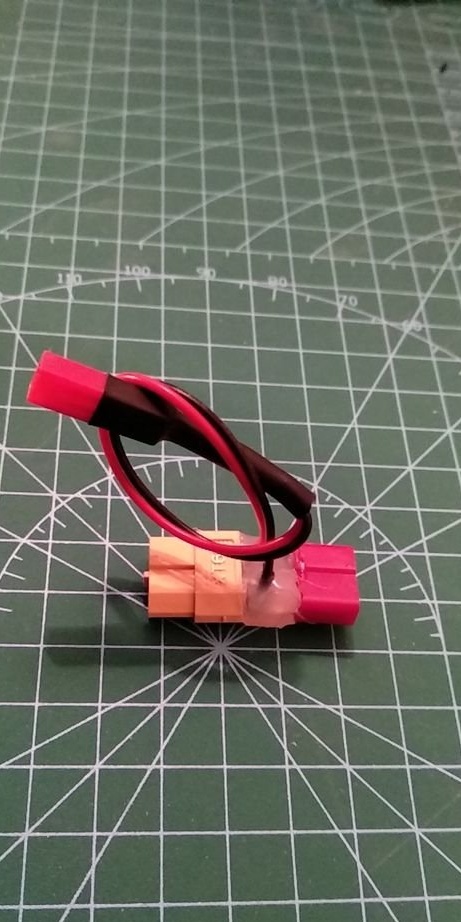
Since a standard DC connector has been added, it is very easy to assemble various adapters.
The best use of this device is drone testing. Using high power lithium-ion batteries to test drones is not a good idea. If something is wrong, there is a chance that the drone will be damaged, and the batteries may explode. With a power source that can provide only a few watts of power, even some kind of improper connection can be restored.
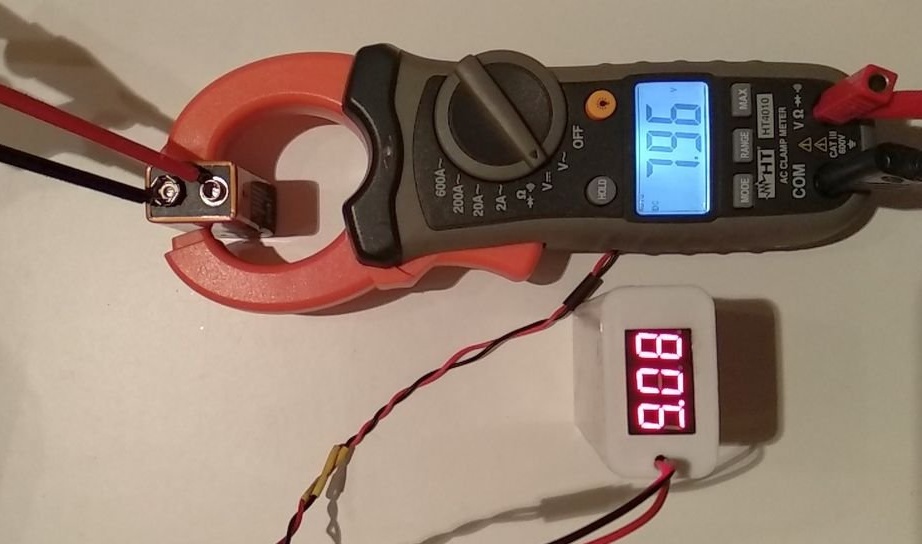
The photo above shows that an adapter with a 9 V clip was also tested to power the multimeter with a discharged battery. The multimeter can measure its dead battery, so this device can help in emergency cases.