
Spring is coming, which means it's time to lay eggs! This article will focus on a homemade incubator, which is not difficult to do. do it yourself. Everything works automatically, the eggs themselves rotate several times a day. All that is required is to make sure that there is water from time to time, well, after 10 days you need to enlighten the eggs and discard those in which the embryo will not be visible.
Necessary electronics it is not expensive to maintain temperature and turn eggs, it can be ordered from China. The incubator body is assembled from shaped pipes, and the walls can be made of plastic or even foam. 4 incandescent bulbs of 40 watts each act as a heat source. If the project interests you, I propose to study it in more detail!
Materials and tools used by the author:
Material List:
- 4 bulbs of 40 watts and cartridges for them;
- two powerful fans from a computer or other equipment;
- wires;
- ;
- a small gear motor;
- ;
- profile pipes;
- sheet plastic or other similar material;
- adhesive sealant;
- door hinges;
- 12V power supply for motor and electronics;
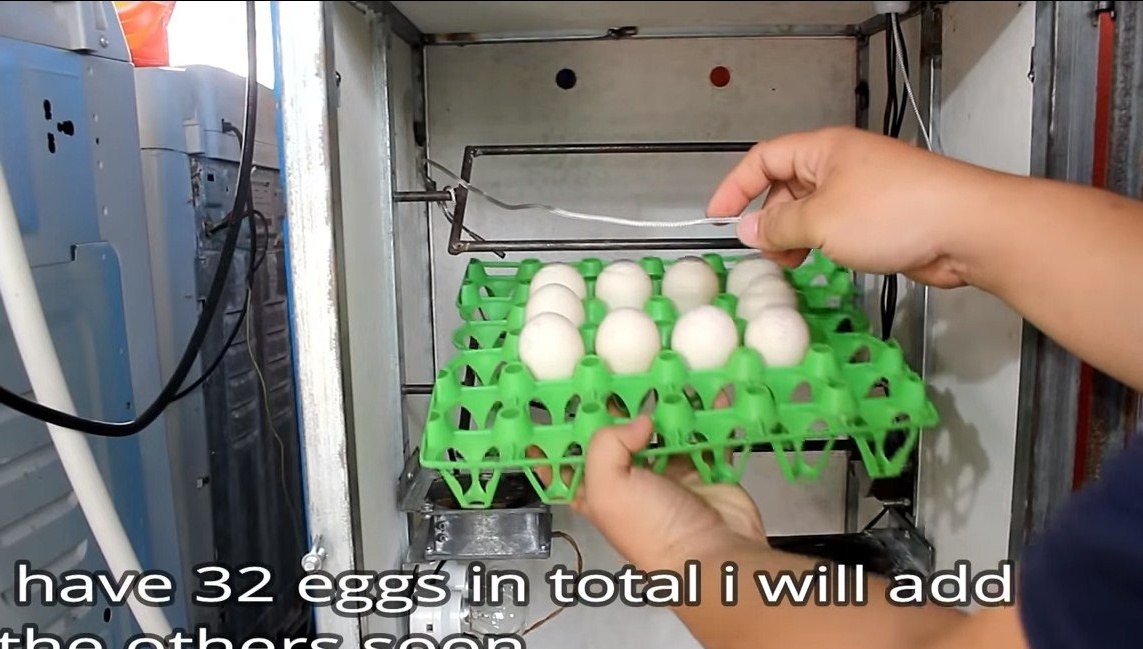
- trays for eggs;
- steel rods, plates, etc.
Tool List:
- welding machine;
- grinder;
- drill;
- vise;
- rivet gun;
- soldering iron;
- tape measure, marker, etc.
Incubator manufacturing process:
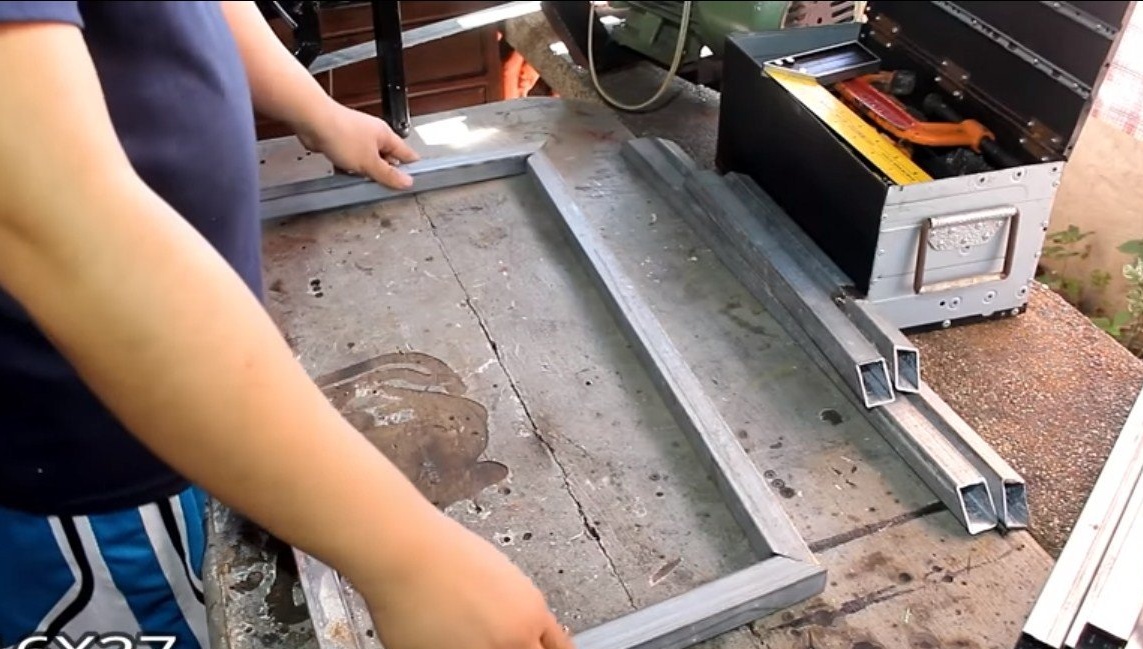
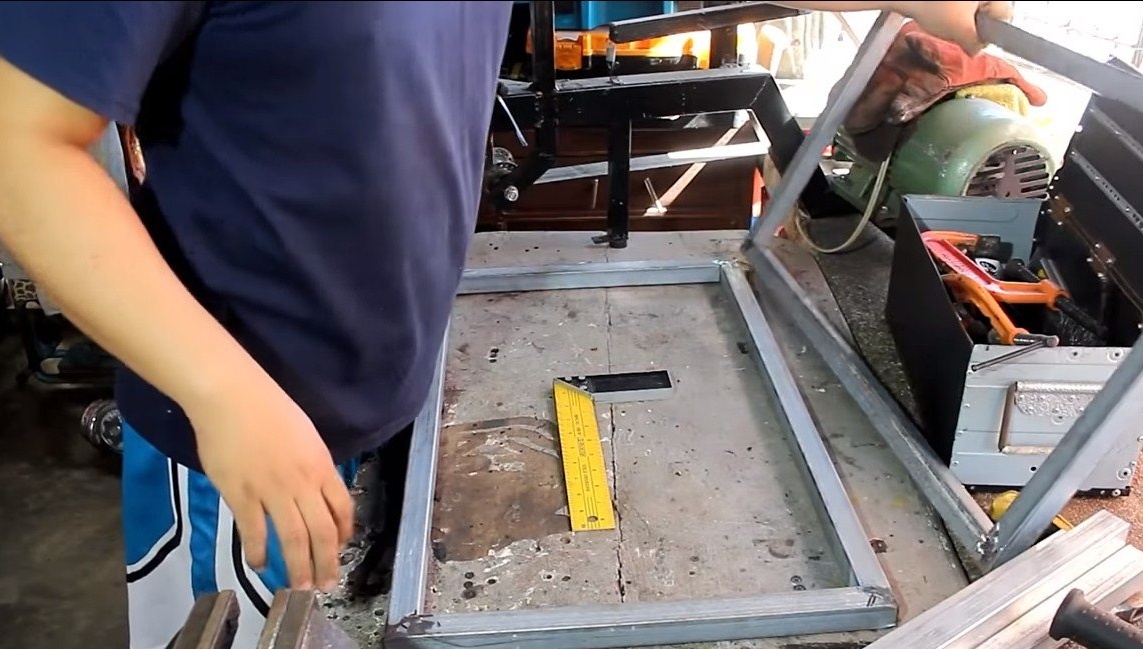
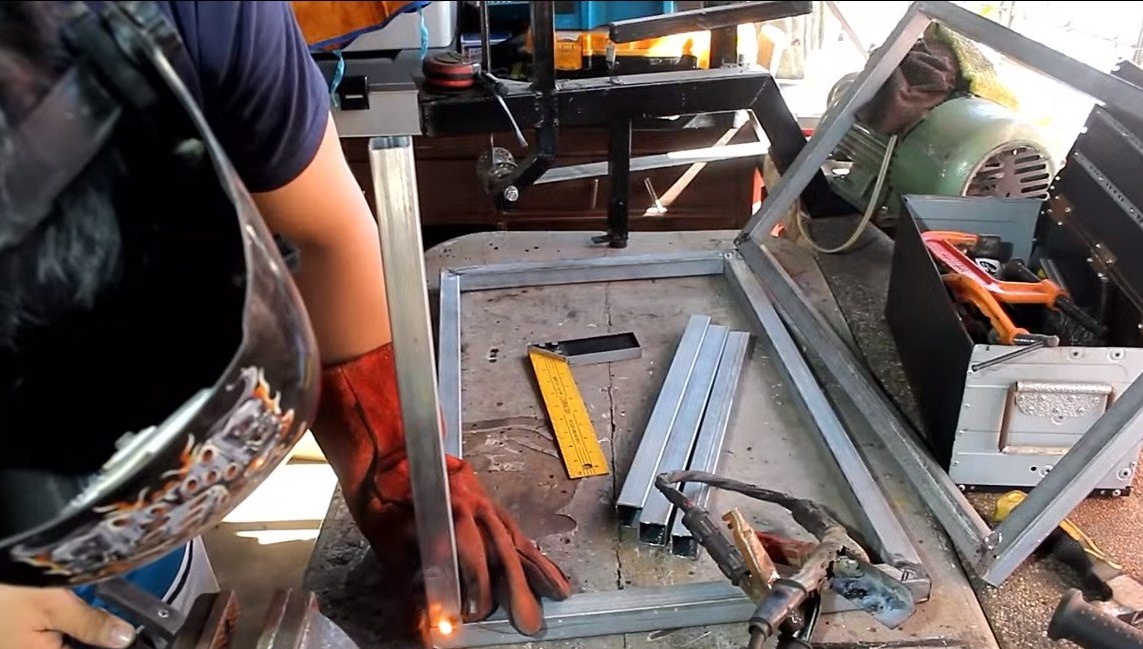
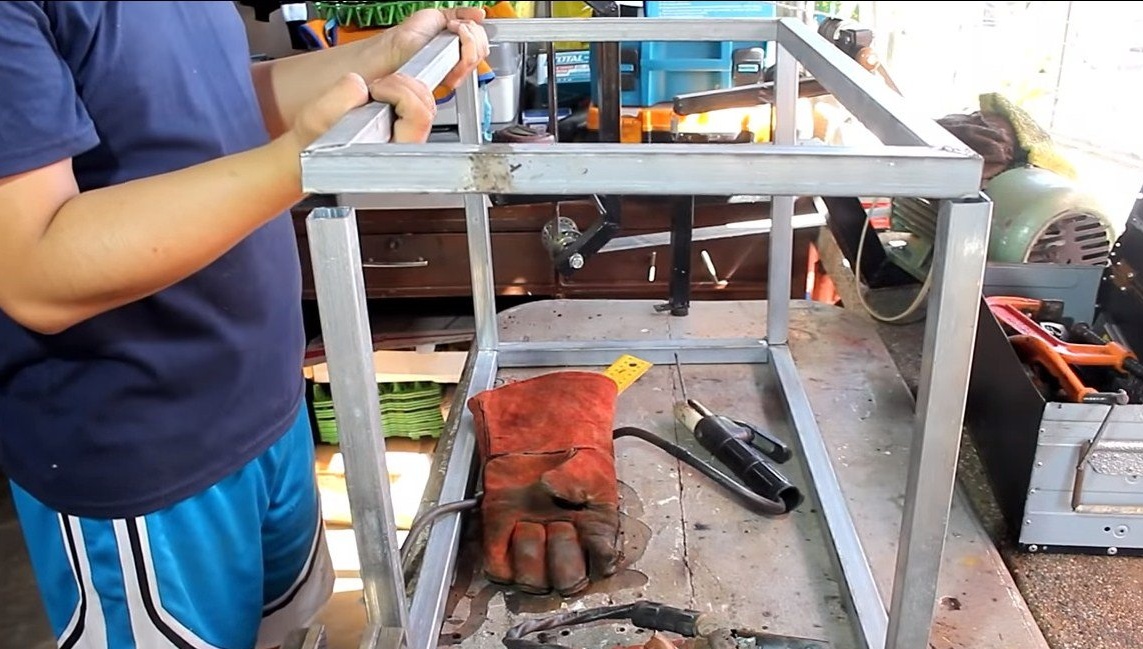
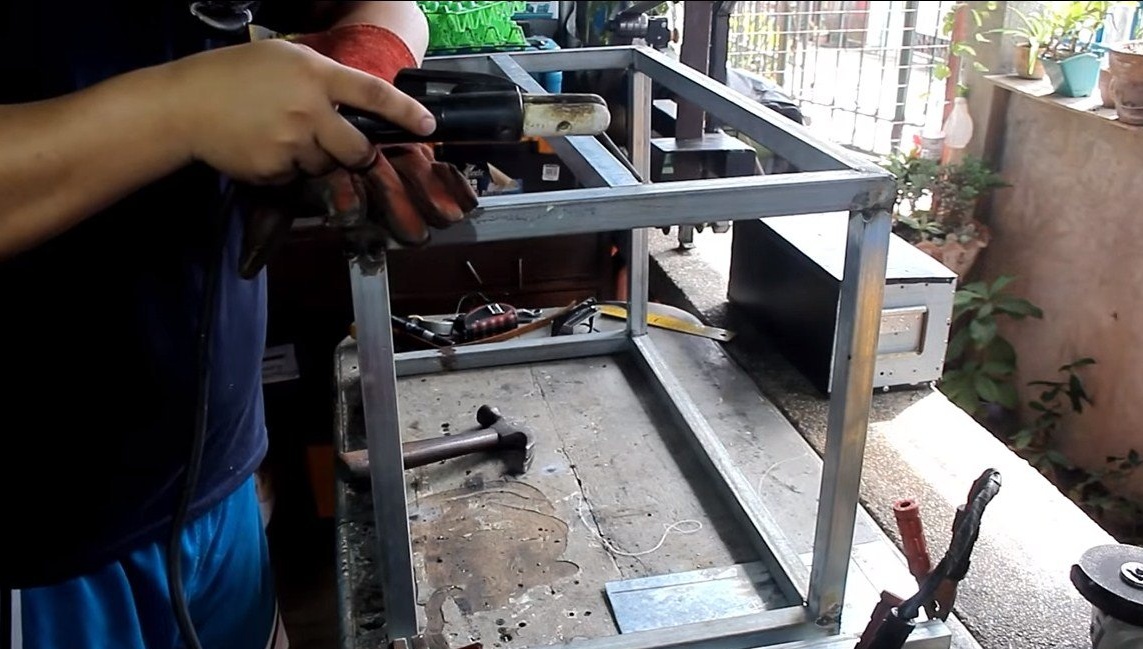
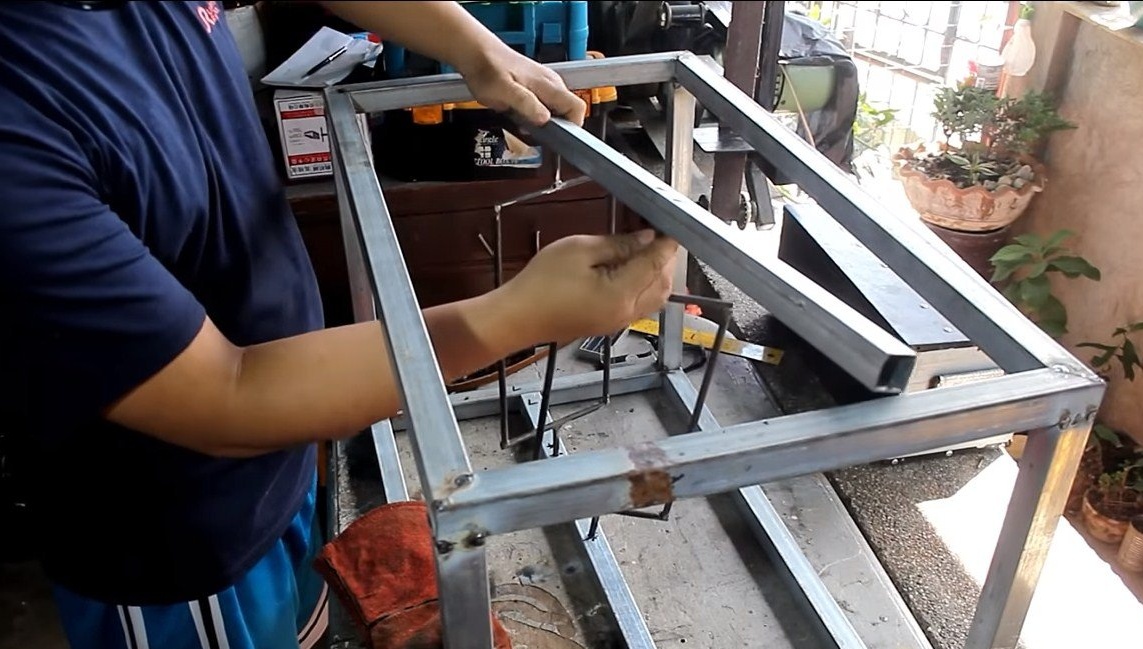
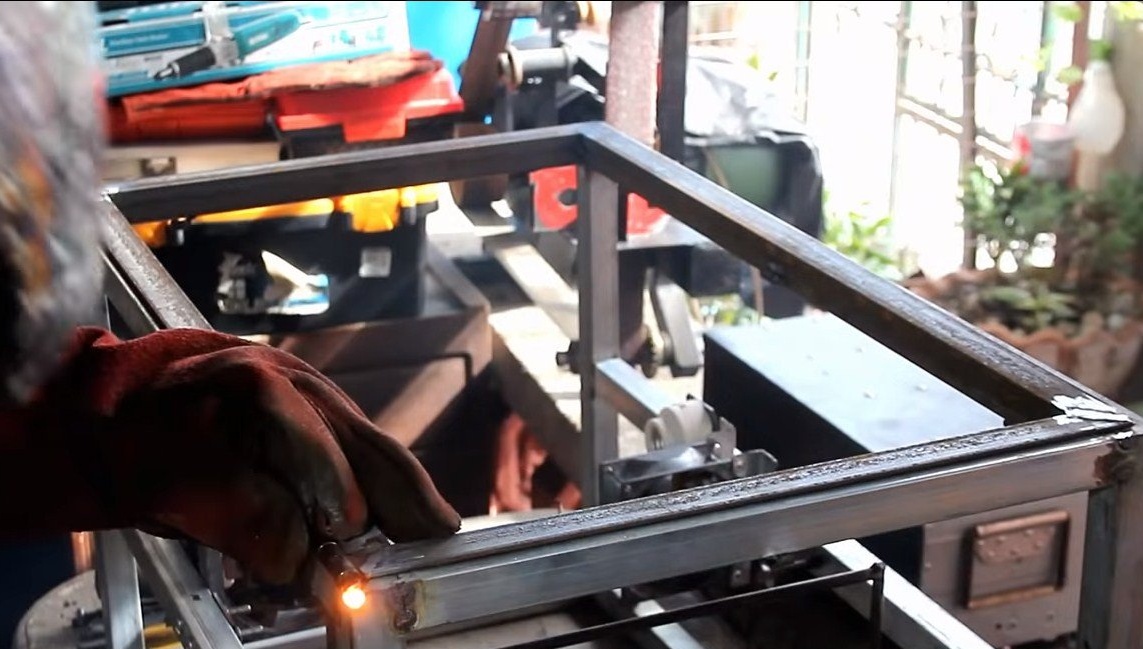
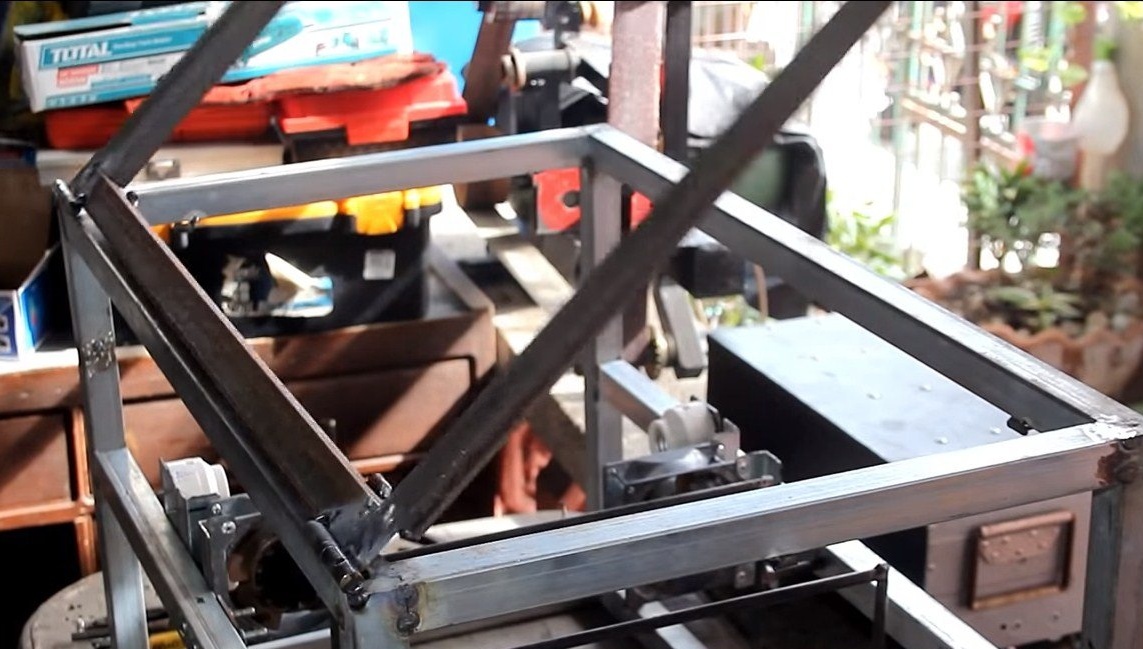
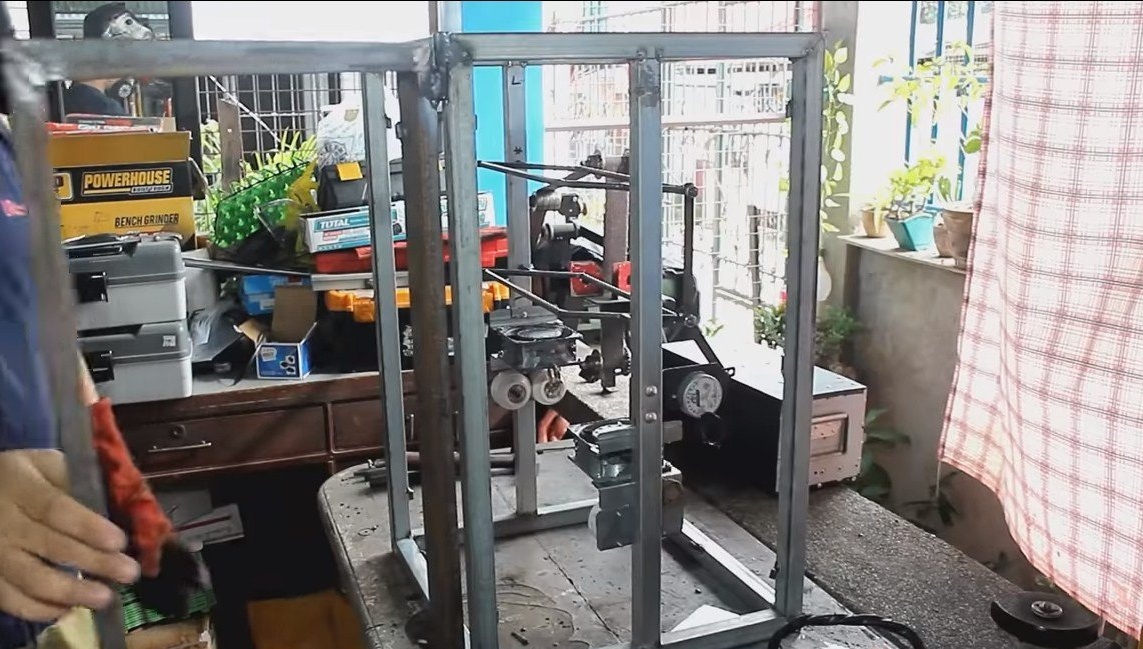
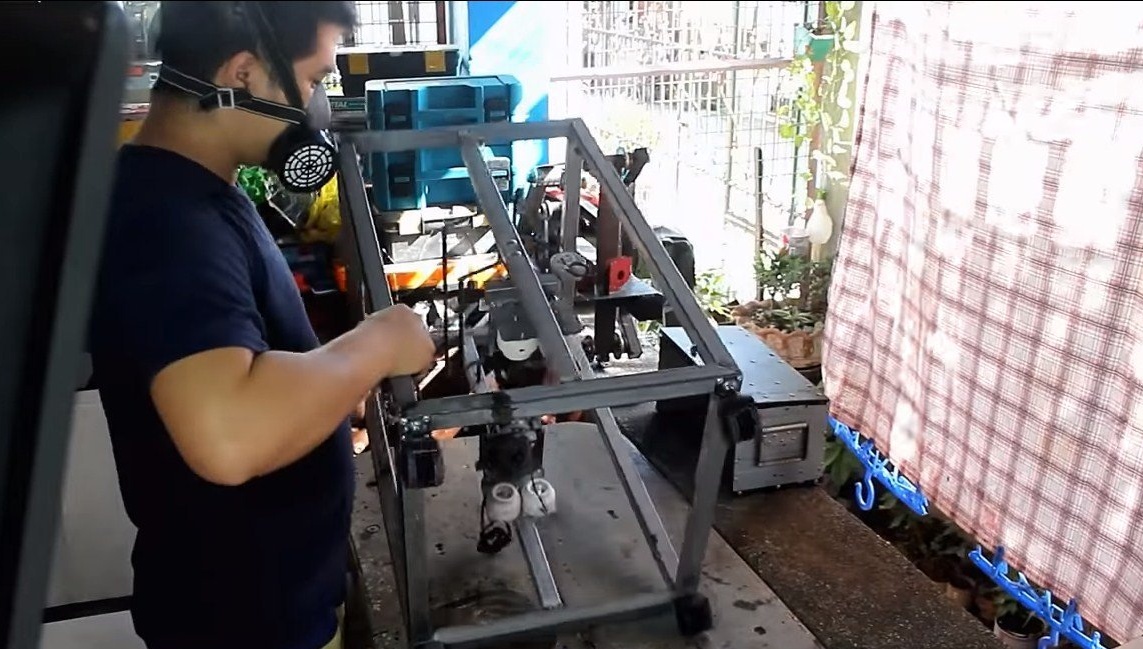
Step one. Frame
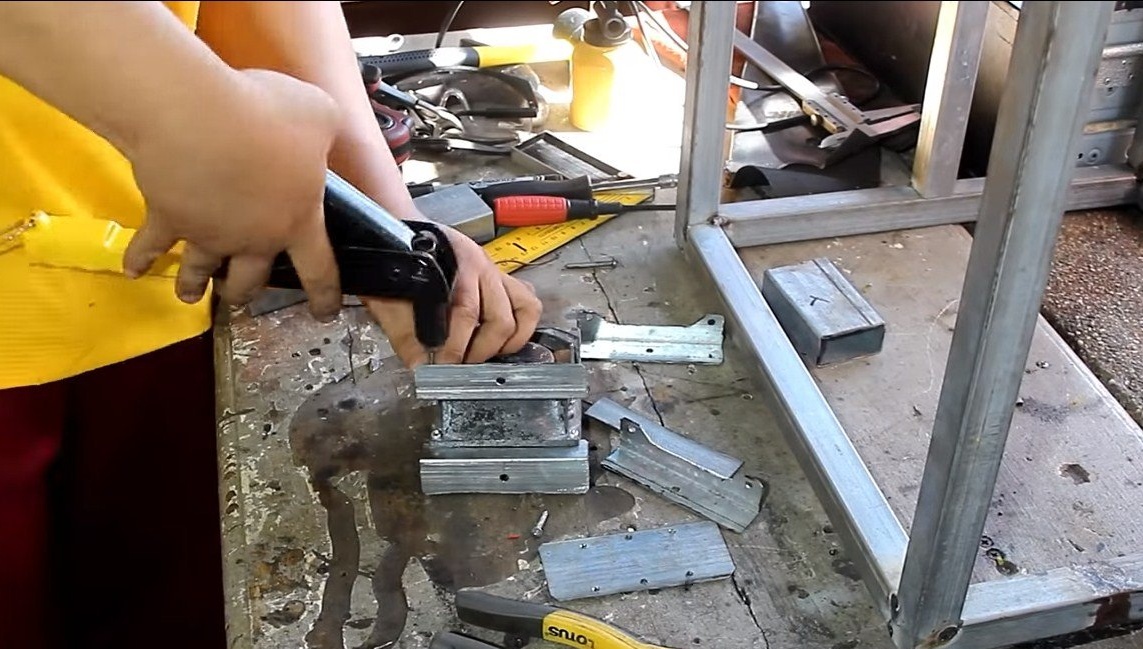
First you need to weld the incubator frame, determined by size and shape. The author uses shaped pipes as a material. Using magnetic squares or special clamps, we weld the frame.


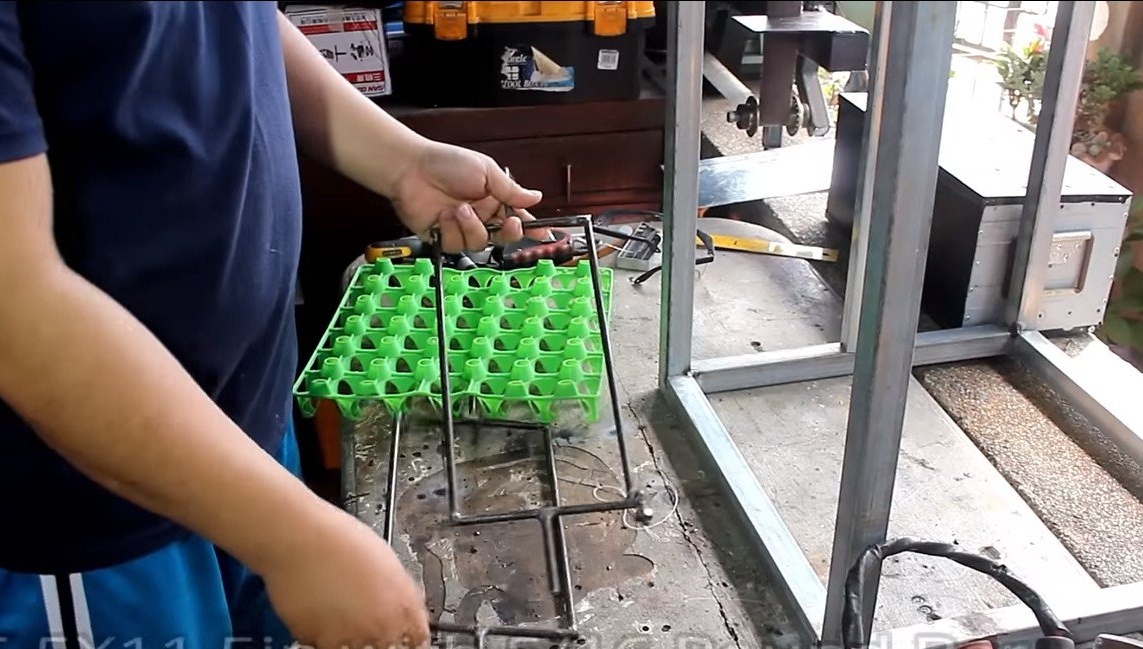
Step Two Tray Frames
Inside the incubator there are frames for installing egg trays that rotate at a certain angle. Due to the fact that the angle of the eggs will change, it will be better to ripen the fruit in them, otherwise the chicks may be born defective. We weld the frames from steel rods, insert their axes into the holes drilled in the profile pipes of the frame.
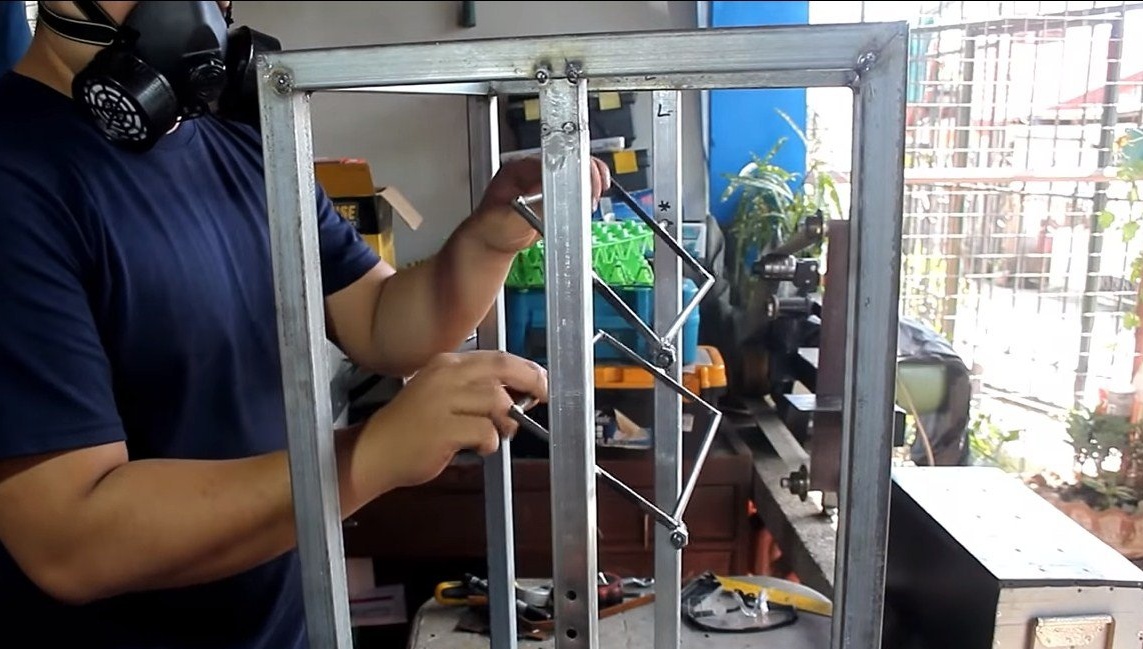

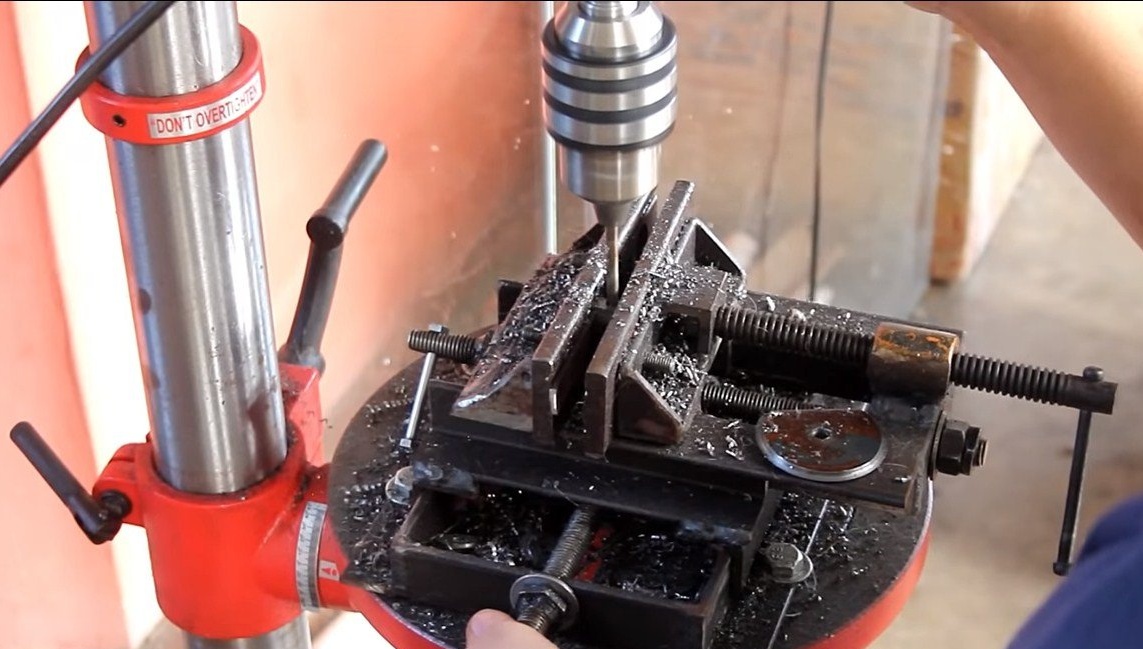
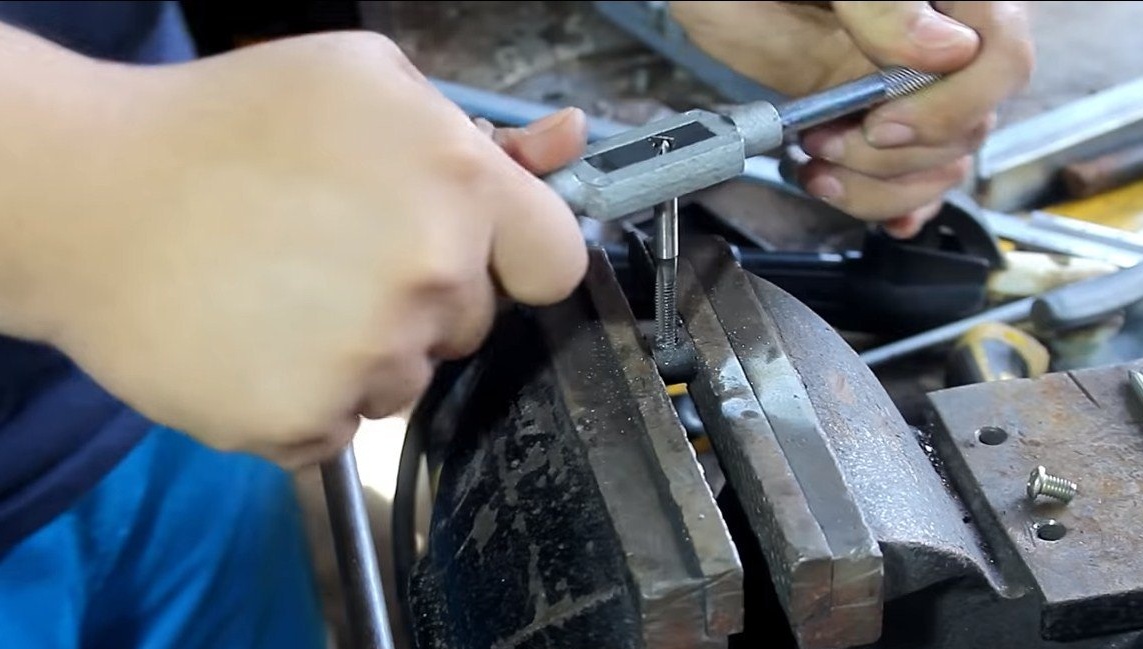
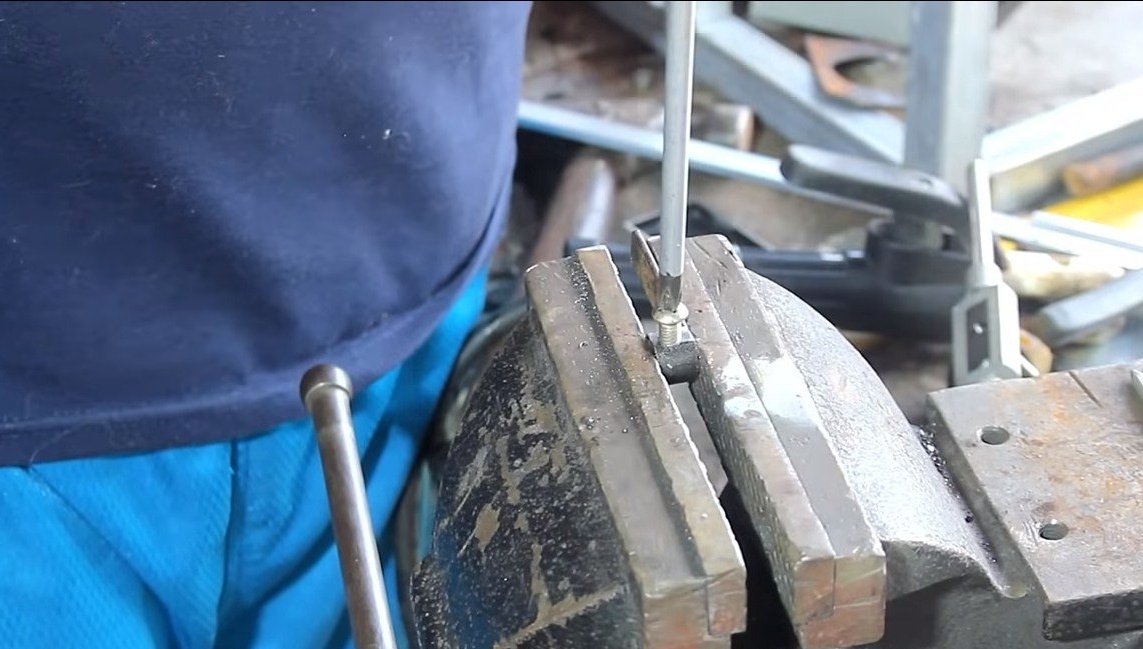
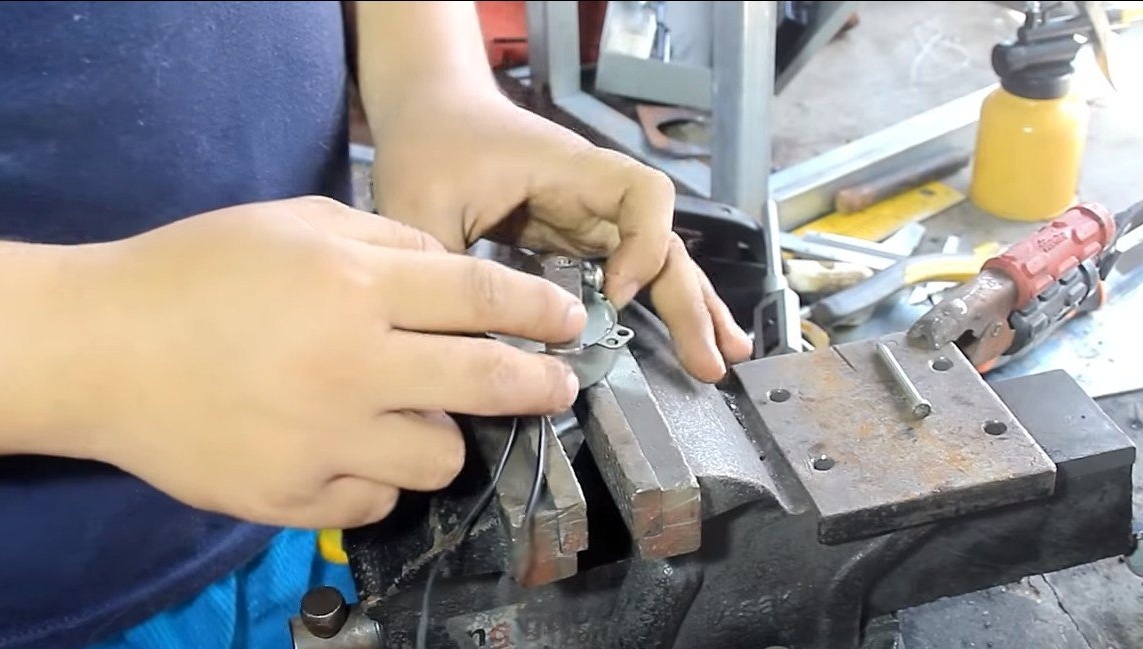
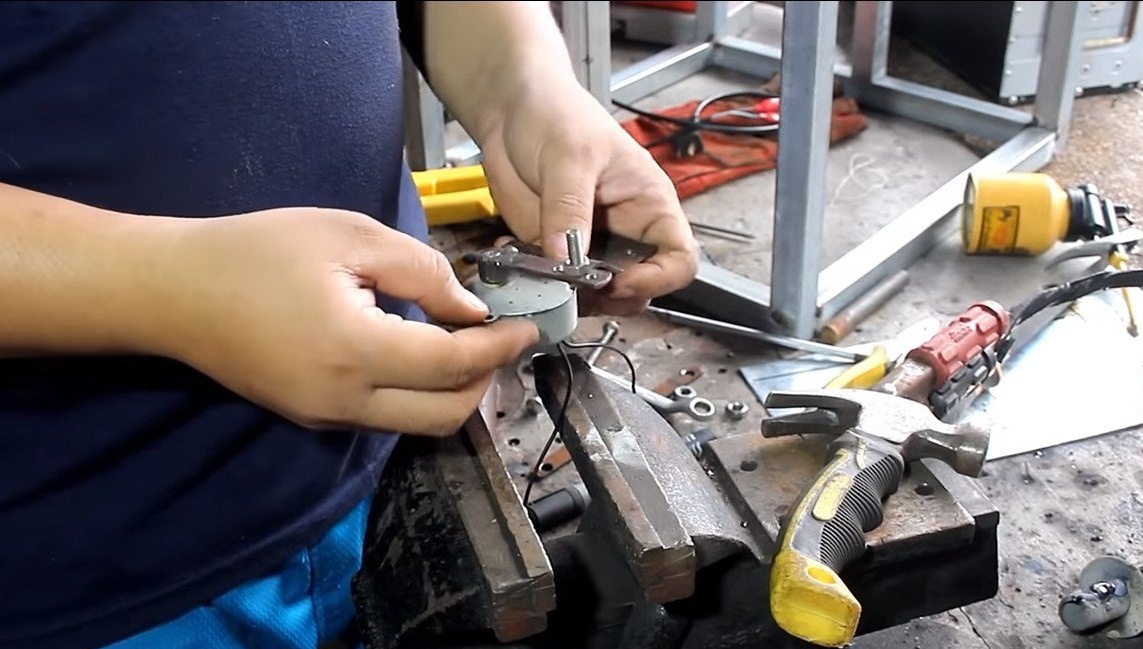
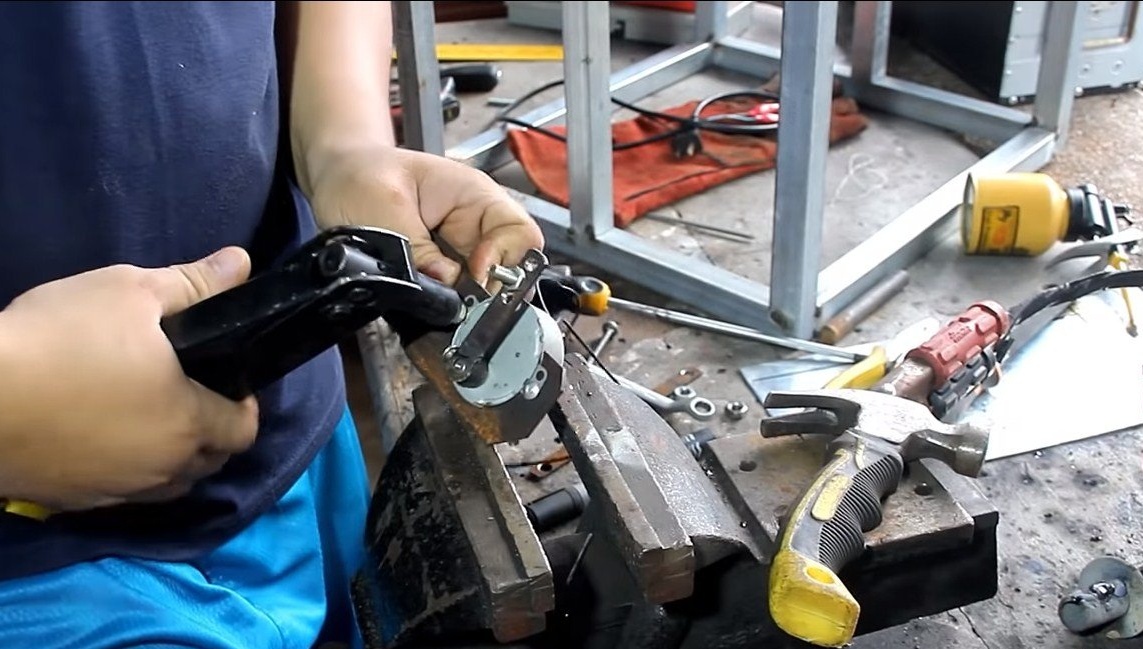
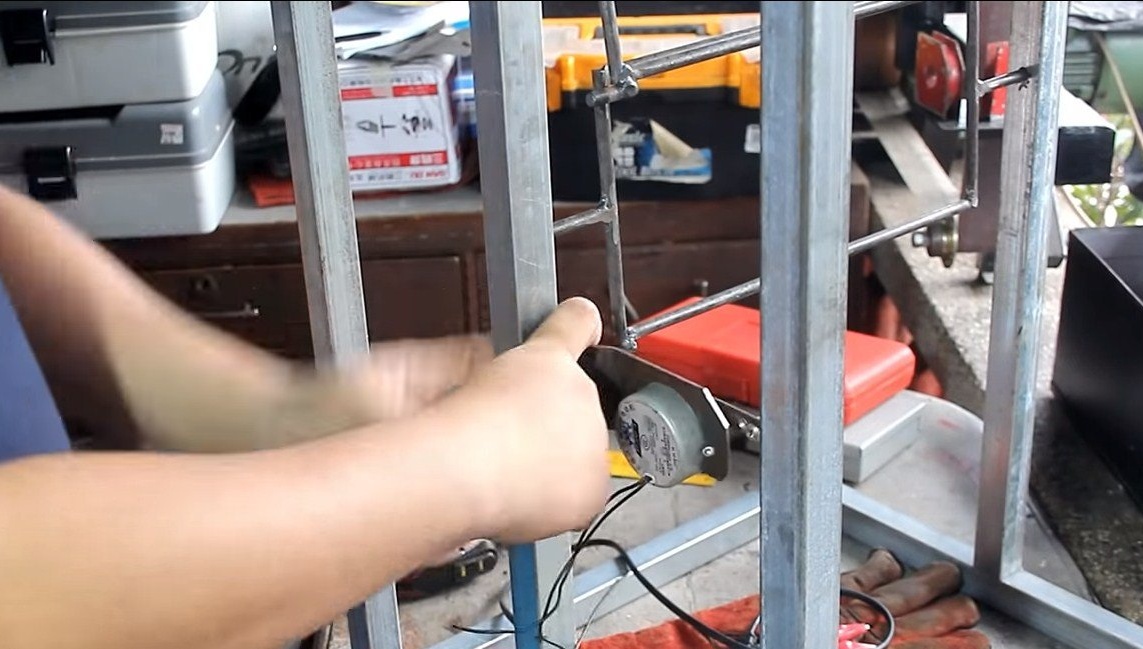
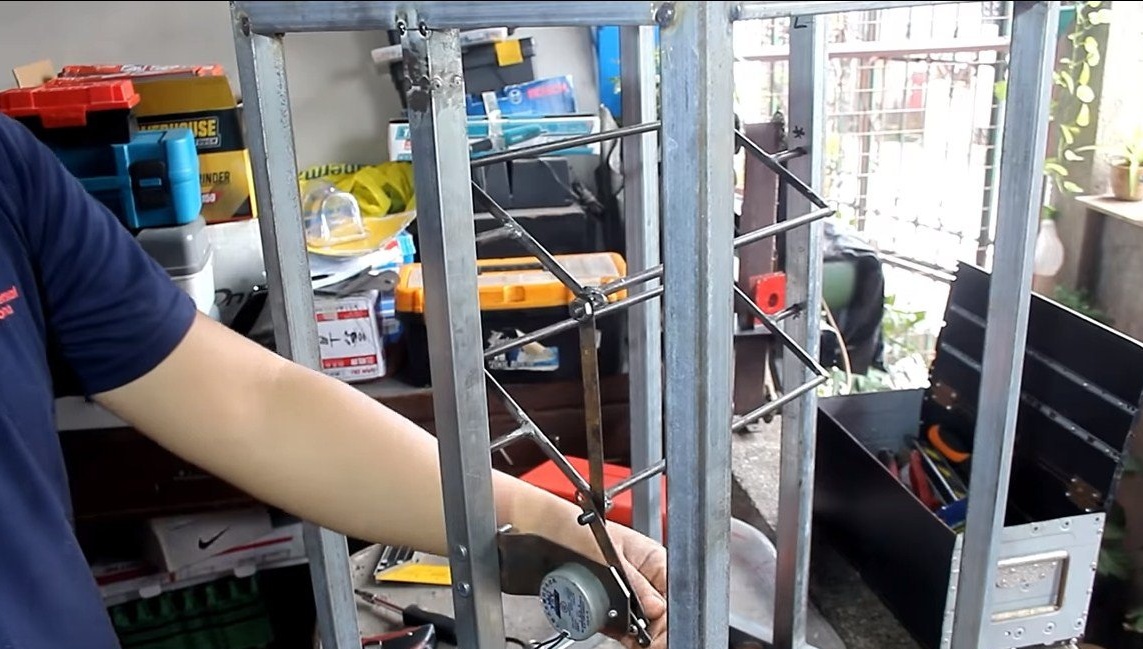
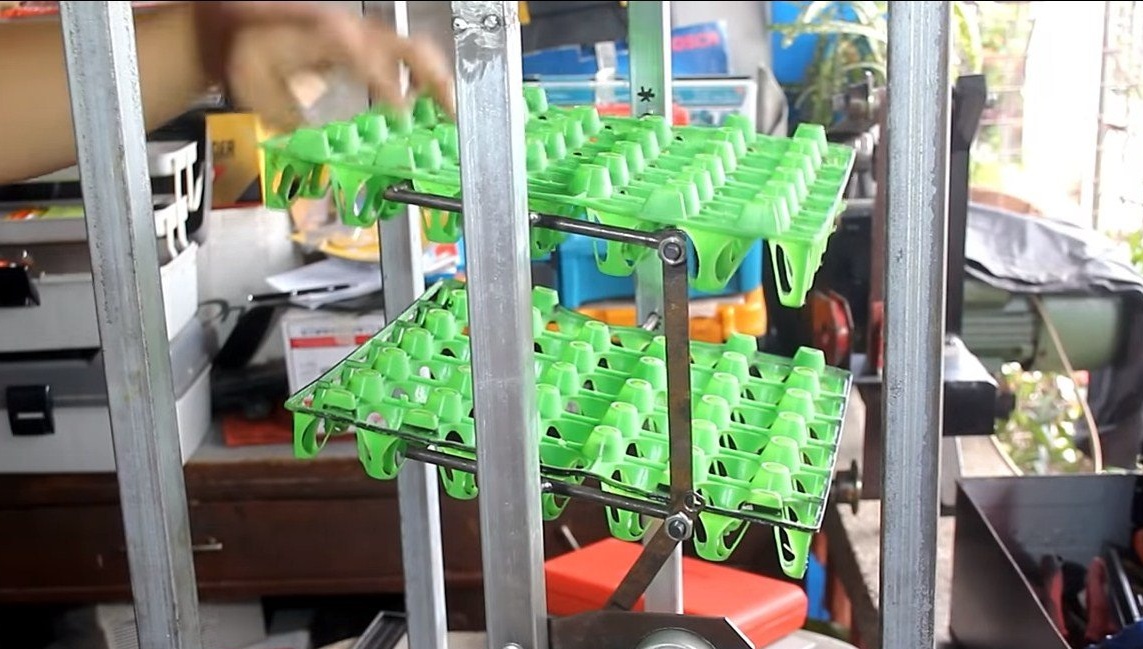
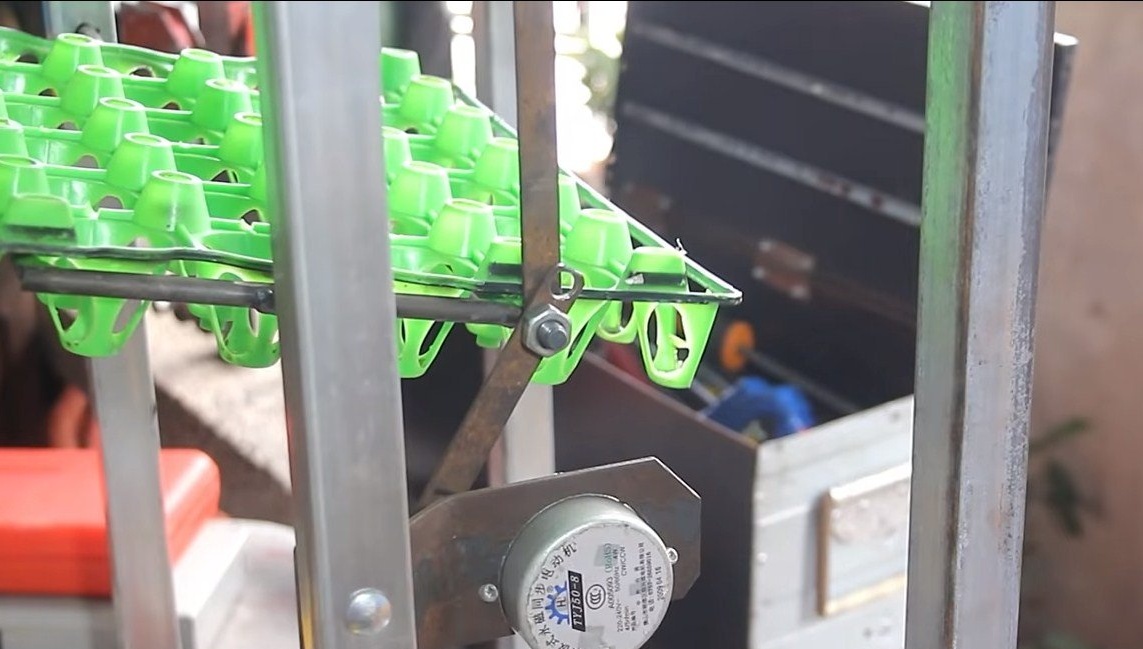
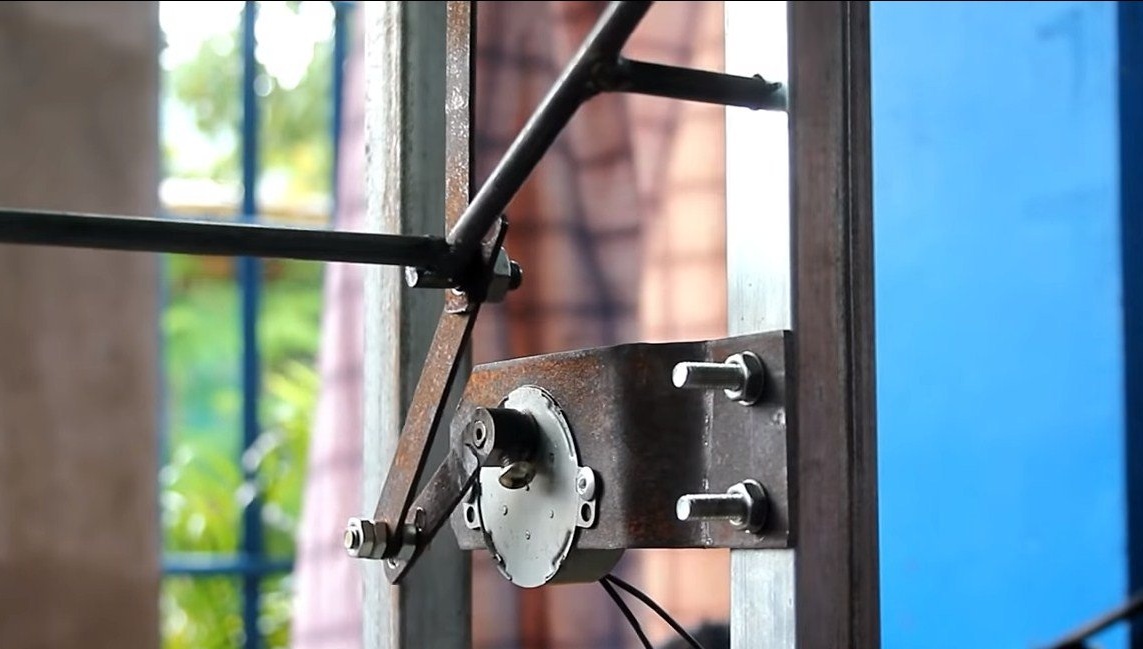
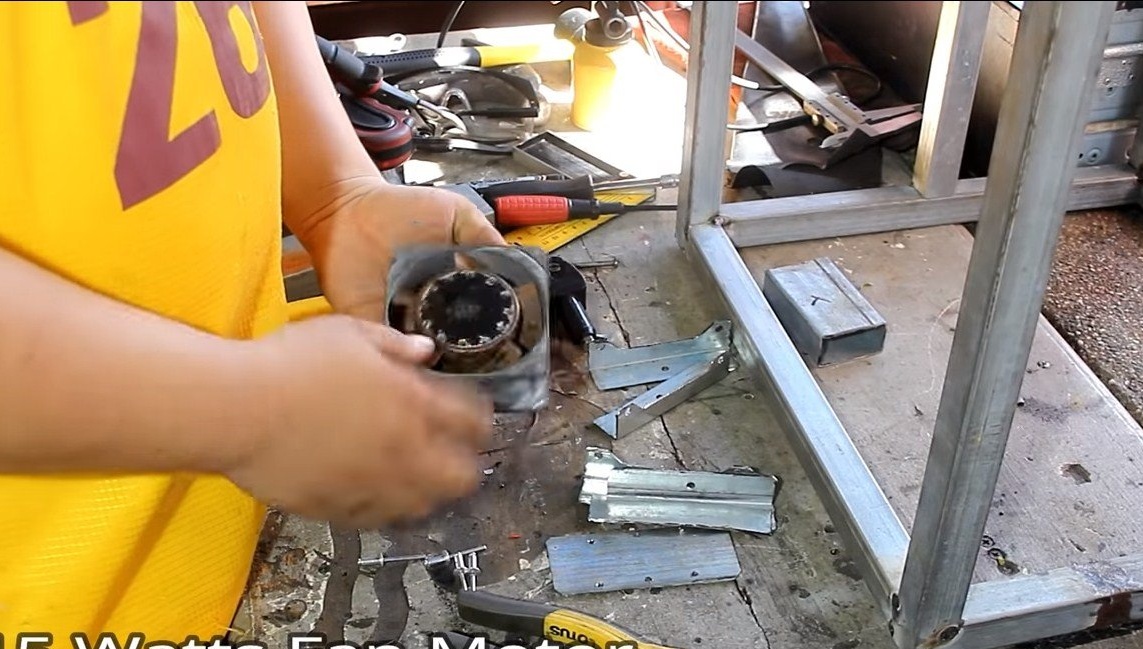
Now the most important thing is the drive for the frames. We combine two frames so that they move synchronously. They will be rotated by a small gear motor; as such an engine, you can use a motor from car wipers. We make a lever (crank) and install it on the motor shaft, and then we connect a connecting rod to this lever to transmit movement to the frames.The motor is securely fixed to the frame through a steel plate. Despite such small dimensions, the engine selected by the author easily copes with the tasks.
Step Three Heater
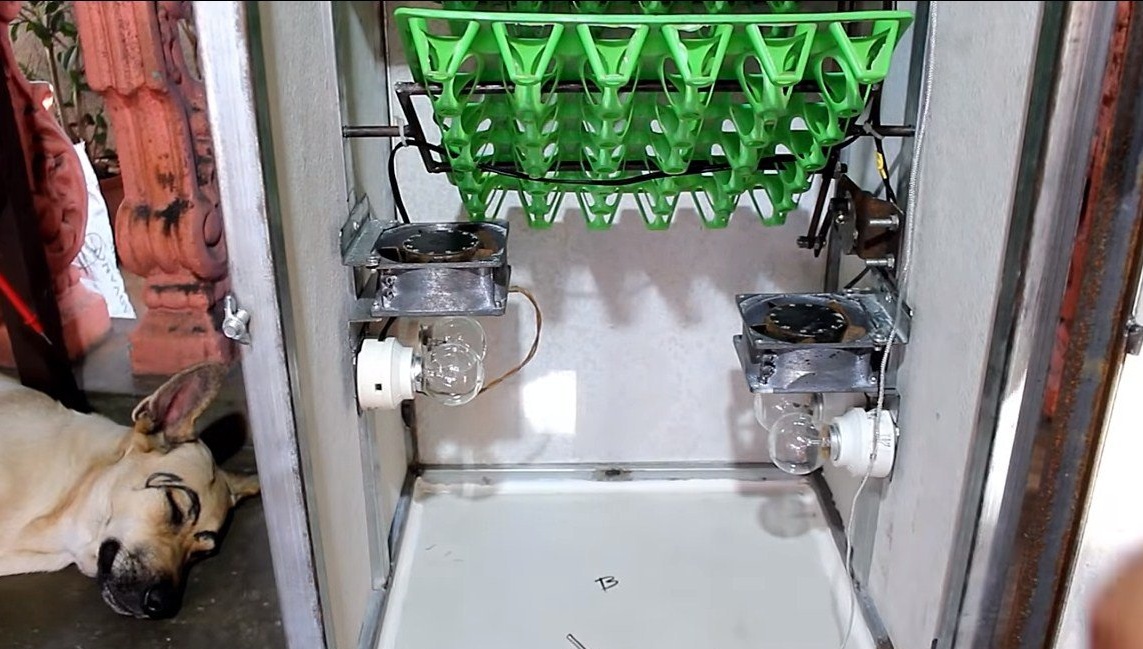
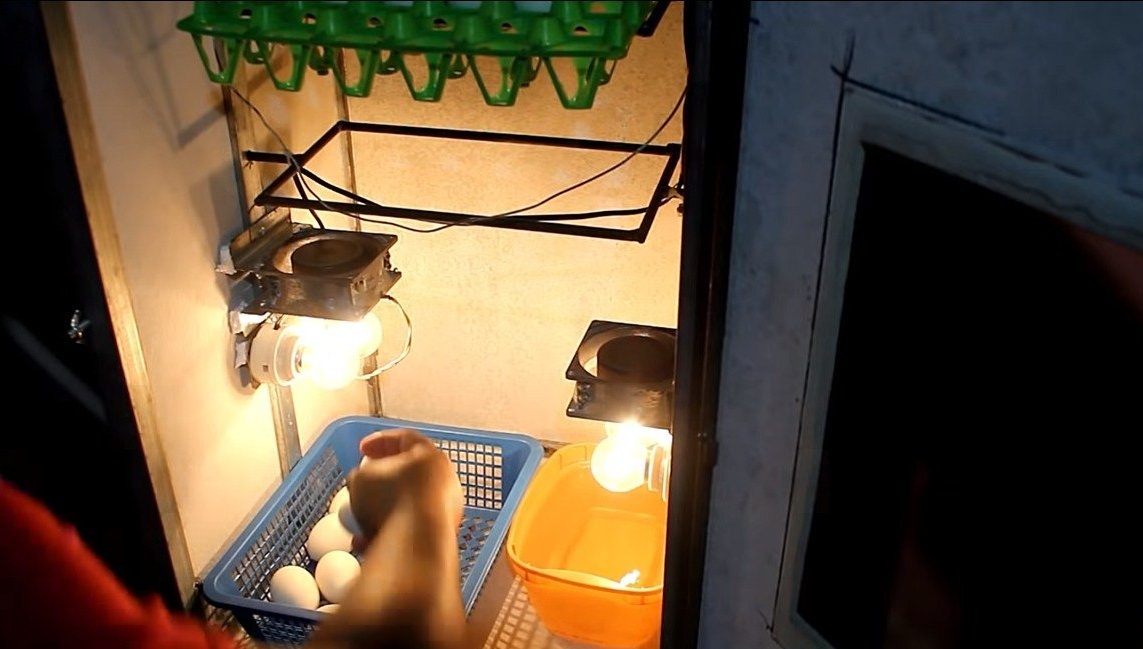
We install heaters in the incubator, as they are 4 incandescent bulbs of 40 watts each. Of course, 160 watts, this is quite a lot, but do not forget that they will turn on only occasionally, maintaining the temperature in the desired range. Of course, energy costs can be reduced tenfold if the incubator is well insulated.
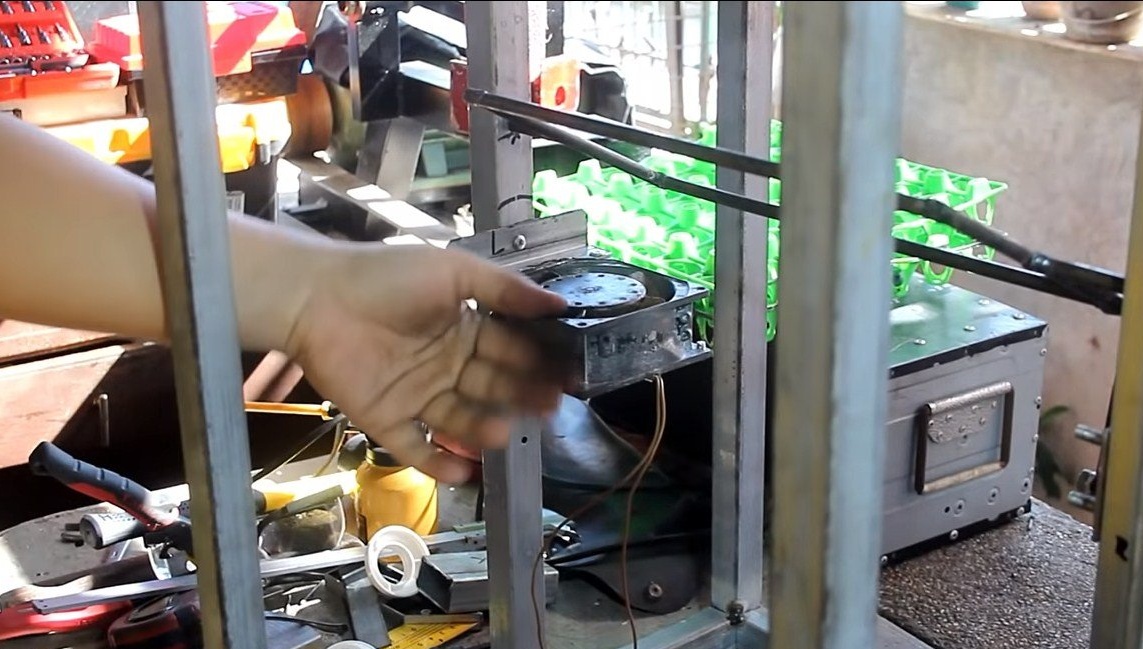
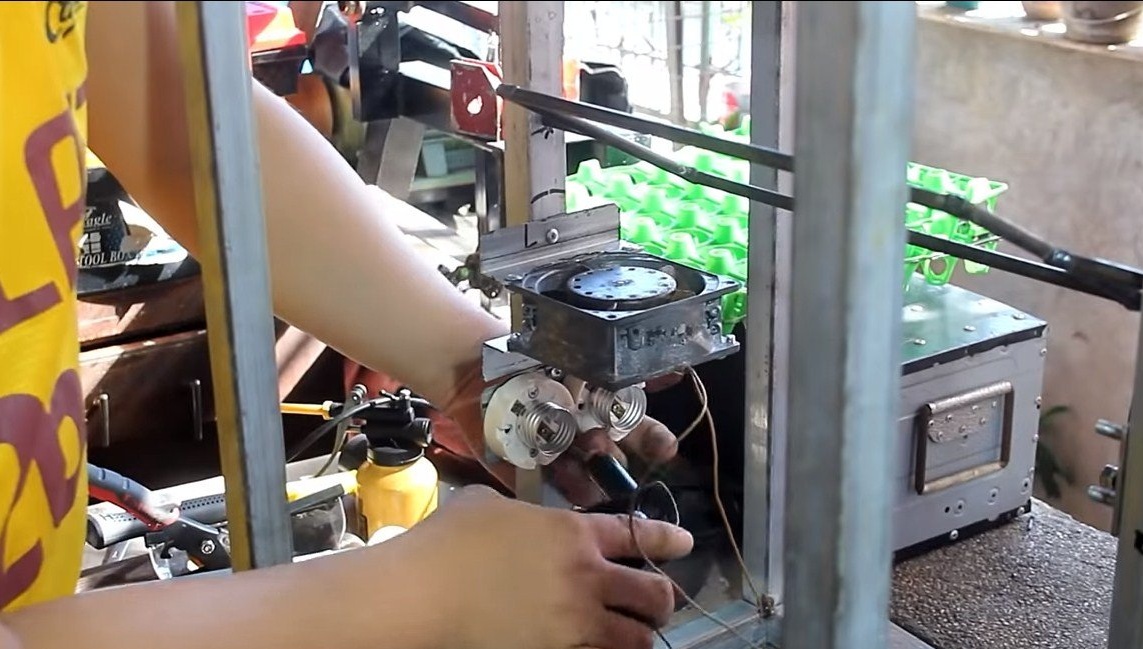
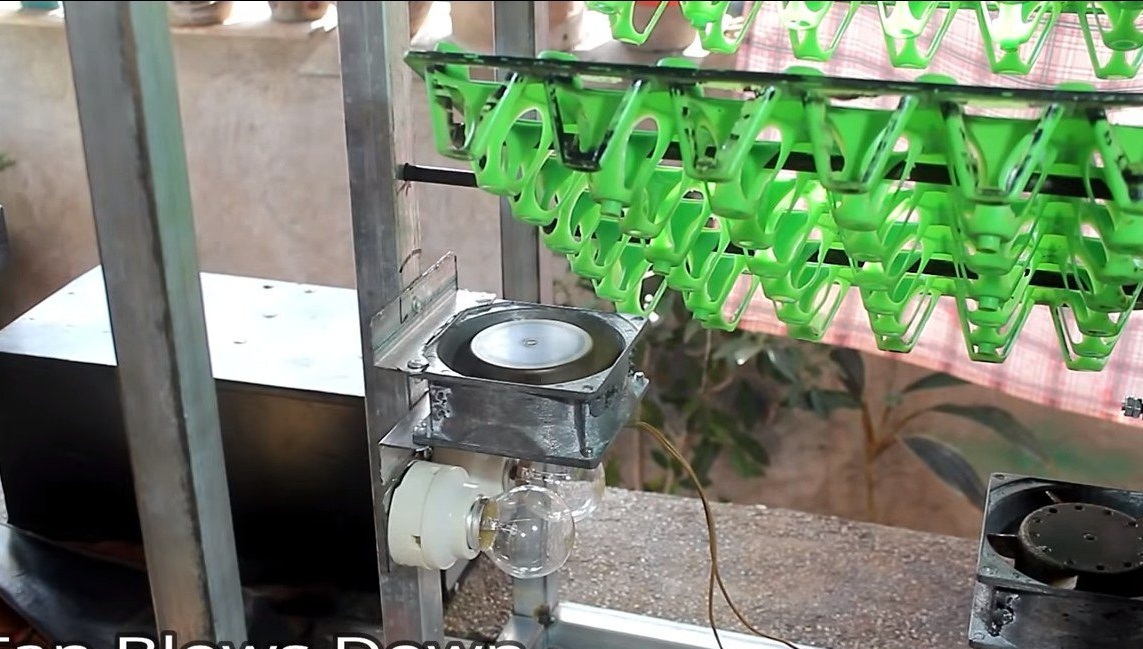
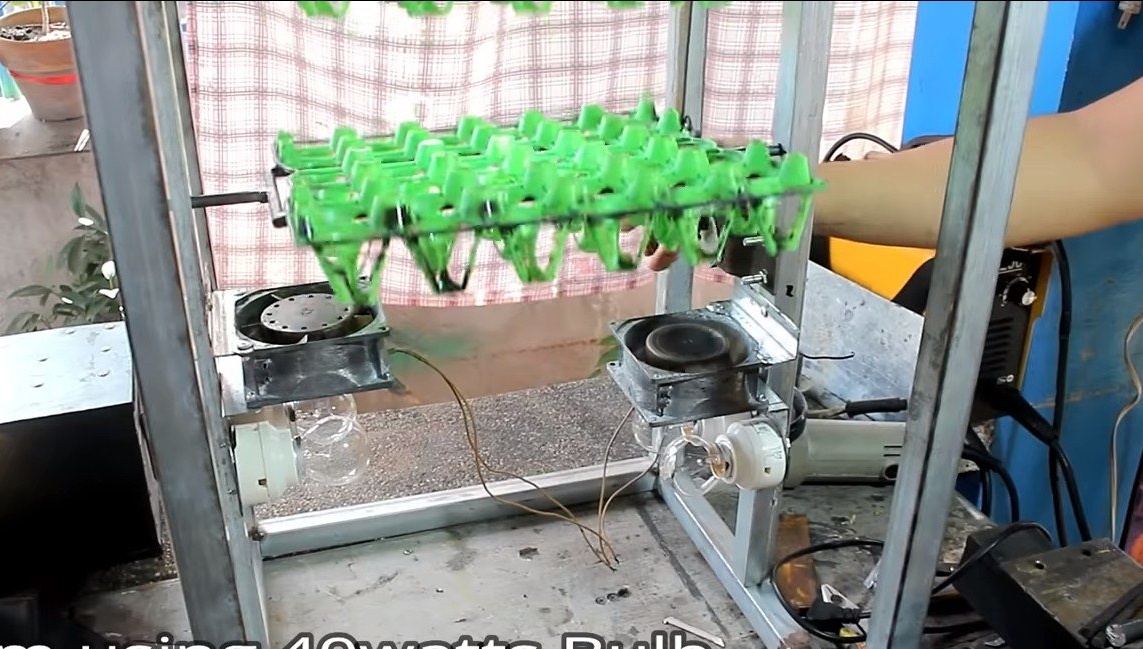
We mount the cartridges on the frame and wrap the lamps. Please note that due to the frequent switching on of the lamps, they usually fail quickly, so it is better to buy lamps with a margin. Opposite the lamps we install fans, they will effectively distribute warm air through the incubator. It is convenient to fix the whole thing with a rivet gun or self-tapping screws.
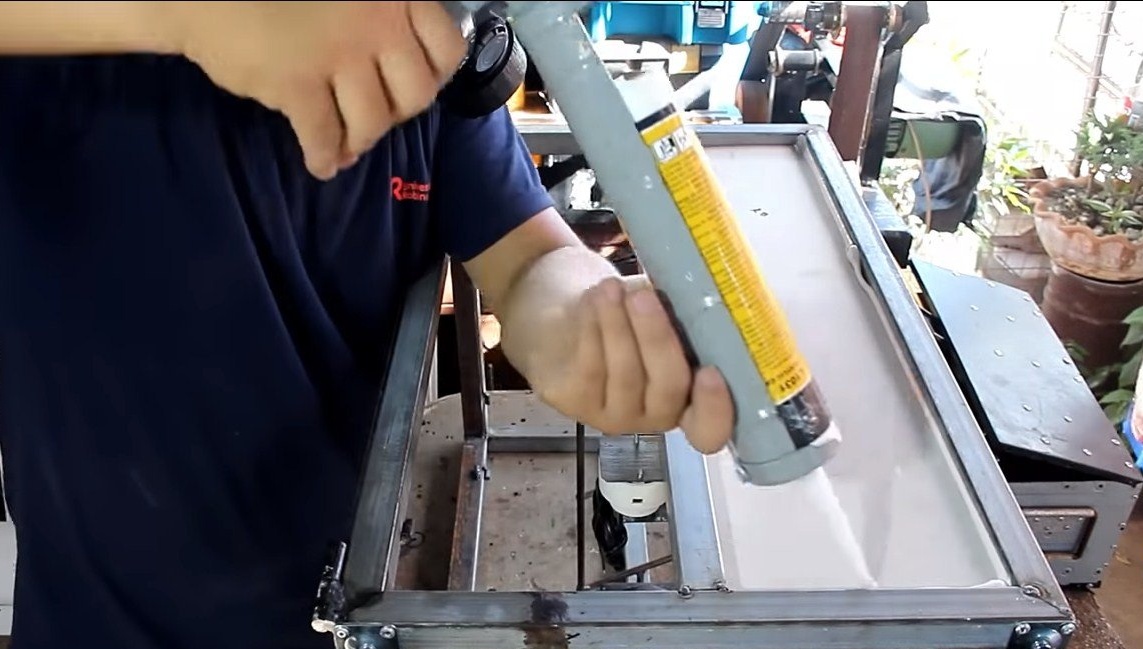
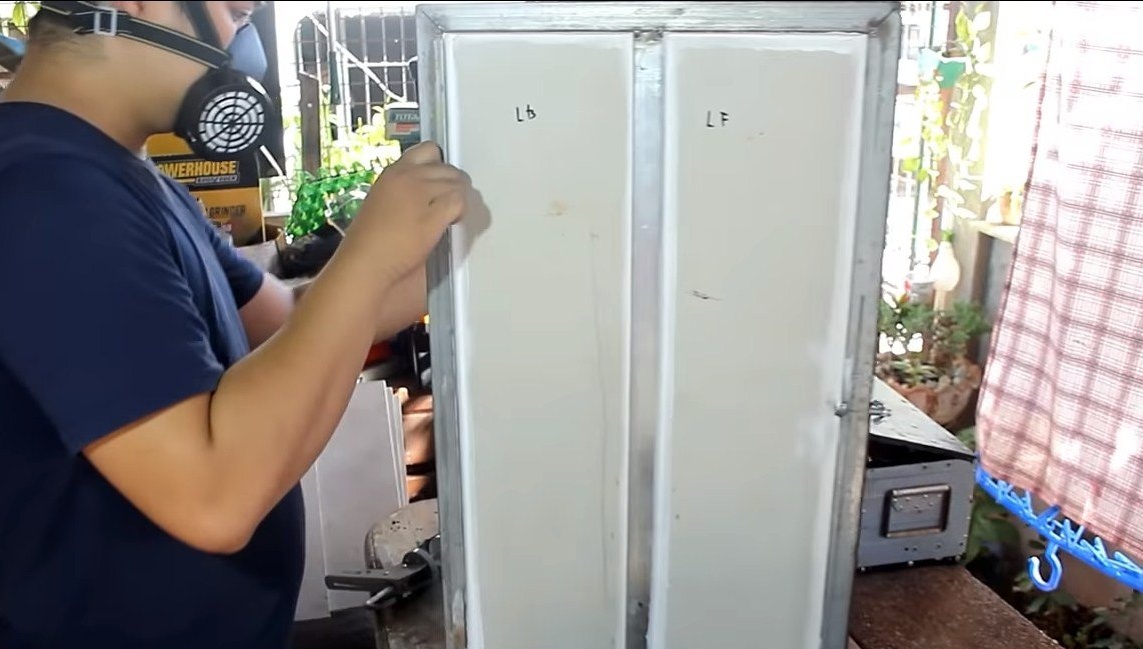
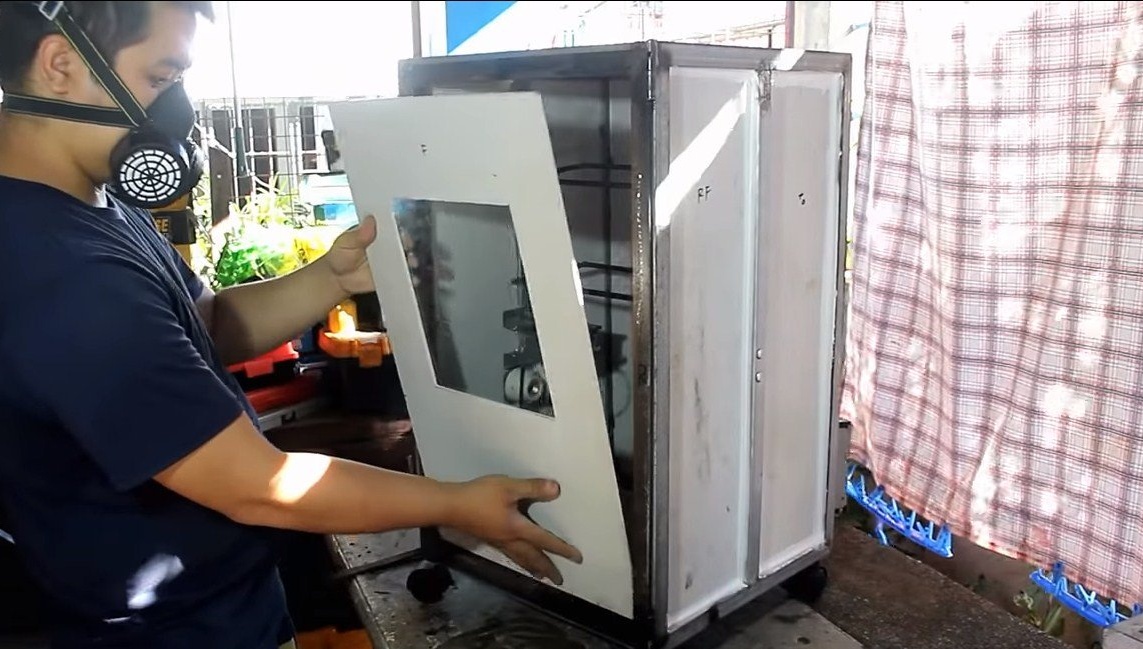
Step Four Door and trim
We install a door on the incubator frame, hang it on reliable door hinges. After this, the incubator can be sheathed, you will need sheet plastic, fiberboard or other similar material. To save incubator, it is useful to glue with foam or another insulator.
As for the door, then do not forget to install the window. Remember that for the effective operation of the device, all joints must be tight so that warm air does not escape.
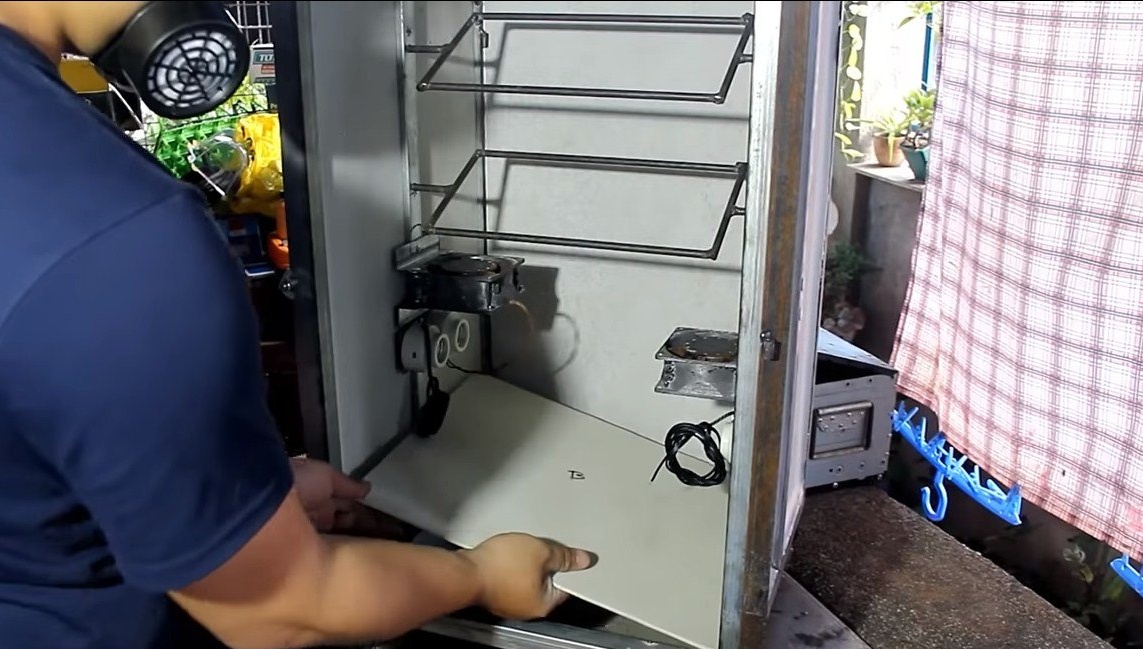

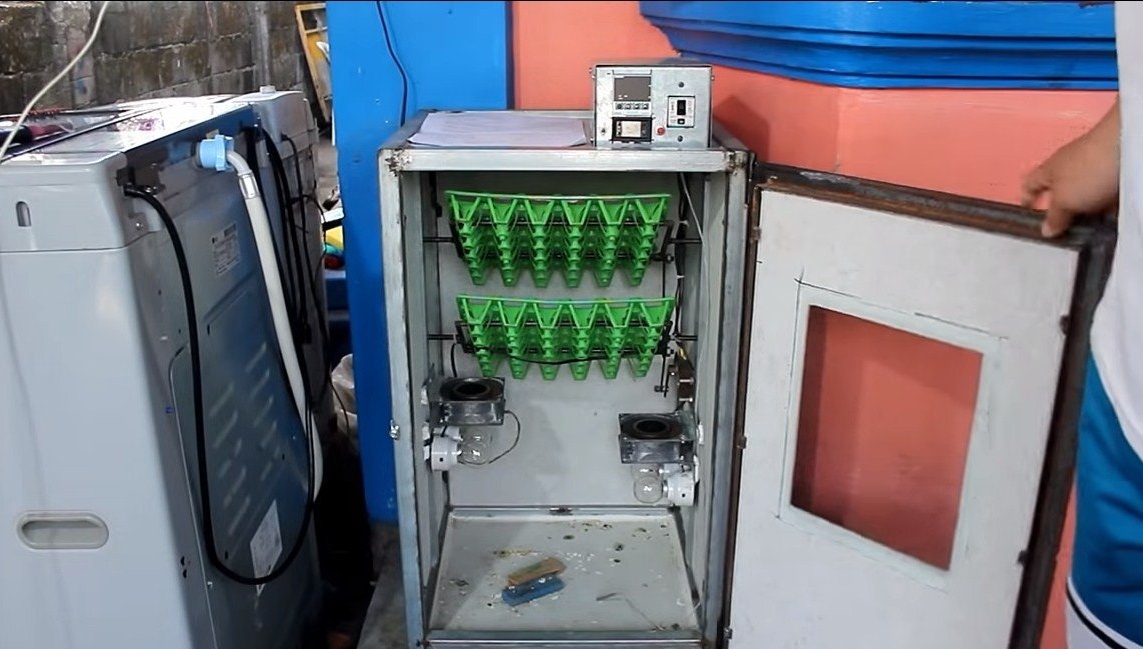
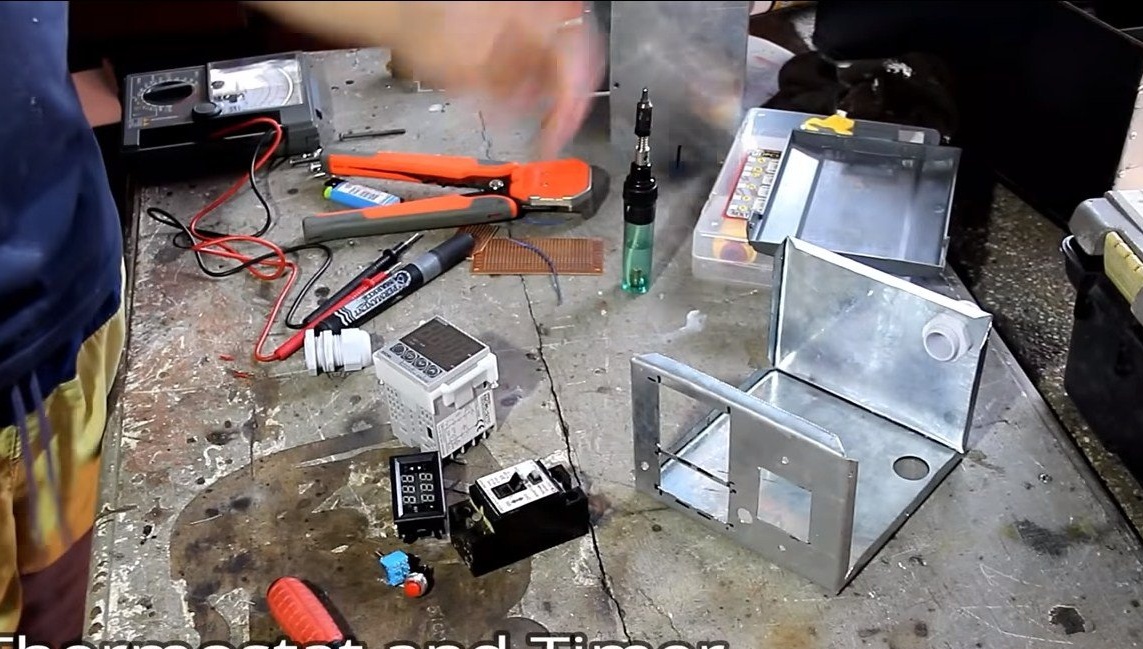
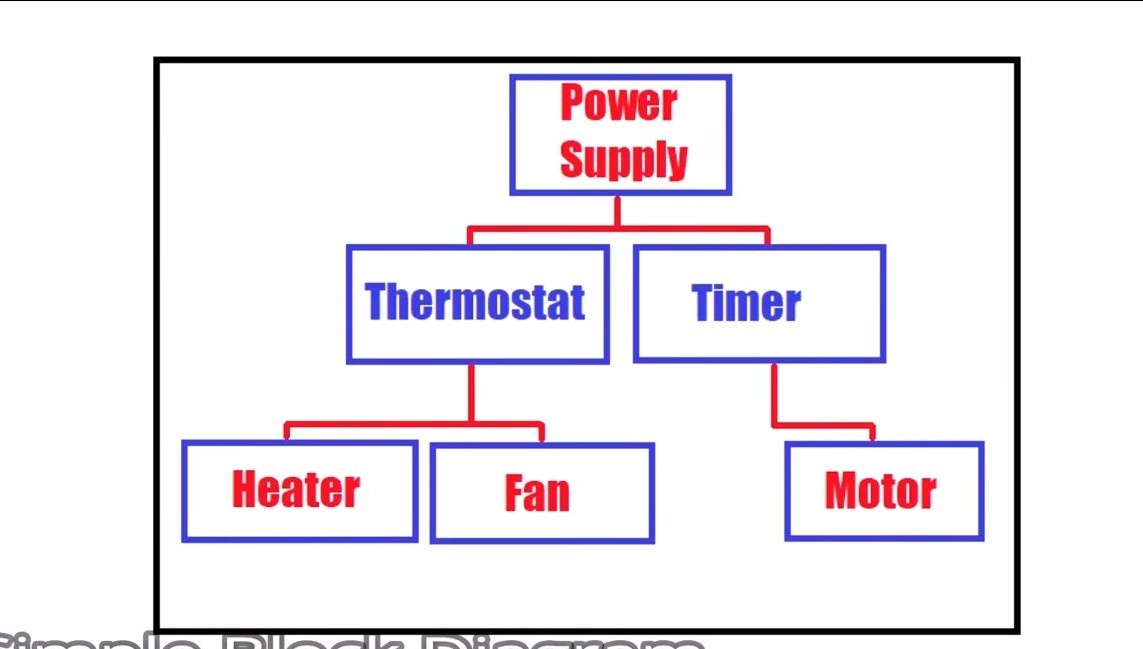
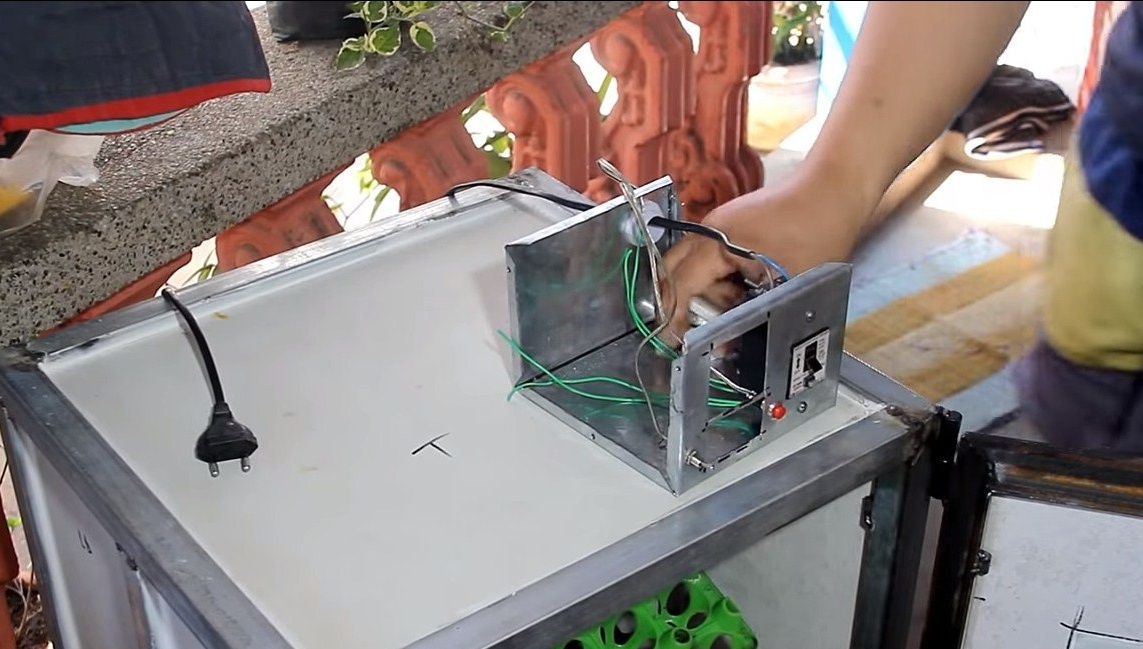
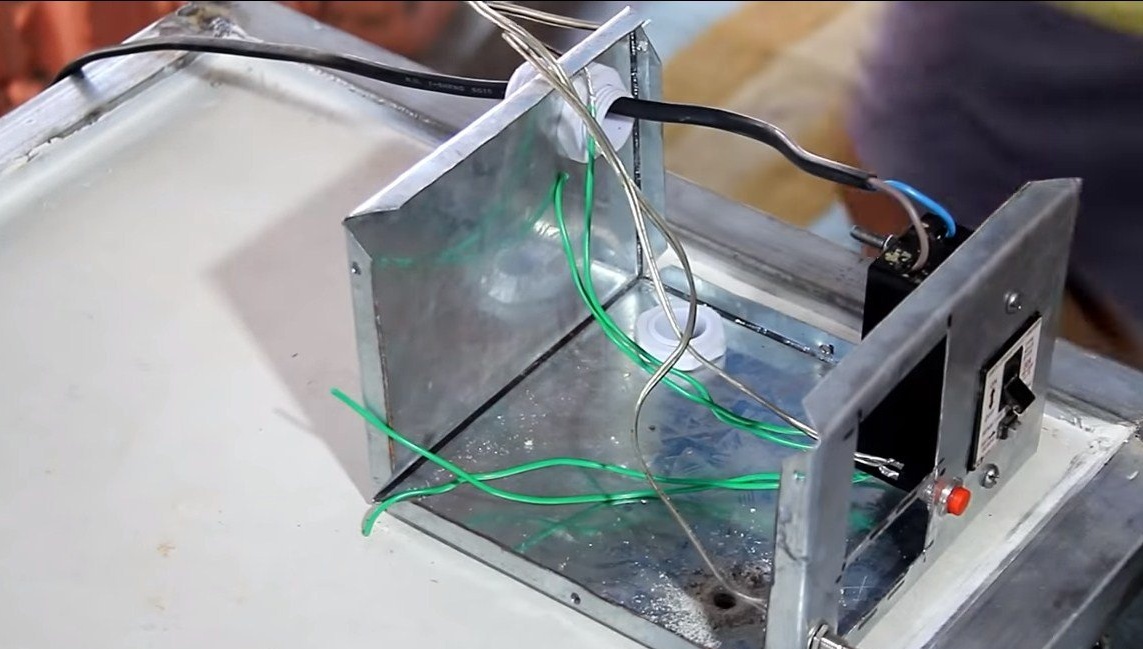
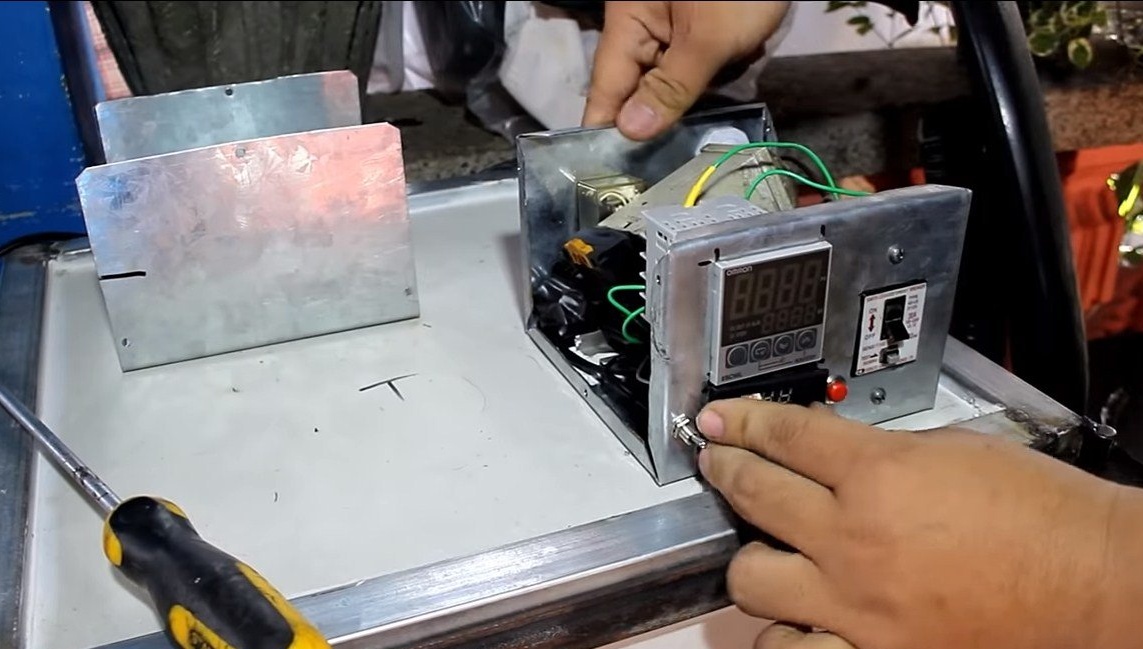
Step Five Electronics
It is time to install the electronics, for its location you can use the case from a computer power supply. There is a timer, it is needed so that the eggs automatically rotate several times a day. You can program it at any time.
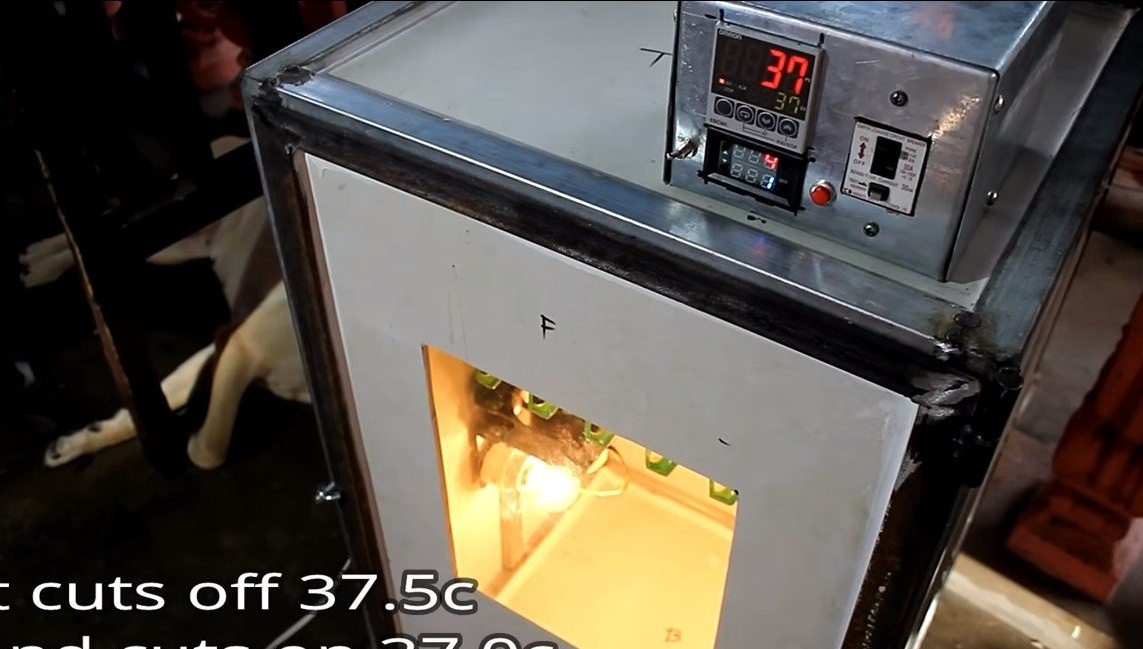
We also need an electronic thermometer-thermostat. This device will maintain the temperature in the incubator in a given range, in our case it is 37-37.5 degrees. When the temperature drops below 37 degrees, the lamps in the incubator light up and the fans turn on. When the temperature rises above 37.5 degrees, the electronics turn off the heaters.
Step Six Testing incubator
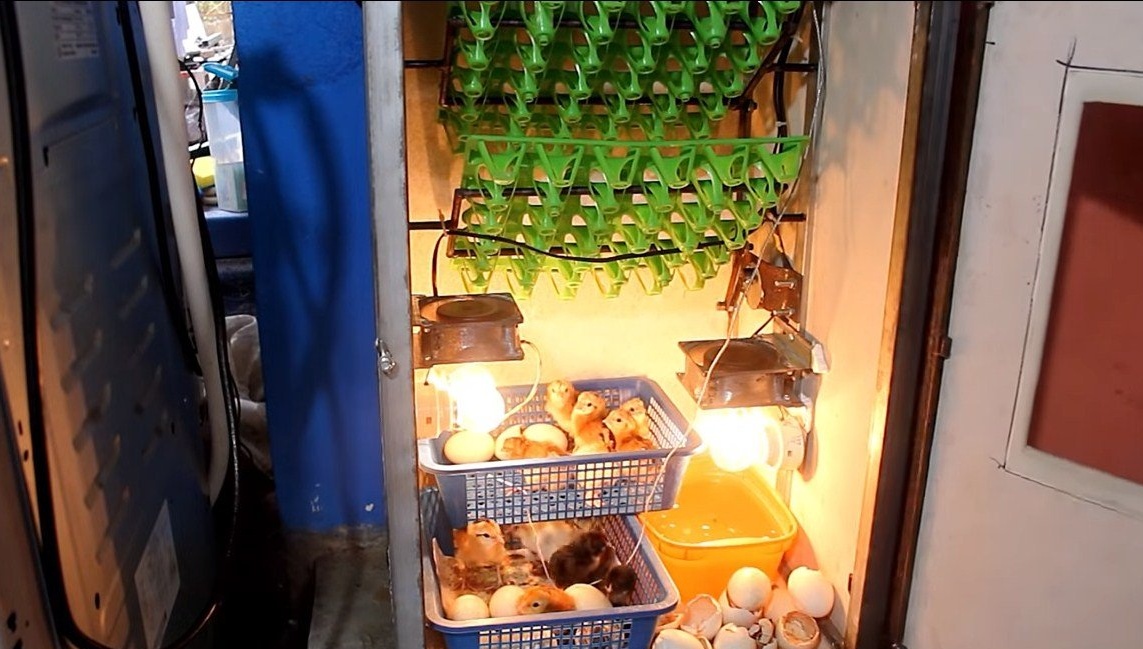
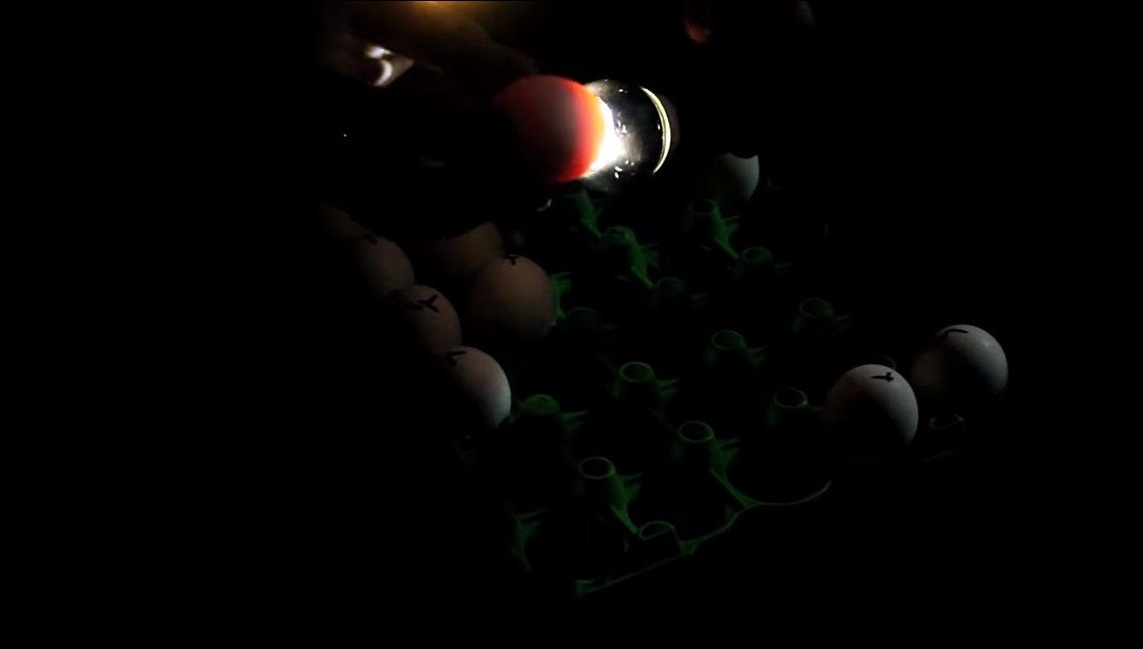
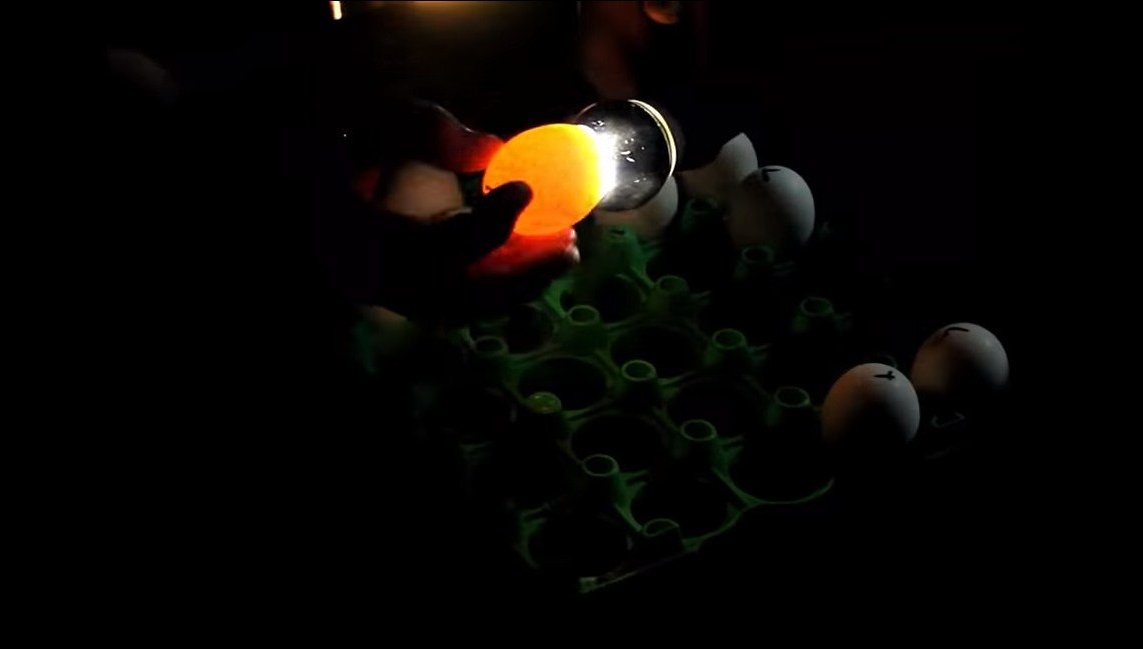
Homemade ready, you can lay eggs, be sure to put a tray of water, as the air inside the incubator should be humid. We start the car, set the temperature and wait 10 days. During this time, life inside the eggs has time to emerge, and in which it does not have time, we need to discard those eggs. We shine through the eggs, those that will be dark, there will be a germ in them, they must be left, and the rest thrown away.

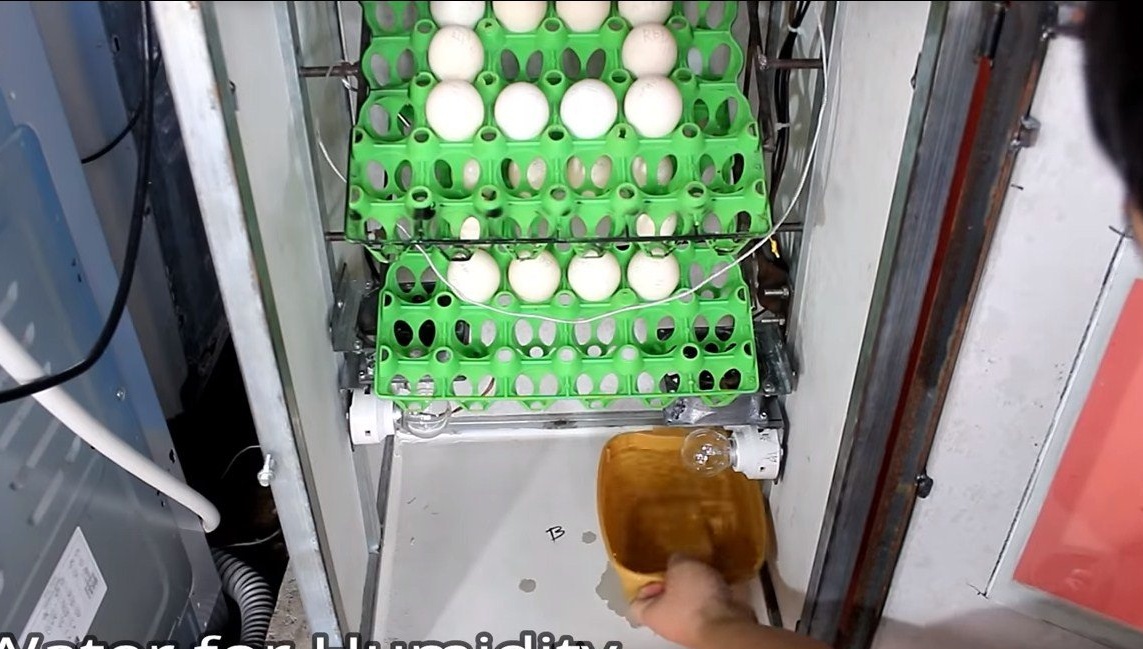


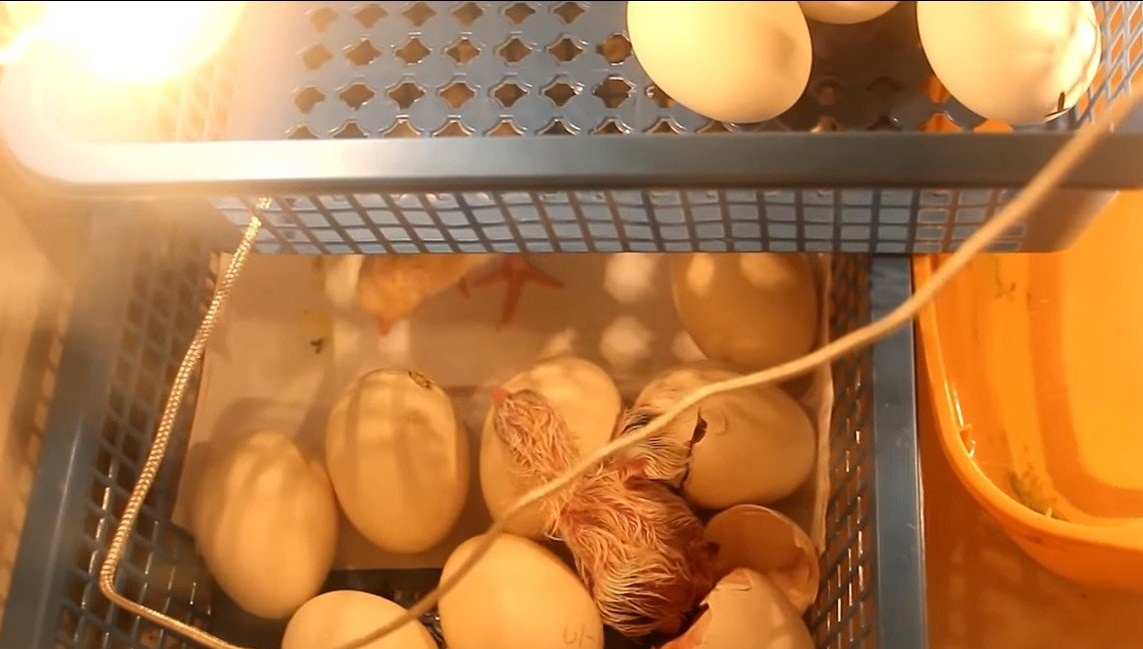
When the chickens hatch, the eggs are collected in containers and left in the incubator. During this period of time, it is especially important that the air is moist, you can spray the eggs themselves with water. Thanks to the water, the shell will become softer and it will be easier for the chickens to hatch.
So, everything works, our iron hen easily hatches chickens. I hope you enjoyed the project, good luck and creative inspiration, if you decide to repeat this. Do not forget to share your ideas and homemade things with us!