
This homemade pursues the implementation of 3 goals:
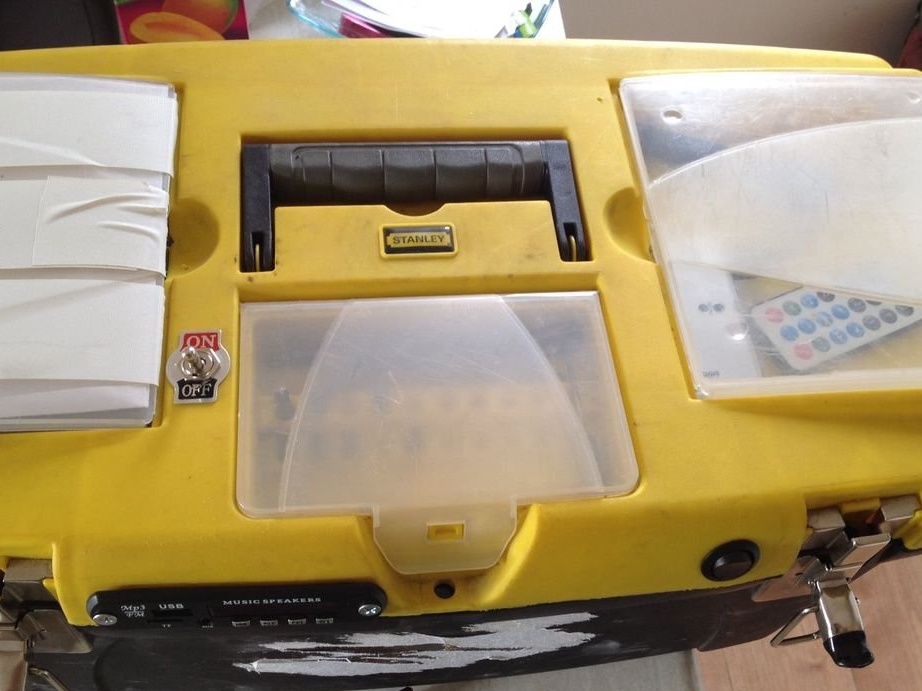
- an improvised toolbox that will not be a burden;
- Built-in music features such as FM-radio, memory card, flash drive and Bluetooth;
- Charging the phone or batteries “without leaving the cash desk”, without using a wall outlet.
Step One: Material and Tools
Materials:
- the necessary and compact set of tools for which this box is created;
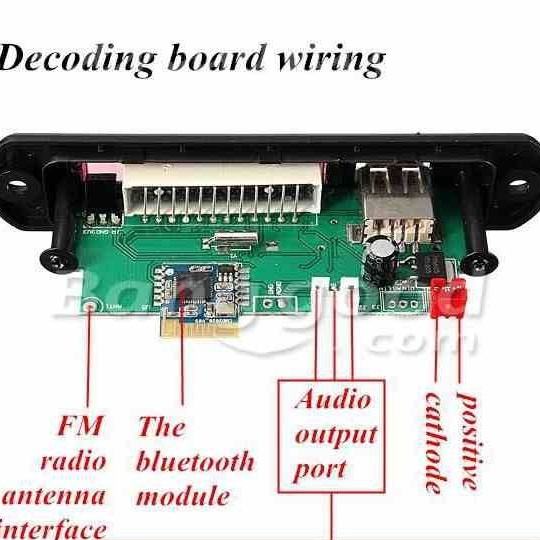
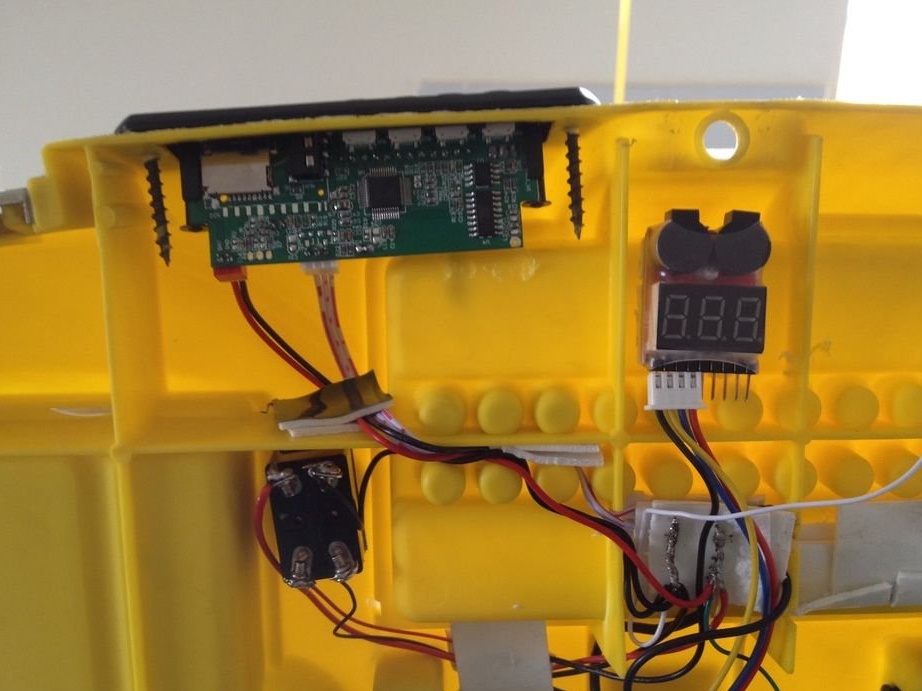
- MP3 decoder module;
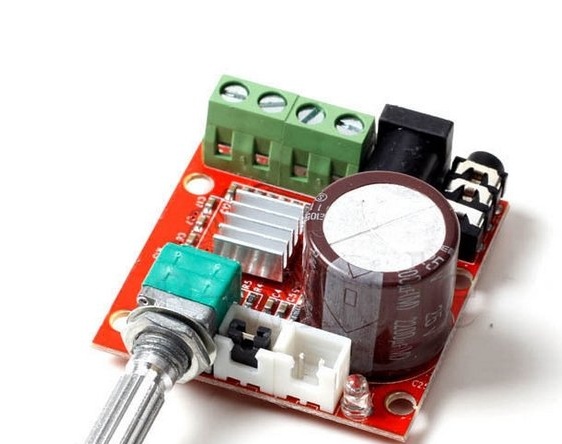
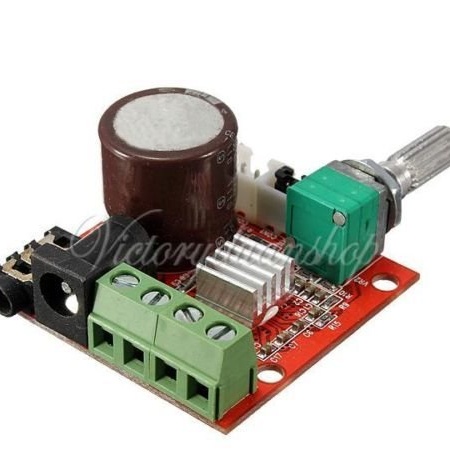
- Mini amplifier module HiFi 2x10 W;
- USB Bluetooth audio receiver;

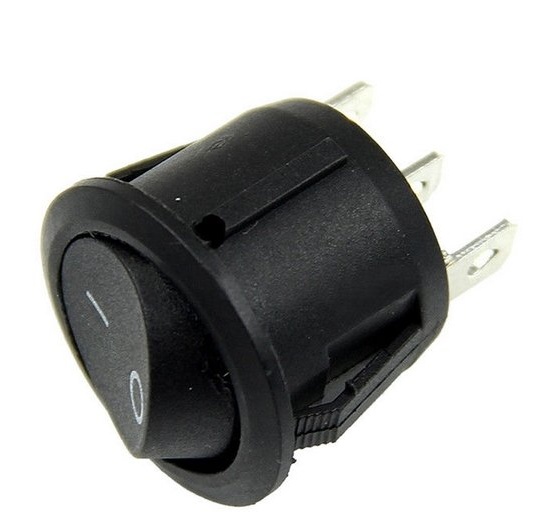
- 2-pole and single-pole switches;

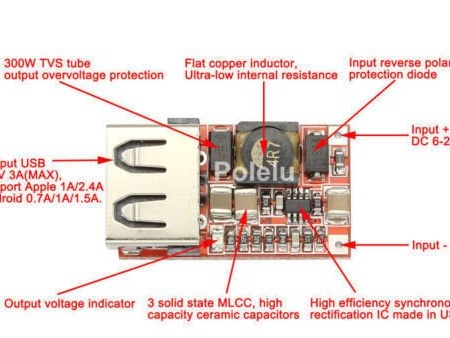
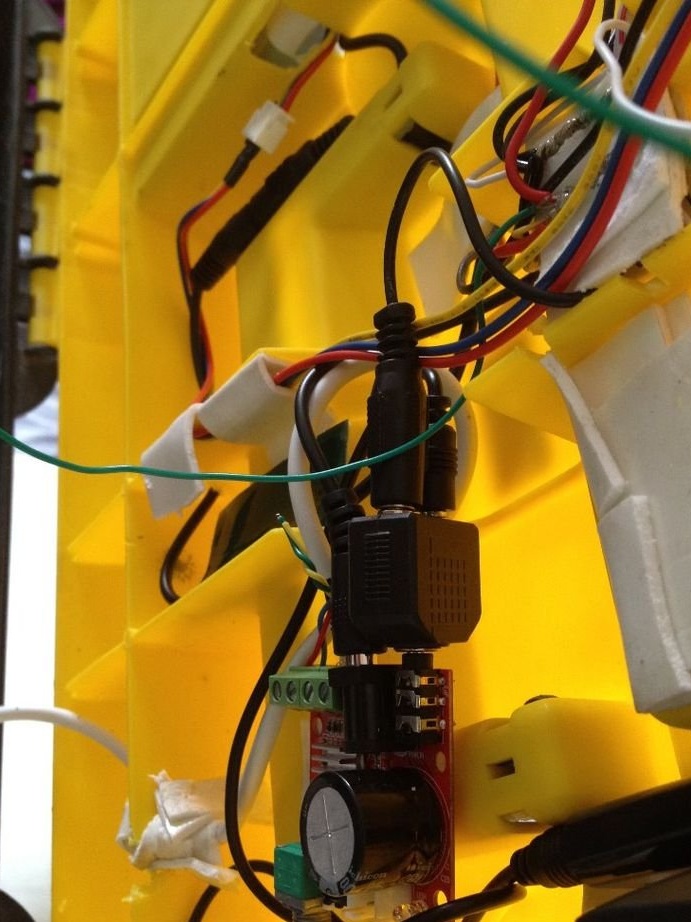
- USB 5V regulator;
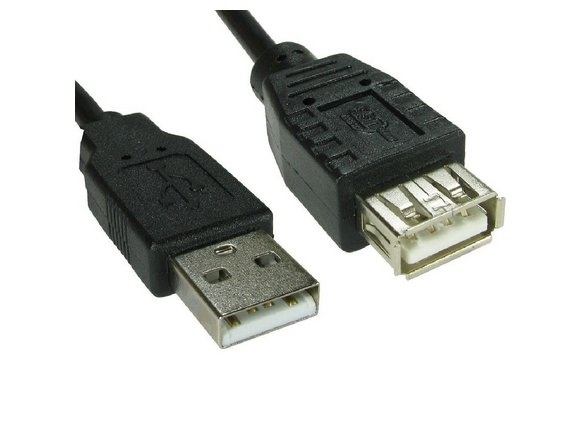
- USB splitter cord;
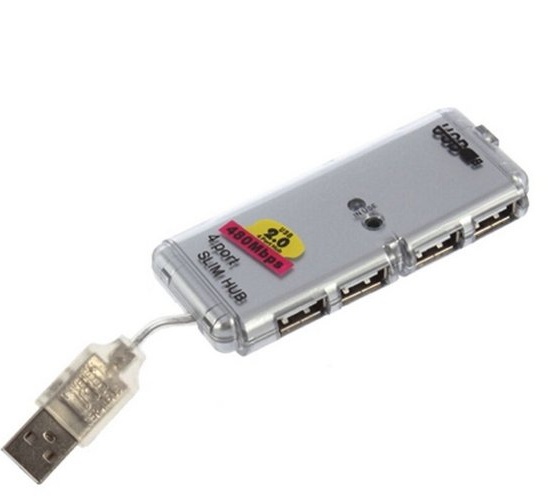
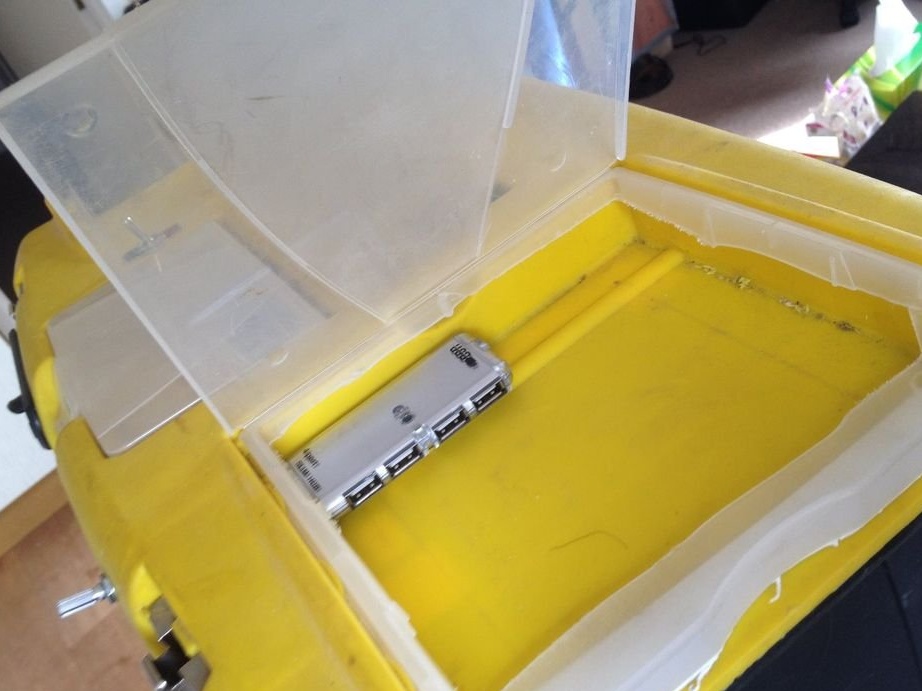
- USB splitter hub;
- 2 speakers of 8 ohms 10 watts;
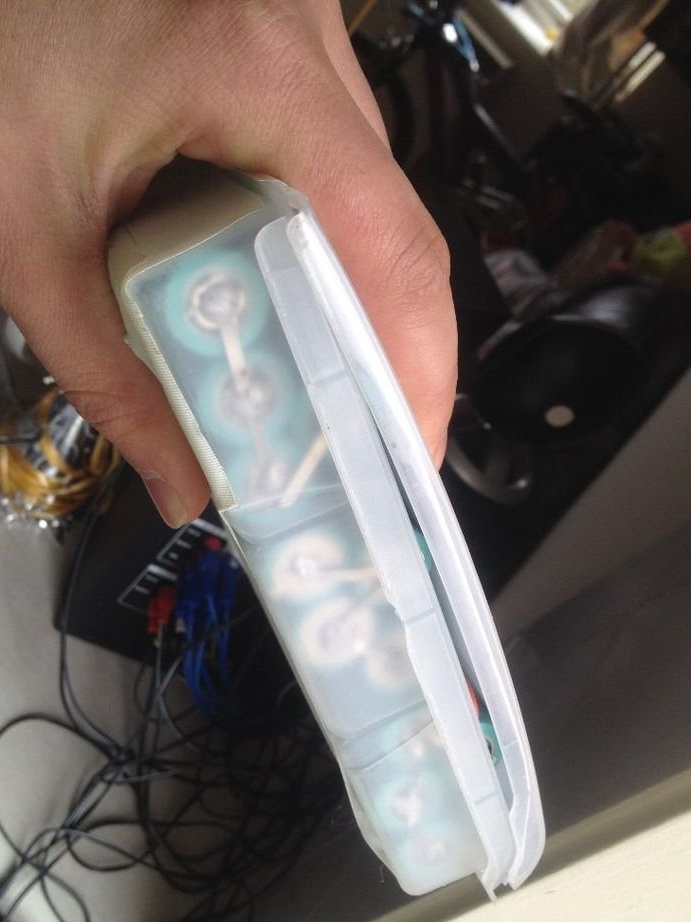
- batteries for the battery pack. In this home-made Li-Ion, 18650 batteries from an old laptop;
- Battery monitor, tabs and balance pins;
- DC connector;
- wired stereo jack;
- stereo audio splitter;
- wire from the signal cable;
- small wooden strips;
- screws (preferably self-tapping)
Instruments:
- pliers;
- wire stripping tool;
- a paint knife;
- screwdrivers;
- soldering iron;
- dremel;
- drill;
Step Two: Drawer Selection
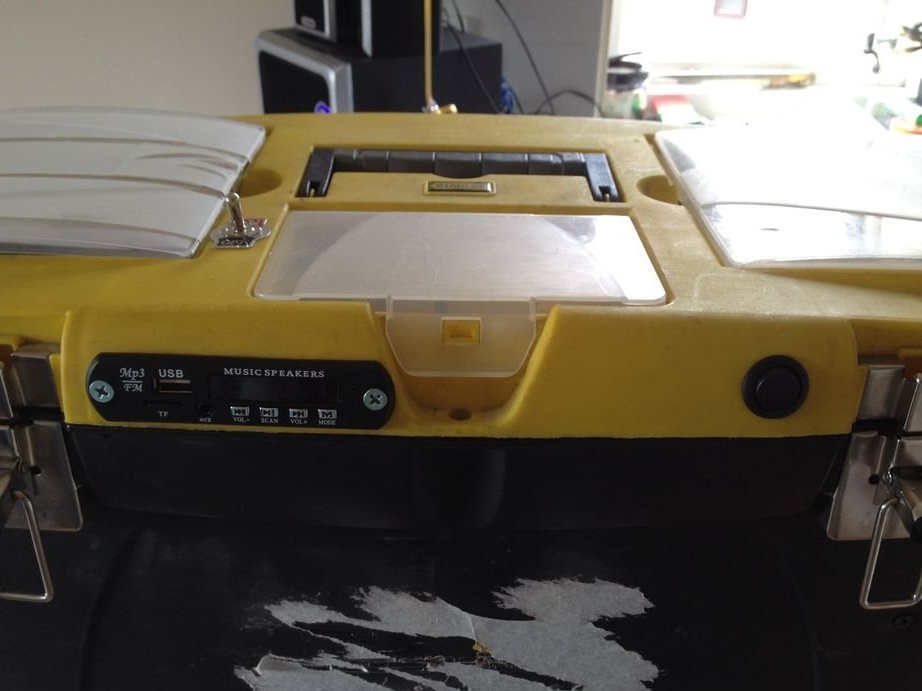
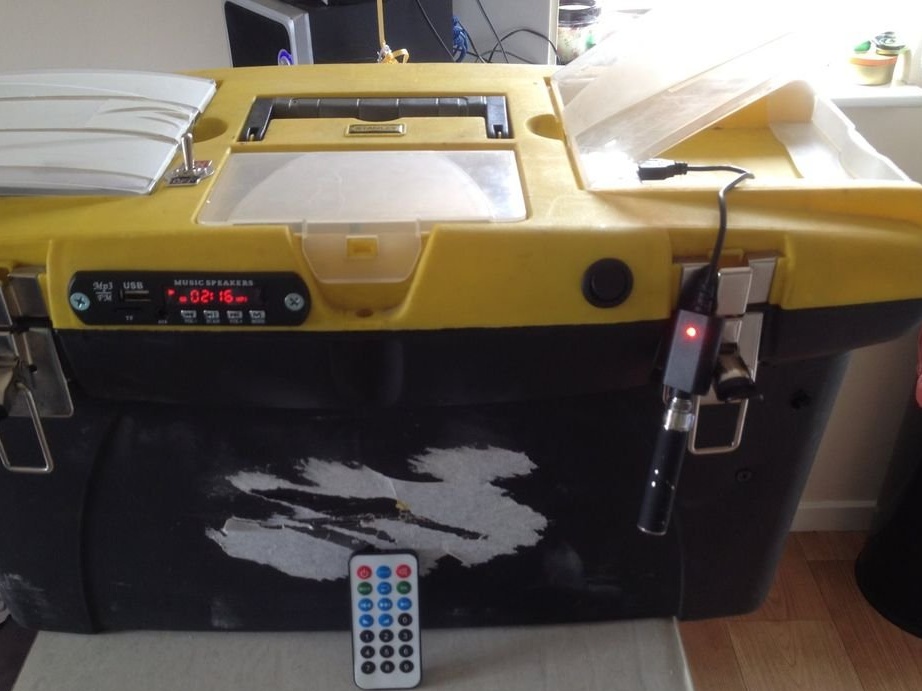
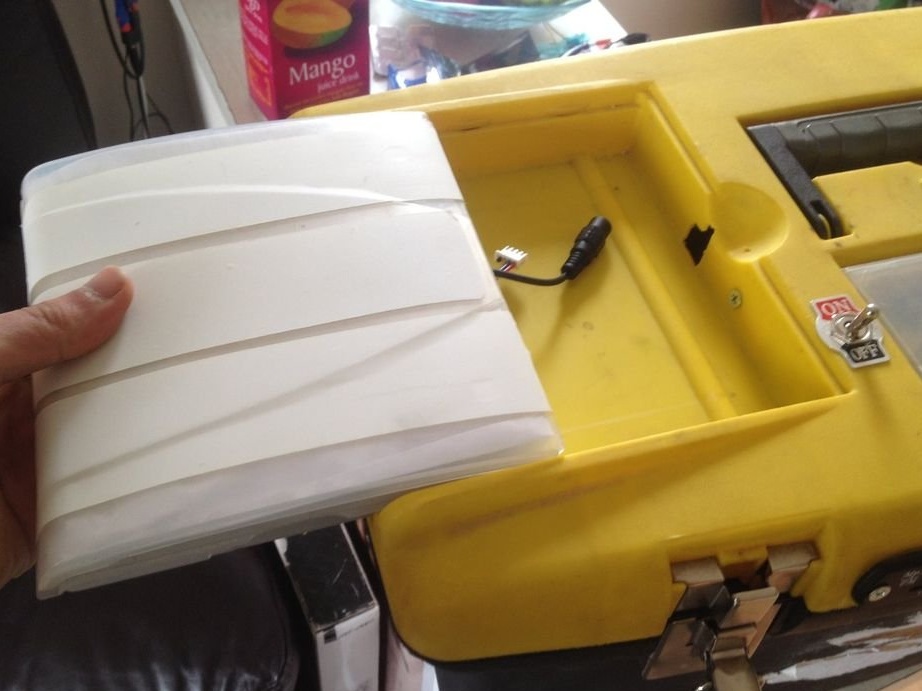
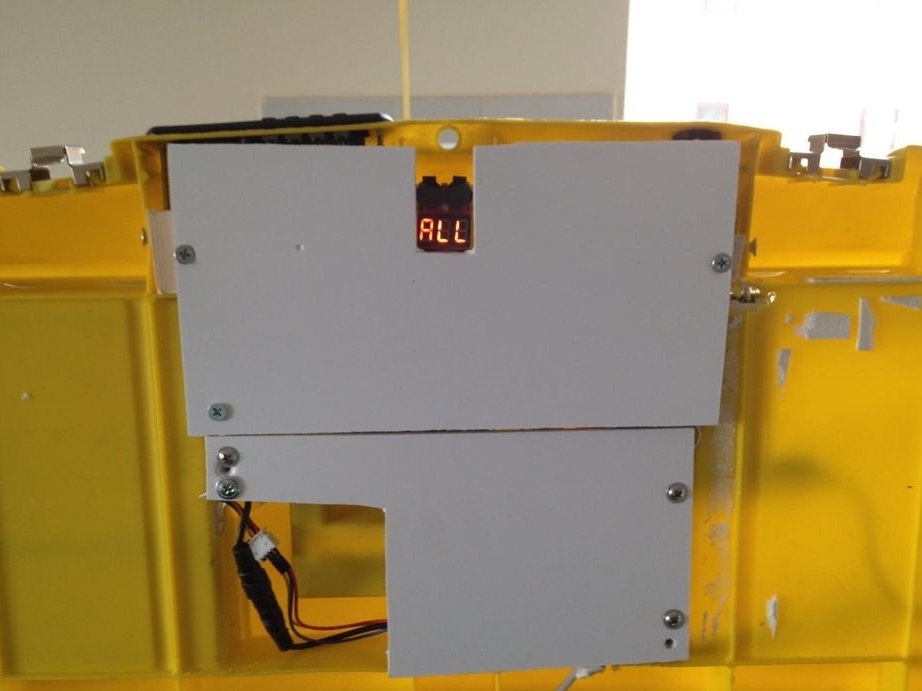
This box was chosen specifically because of the free space in the grooves under the lid and two storage compartments on top, which made it an ideal candidate for this homemade product.
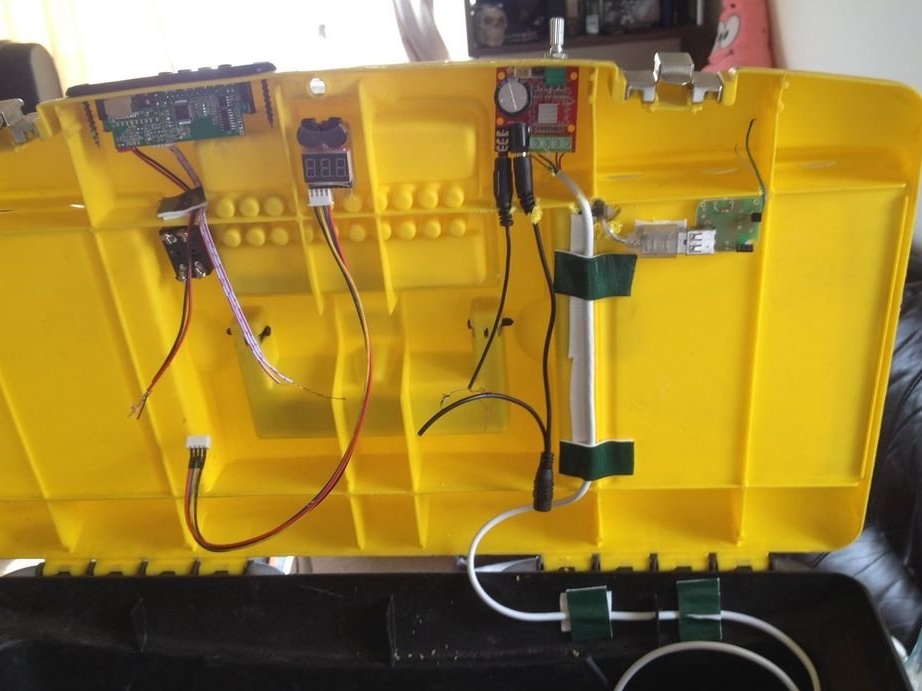
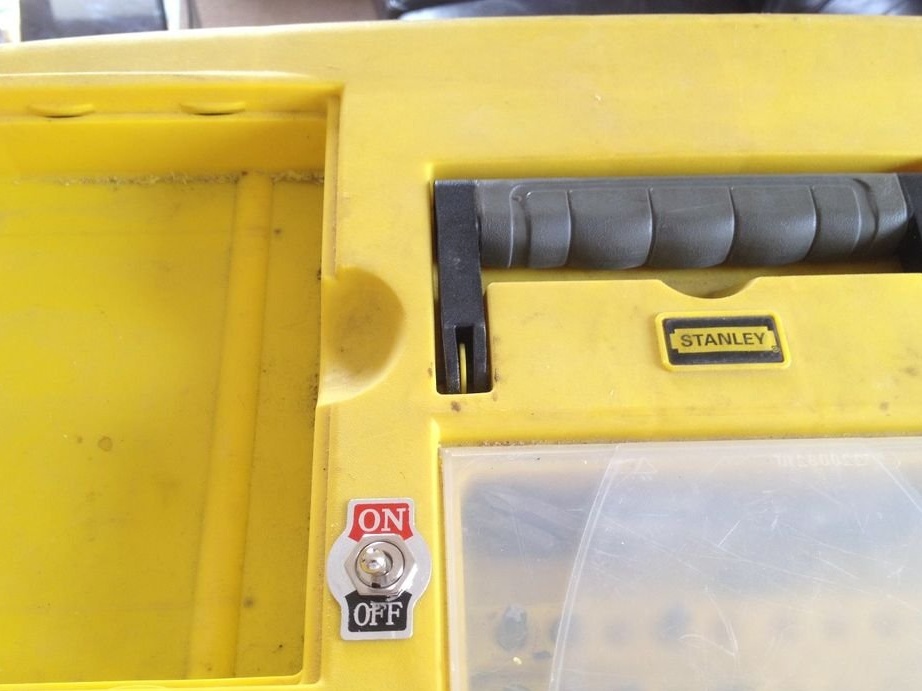
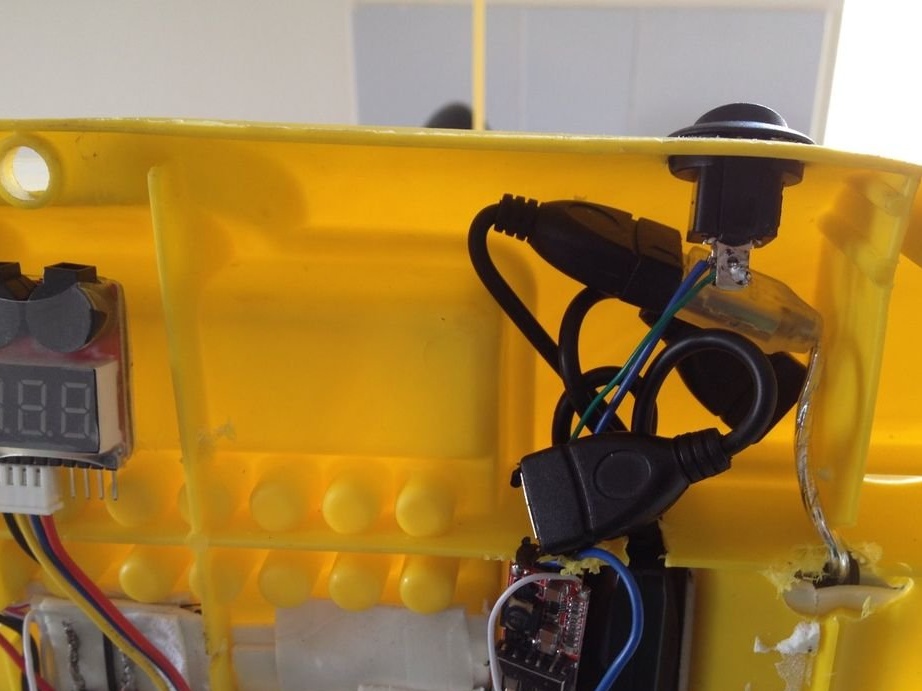
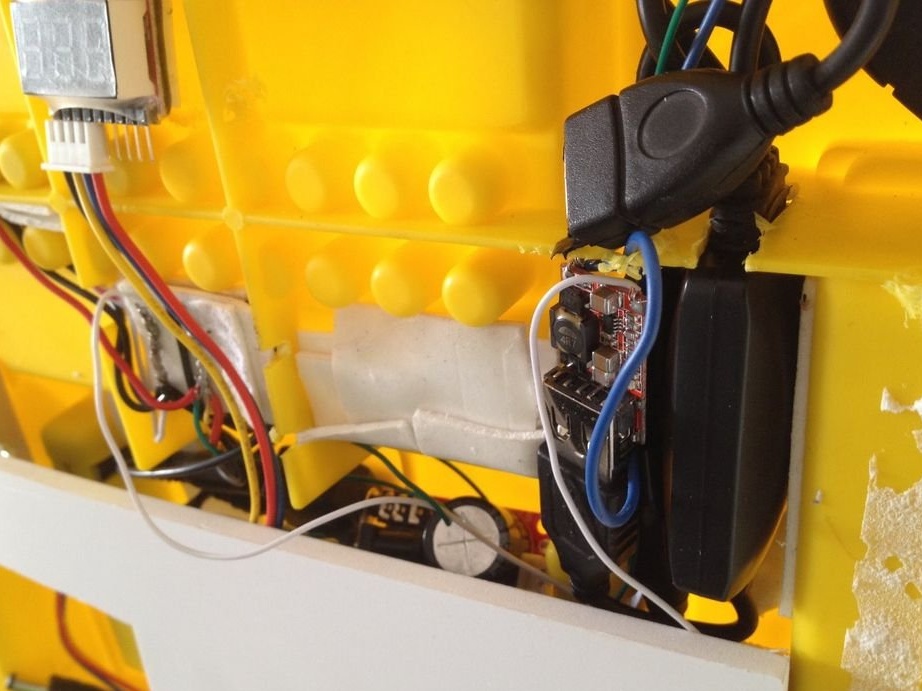
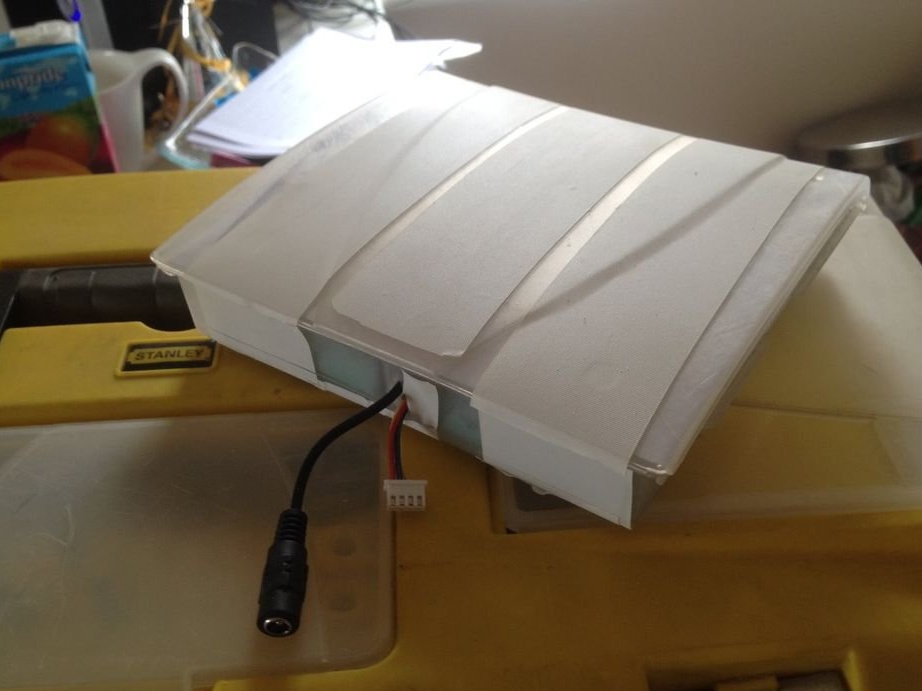
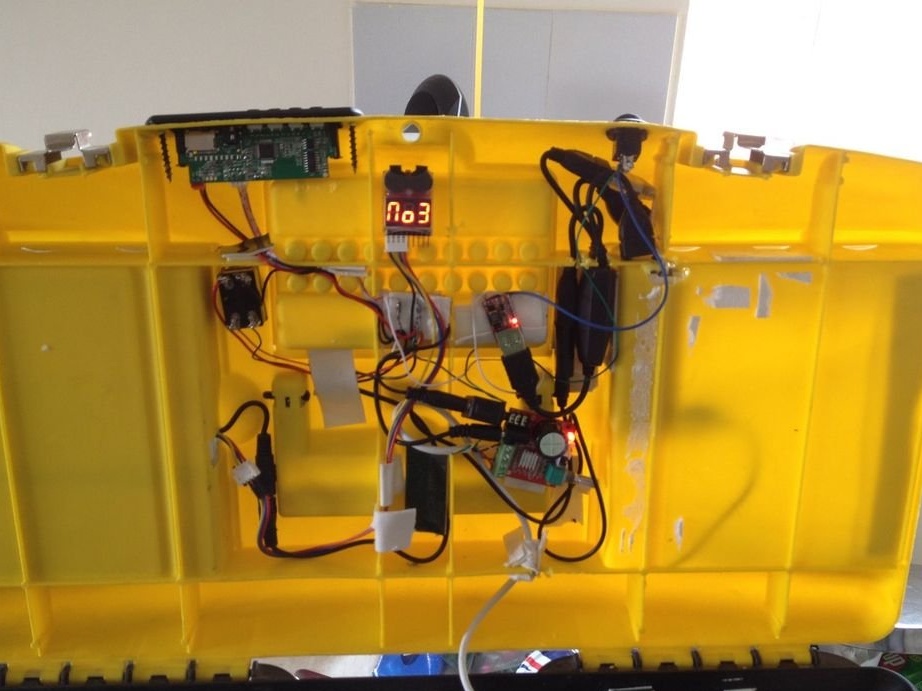
One of the compartments contained a battery, the other a USB charging station. The main switch is on top, the Bluetooth switch along with the mp3 module are on the front of the lid, and the speakers are mounted on one end of the box to save internal space. The speakers are internally protected by a wooden frame trimmed with very thick plastic sheets.
Step Three: Power for Components

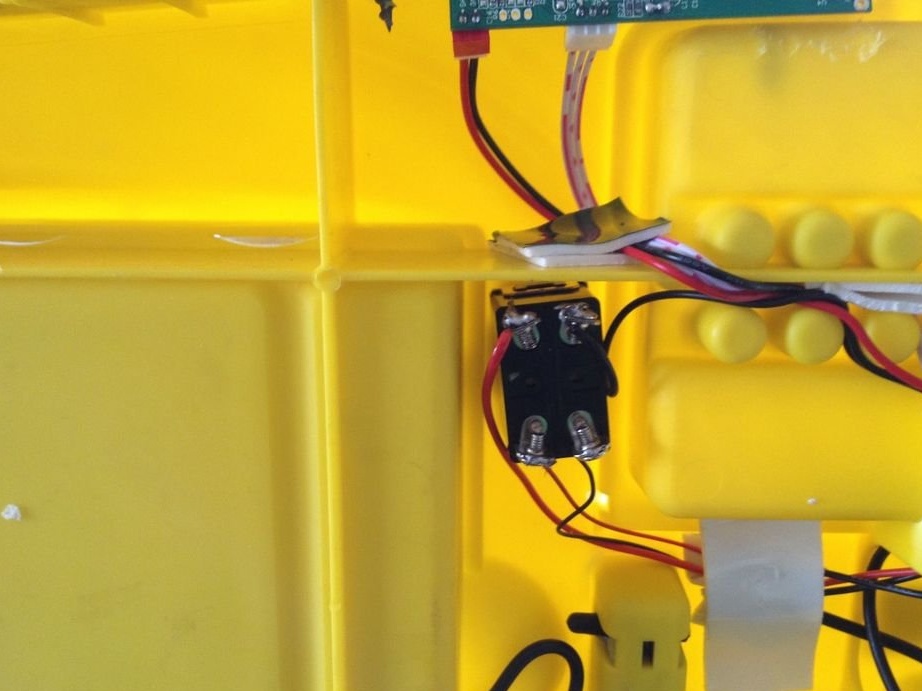
- From the power connector, lay both wires to the 2-pole switch;
- from the pole switch, draw a live wire to the “+” of each component (mp3 module, hifi module and single-pole switch for our USB voltage regulator);
- the same with the ground wire, but with the “-” of each component and the ground (black wire) of one of your balance pins that goes to the battery monitor;
In this home-made work, the author chose a “converging wiring”, where, as the name implies, each wire converges to one point on the diagram, which provides easy access in case of repair or replacement.
Step Four: Audio and USB Diagram


Audio:
- connect the wired audio connector and solder it to the audio output connector of the mp3 module;
-connect the audio splitter to the amplifier module and connect both the connector from the mp3 module and the Bluetooth audio receiver;
-From the amplifier, lay separate wires to the speakers;
USB:
- Pick up your USB splitter and connect it to the voltage regulator;
-Connect the USB receiver to the other end of this splitter;
- then connect the USB hub to the other end of this splitter.
Step Five: Component Placement
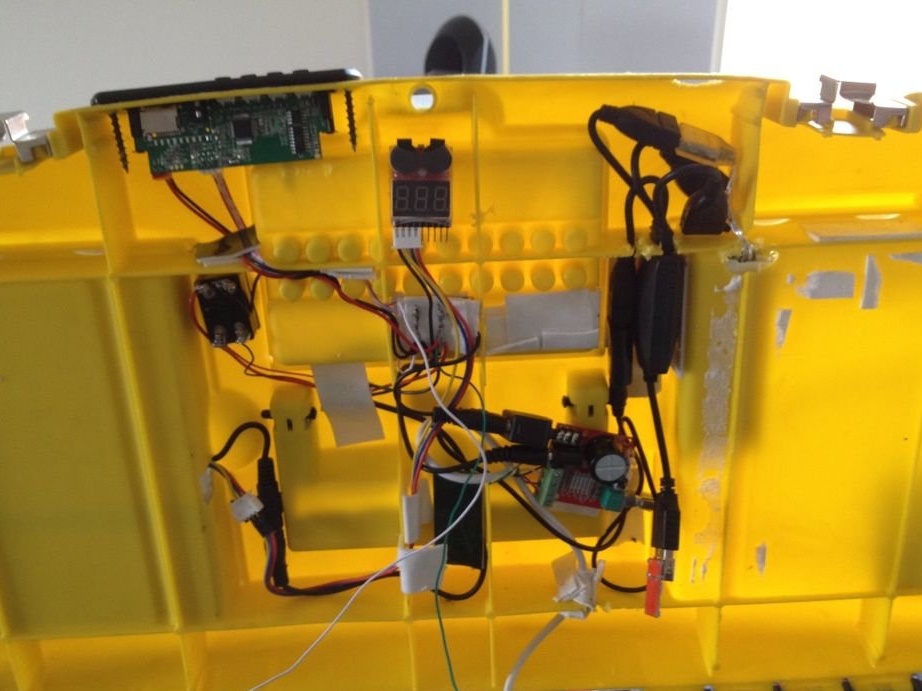
The wizard placed the audio components under the box lid. Looks
not very impressive, but do not worry, because everything will be hidden.
Before moving on, you need to look around for possible errors.
- check the soldering;
- check the polarity of the connections;
- make sure that everything is in order with double-sided tape;
Step Six: Selecting and Installing the Batteries in the Tool Box
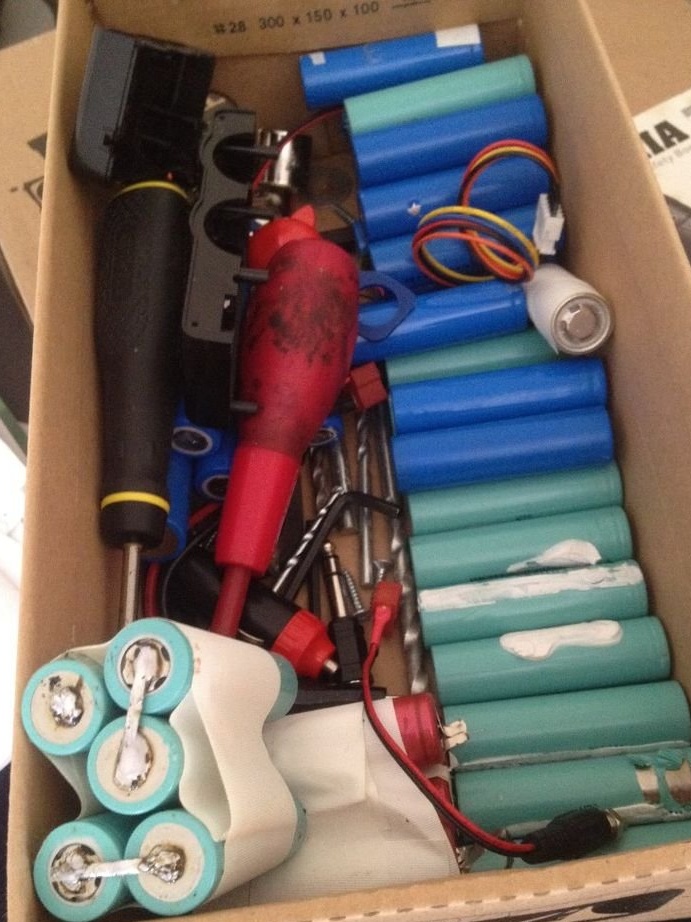
The most important part of this project: the battery.
Batteries are not toys. Keep in mind that high-density chemicals such as lithium, lithium-ion, lithium polymer, etc., are extremely volatile and explosive components.
If you are not sure what you are doing, seek help from someone who understands this and follow his instructions to the smallest detail. Battery leakage and subsequent explosions are serious consequences.
In his homemade work, the master decided to use Li-Ion batteries. Why?
The answer lies on the surface:
“He had a lot of laptop batteries with Ebay.” The author’s 18650 batteries would be enough to power a small electric car, so why not? ...
Battery specifications are as follows:
- used element size - 18650 at 3.7 V, 2600 mAh;
- these batteries are soldered in series;
- latest specifications: 12.6 V when fully charged with a capacity of 20,800 mAh
Yes, the resulting battery pack has a capacity of more than 20 amperes / hour.
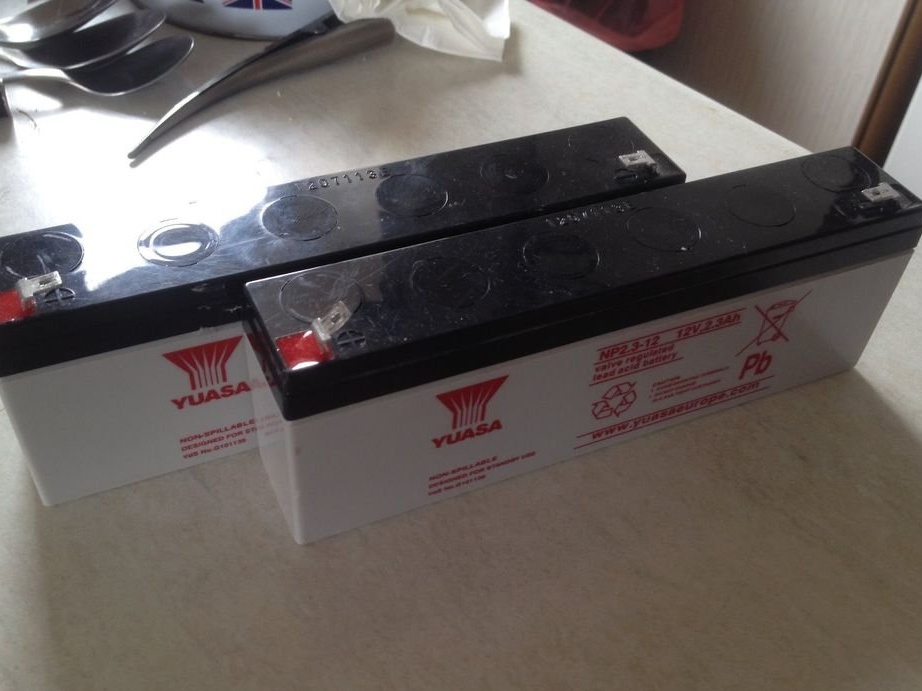
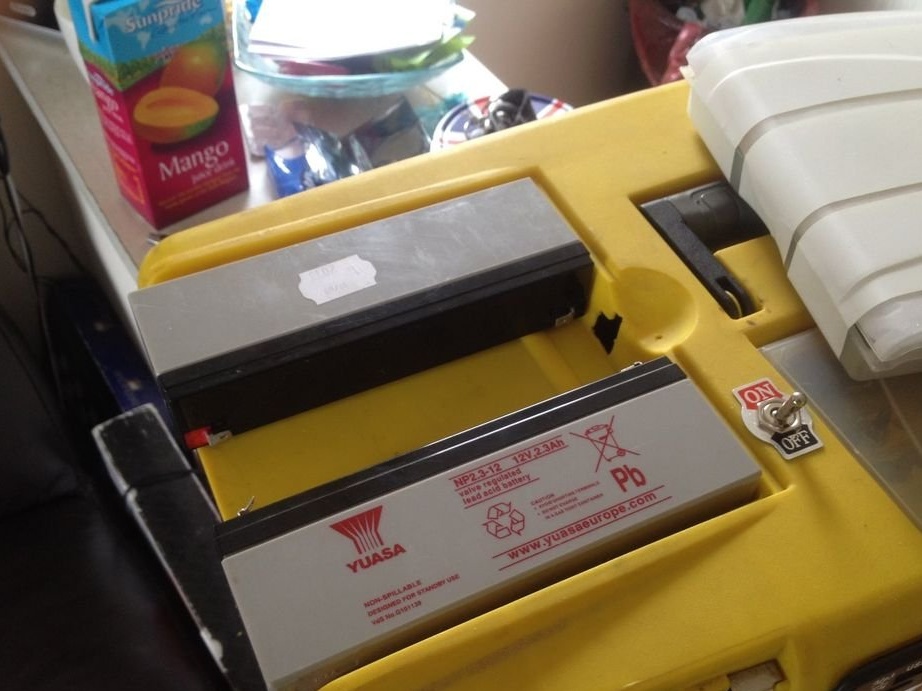
The author has another rechargeable battery, which consists of 2 lead-acid batteries that run in parallel, with a total capacity of 4600 mAh. This unit will be used as a backup battery if the main battery runs out and needs to be charged.
The only reason for using the emergency battery is that the primary lithium-ion battery requires about 25/30 hours to charge at 1 A, and in the meantime, hunting to listen to music, and the phone will not be superfluous.
This battery pack is assembled and packaged in one of the upper removable sections.
Seventh step: Completion
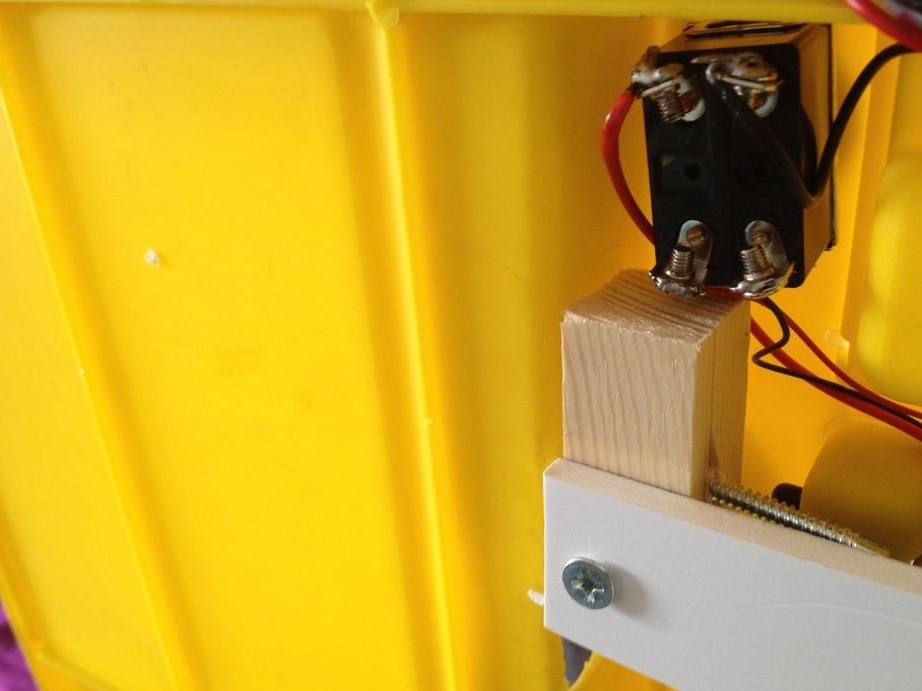

It's time to hide the bundle of wires and components that dangle under the cover:
- take pieces of wood, screw them where possible, and make sure that they do not interfere with anything and do not harm anything;
- cut the plastic sheet to size and screw it to the tree that you previously put there. The author decided to use 2 sheets for this stage in order to facilitate its repair or replacement in the future.