

During the construction of my first airplane model, the issue of balancing propellers became a concern. Doing this is highly recommended for several reasons. Firstly, the engine itself is less broken. I also read that when fastening the engine with small screws to the plywood engine, there were cases when, with strong vibrations, the holes broke and the engine simply fell off directly in flight. Well, the last plastic screws themselves are quite elastic, as a result of the imbalance of the screw, he can grab a phenomenon such as screw flutter, which is fraught with a drop in traction to the destruction of the screw. I will not undertake to state that all of the above is true, here, as they say, what I bought for - I sold it for. Nevertheless, if you do, so do well and by standards. Buying special balancing devices is not a problem right now; they are sold both in all model stores and at different Chinese sites. But it just so happened that his model I’m almost done, the first flights were on the nose. Waiting for a balancer from aliexpress was completely unpromising, and ordering from local online stores is pointless, since the delivery cost would have cost me the cost of a balancer. So why not do it yourself?
The device is actually simple to disgrace. Its manufacture today and consider.
Necessary materials:
- Plastic or plywood. Foamed PVC is best (easiest to work with)
- 2 small neodymium magnets
- Smooth metal stud. Knitting needle from bicycle / motorcycle equipment, knitting needle
From the tool:
- Model knife or jigsaw, depending on what you are doing
- Drill or screwdriver
- Glue cyanoacrylate or epoxy resin
- Hacksaw
- File / grinder / engraver with diamond blade (for sharpening the stud)
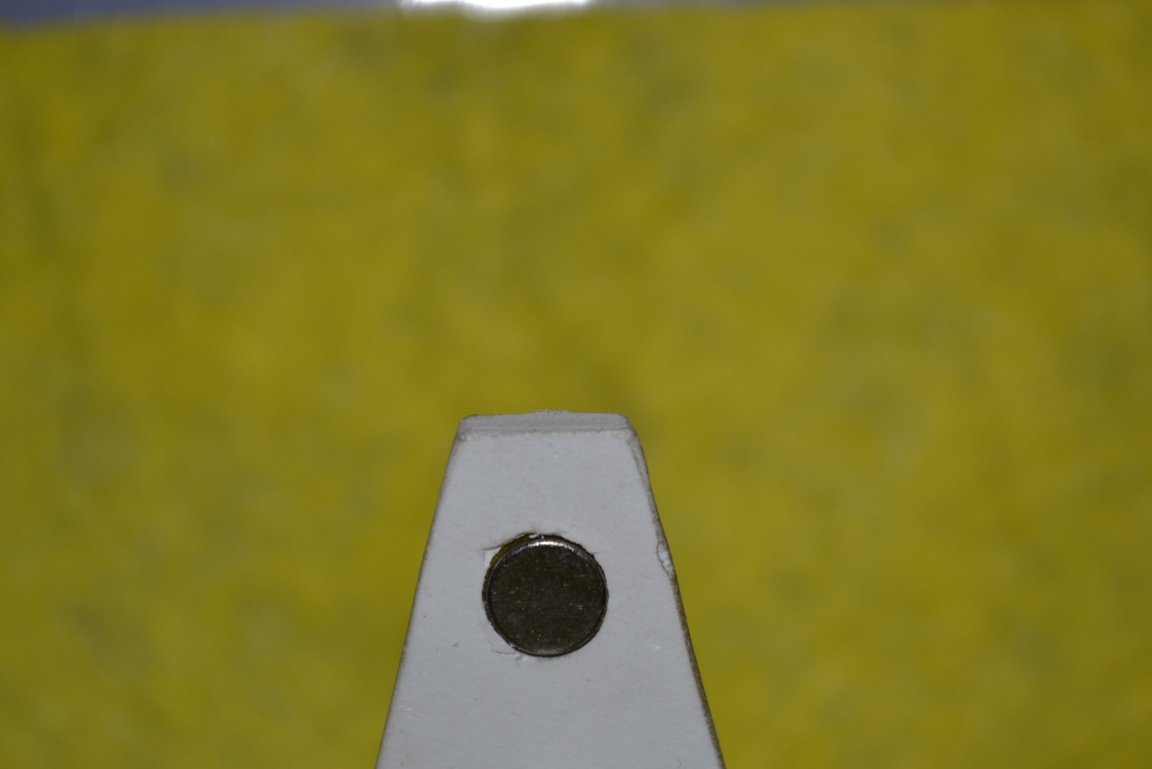
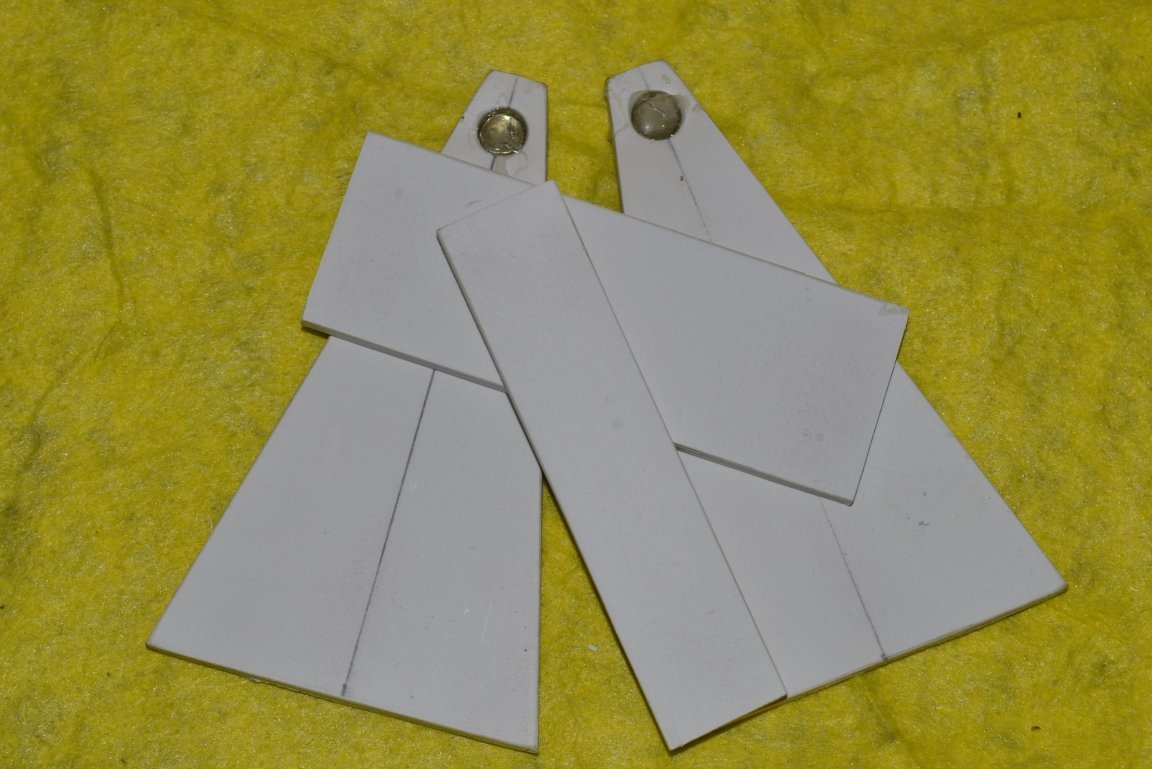
First you need to cut 2 trapezoid. I used foamed PVC with a thickness of 4 mm, this material is quite durable and at the same time very easy to process. But if you can’t use it, you can use anything: any other plastic, plywood, getinaks, which is at hand. Dimensions by eye, in my case it is a trapezoid 10 cm high, 1 cm top and 6 cm bottom. 2 pieces are needed. Now in the upper part you need to make holes for gluing magnets. It is possible to drill, but since the foamed PVC is quite soft, I punched holes with a section from the telescopic antenna.

We paste neodymium magnets into these holes. I have such magnets left over from some project.If you don’t have them, you can get them from the old CD / DVD room, from the old DVD player, in general, from any laser head, though they are square there. They are also sometimes found in headphones, although more often there are ordinary ferrite magnets.
I pasted on a "five-minute" epoxy. Now you need to glue the trapezoid between each other. We cut out the rectangle, again, of arbitrary shape, with my case 9x3 cm. Glue with ordinary cyanoacrylate glue.
It is necessary to glue evenly, when gluing, I simply substituted a corner until the glue seized. Before that, you can trim the edges with sandpaper, which would be more presentable. Now do the hairpin. As I wrote, a hairpin can be made from a knitting or bicycle knitting needle, the main thing is that it should be even. I made from knitting. Take the same length as the length of the bottom rectangle.
The edge of the stud must be sharpened as sharply as possible.
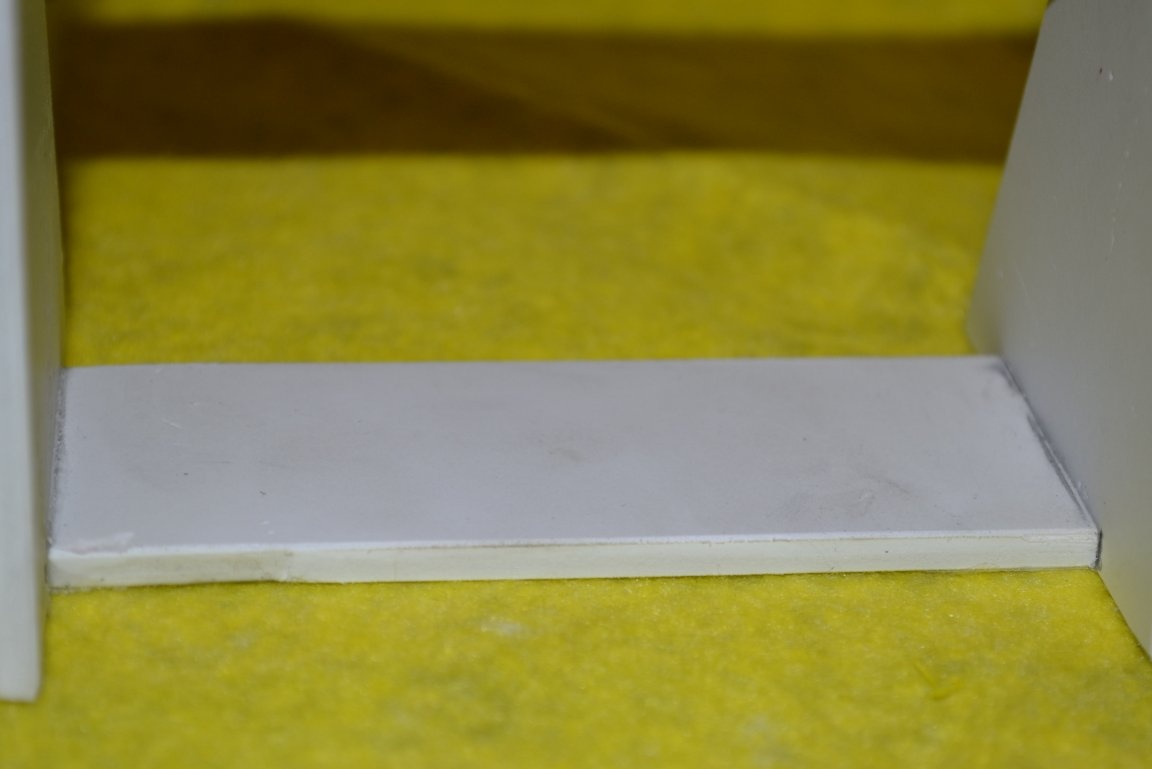
Now put the pin in place and measure the distance near it. Cut off another strip, literally a millimeter more than necessary.
We put it in place, put the hairpin, and watch how it behaves. If necessary, take out this strip and customize with sandpaper. It is necessary to ensure that one edge of the pin literally for tenths of a millimeter does not touch the magnet. When everything is adjusted, we glue the strip into place.
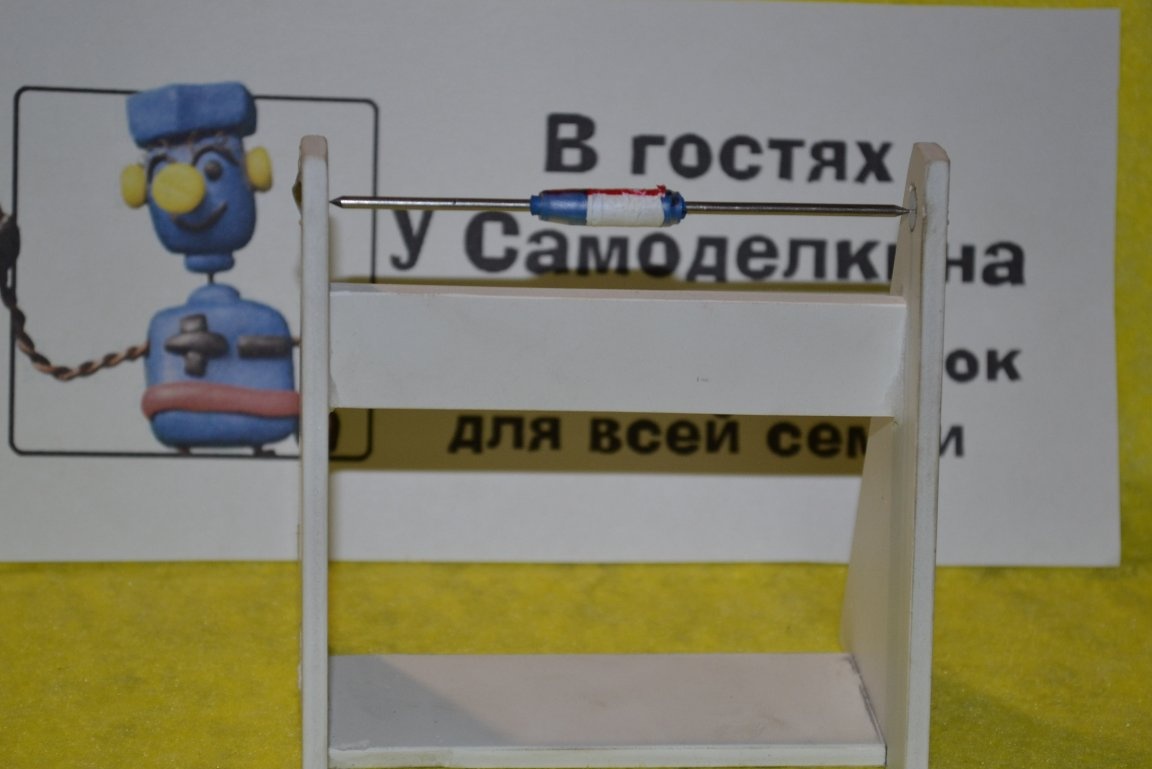
Actually, almost done. On the stud in the middle we fit the necessary amount of heat shrink tubing so that the screw easily but tightly sits on it. After that, you will see how easily the hairpin rotates around its axis. But since it is impossible to balance perfectly on the knee, we balance the hairpin itself. More precisely, how to balance. Just put a mark on top, this will be the state of rest of the hairpin itself. When balancing the screws themselves, set the screw perpendicular to the mark.
That's all! When using the materials that I used, everything takes about half an hour to complete. And that is exactly what I would like to complete the article. Dear modelers! When you need something now and you can do it yourself - do it yourself! Of course, when I make a new order from a model store, I will most likely order a factory balancer, but that is not the point. If not, but you can do it - do it! The top of senility, I consider the purchase of rods, hogs and loops, which in fact just lie under our feet.
That's all, good luck to everyone in your work!