Hello everyone, I propose to consider a very useful homemade for home and more. It will allow you to breathe fresh, clean and cool air. It's about a small home-made air conditioner, which is easy to make do it yourself. This air conditioner is of an evaporative type, and although its size does not allow much cooling of the air, the device copes well with the cooling and cleaning functions. And if someone does not like silence, then during the operation of the device it will be possible to meditate under the rustling of fans, the hum of the pump and the murmur of water.
Homemade is very easy to assemble, and you can even power it with a battery. So, if you are interested in home-made, I propose to study the project in more detail!
Materials and tools used by the author:
Material List:
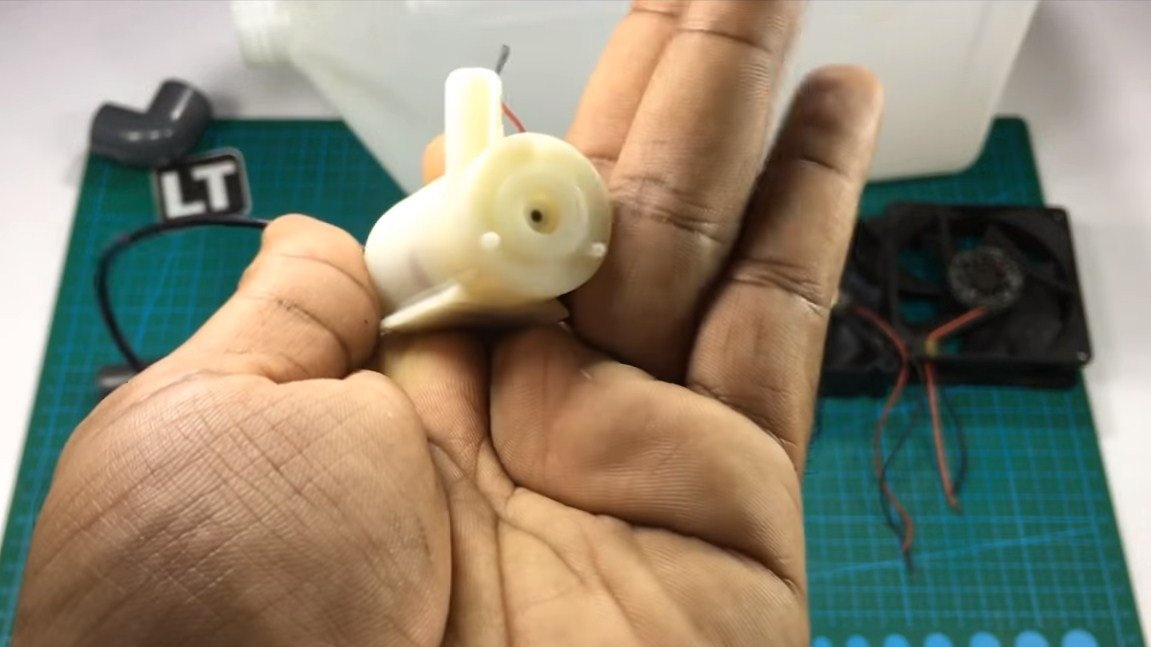
- a small pump at 5V;
- (from 12V to 5V);
-;
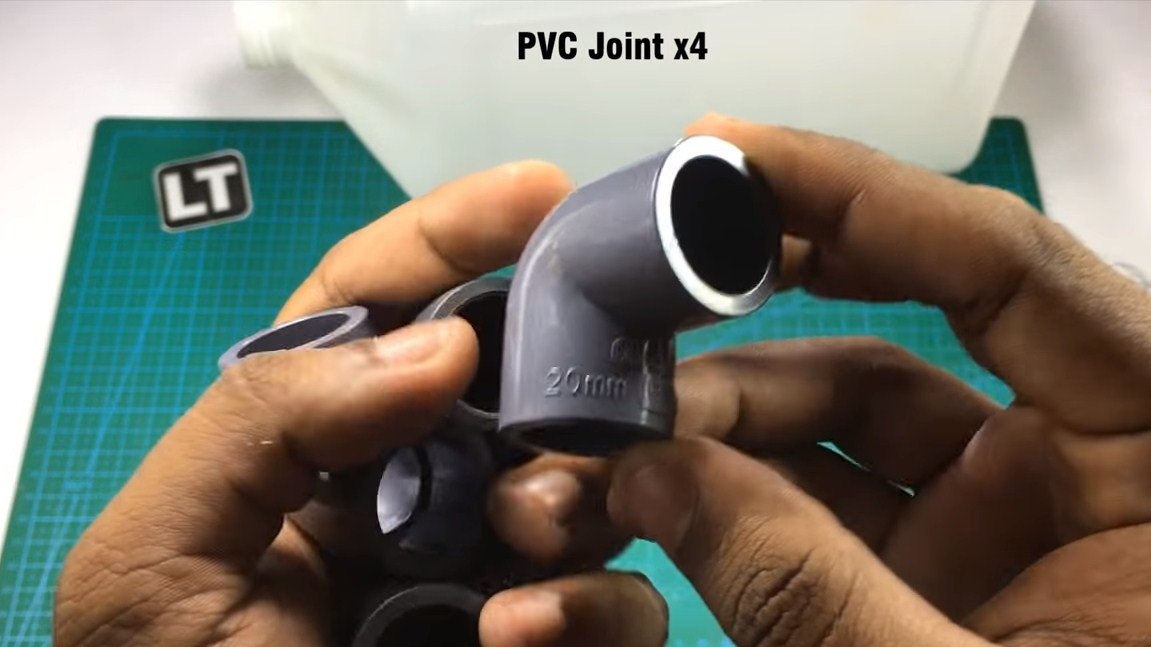
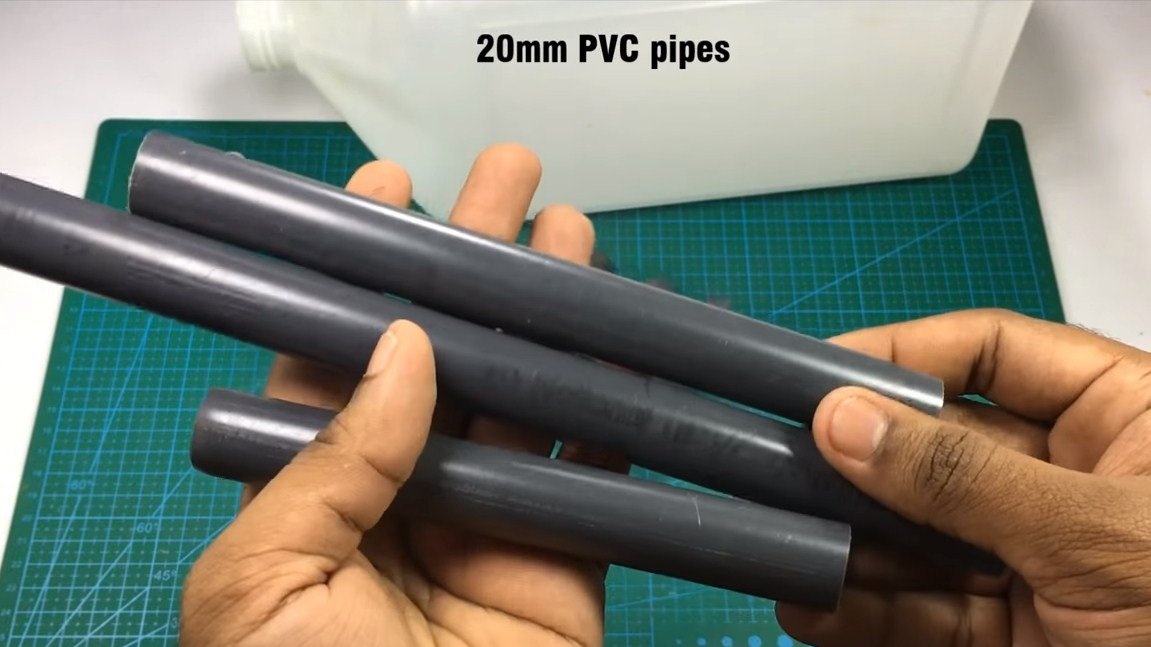
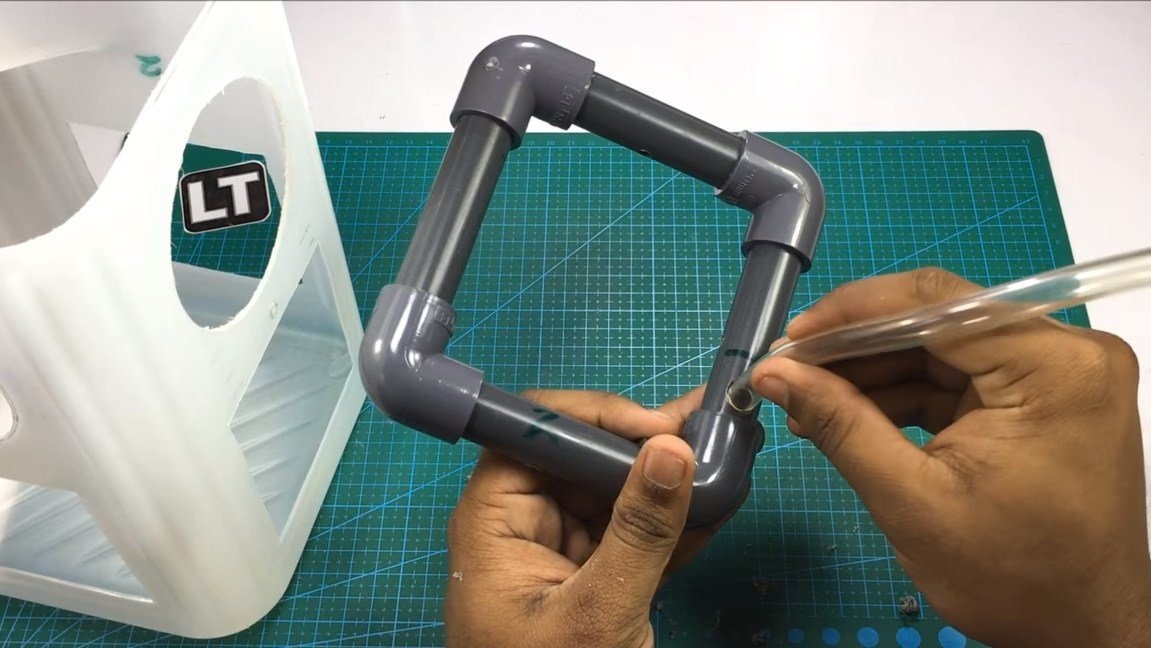
- a piece of plumbing pipe and 4 connecting corners for pipes (20 mm);
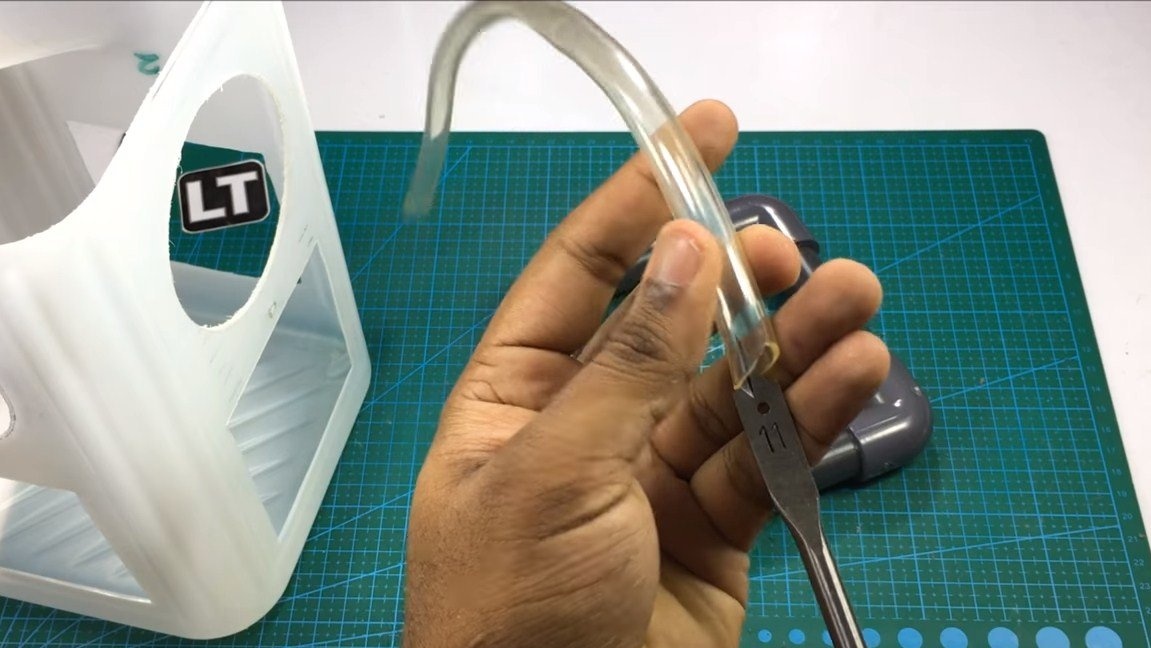
- hose to the pump;
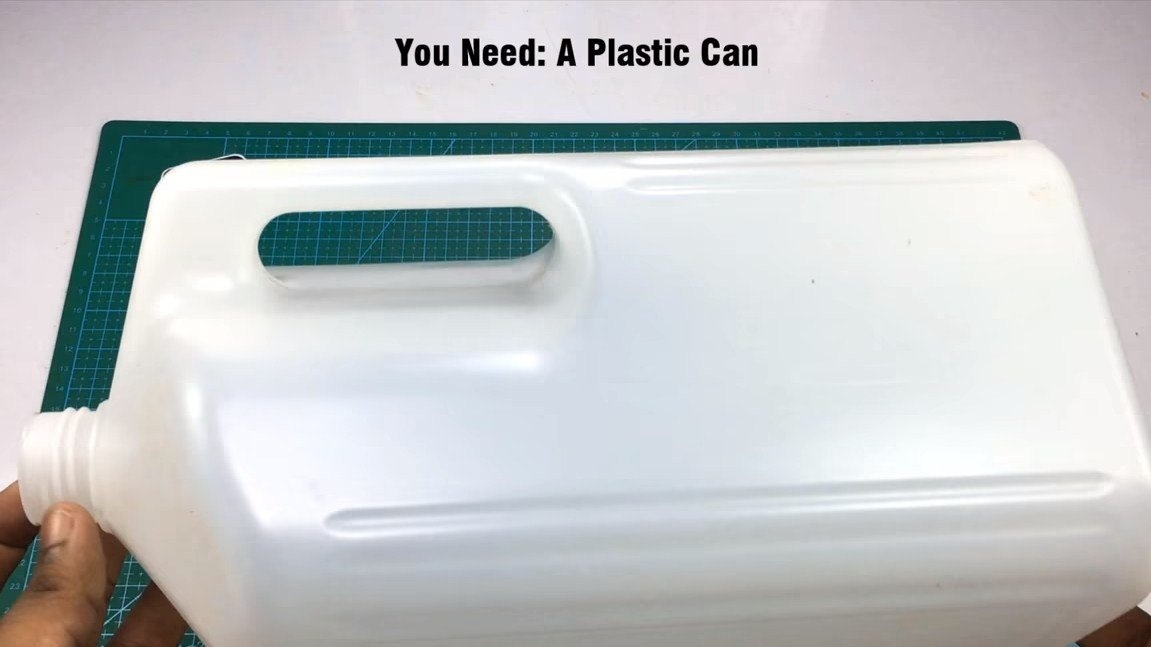
- plastic canister;
- sheet plastic (for cover);
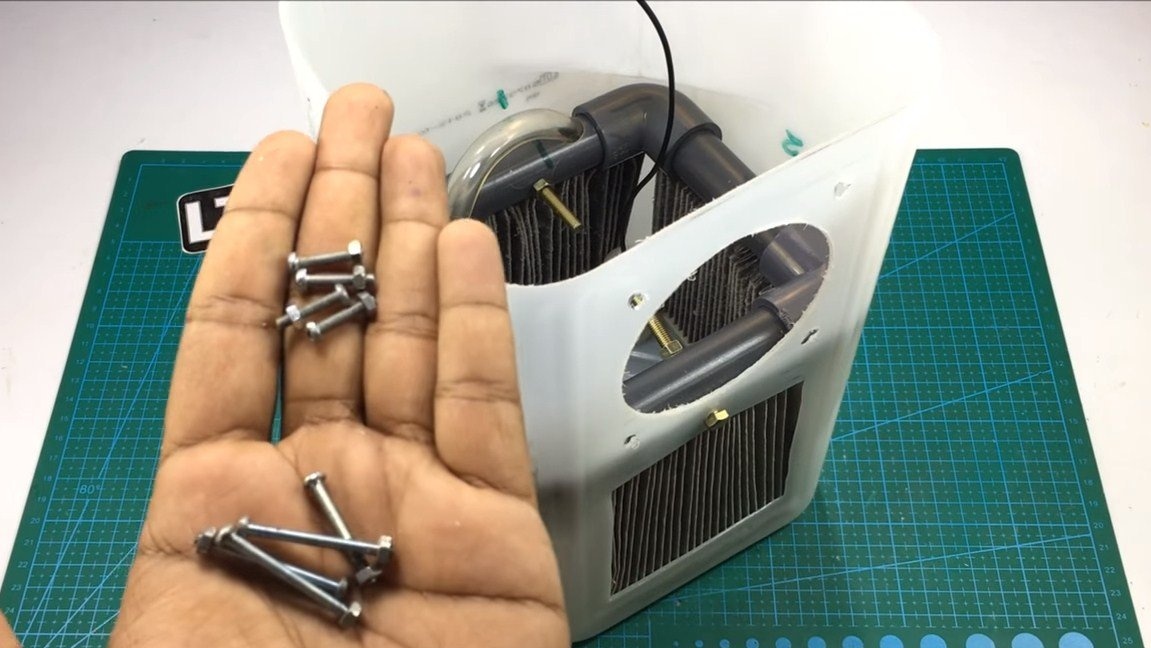
- screws and nuts;
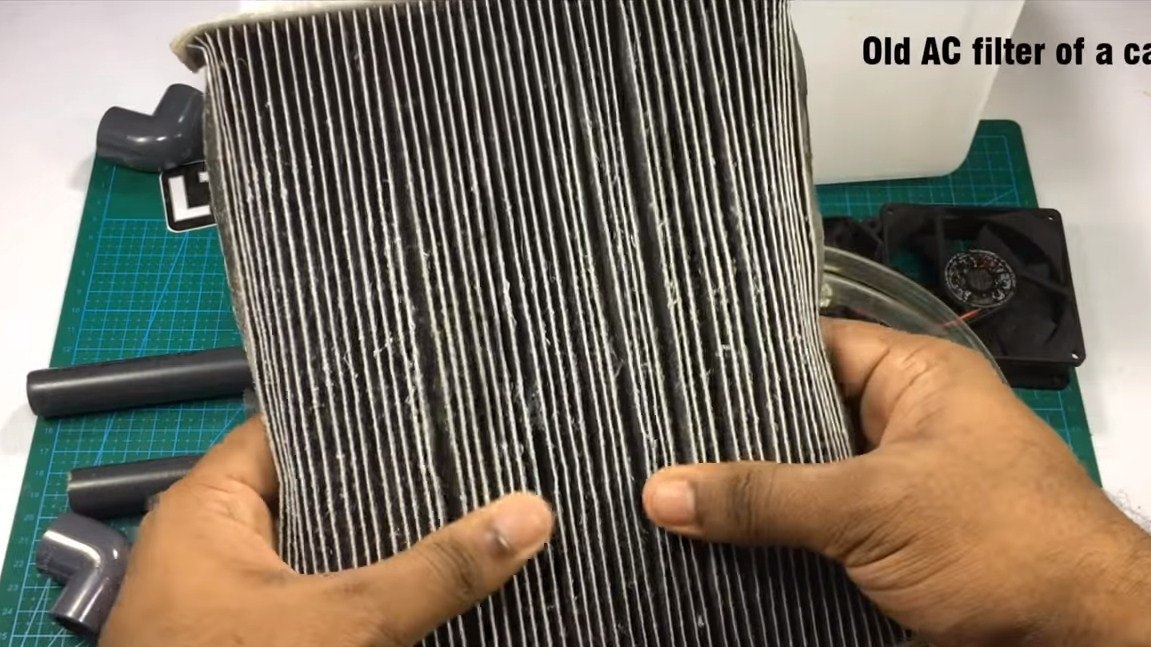
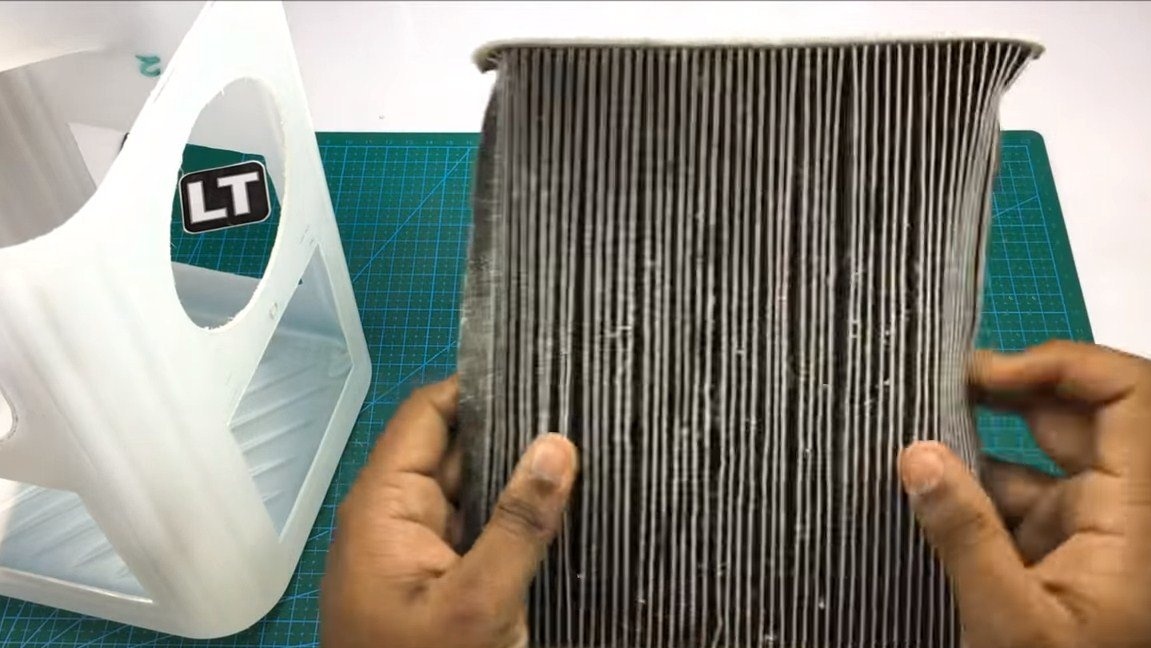
- paper filter (from a car or similar);
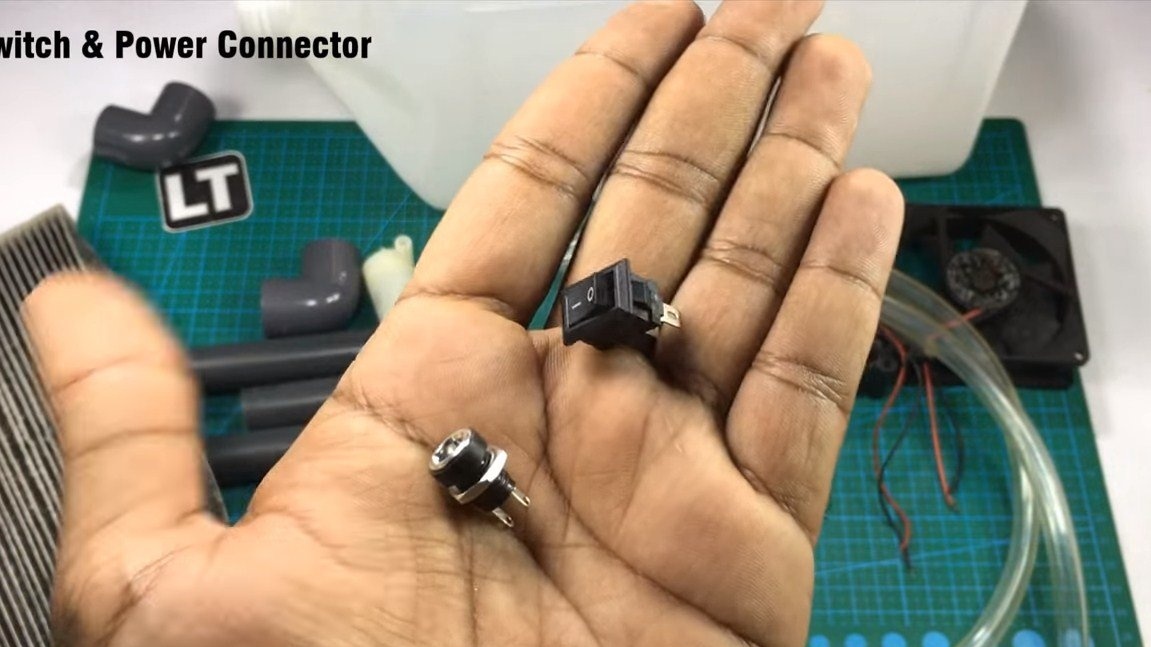
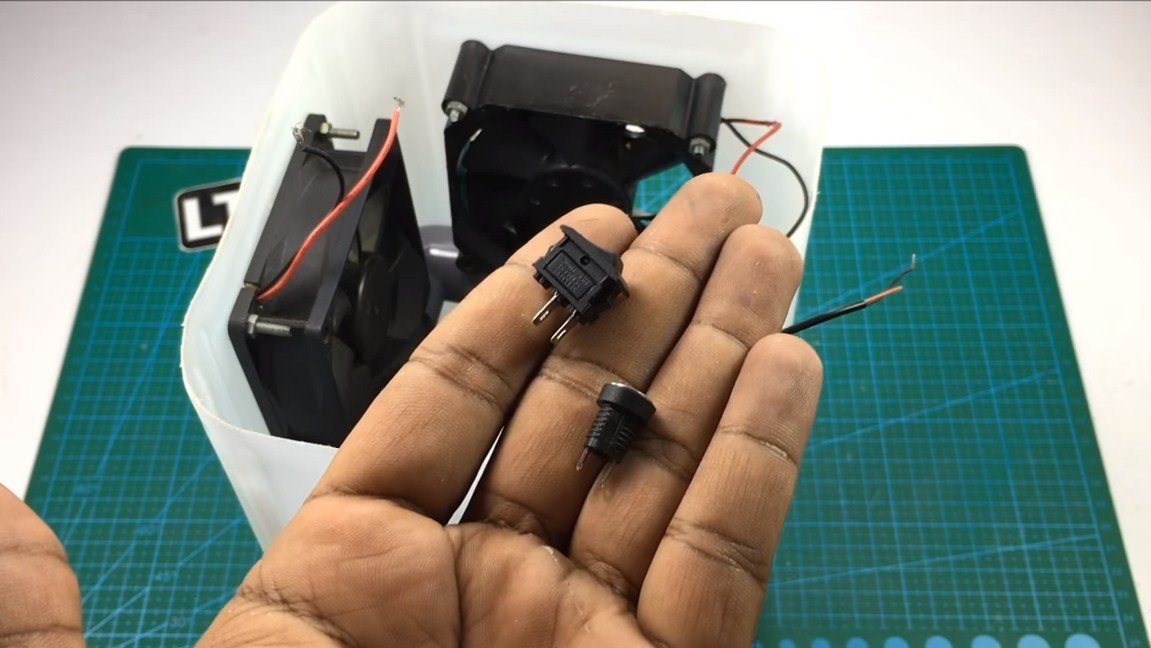
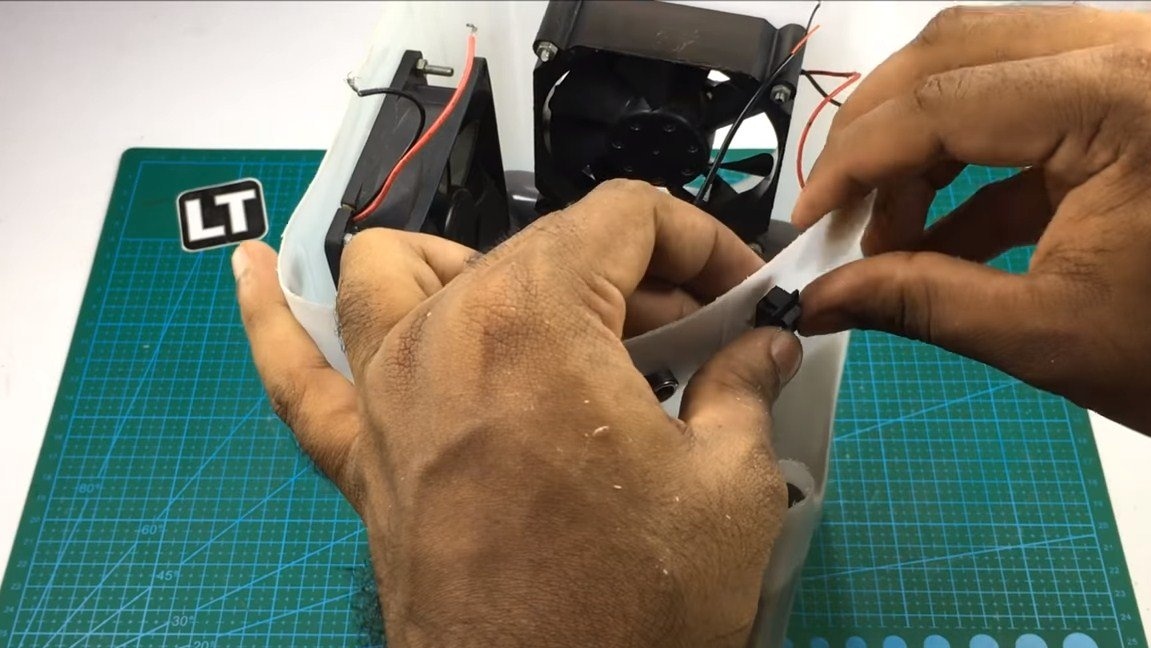
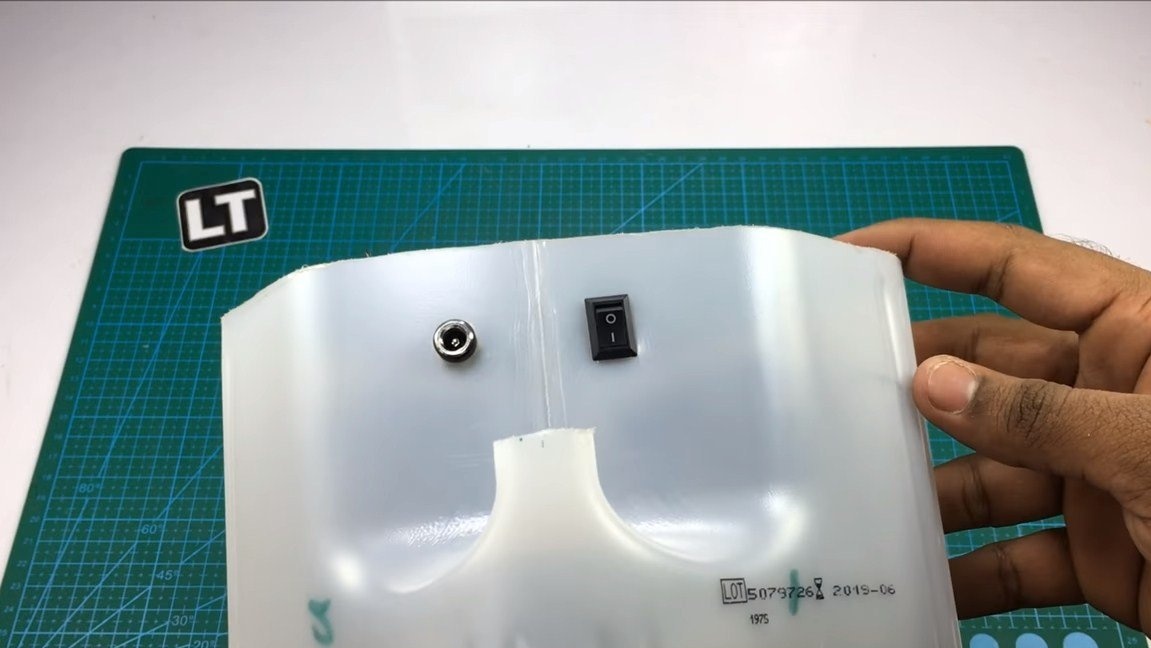
- a socket for connecting a power supply and a switch;
- power supply for 12V;
- wires.
Tool List:
- scissors;
- drill;
- screwdrivers;
- marker;
- ruler;
- soldering iron;
- a hacksaw for metal;
- a pen drill.
Homemade manufacturing process:
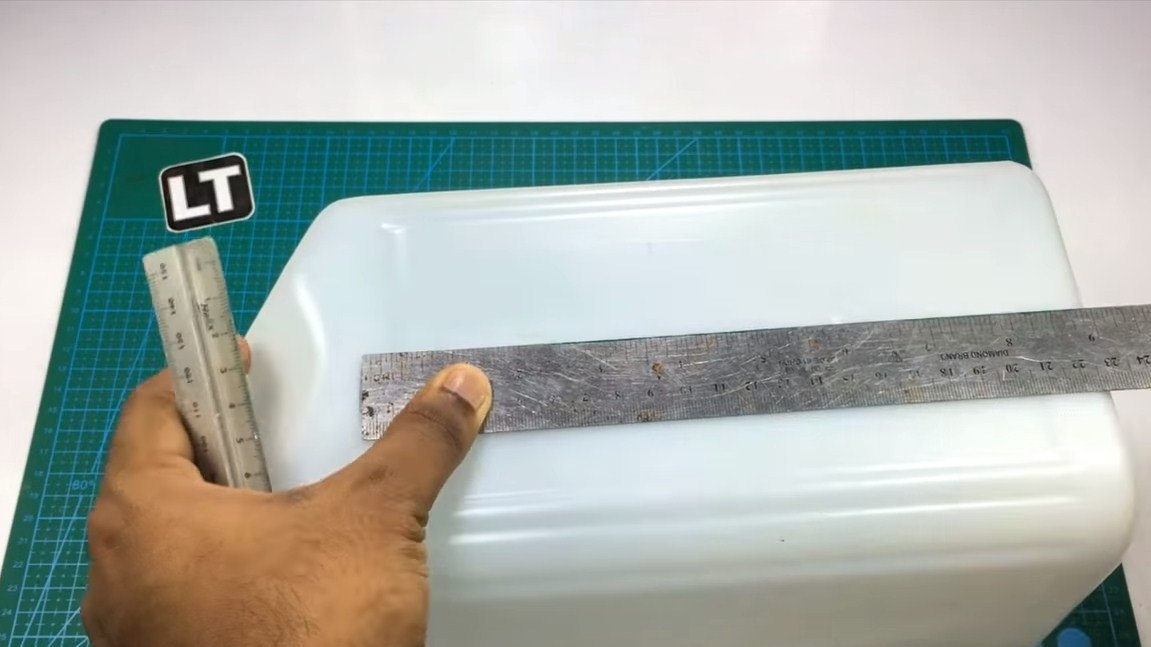
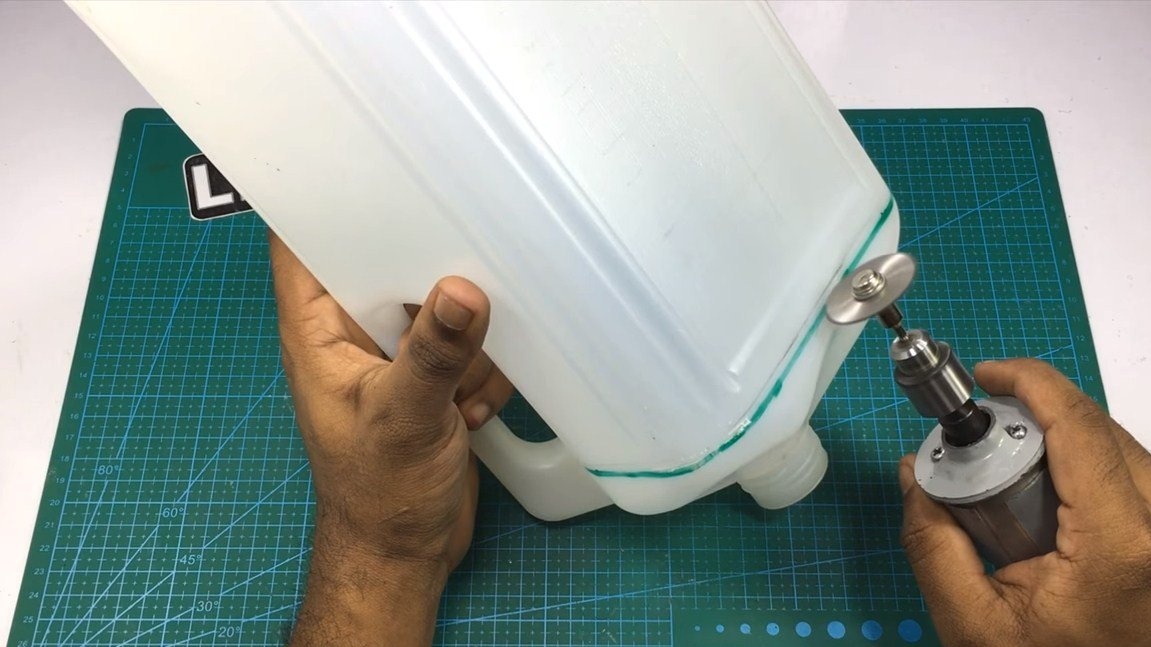
Step one. Capacity preparation
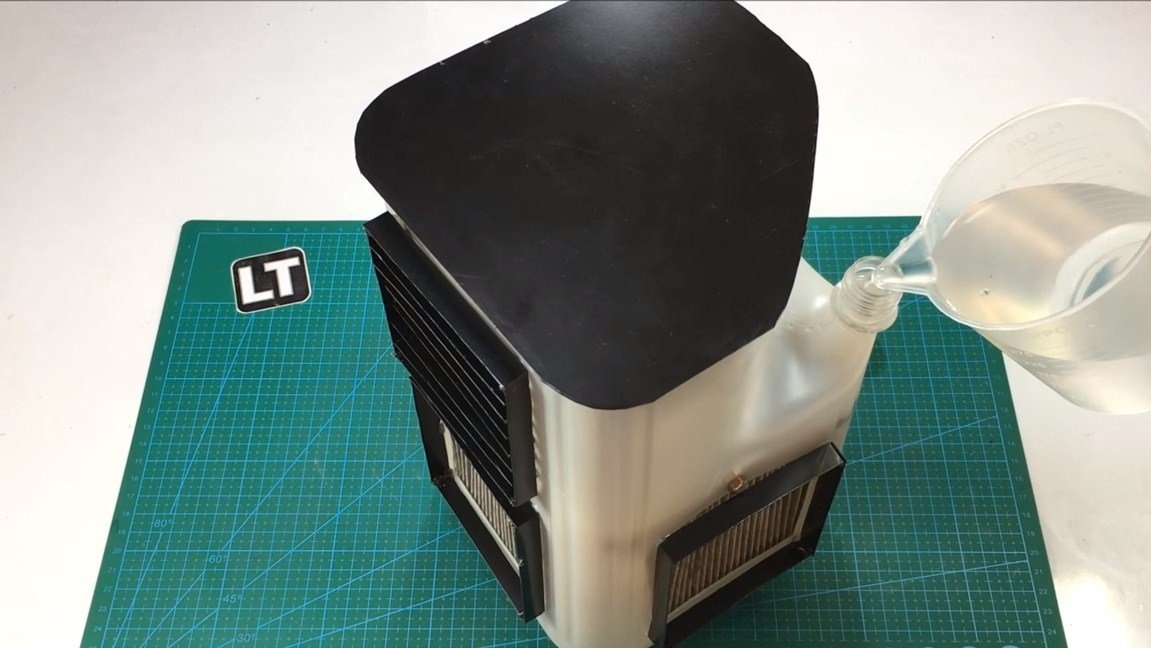
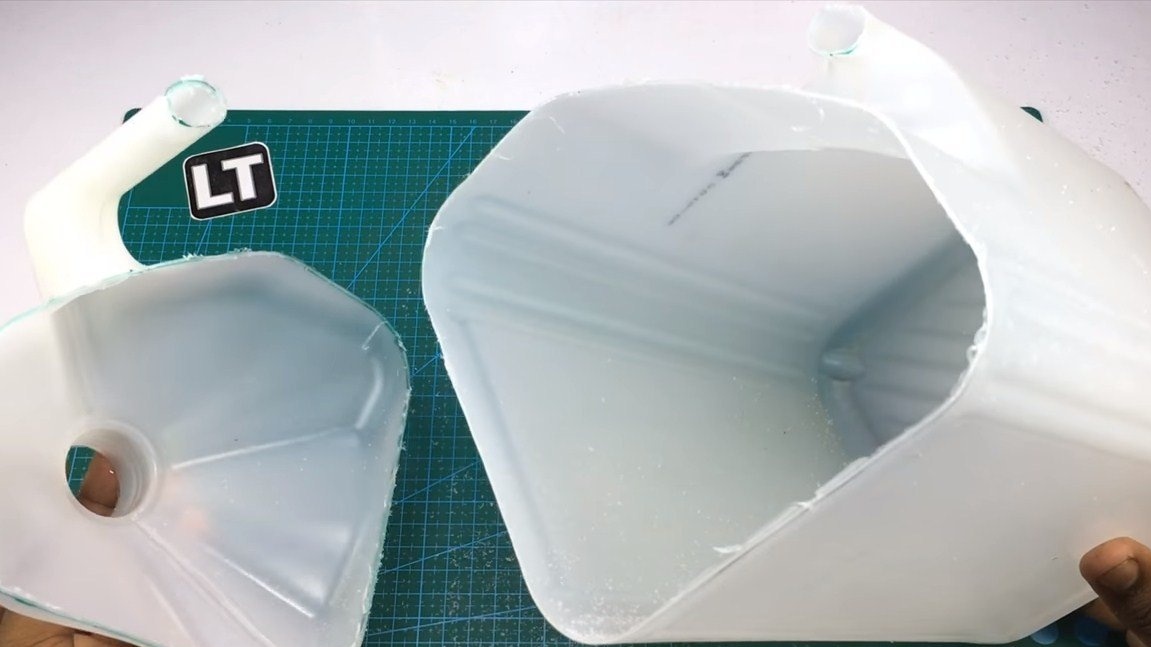
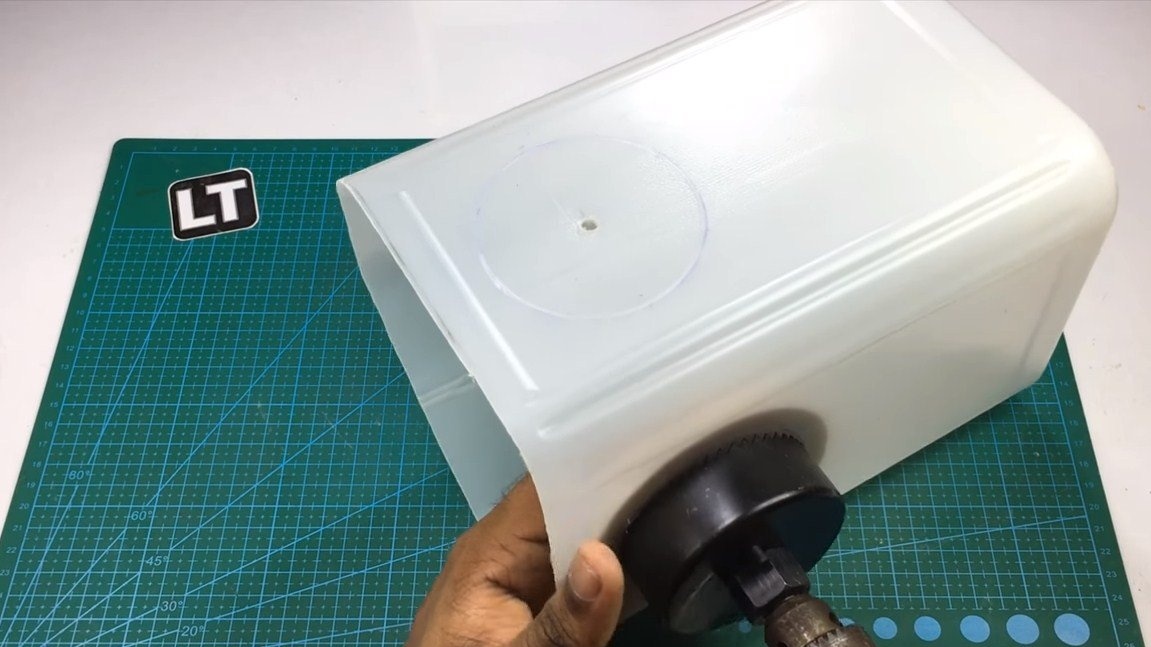
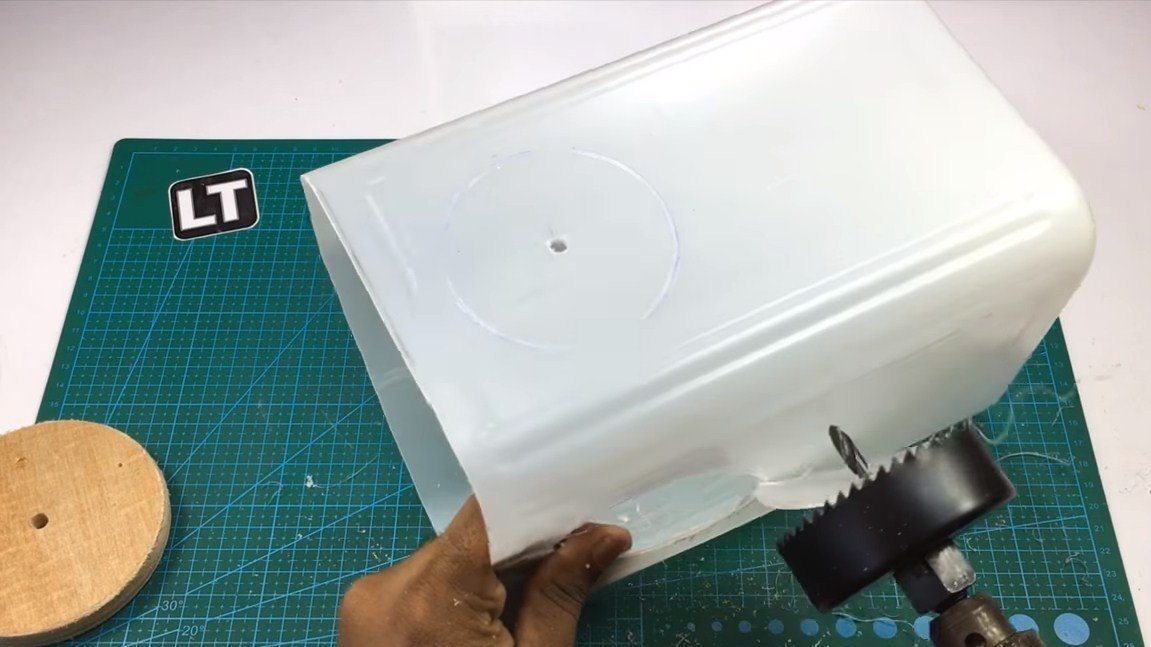
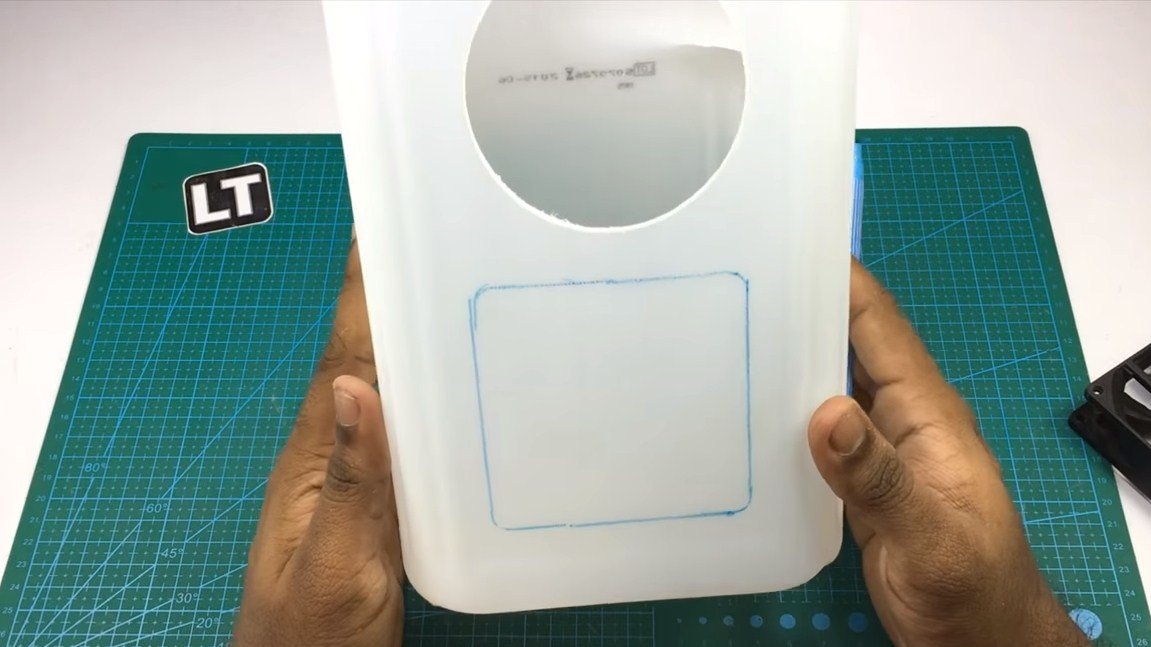
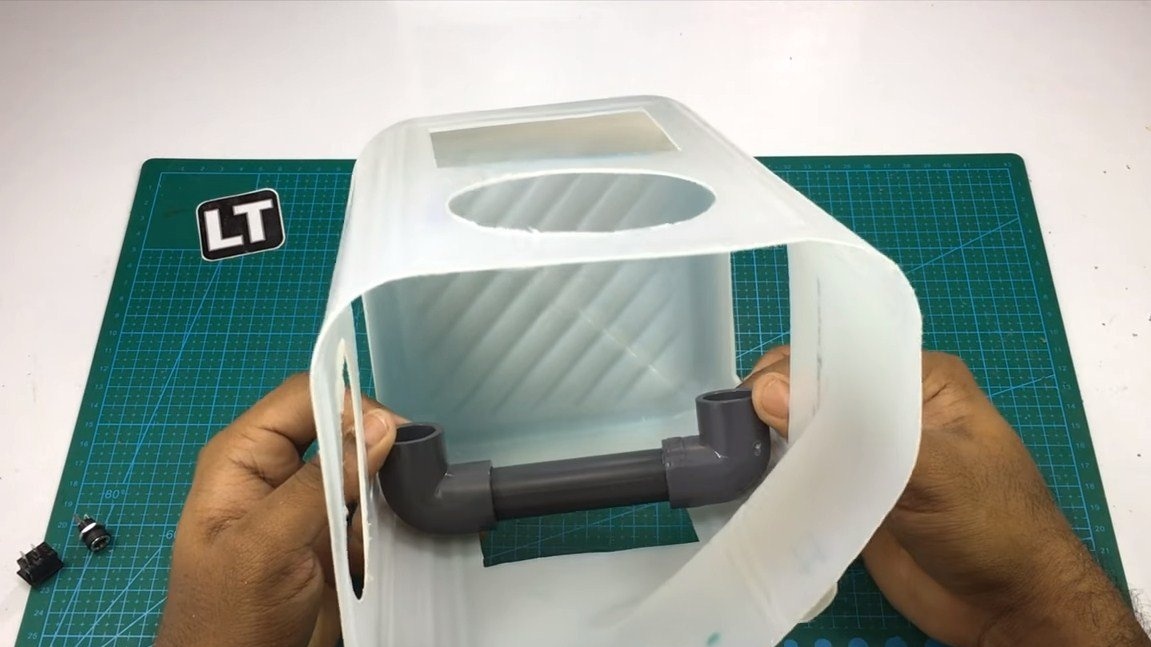
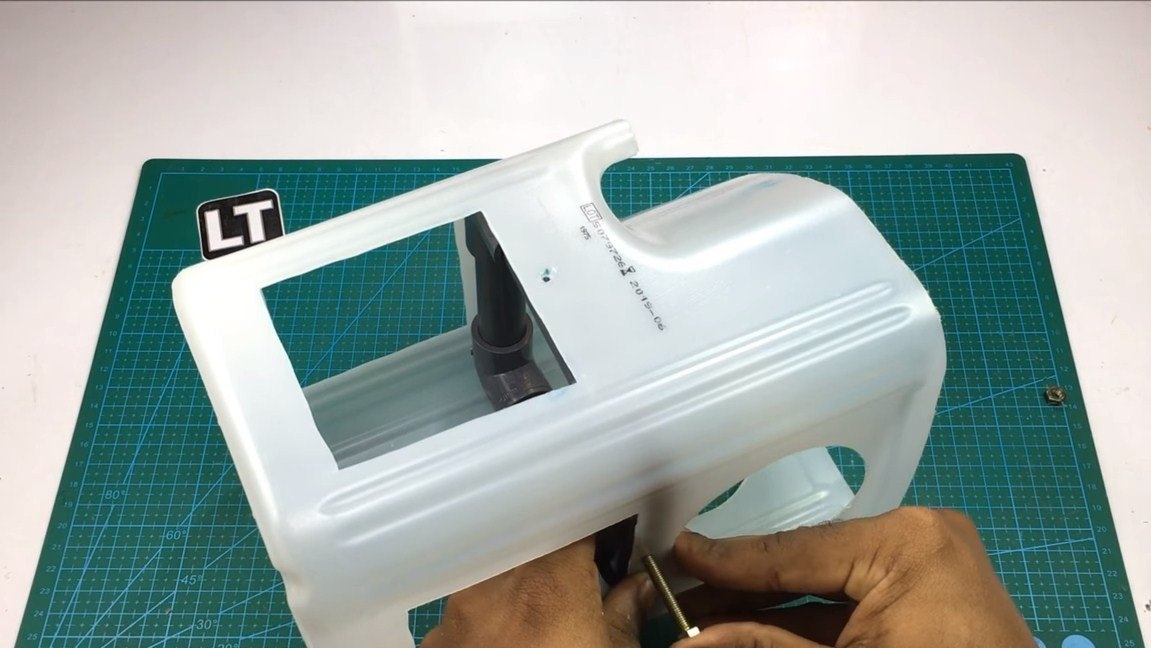
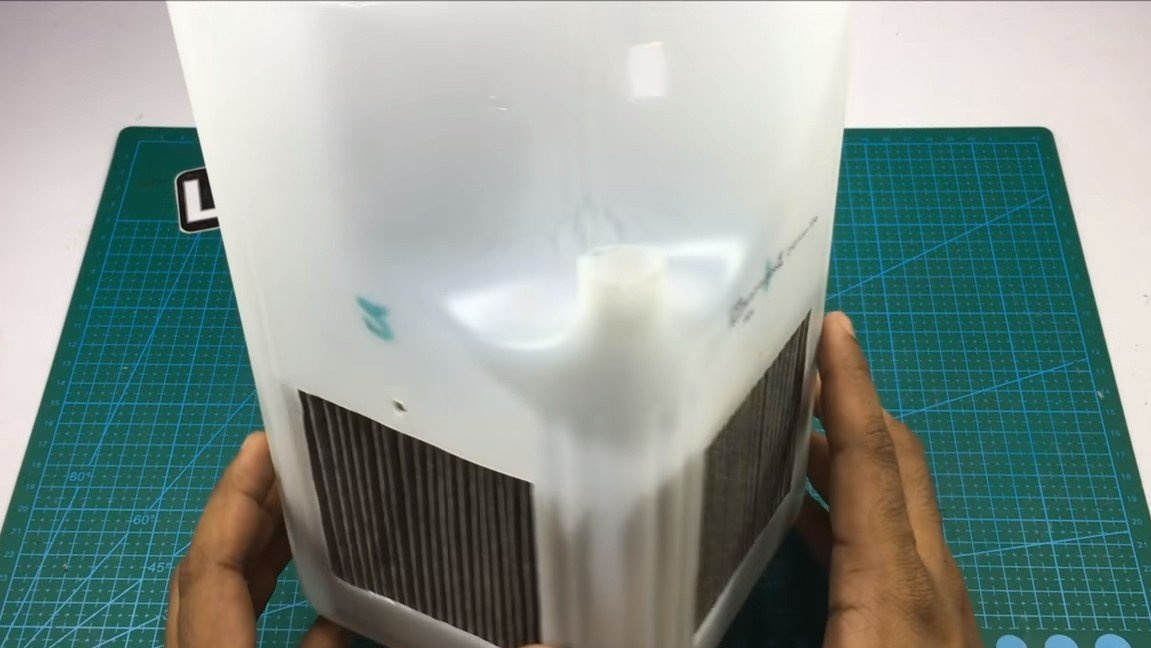
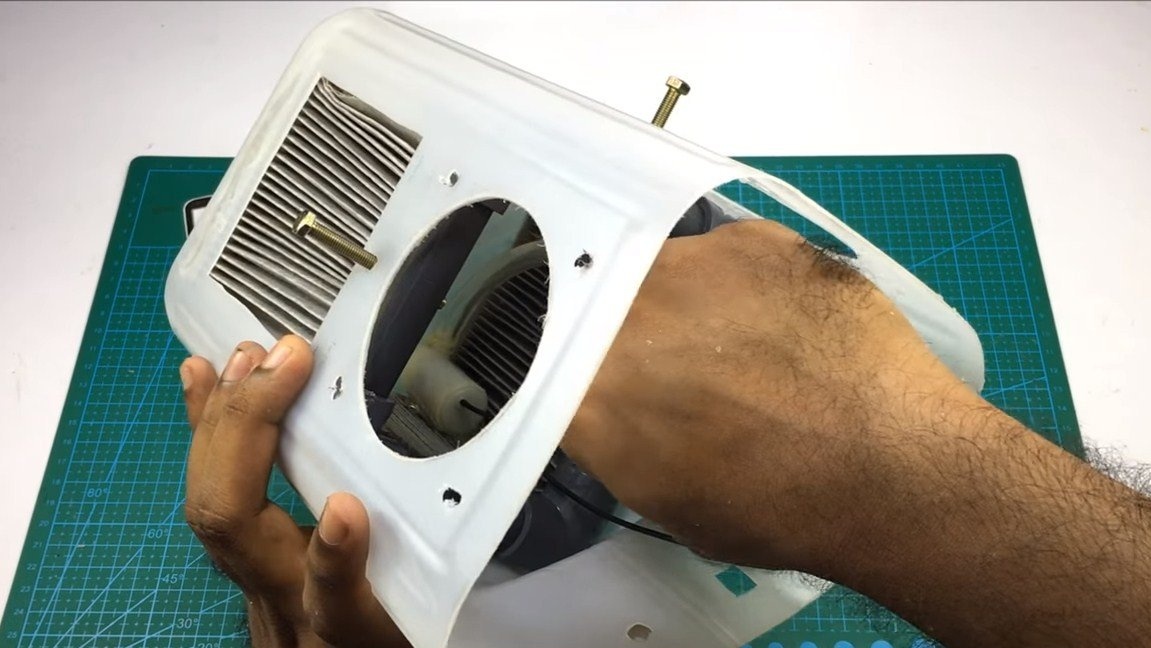
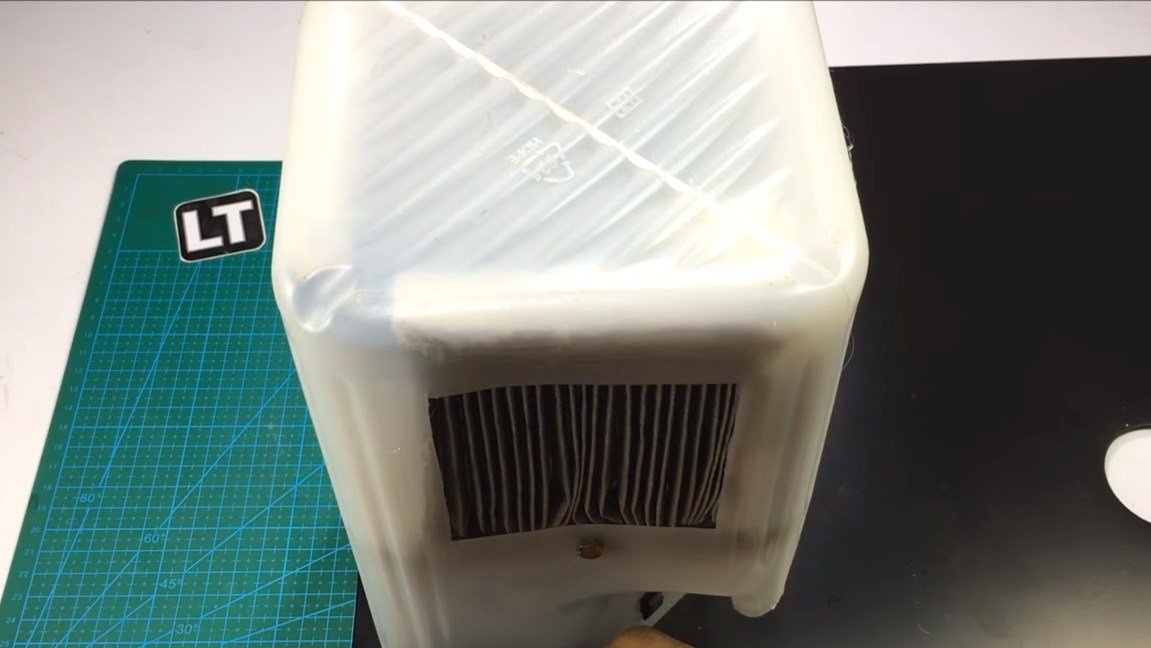
As a container, the author used a plastic canister, her neck is placed on the side, so it is very convenient to pour water into the homemade product. To begin with, we cut off the upper part, it is possible to cut off not completely, so that later this part can be used as a cover.
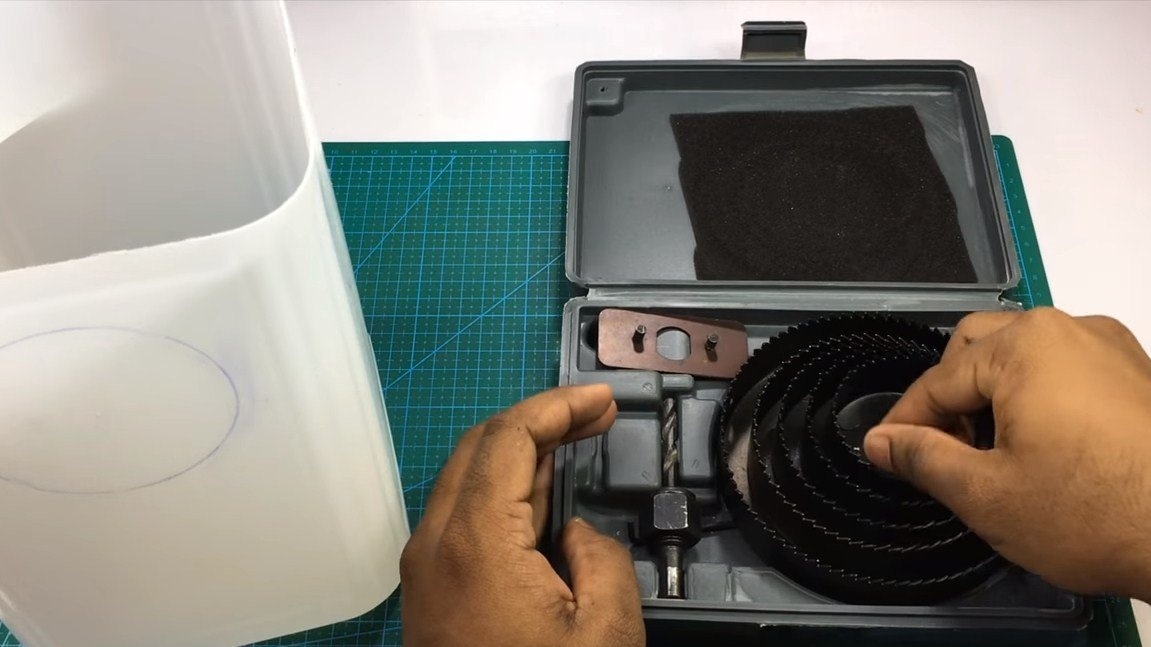
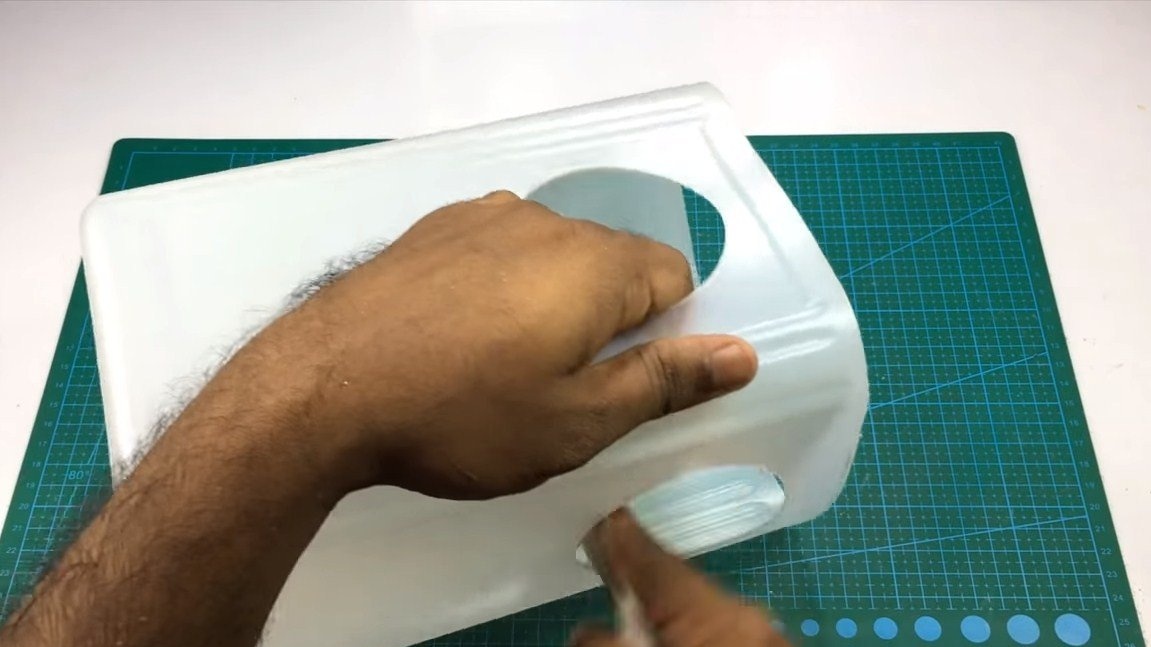
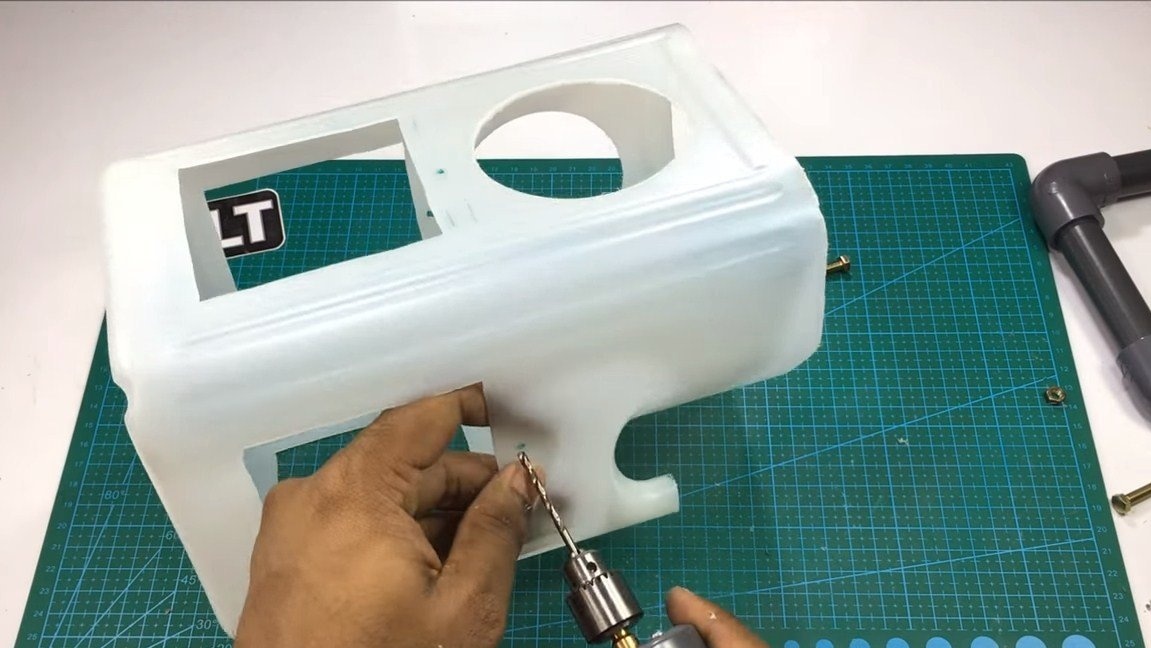
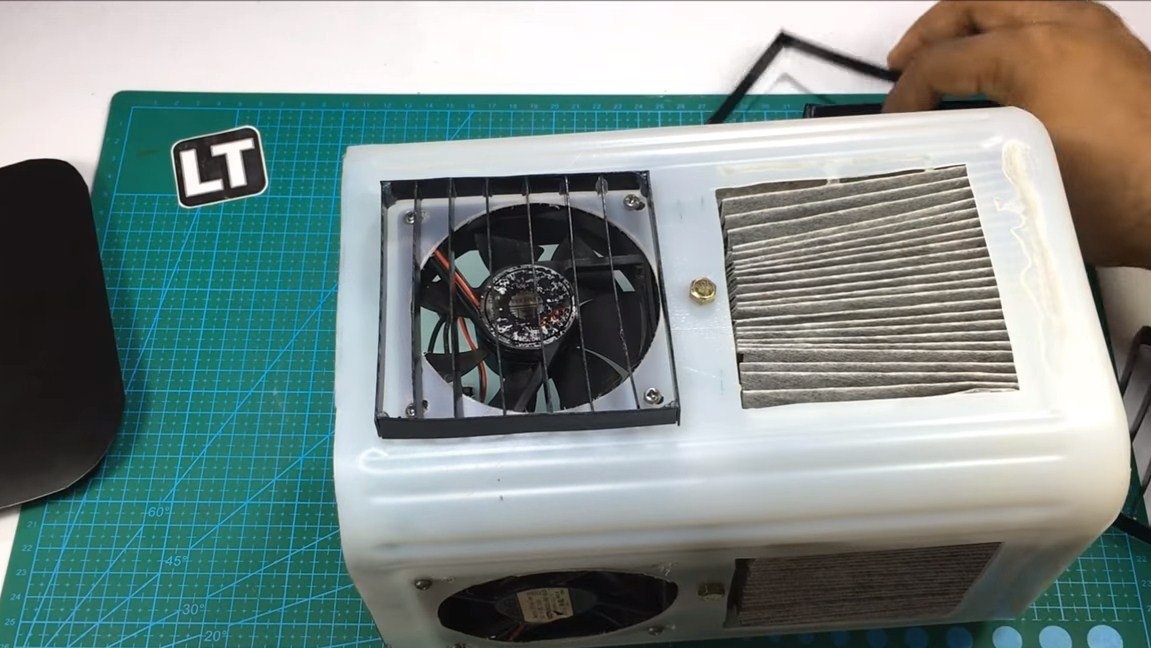
Next, in the resulting container, cut holes for the fans, they are round. It is most convenient to drill such holes with a drill using a crown. We cut square holes below, filters will be inserted here, you can cut them with scissors, or better with a drill. Well, you also need to make a window for installing the switch and socket for the power supply.

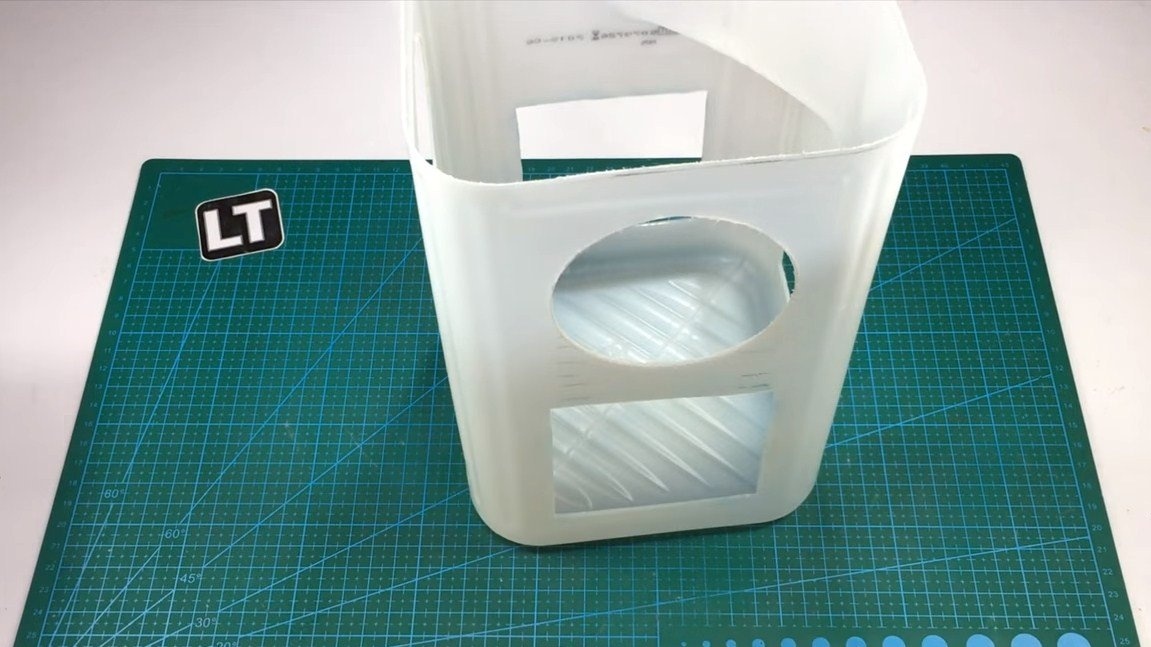
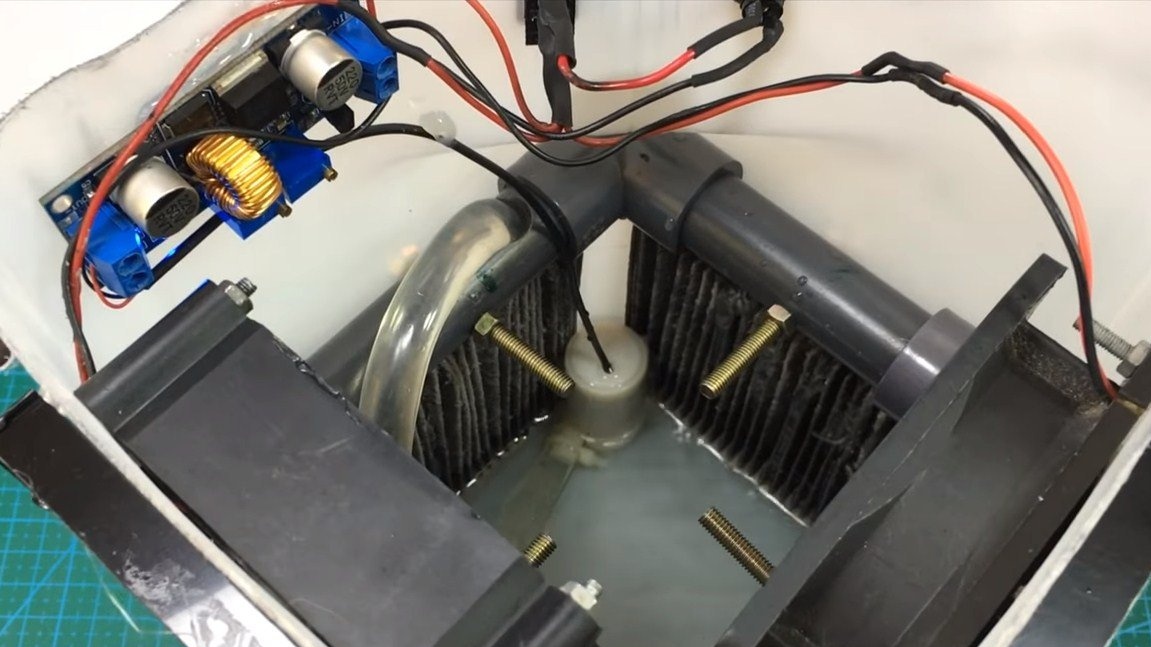
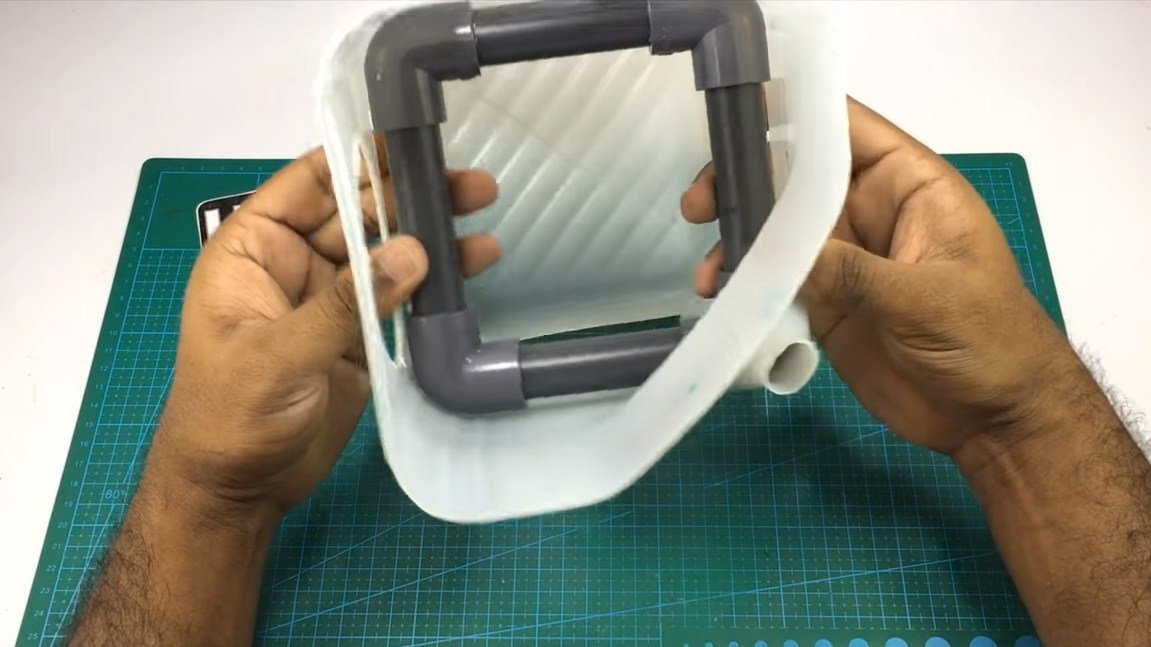
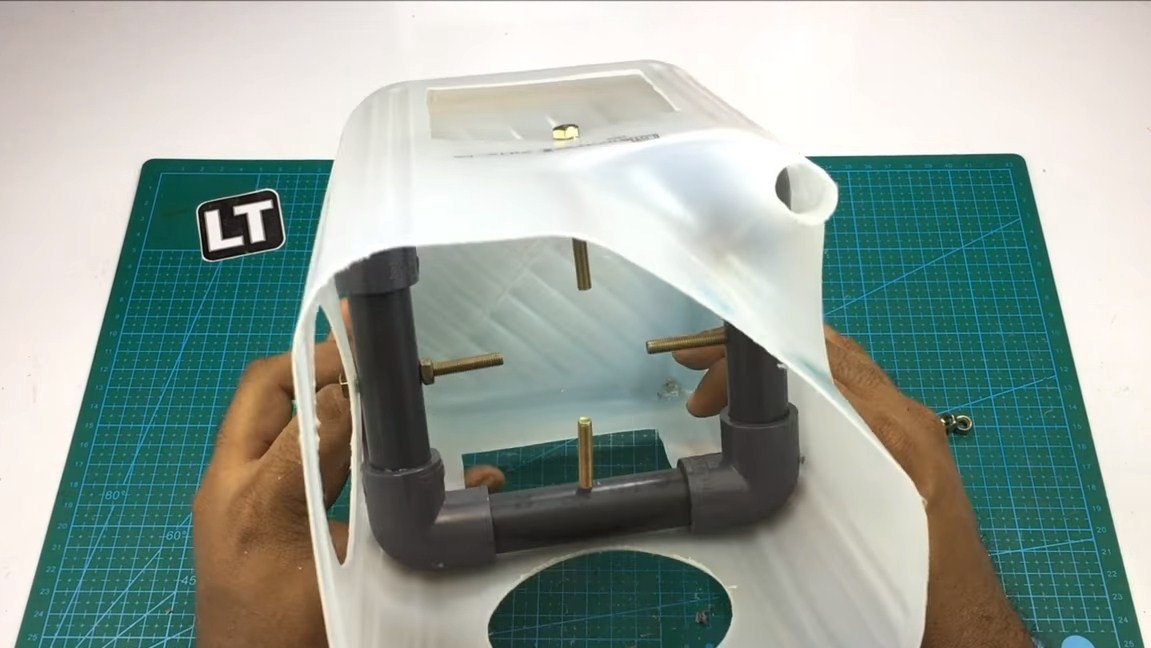
Step Two Water circuit
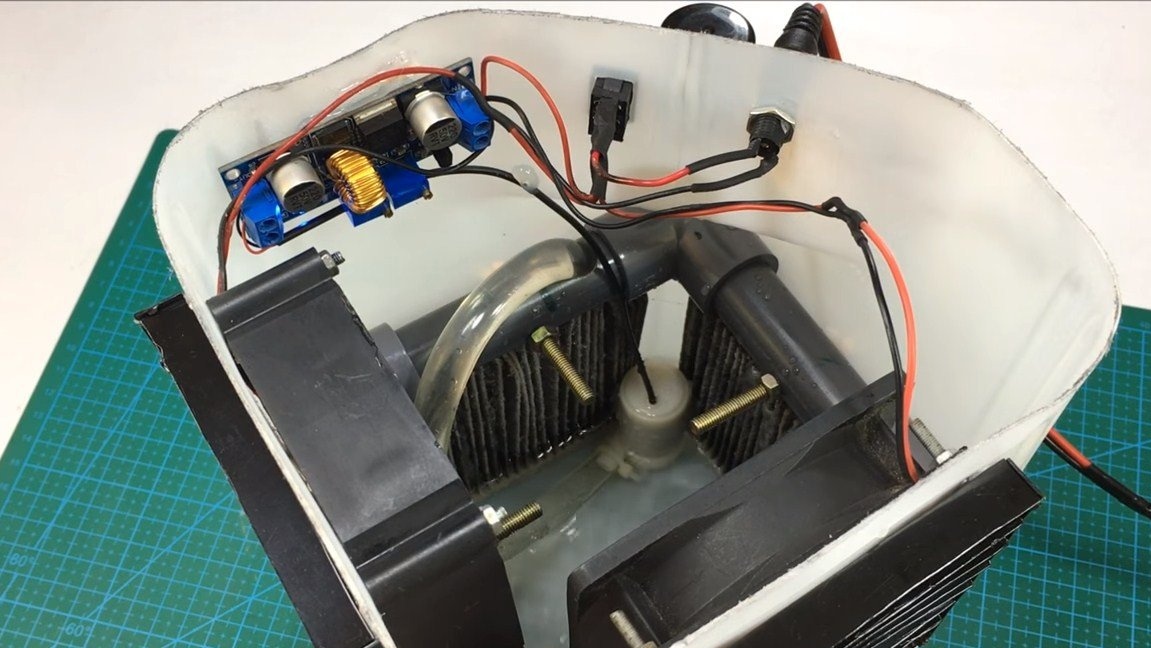
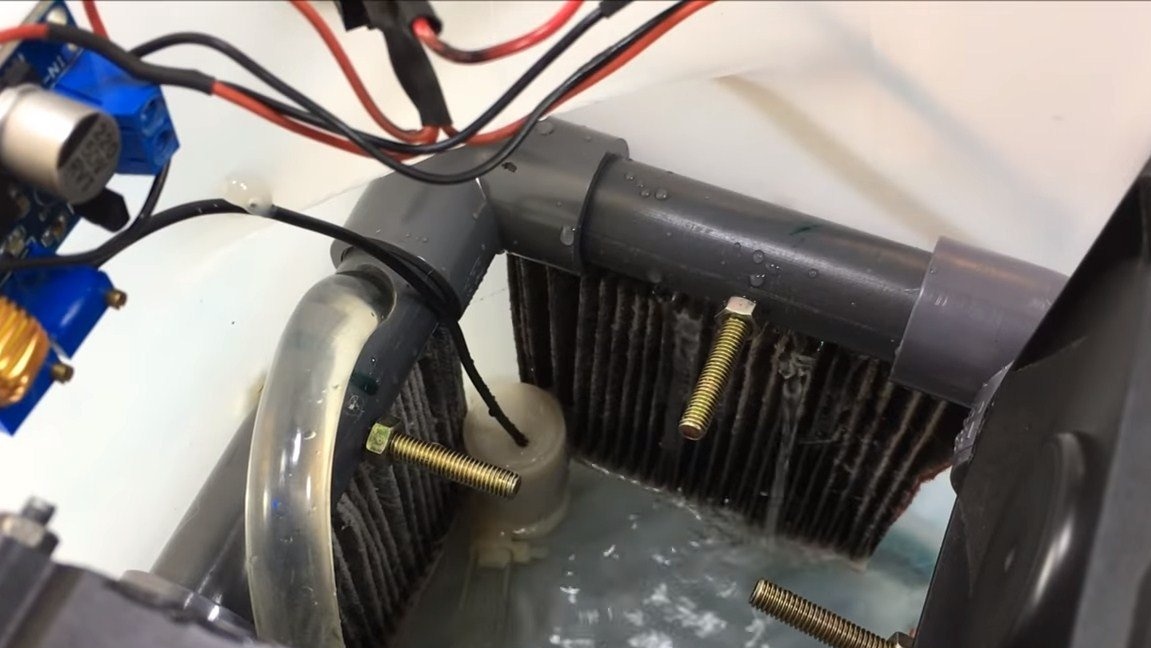
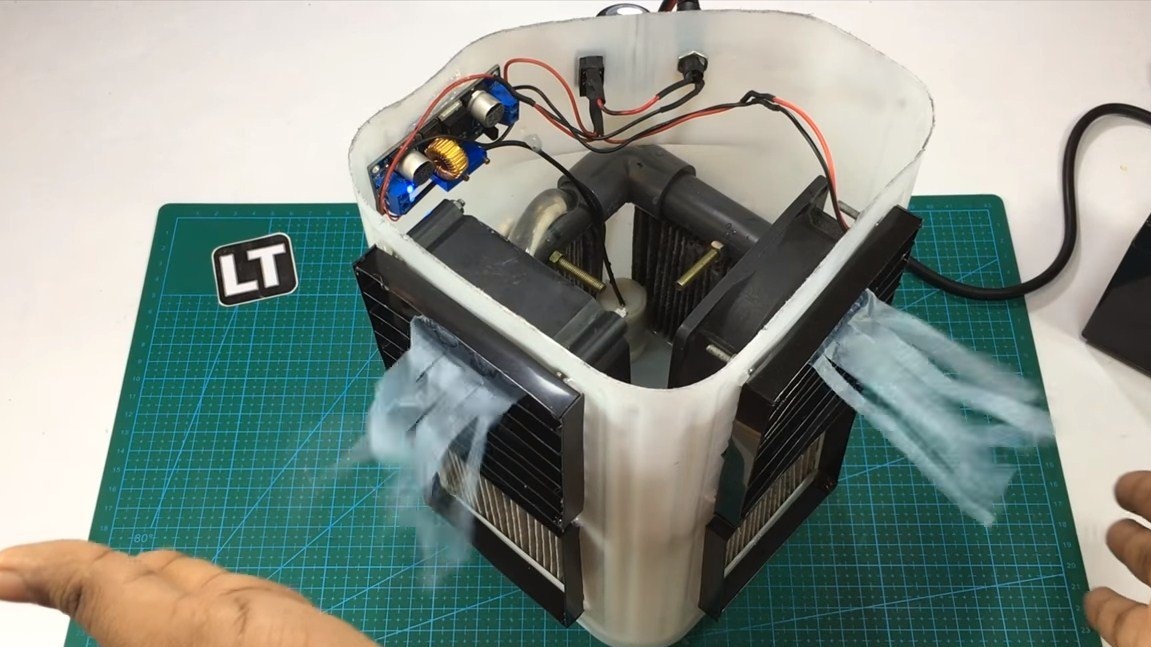
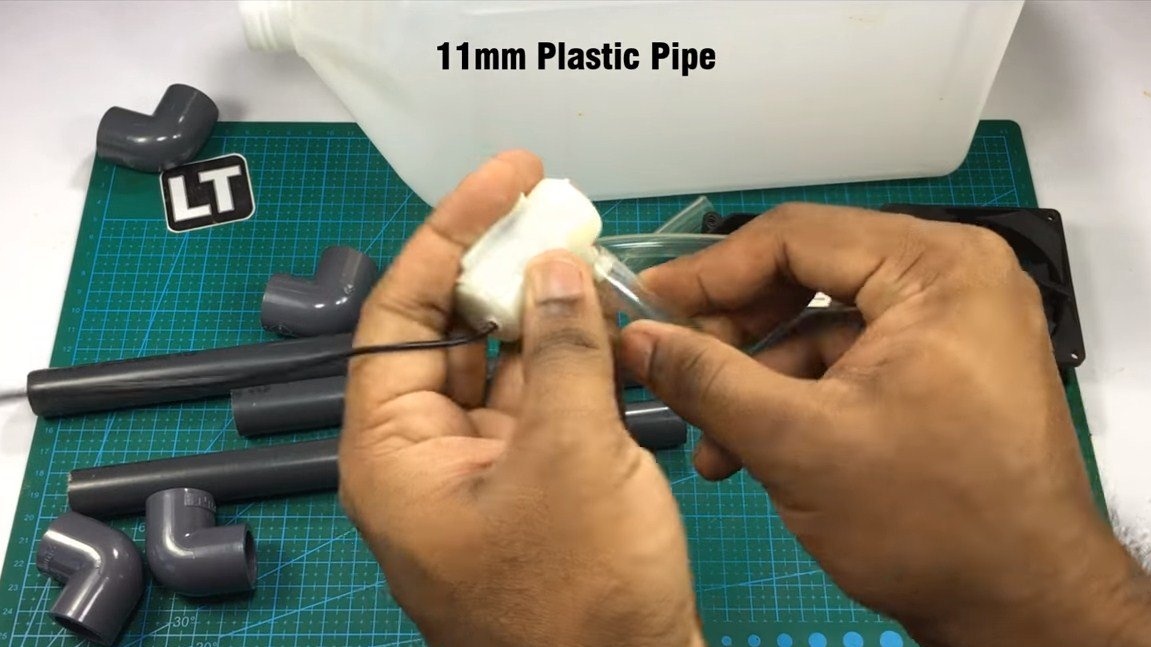
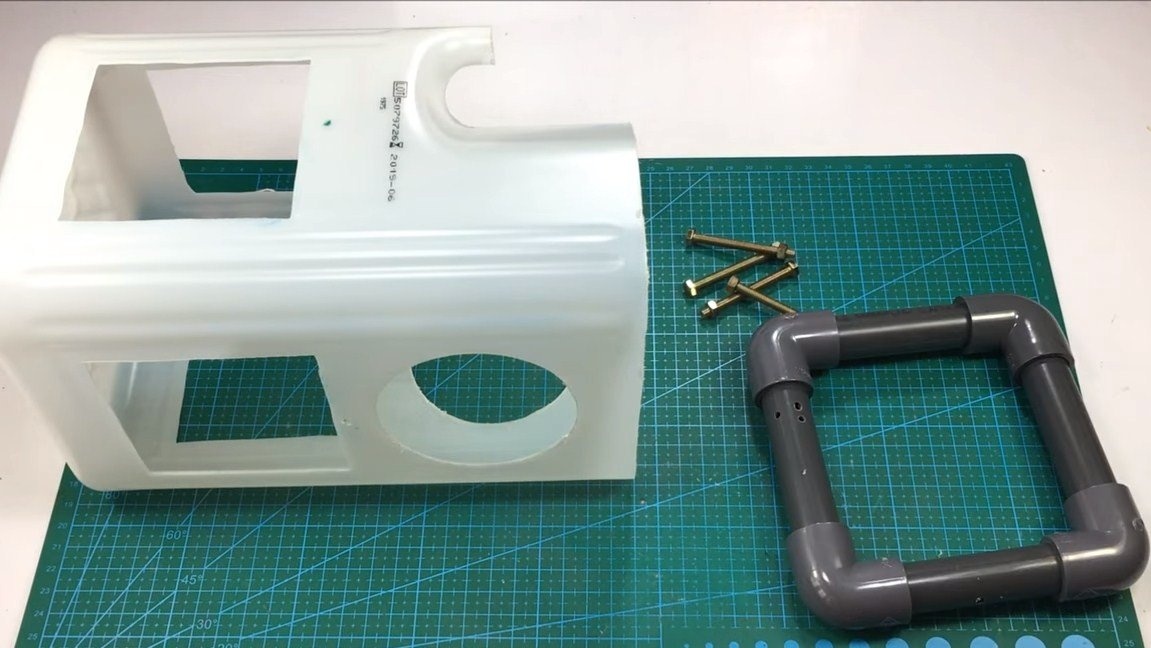
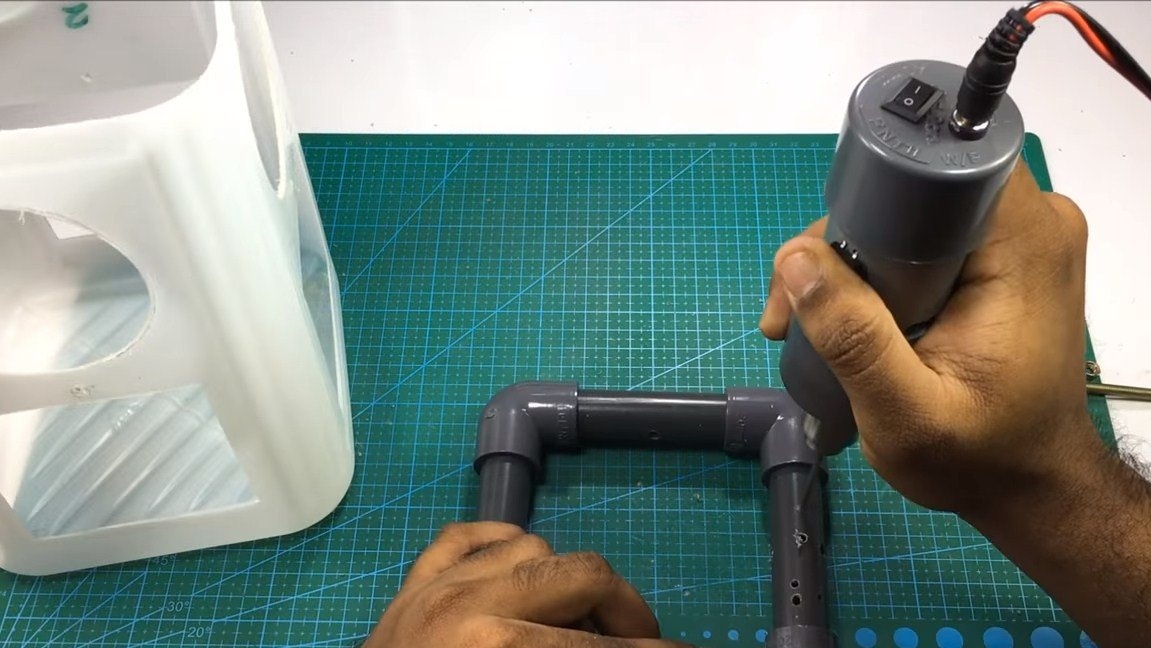
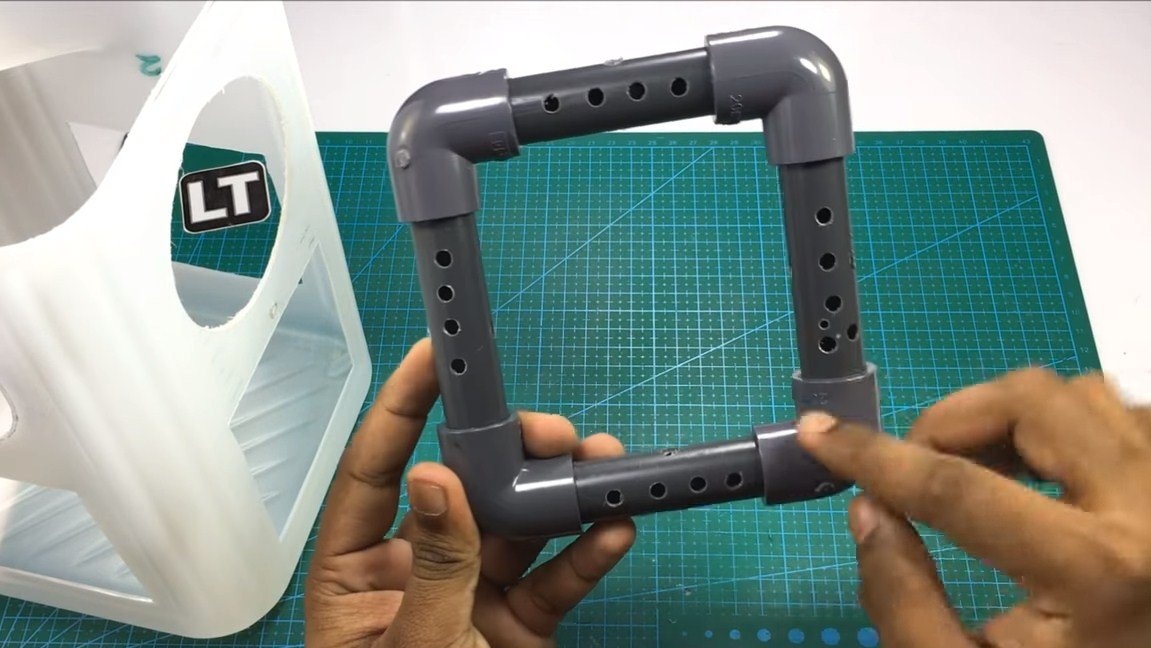
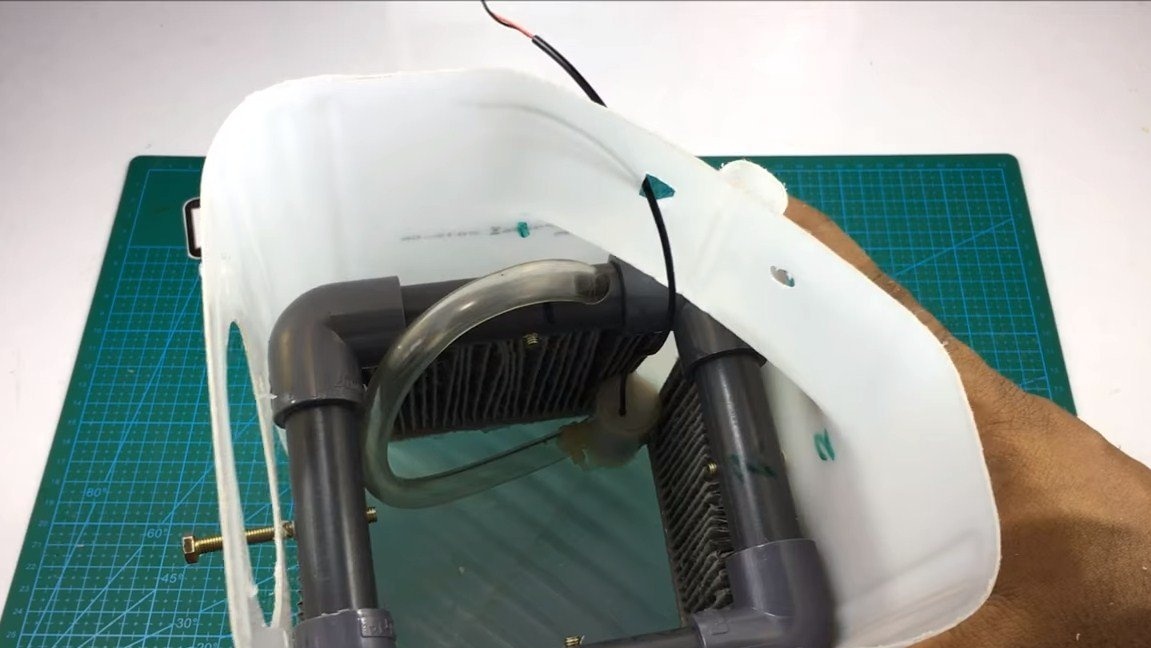
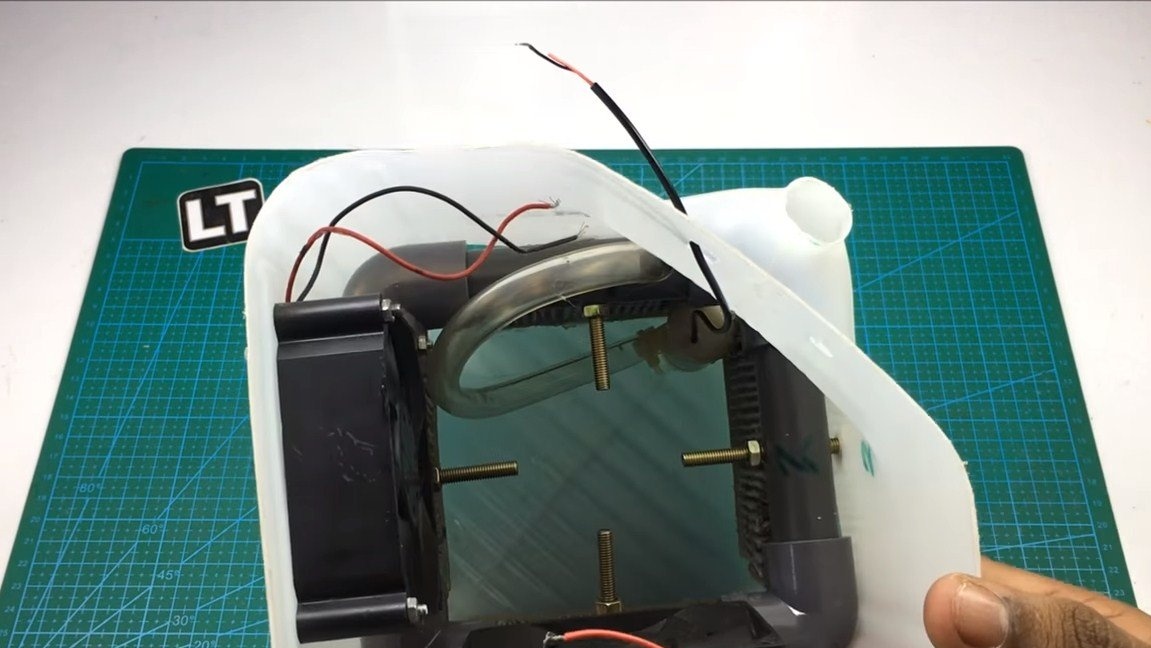
Inside the canister, we install the water supply circuit, for this we assemble a square from the sanitary pipes with a diameter of 20 mm and corners so that it fits tightly into the canister. In this circuit we drill rows of holes below, through them water should flow out to the filters.
We fasten the circuit with bolts and nuts to the canister.


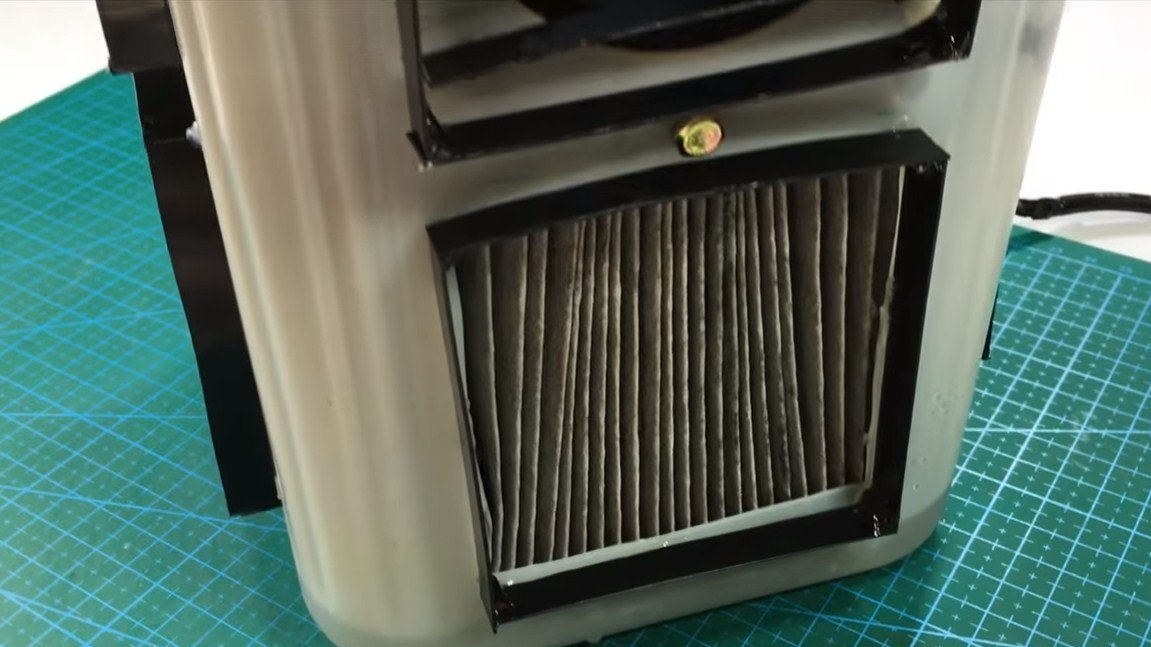
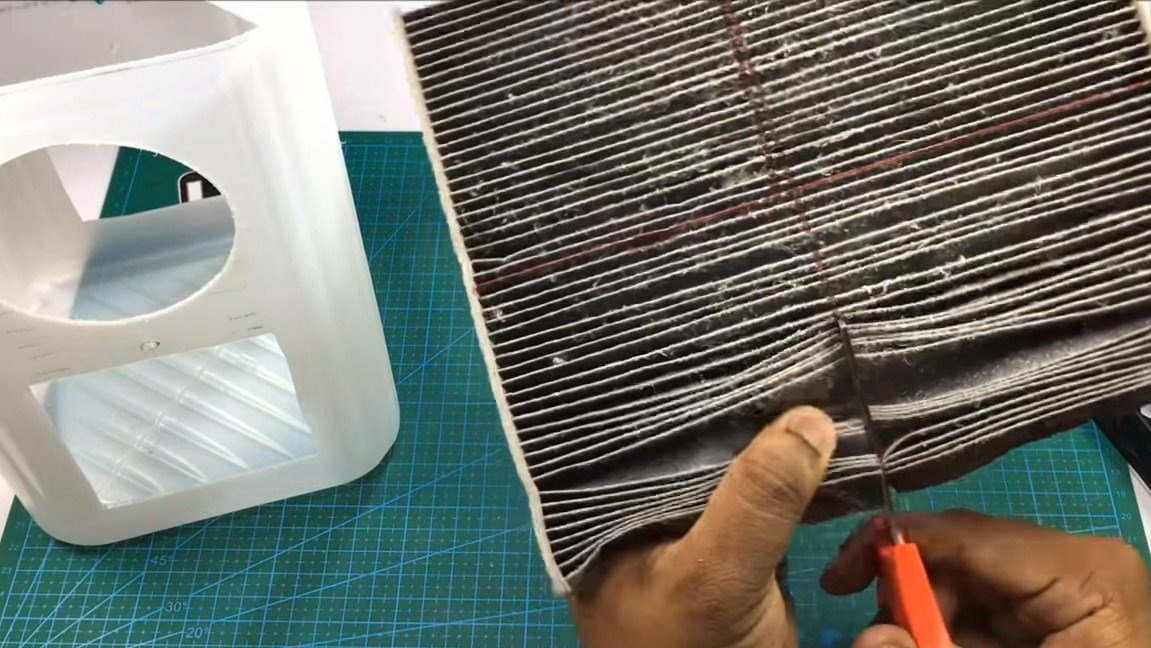
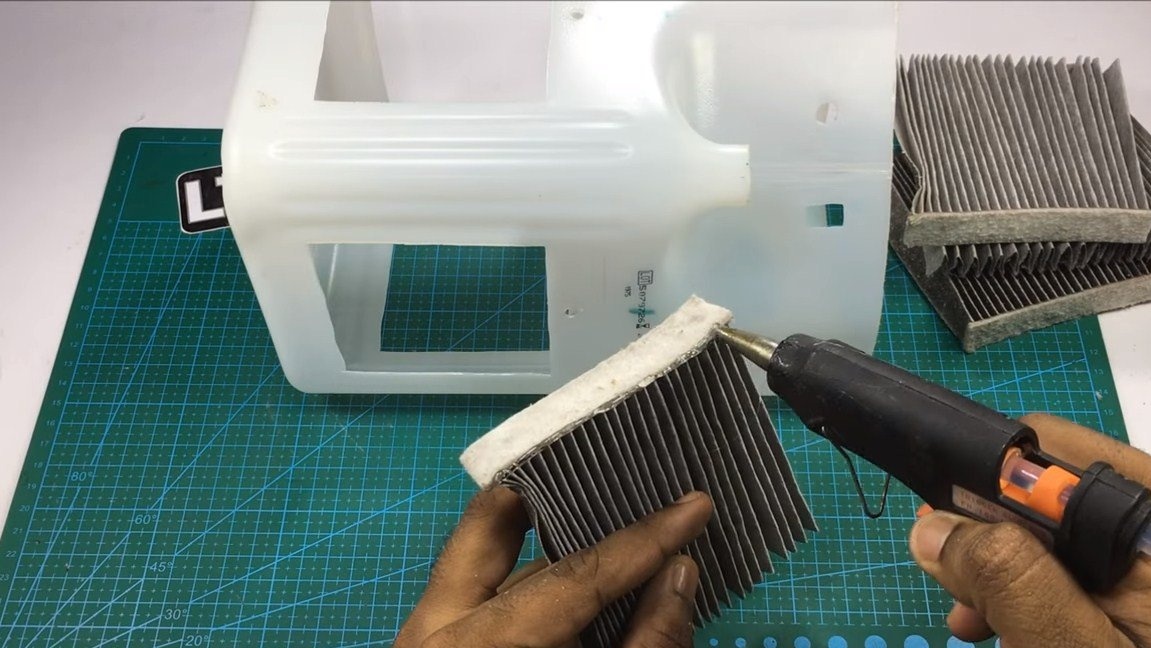
Step Three Filters
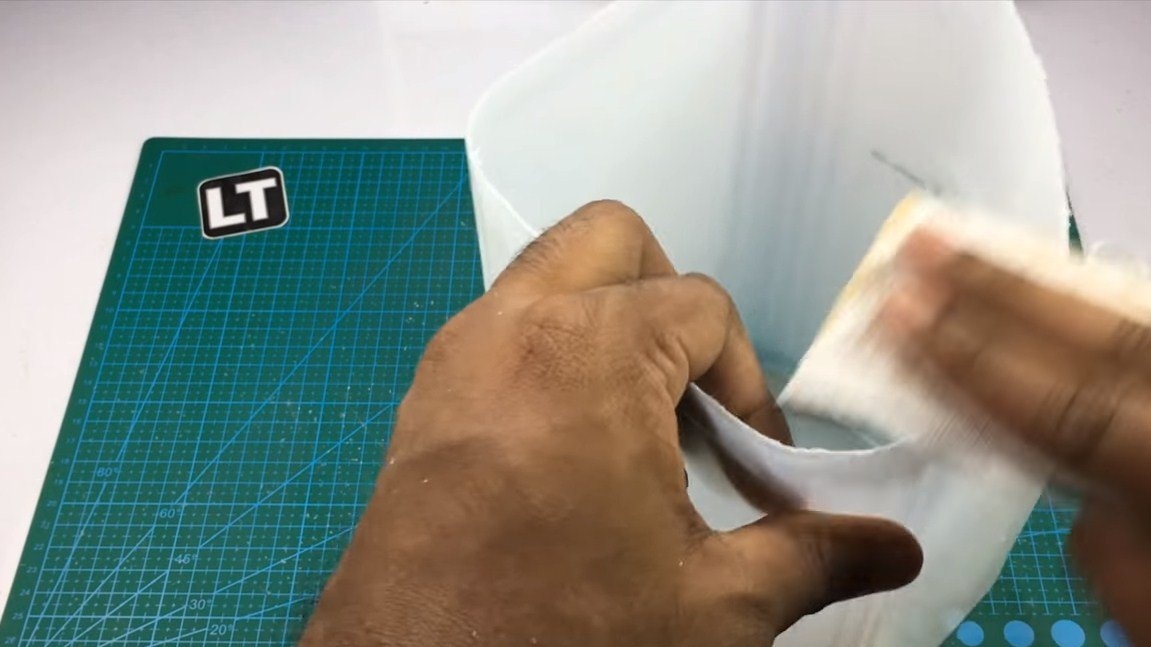
Inside the canister, filters must be installed in the rectangular windows; they will be needed to clean and humidify the air. The air inside the container will be drawn in precisely through them, and since water will flow through the filters, the air will be humidified and cooled due to the evaporation of water.
Filter suitable car or other similar. We cut it into pieces of the right size, and then glue it with hot glue inside the canister. It is important that the filters are glued tightly, otherwise dirty air will get inside.

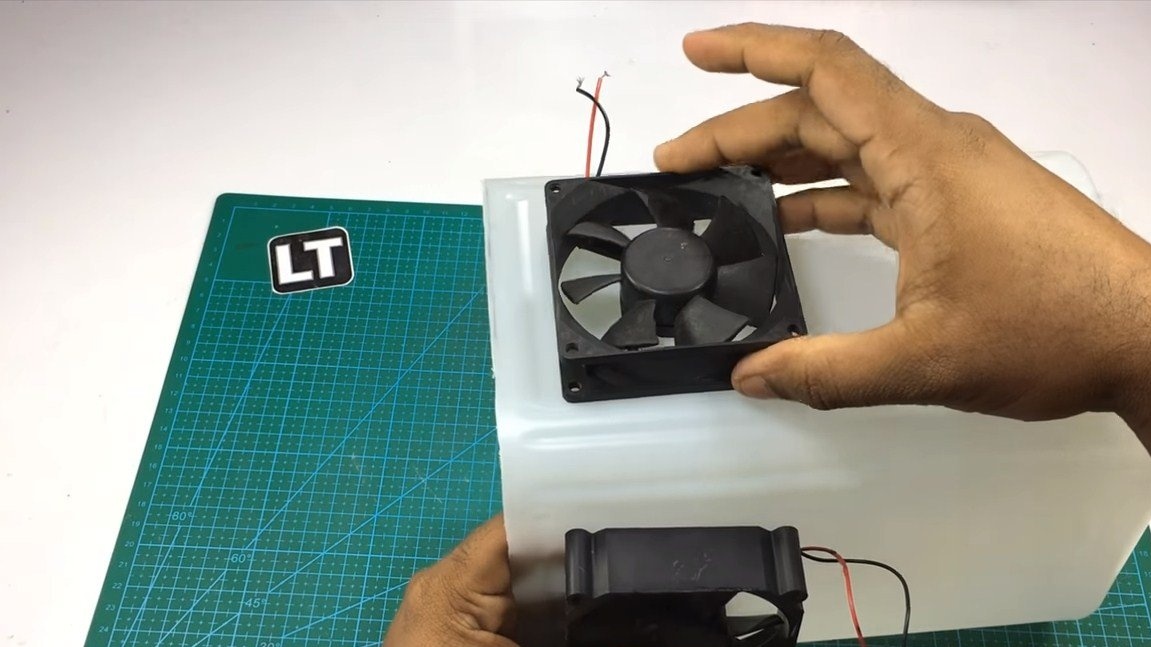
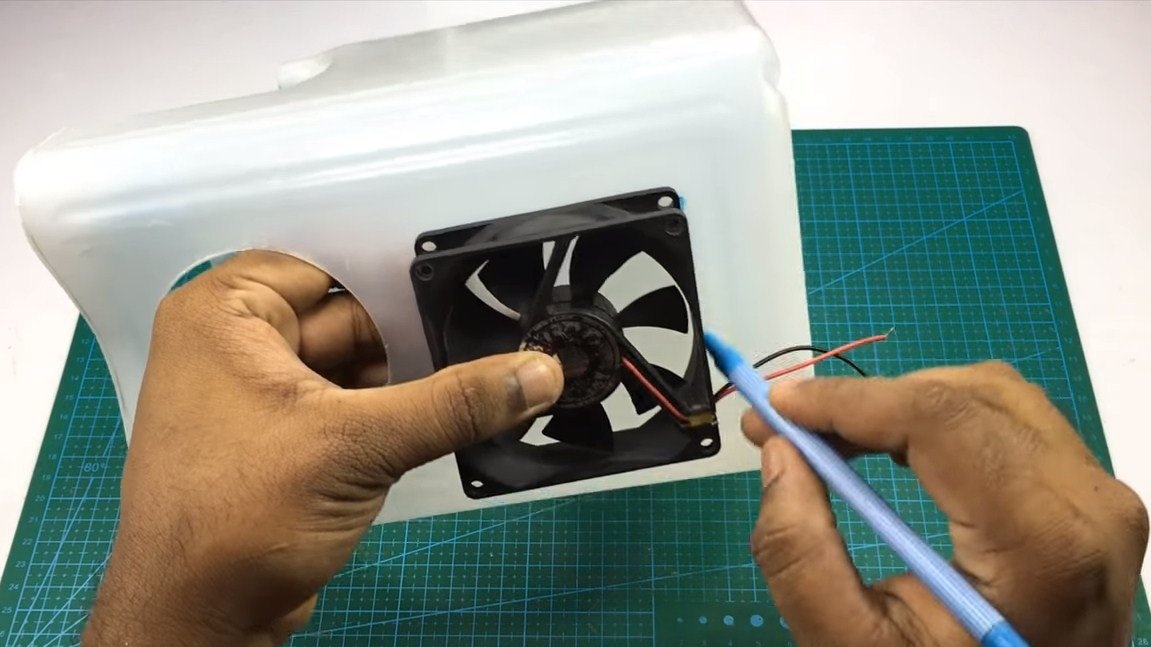
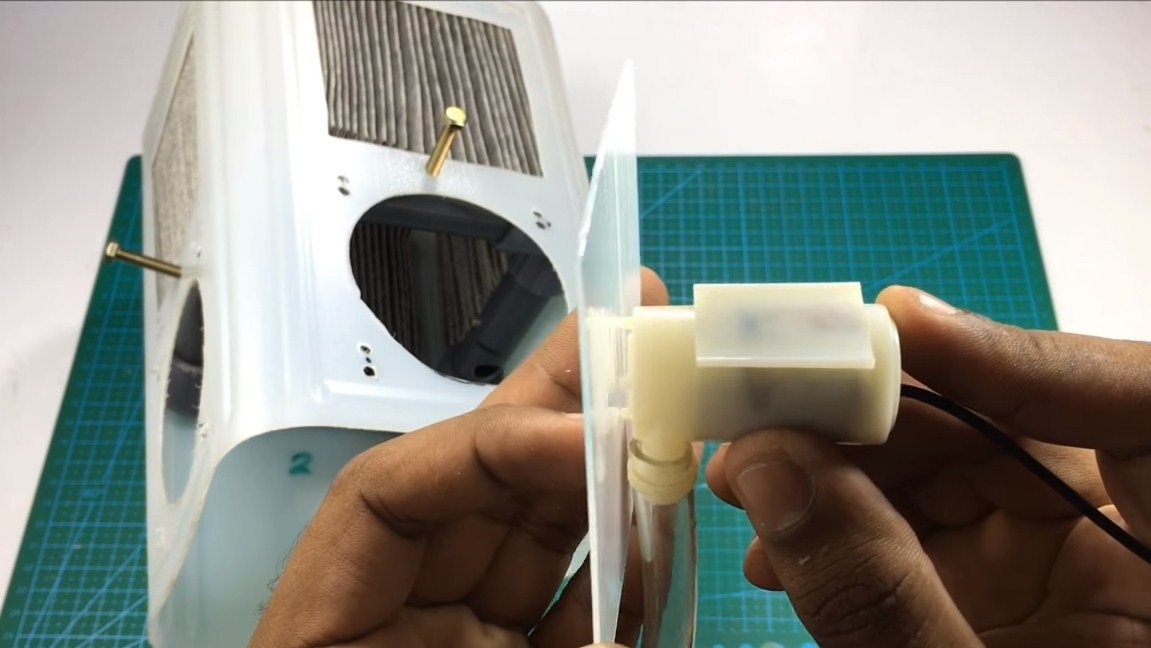
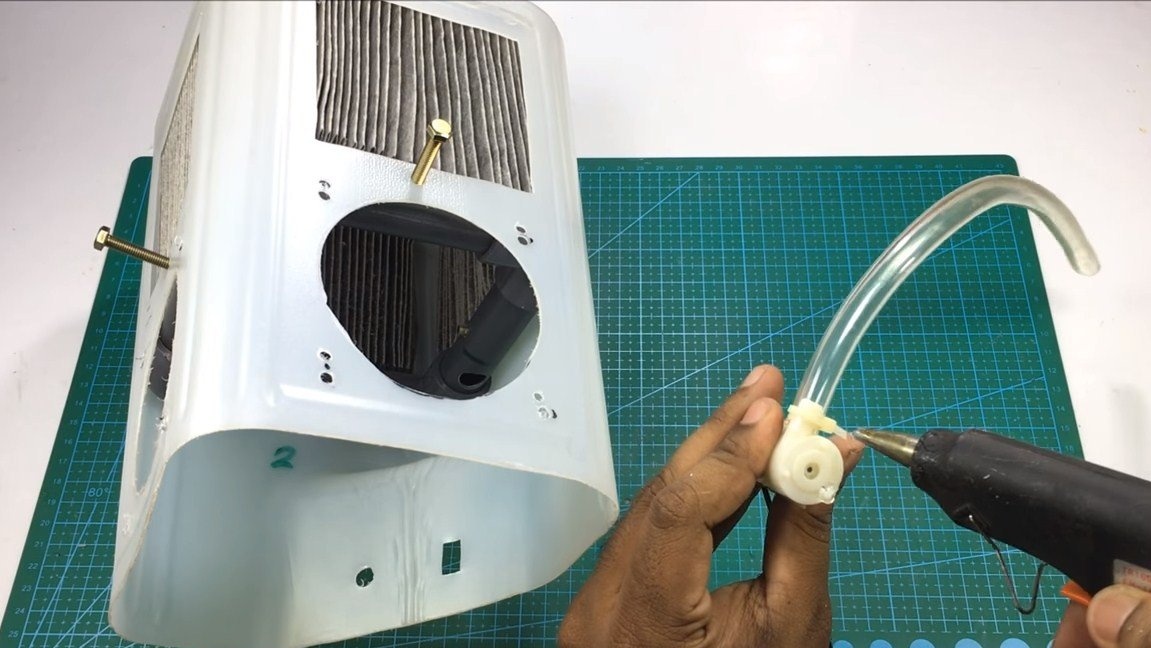
Step Four Pump and fans
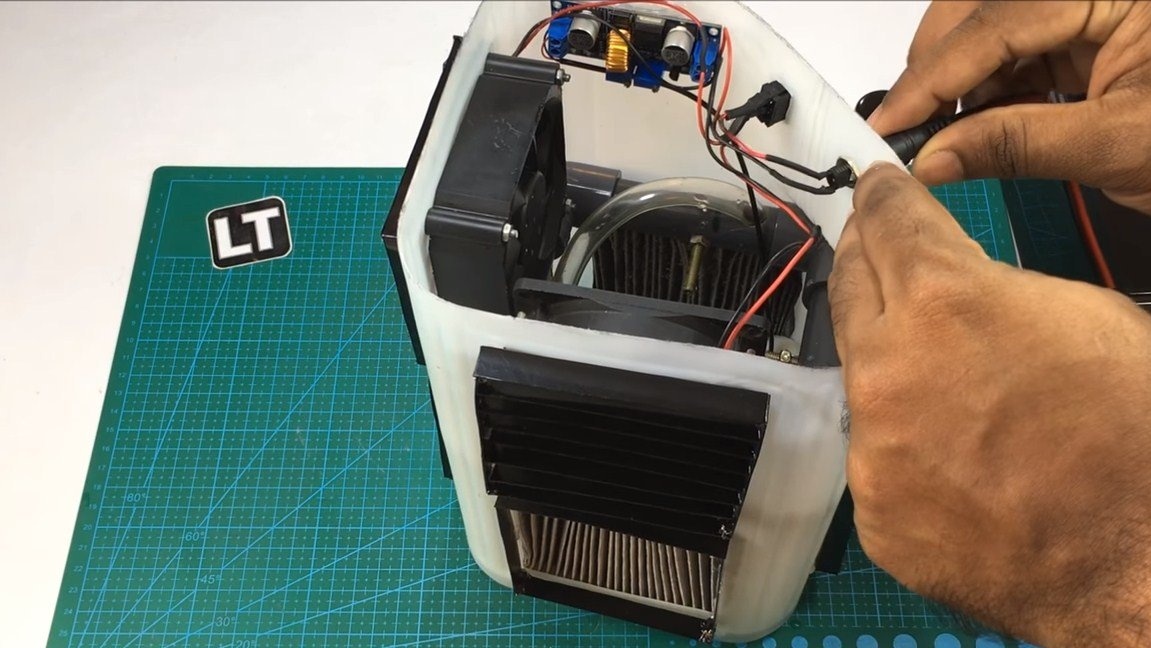
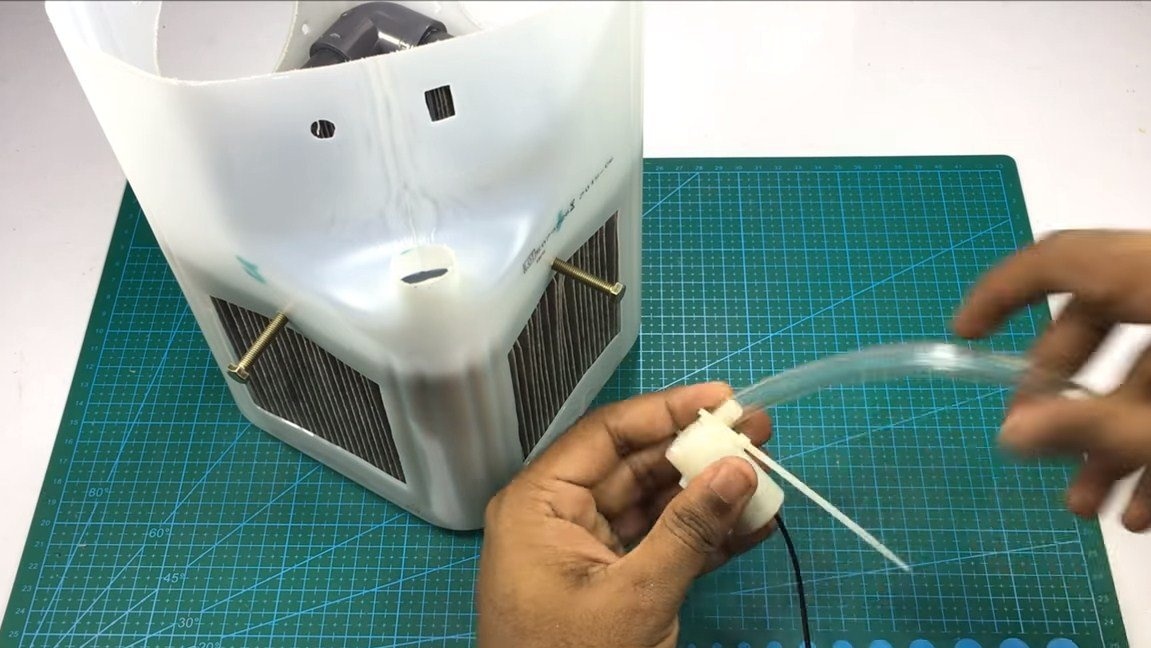
For forced water circulation, a small pump is provided in the system, which operates on a voltage of 5V. We put a hose on its outlet and glue the pump with hot glue to the base of the tank. We connect the hose to the pipe loop made earlier.
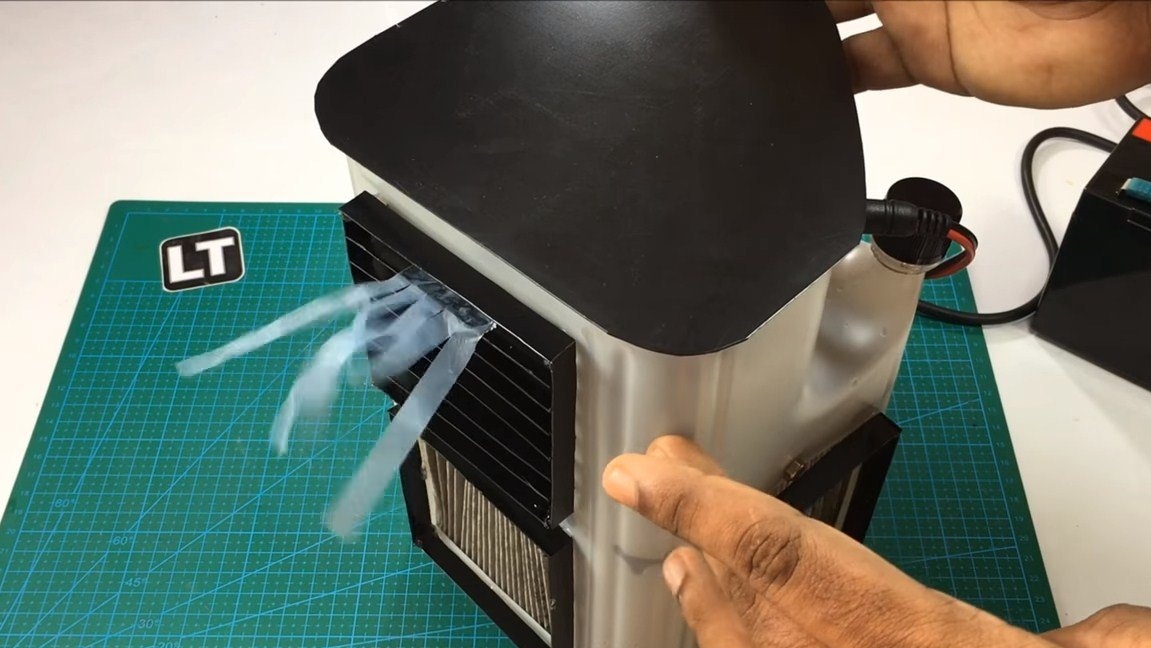
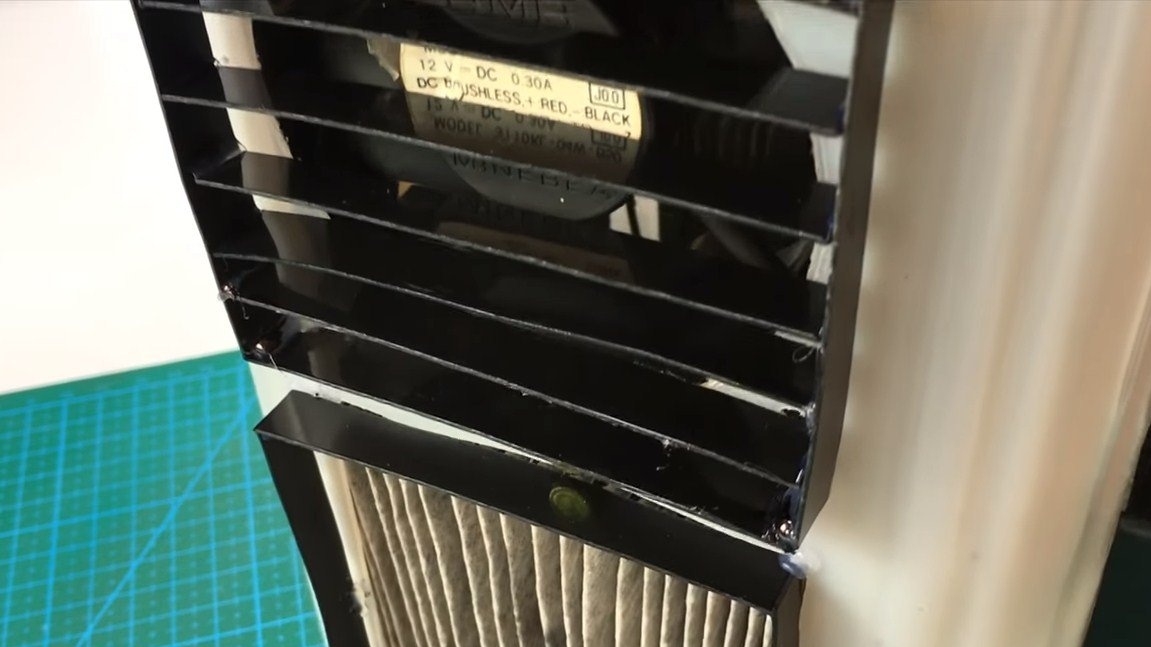
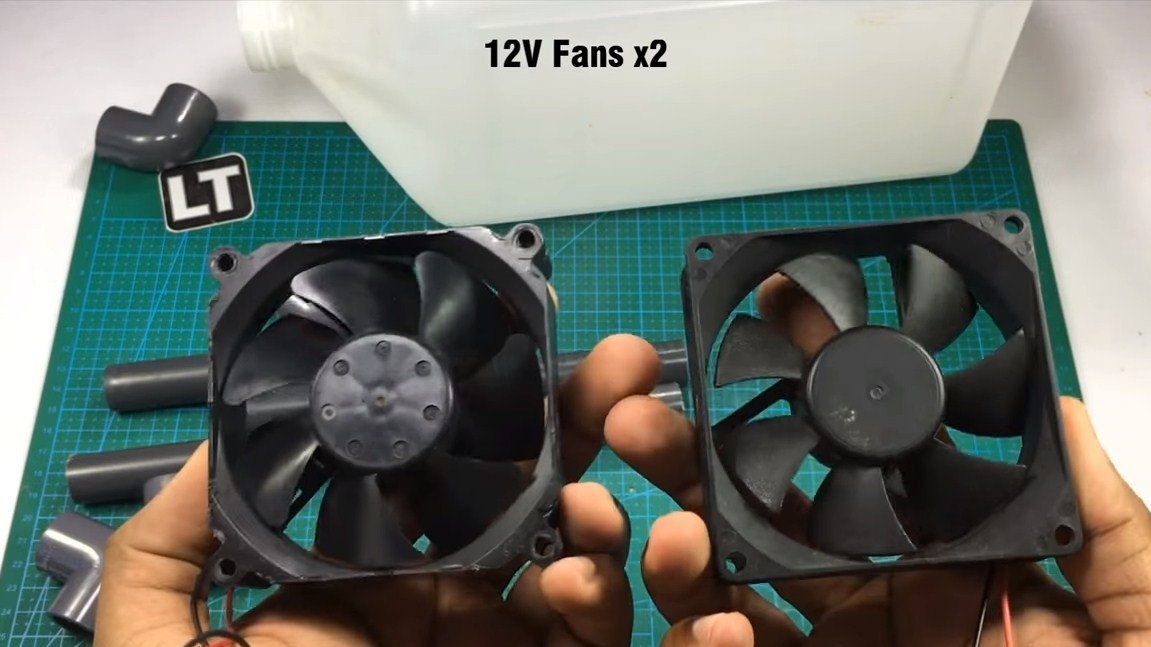
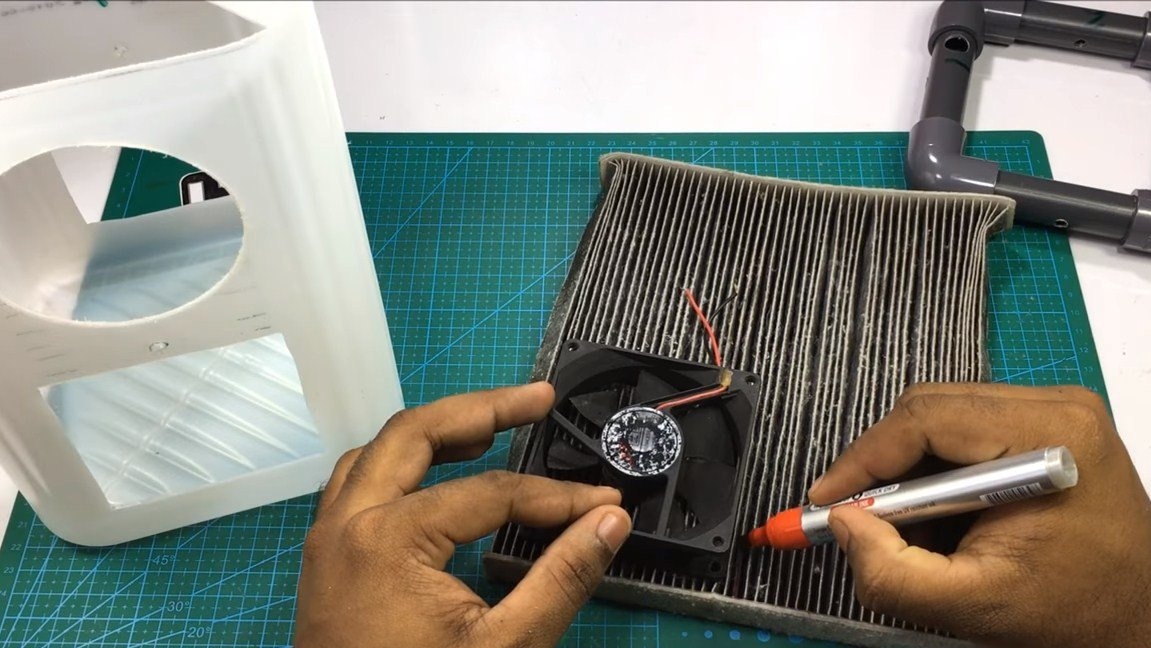
Now you can screw the fans, they will have to blow air out of the tank outward, if you do the opposite, water will be blown out of the filters outward. We fasten them with screws and nuts.
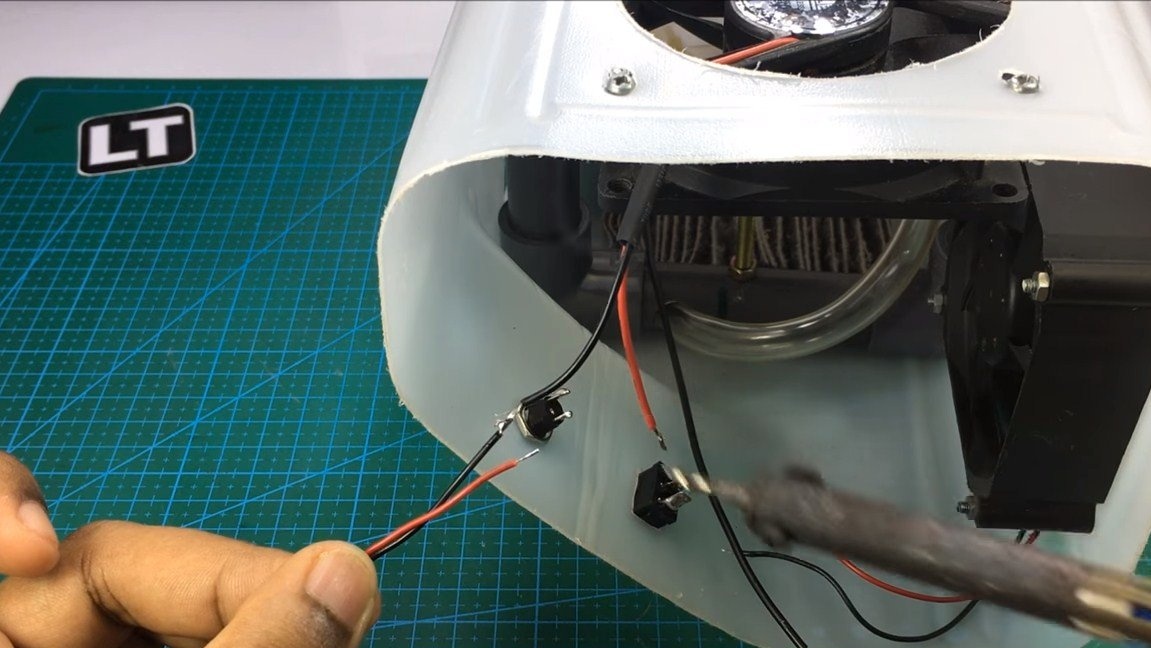
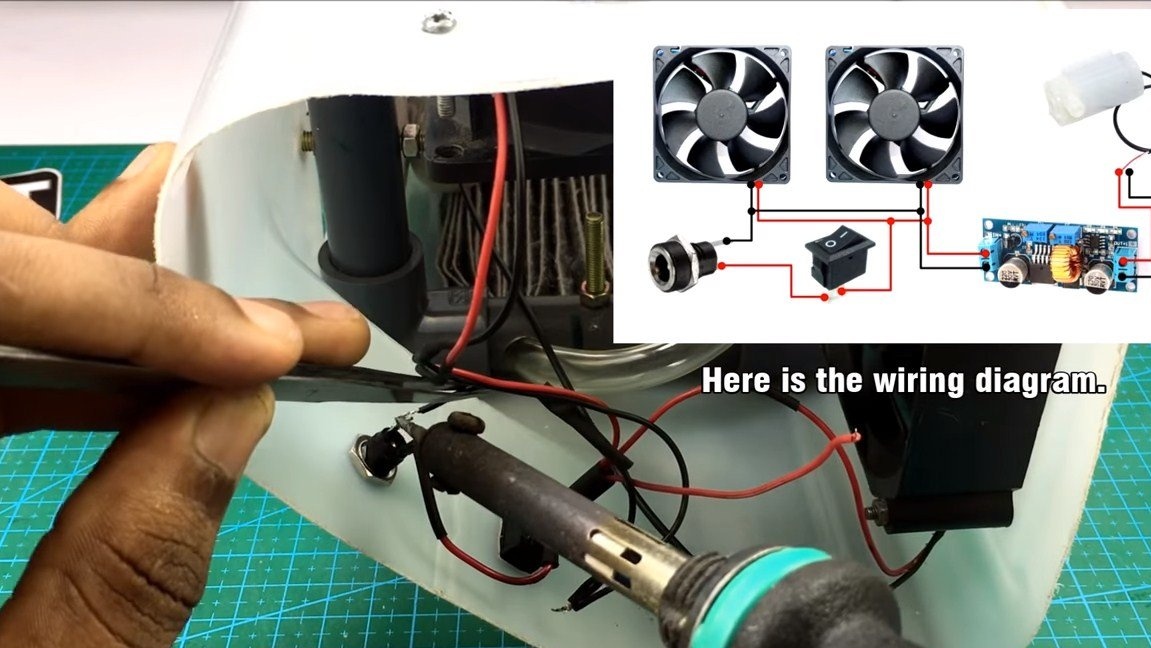
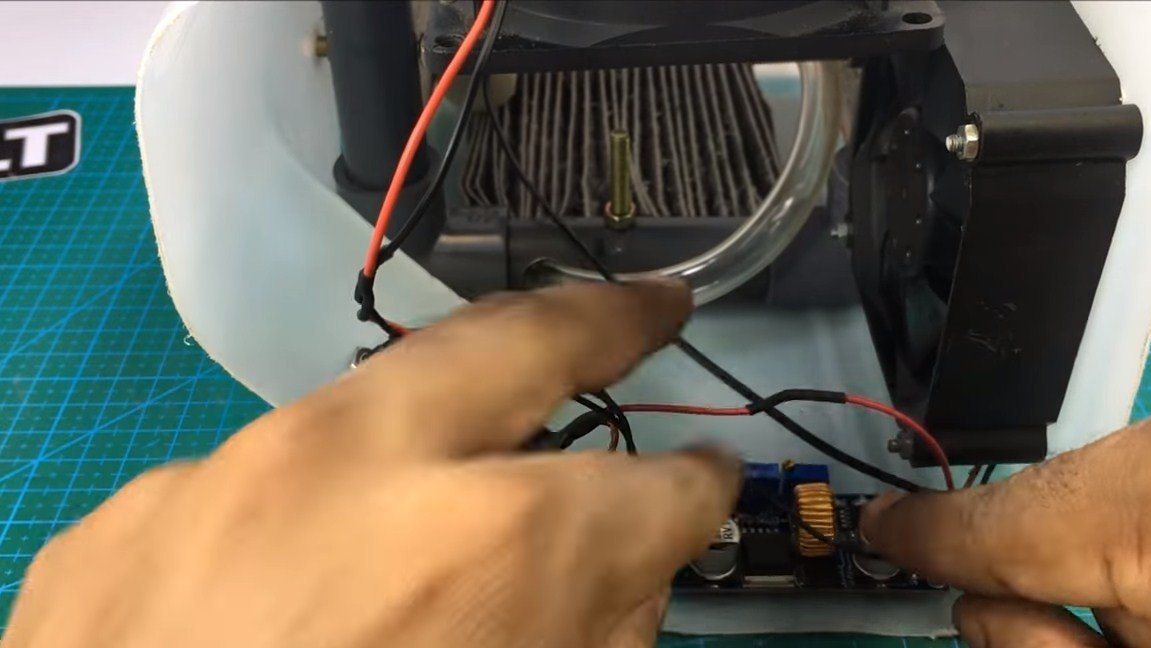
Step Five Connection
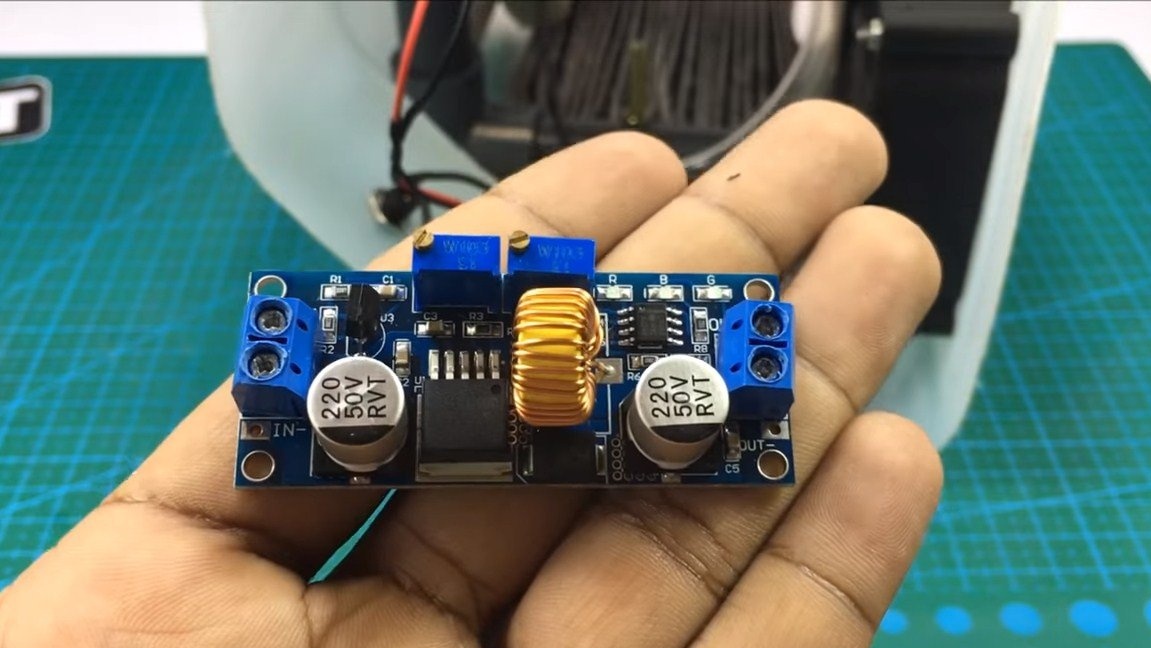
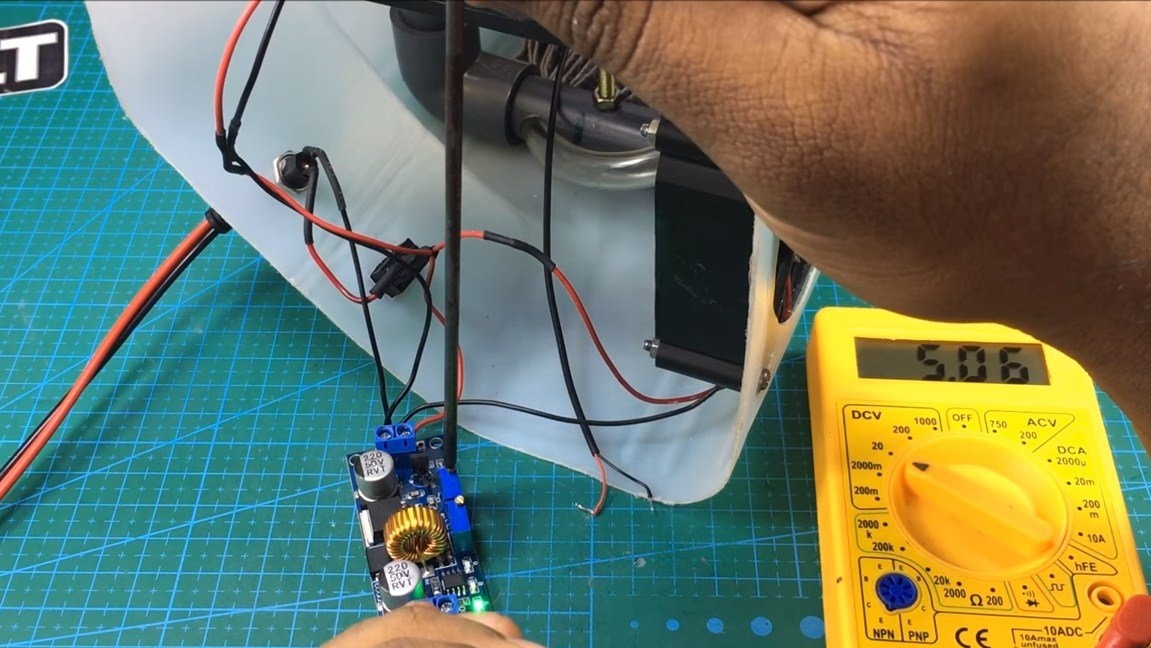
We install the socket for connecting the power supply, as well as the switch. The fans are powered directly from the 12V power supply, but the pump operates on 5V. Especially for her, the author installed a step-down DC-DC converter, which turns 12V into 5V.


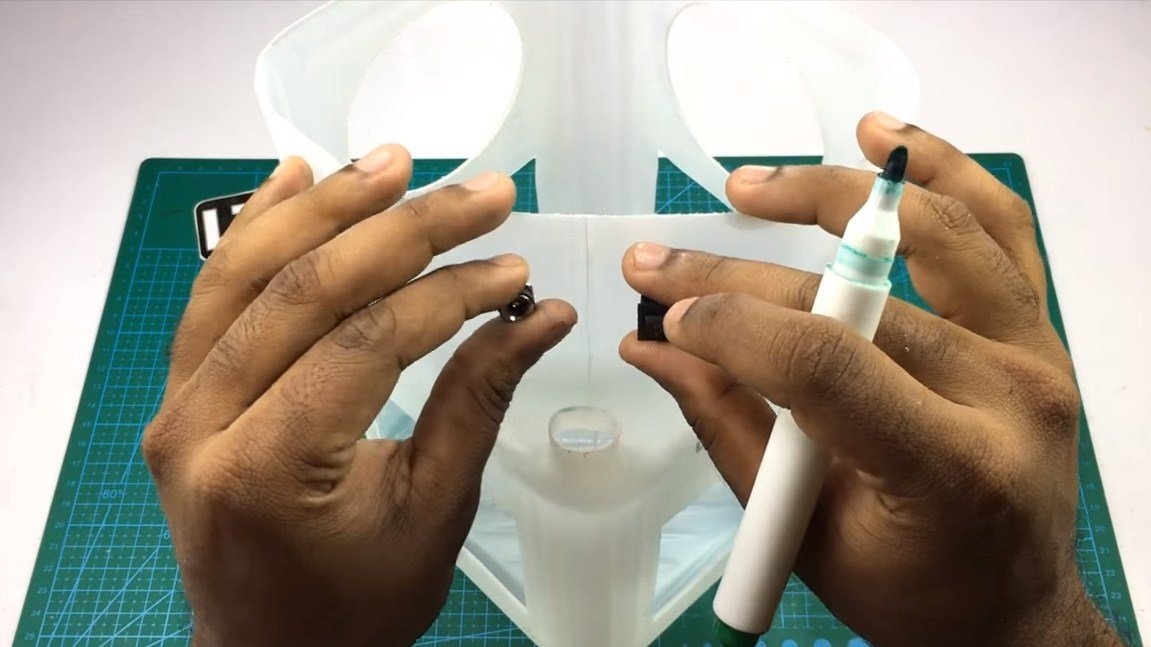
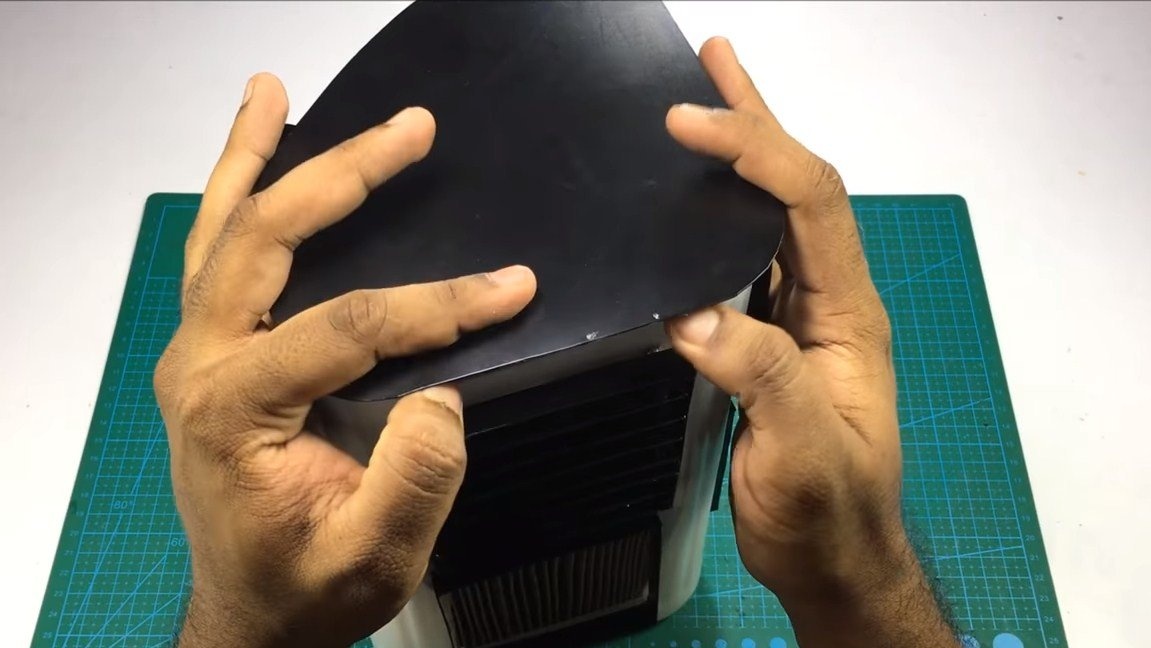
Step Six Cover and protective grilles
The system will not work if you do not make a lid for the container, and it should be as tight as possible. For its manufacture, the author used thick sheet plastic. Since the cover does not need to be opened during normal operation of the device, it can be glued with a glue gun.
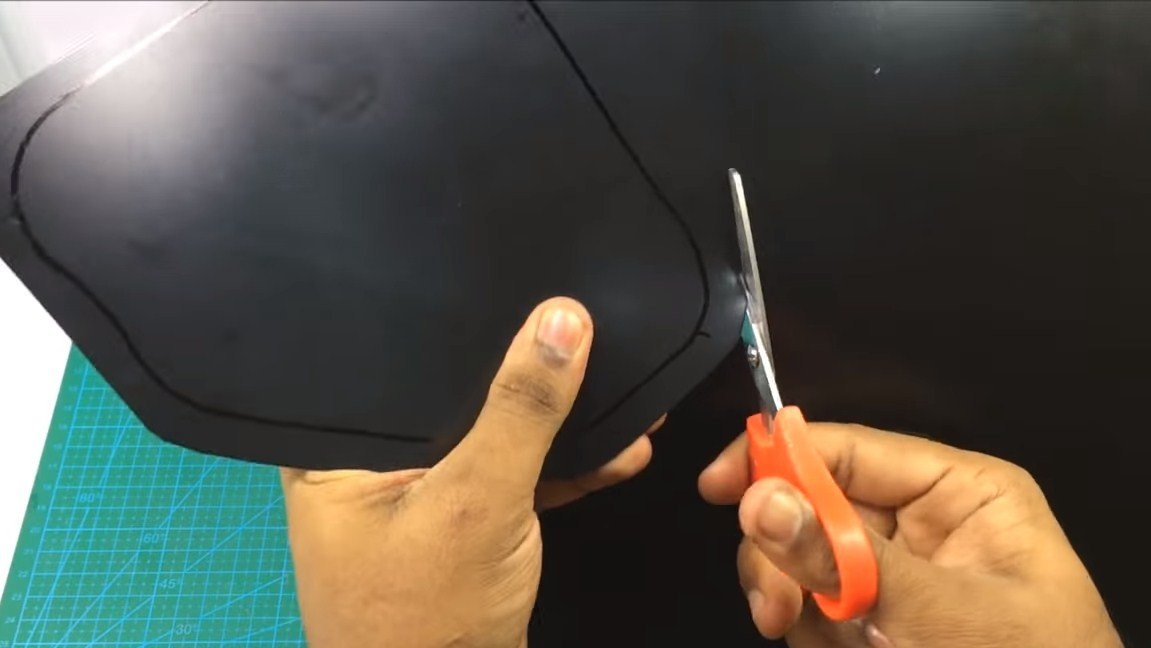
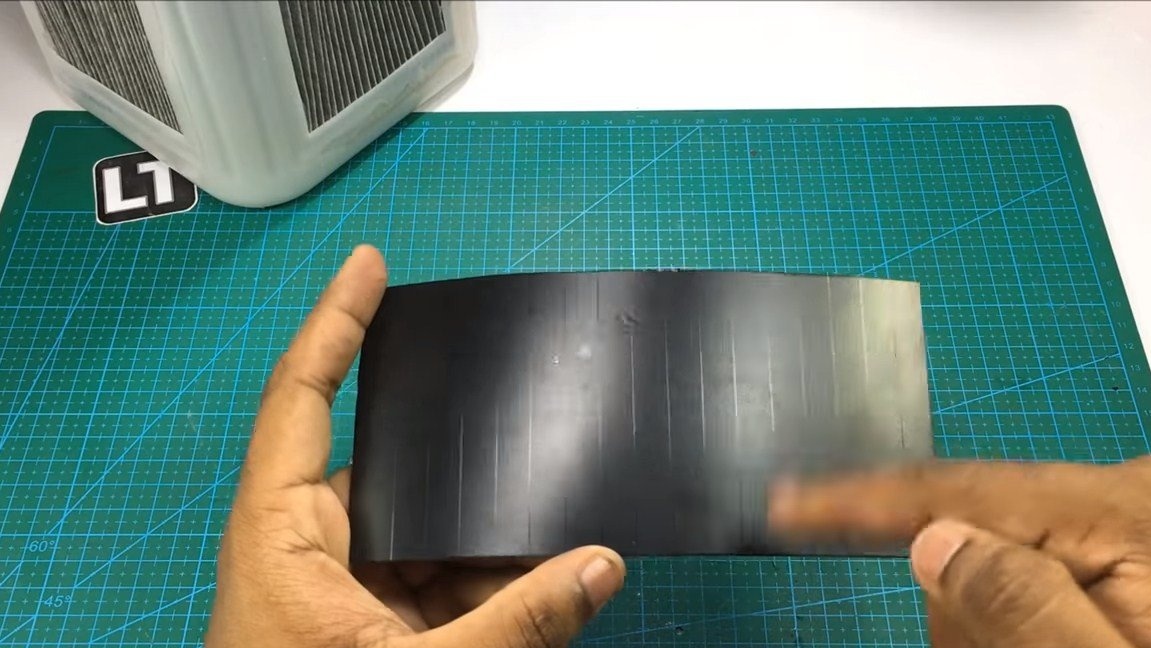
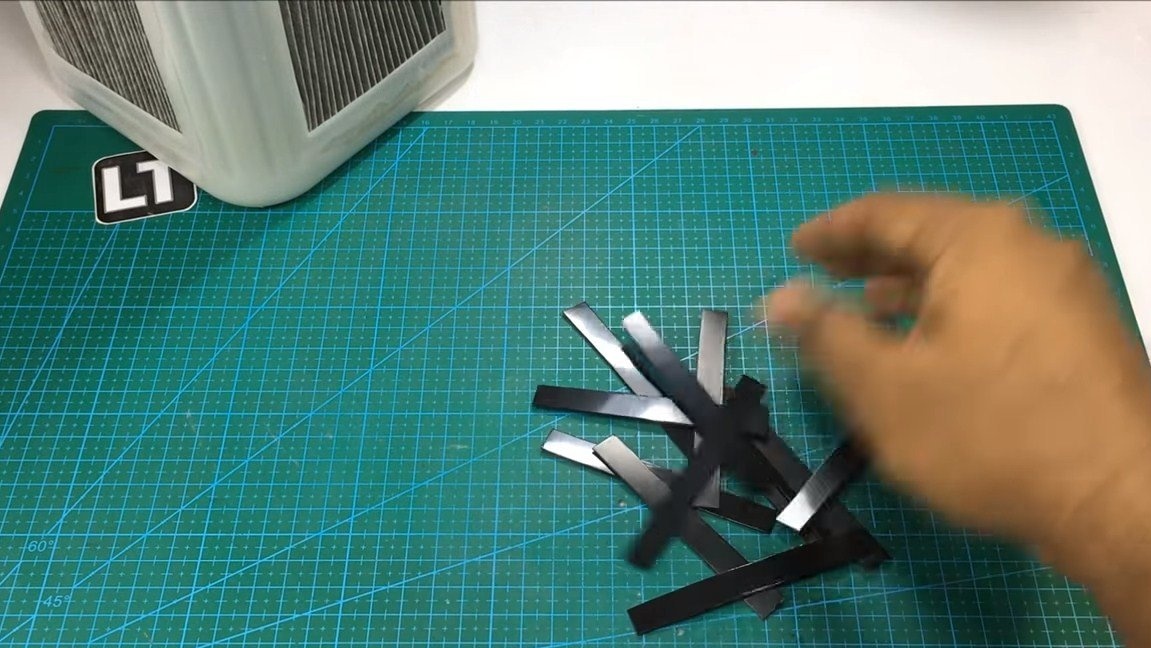
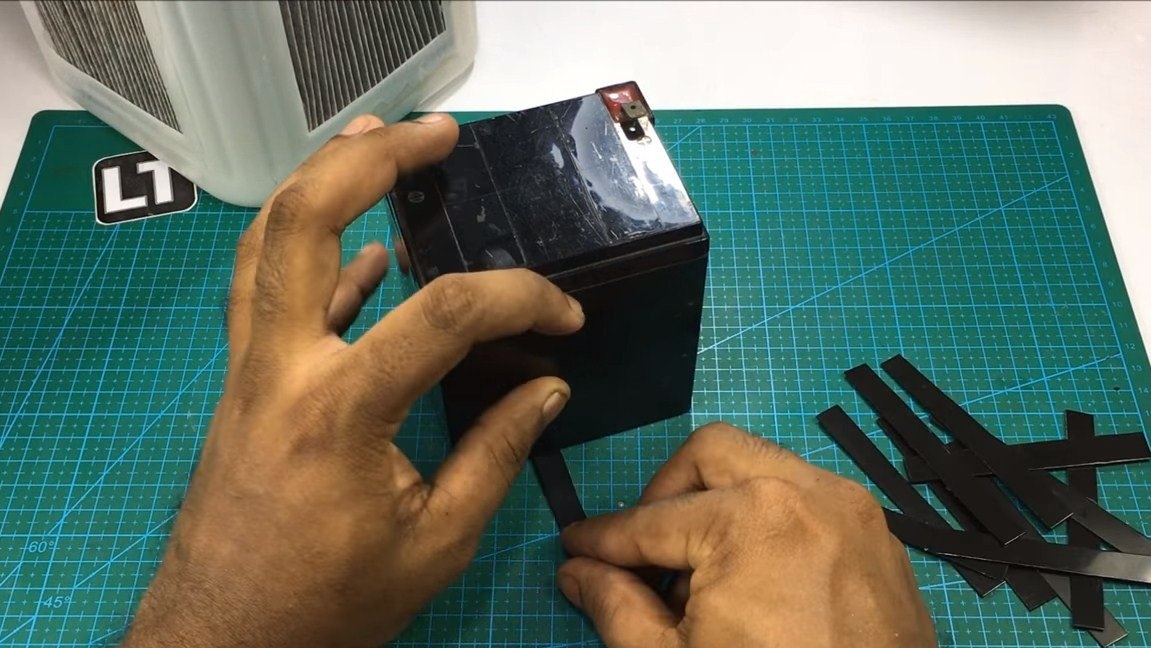
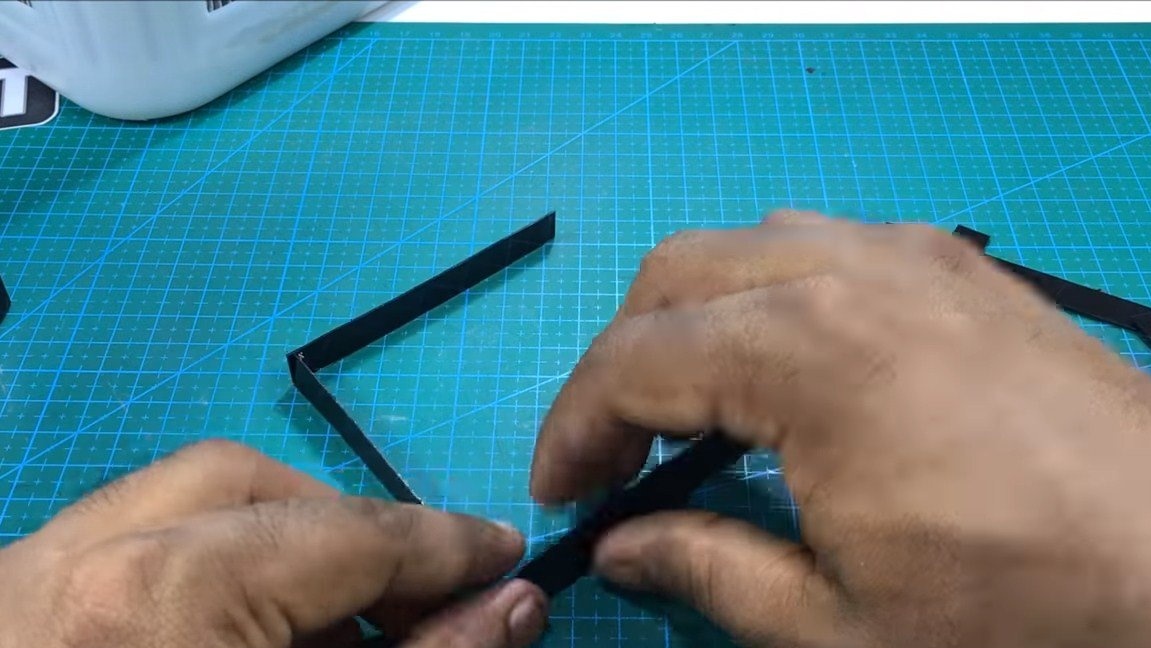
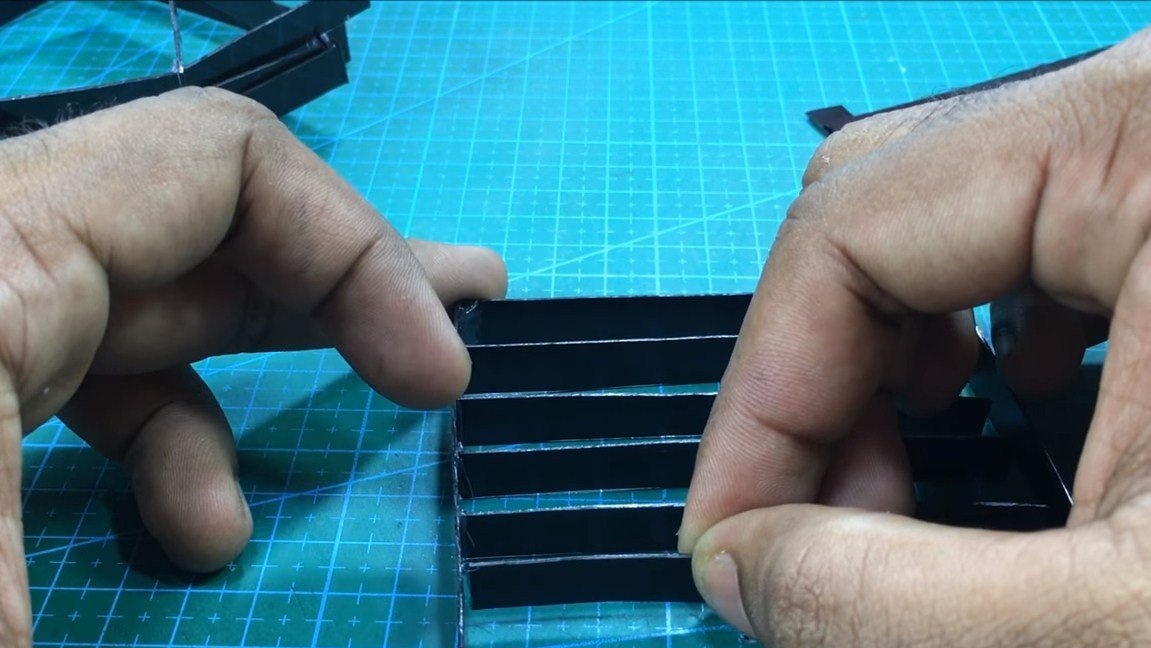
Be sure to make protective grilles for fans, as well as filters, so as not to accidentally damage them. Lattices the author glued from pieces of thin sheet plastic. That's all, the homemade product is ready.

Seventh step. Launch
Homemade can be tested, pour a little water into the container, its level should not reach the filters. The author has a transparent canister and the water level is clearly visible. That's all, turn on the car, the pump will begin to pump water, and it will drain through the filters. At this time, fans will also work, which, when the lid is closed, draw humidified and cooled air inward through the filters, and then blow it into the room.
Of course, the author did not take any performance measurements, but in general the design inspires confidence and everything should work. All that is needed is to add water from time to time, but even without water the device will clean the room of dust, to some extent.
This is the end of the project, I hope that homemade work will be useful to you, and you have found useful thoughts for yourself. Good luck and creative inspiration, if you decide to repeat this. Do not forget to share with us your ideas and homemade products.