

For many of us, the cost of a table saw is too high to be able to dissolve large beams onto boards or boards into small bars. If you buy a small table saw, then sawing on it will turn out except that a glazing bead. Because small circular saws are not designed for cutting large volumes of lumber. A table saw is an expensive pleasure, especially when it is not used or is used extremely rarely.
The solution in this situation is only one - to make a jig for a hand-held circular saw. A hand saw is a very common tool. Moreover, it is not very expensive.
Step One: Getting Started: Materials and Information
Materials required:
- Circular Saw;
- Hand drill;
- Countersink;
- Drill with a diameter of 10 mm;
- Screws with countersunk head 15 pcs;
- Nuts 15 pcs;
- Lock washers 15 pcs;
- Screws Sheetrock;
- fiberboard 10x20 cm in size, 6 mm thick;
- Aluminum corner 25x25 x3 mm (length optional)
Step Two: Making a new bed for the "flooring"

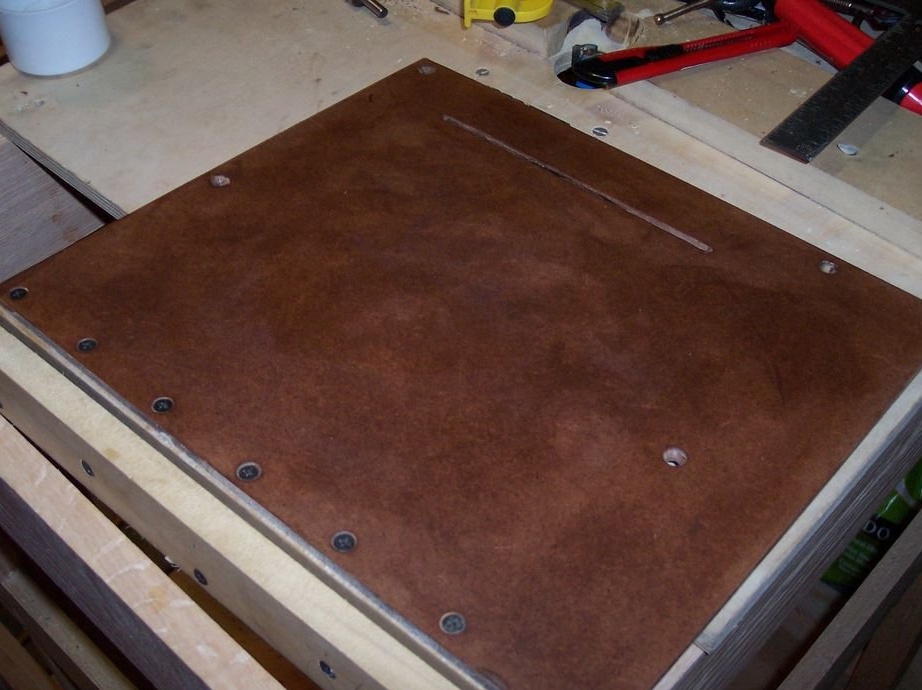
The author of this homemade, used a piece of fiberboard, 6 mm thick. To do this, he used a hand-held circular saw to cut a square several centimeters longer than the aluminum base of his “parquet” and a few centimeters wider than the width of the “parquet”.
Step Three: Holes are Good!
** Attention!
To facilitate further work, it is necessary to remove the aluminum countertop from the floor. **
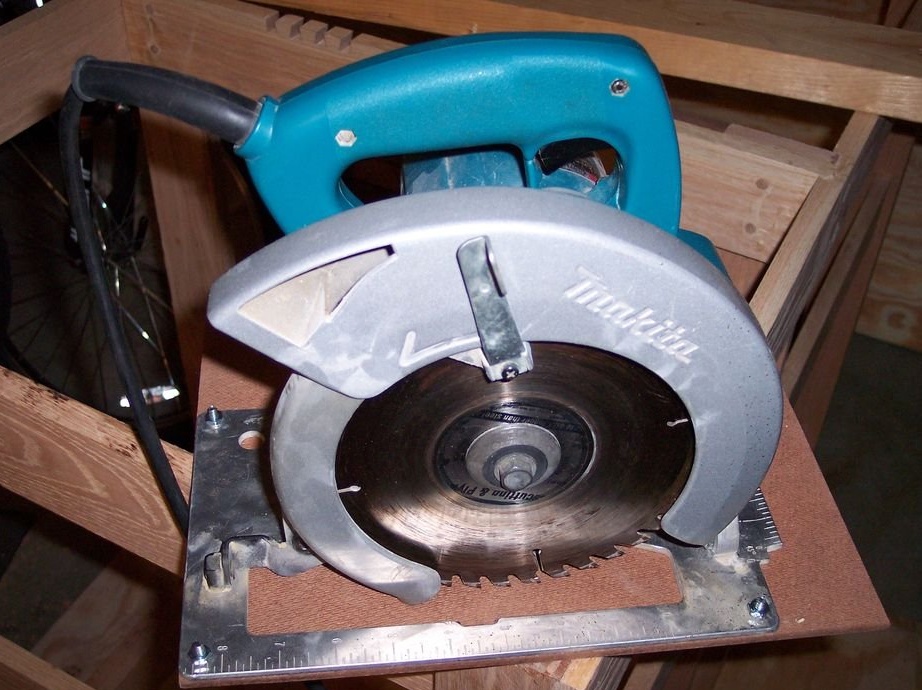
Drill holes in the aluminum worktop of your saw.
The author drilled 4 holes, 1 in each corner of the countertop.
Lay the aluminum worktop and mark the holes on the cut piece of fiberboard. Make sure the smooth side of the fiberboard is facing down.
Drill holes. You can also fasten the countertop with a fiberboard sheet with clamps and drill both materials in the right places at once.
Further, the holes on the smooth side of the fiberboard (from the bottom) must be countered so that the countersunk head screws are flush with the holes.
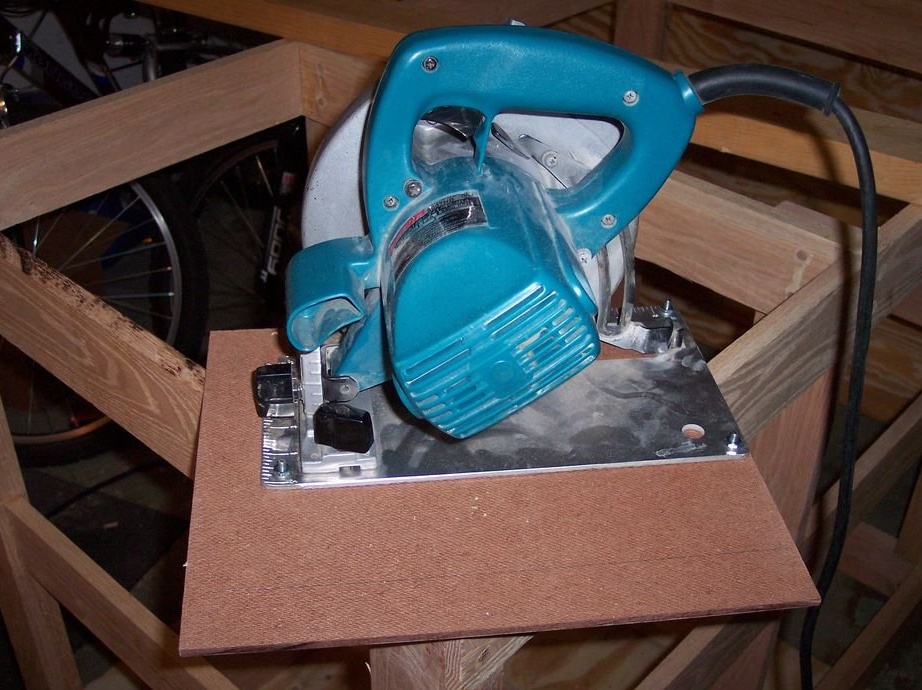
Step Four: Installing the Saw and Cutting the Slot

Install the circular saw on the resulting fiberboard panel. In this case, release the height adjustment mechanism and set the depth to “0”.
Clamp this assembly to a structure such that there is nothing under the saw blade.
As soon as you fix it in the right position and make sure that you have a gap under the saw, turn on the saw and cut through the fiberboard until the slot reaches its maximum size. Through this gap will pass the disk "parquet".
The author recommends using the widest disc for making an incision. Then it is necessary to remove excess material around this cut using a chisel or rasp, so that the gap is free.
You must admit that it is not very comfortable to work when the “parquet” disc rubs against the board. This is especially unpleasant when you have to work with long material.
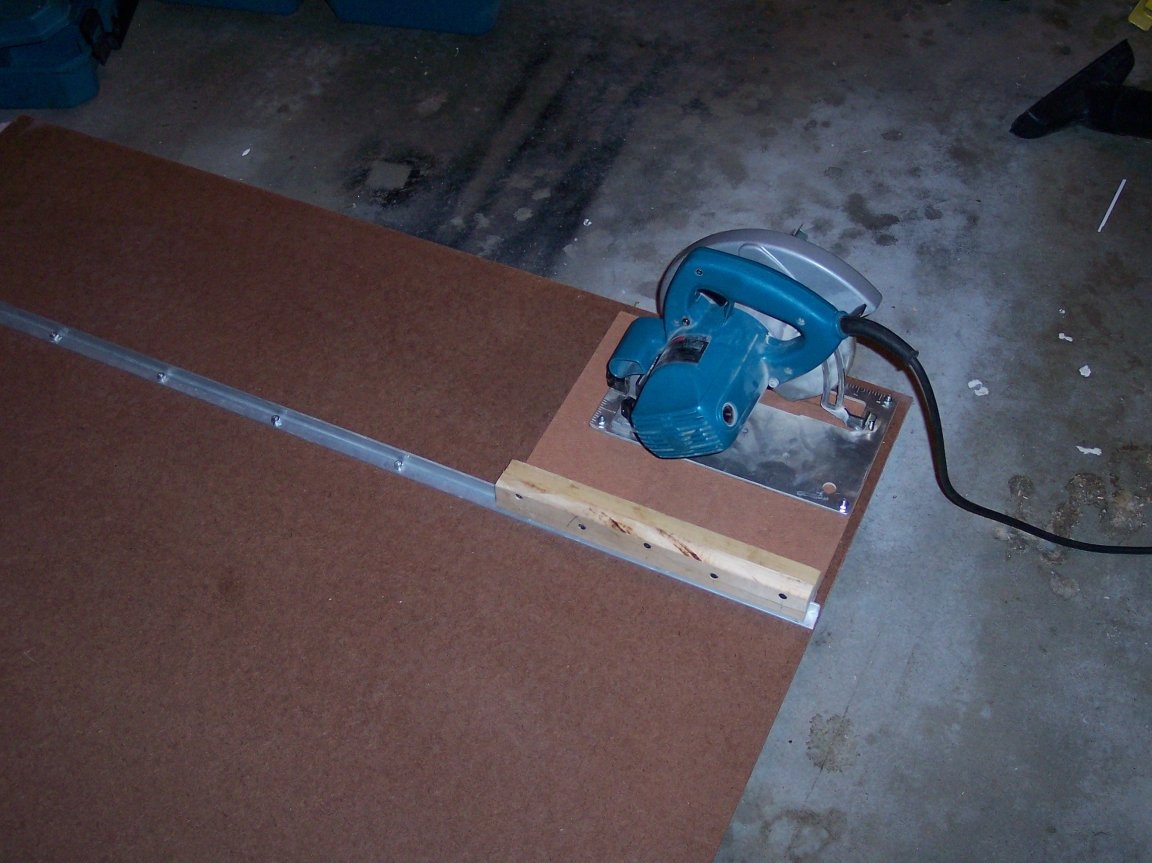
Step Five: Making a Side Stop for the Saw
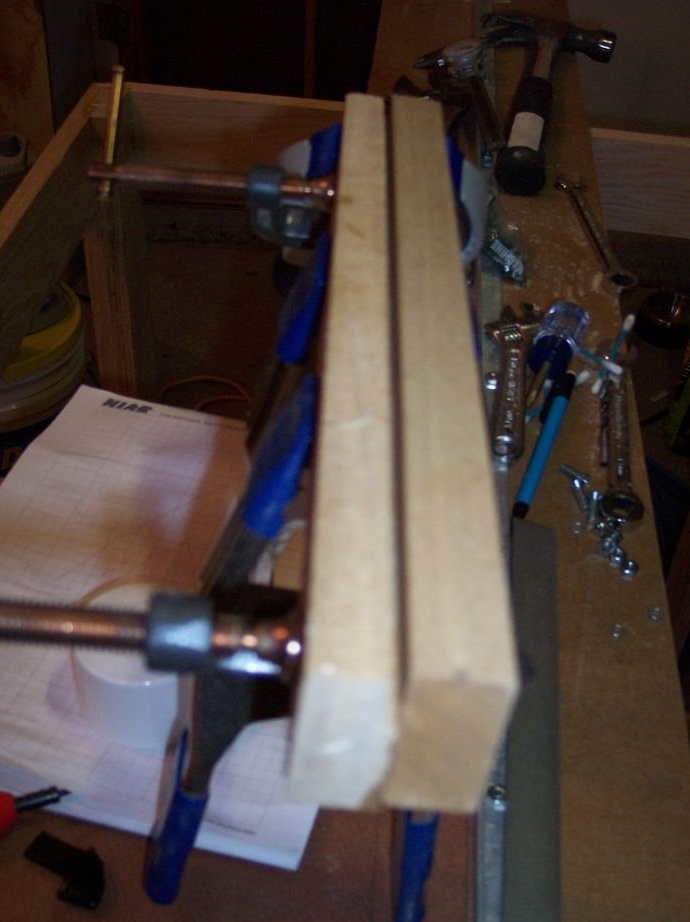
For the manufacture of a lateral stop, the author used 2 bars of poplar, which he sawed the same length as a cut panel from fiberboard. He used a router in order to select material from a wooden blank for a side stop, but you can also use just a gasket to create a quarter offset. He decided to use a router because it was configured. In addition, there was an idea that he would give a better result.
The quarter cut was made so that the shelf was the same depth as the thickness of the aluminum corner.
Step Six: Install the Side Stop
Ultimately, at this point it is important to make sure that the side stop and the saw blade are as close to each other as possible. The author set his saw on the panel, and then proceeded to measure.
Lower the blade through the slot as much as possible.
Use the scale to create marks at equal distances from the blade front and back. Mark the line between the marks so that it becomes a guide for the side stop.
When you are ready, apply glue to the bottom of the side stop and to the top of the panel and lock the stop in place.
Seventh step: Installing an aluminum corner on a fiberboard

If you make a guide with a length of about 120 cm, then cut the aluminum corner less than 120 cm.
Take one end of a 6 mm fiberboard sheet
and clamp the aluminum corner so that your panel with the guide lateral emphasis rests completely on the large panel. To ensure that the angle is straight, while you are checking the angle on the panel, hold a level or other straight, long piece of material in the direction of the angle. This will help keep it straight.
With aluminum in place, drill holes evenly distributed along the length of the aluminum corner approximately every 15 cm. This frequency will prevent the aluminum corner from bending during use.
Step Eight: Setting for the first cut
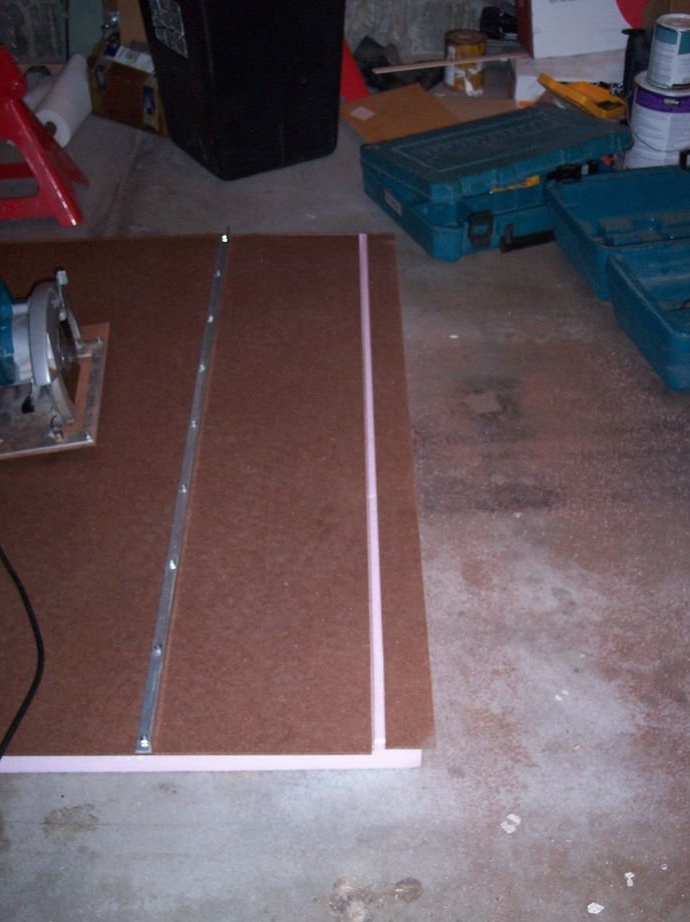
Place the circular saw with the slide attached to it on the newly installed aluminum corner.
Lower the saw until the blade is at the desired depth.
Run the saw and make a cut along the fiberboard.
This cut is the inside edge of the clip trim, so each time you cut with the clip, align the edge of the clip with the lines marked on your sheets.
Now you can run the saw, still attached to the slide on the opposite side, to cut device from the rest of the stove.
Step Nine: Tips and Lessons

Now you can use the jig to cut large sheets of lumber without trying to maintain a direct cut of the saw.
- The author uses mainly 38 mm C-shaped clamps for fastening lumber. And sometimes it uses quick-clamping clamps.
- He drilled holes in both parts of the clamp to hang them on the wall.
- If you need a longer guide, then use a longer aluminum corner and fix it on the board. The author has guides equal to 60 cm, 120 cm, 240 cm.
Attention !!!
These skids were built so that they disconnect the protective cover of the "flooring". The author recommends cutting a slot in the back of the slide around the blade so that the protective cover continues to work.