
The author likes to work with a paracord. He loves various knots, braids and weaving. Therefore, he decided to create a conductor for weaving from a paracord. The conductor should be lightweight, easy to wear and fold.
This jig can be used to make traditional bracelets, straps and key rings. With its help, it turns out much faster.
Step one. Necessary materials and tools
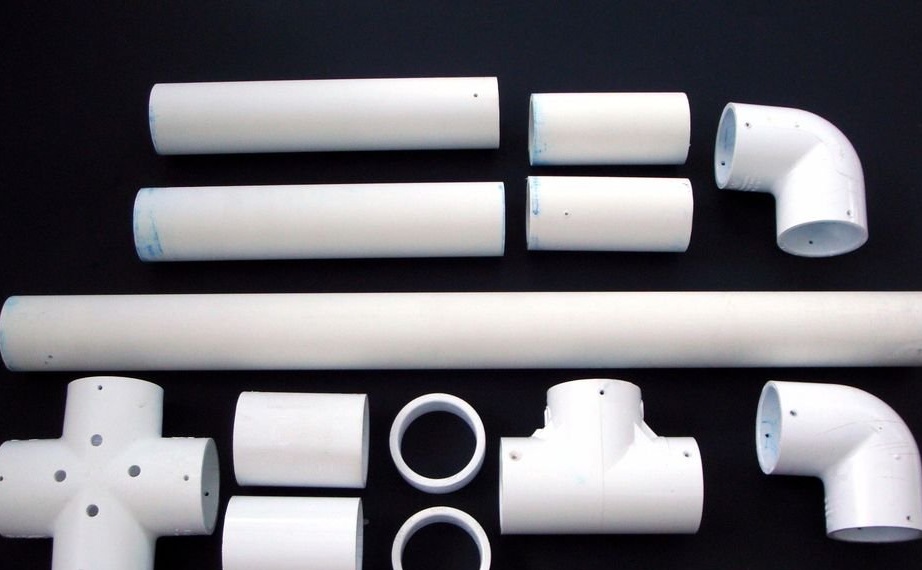
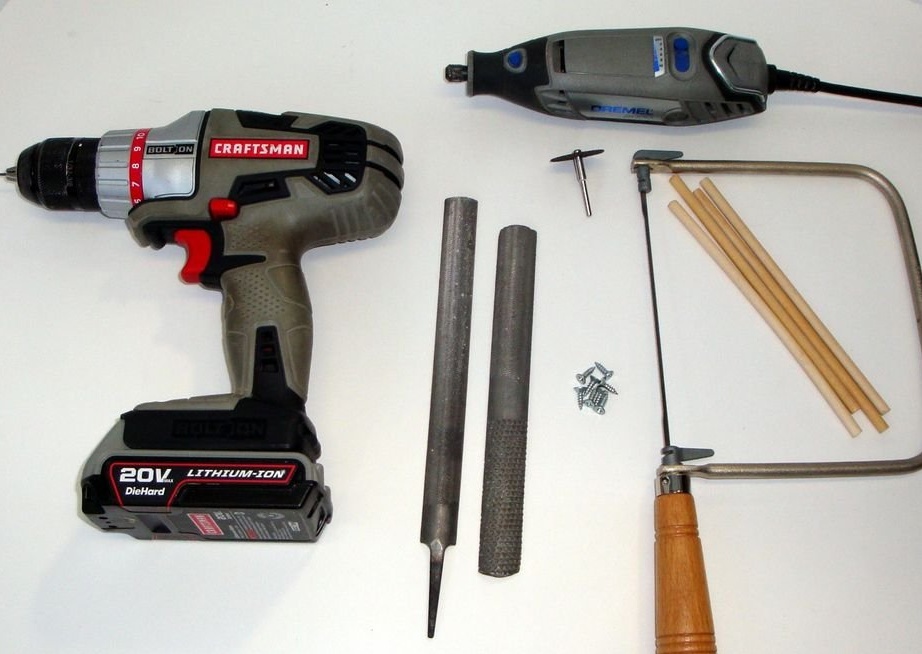
The following materials will be needed for this project:
PVC pipe 38 mm., Cut into the following sections:
- a conductor stand, 50 cm long. - 1 pc.;
- legs, 20 cm long. - 2 pcs.;
- connection of legs with a stand of 8 cm. - 2 pcs .;
PVC fittings 38 mm. following sizes:
- Coupling - 3 pcs;
- angle of 90 degrees - 2 pcs.;
- tee - 1 pc.;
- crosspiece - 1 pc.;
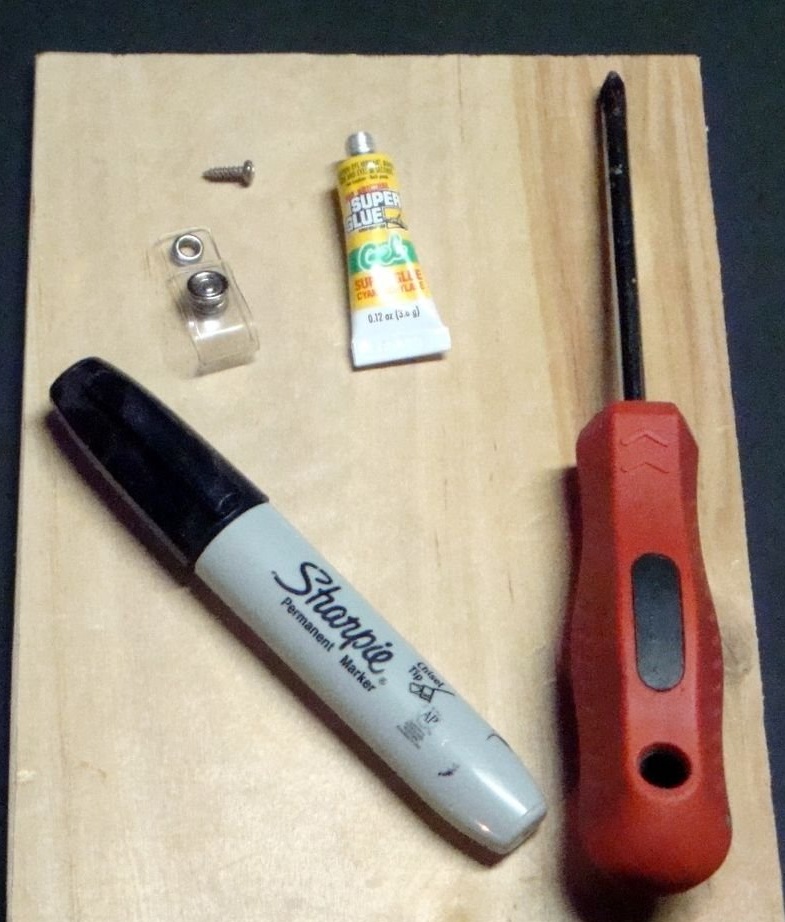
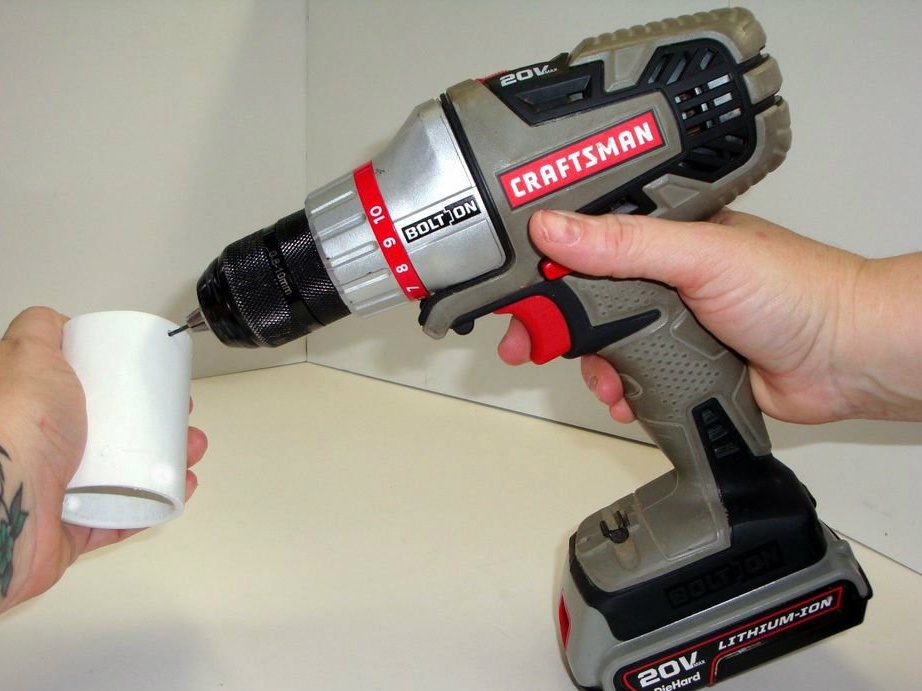
- Small screws (about 9 mm long.) For fixing PVC pipes in place -10 pcs .;
- Screws with a cylindrical head - 8 pcs. - 12 mm. or more, depending on how many racks you want to use for your conductor. You will need two screws for each joint, one for the top and one for the bottom.
- Lanyards or clips - 2 pcs.;
- Wooden dowels - 4 pcs.;
- Permanent marker;
- tape;
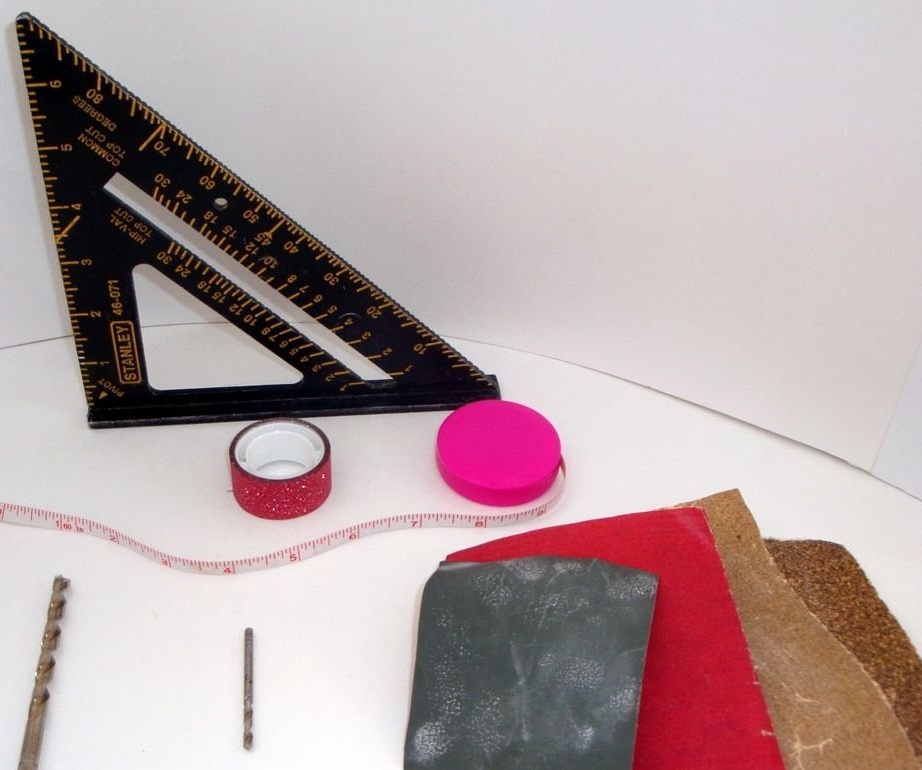
The tools are pretty simple:
- Electric drill;
- Roulette;
- Drill 6 mm .;
- The second drill bit is one size smaller than the screws for your base;
- screwdriver;
- Knives or pipe cutter (for cutting PVC);
- Dremel with a cutting disc;
- Rasp;
- Emery paper of different grain sizes, from 60 to 400 units;
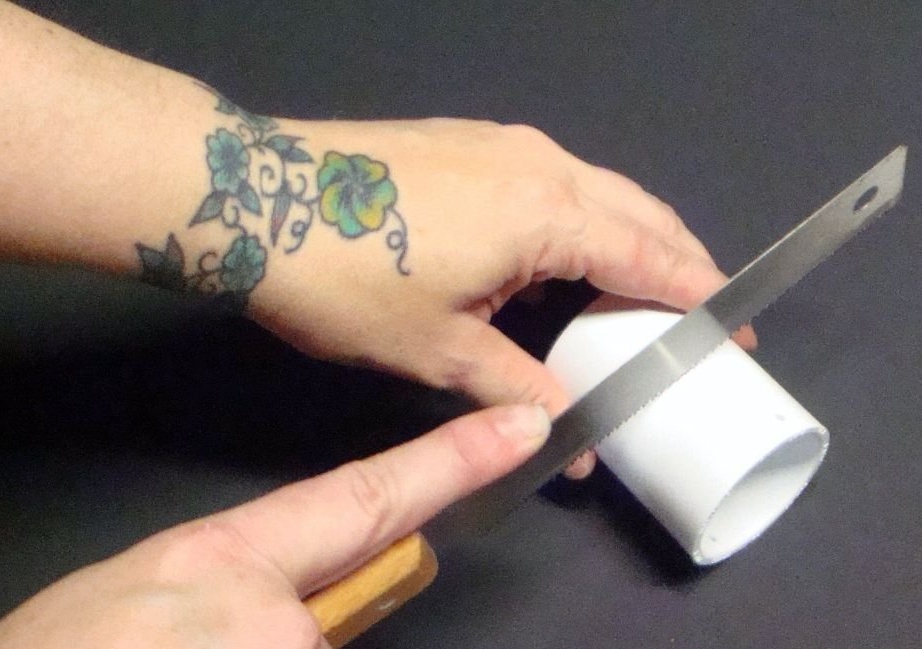
Step Two: Smoothing the Inside Diameter of Fittings
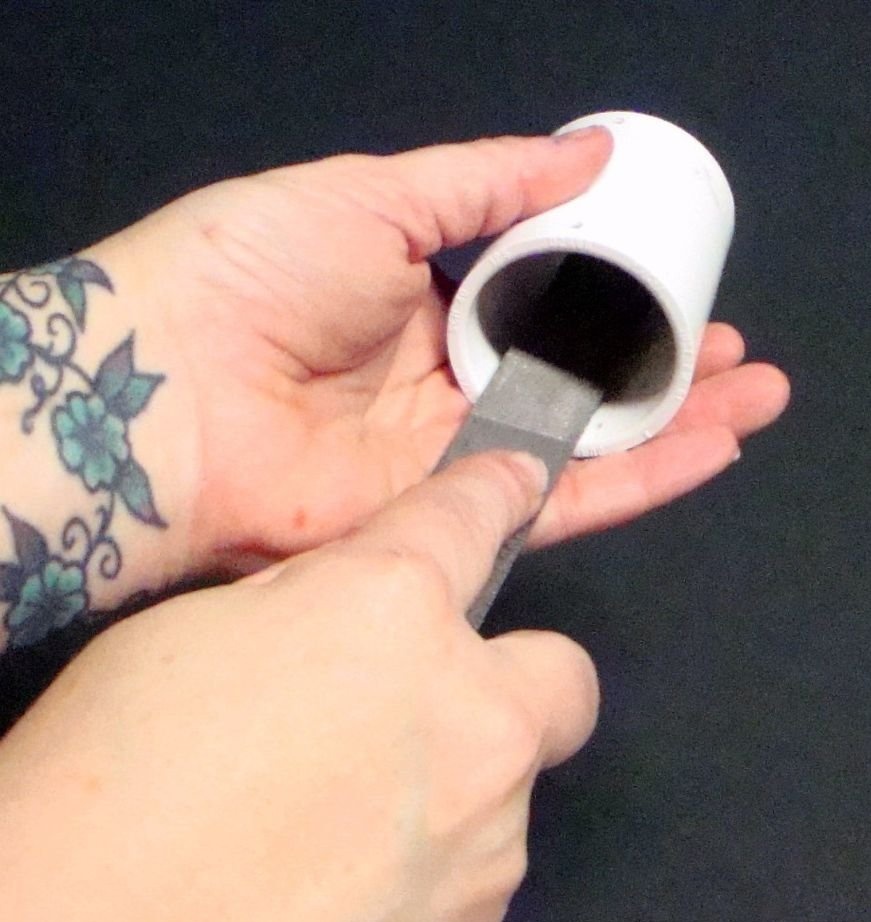
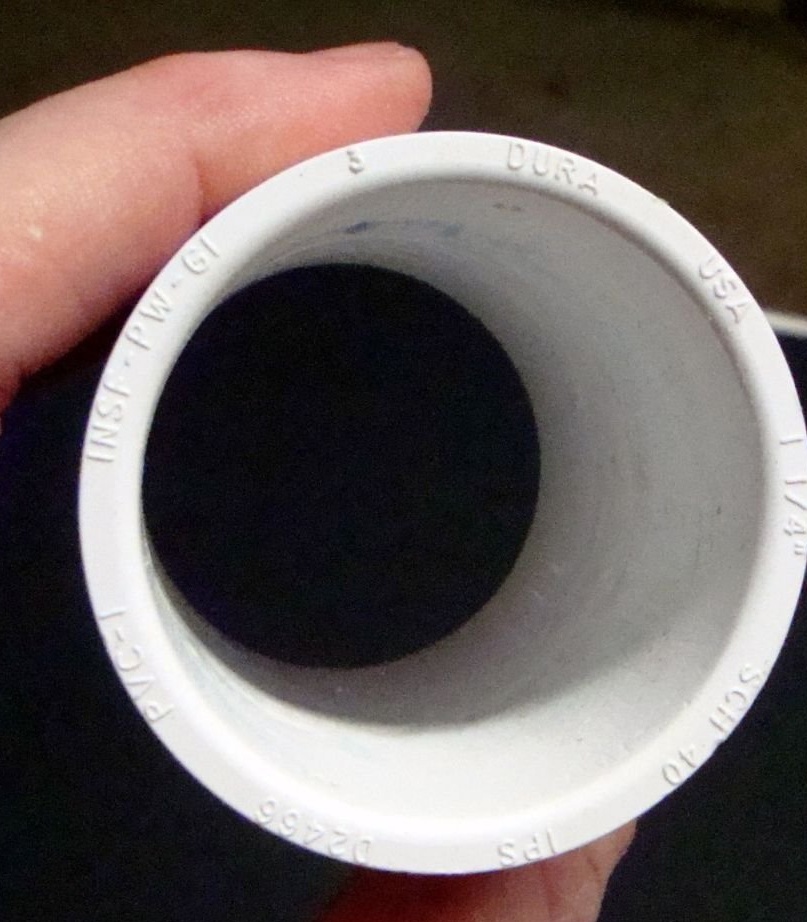
After all PVC pipes are cut, it is necessary to grind off the internal protrusions of the fittings. PVC fittings have internal protrusions that prevent the pipe of the appropriate size from going too far, but we need the connectors that make up the bracelet part of the clip and the mandrel to slide up and down easily along the entire length of the stand. Grinding fittings is done using a rasp or dremel with a grinding drum.
As soon as you get rid of the ridges, use fine-grained sandpaper and smooth out any scratches left on the inside of the pipe. The more you polish the pipe, the easier it will be to raise and lower, so be patient when working with this part.
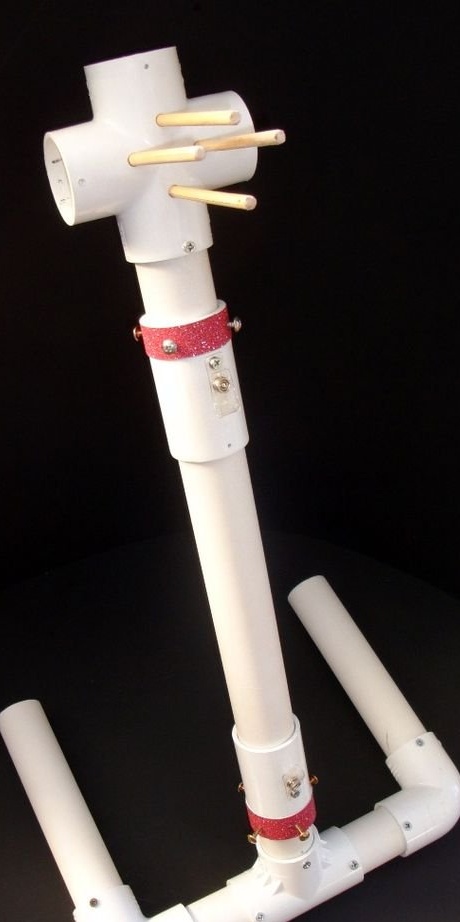
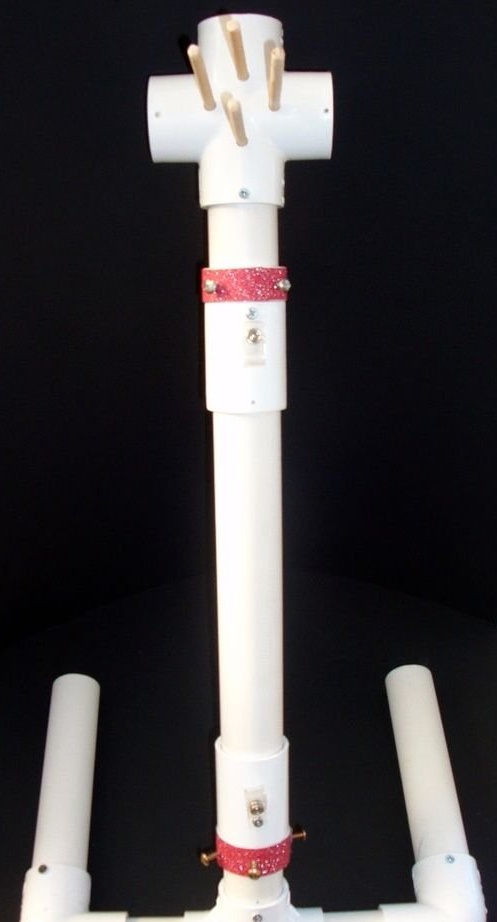
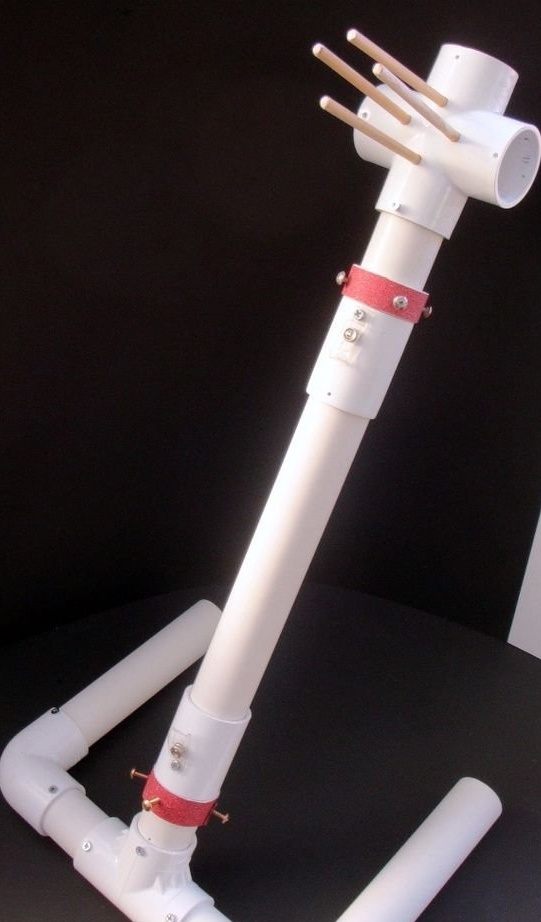
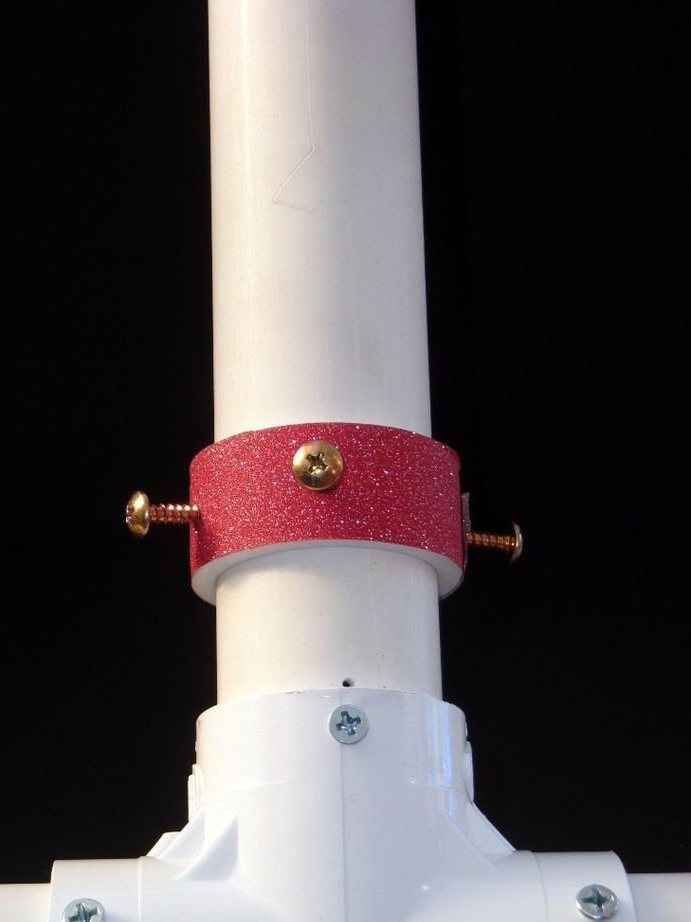
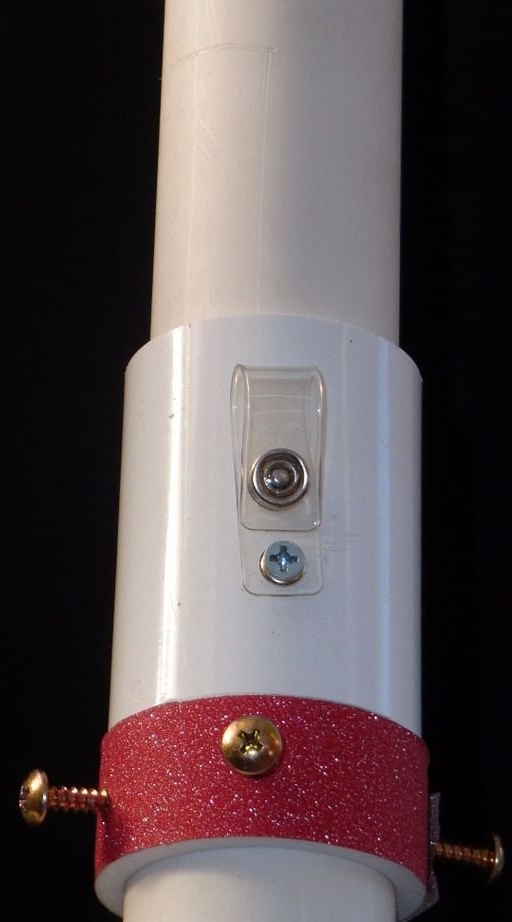
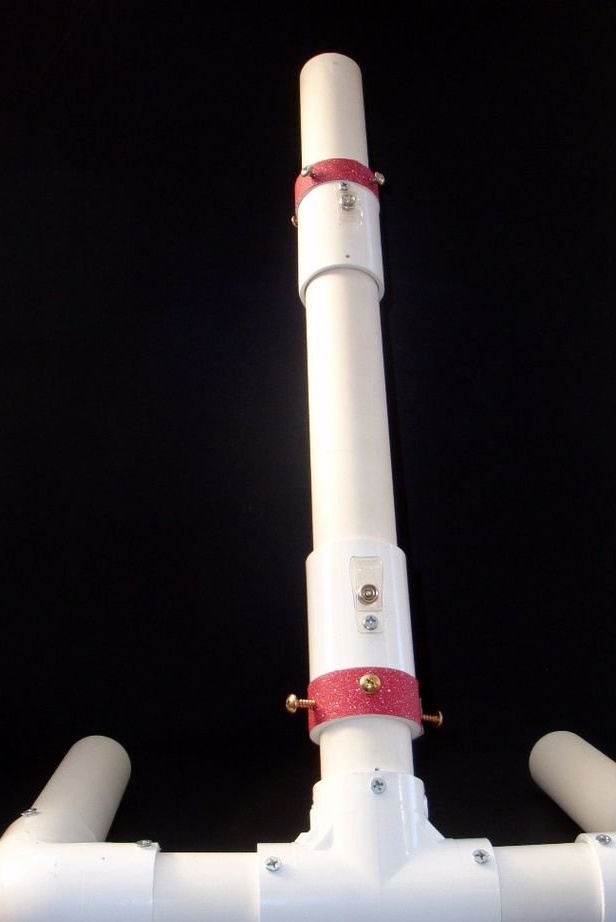
Step Three: Conductor Bracelet
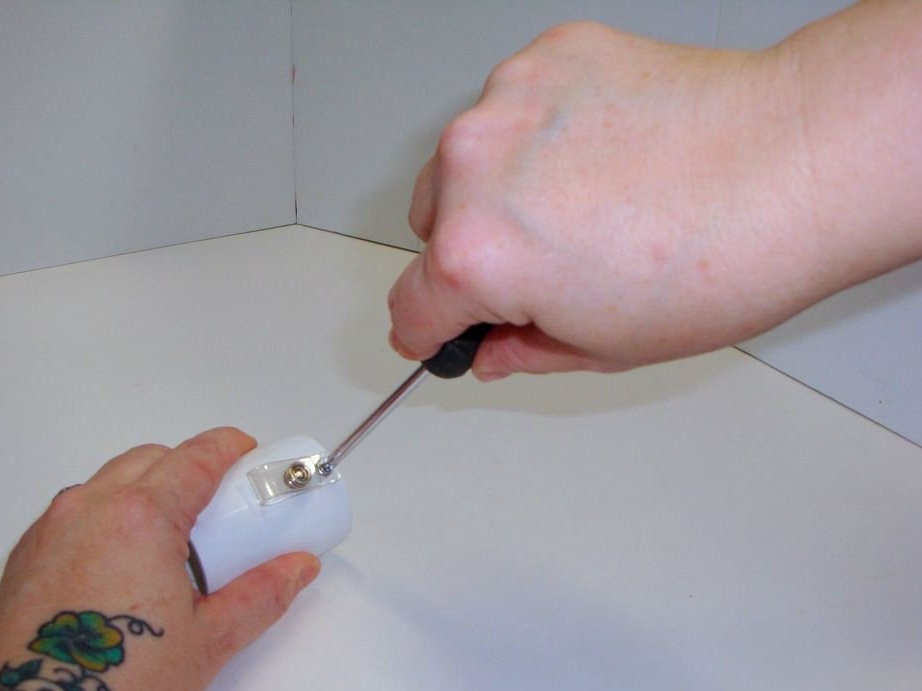
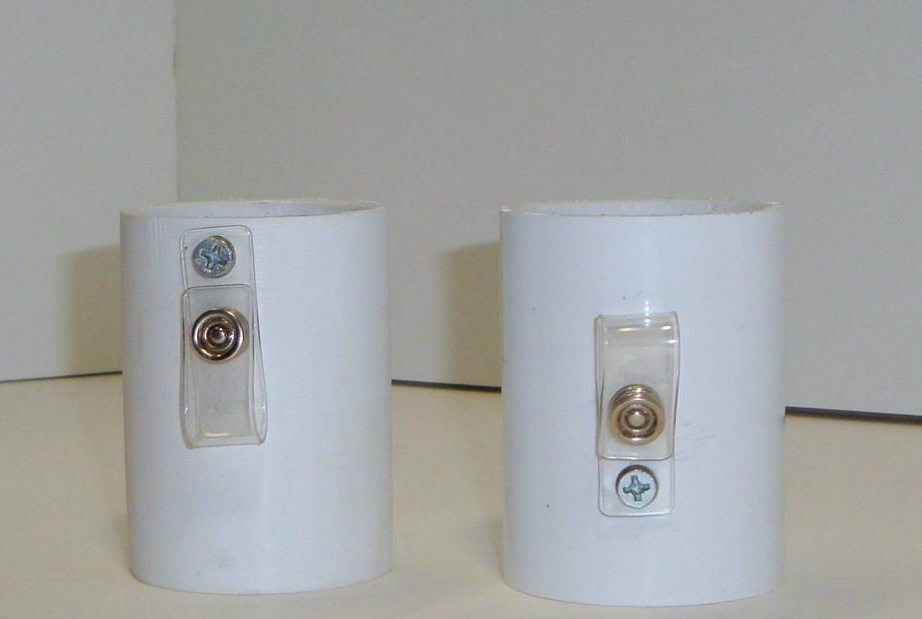
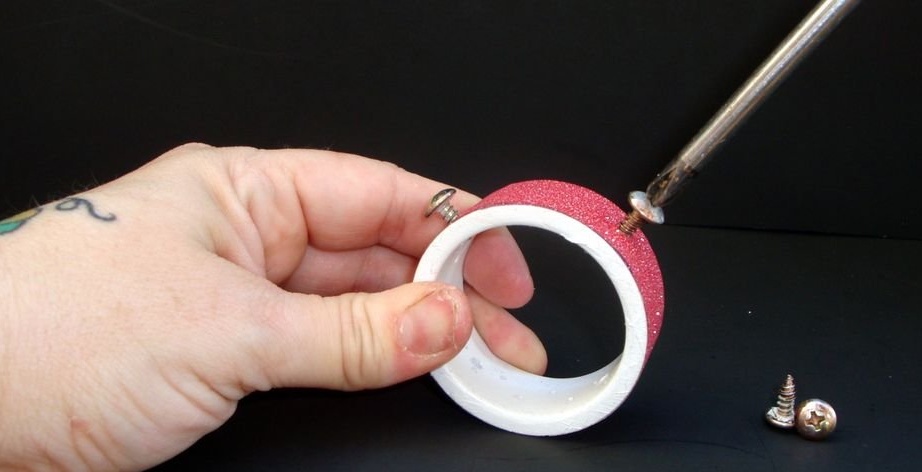
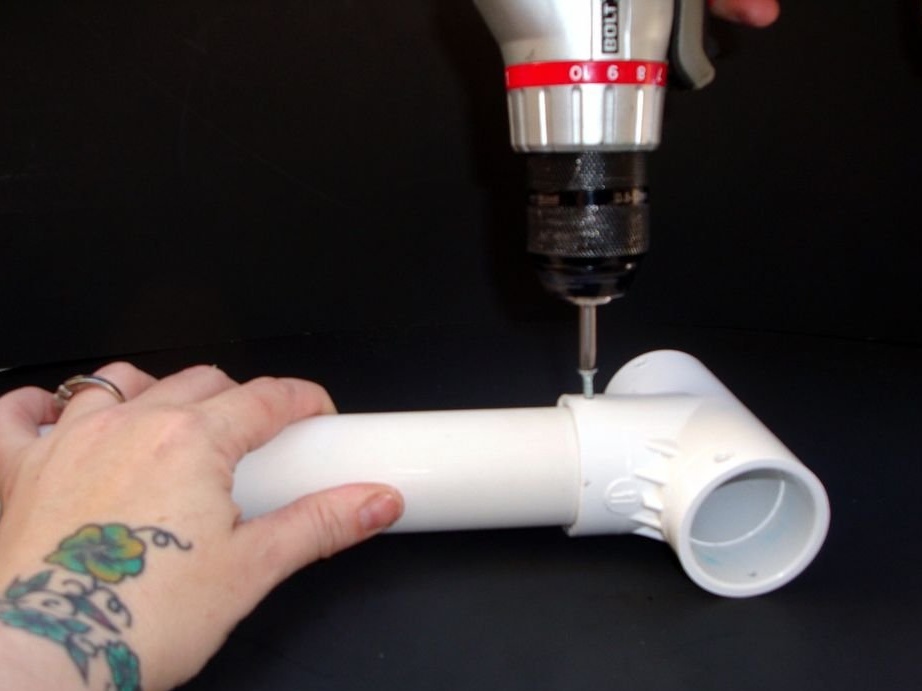
Now we need to add the fasteners on the outside of the PVC so that our product can be fixed. This is a plastic part that holds the loop for the strap with a loop and button.For the author, this is the perfect way to attach buckles or key rings. This allows many different compounds to be used.
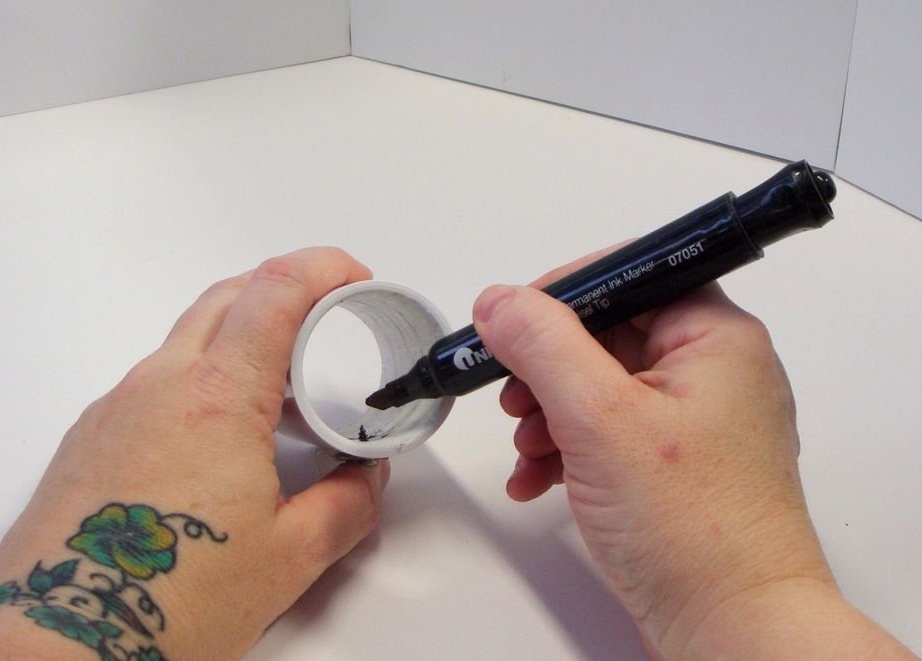
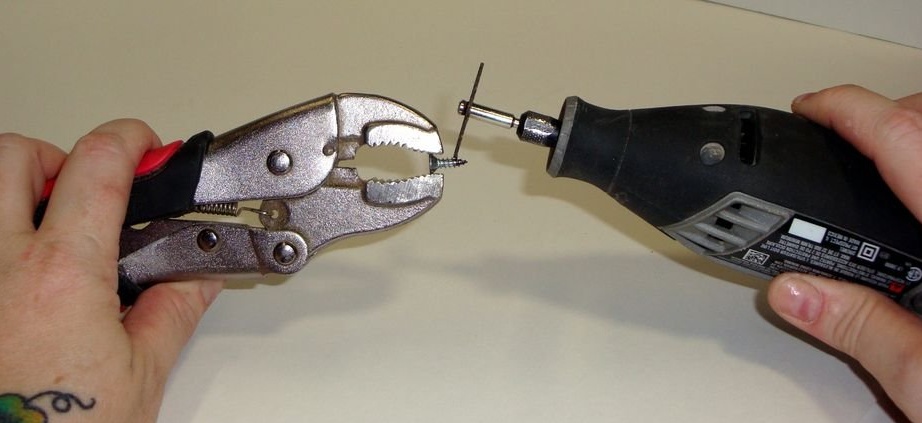
Decide where you want to place the clasp and mark the place with a marker. Using a smaller drill bit, drill a hole in each connector. Attach the fastener to the PVC with a small screw. The screw must pass freely through the PVC. The protruding part must be cut off so that the clip slides. Take the permanent marker and mark the protruding part of the screw. Unscrew the screw with a screwdriver and cut off the marked area. Now, when you screw the clasp, it should be flush with the inner wall of the connector. Attach both fasteners and set the connectors aside.
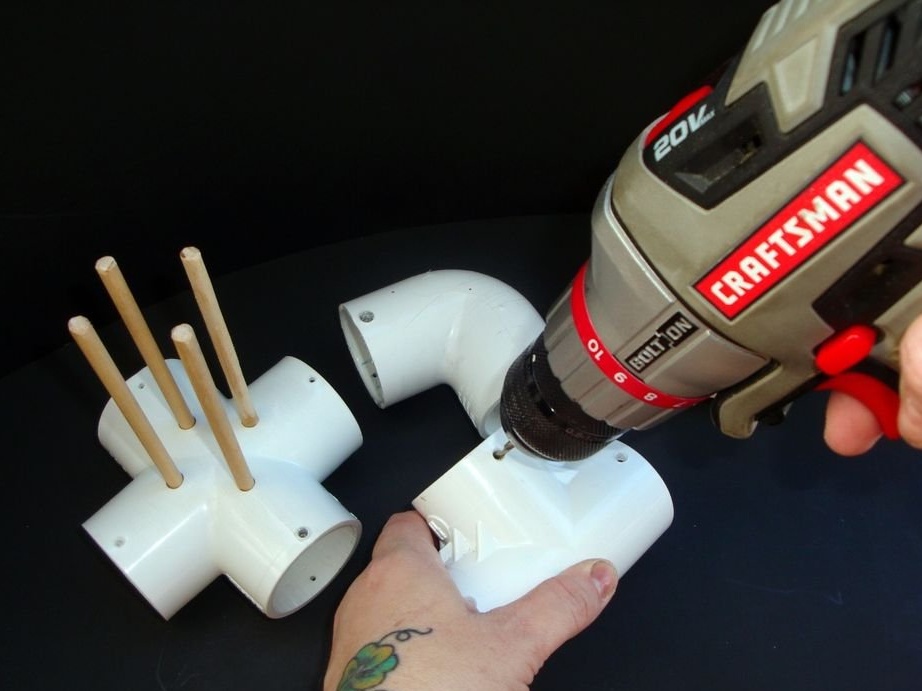
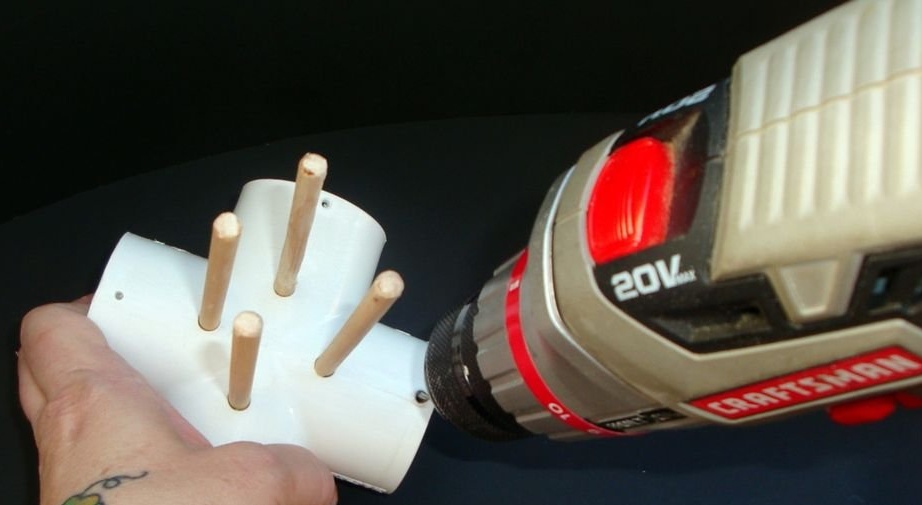
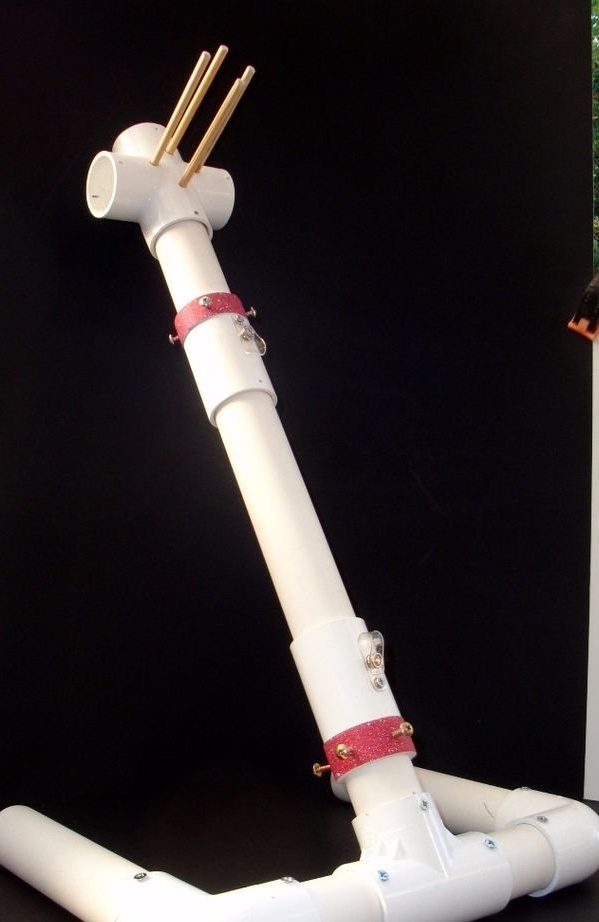
Step Four: Mount the Cross

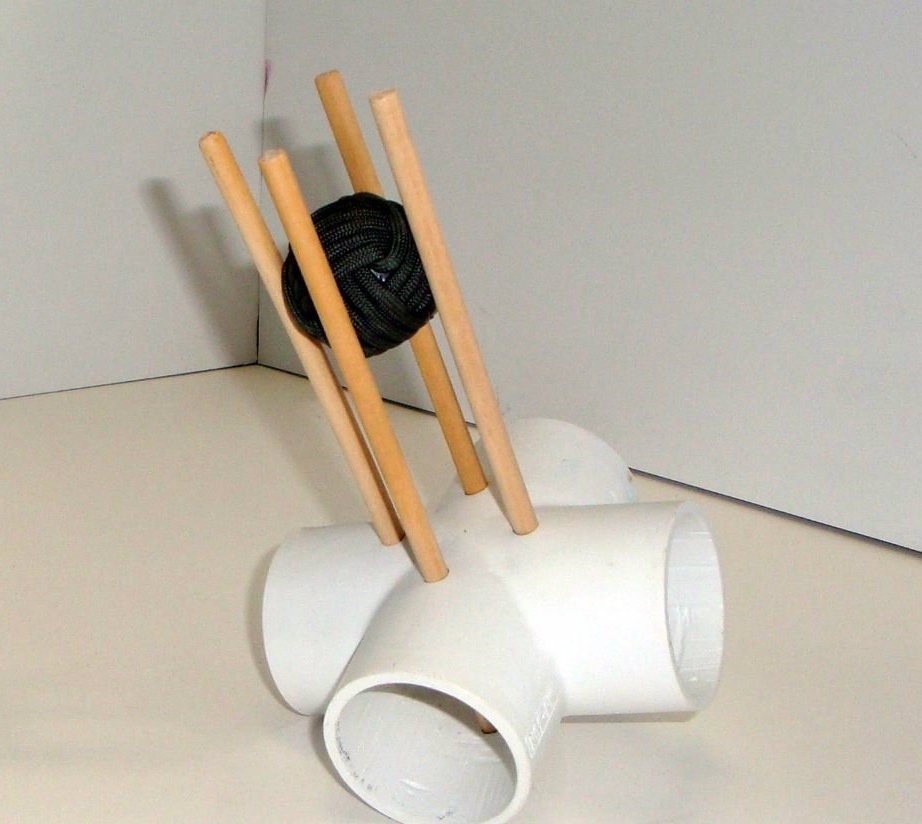
Drill holes on each cross on each corner. The length of the diagonals should be equal to 25 mm. Be sure to drill through the crosspiece so that the wooden dowels come out from the other side. Insert wood dowels through both holes. This will provide the necessary emphasis to hold the steel or lead ball.
If you want to fix something larger or smaller than the standard 25 mm., You will need to resize the diagonals to the appropriate size.
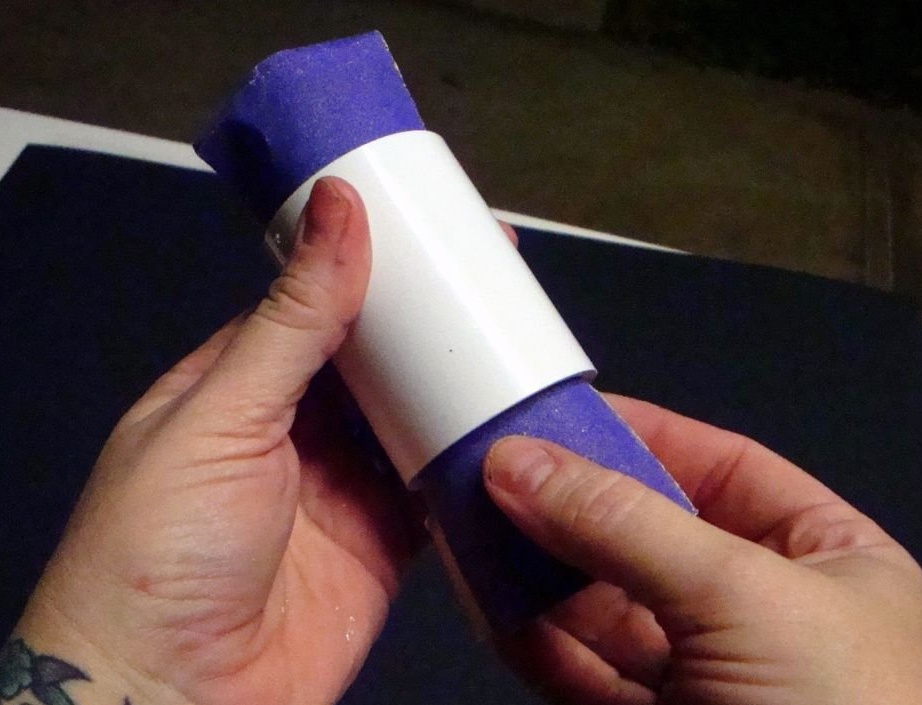
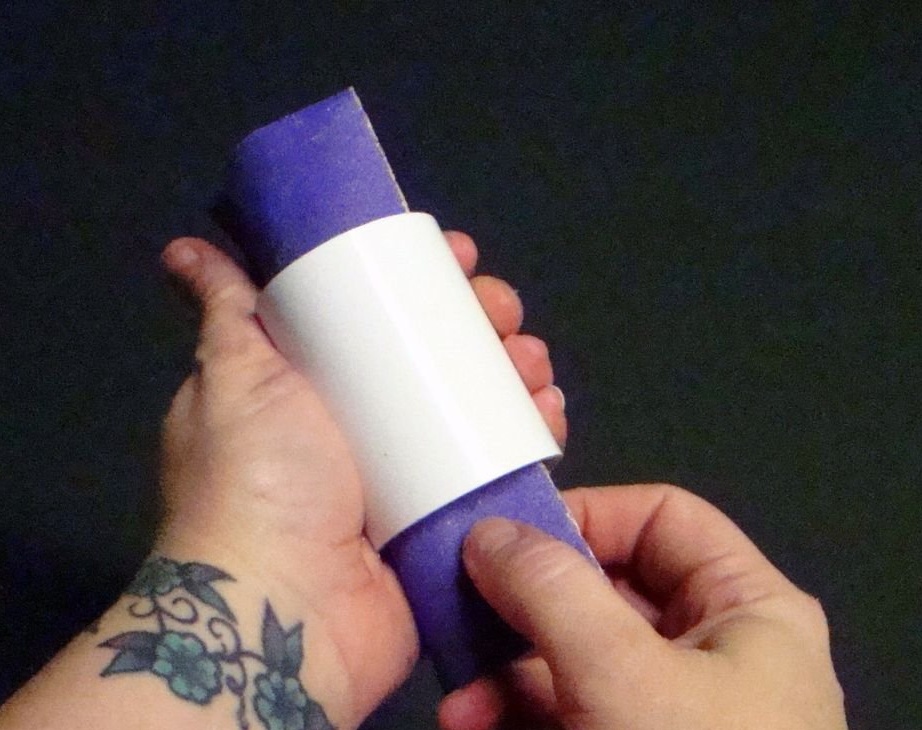
Step Five: Connector Mandrel

Creating a mandrel can save an incredible amount of time.
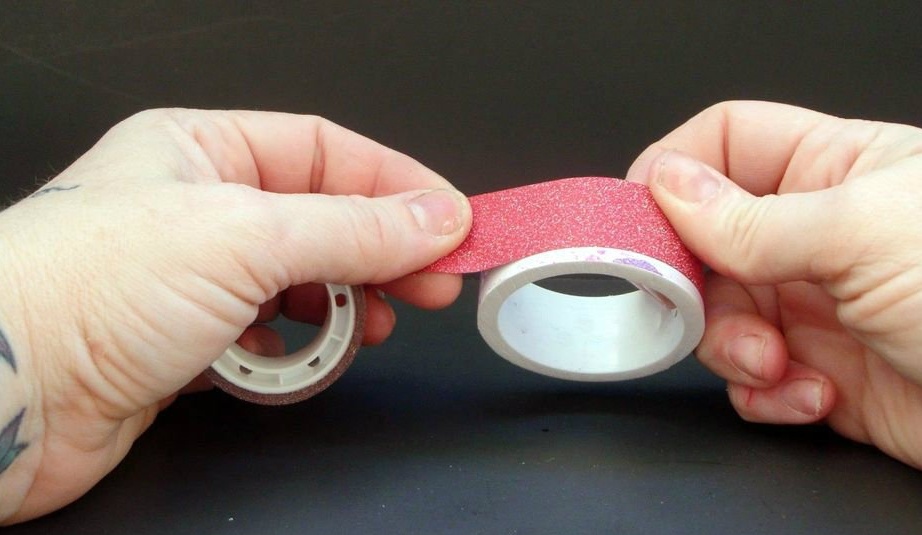
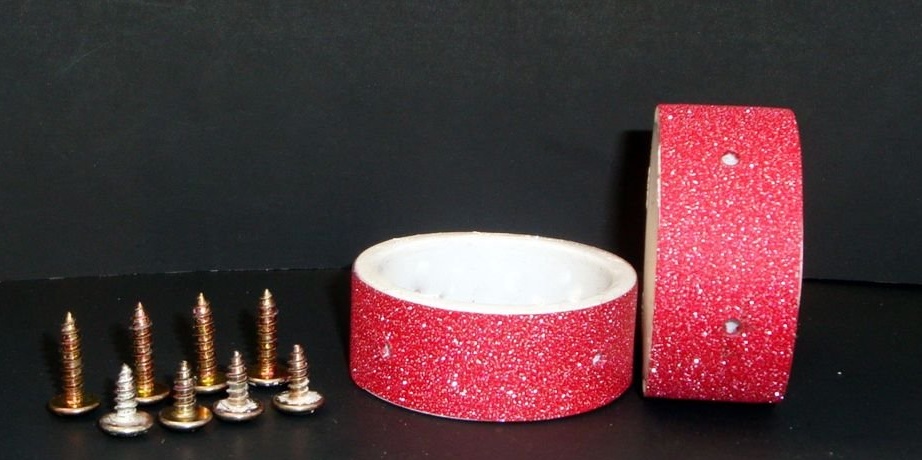
Take the tape. It can be masking tape, paper tape, depending on what you prefer. The author uses the remains of a shiny ribbon. Wrap tape around each half of the connector.
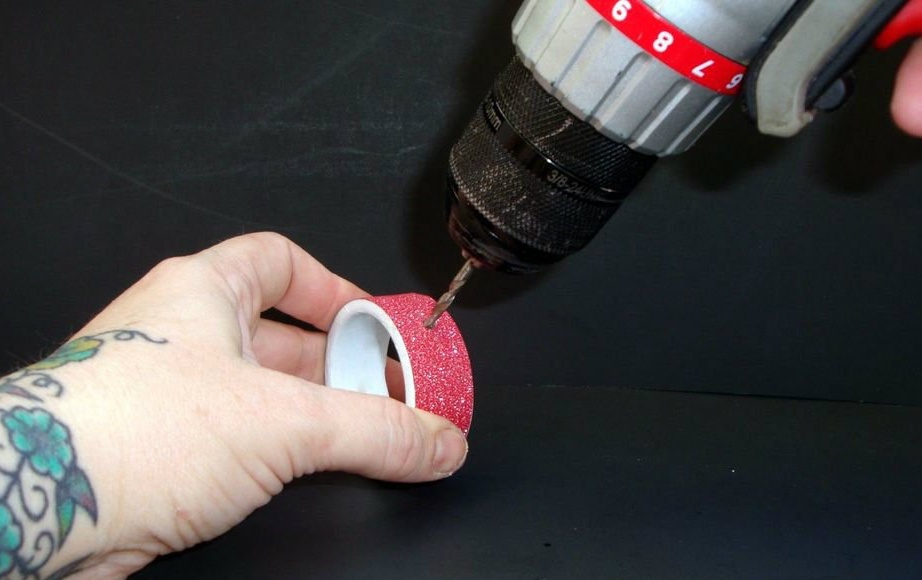
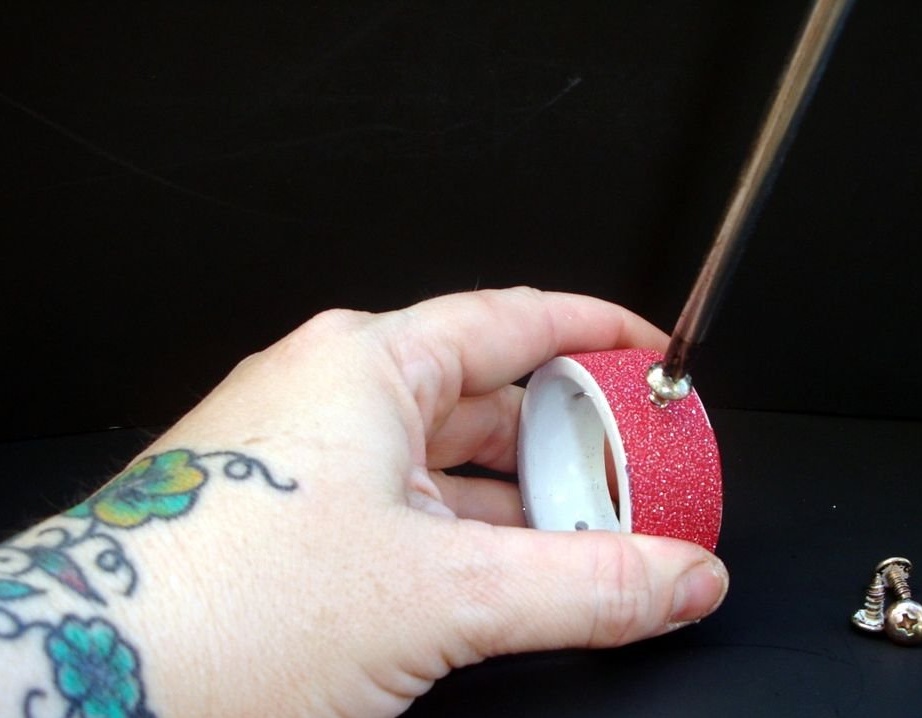
Using a smaller drill (one size smaller than the pan head screws), drill four holes at the same distance from each other in both parts. Then insert the screws so that they remain in place, but not so much that they stick out through the inner wall.
You will notice that the author has two sizes of screws. He used both sizes, 9 and 12 mm. To show you the difference between them. The author prefers a screw of a smaller diameter, it is enough to hold the paracord in place.
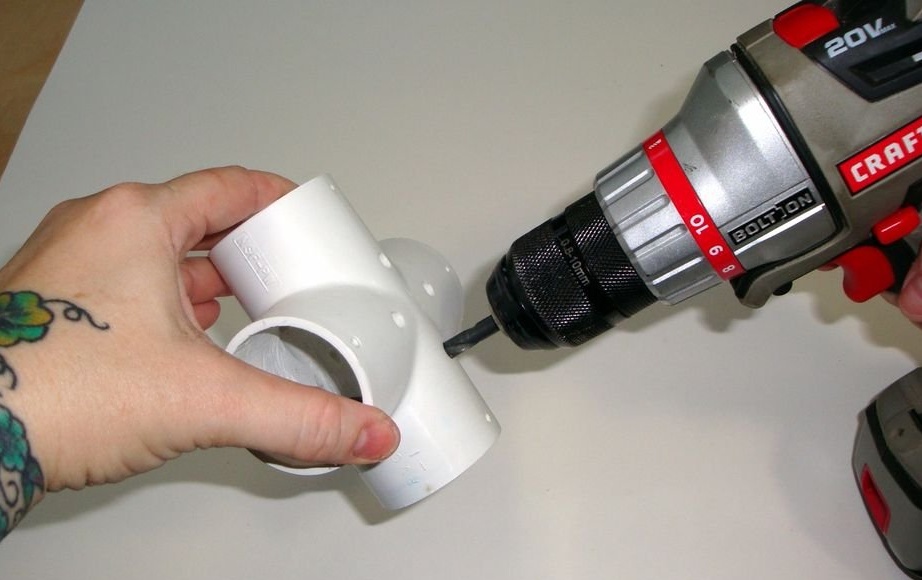
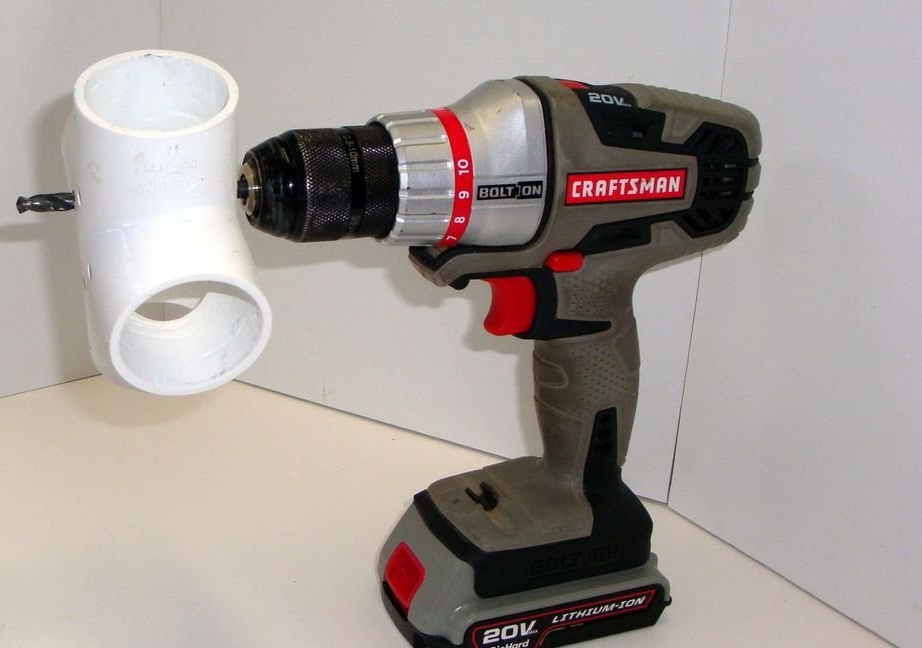
Step Six: Install Screws and Assemble Design
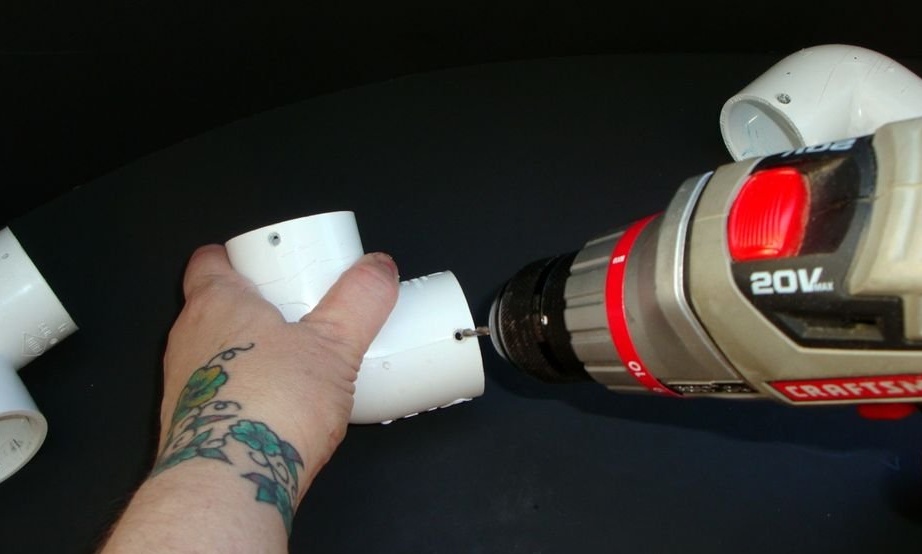
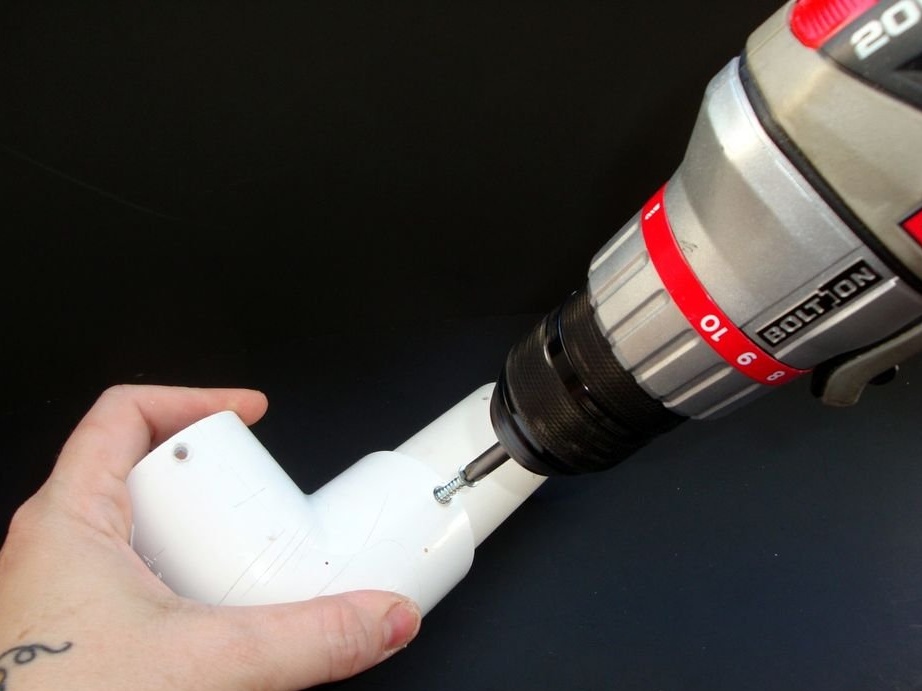
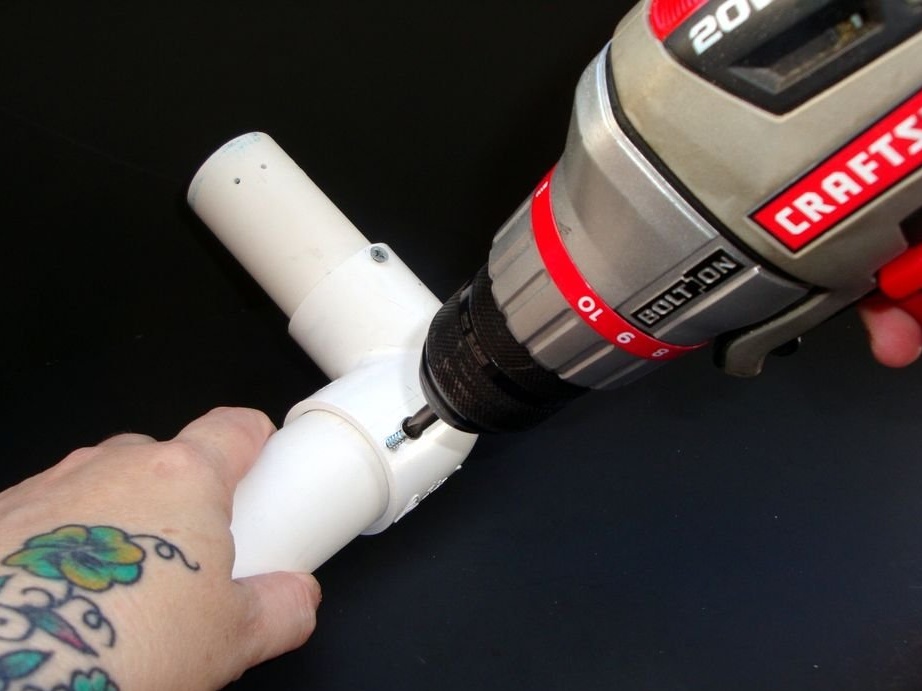

Take a small drill bit and drill a test hole at each of the different ends of the coupling.
This means that two holes should be drilled in the corners, three holes in the tee and one hole in the bottom hole of the crosspiece.
For couplings, drill holes at each end of the connector. Depending on how the couplings slide, tighten the set screw to secure the ideal position.
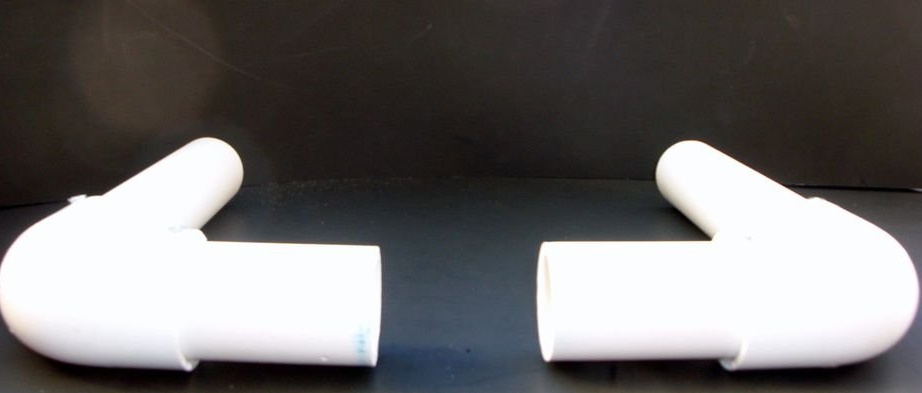
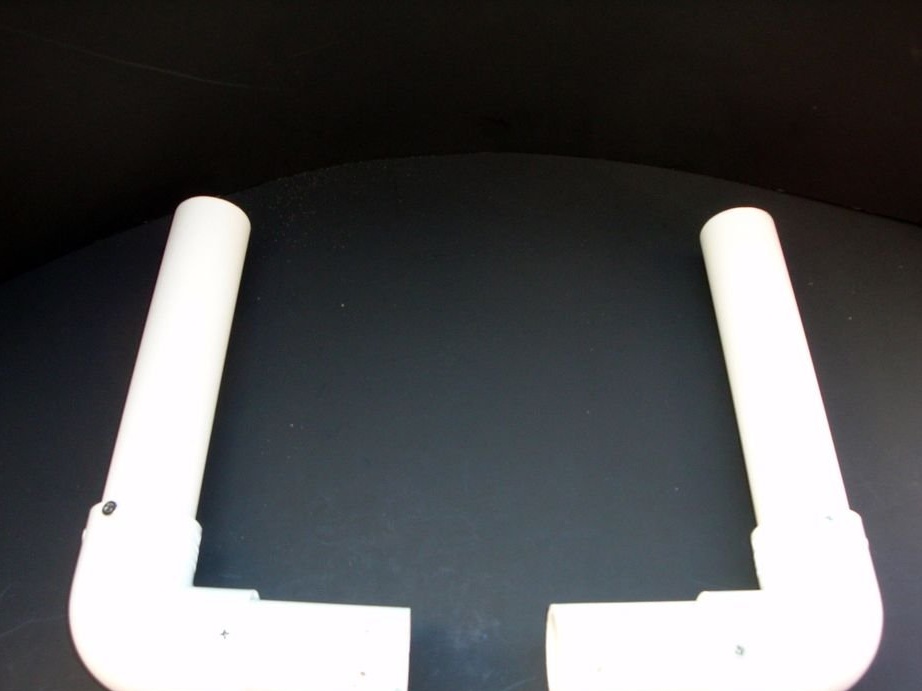
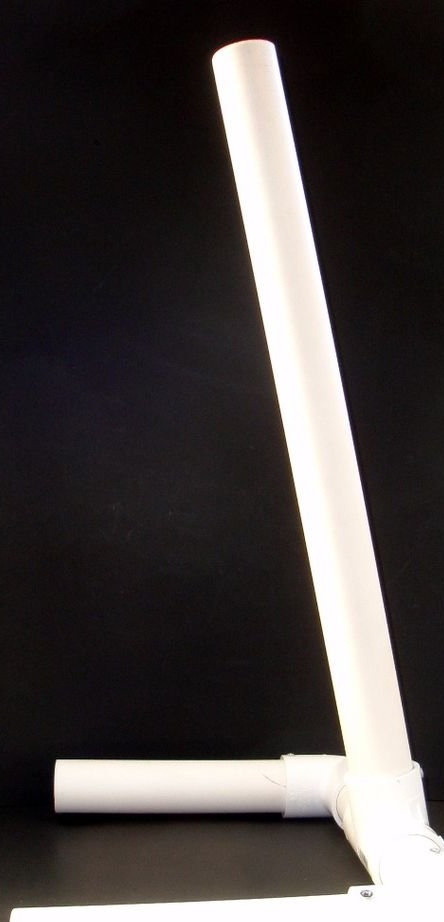
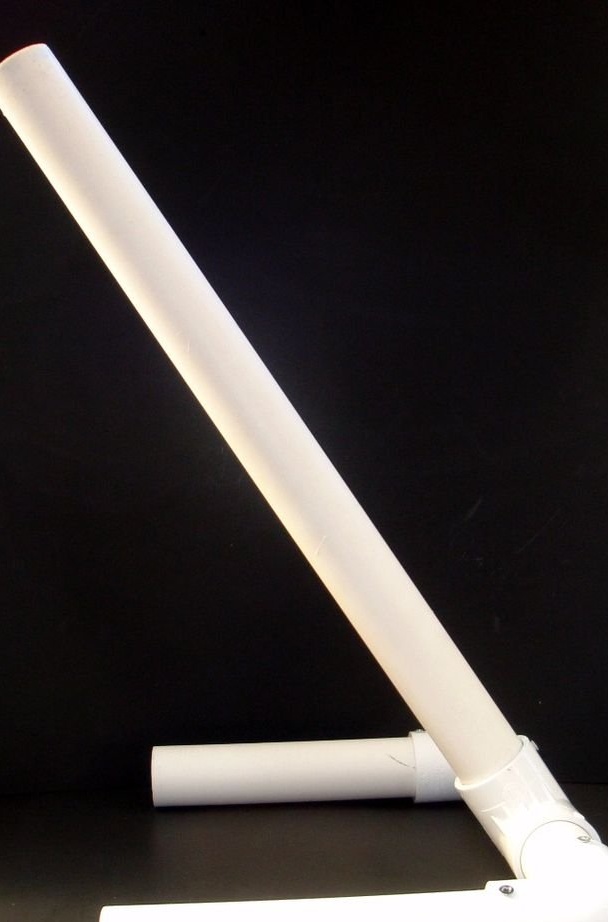
Take a 20 cm long PVC pipe and use a screwdriver to insert a screw into the previously drilled hole. Attach 20 cm. PVC to the elbow 90 degrees. Do the same for the second leg.
Now take pieces of 8 cm. Of PVC pipes and attach it to the other end of each of the 90-degree elbows. Set both legs aside.
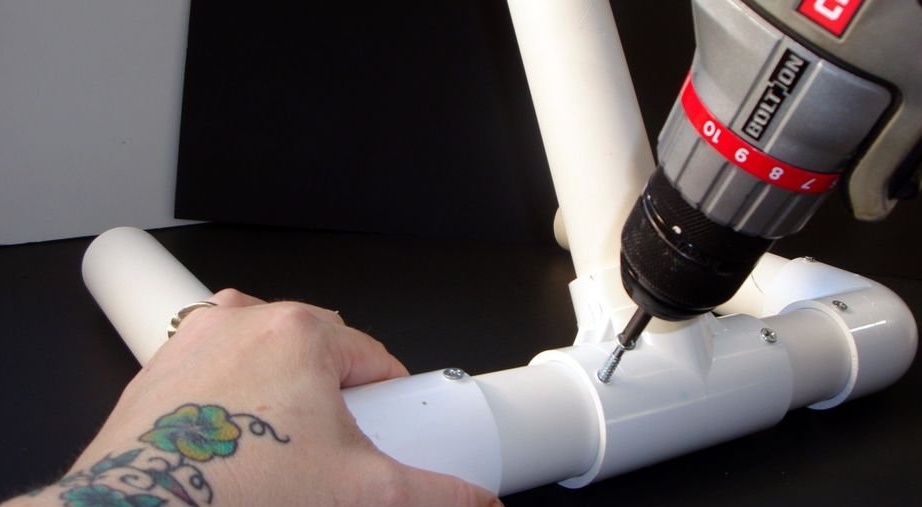
Attach the stand to the tee by inserting one screw into each hole. Before final assembly of the central screw, turn the tee to the position most convenient for you.
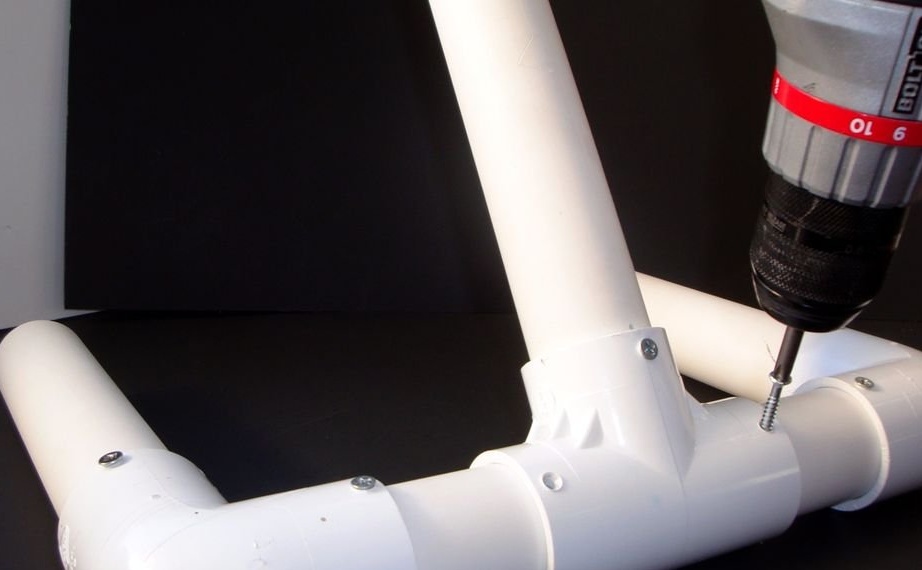
Step Seven: Final Stage
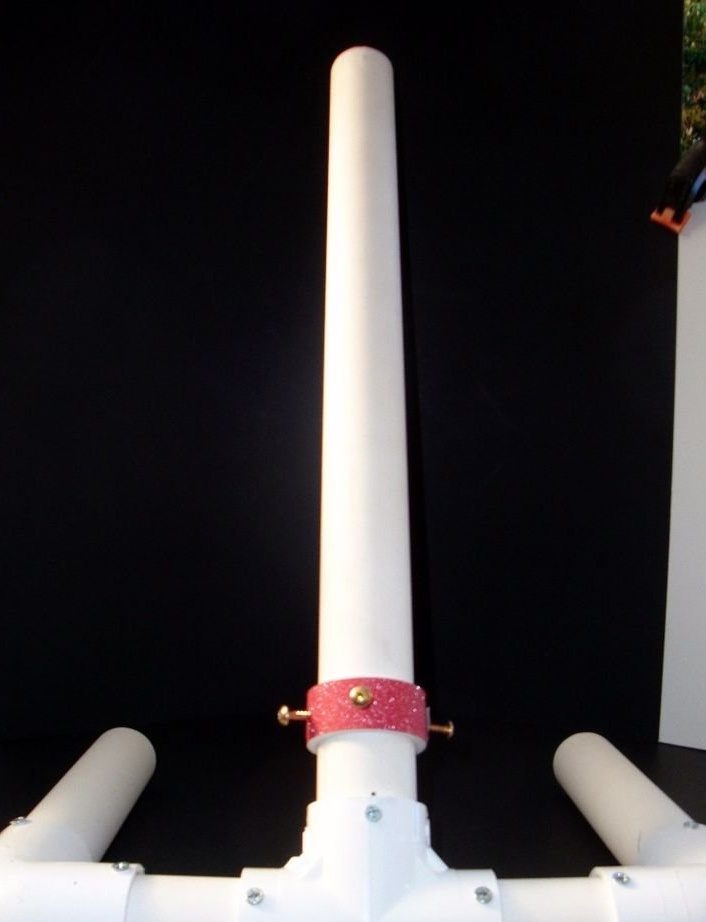
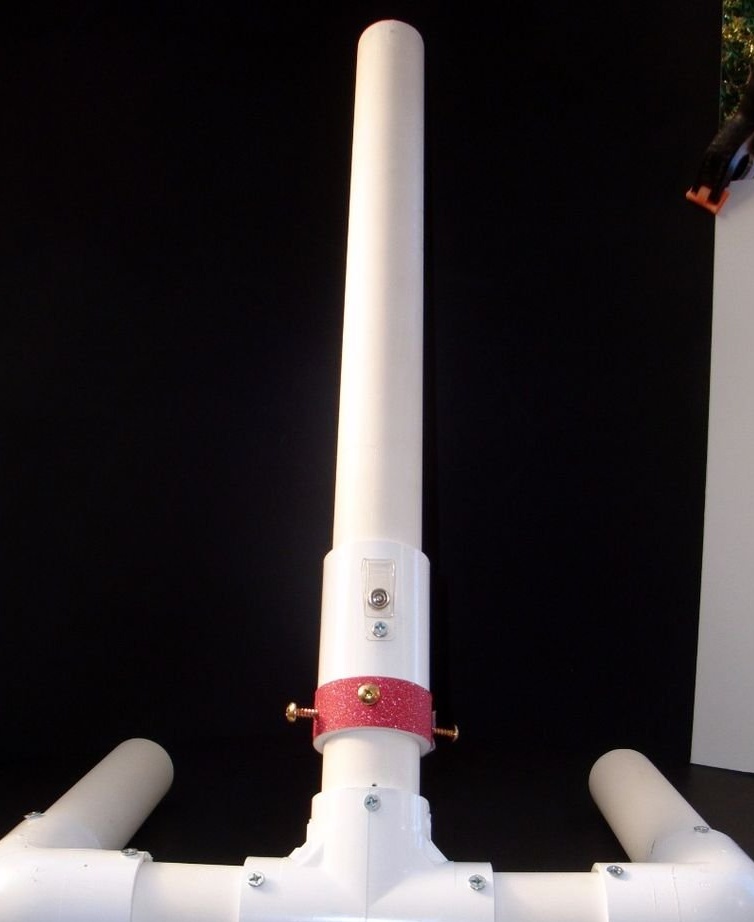
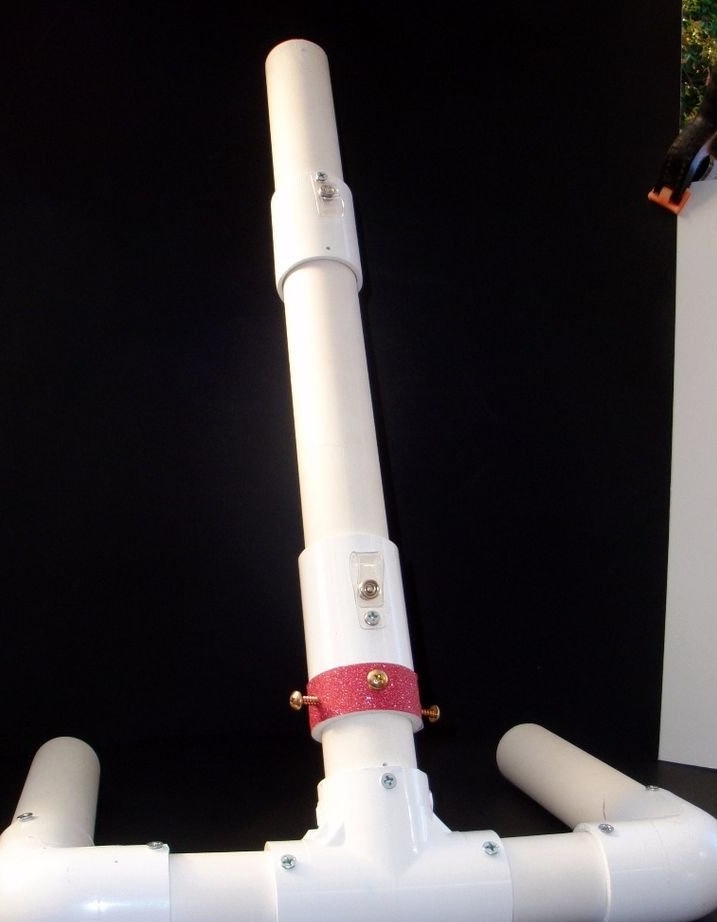
The final assembly of the structure consists of connecting all your parts. And it is entirely up to you and how you want your conductor to work. The author preferred that the head was outside, and the bracelet inside. To achieve this, he first slipped one of the mandrels into the rack. Then he added the bottom screed up (that is, the loop up) and then the top.