

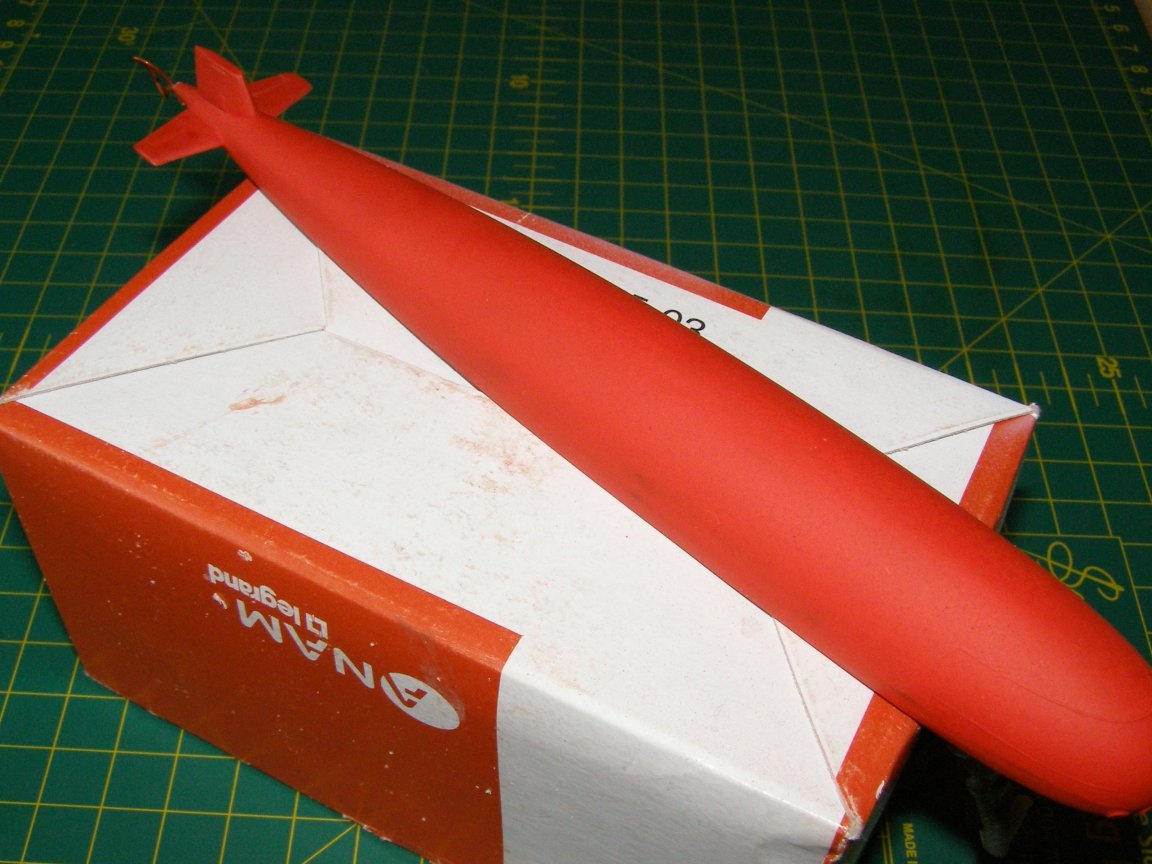
Seeing on sale model a submarine of project 877, such as the Varshavyanka from Modelist company on a scale of 1: 400, I somehow immediately wanted to buy and assemble.
For some reason, the idea was immediately to collect it on the go. That is, so that the waves depart from the side of the boat in different directions and the breaker from the propeller, etc. This will revive the model, and there was an ardent desire to make the sea believable.
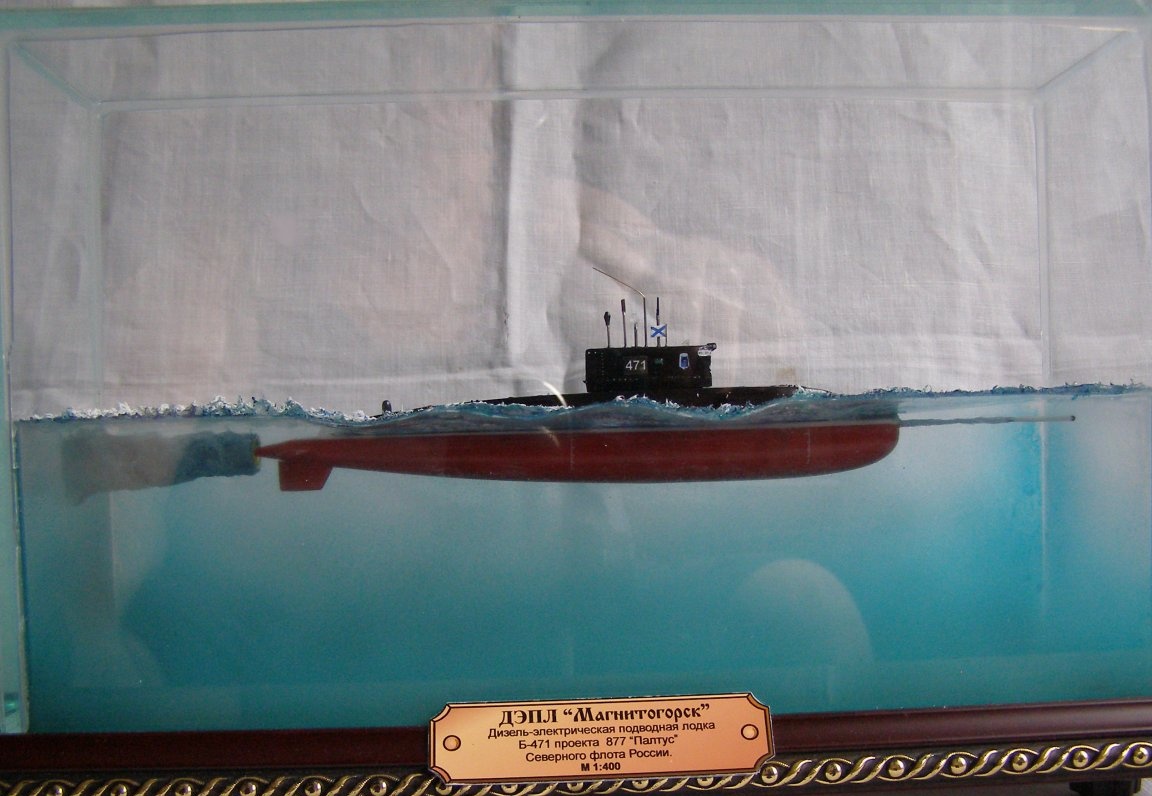
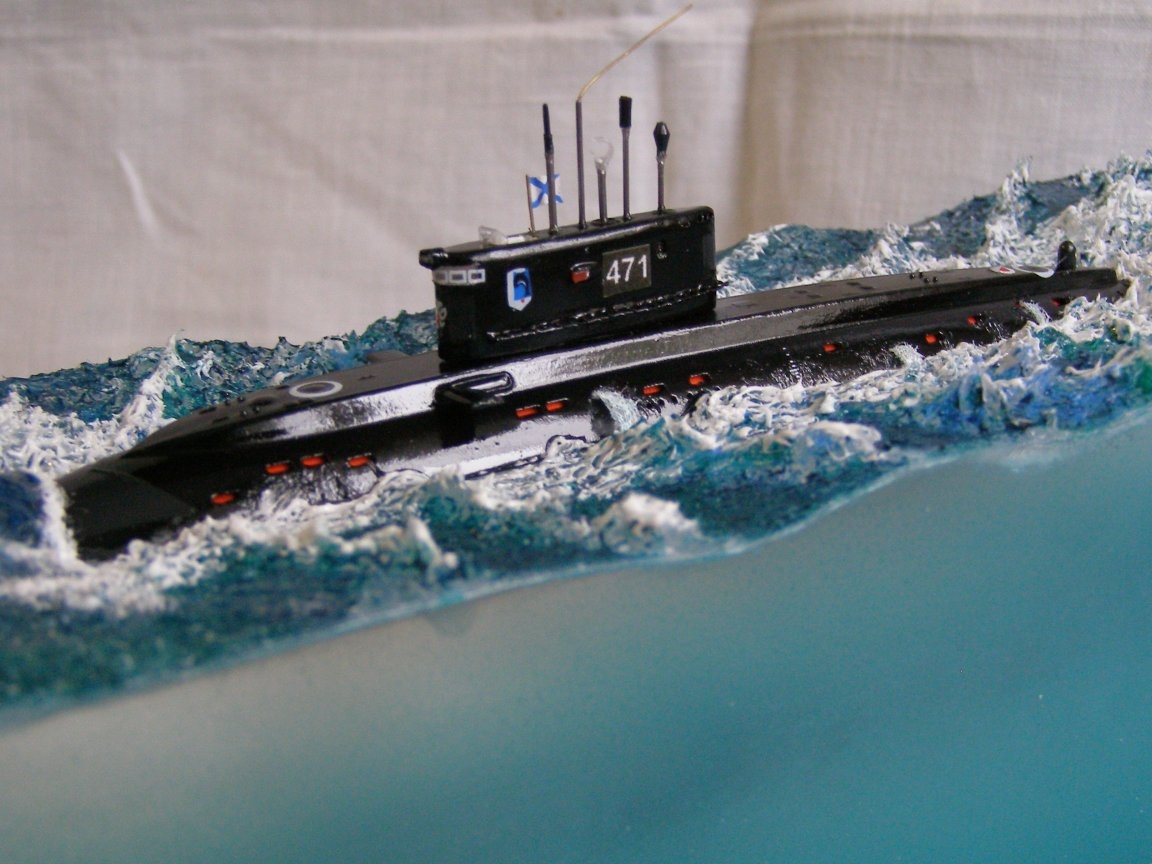
Of course I bought a model. Going home, everyone was thinking how to implement the thought that came to mind. I caught myself thinking that I did not want to lose the underwater part of the model in the sea. He began to think how to implement his plan. Ah, thoughts were swarming in my head. Before my eyes I got a picture of a submarine walking across the surface of the sea, the screw was spinning, its chip track was visible, the Caliber cruise missile had already been launched from the torpedo tube. All this can be seen from below and from the side, from where the soul desires. Imagined well, but how to do it all?!?! Here is such a beauty.
To come up with one thing, to implement what was invented is quite another. The main thing was to decide how to keep the water surface. And came up with ....
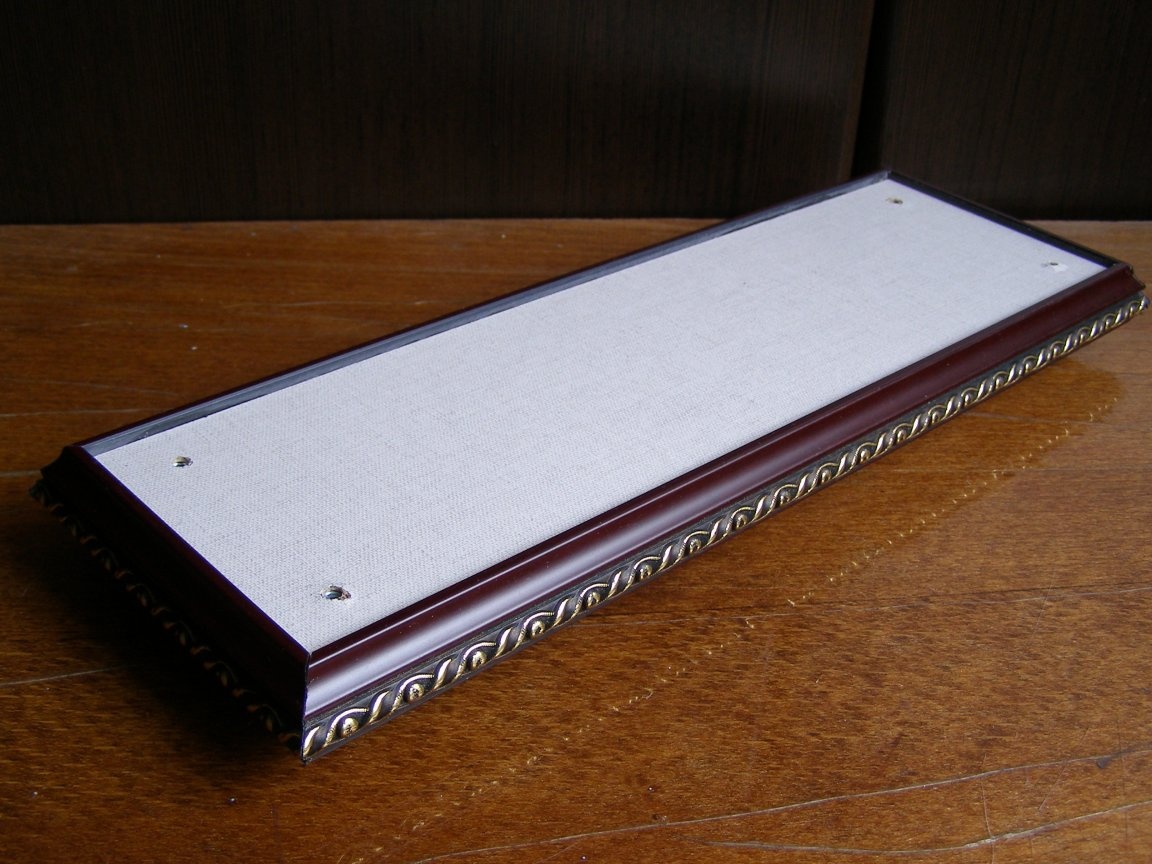
Immediately began to carry out his plan. To begin with, I figured the size. Then, accordingly, he made the base.
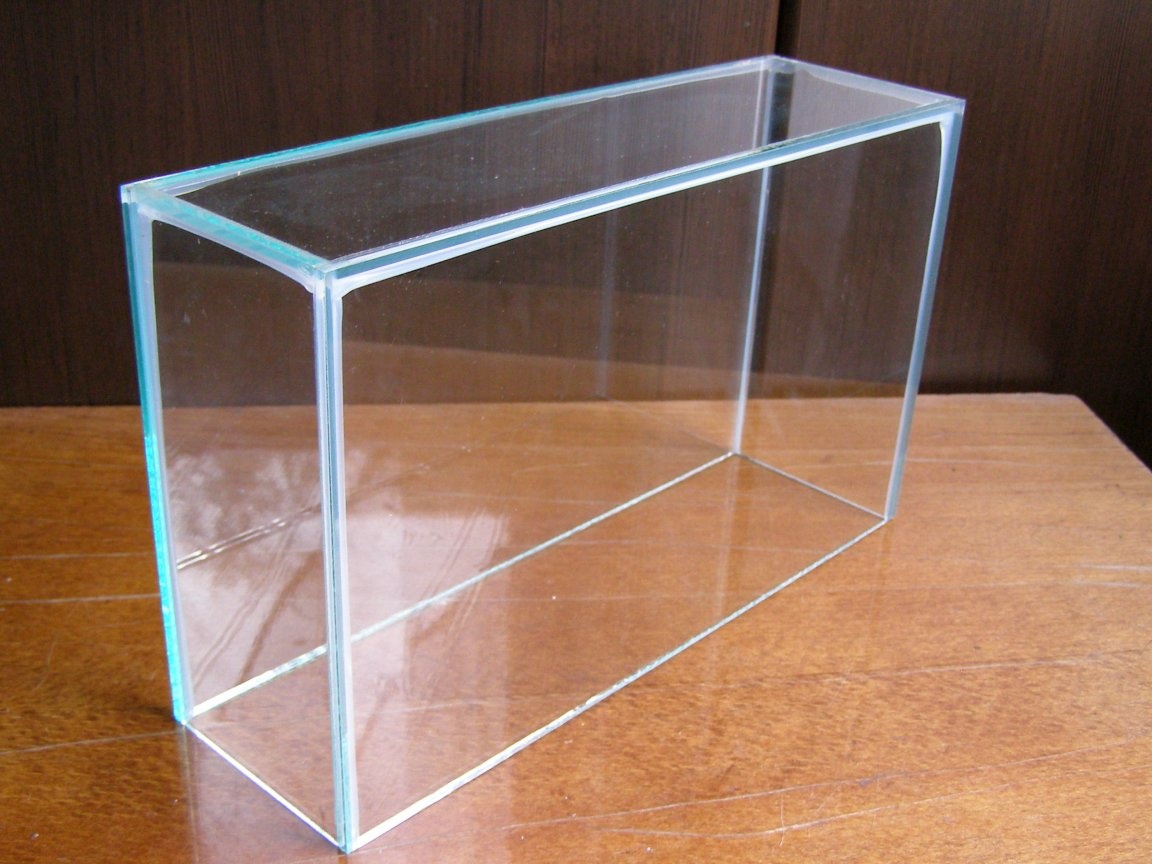
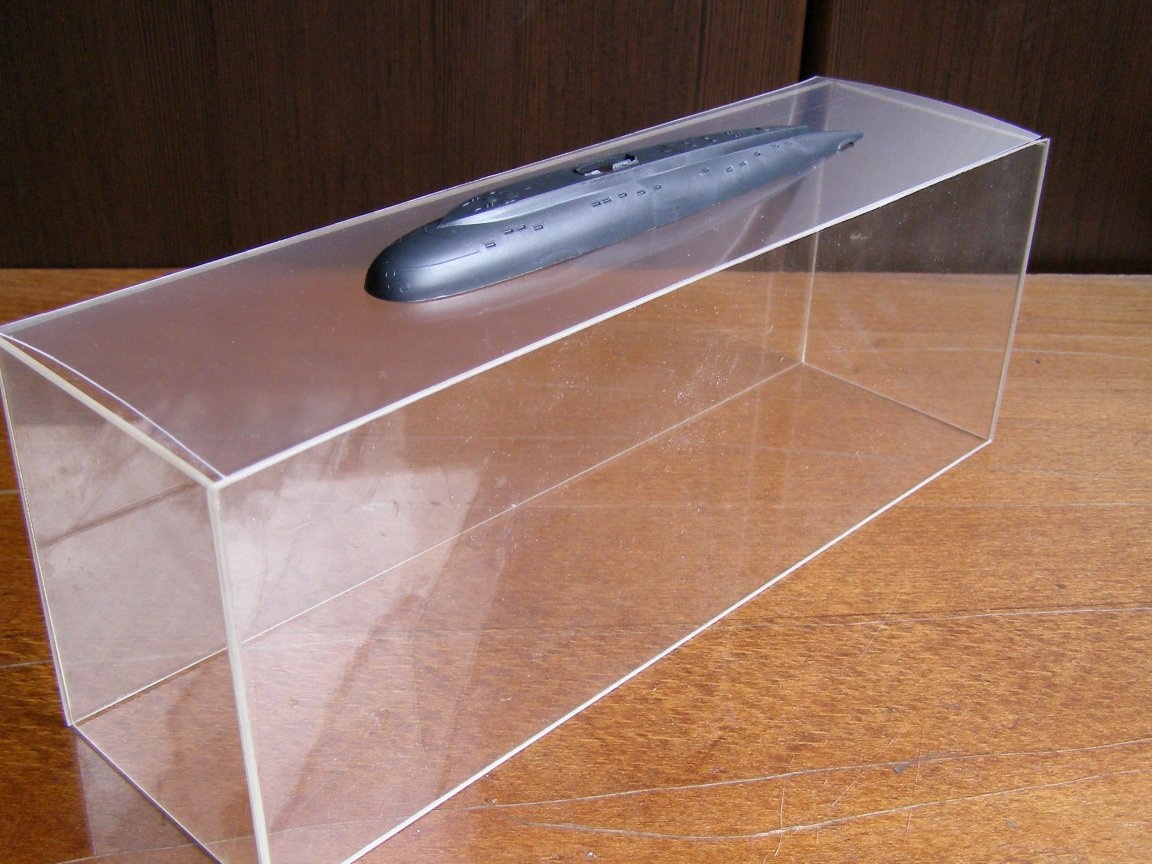
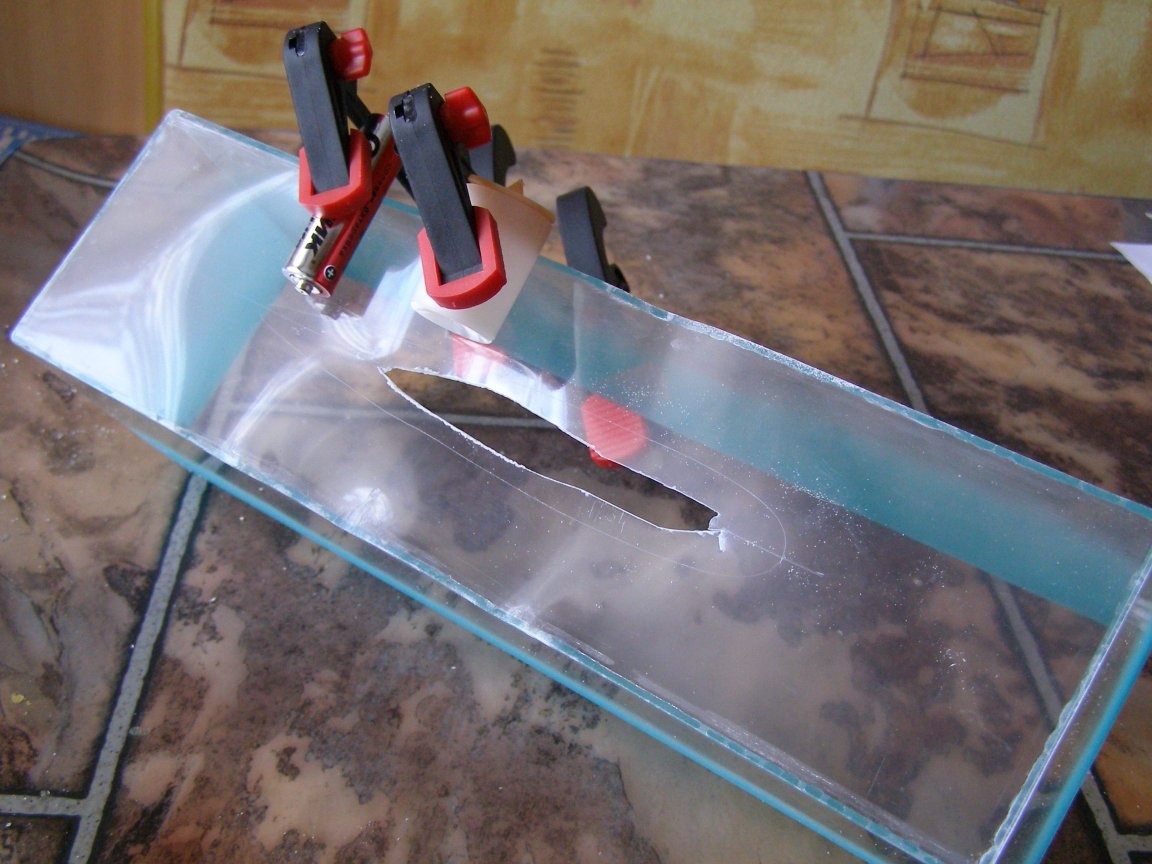
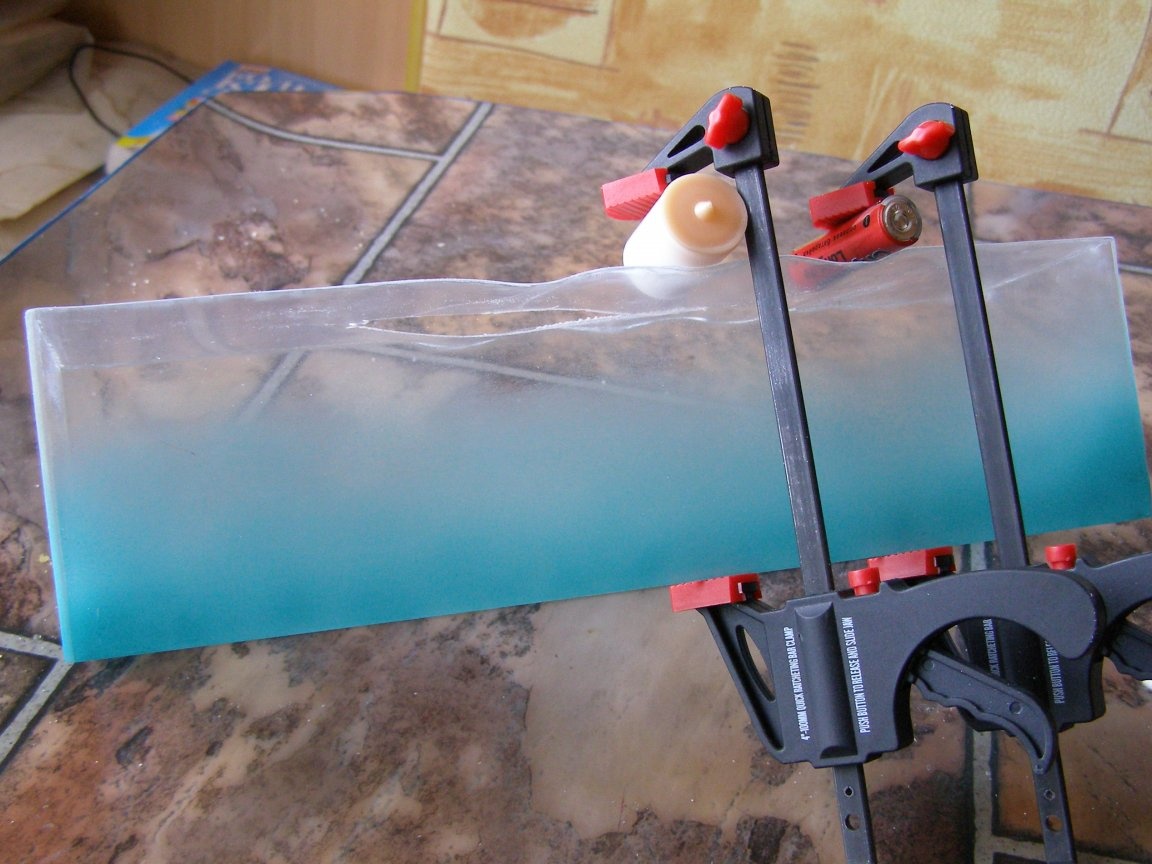
Further showcases. As planned, they need two. One outside, made of silicone glass.
The second is made of organic glass. It is glued from four segments with cutting in the corners at 45 degrees. This is done so that it would not be visible in the corner of the window. The dimensions of this display case are made according to the internal dimensions of the external display case. So that she freely entered, with a minimum gap, into the inside of the display case.
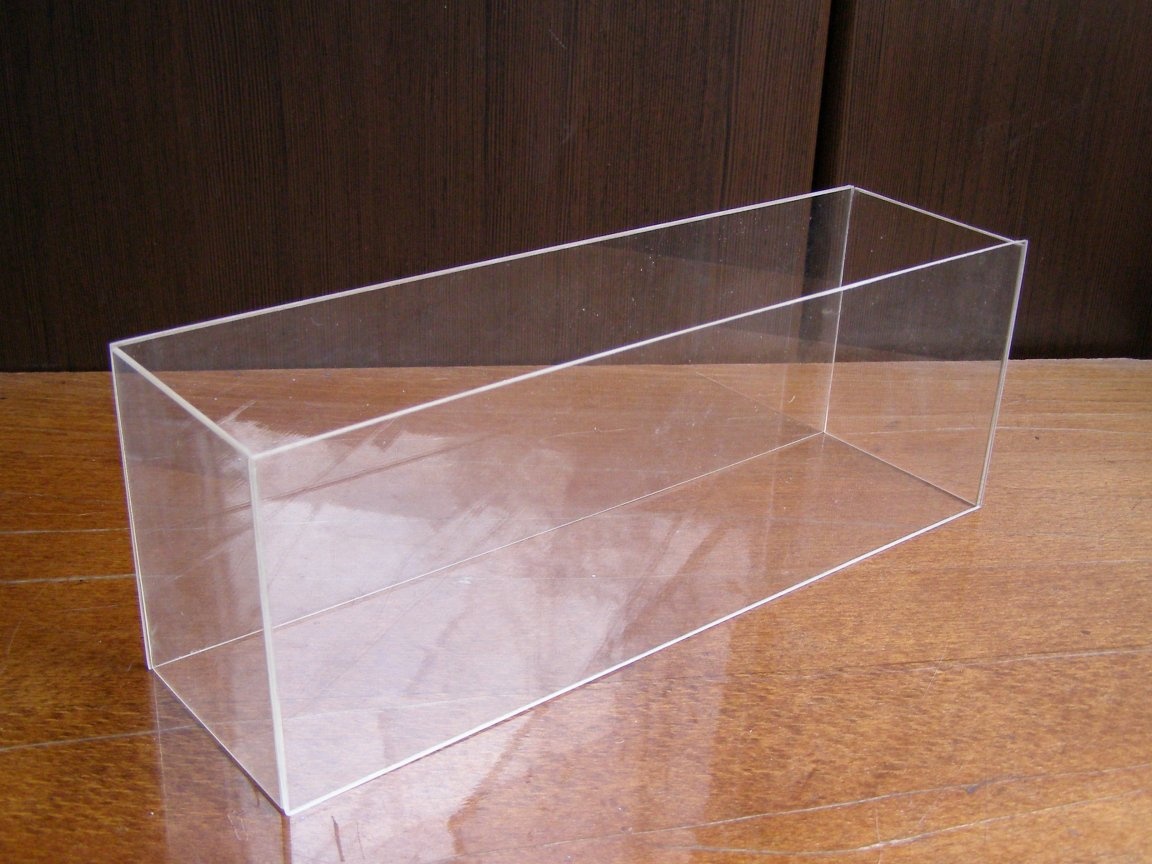

The inner window will serve as a support for the water surface, in the initial position it looks like this.
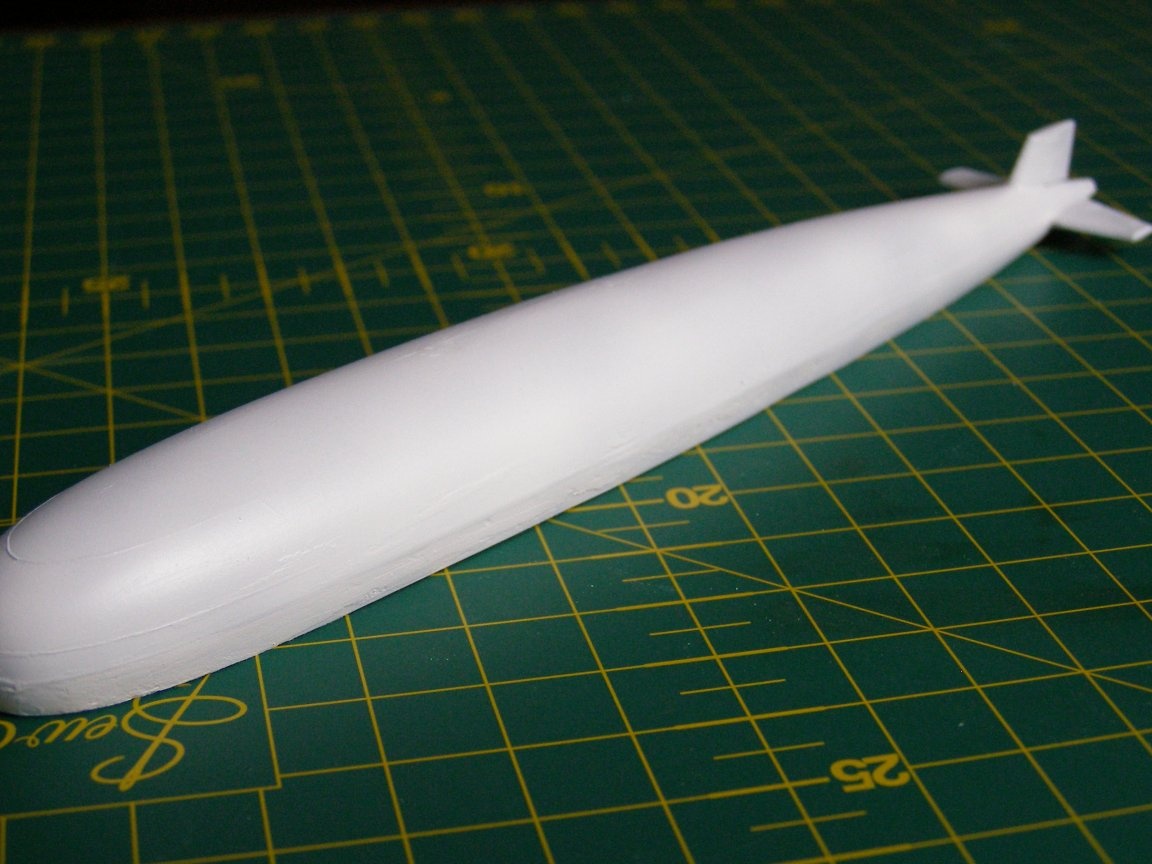
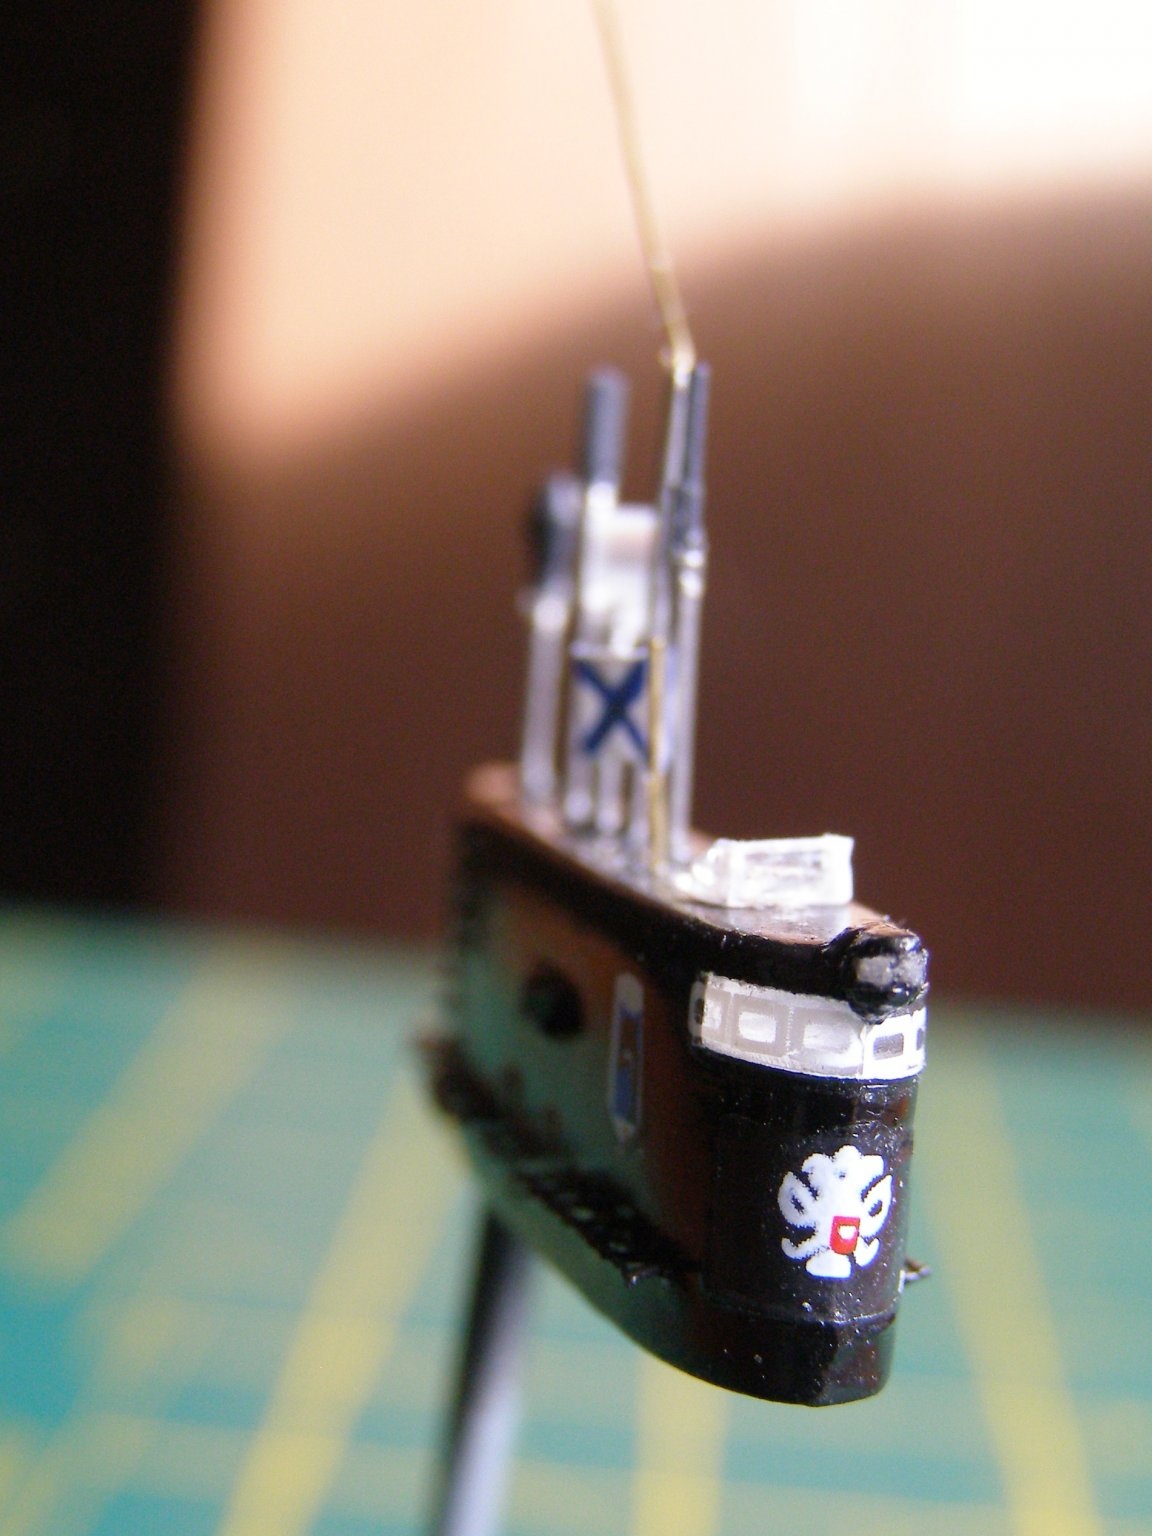
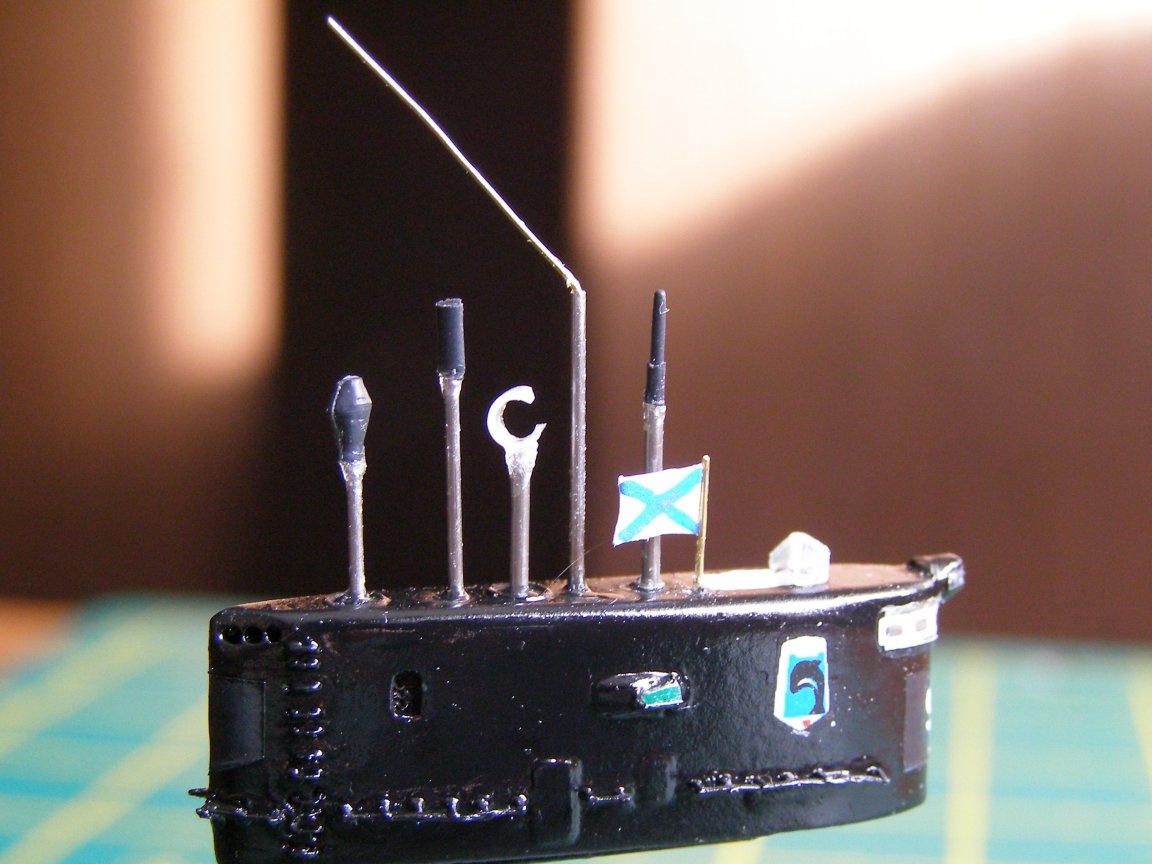
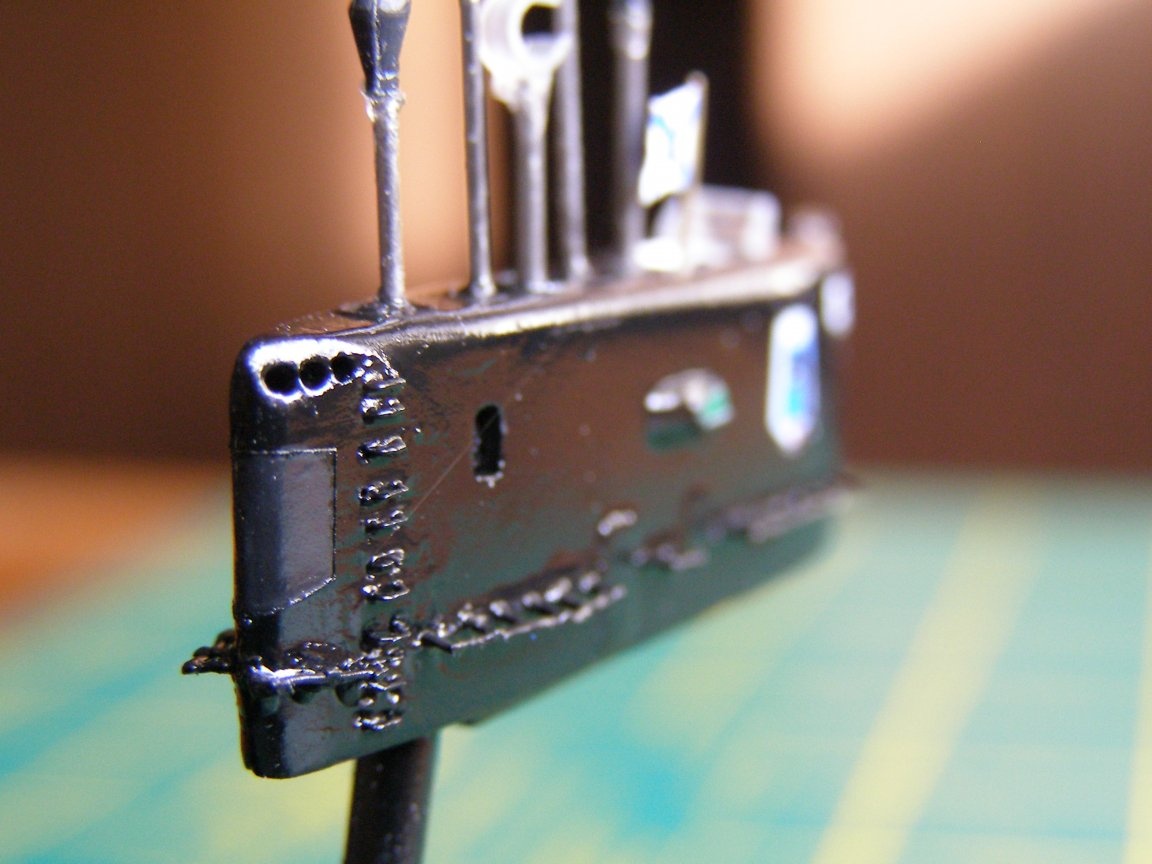
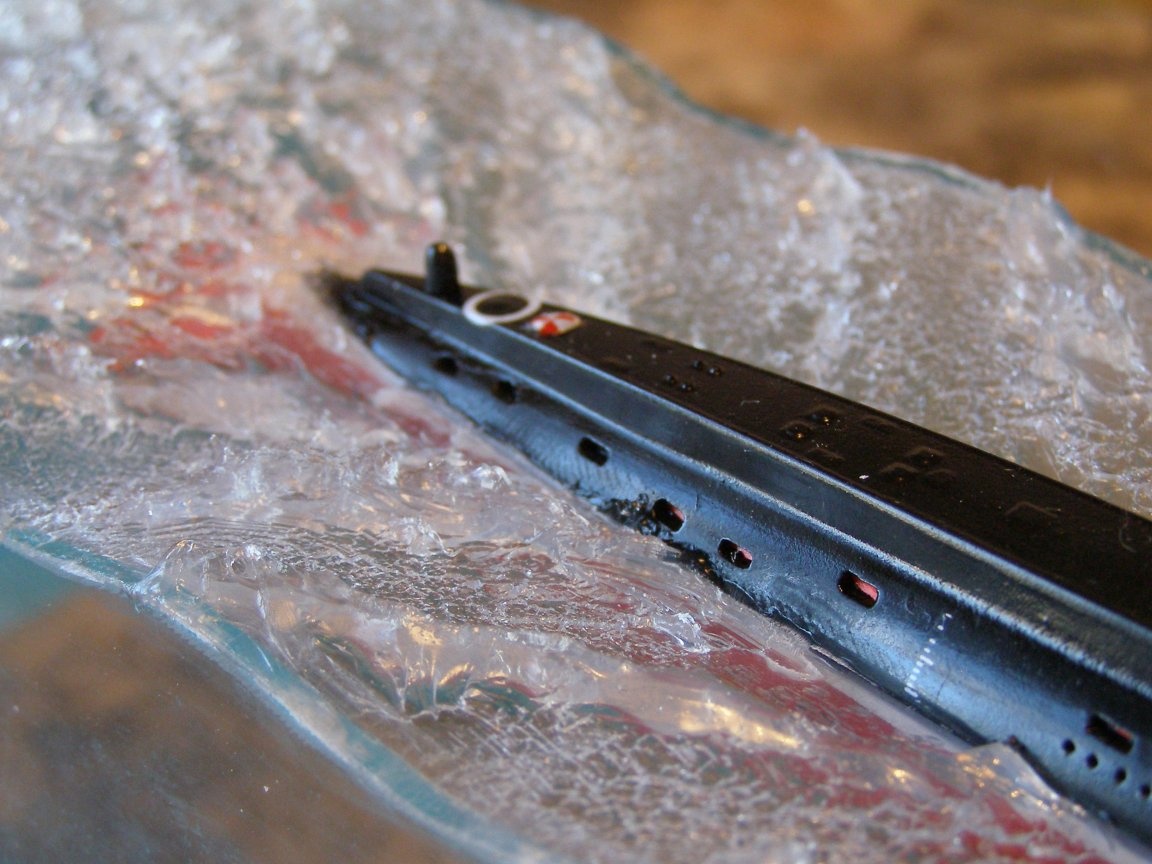
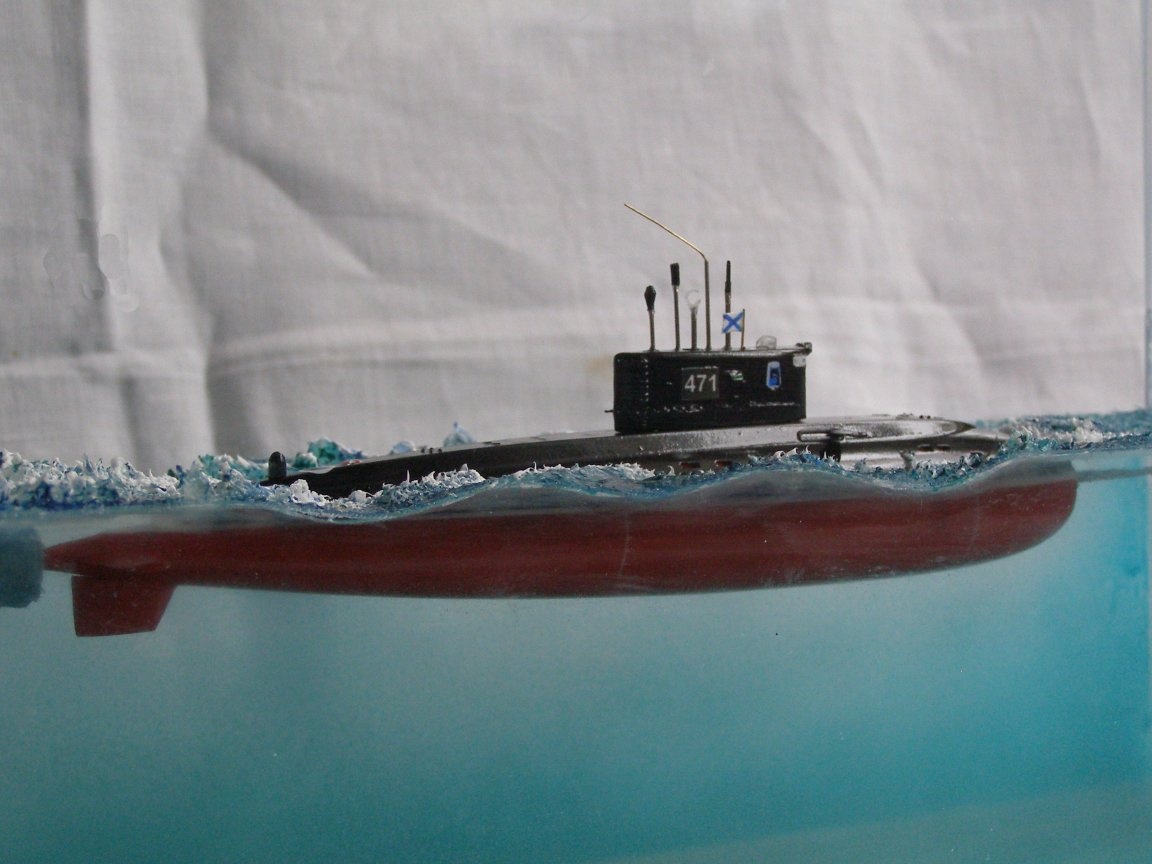
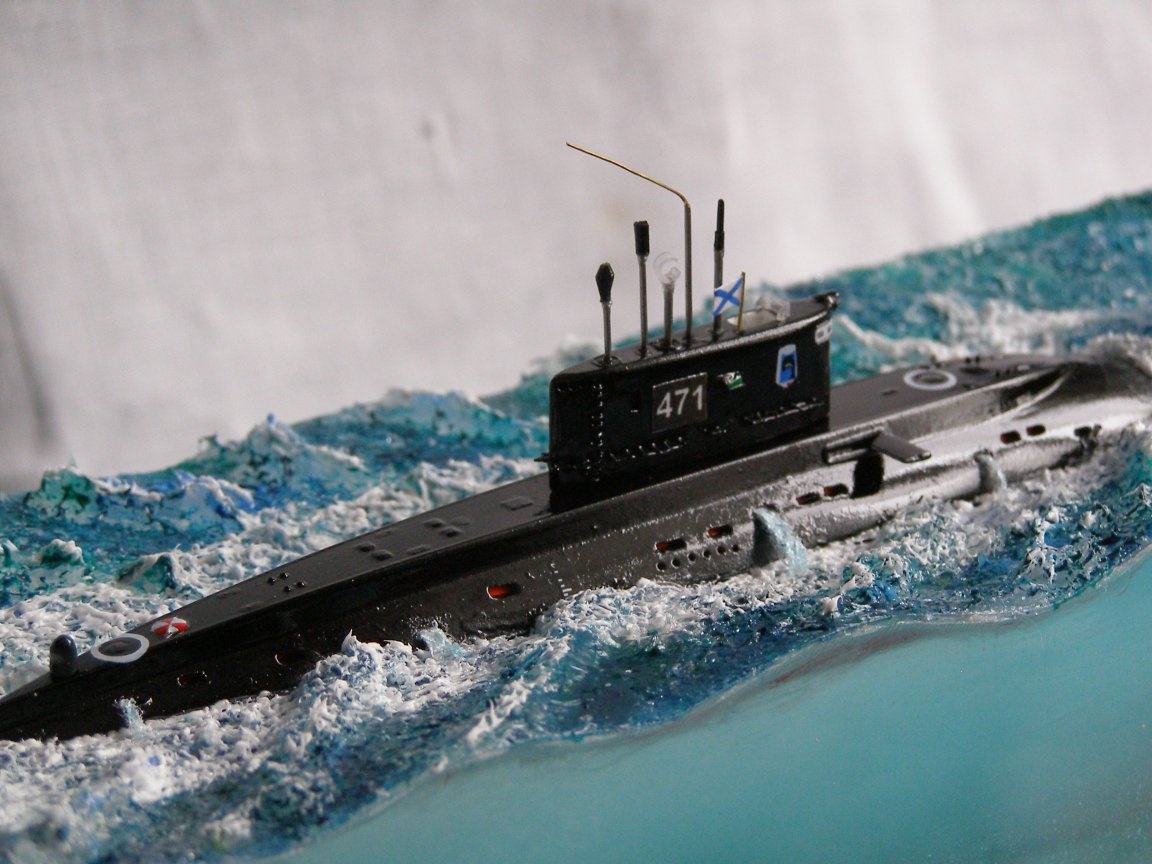
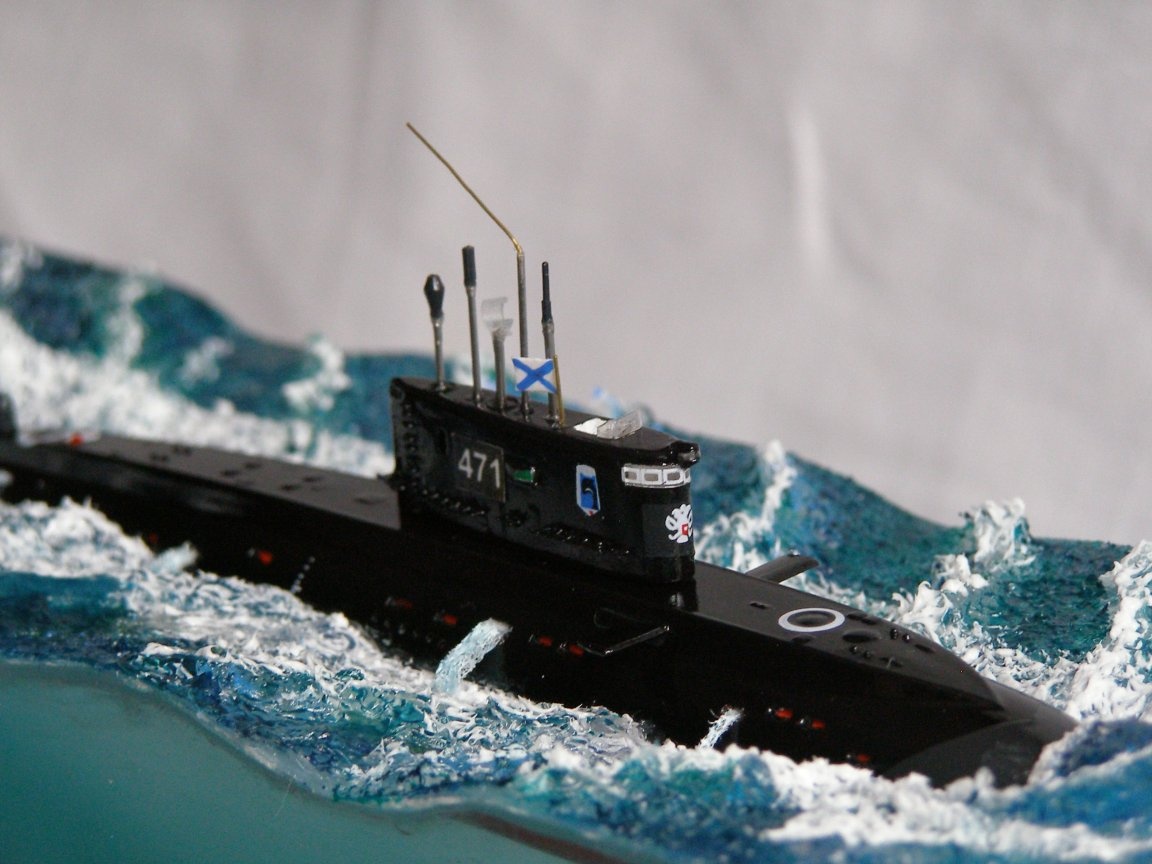
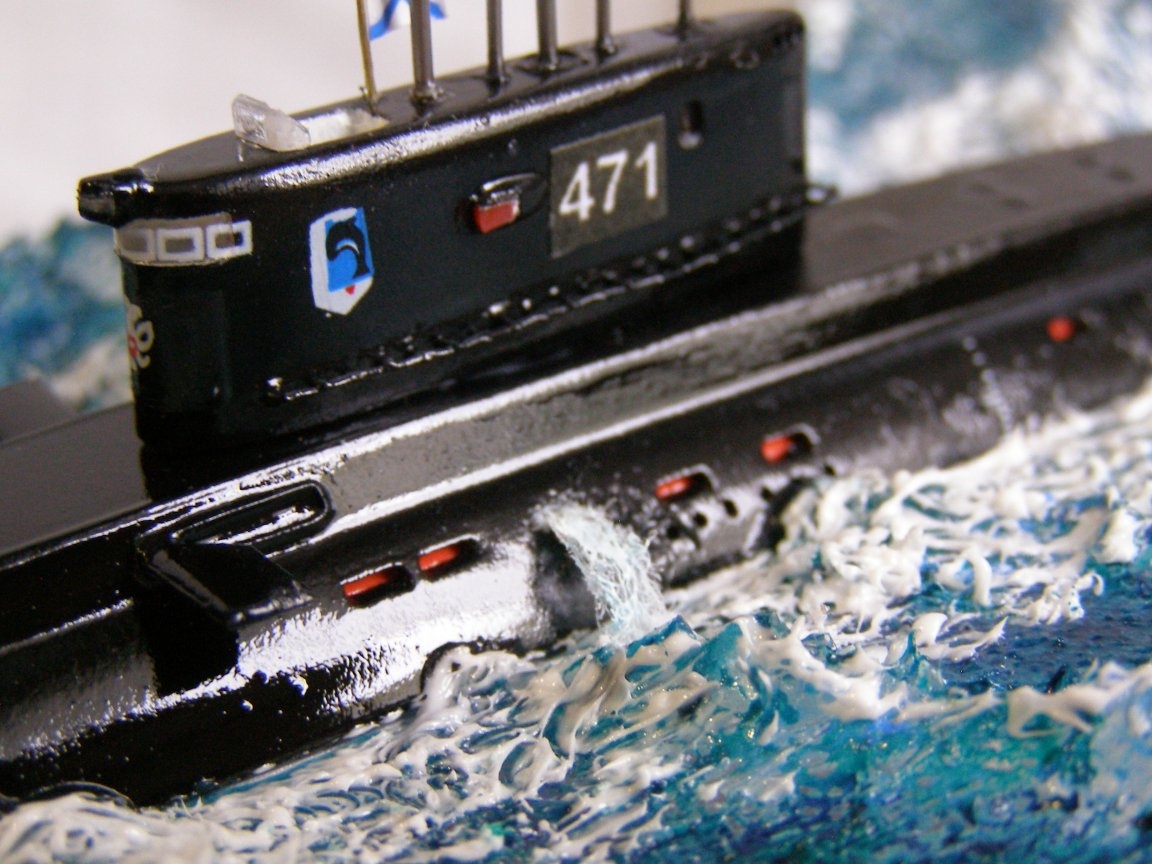
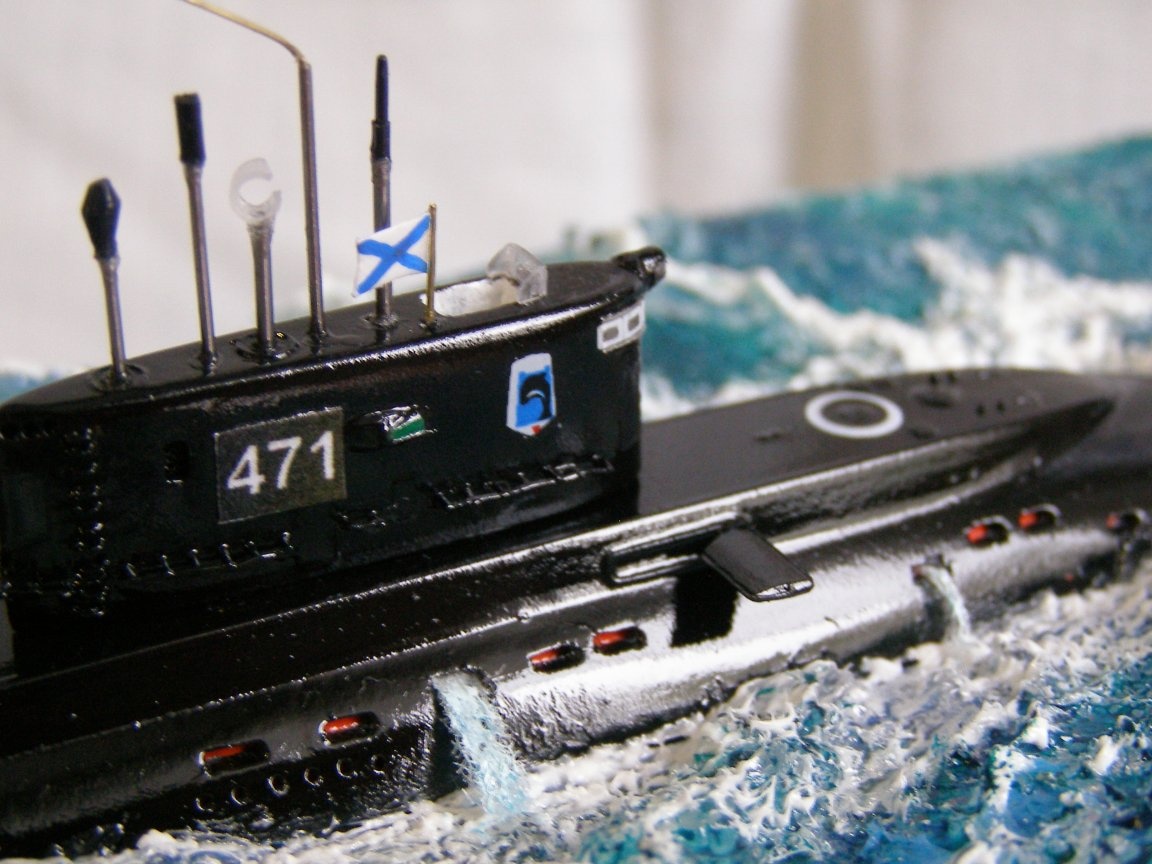
Next, I started actually assembling the submarine model itself. He cut the scuppers and primed the upper part of the body, painted and varnished.
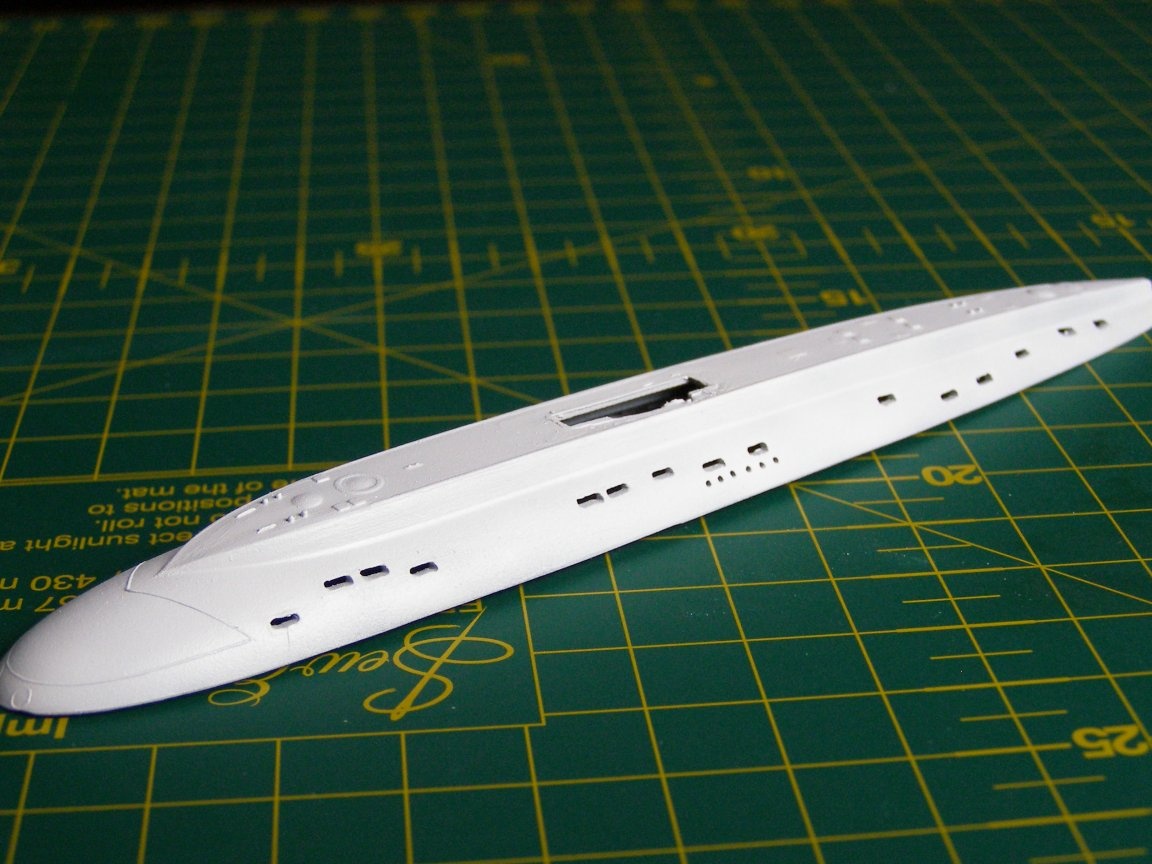
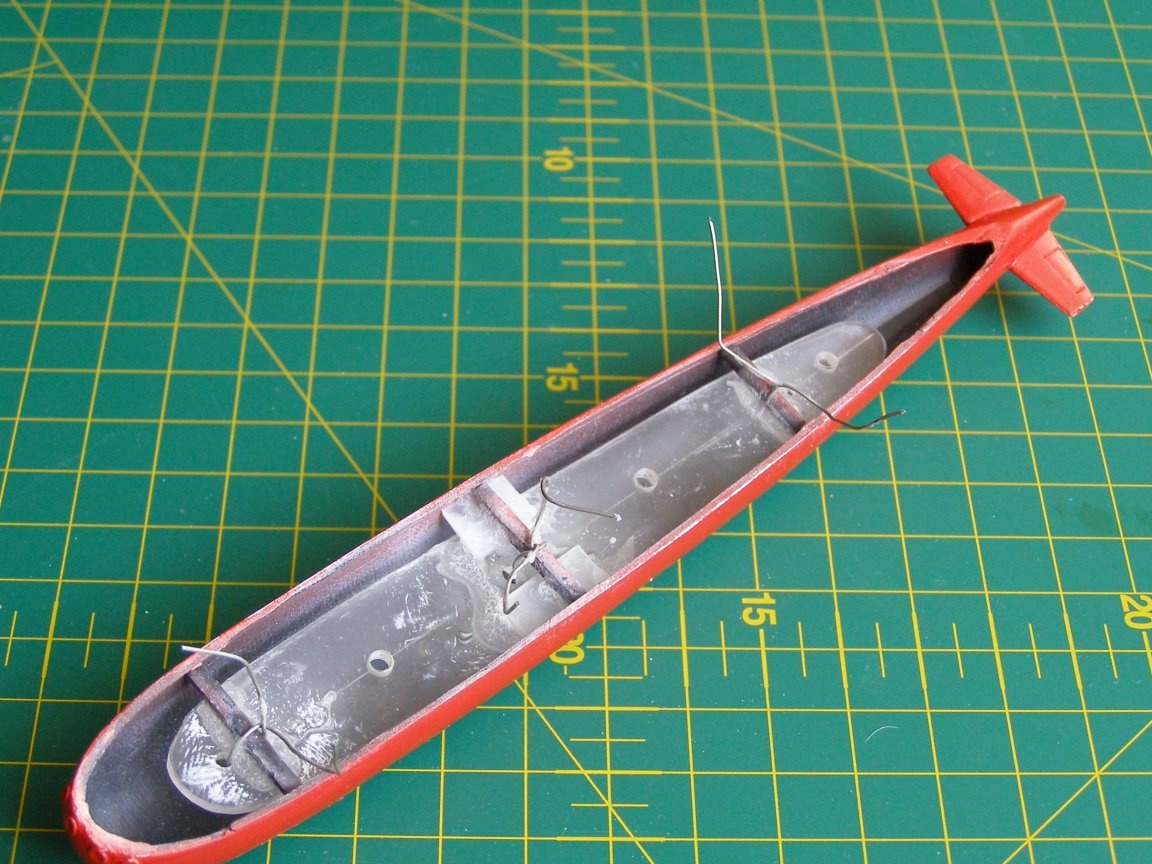
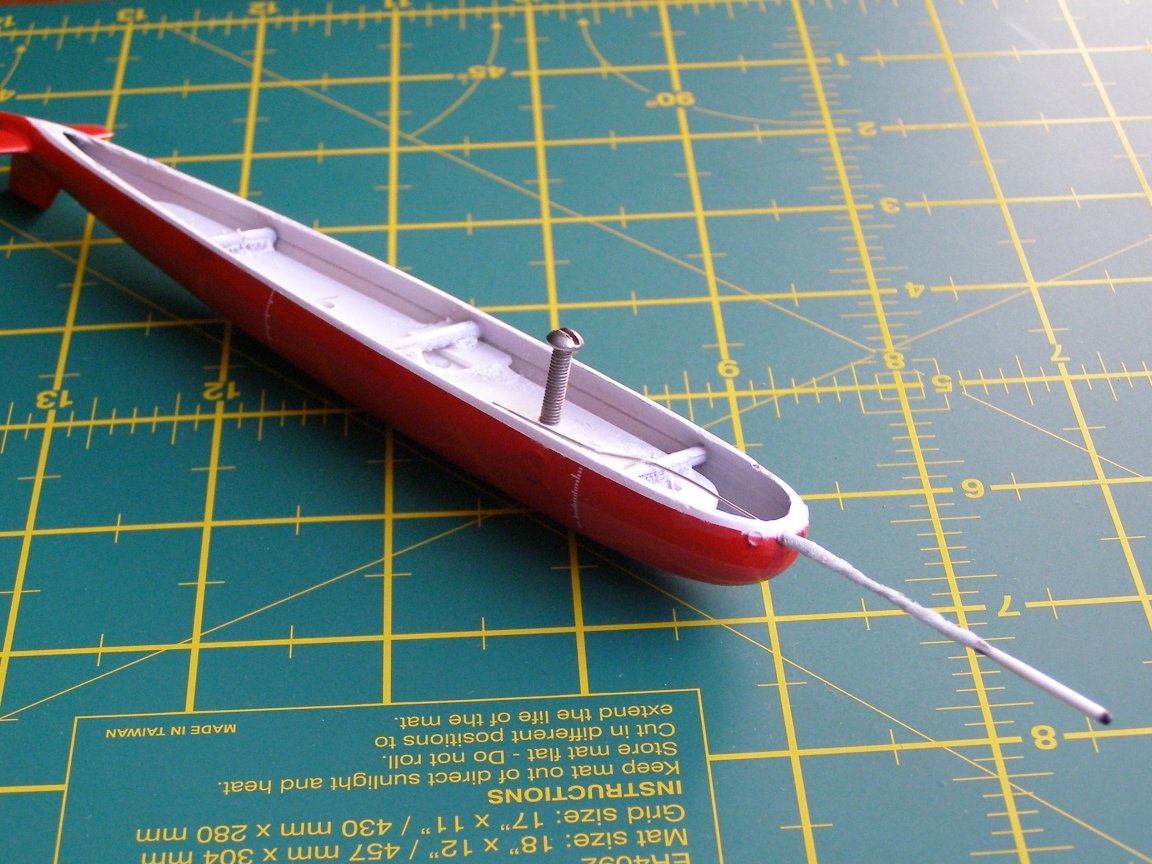
I glued the aft plumage of the boat, installed struts in the hull, put in a plexiglass plate, primed and painted.
Then I marked the position of the submarine on the water surface (model plastic), made a slot. Then he made waves along the long sides of the inner display case, removing unnecessary plexiglass. Then he painted the inner window of the nutria with a gradient (lighter on top, darker on bottom). He painted the inner surface of the display case so that there would be no scratches when installing the external display case. Then he glued the water surface to the inner display case from above.
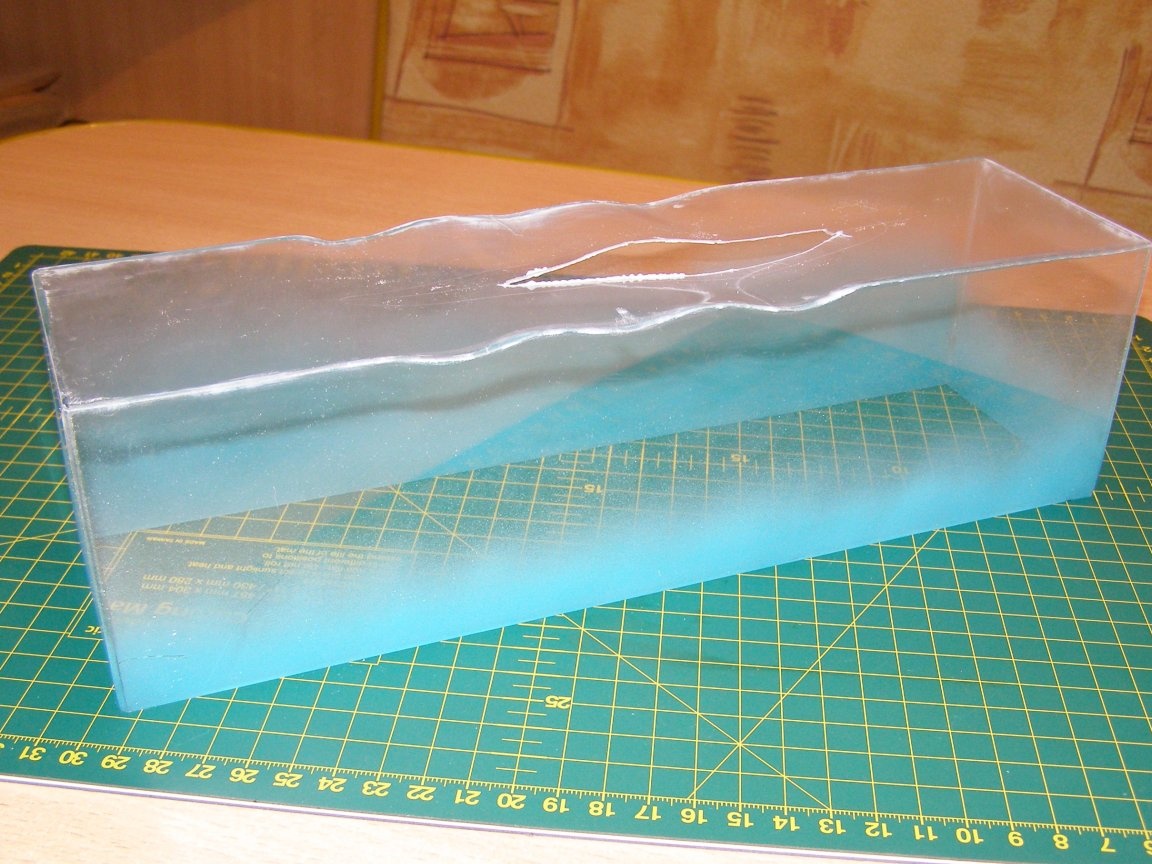
When I saw the result, I realized that at the bottom you also need to cut plexiglass and paint it. Otherwise, the base of the model will be viewed. Which he did.

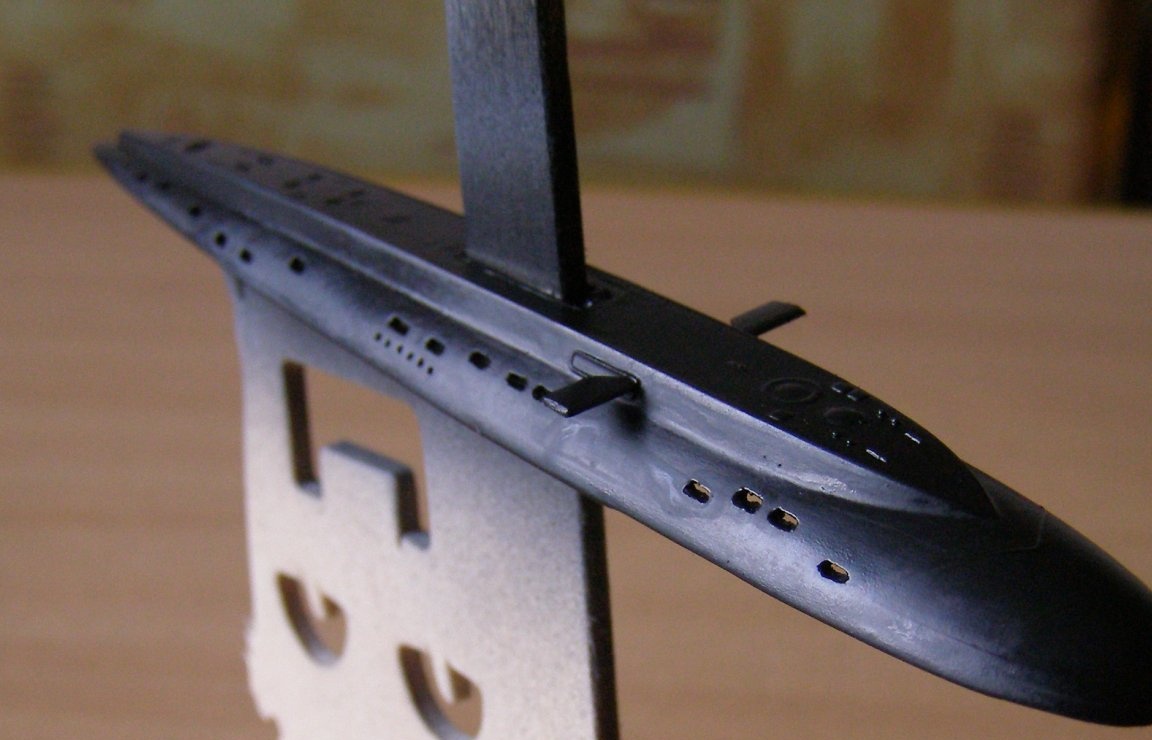
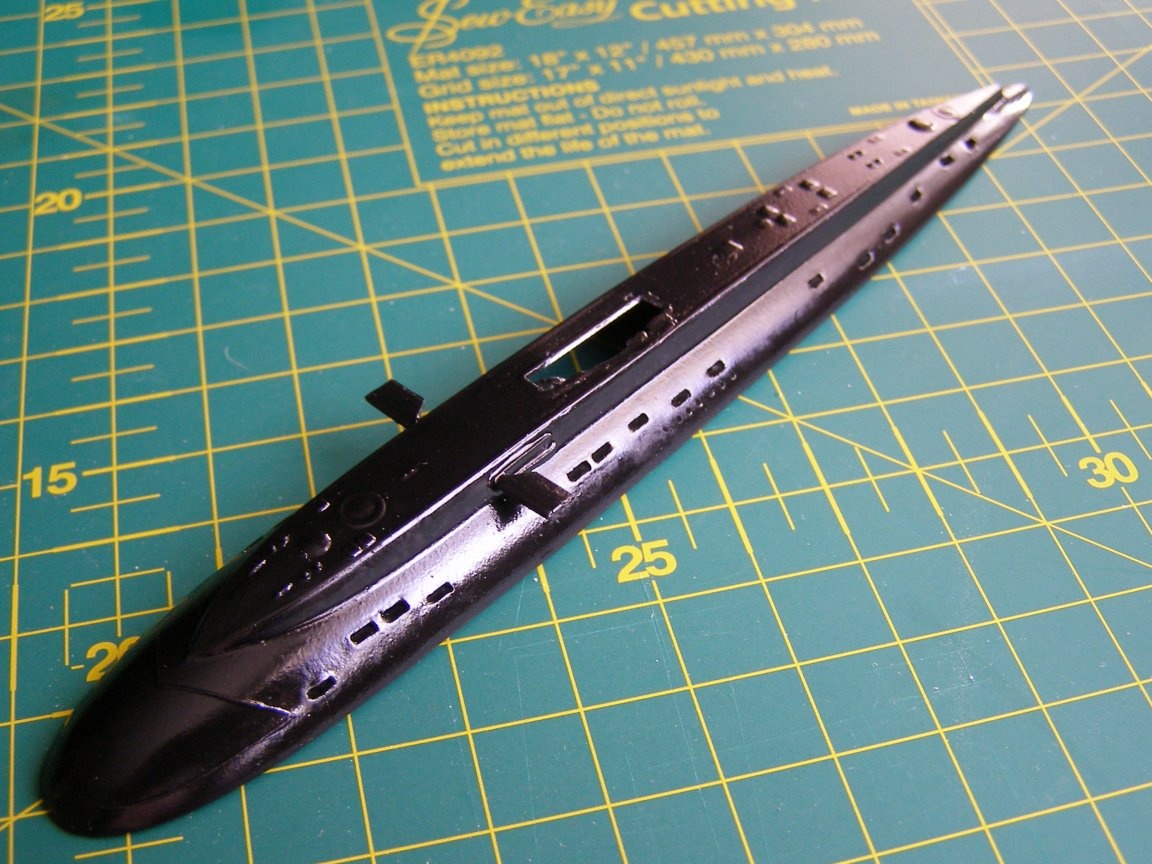
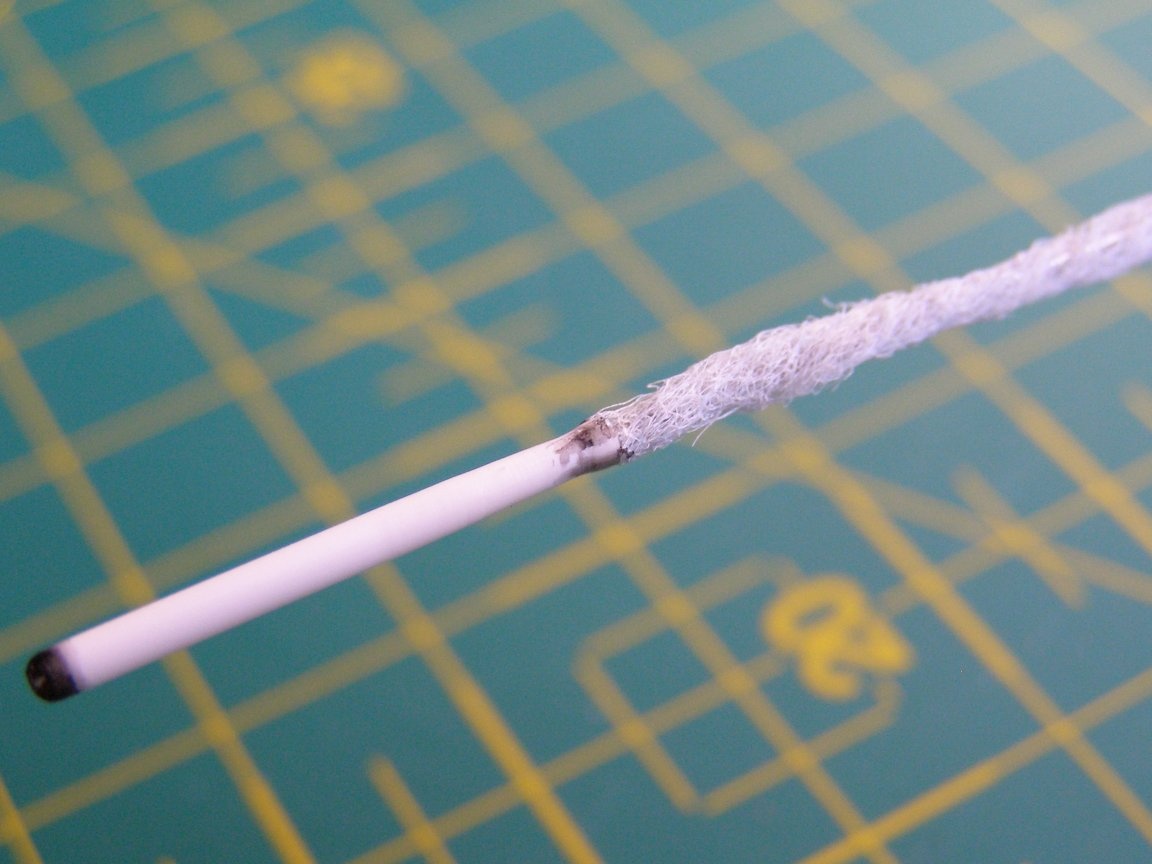
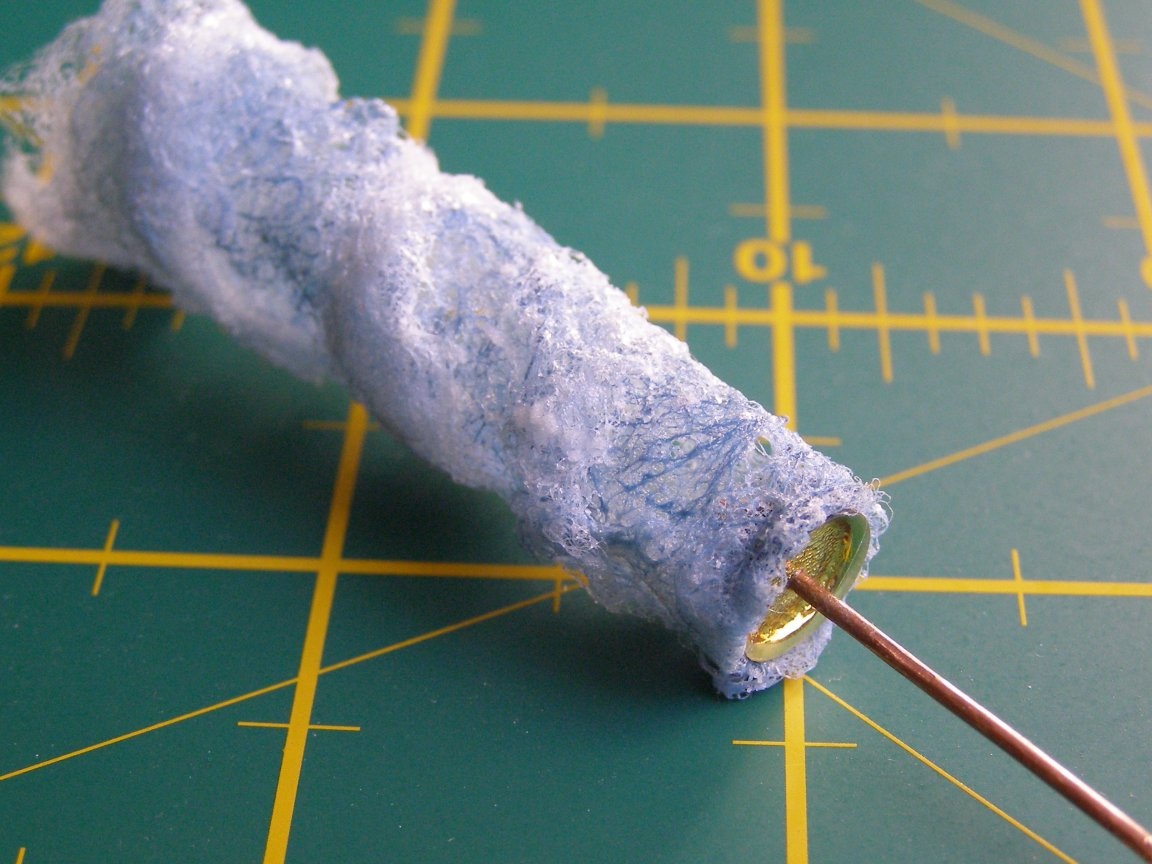
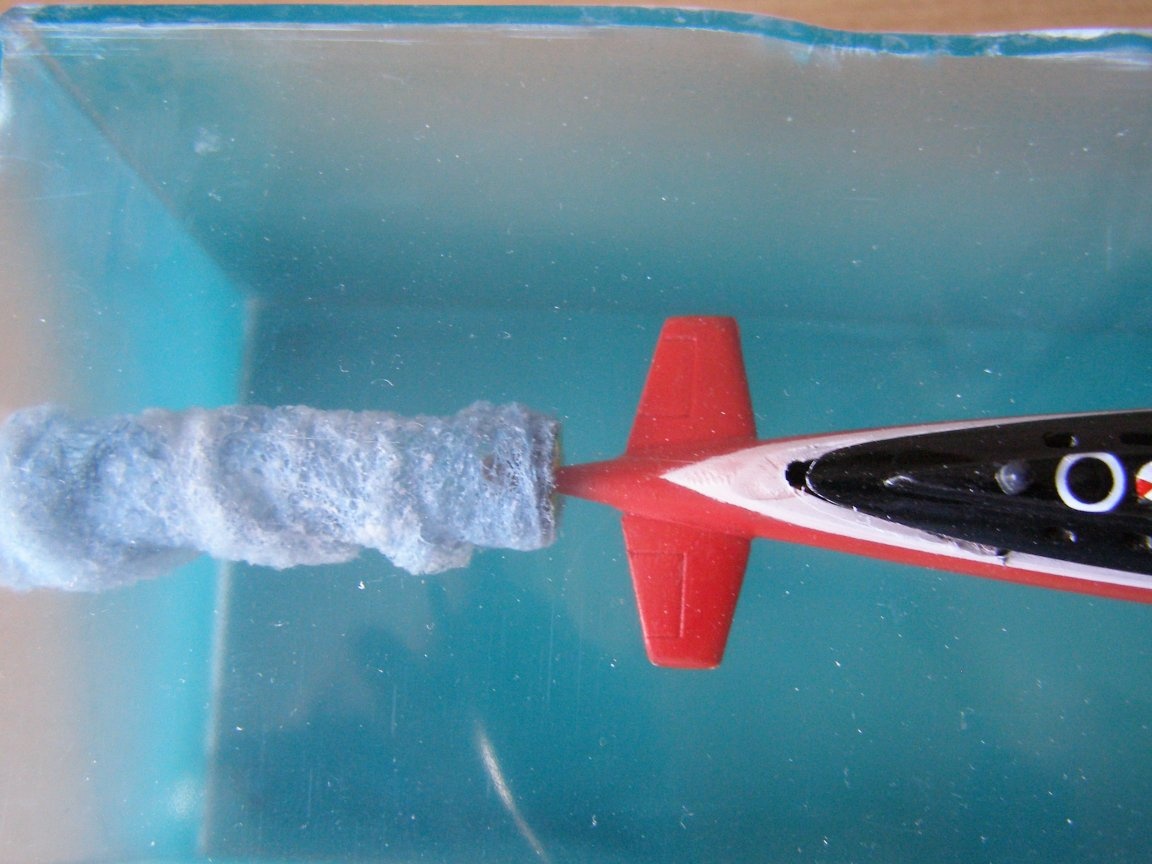
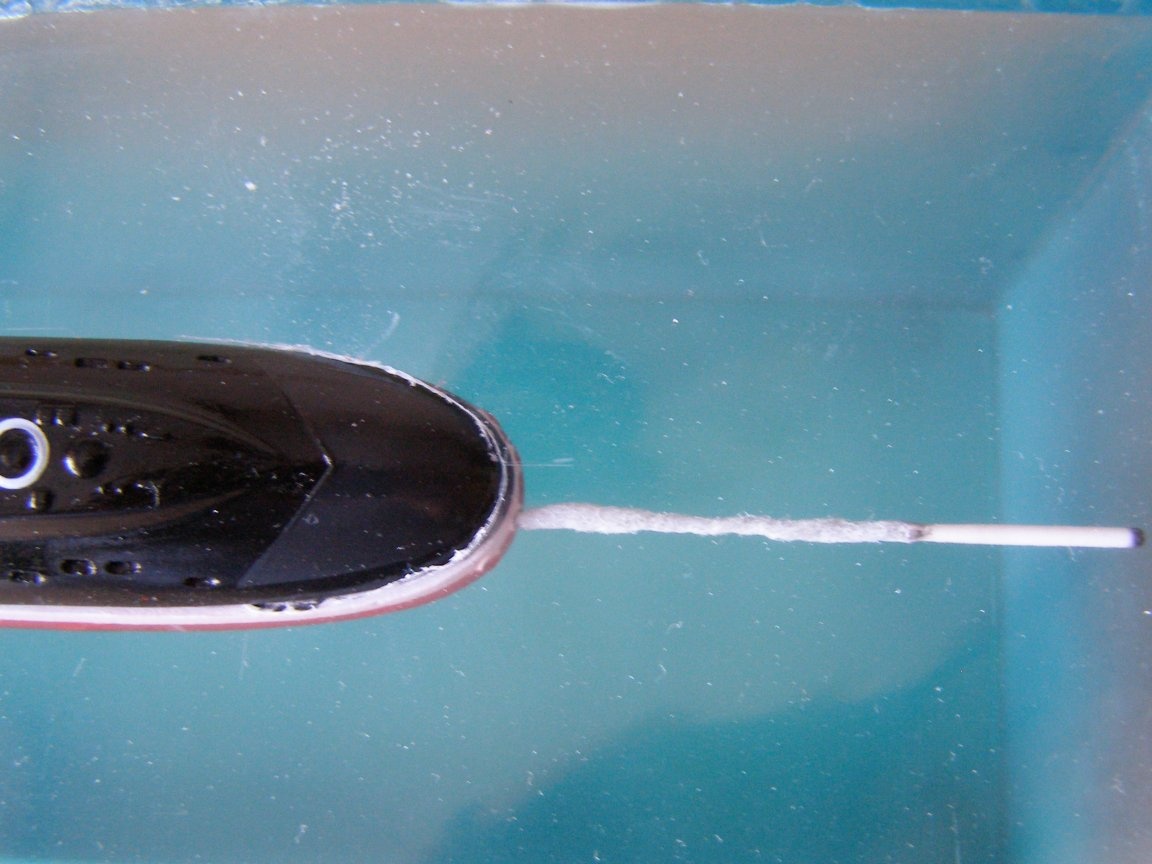
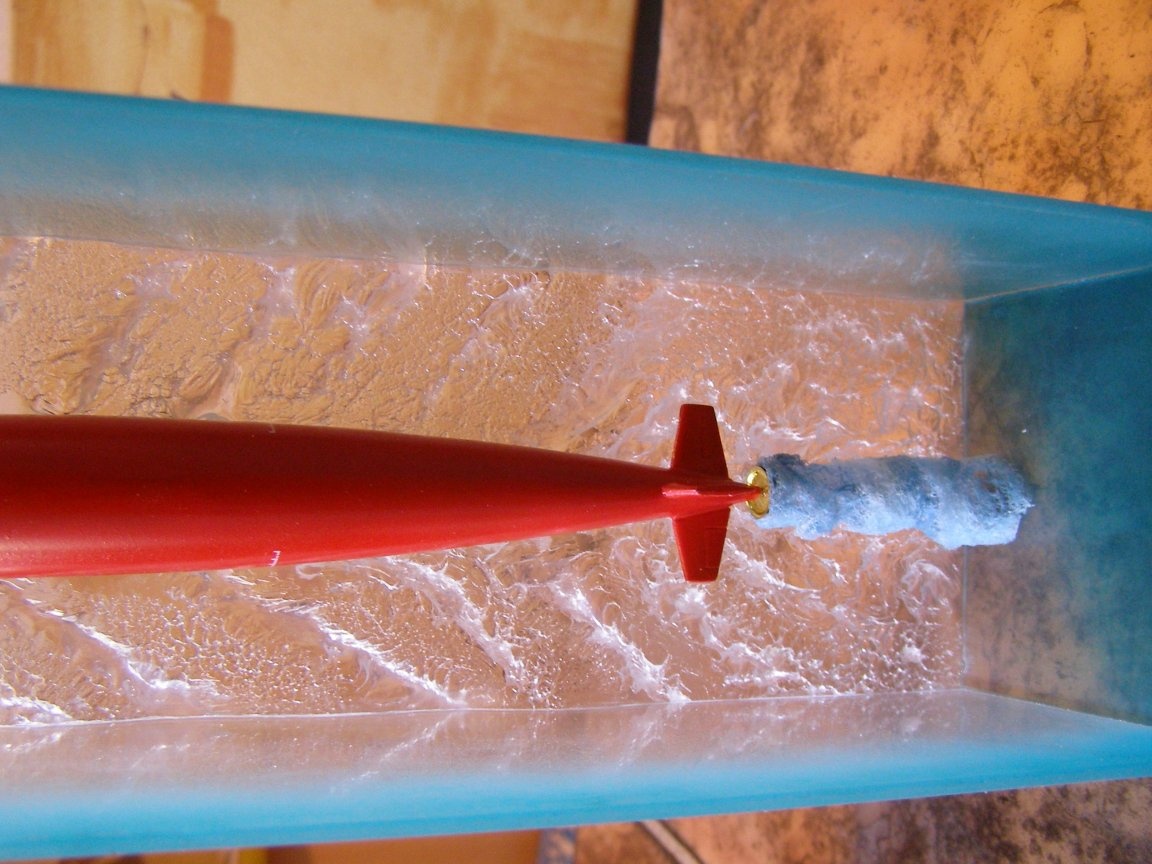
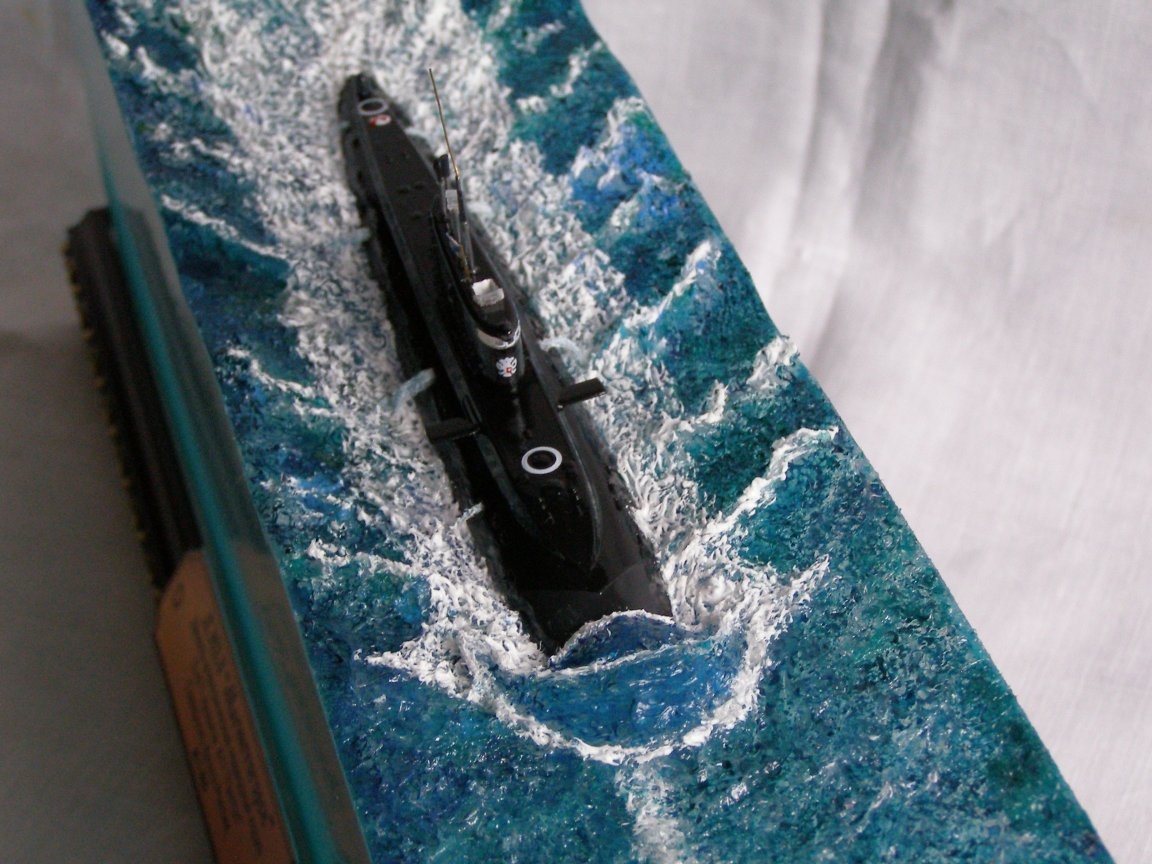
Next, I made a screw and a torpedo. The trace of them was made of non-woven fabric with the appropriate color. Then it was installed at the bottom of the boat. She herself was installed on the water surface, from the bottom. And fixed with screws. Then the top of the boat hull was installed.
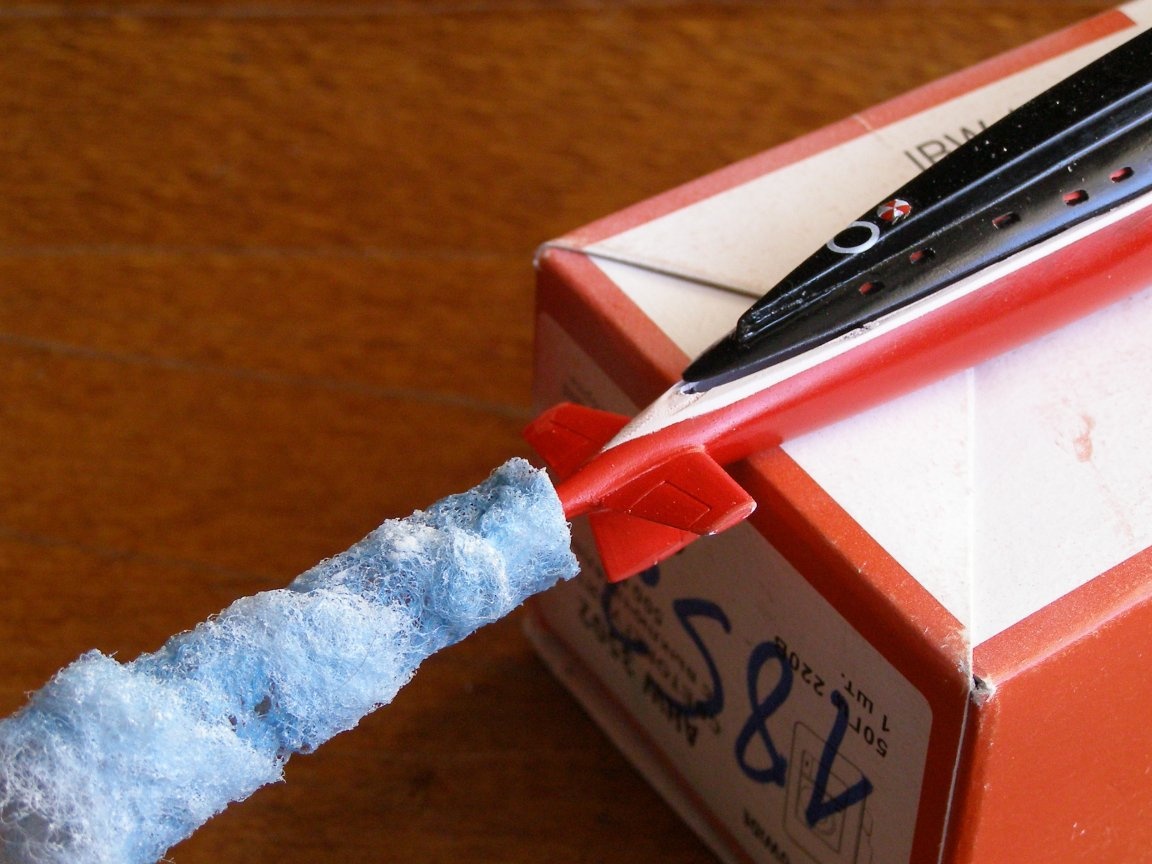
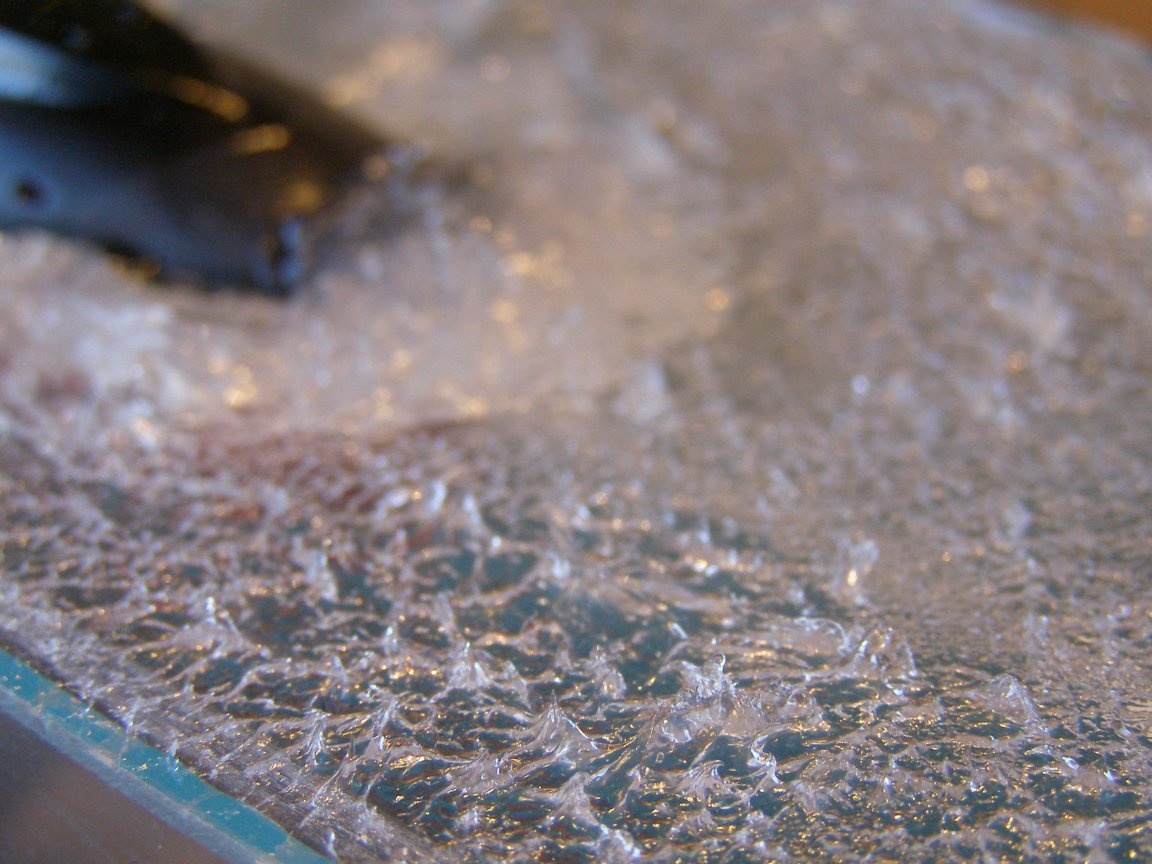
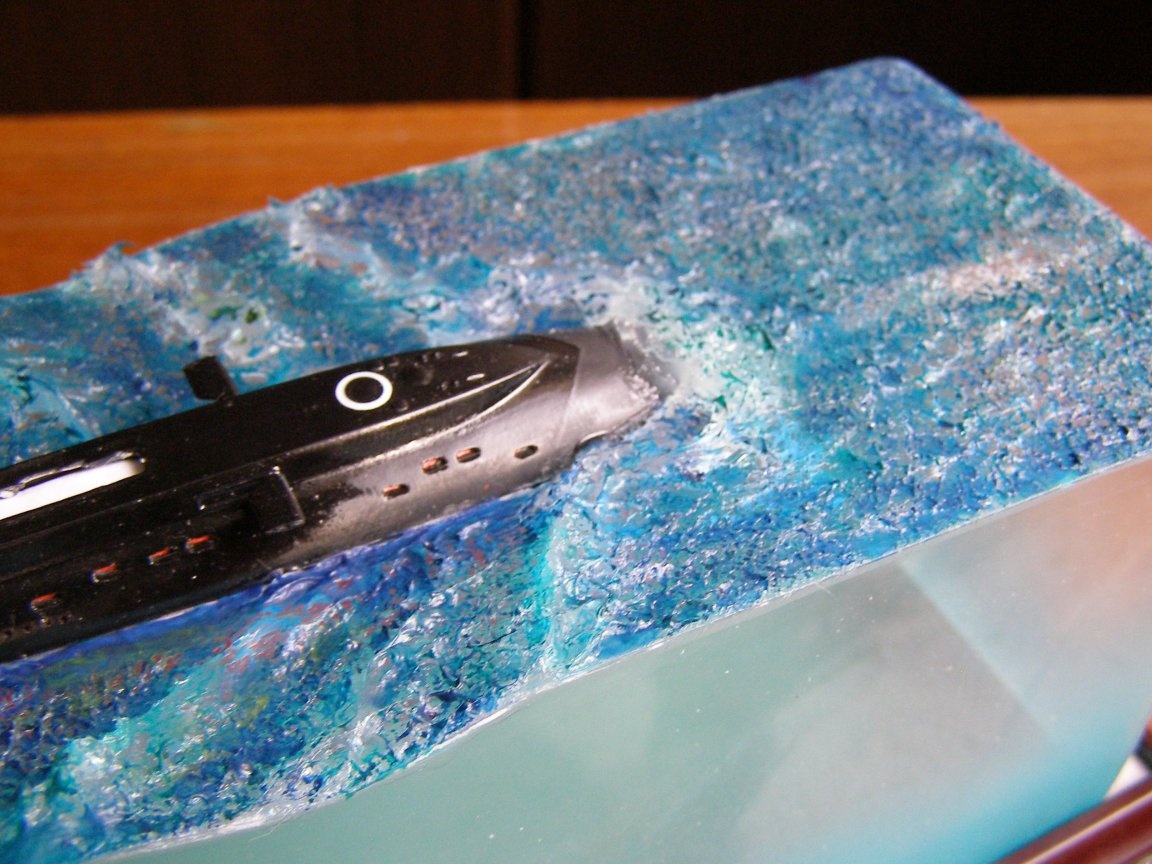
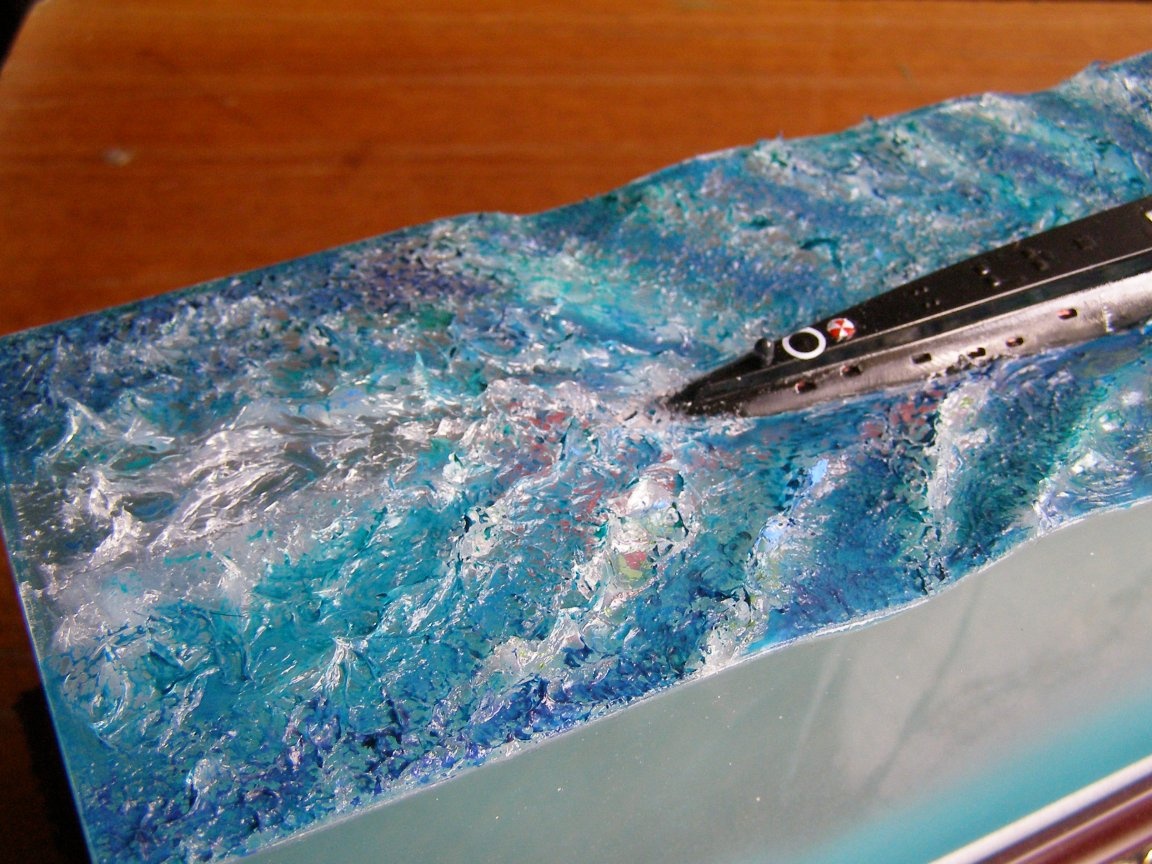
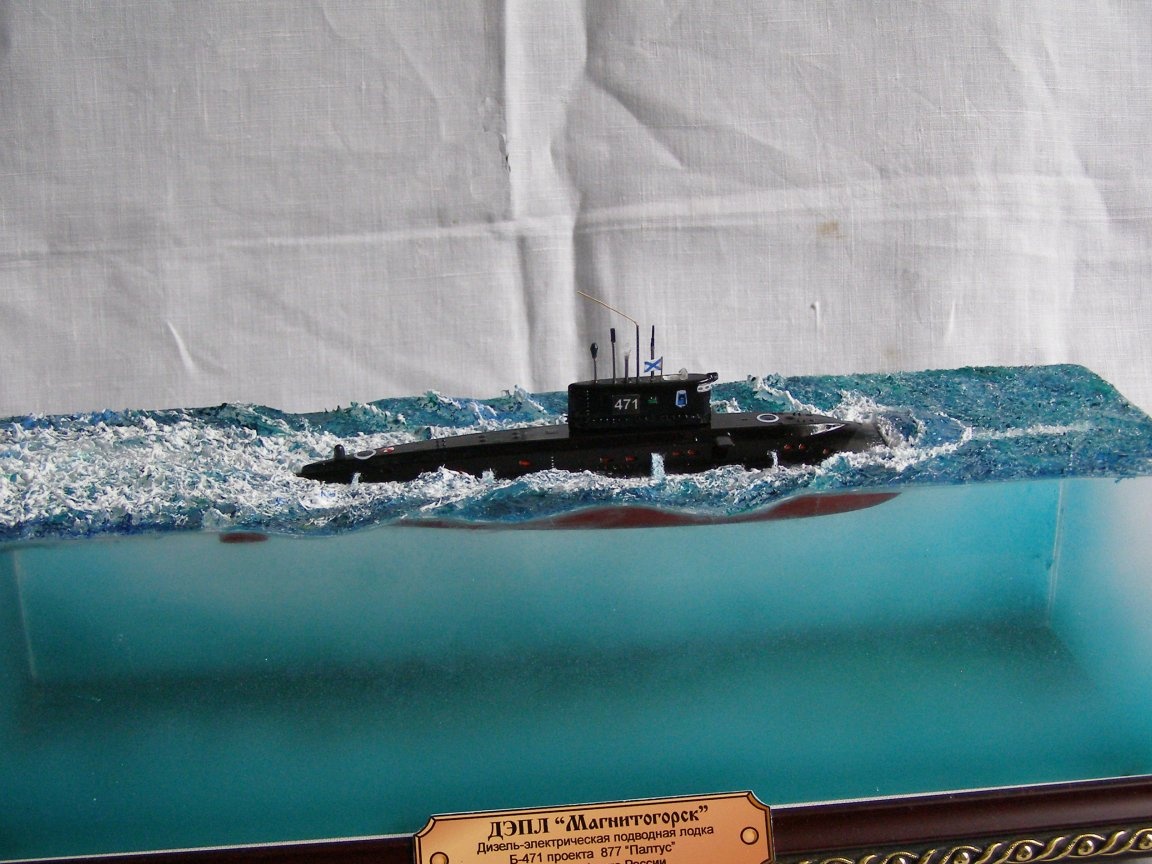
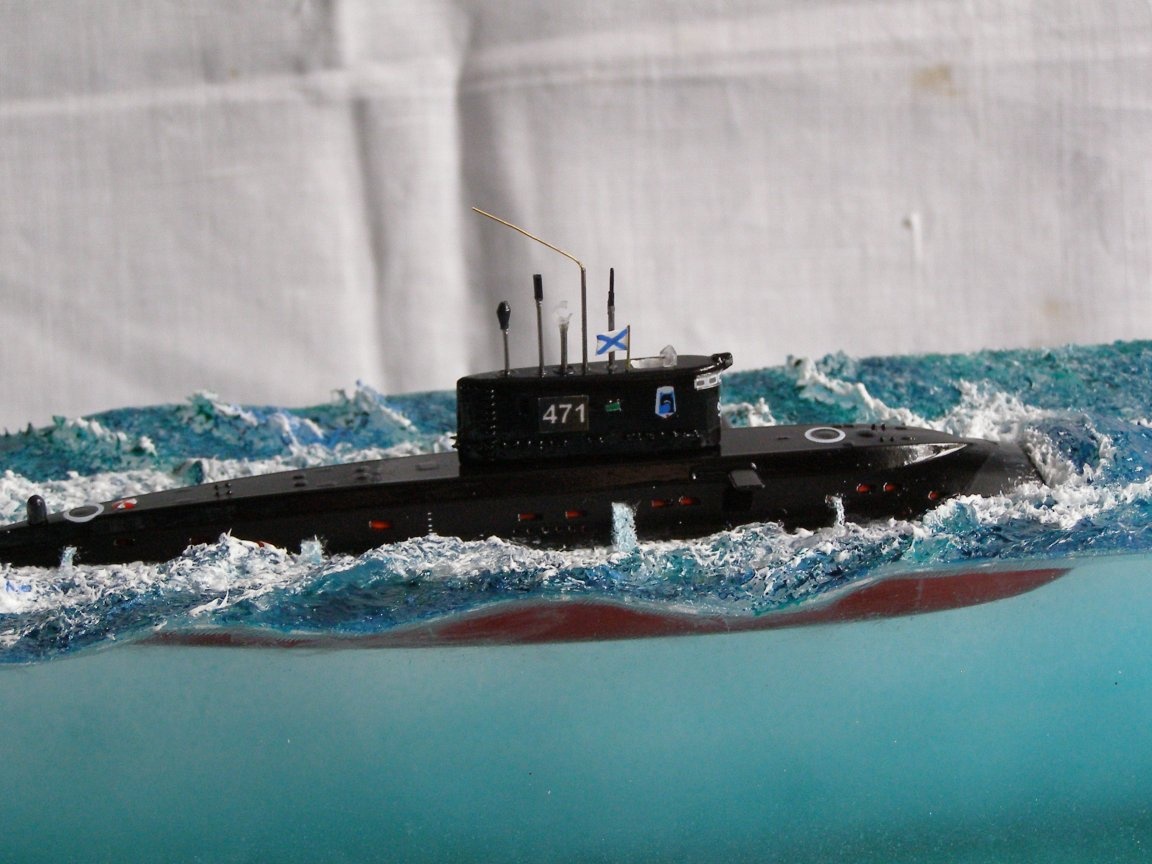
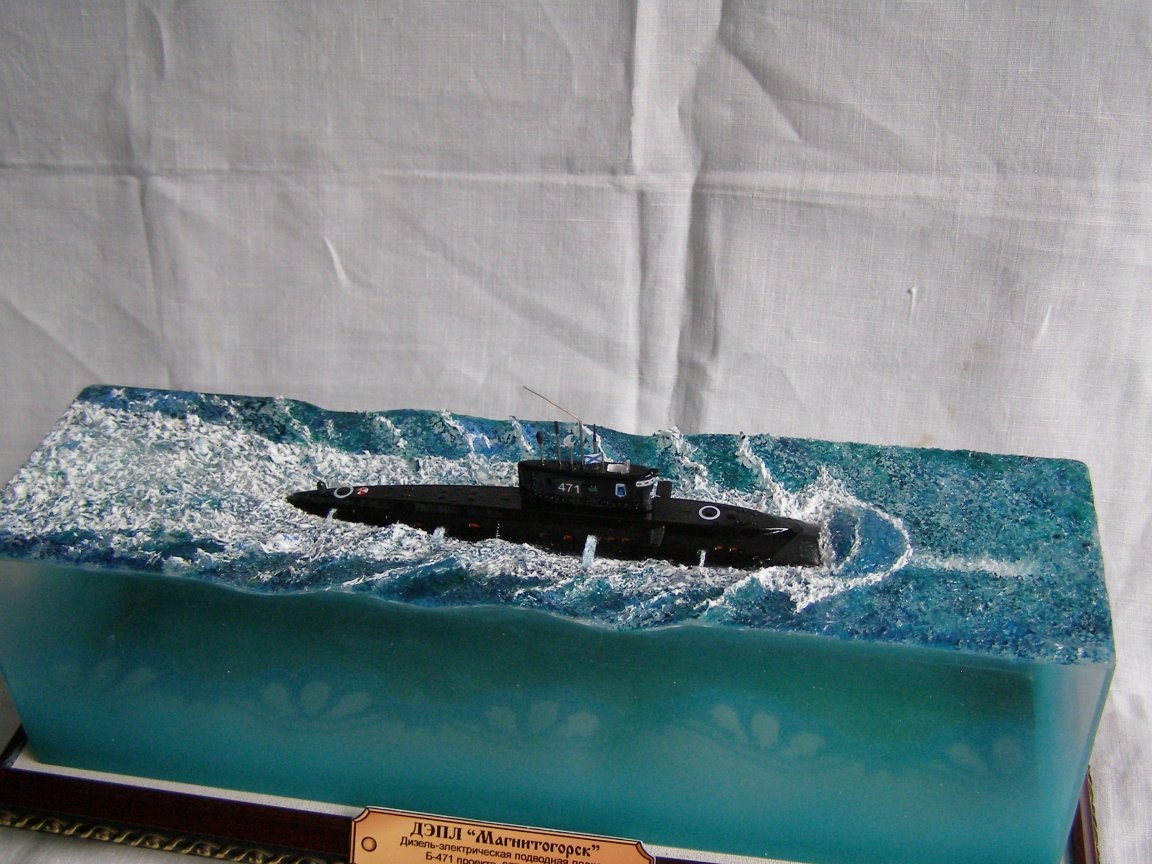
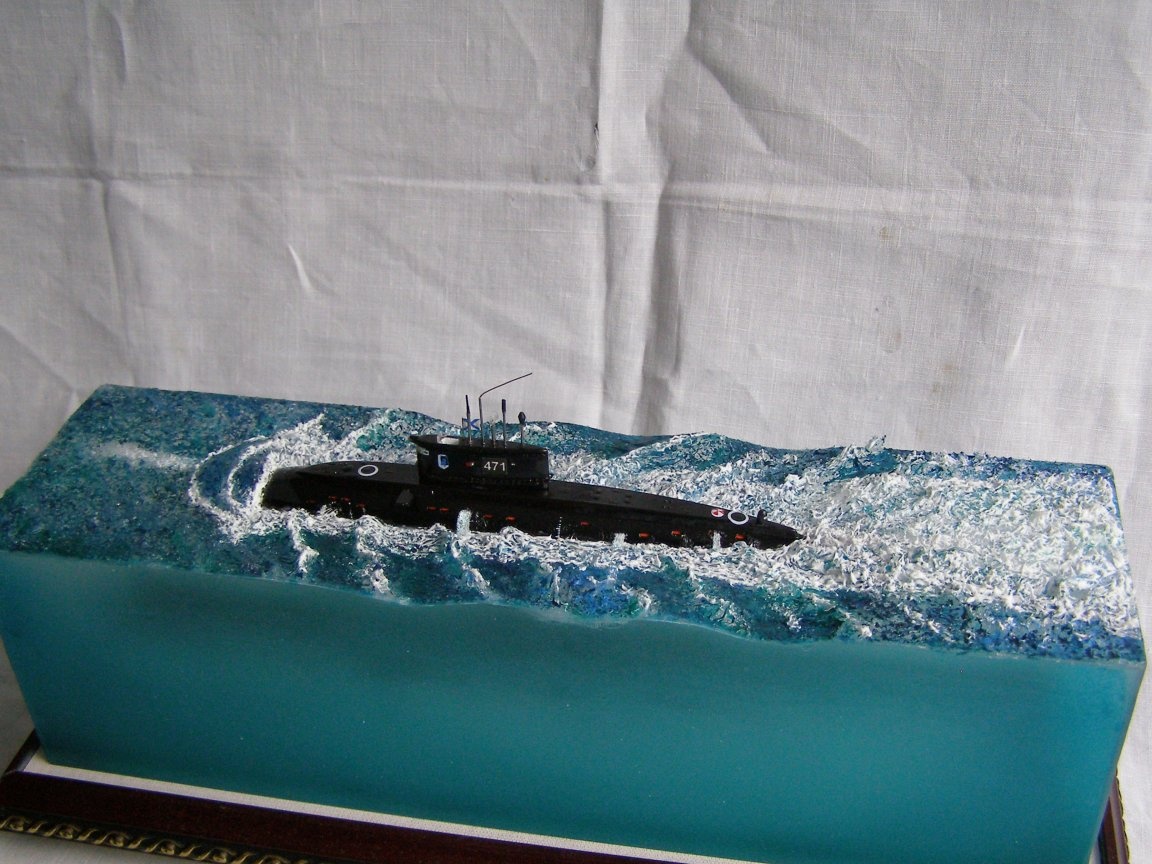
It's time to create the water surface itself. It was created by applying a transparent sanitary sealant. From it, waves were formed in accordance with the photographs of the passage of the submarine.
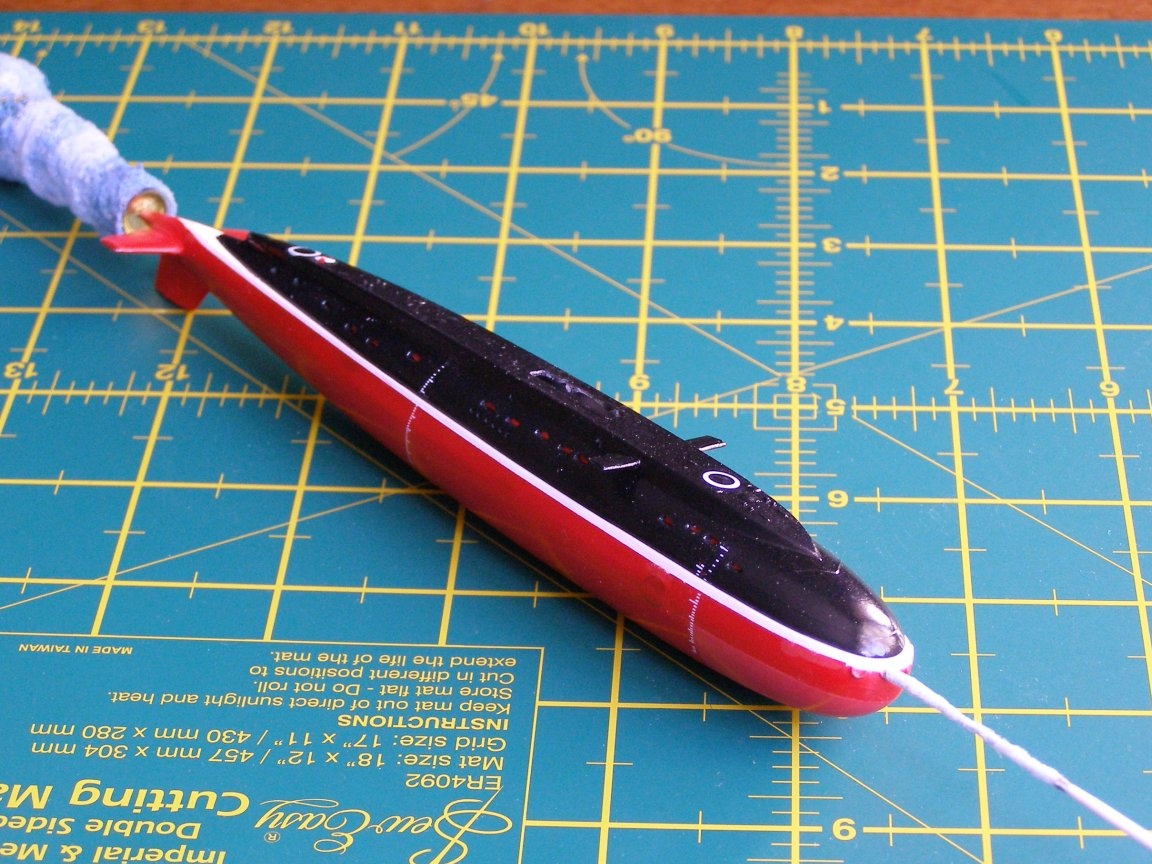
Seen from below it looks like this.
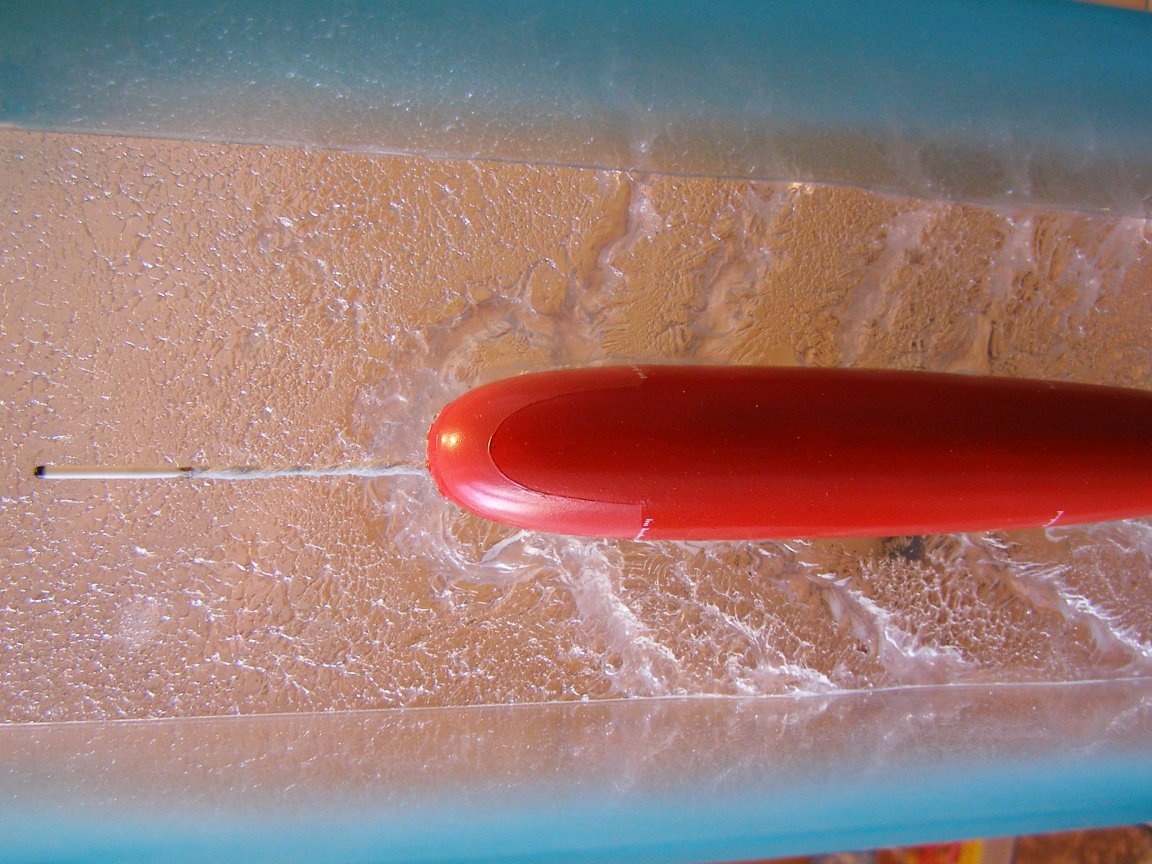
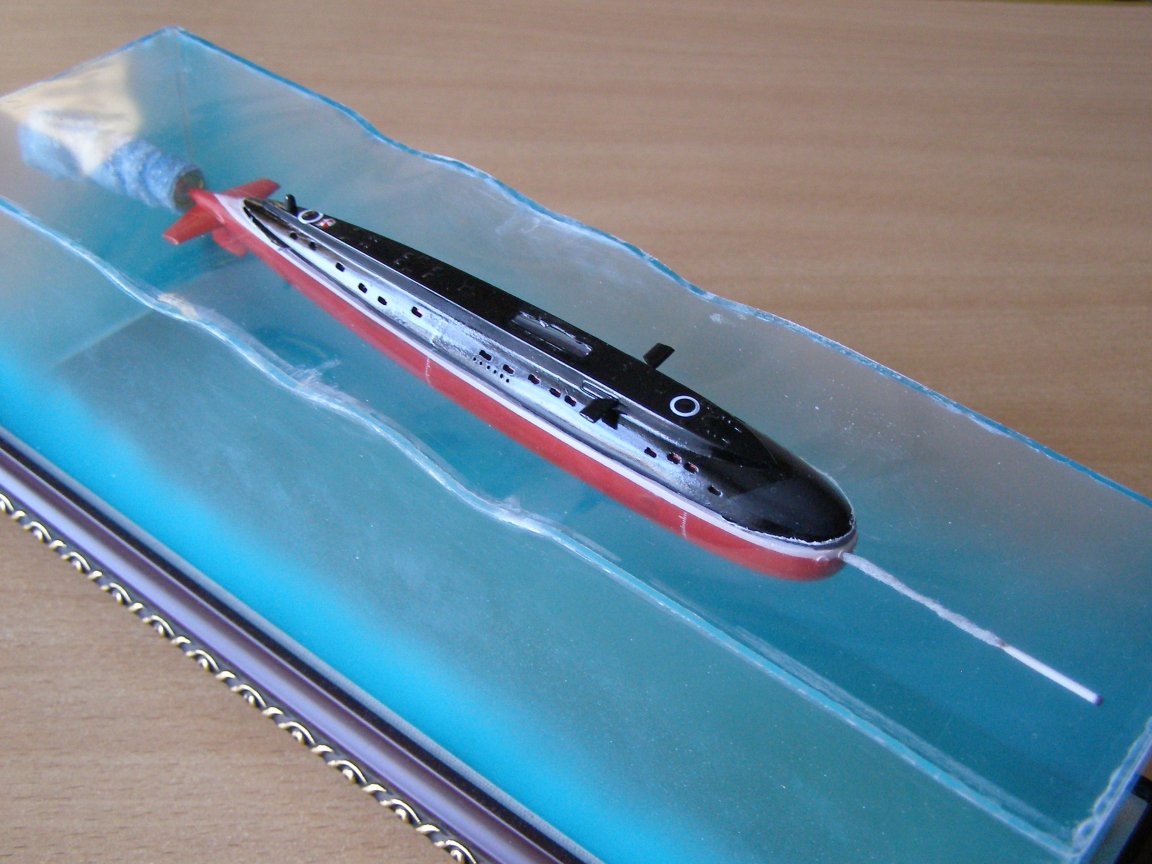
Well, then reusable staining with a brush, selected flowers from acrylic paints. And the last stage of creating the water element is coating it with glossy acrylic varnish.
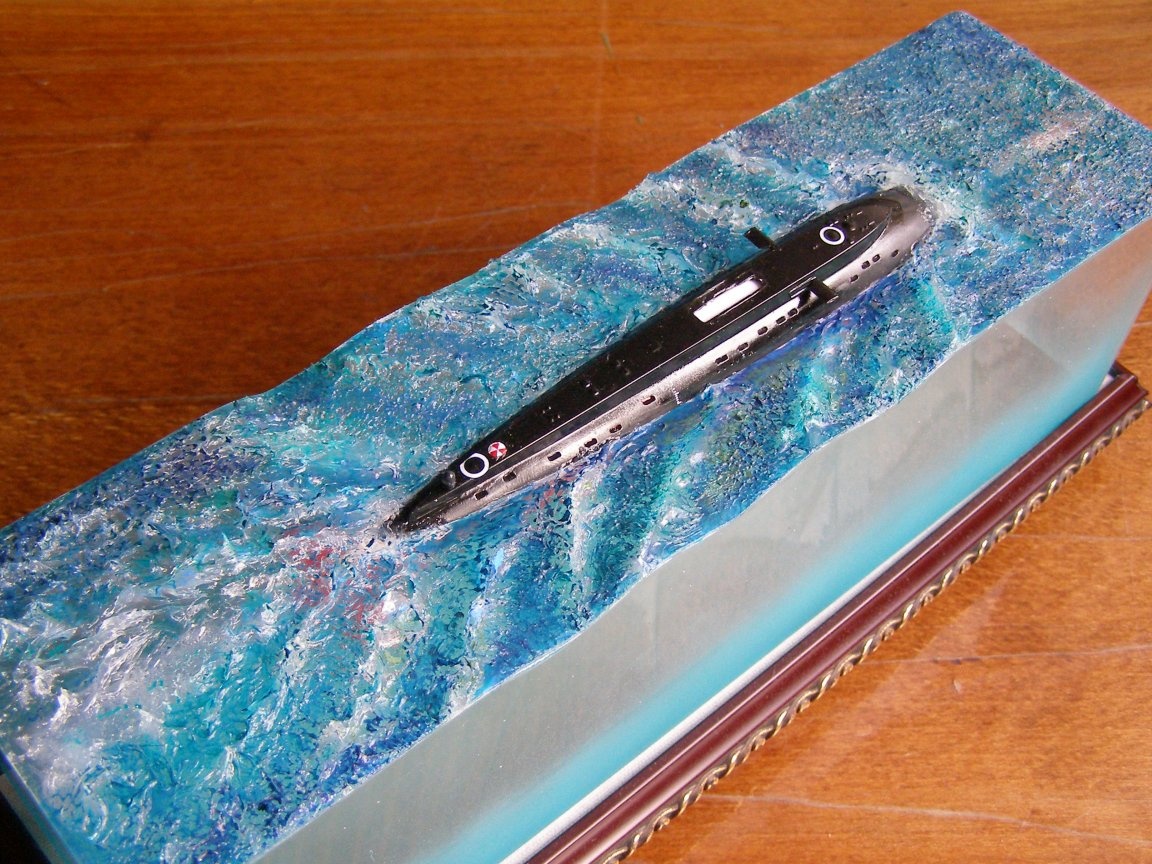
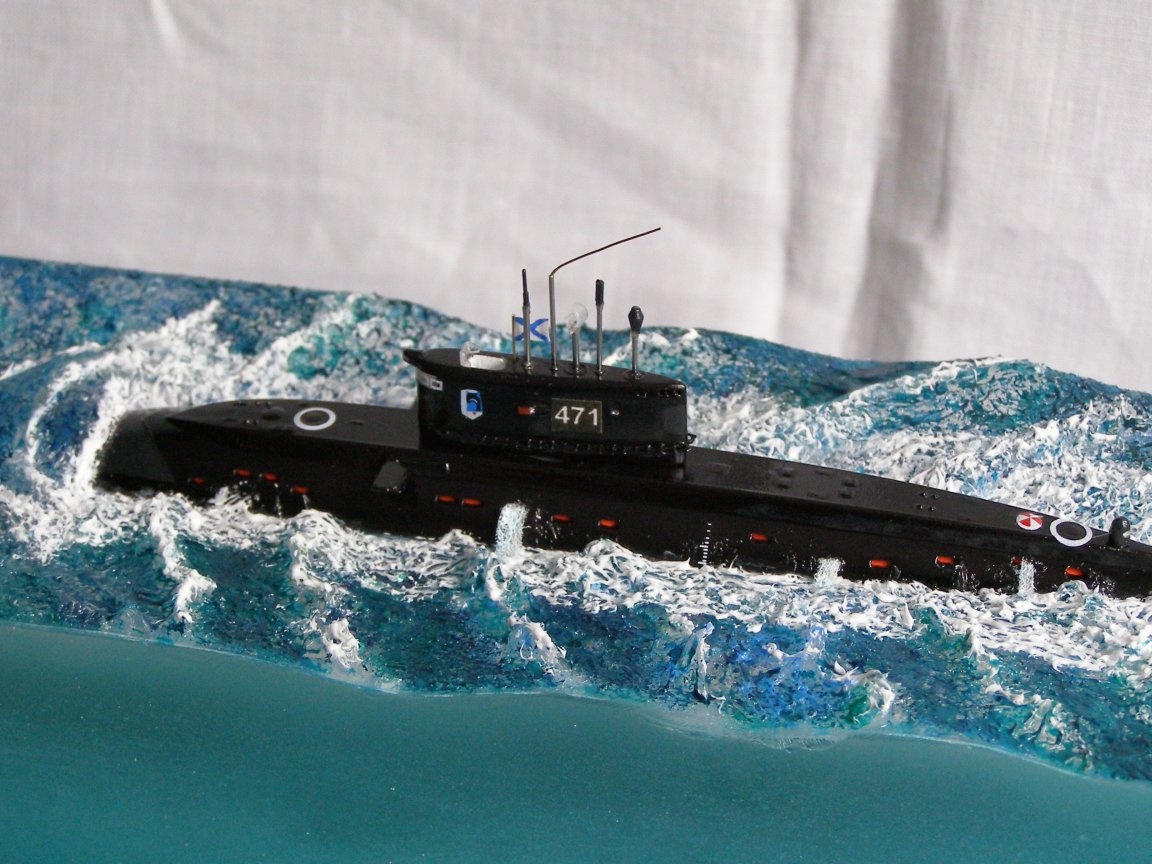
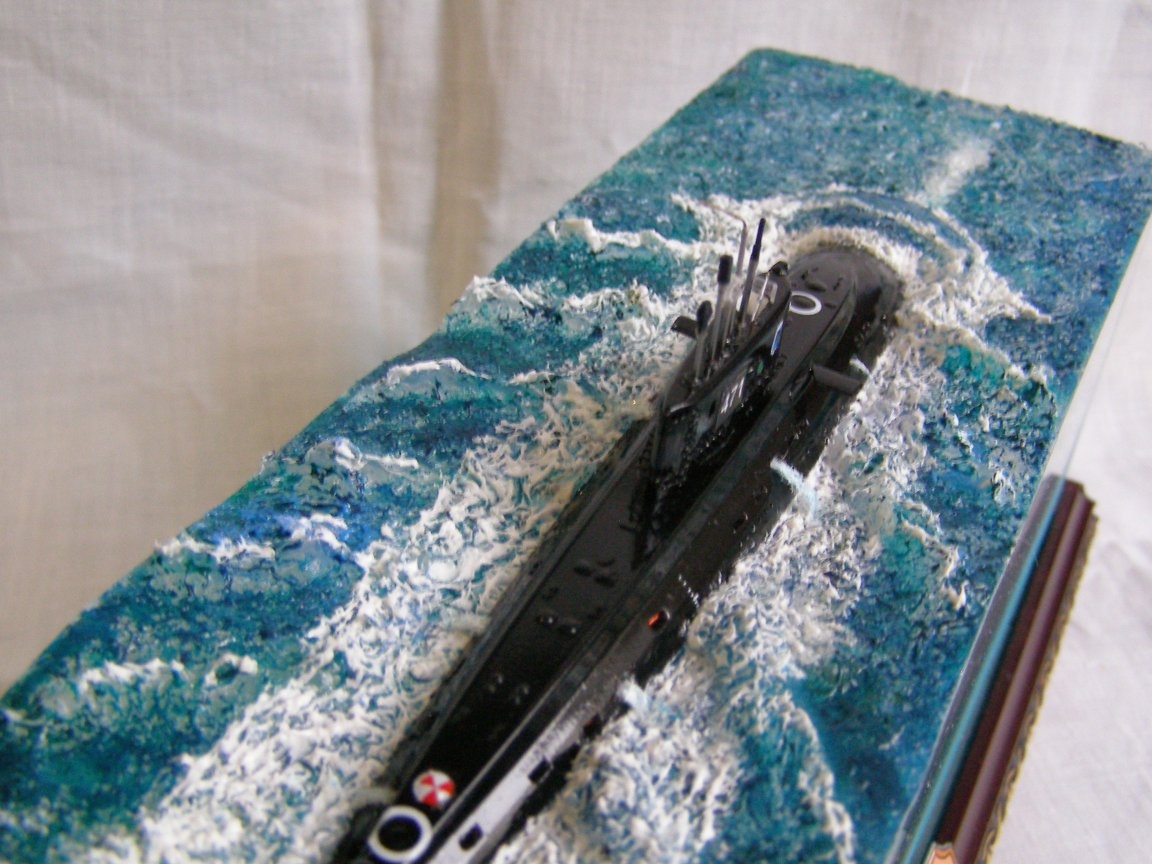
Then the boat was assembled with modifications and installed in its place.
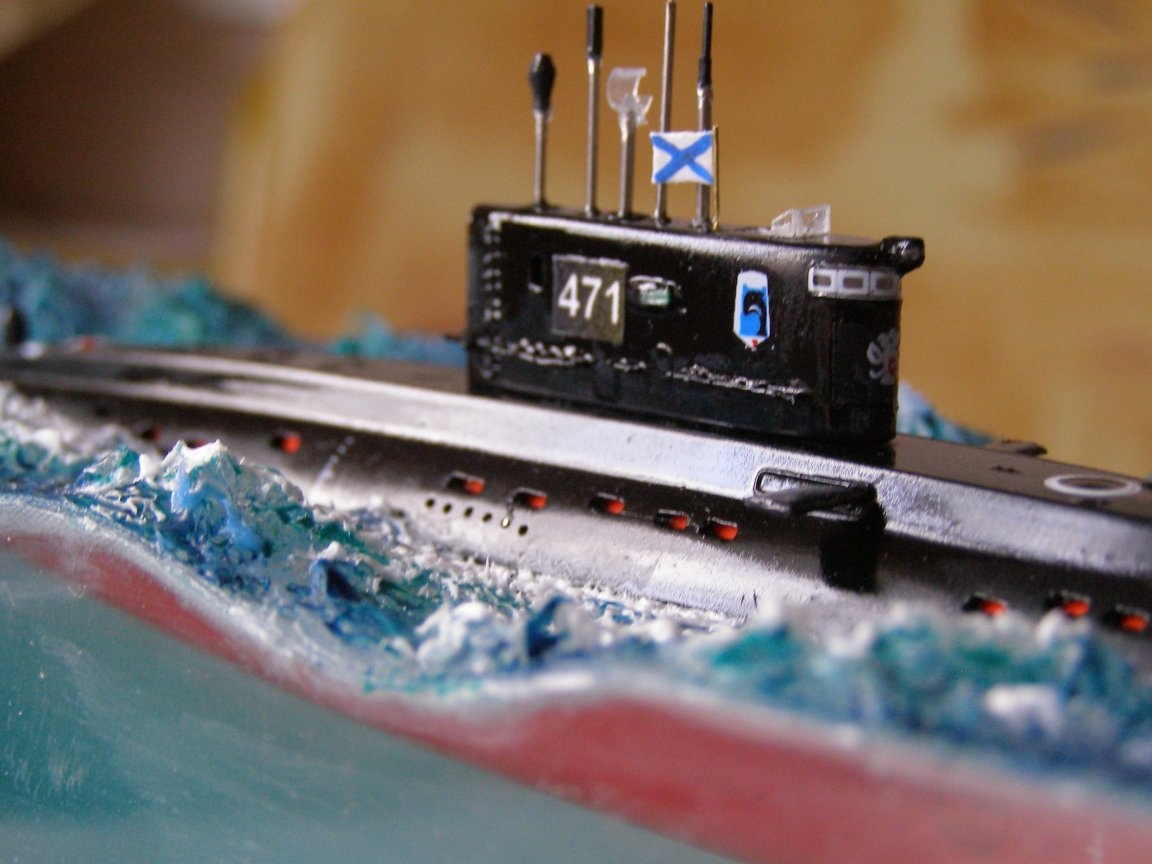

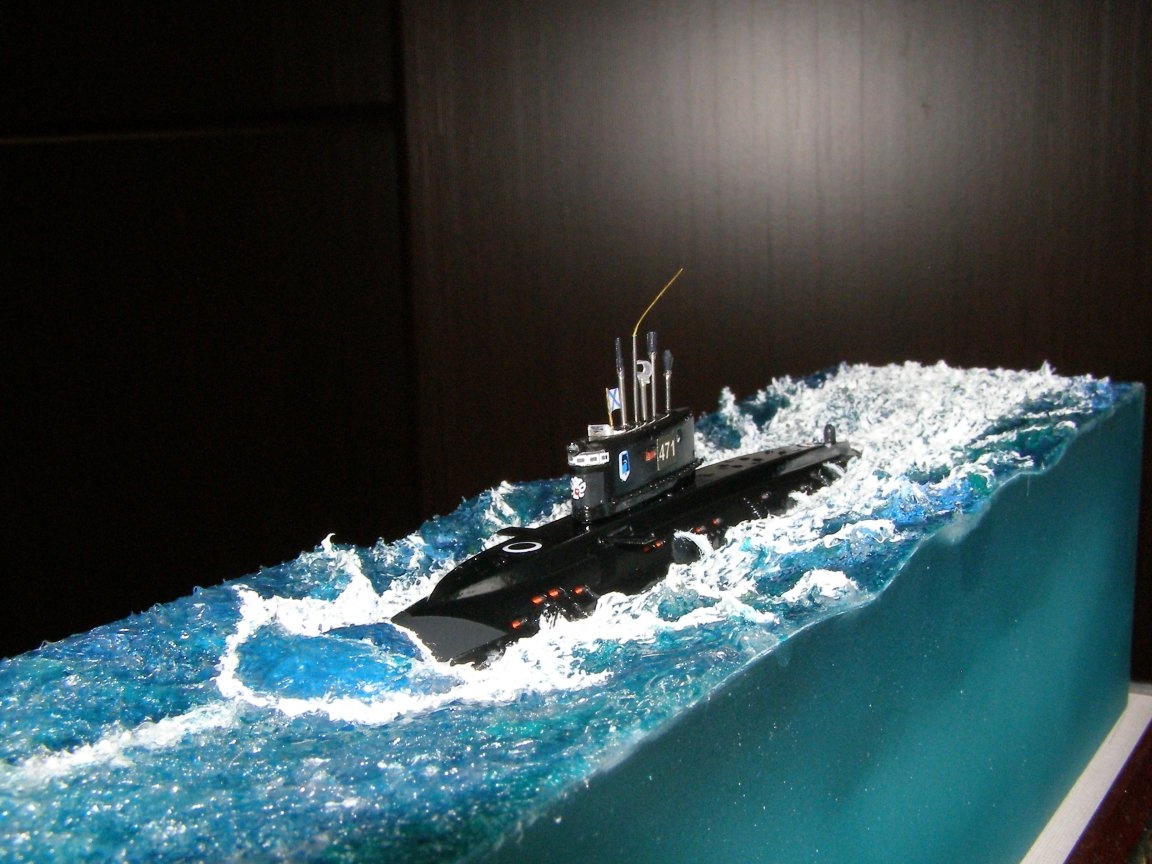
After the final assembly, the following happened.
For the manufacture of the model required.
1. The plastic prefabricated model of the submarine "Varshavyanka" from the company "Modelist" in M 1: 400
2. Plastic molding for paintings 2 m
3. Chipboard in the right size
4. Silicate glass for the display case
5. Plexiglas for an internal showcase
6. Plastic sheet to create the foundation of the water surface
7. Silicone sealant tube
8. Glue super-moment 6 g (two tubes)
9. Acrylic paints. I worked with paints and varnish from Tamiya
10. Airbrush
11. A piece of non-woven fabric
12. The tool of the modeler.
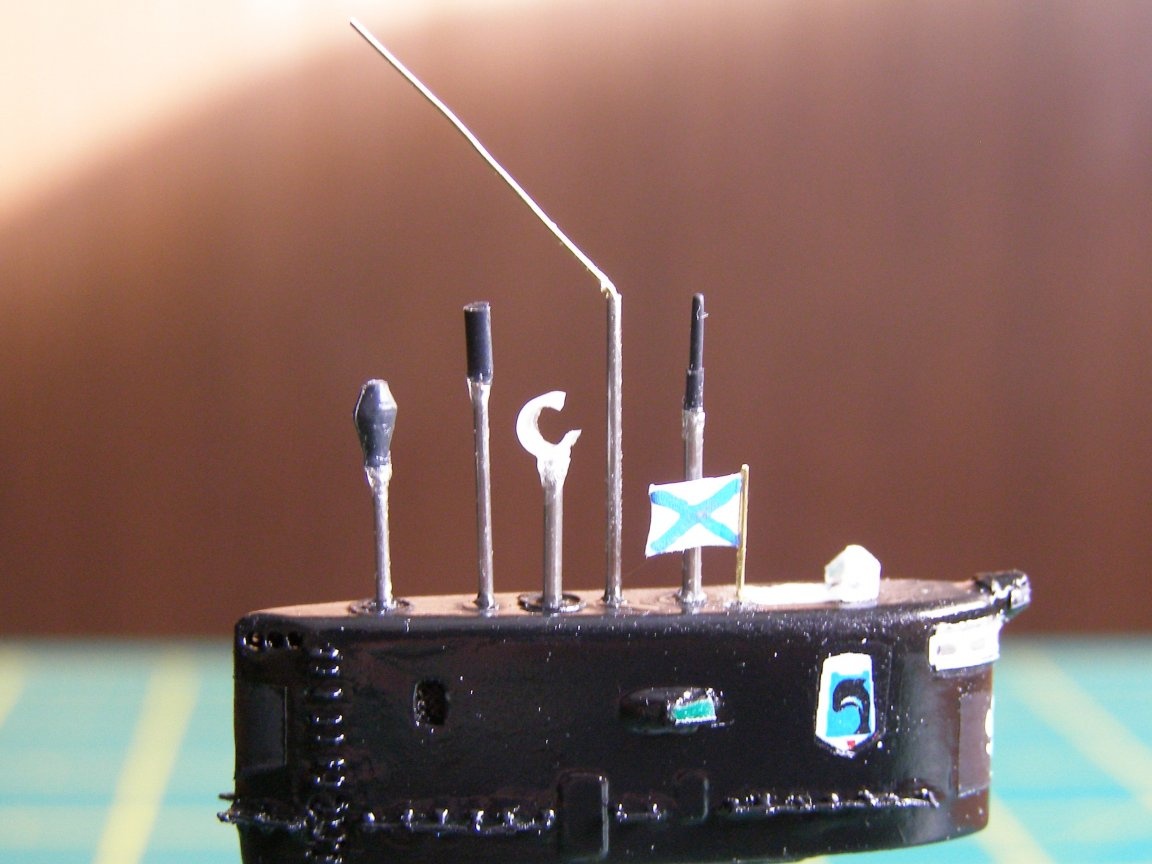
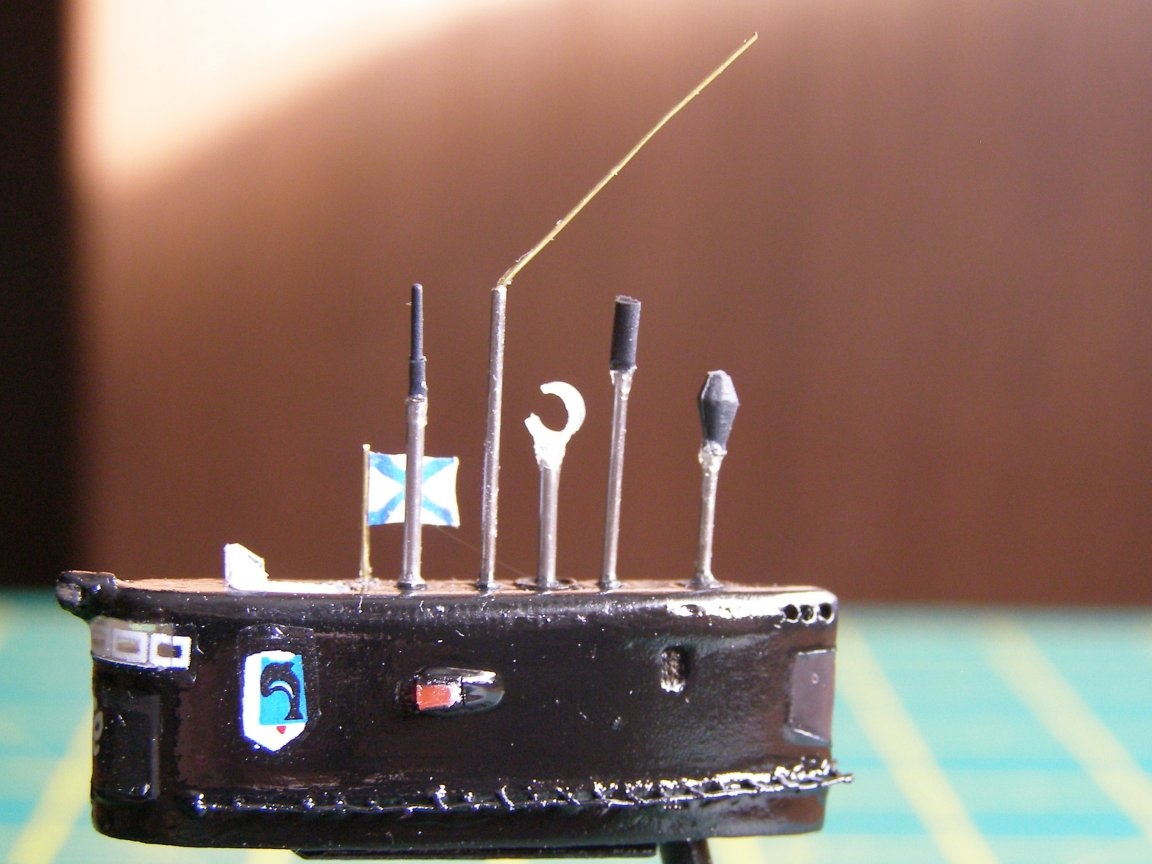
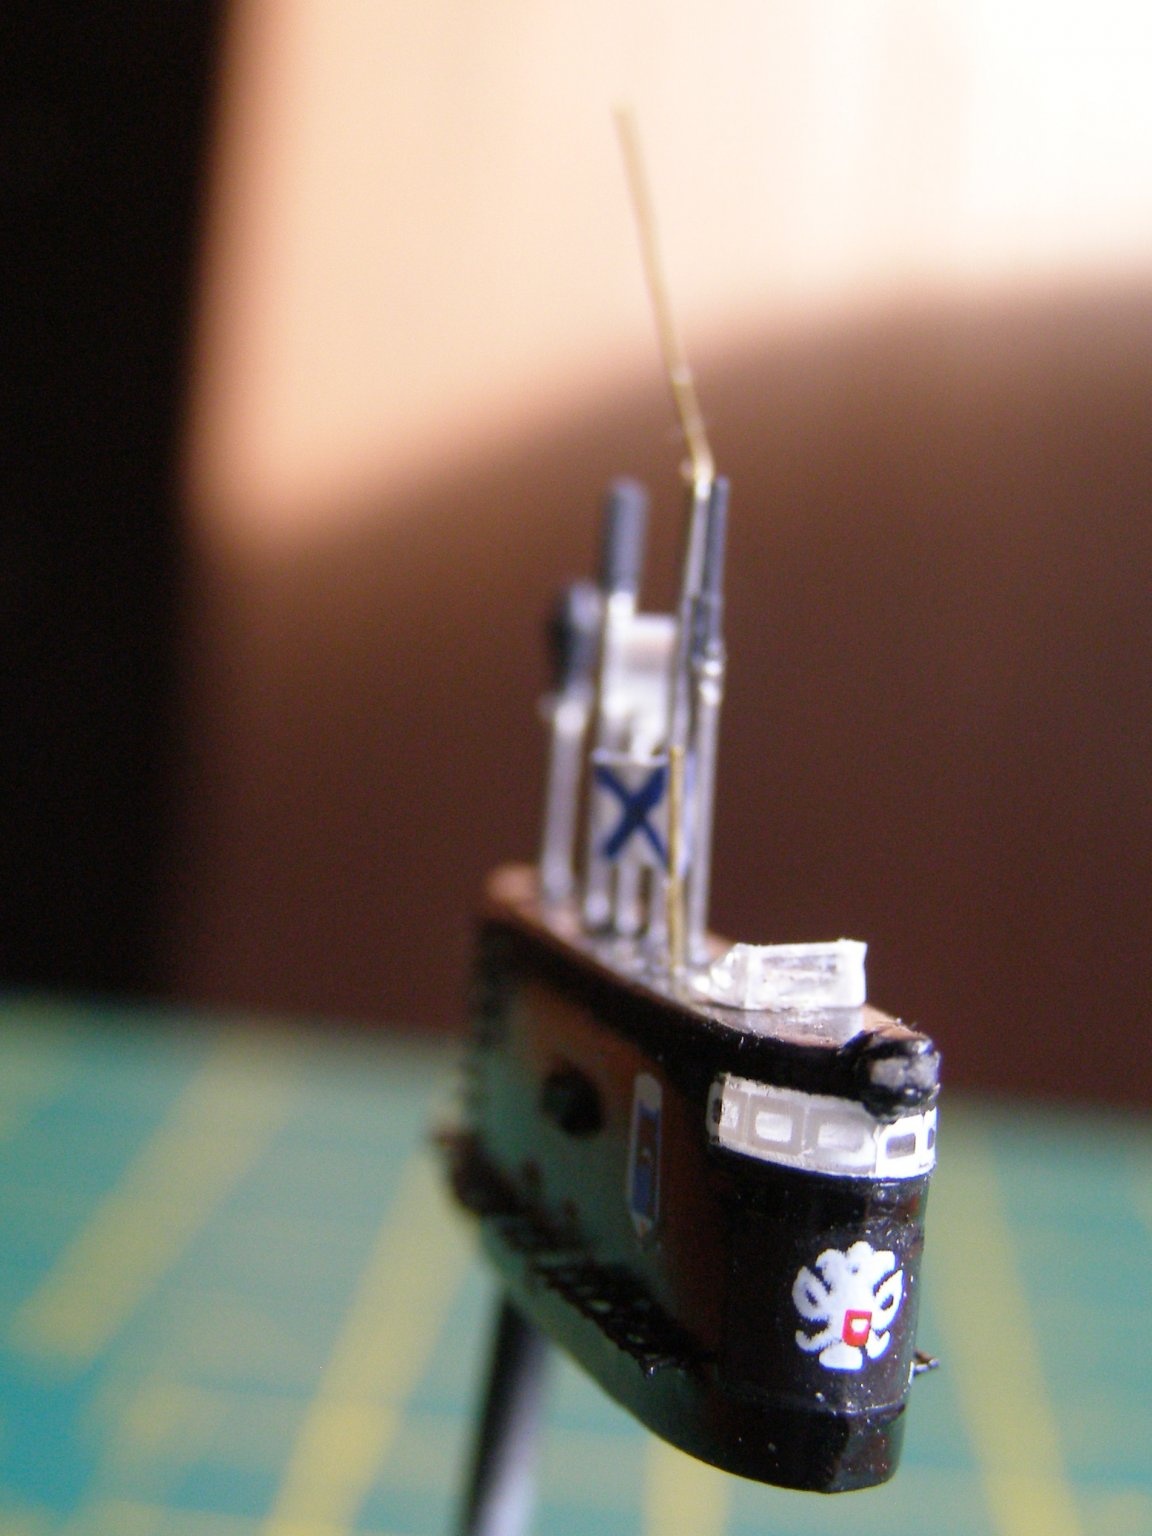
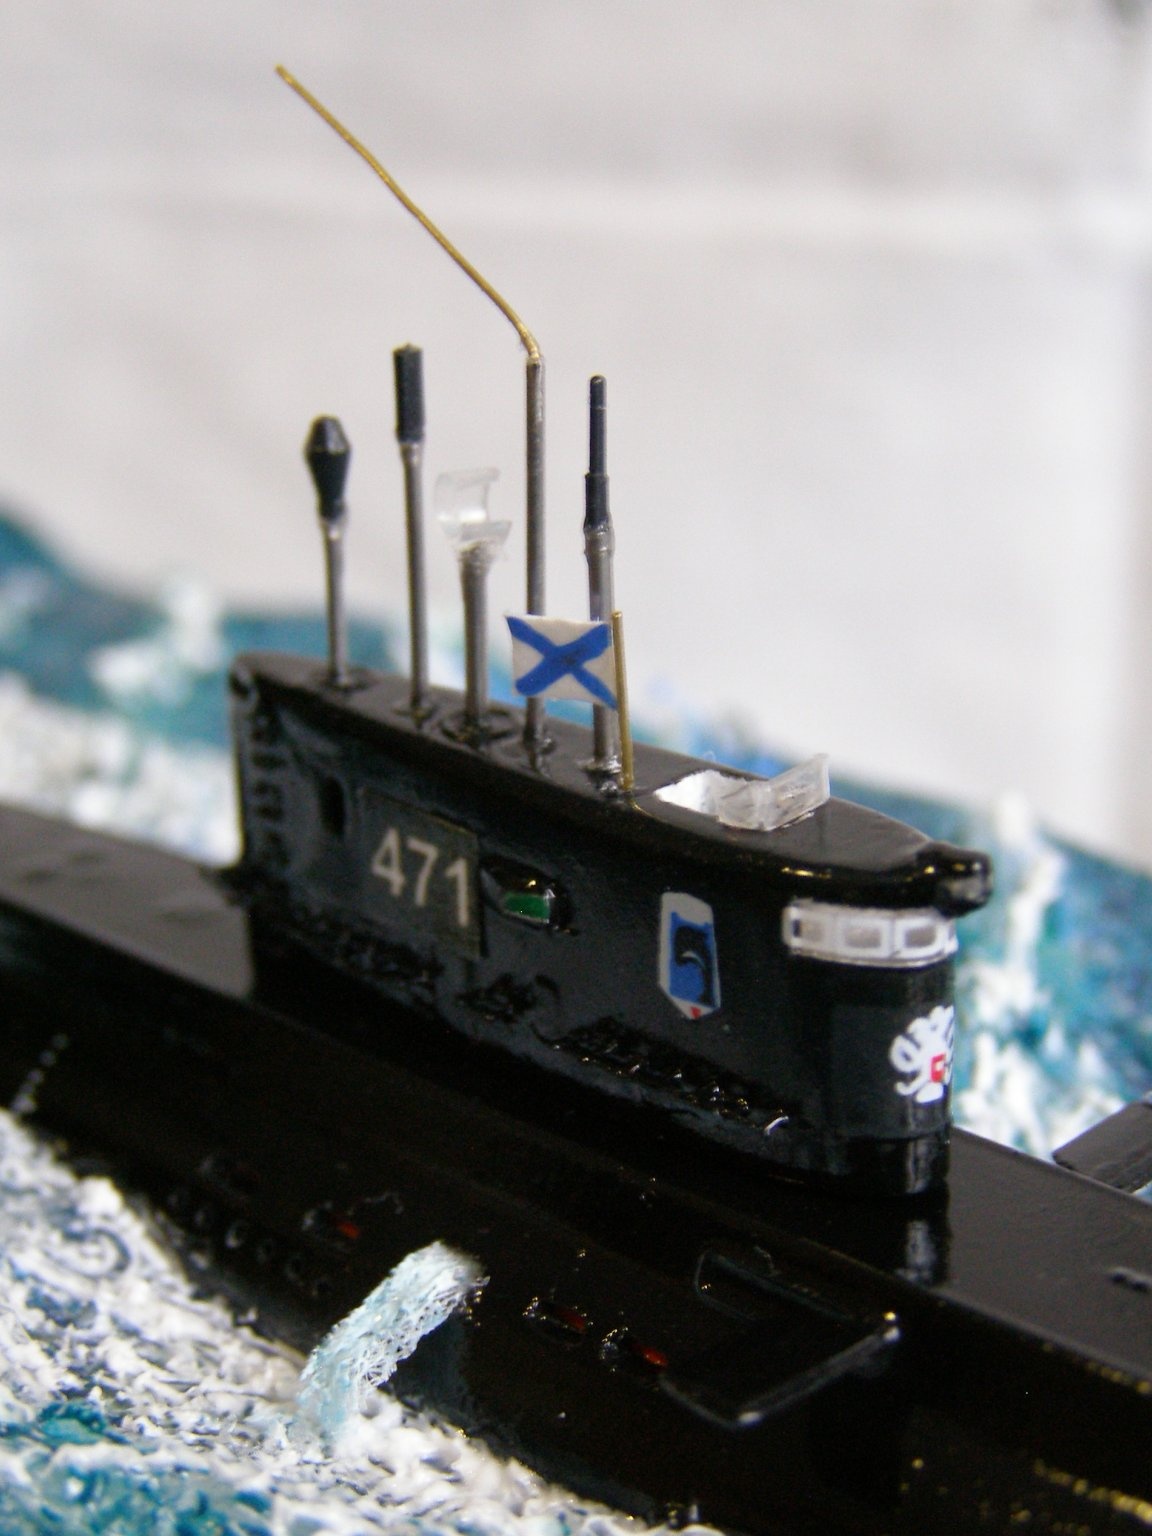
In conclusion, I want to list those improvements that were made in the plastic kit of the model. That is, they were not provided by the manufacturer.
I hope that my author’s idea can be useful to someone.
Good luck, Starpom.