Good afternoon. Continuing the theme of modeling from Lego Technic, I want to bring to your attention another version of the SUV, the hallmark of which will be high speed and throughput. Great speed compared to others models, will be provided through the use of a Tamiya 70097 Twin-Motor Gearbox Kit. The left and right rear wheels will be expressed independently. Thus, two motors will be used to carry out the movement. Electrification, as always, Arduino. This time we need an Arduino Nano, and something else:
- Lego Technic 42079
- Tamiya 70097 Twin-Motor Gearbox Kit
- Arduino Nano v3 AT Mega 328
- L9110S engine drivers 2 pcs
- Bluetooth module HC-06, HC-05 or equivalent
- White LED 2 pcs.
- Resistor 150 Ohm 2 pcs.
- Capacitor 10v 1000uF
- Inductor 68mkH \
- 8 NI-Mn 1.2v 1000mA batteries
- Circuit board
- Single row comb PLS-40
- Connector dad-mom two pin to wire
- Wires of different colors
- Solder, rosin, soldering iron
- Bolts 3x20, nuts and washers for them
- Bolts 3x40
- Bolts 3x60
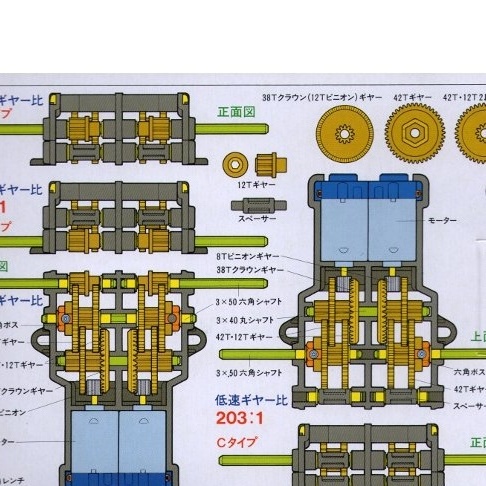
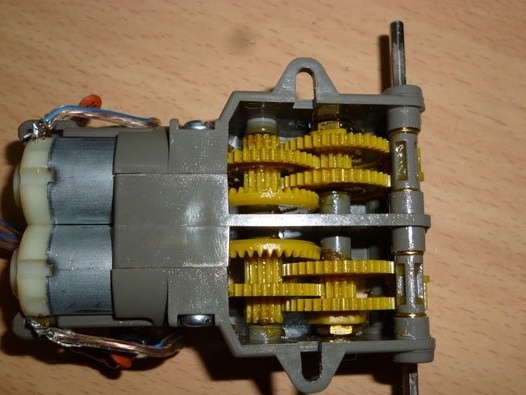
Step 1 Assemble the gearbox.
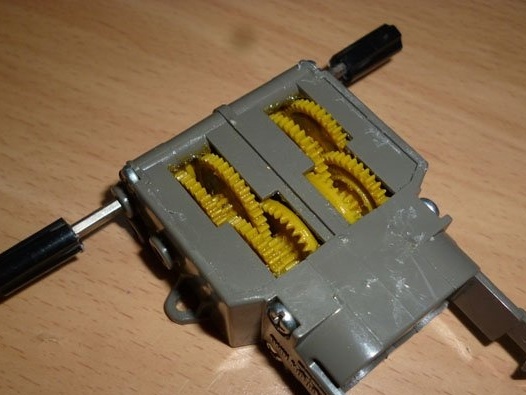
First of all, unpack and assemble the Tamiya 70097 Twin-Motor Gearbox Kit. Together with him is a detailed instruction for assembling several options, with different gear ratios. One option is with a gear ratio of 58: 1, the other is 203: 1. Choose an option with a ratio of 58: 1. Next, you need to determine the location of the output shafts. According to the instructions from the gearbox, two options are possible. Output shafts in the center or closer to the bottom. Choose the option in the middle.
Do not forget to lubricate the gears and shafts on which they are sitting when assembling the gearbox. From the experience of collecting several gearboxes, I’ll say that they put little grease, and it’s a little liquid. I advise you to use a lubricant such as Litol, in a reasonable amount, of course.

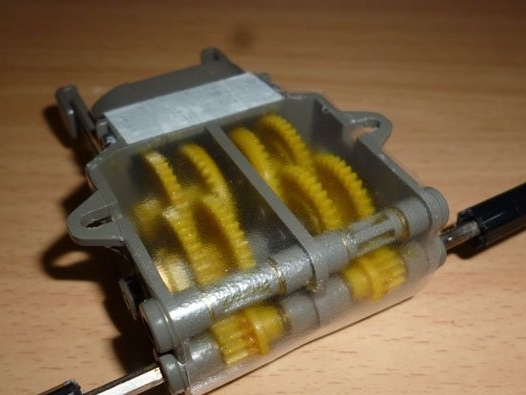
And on the flip side:
Now we take two Lego connecting sleeves:
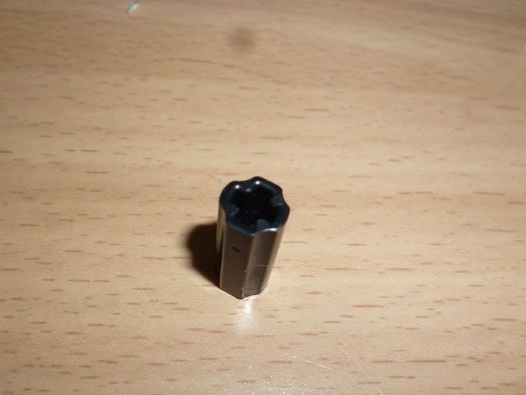
We put bushings on output shafts:

Having put on the bushings, fill in the empty slots of the hot-melt bushings, thereby fixing the bushings on the shafts:
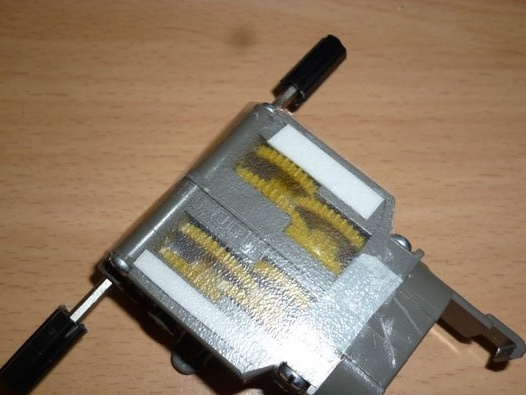
At our gearbox, the case does not cover the gears, which means that it is highly likely to stain Lego parts in Litol. To prevent this, we take a thin plastic, for example, from a plastic binder, I took a transparent one. Glue on double-sided tape, starting on one side, wrap the end and glue it on the other side. It should be like this:
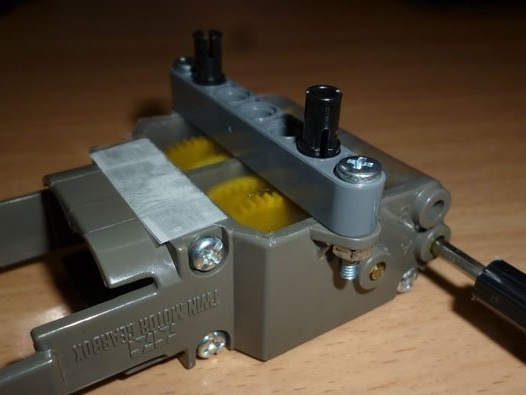
Now you need to screw the part to the Lego gearbox. We use 3x20 bolts for this:
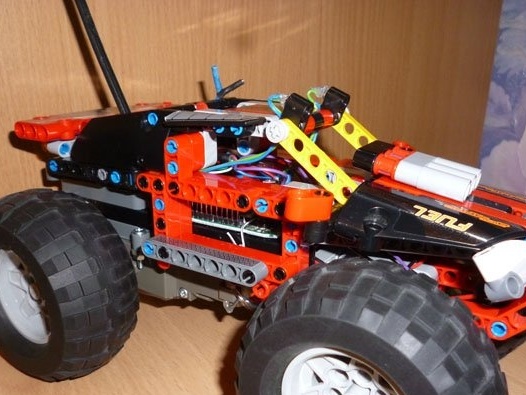
Step 2 Putting together the foundation.
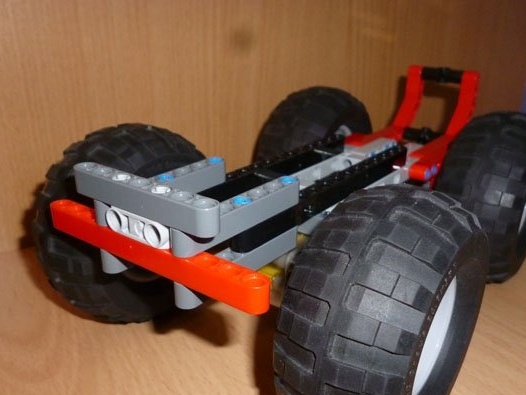
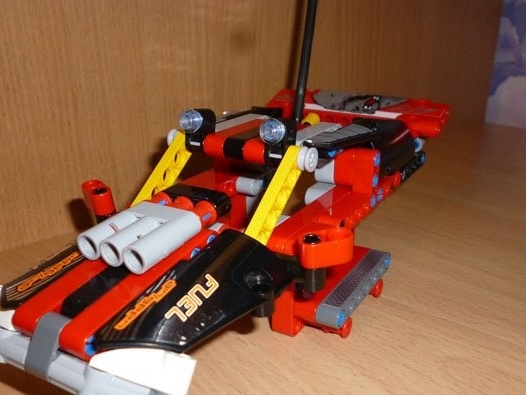
The basis will have to be collected from photographs. Everything is clearly visible in the photo:
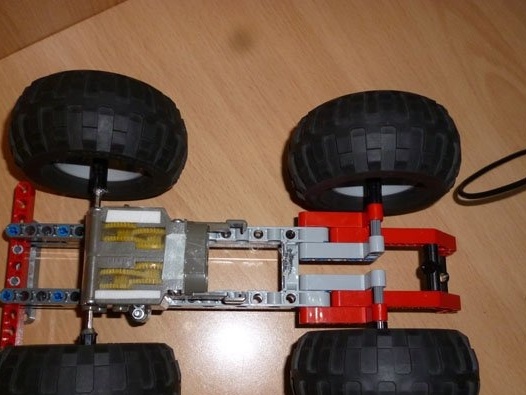
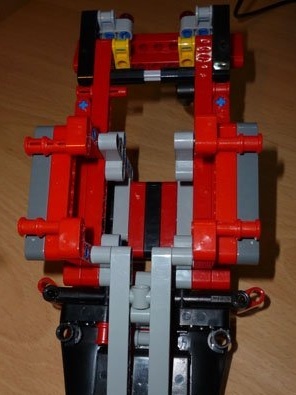
The front looks like this:
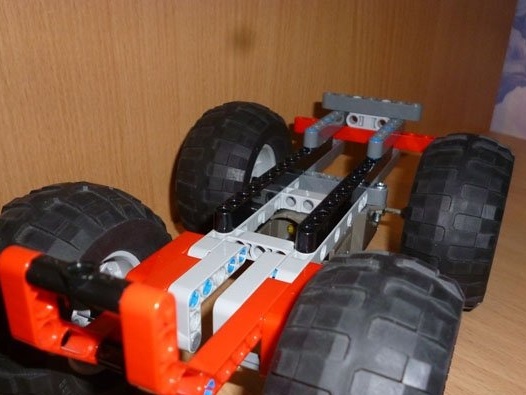
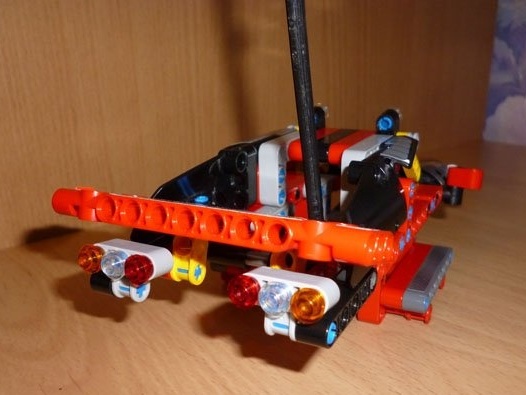
Back view:
Step 3 Putting the cab together.
Take the cab from Lego 42065.Download instructions from
We assemble the cabin, starting from 61 steps and up to 95. Add the bottom mount as in the photo to connect to our base:
On the front, we’ll also add some details:
And add the lights at the back:
At the top of the cab add lights:
Step 4 Electrician.
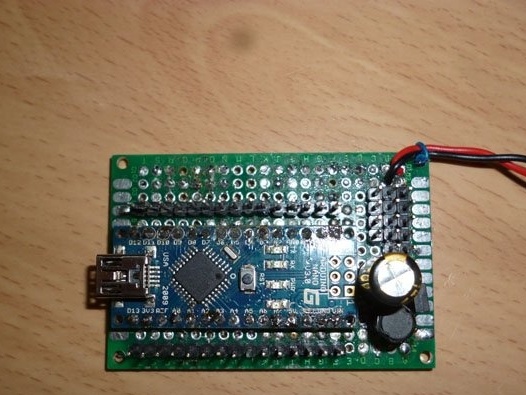
The brain of our model will be the Arduino Nano v3. For engine management, we will carry out through the engine driver L9110S. I do not like to make many wires. Firstly, it takes up a lot of space, and secondly, a lot of connections increases the risk of poor connections and other “glucophs”. Therefore, we will collect everything you need on a circuit board. The scheme will be as follows:
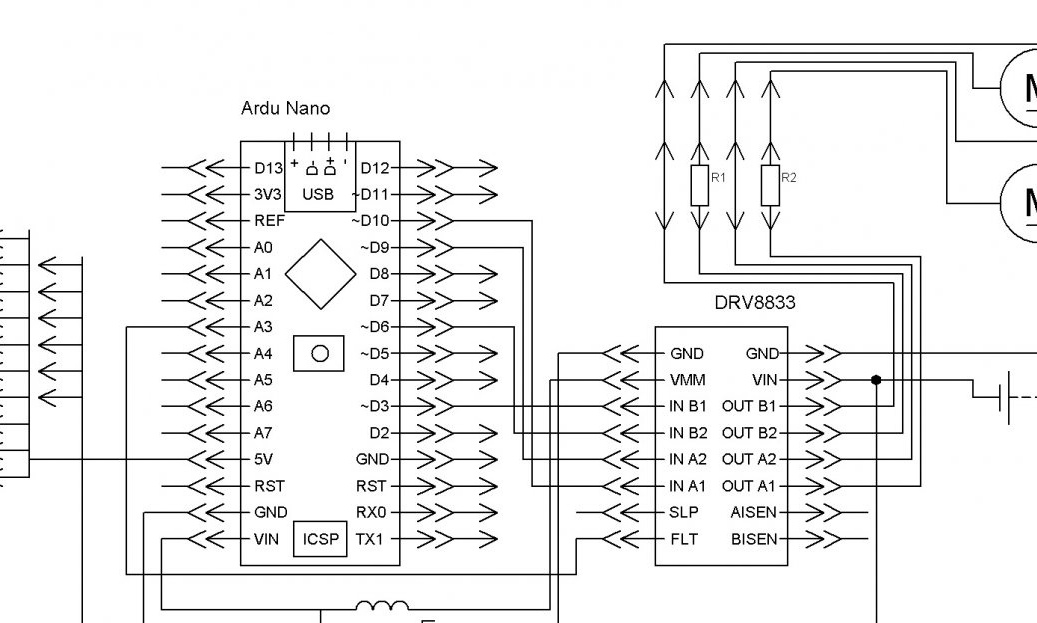
Power Arduino, engine drivers and motors will be common. To avoid Arduino restarting when the motors turn on due to a power surge, it is necessary to use an inductor and a capacitor included in the Arduino power circuit. We place all this on a circuit board, solder according to the scheme. In assembled form it should turn out like this:
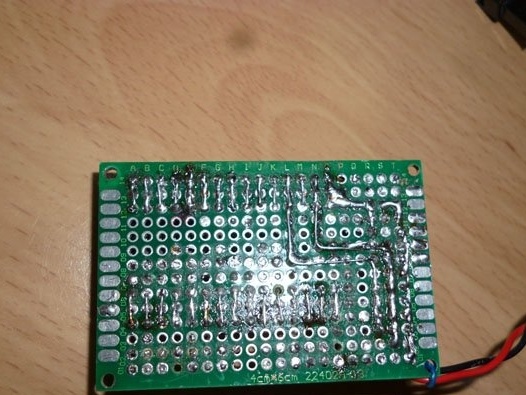
From the bottom we connect everything using solder.
For power we will use Ni-Mn batteries. We solder 4 batteries in succession, rewind them with electrical tape and lead the wire with the connector out. We get two power supplies with 4 batteries each. We place them on the basis, next to the front wheels:
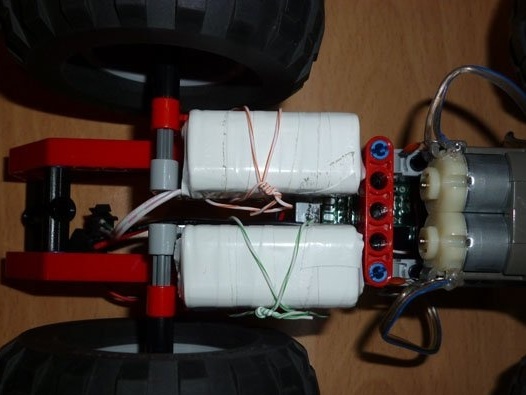
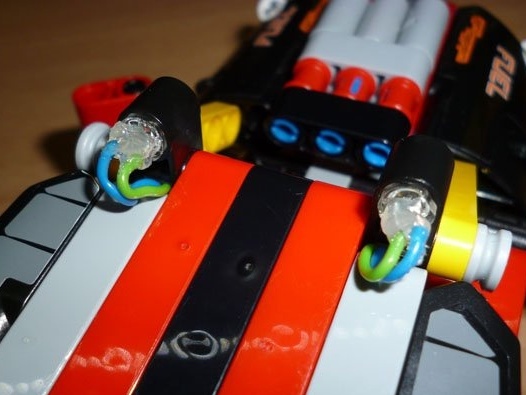
These two battery packs are connected in parallel. Thus, a stable voltage is achieved at high amperage, which occurs when two electric motors are turned on at once. The headlights must be connected via current limiting resistors with a nominal value of 150 ohms.
Step 5 of the programming environment.
We will edit and fill the sketch through the Arduino IDE. This is a simple and convenient programming environment. This program can be easily downloaded from
Install it according to the instructions from the program. Then you need to add to the Arduino IDE library, which is necessary for the sketch. SoftwareSerial.h is used to create a software channel for communication with the Bluetooth module:
The downloaded and unpacked archive must be moved to the “libraries” folder. This folder can be found by finding the installed Arduino IDE. It is also possible to use the internal function of the Arduino IDE. Without unpacking the archive, you can add it to the programming environment. Launch the Arduino IDE, select the menu item Sketch - Connect Library. At the beginning of the drop-down list, select the item "Add .Zip library". We indicate the location of the downloaded archive. After completing all the steps, you need to restart the Arduino IDE.
Step 6 Bluetooth module.
We will use one of the most affordable Bluetooth modules for today - HC-05 or HC-06. They can easily be found both in Chinese stores and on the Russian market. They are similar, but there are slight differences: the NS-05 module can work both in the master mode (slave) and in the slave mode (master). NS-06 can only be a slave device.
Characteristics of the modules:
- Bluetooth chip - BC417143 manufactured by
- communication protocol - Bluetooth Specification v2.0 + EDR;
- radius of action - up to 10 meters (power level 2);
- Compatible with all Bluetooth adapters that support SPP;
- The amount of flash-memory (for storing firmware and settings) - 8 Mbit;
- the frequency of the radio signal - 2.40 .. 2.48 GHz;
- host interface - USB 1.1 / 2.0 or UART;
- power consumption - the current during communication is 30-40 mA. The average current value is about 25 mA. After the connection is established, the consumed current is 8 mA. There is no sleep mode.
For everything to work as it should, the Bluetooth module must be configured before connecting. The setting is done by giving AT the commands entered in the terminal window. We will configure HC-05 module. For other modules, commands may be different. We will connect the computer and the Bluetooth module through Arduino.
We connect the Bluetooth module as follows:
Arduino Nano - Bluetooth
D7 - RX
D8 - TX
5V - VCC
GND –GND
Fill the following sketch in arduino:
This sketch is used to send AT commands to the Bluetooth module. Arduino simply transfers everything written in the terminal to the Bluetooth communication module. Now and in the future we will connect the module through the SoftwareSerial library. At high speeds, the library is unstable. If you encounter problems with communication speed, you can connect the module directly to the Arduino RX and TX contacts. Do not forget to correct the sketch in this case. In this case, we will work with the module at a speed of 9600. So, after filling in the sketch, open the terminal window and enter the following commands:
“AT” (without quotes) the answer “OK” should come (it means everything is connected correctly and the module is working)
“AT + BAUD96000” (without the quotes) the answer “OK9600” should come.
If you have the right answer, go to the next step.
Next, you need to fill in the sketch of our SUV in Arduino:
Step 7 Installing electrics on the model.
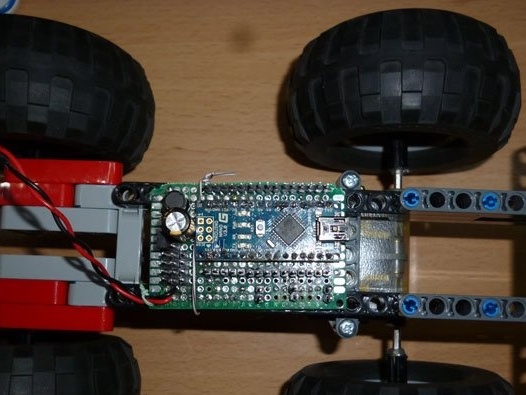
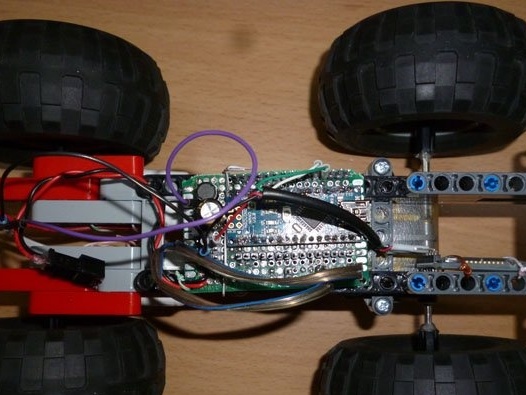
We install the boards on the basis in the middle:
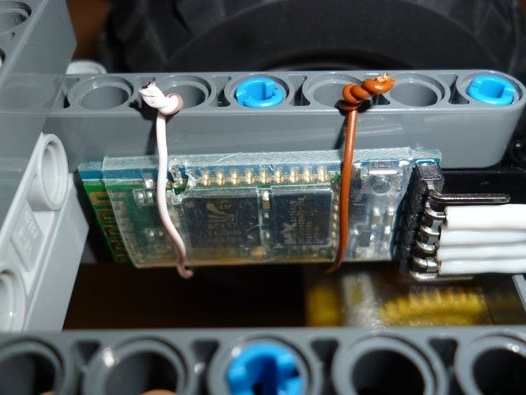
We install the Bluetooth module in the back of the base, fixing it with a wire:
We connect everything together according to the scheme:
Step 8 Preparing the Remote
For control, we take an Android phone or tablet, as usual, or a computer running Windows, or make a remote control on Arduino ourselves. Let's start with Android, first we need to install the robot control program via Bluetooth. To do this, enter “Bluetooth Arduino” in Google play and install the program you like. I personally like BT Controller. Then, through the Android setup menu, we establish a connection with the Bluetooth module. We use the password for the connection “1234” or “0000”. And move on to setting up the program. It is necessary to write down the necessary characters for the corresponding action. The list below.
And now - a computer with Windows. To send commands, you can use the terminal program or run the convenient, specially made for this, Z-Controller program. Select the port (com port through which the connection is made) and configure the keys for the commands.
The third option, the best, is the use of a physical remote control, since then you feel the click of buttons. I advise you to make a remote control, following mine instructions
And add to it Bluetooth module
The management commands are as follows:
W - forward
S - back
A - left
D - right
F - stop
K - headlights
L - headlight off