
Hi the inhabitants of our site! In today's article we will try to consider in detail how to make a wireless speaker. The advantage of this homemade product compared to similar homemade products is that we will assemble it using ready-made cheap Chinese modules. And we don’t have to solder any complicated circuits, and everyone, even a child, can assemble such a homemade product. Having collected this homemade product, you will get not only a cool and high-quality wireless speaker, but most importantly, improve your skill with working with a soldering iron, solder, etc. I would also like to add that our assembly, which is described below, can be further improved, namely, add a Bluetooth module to it. In general, the homemade product is very interesting, so let's not pull with a long introduction, let's go!
Links to the main components are left at the end.
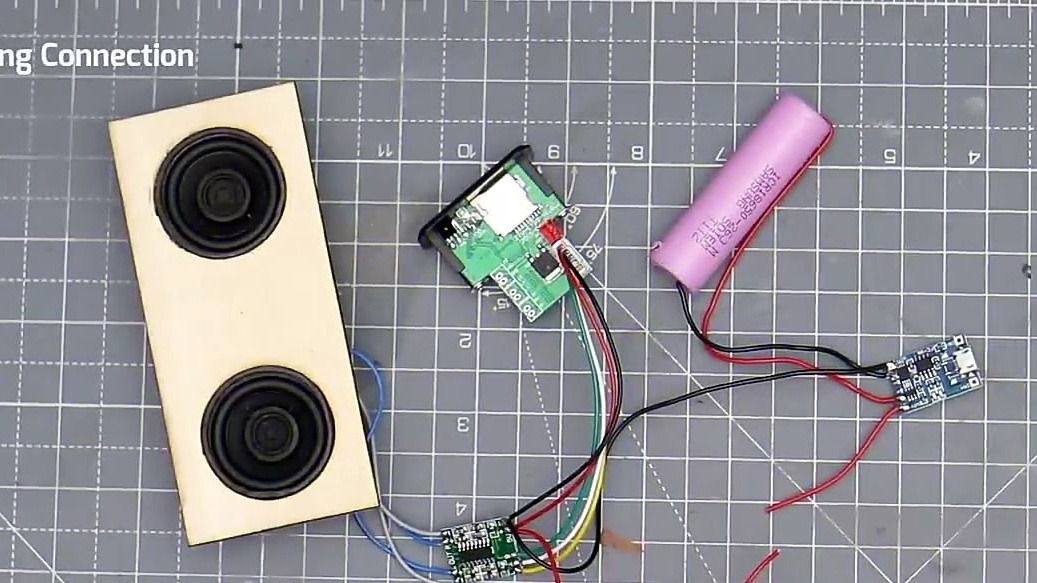
For this homemade product we need:
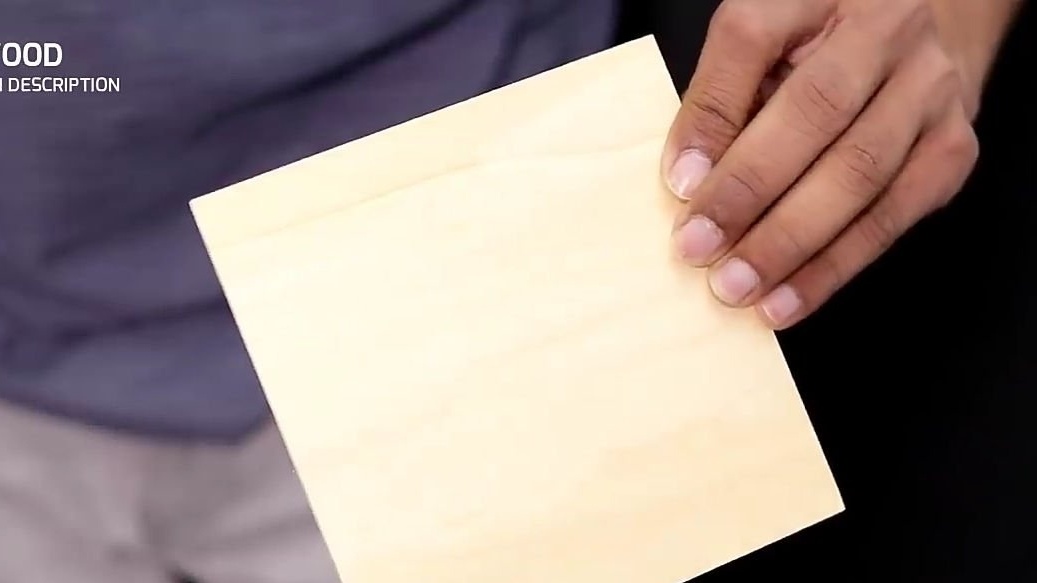
- Case. Any, but it is better to use wooden, such as plywood
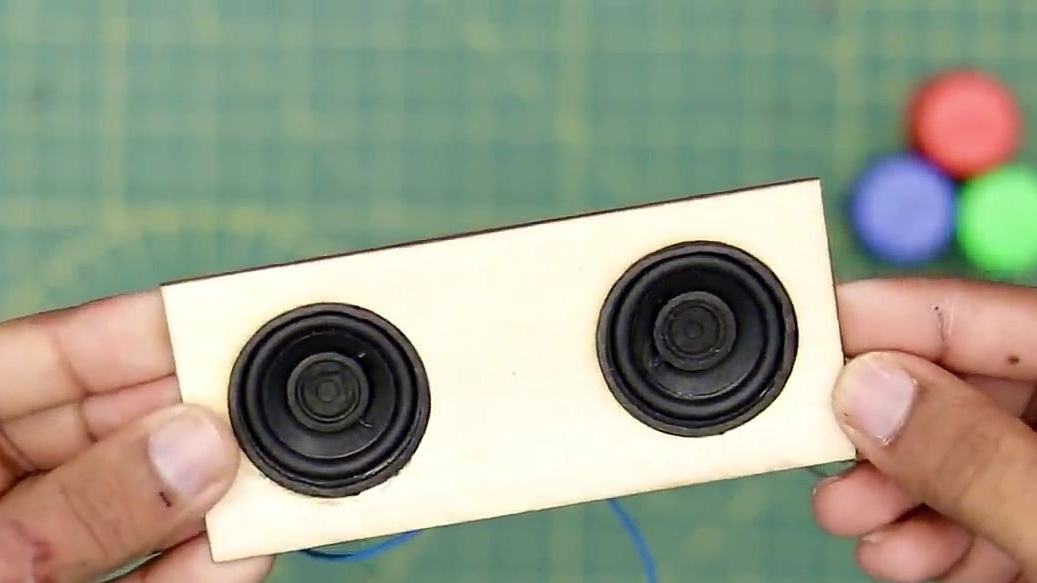
- Two speakers 1.5 inсh 3W 4 Ohm
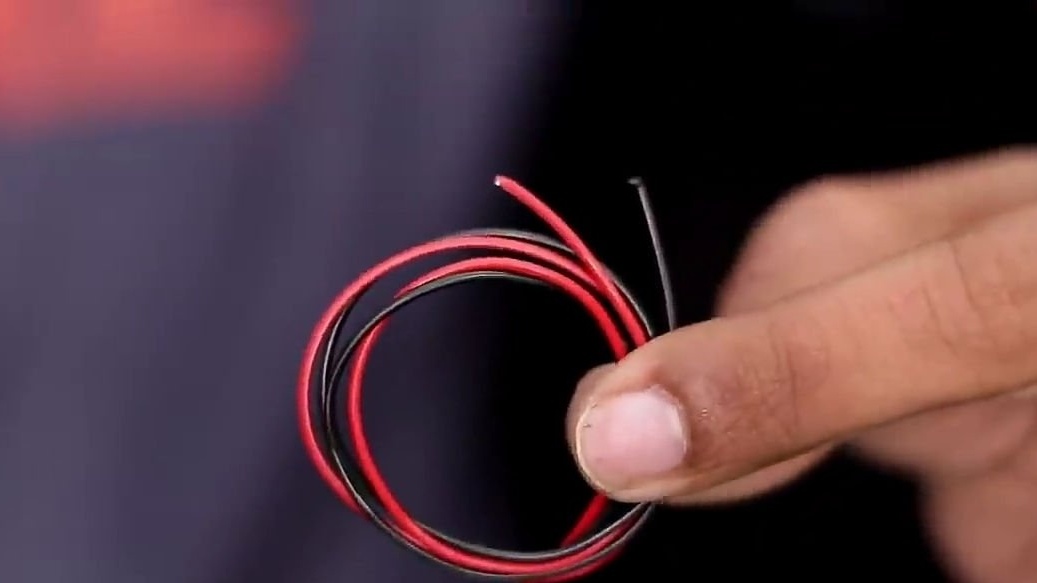
- Audio wires (but you can also ordinary)
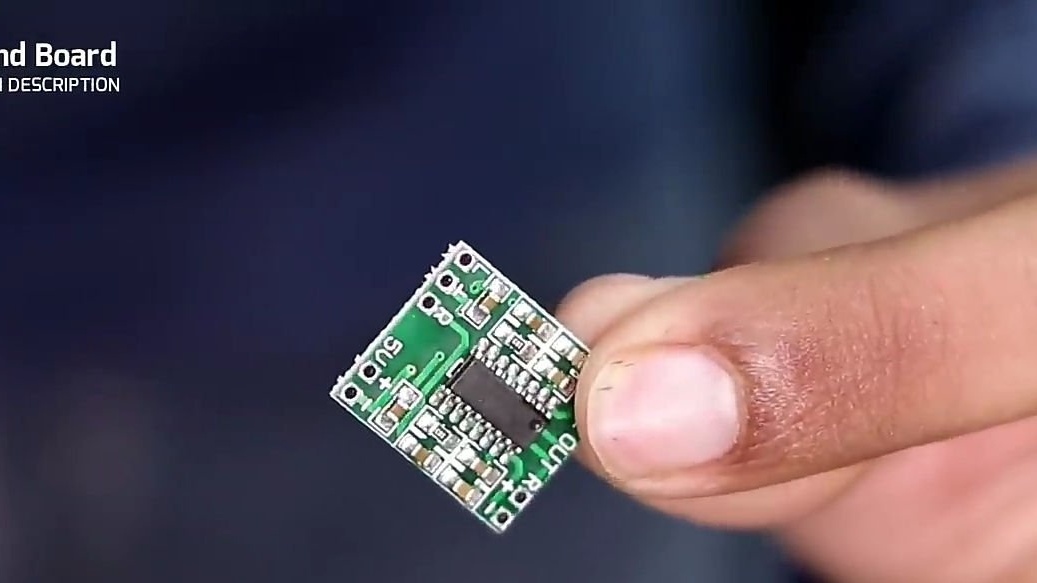
- PAM8403 module (sound amplifier)
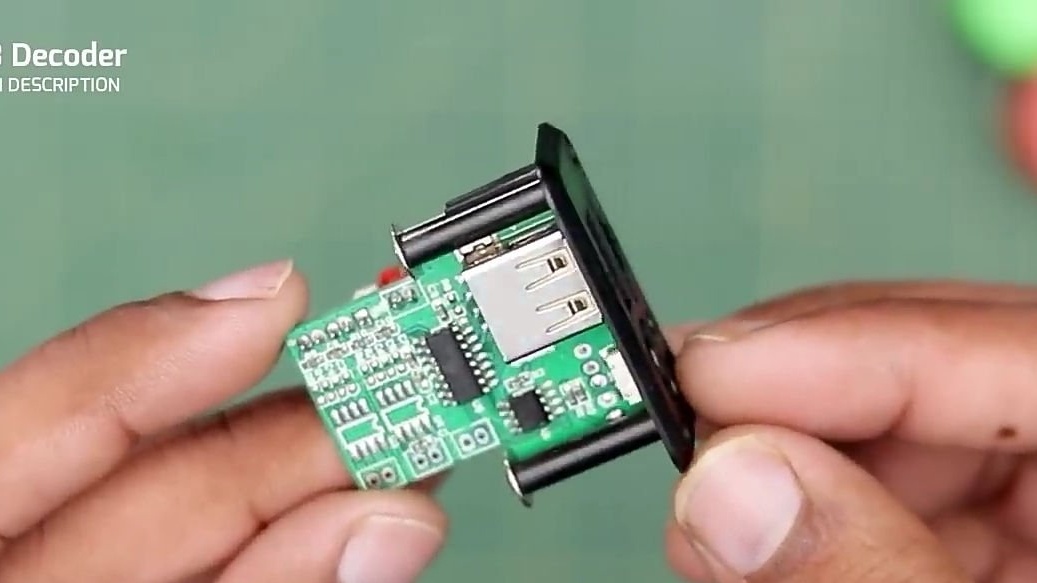
- MP3 decoder, or otherwise a player
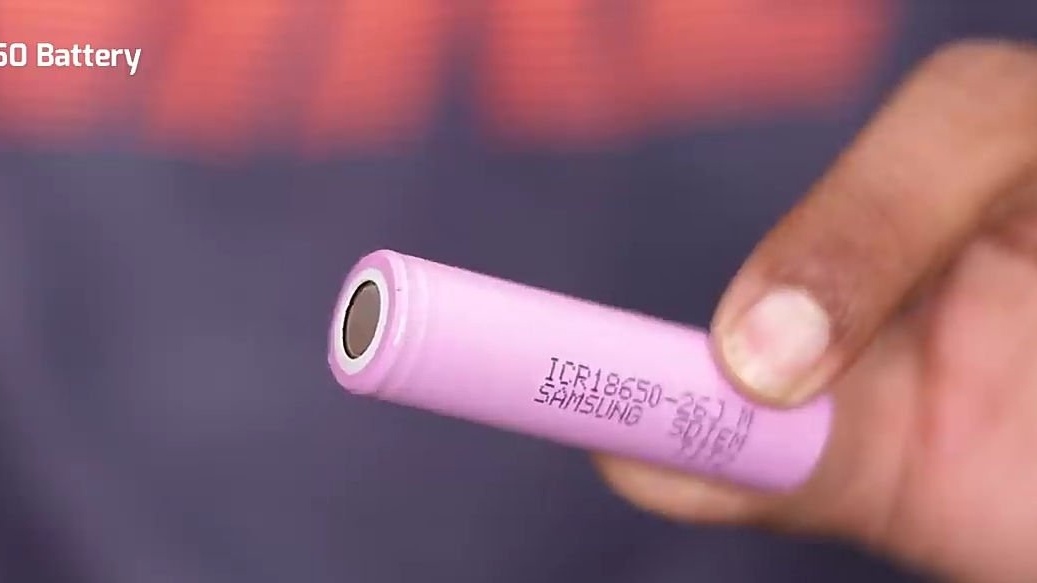
- 18650 battery
- switch
- Battery management board
Of the tools we will also need:
- soldering iron
- solder
- Nippers
- Super glue
- Hot glue
- Jigsaw
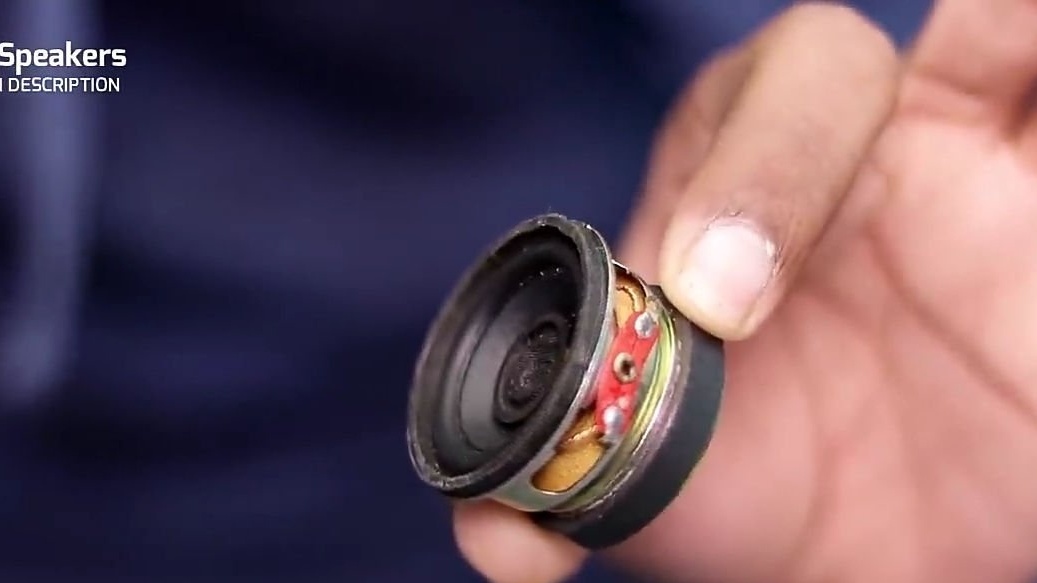
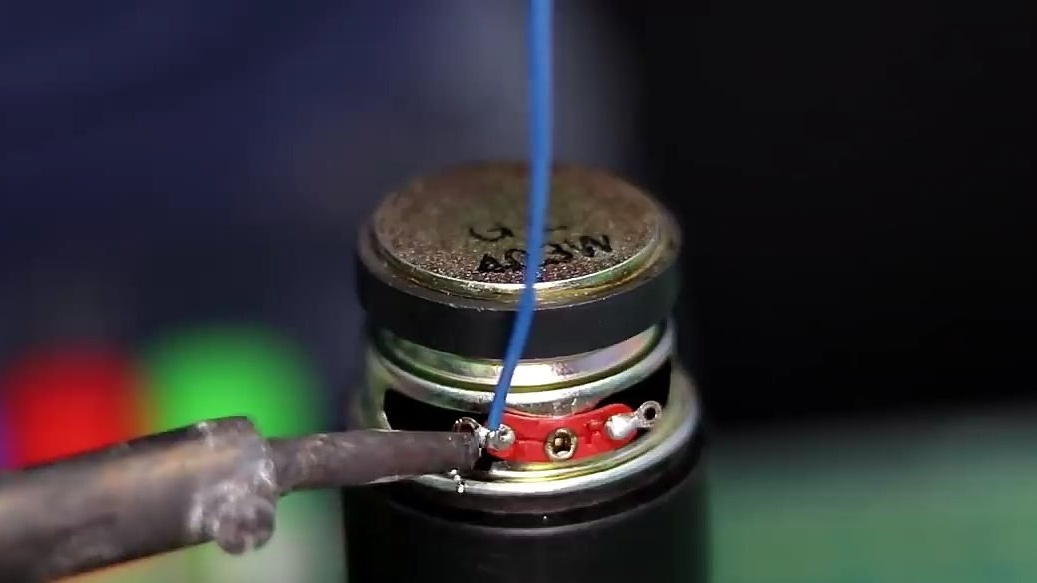
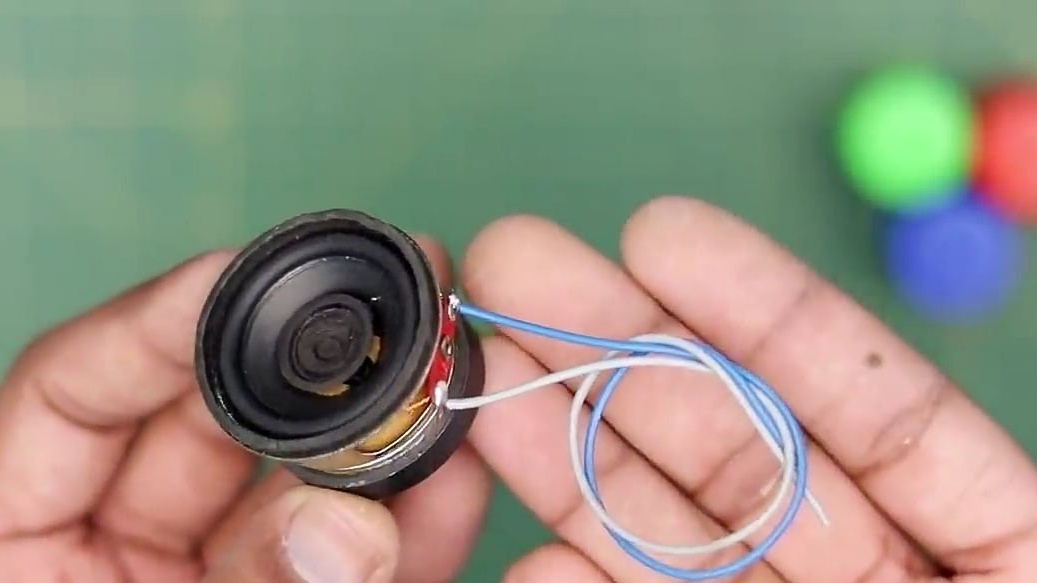
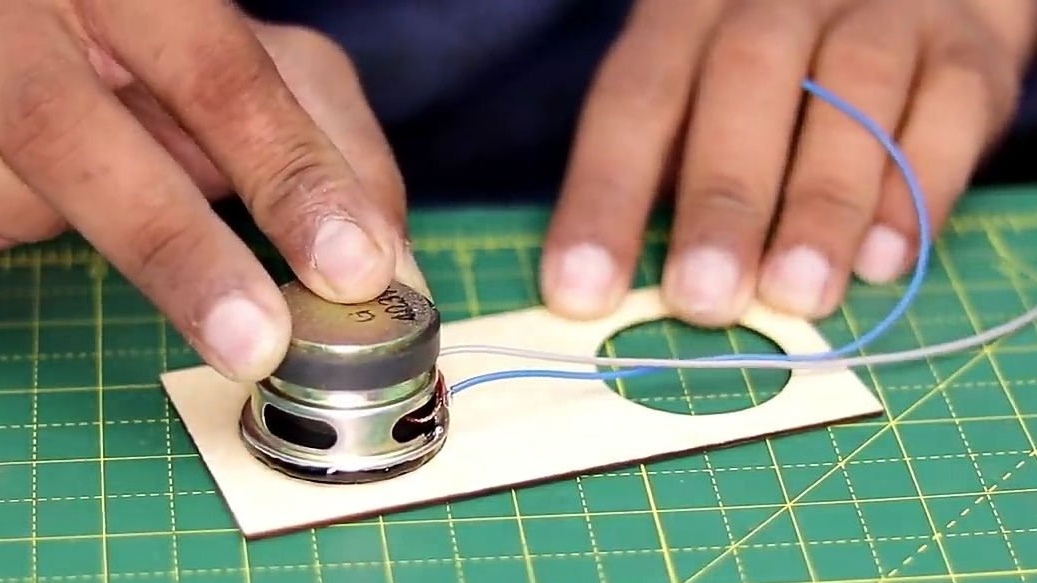
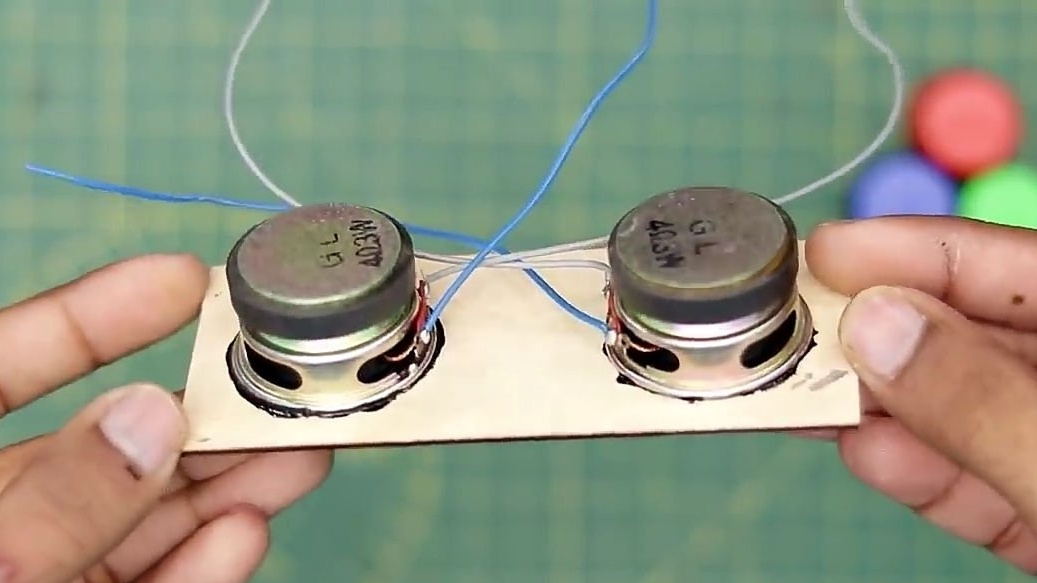
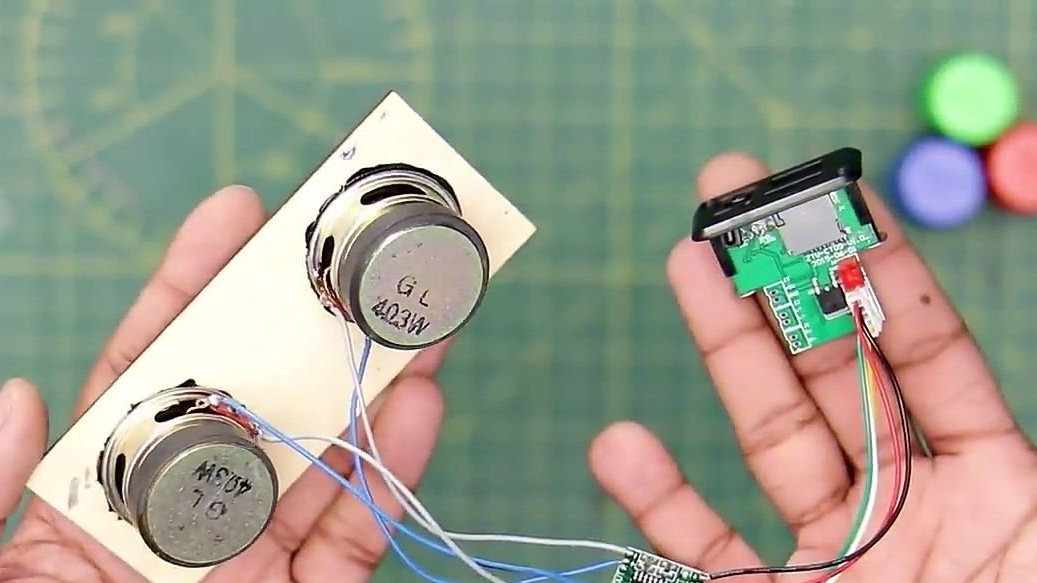
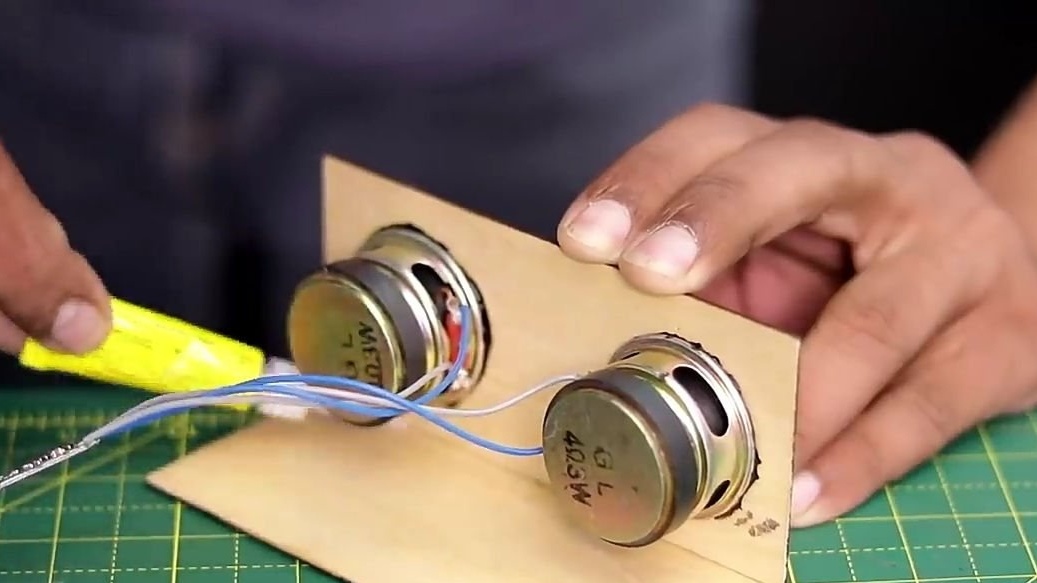
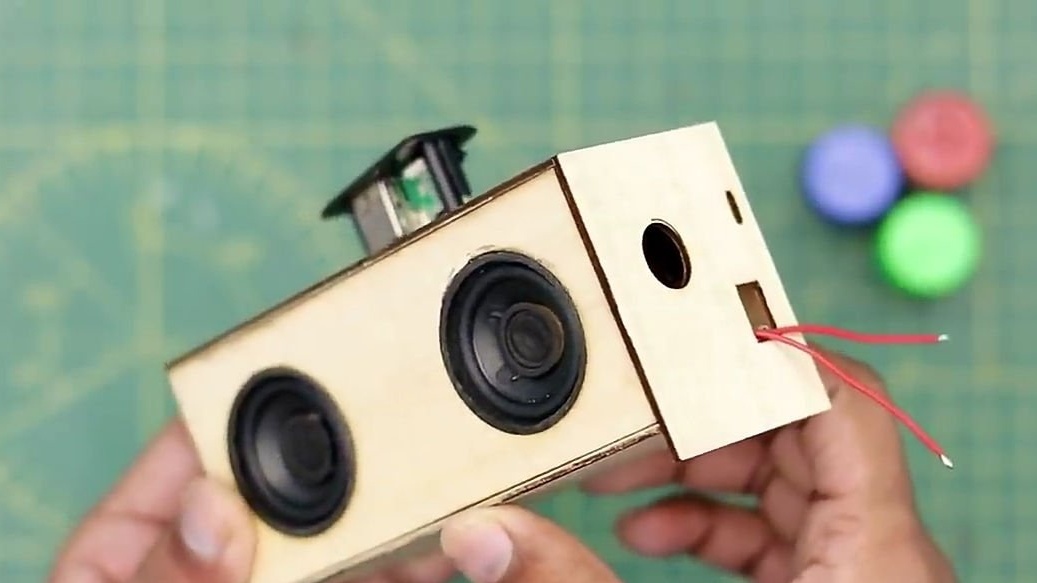
Well, let's proceed to the assembly. To begin with, we should take, probably, the most important elements of homemade work, and namely the dynamics. You can find a link to the appropriate option at the end of the article. But I still repeat that the speakers should be at 3W with a resistance of 4 ohms. To the speaker data Pripyat should be two wires with a length of no more than 15 cm. In order not to get confused, I recommend using colored wires.
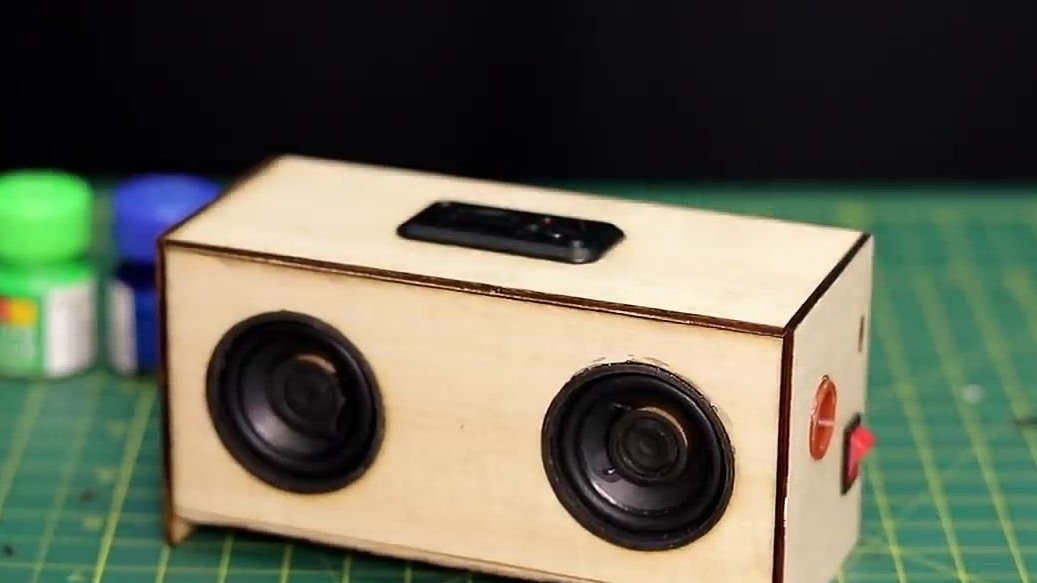
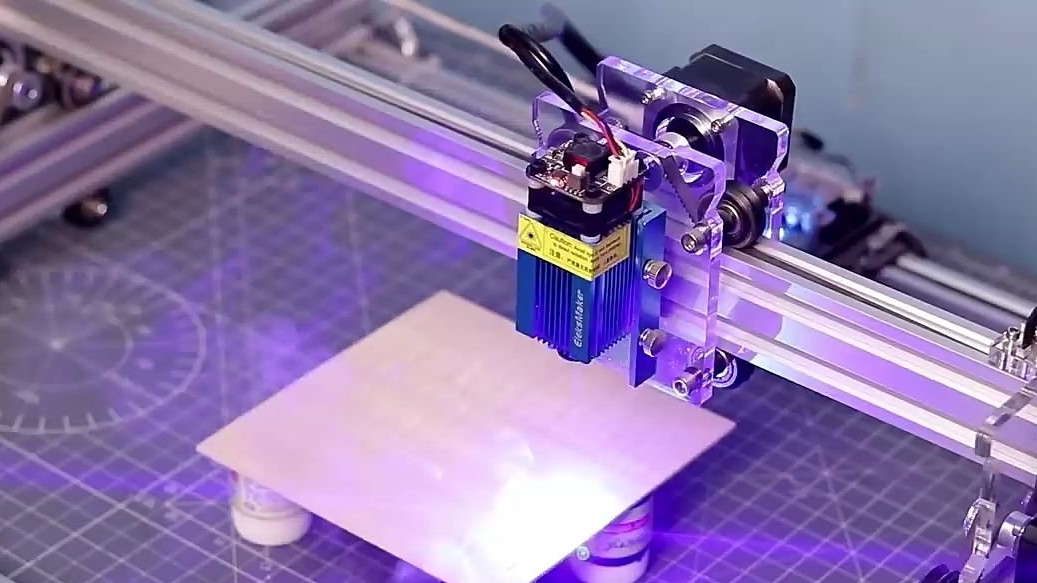
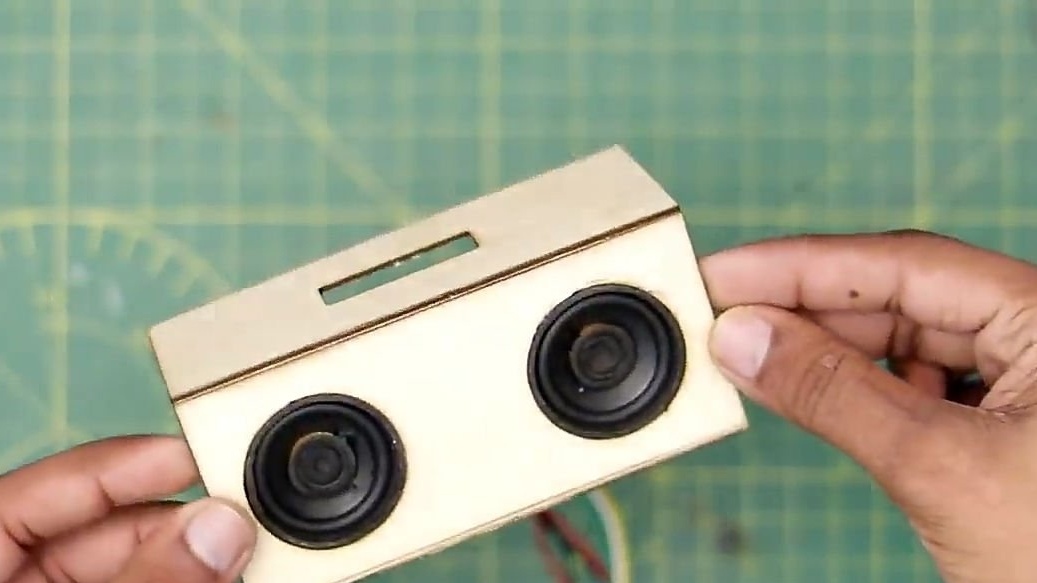
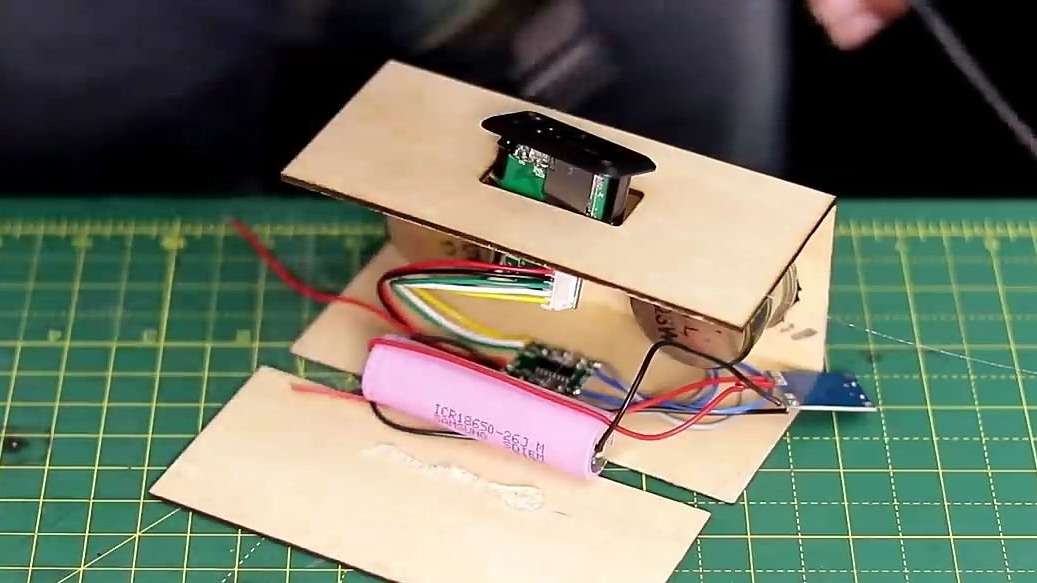
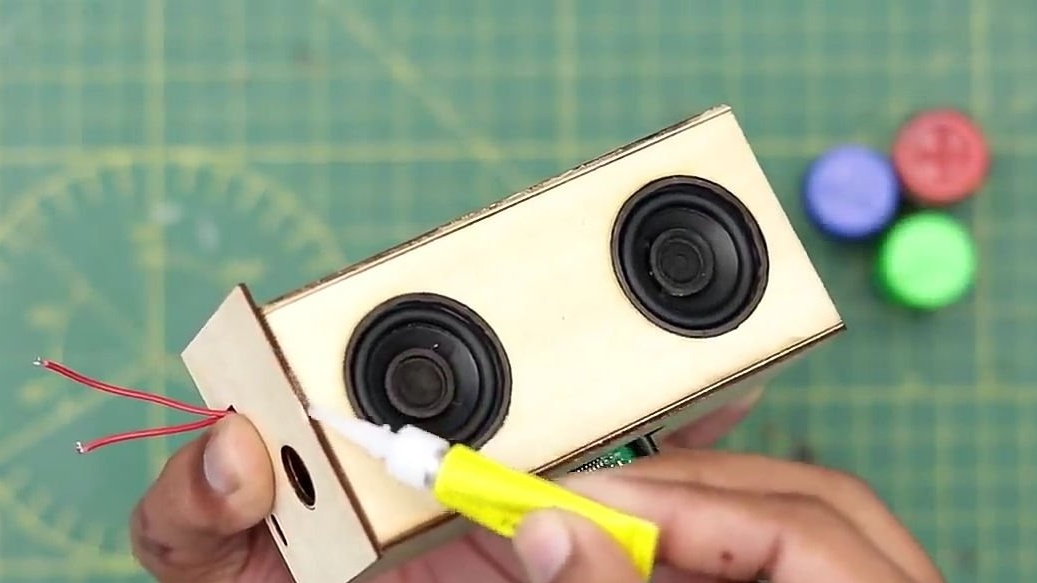
The next step we need a case in which we will actually assemble our homemade product. It can be absolutely any form and from any material. But for acoustics it is best to use a wooden case. We will use thin plywood. The author of the homemade product used the CNC laser machine for cutting plywood to make the necessary holes and to cut the plywood itself. If you do not have it, then you can do with an ordinary manual jigsaw. To begin with, cut out a rectangle from a sheet of thin plywood, which we will serve as the front panel of the homemade product. The size of this rectangle should be approximately the same as in the photo below.In the cut rectangle, two round through holes should be made, with a diameter slightly smaller than the outer diameter of the speakers. Then we connect the speakers with the plywood blank. It should be connected with hot-melt adhesive, but an epoxy-based adhesive is also perfect for this.
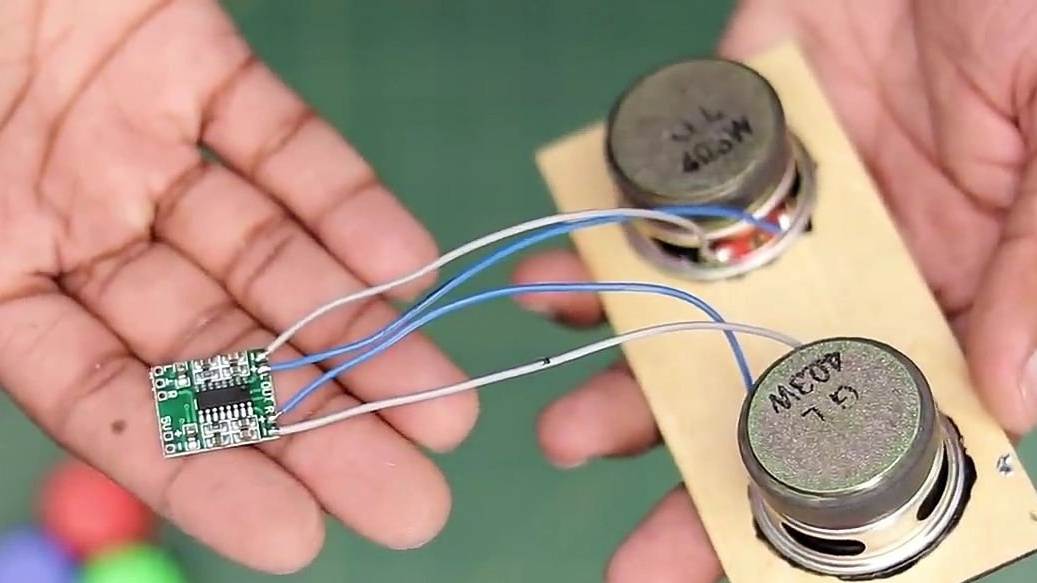
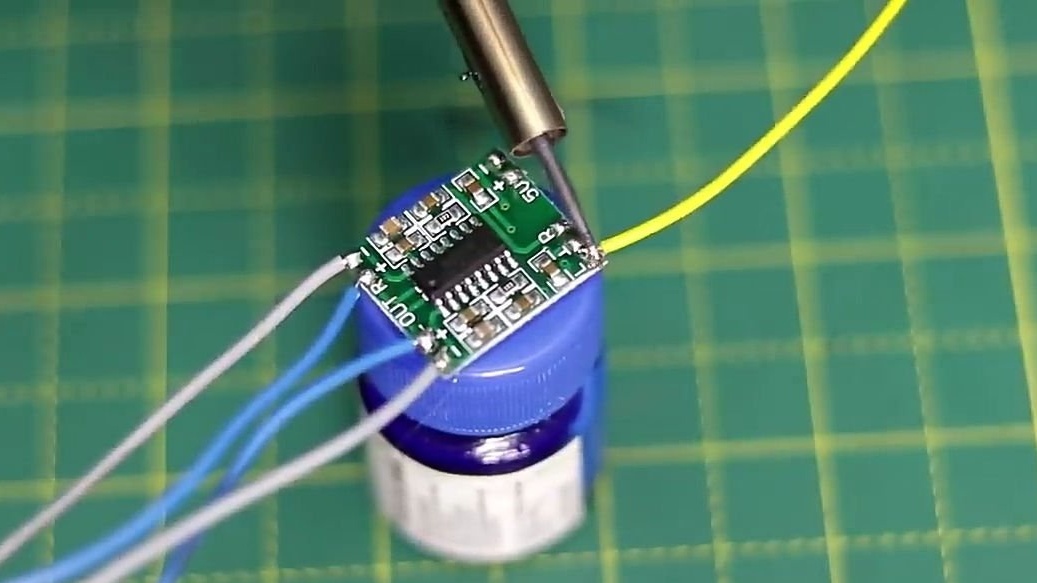
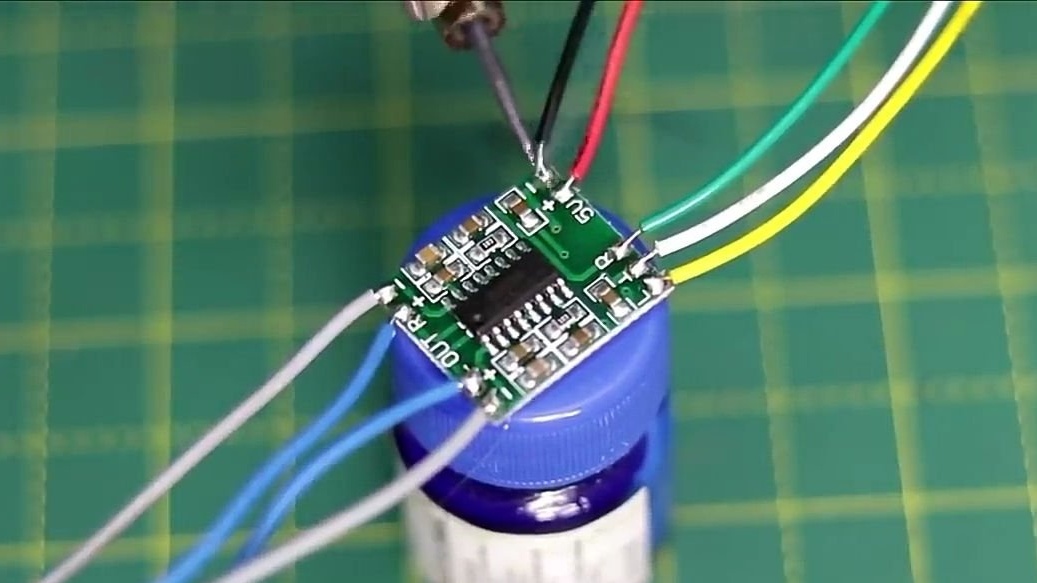
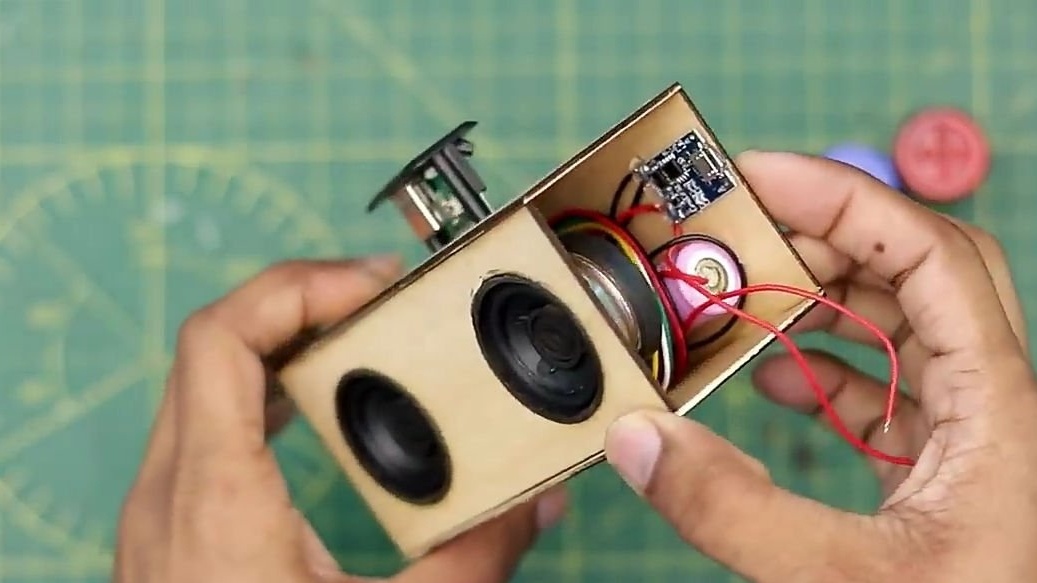
After that, we need to take a sound amplifier that suits our speakers, namely, we need a PAM8403 amplifier, a link to which you will also find at the end of the article. To this module, you should solder the wires that were previously soldered to the speakers. Solder should be observing the polarity “+” to “+”, and “-” to “-”, the polarity is indicated on the amplifier circuit board and on the speakers at the desired contacts and therefore it will be difficult to mix up. As a result, at this stage, we should get a design, as shown in the photo below.
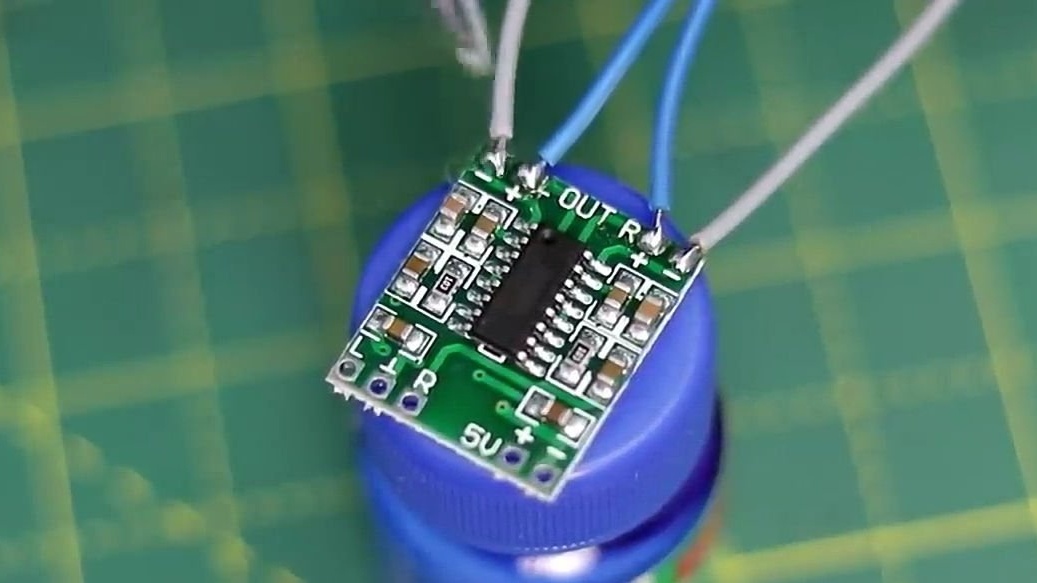
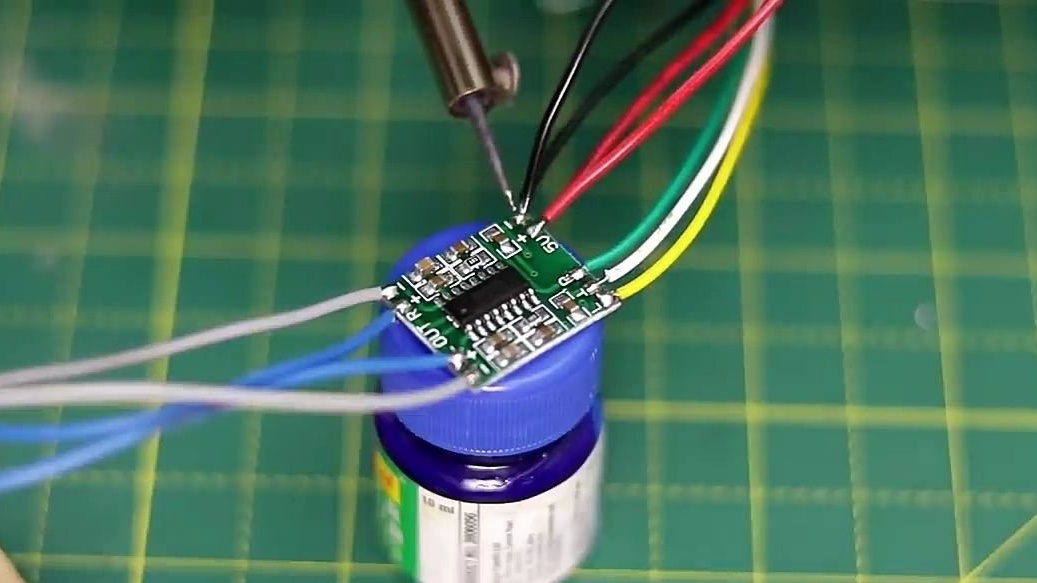
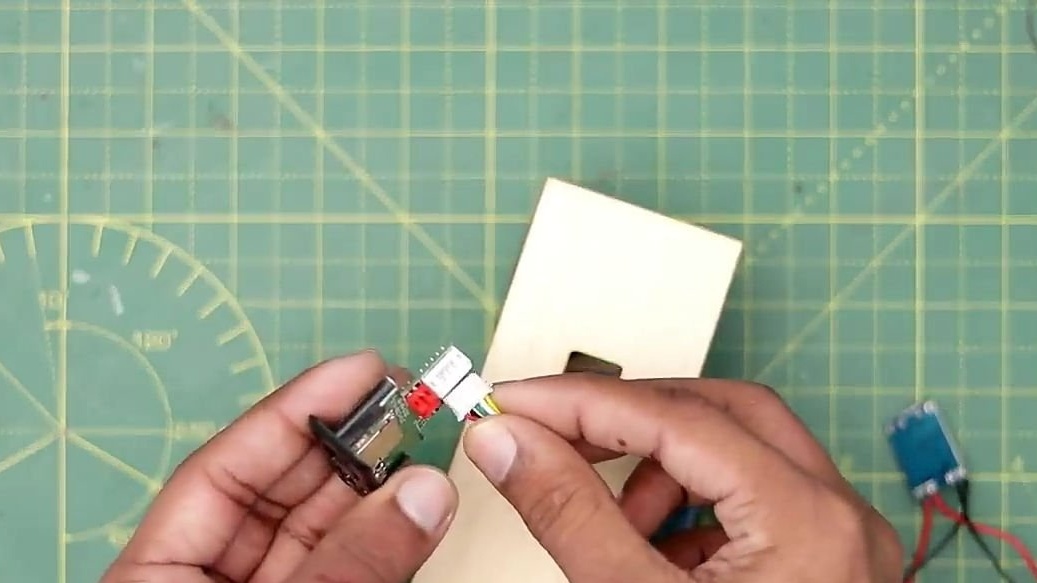
Next, we need to take a module such as an MP3 decoder (player), a link to it is also left at the end of the article. In fact, the choice of such players from our Chinese friends is very large, with different cost and functionality, choose any that you can afford and the one that suits you according to the characteristics. The wires from the 4-pion loop from the MP3 decoder should be soldered to our sound amplifier as follows. Namely, on the reverse side of the relatively previously soldered wires, there are five contacts. The yellow wire should be soldered to the contact with the symbol “L”, the white wire to the contact with the inverted “T” symbol, and the green wire to the contact with the symbol “R”. And solder the black and red wires to the contact “-” and “+”, respectively.

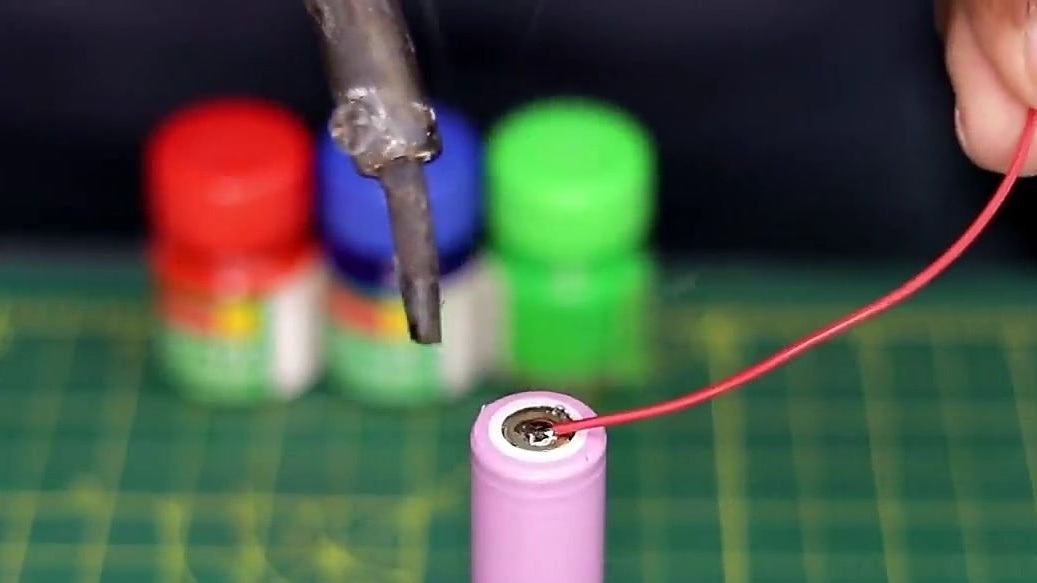
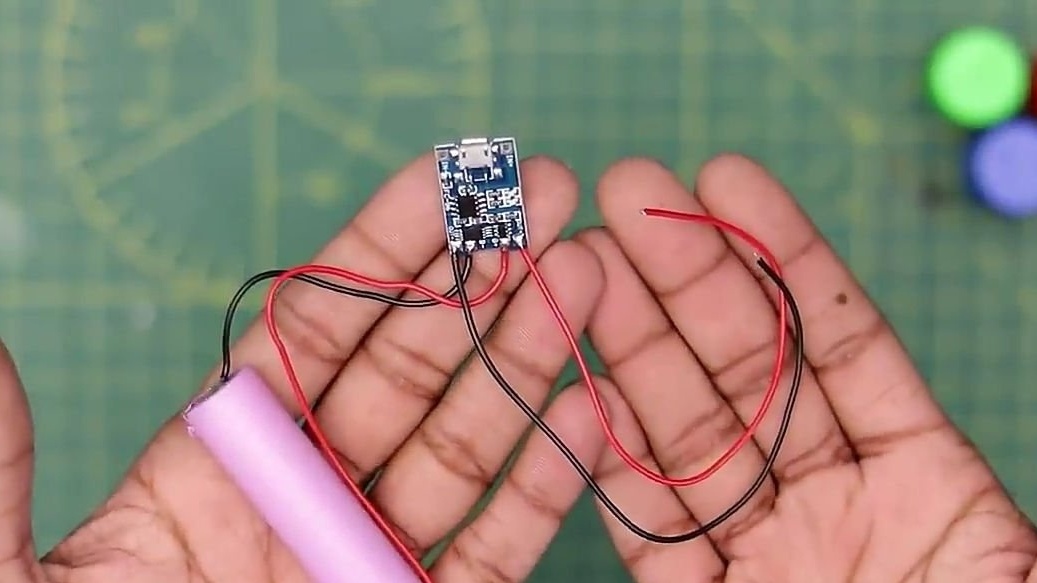
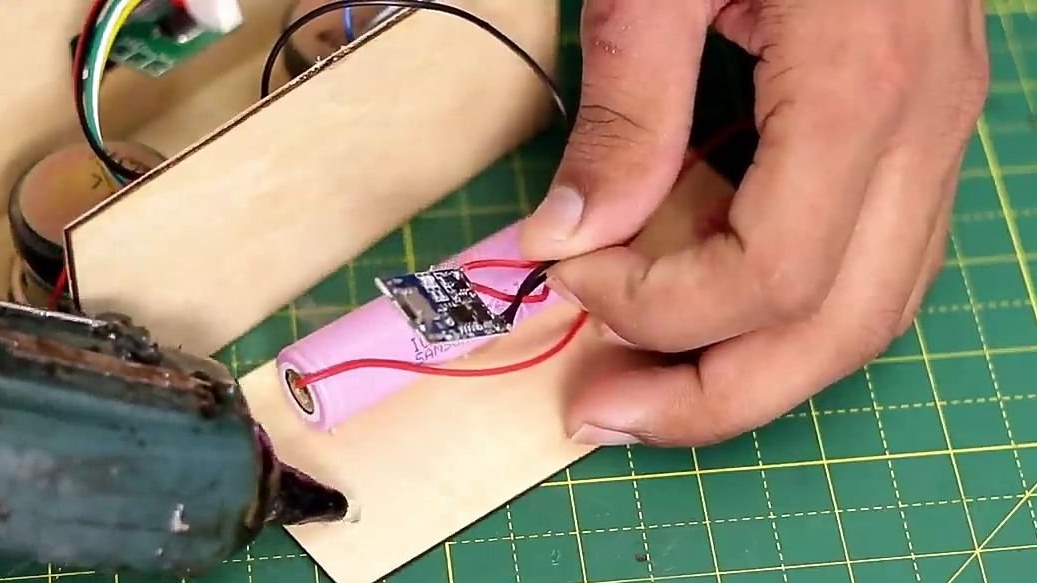
Then we need to take a rechargeable battery of the 18650 format, this format of batteries is very common, and finding them anywhere will not be difficult. It should be noted that for the correct and safe operation of the battery, a special control board should be used, which will monitor the charge and discharge of the battery, which will extend the battery life. Two wires should be soldered to the battery no longer than 15 cm long. The batteries should be soldered very quickly without allowing them to overheat, otherwise they will simply be out of order.
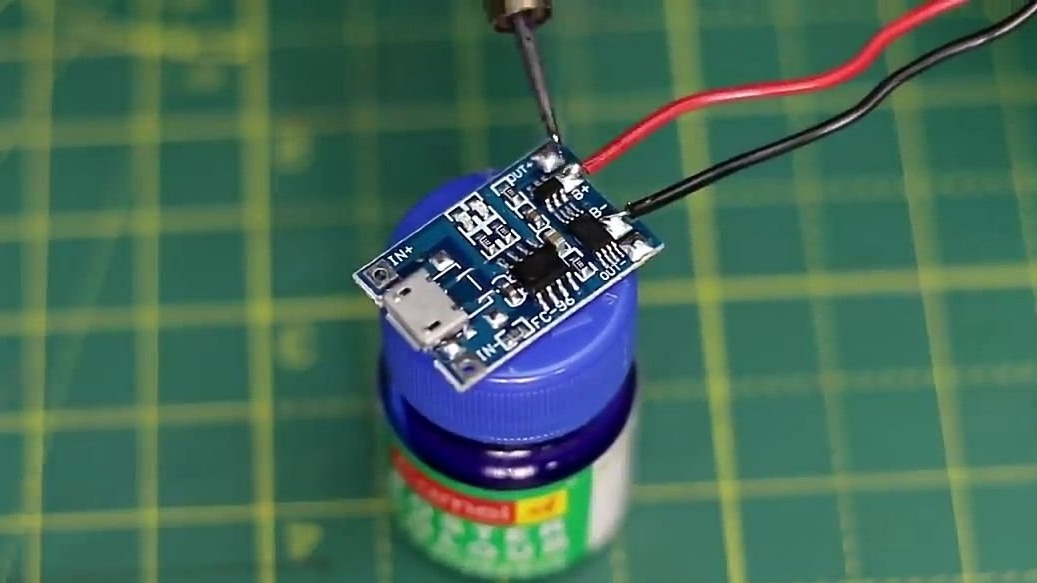
The wires just soldered to the battery should be soldered to the battery control board, namely to the contact with the designation “B +” and “B-”, to “B +” the positive wire, and to “B-” the negative wire, respectively. After that, two wires with a length of not more than 10 cm should be soldered to the contacts on the board with the symbols "OUT +" and "OUT-". After that, the wires coming from the battery control board (those that have just been soldered) are soldered to the contacts on the amplifier “+” and “-”, that is, “OUT +” to “+”, and “OUT-” to “-” .
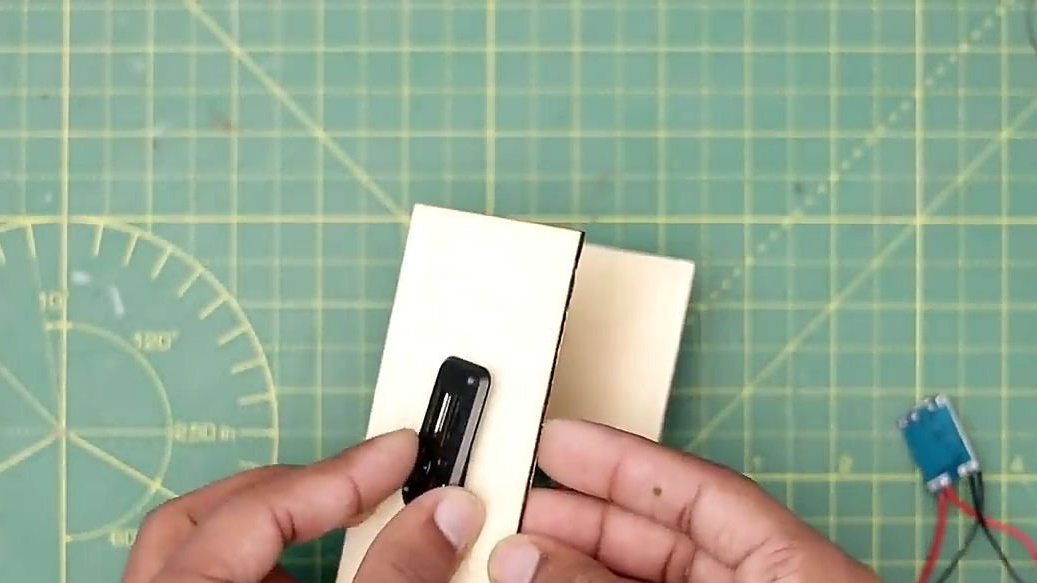
Next, we need to cut out the same rectangle from plywood that we cut at the very beginning (it can be wider) and glue it with super glue to the rectangle cut out at the beginning, as shown below. This plywood rectangle will serve as the bottom of the structure. Then one more exactly the same rectangle, but only with an opening for an MP3 decoder. And glue this rectangle also with superglue to the opposite side (see photo).
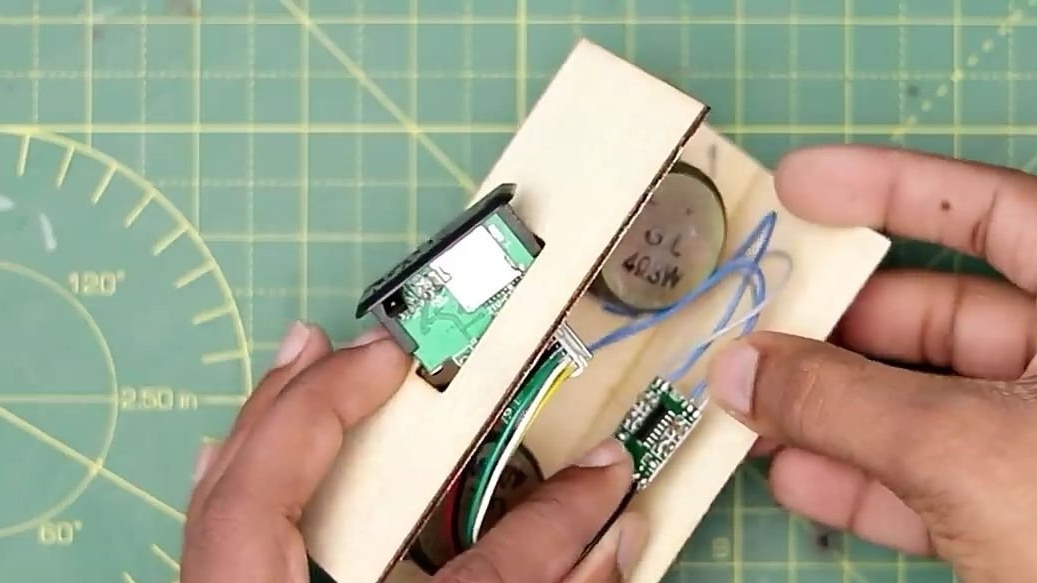
Install the MP3 decoder in its seat after removing the cable. And fix the MP3 decoder using superglue, then install the cable back. Also, an audio amplifier should be glued to the inside of the case so that it does not hang there. We cut out another wooden rectangle similar to those previously, and to this rectangle with the help of hot melt glue the battery and its control board. And glue this rectangle in the place indicated in the photo.
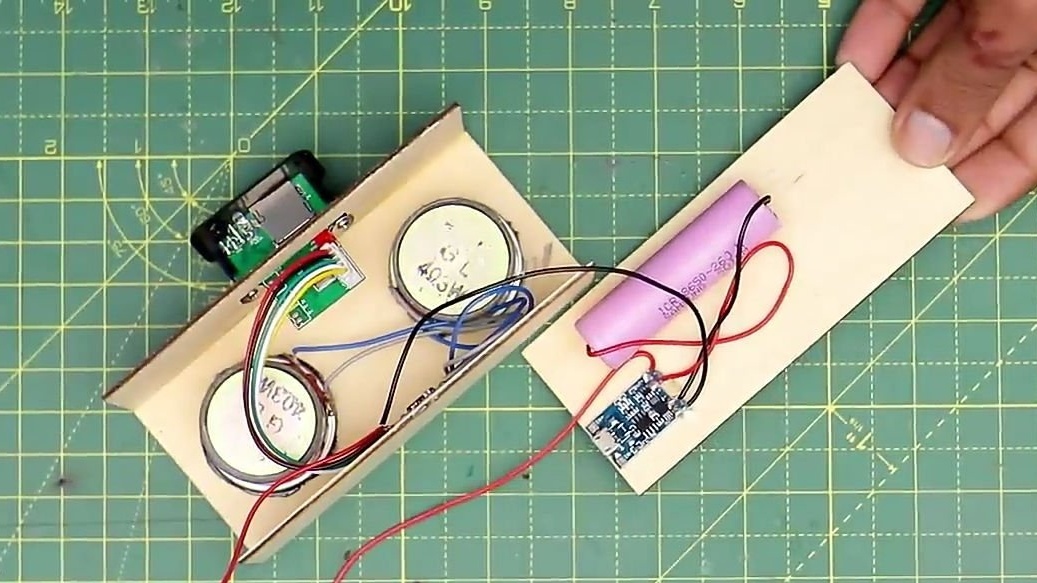
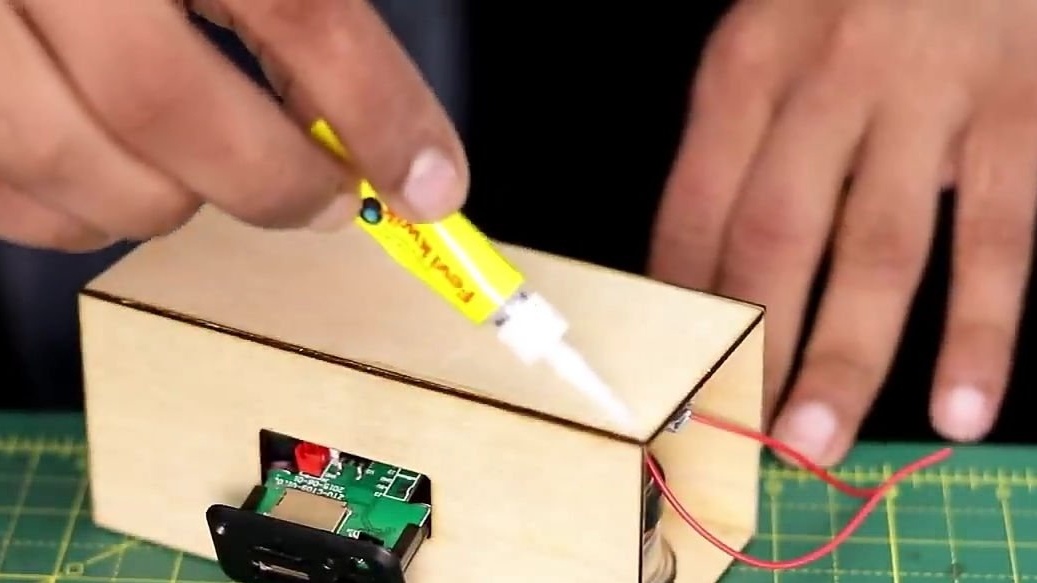
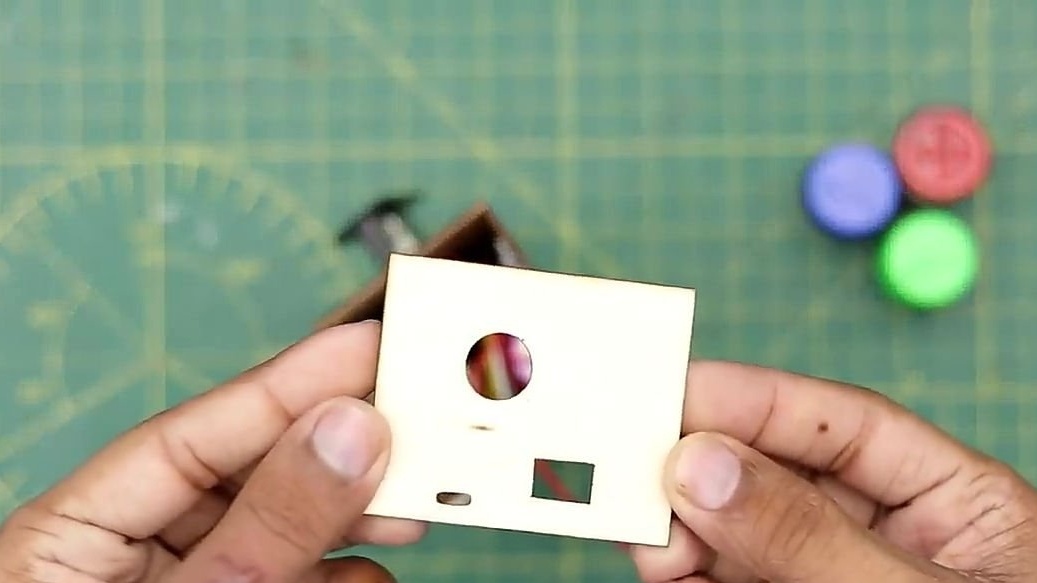
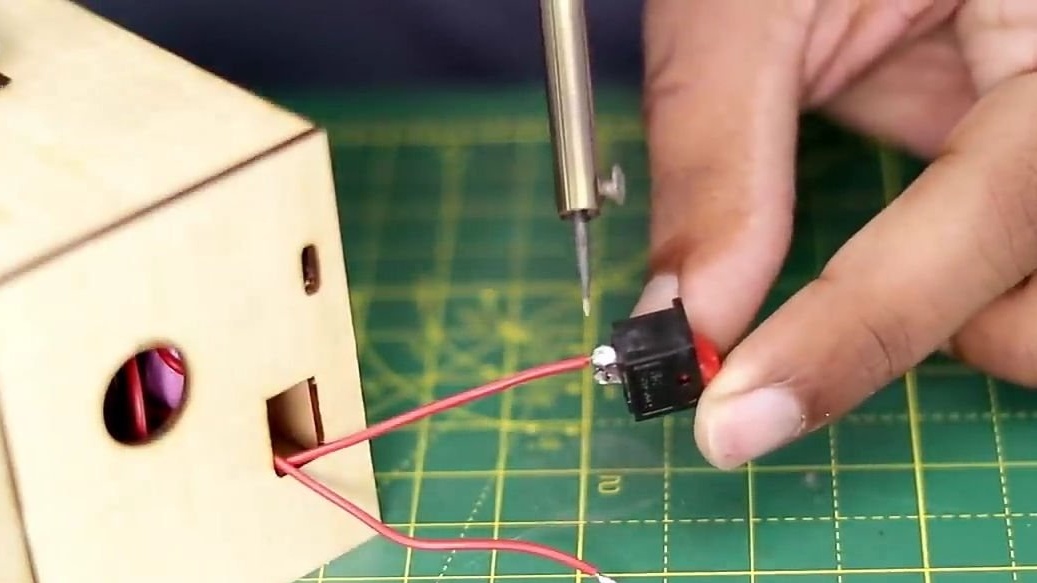
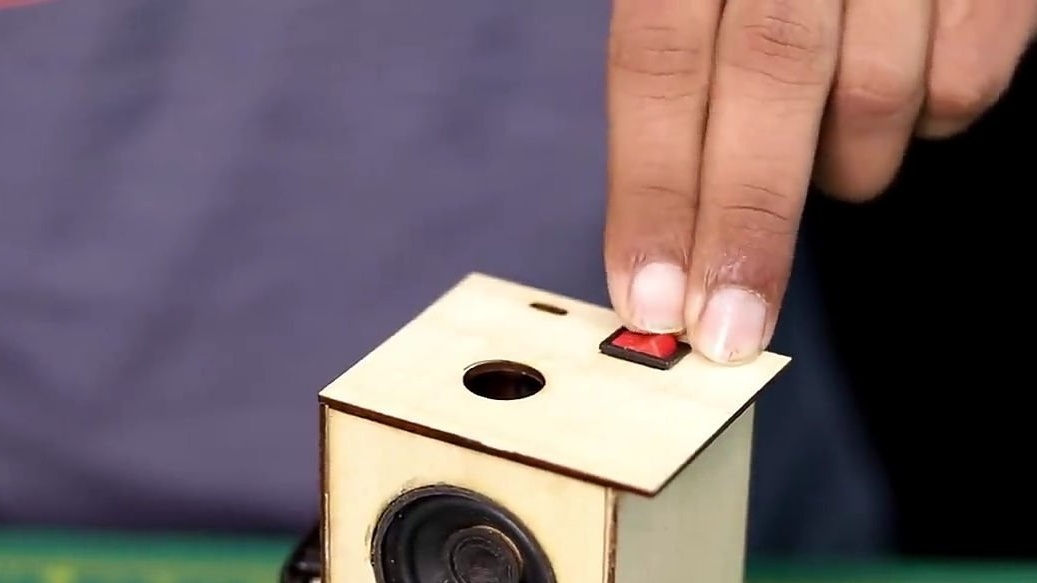
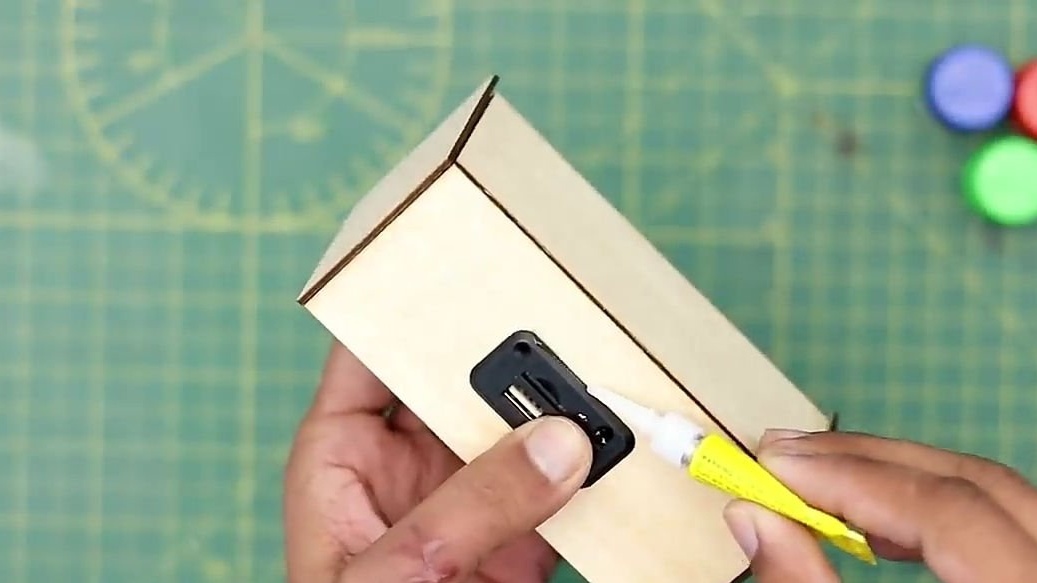
Next, from the same plywood, we should cut a square with holes, under the switch, power connector and under the air flow passage. And we glue it, stand on the side where you glued the battery control board (by inserting wires under the switch through the holes).Next, solder the switch to the inserted wires, and install it in your landing hole. At the end, we cut the same square out of plywood as with the holes, but only without them. And glue it on the opposite side (see photo).

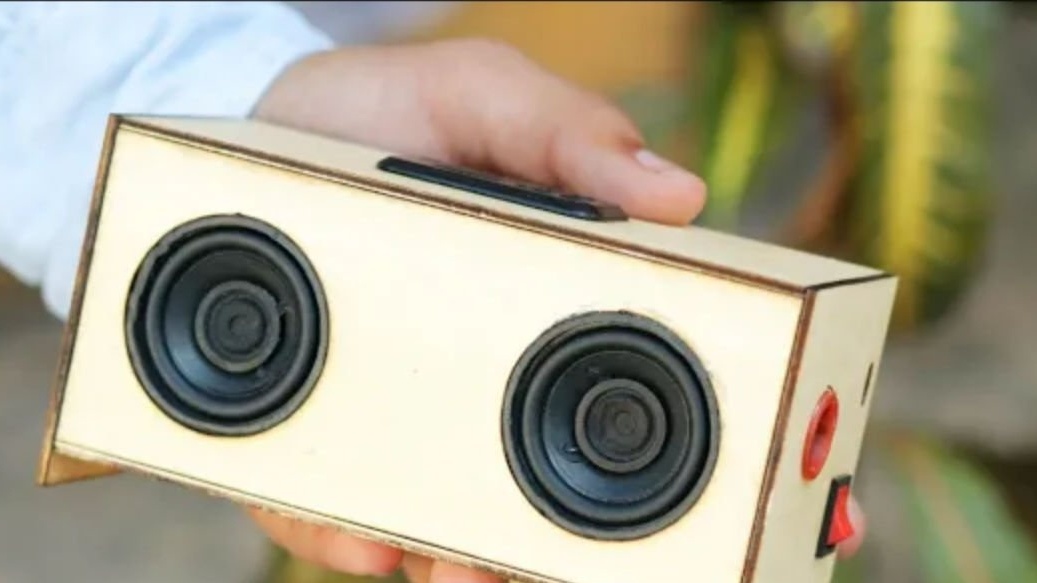
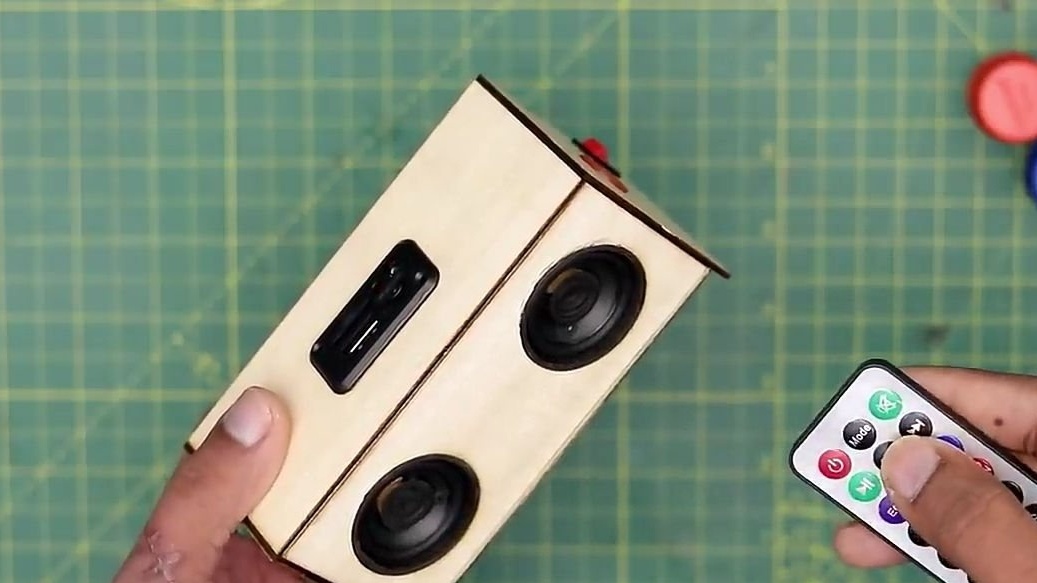
That's all! Everything is ready, it remains only to charge the battery, insert into our column an SD card with music of a supported format and enjoy the music.

You can purchase accessories that can be useful for assembling this homemade product here:
Here is a video of the author of the homemade:
Well, thank you all for your attention and good luck in future projects, friends!