

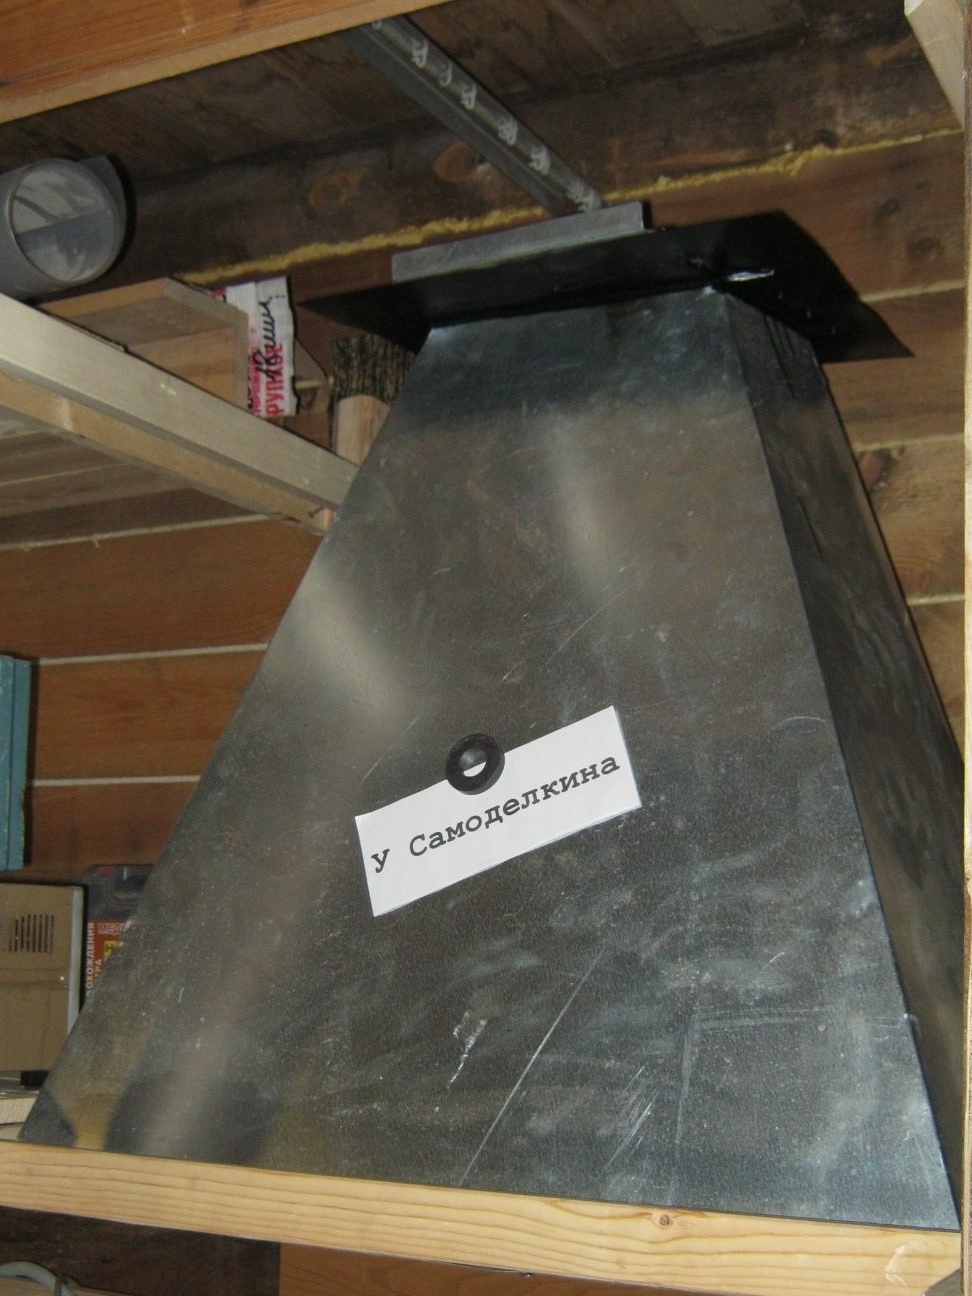
An exhaust hood collects and removes contaminated air from the desired location. This can be intensive regular soldering (for example, stained glass), setting up experiments with volatile and toxic chemicals and storing them, welding metals, the use of high-temperature furnaces. It is mandatory to use a hood (umbrella) for glass-blowing work (burner).
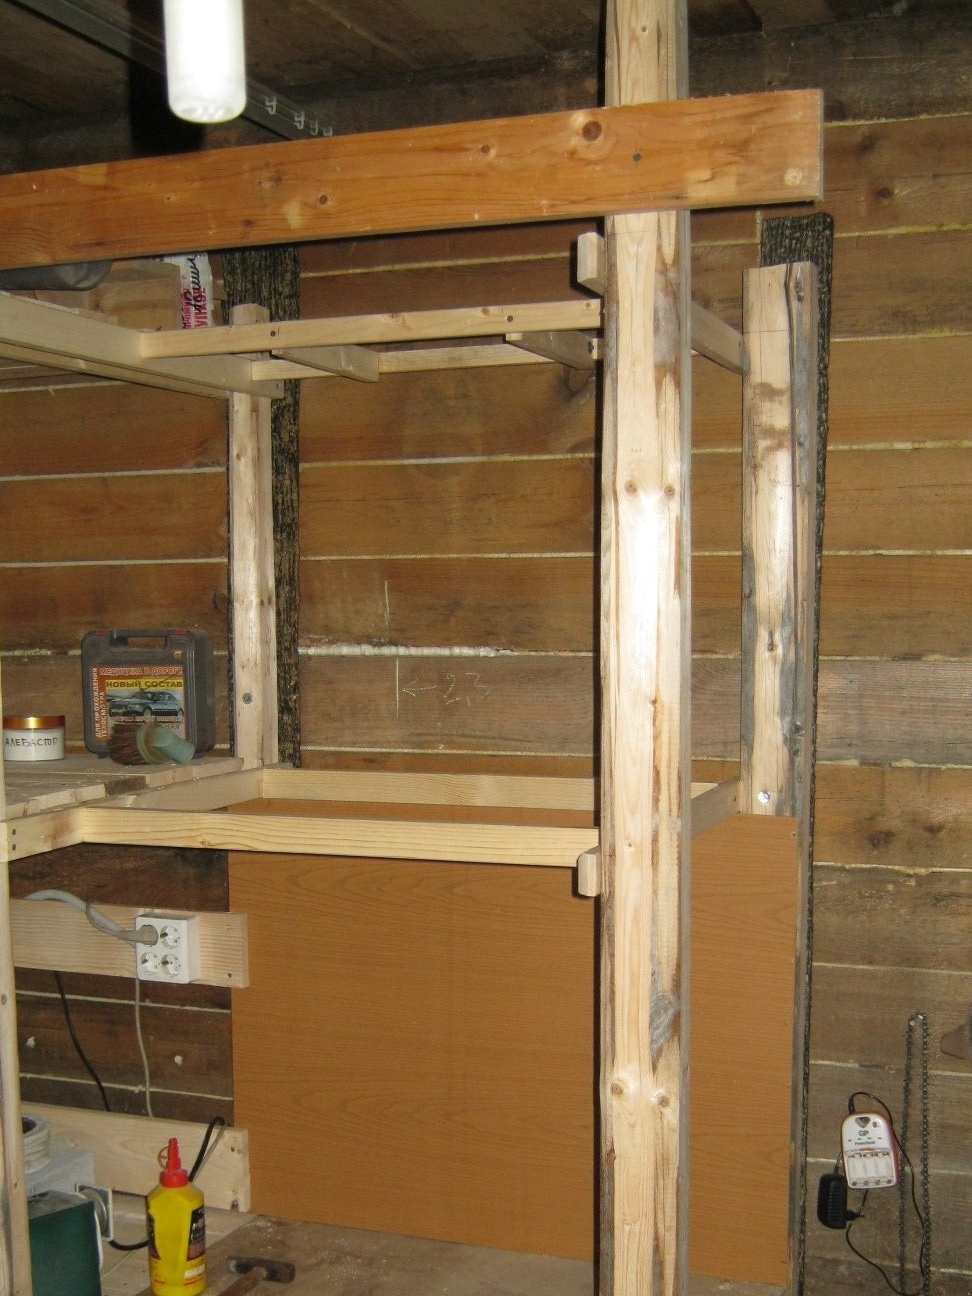
The following describes the manufacture of an exhaust hood for a glass blower home workshop. The exhaust hood is made of simple and common materials without the use of special equipment for tin works. The described umbrella has the shape of an inclined tetrahedral pyramid (the best use of space), a scan for this shape can be constructed by means of descriptive geometry (in several ways). For a simpler form - a straight pyramid, the sweep can be calculated and automated. The dimensions of the umbrella are obviously taken with an excessive margin, if necessary, all the necessary calculations of ventilation equipment can be found in the literature. An exhaust hood is integrated in the racks and is equipped with an integral home-made gate-valve that shuts off the air duct.
What was required to work.
Instruments
Set of bench tools, marking tool, device for installing blind rivets, a powerful soldering iron with accessories and / or a small gas burner. Electric drill (screwdriver), angle grinder, goggles and headphones, a good extension cord. Paint brush, dishes.
Materials
Galvanized steel 0.5 mm thick, steel sheet 1 mm thick, flux, solder, paintwork, rags.
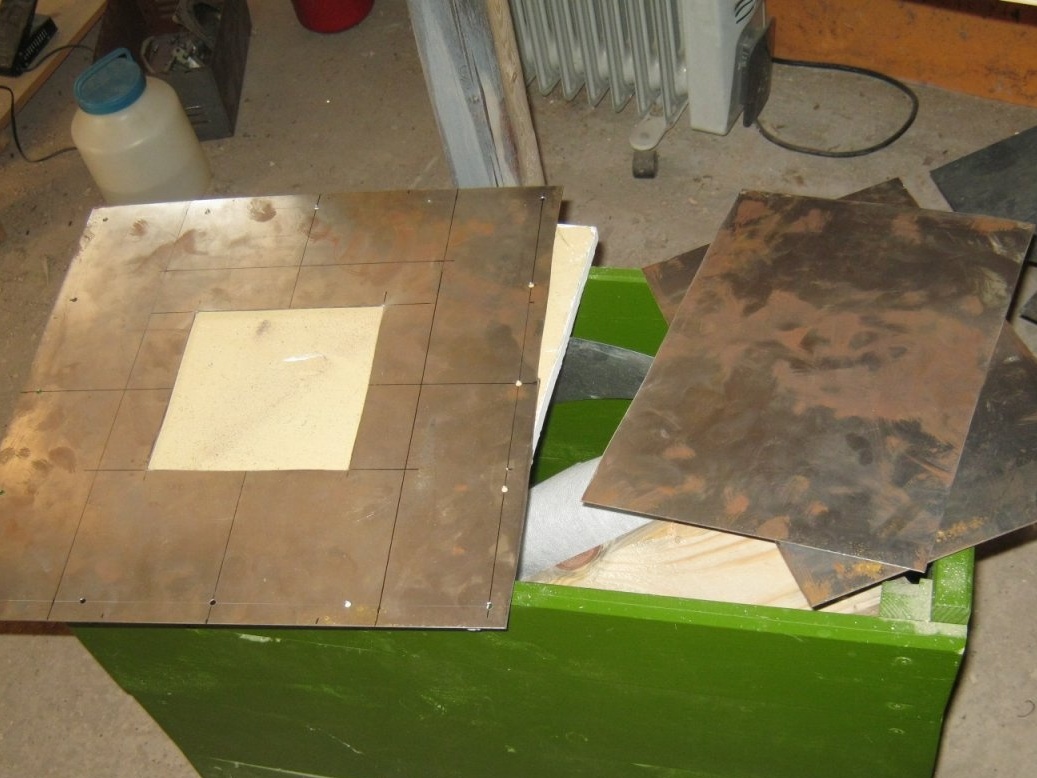
Umbrella design, scan.
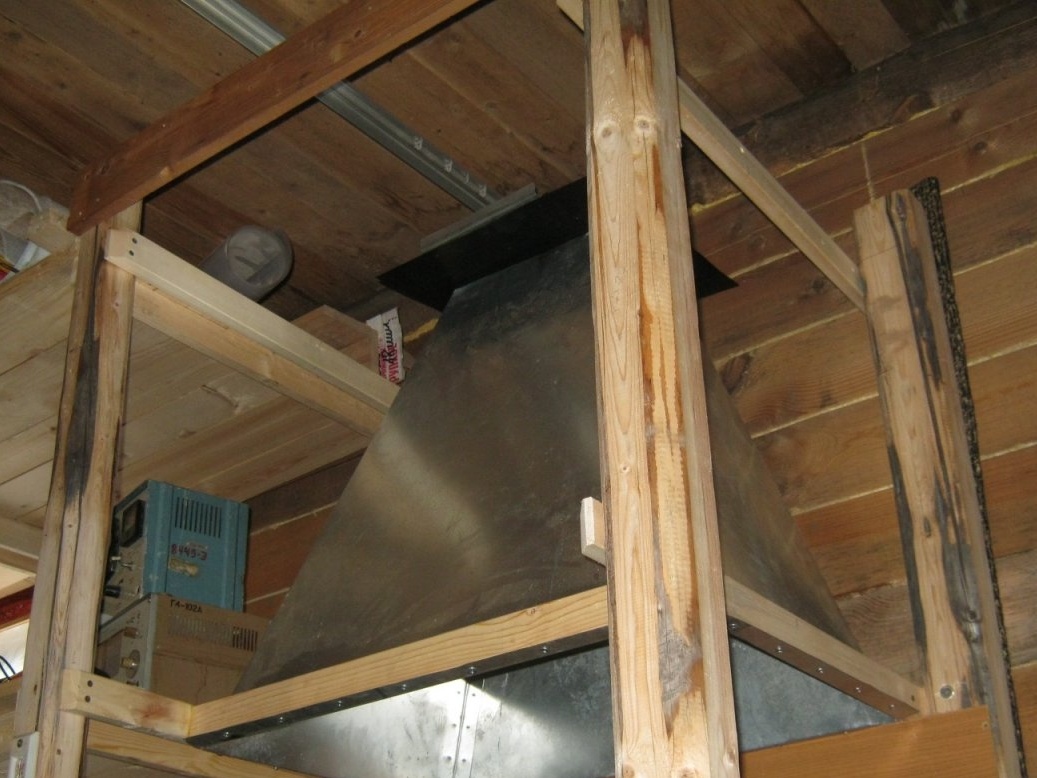
An exhaust hood was intended primarily for a glass blower. Unlike the classical ones, its mouth is much wider, and the lower part of the umbrella will not be exposed to heating, and the upper part is more likely to heat up (the gate is not open enough or is completely closed). Hence, a somewhat specific design of the upper part - wooden structures are removed from the place of probable heating, painting is made with heat-resistant paint.
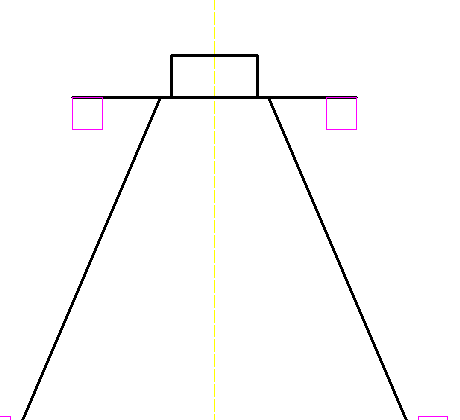
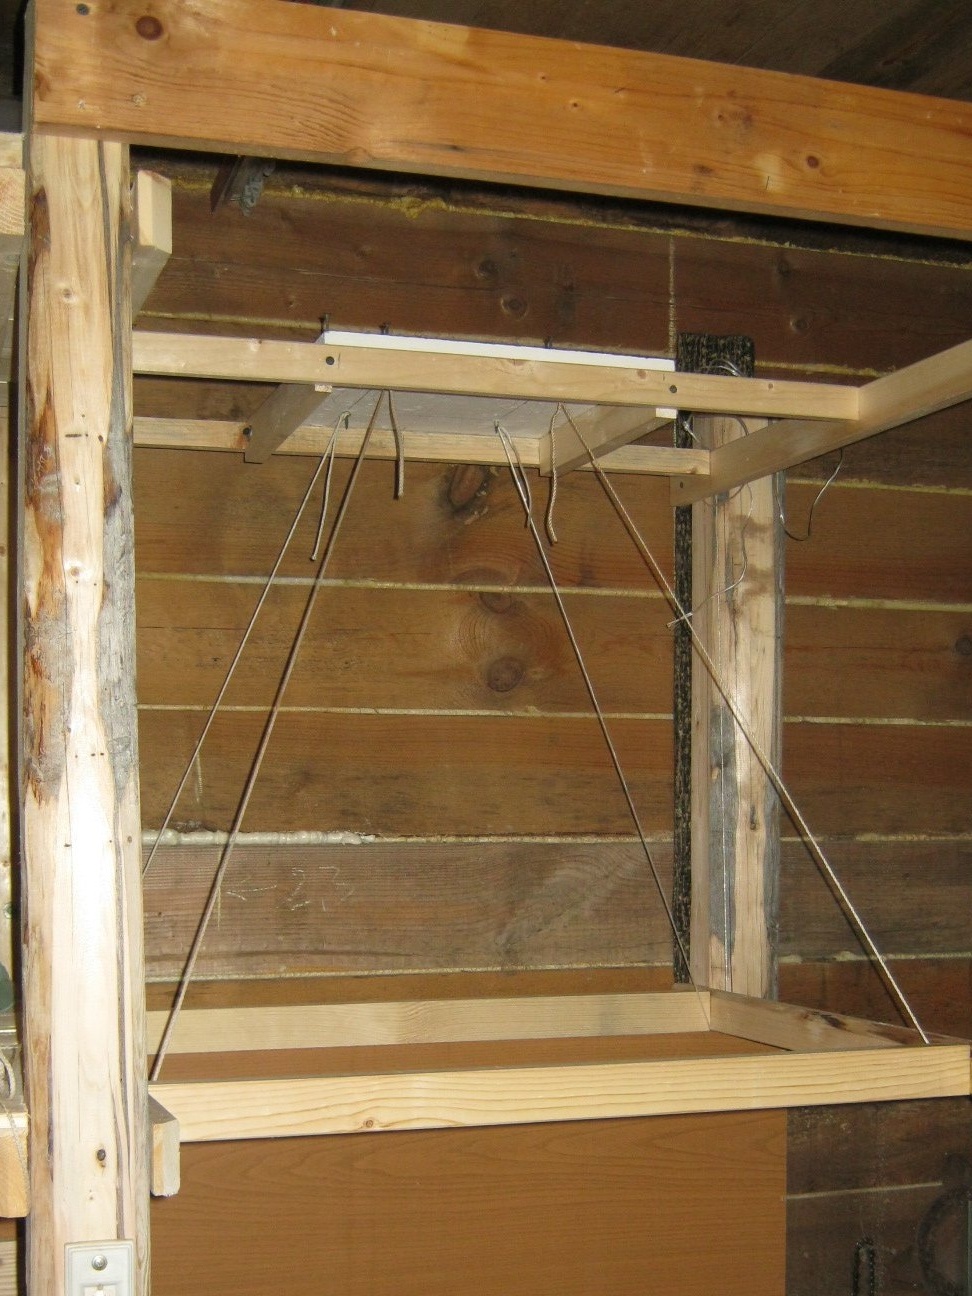
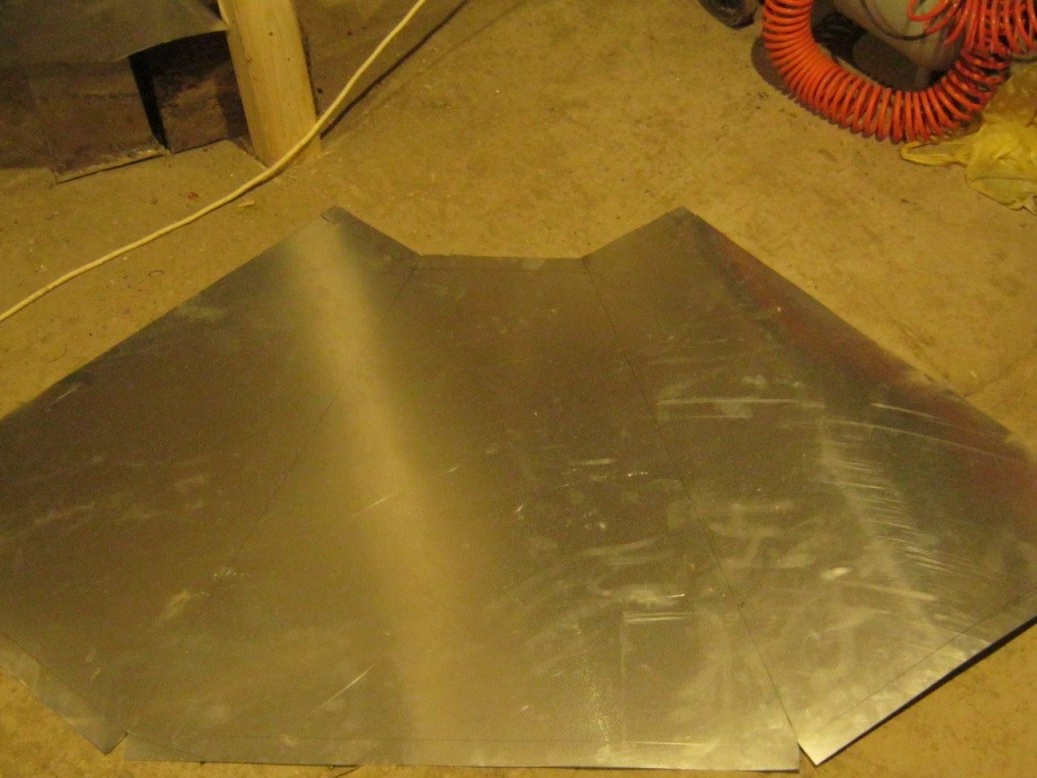
As already mentioned, a scan can be built using descriptive geometry without any “naturalness”, only on paper or a screen, but in my case, almost everything was ready to build a full-size model “on the ground”. The lower perimeter on which the umbrella bell will be attached and the upper for attaching the gate have already been.It remained to draw an outlet in nature and pull four ropes. Model it is easy to transfer to a drawing and make a scan.
The scan is equipped with allowances for the fastening elements to the gate and the elements of the wooden structure. The finished reamer is divided into two parts - the left-front-right-hand side and separately the rear one, for transfer to a standard galvanized steel sheet (the whole reamer did not fit in width). Most also have allowances for connecting to the rear wall.
Bending without a special bending machine is done on a hard, even (if possible rectangular) edge. This may be the edge of the desktop, workbench, installed specially thick board. The piece of iron along the gib line is pressed from above by a board with an even edge (metal corner) with two clamps. With moderate lengths of bending and galvanized steel with a thickness of 0.5 mm, it is possible to obtain a result quite acceptable in ordinary cases. Small parts are conveniently bent between two metal corners clamped in a bench vise.
He bent his tin on the bed homemade latheby pressing on top of an inch board. Bending should be done not pointwise (with a mallet on a piece of iron), but through an even, long gasket (board scrap).
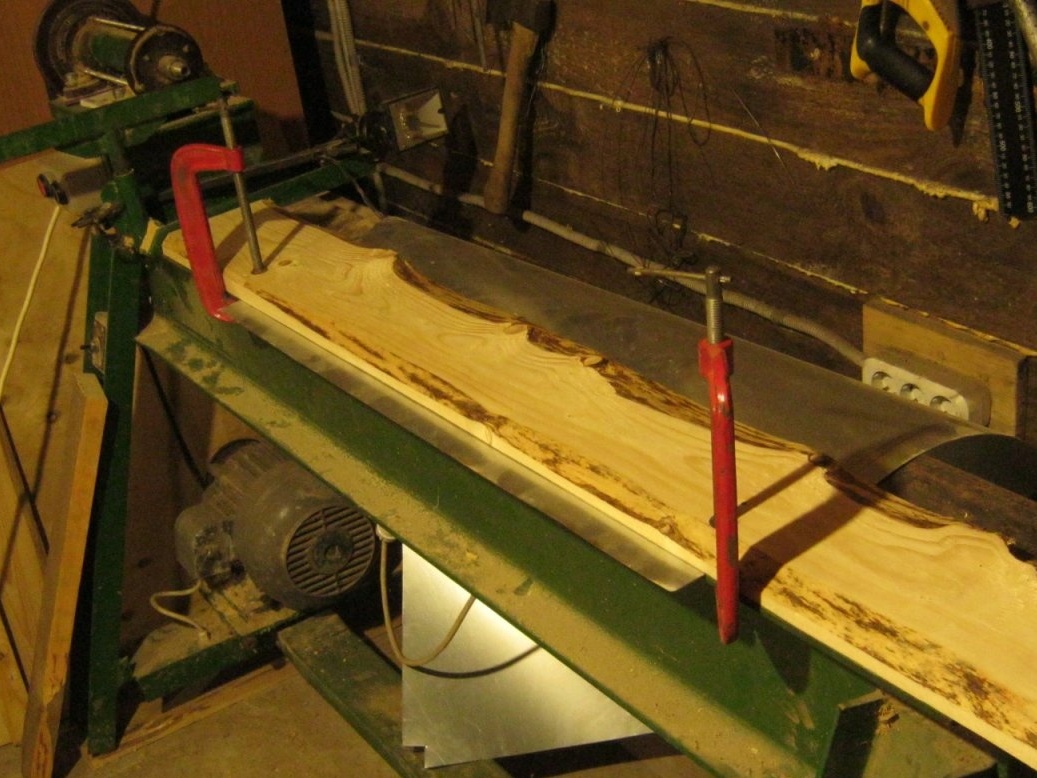
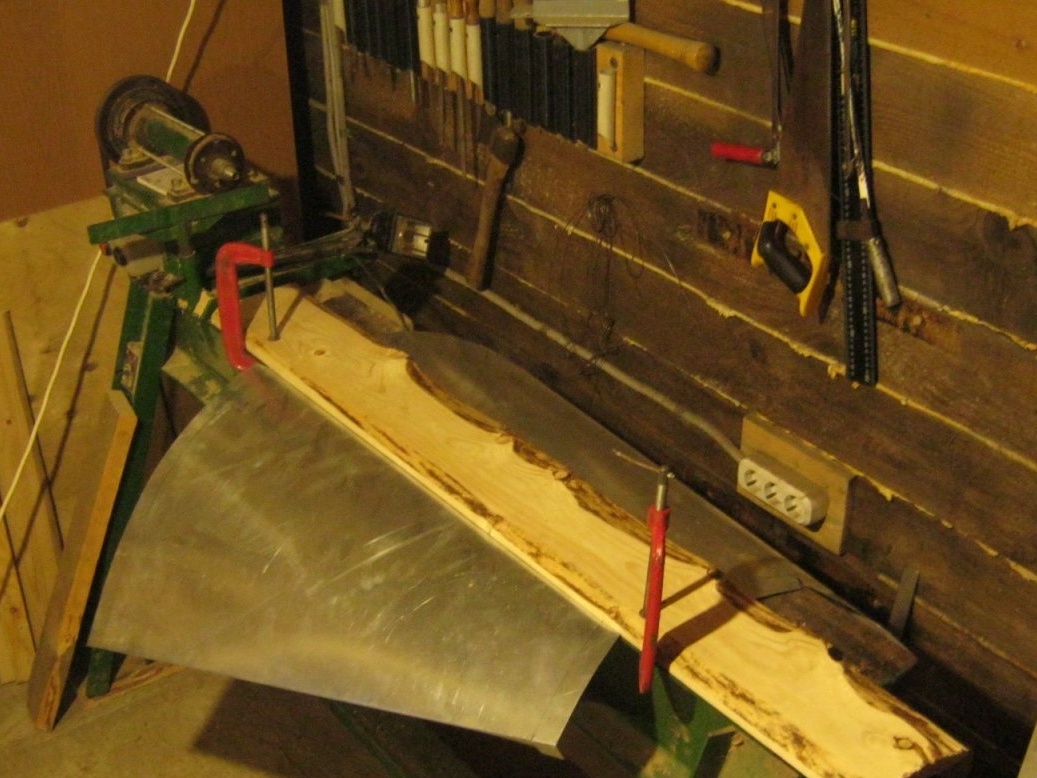
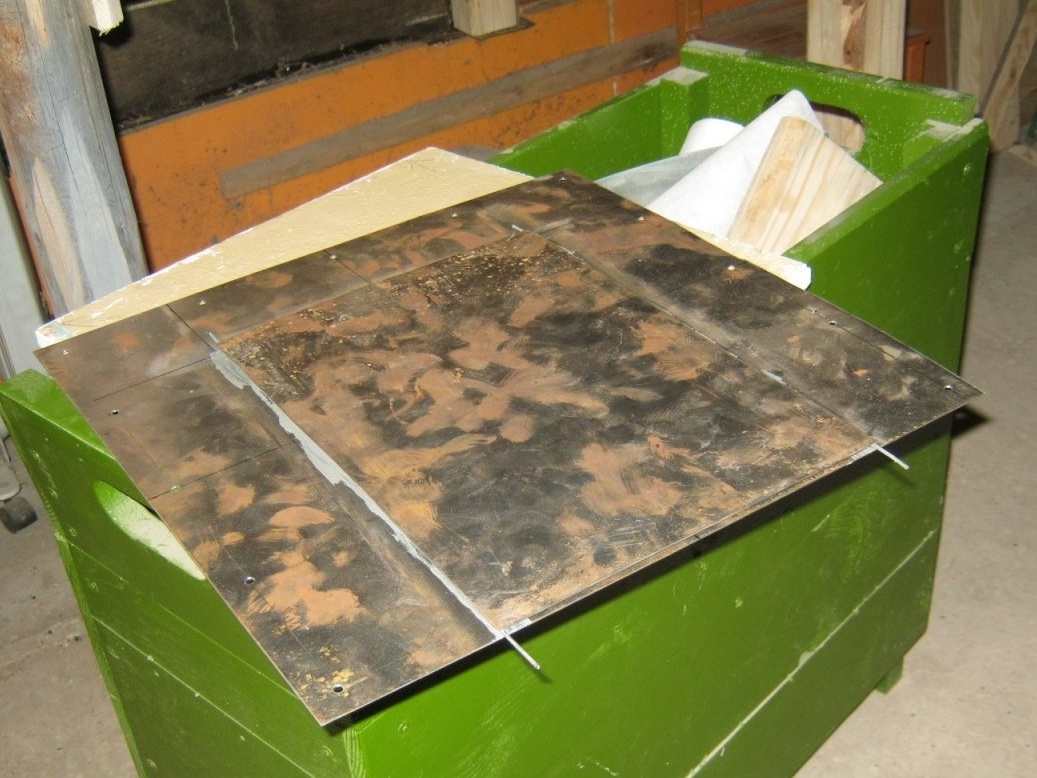
He bent in this order - a petal for connecting to the missing back wall, the nearest rib. Turned over the workpiece and repeated. On the resulting incomplete truncated pyramid, the petals bent from above and below the sides with a wooden bar of the corresponding length, the back wall was separately cut. It was more convenient to do her bends right away.

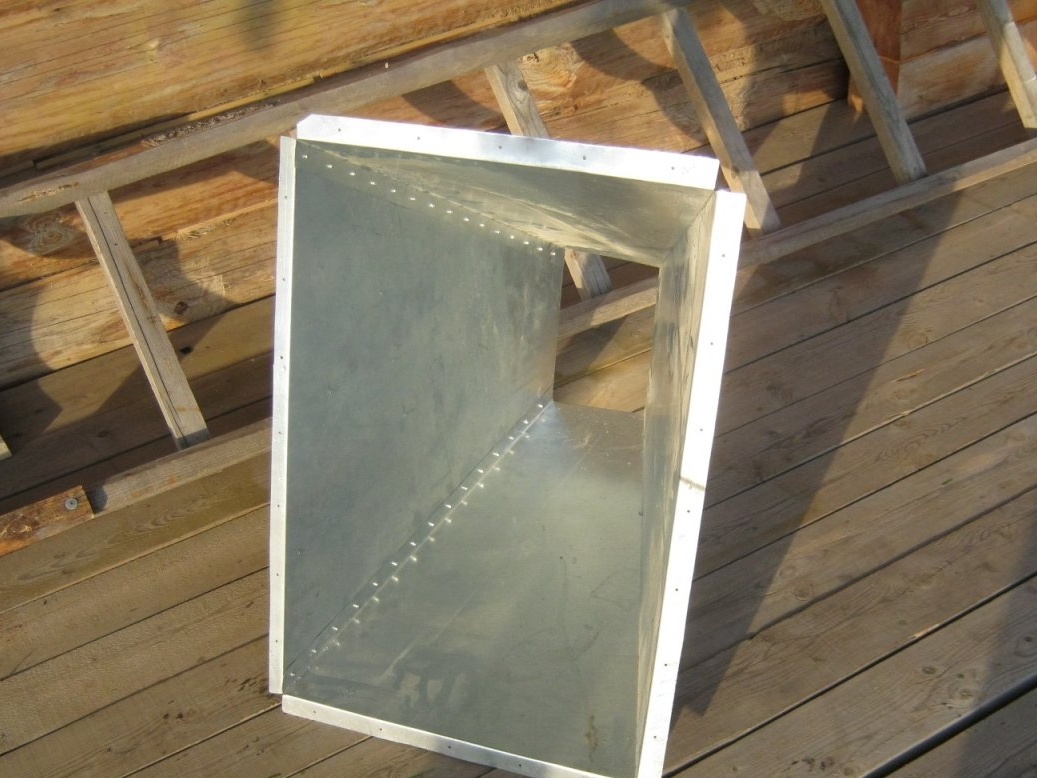
The back wall was soldered to the main part. I soldered a small gas burner with tin-lead solder with a special "burner" flux from copper water pipes. The flux is a grayish thick paste and contains particles of solder, when the surfaces reach the desired temperature they melt and the flux becomes silver - time to introduce solder. The flux is designed to work with tin-copper solder, but works well with lead. You can also use other inorganic fluxes (organics burn and soot makes it difficult to solder), for example, "soldering acid" - zinc chloride. Structural soldering of large parts can also be done with a relatively low-power soldering iron, heating the soldering place with a burner flame, a building hair dryer, electric heaters (iron, electric stove). Acid fluxes should be washed with warm water immediately after cooling parts.
When soldering relatively large boxed gizmos of thin metal, there is an unpleasant moment - the glands are highly warped from local heating and well-fitted thin seams turn into ugly, hard to solder waves. The difficulty can be significantly reduced by frequent mechanical fastening of the surfaces. Here, this kind of fastening is made by blind rivets.
In general, the installation in place of the back wall looked like this - put the marking of the back wall on the piece of iron, cut it out. Bend the petals from above and below, mark the rivet holes on the sides, tilt, drill, countersink holes (remove burrs). Attach the back wall to the main part of the umbrella, secure. Mark the rivet counterholes, remove the back wall, mark the centers of the holes on the main part of the umbrella, drill, countersink. Strip out the soldering spots with a small sandpaper, apply flux and rivet. Solder, remove flux residues.
Shiber
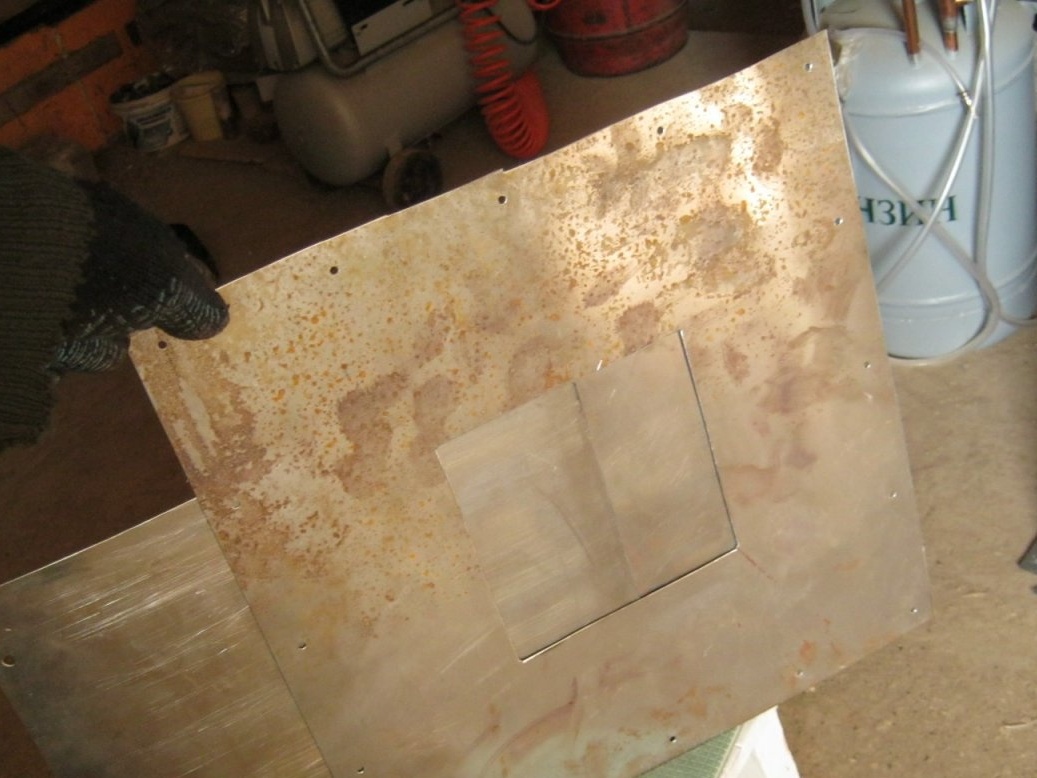
A separate, rather time-consuming part of the design was the gate. It was decided to make its design in the manner of a furnace valve - unlike a rotary valve, it allows low manufacturing accuracy. The material was available steel sheet 1 mm thick.Connections are made by soldering.
After marking, three main flat parts are cut out, a square opening of 150x150 mm in size is cut out on the base (for the duct ø150 mm). A cover is soldered over the gate base. The lid is placed on pieces of galvanized steel wire with a diameter of 2 mm; previously, a flux is applied to the soldering place.
From a cut strip of the same steel, a cylindrical neck is bent to connect a round duct with a diameter of 150 mm. The neck is bent on a three-liter glass jar and carefully fitted (diameter). The ends are soldered. The finished neck is soldered to the gate cover until the hole erupts. Thus, it was possible to slightly reduce the warpage of the soldered surfaces.

Holes were drilled from the inside around the circumference of the soldered neck, the bridges between which were cut by a “remnant” of the abrasive wheel of a small angle grinder. It was also possible to make a major fine-tuning of the hole with a thick cleaning abrasive wheel with a angle grinder, then a semicircular file.

The finished gate is attached to the exhaust hood, the places occupied by the “paws” are marked, in the places where it is possible, the rivet holes are marked, poked and drilled. The places of contact are cleaned, soldering flux is applied. The gate is riveted into place, the connection is soldered. The flux is washed with warm water, the gland is dried.
After trying on the structure, the upper rusting part of the structure is cleaned, degreased with gasoline and painted in two layers with black heat-resistant paint. After drying, an exhaust hood with four-way gate is in place.

Conclusions, work on bugs
In general, the design turned out without significant miscalculations, but a few little things could have been improved.
The upper belt of the external wooden fastening (gate) was not needed at all - with the standard fastening of the lower part, the whole structure is very rigid and any reasonable effort when opening and closing, even with the gate valve that is heavily jammed, can withstand without flinching. The wide "fields" on the gate were not useful at the same time.
Soldering the side ribs when installing the back wall was unnecessary - rivets would have been enough.
Several standard rigid chimneys leading to the attic (or soft corrugated aluminum duct), ending with an exhaust fan, will be connected to the exhaust hood. Air ducts outside the heated room will require careful thermal insulation.
Babay Mazay, March 2019