

A couple of months ago, the author of this homemade I saw a magnetic sweeper that collected iron filings and shavings. But looking at the price, I realized that this was not for him. Soon after, his engine burned out and the only thing left of it was the magnets in the case. He immediately had the brilliant idea to build his own magnetic broom.
Step 1: Materials Used
- 1 motor housing (or other large magnet);
- 2 rollers or wheels;
- A metal rod (or a suitable alternative for use as an axis) There were threaded holes for screws on the shaft;
- 4 screws with nuts;
- dowel 44 mm .;
- 2 pieces of metal;
- epoxy resin;
- 2 plastic buttons from electronic devices (or other suitable material for use as a hub cap);
Step 2: Tools
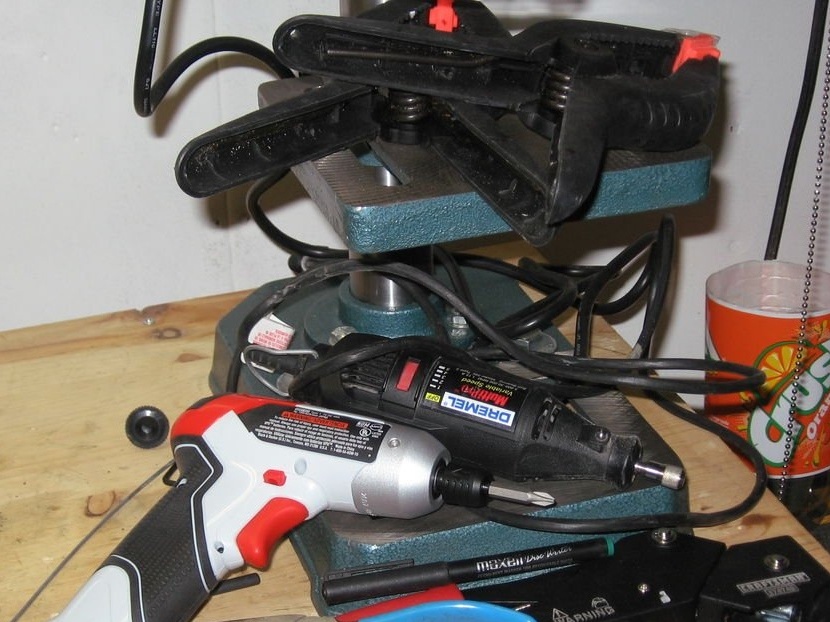
- Protective glasses;
- Drilling machine with corresponding bits;
- Hand drill;
- drill;
- Dremel (with cutting and grinding discs) {or a hacksaw with replaceable blades};
- vise;
- clamps;
- hammer;
- riveter (with rivets of a suitable size);
- pliers;
- screwdriver;
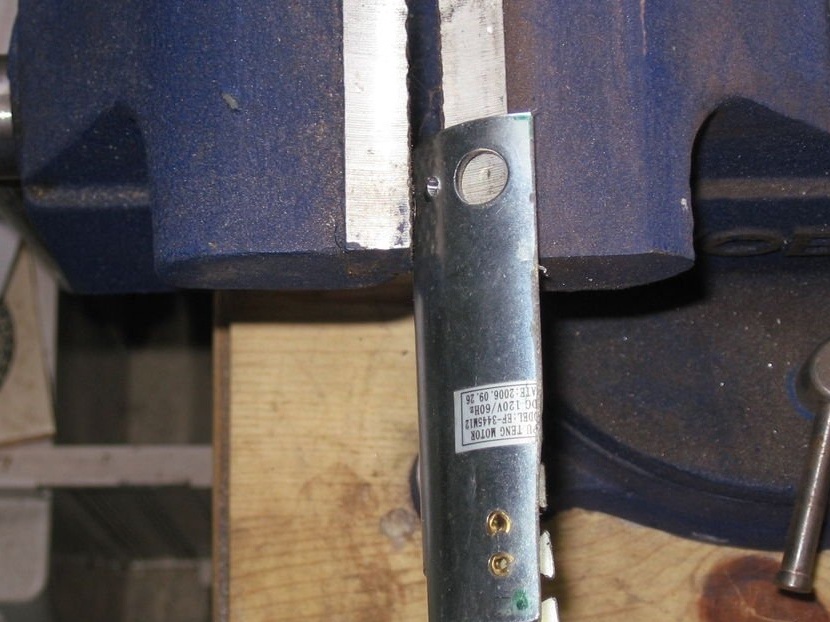
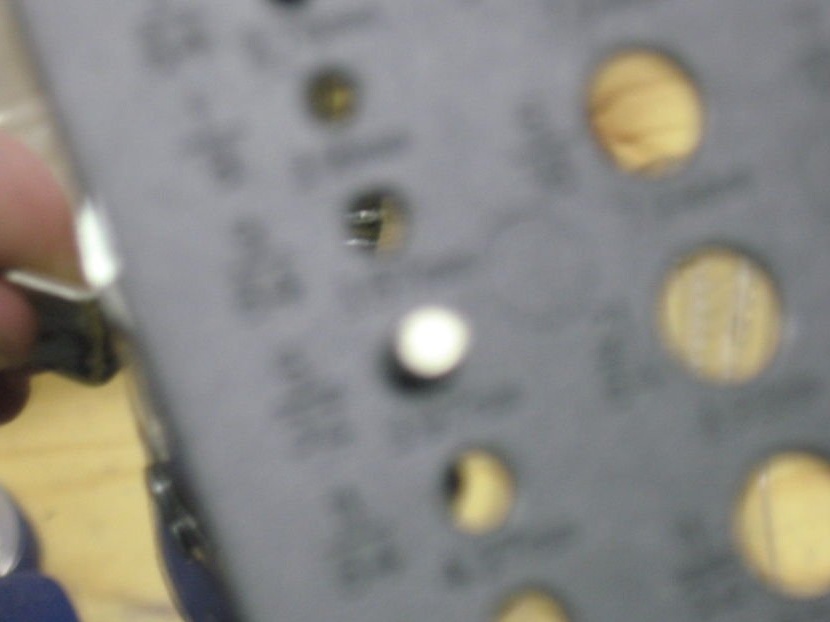
Step 3: disassembling the motor housing
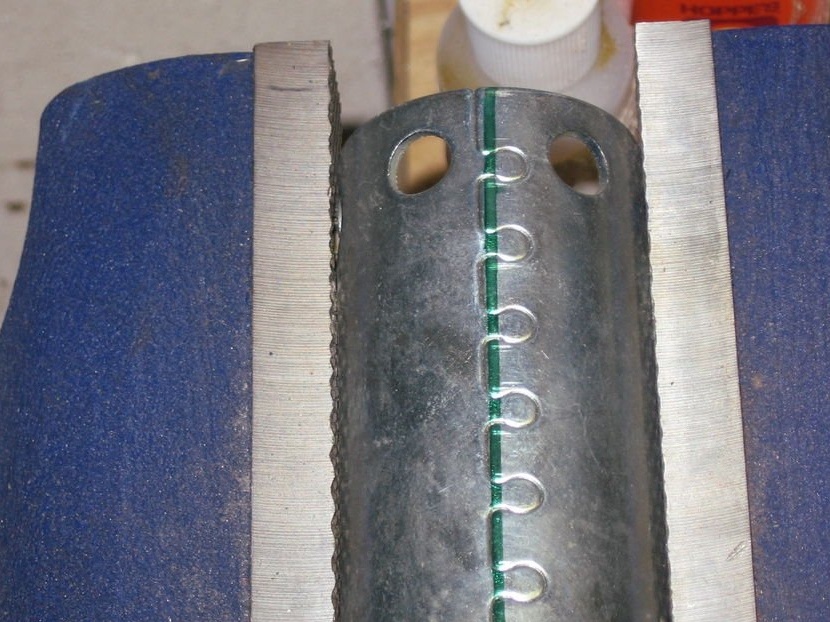
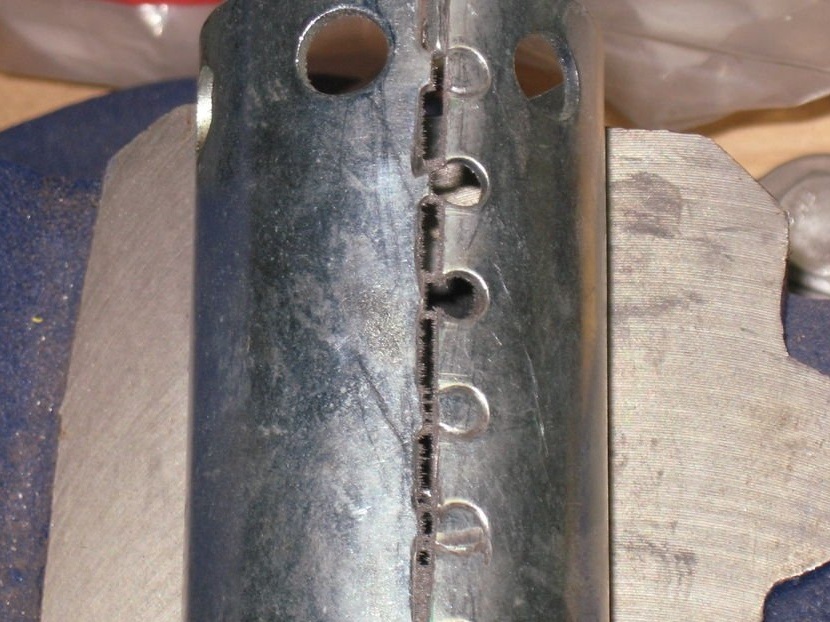
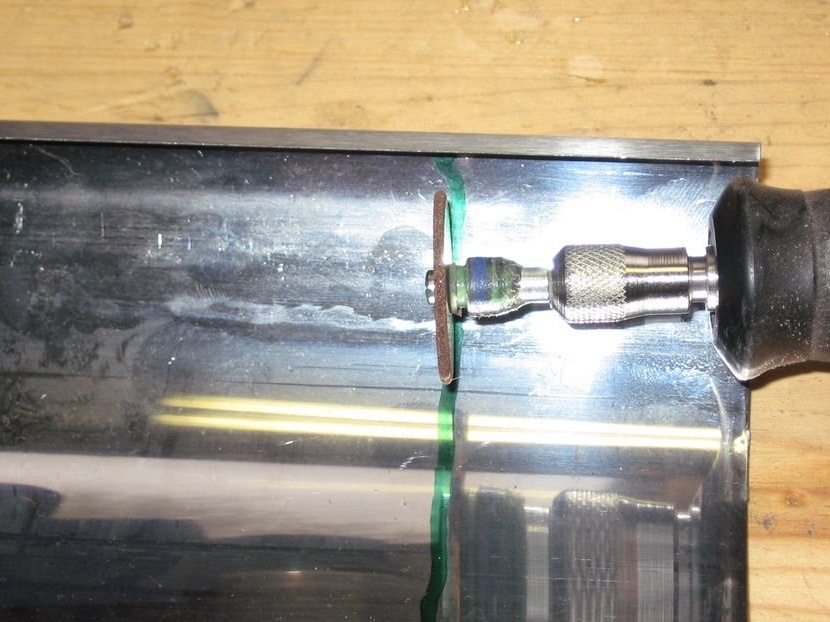
Look into the motor housing and determine where the magnets are located. Draw a line down on the sides where the magnets are not located to split the body in half along the axis. Secure the casing in a vise and then use the Dremel with a large cutting blade. When sawing the first side, saw on the other side.
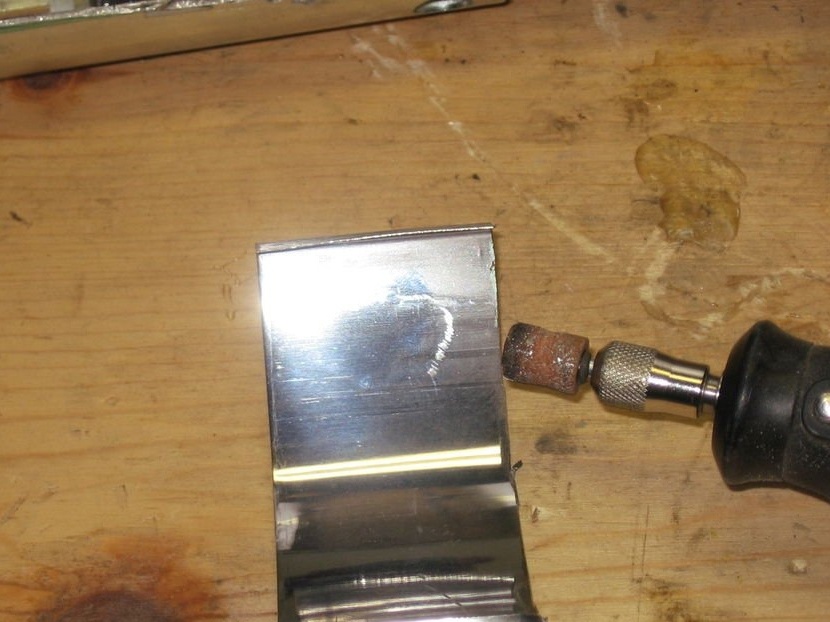
After you split the body into two parts, switch from the cutting disc to the grinding nozzle and clean all sharp edges / material residues at the edges.
Be sure to wear safety glasses. This process creates a lot of dust from the blade, as well as sparks and small pieces of metal flying into the eyes.
Step 4: Marking and Drilling Holes
In order to increase the area of the magnetic broom, it is necessary to connect the two halves of the motor housing. You also need to attach the wheels, because otherwise it will be just a magnetic scraper. For this, the author used a combination of screws, rivets and epoxy. Unfortunately, the motor housing does not have holes previously drilled at the right points. This means that you will need to drill them.
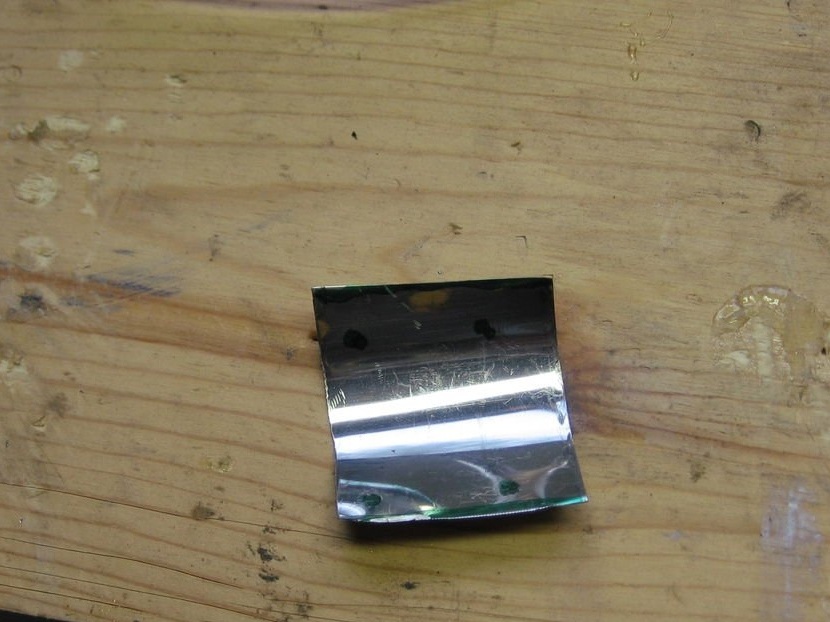
The author decided to connect the halves of the case at the end with the holes in the case.(The holes will allow the epoxy, which will be used at a later stage, to form a better bond.) After the halves are laid out, mark the rivets. And do not forget to make sure that there is no magnet on the other side!
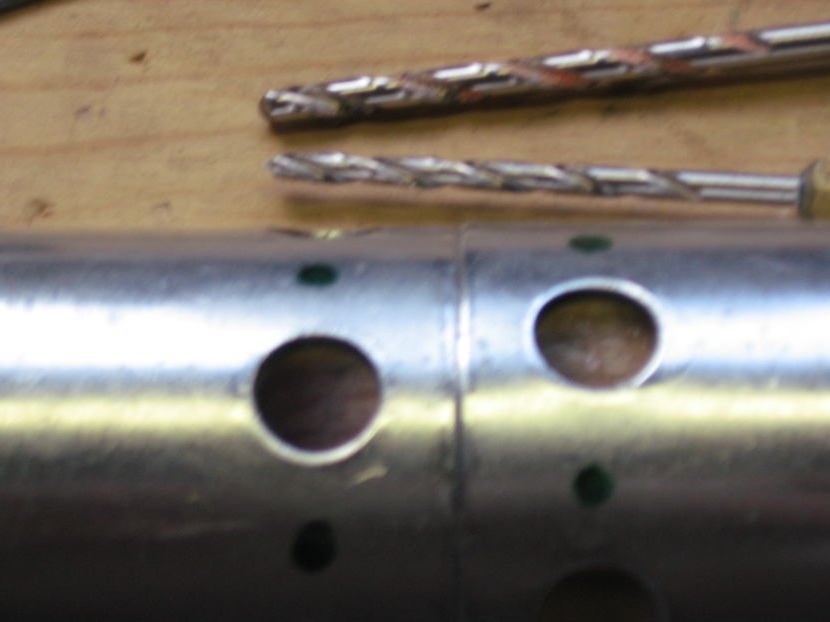
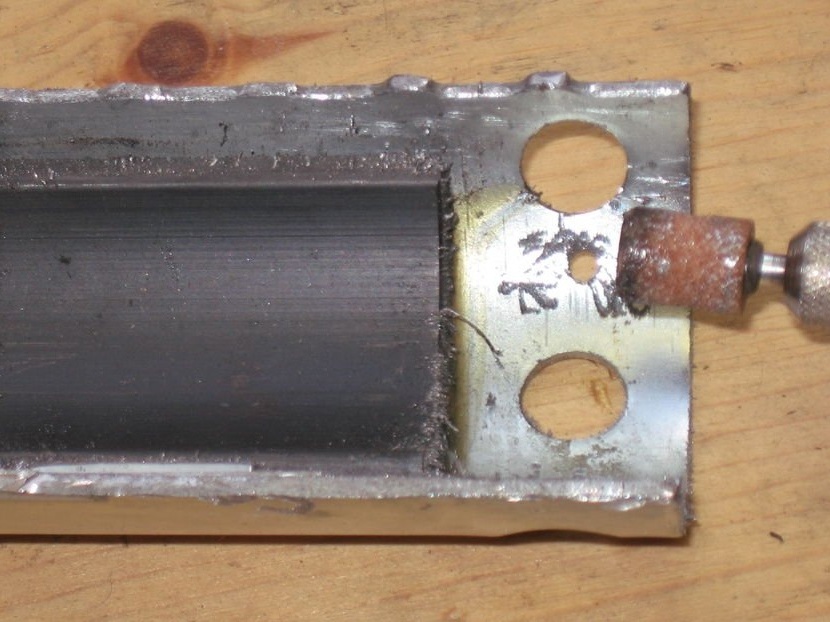
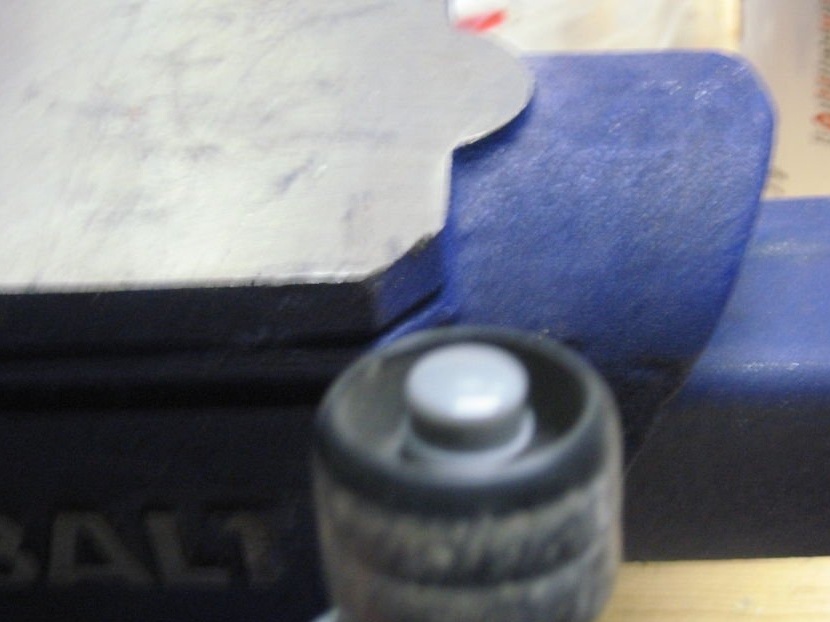
Then flip the halves and mark the places where you want to attach the axles. This can be understood by laying the future axis along the edge of the section. Then the author put the wheel in its place to find out how close you can get to the edge, and at the same time turn it. As soon as this became apparent, he noted the position of the threaded hole, which he wanted to use to mount the axis. He then repeated this procedure for the other side.
Use a core to mark holes.
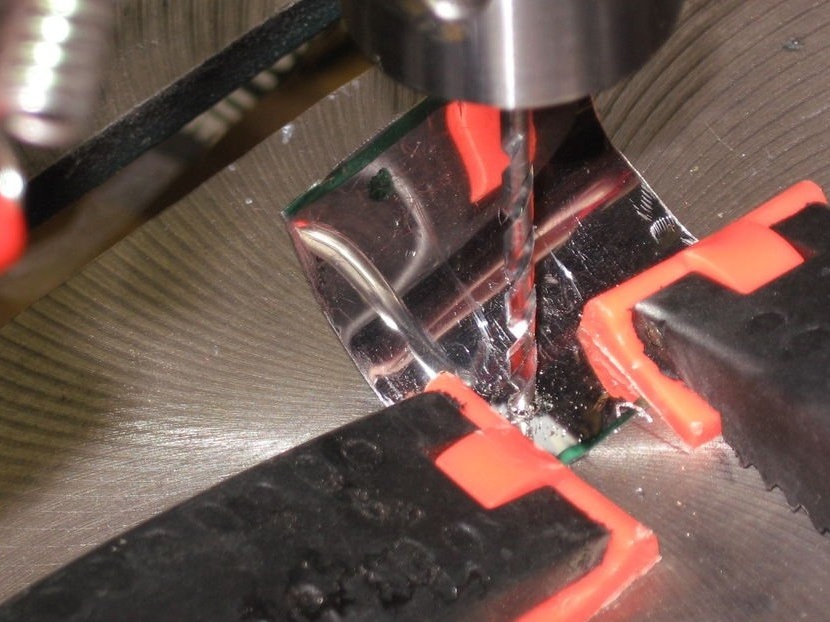
Determine the desired diameter of the screws and rivets. Then drill holes of the appropriate size for the rivets at the top.
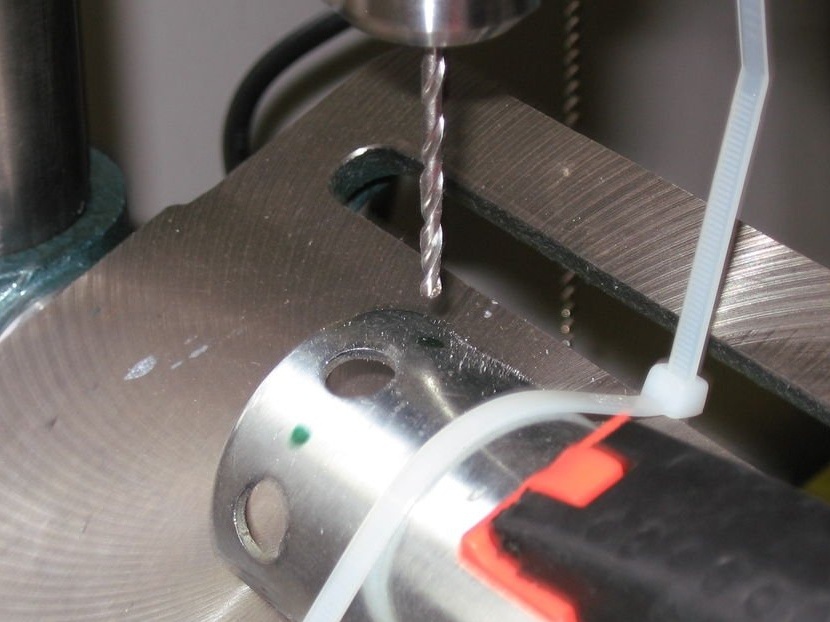
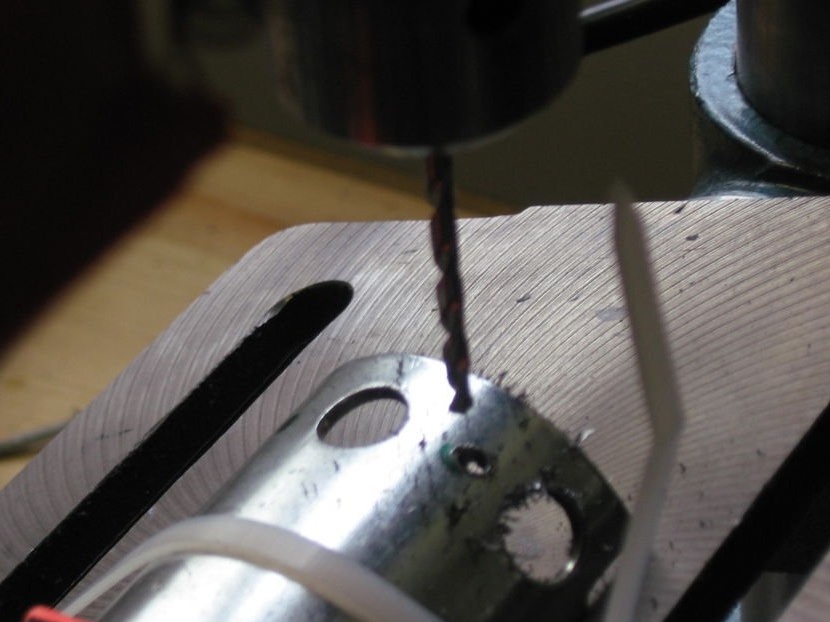
As for the holes in the axes, the place that needed to be drilled was very close to the edge, and the part was almost impossible to fix in the drilling machine. Therefore, the author secured the part in a vice and drilled it with a hand drill.
Clean the edges of the holes with a Dremel grinder.
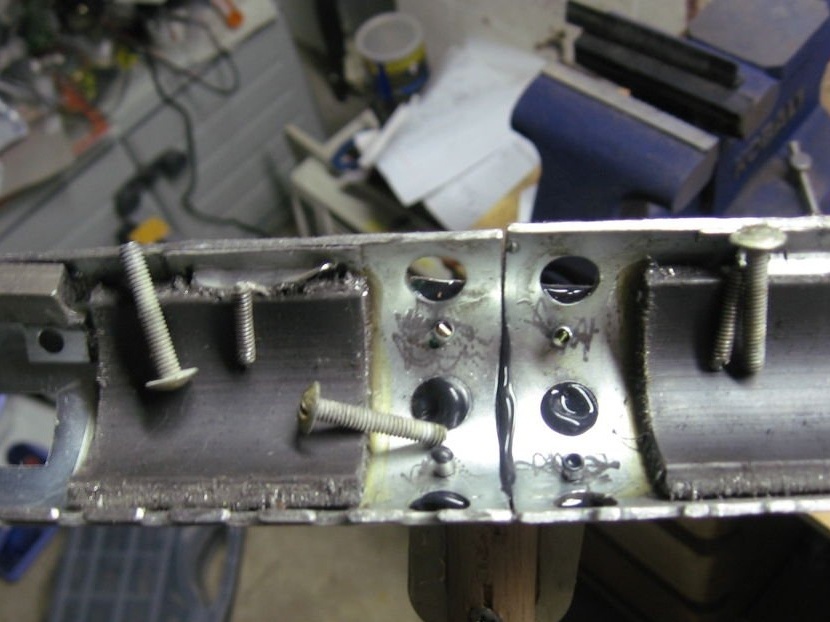
Step 5: join the halves of the metal
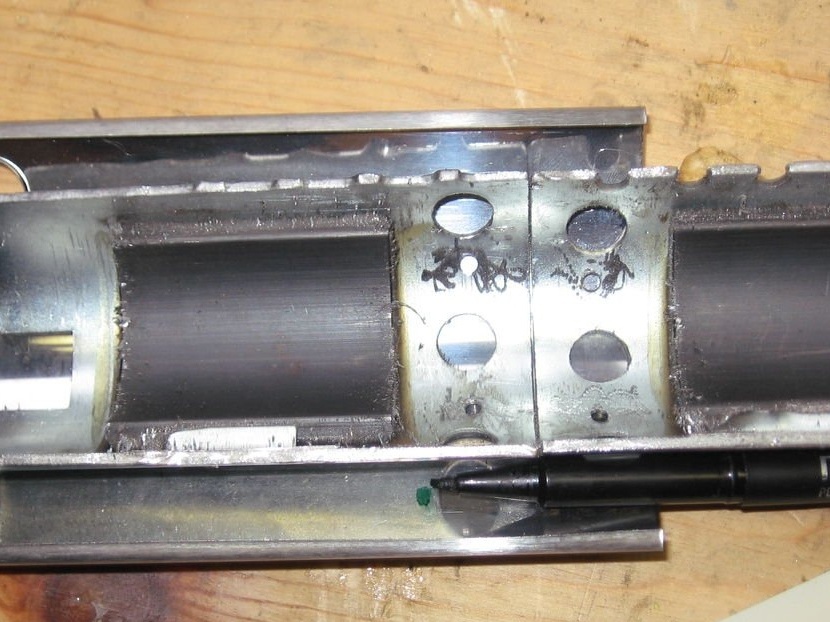

Next, you need to make a piece of metal that actually connects the halves of the magnetic broom together. Find out how wide a piece of metal is needed. Put the halves of the brush on a piece of metal. Mark on the metal next to the holes. Then the author cut off the excess metal from the part that he wanted to use in homemade work. As soon as the metal was cut to the desired size, holes were marked. Then the holes were drilled on the drilling machine in the marked places, with a drill of the same size as the previous holes.
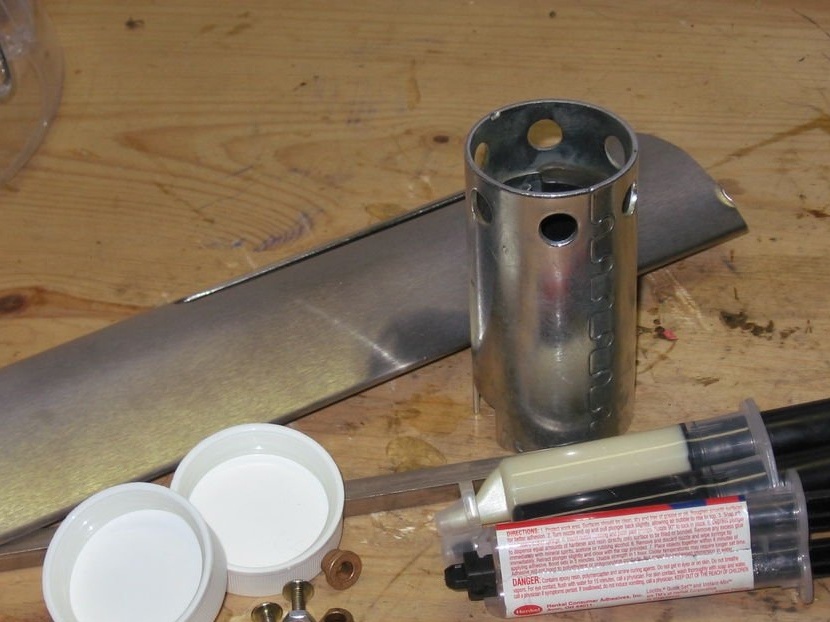
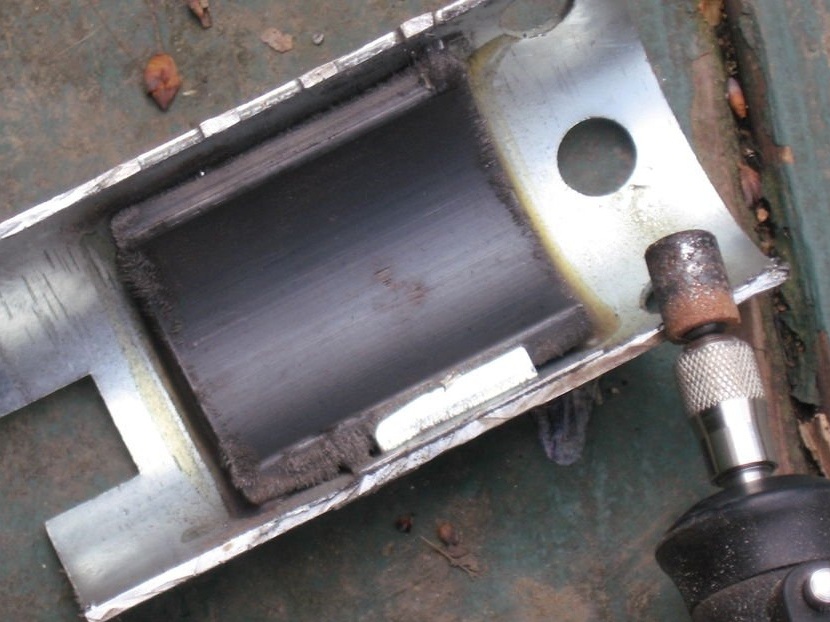
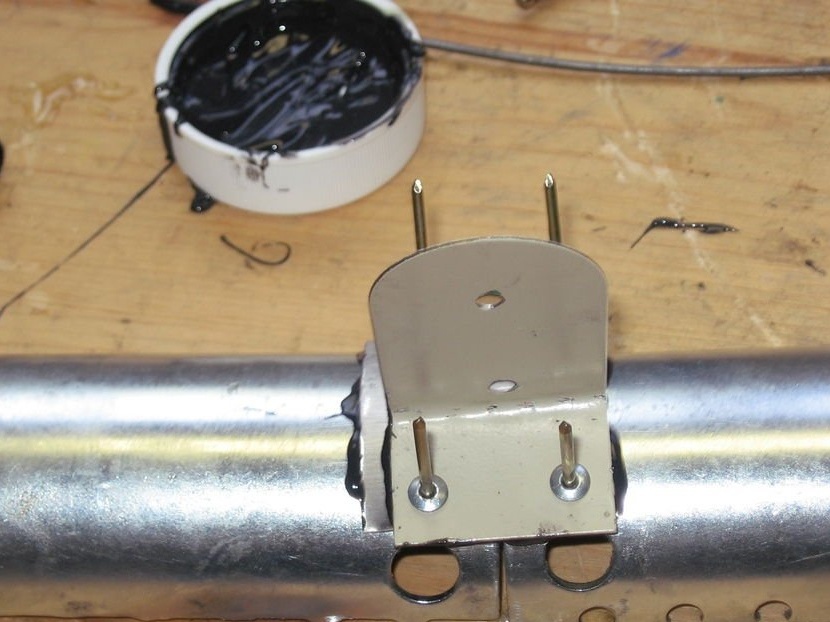
Step 6: Processing the attachment point
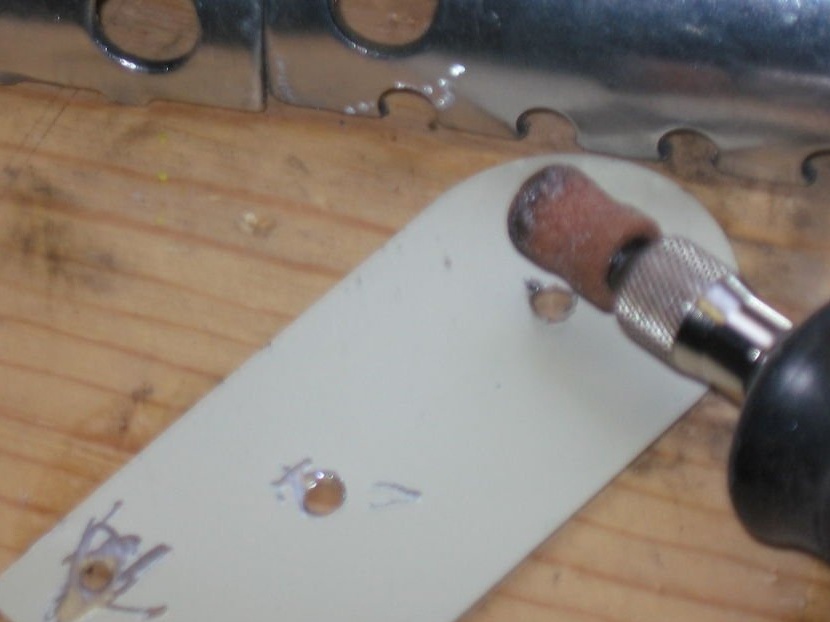
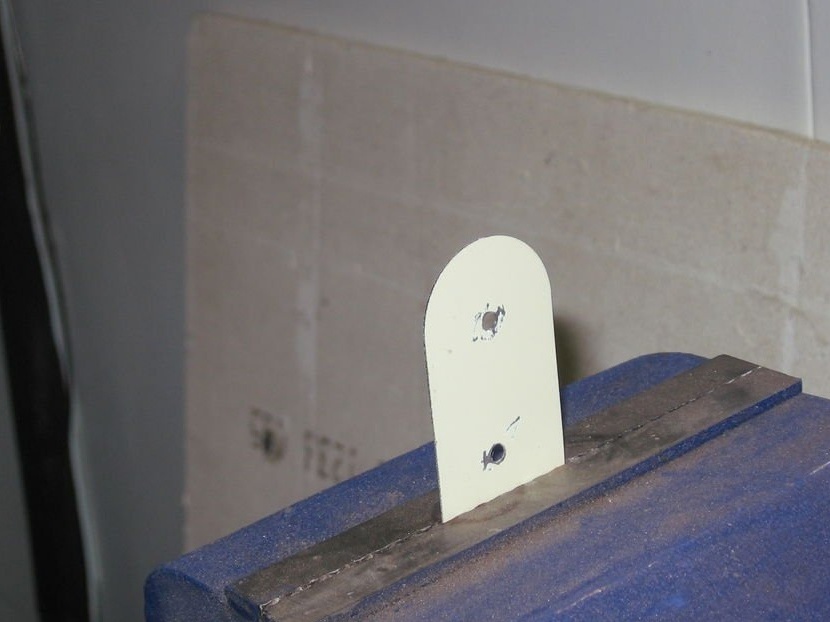
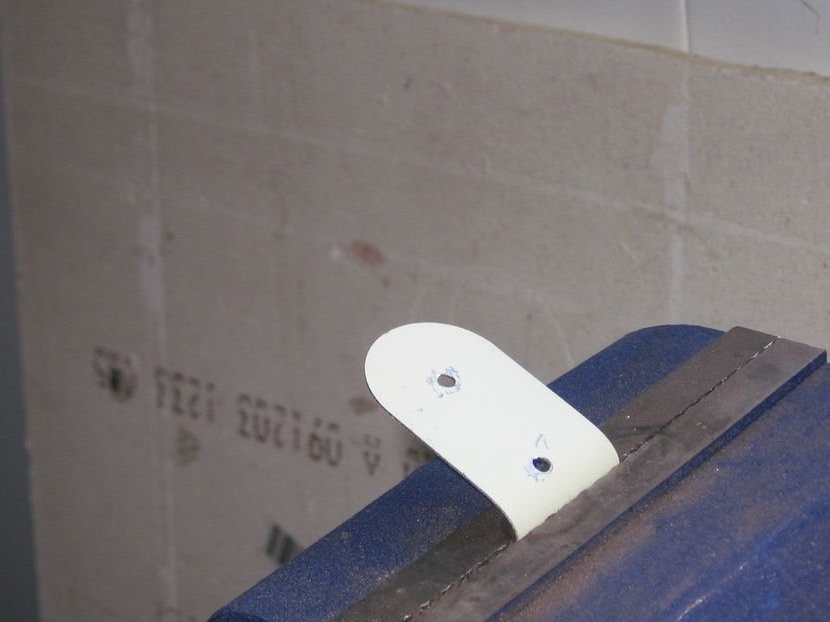
It will take another piece of metal. Its dimensions are 25 mm. in width and 76 mm. in length. Two holes on one edge were noted that coincided with rivet holes on the engine housing. Then, the places where the screws that hold the handle will be placed were marked. Then the marked holes were punched with a core.
Further, the author drilled holes located at the end of the part using a drill of the same size as for rivet holes. Then, the diameter of the screws that will be used to secure the handle was determined. These holes have also been drilled.
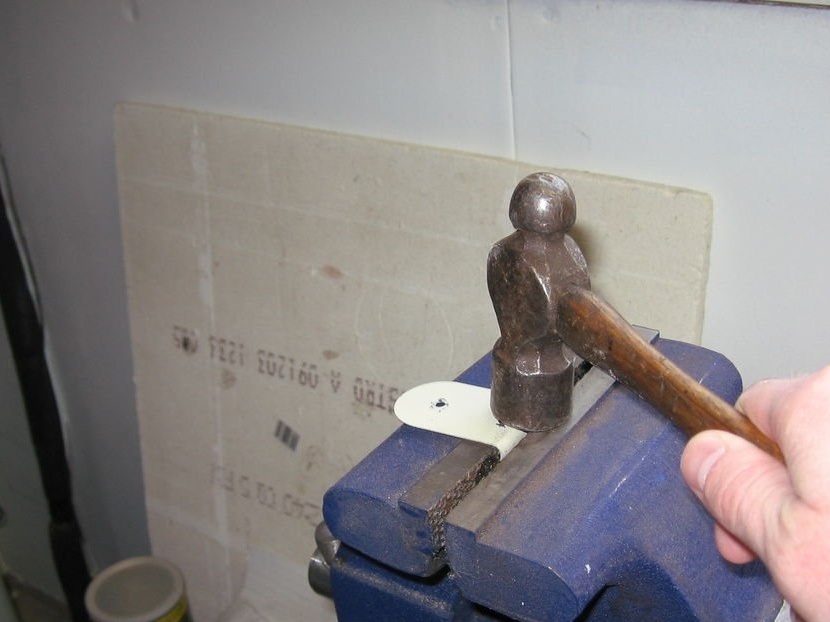
Now you need to make the handle at a convenient angle. Place the metal in a vice so that the horizontal holes are just below the edge of the upper surface of the vice lips. Bend the metal by hand until it approaches a 90 degree bend, and then strike with a hammer.
Step 7: Attaching the Halves

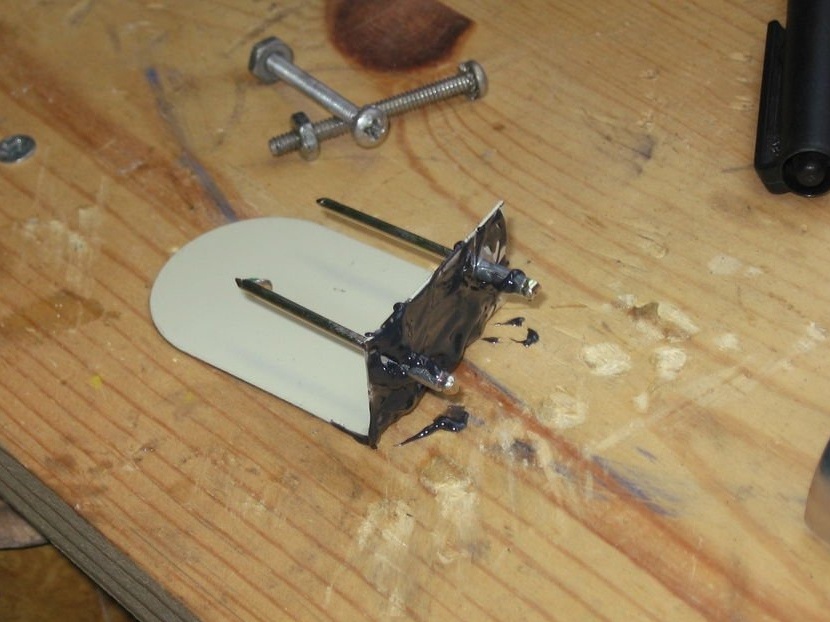
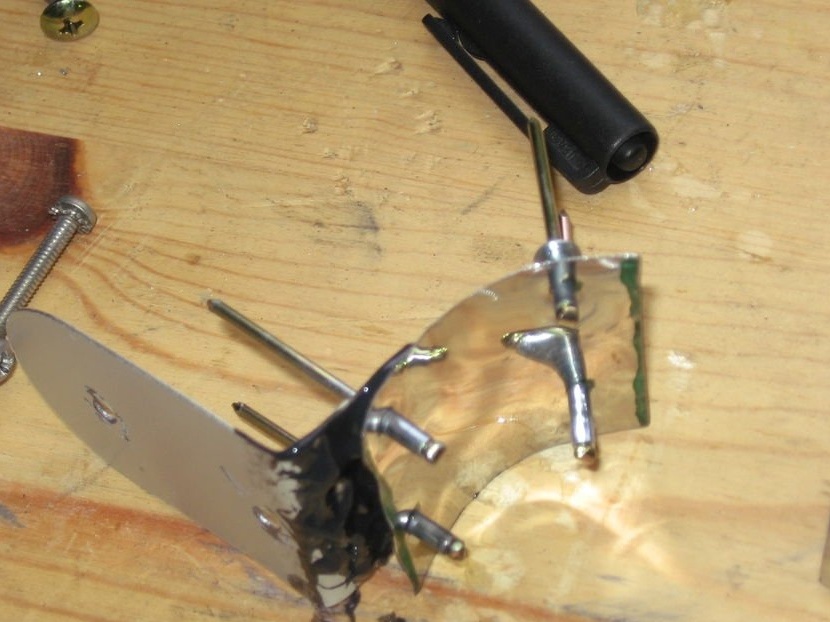

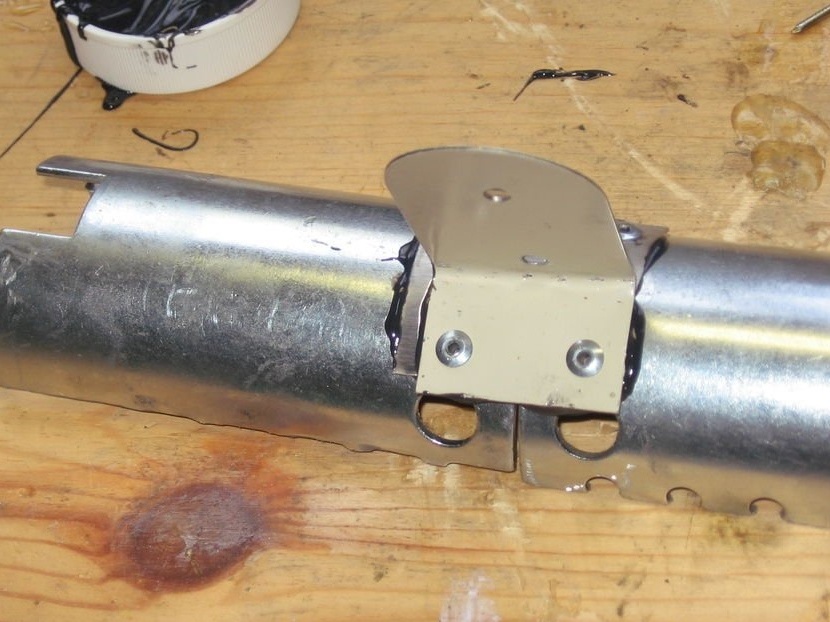
This step should be done relatively quickly after the epoxy is mixed. Before you start gluing dry, insert rivets into the holes that were drilled in both pieces of metal.
After the rivets fit satisfactorily, mix the epoxy for the metal and then apply it to the bottom of the bent portion of the handle attachment point. Place a rivet in each of the holes and push the rivets through the corresponding holes in another piece of scrap metal. Once this structure is installed, place the rivets in the two remaining holes. Then grease the bottom of the second piece of metal with epoxy. After it has been thoroughly lubricated, push the rivets through the corresponding holes on the two halves of the magnetic broom.
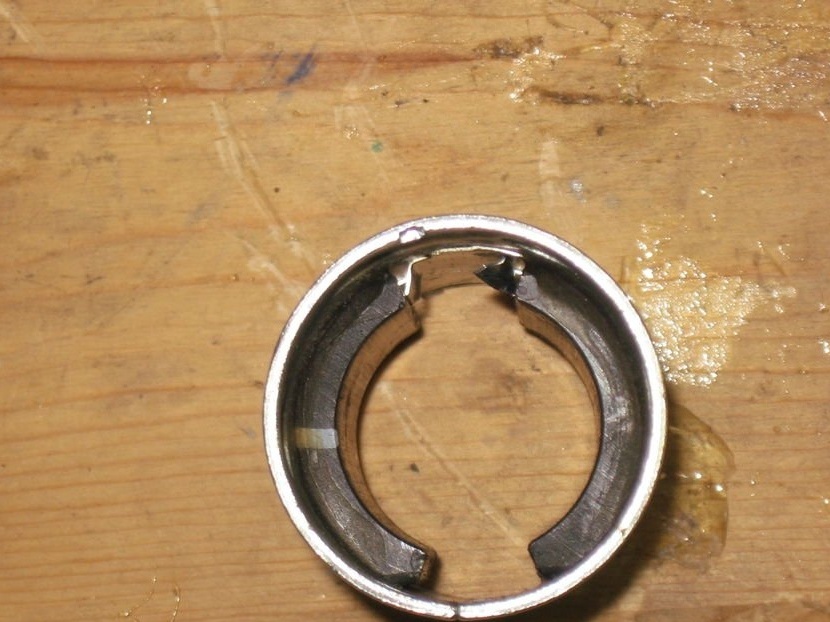
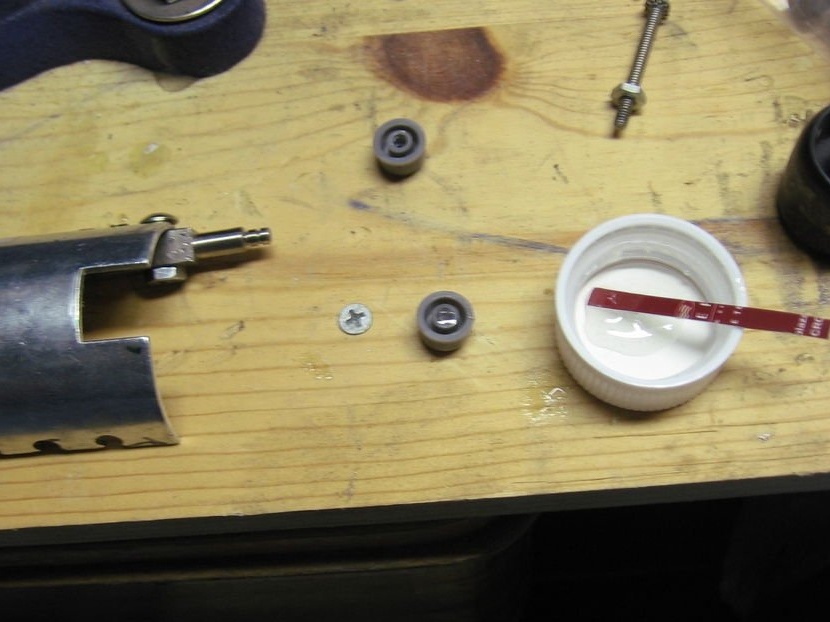
Step 8: Preparing and Attaching the Axis
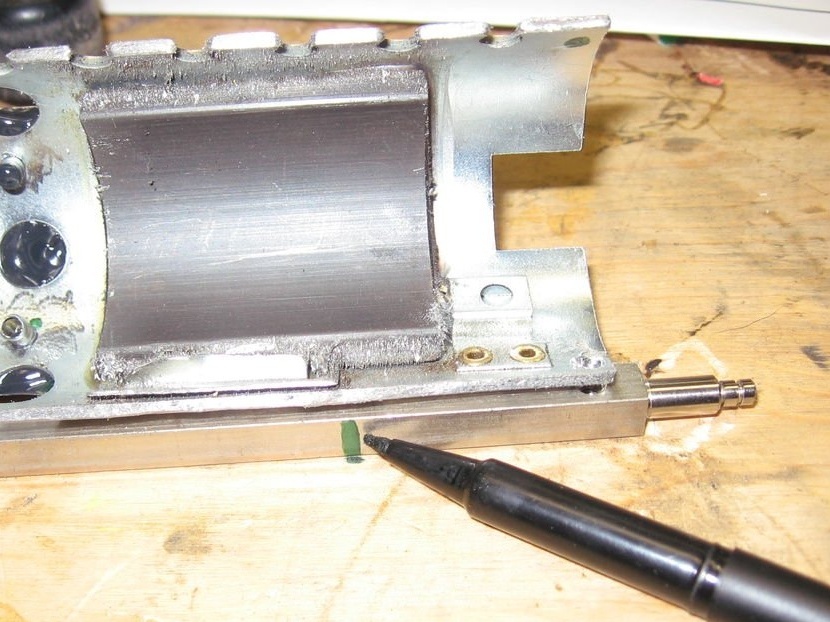
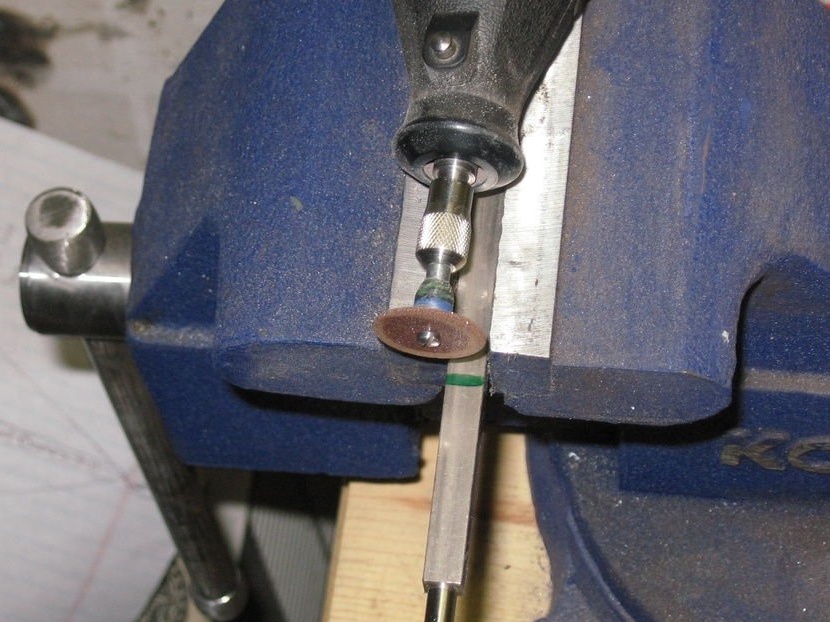
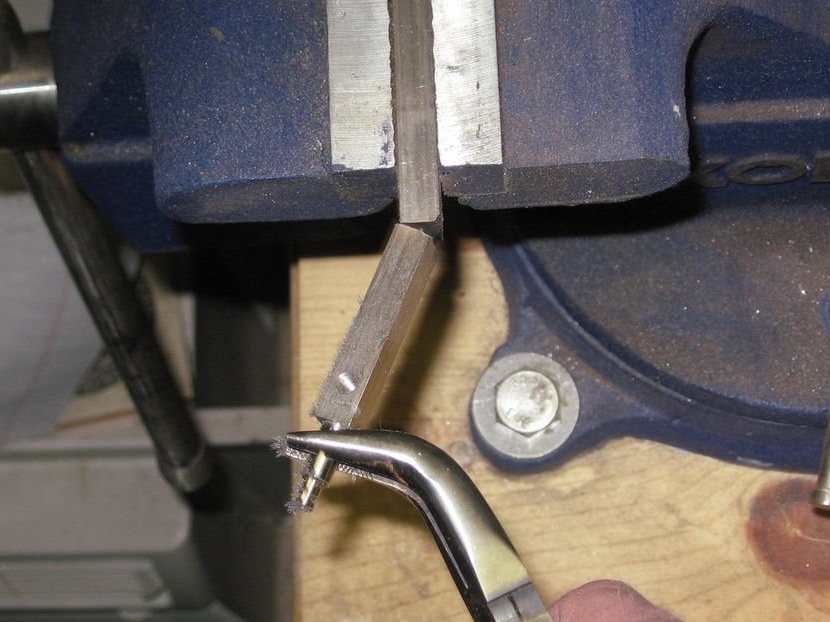
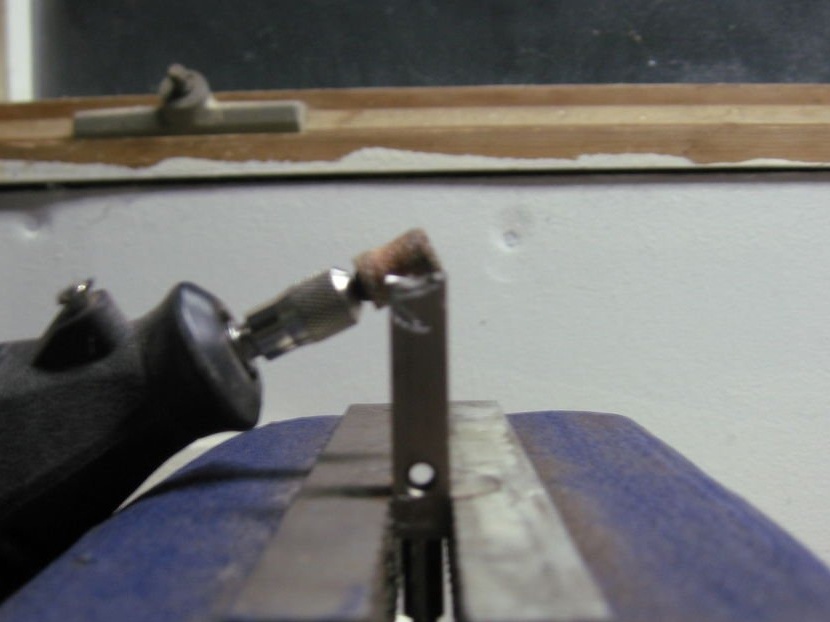
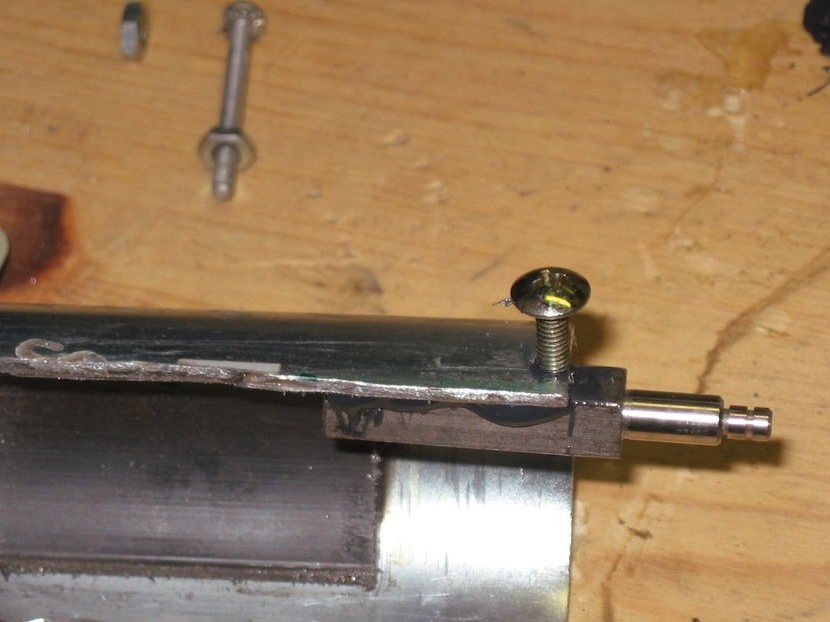
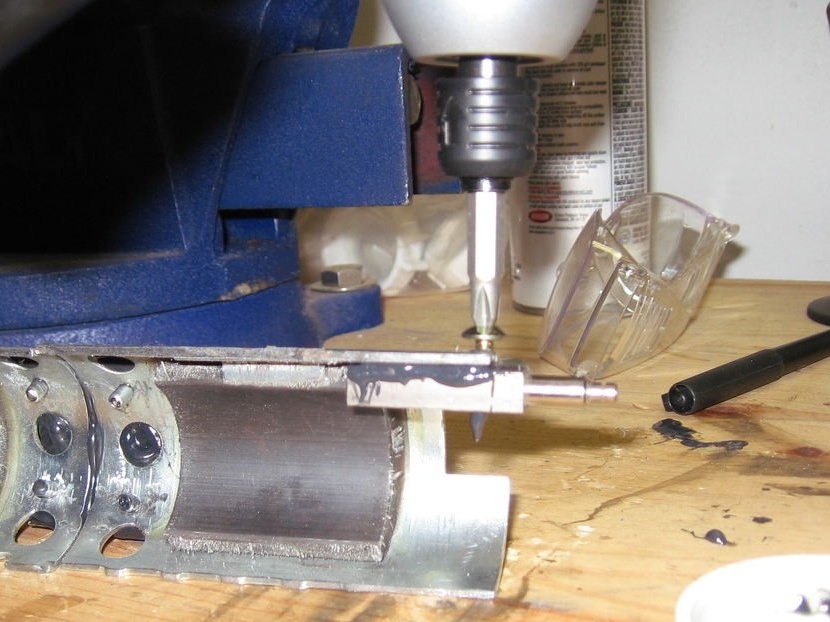
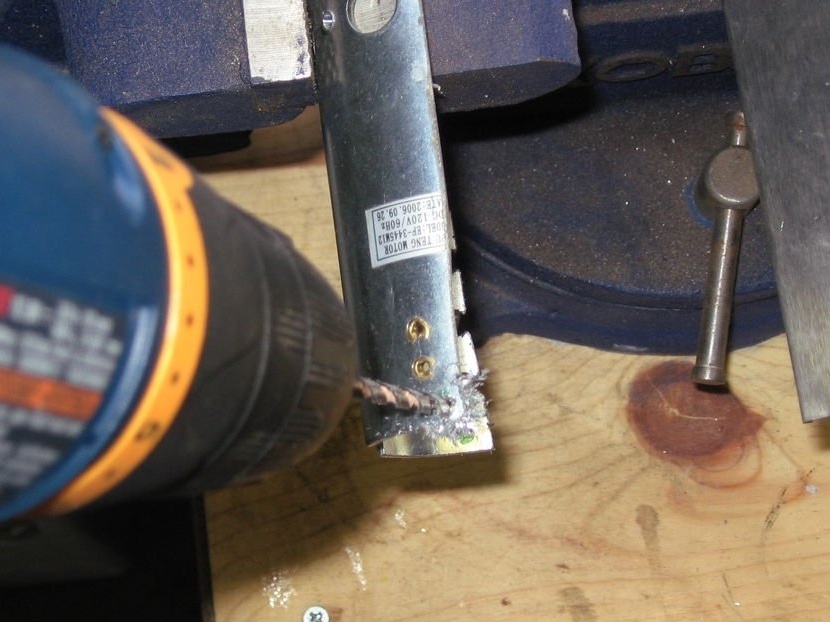
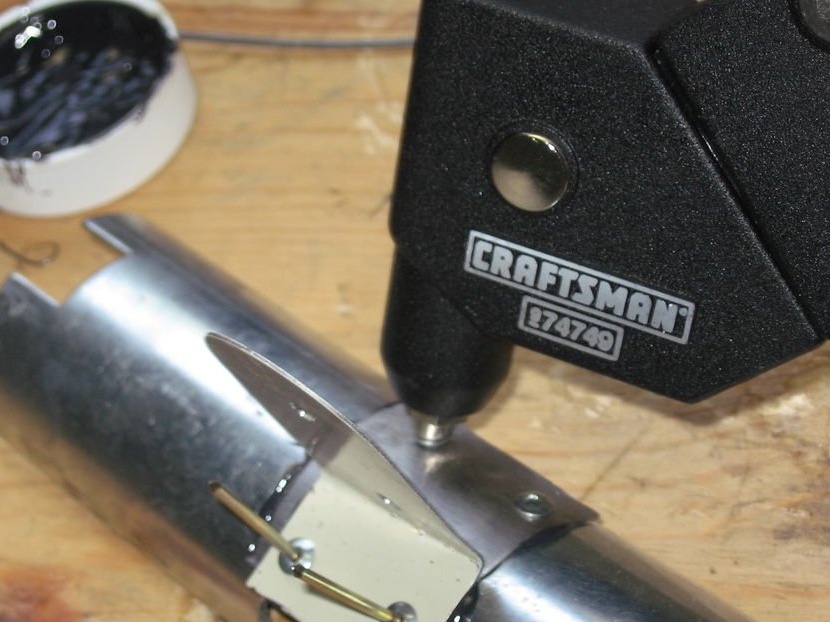
The stem used for the axis is too long. To determine how far each axis can be inserted into the motor housing, the author aligned the threaded hole in the stem with the hole that was drilled in the housing. Then marked the point.The same action was done for the second end. The core was secured in a vise and cut almost completely by Dremel. Once you have cut both ends, fasten them vertically in a vise and sand the trimmed ends.
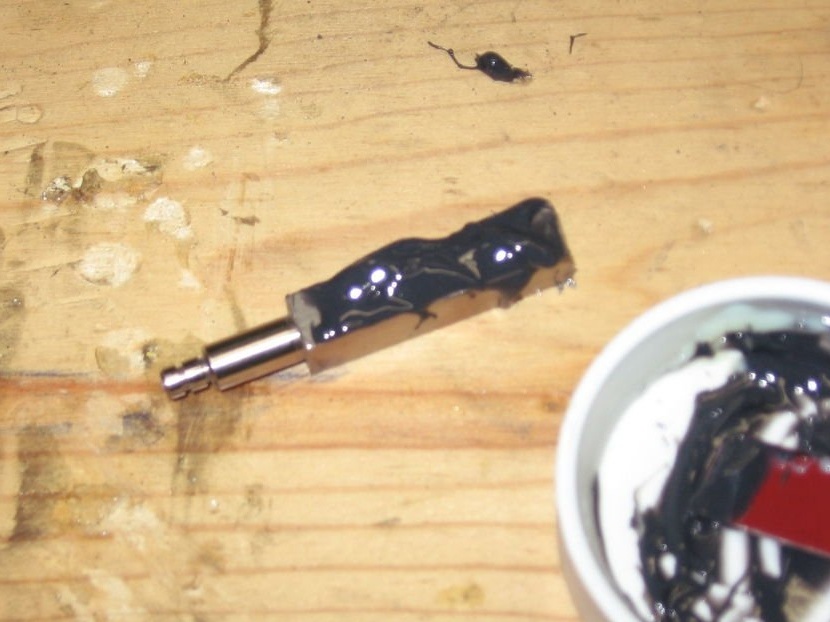
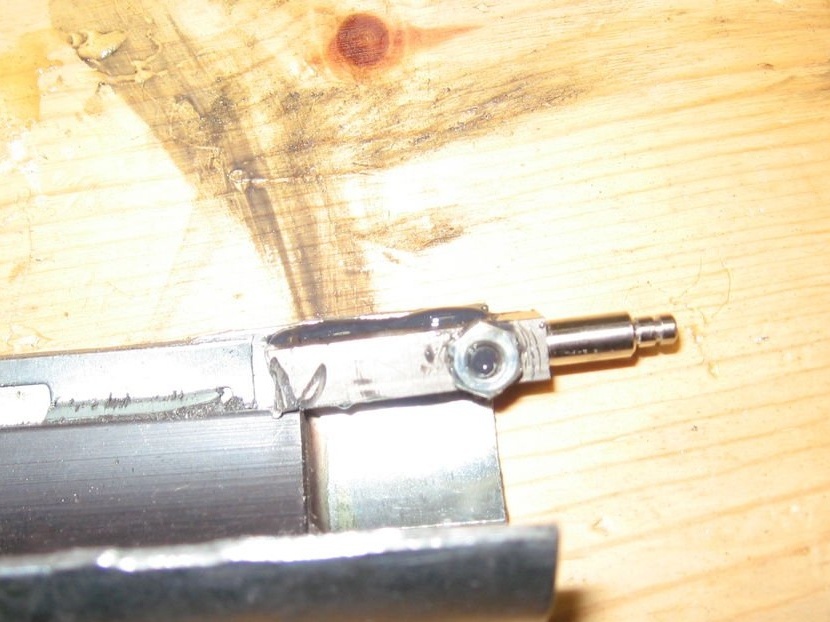
Mix some epoxy for the metal. Apply it on the surface of the axis that you are going to attach to the body. Align the threaded hole in the axis with the hole in the housing. Screw the screw into the hole in the axis, passing it through the hole in the housing. Tighten the screw with a screwdriver. Apply a small amount of epoxy to the part of the screw that has passed through the axis, and then tighten with a nut. Repeat for the other side. Let the epoxy dry overnight.
Step 9: Wheels
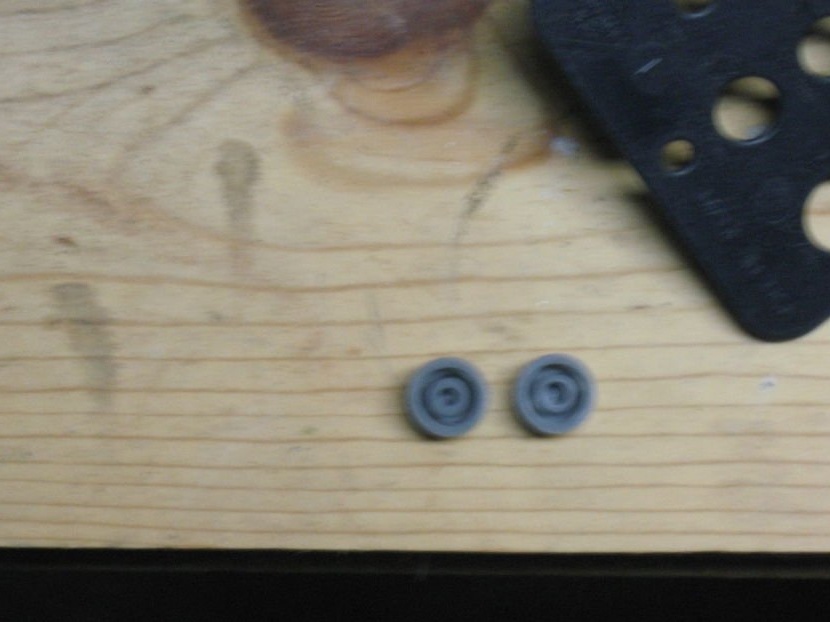

It's time to install the wheels. Initially, the author intended to make wheels of bottle caps for drugs, bearings and epoxy. However, other wheels were found.
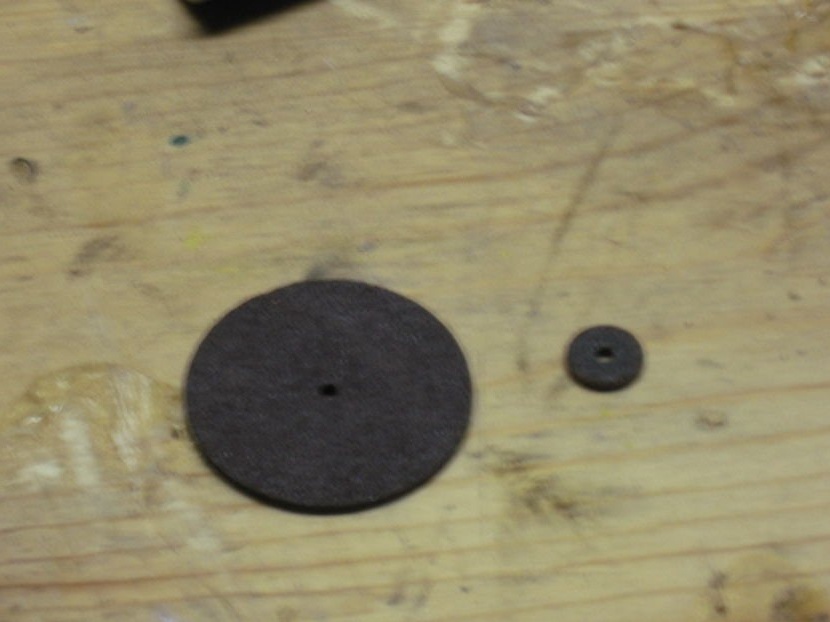
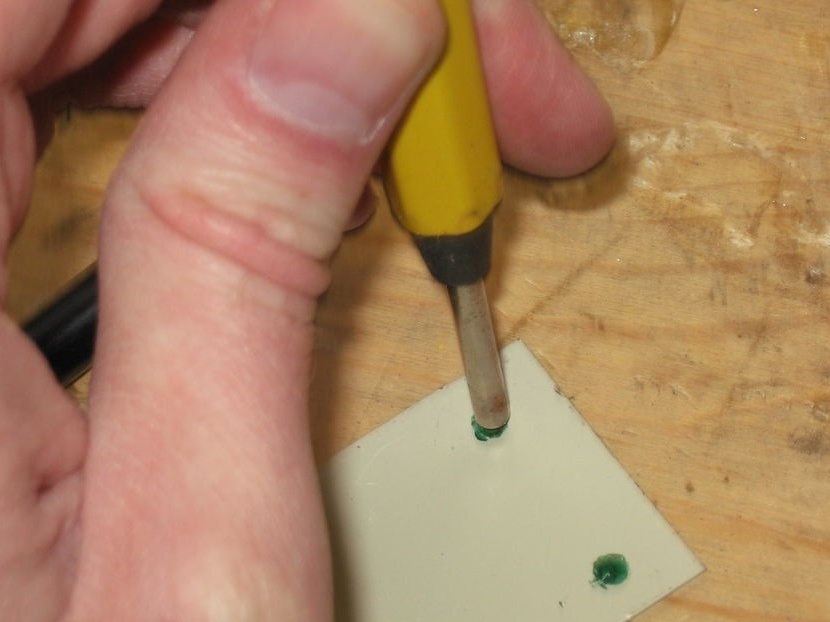
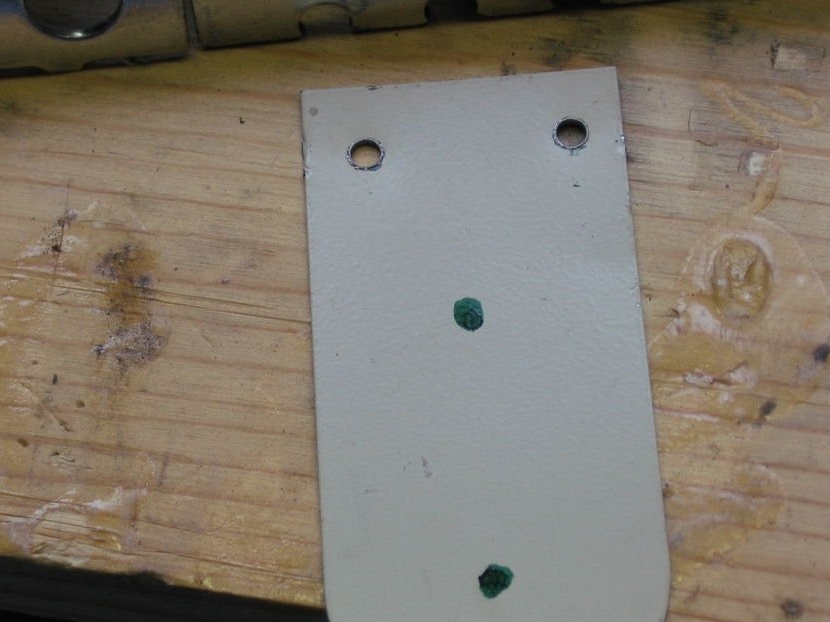
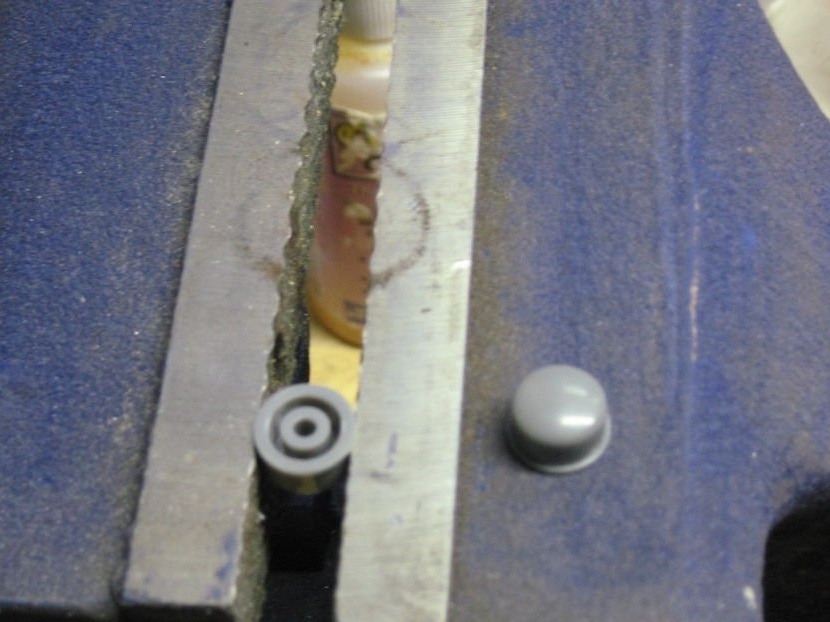
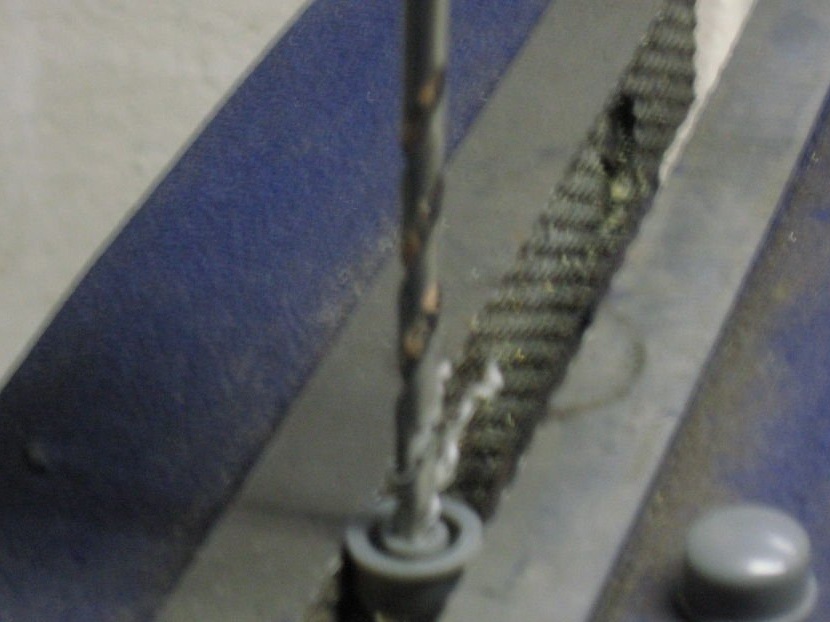
Previously, the optimal arrangement of the wheels with the axle position was determined. Now you need to lock the wheels so that they do not come off the axis. The author used plastic plugs from some electronic device. The inner diameter of the plugs was slightly smaller than the axis required. Therefore, the plugs were drilled to the desired diameter.
After that, the author mixed a little epoxy and put it in the cap.
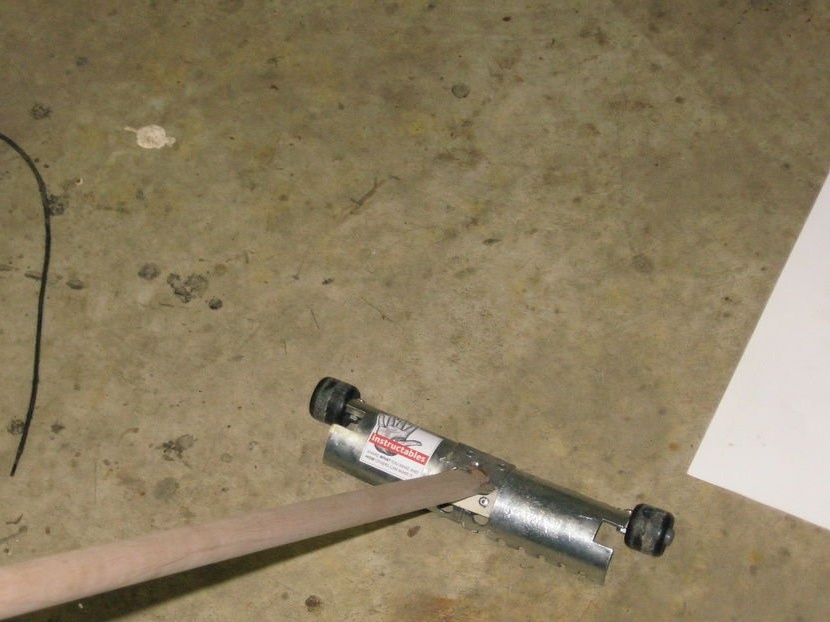
Step 10: Attaching the Handle
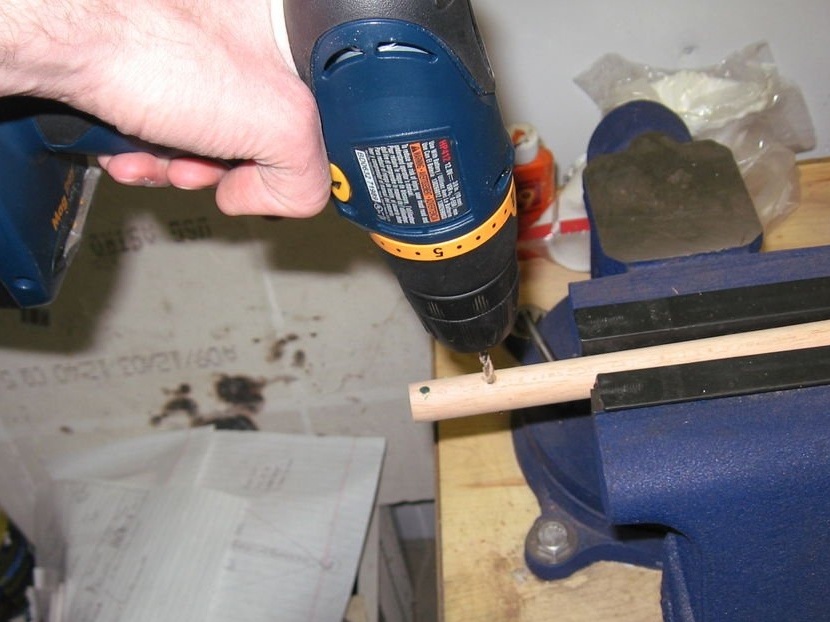
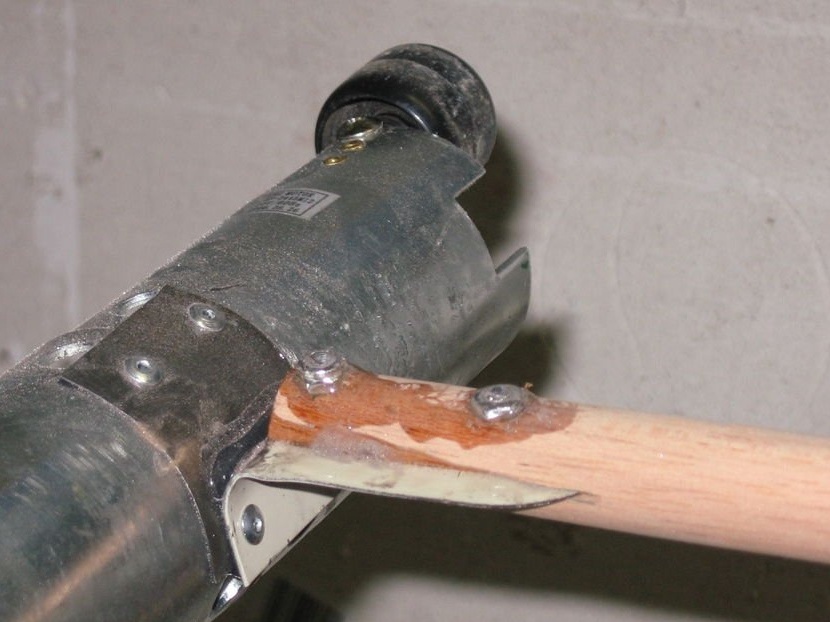

Now you need to fix the handle. As a handle, a handle with a diameter of 19 mm was used. and 120 cm long.
The handle was placed above the handle fastening tab. To mark the places where the holes were drilled, holes in the metal tongue were used as a template. Then, holes were drilled in the handle using the same diameter as the mounting screws.
After the holes are drilled, rotate the handle 90 degrees and tighten in a vise. Place a tongue on top of the handle and draw a line a little longer than the tab. Use a saw to cut the stalk along the line.
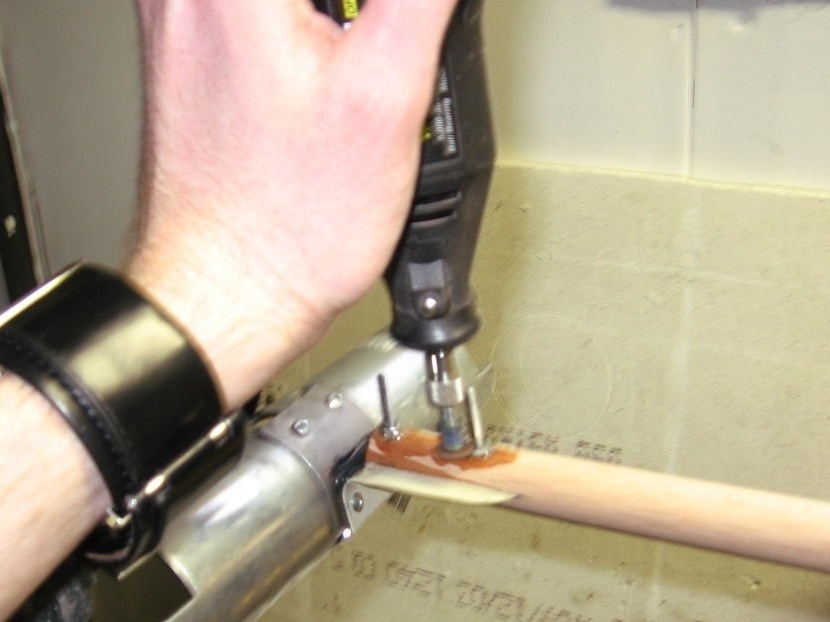
Mix a little epoxy and apply it on the fastening tab. Insert the tongue into the groove on the handle, and then pass the screws through the holes in the handle and tongue. Tighten the nuts with a screwdriver and pliers.