

The miter box is a convenient woodworking tool used to guide the saw at an angle. This way you can make clean and precise cuts. This homemade different from a simple box for cutting at an angle. This miter box has an adjustable width. Therefore, it can be used for cutting wood of all shapes and sizes.
In fact, you can adjust the width of the box at an angle from 0 to, well ... the length of any saw that exists.
Making this miter box easier than a regular box for cutting at an angle. The trick is that we just do the two sides of our “box”, pinch them with clamps and let the desktop do the hard work. That is, the workbench will form the lower part of the cutting box, and will also provide an adjustment mechanism. In addition, you can fix your workpiece by attaching it to a workbench.
Step 1: Tools and Materials
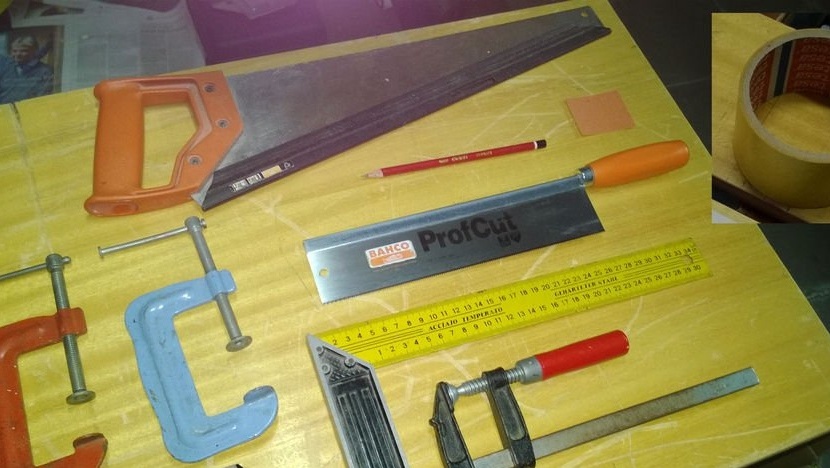
- Pencil;
- square;
- Double-sided tape;
- clamps;
- skin;
- Hand saw / reverse saw;
- A small board;
- clamps;
Step 2: Making the miter box

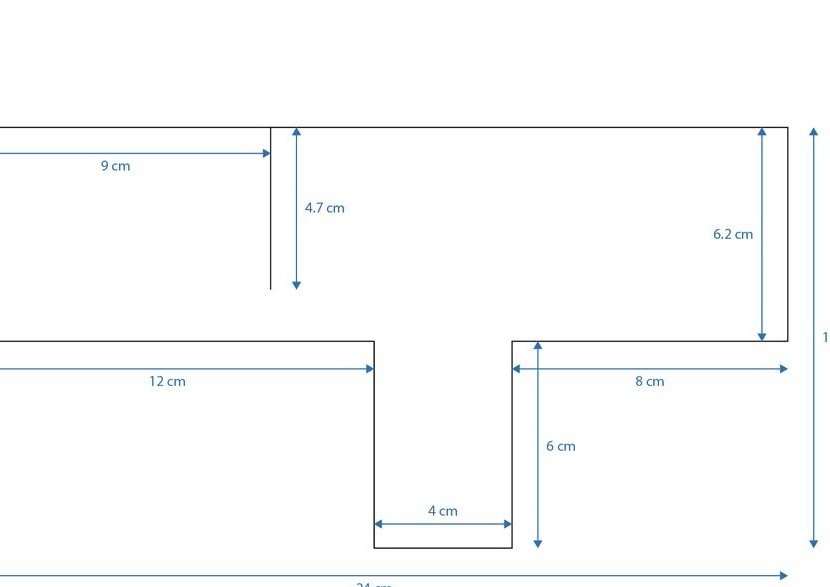

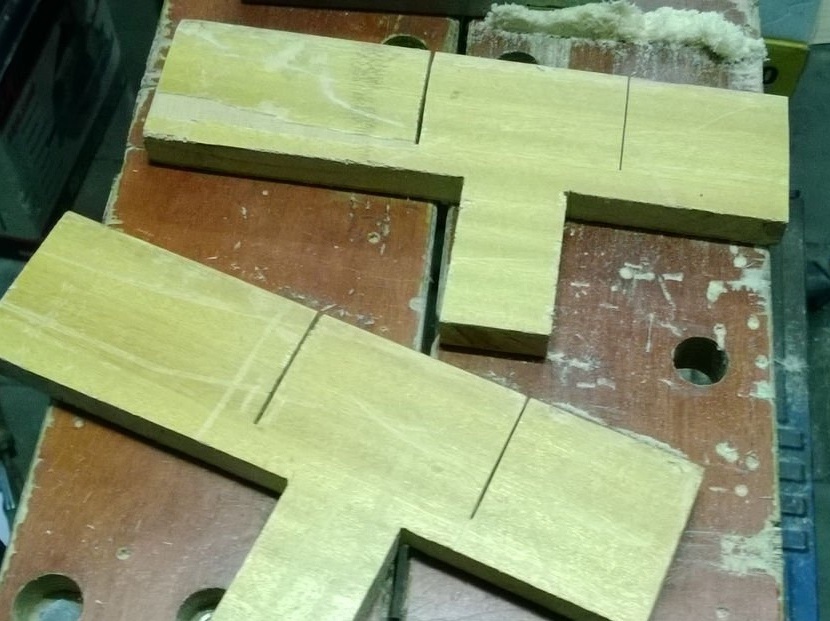
The construction of the miter box consists of only two parts, shown in the first figure.
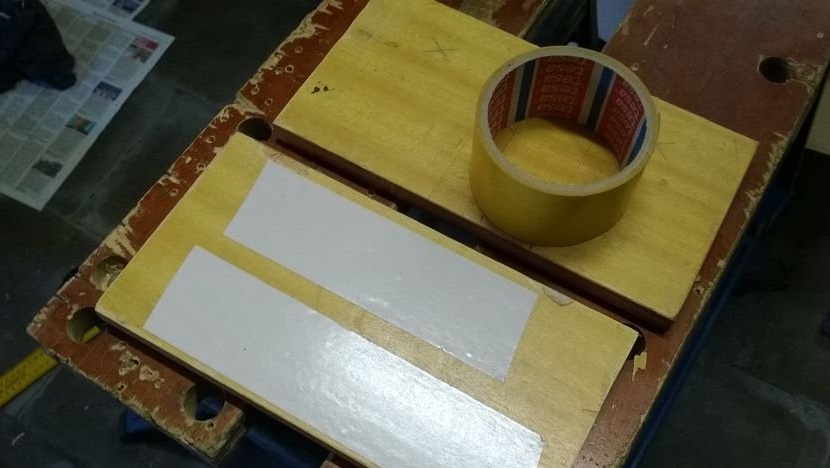
First attach the board to the workbench and cut two pieces of 24 cm x 12.2 cm.
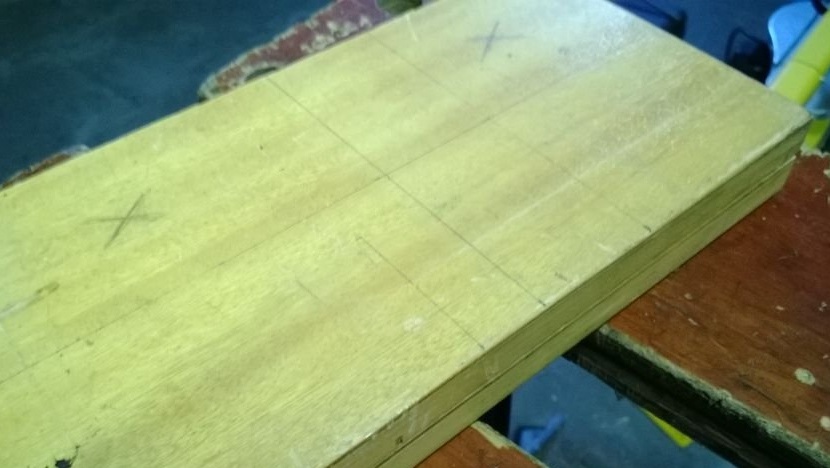
Use double-sided tape to attach one piece to another. (see second image). This ensures that both parts will have the same shape at the end.
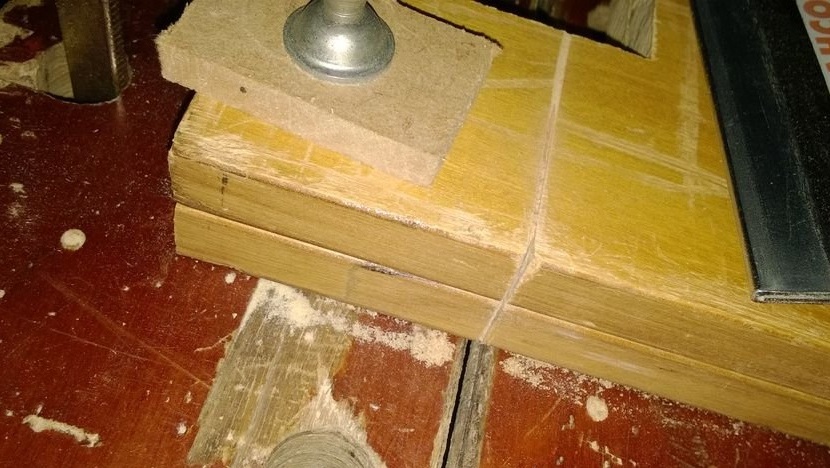
Using a pencil and a square, copy the picture in the third photo onto the blanks glued together.
Make the rest of the cuts (except for the cuts in the miter box) using a hacksaw.
Cut a slot for the miter box with the saw for which it is intended. You can also cut through several slots if you plan to use a miter box with various saws. (As you can see in the first figure, two grooves are cut out as a result: one for the miter saw and a wider one for the hand saw.)
It is especially important to be precise when cutting these grooves, since they must be perpendicular to the surface of the workplace.
Remember to read the notes below!
All is ready. Now you can again disassemble the two parts and remove the double-sided tape. You can also grind lightly to clean the edges of scoring.
Notes:
The size of the miter box mainly depends on the following two factors:
Firstly, the length of the groove of the miter box depends on which saw it is intended for, so the miter box needs to be made more or less high to accommodate it.
Secondly, if you want to cut through several grooves, you can make the cut box a little wider to provide sufficient space between the grooves.
When making straight cuts, the main problem that needs to be prevented is that you start to cut and at some point notice that you are moving in the wrong direction.
To make sure you are making the right straight cut, try the following tips:
When cutting with a hand saw, you can simply pinch a piece of wood next to the cut, using a square to align it. This unit helps in the direction of the saw.
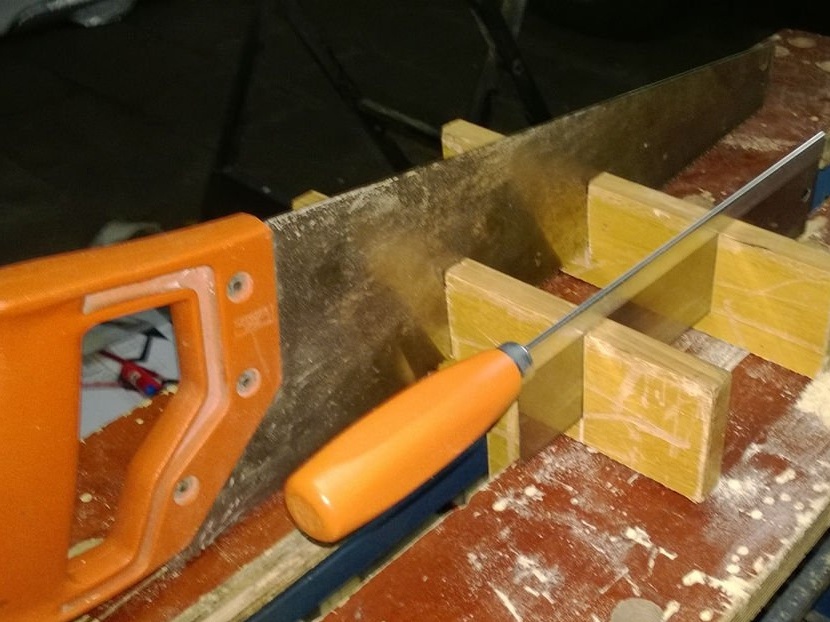
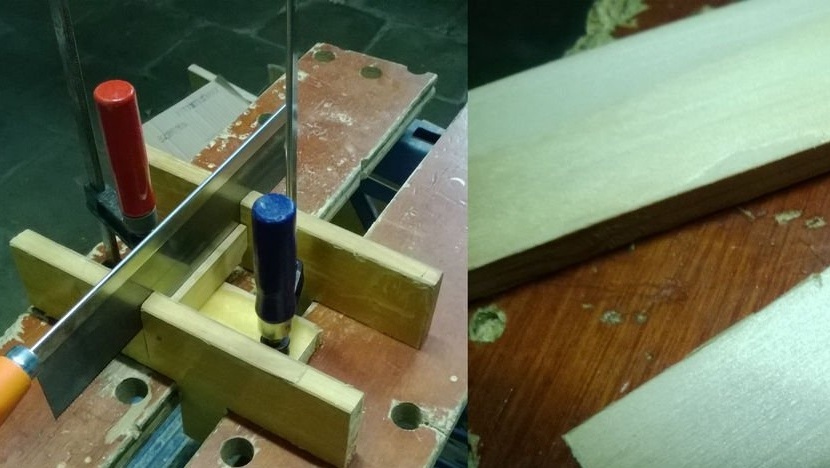
When cutting with a miter saw, you cannot use the auxiliary unit for the entire cut, since the stiffener of the saw will interfere at some point. However, it is enough if you cut the initial groove with the auxiliary unit, and then remove the unit. (see the fifth image). You can also cut the initial groove along the side so that your saw also goes in that direction. (see the sixth image)
When cutting, you do not need to put a lot of effort on the saw. There is also no need to worry about keeping the saw in the correct position. After the first few movements are made, the incision is mainly directed by itself. In fact, if you apply too much force to your saw, you can just lightly push it in the wrong direction, and the saw will begin to beat off (due to friction), so most of your energy will be wasted anyway.
Step 3: Using the Miter Box

Despite the fact that this miter box requires more settings than usual, you get an adjustable width. You can also securely secure your workpiece.
Here's how it works:
Place the workpiece you want to cut somewhere in your workplace. If necessary, place some kind of wooden block at the bottom to raise the workpiece to the desired height.
Place the two sides of the cutting box in the workbench and clamp the clamps on the workbench so that both sides of the miter box are locked in place, as shown in the first figure.
Please note that you can adjust the distance between the two side walls to a minimum so that it already exerts a slight clamping pressure on the workpiece.
If necessary, you can add a clamp to the part itself so that it cannot move at all.
If the workpiece is too small to add clamps, you can still fix its position by securing additional blocks next to the workpiece, as can be seen in the second figure.
If everything is done correctly, there is no need to exert force on the saw, and the sawing will turn out beautiful and smooth.
Notes:
As bars, for linings for the workpiece, you can use the rest of the material after making the miter box.
There should be enough space to be able to fix the clamps to the workpiece using a 4 cm gap between the jaws. If there are holes on the working surface of your workplace, you can add quick-clamping clamps through them.
Step 4: Optional: making corner grooves

While our miter box is mainly suitable for cutting at an angle of 90 degrees, you can also use it for cutting at any other angle. You just need to think outside the box ... A box with cuts will still do what it is designed for, that is, direct the saw, and you can tilt your workpiece the way you want. Look at the images to understand what is meant. You can position the two sides of the miter box at a certain distance, and then clamp the workpiece outside the box at the desired angle.
How can I position my workpiece at a certain angle? Our miter box in itself certainly cannot. However, this can be easily fixed, for example, using a protractor.Align the protractor to the angle, then align the workpiece opposite the protractor to position it at the desired angle. Now attach the workpiece to the workbench, remove the protractor, and you're done. (If there is no protractor or you need an angle other than 30/45/60/90 degrees, then you should make your own auxiliary tool.)
However, there is one more problem: making angular cuts with the help of our miter box is good only if the cut is somewhere near the edge of the workpiece. The miter box will interfere if you need to make a 45-degree cut in the middle of some long rail (for example, a plinth).
This problem is also solvable. You can make a variant of the miter box, where the sides will be less wide (than the current 24 cm), which should provide much more space for installing the workpiece in the desired position and angle.