

To all the inhabitants of our sites and sympathizers, hello.
1st step. Background.
Forgive me, the public will be talking about the fleet and ship models, as well as the device that shipbuilders need.
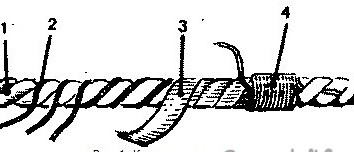
In the sailing fleet, so-called cageing was used to protect the cables from moisture and grinding. I will explain the diagram for a long time.
In ship modeling, this method is also used, but to convey, let's say, genuine sailing charm. What would model the sailboat was more like a script. There are many machines for this, both home-made and branded. Everyone (modeller) is trying to facilitate this laborious and tedious work, creating their own fixtures.
So I decided to make a manual cage for myself to work on a sailboat. A similar device is used for hardening (strengthening) bowstrings of homemade bows.
2nd step. What we need for this:

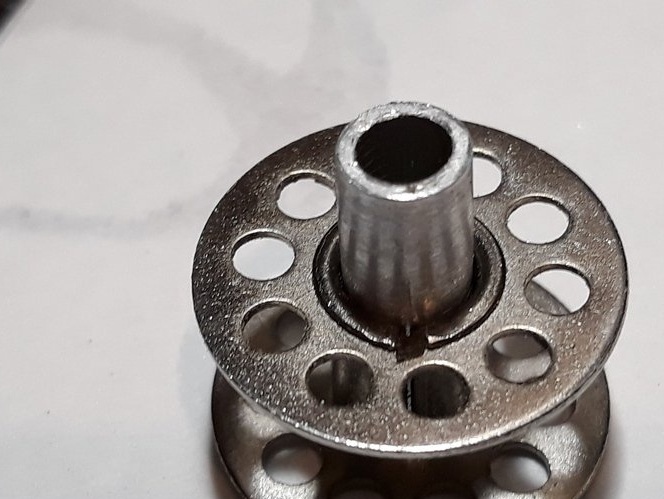
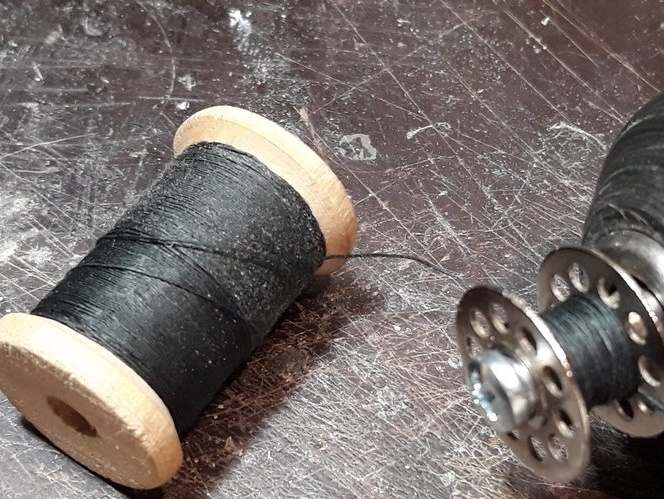
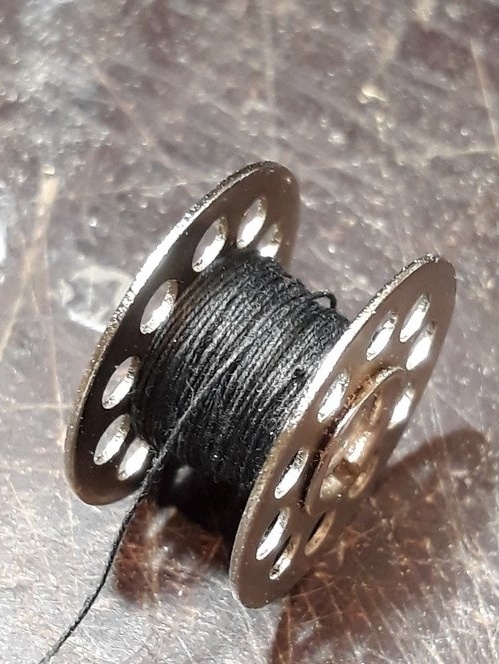
- spool from a sewing machine,
- a wide range of students (cut) or a piece of plywood (width 20 - 25 mm),
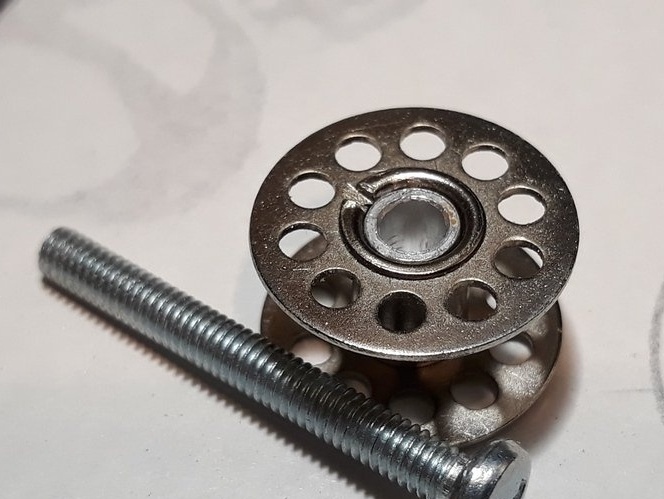
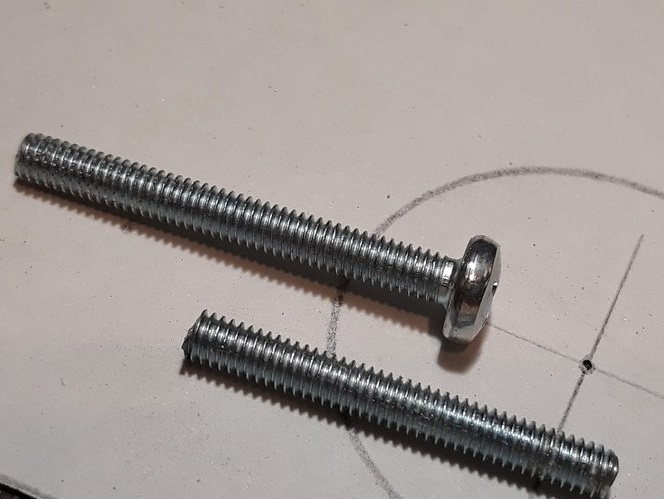
- hairpin M4 x 32 mm
- wing nuts on M6 2pcs.,
- screw M4 x 26 mm 1 pc.,
- M4 nut 1 pc.,
- tube diameter hole in the spool,
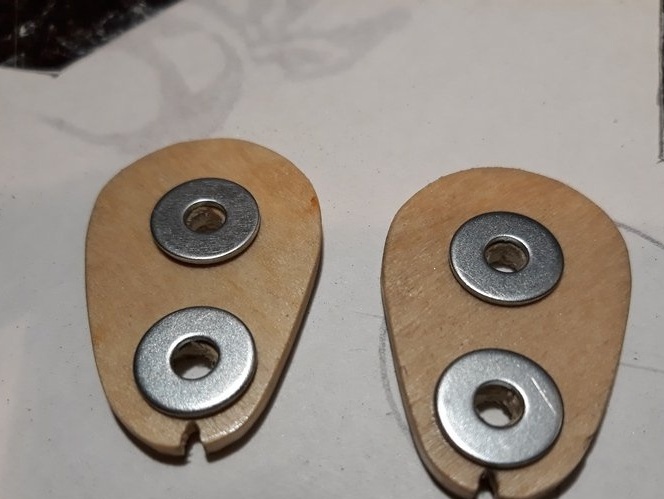
- a washer reinforced with a hole diameter of 4 mm - 8 pcs.
- a manual fret saw,
- a drill or a drilling machine,
- files
- sandpaper,
- varnish.
3rd step. Getting started.
We mark it on the ruler, but we can also make a stencil, the diameter is slightly larger than the diameter of the spool, we postpone 16 mm along the axis and mark the center of the second hole and the second circle with a diameter of 12 mm.
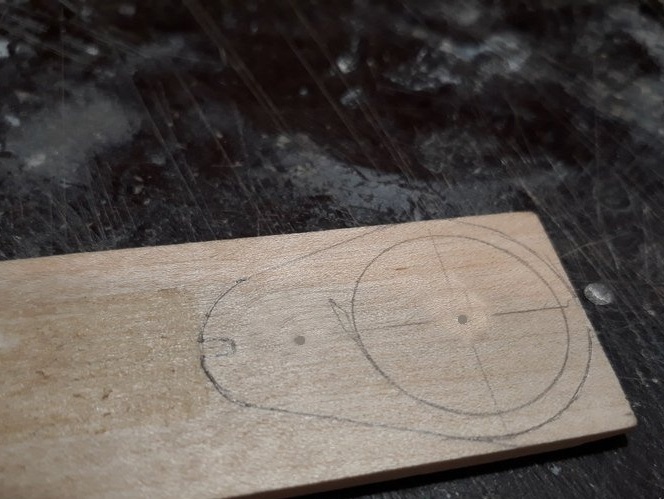
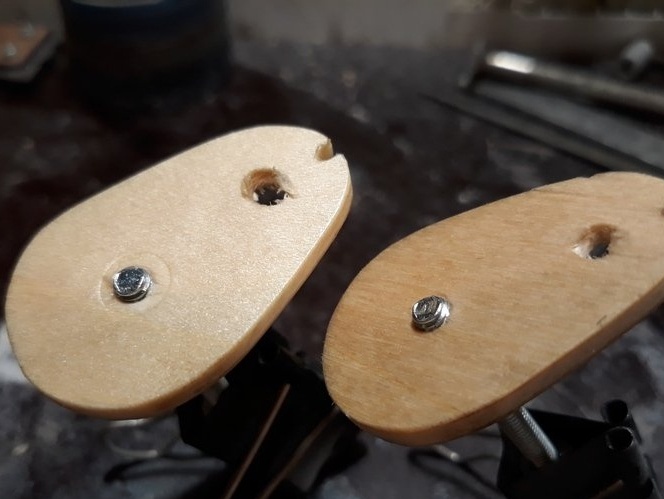
On the sides we draw two straight lines tangent to both circles. The resulting figure (detail) will be called a cheek. There are two of them. For this we do one, and mark it up and do the second. We drill holes in the second cheek, folding the parts together.
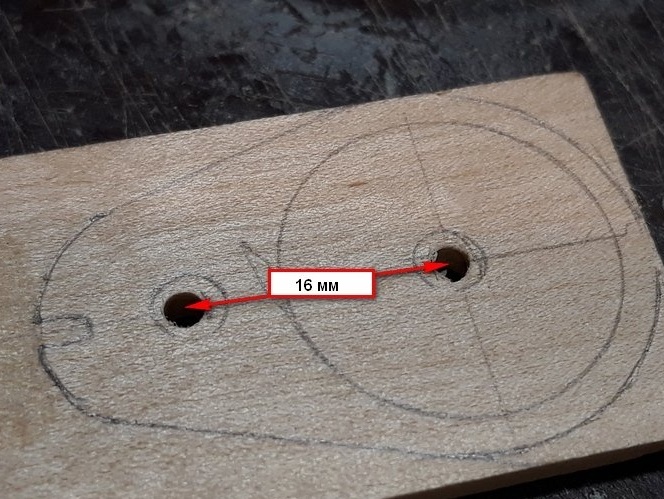
Having connected the parts together through the holes, we clamp and process the contour.
Next, on a small circle along the axis of the holes, we make a cut with a width and depth of 2 mm
Separate the parts, process the ends and the contour with sandpaper. And varnish.
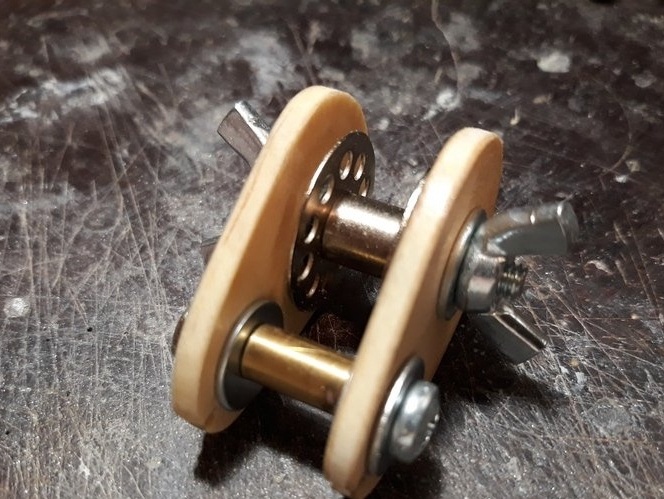
While the cheeks are dry, From a suitable tube, cut the workpiece to the height of the spool. They will need 2 pieces
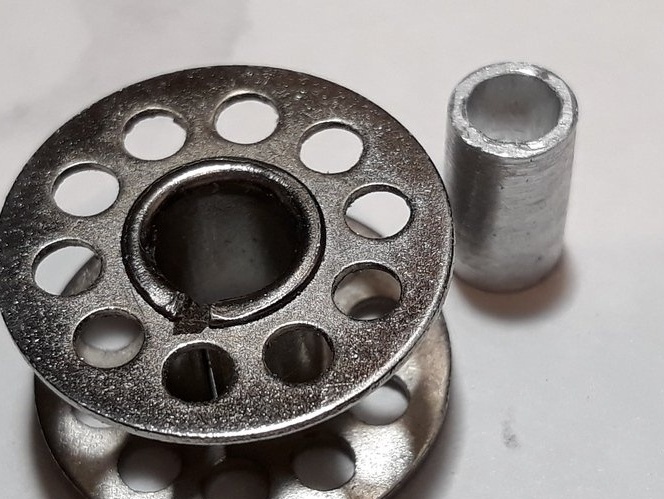
We insert the tube into the spool.

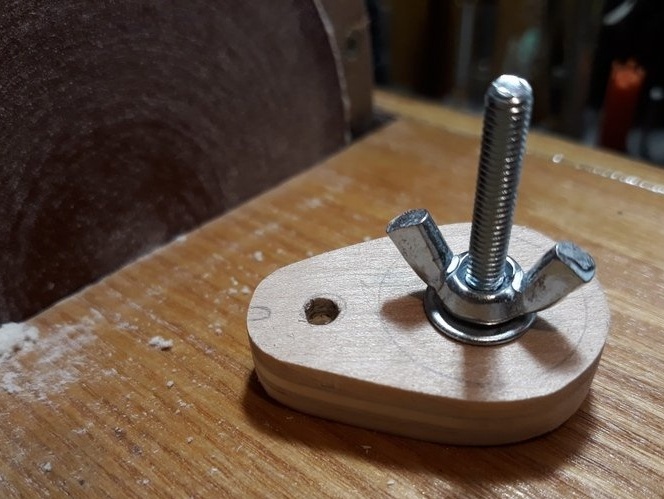
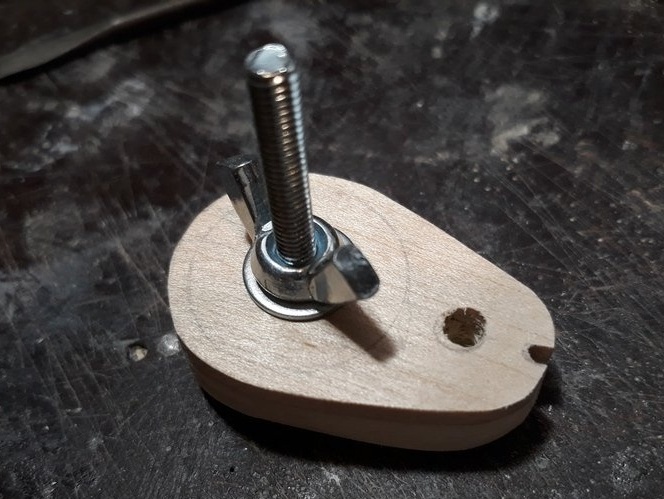
I make a stud from a suitable screw or take a finished 32 mm long.
On the cheeks on both sides, coaxially with the holes, I attach the washers to the Super-Moment adhesive. Only 8 pieces.
I begin the assembly of the device (cage rack) by inserting a stud with a pre-screwed wing nut into one of the cheeks and a screw into the second hole of the cheek.
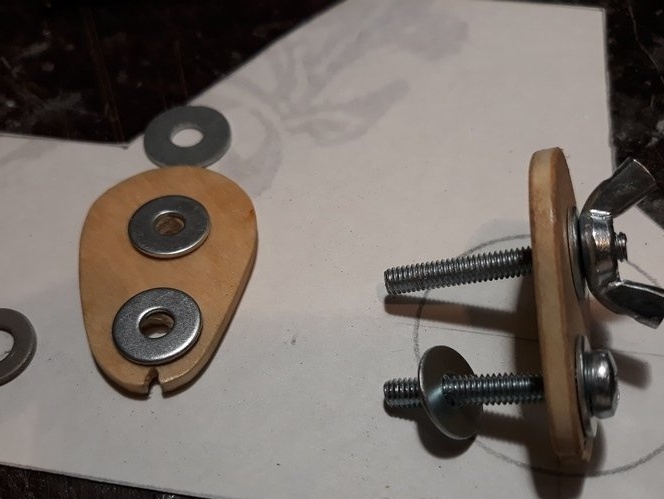
On the hairpin, I put on the spool and the second cheek. Accordingly, twist the second wing nut onto the stud. On the screw, a second spacer and a simple nut.
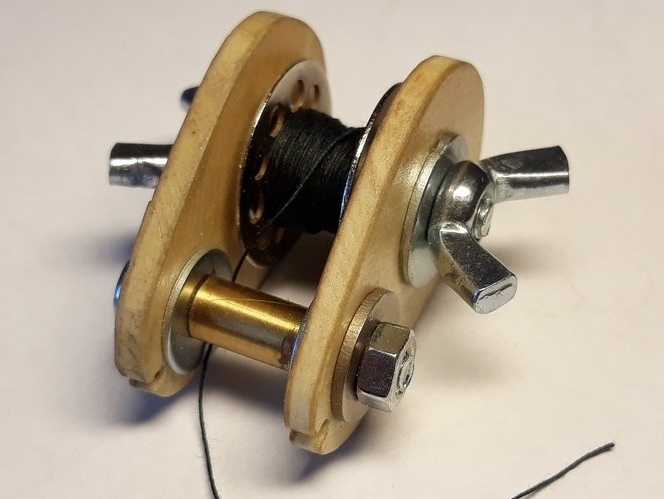
Such a design should be obtained.

4th step. How it works.
We take the spool and wind the thread. For the convenience and speed of filling, you can use various mechanisms. For example - a screwdriver or a drill.
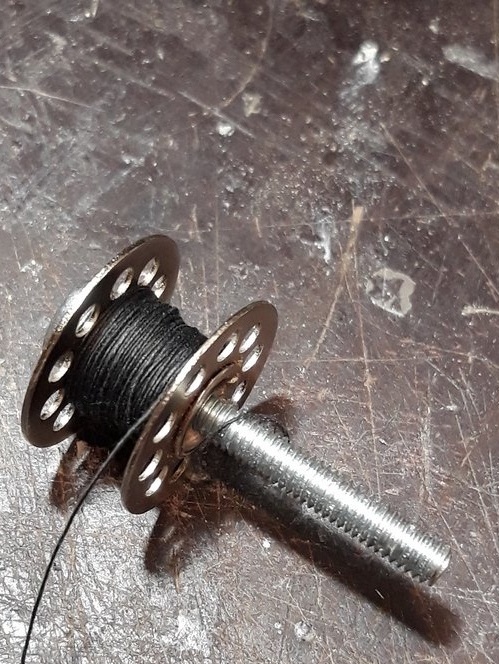
I, for trial, did not reel a full spool.
We pull the rope, which we will cage. From experience - you need to pull it properly. We fix the end of the thread from the spool on the rope, you can use a needle or a knot. For the model, it is better to use Secunda glue. We bring the fixture so that the rope falls into the slot, while winding up the spool, if necessary. And we begin to rotate the cage (fixture) around the rope, adjusting the tension of the thread from the spool with gadgets with lamb. And following the thread, that would go without gaps on the rope.

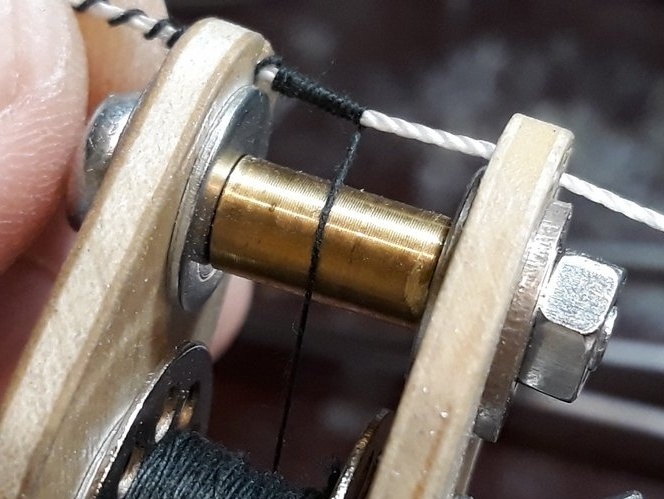
At the end of the hardening, the thread must also be fixed.
That's it.
See, criticize, advise, ask.
Regards, Starp.