

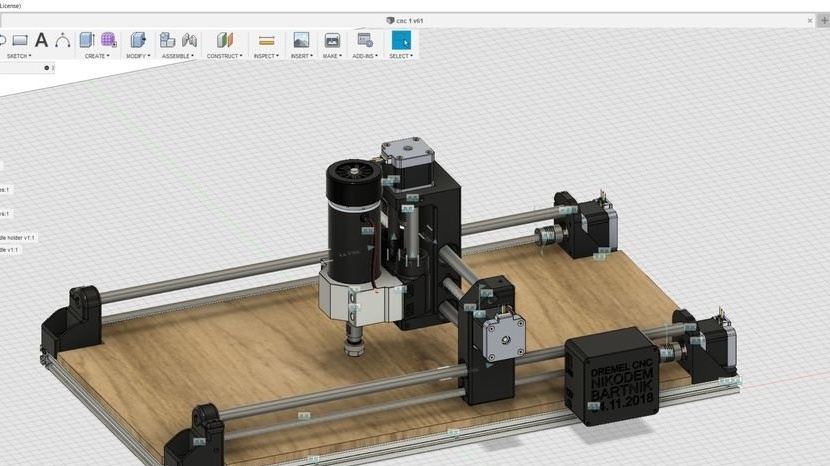
A master from Poland, loves to program and make various devices do it yourself. In this article, he will introduce the process of manufacturing a CNC machine as a tool whose working tool is installed by Dremel. The master developed his machine for a long time, trying to make it as accessible, reliable and easy to assemble as possible. It was in order to reduce the cost that the components of the machine were selected. The cost of the finished device is less than $ 300. For the manufacture of some components of the machine requires a 3D printer. So, for the manufacture of such a machine, the master used the following
Materials and tools:
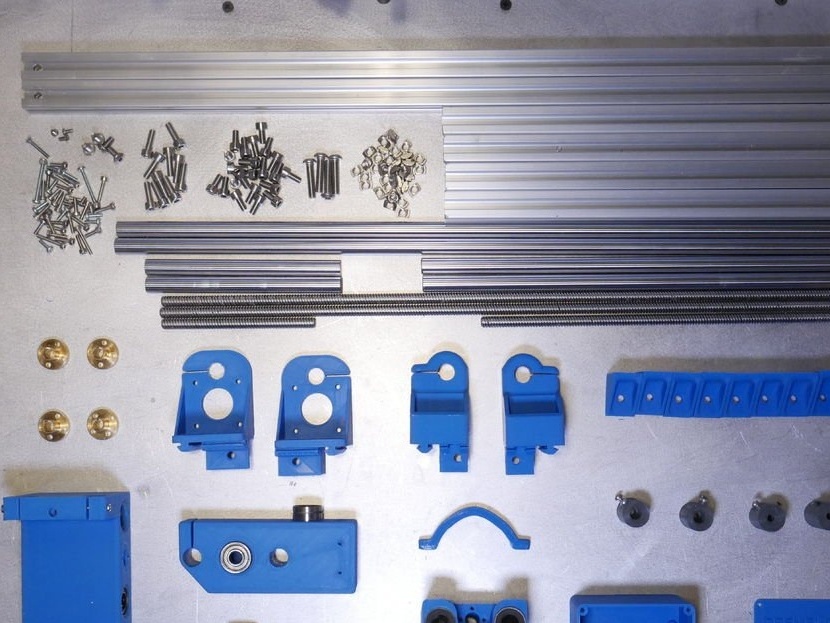
- Aluminum profiles 20x20mm 600mm long - 2 pcs;
- Aluminum profiles 20x20 mm, length 300 mm -5 pcs;
-12mm rod 310mm - 2 pcs;
-12mm rod 530mm - 2 pcs;
-12mm rod 140mm -2 pcs;
- Lead screw 500 mm - 2 pcs;
- Running screw 280mm -1 pcs;
- Drive screw 120 mm - 1 pc;
-12mm linear bearing - 12 pcs;
- Bearing 608zz - 4 pcs;
-T-shaped nut M5 - 36 pcs;
- Screws M6 x 25 mm - 4 pcs;
- Screws M5 x 10 mm - 34 pcs;
- Screws M5 x 16 mm - 10 pcs;
- Screws M3 x 20 mm - 8 pcs;
- Screws M3 x 12 mm - 32 pcs;
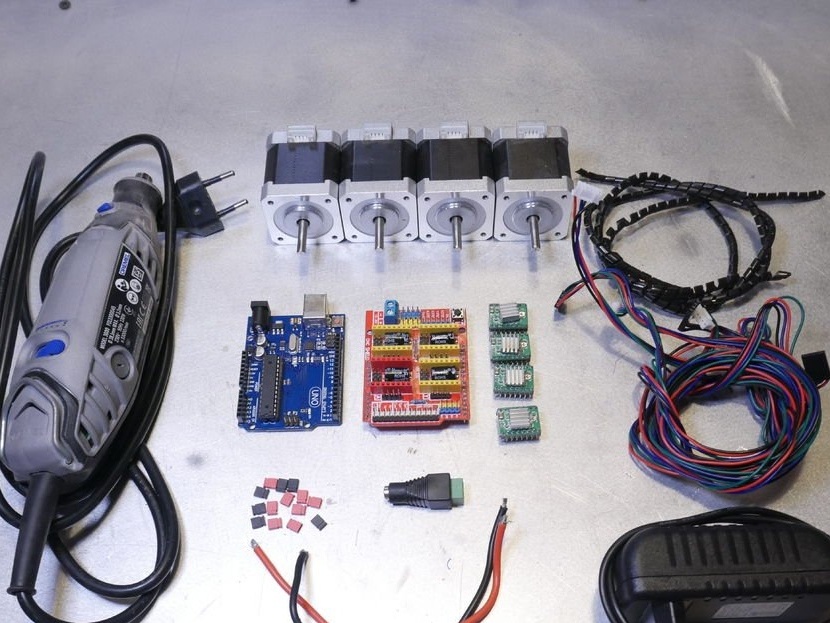
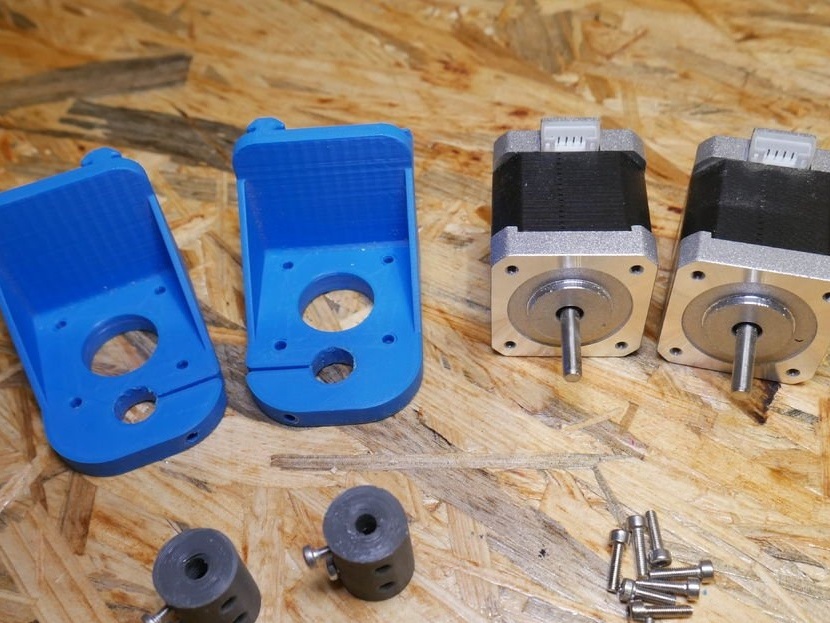
-Step engines - 4 pcs;
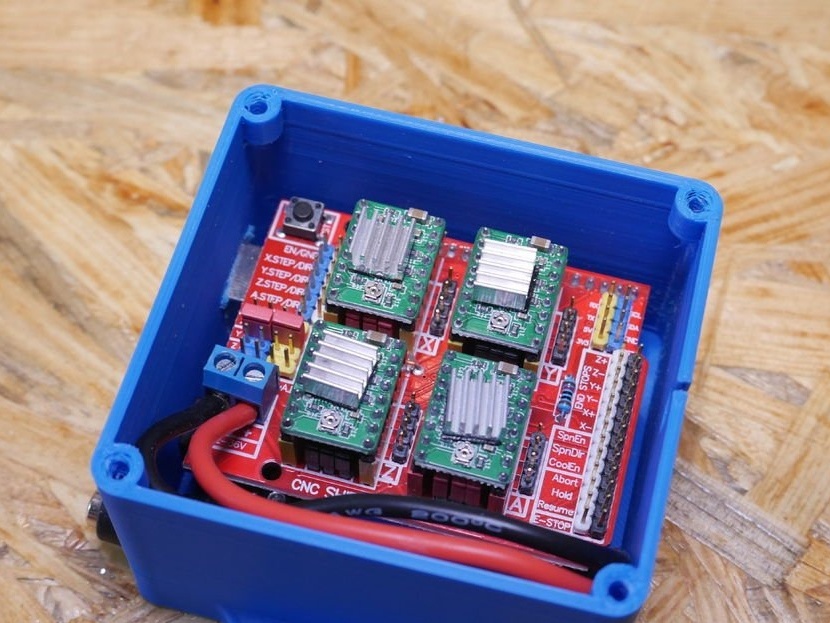
-A4988 Expansion Board - 1 pc;
-Step drivers - 4 pcs;
-Arduino - 1 PC;
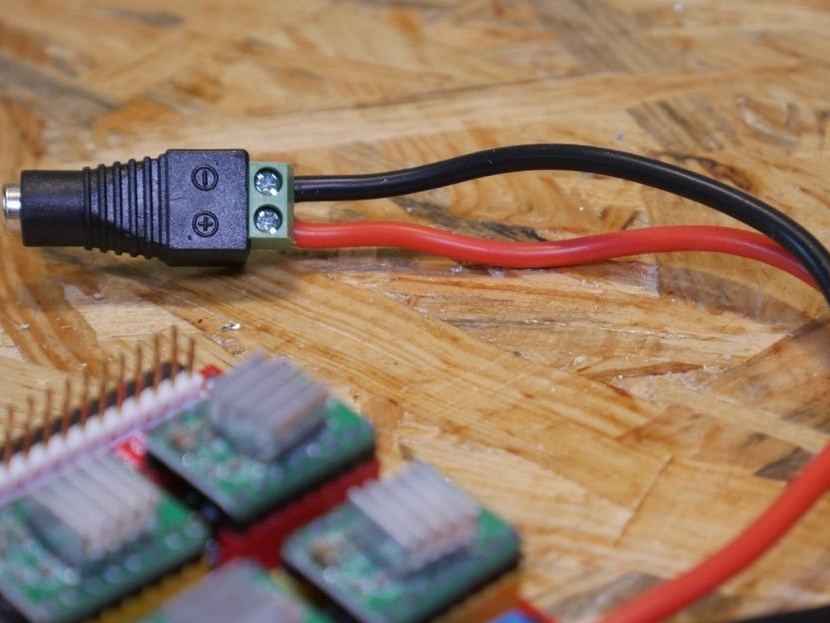
- Power supply - 1 pc;
- DC connector - 1 pc;
- Jumpers - 14 pcs;
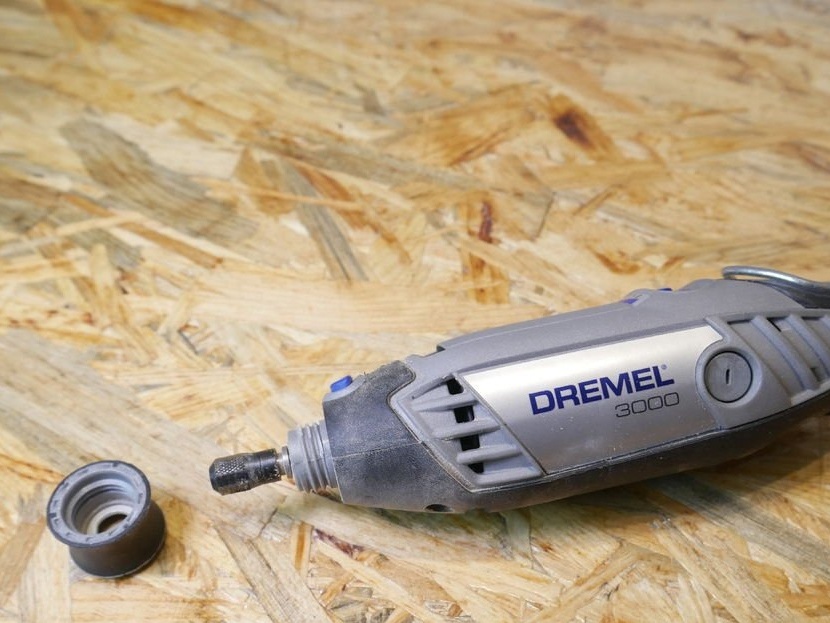
-Dremel 3000 - 1 pc;
-3D printer;
-Vise;
-Ushm;
-Screwdriver;
-Drill;
-Plywood;
-Drilling machine;
- Electric jigsaw;
-Computer with software;
with all the details, quantity, various links and comments.
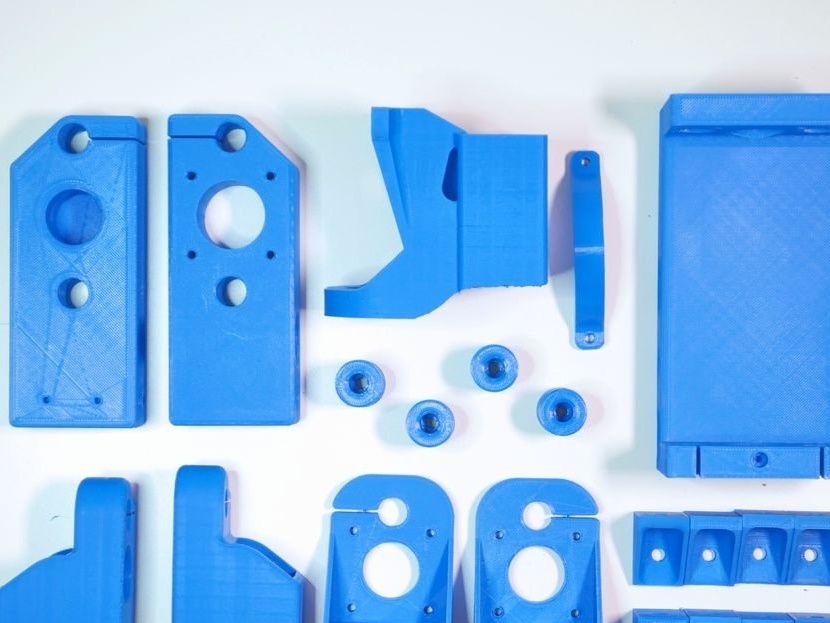
Step One: 3D Printing
According to the master, when printing parts, it is enough to set the "fill" parameter to 20-40%.
The master printed all his details using PLA, but it is better to print them using PETG, the cost of PETG is almost the same, and both of them are easy to print, but PETG is a little more flexible, so it’s harder to break.
You do not need to print the parts marked as OLD, these are old versions of some files that the wizard shared if someone wants to use them.
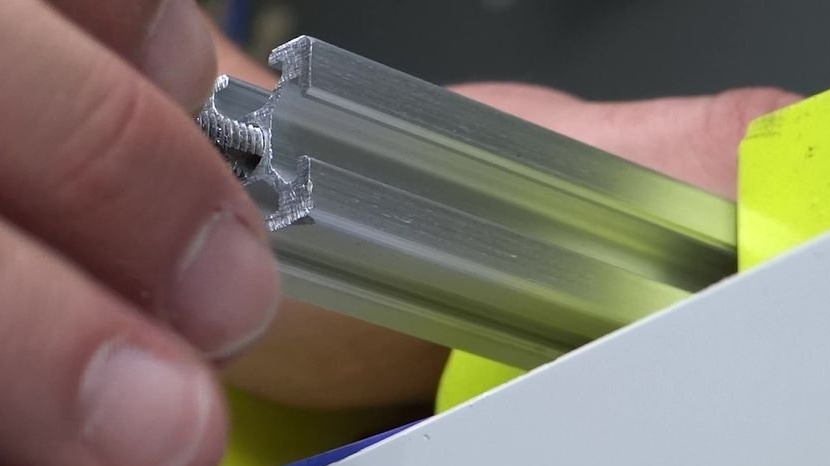
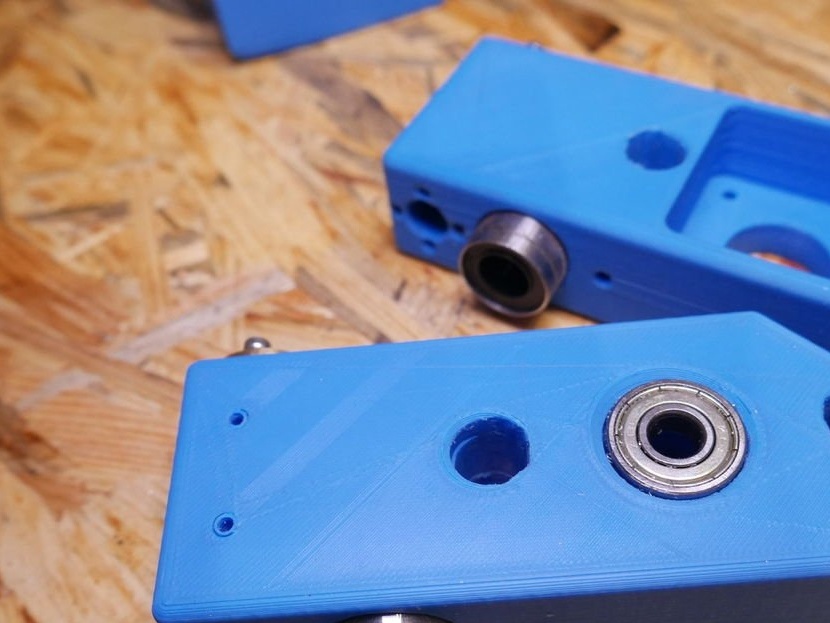
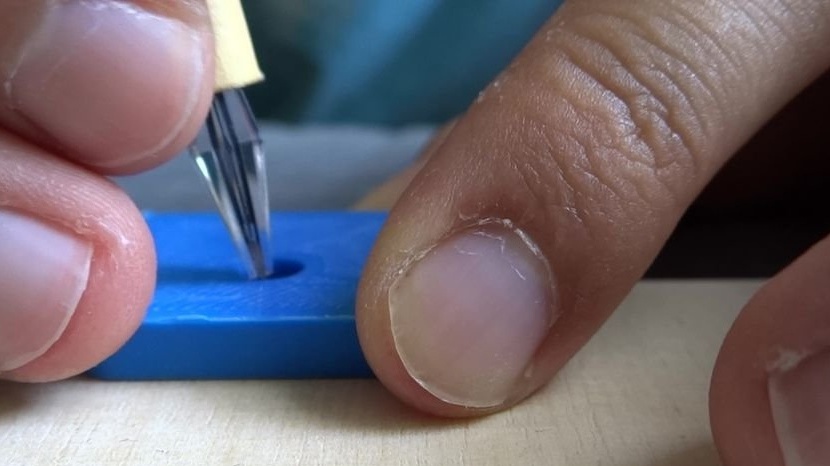
You can also find .f3d, .iges, and .step files so you can easily edit your authoring project. After manufacturing the parts, you need to check the bearing seats. You may also need to lightly grind the pins that fit into the aluminum profiles, it depends on the accuracy of your 3D printer.
Two conductors are also given that are not part of the CNC, but are very useful for drilling holes in aluminum profiles and a wooden support.
Step Two: Preparing to Build
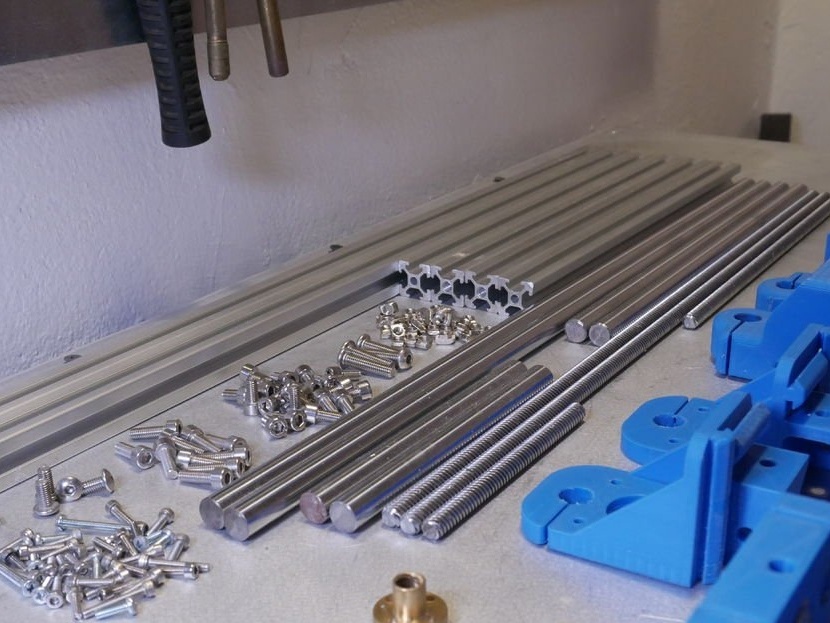
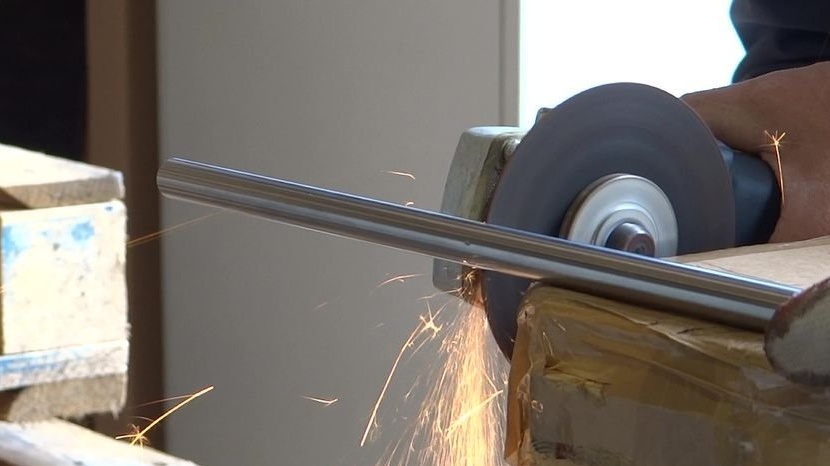
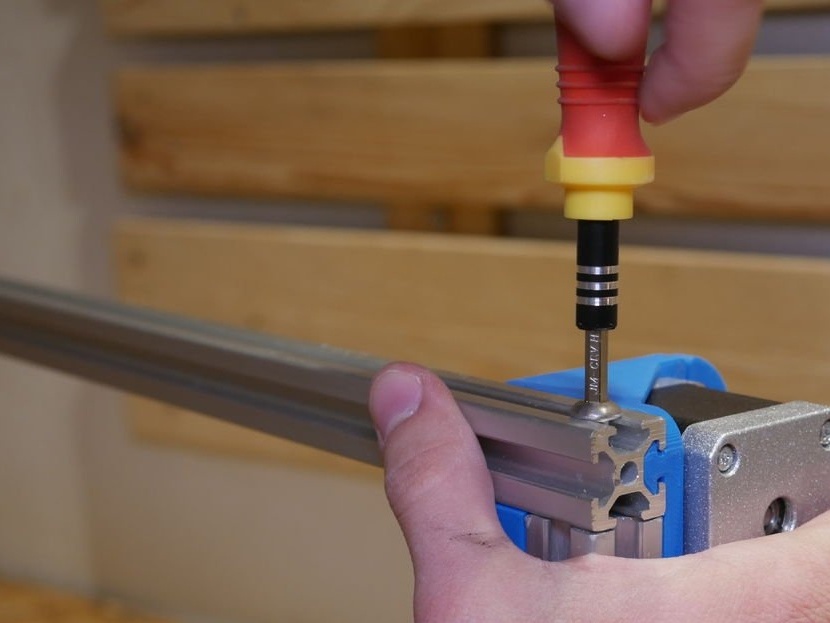
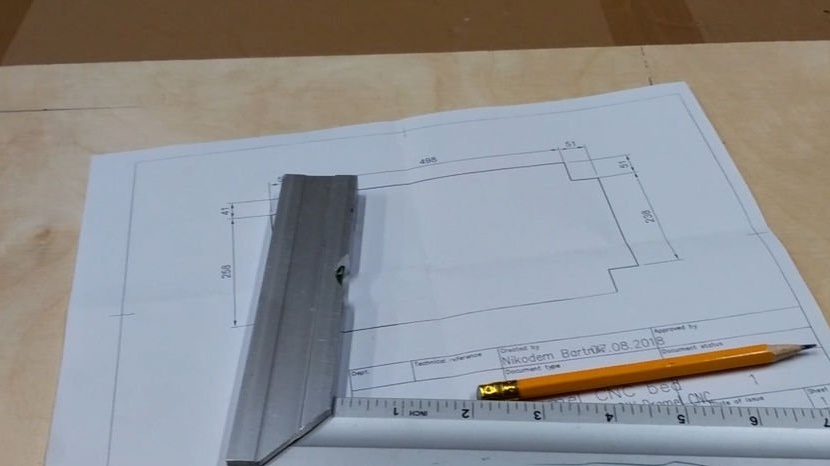
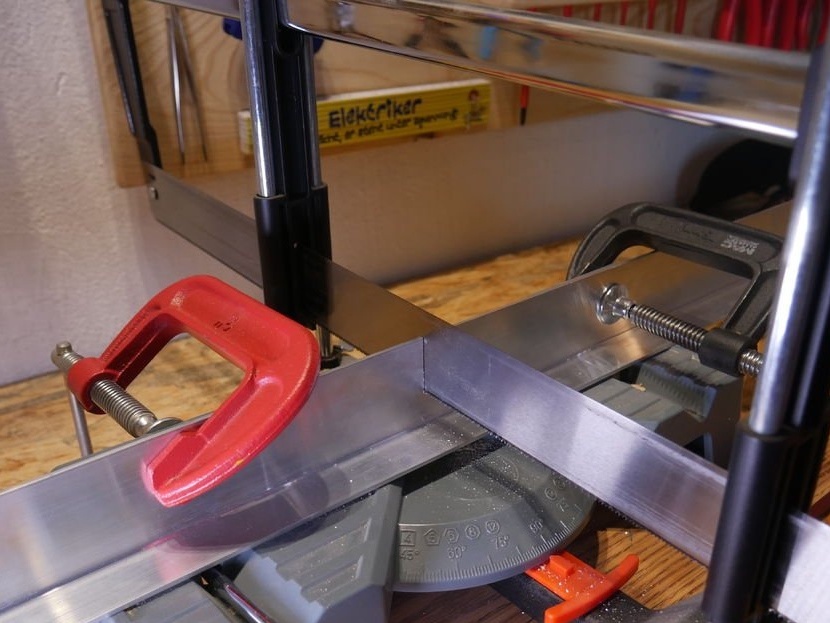
Before assembling all components, it may be necessary to trim them to the desired length. The master used aluminum profiles 60 and 30 cm long and 12 mm rods. If you want to make a larger machine, you just need to use longer aluminum profiles, rods and thumbscrews, the details with 3D printing remain the same. If you bought all the parts cut to the desired length, just skip this step.
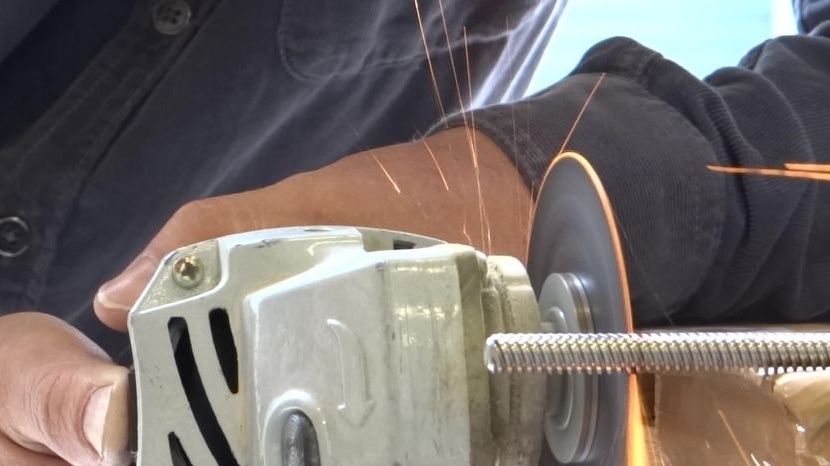
The master found that these rods and spindles cannot be cut using a hand saw, so he cut using a angle grinder.
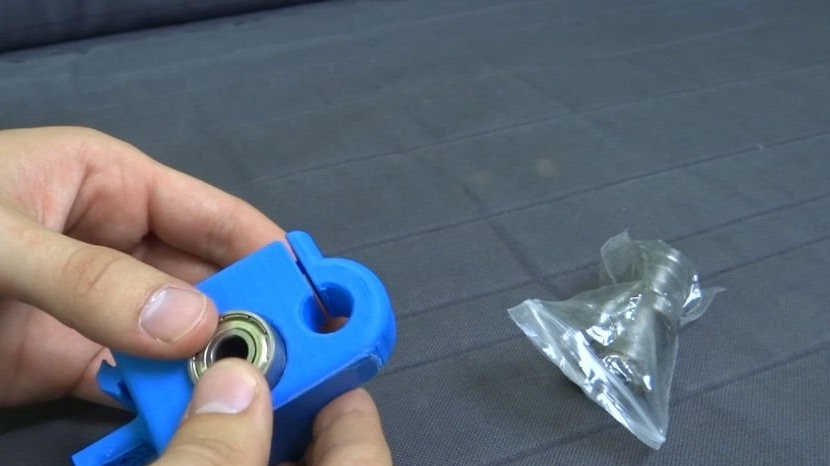
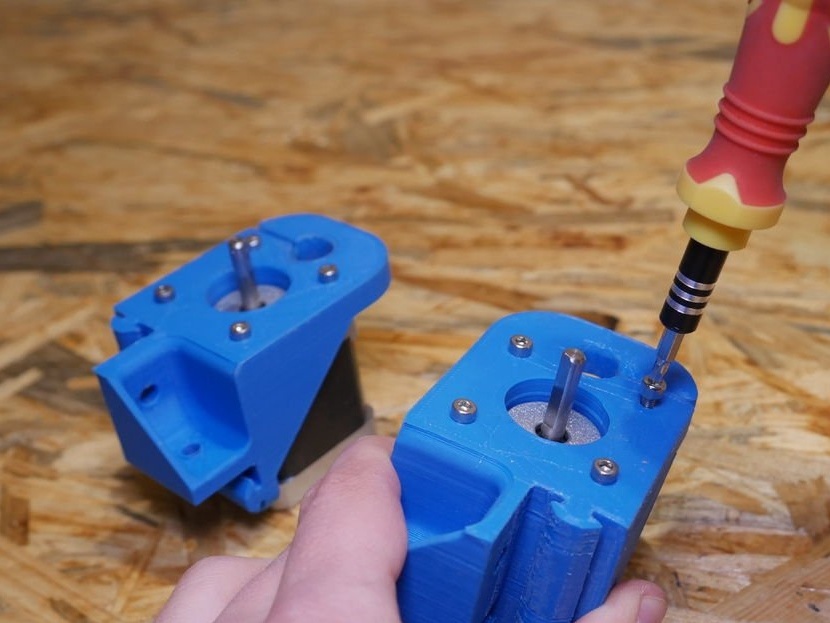
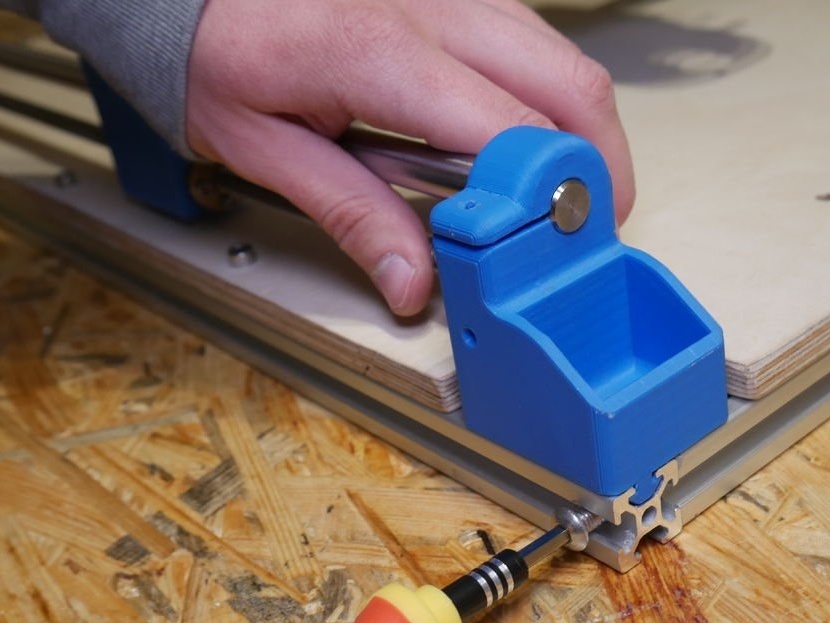
At this step, all bearings must be installed. The master did this with a small vice.
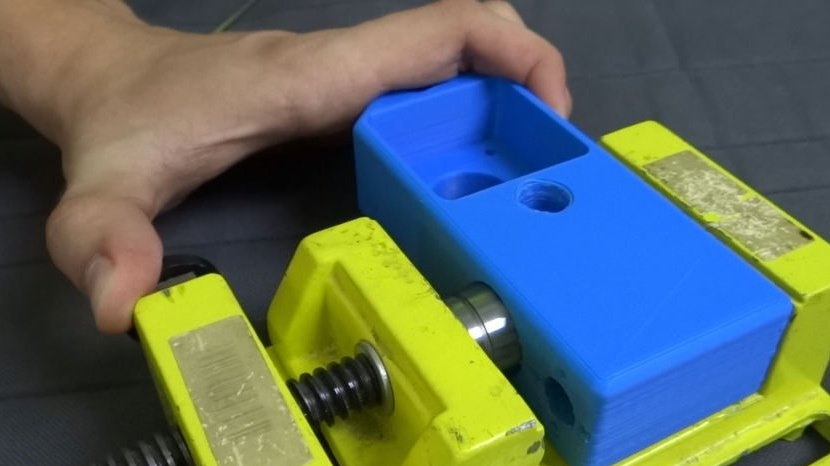

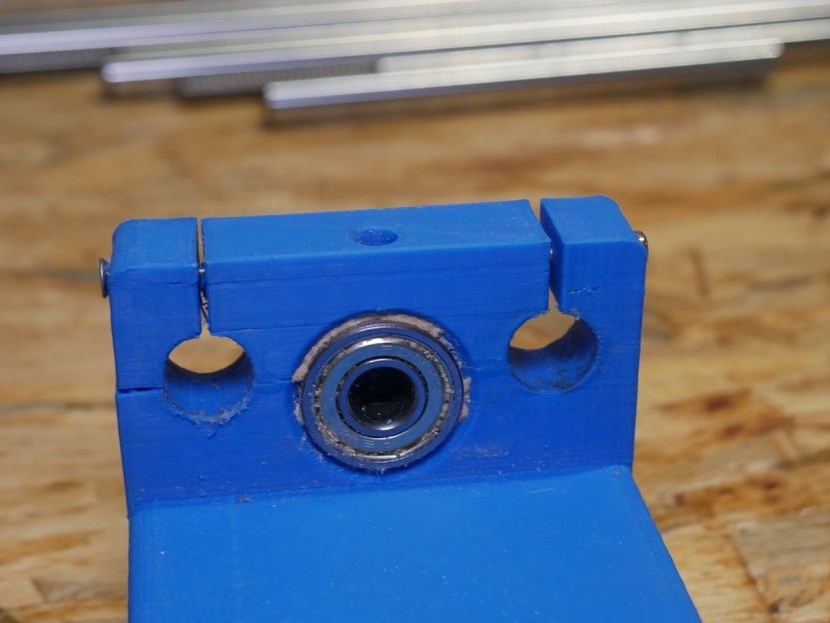
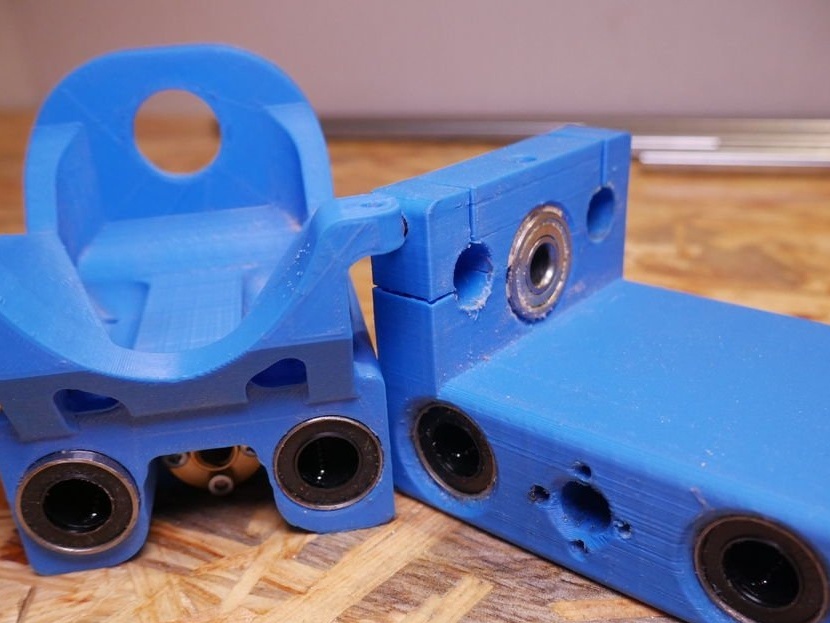
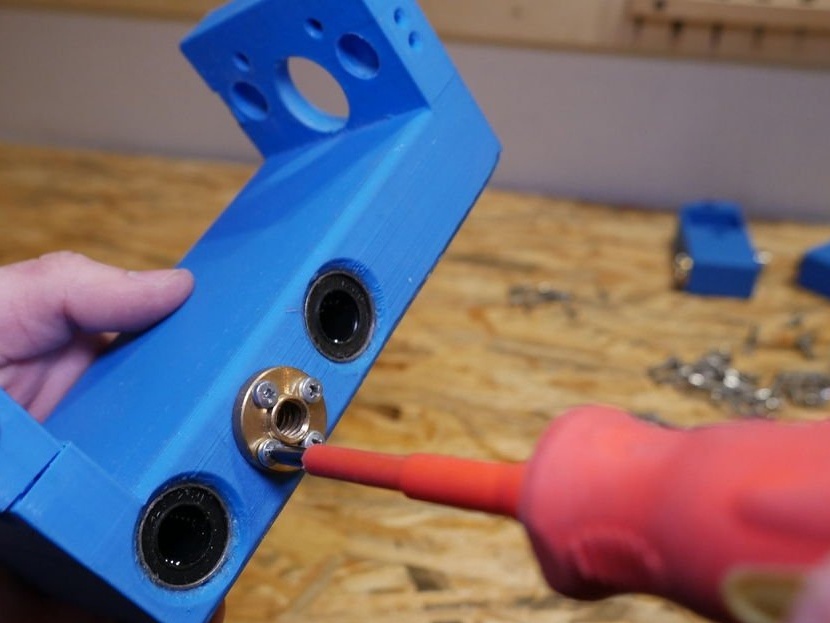
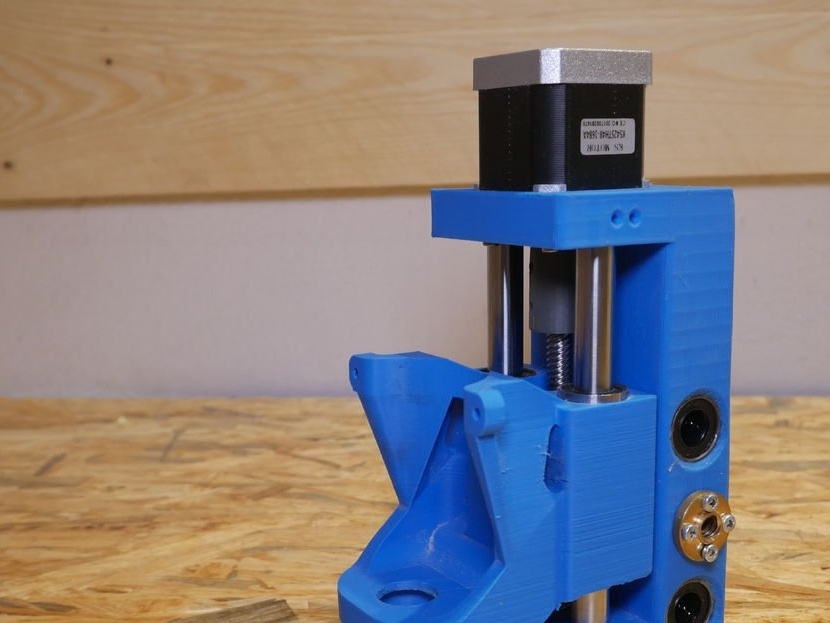
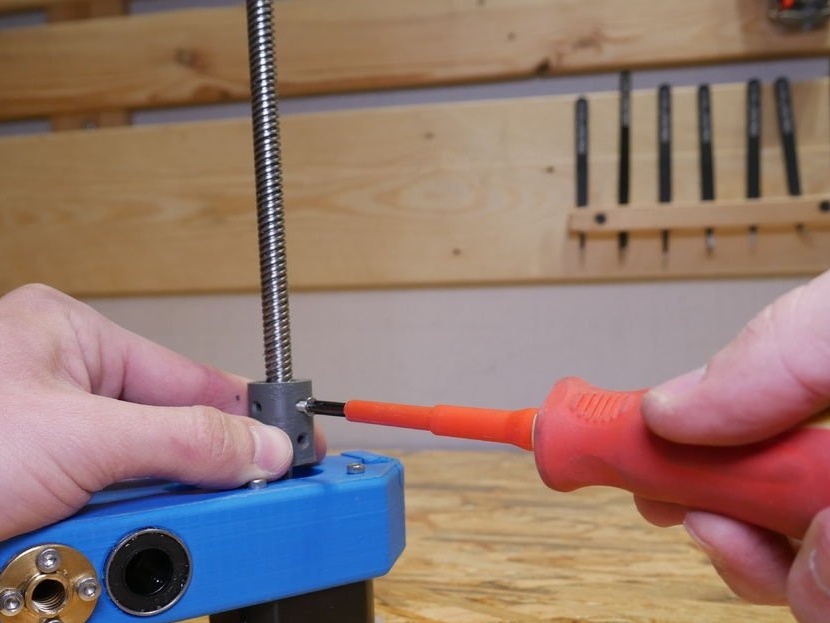
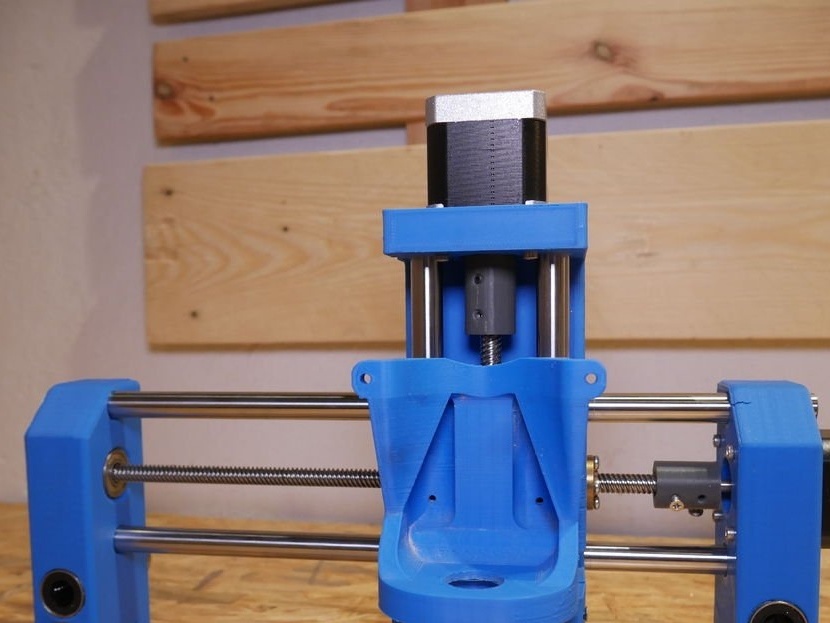
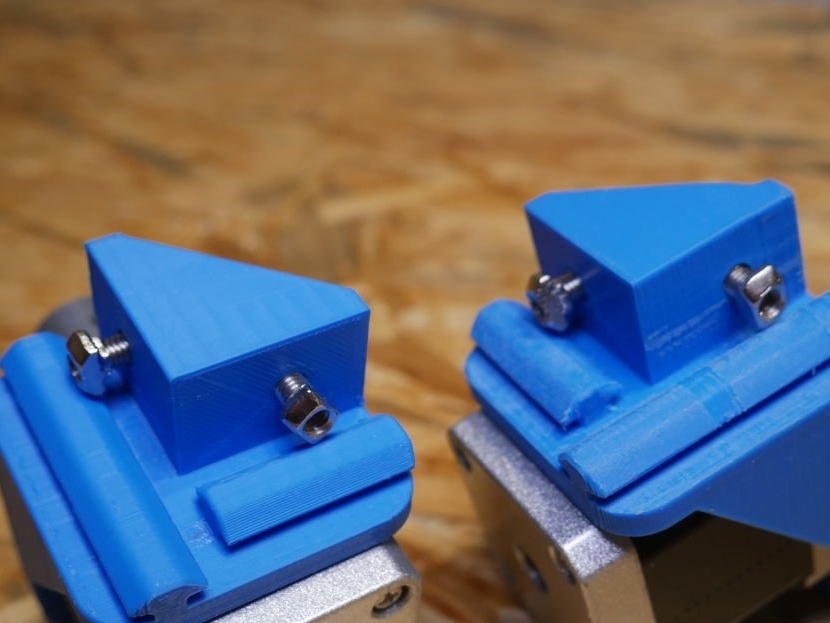
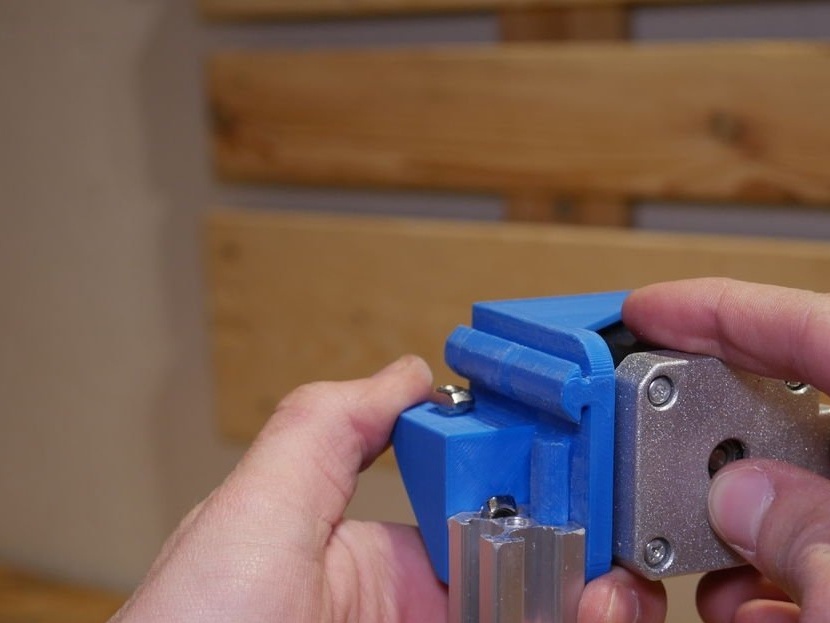
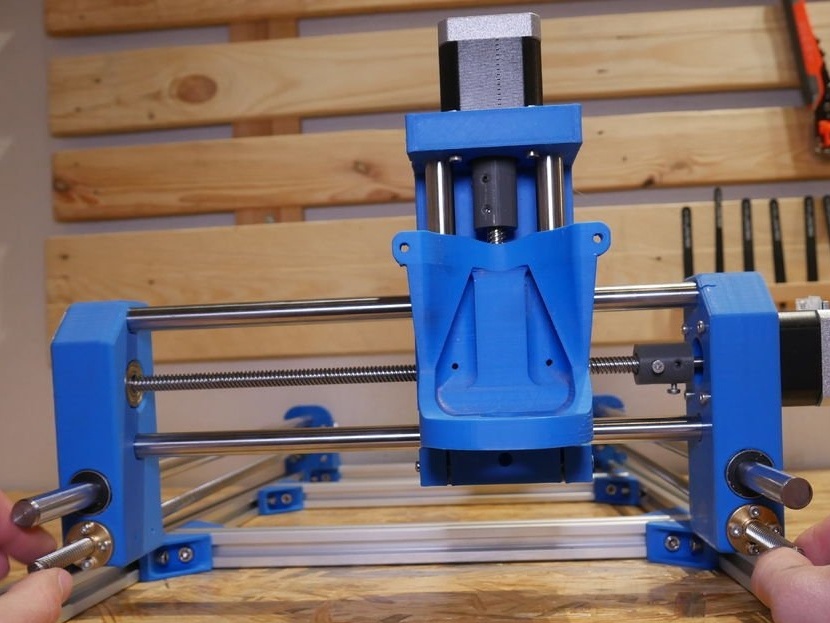
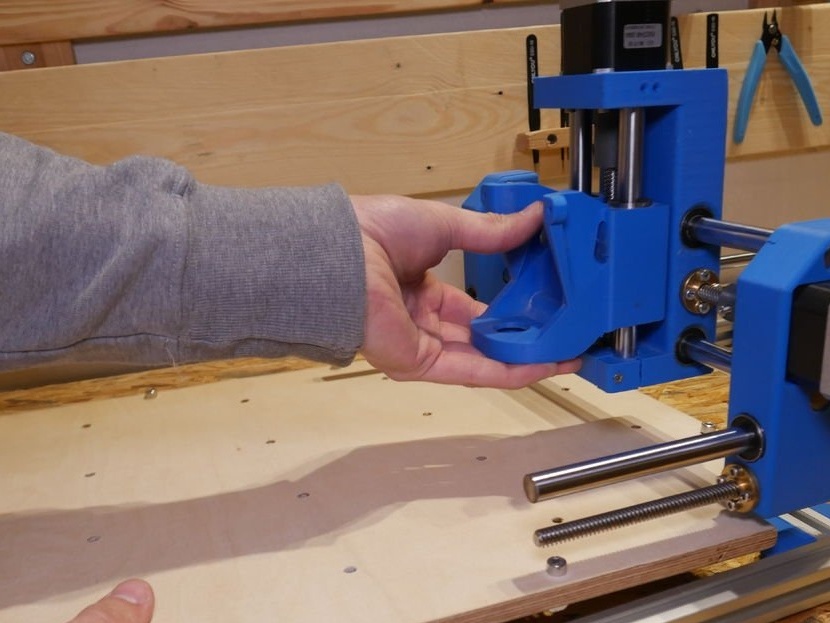
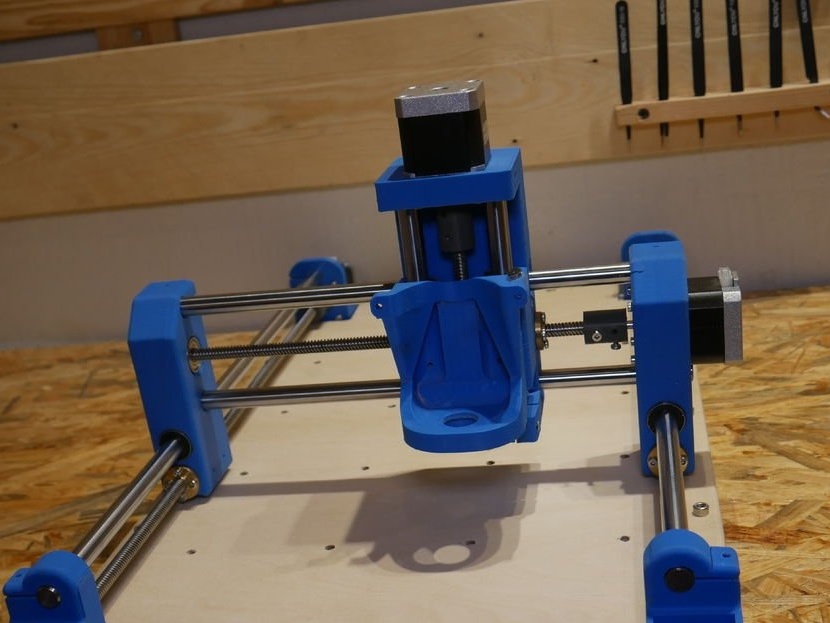
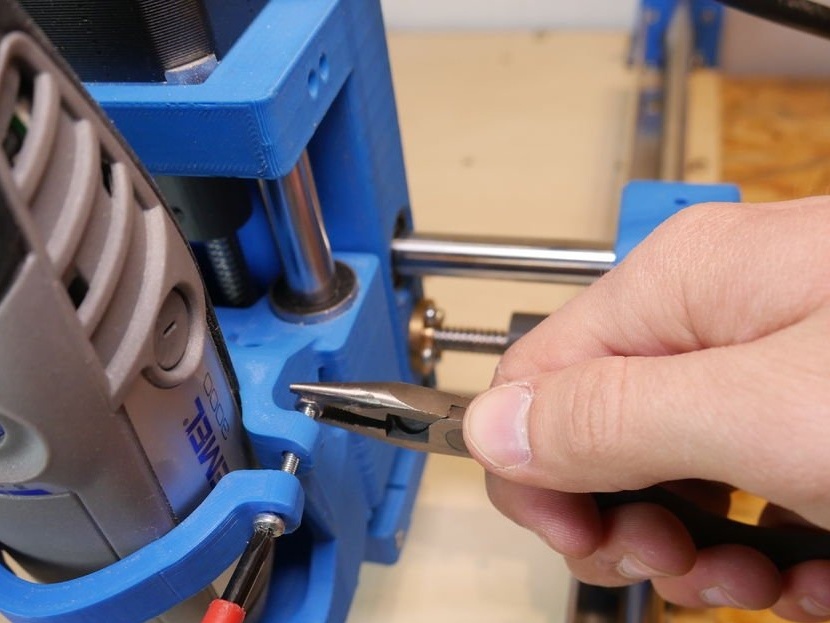
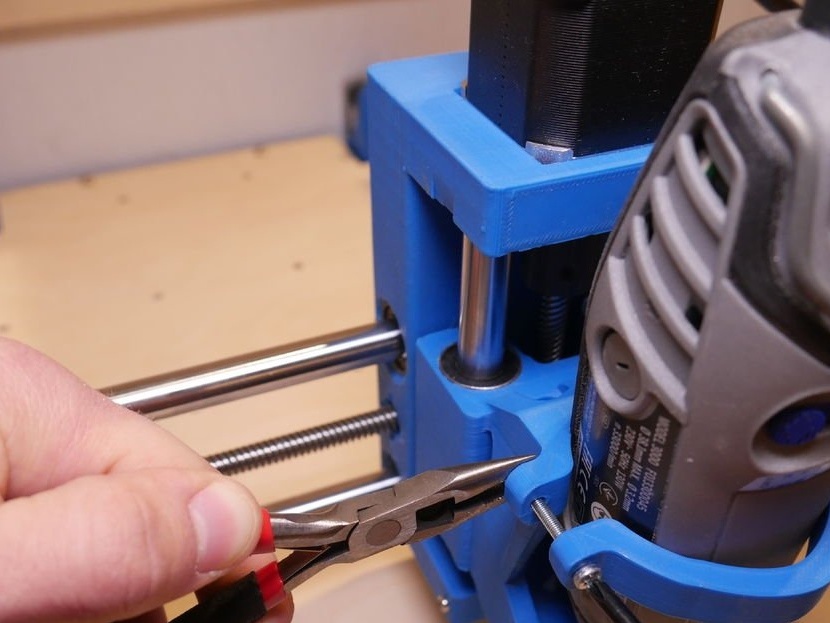
Step Three: Z Axis
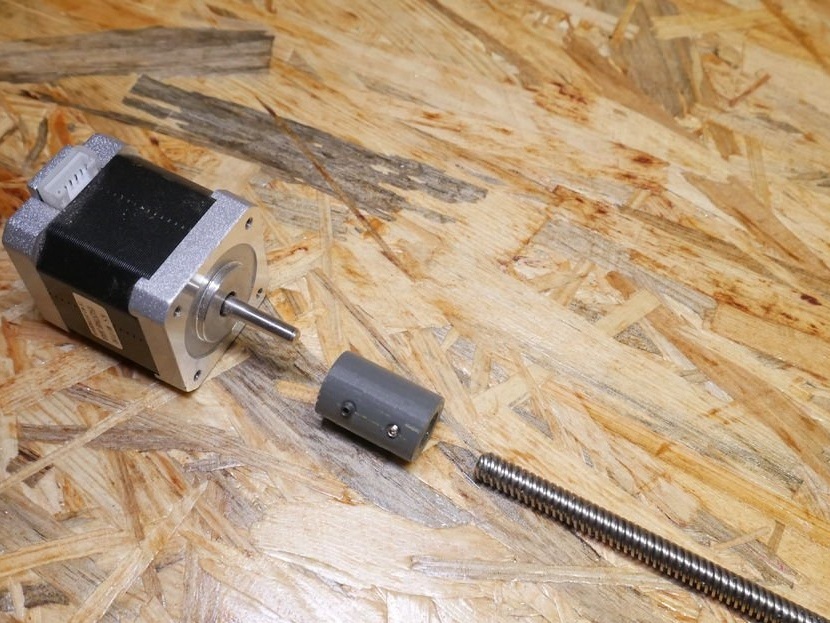
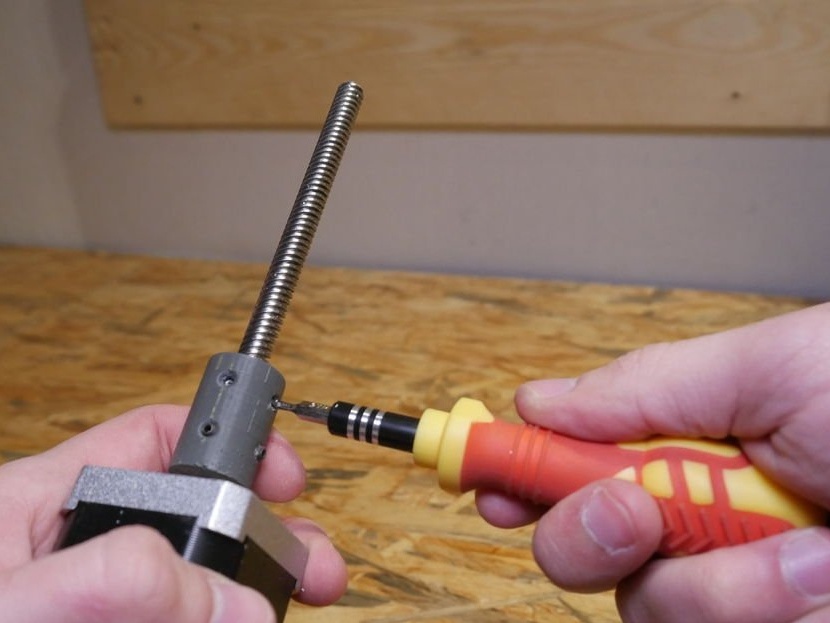
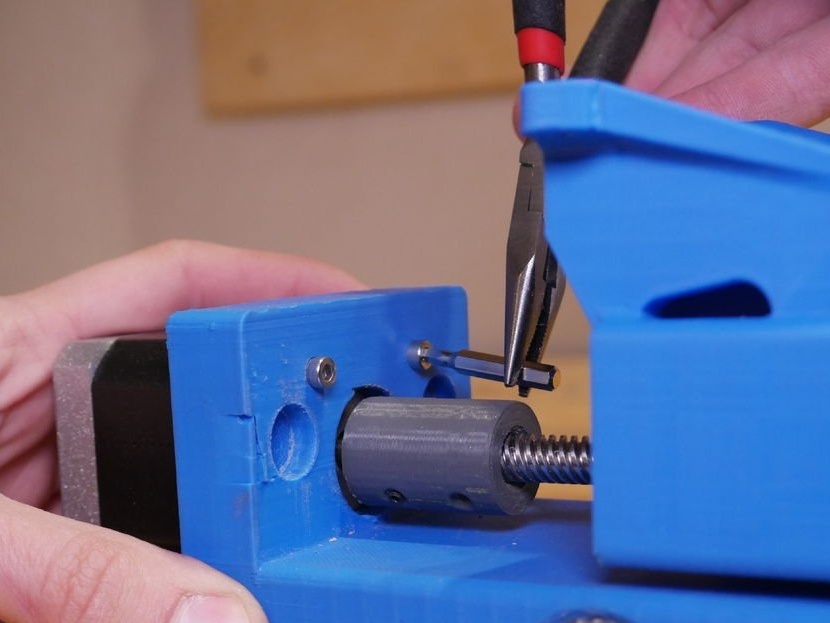
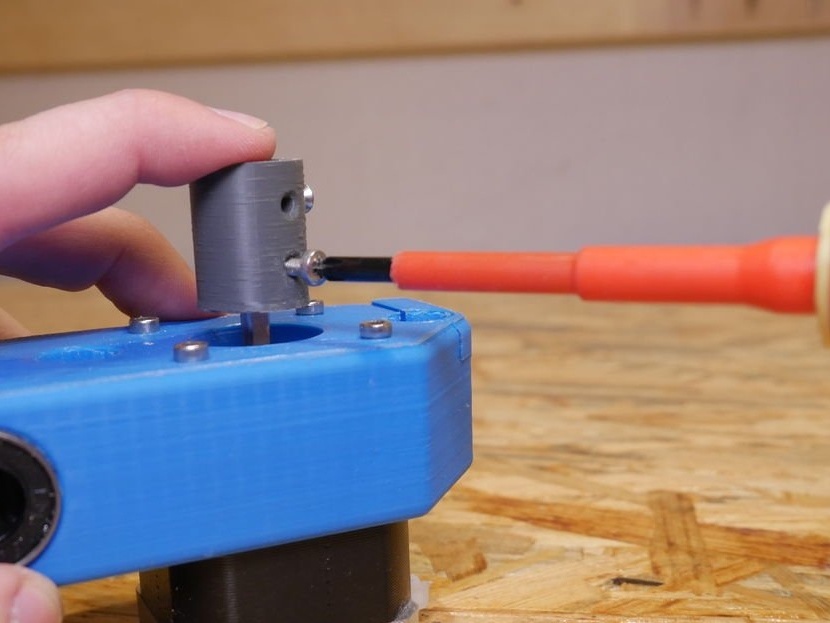
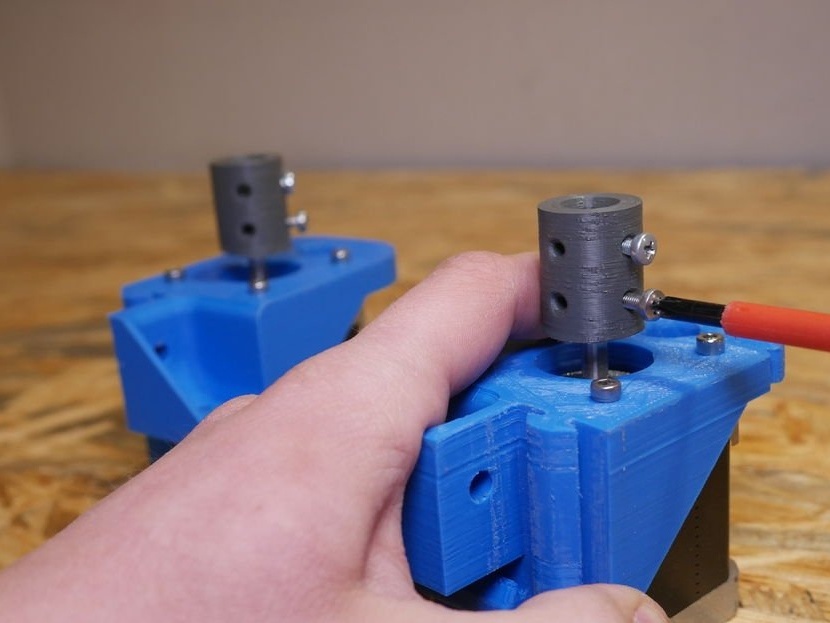
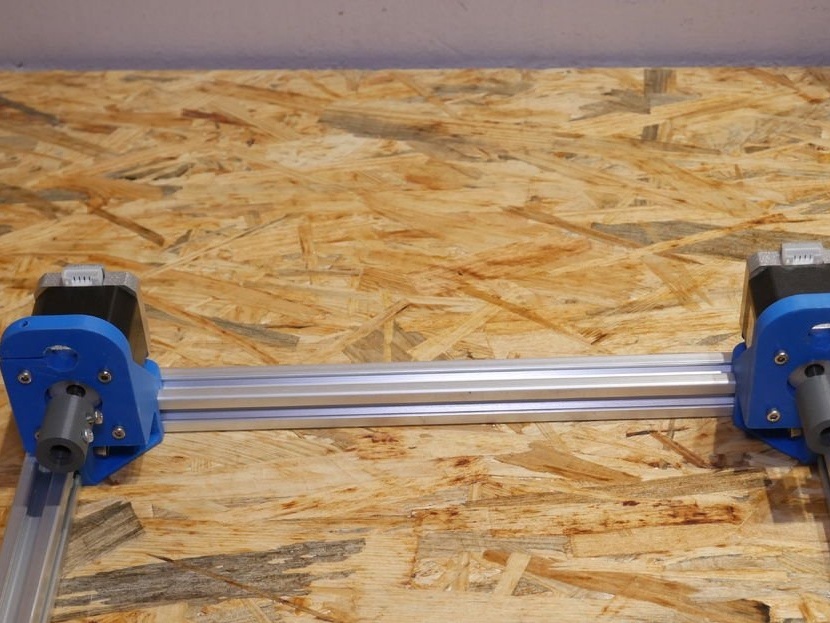
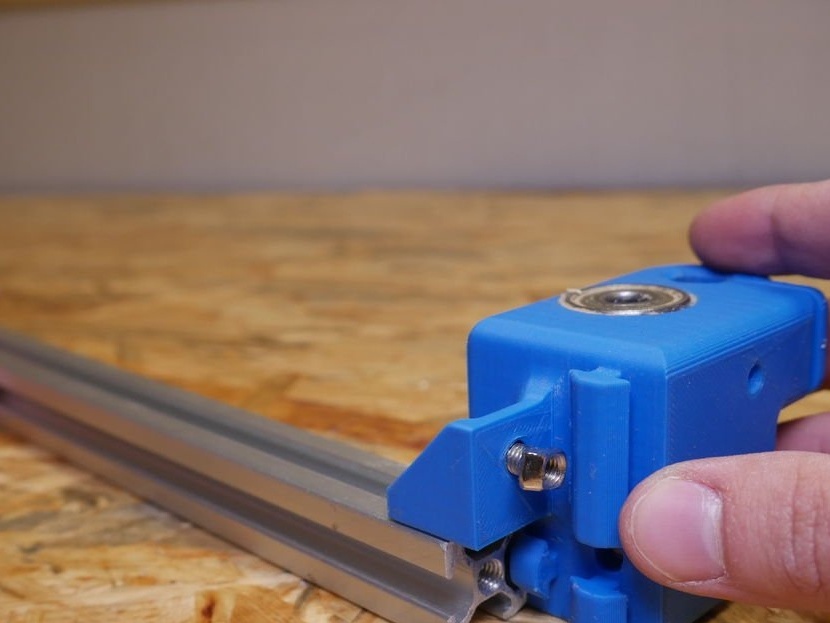
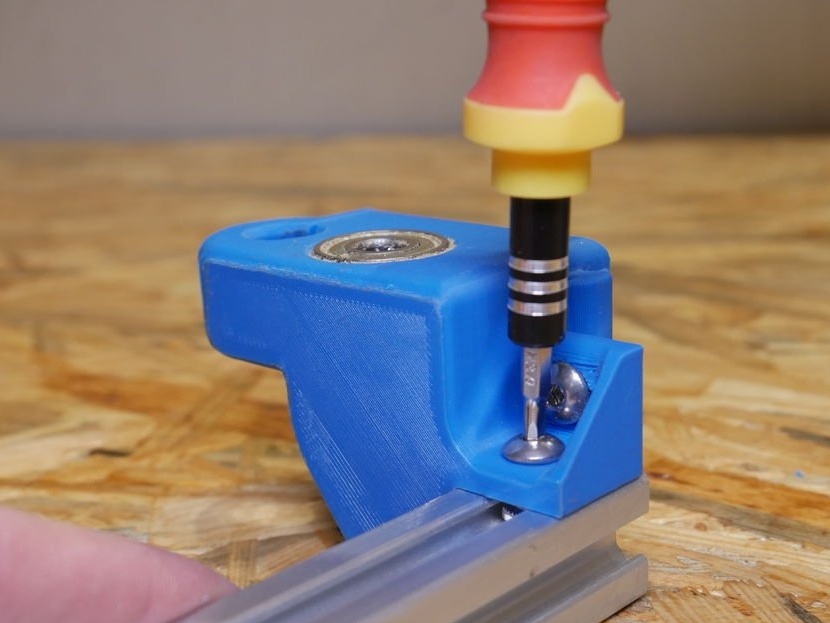
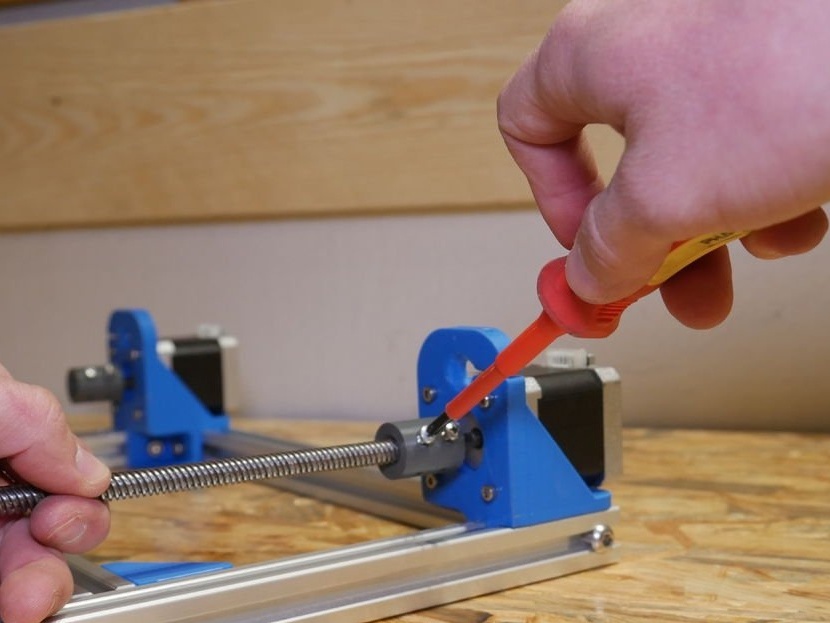
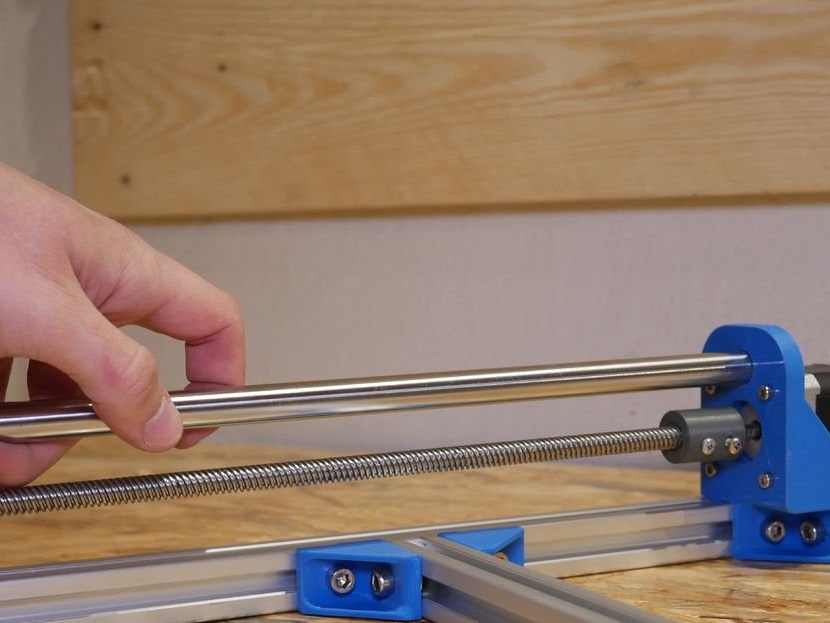
The assembly begins with the Z axis. Put two rods in the Z axis carriage, but not completely, there will also be a Dremel holder. The Dremel holder must move freely along the linear bearings. The 608zz bearing should already be installed in the hole in the bottom of the carriage along the Z axis. Now you need to install a stepper motor with a lead screw and a 3D printing coupling. Fasten the motor with the M3 screws and make sure that both rods are secured with a screw at the bottom. To facilitate future use, install the stepper motor connector backwards, because it will be connected there electronics.
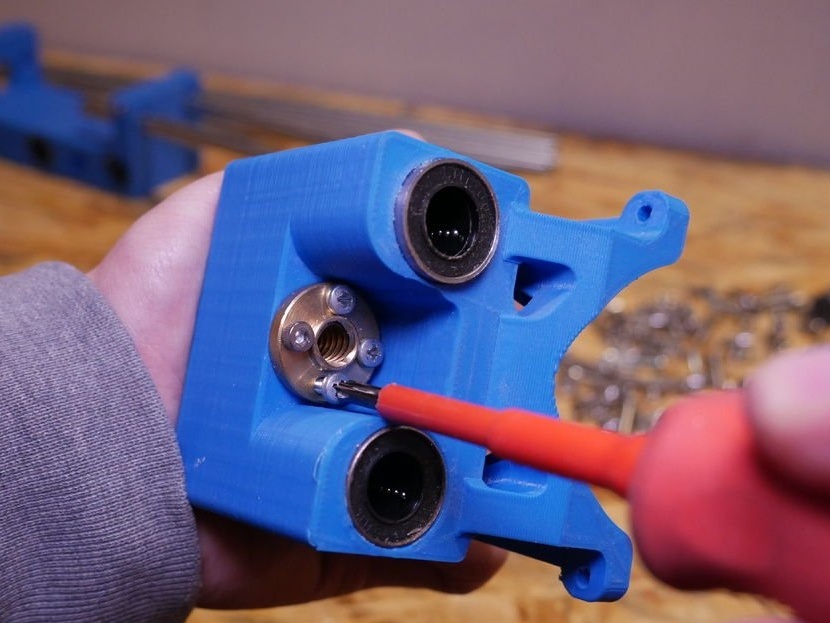
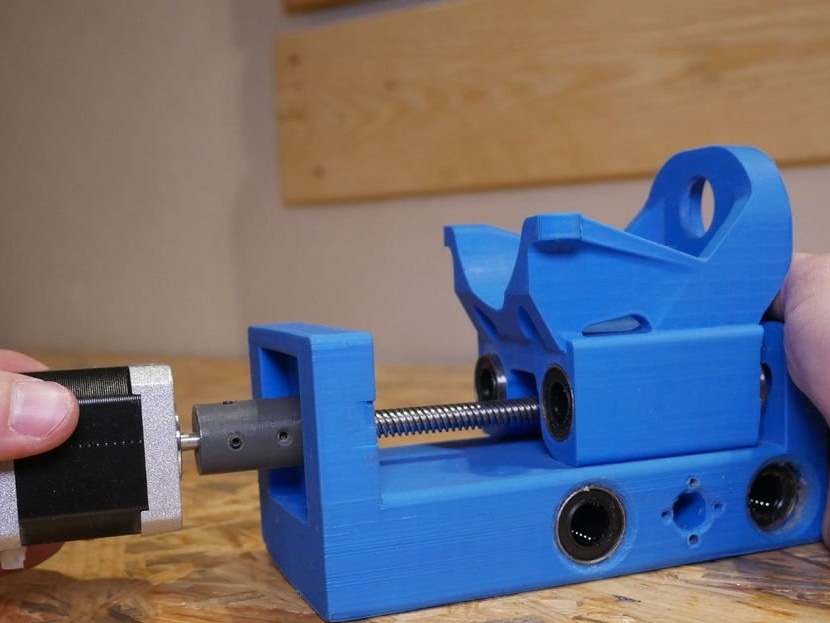
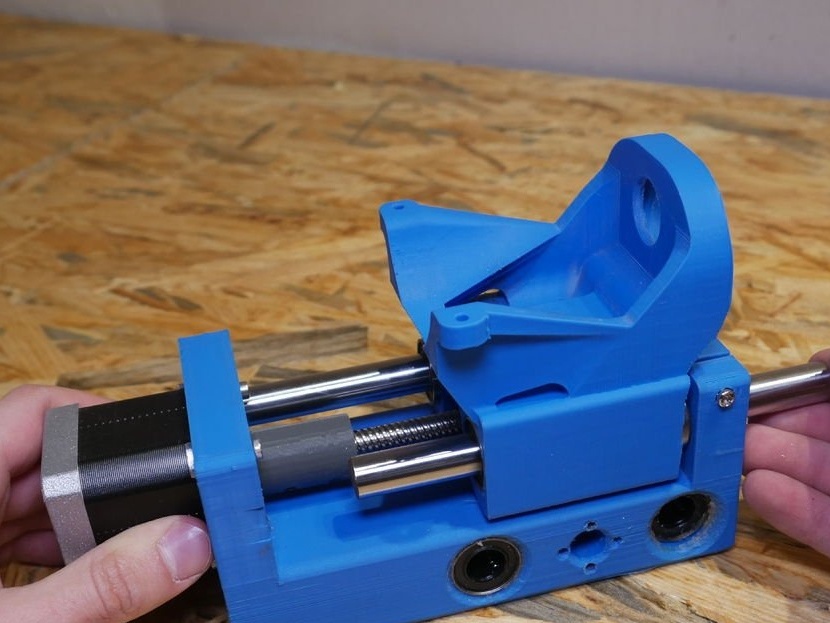
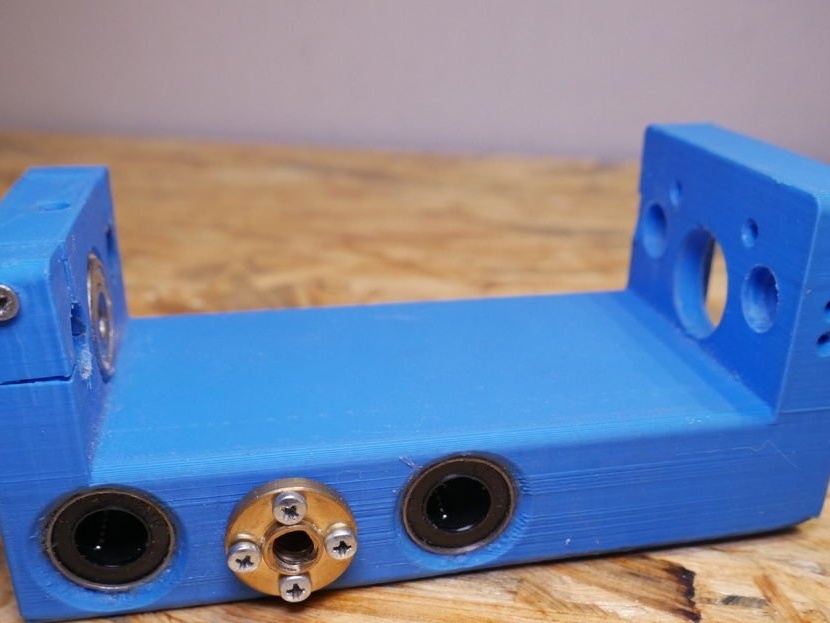
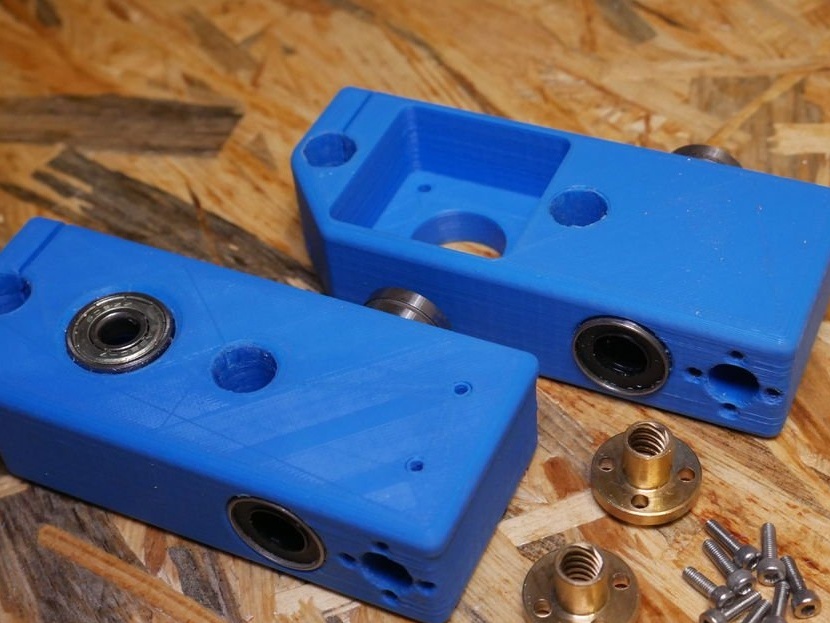
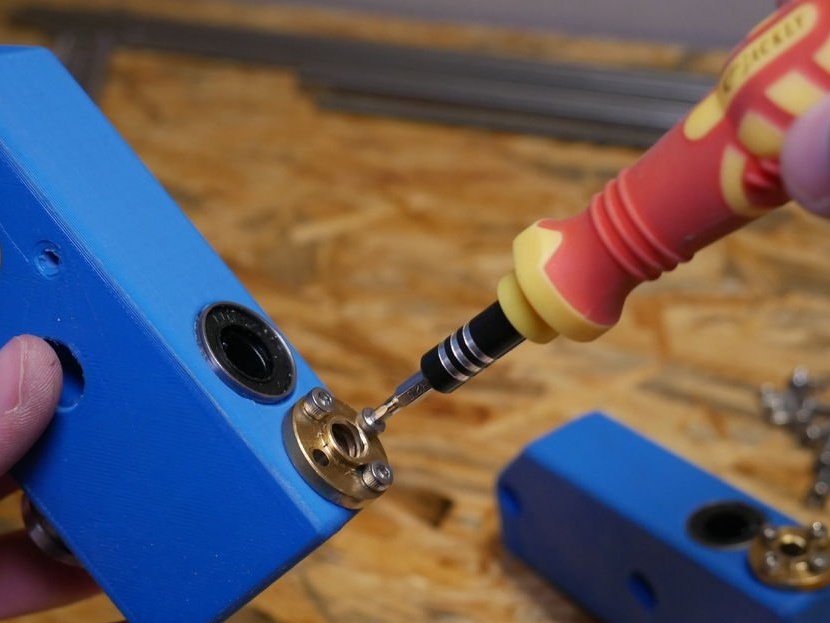
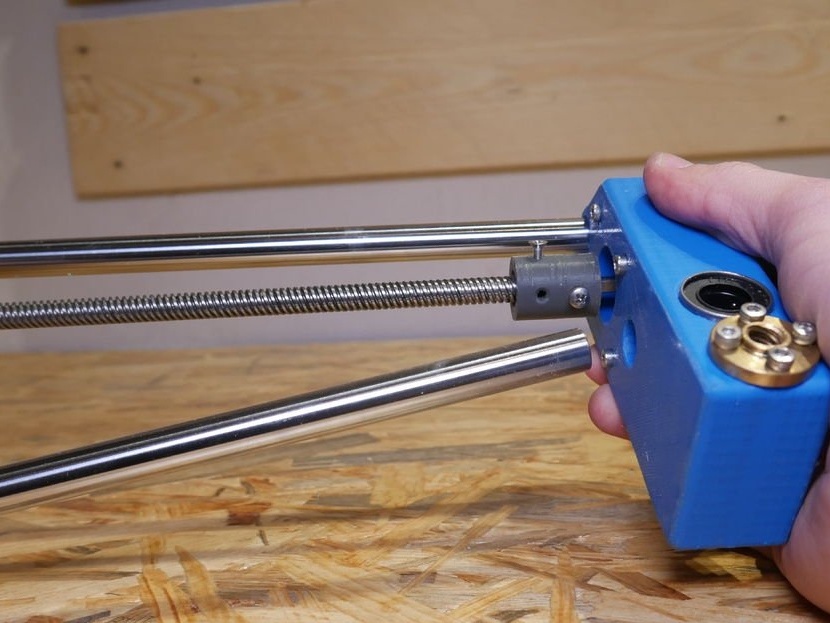
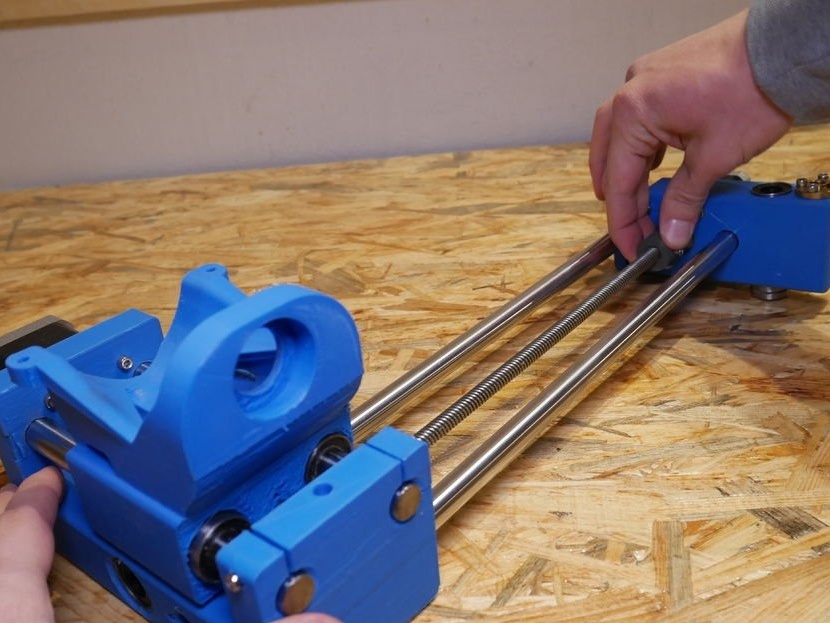
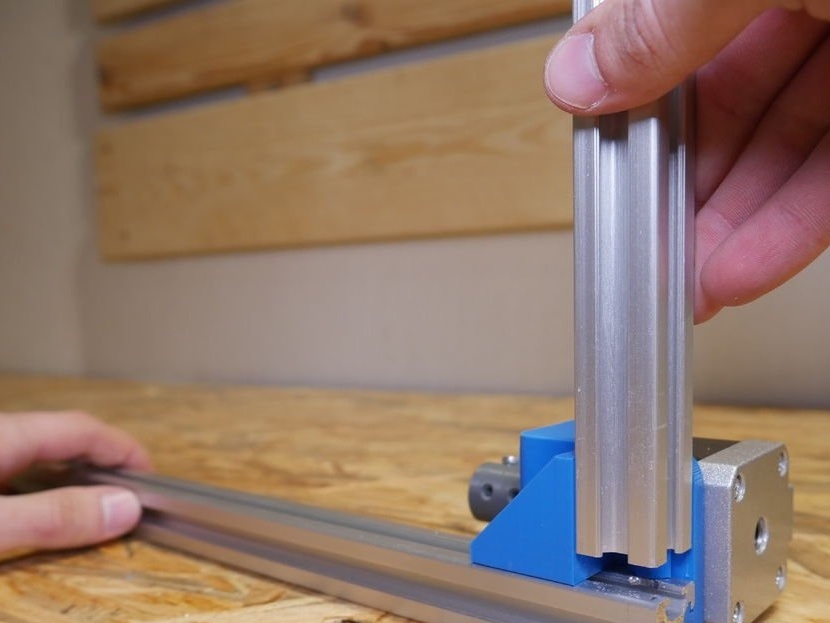
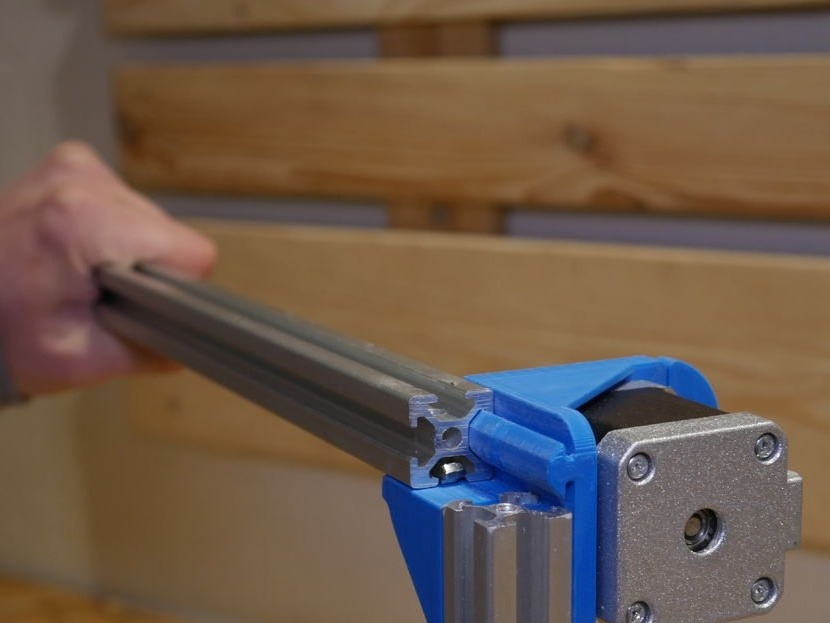
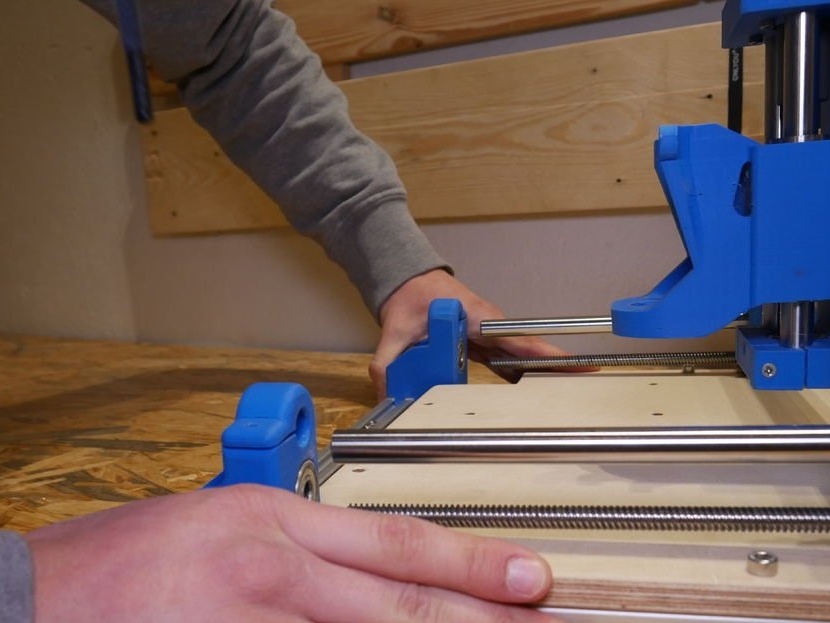
Step Four: X Axis
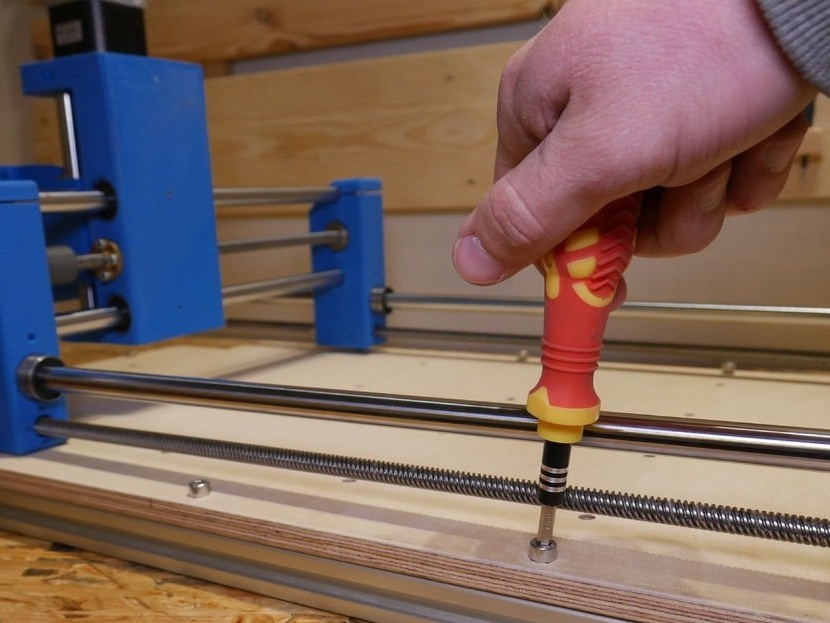
Now go to the X axis. Screw the brass flanges. Take one of the X axes and attach two rods to it. Then place the Z-axis carriage on these rods and install the second X-axis carriage on the opposite side. Secure the engine with the M3 screws.

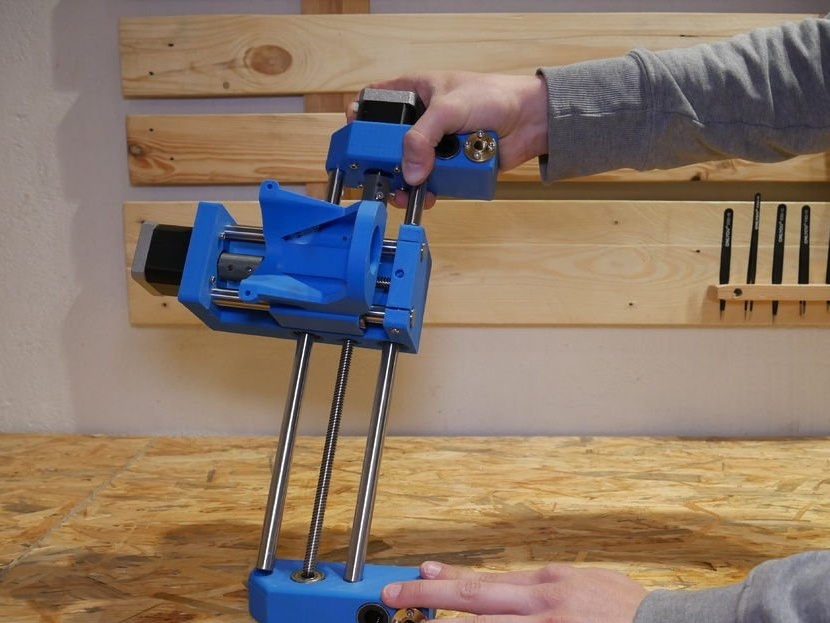
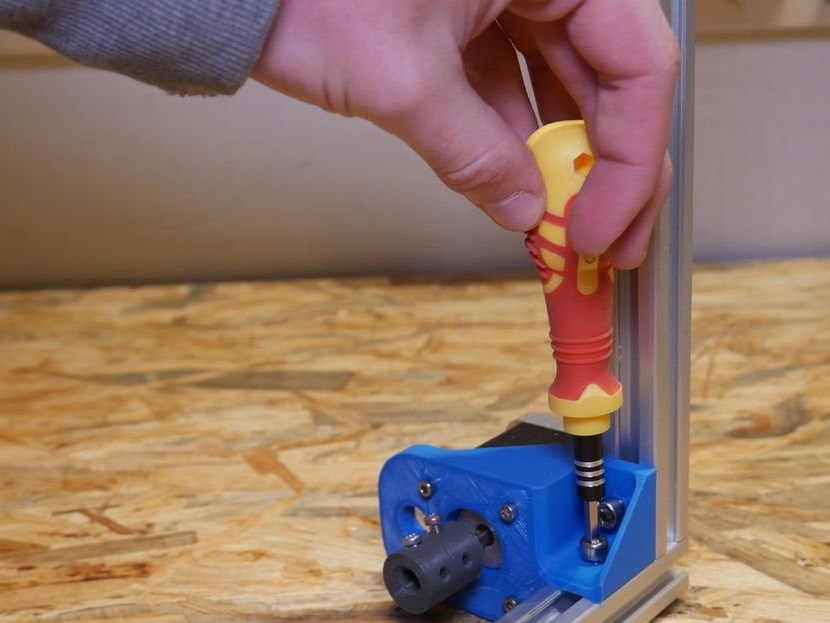
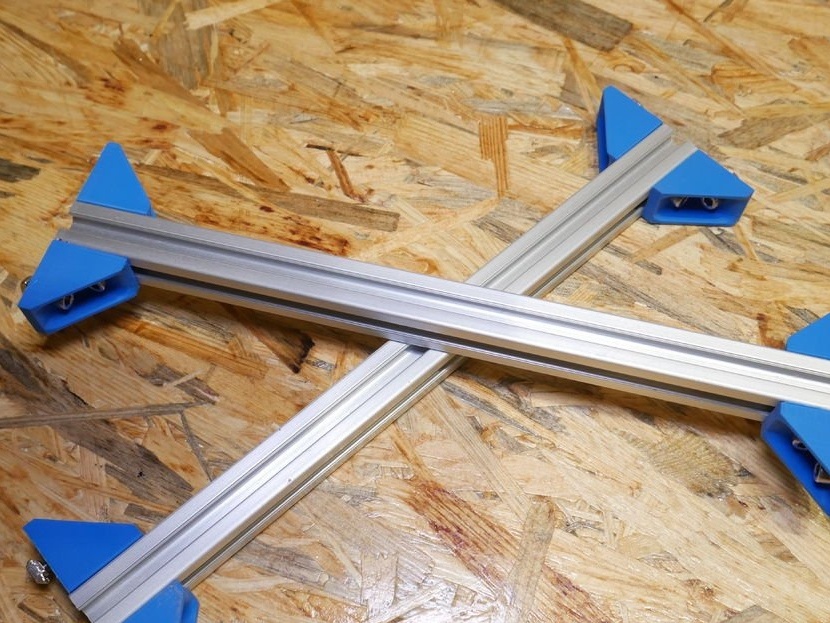
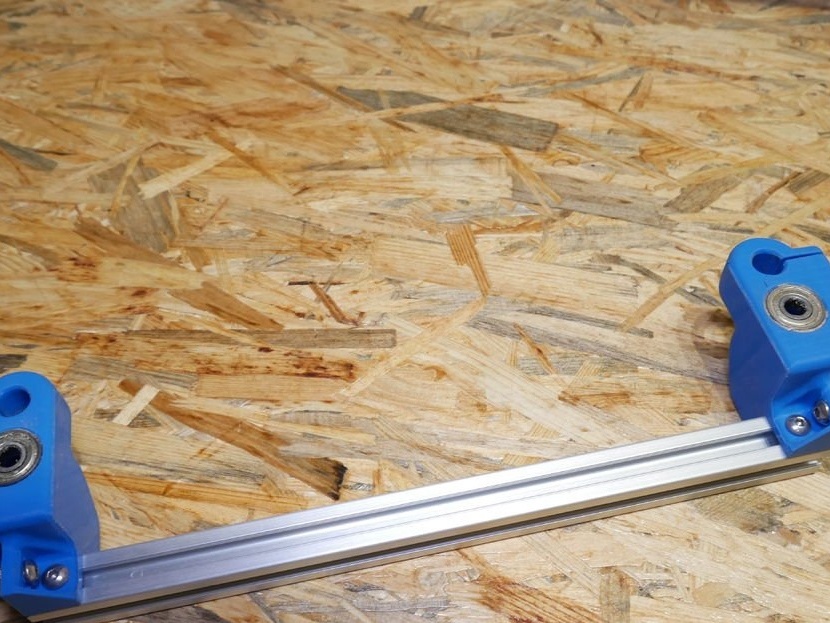
Step Five: Y axis and aluminum frame
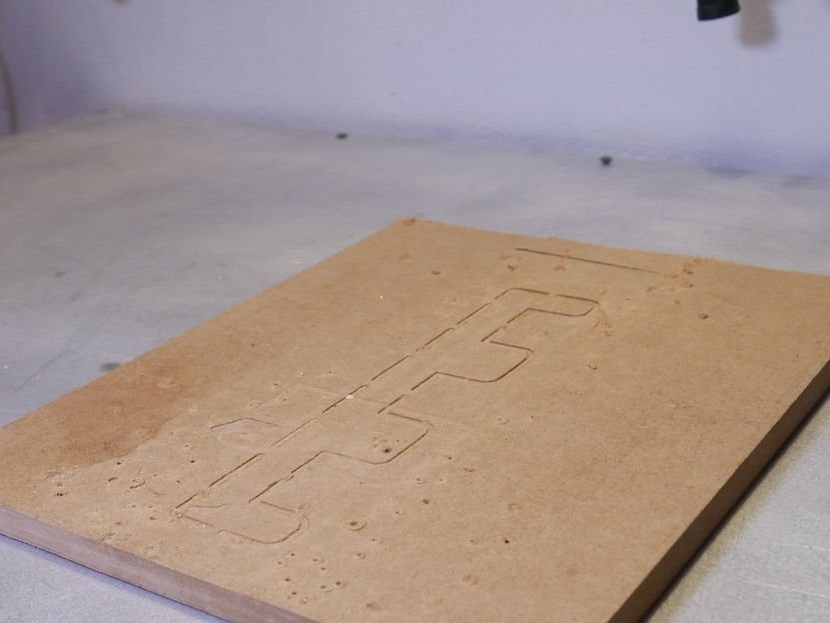
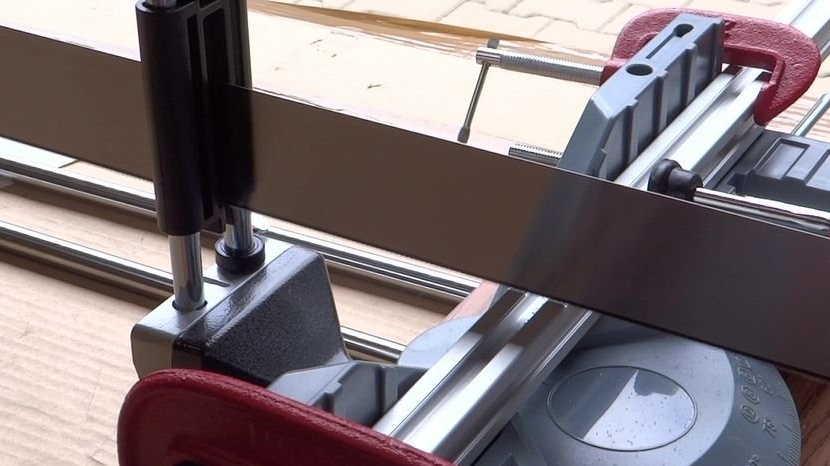
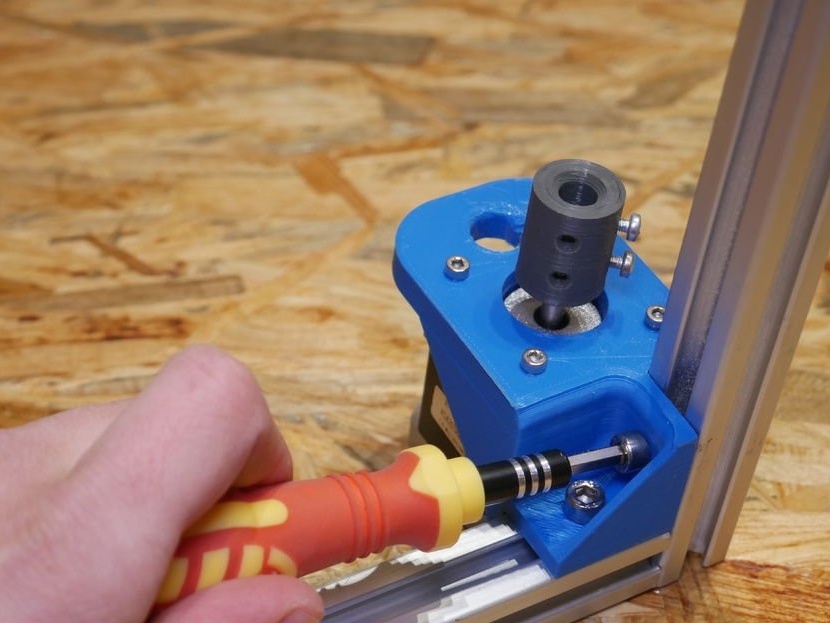
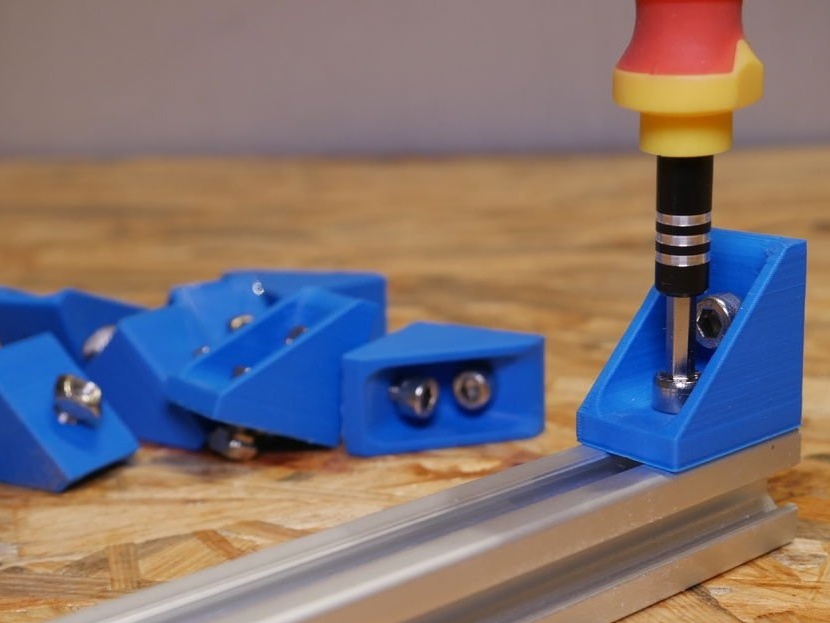
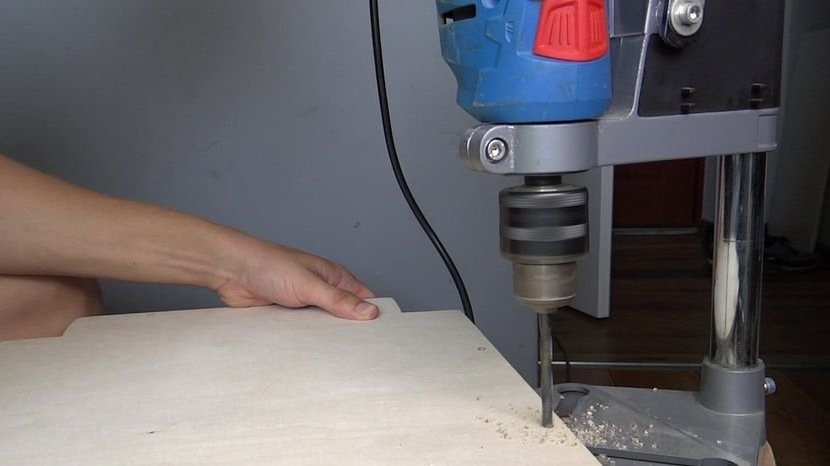
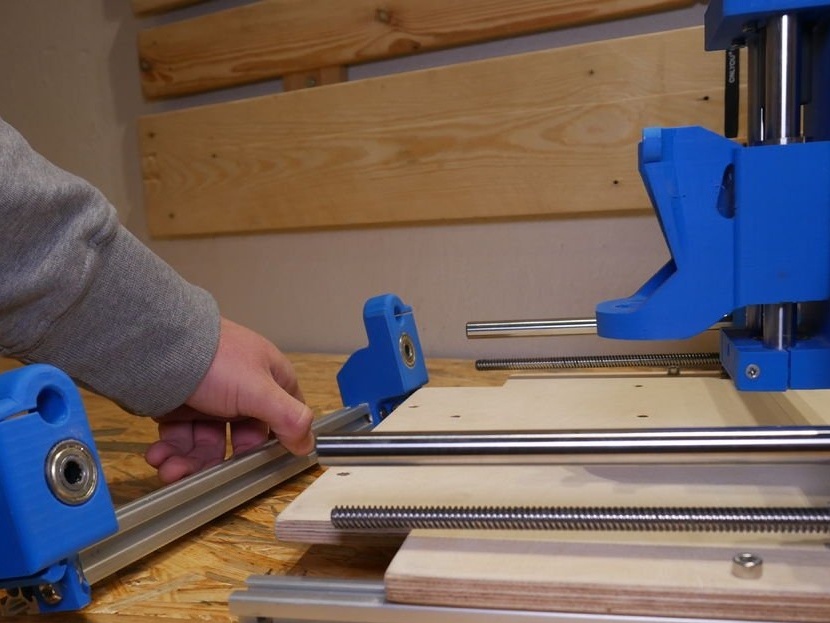
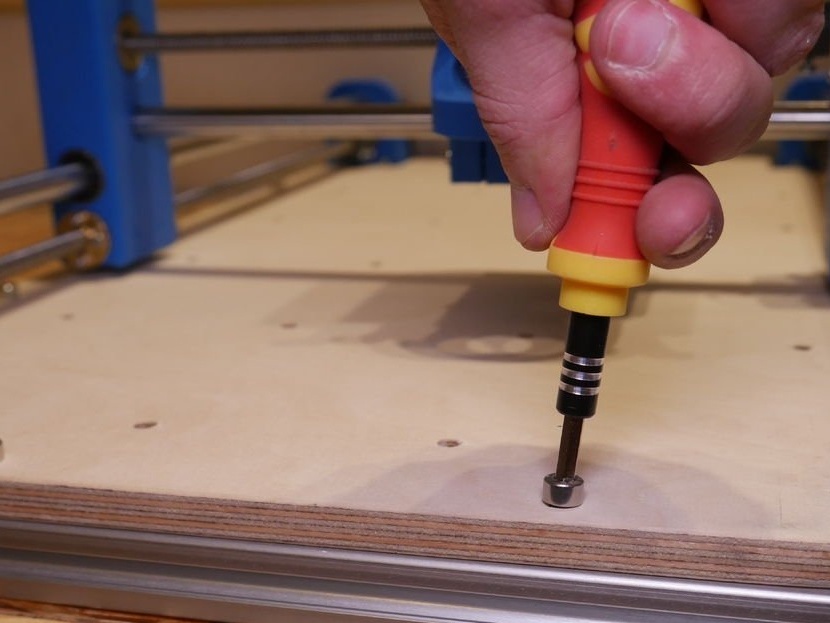
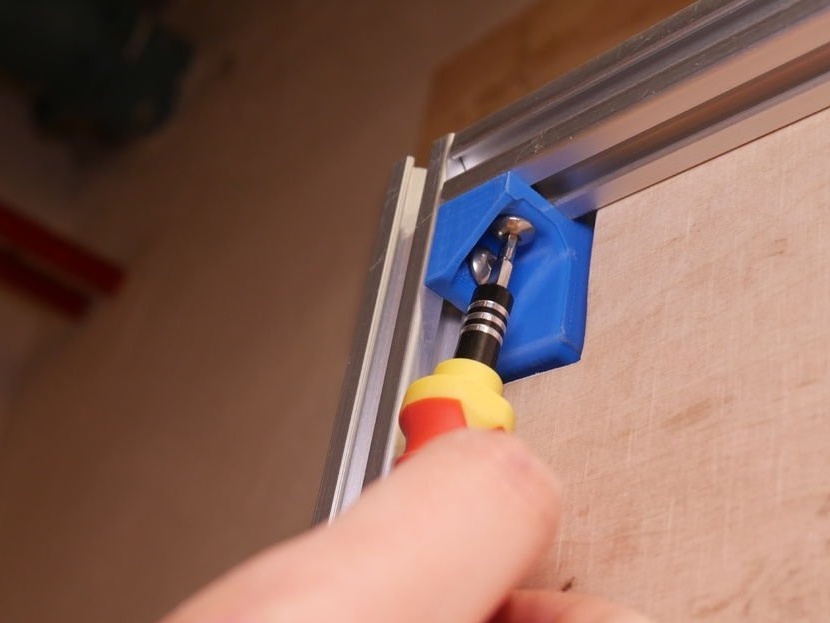
The Y axis is directly connected to the main frame of this machine. It is made of 20x20 mm aluminum profiles connected by screws for stiffness. Since this machine is modular, it is possible to reduce or increase the length of the profiles. The master cut his profiles to 60 cm - 2 pcs., And 30 cm - 4 pcs. Next, you need to drill mounting holes. To facilitate the drilling process, the master developed and printed a conductor that can be put on the profile and then drilled a hole using a 6.5 mm drill. At both ends of the 2 short profiles, threading is still necessary. It is recommended that you pre-drill the tap hole with a 5.2 mm drill and then create an M6 thread.
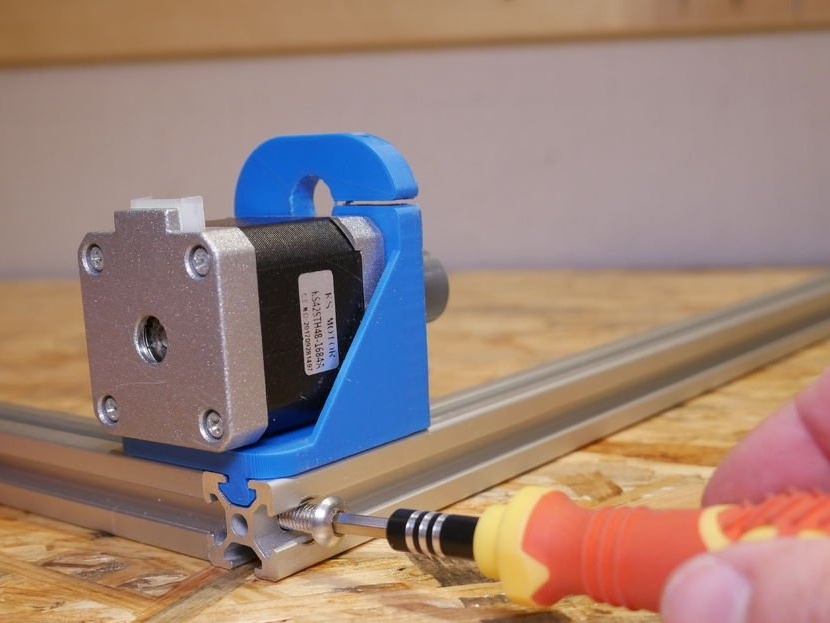
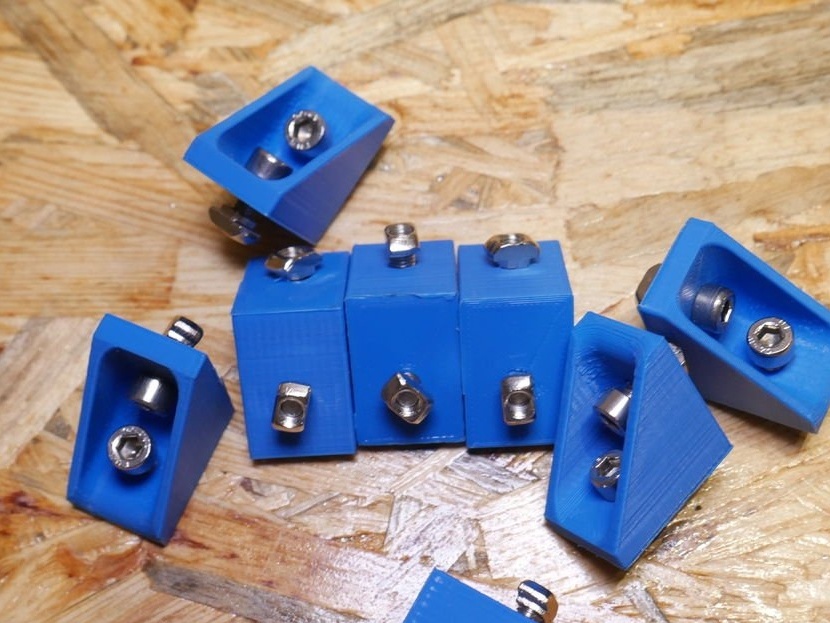
Further on the stepper motors are mounted corner joints.
Aluminum profiles are installed.

Sets cross profiles.
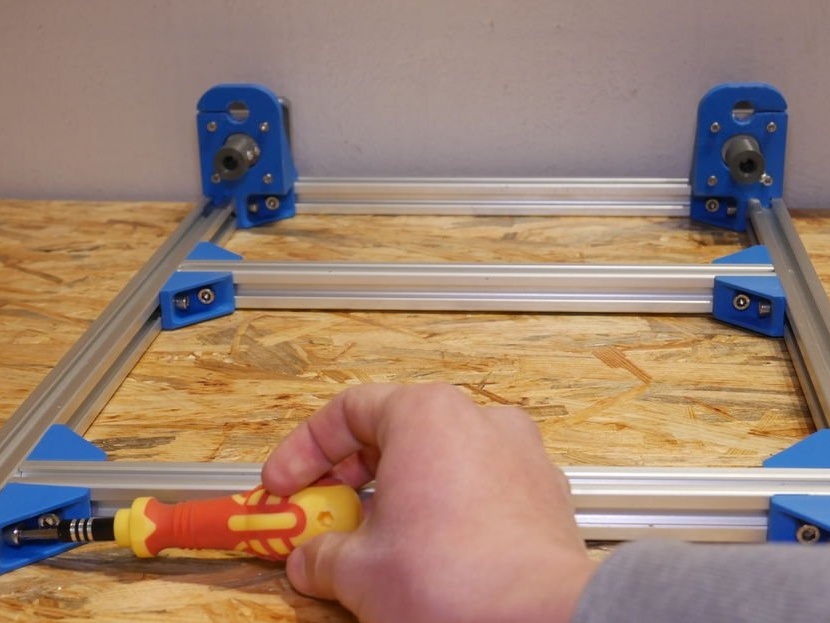
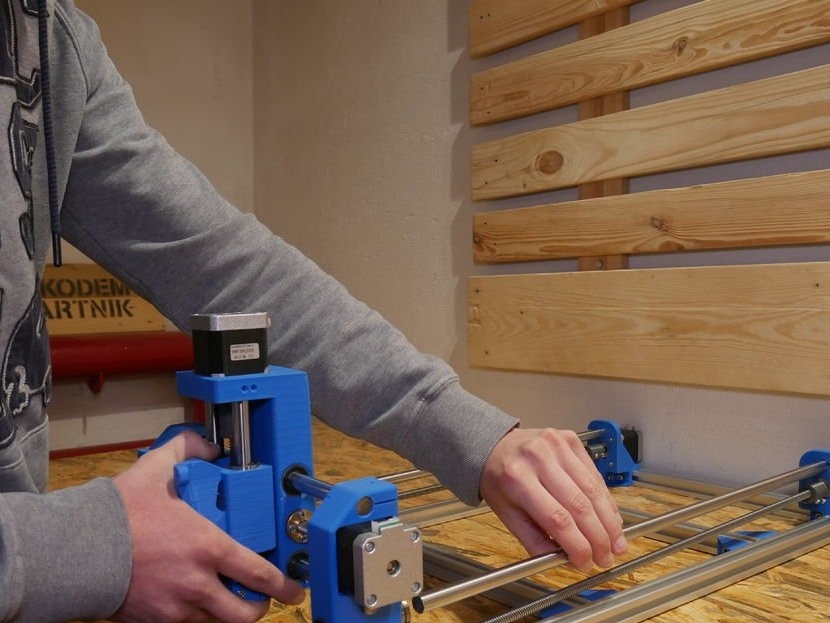
Installs on the frame, the previously assembled X / Z axis.
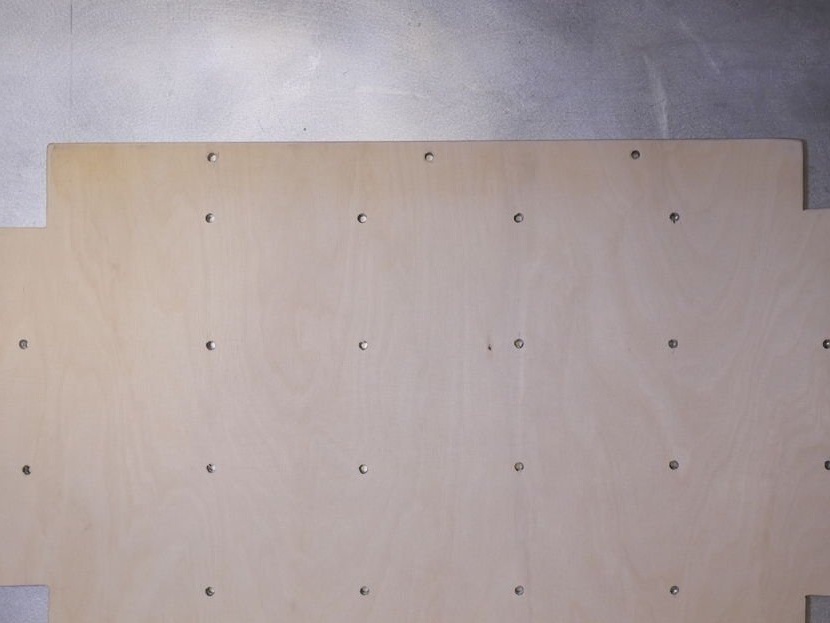
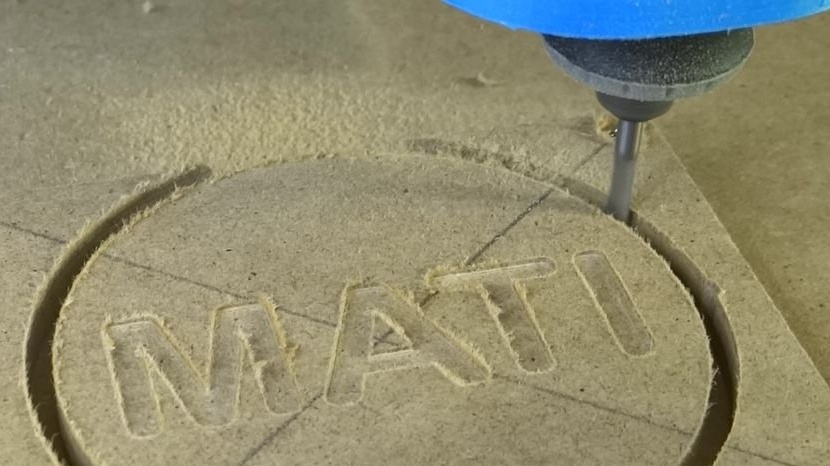
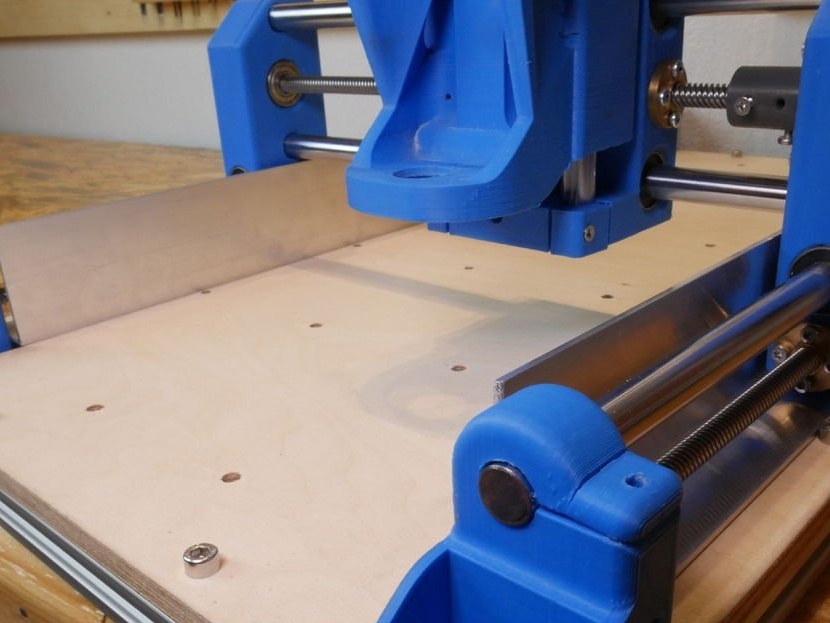
Step Six: The Table
The master made a desktop from plywood. I cut the piece to size, drilled mounting holes along the edge. On the working part of the table, I also drilled holes, and installed threaded inserts from below. They are needed for fastening workpieces. To prevent plywood from being damaged, a fiberboard sheet will be placed on top.

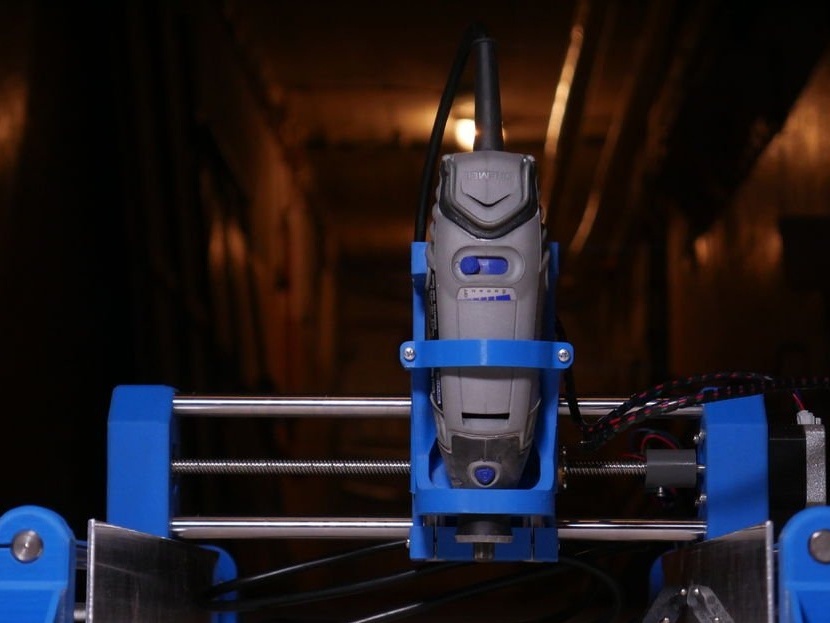
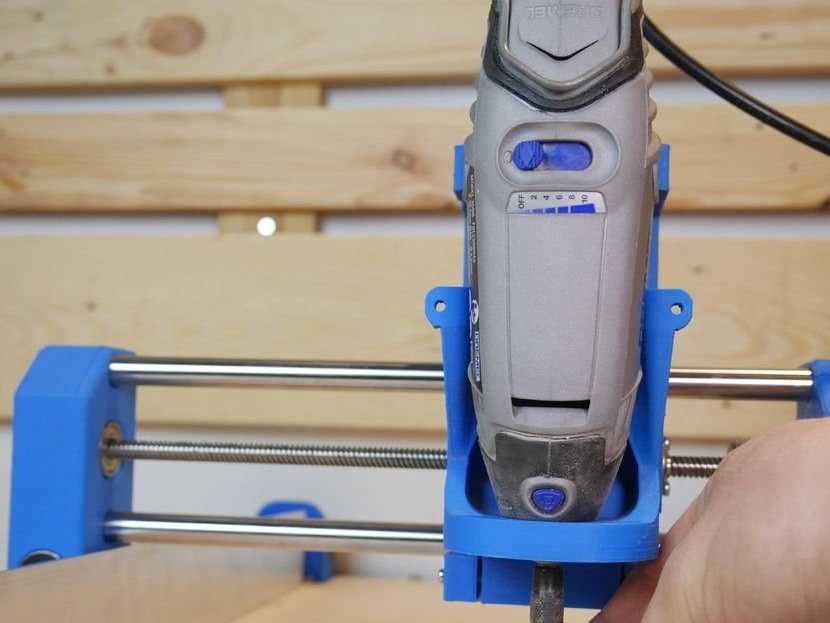
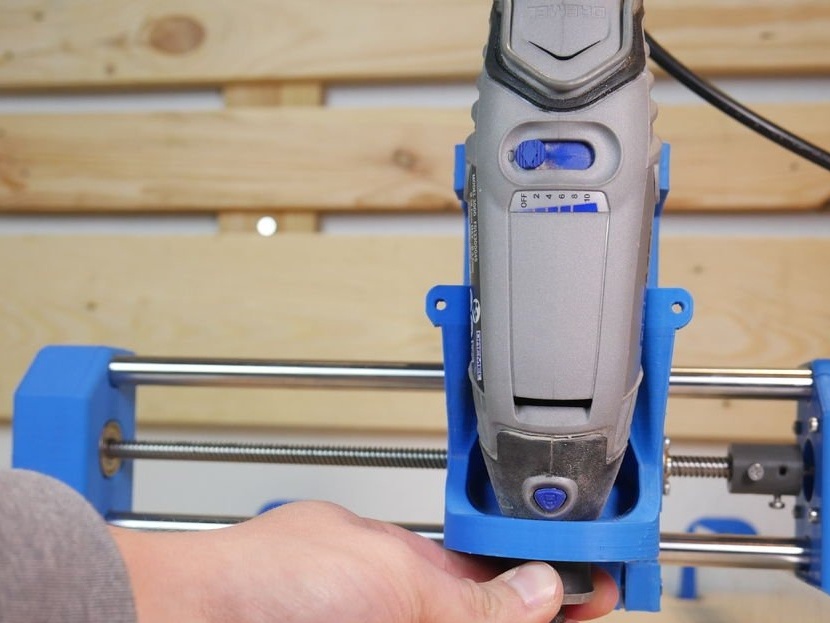
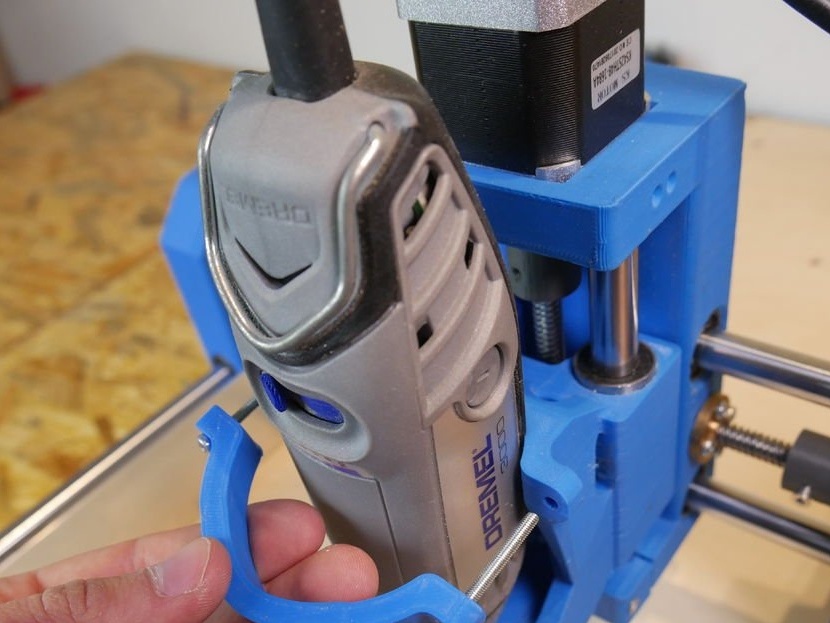
Seventh step: Dremel
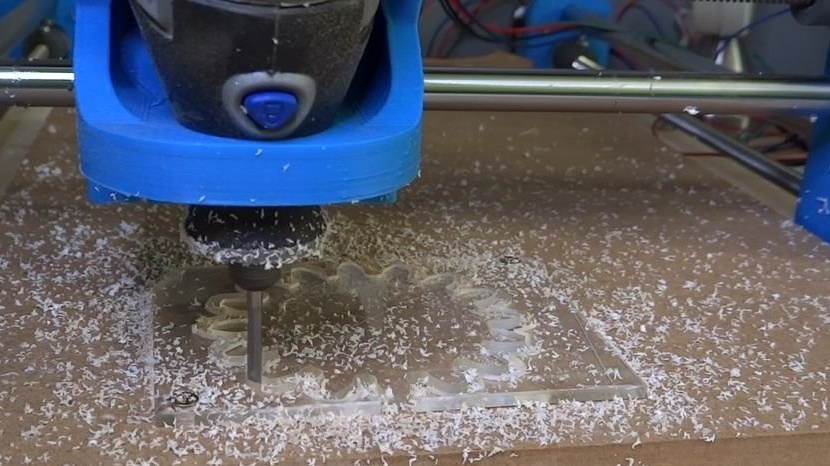
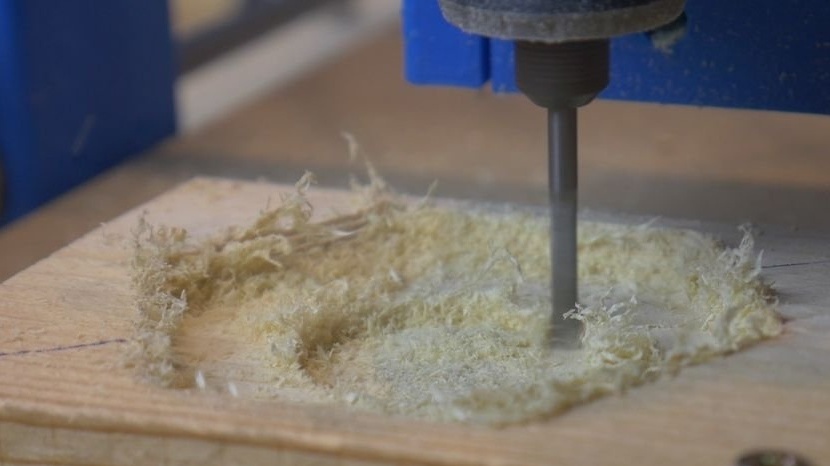
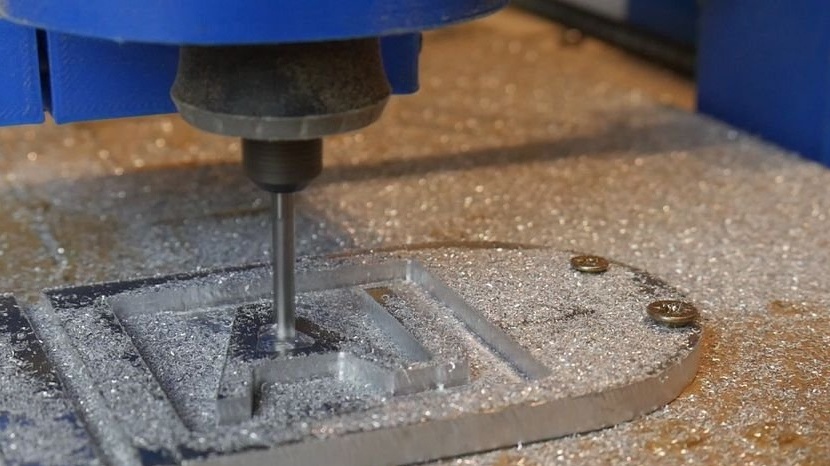
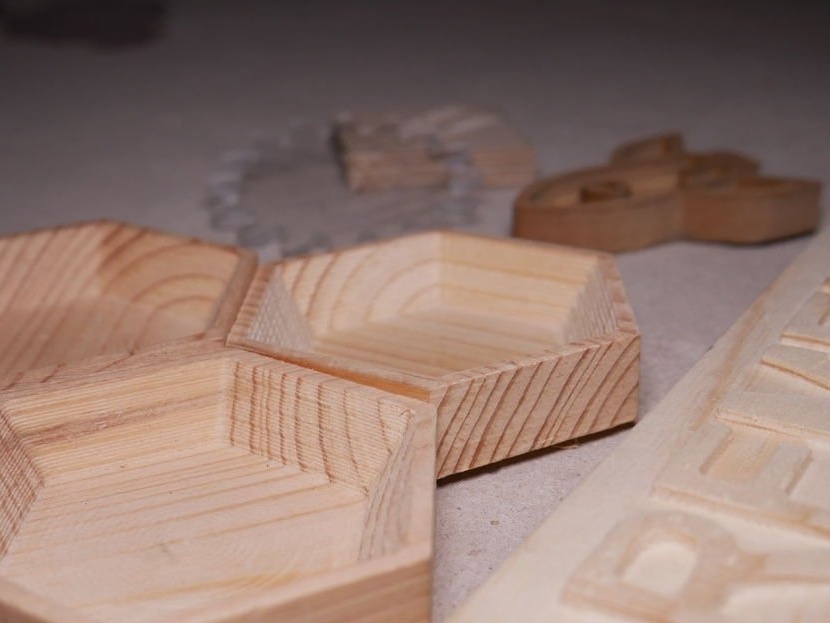
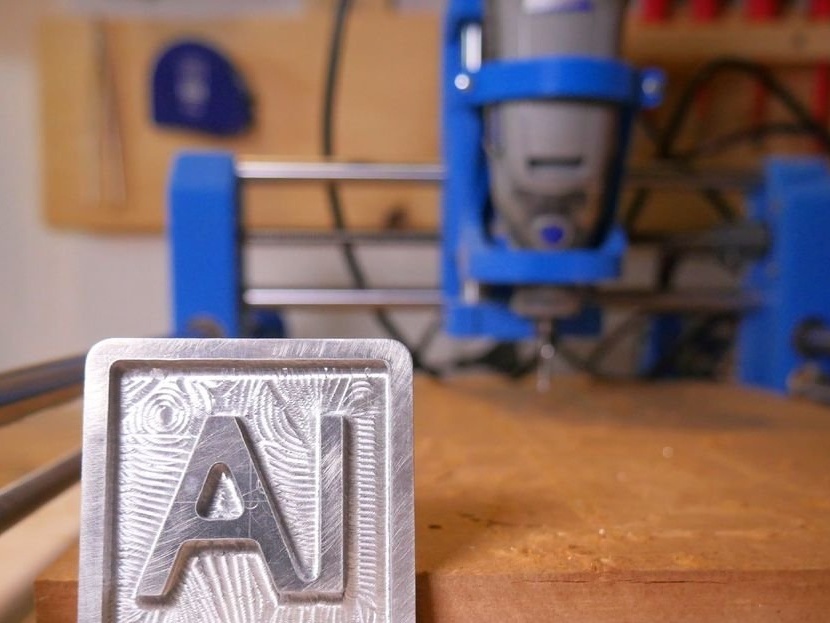
The master uses the Dremel 3000 on his machine. This tool is not ideal and it is difficult for him to process aluminum, but it is enough for processing wood or acrylic parts. In principle, you can also process aluminum parts, this will be demonstrated on video at the end of the article.
Some friends install the Dremel 4000 on which another spindle is mounted, and this extends the capabilities of the machine.
At the beginning of this project, the master wanted to add a relay to turn Dremel on and off using the G-code command, but because of some problems, he decided not to use it. Therefore, the engraver is turned on and the speed is regulated as standard, with the buttons of the Dremel itself.
Dremel fastens with a nut at the bottom of the engraver and clamp.
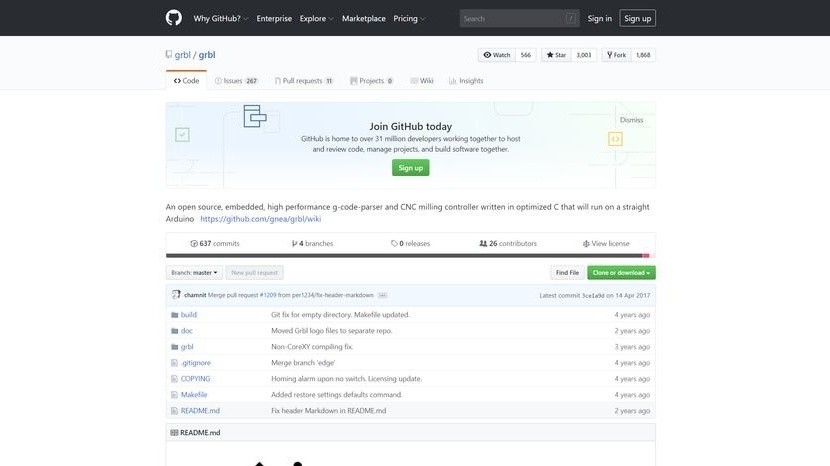
Step Eight: Firmware
To install GRBL on an Arduino, you will need an Arduino with a USB cable and software, which can be downloaded here: https://github.com/grbl/grbl
After downloading the .ZIP file from the link above, you can add it to the Arduino IDE as a library. Go to the sample files and open the example from the GRBL tab. You should see only one line of code, nothing more, this is normal. Connect the Arduino to the computer and download the program. And so, GRBL is installed on Arduino, you do not need to change any code. If you have problems with this step, try to find instructions on the Internet.
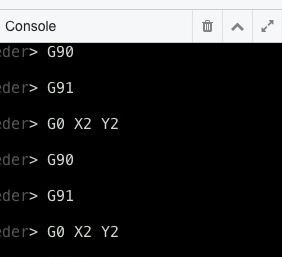
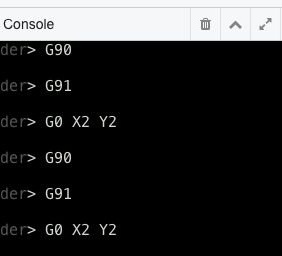
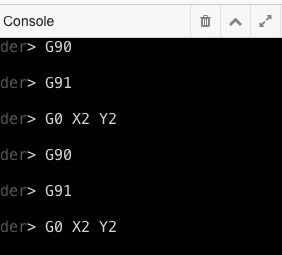
There is also one thing that needs to be changed, you can do it through a serial monitor in the Arduino IDE or a console in CNCjs.
All you need to do is send 3 simple commands:
$100 = 400
$101 = 400
$102 = 400
Send these commands separately. Depending on the resolution of the stepper motors you are using, you may need to use a value other than 400.
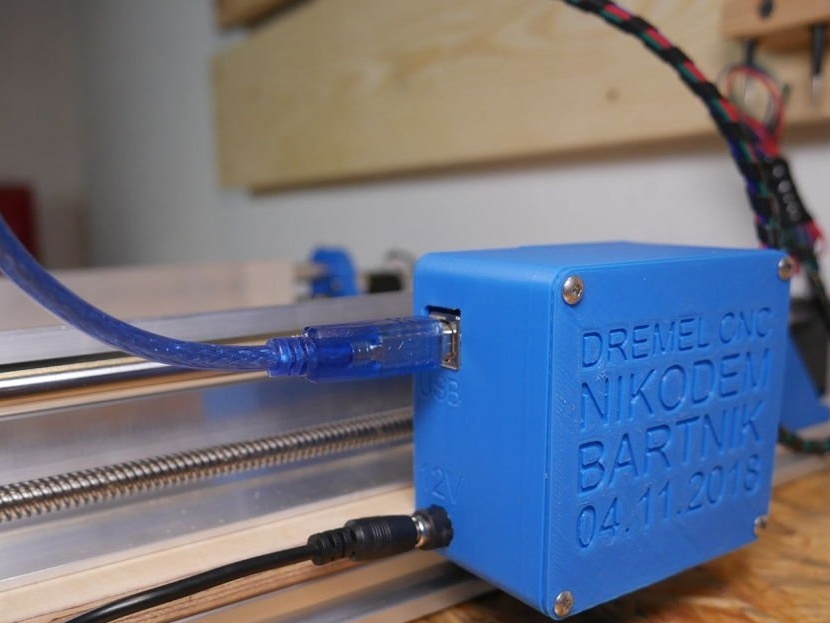
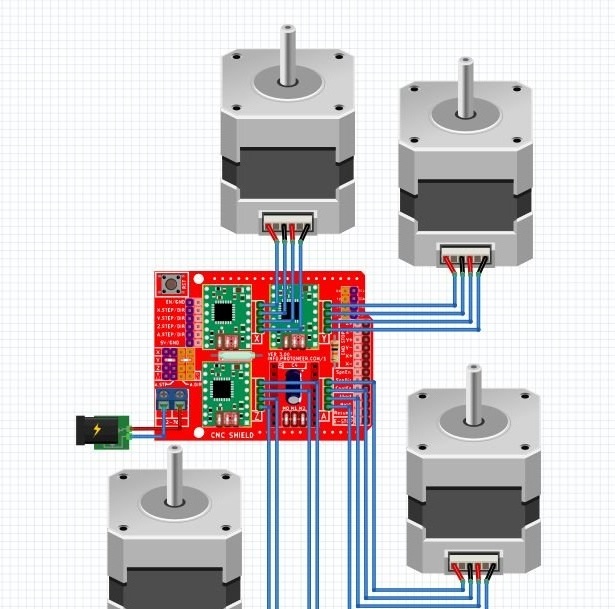
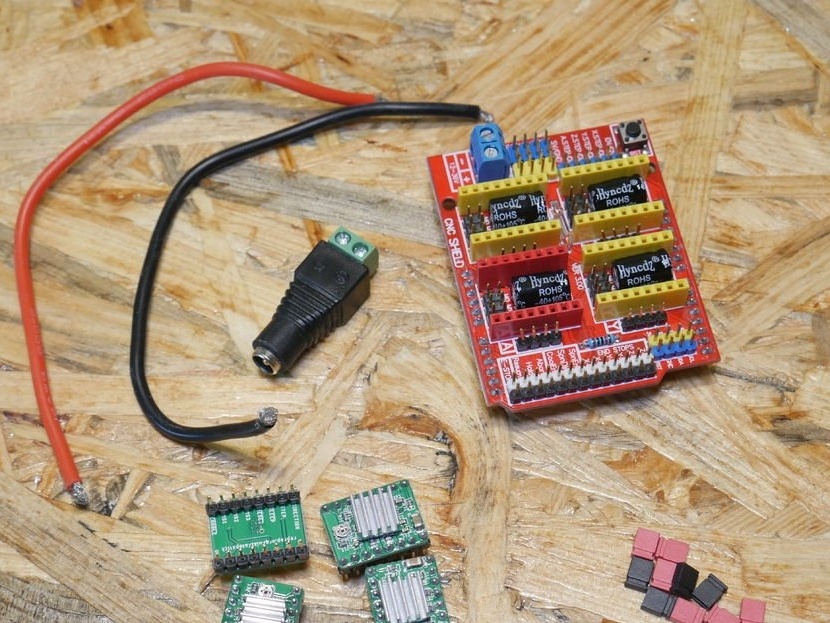
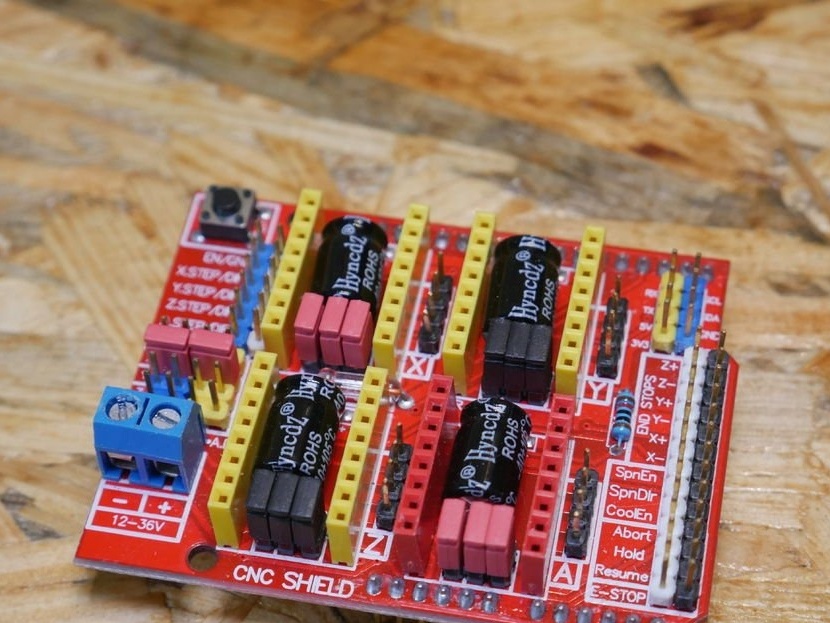
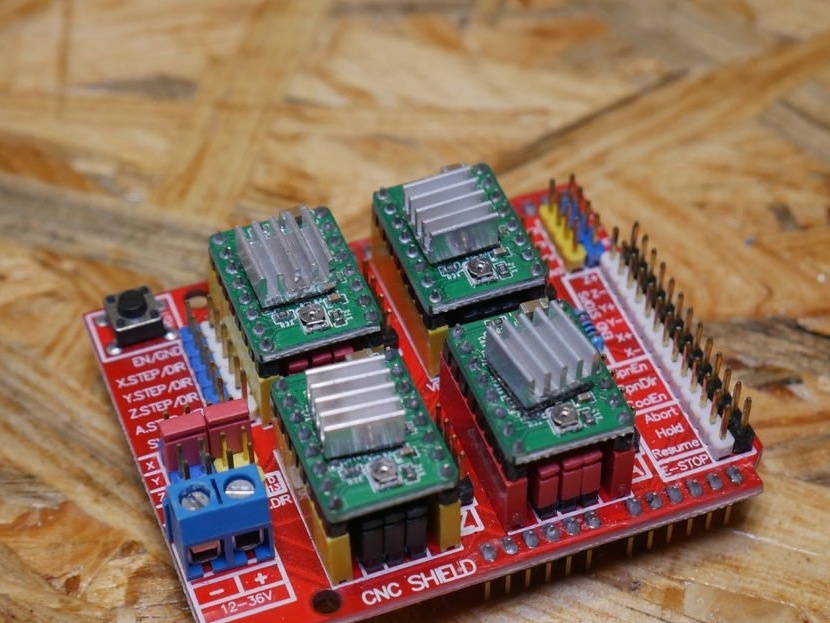
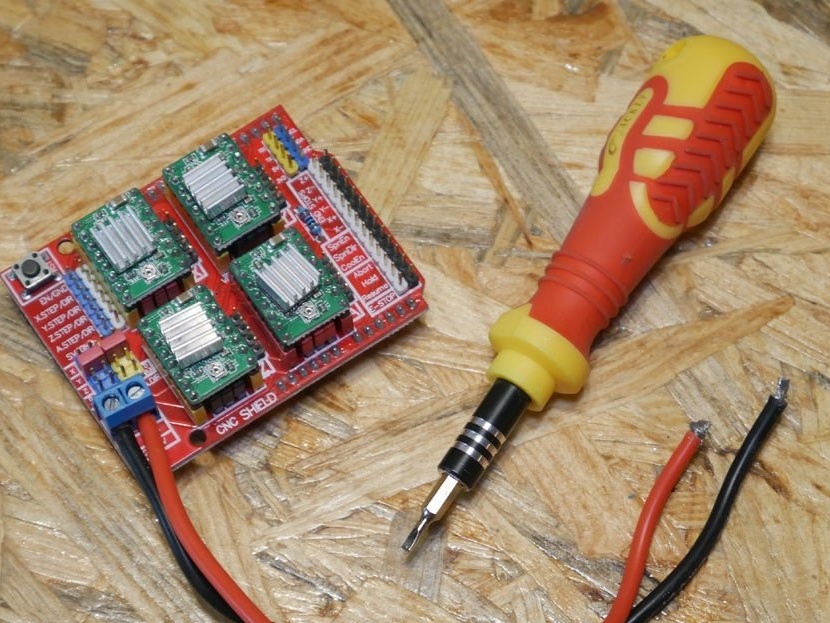
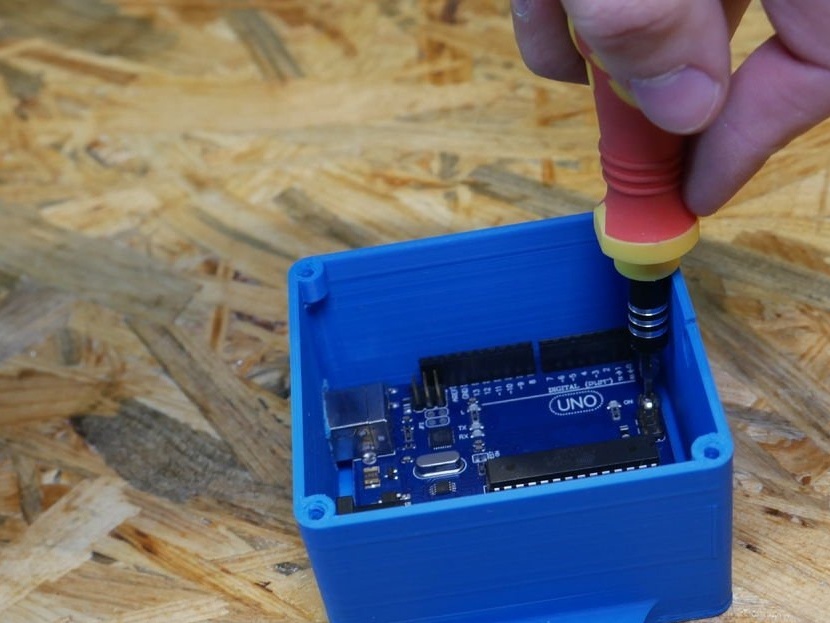
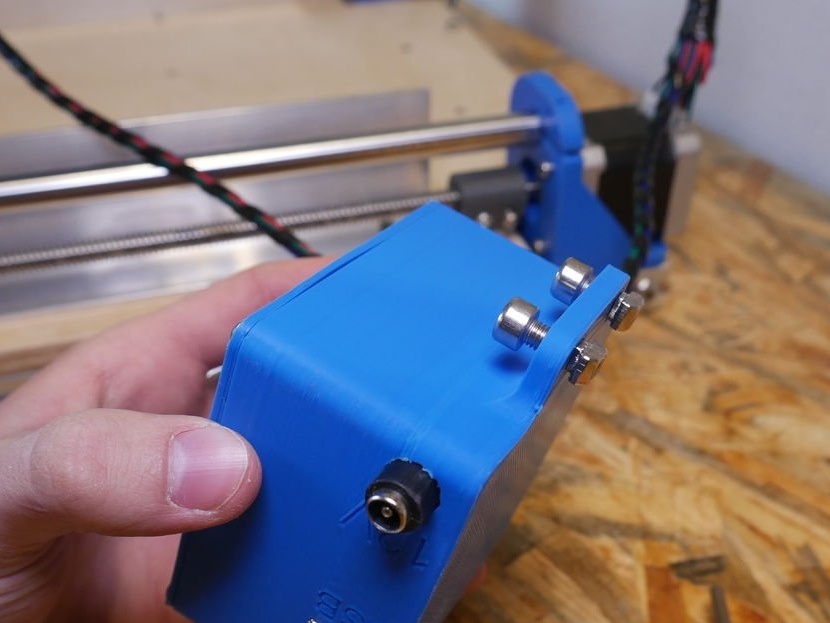
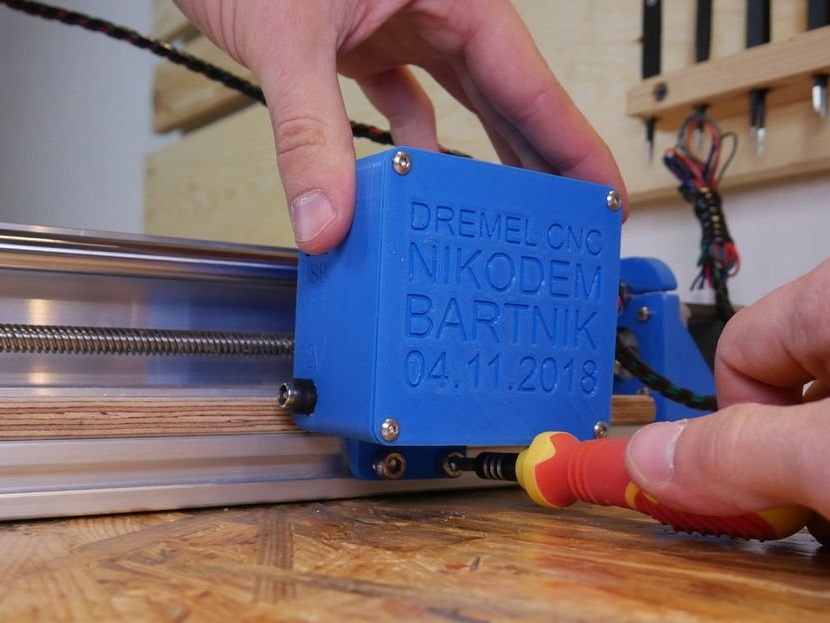
Step Nine: Electronics
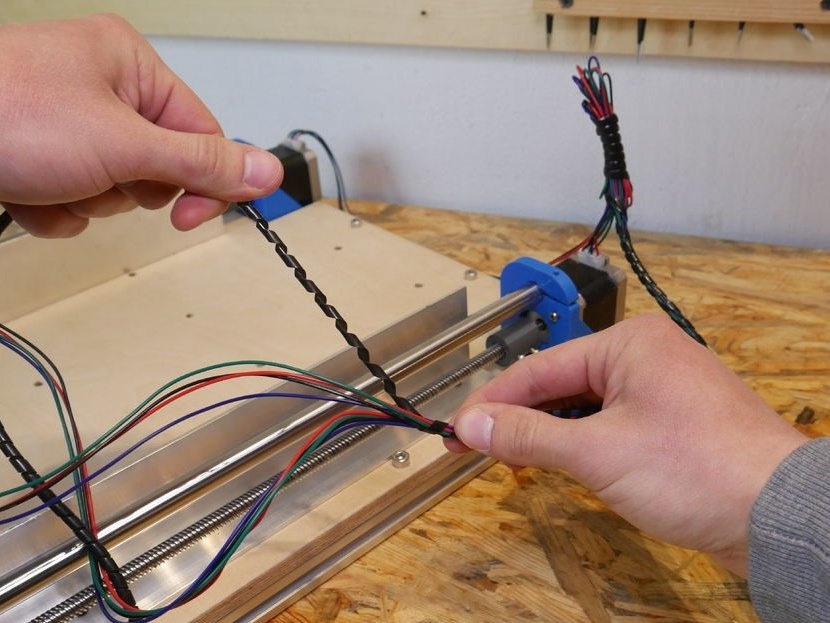
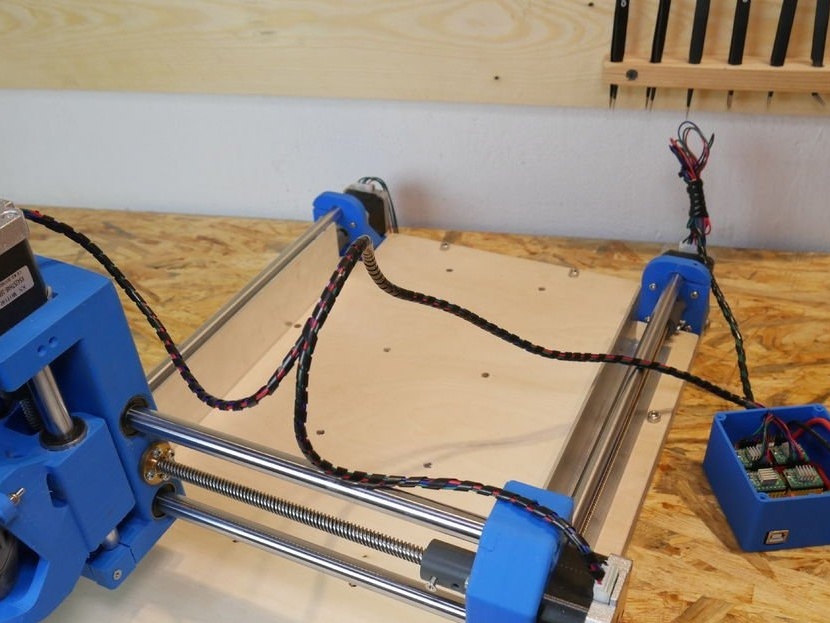
Next, the master installs the electronics and connects the stepper motors. When connecting, the master was guided by the instructions from this site.
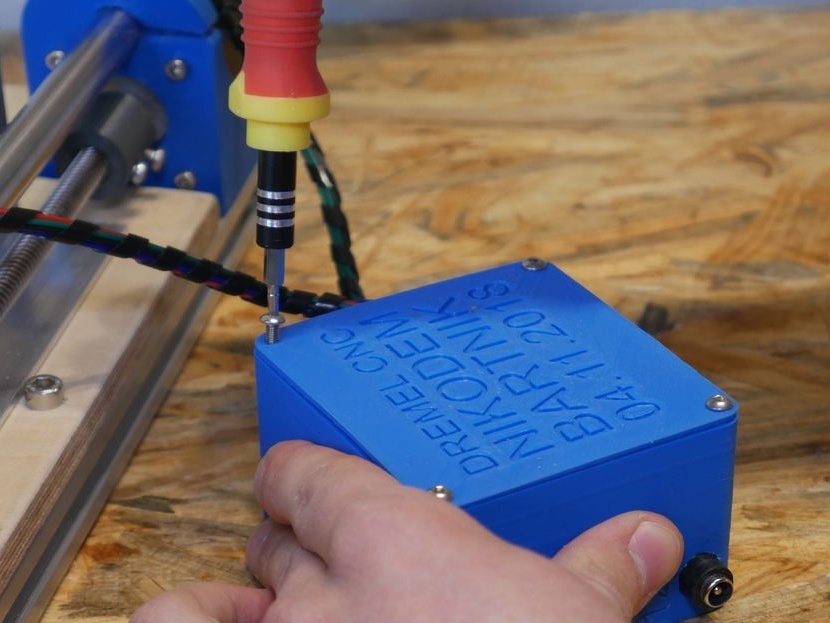
Install jumpers, then stepper motor drivers on the expansion board. Connects power connector, stepper motors, Arduino. Installs electronics in the housing. After assembly, it is necessary to check the operation of the stepper motors, specifically in which direction they are spinning. If necessary, incorrectly working, the engine turns off and turns over 180 degrees.
Step Ten: Nutrition
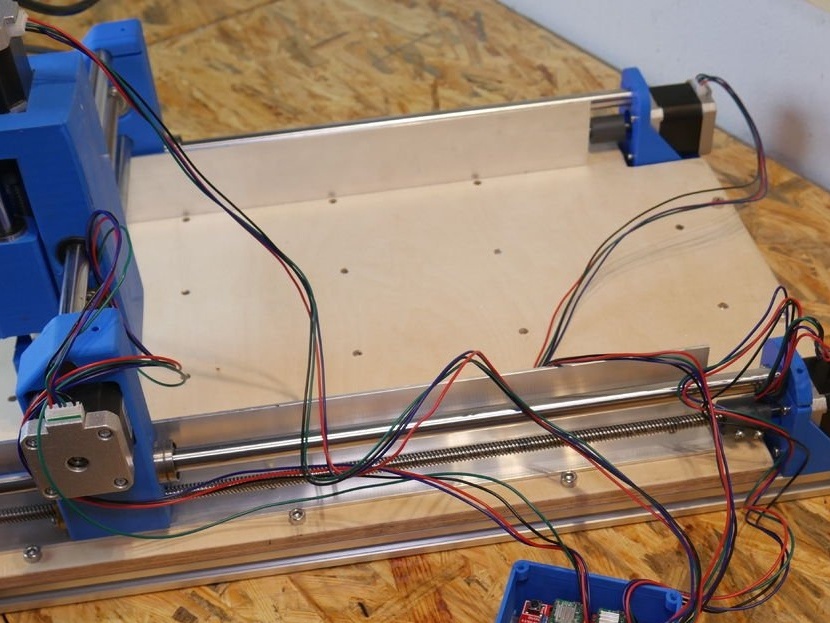
For power, the master uses a 12V 3A power supply.
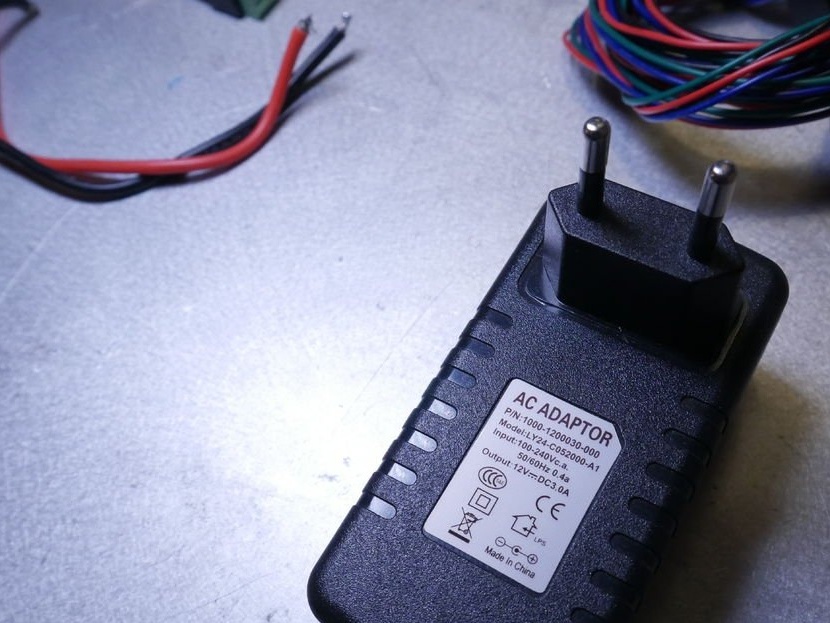
Wires must be wrapped and routed correctly so that they do not fall under the moving parts.
Step Eleven: Software
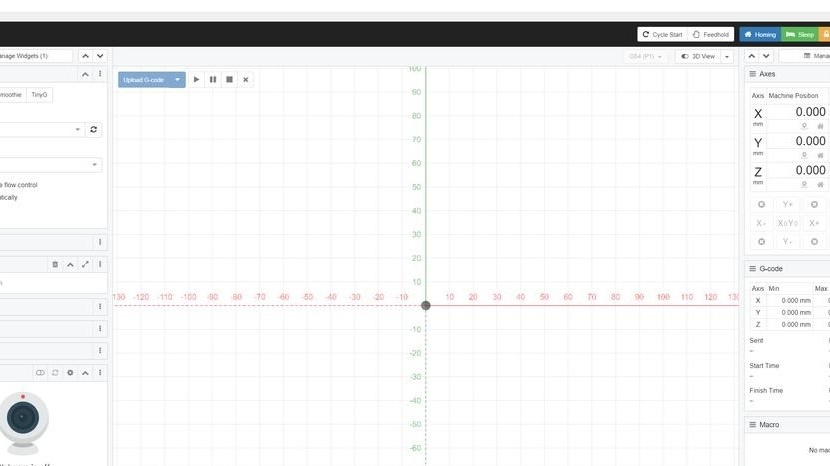
To control the machine using a computer, the wizard installs the CNCjs program from this resource.
The program is free and is installed on almost all operating systems.
If you have problems connecting to the machine: most likely, this is due to the wrong transfer speed, try changing the transfer speed in CNCjs to 11520.
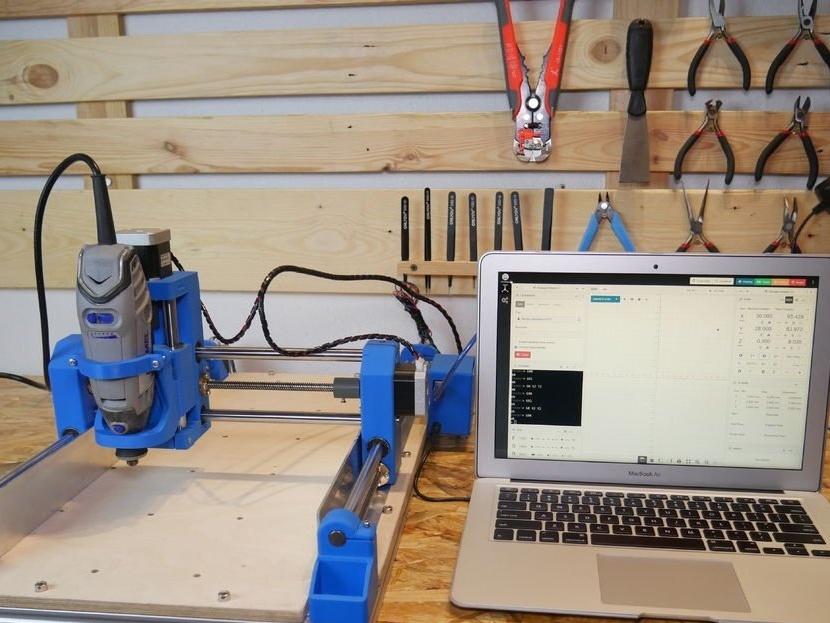
The master uses Fusion360 to design parts.
Step Twelve: Options
Choosing the right feed and cutting depth are important parameters. Start milling slowly and superficially, slowly increase speed. Be careful, the cutter is easy to break. Keep in mind that slow motion is just as bad as too fast; you must be between them to achieve the best results.
Here are the settings that the wizard uses:
Wood, MDF:
Feed: 800 mm / min
Depth of Cut: 3mm
Dremel switch 8/10
Acrylic:
Feed: 500 mm / min
Cutting depth: 1 mm
Dremel switch 6/10
Aluminum:
Feed rate: 800 mm / min
Depth of Cut: 0.2mm
Dremel at full speed
The master created his project for many months. As the machine was made and adjusted, he uploaded a video. Over time, the master created a group in. You can discuss a problem in a group or propose your own solutions. The group already has about 1,200 people. Many of them made their machines based on the work of the master. Some masters finalized the products with their original solutions. Based on this machine, some friends made laser cutters and plotters. You can get acquainted with these materials either by going to the group, or by clicking on the "Source" link at the end of the article and scrolling down the page.

A few examples of the machine.

The wizard gives a series of videos with examples of the machine, with settings, etc., let's see some of them.
Machine assembly and setup.
Examples of work.
The rest of the video can be found on the author’s page or at the source link at the end of the article.