

While working in an educational institution I was repeatedly faced with the problem of holding all kinds of intellectual games, such as “my own game” and “Brain ring”. Thus the idea came up to come up with a system for determining the "first pressed button."
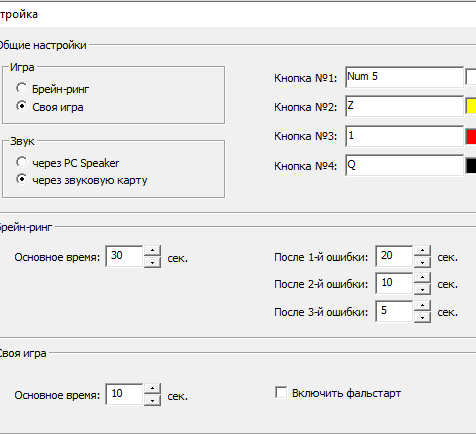
The main selection criterion was the cheapness and ease of execution in order to still be able to apply the creation in the work of an educational institution circle. After a brief interruption of the Internet, the BrainSystem program was found (link further)
Tools required:
• Soldering iron
• Thermogun
Materials for the manufacture of:
• Old keyboard
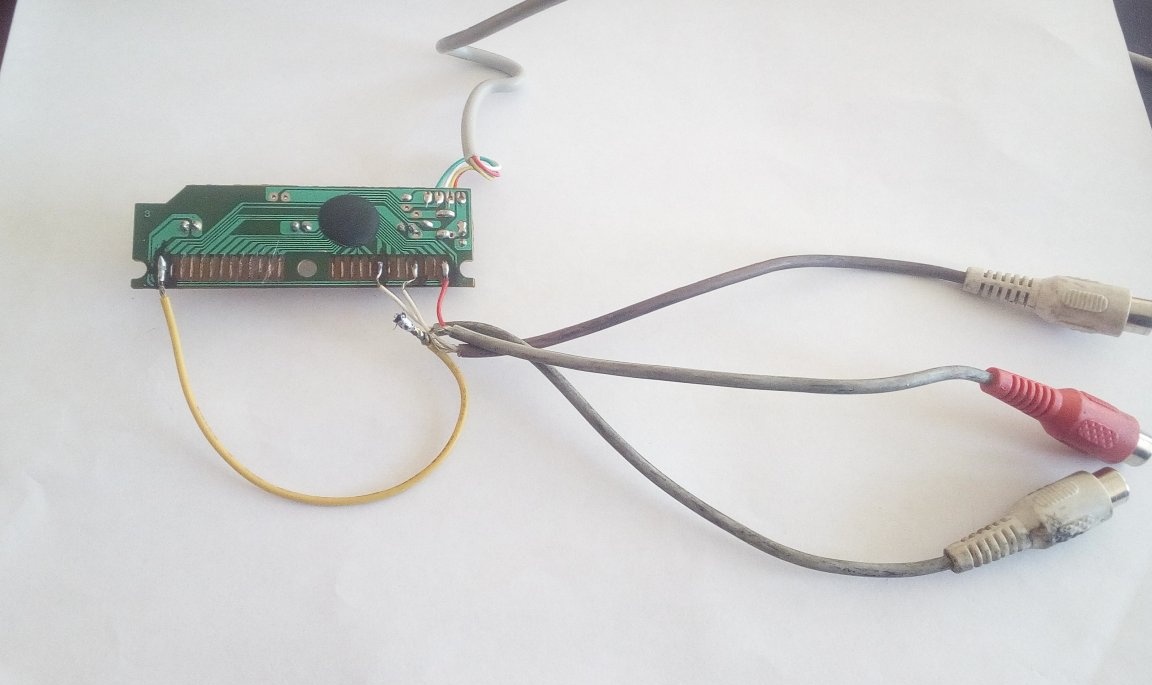
• Tulip connectors (mother-to-mother)
• Box for housing
• Buttons without fixing or will be described later on how to do it yourself
Which uses the keyboard keys to play. We understand that within the audience it is inconvenient and not practical to use one keyboard for 3-4 students, so I decided to sacrifice an old keyboard with a PS / 2 connector in which not all keys worked.
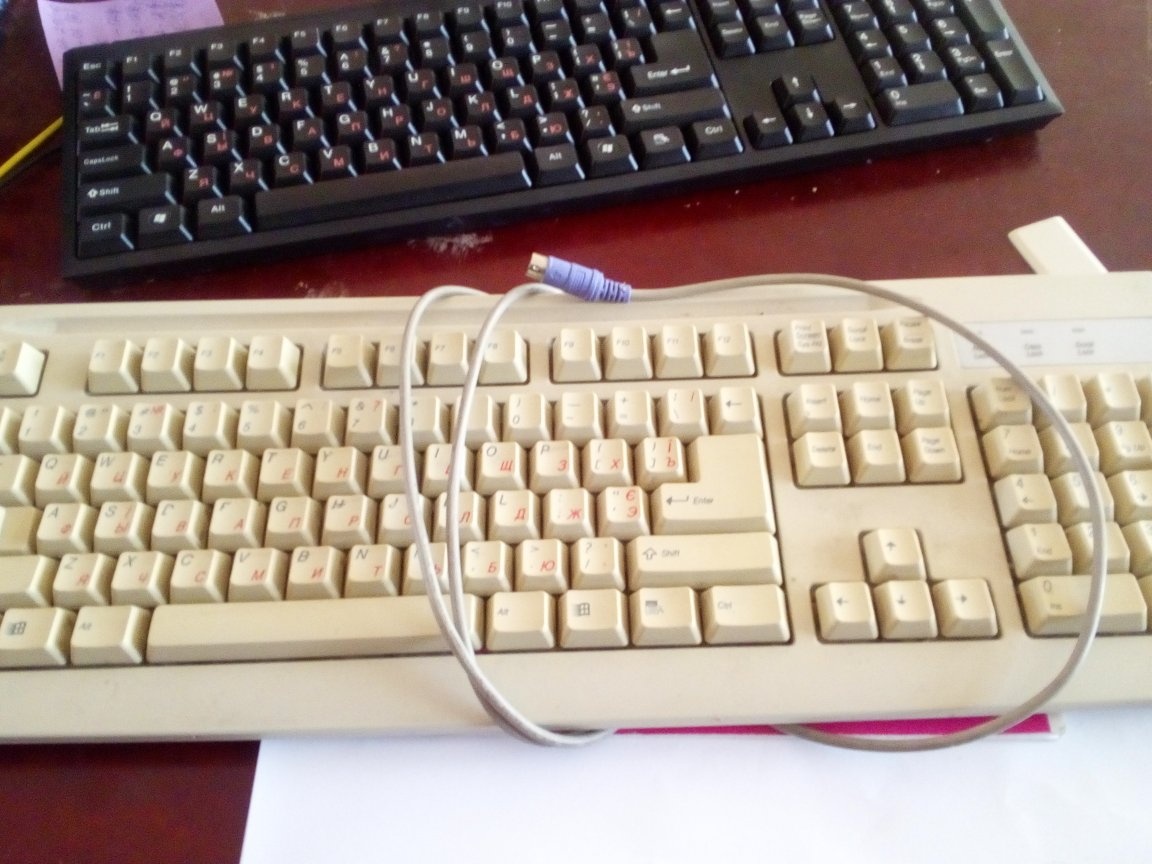

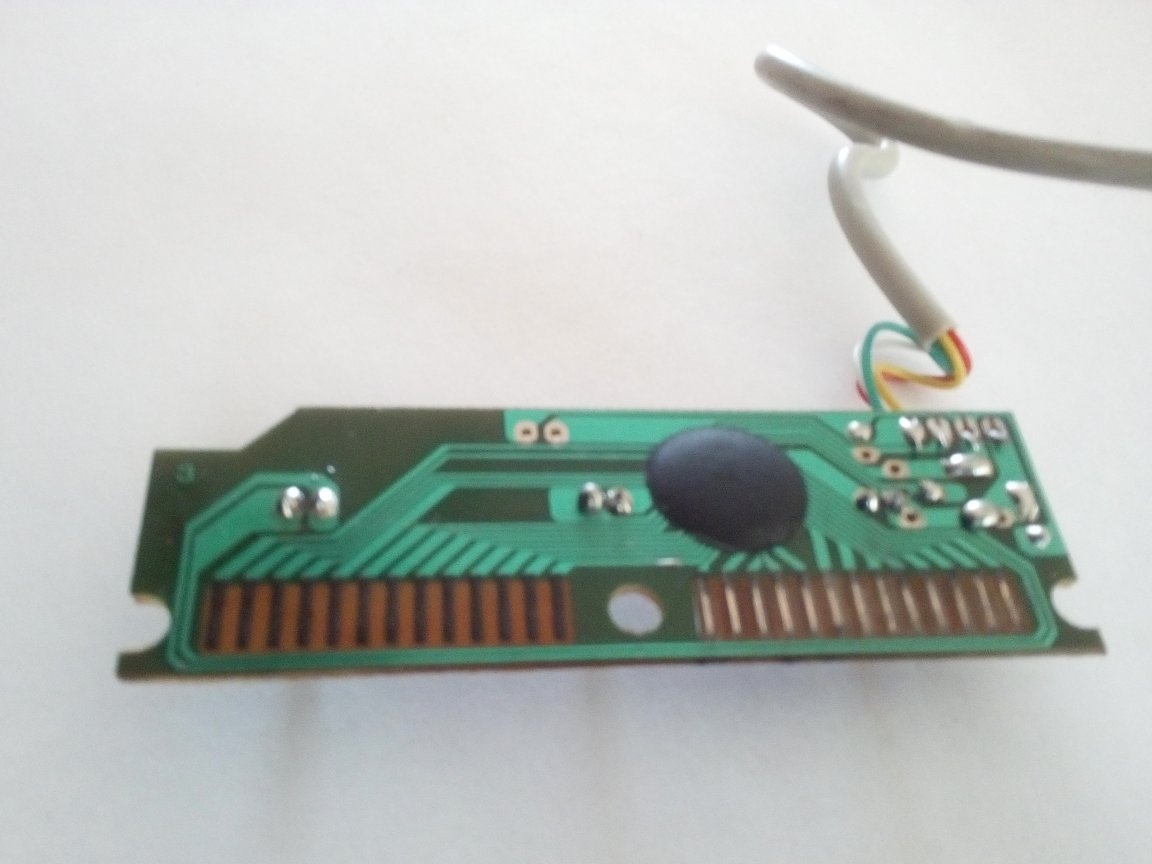
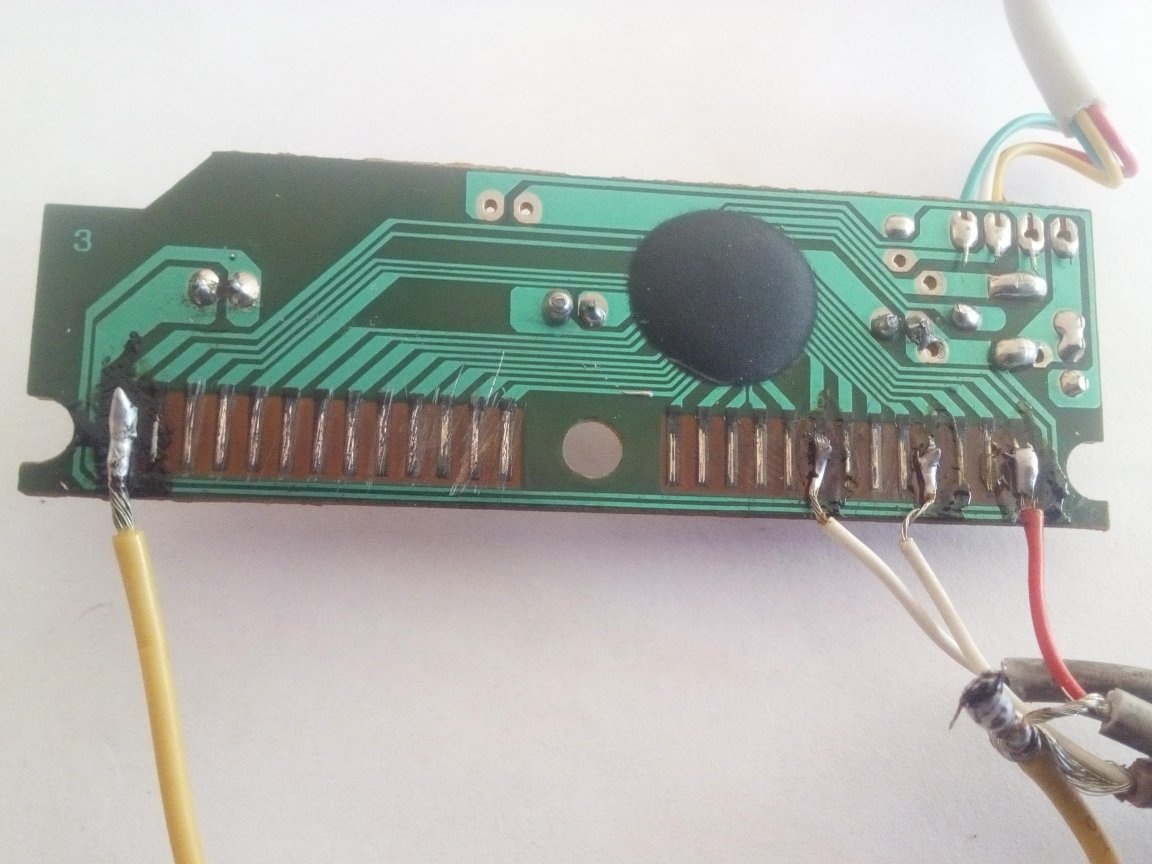
After dissecting the keyboard in our hands, we still have such a board with a microcircuit and a number of contacts. On the right, the contacts are stripped to solder, on the left, in pristine condition.

Then we take a suitable box and install a board in it, in the box the board is fixed with a self-tapping screw through the provided hole (it is important that the self-tapping screw does not touch the contacts), and the wires are fixed with hot-melt adhesive. We cover the box with azure on wood.
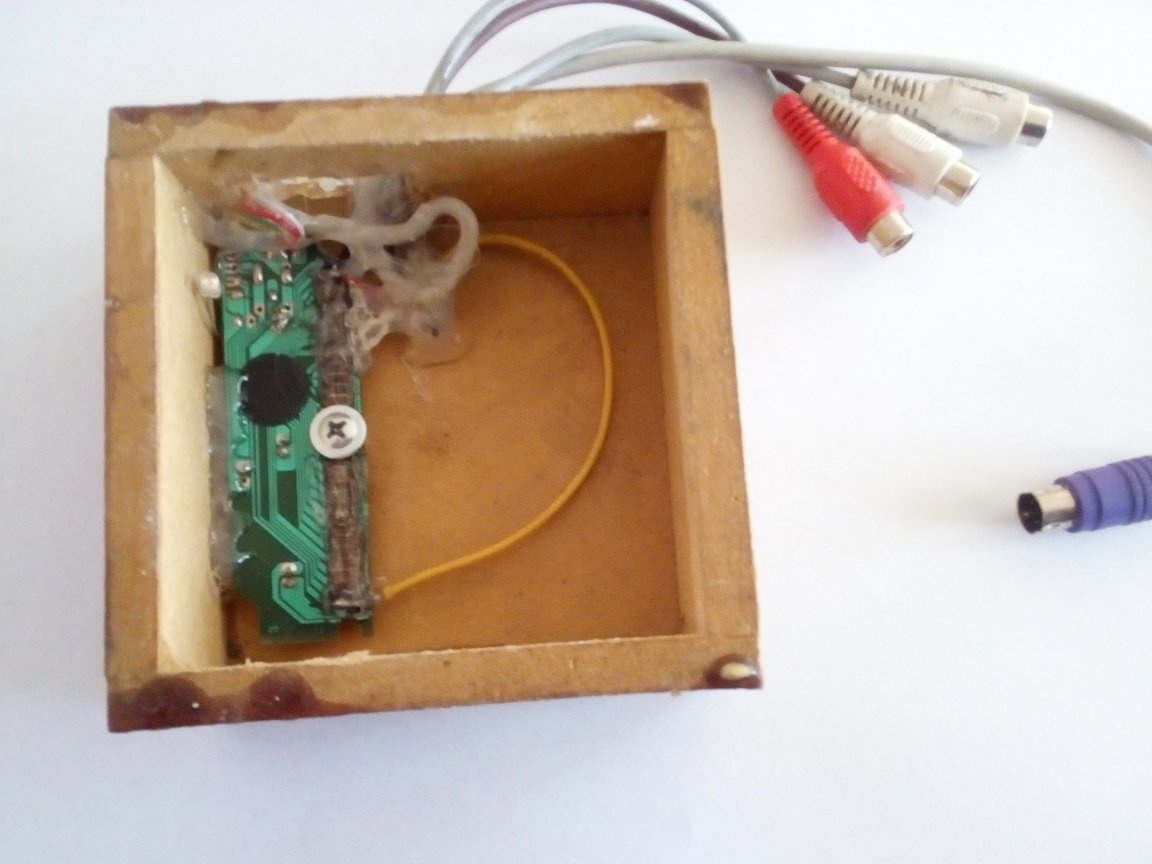
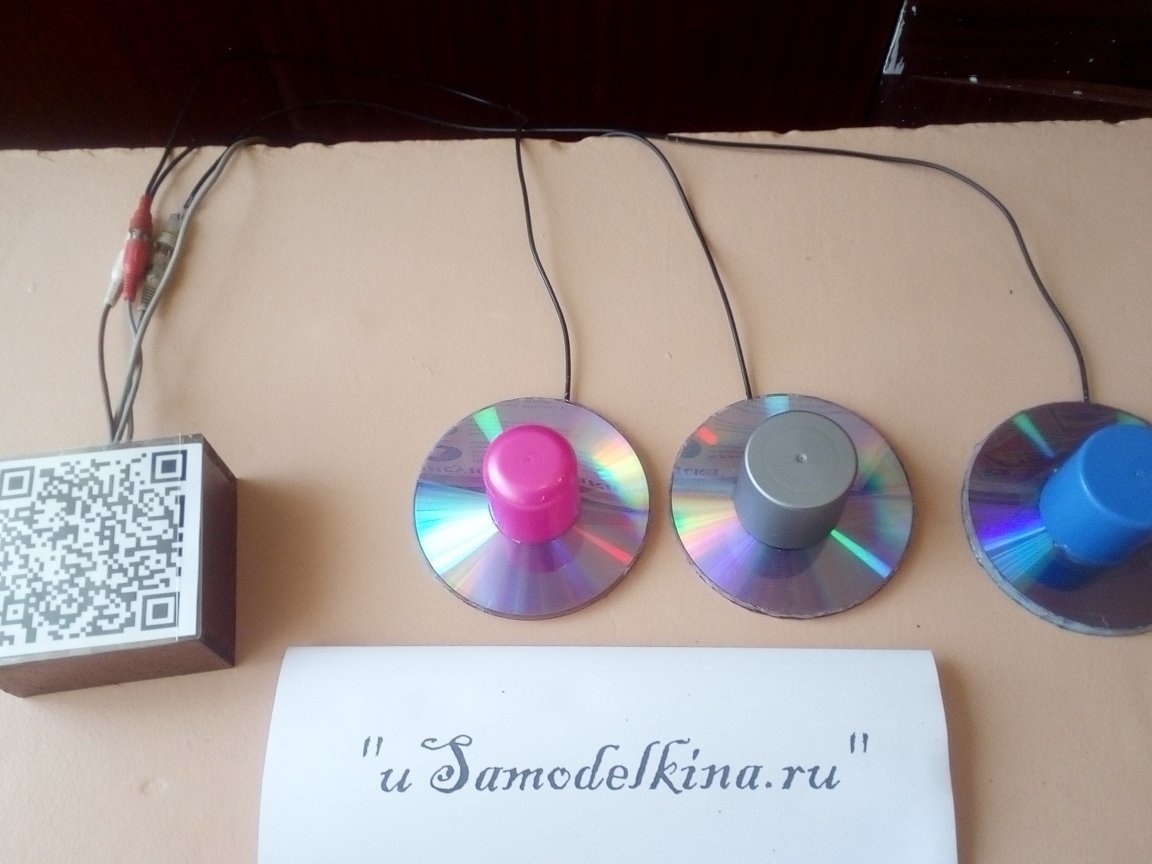
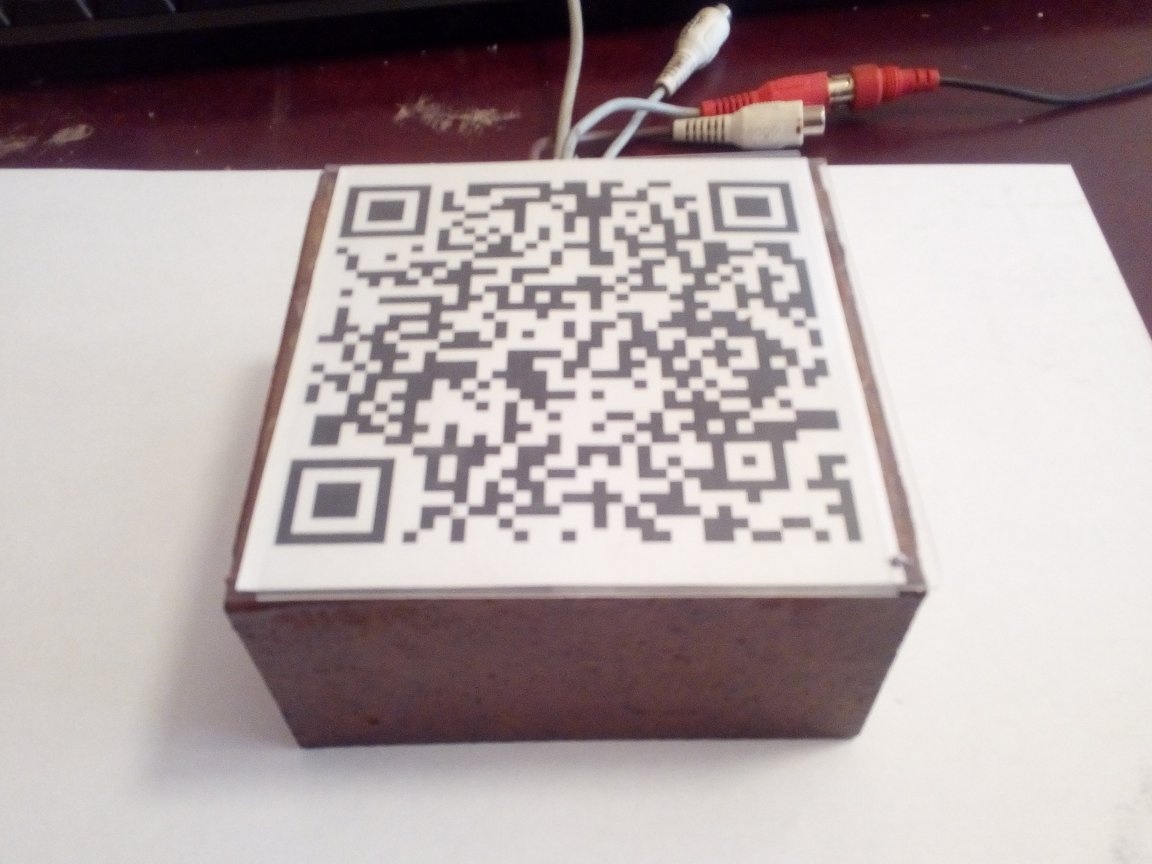
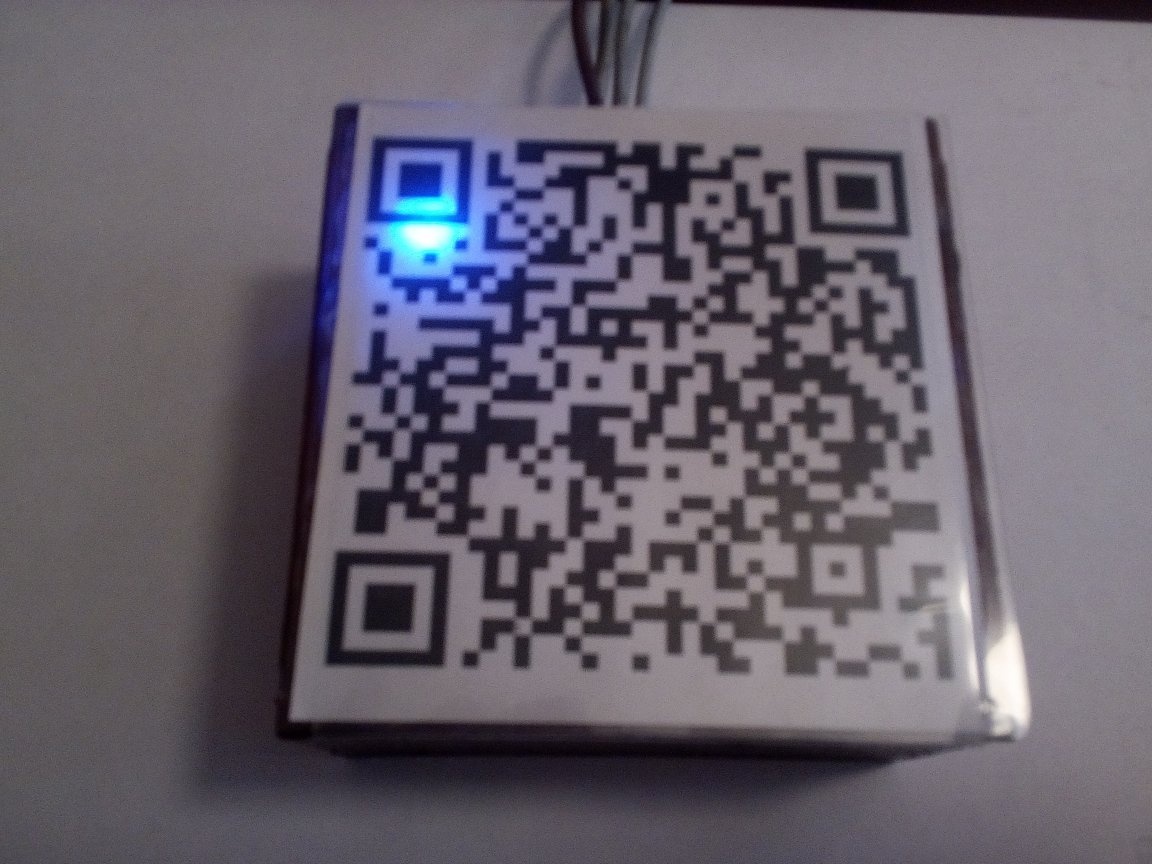
The box cover is made of two layers of transparent plastic between which we attach a QR code with a link to the program. The NumLock indicator is soldered to a bright blue LED.
Game buttons
It remains to make buttons for the game. And we have three “tulip dad” connectors with wires and you can solder the buttons you bought for door bells to them. But due to the fact that we have budget and creative buttons, we do do it yourself.
For this we need:
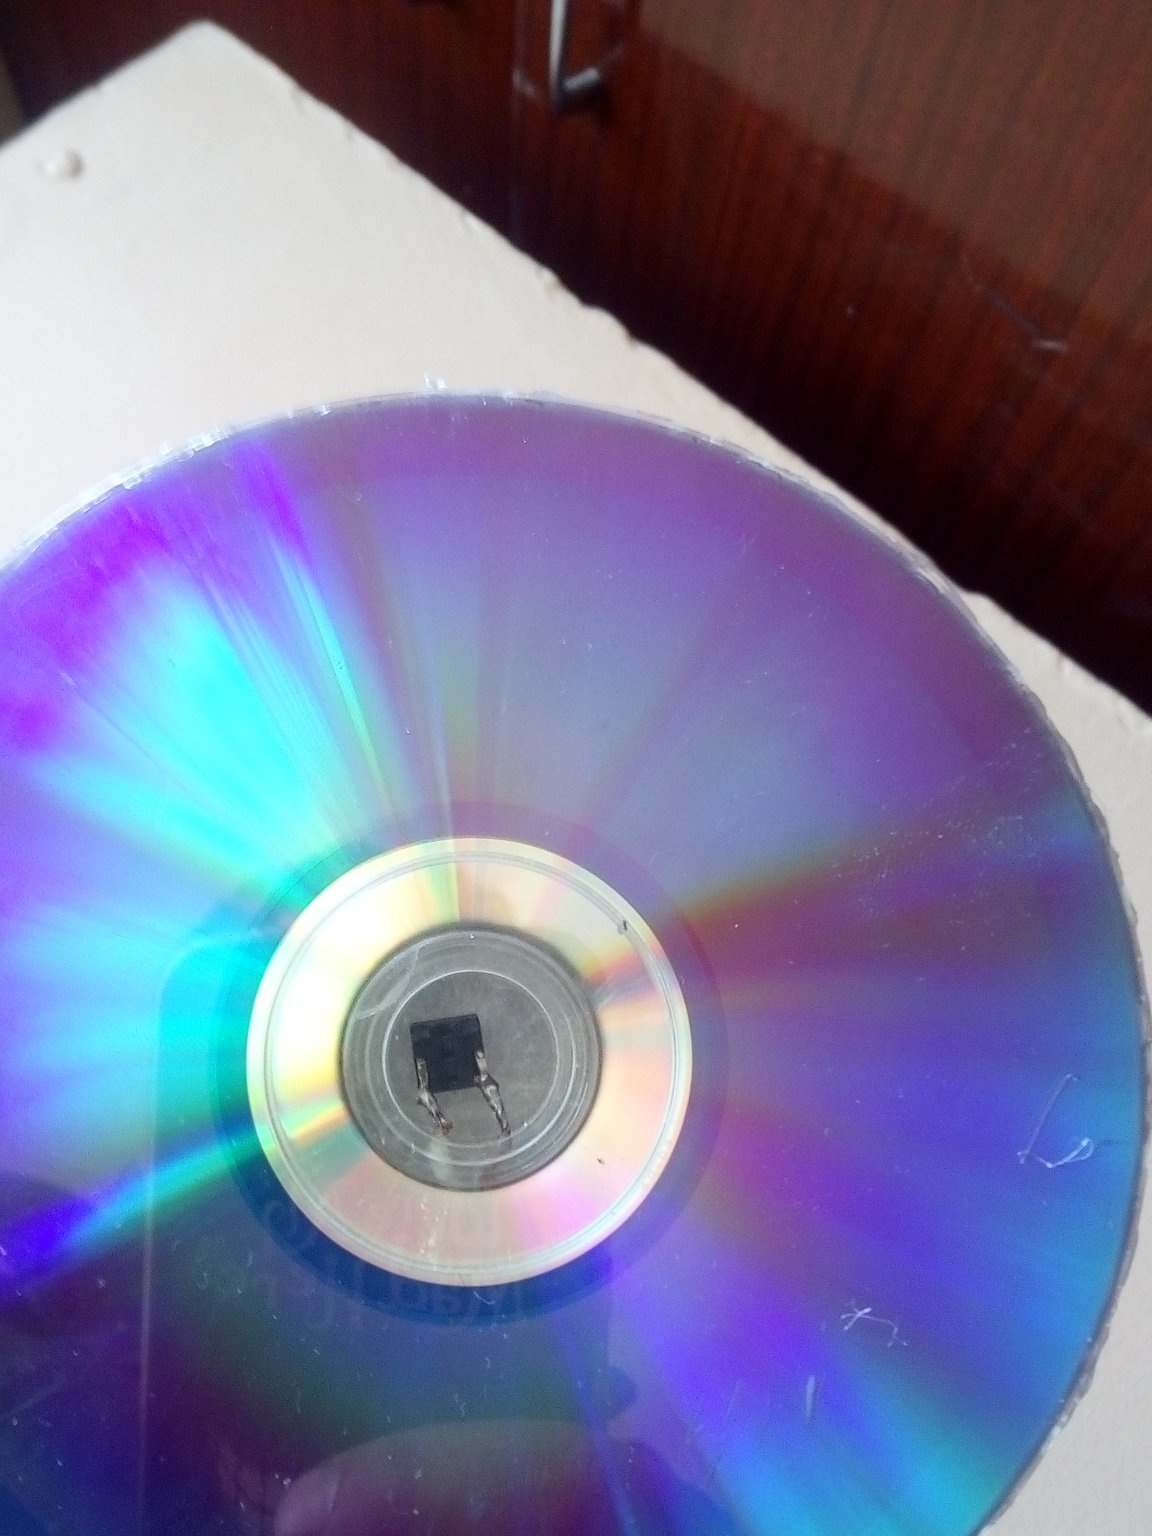
• Clock button - 3pcs. (can be removed from the old equipment)
• CD / DVD - 6 pcs.
• Lids for spray cans or the like - 3pcs
• Pieces of plastic 2x2cm
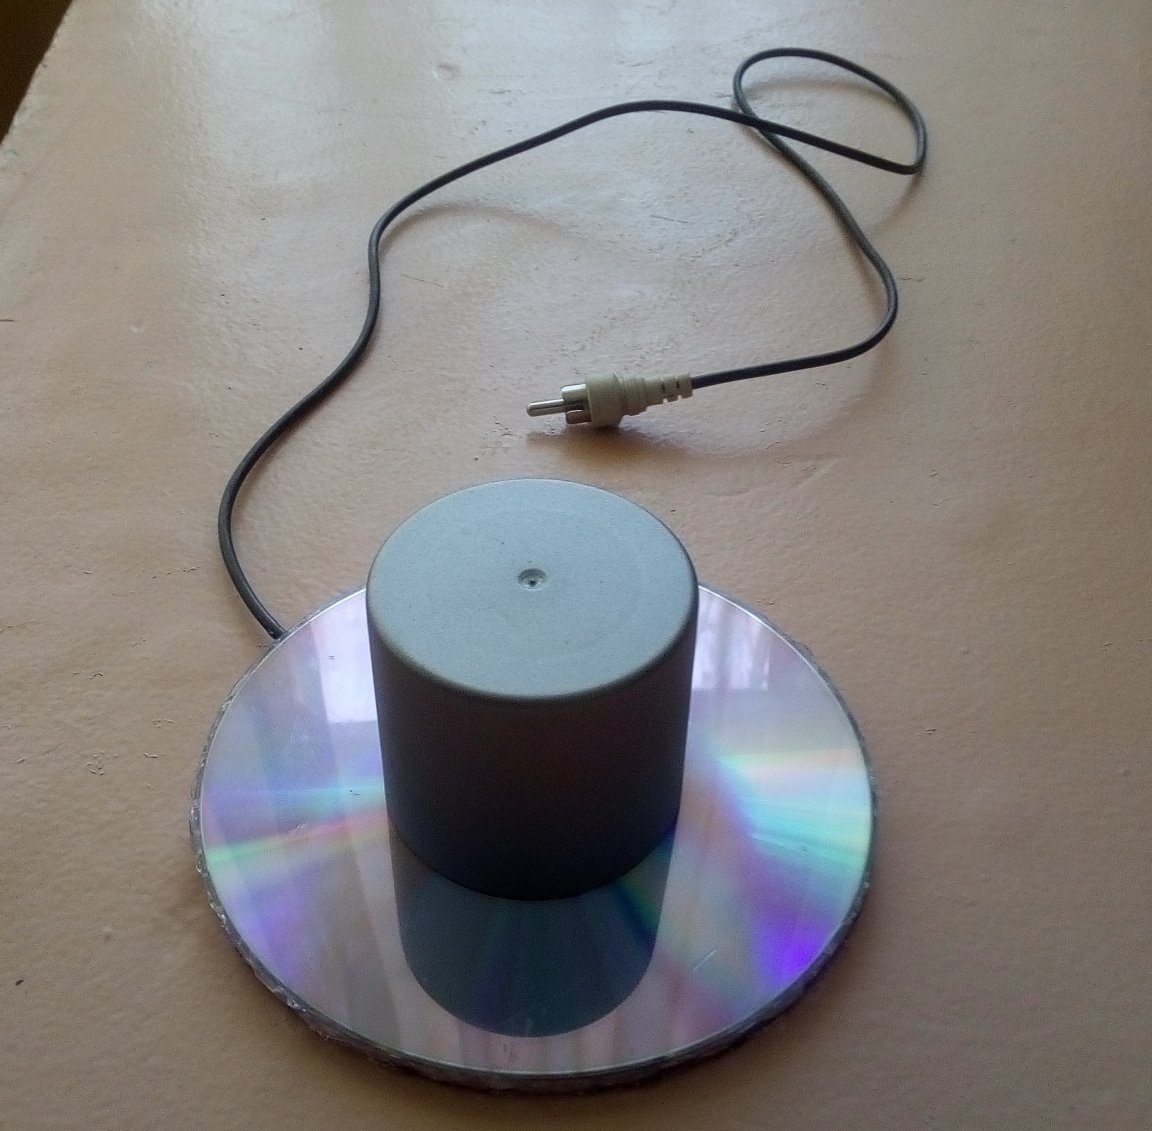
• “Tulip” connector with a wire -3pcs.
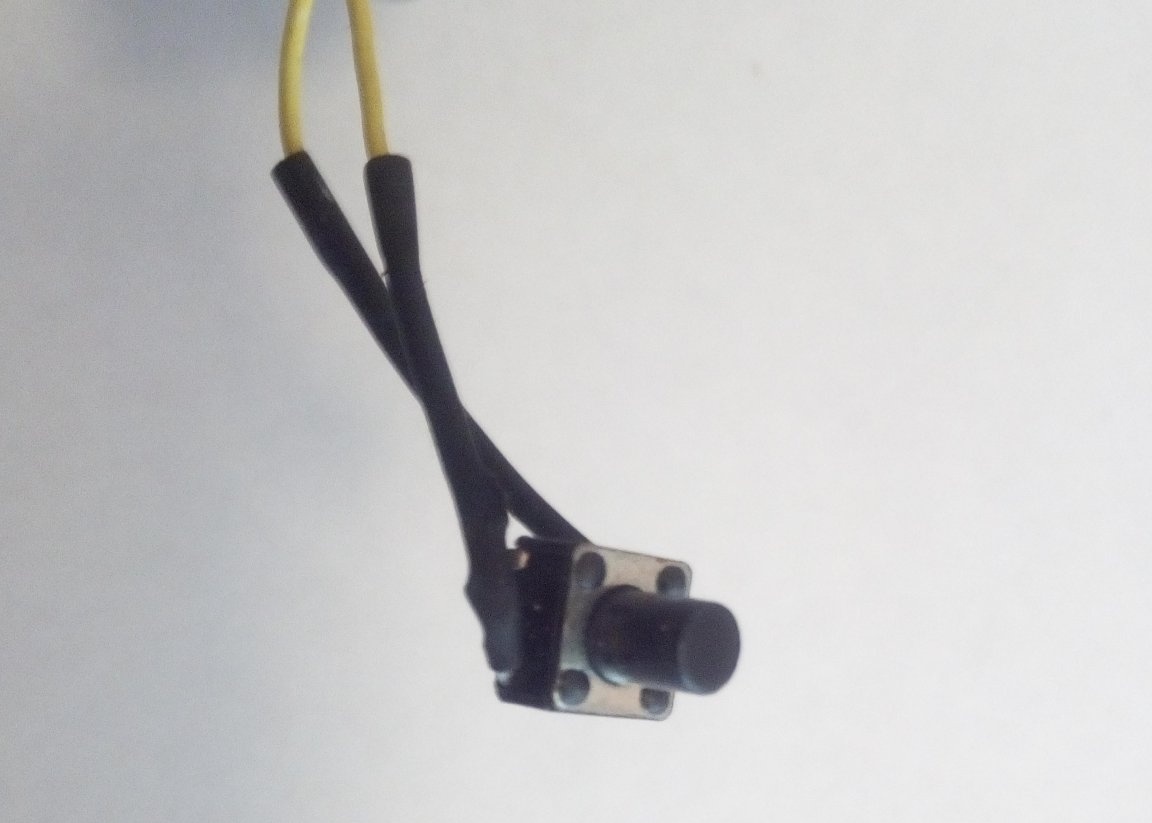
We solder wires of the required length with a “tulip” to the clock buttons. Using glue and a piece of plastic, we close the holes in the disks. And we put the clock button in the middle of the disk (as shown in the photo) and fix the wire with hot-melt adhesive.
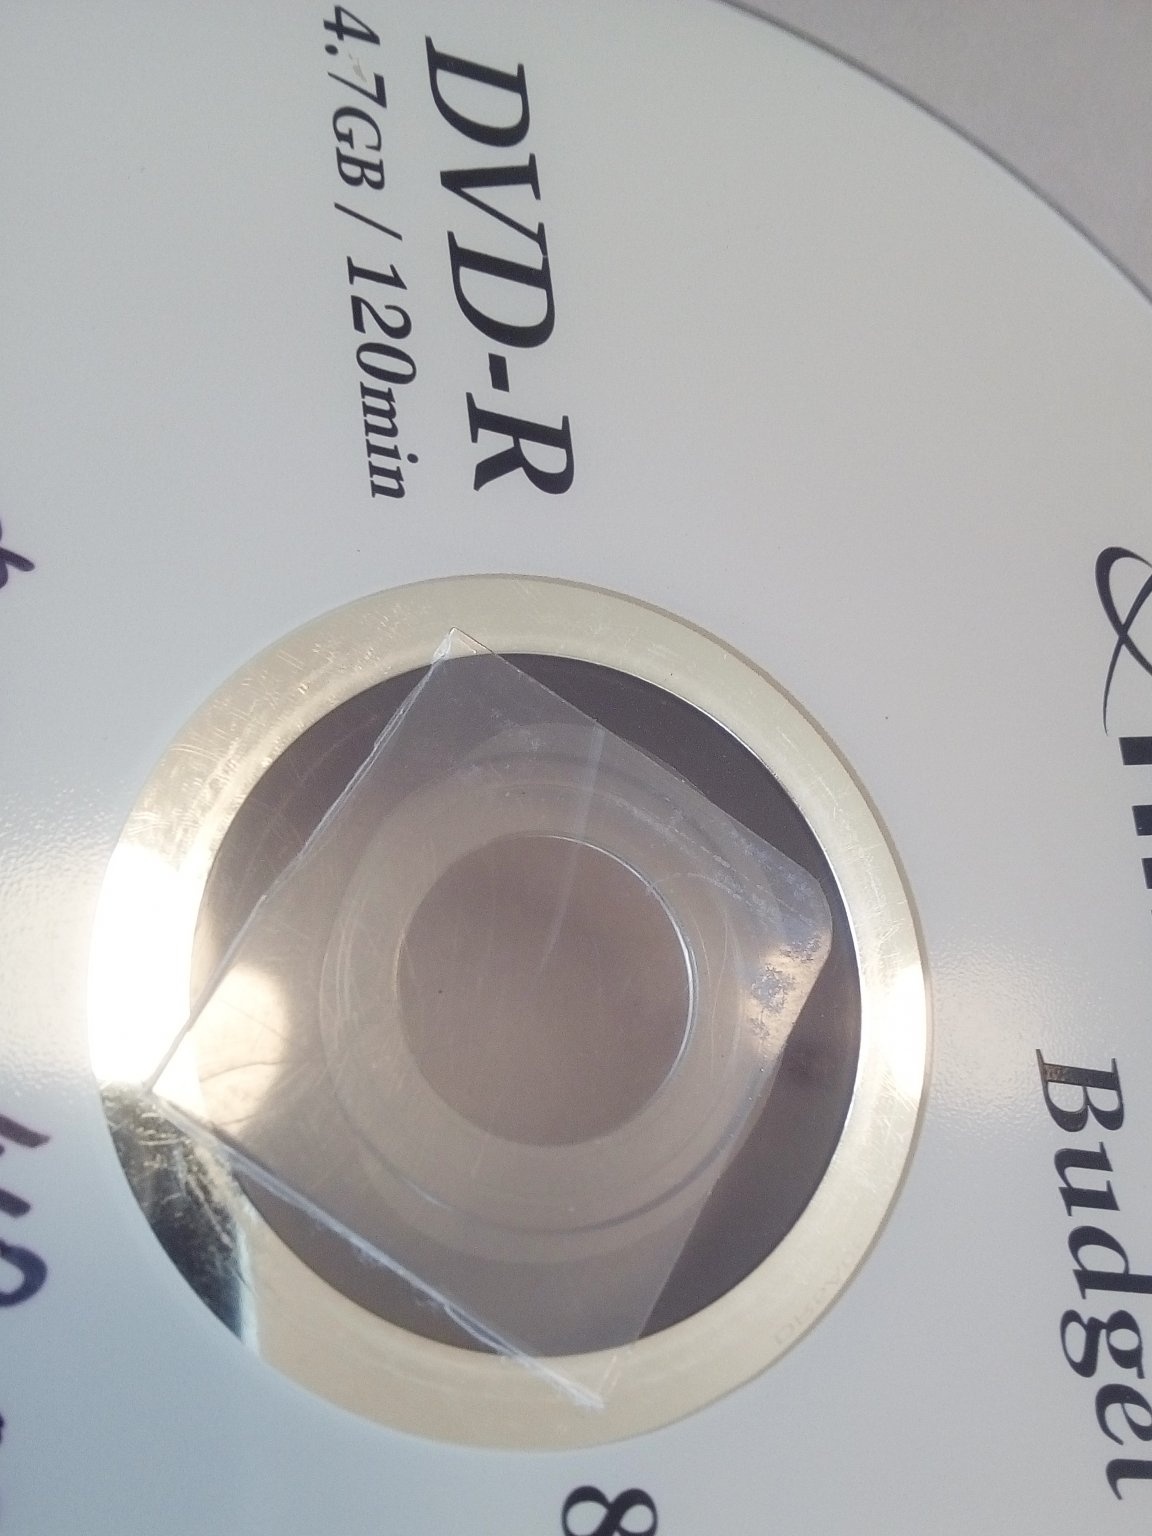
We put the second disk on top and fix it with hot glue in the position when the button is not pressed. And the last one we glue the lid from the spray can on the upper disk and get such a button.
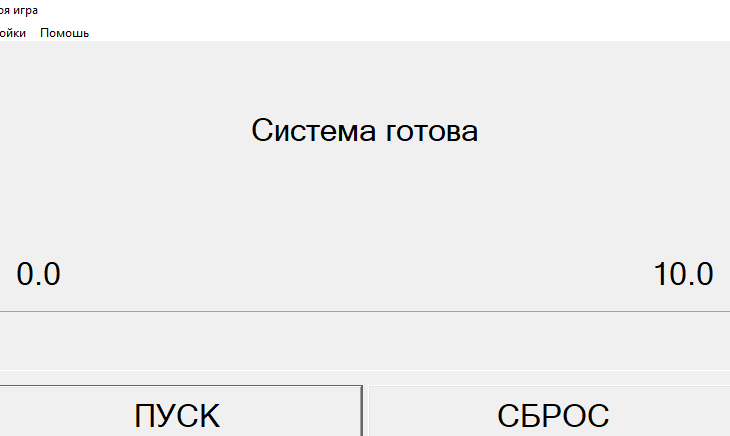
All is ready. You can connect to a computer and play a game! For me, the cost came out only on consumables (solder and glue); everything else was taken from old non-working equipment that many throw away! If desired, you can add to homemade backlight powered by 5 volts of voltage on the board.
Link to the program.
This homemade product has already been tested - the students are happy and the buttons are intact.