

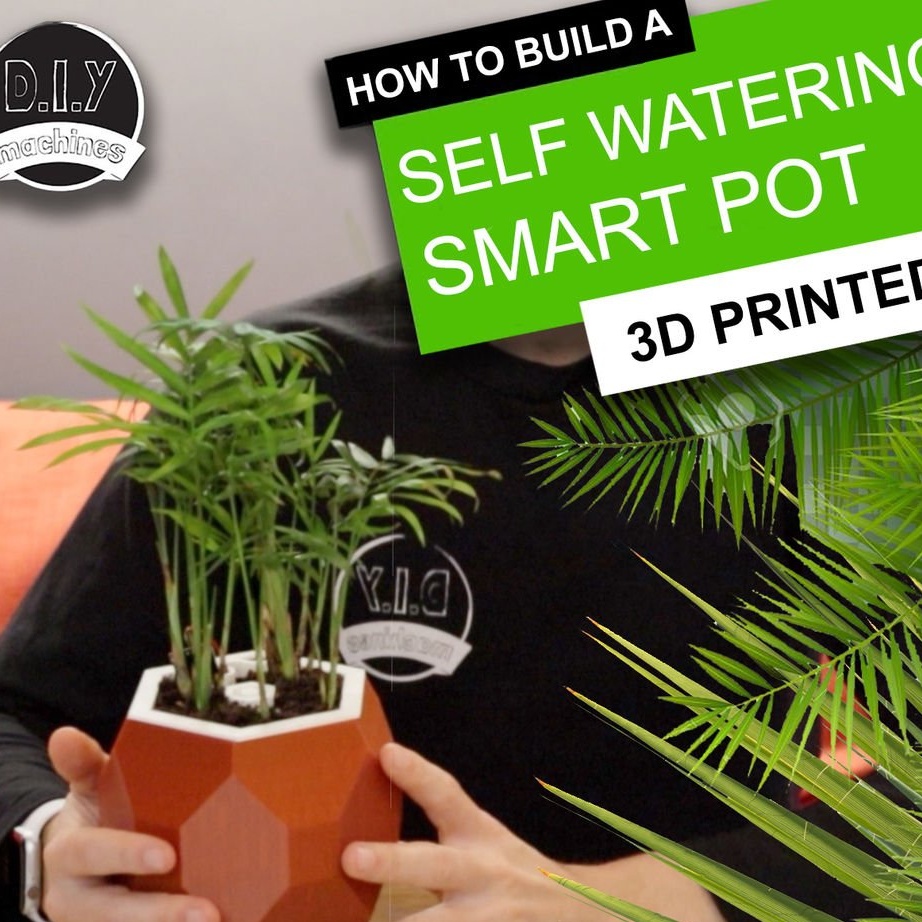
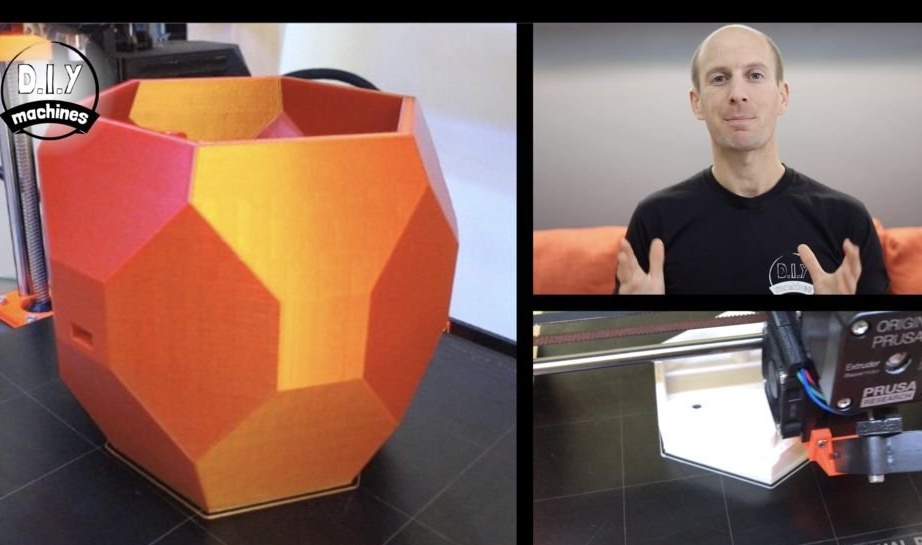
This homemade designed to make life easier for gardeners. Now you don’t need to be afraid to “forget to water the flowers” or vice versa to “strongly pour”. You will not be attached to the house, because of the fear that your flowers will dry out, automation will do everything for you.
The following features are implemented in this device:
-Built-in water tank
- Soil moisture control sensor
-Pump for supplying water to the ground
- Water level sensor in the tank
- LED informing about lack of water in the tank
All electronicsThe pumps and the water tank are inside the pot. Each pot can also be customized to the needs of different types of plants.
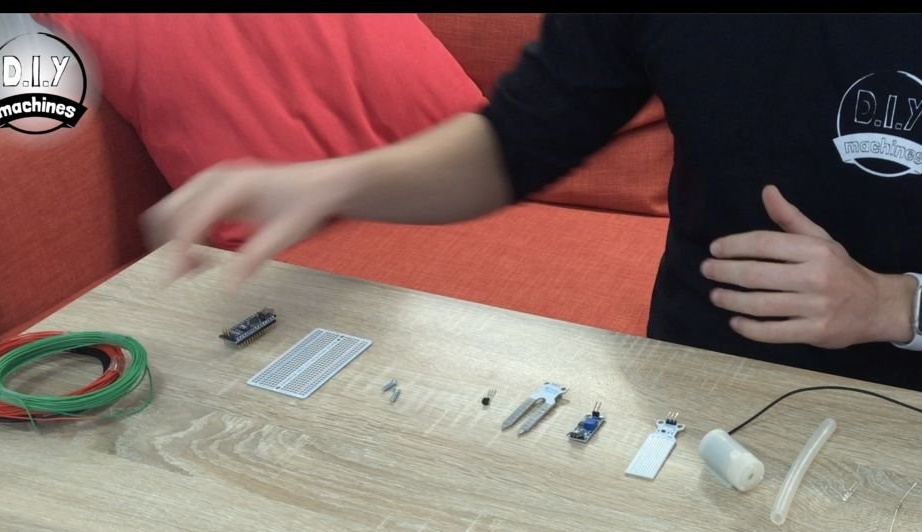
Tools and materials:
-Arduino Nano;
-A tube;
Transistor 2N2222;
- Resistor 1 kOhm;
-Resistors 4.7 kOhm;
-The wire;
-Light-emitting diode;
-3D printer;
- Sealant;
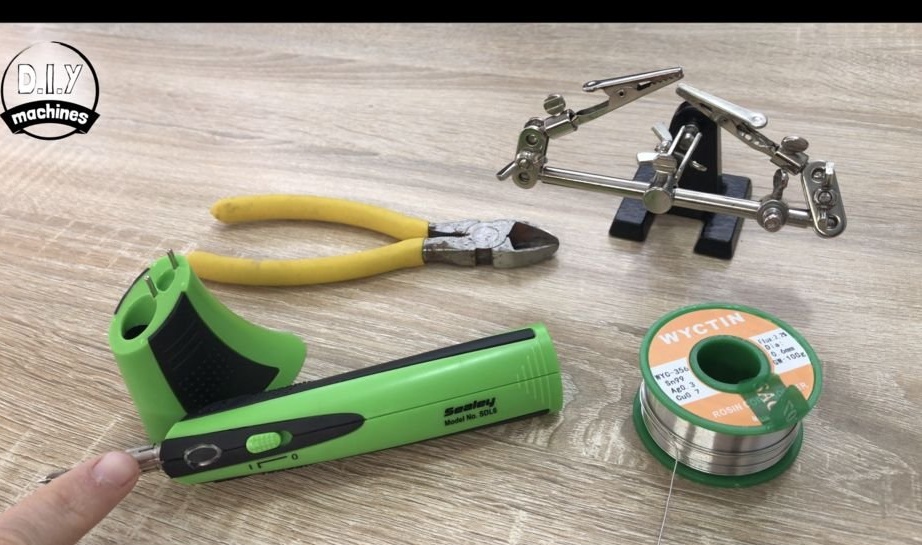
-Soldering accessories;
-Third arm;
-Nippers;
-Insulating tape;
- Thermo-glue;
-A computer;
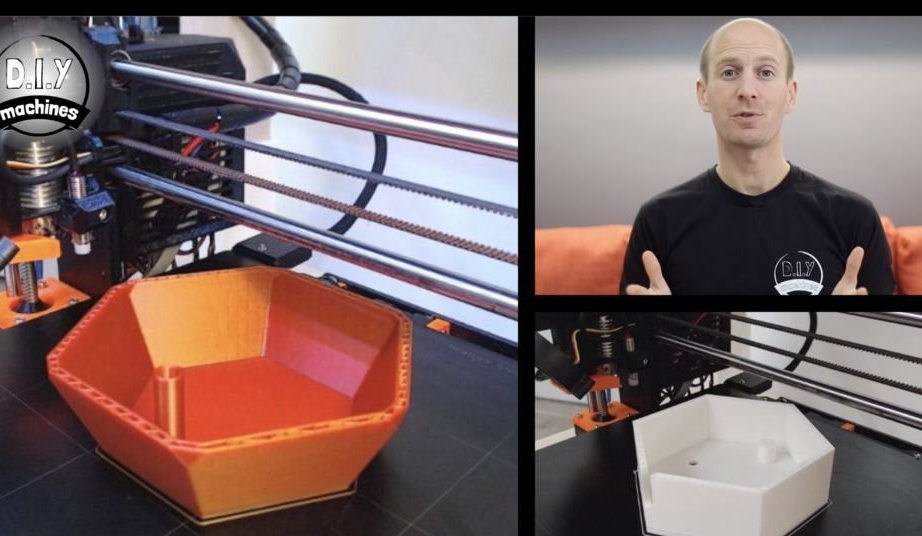
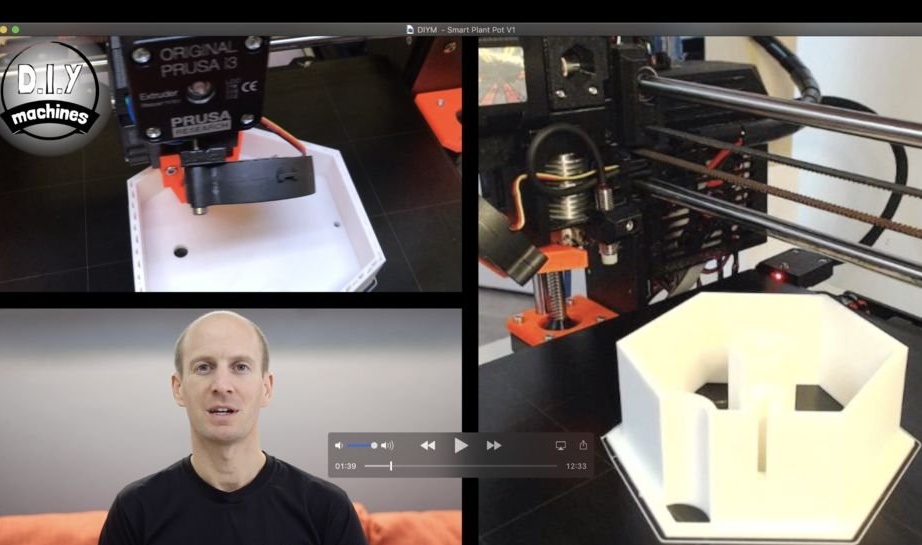
Step One: 3D Printing
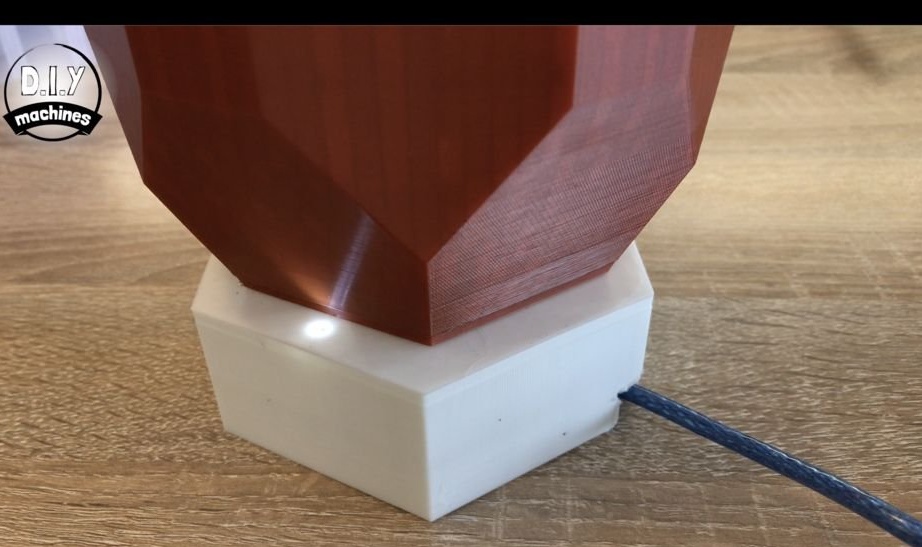
The pot consists of three parts: an electronics compartment, a tank and a flower pot. All parts are printed on a 3D printer. Files for printing can be downloaded here. After printing, it is necessary to check the tank for leaks, if necessary use sealant.
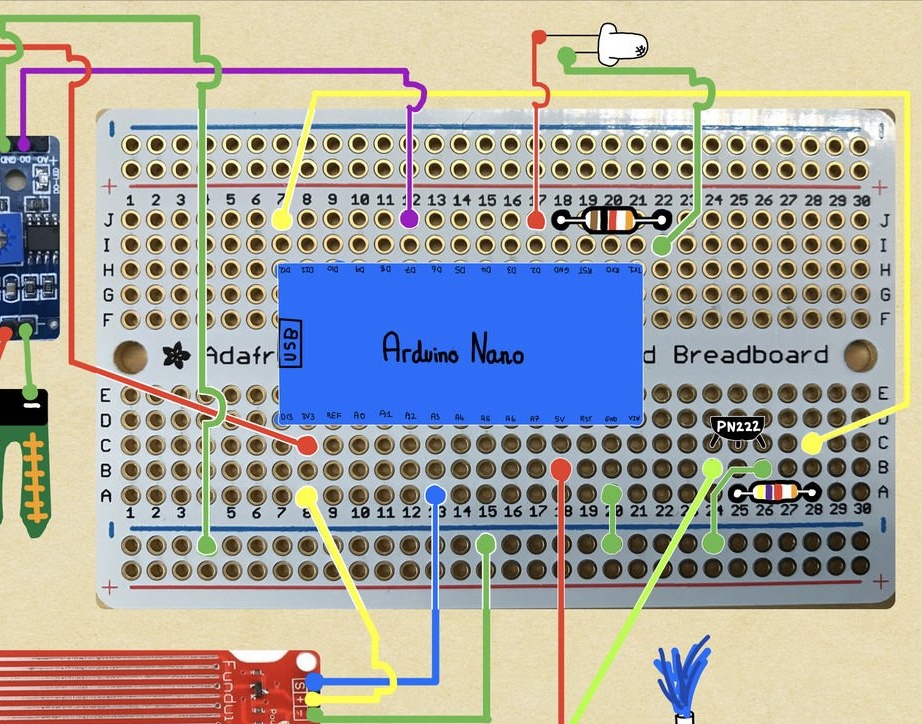
Step Two: Scheme
Installation of electronics will be carried out according to the scheme in the photo.
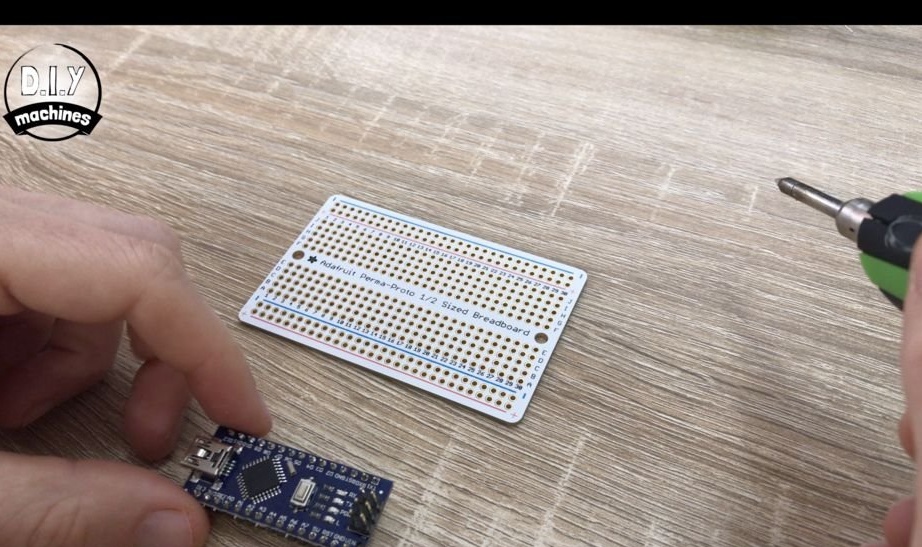
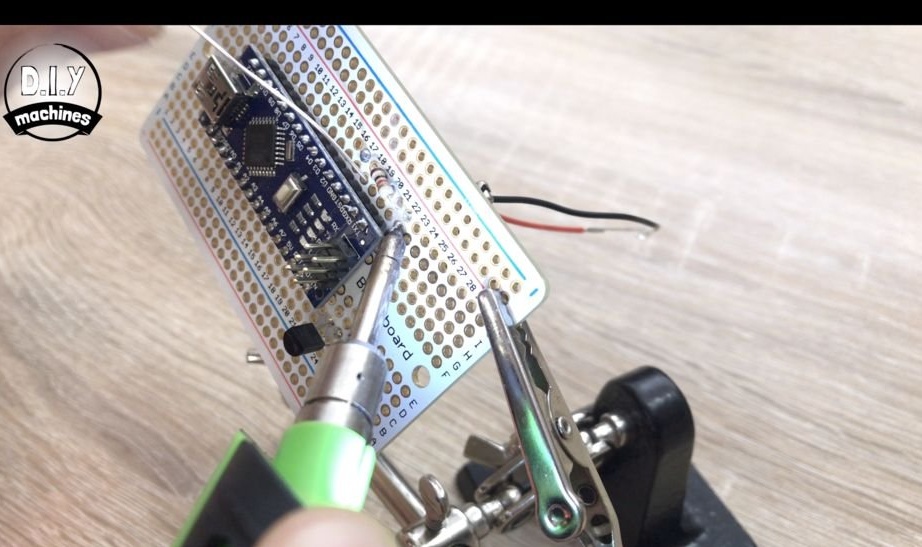
Step Three: Arduino
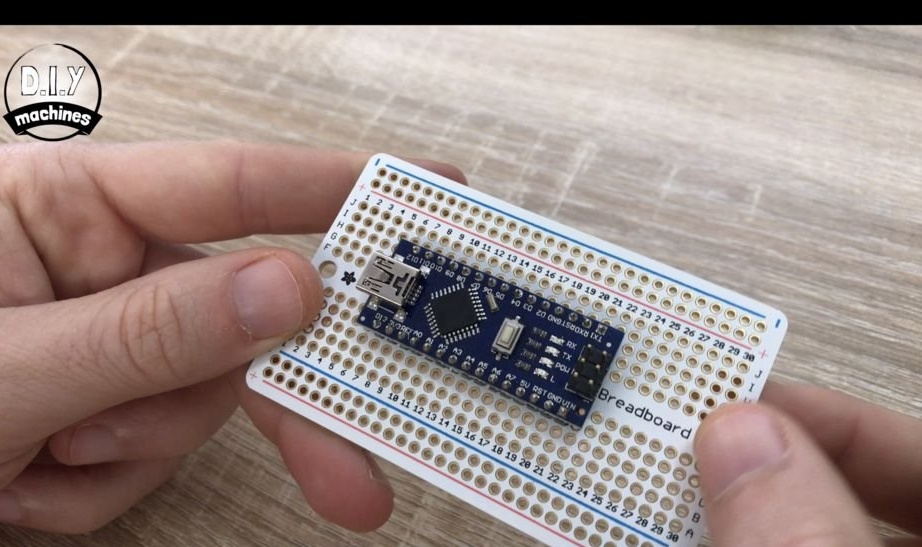
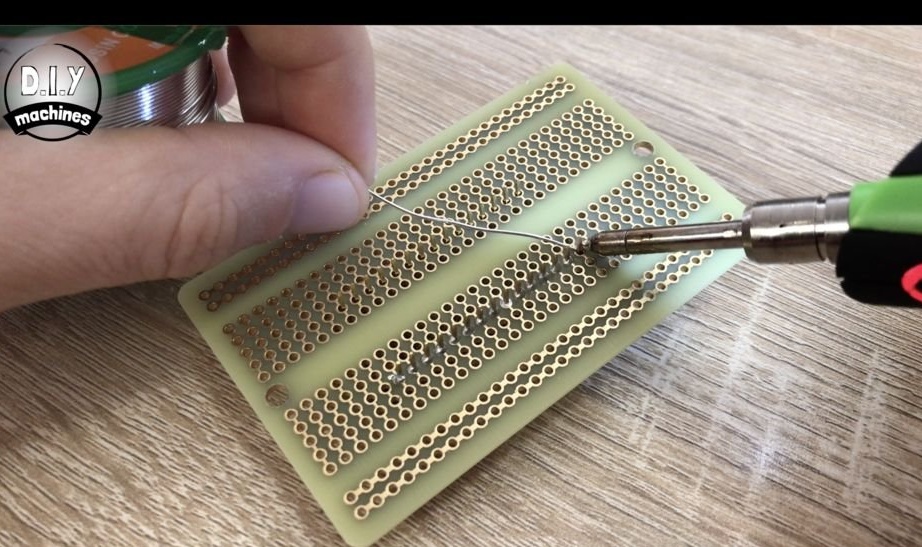
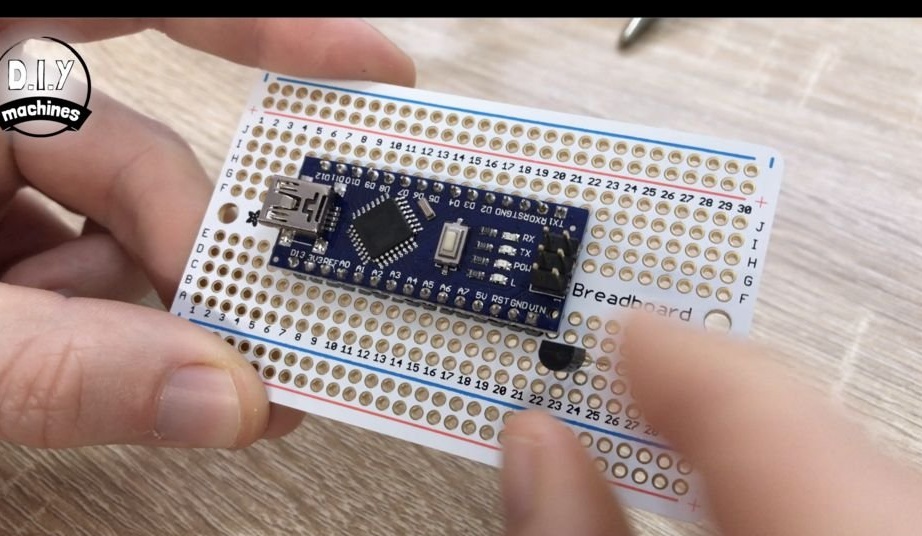
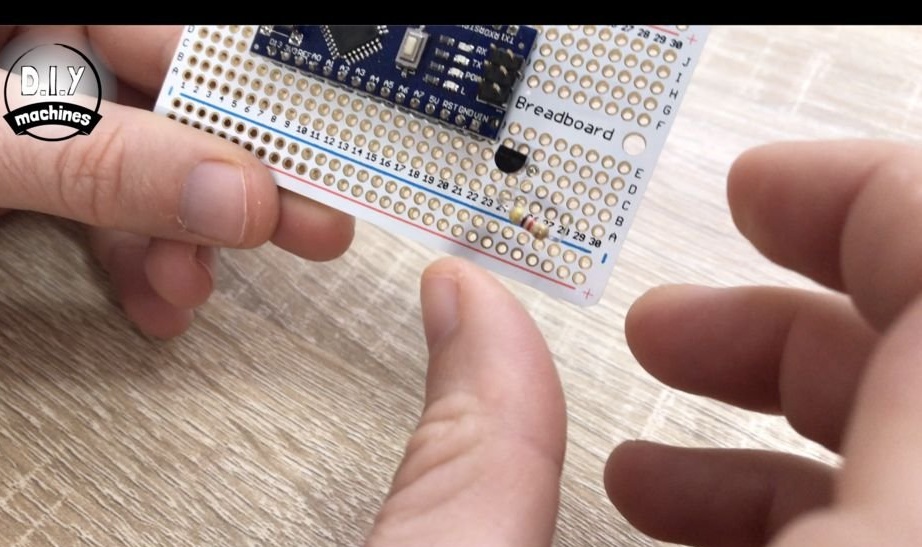
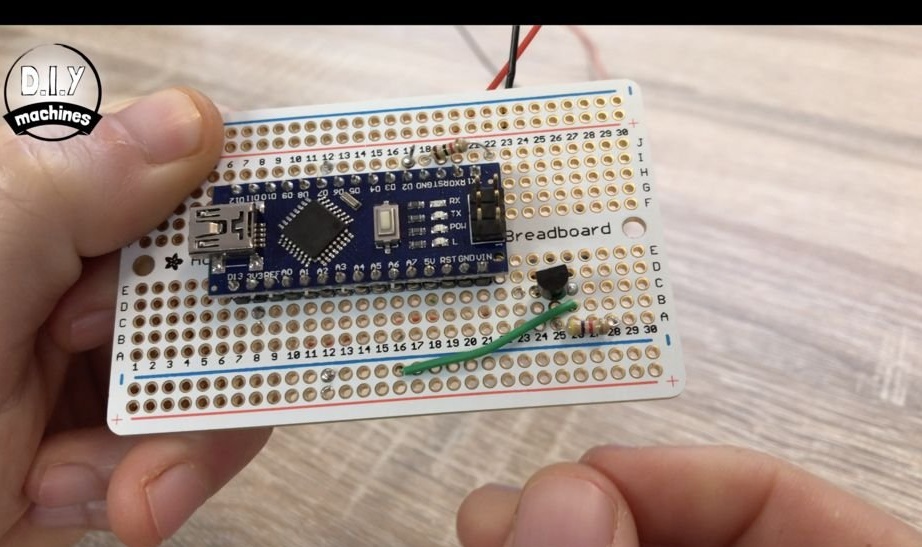
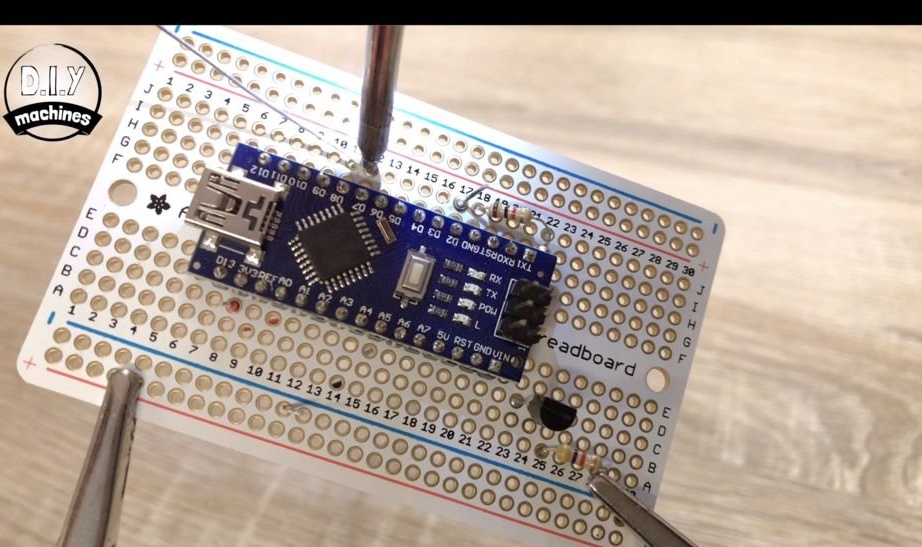
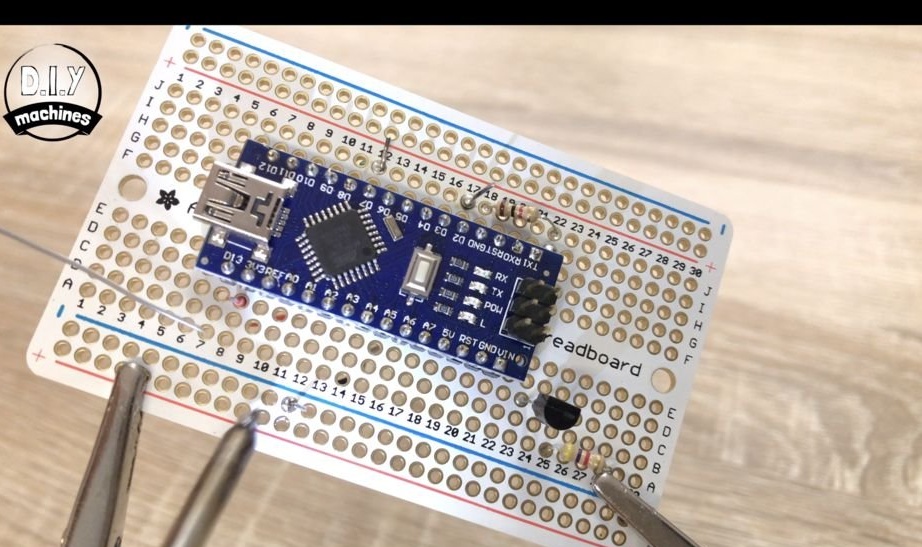
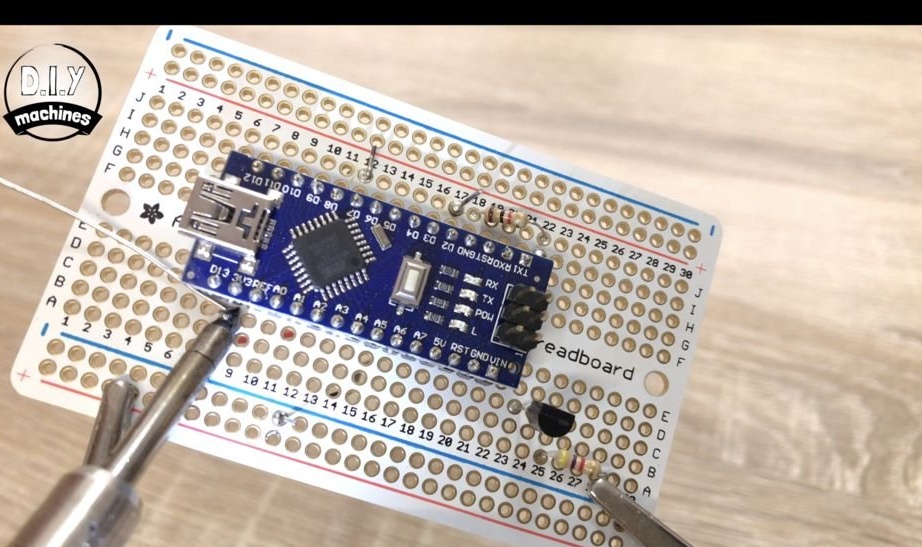
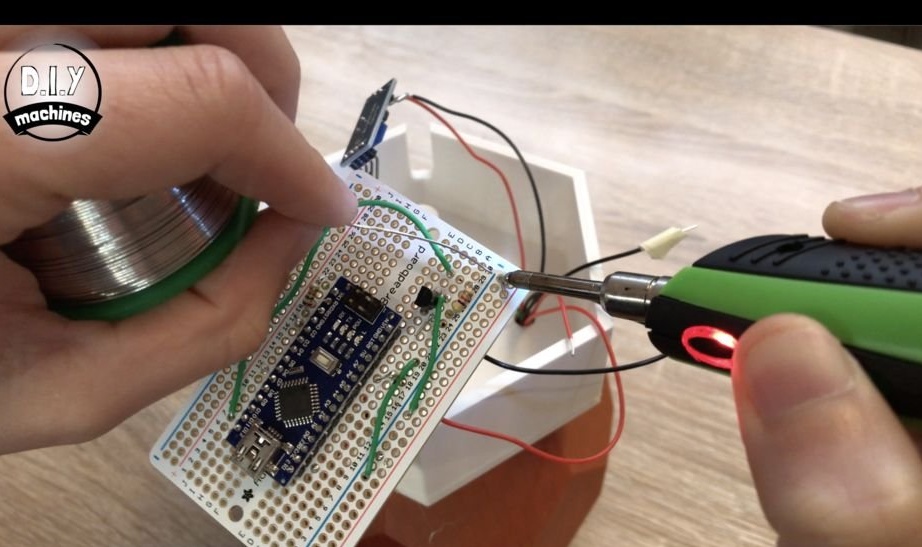
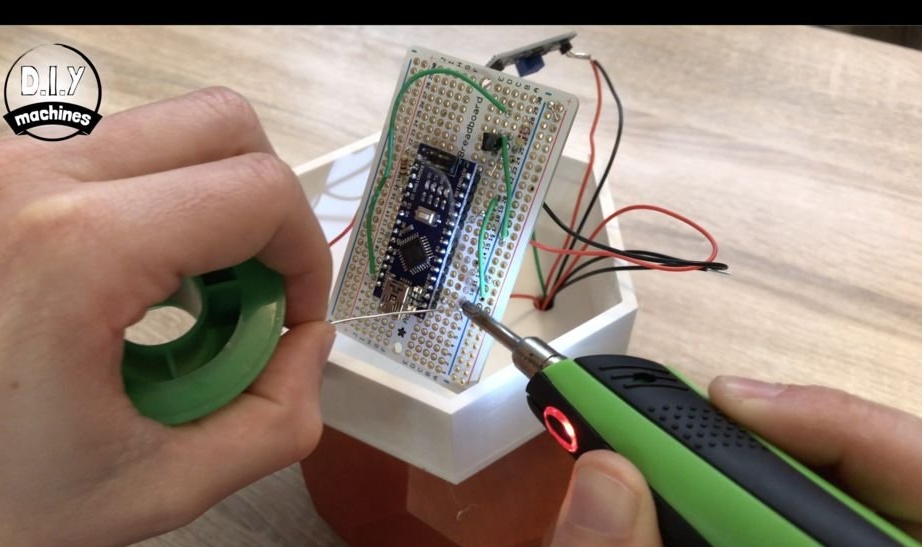
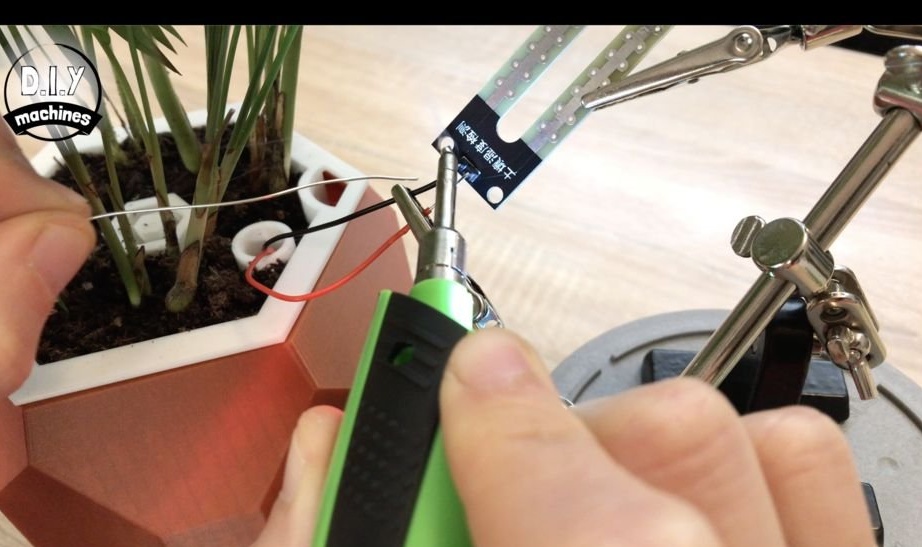
Now you can begin the installation of electronics. Solder Arduino to the board. On the Perma-proto board, there are symbols for mounting holes. It is necessary to combine the contact of the Arduino D12 with the mounting hole H7 of the board and then solder all the connectors.
Step Four: Transistor, Resistor
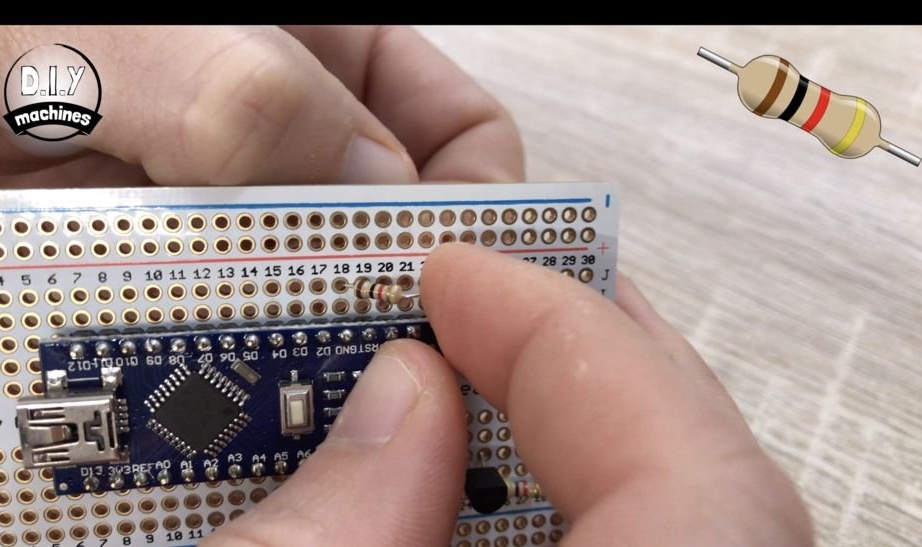
Further solders resistors and a transistor. The transistor turns with the flat side to Arduino, installs the legs in the mounting holes C24, C25 and C26 of the board, solders.
A 4.7 kOhm resistor is soldered into holes A25 and A28. A 1 kΩ resistor is mounted on pins J18 and J22.
Step Five: LED
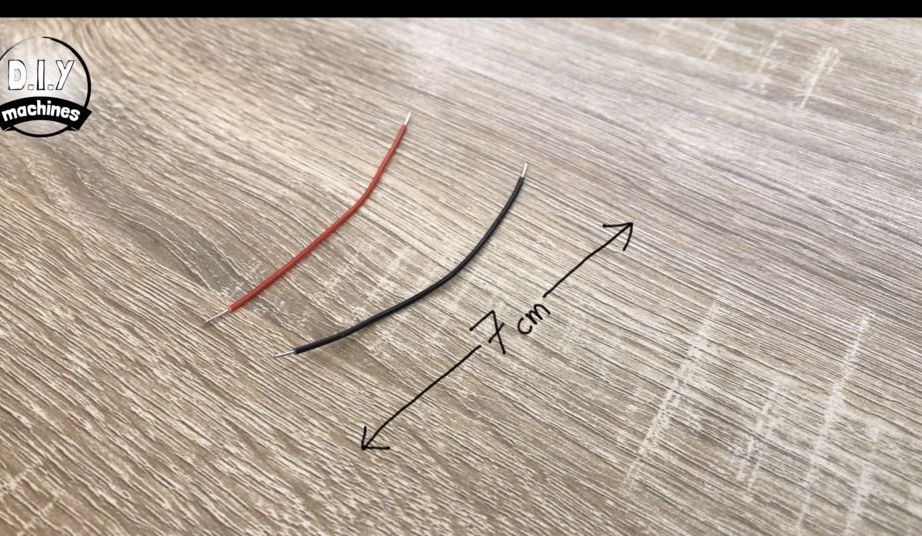
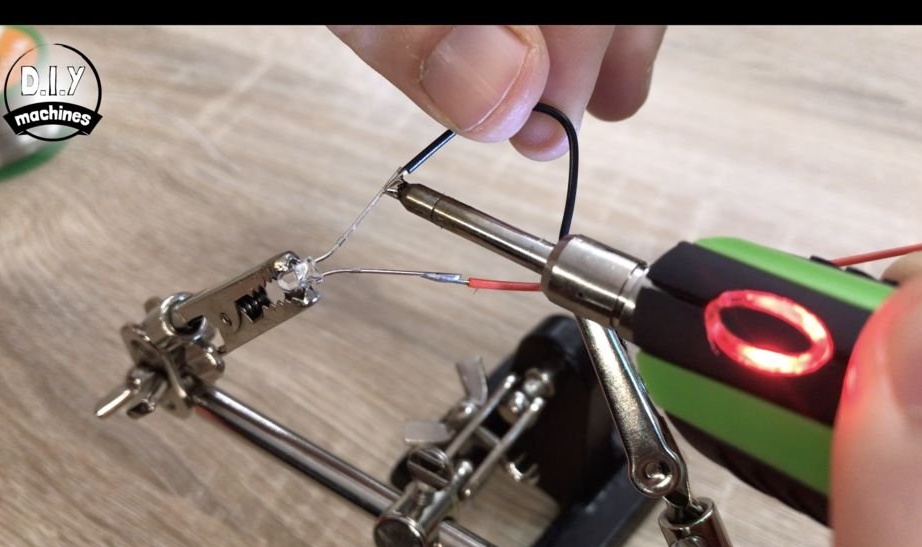
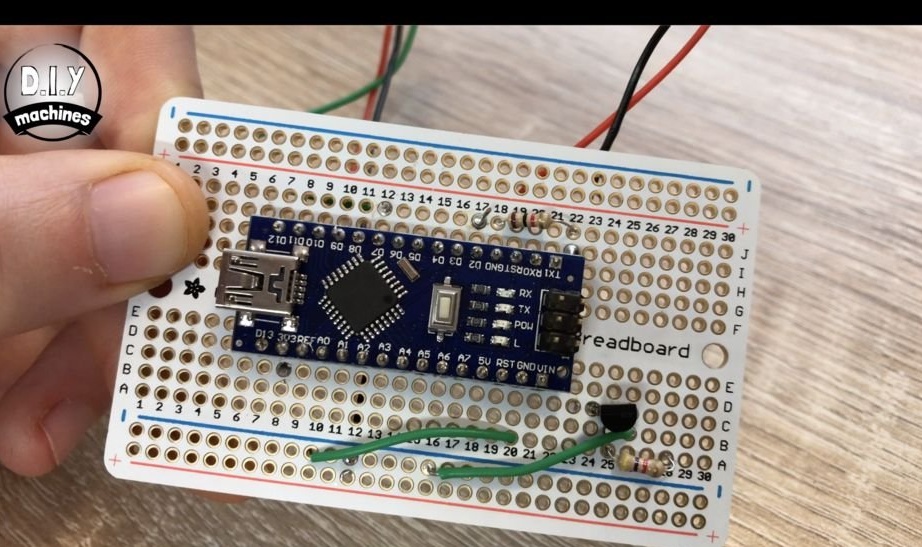
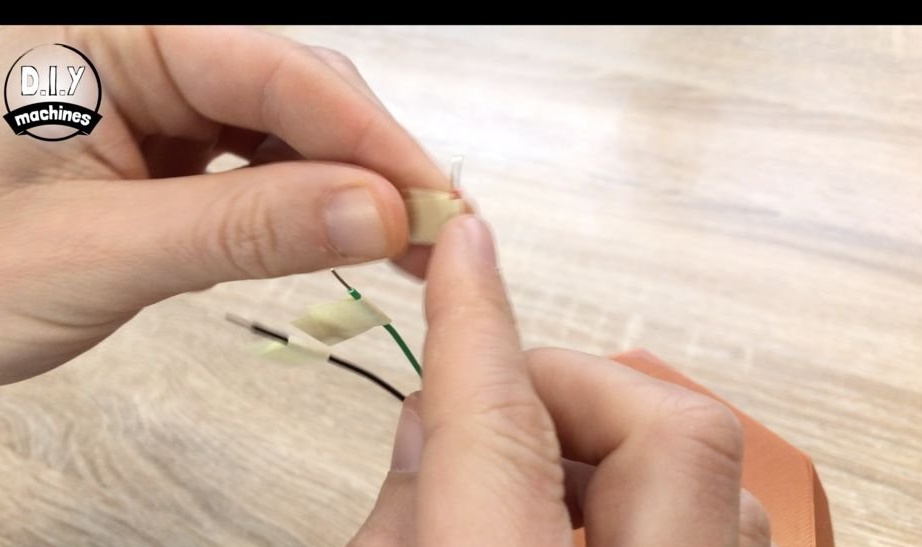
Solder wires to the LED 7 cm long. Then solder the anode (long leg) to J17, the cathode (short leg) to I22.


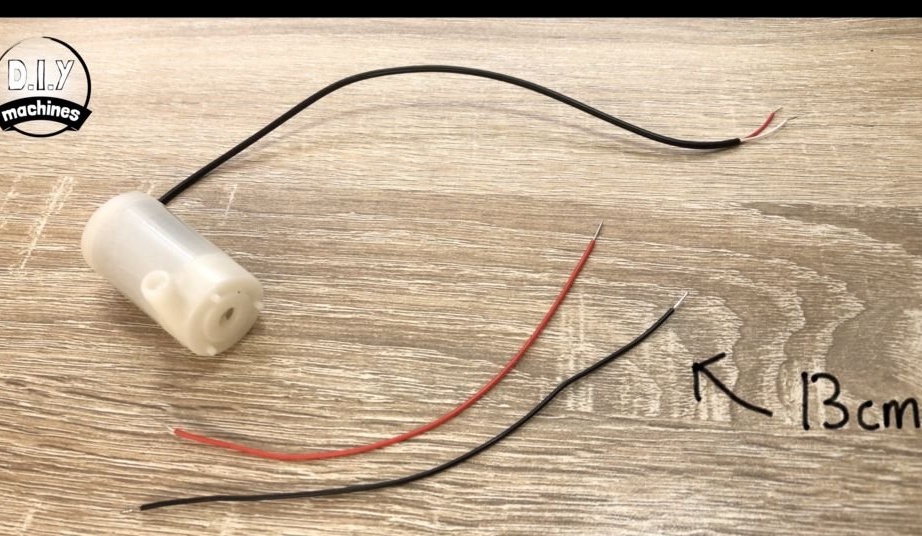
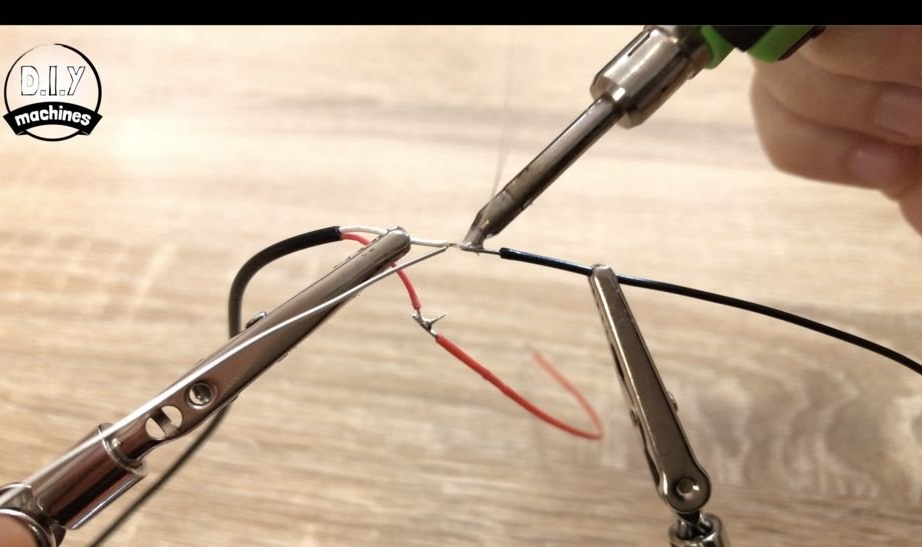
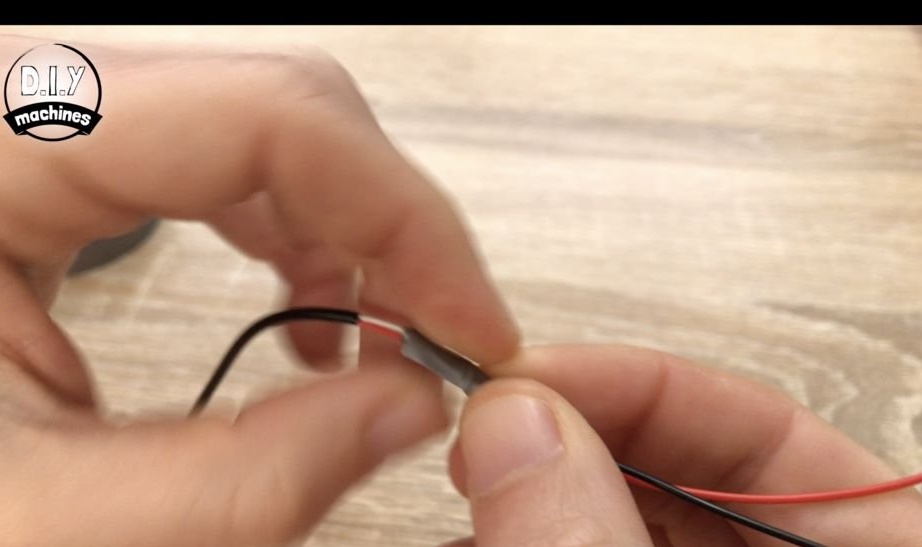
Step six: wires
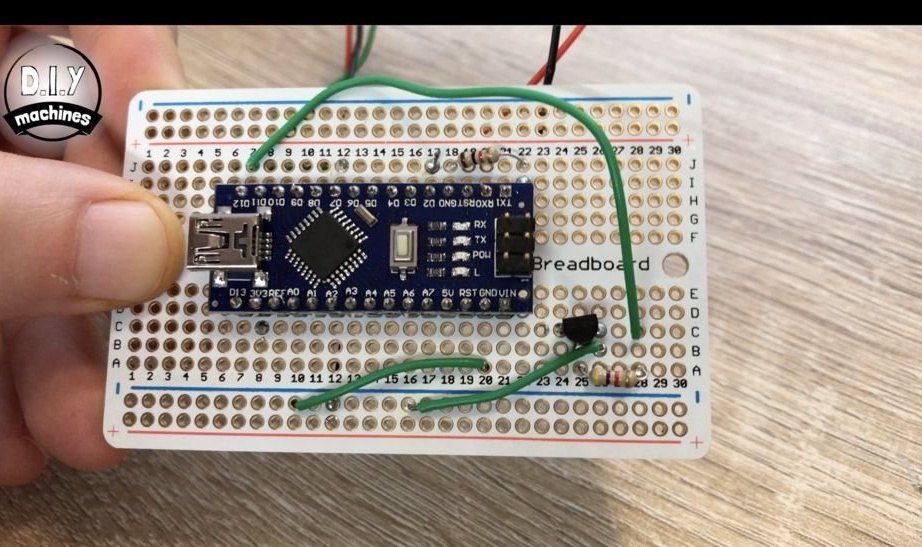
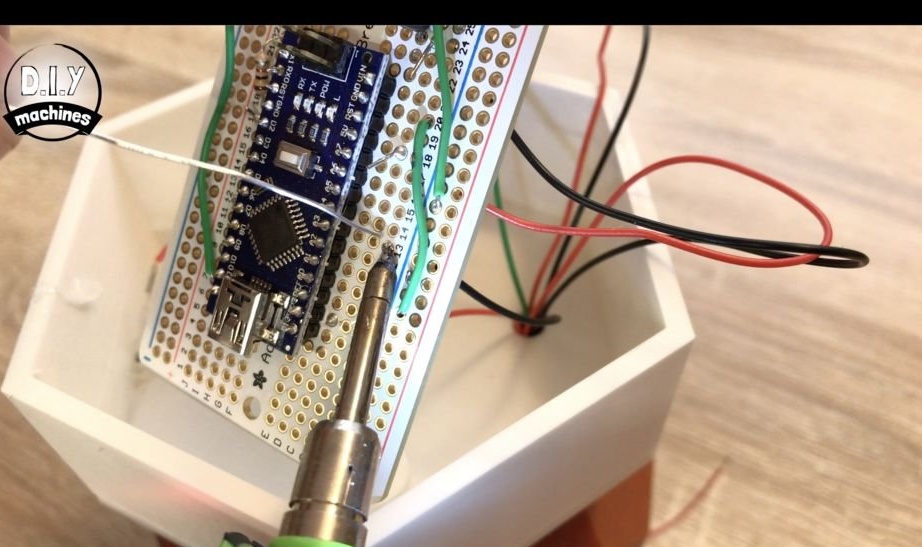
Adds 13 centimeters of wires to each pump wire. The junction isolates.
Solders 20 centimeters of wires to each output of the water level sensor.
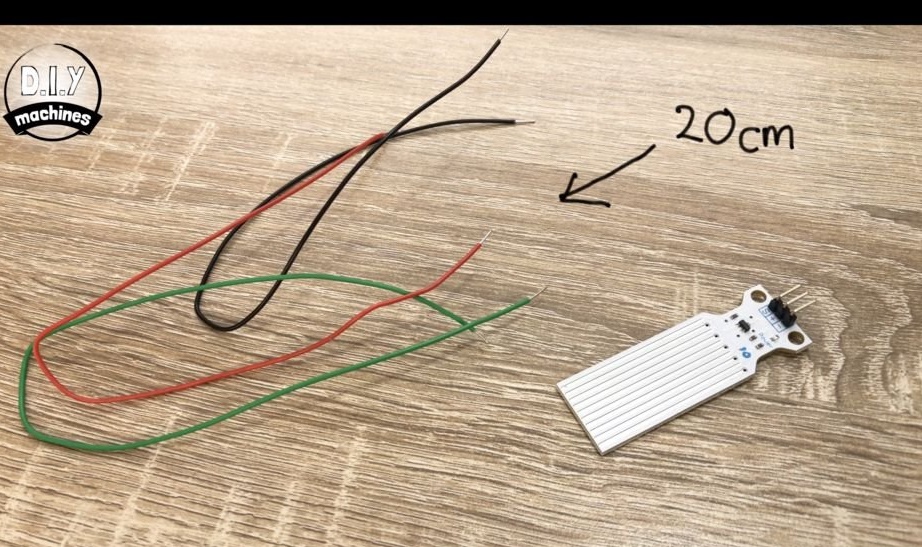

Solder the wire with one end to the minus of the board, the second to B26. Another wire to the minus and the A20. A third wire connects C28 and J7.
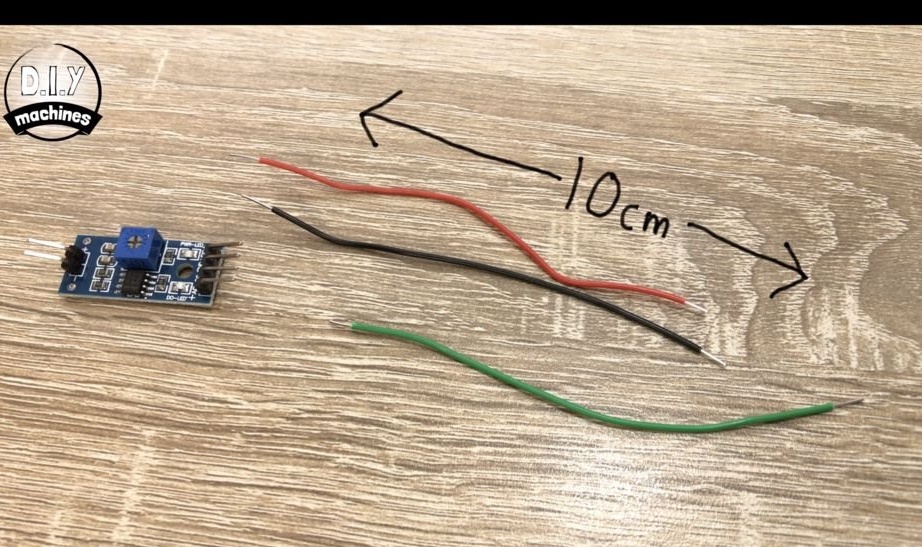
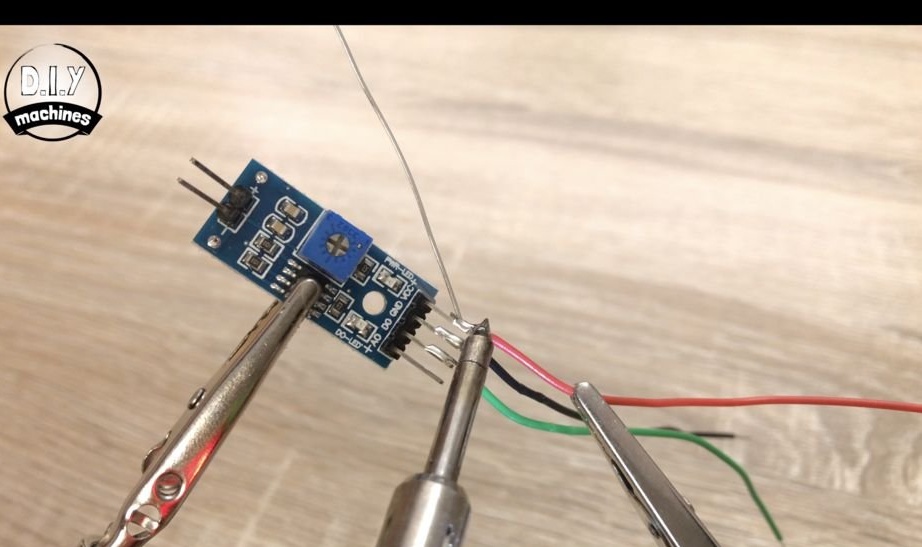
Seventh step: humidity sensor
Solders 10 centimeters of wires to three contacts (D0, GND, VCC) of the humidity module. Solder the wires from the module to the board in the following order:
module board
D0 - J12
GND - GND
VCC - C8
Solder 25 cm of wire to the contacts connecting the module and the humidity sensor.

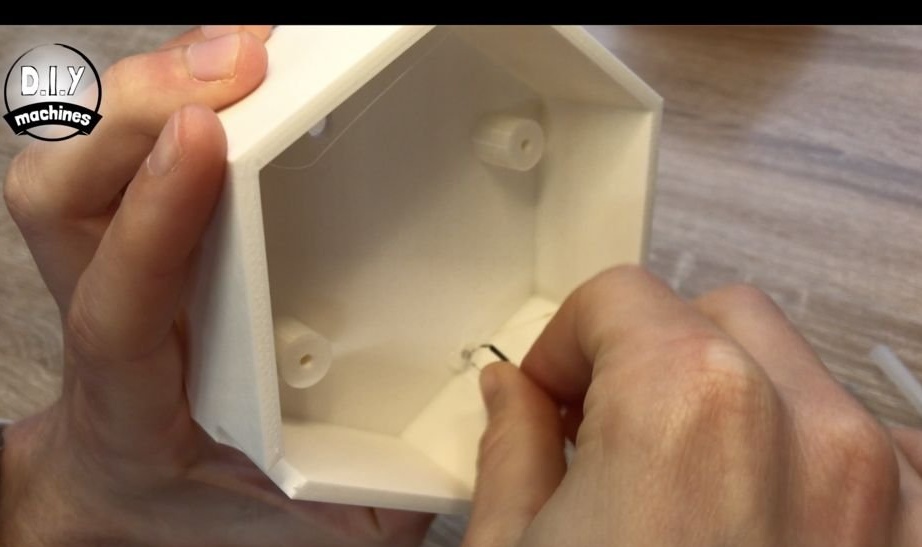
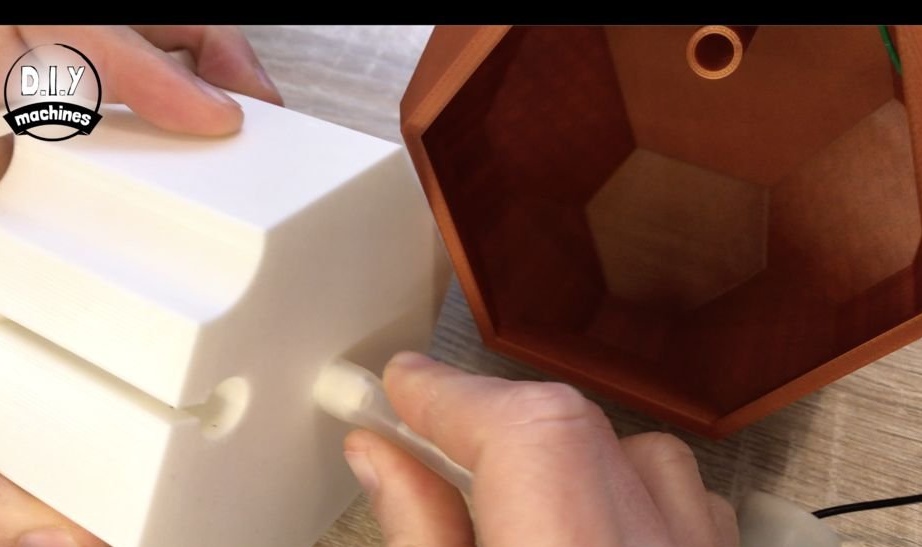
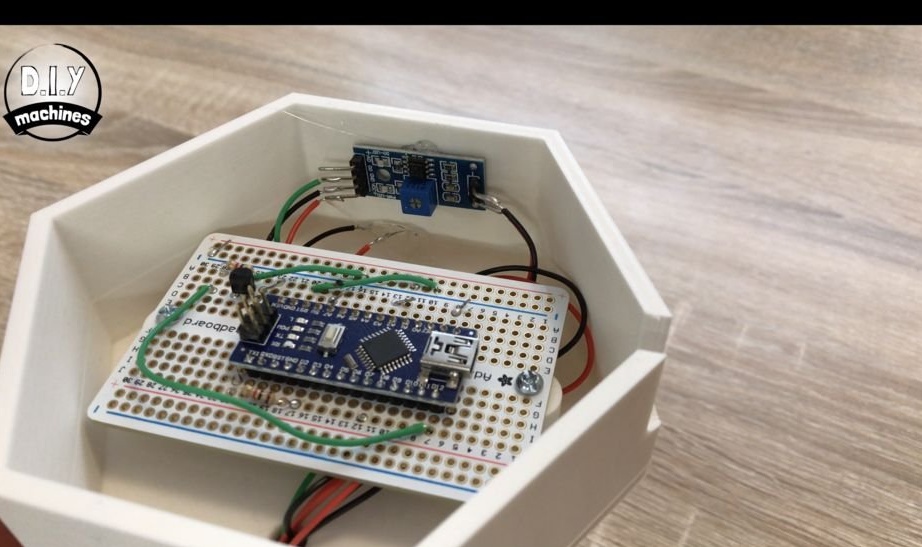
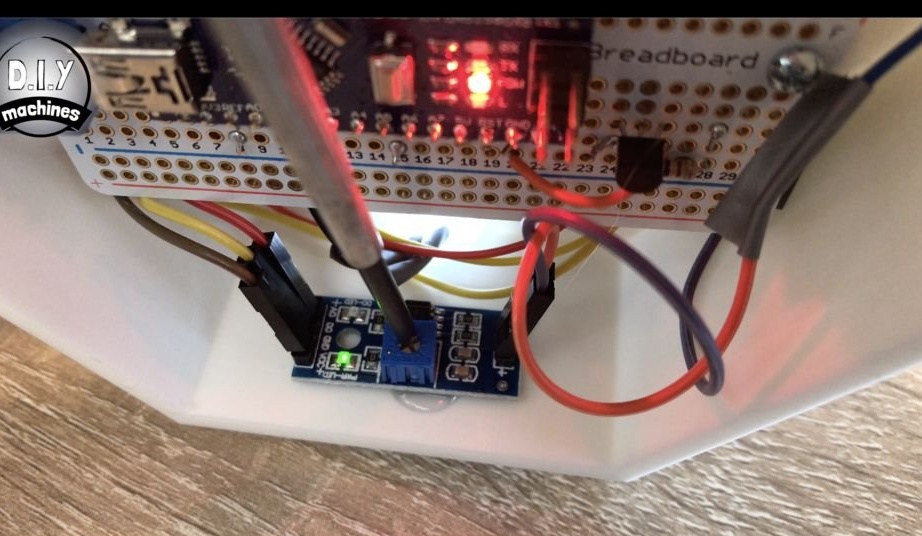
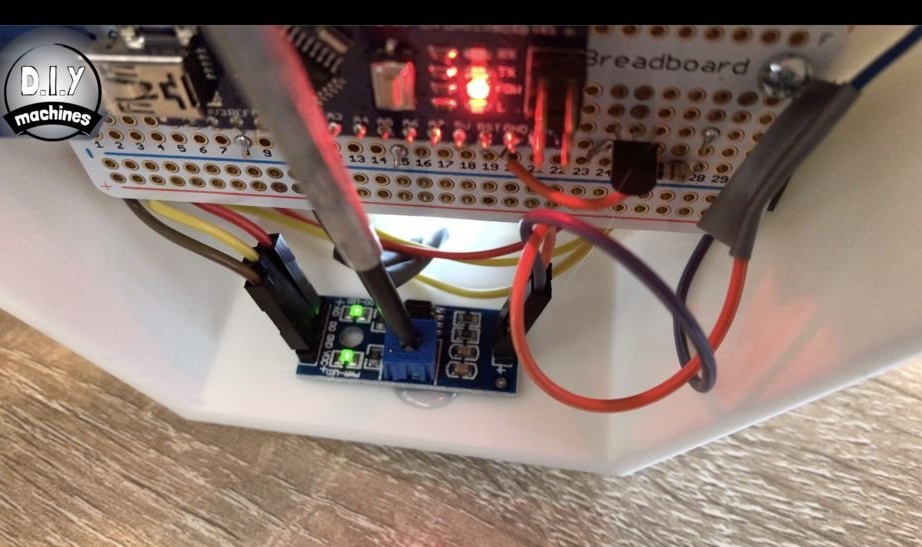
Step Eight: Build
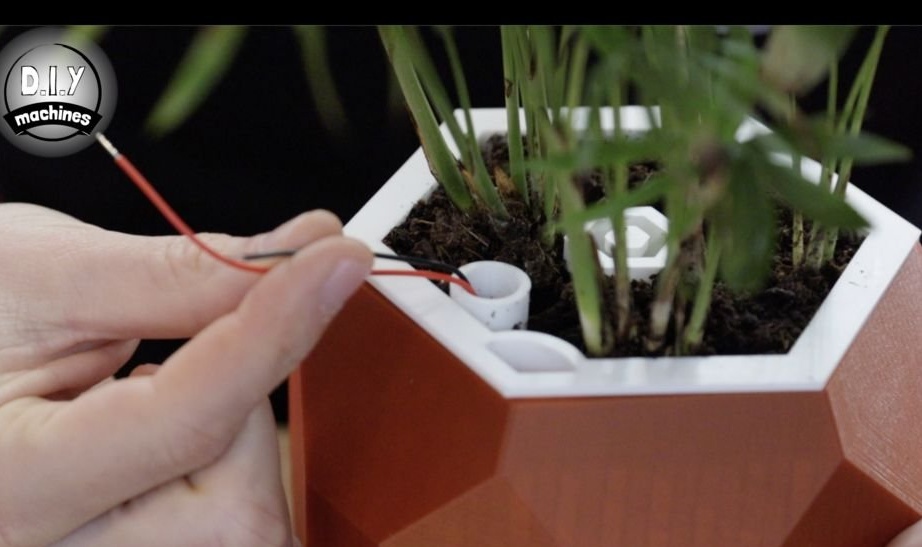
Glues the water level sensor to the plate inside the tank. The wires are pulled into the hole in the tank and marked. Installs the LED in the hole in the stand.
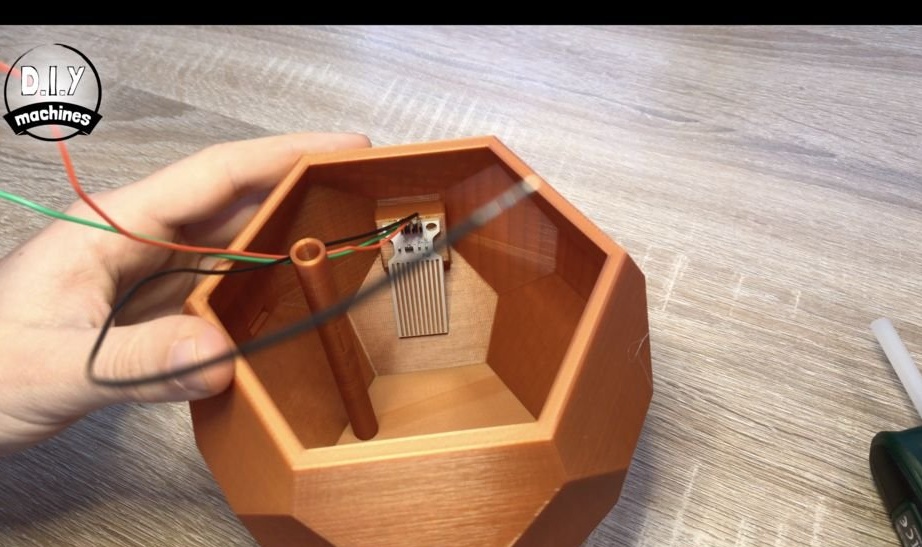
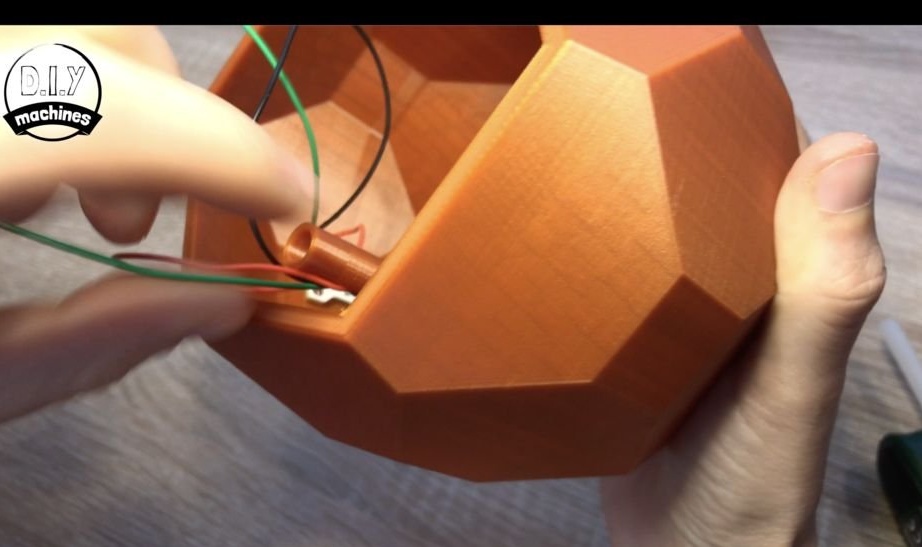
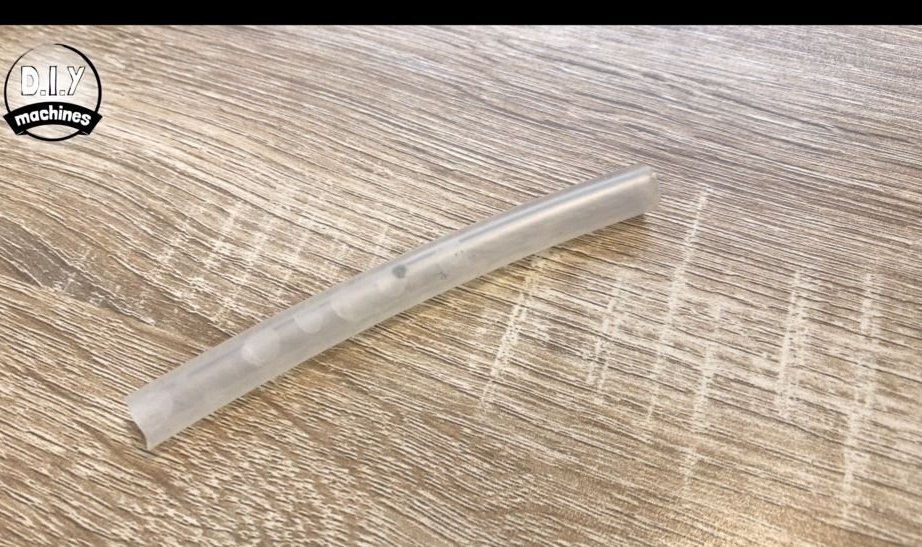
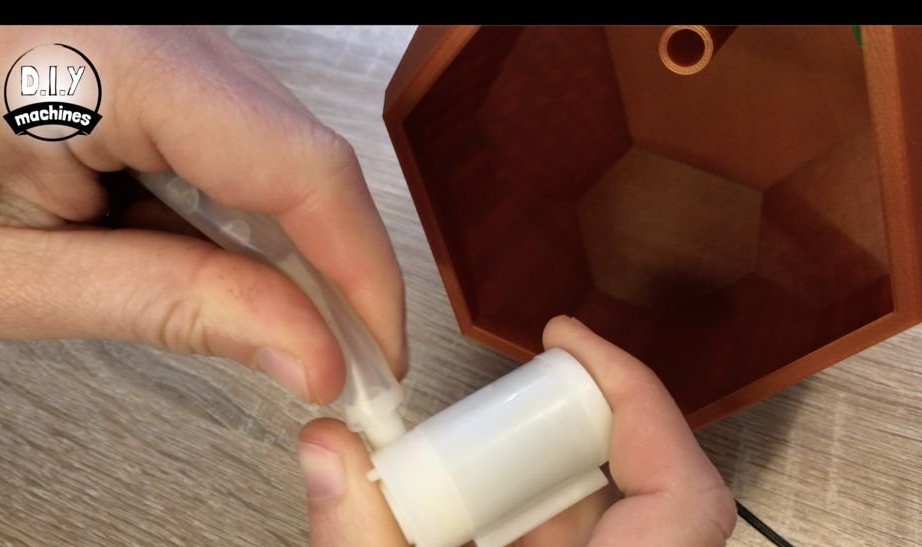
Pulls the pump wire into the tank opening. Installs a tube on the pump, the second end of which is inserted into a special hole in the pot. Inserts a pot into the tank.


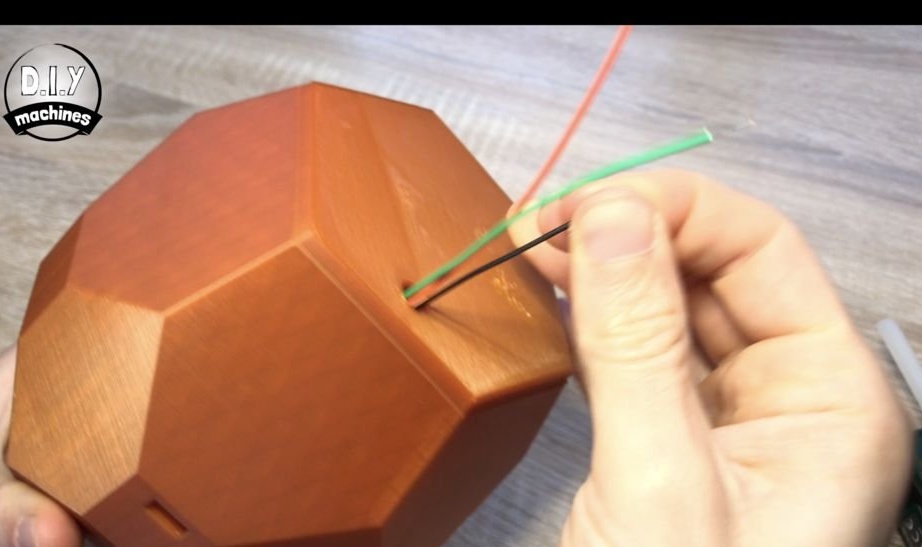
Draws wires through the hole in the stand (bottom). The wire from the humidity sensor stretches in the opposite direction, into the pot.


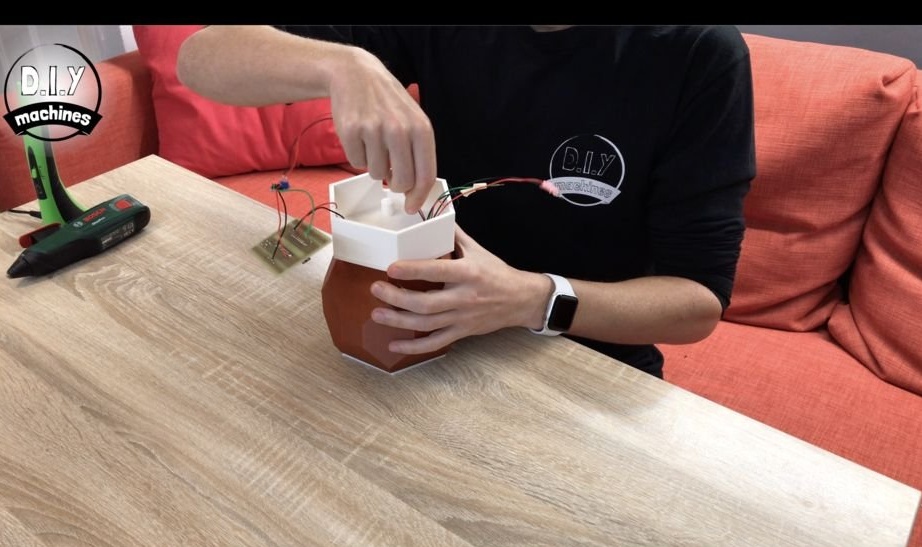
Solder the wires from the pump to B18 and B24. The GND of the water level sensor is soldered to the GND board, the positive sensor wire to A8, and the sensor wire to A13.


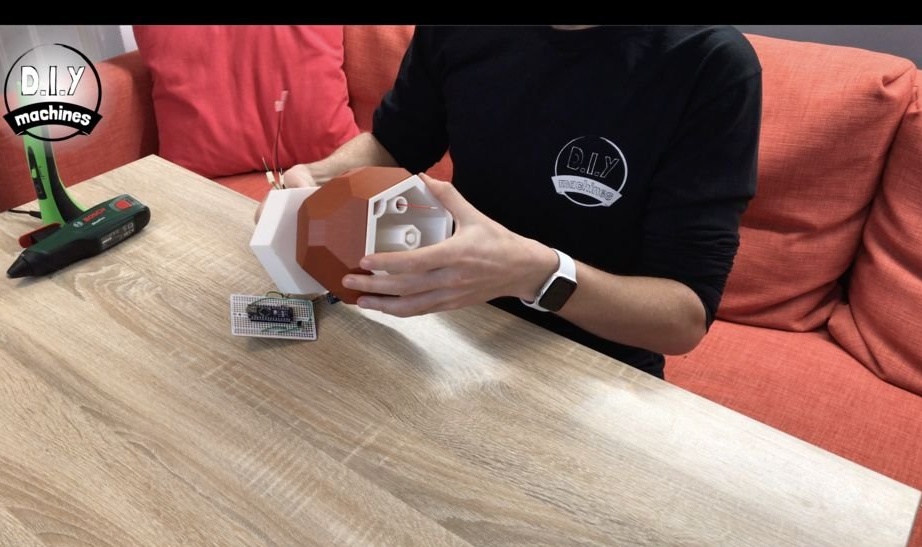
Secures the board and humidity module inside the case.
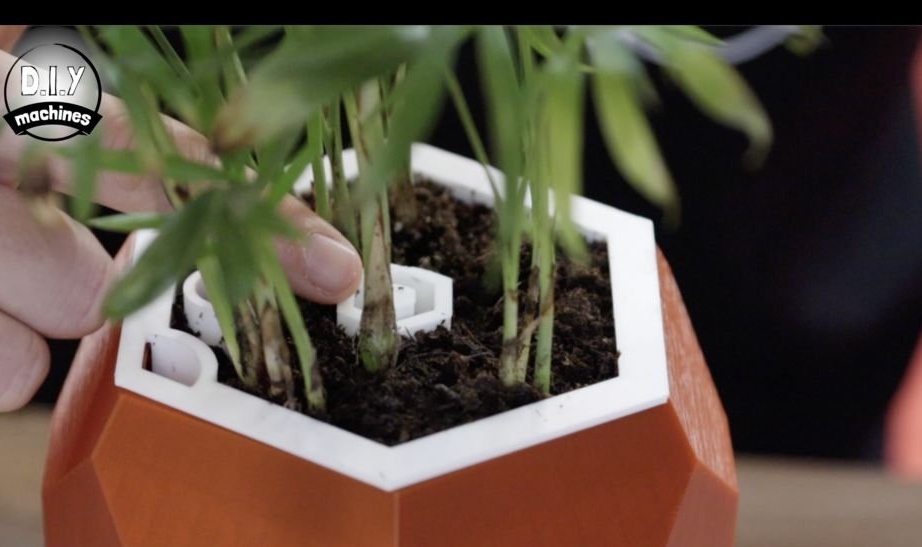
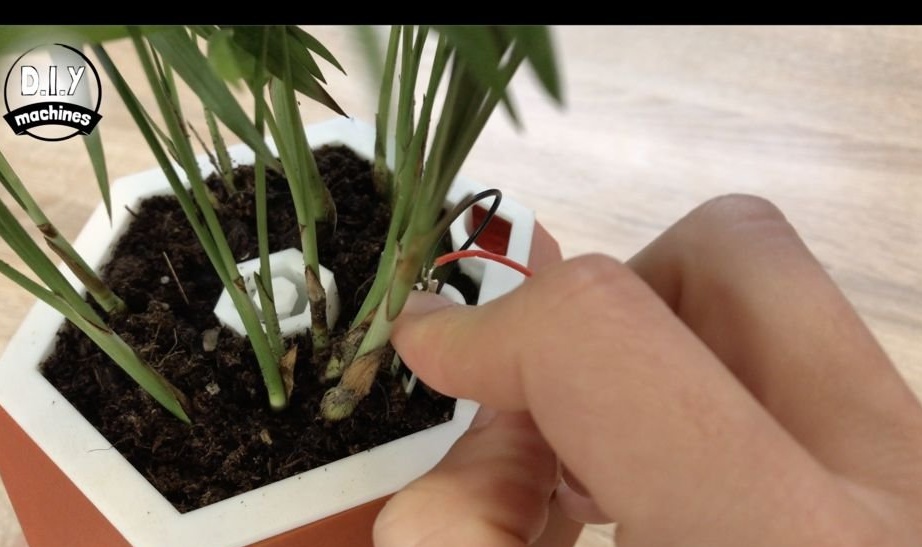
Step Nine: Planting a Plant
Now you can pour soil and plant a plant.

Step Ten: Humidity Sensor
Solder the wires to the moisture sensor and install it in the soil.
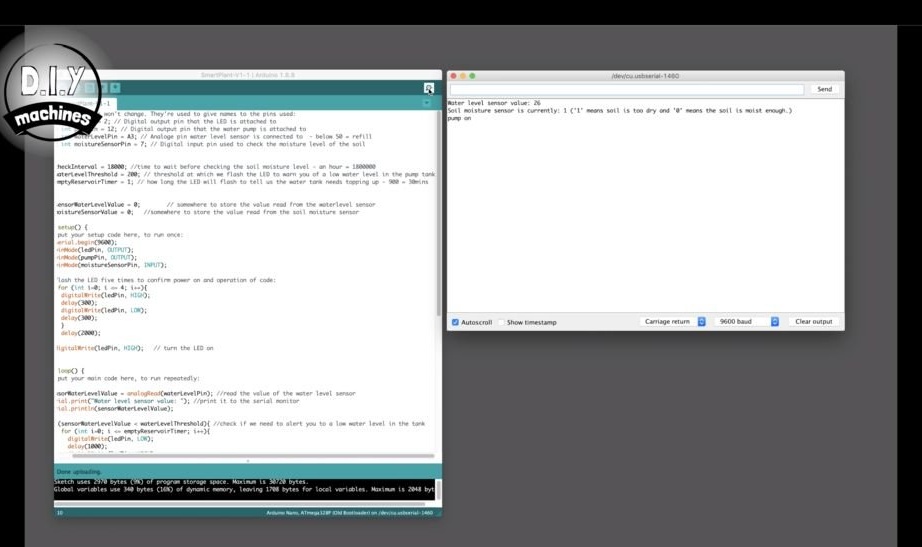
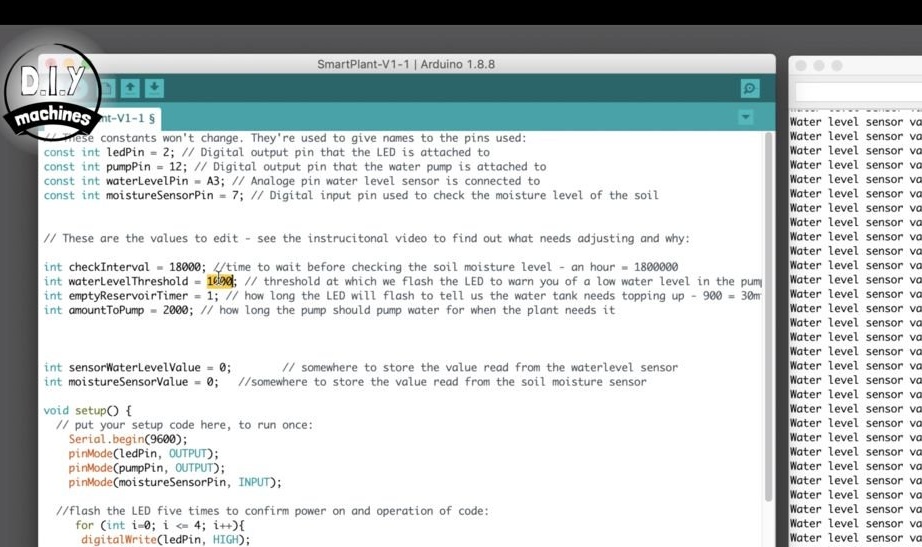
Step Eleven: Download Code
You can download the code here. here
After downloading it, you need to open the file “SmartPlant-V1-1.ino” in the Arduino IDE and upload it to Arduino. If everything is done correctly, then:
After the download is complete and the Arduino restarts, the LED should flash quickly five times, confirming that the code has loaded and is working.
The current water level will be displayed on the screen.
After a few seconds, you can hear the pump starting.
Then the LED should start flashing slowly, warning that there is no water in the inner tank.

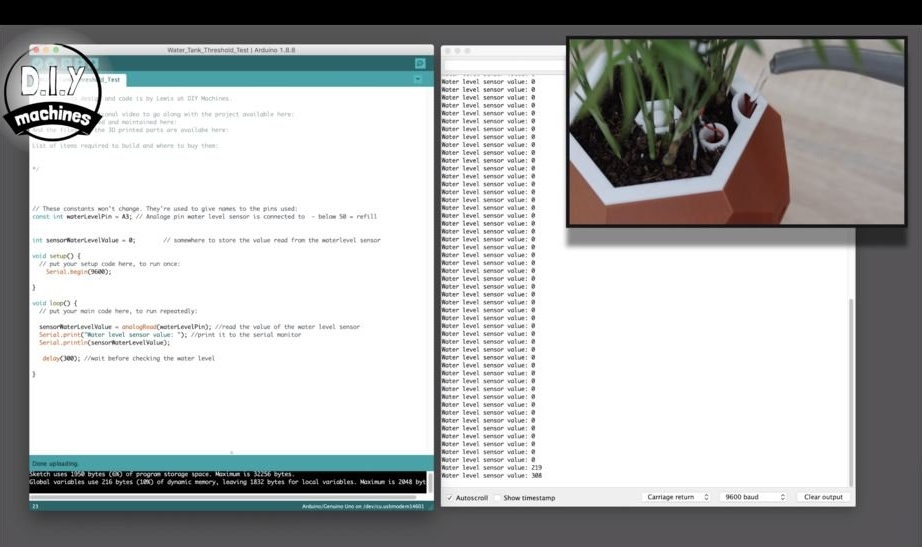
Step Twelve: Calibration
At the bottom of the pot is a soil moisture sensor module. This module has a potentiometer, with which you need to calibrate the humidity sensor. To do this, you need to water the plant to the required level. Wait about an hour.
Then you need to turn the screw of the potentiometer until the second indicator on it lights up, stop at that moment, and then turn it in the opposite direction until the light goes out.
Now you need to calibrate the water level in the tank.
Loads the code "Water_Tank_Threshold_Test.ino".
After loading, slowly start adding water to the tank until the display shows the water level. Records the average value that it is currently displaying.
Now you need to write these values in the column WaterLevelThreshold code.
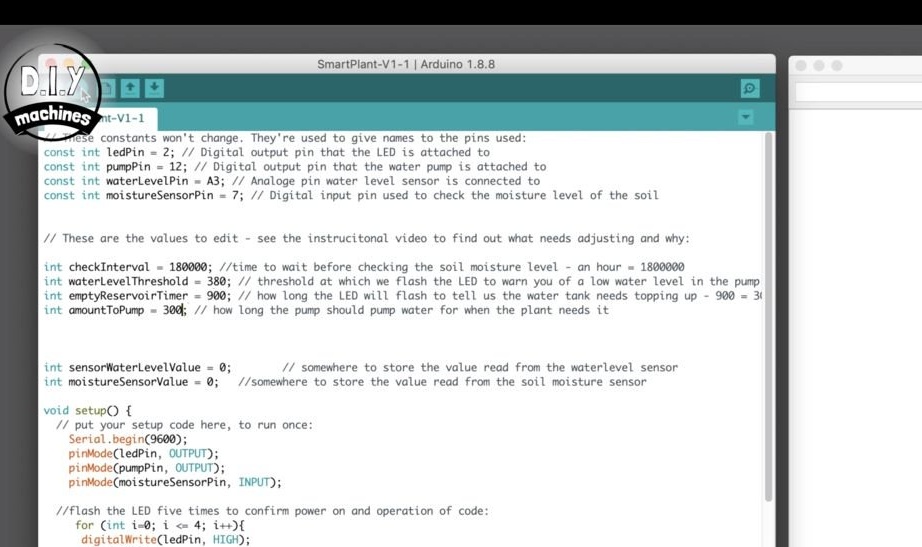
Set the check interval to 180,000. This means that the soil moisture level will be checked every hour. The emptyReservoirTimer value should be set to 900. This means that the LED will flash slowly for 30 minutes to indicate a low water level in the tank.
The variable for "amountToPump" controls how much water is pumped into the soil. The wizard sets the value to 300.
When water is added, its level is controlled through an opening in the tank.
Everything is ready, more details on the assembly of such a device can be seen in the video.