

Anyone who works with wood knows that you need to make hundreds of holes for screws and it is almost impossible to make a series of holes perfectly straight and of the same depth manually.
This article will help you create a tool that will save a lot of time and effort when drilling precise holes on wood, plastic, metal or any other material that you work with. It can also be very useful for cutting holes of various shapes due to the adjustable height of the tool.
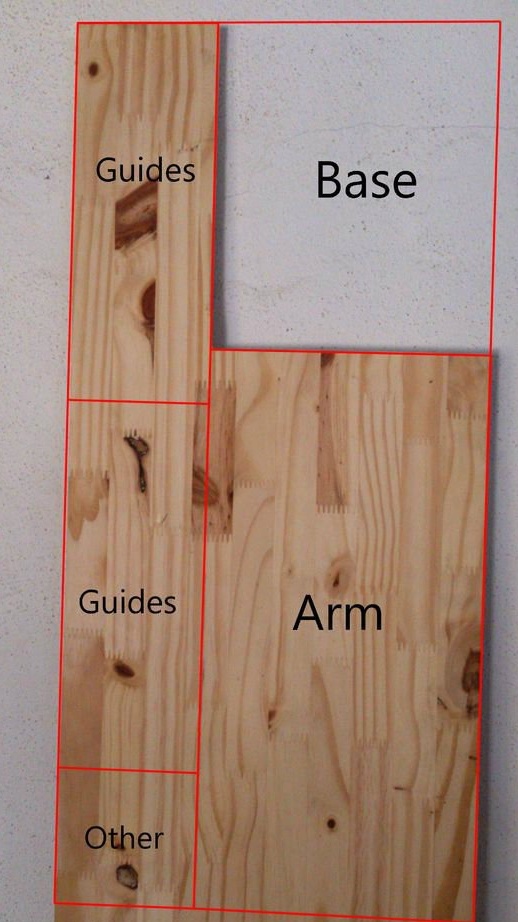
Necessary materials:
- Wooden board (~ 2 cm thick);
- Wooden beam (minimum 2 m, the master used 25x35 mm);
- 2x small guides for the furniture drawer;
- About 30 long screws (and about 20 shorter ones);
- Glue for wood (optional);
-M8 hairpin;
-M8 sleeve;
- Screws and nuts M6;
Tools required:
- Ruler and pencil;
- Square;
- Saw on wood;
- 80 grit sandpaper;
- drill;
- Clamp (optional, but makes the job much easier);
- screwdriver;
- miter box;
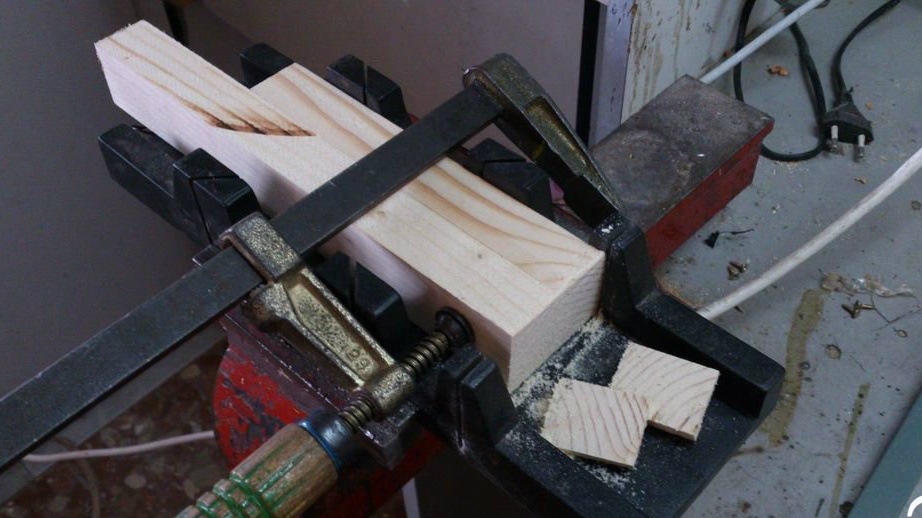
Step 1: Product Base
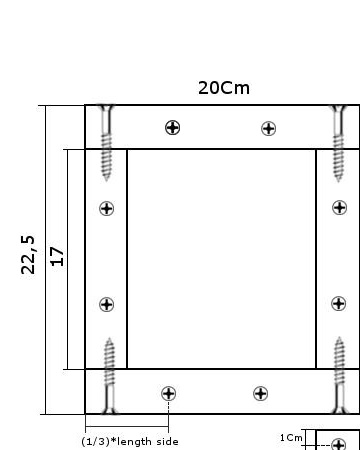
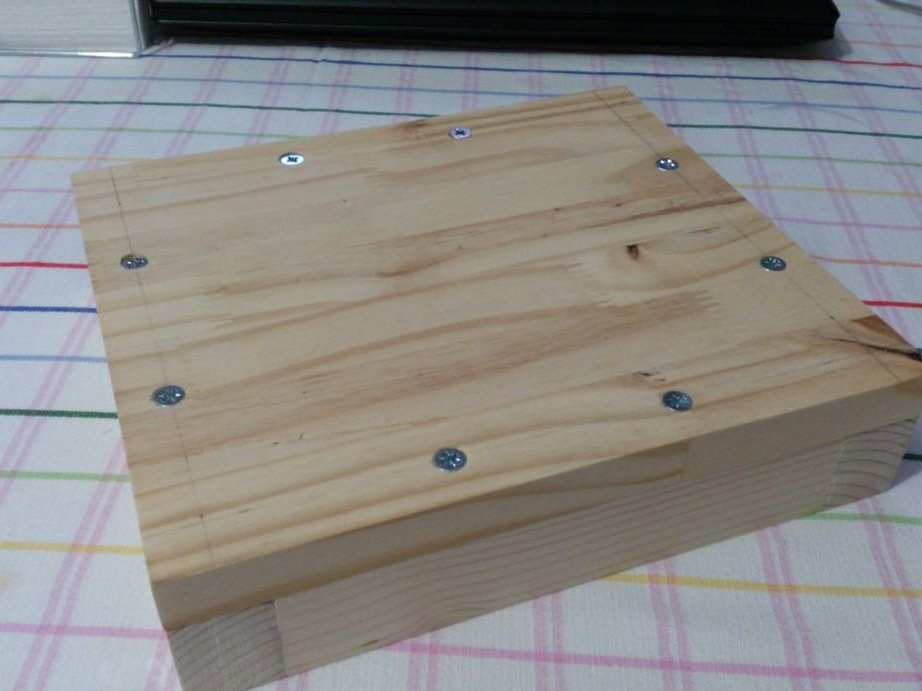
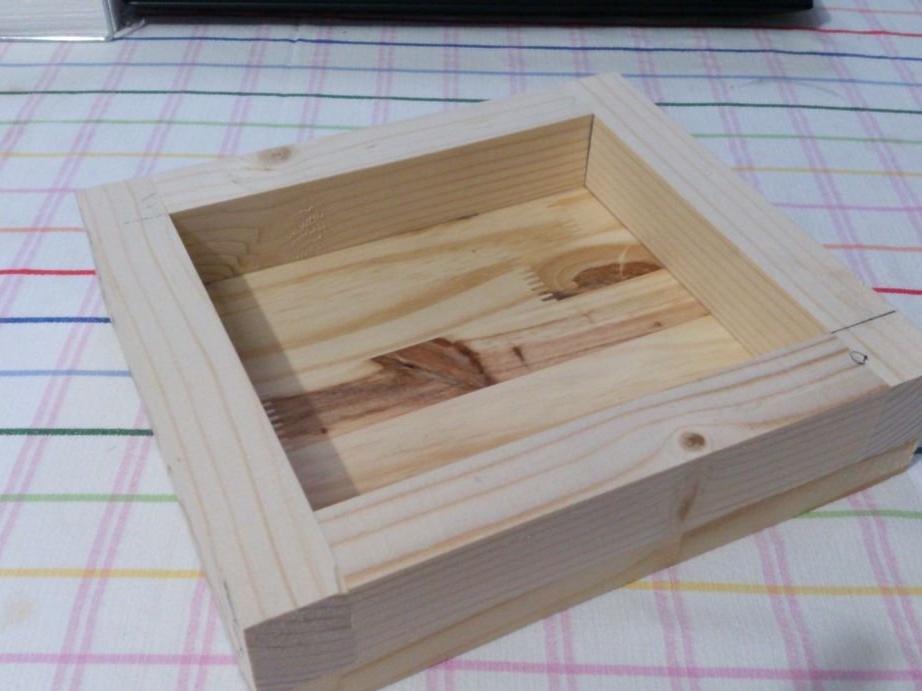
To make the base, cut four parts from a wooden beam, the dimensions are indicated in the image. To avoid problems when assembling them, the master used a miter box and a clamp.
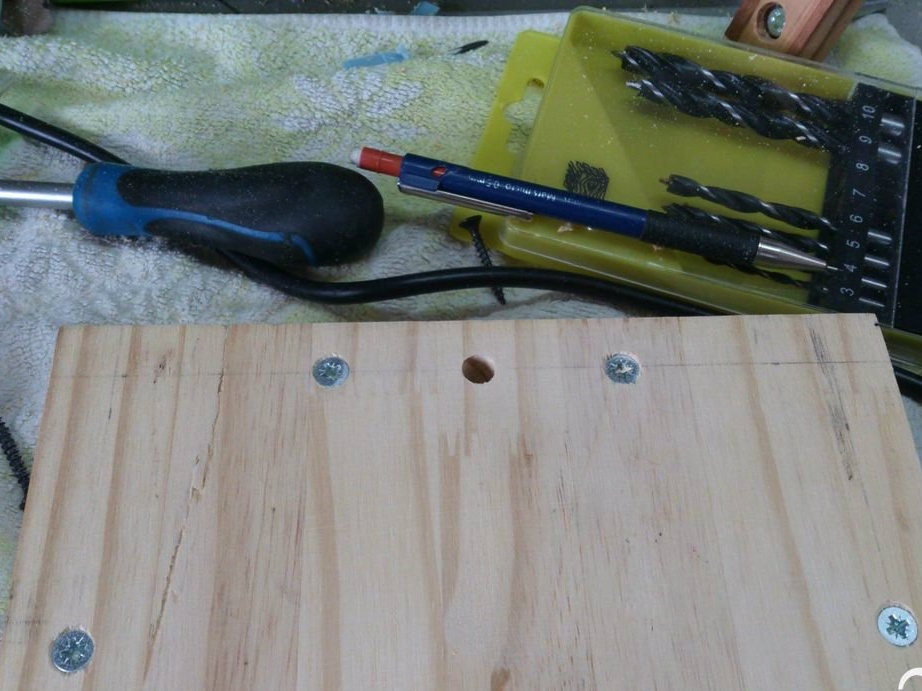
Mark the position of the screws at a distance of 1 cm from the edge. Find the center of the beam and mark the position of the holes. Then drill holes that should be slightly narrower than a self-tapping screw.
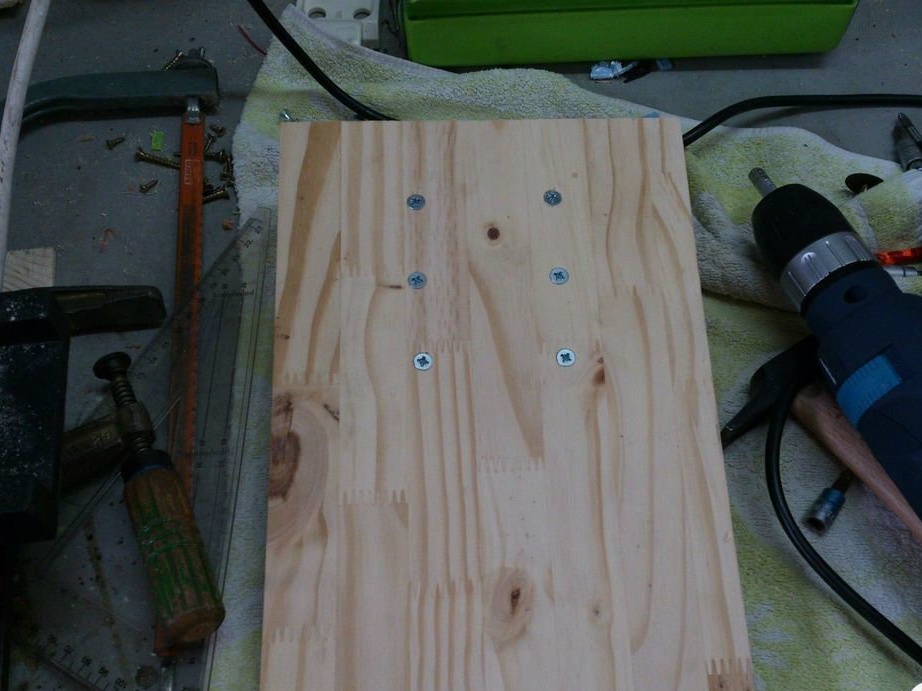
After all the holes have been drilled, tighten the screws. The master lubricates them additionally with wood glue.
To attach the cover, simply draw a contour above the wooden board, cut it and attach it to the frame from the bar using self-tapping screws.
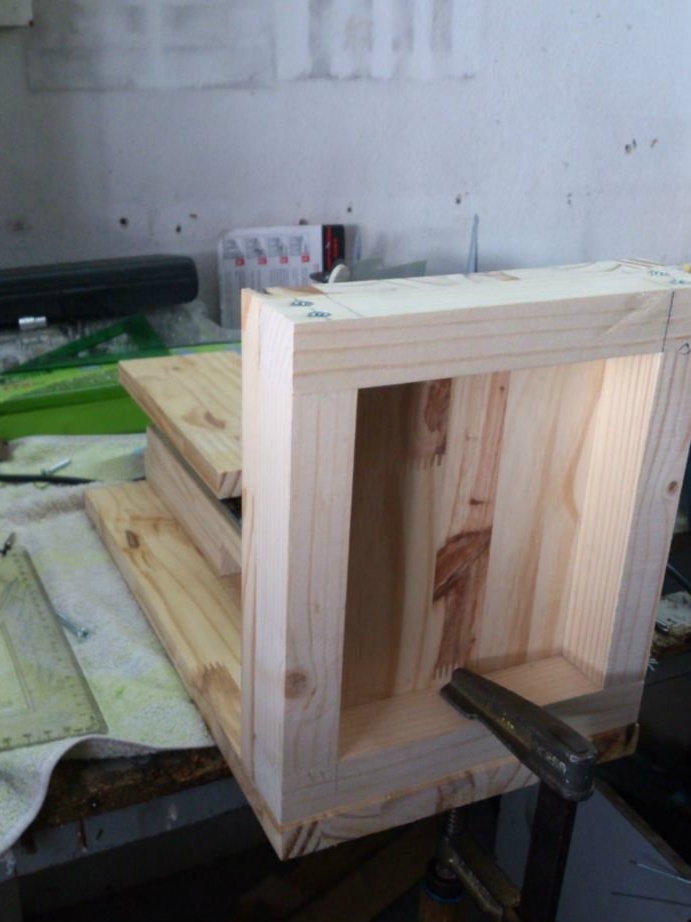
Step 2: Movable part of the device or lever
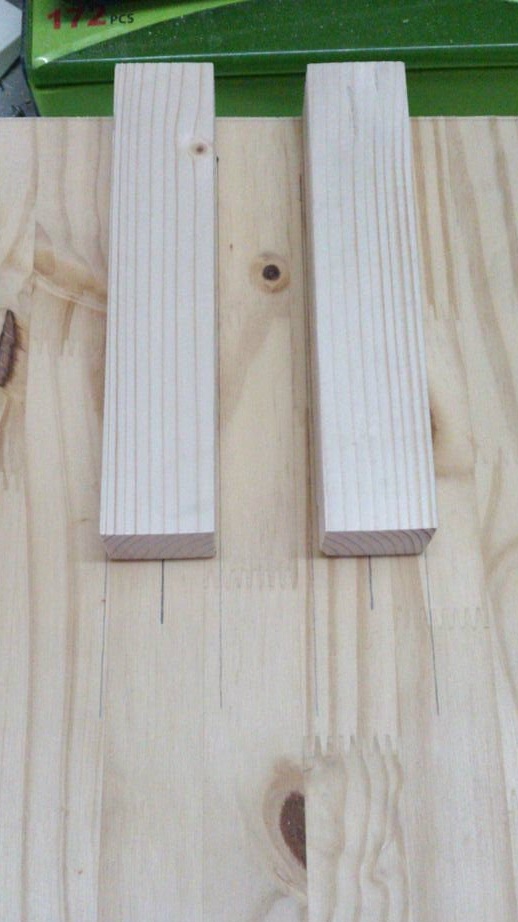

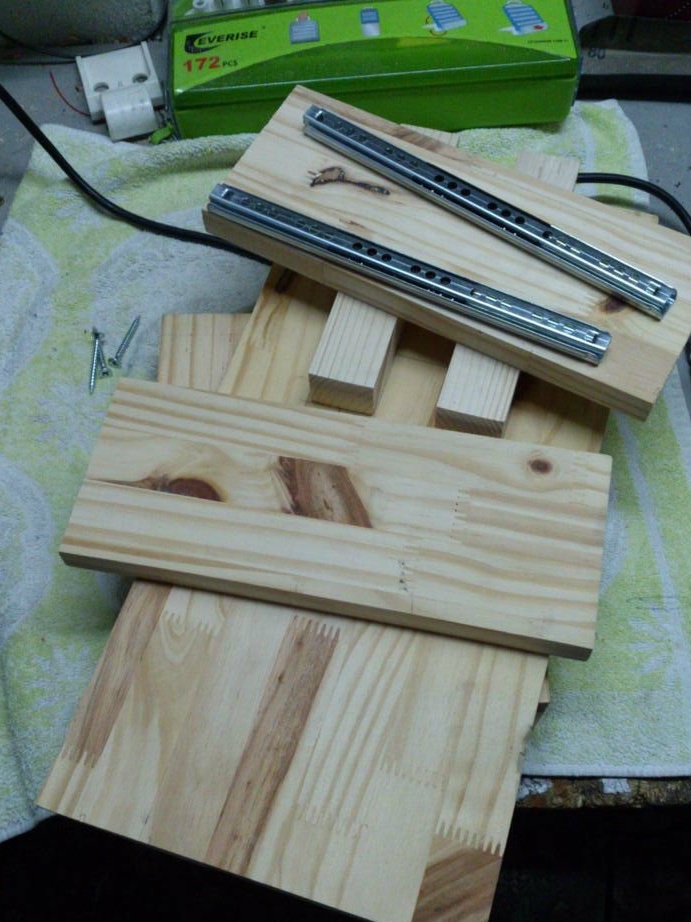
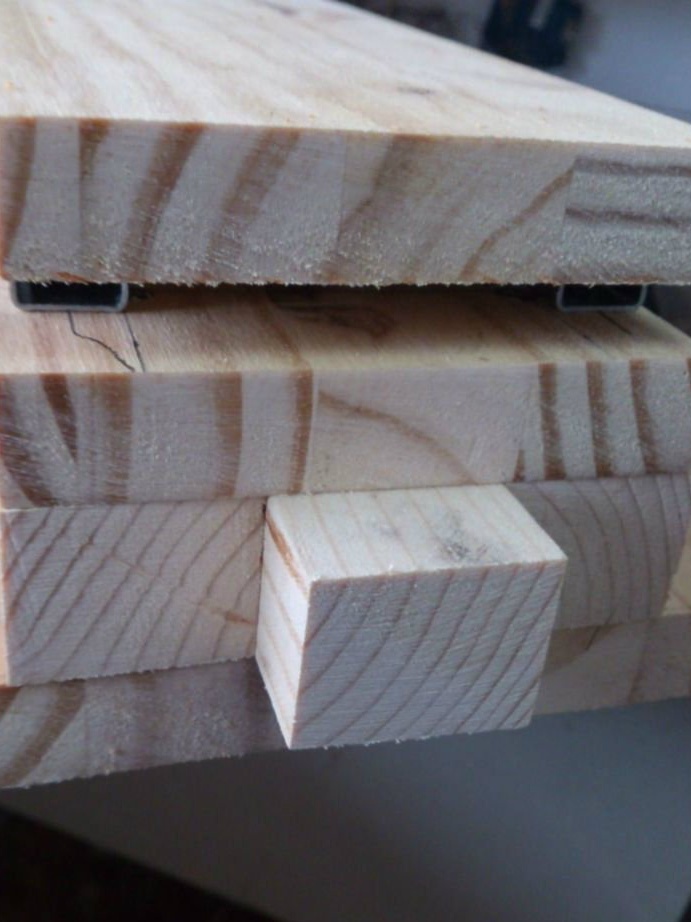
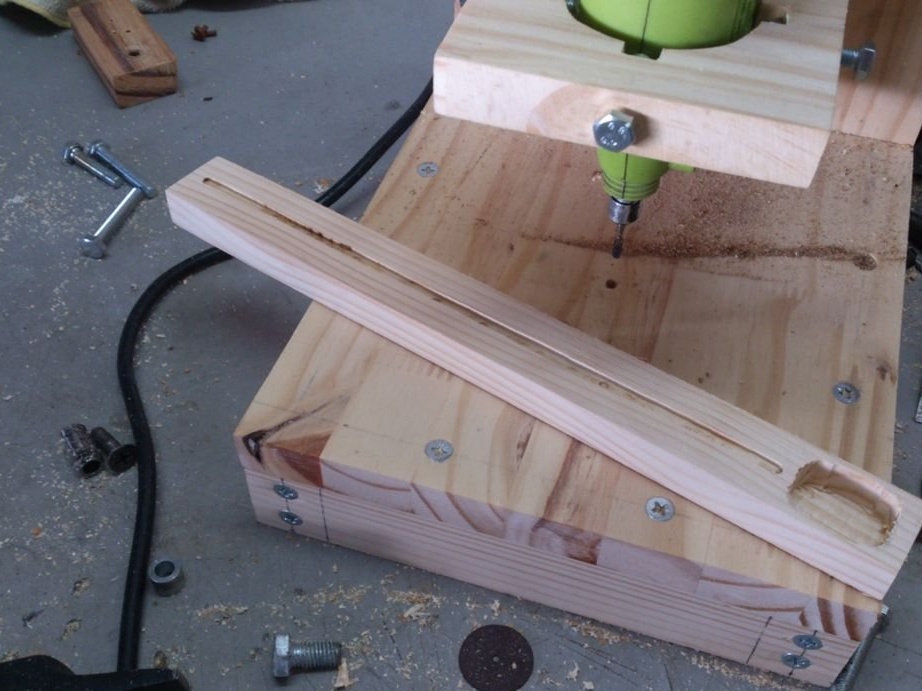
The next part of the drilling machine is the lever that will hold the guides for attaching the drilling tool. The master uses dremel. To do this, you need a board 40 cm high and the width of the bottom base (Fig. 1).
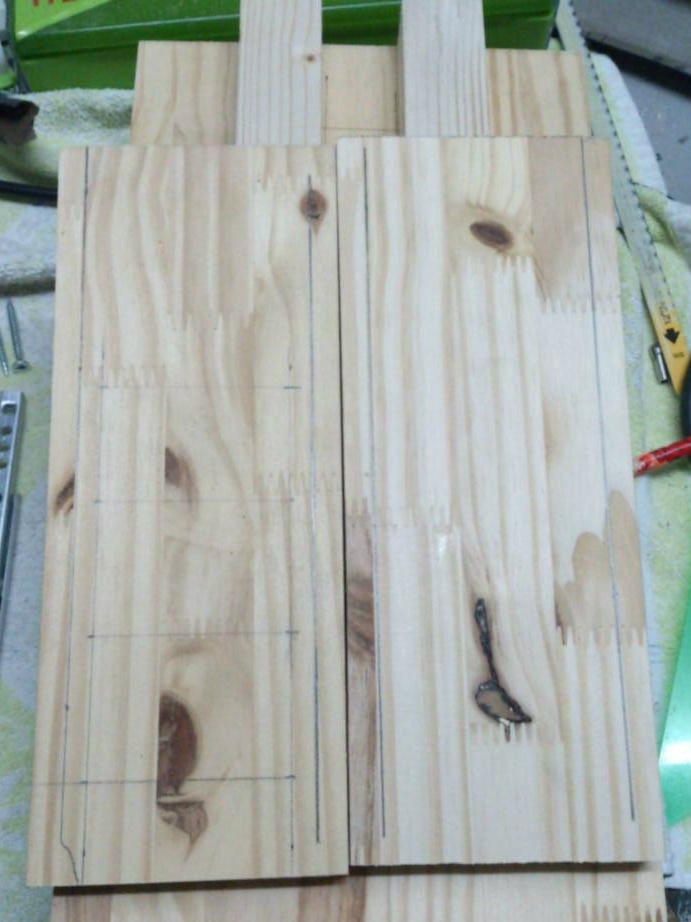
To set the guides, you need to make a separation between the board and the dremel. To do this, the master cut out two pieces of wood from a bar (Fig. 2), their height is 17 cm. After attaching to the rack, they will provide some indent from the rack, which will allow working with large materials.
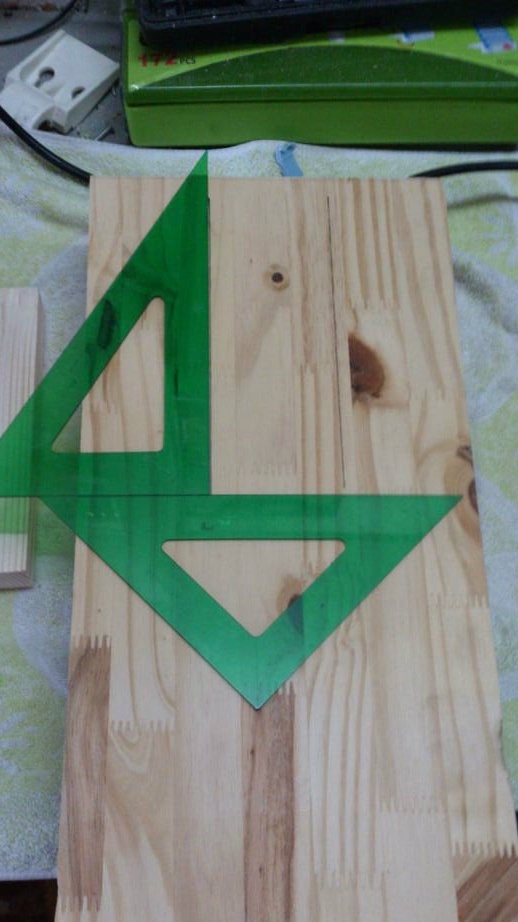
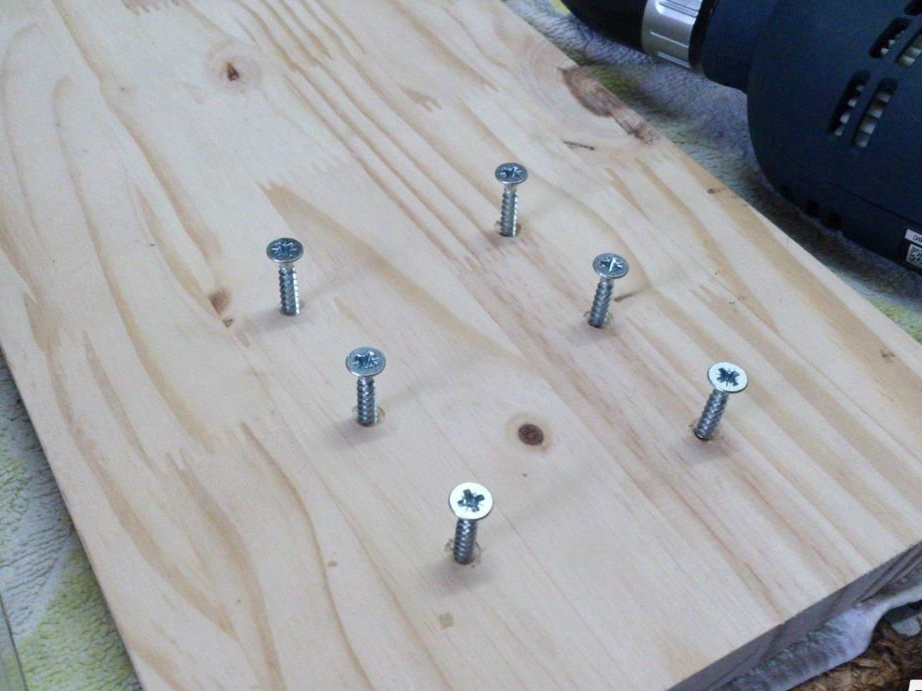
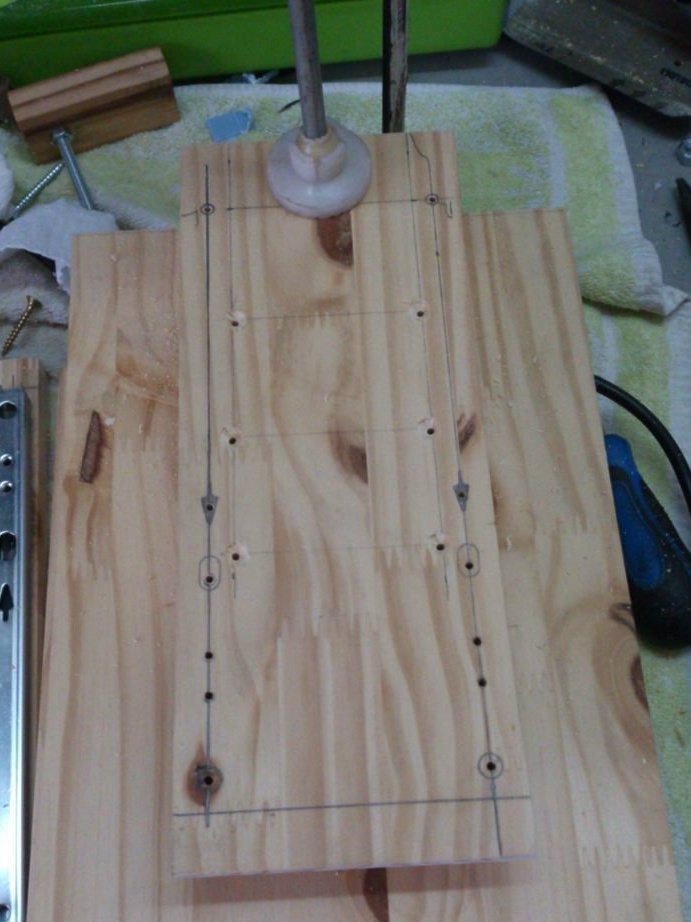
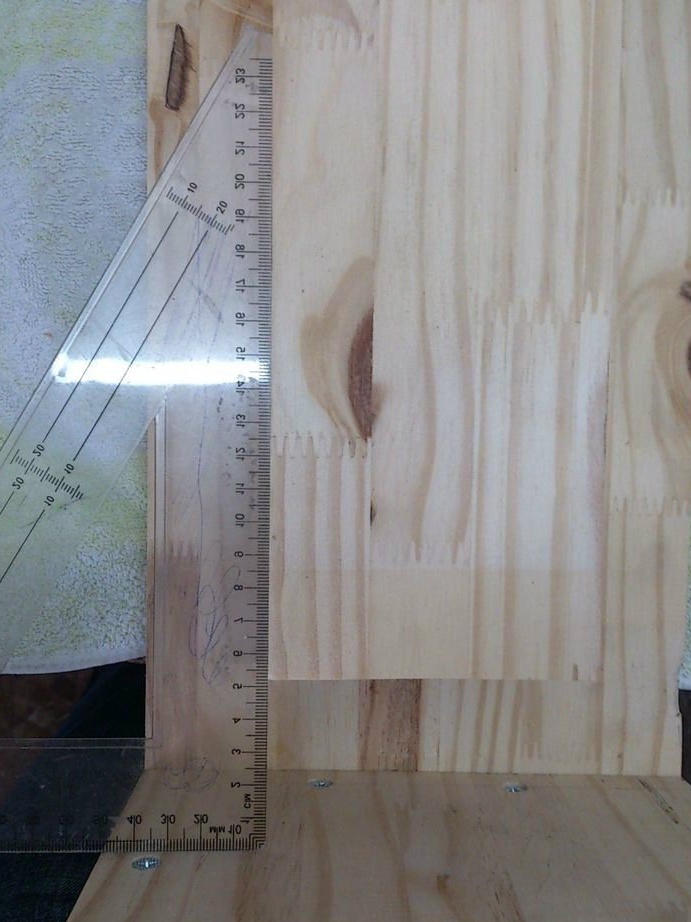
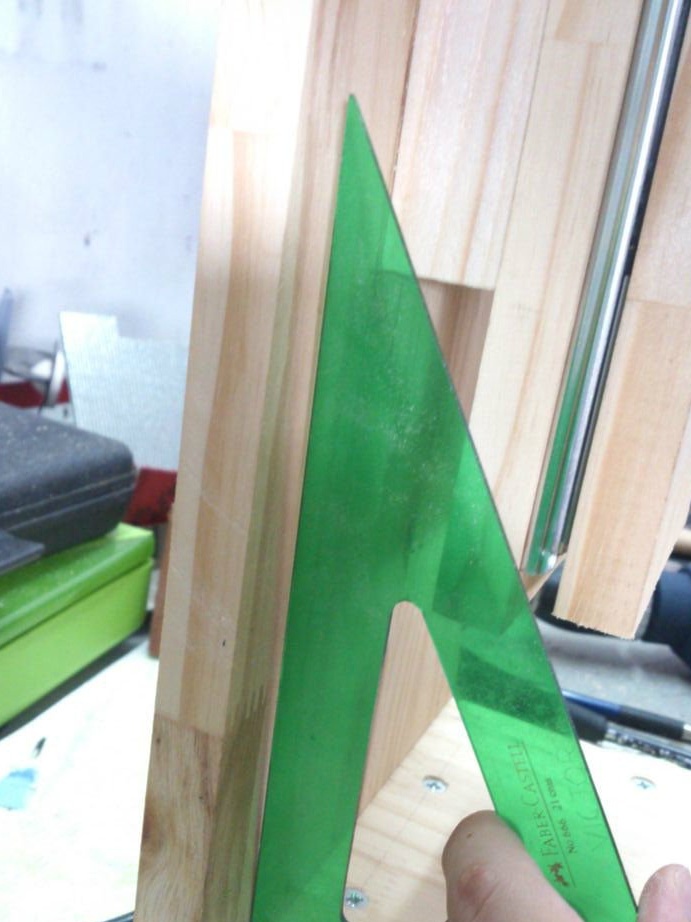
To attach these slats, the master marks the center of the upright, then adds 5 cm on each side. The distance between the opposite edges of the lamellas should be 10 cm. With this in mind, the master uses a square to draw parallel lines in the place where the beam will be (Fig. 4 and 5). The master also draws another parallel line, the size of half the width of the bar. This line will show where to screw the screws.
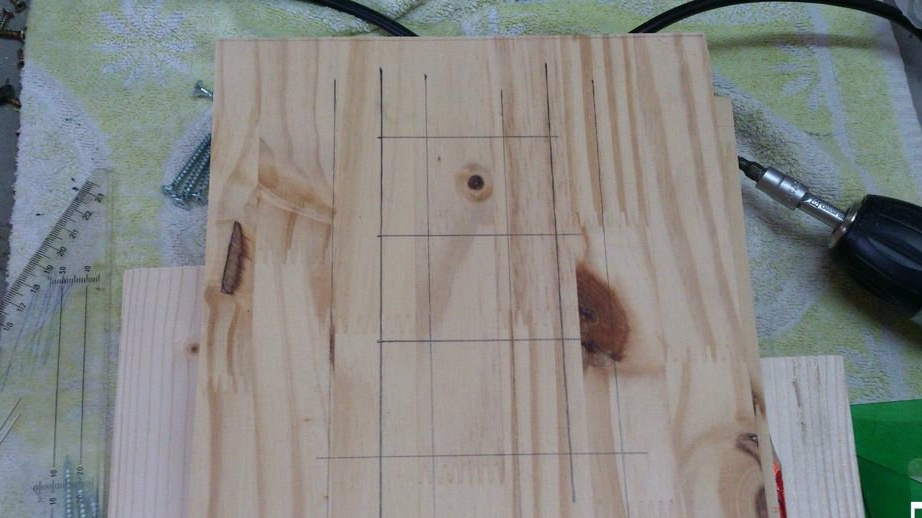
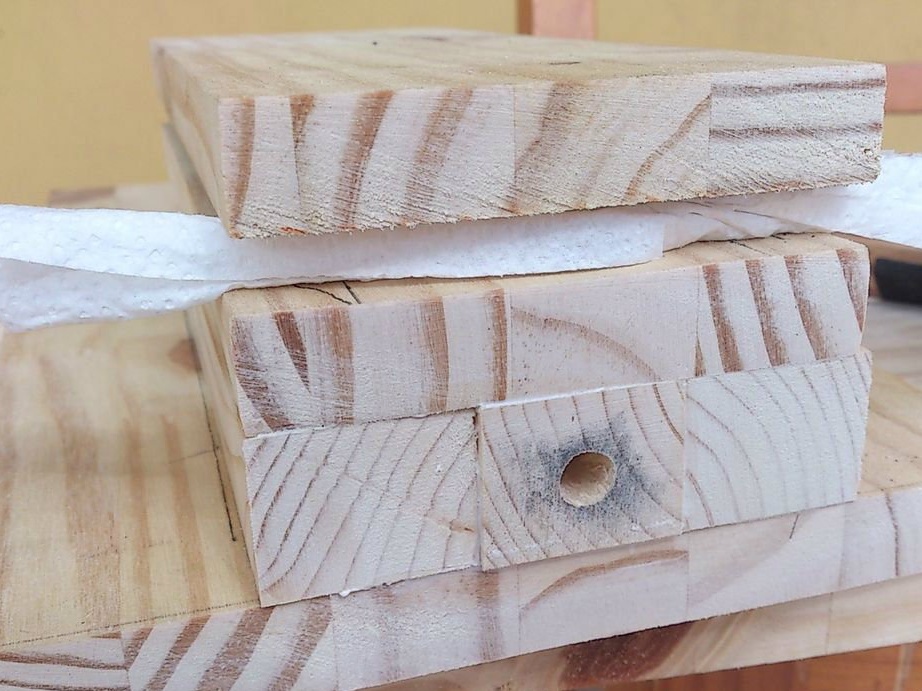
To find a place for self-tapping screws, the master divides the length of the strips by 4 (Fig. 5).
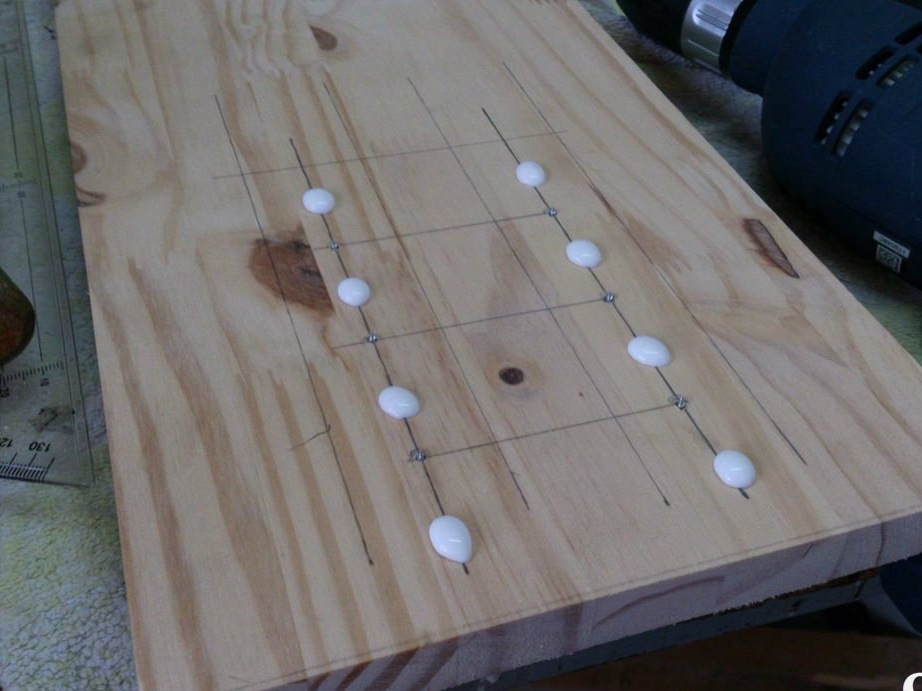
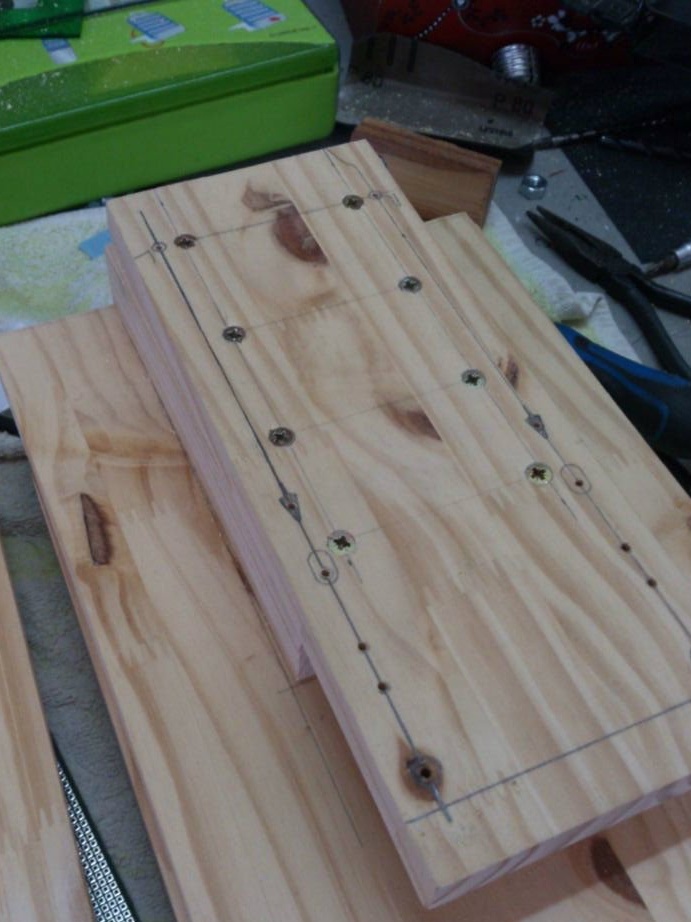
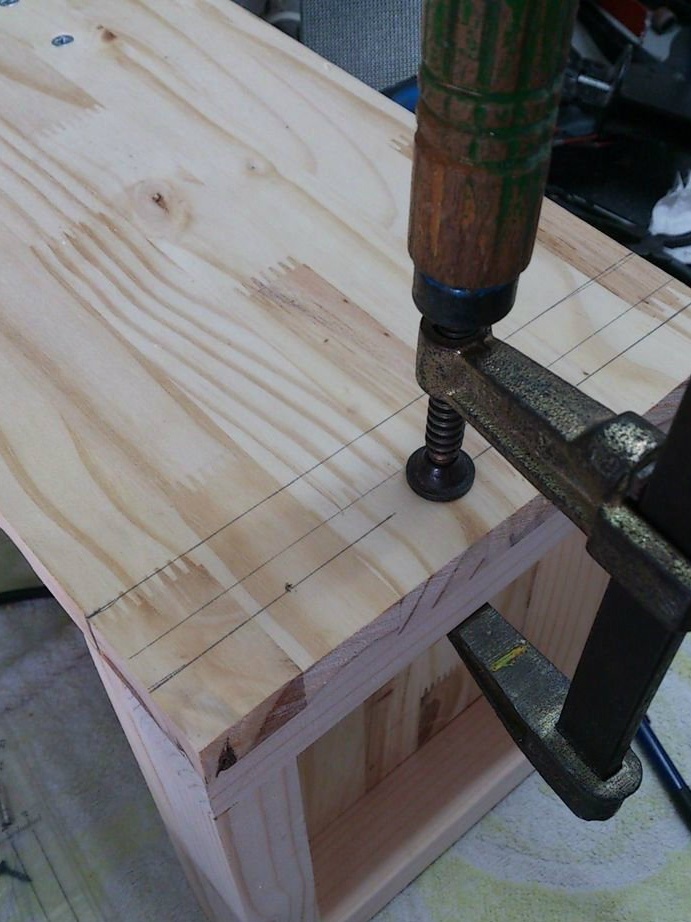
After the holes are drilled, the master countersinks them (Fig. 6). Then joiner's glue is poured into the holes and a beam is installed. After that, the beam is installed and screwed into place (Fig. 9).
Step 3: Material Cutting Explanations
Placing the guides is the most difficult operation, they must be completely perpendicular to the base, and should be completely parallel to each other.
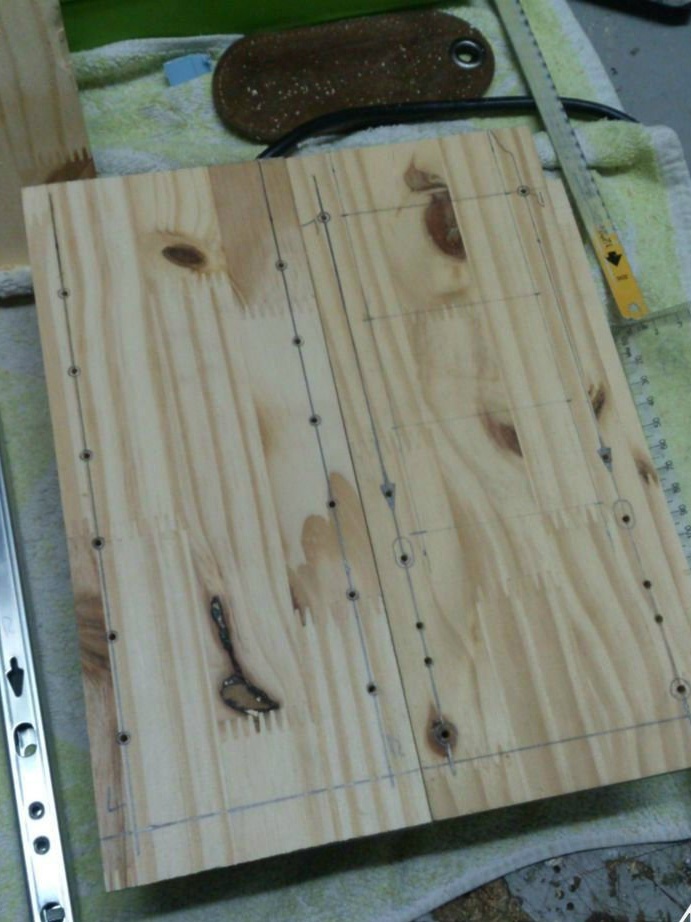
First, the master sawed off two boards 25 cm long (10 mm wide) (Fig. 1), note that wood is not thrown away (Fig. 2). After grinding the edges on the base board, two marks are made, one indented 10 cm, and the other 90 (Fig. 3). The whole procedure is repeated with the bottom of the board and with the second board.
After drawing, these lines should be parallel to each other. Using a square, the master draws a line 1.5 cm above the lower edge, perpendicular to the other two. This line will help the guides to be at the same height.
The lines that determine the position of the guides must go through the middle of the holes. Then the places of future holes are marked, after which they are drilled (Fig. 4).
Then the guides are attached to the board, in order to check the accuracy of their location (Fig. 5).
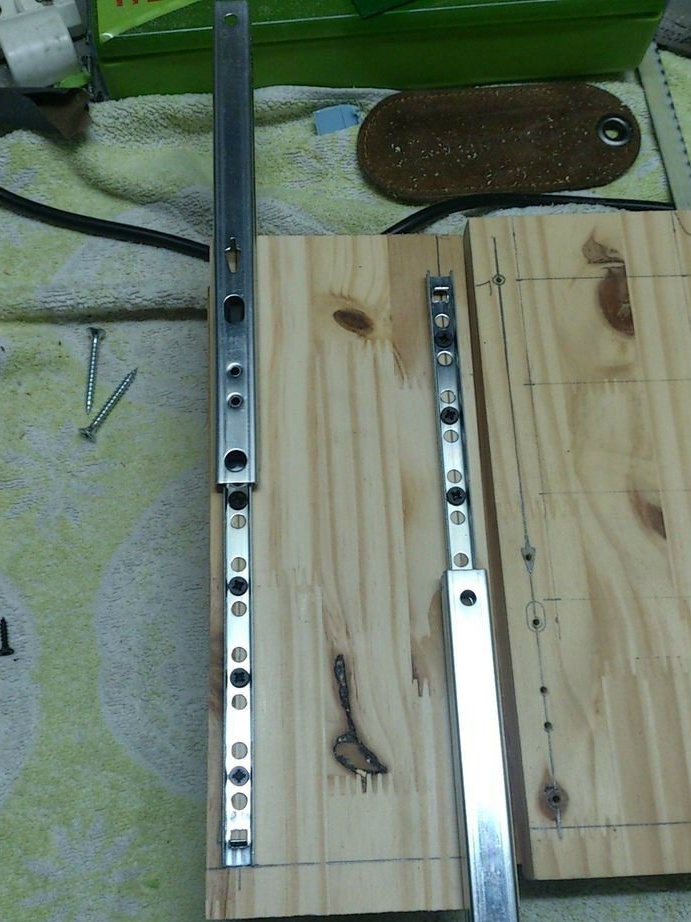
Important: note that the guides have holes in different places. On the one hand there are many, and on the other, only a few. The side with several holes will be the side attached to the movable part of the rack. This is necessary in order to make it easier to disassemble in case the guides are stuck, or make any adjustments ...
To fasten the board to the spacers, the master performed a special procedure. This board should be perfectly parallel to the large board. To do this, the master made a simple but effective tool for leveling the board, similar to a surface gage (Fig. 6). As soon as the board is aligned, it is fixed with screws (Fig. 7 and 8).
After that, it remains to screw the guides (Fig. 9).
IMPORTANT: When tightening the screws, the board may go away. Therefore, secure the guides with clamps.
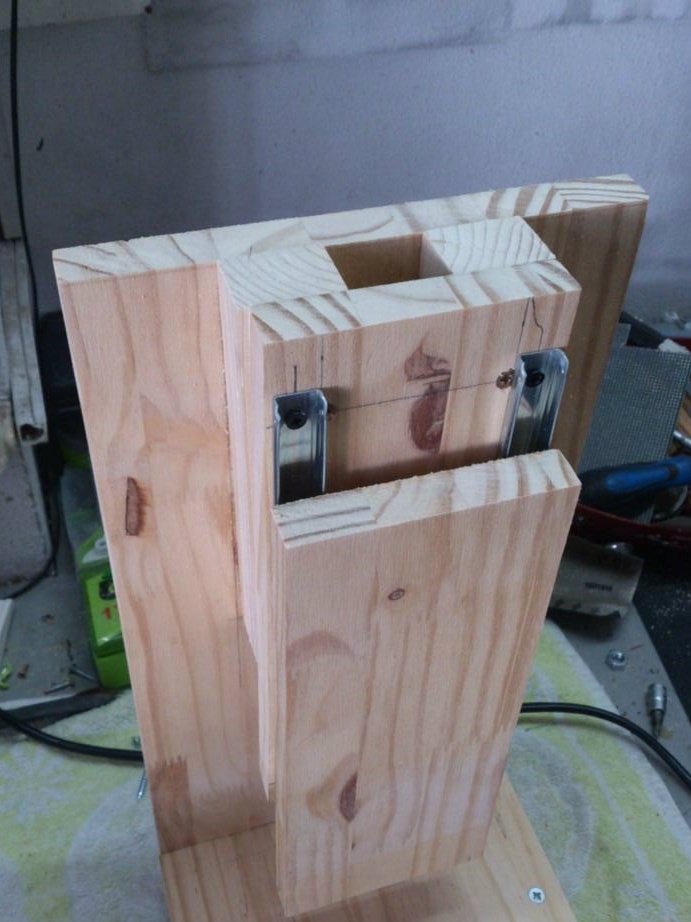
Step 4: Combining Structures
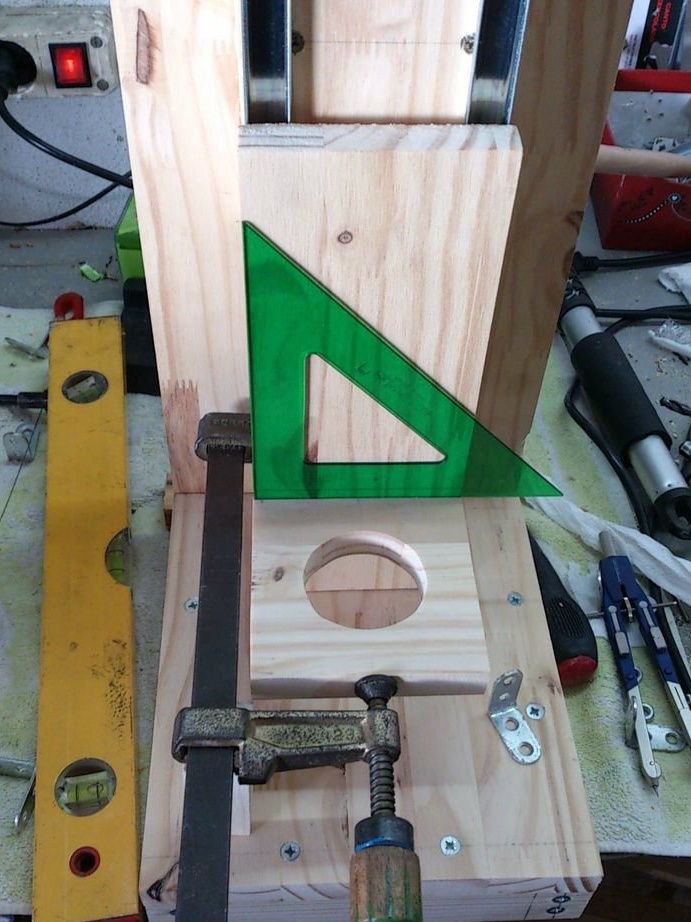
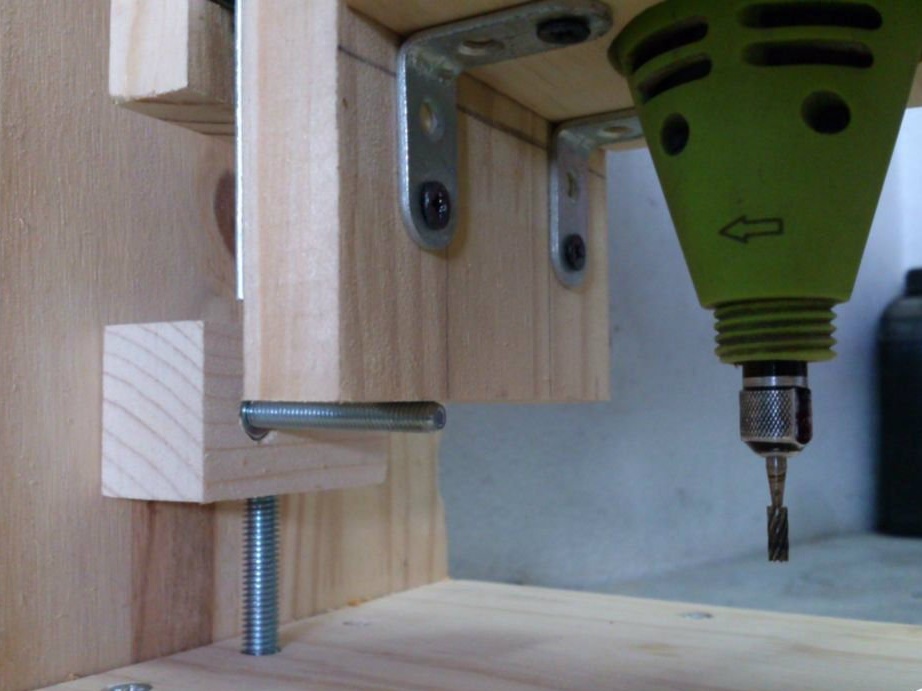
First, we press the base to the vertical board on the eye, make sure that the edges are more or less aligned. Do not tighten the clamp strongly, there should be a small stroke of the parts (Fig. 1). After that, using a square, check the correctness of the angles during the movement of the rack (Fig. 2). If the angles change during movement, then it is necessary to change the inclination of the base, gently tapping on it from below.
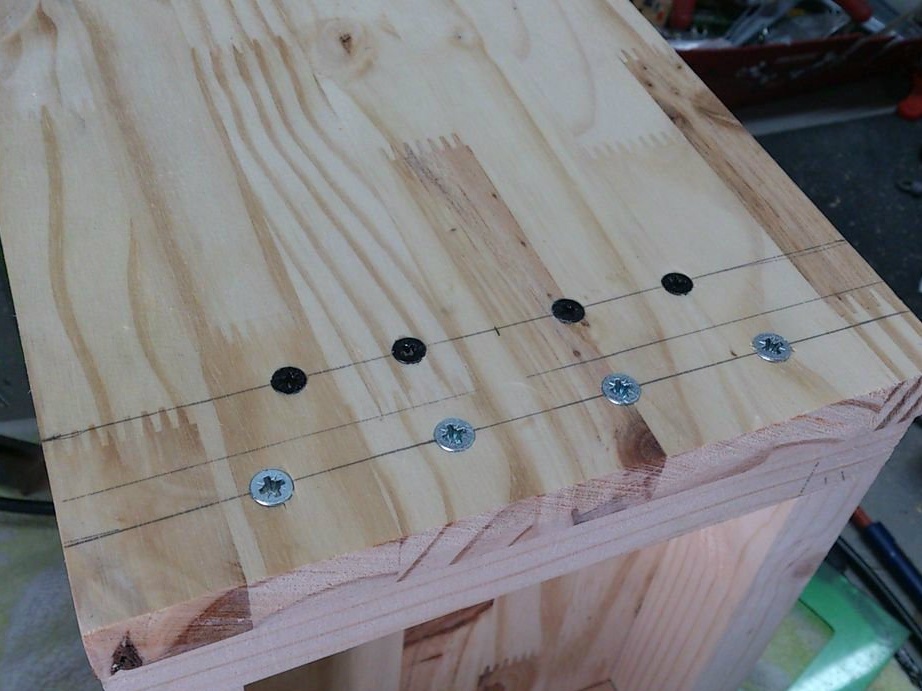
As soon as the base is aligned with the guides, we tightly clamp it and mark the places where the screws will be attached (Fig. 3). To mark the lines where the fasteners will be located, the master divided the length of the bar and the board into two. Thus, the screws will go through the middle. The master fixed 4 long self-tapping screws at the top (near the bar) and 4 short (on the board) (Fig. 4).
From the first time, the master was not able to precisely fix the structure. The upright is offset from the base (Fig. 5). To solve the problem, the master polished the upper part of the base, to which the stand is attached to an ideal angle of 90 degrees.
Step 5: Making a Dremel Holder
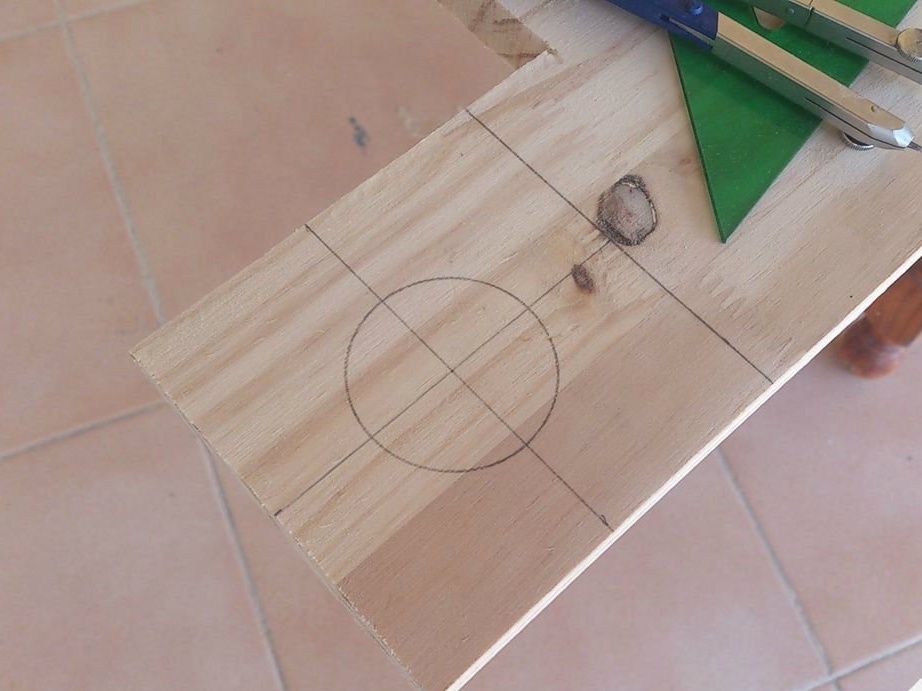
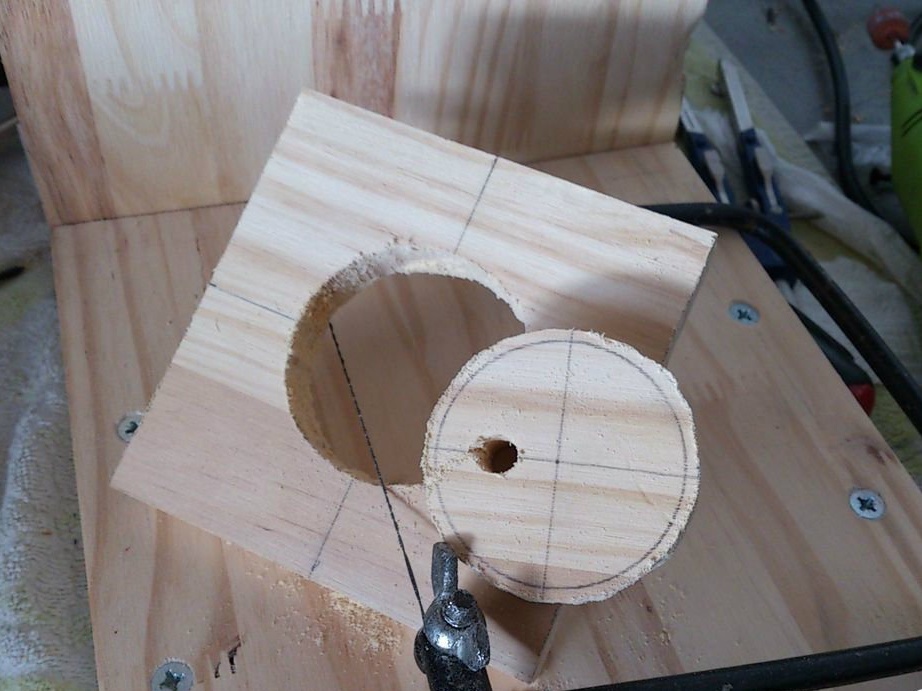
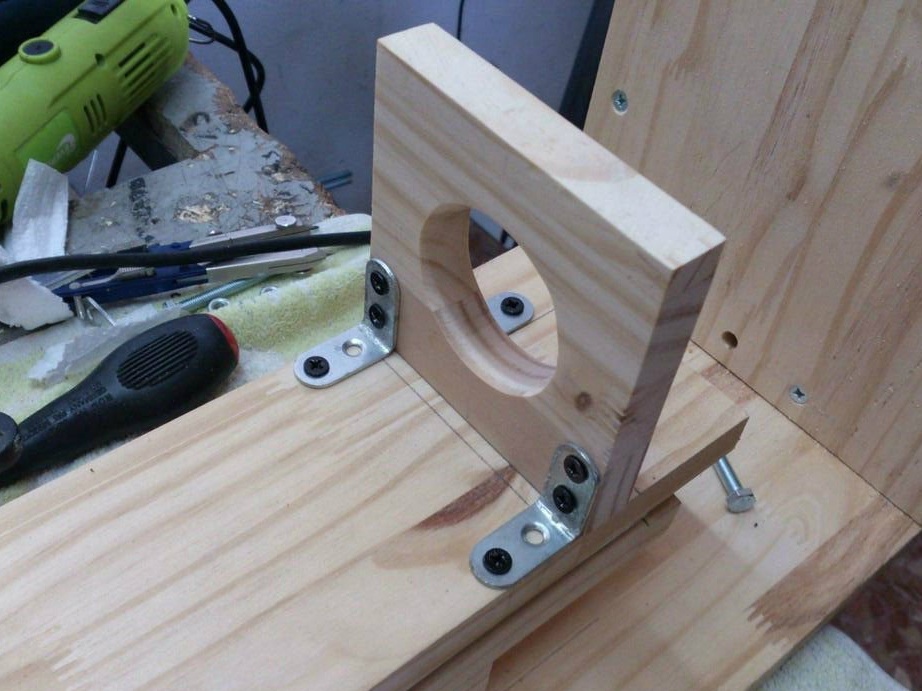
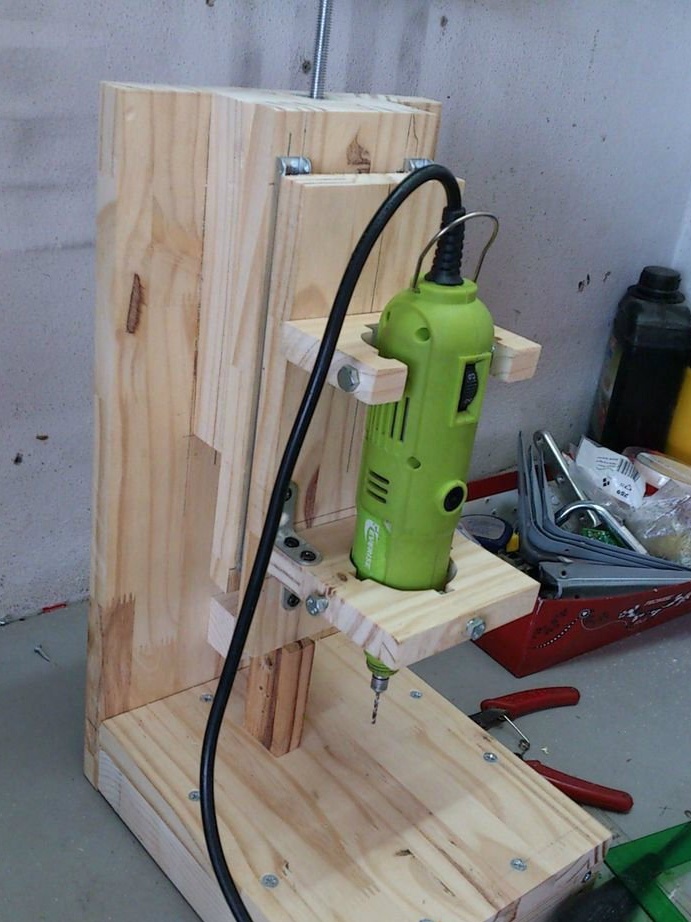
The diameter of the hole is the diameter of a high-speed dremel. Since this is the widest power tool that the master will use (Fig. 1 and 2).
The flat, factory side (the side that has not been trimmed) will be attached to the guide post. Three other sides are polished and marks are made in them for the location of the bolt holes in the middle of each side.
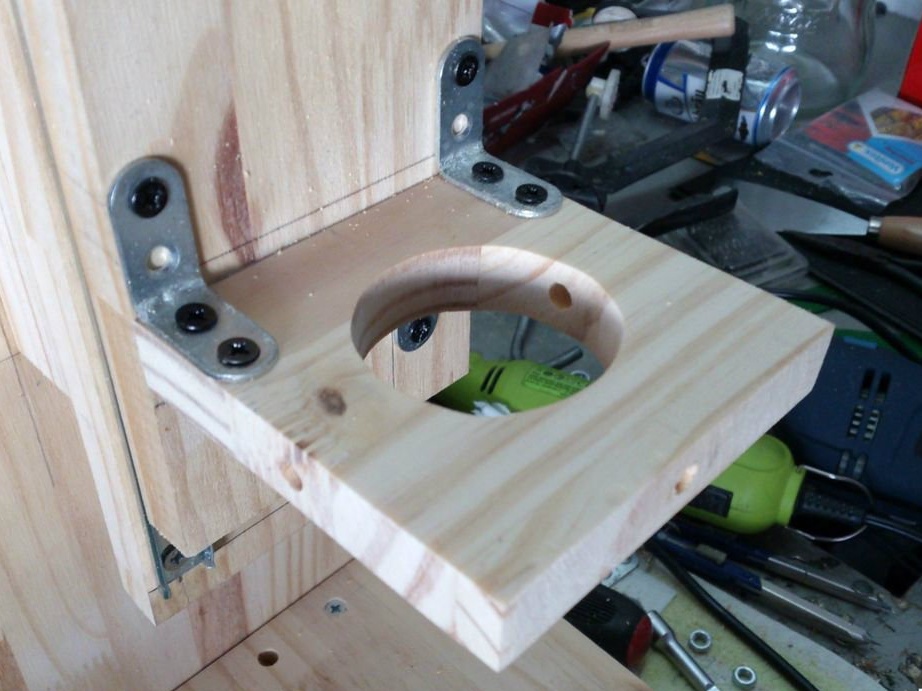
The holder is mounted in place with a clamp and leveled. Then drill holes for screws. When everything fits, the master removes the holder.
The master marks the points from the ends, in the middle of each side. Then he drills holes with a 6 mm drill. (Fig. 5).
Then the master cuts out square holes from the inside, equivalent to the size of the M6 nut. These grooves will hold the nuts in place (Fig. 6).
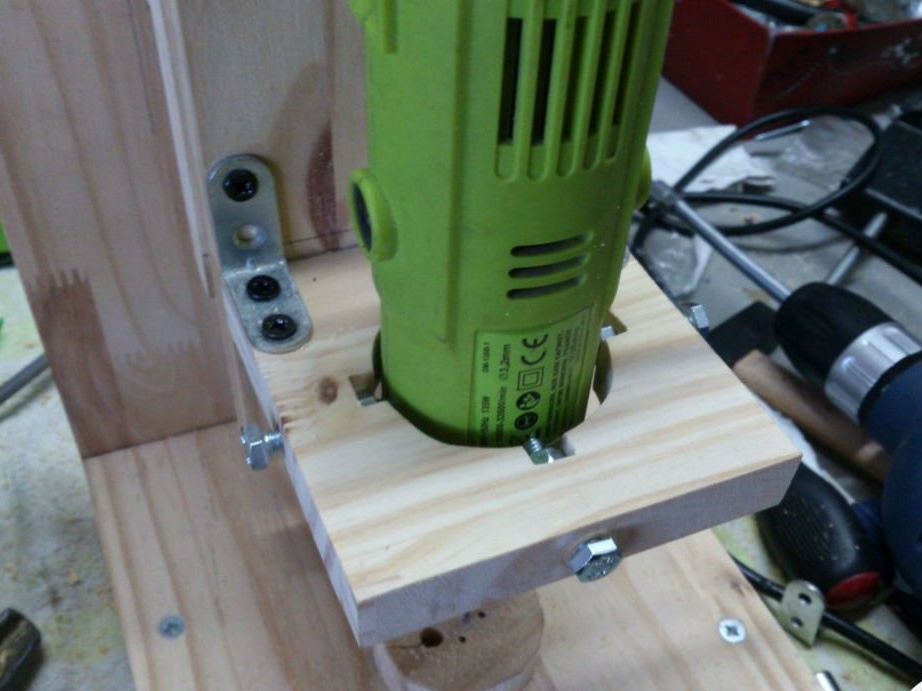
On top of the master attaches another holder, which he made in a similar pattern. The upper holder has an open part from the outside. It is necessary to hold the tool, just in case, by hand (Fig. 7 and 8).
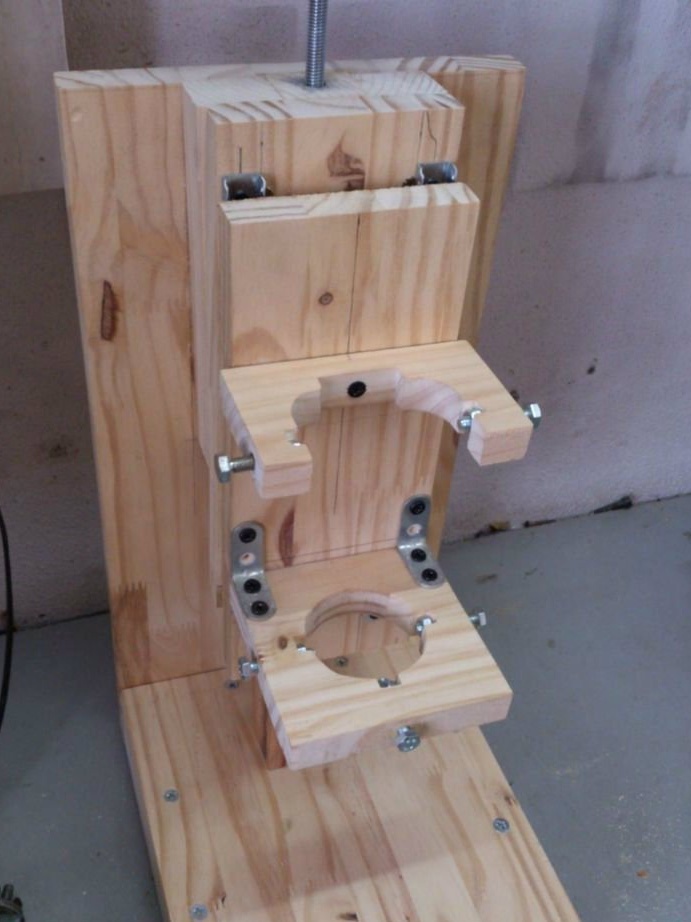
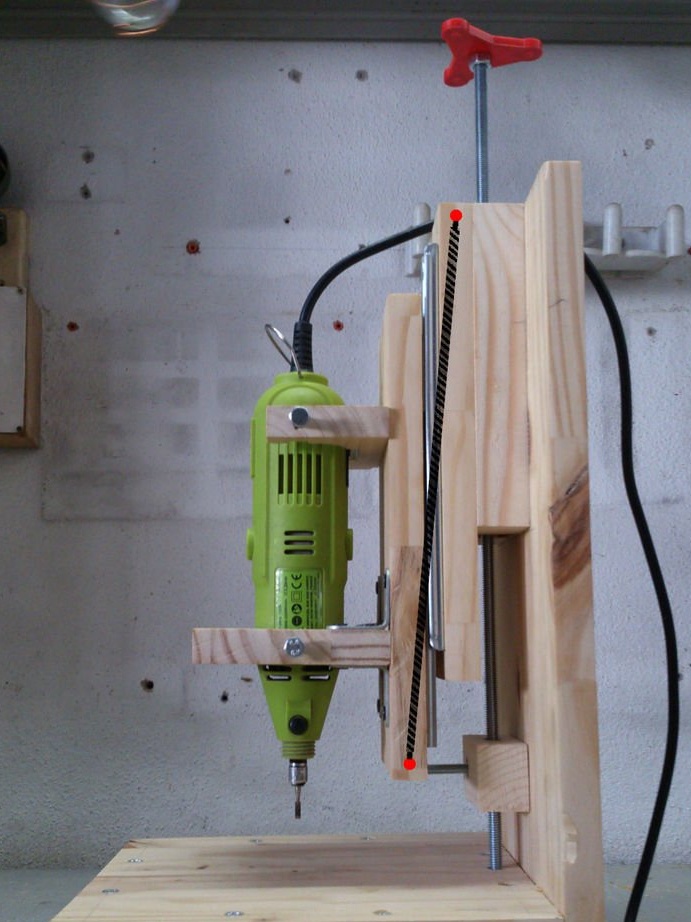
Step 6: Final work: hole depth adjuster
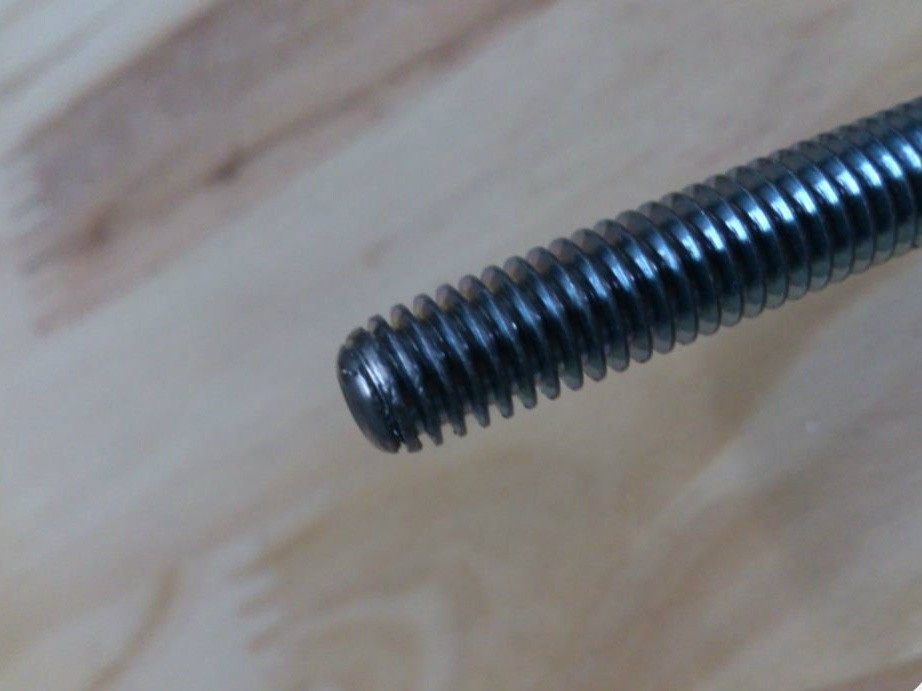
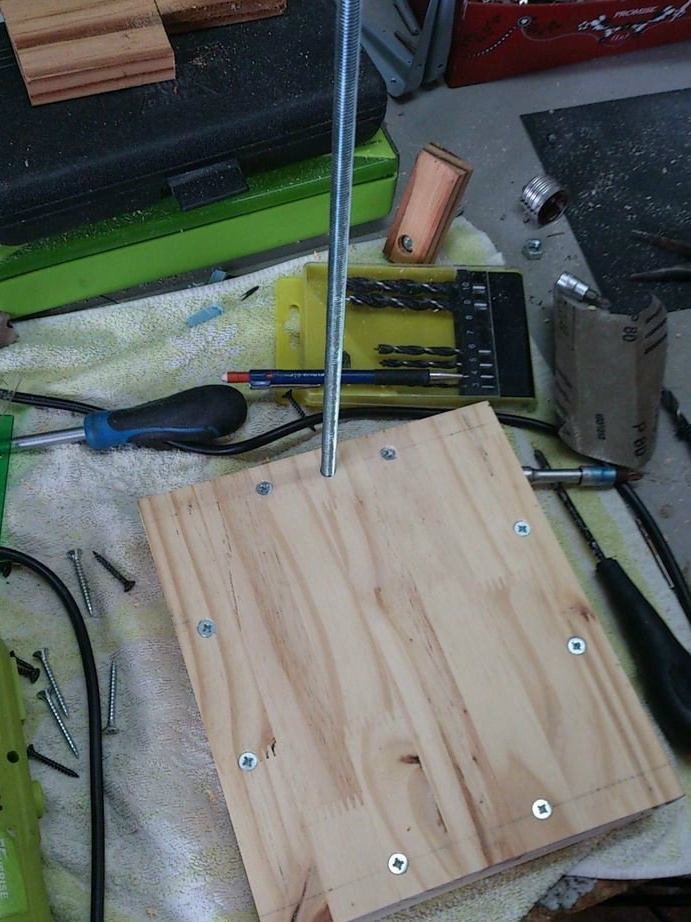
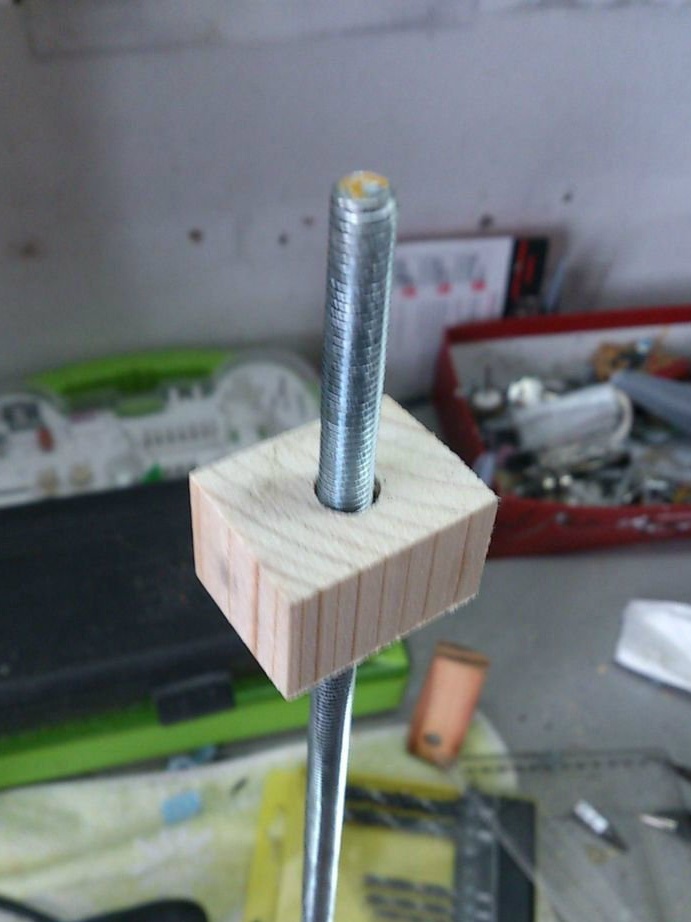

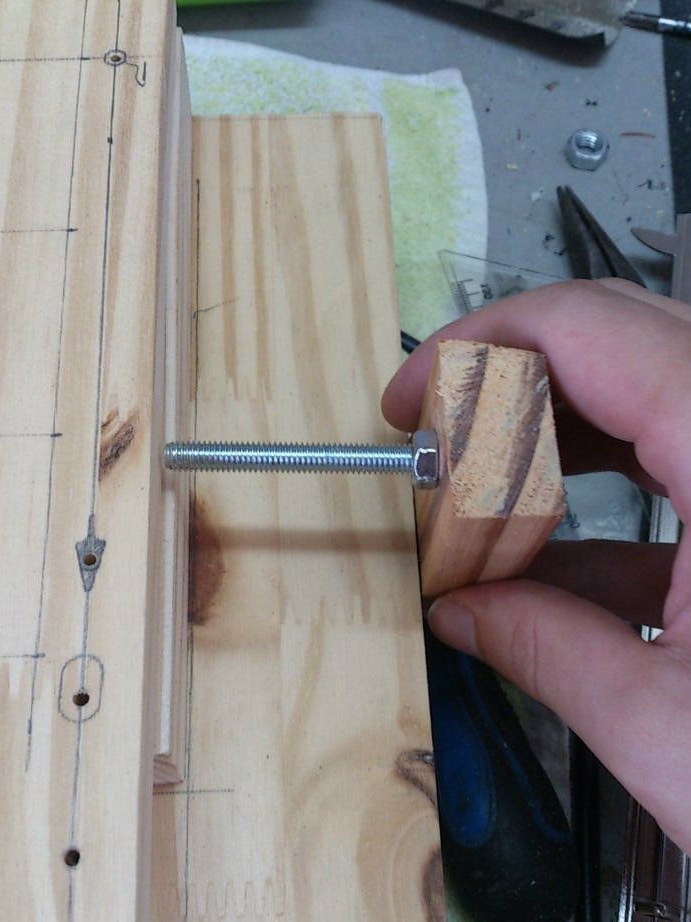
To make the holes the same height, you will need a height adjuster. The master used a hairpin with a diameter of 8 mm (M8). I cut it to a length of 50 cm and polished the edge to give it a round shape (Fig. 1). Then he made a hole in the base (Fig. 2). This hole should be large enough so that the pin rotates freely (Fig. 3).
A small block with a drilled hole in the center is glued to the top of the rack. It will help to maintain the stability of the guide rod (photo 4, 5 and 6)
Then the master makes a small bar, which will adjust the height of the guide rod. In the places of the passage of the studs, sleeves with M8 internal thread are pressed in (Fig. 7). A movable stand will rest on one of the studs. Thus, by twisting the guide rod up and down, high drilling accuracy will be established (Fig. 8). A small handle has also been added to the shaft to make it easier to turn.
Step 7: Using the Rack
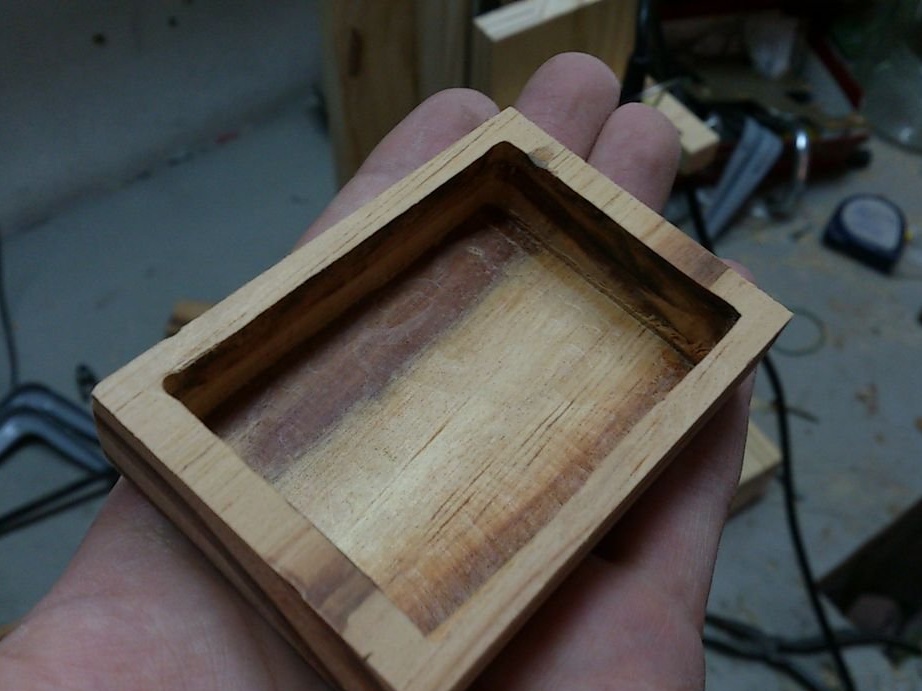
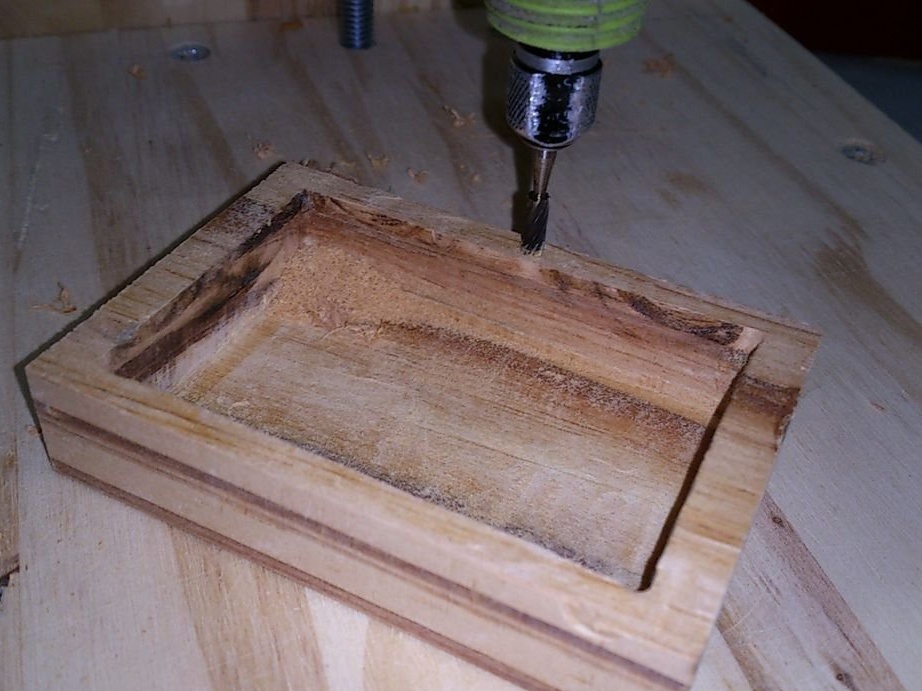
This stand is very useful for drilling straight holes with minimal effort, but in combination with a high-speed tool and a mill, it is very easy to cut the necessary recesses, as seen in the photographs.
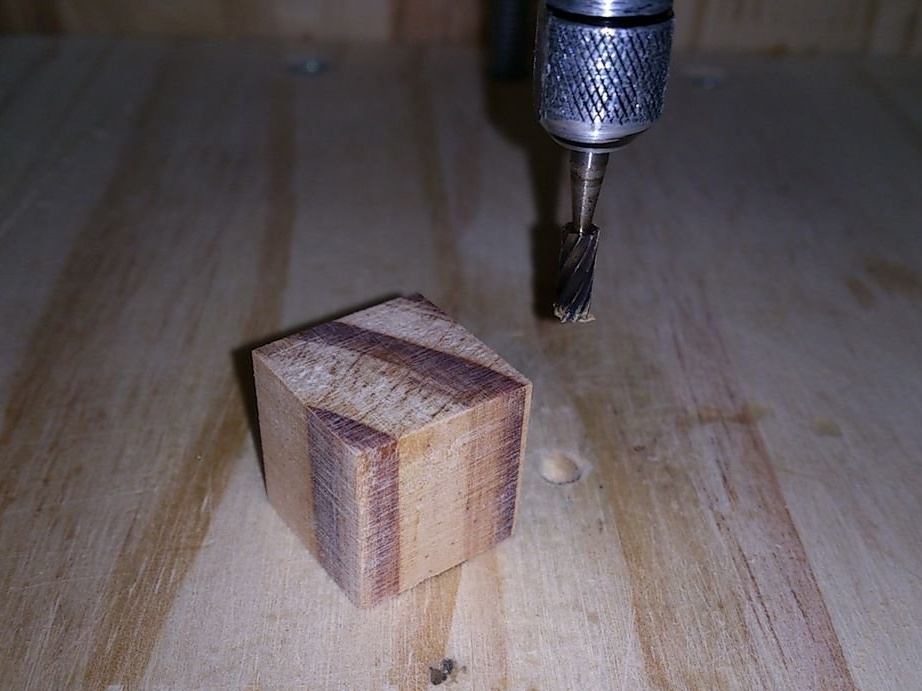
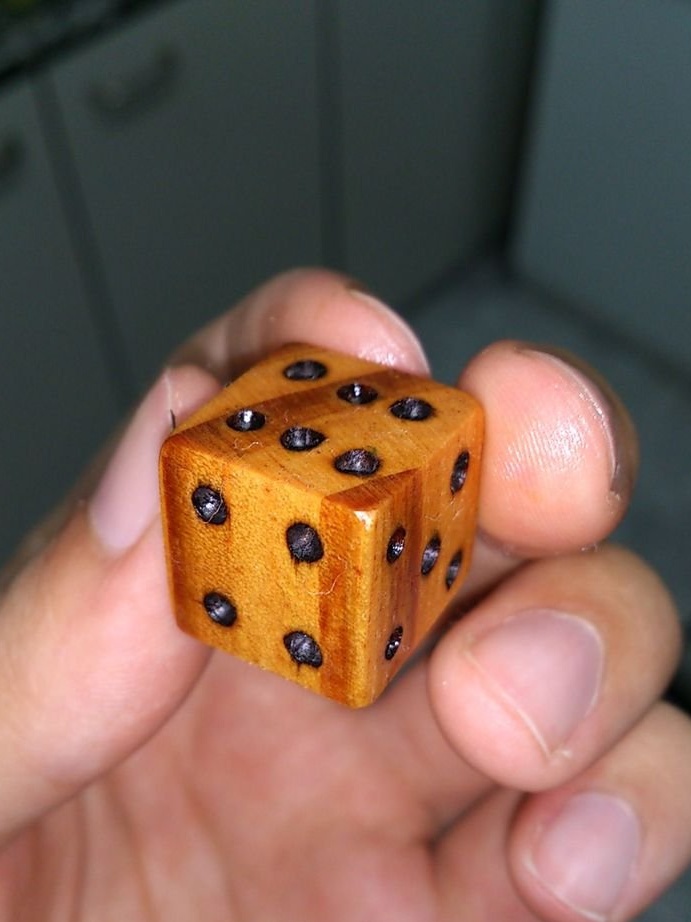
You can also cut perfect cubes from a piece of wood.