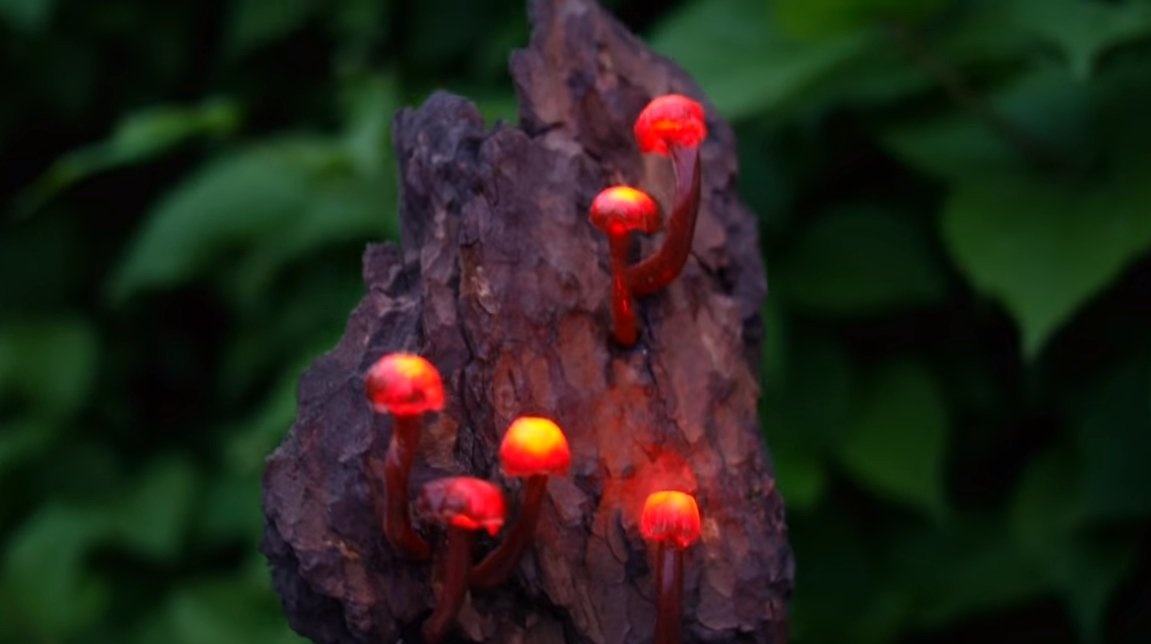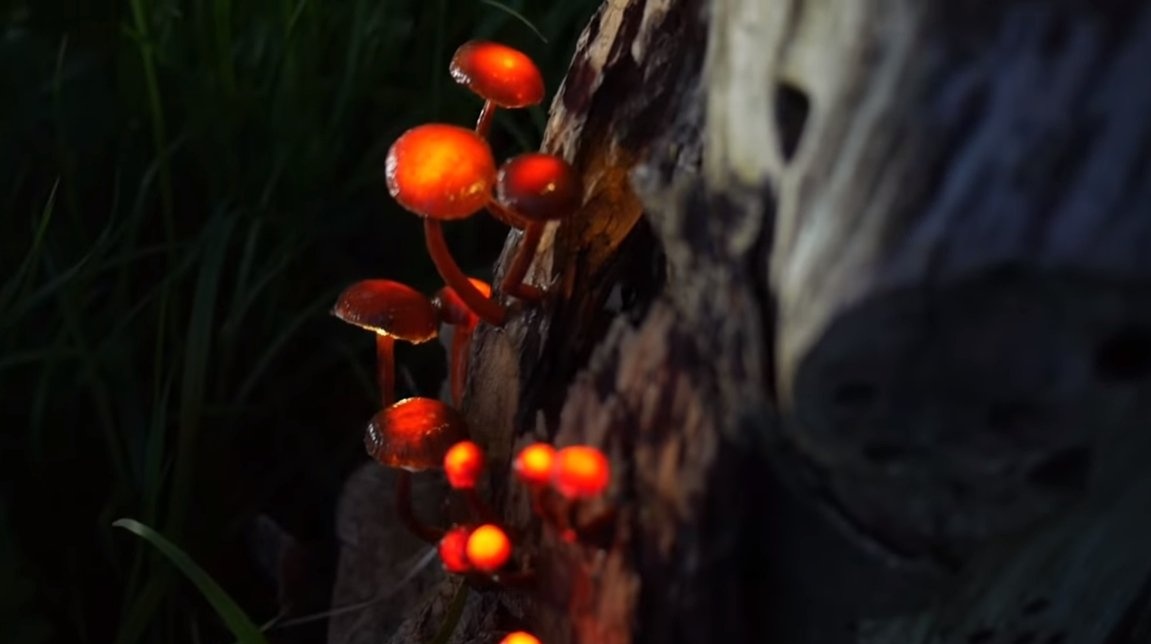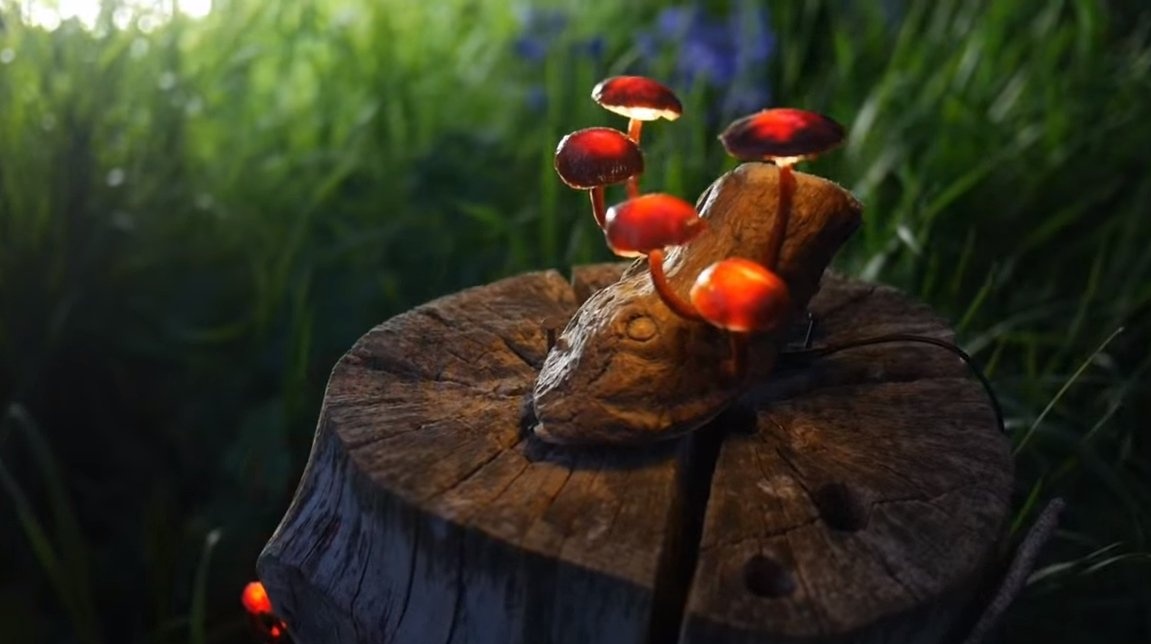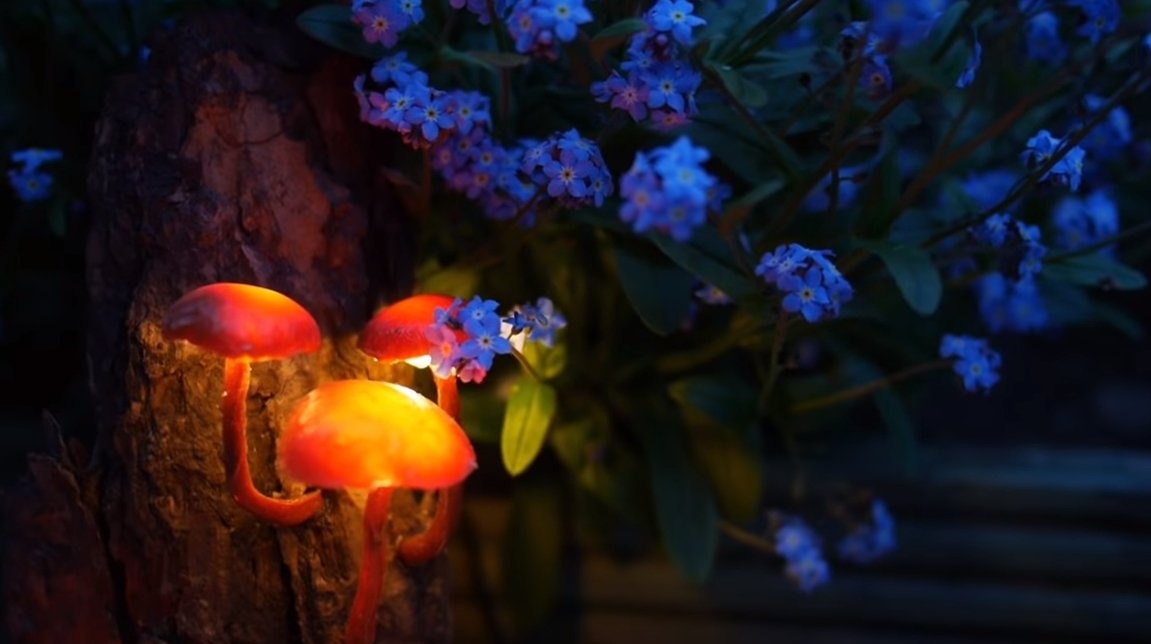
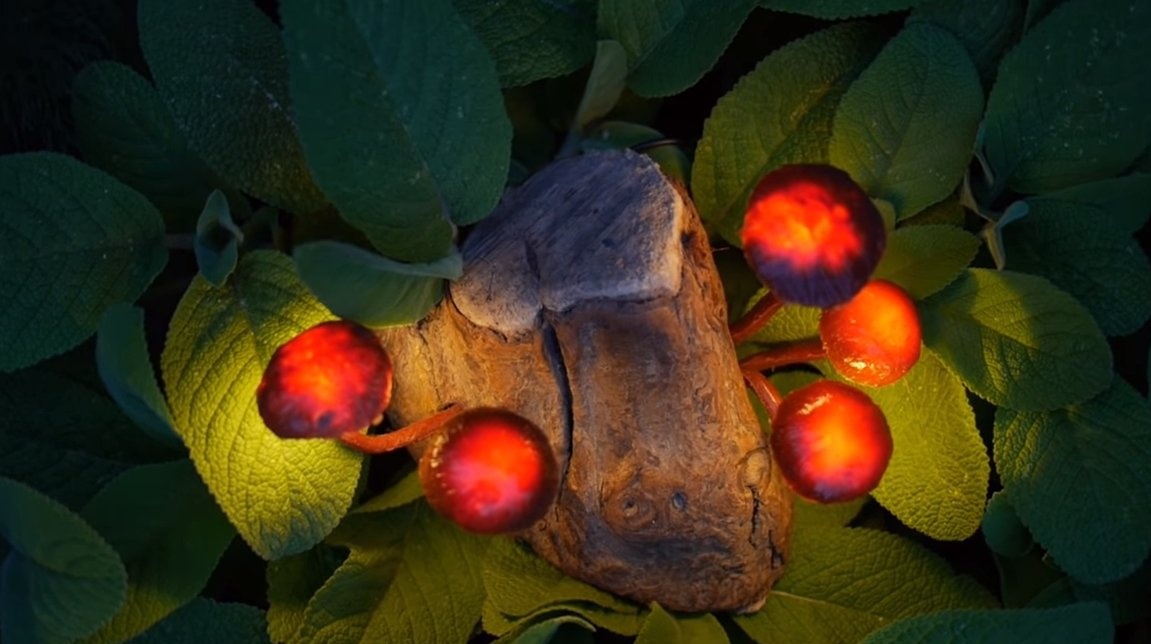
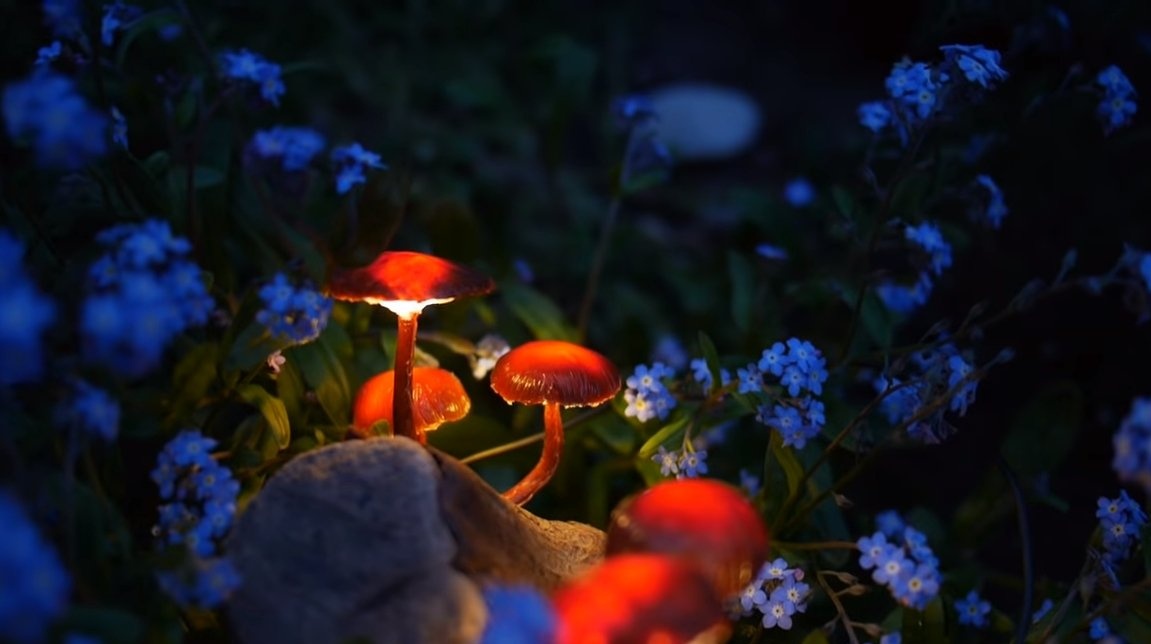
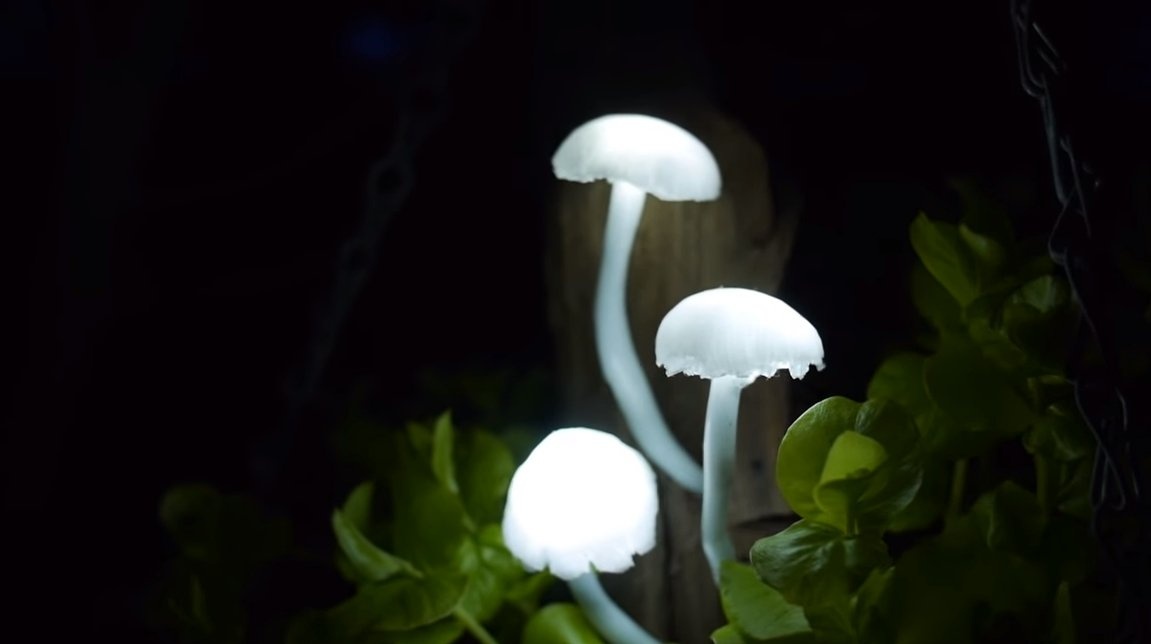
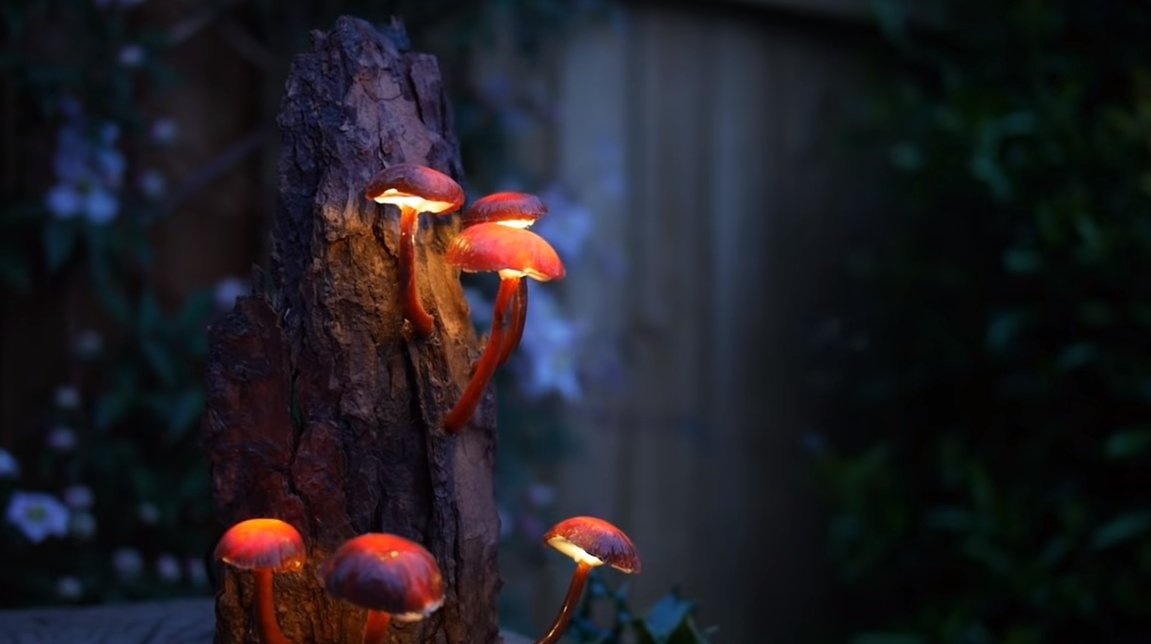
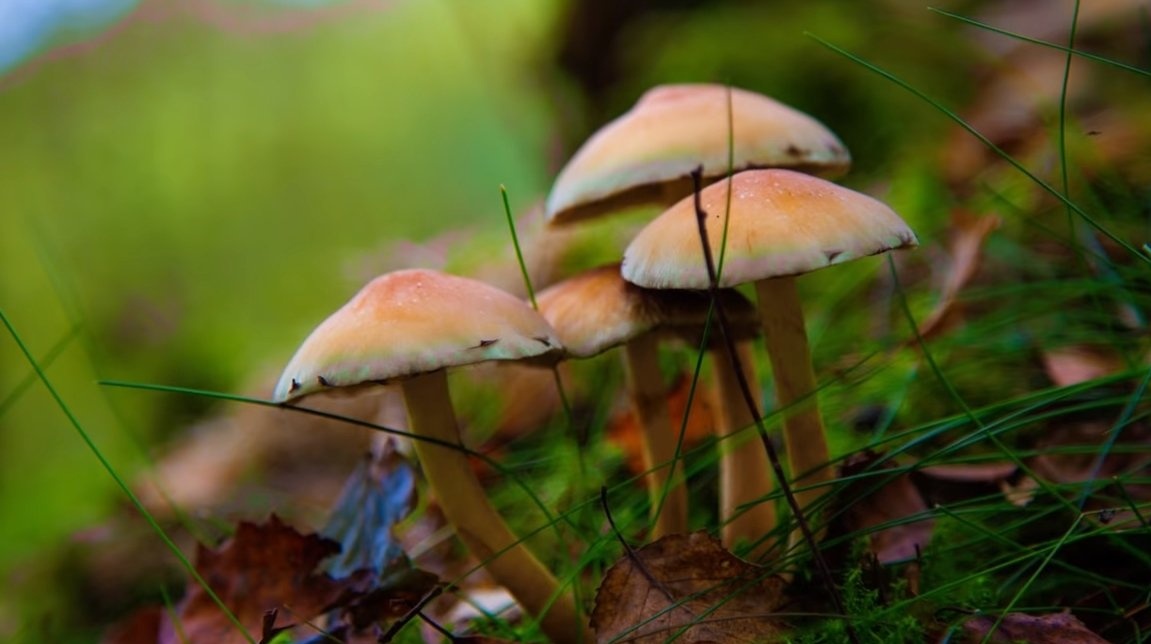
Hi everyone, I propose to consider a unique night light that you can make do it yourself. It looks pretty realistic, such homemade can be a great gift, and even a homemade product will look great in the garden. The night light mushrooms are made of silicone, so they look like real ones. You can arrange them on a stump, bark or tree branch. According to this principle, the author made other mushrooms. If the homemade product interests you, I suggest studying the project in more detail!
Materials and tools used by the author:
Material List:
- ;
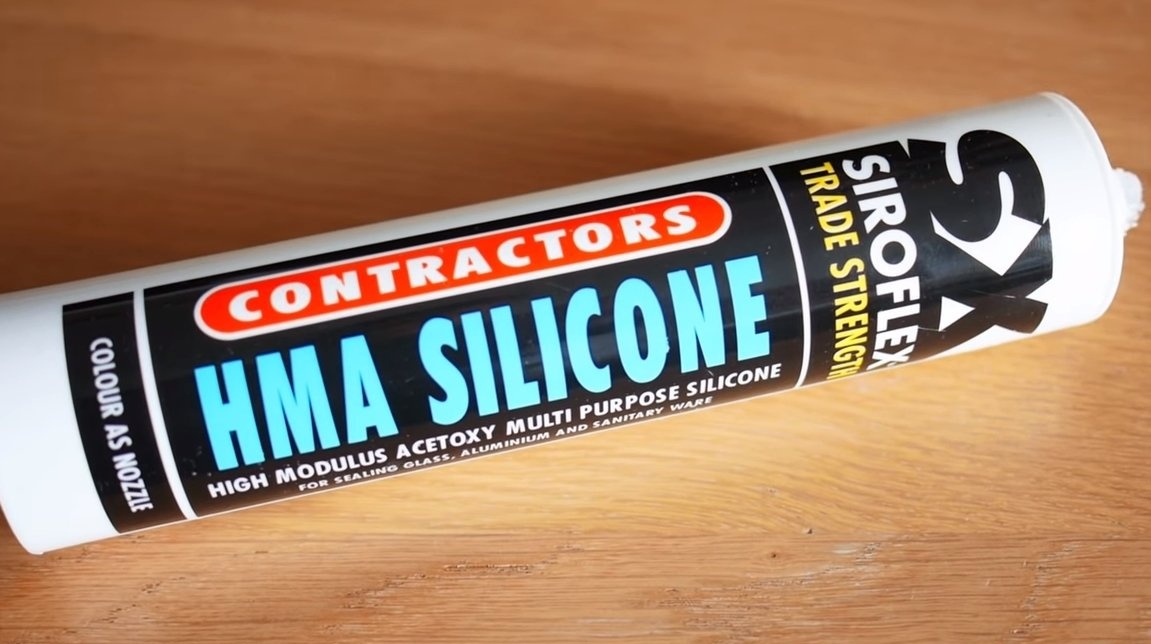
- dye for silicone;
- bark, stump or other basis;
- ;
- wires;
- iron or copper wire;
- napkins;
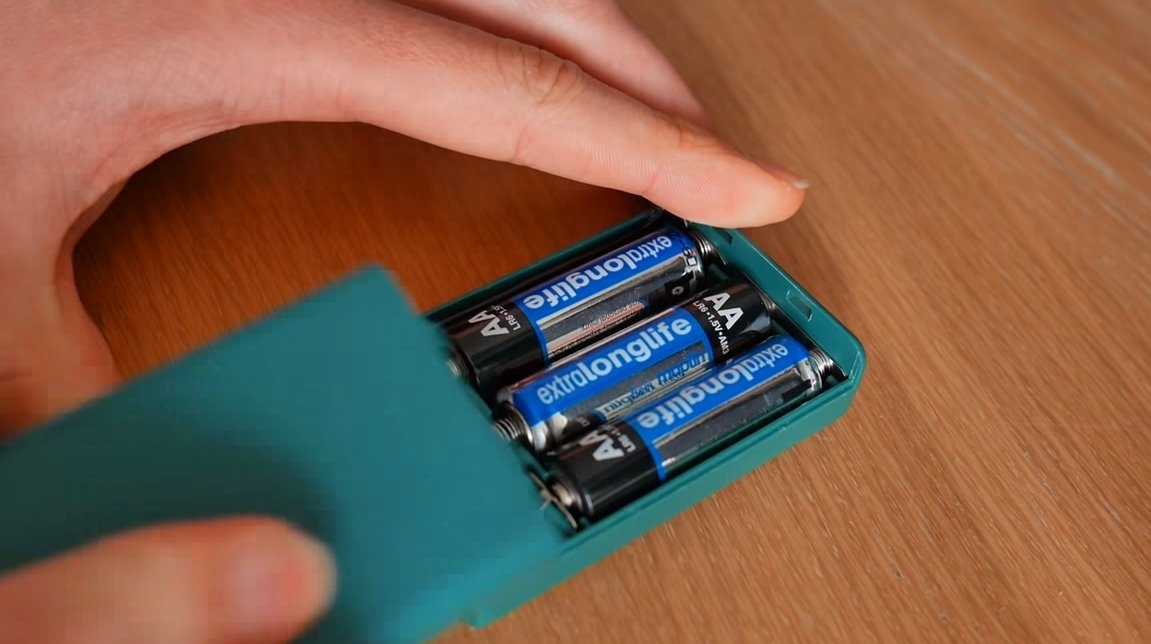
- unit for installing batteries (3X1.5V).
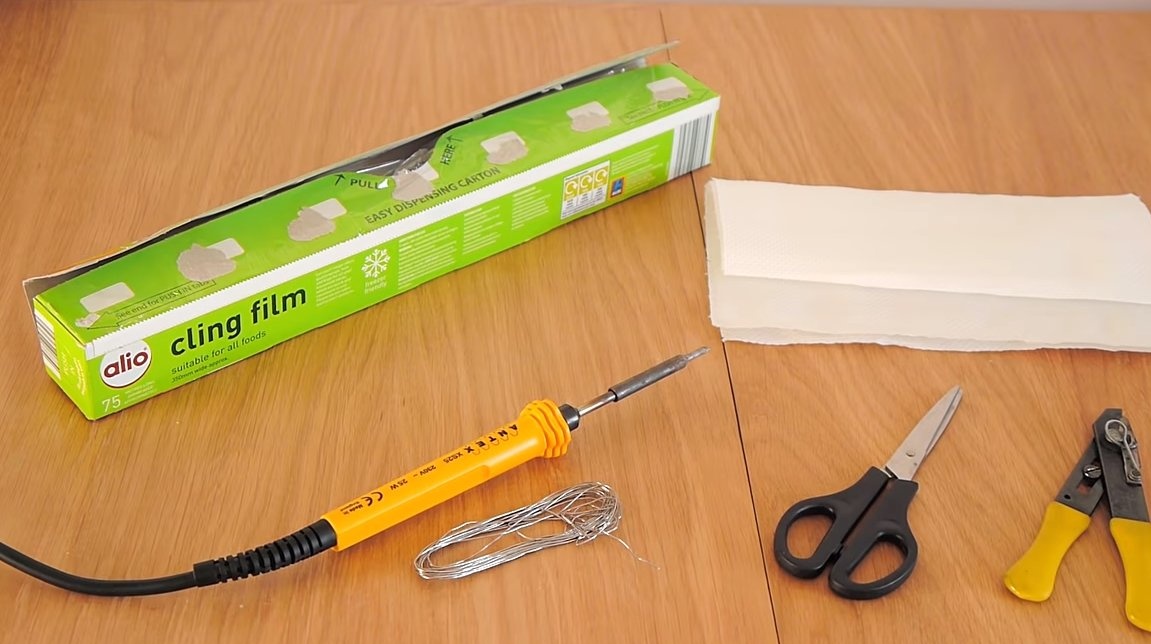
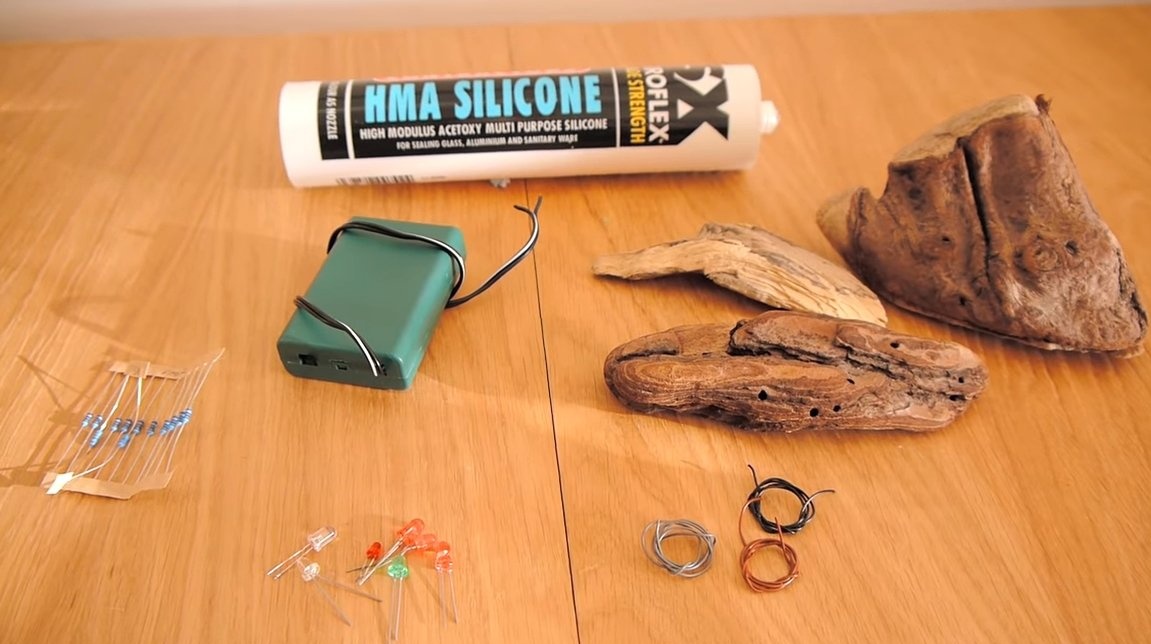

Tool List:
- soldering iron;
- nippers;
- drill;
- glue gun;
- scissors.
The manufacturing process of the lamp:
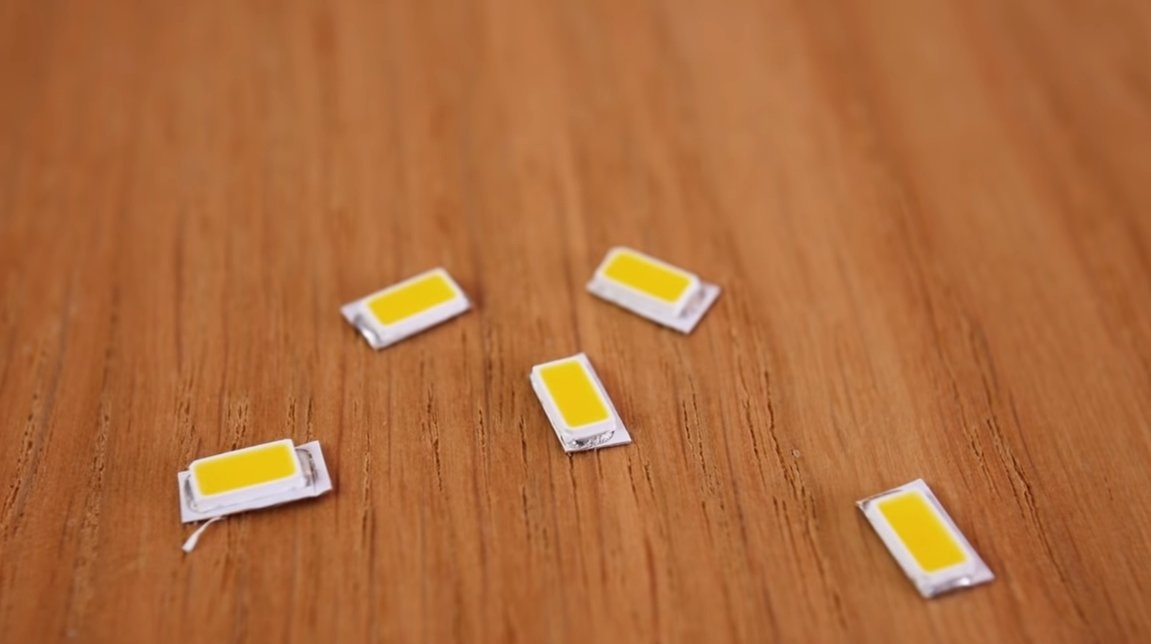
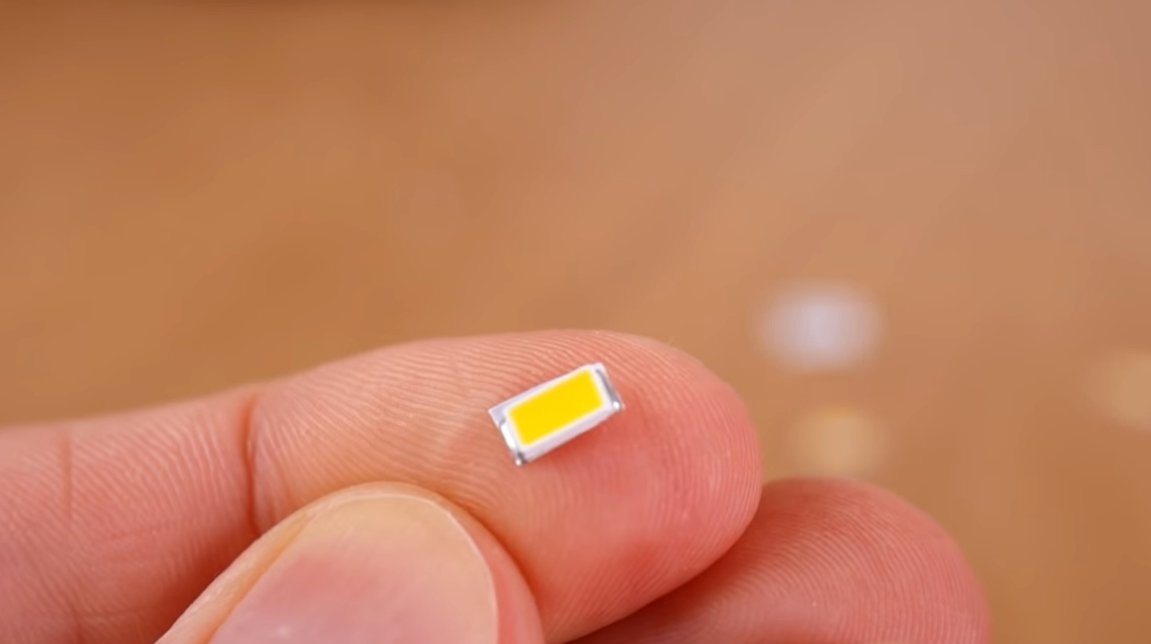
Step one. LEDs
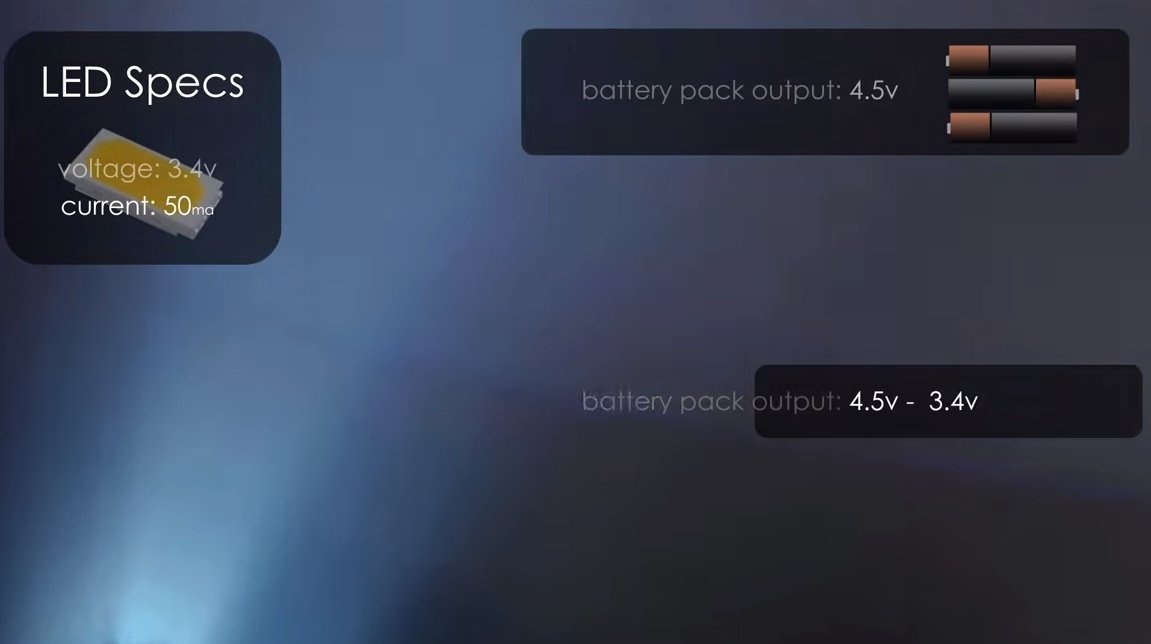
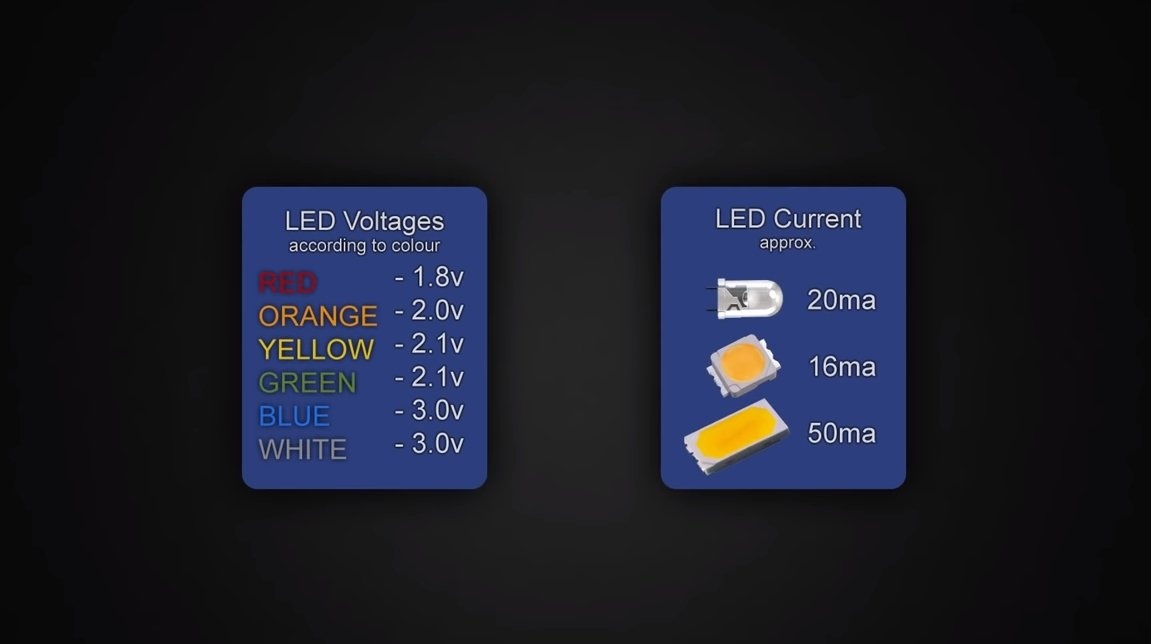
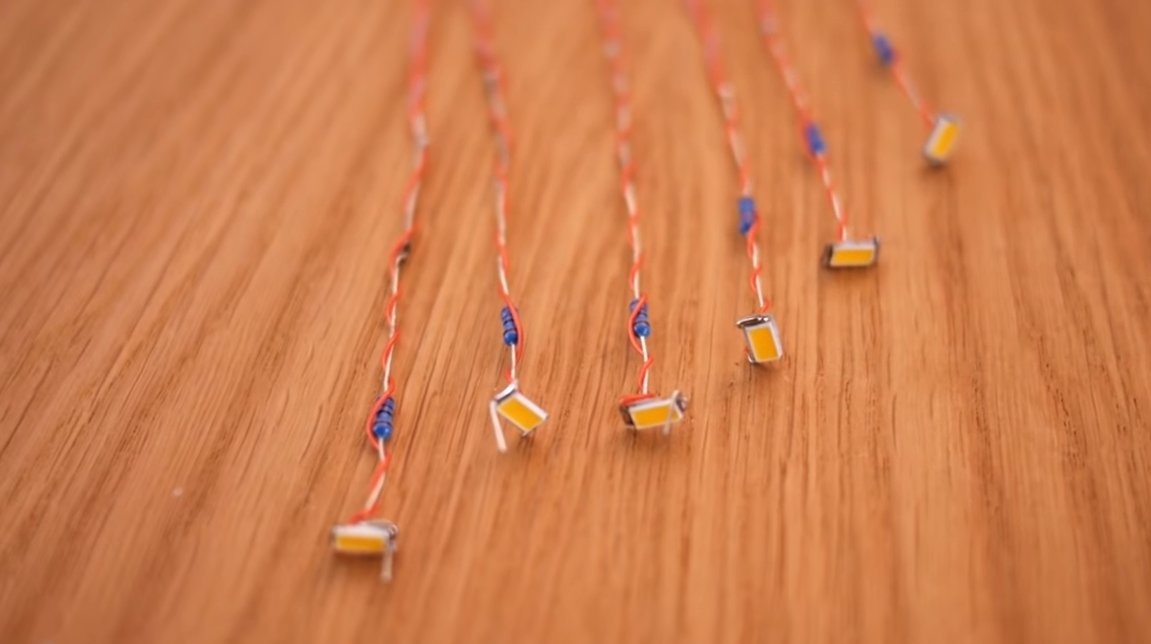
First of all, we have to deal with LEDs, we need to select resistors of the corresponding nominal value to them, taking into account the supply voltage and consumption of each LED. For each LED, you need to make a separate resistor, so the LEDs will last a very long time.
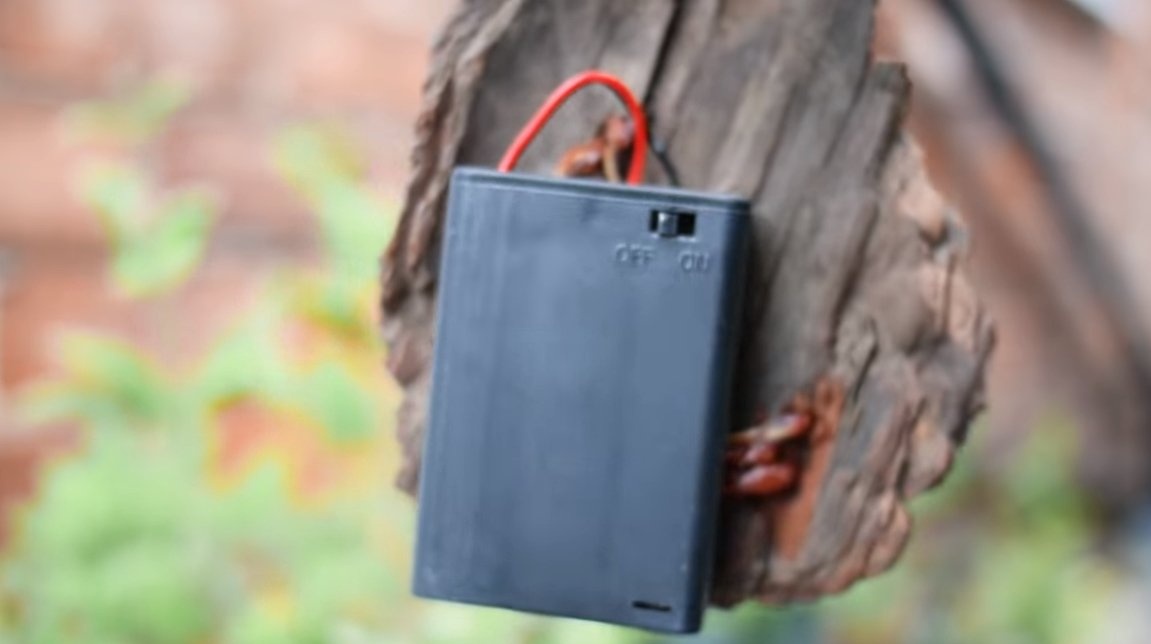
The power source we have are three batteries of 1.5V each, which total output a voltage of 4.5V.
Step Two Leg assembly
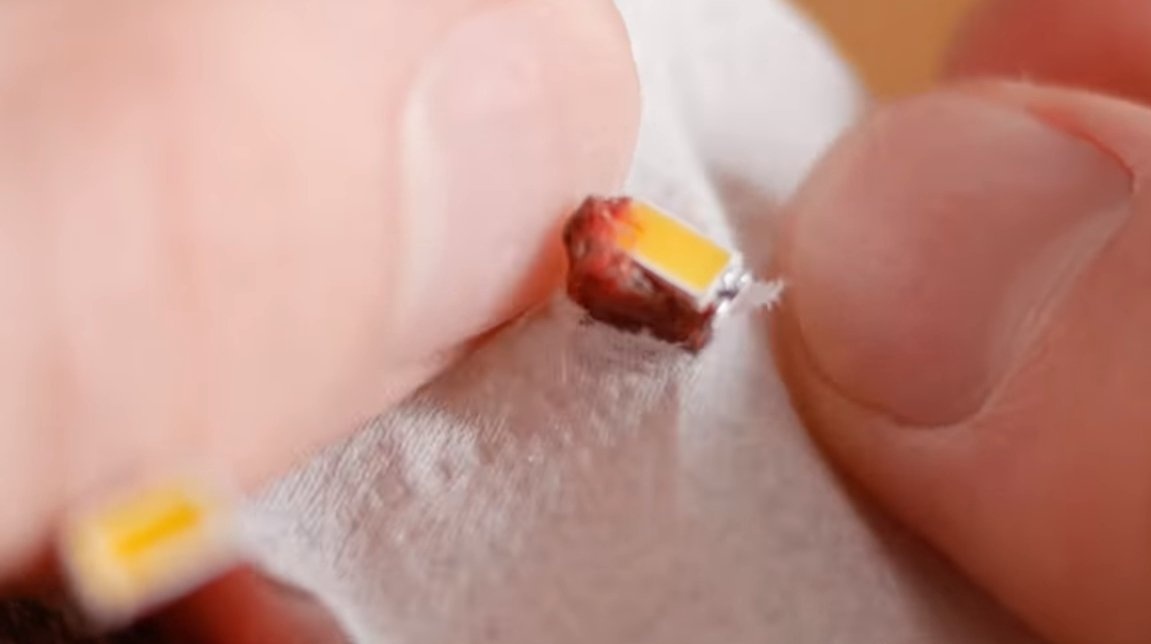
We collect the legs of the mushrooms, and we will start with the "skeleton". Such a skeleton is a wire, you can use copper wire or iron. The wire will be one of the conductors through which current will flow to the LED. We solder the resistors into the gap of each wire, and solder the wire to the contact of the LED. The second conductor we will have an insulated wire, wrap it on the wire and solder to the second contact of the LED.
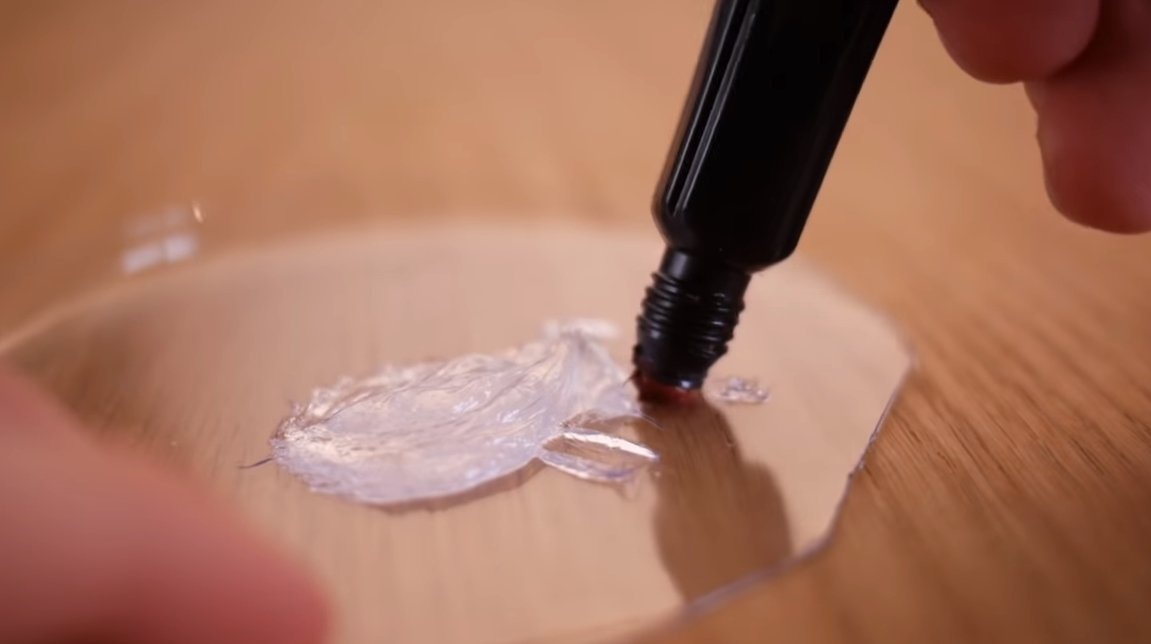
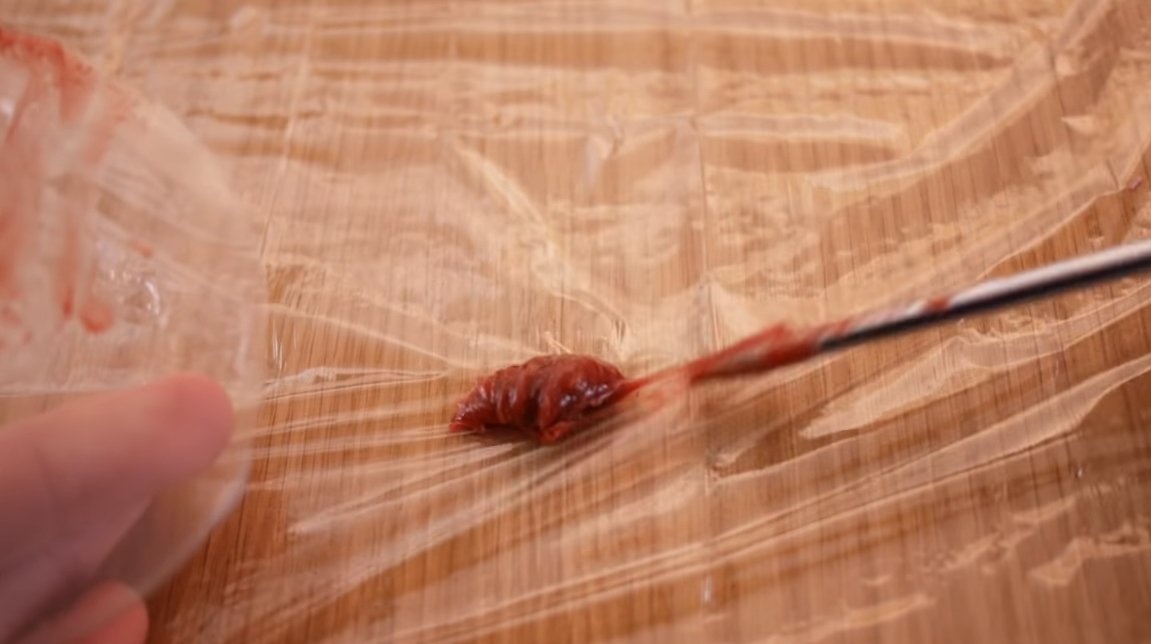
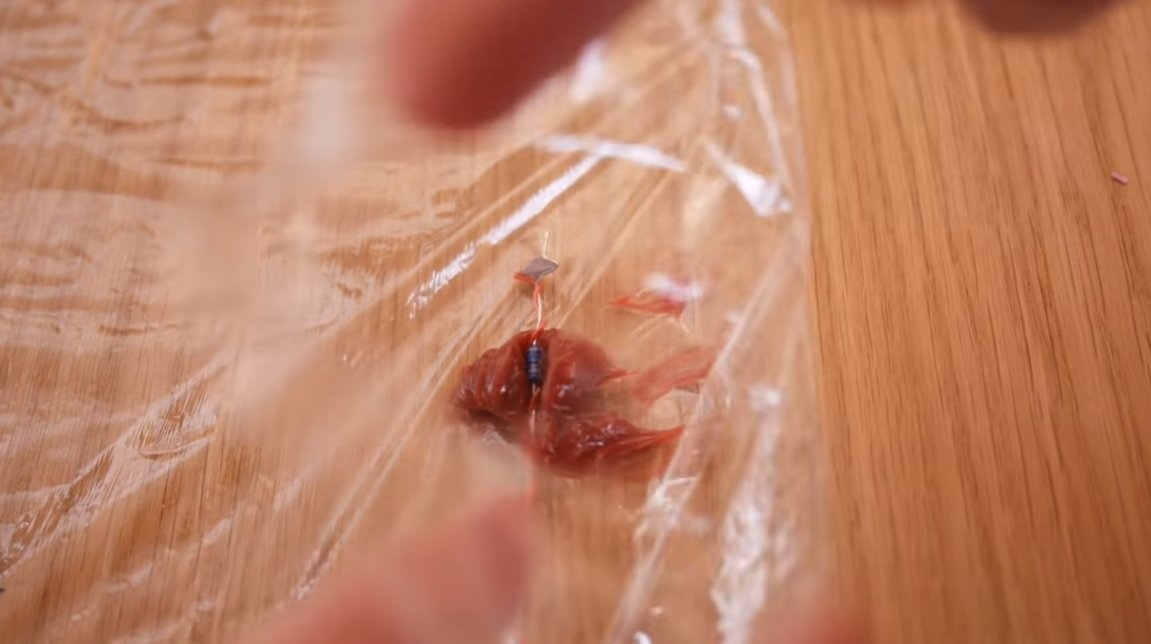
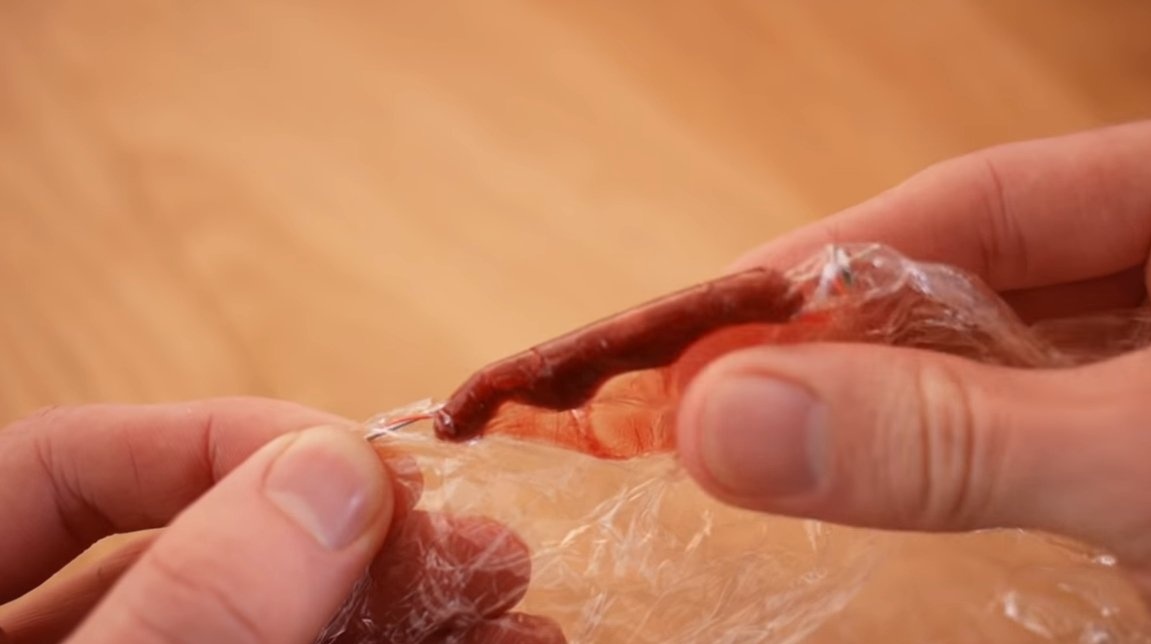
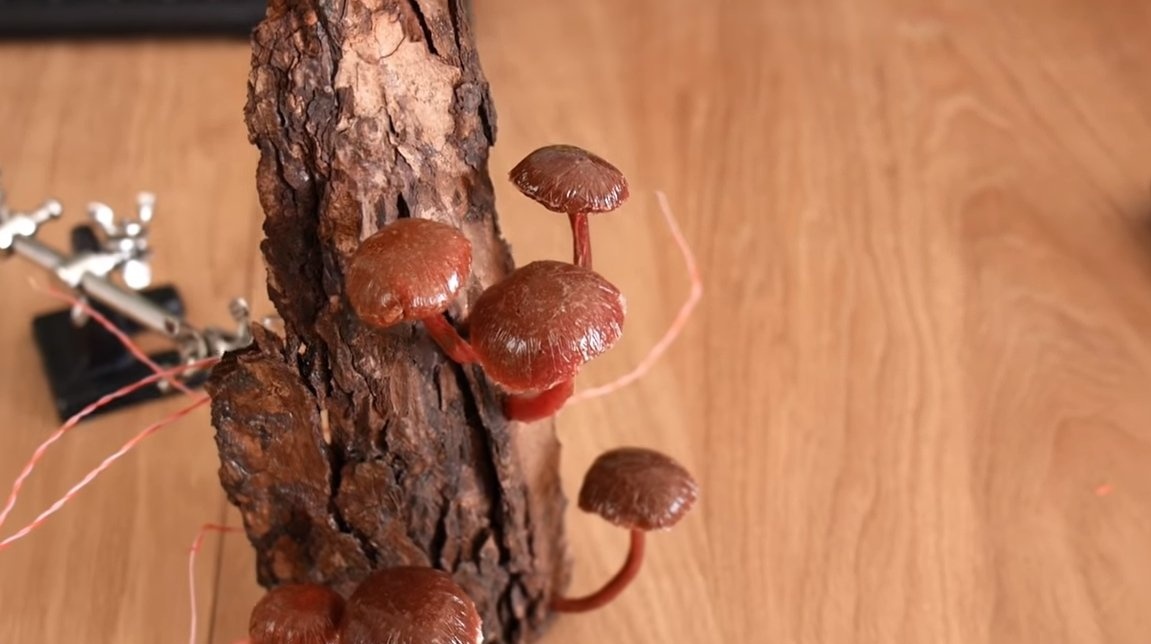
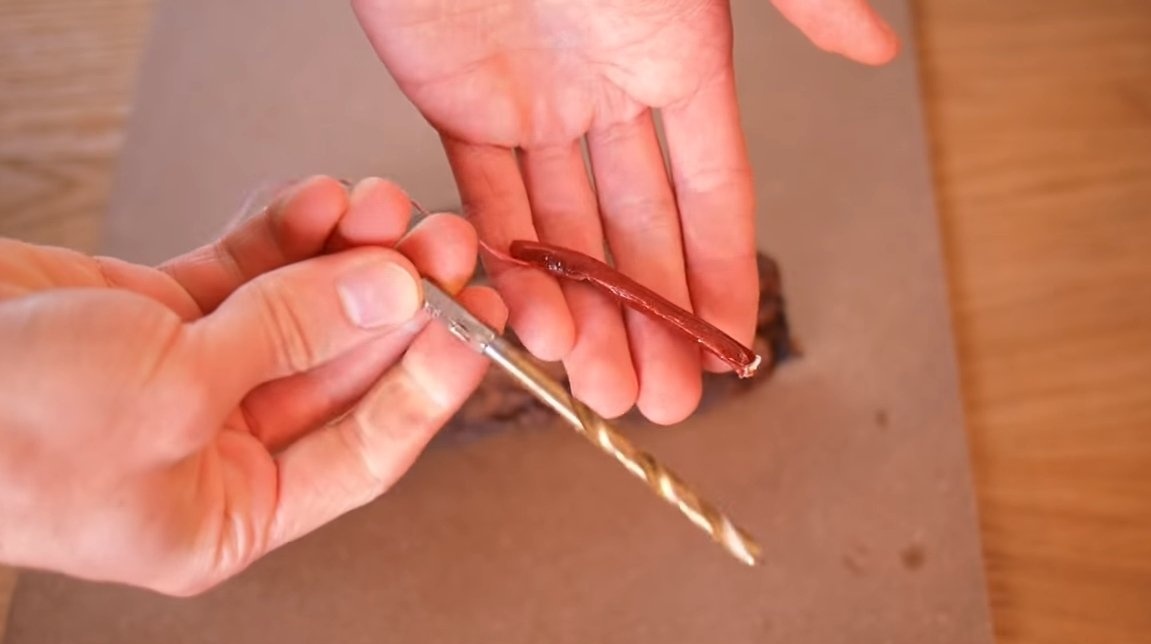
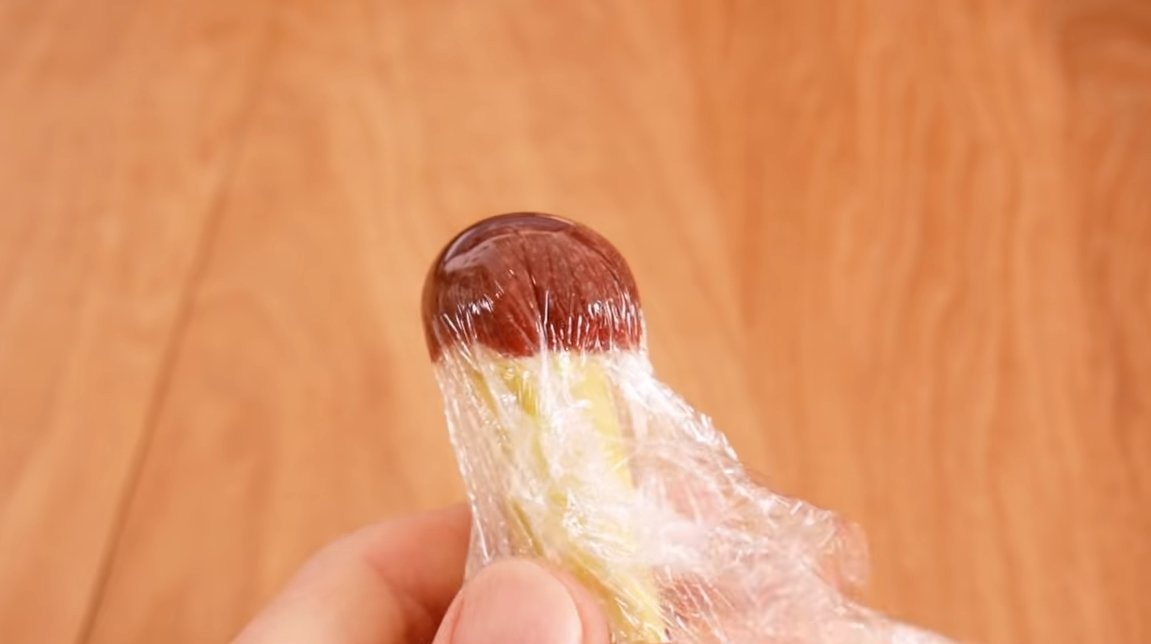
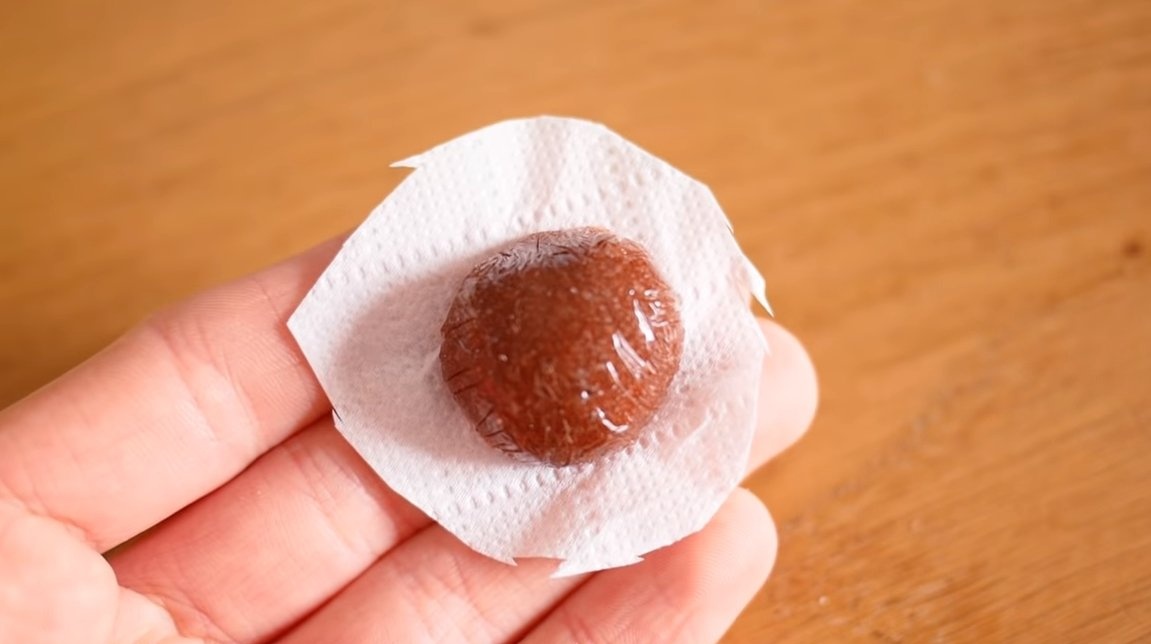
With the skeleton finished, now we will build the body of the legs of the mushroom. For these purposes, we need silicone, add the dye of the desired color to it and mix well for a uniform shade. As a dye, you can try to use dye from an inkjet printer. To form the leg, we need a film, spread the silicone on the leg, and then wrap the film and form the desired shape of the mushroom leg with our hands. We leave the whole thing to dry, and then the film can be removed, and we get excellent legs. Thanks to the wire inside, we can fix any desired shape of the legs.
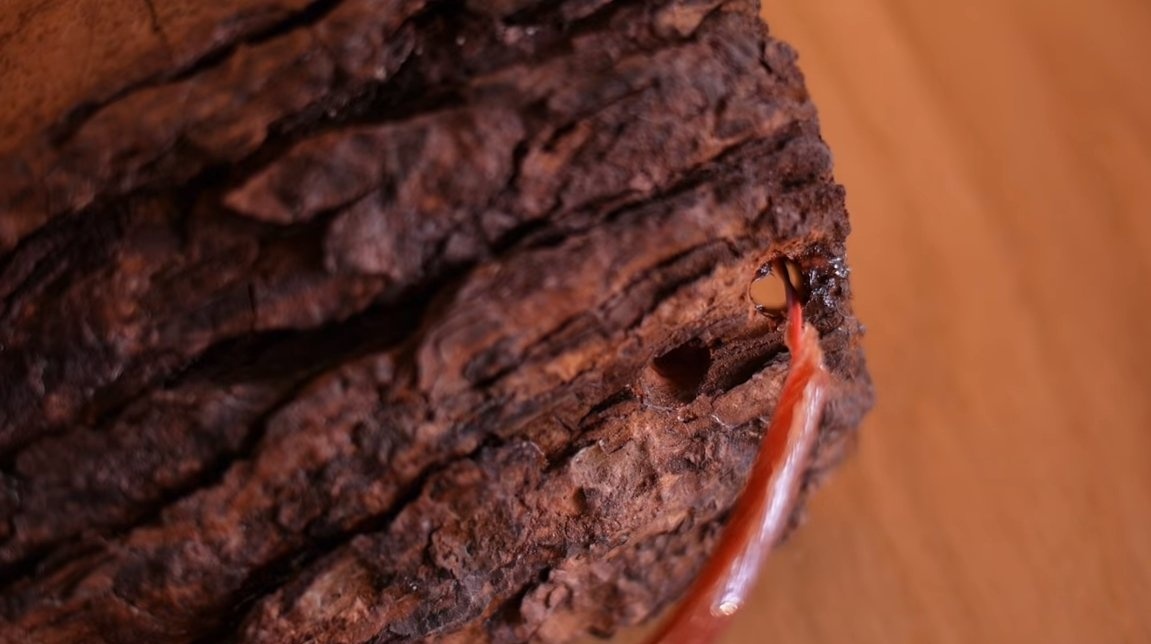
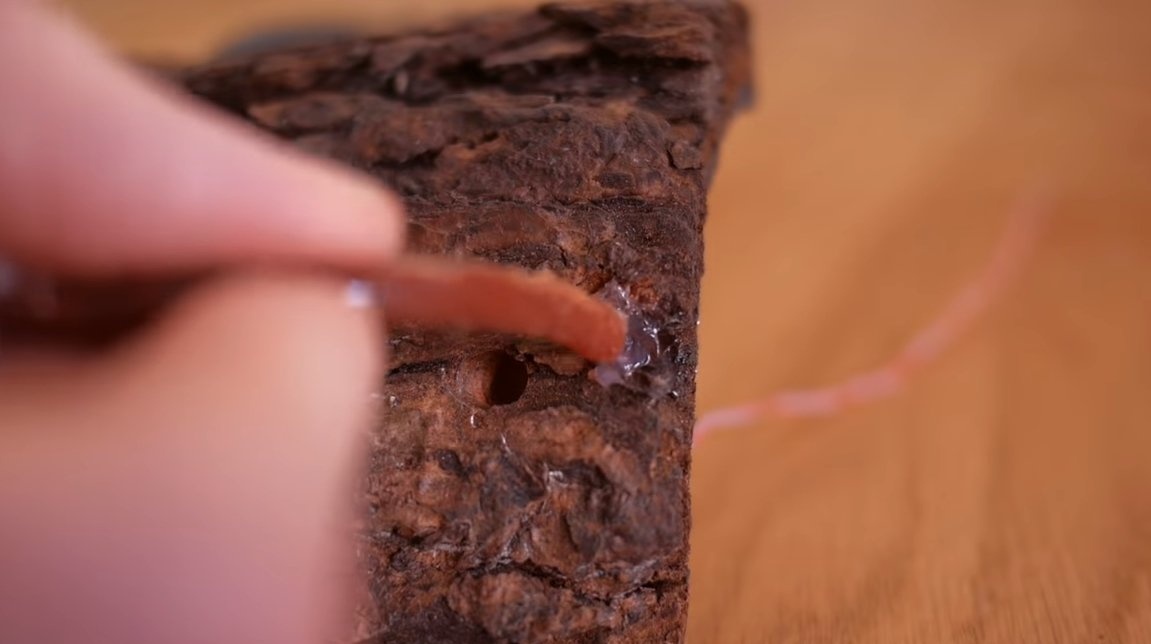
Step Three Installing the legs on the base
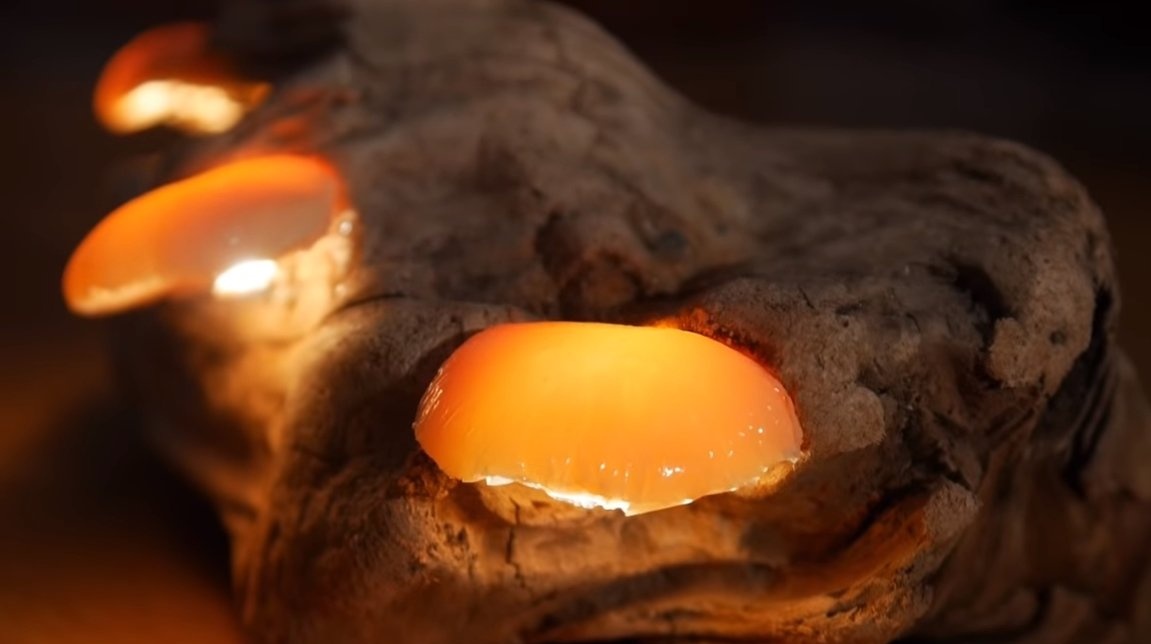
We prepare the base and install the legs.For a small composition, you can use a piece of bark, cut the trunk and so on. We drill holes of such a diameter so that the legs fit tightly into them. For reliability, the legs are glued to silicone or hot glue. As a result, the legs will remain bent as you like.
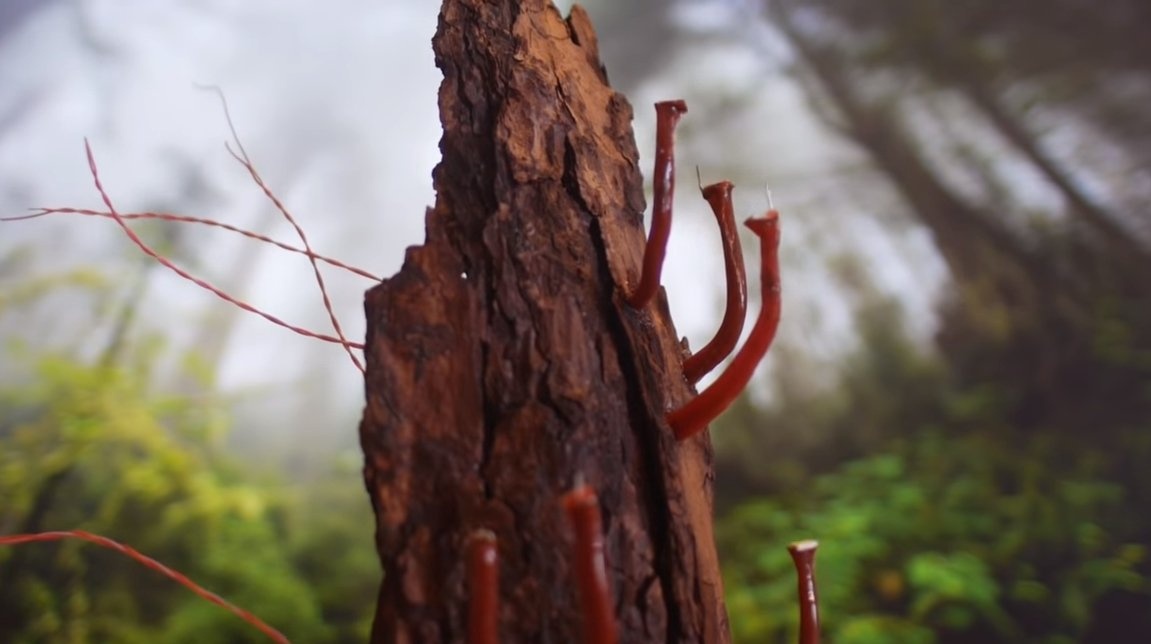
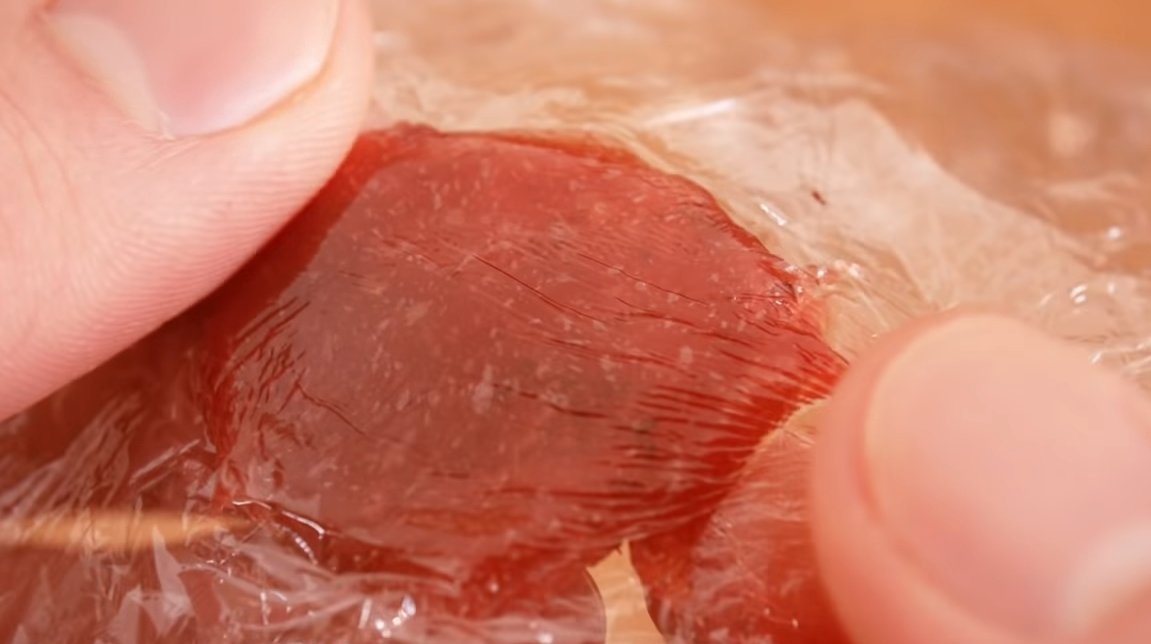
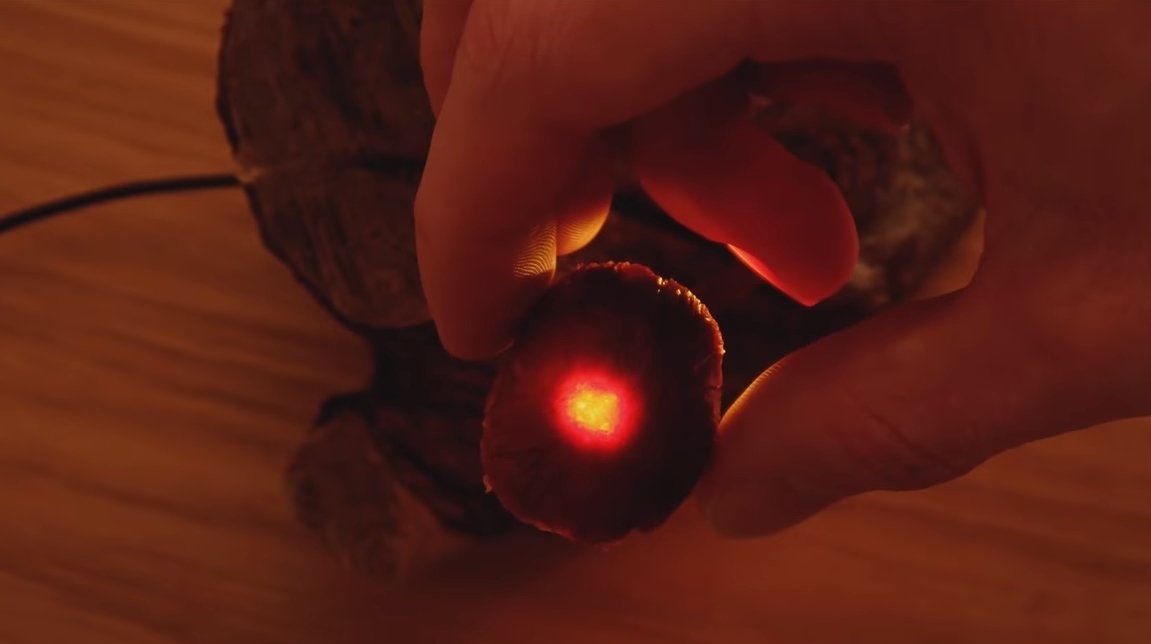
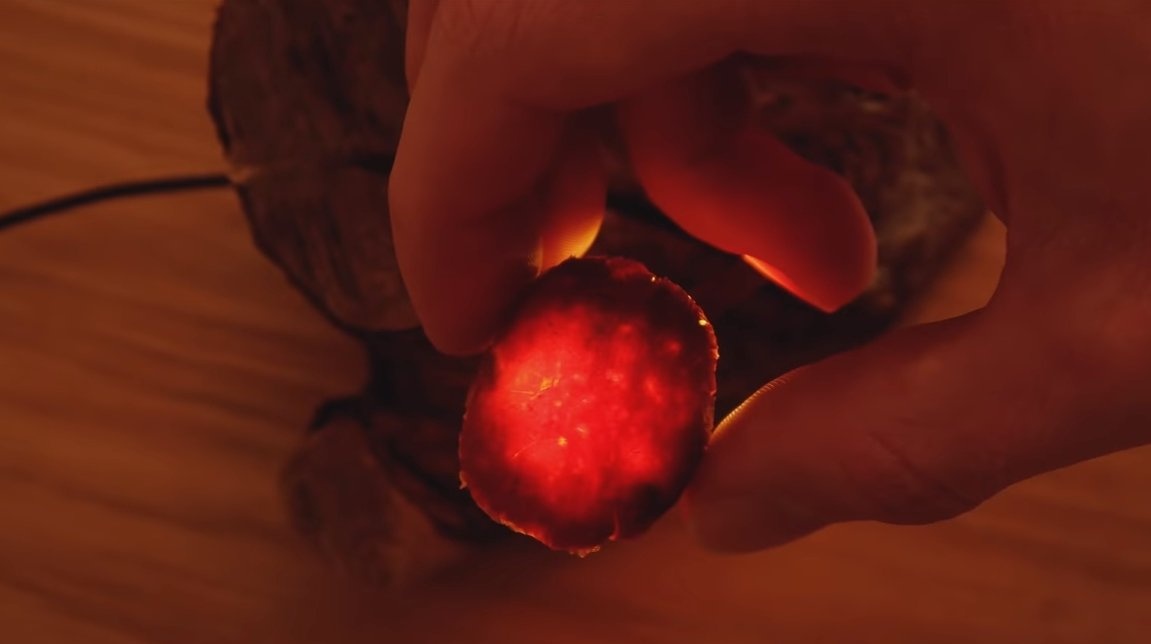
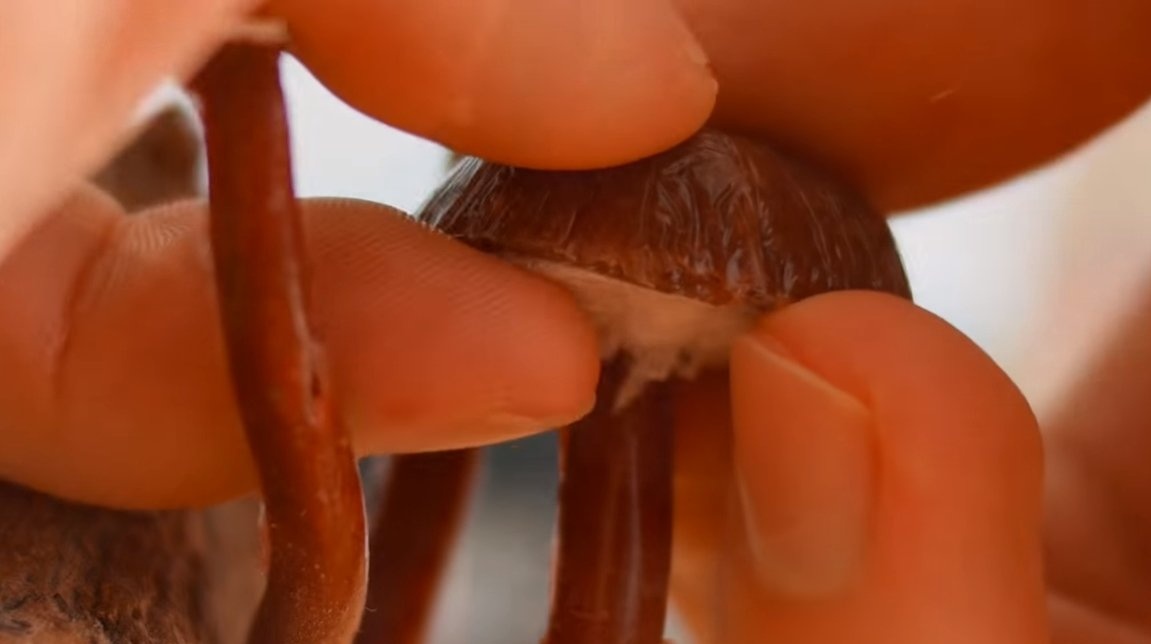
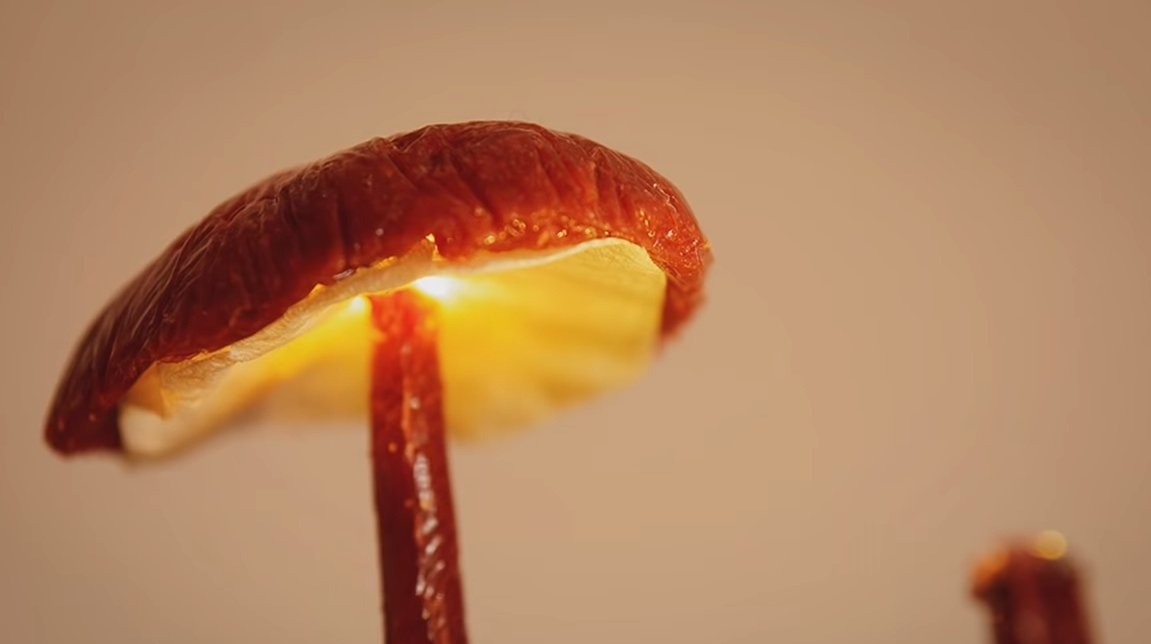
Step Four Making and installing hats
Hats are also made of silicone, using a film to form. Due to the shape in the form of a lens, the light will be scattered from one side of the cap, and focus on the other. But what we need is the dispersion effect, which is excellently achieved.
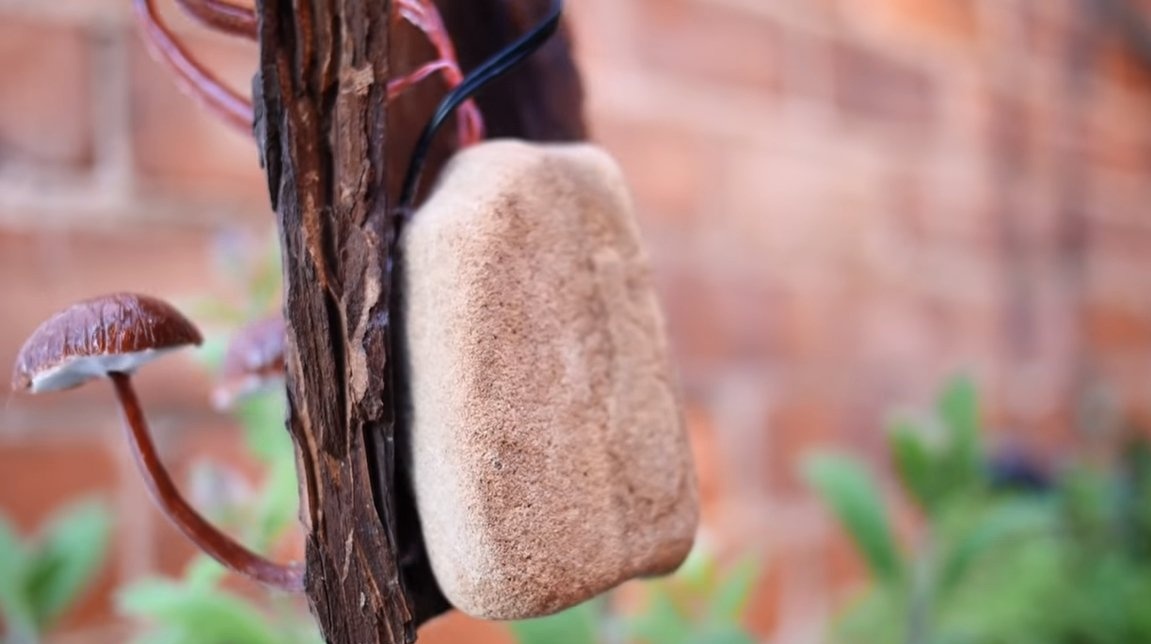
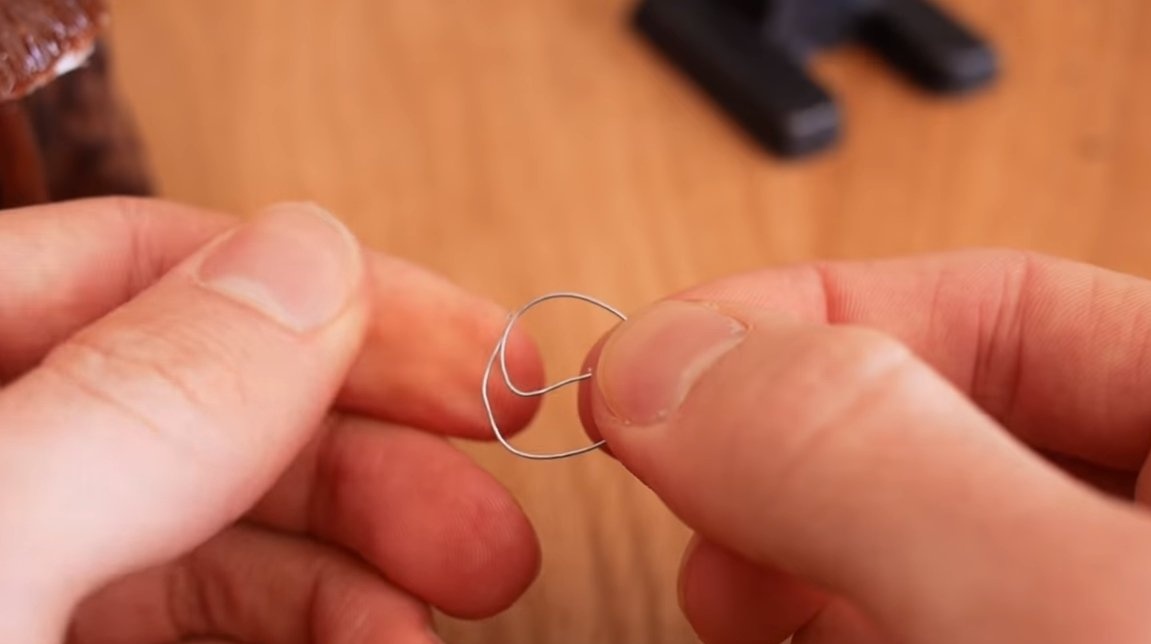
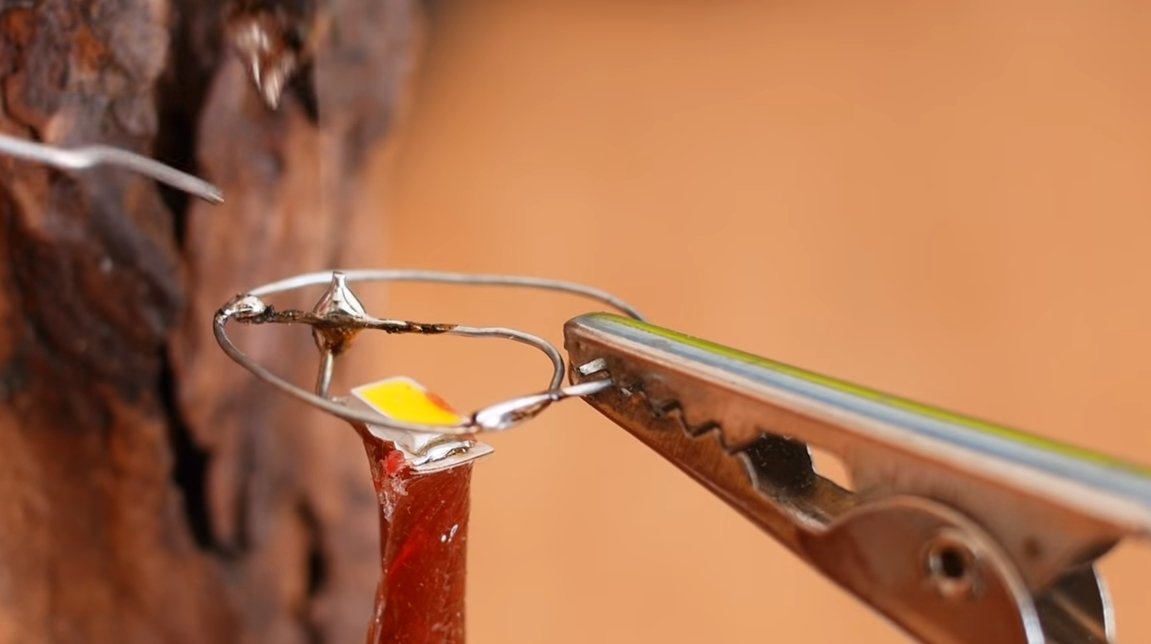
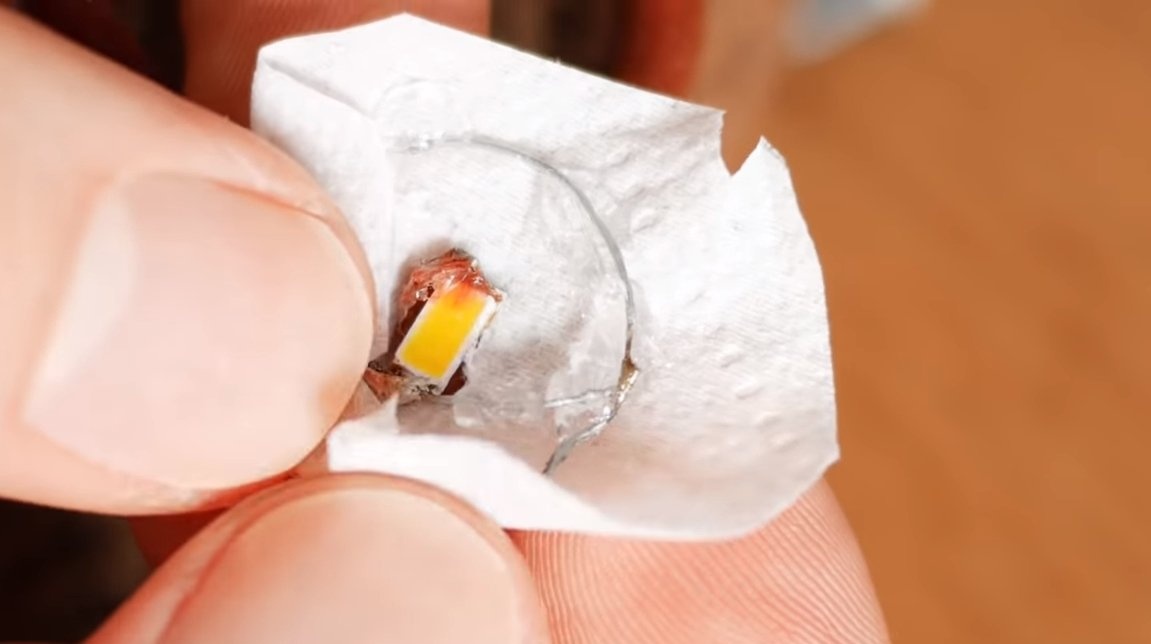
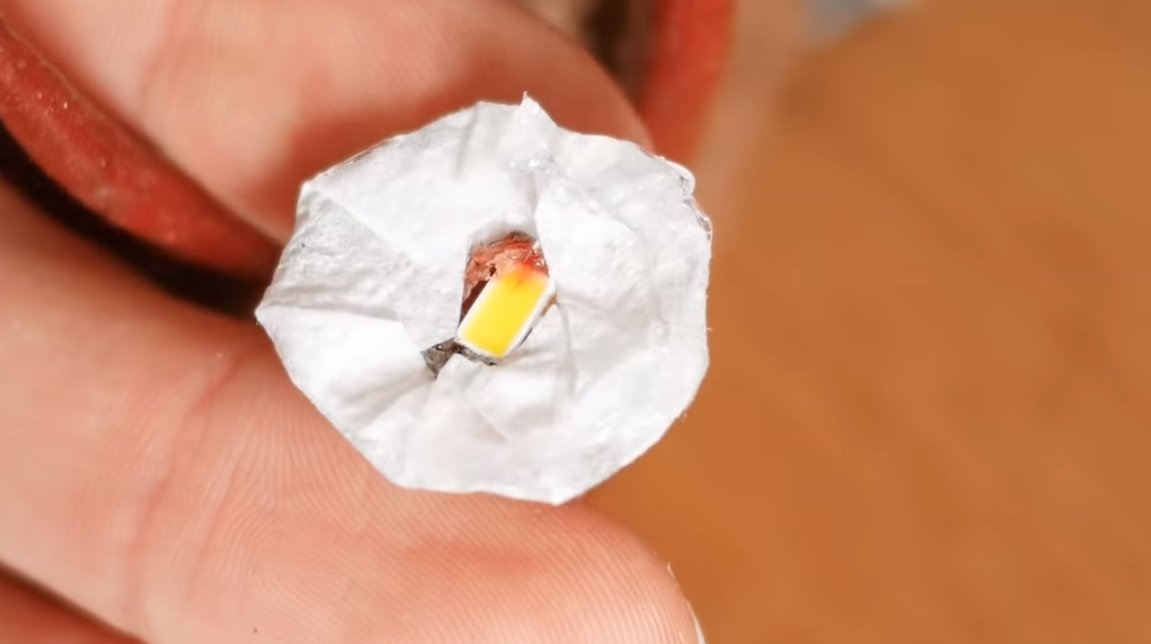
When the hats are ready, they can be installed on the LEDs, but for this we will first make the fasteners. To begin with, put a napkin on the leg, it will imitate the part of the mushroom that is under the hat (lattice). Next, we assemble a simple frame made of wire in the shape of a hat and solder it to the contact of the LED, to which the wire of the "skeleton" is soldered.
The previously put on napkin is raised to the frame and bent so that the frame is covered with a napkin. That's all, now you can stick a hat to such a base. As glue, you can use a glue gun or silicone.
Step Five Final touches
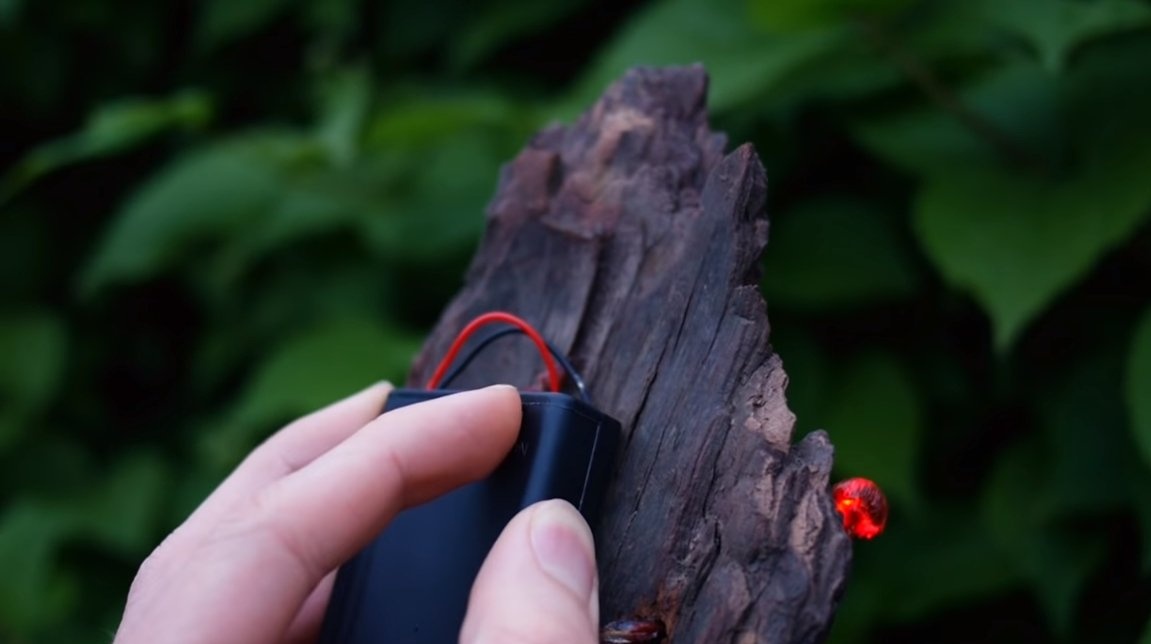
In the end, it remains for us to connect the power source to the wires. In our case, the lamp is powered by batteries, we install the battery pack at the back of the lamp so that it is not visible. The switch is already located on the battery pack, which is quite convenient.
That's all, after that the lamp is ready. It looks very interesting, it is mobile, and the battery charge should be enough for a long time. As a power source, you can use rechargeable batteries, well, or if you want, you can power the nightlight from a 5V power supply.
The project was successfully completed on this, I hope you liked the homemade work and you found useful thoughts for yourself. Good luck and creative inspiration, if you decide to repeat this. Do not forget to share your ideas and homemade things with us!