
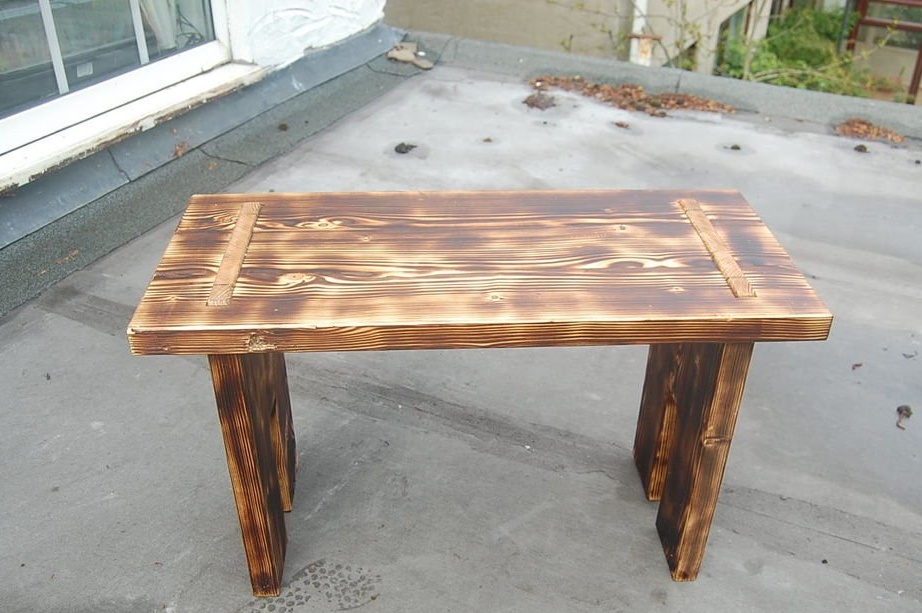
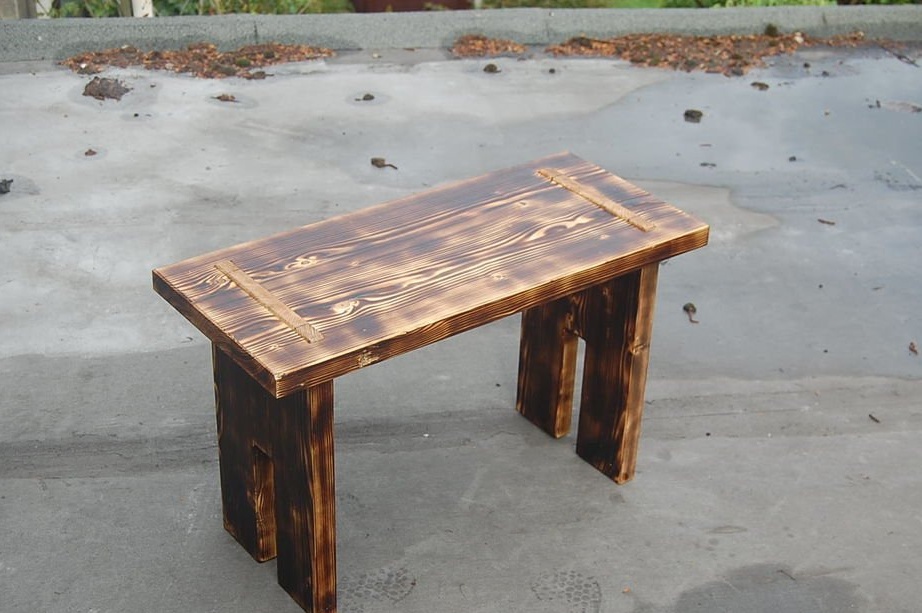
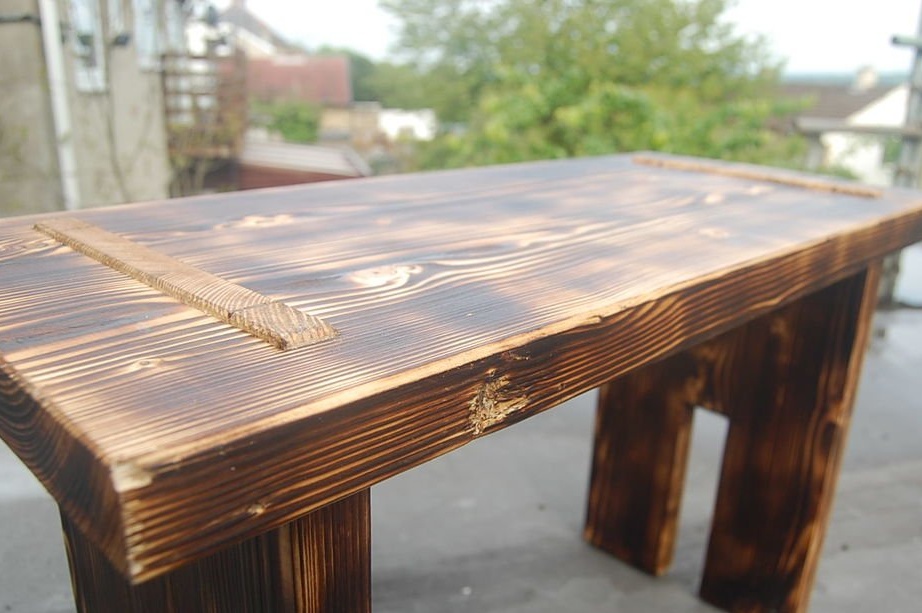
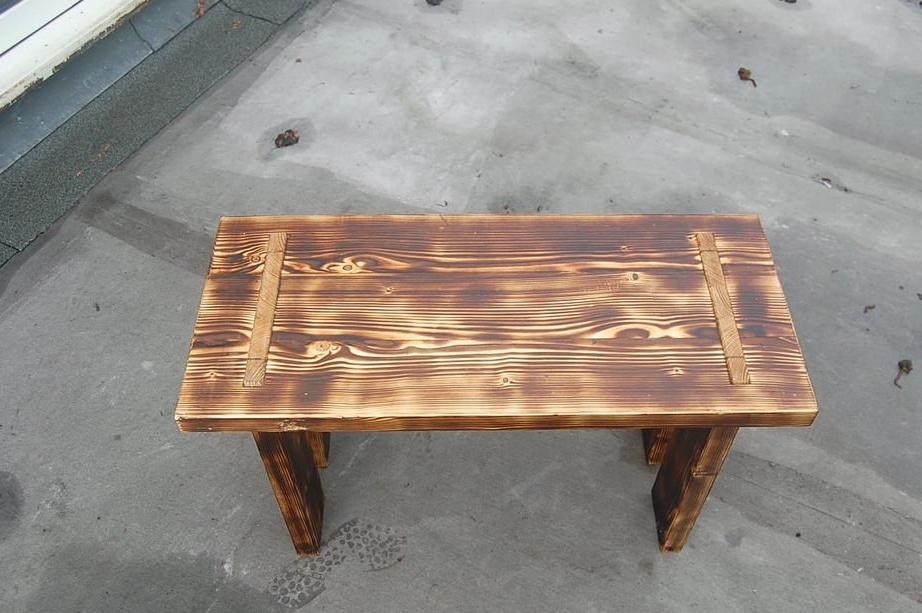
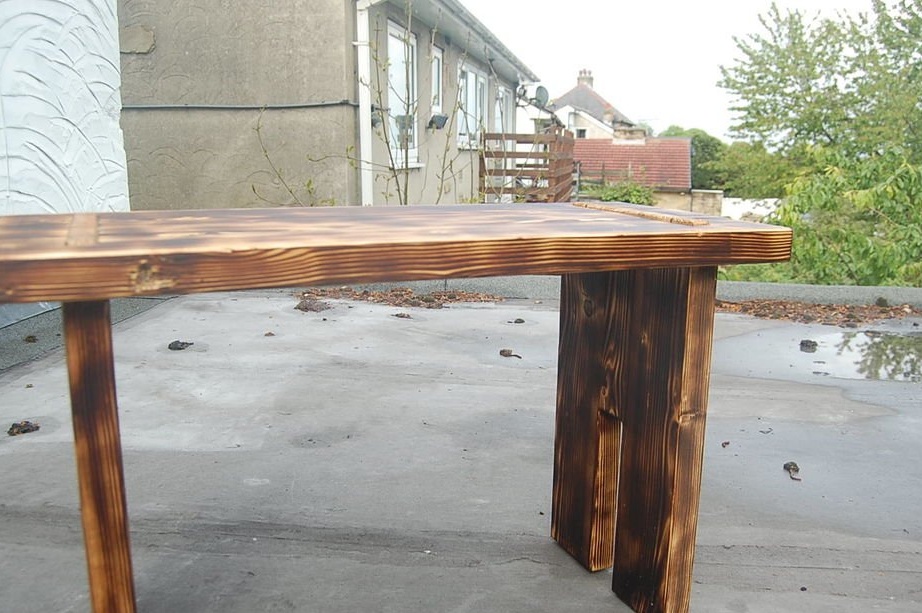
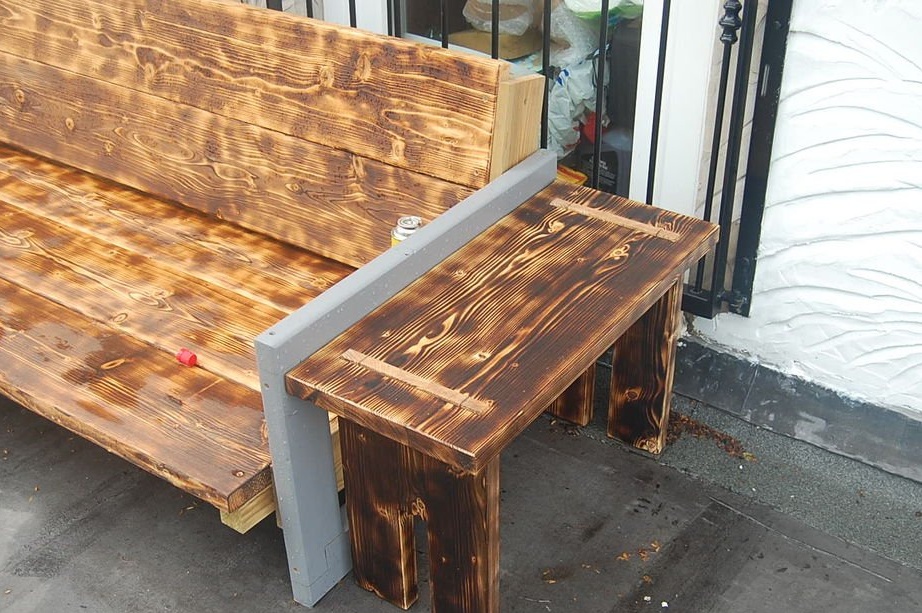
Master of this homemade I wanted an open table so that you could sit in the fresh air.
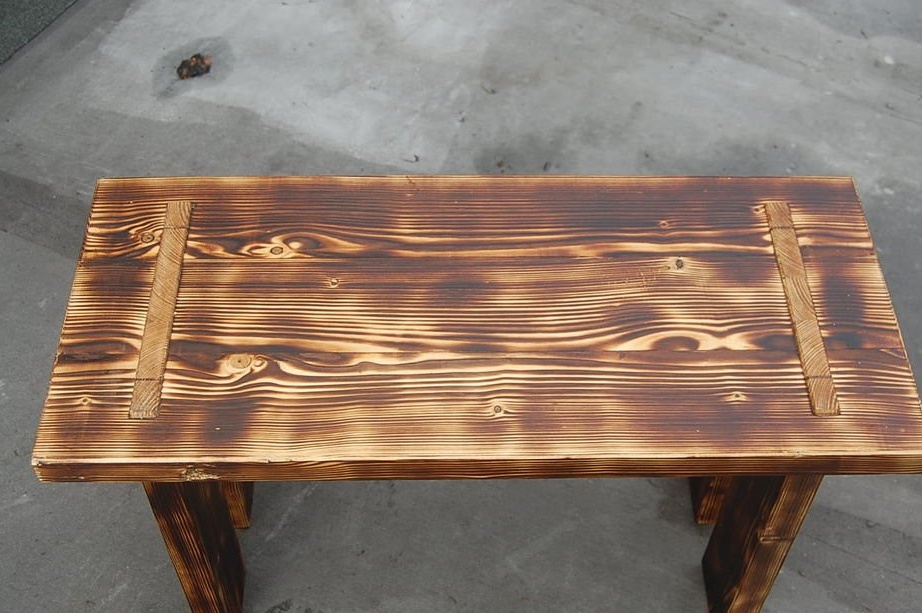
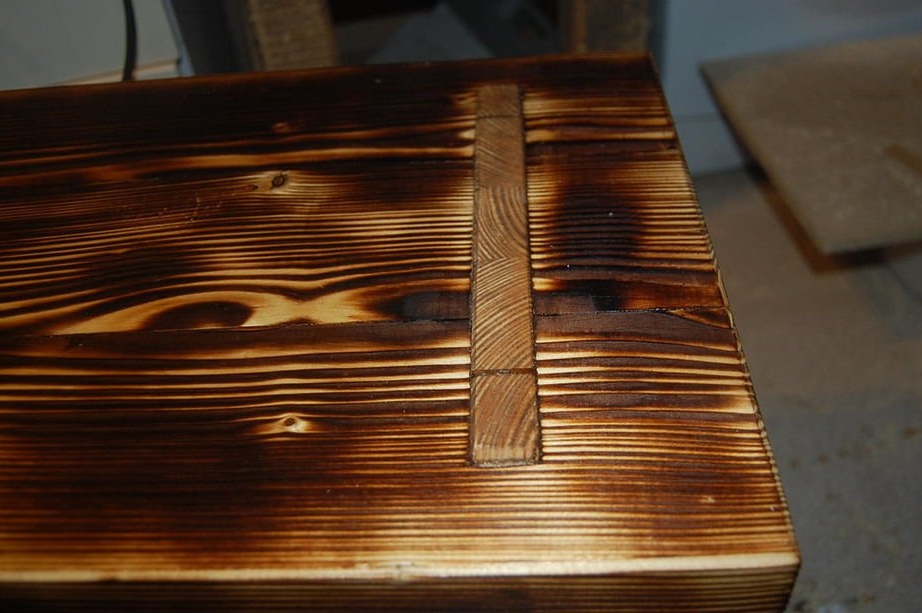
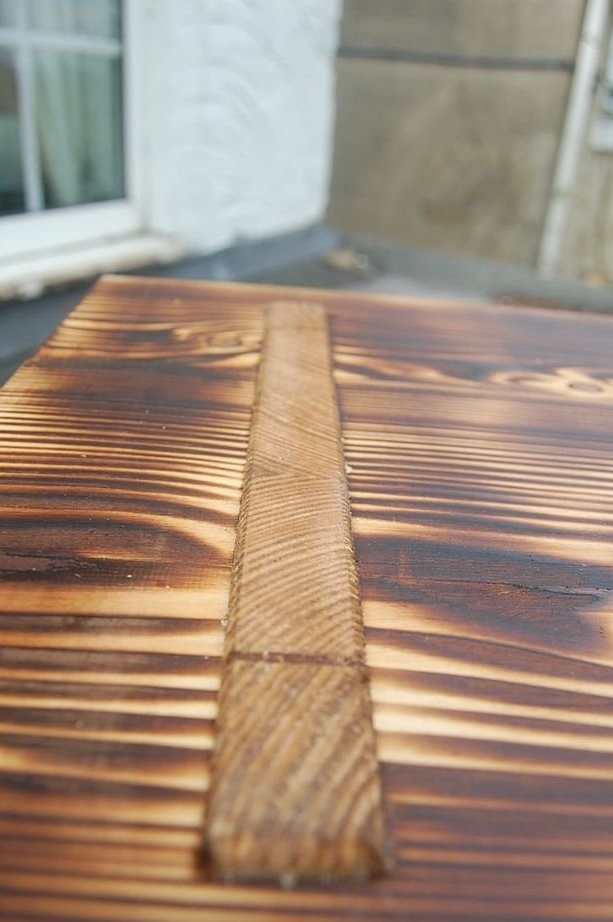
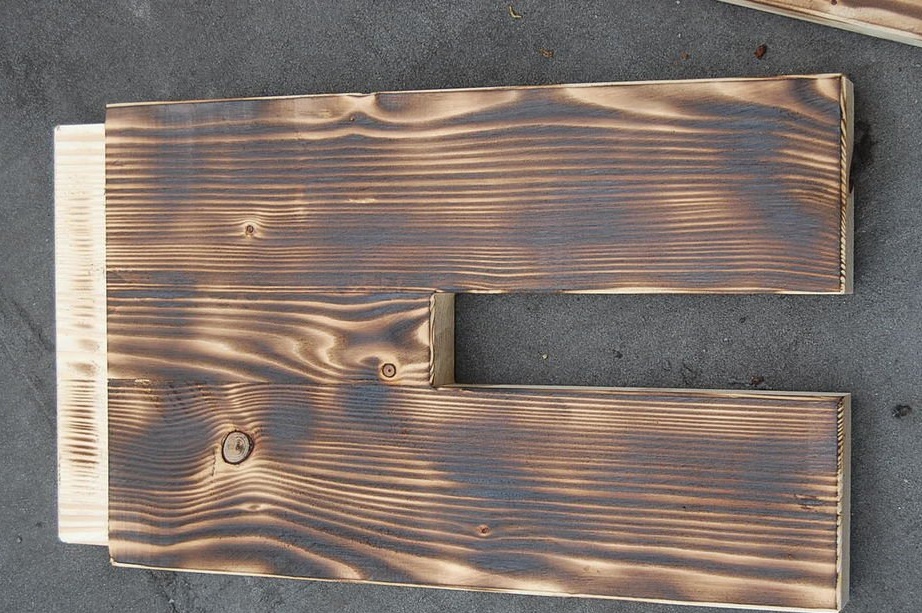
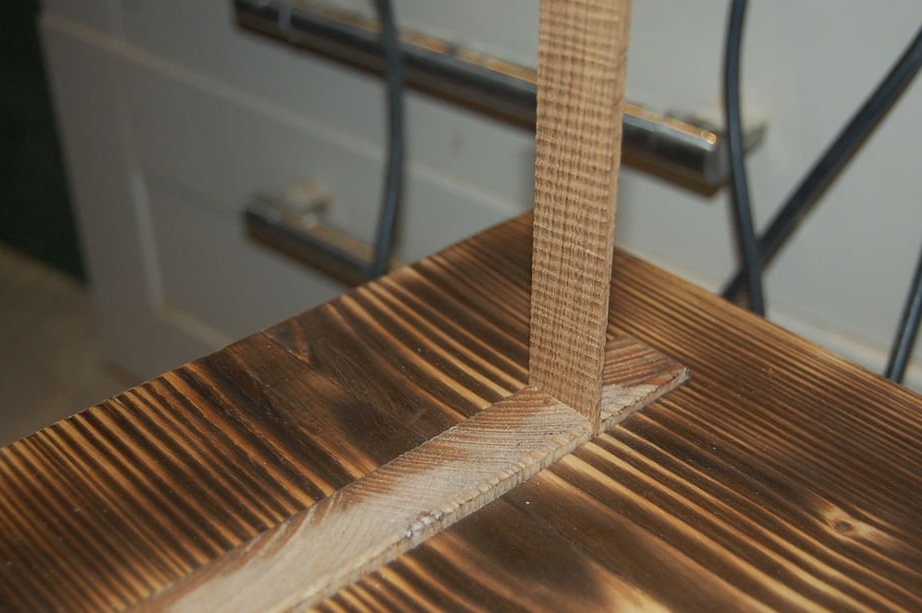
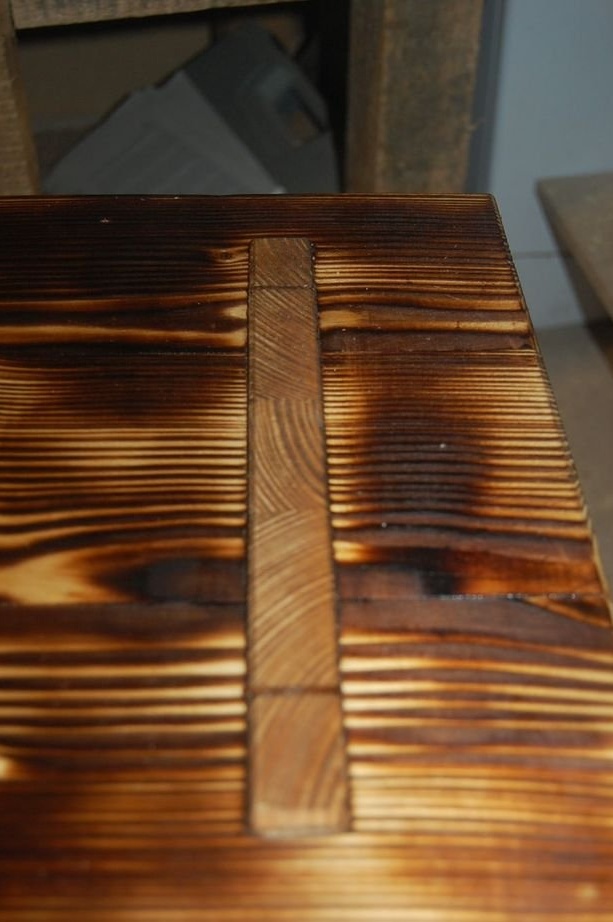
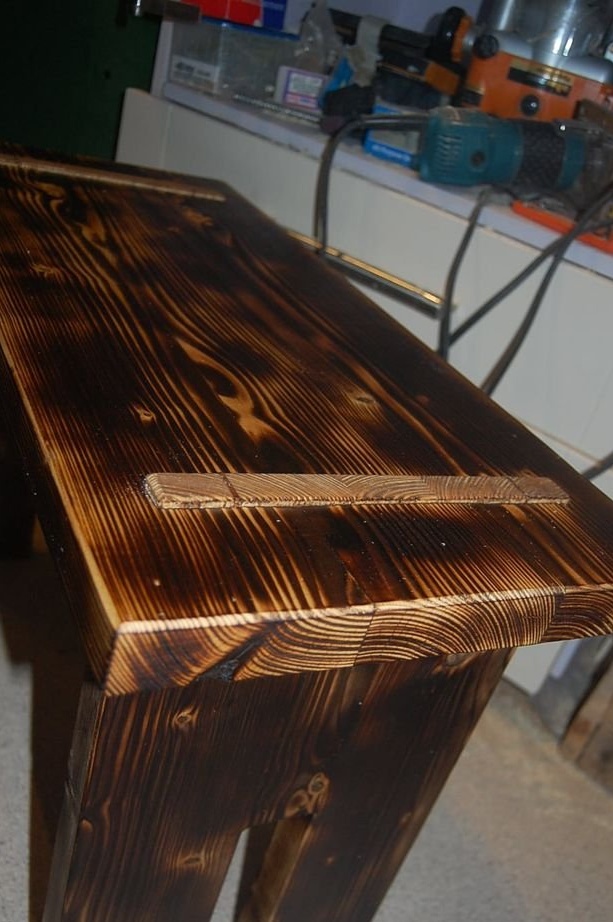
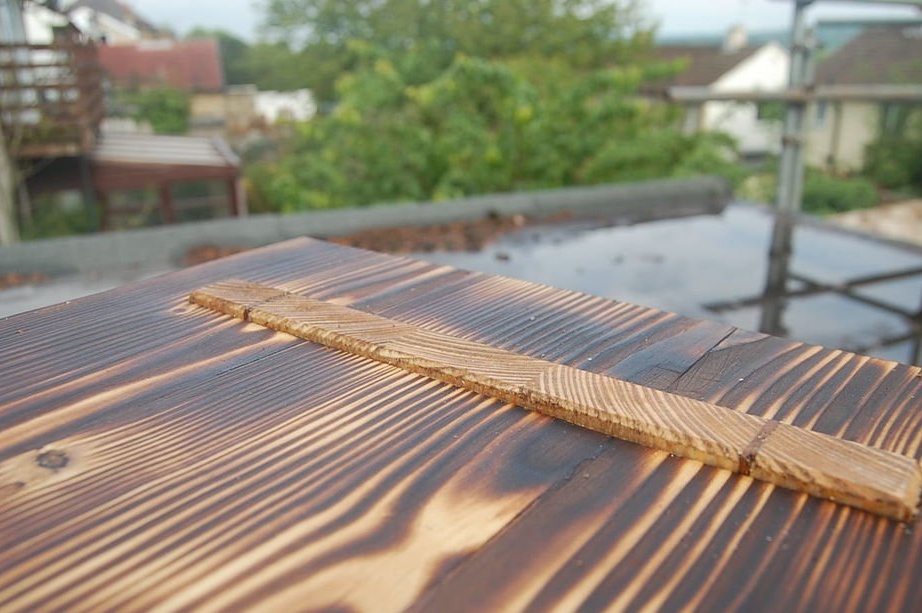
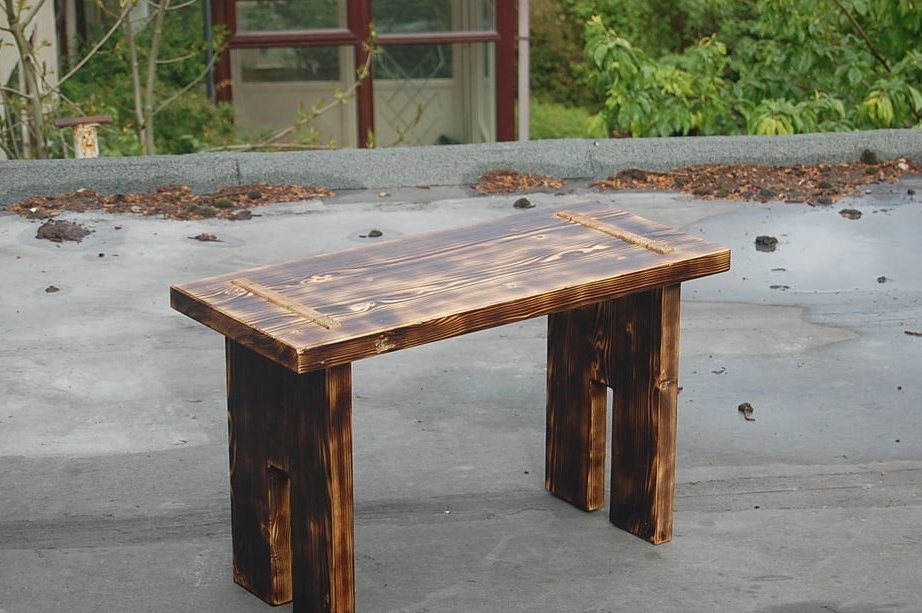
He had already made a bench for sitting on the street. It is made of planks that have been burned with open flame to create a darkened / darkened colorful effect. Therefore, he decided to use the same decoration method for the table. This technique adds wood protection. To add contrast to the countertop, it was decided to use a straight-through inset of the legs so that the upper legs are visible on the countertop. The ends of the legs will be the only thing that will not be burned, giving a bright area on the dark top of the countertop.
Material:
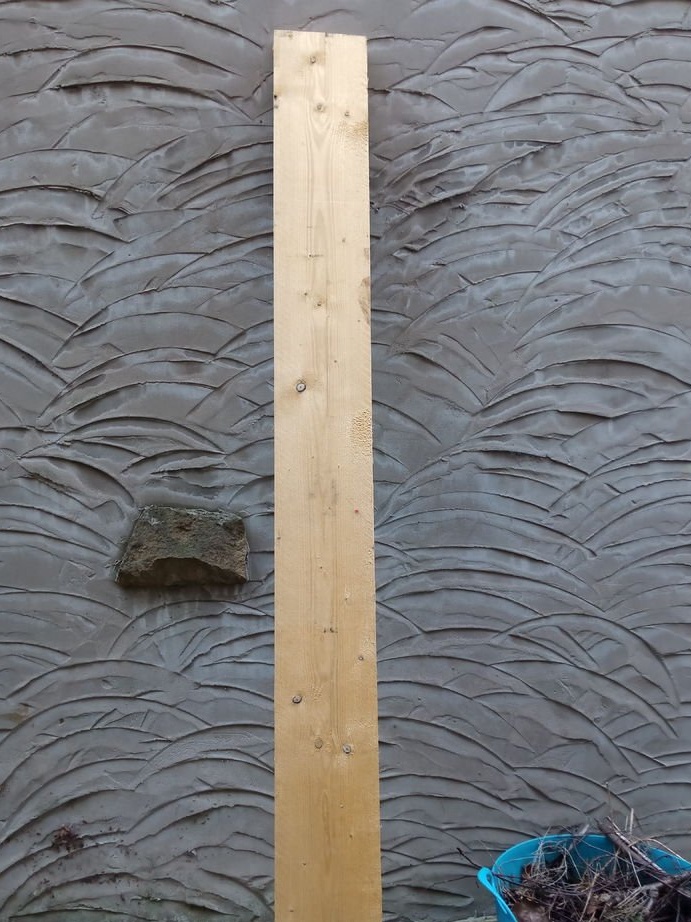
The only wooden material used by the master was a board of the following sizes: 1800x200 x 40 mm. Oak was also used as spikes / pins.
Tool:
- table saw;
- milling machine (needed for work inside and outside the table);
- band-saw;
- clamps / clamps;
- a chisel;
- cord brush;
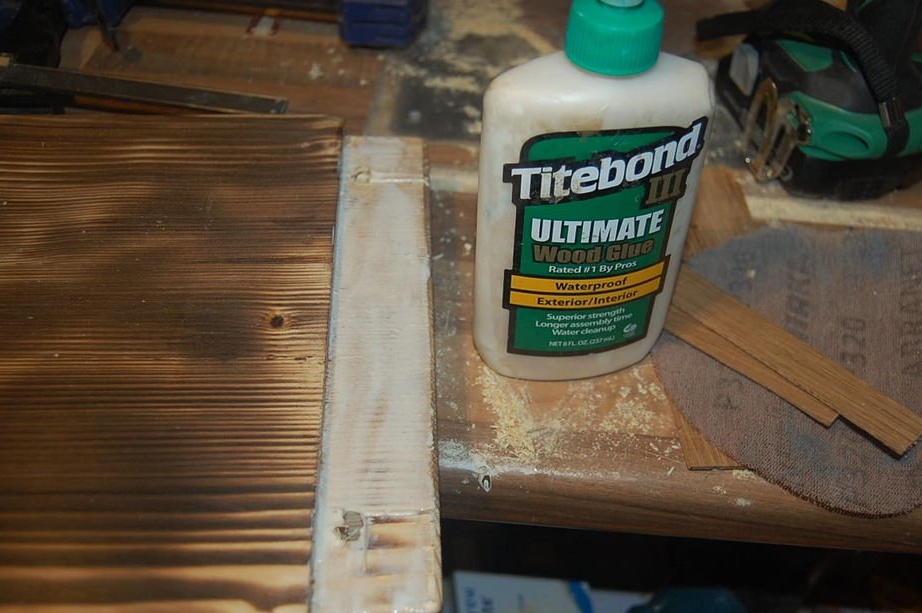
- carpentry glue;
Step 1: Size and sizing of wood
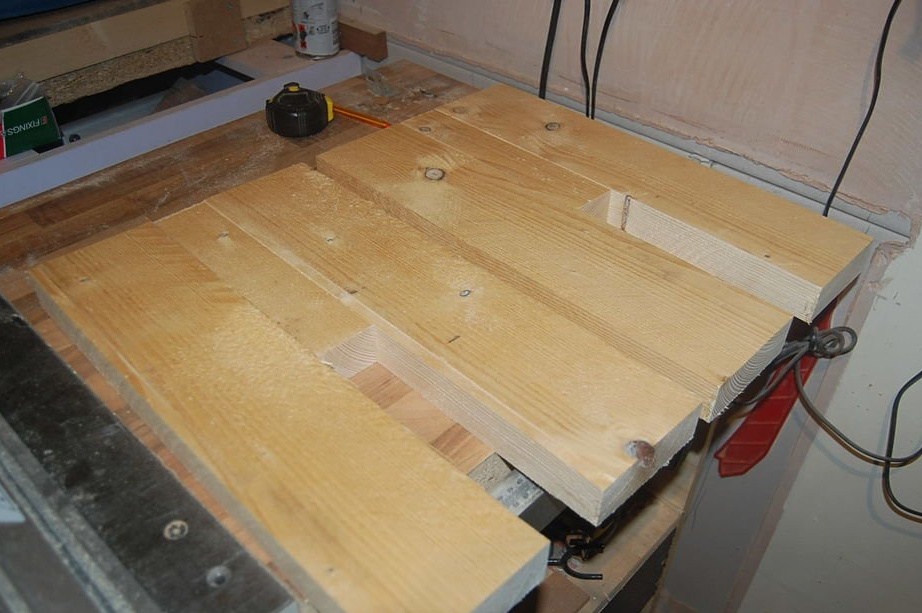
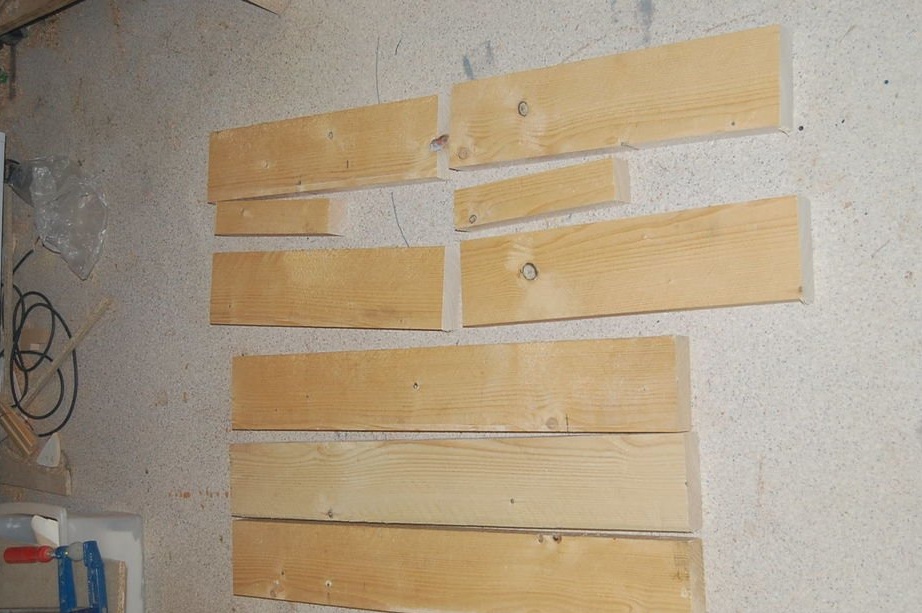

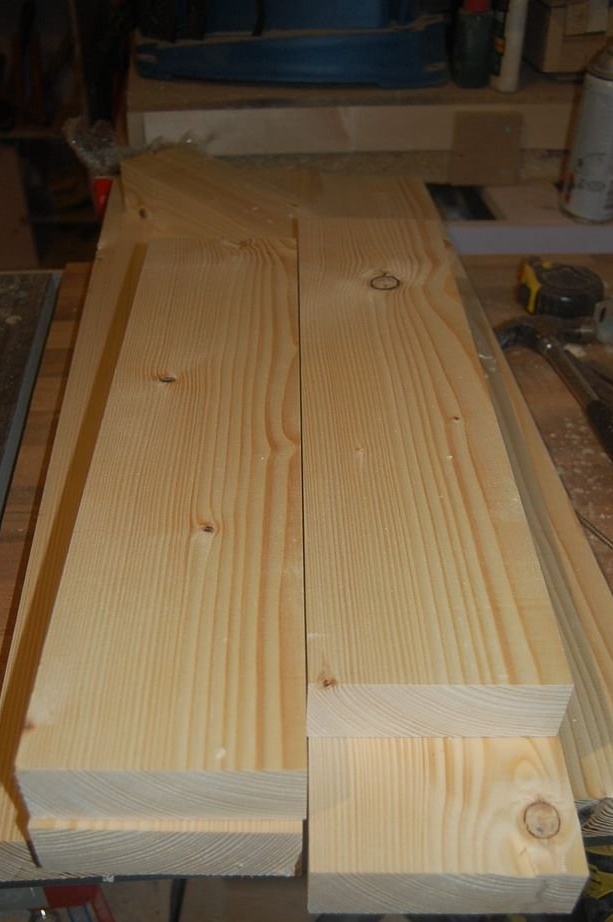
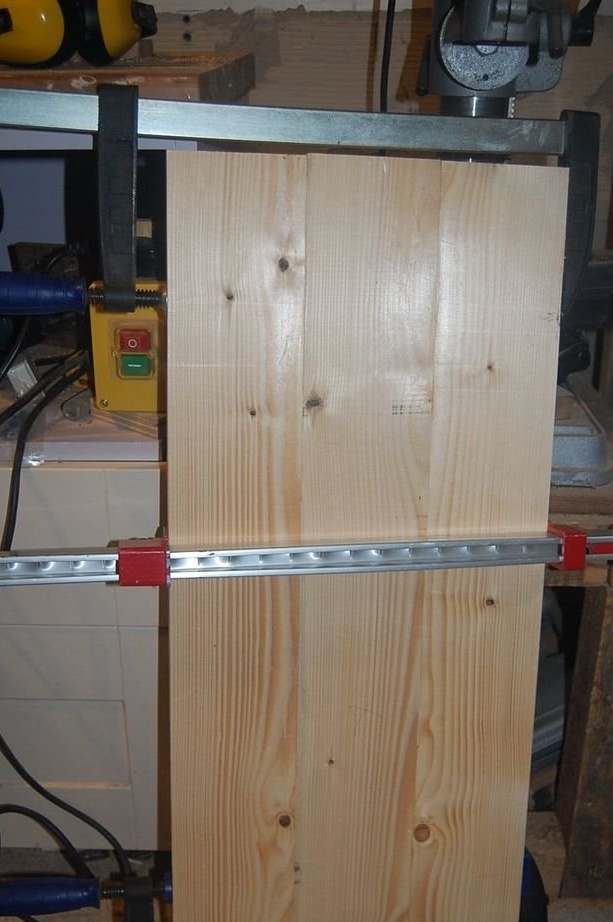
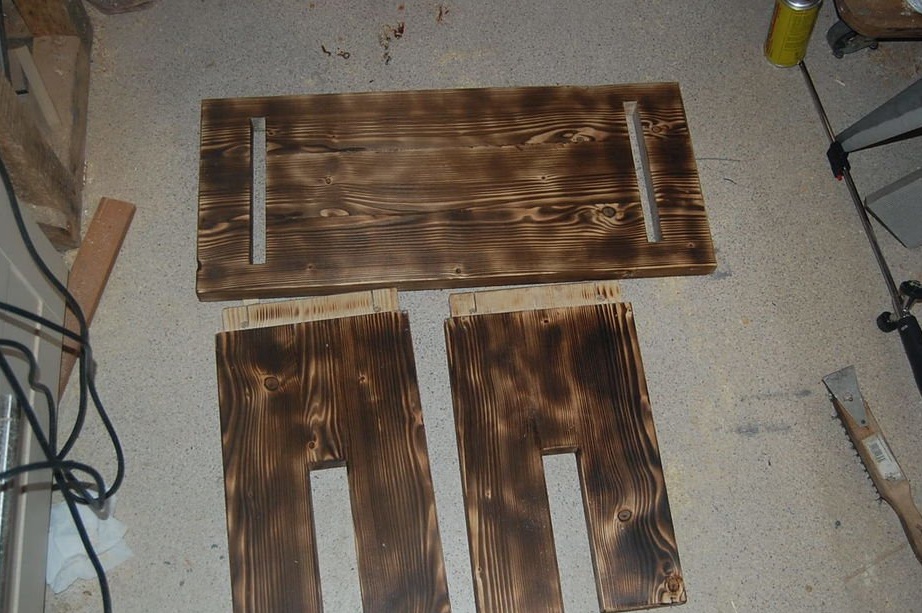
Firstly, the master cut the board to the following sizes:
- 750 mm x 110 mm - 3 pcs.;
- 450 mm x 110 mm - 4 pcs.;
- 240 mm x 50 mm - 2 pcs.;
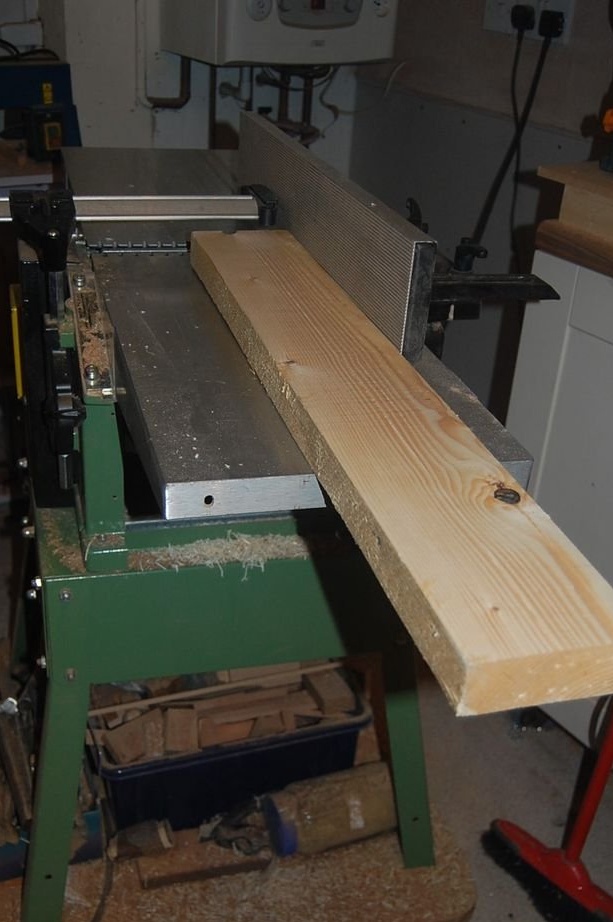
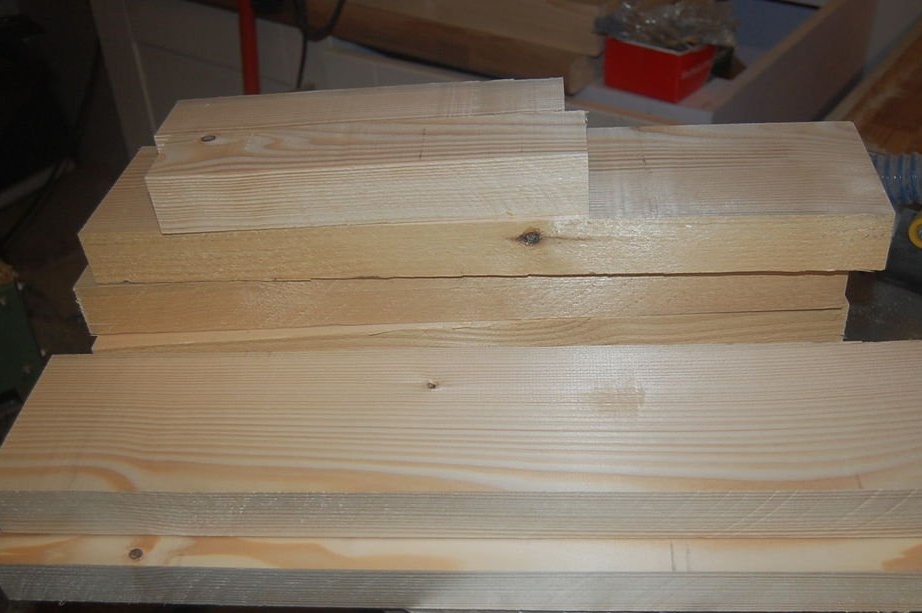
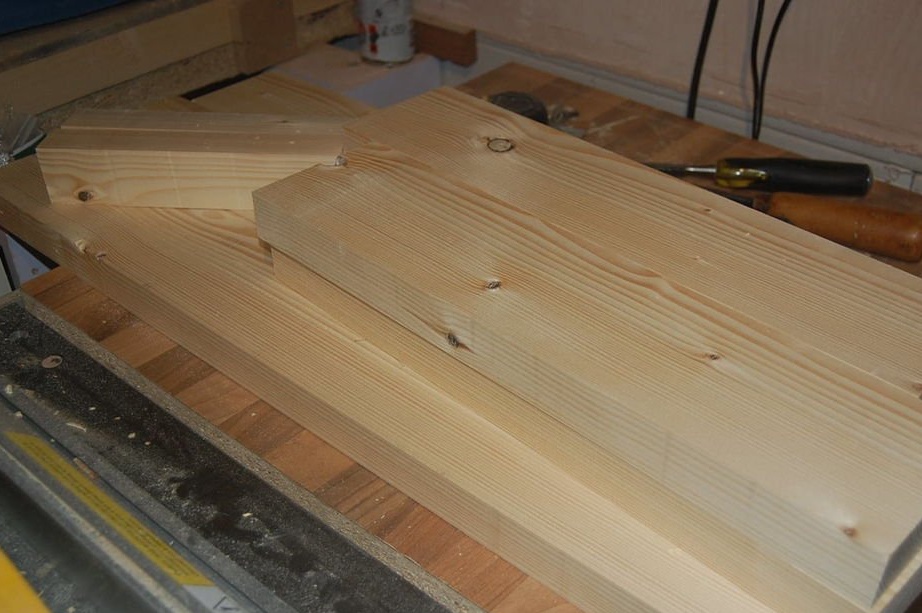
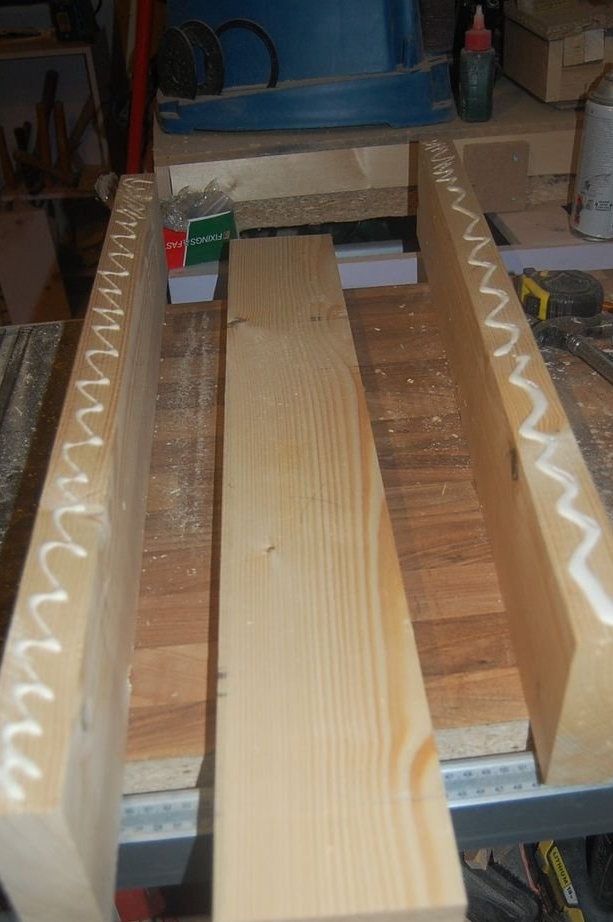
It was necessary to glue the parts, and this required straight edges. Therefore, the master used a planer / planer (planer / planer). On each detail, the master planed two ribs, and then gathered a furniture board using planed edges so that the sides were parallel. All parts were rectangular and parallel. He glued the countertop and two legs, leaving them clamped in clamps for several hours.
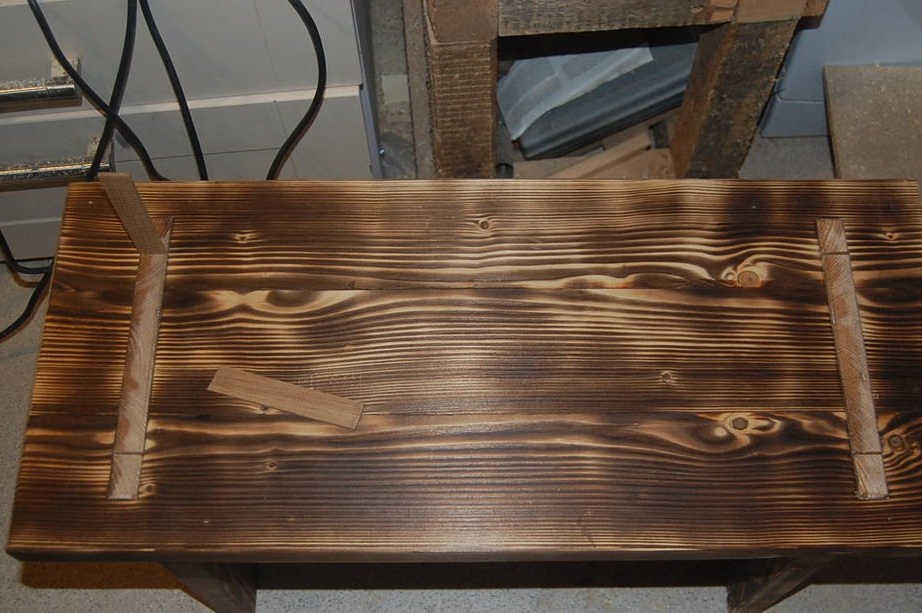
Step 2: Insert on the countertop
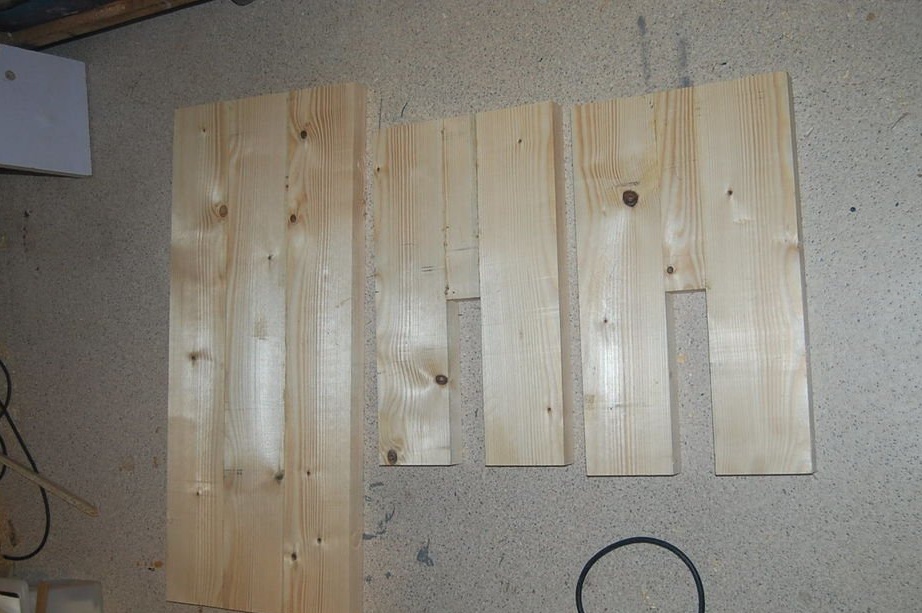

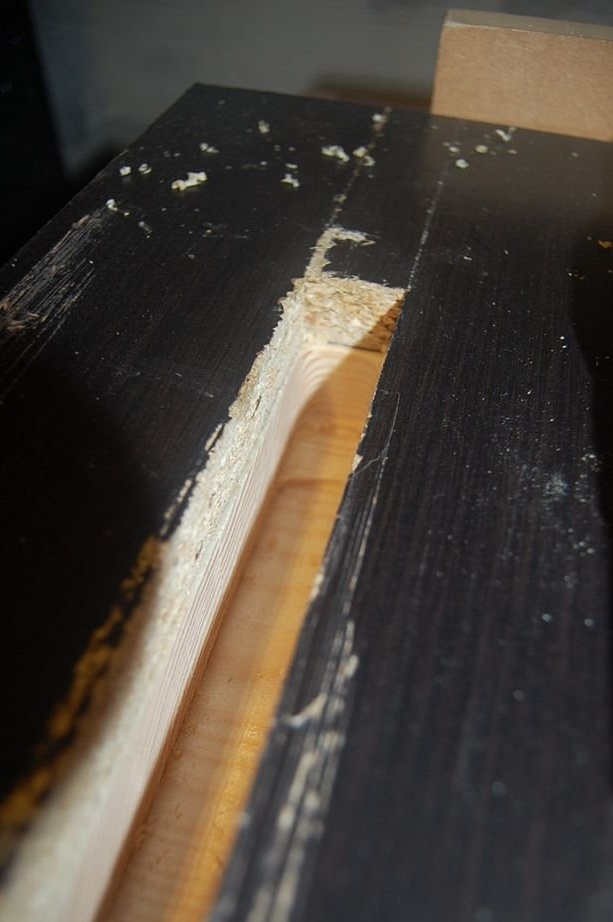
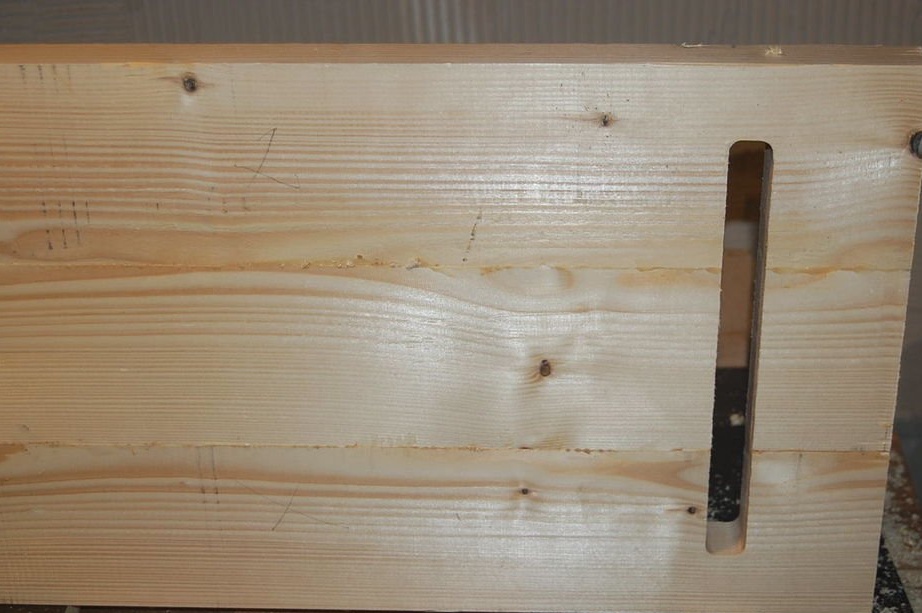
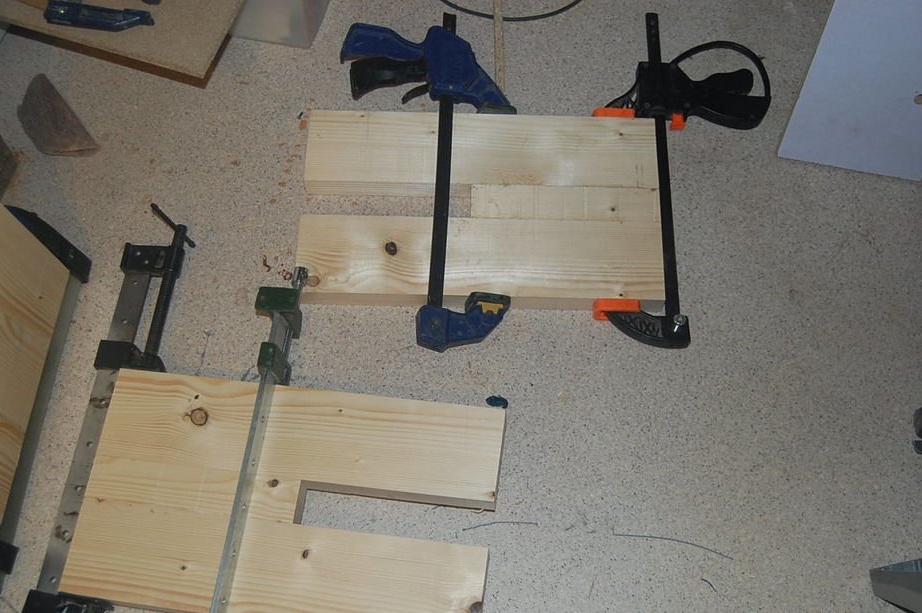
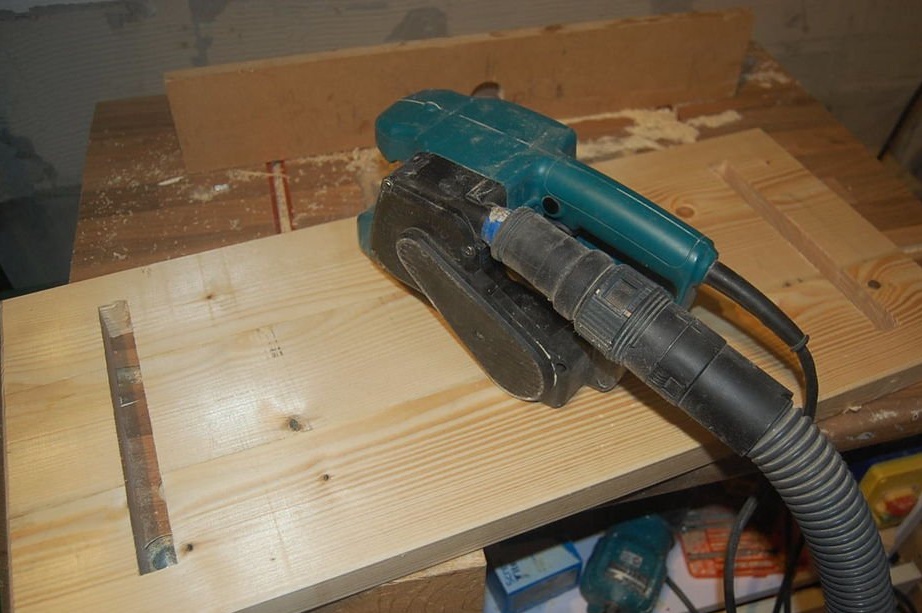
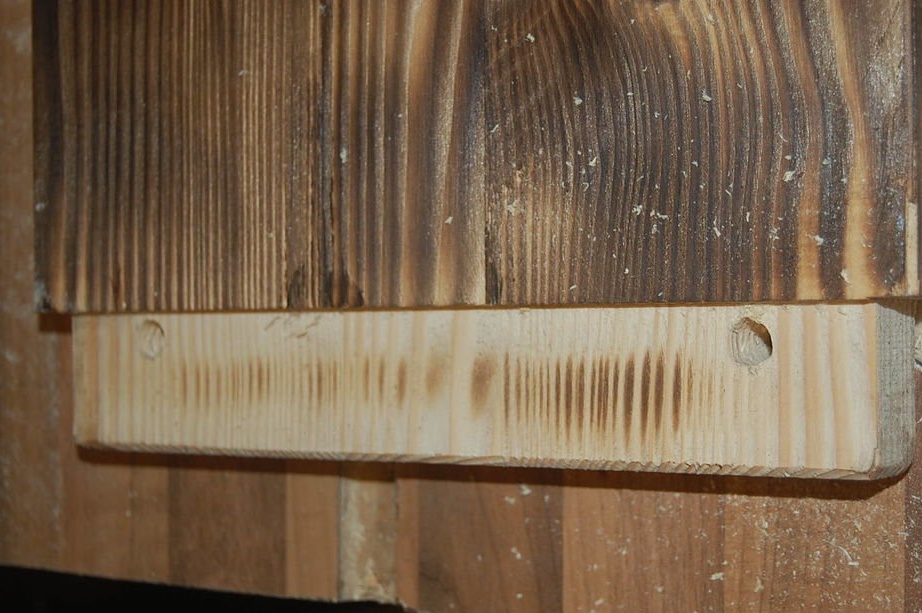
While the glue has dried, the master made a template that will be used to reduce the size of the frame. The exact dimensions are not very critical, but it would be very good to have a shoulder of about 7 mm.
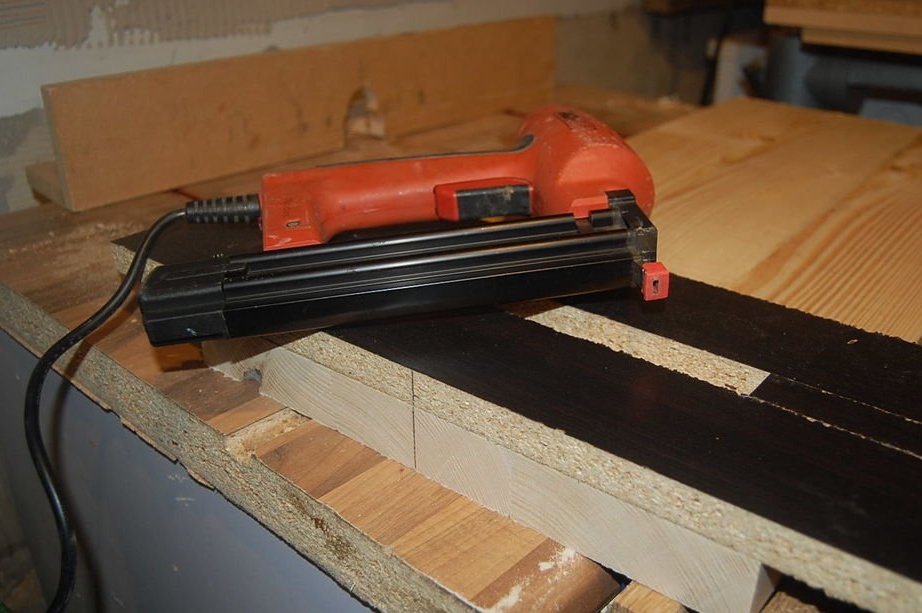
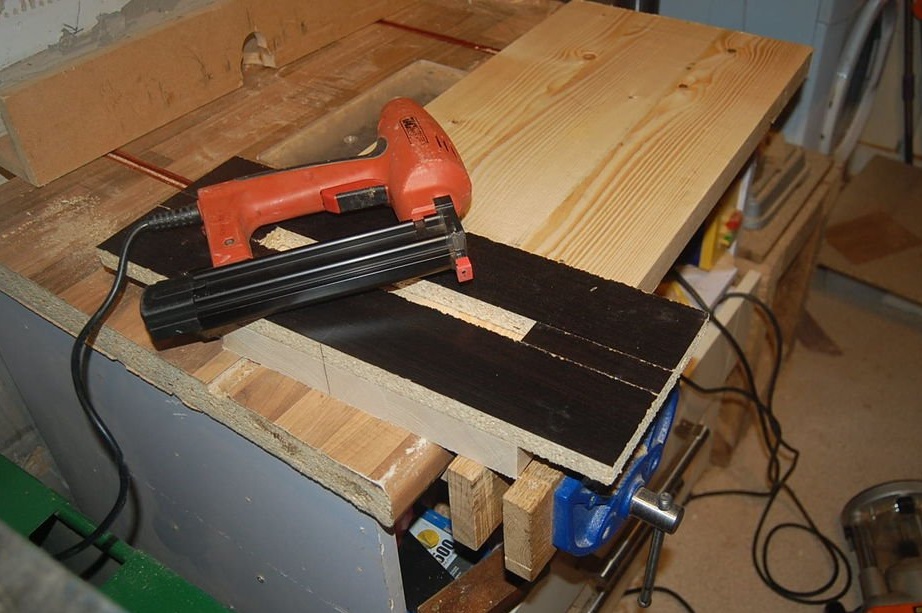
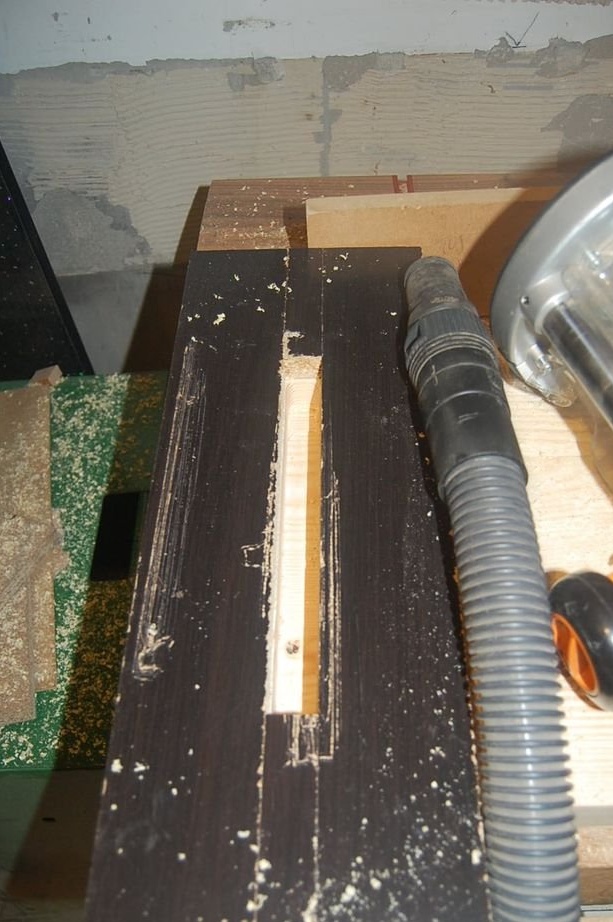
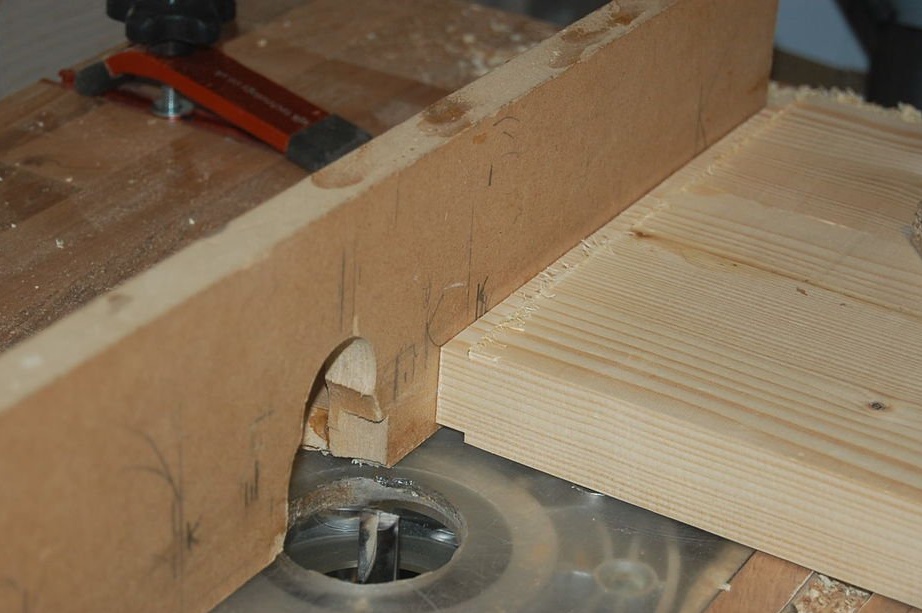
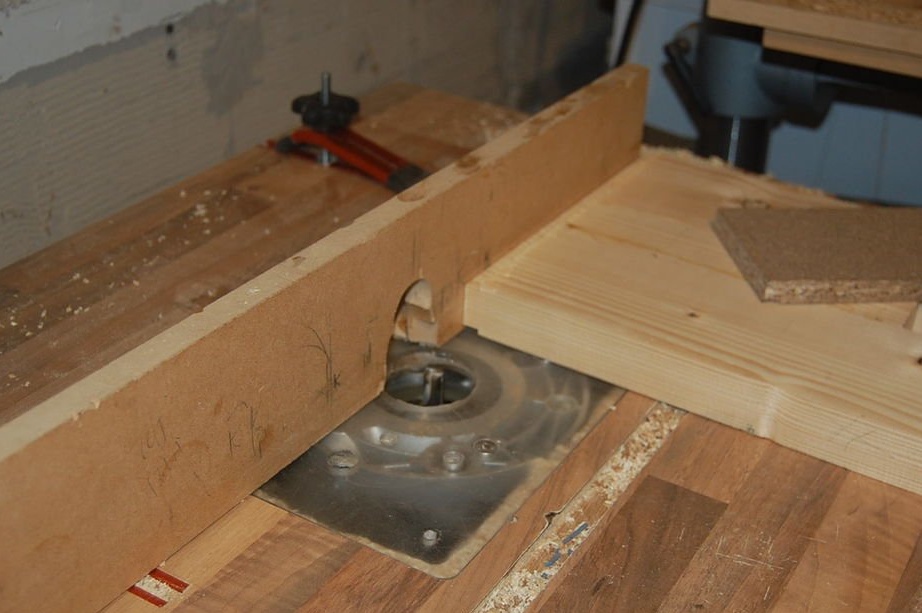
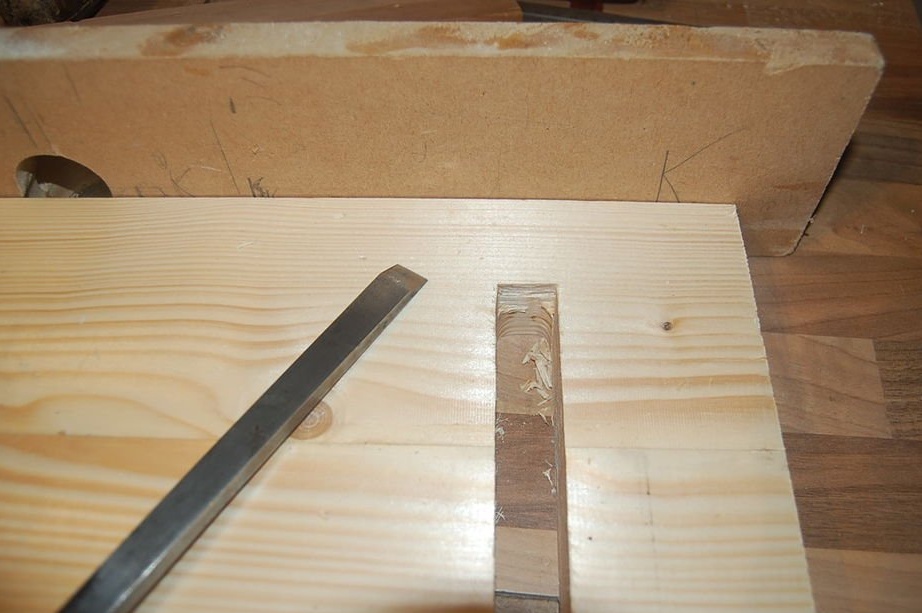
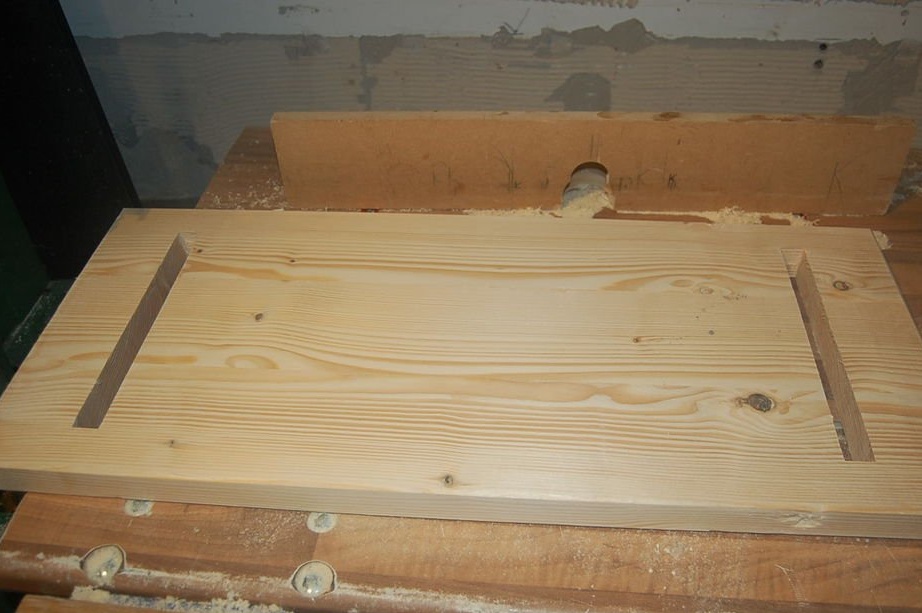
The master used a router with a guide sleeve to cut out the sidebar, so the hole for the template was slightly larger than the desired hole. The tapping hole was obtained with dimensions: 250 mm x 25 mm. The template was made of four parts, two long parts and two spacers to create the desired hole. For this, the master used a chipboard from under a wooden container, since the template did not have to be especially durable.
The master marked the center line on the template so that it can be easily integrated into the line where the insert of the legs was needed.Using this line and pattern, you can easily make two grooves at either end of the countertop exactly in the right place. The template was attached to the countertop with a pair of nails, since it was not possible to install clamps.
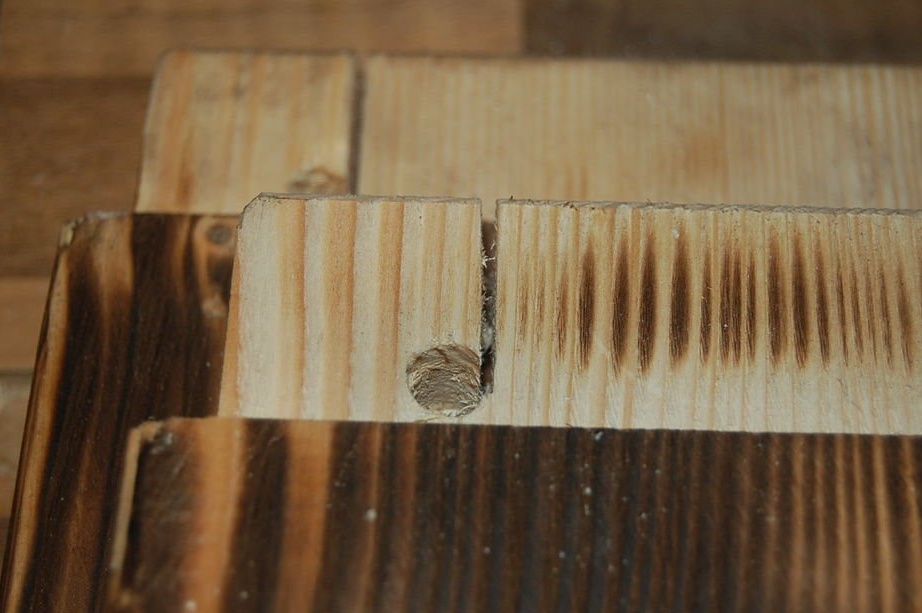
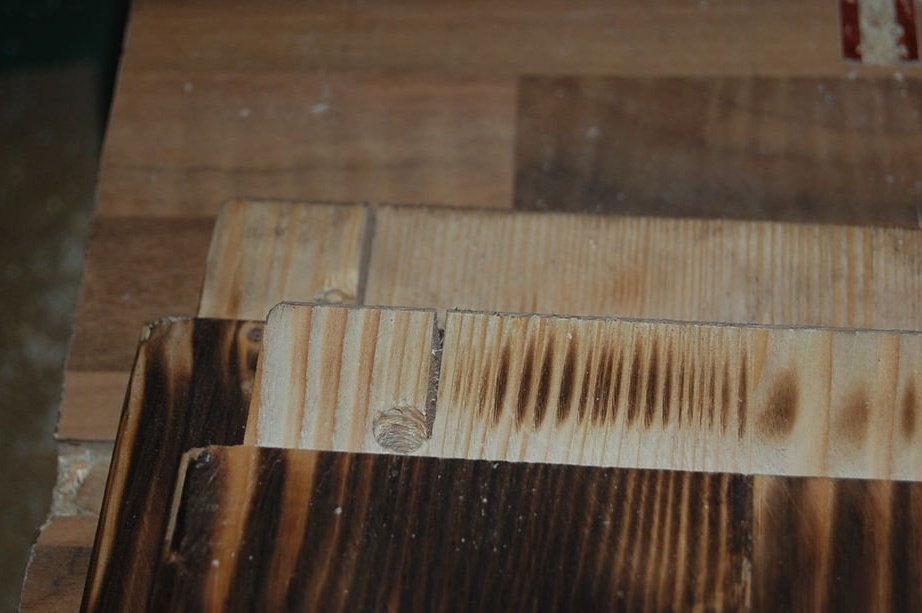
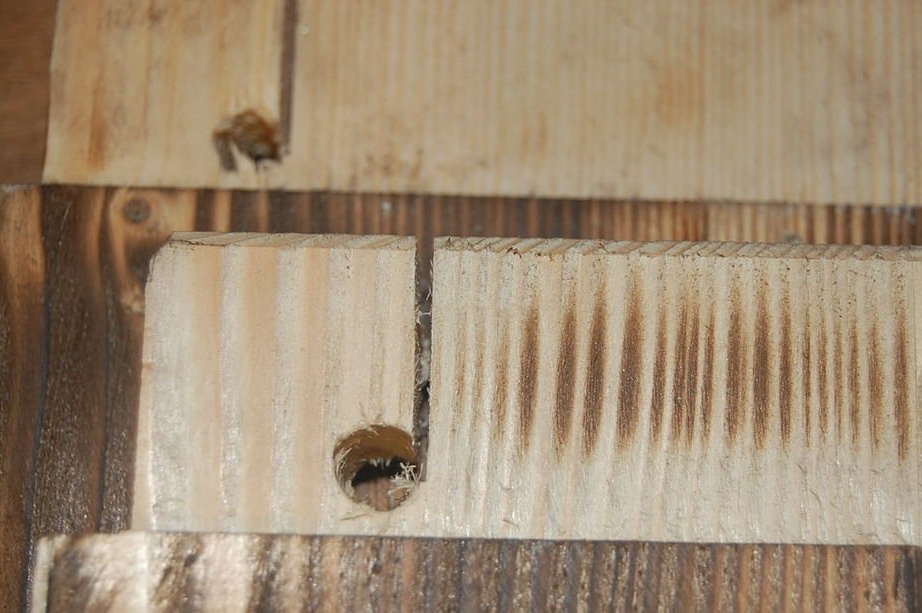
Step 3: Making and fitting the stud to the countertop
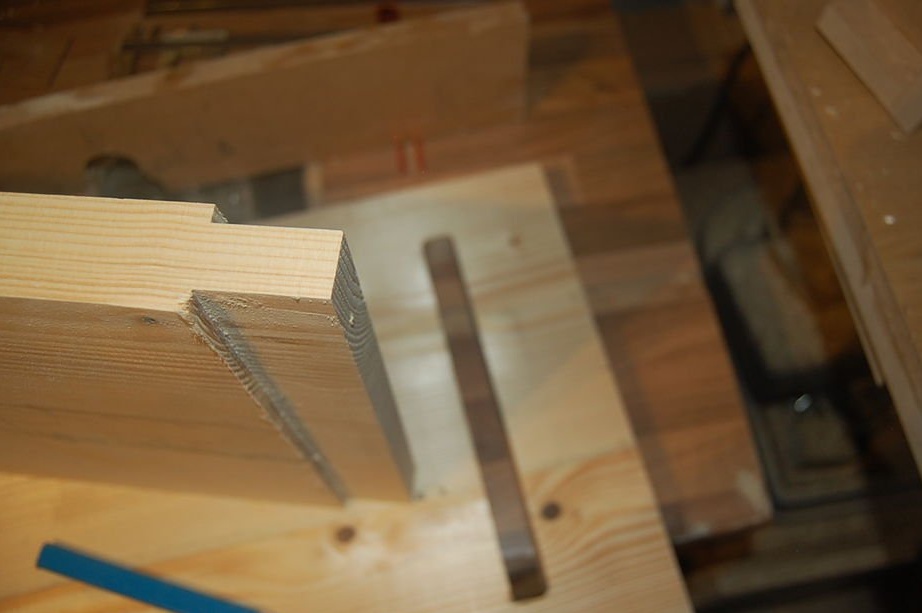


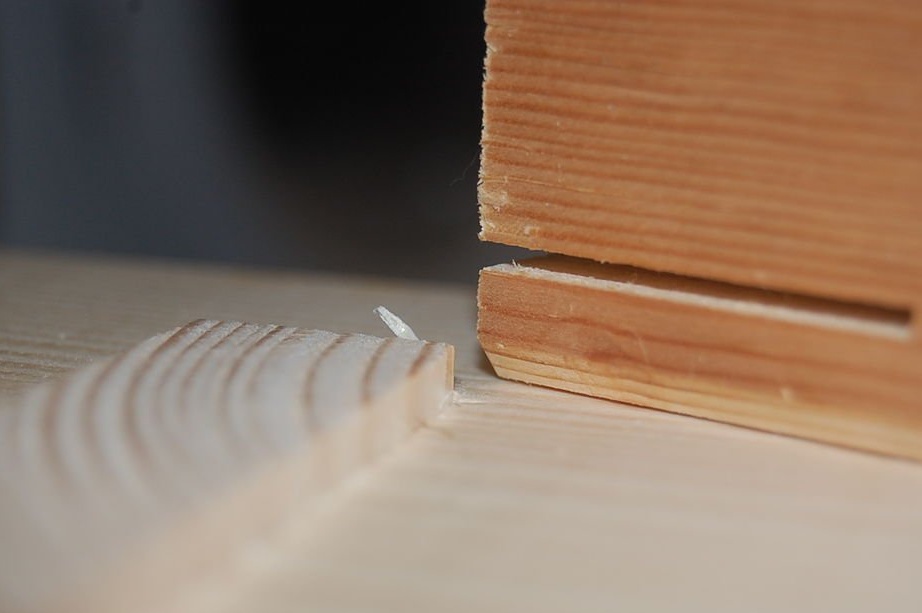
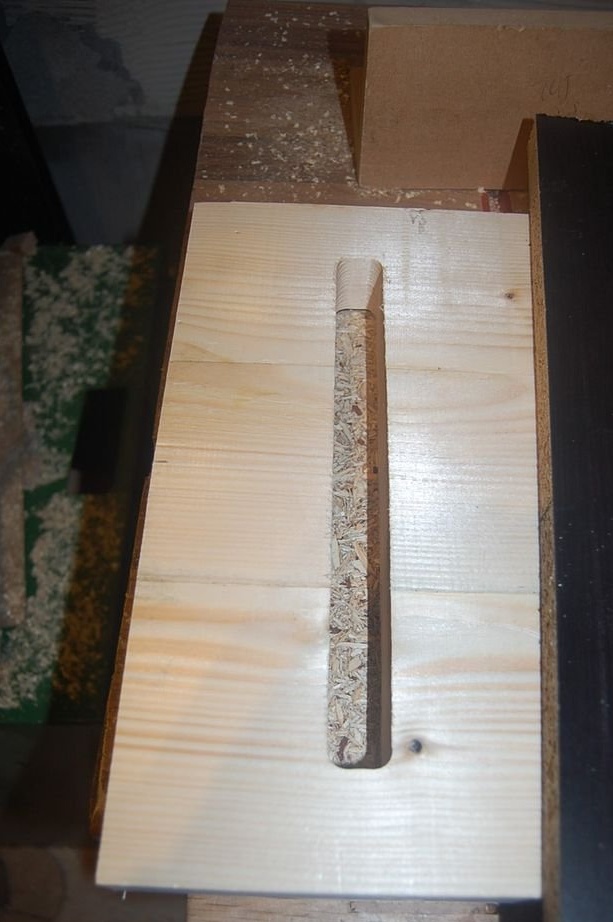
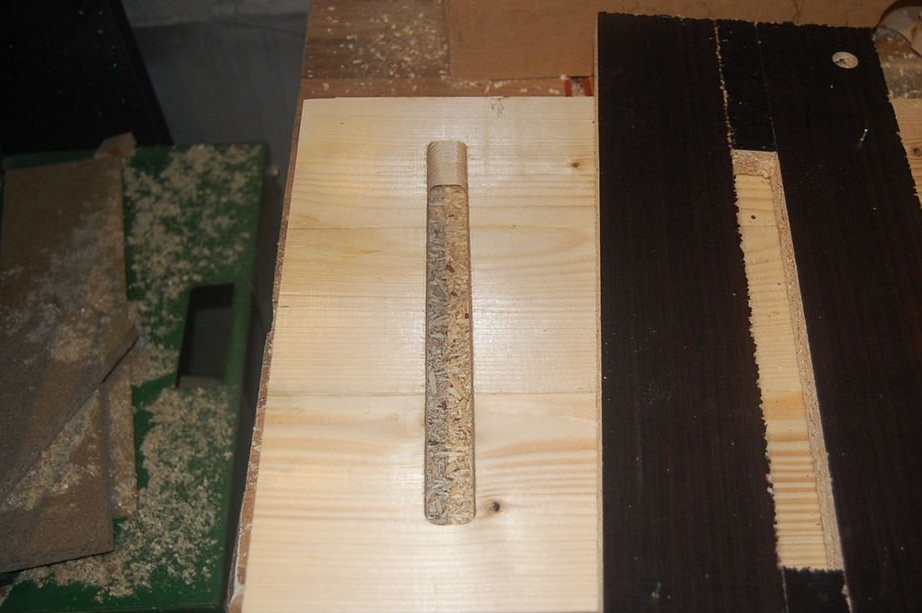
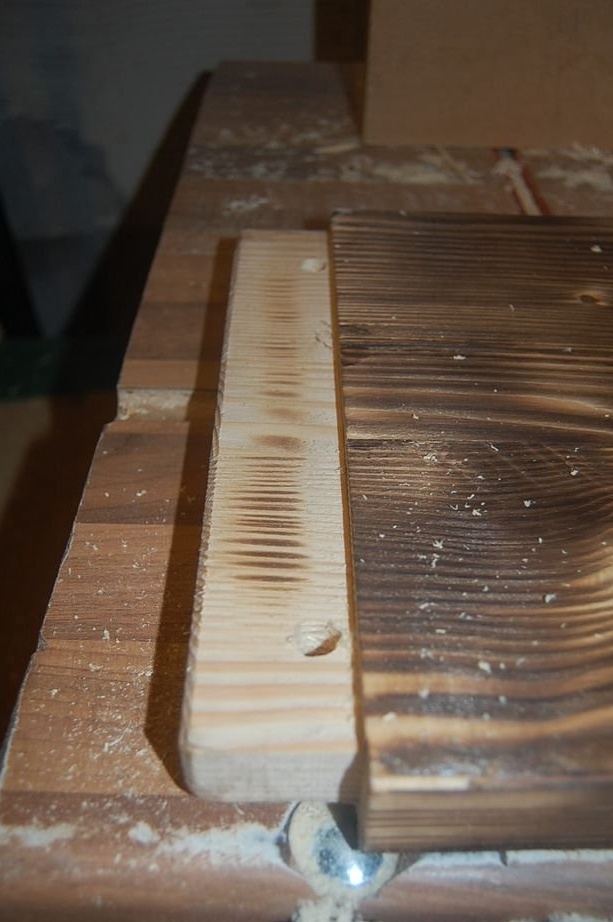
After an inset under the legs was cut out on the countertop, the master already knew the size of the future stud.
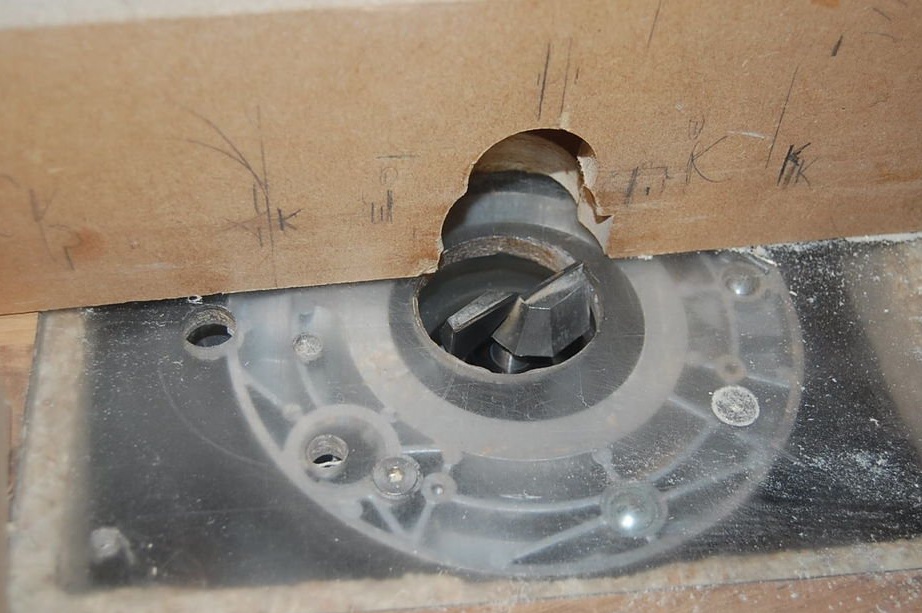
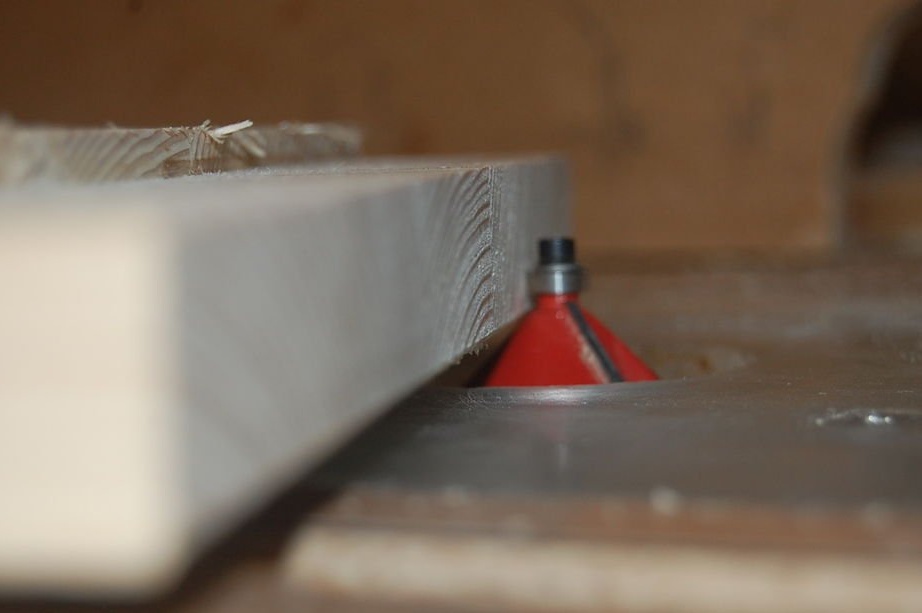
Using a router mounted on the table, the master cut the spikes. He started with a 12.5 mm long cutter, but it took a long time and did not give the desired result. He then changed this cutter to a large diameter milling tip that was large enough to cut through the entire height of the tenon. He changed it and made several passes, increasing the width, regularly checking the fit.
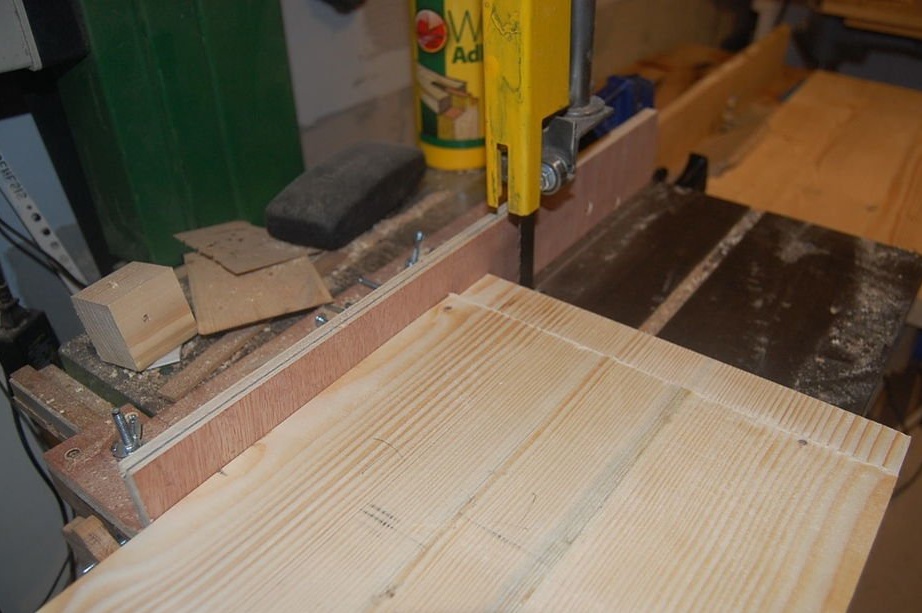
The groove length was then measured to trim the ends of the spikes on the band saw to the desired size.
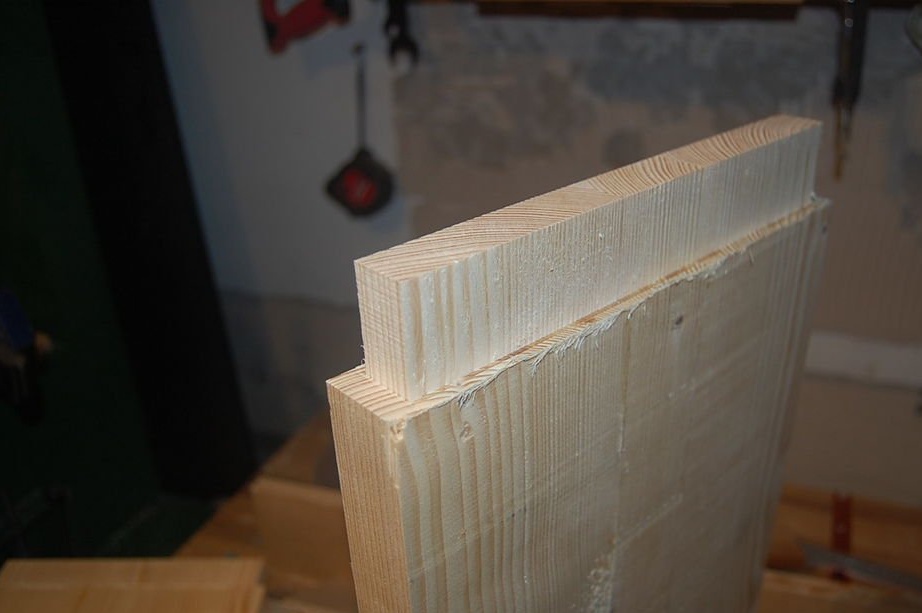
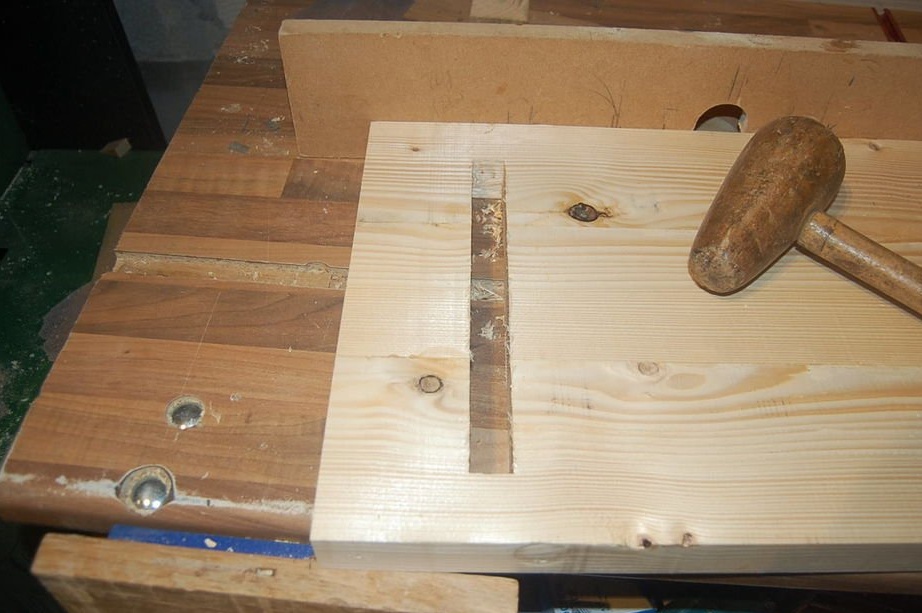
Since the edges on the groove were rounded, it was necessary to either align the groove or round the spike. It was more convenient to erect a mortise groove, so the master used a chisel and a hammer. Then he checked the fit of the legs on the countertop, they sat very tight.
Then the structure was disassembled and a chamfer was added along all the edges of the legs.
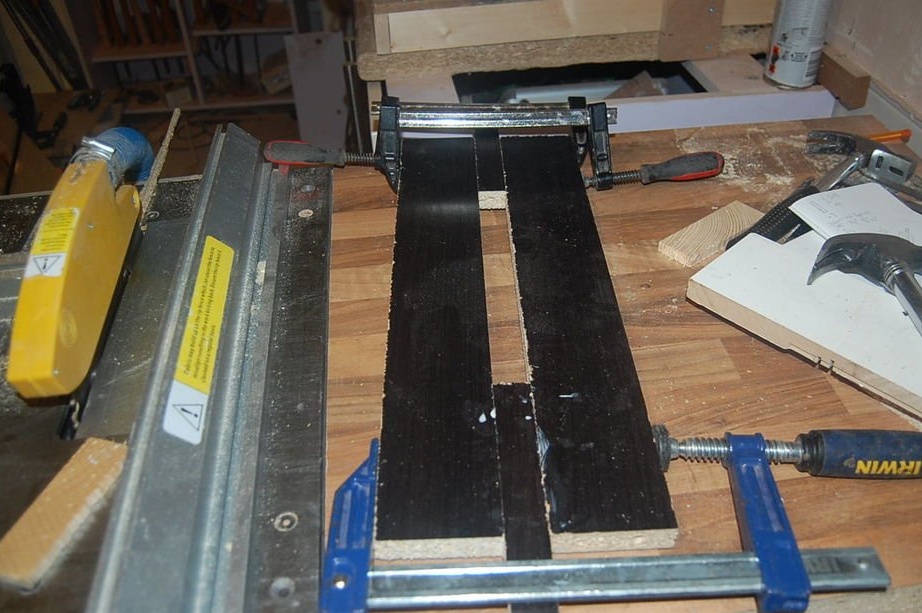
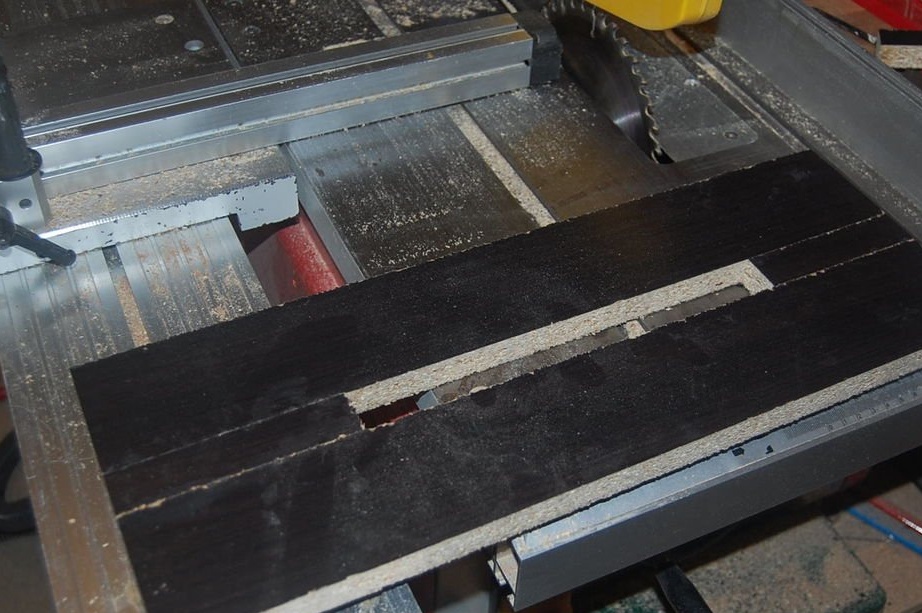
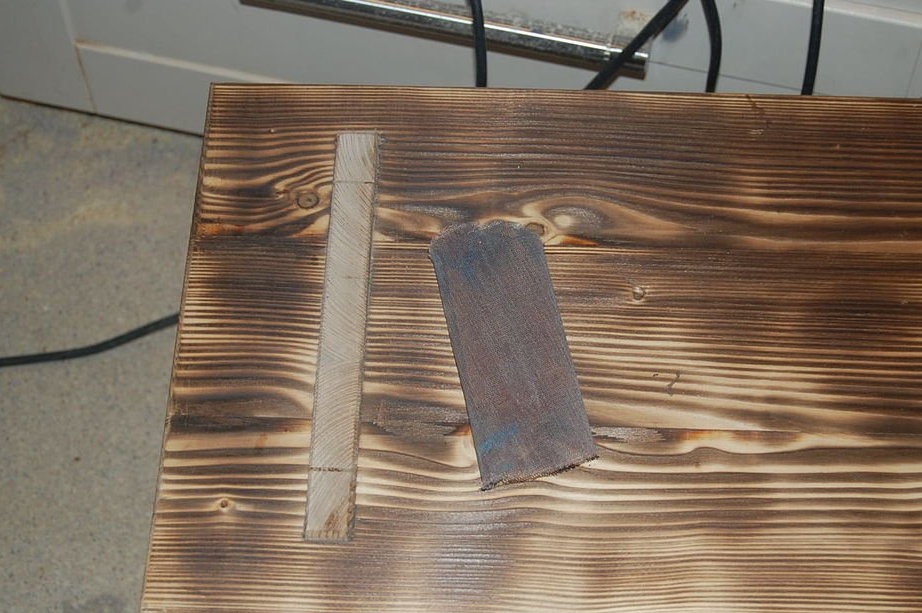
Step 4: Burning the Tree
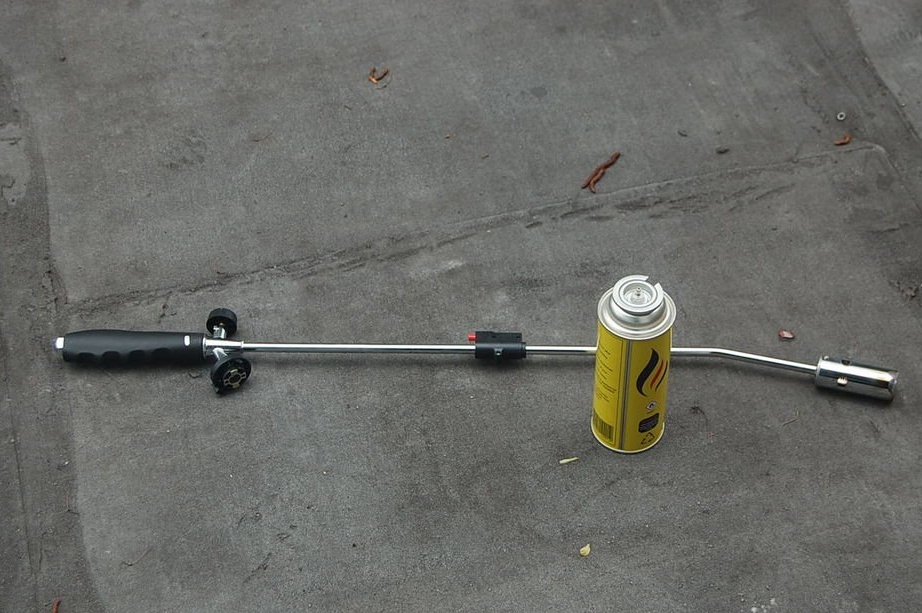
Before burning wood with a burner, the master polished the countertop and legs to 120 grit so that the surface was not too smooth.
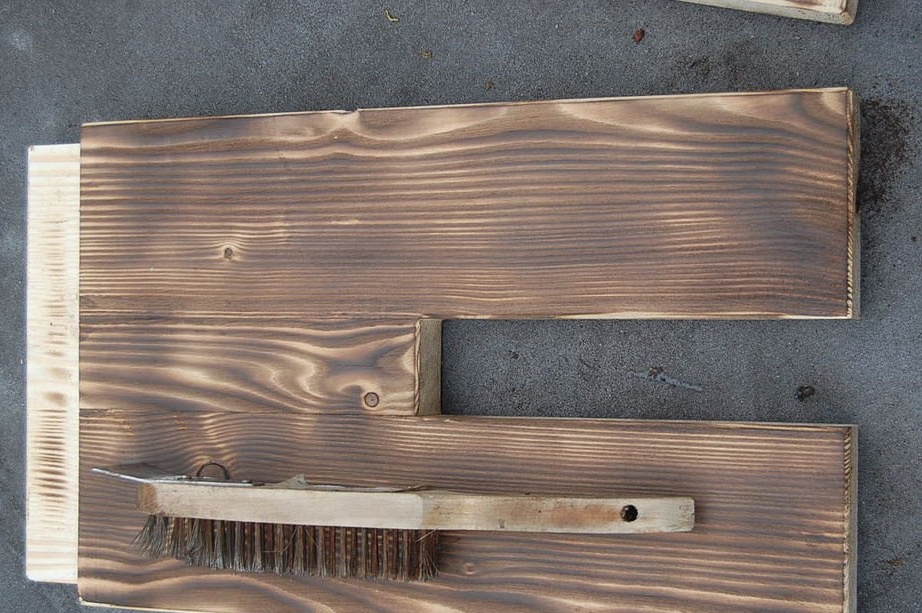
As a burner, a gas burner was used to control weeds. All you need to do is slowly burn the tree until it burns to your liking. The master burned the tree to medium black, but you can burn it to complete blackness. Whoever you like. It will take a lot of time, but it's worth it.
After the tree was burned, the master used a cord brush to get rid of excess soot and ash.
Step 5: Gluing and Finishing
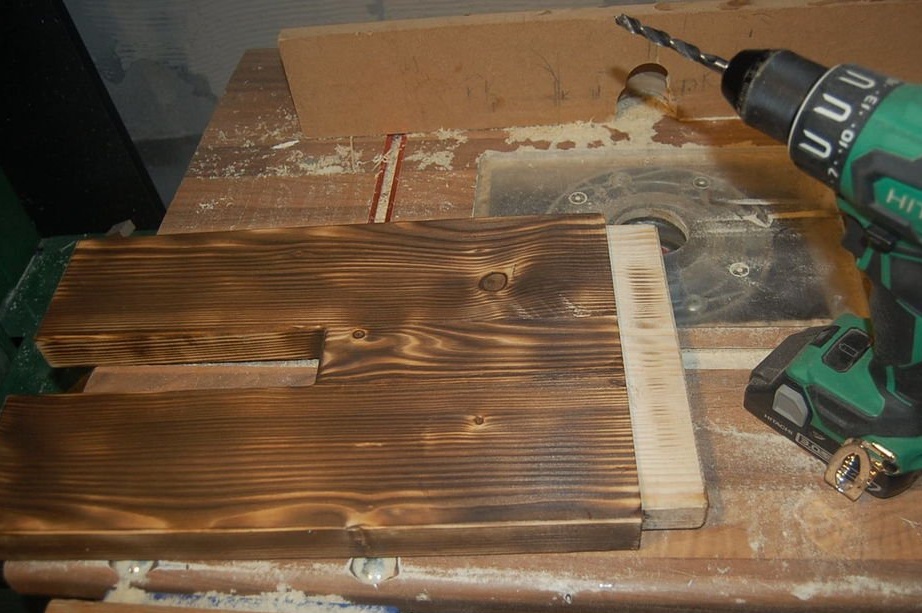
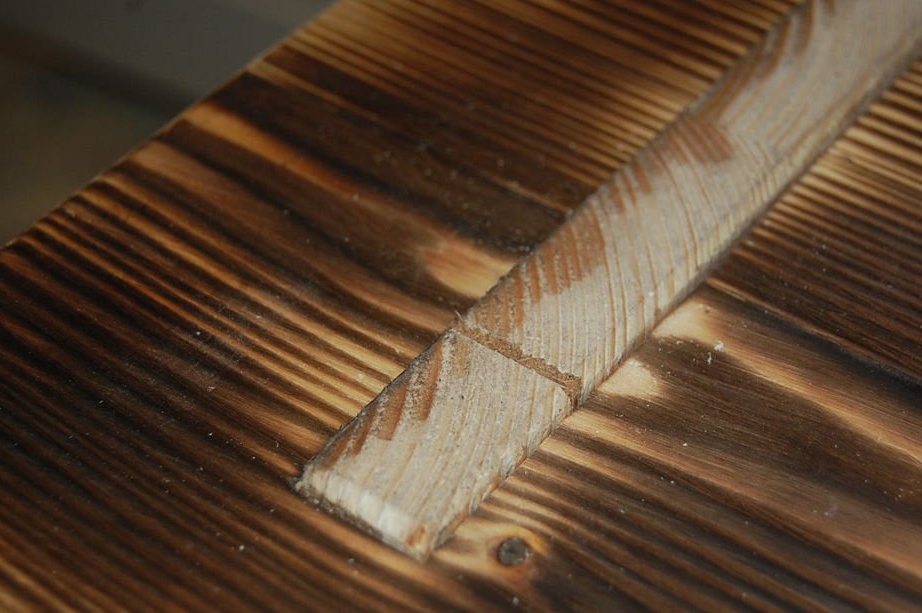

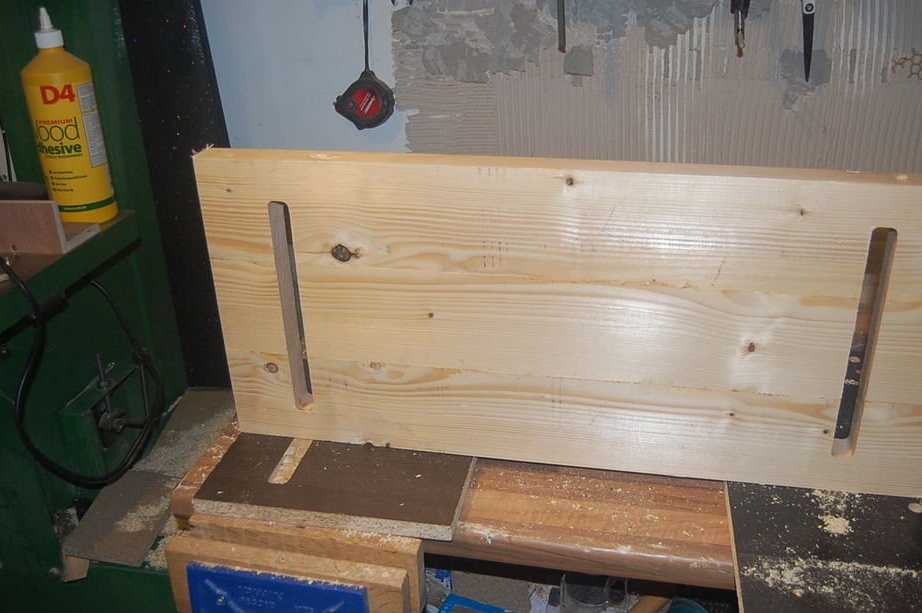
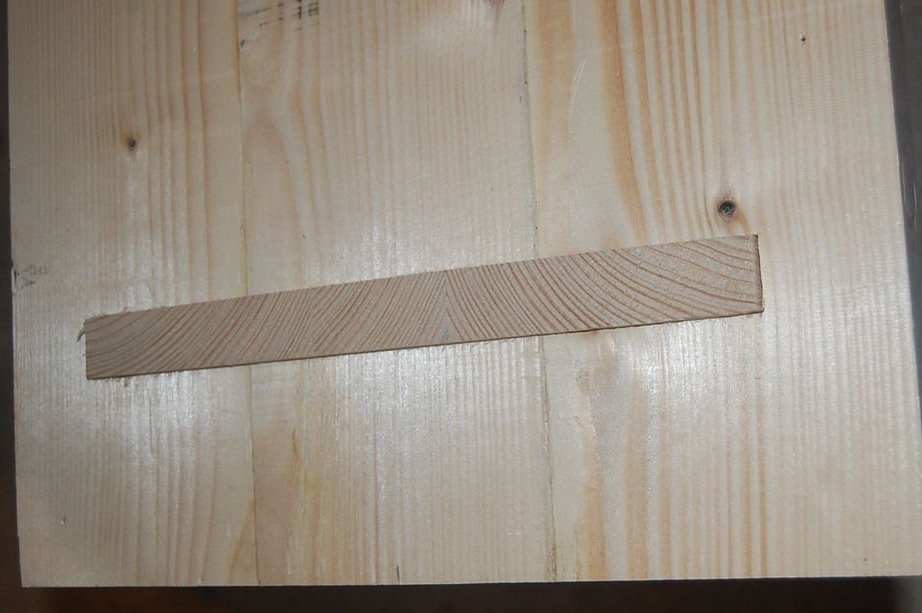
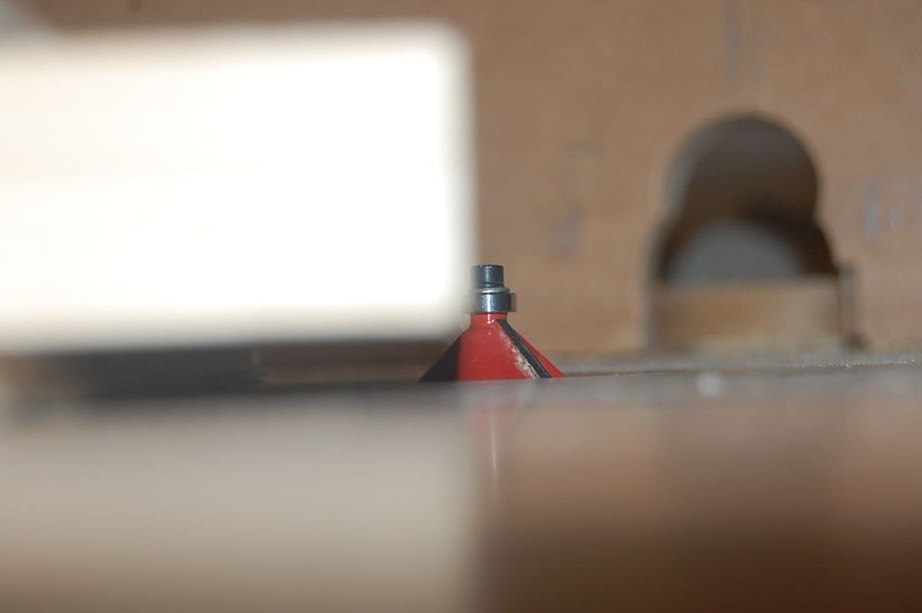
The master added a couple of discharge holes on the spike of the legs, so that it is easier to use several wedges in the spike, and also so that the wood does not burst lower than necessary. Wedges are needed to close a small gap at both ends of the legs. He drilled a 10 mm hole 20 mm from the edge. Then he cut out wedges on a band saw.
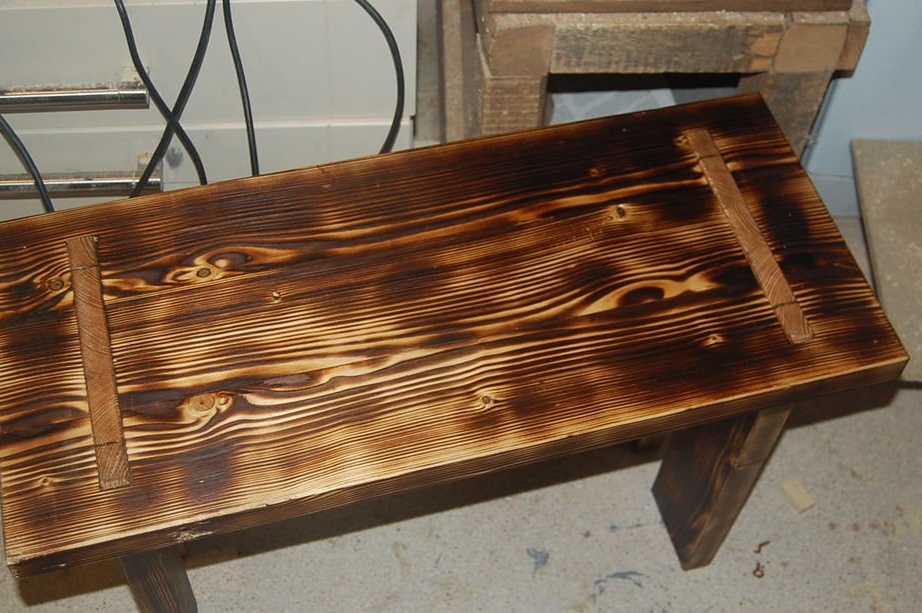
After that, the spikes of the legs and the inset in the countertop were glued. After which the legs were inserted into the countertop. With the help of a hammer, the legs were upset in the countertop. Then a small wedge of oak was hammered, which was cut to the size of the slot.
The only thing left to grind is to grind the upper part of the legs to get the desired result.
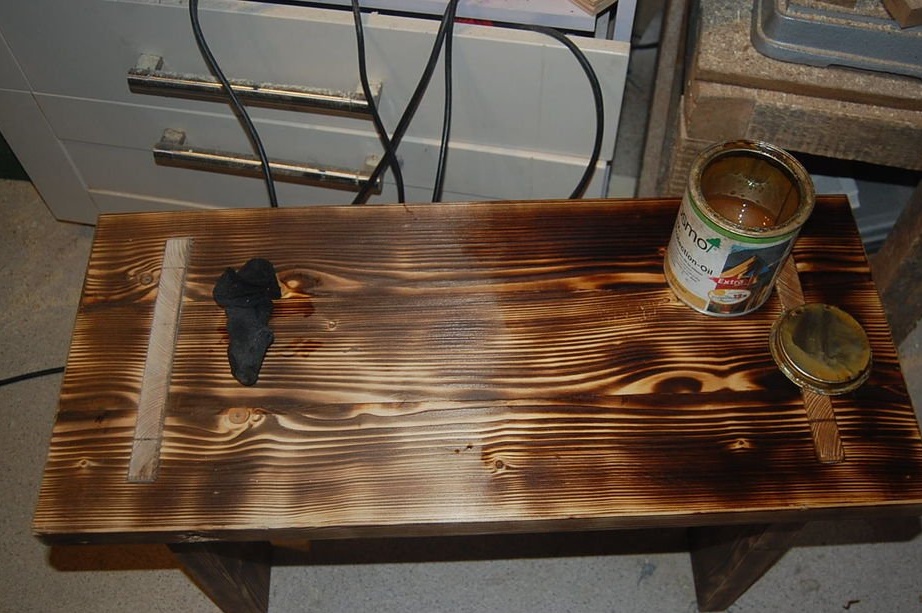
Finally, the master covered the table with UV resistant oil. Using firing finishes eliminates the need to add oil, but any additional protection will not be harmful.