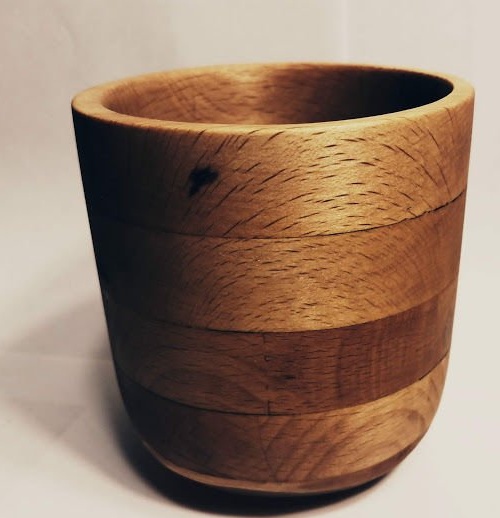
This idea occurred to the master after one of his favorite mugs broke at one of the parties.
After that, he decided to make a non-killable mug of wood.
He had no experience in the manufacture of such things, and also did not have a lathe. This is how he got out of the situation.
Tools used:
- drill;
- pen drill 25 mm .;
- saw;
- clamps;
- Sander;
- drilling machine;
- Dremel grinder;
- grinding drum;
Materials:
- a tree (the master used a discarded cutting board);
- glue for wood;
- epoxy resin;
Step 1: Preparing Wood for Cutting
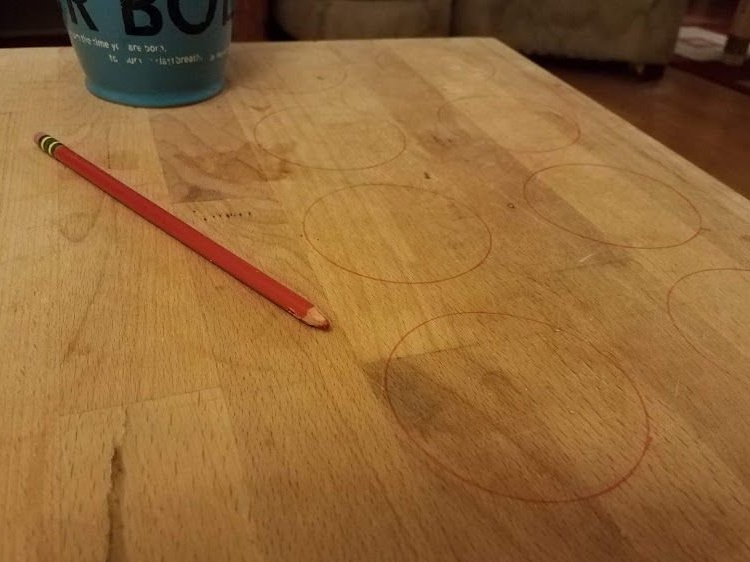
The master found an old chopping board that he could use. She had a good thickness, 19 mm. Since this is still a cutting board, it should be made of solid wood. But it is better to use hardwood with a dense granular structure.
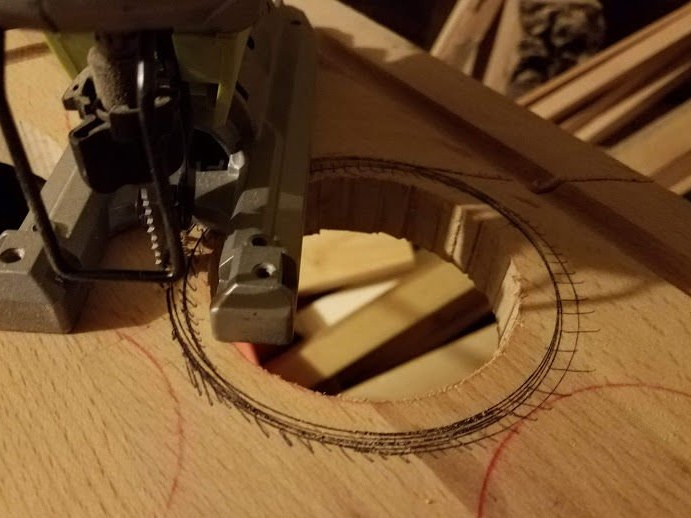
Using a broken mug, the master drew several circles on a cutting board. The idea was to cut out several wooden rings, put them together, glue them together, and then grind the cup to its final shape.
Step 2: Cutting Holes
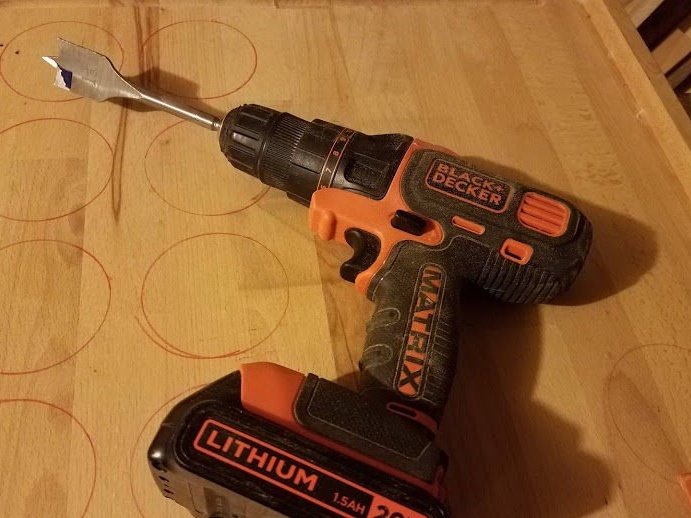
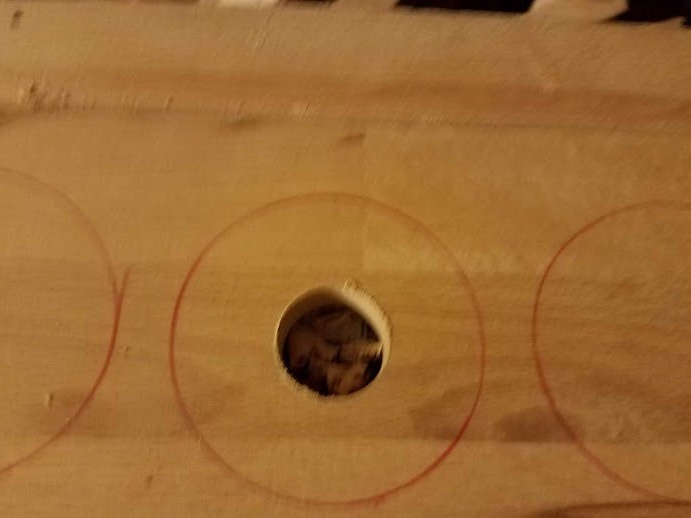
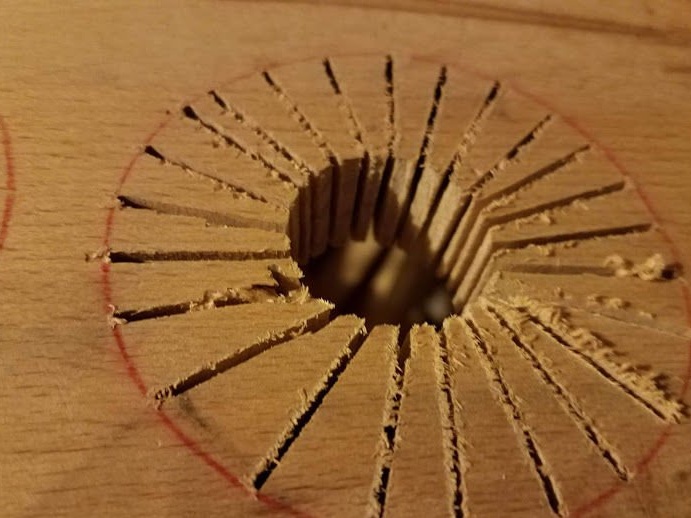
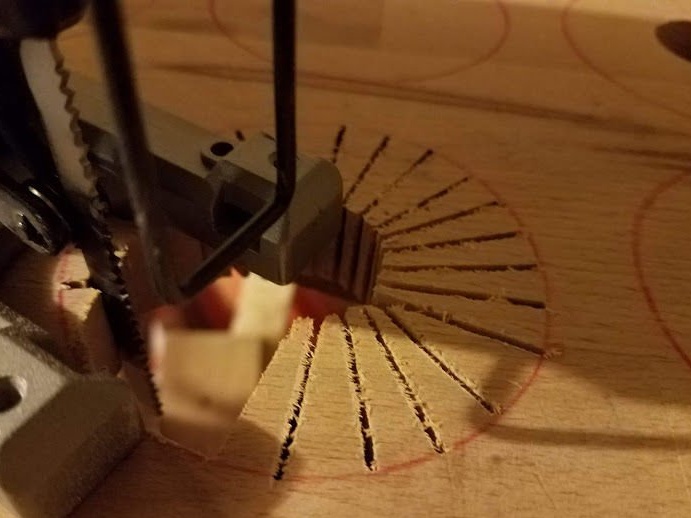

These holes will define the inside of the cup. First, the master drilled a hole in the center using a 25 mm pen drill. Then he inserted a jigsaw and began to cut a circle.
The master decided that the best way to cut a circle was to make several radial cuts (from the hole he drilled to the marked line). Then he began to cut out the pattern with a jigsaw from the center to the circled circle. Radial cuts helped him ease the maneuvering with a jigsaw.
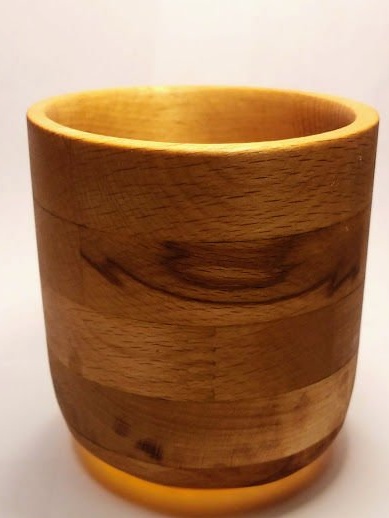
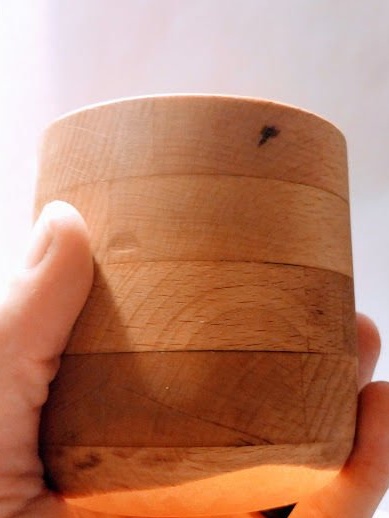
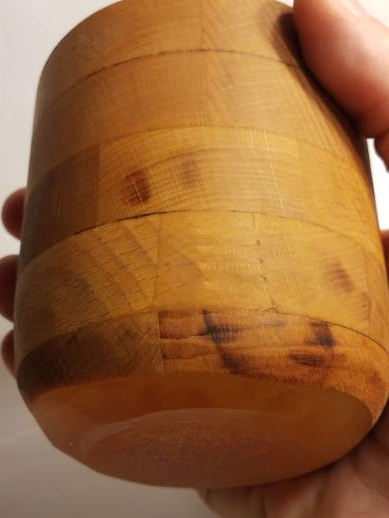
In total, the master cut out 5 such circles. With a wood thickness of 19 mm, a cup height of 5 rings will be about 9.5 - 10 cm.
Step 3: Cut the rings
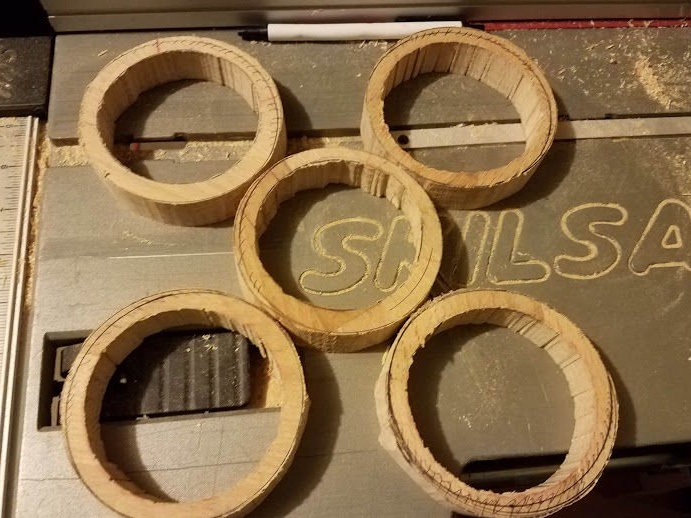
Then the master circled circles around the holes that he had just cut out. He counted on the difference between the hole and the circle of 9 - 12 mm.
Then he cut the rings with a jigsaw.
Step 4: Grinding the inner diameter of the rings

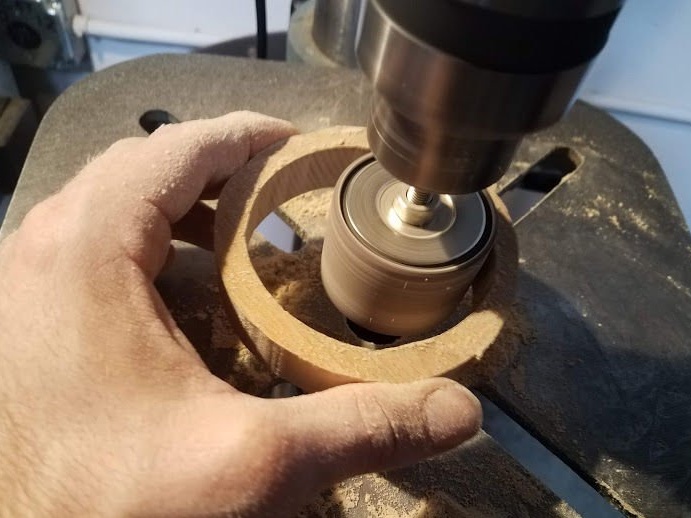
Then the master, using a drilling machine on which the grinding drum was installed, polished his rings. I used sandpaper rather rough.
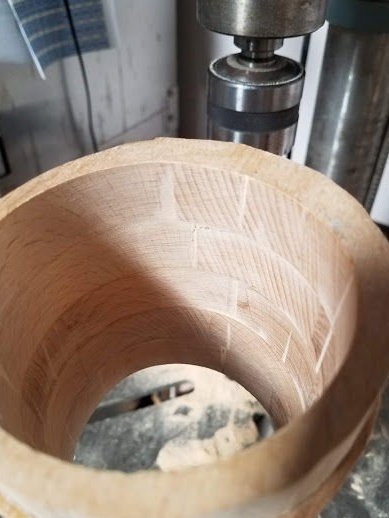
Step 5: Adhesive Rings

The next step is to connect the rings together. The master used carpentry glue. Then he squeezed the stack with clamps.
Not all rings are identical.It is advisable to fold the rings so that their inner diameter matches, and the outer diameter is of sufficient thickness so that it can be aligned.
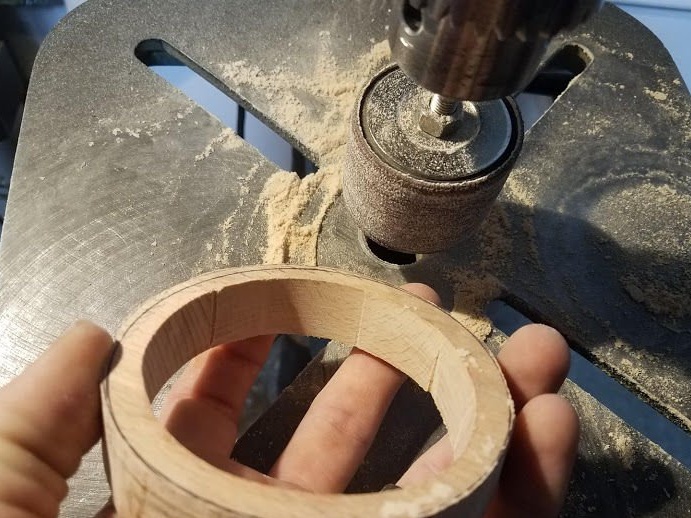
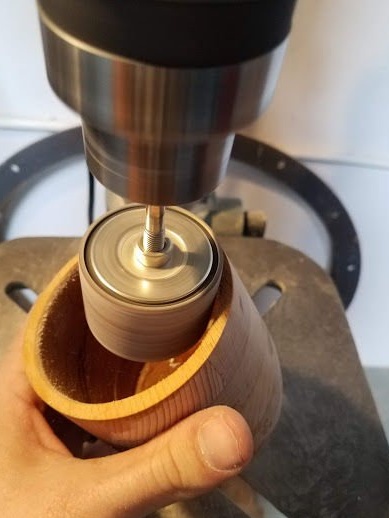
Step 6: Forming the Inner Diameter of the Cup
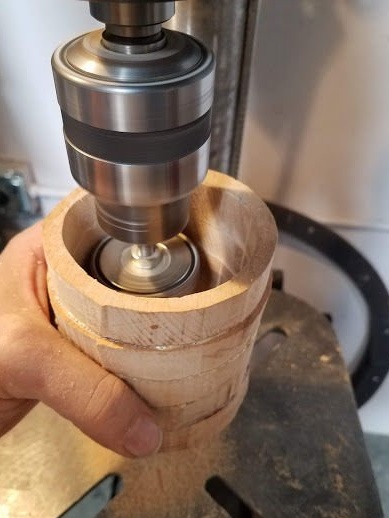
The master brought the inner diameter of the bowl to the desired size on a drilling machine with a grinding drum.
The idea is to smooth the high points on the inner wall. Periodically, you should stop and run your fingers along the inside of the cylinder to feel defects or waviness on the walls. Also, one should not dwell on one place for a long time so that the round shape of the inner diameter does not change.
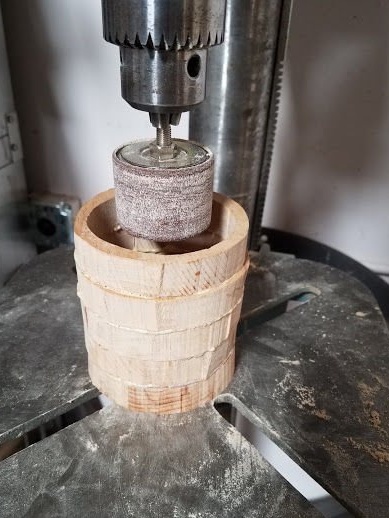
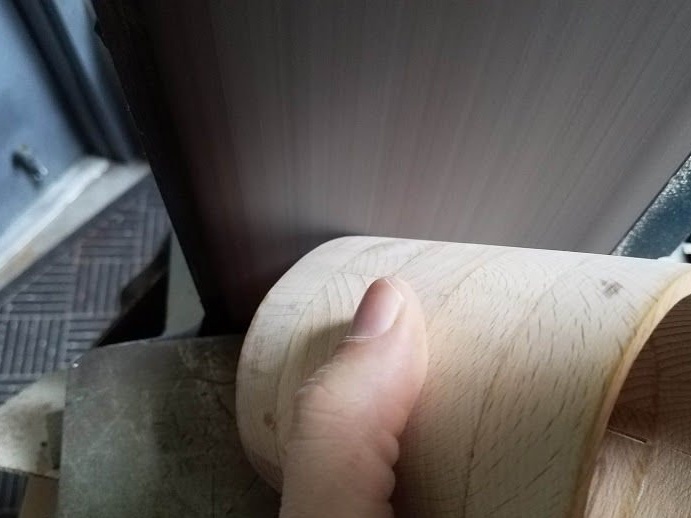
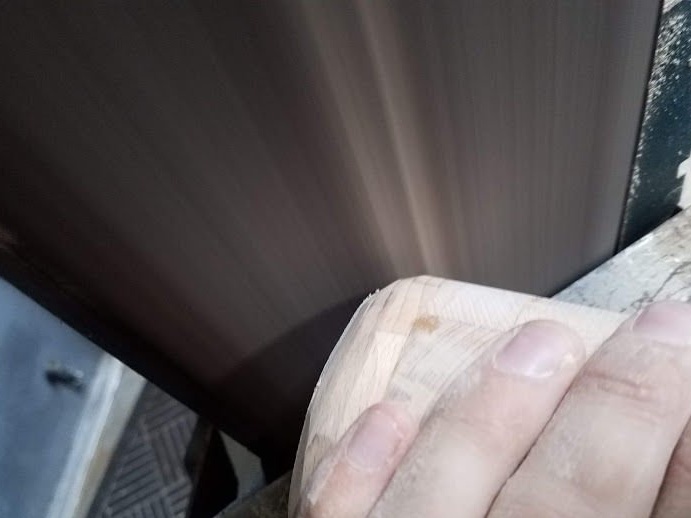
Step 7: forming the outer contour
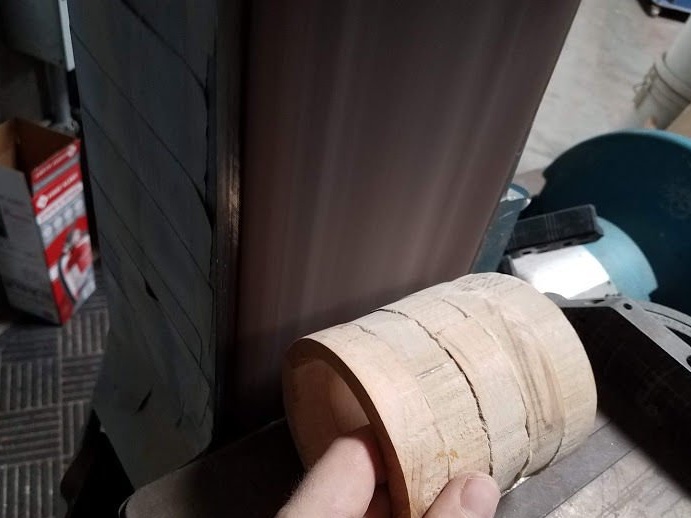
Then the master moved on to the bench belt sander.
The master polished the cylinder, slowly turning it. It is also important here not to stop in one position, otherwise the wall thickness will not be uniform. The master periodically stopped work to check the wall thickness. He continued to grind until he got a good cylindrical shape and a fairly constant wall thickness.
Step 8: bottom for the cup
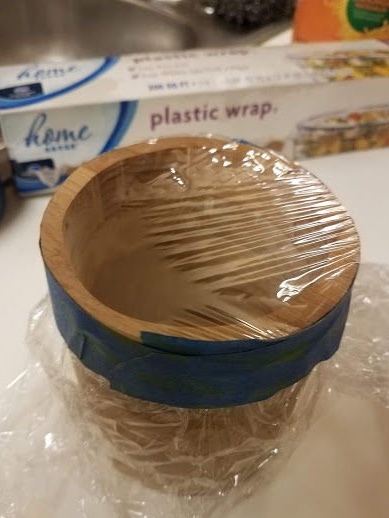
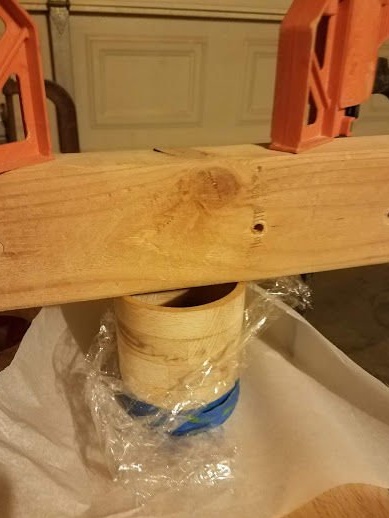
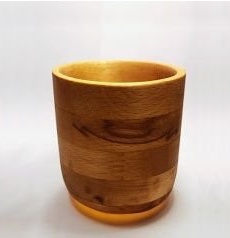
Cutting a piece of wood so that it matches the bottom of the cylinder and sticking it without leaving gaps is very difficult. Therefore, the master decided to cast the bottom of the cup from food epoxy.
The master sealed the bottom by pulling the film on a tree and glued it. Then he put a piece of wax paper under the cylinder and fastened it to the desktop with a clamp.
Step 9: Add Color!
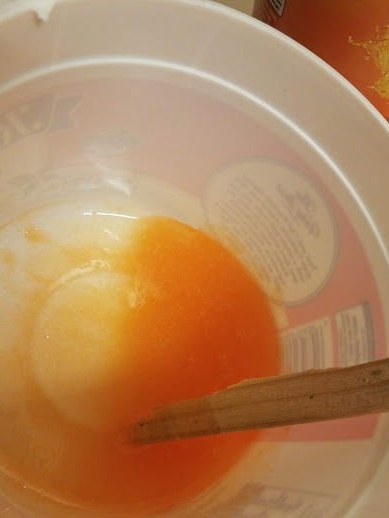
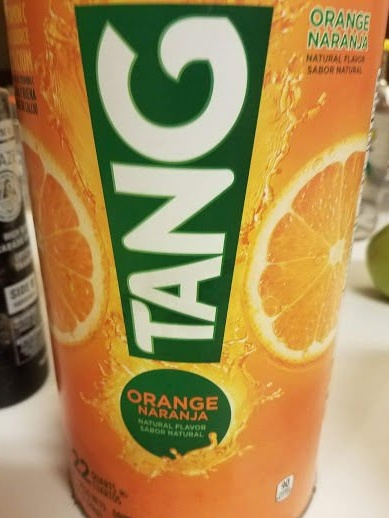
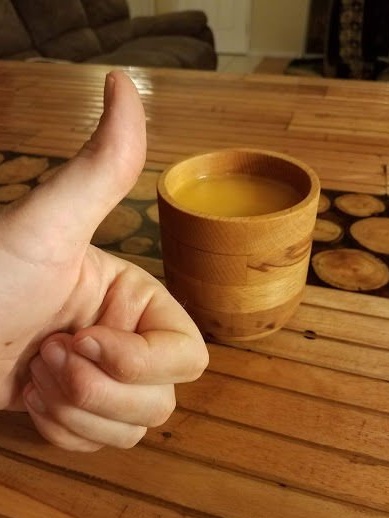
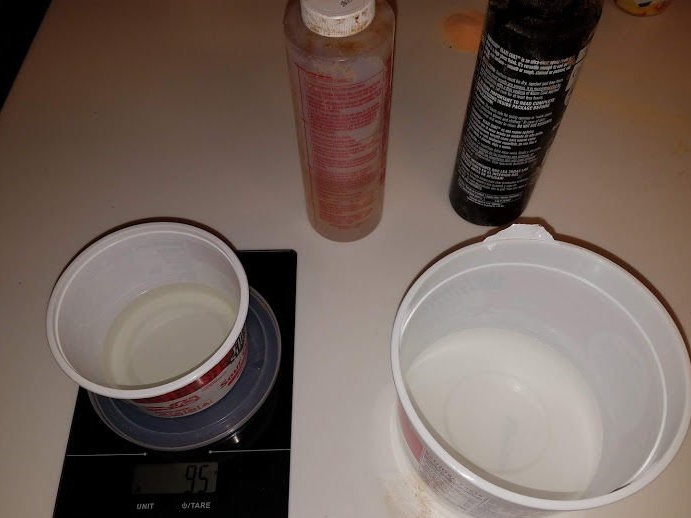
The master had fun and decided that the transparent epoxy bottom is not interesting enough ... He wanted a colored bottom, but he did not have any dyes for the epoxy. In addition, they are still expensive. Dyes are powders that dissolve in epoxy during mixing. The master decided that he could do the same with the powder ingredients in his kitchen. He found an orange powder drink and mixed a few balls into epoxy.
Step 10: Fill the bottom with epoxy
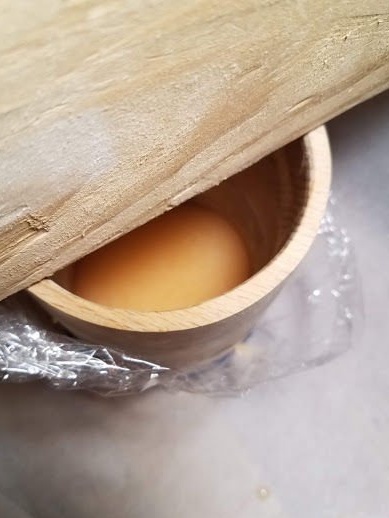
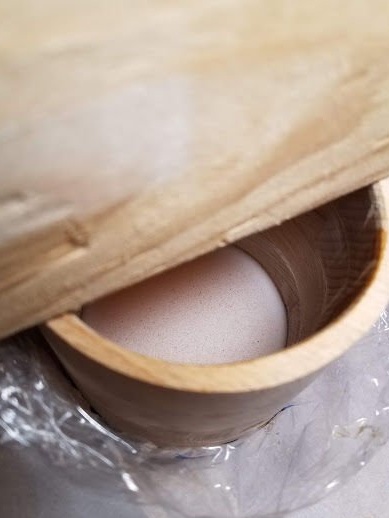
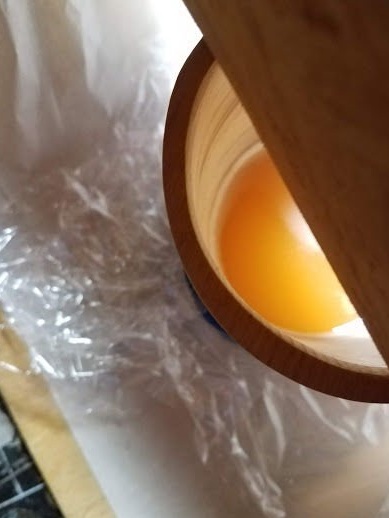
As soon as the master mixed the epoxy and got the necessary mixture, he poured it into a wooden cylinder. The resin poured enough to completely fill the bottom ring (about 19 mm deep).
Epoxy takes about an hour to harden. As curing began, the top surface began to foam. This usually happens with epoxy, but this time it was much worse ... probably something began to come from mixing with a powder drink.
Here is a good tip.
You can get rid of bubbles on the surface by heating them. Trying to stir the foam, mix the bubbles with epoxy and they will be trapped. Instead, the master used a hairdryer, the bubbles burst and disappeared on their own.
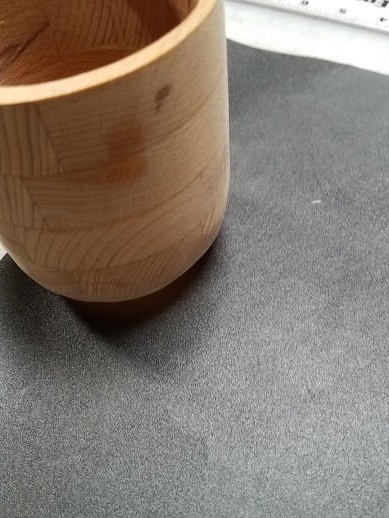
Step 11: Bottoming
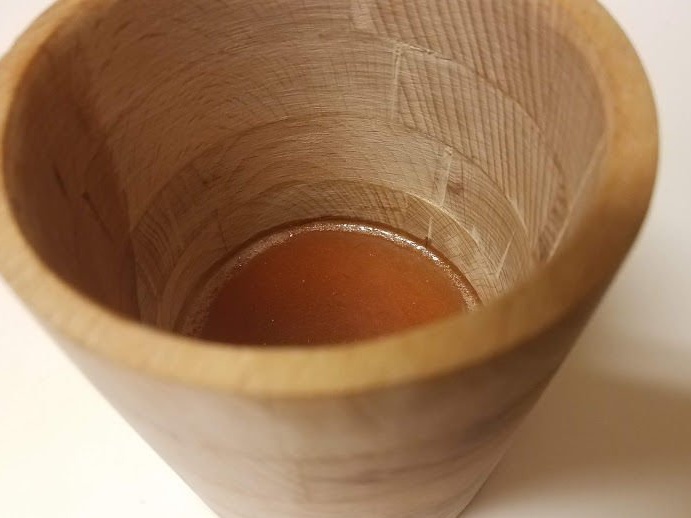
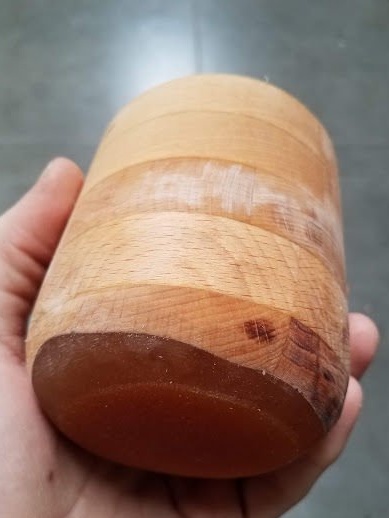
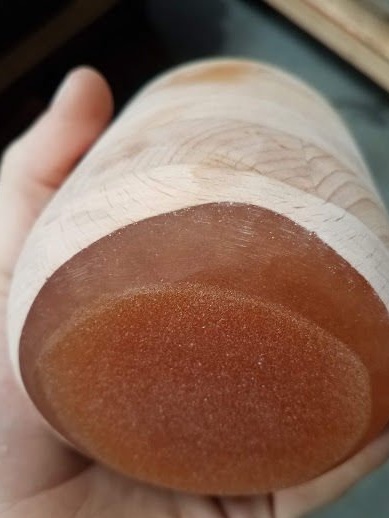
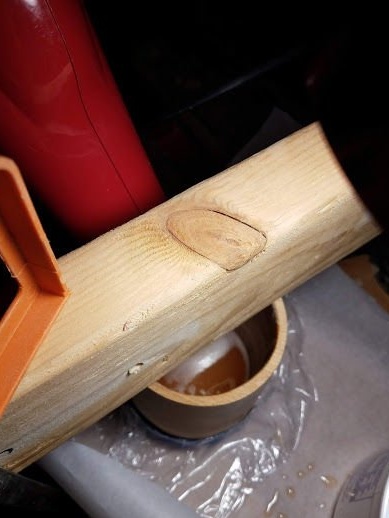
The master waited 24 hours before removing the cylinder and film. The casting was fairly clean, no spills or traces of leaks and no major defects at the bottom. Epoxy certainly took wrinkles from the film, but these defects were sanded.
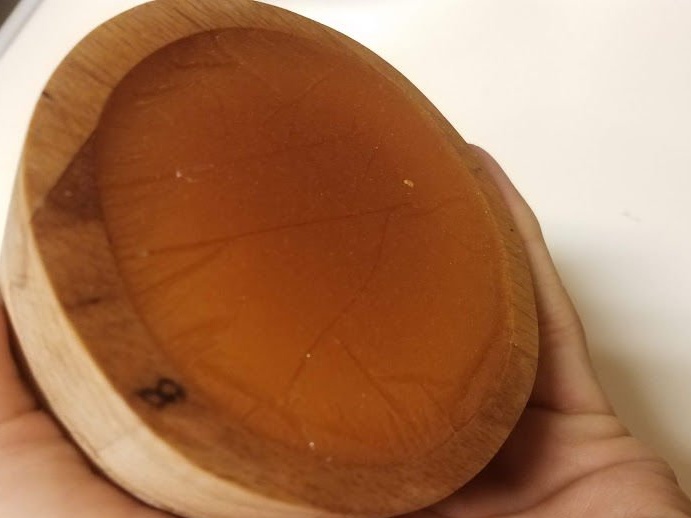
Then it's time to polish the bottom.
We return to the belt sander.
And again the master continued to rotate the cup, supporting it with his other hand. This time, he slowly changed the angle of the cup to the grinder. This made it possible to round the bottom.
Step 12: Shut Down
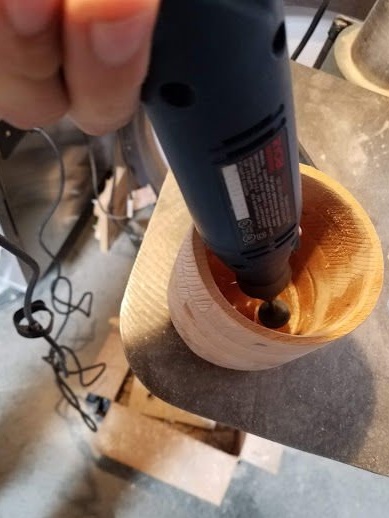
1) On the grinding drum, the master polished the inner edge of the neck of the cup.
2) For fine grinding at the base of the cup, next to epoxy, the master used a Dremel grinder.
3) On the surface of the cup, the master made several finishing passes with sandpaper, grain size 220 and 320 units.
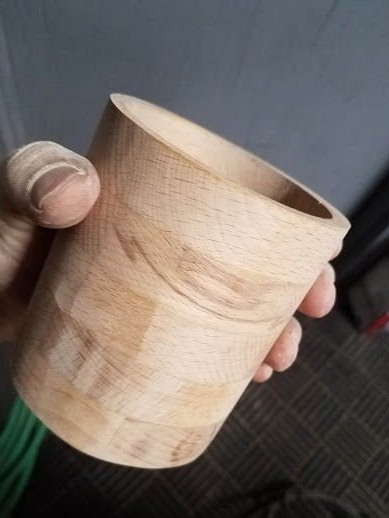
Step 13: Finishing the Wood

The cup is almost ready.
For the final readiness of the product, the master decided to use mineral oil and beeswax.You can also use linseed oil, polyurethane and epoxy resins, but it is not known how safe it is in terms of ingestion.
Regardless of what you use for the finish, follow the instructions and be sure to check the resistance to heat and safety of use.