
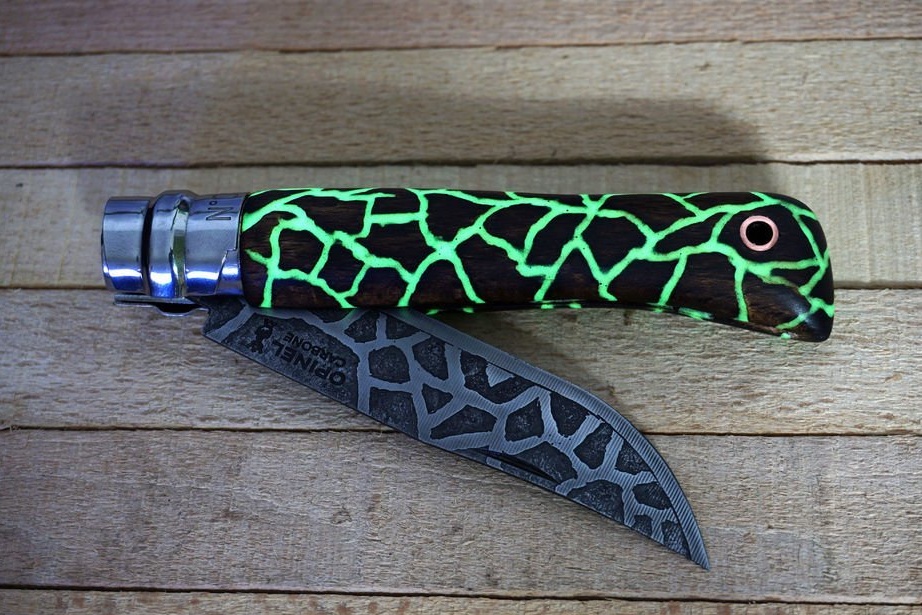
Those who regularly go hiking, hunting or fishing at least heard about the knives of the French company OPINEL. These are inexpensive, but reliable "workhorses" with a rather minimalistic design and a simple but reliable design of the locking mechanism. This article discusses how to turn an ordinary “mushroom” into a beautiful, personalized knife.
For this mod, you will need Opinel Carbone (obviously) and tools, such as pliers, a file, a rasp, an engraving machine (dremel), a blowtorch, and a phone charger. Of the materials, phosphor powder, epoxy resin, vinegar, linseed oil, salt, nail polish and sandpaper. Well, the little things.
Disassembly
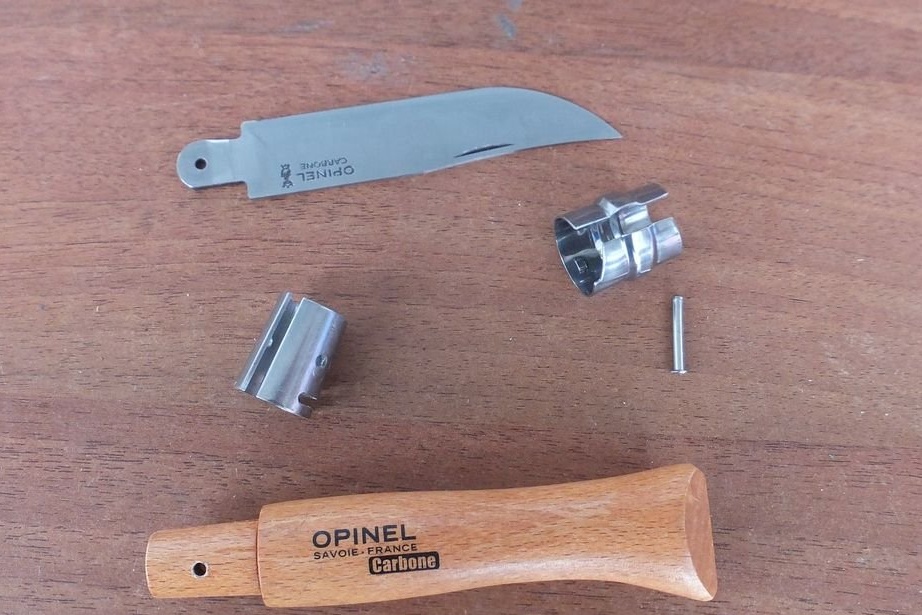
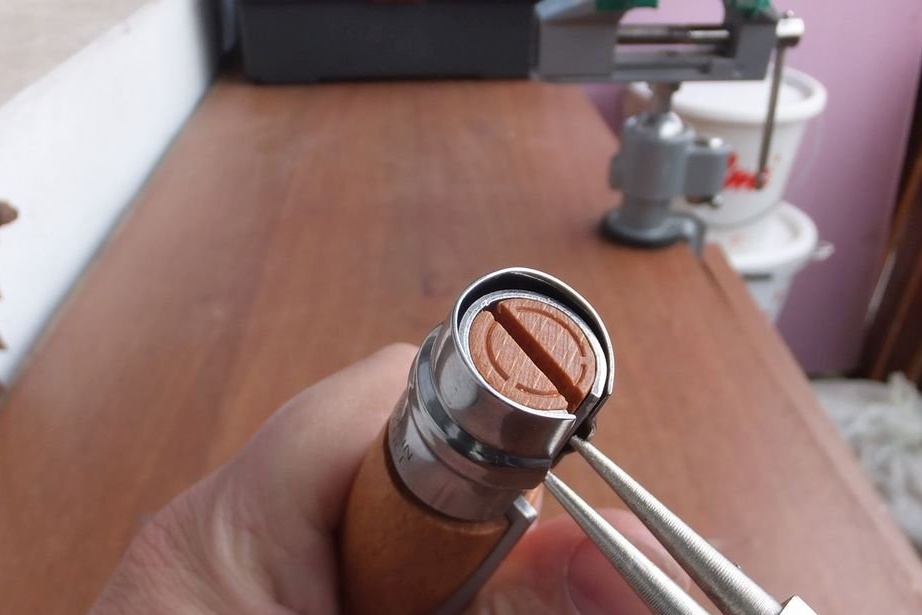
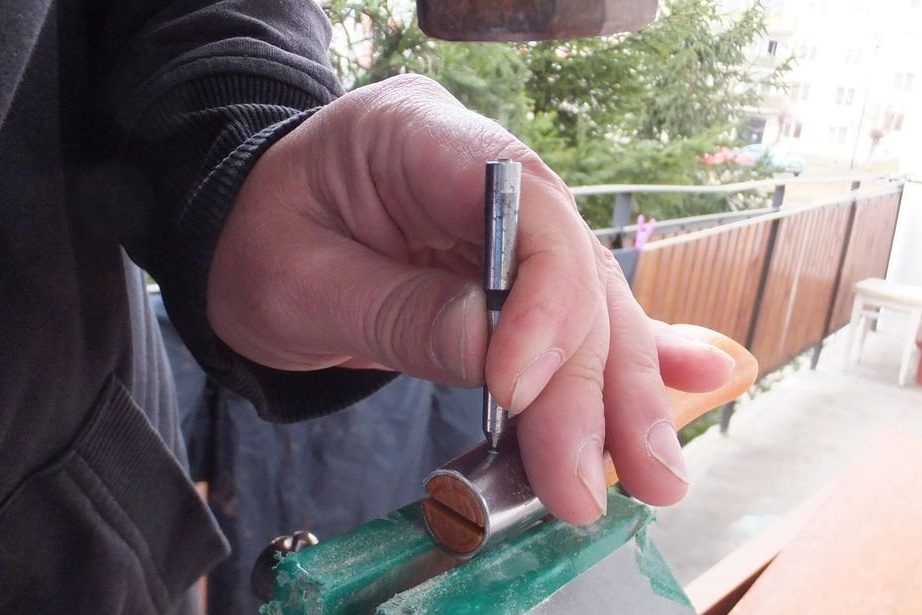
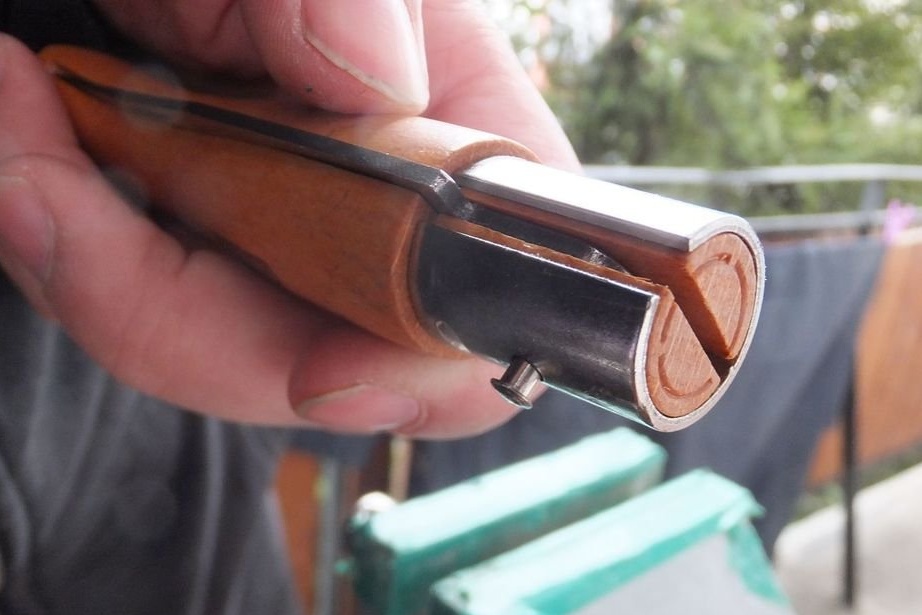
Dismantling the Opinel pocket knife is not exactly rocket science, first you need to remove the locking ring using round-nose pliers (thin-nose pliers, or loosen it in any way possible), then remove the pin that holds the blade; For this operation, the author used a sharp steel rod and a hammer. After that, the blade can be removed with bare hands.
 [
[
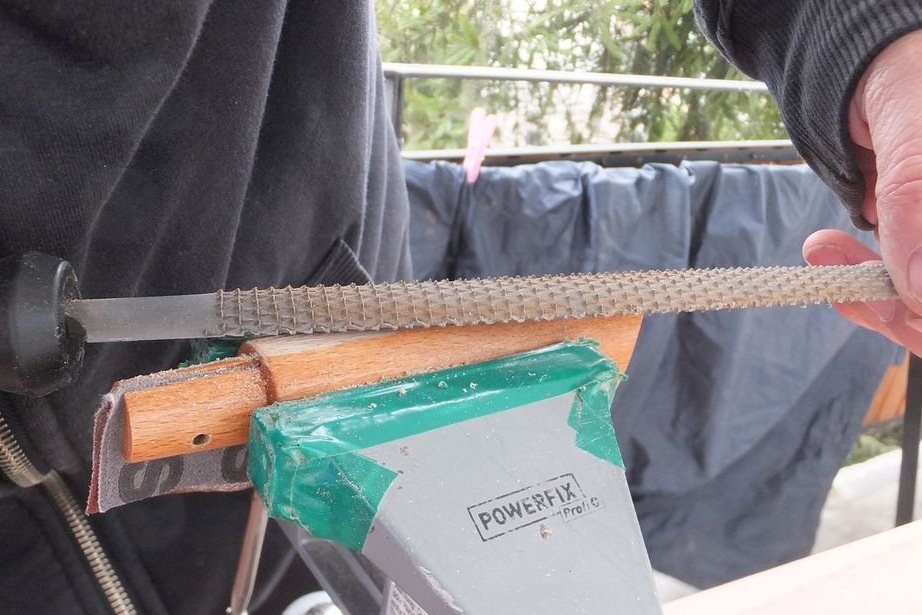
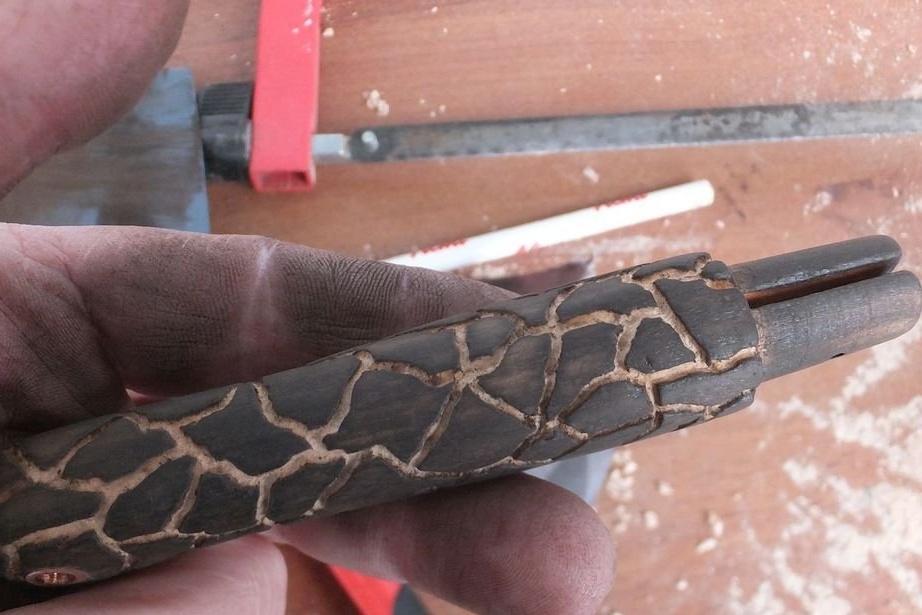
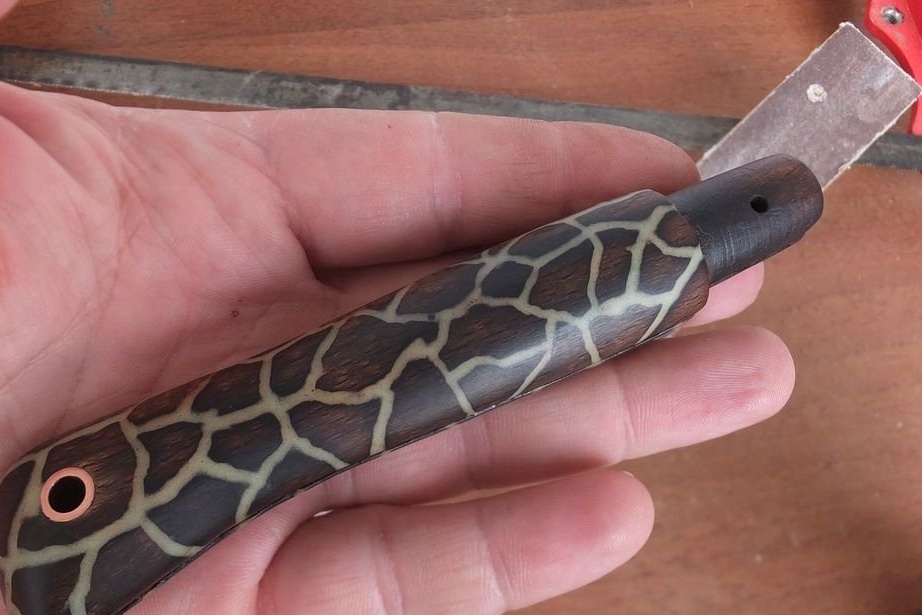
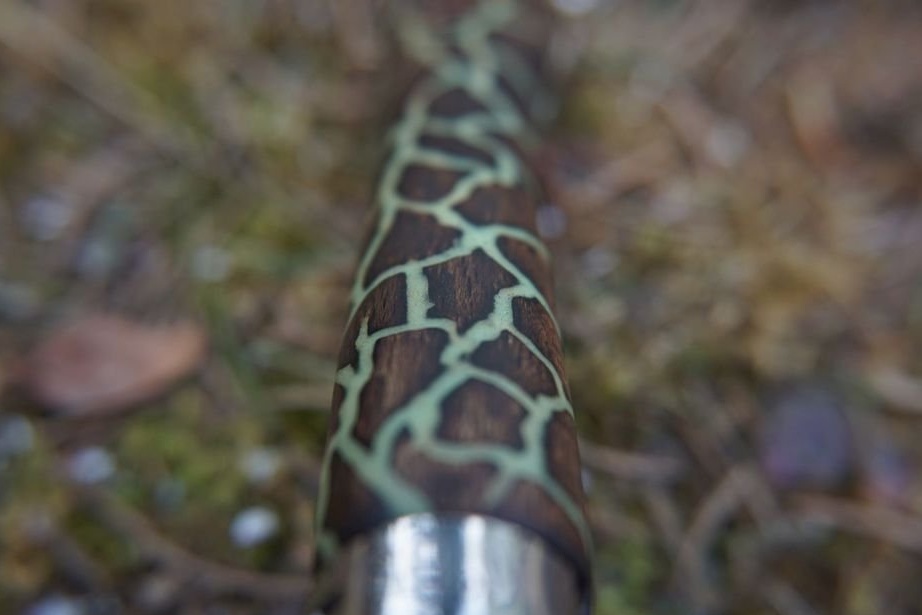
Further, the author decided to slightly change the geometry of the handle. Rough processing can be started with a rasp, after which with the help of sandpaper of 60th grit it is necessary to remove traces of rough processing and varnish. Removing the varnish is important, even if you decide to keep the original shape of the pen.

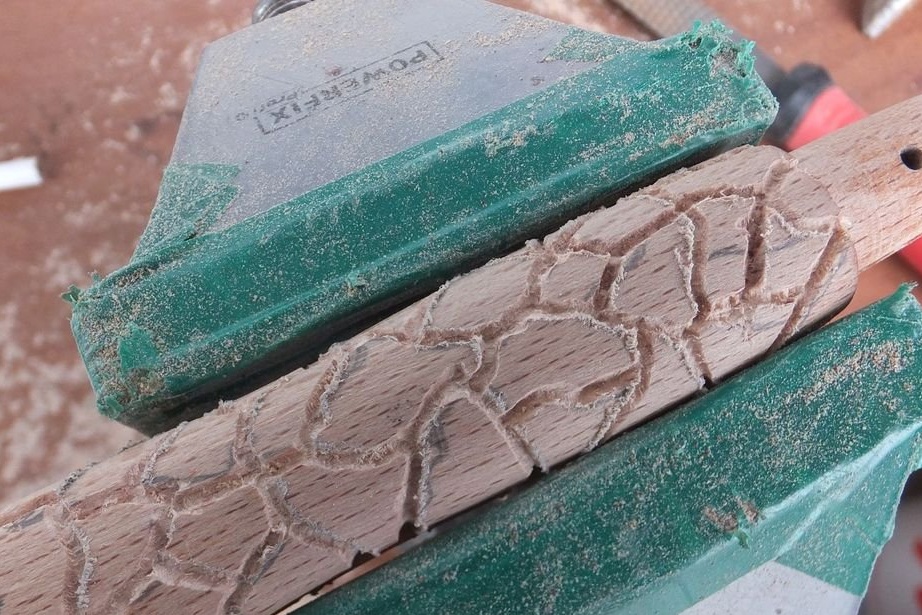
Grip Pattern
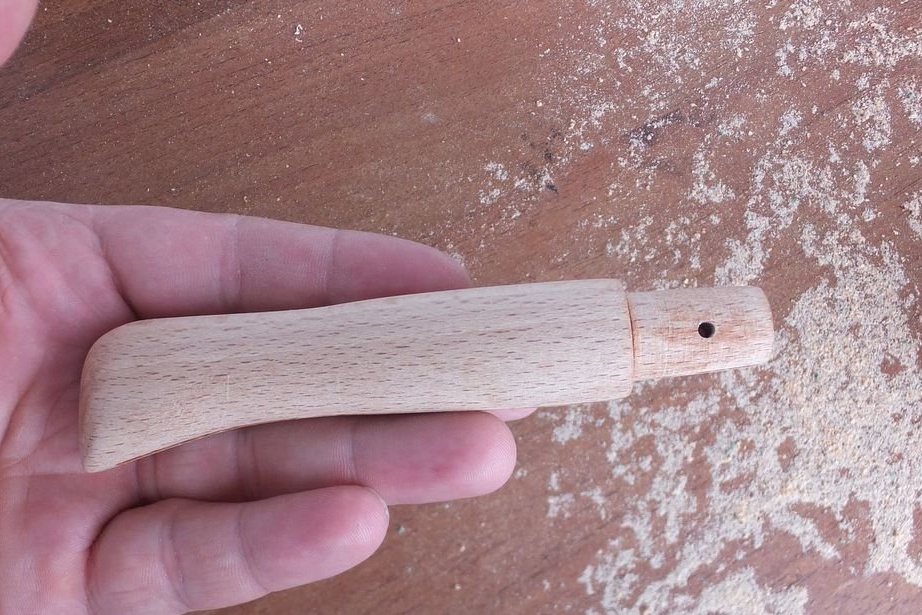
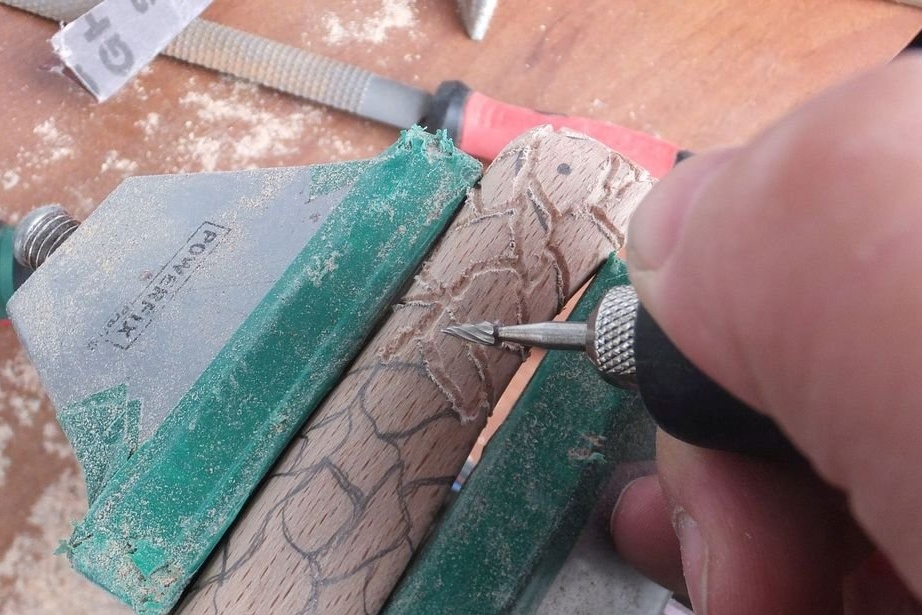
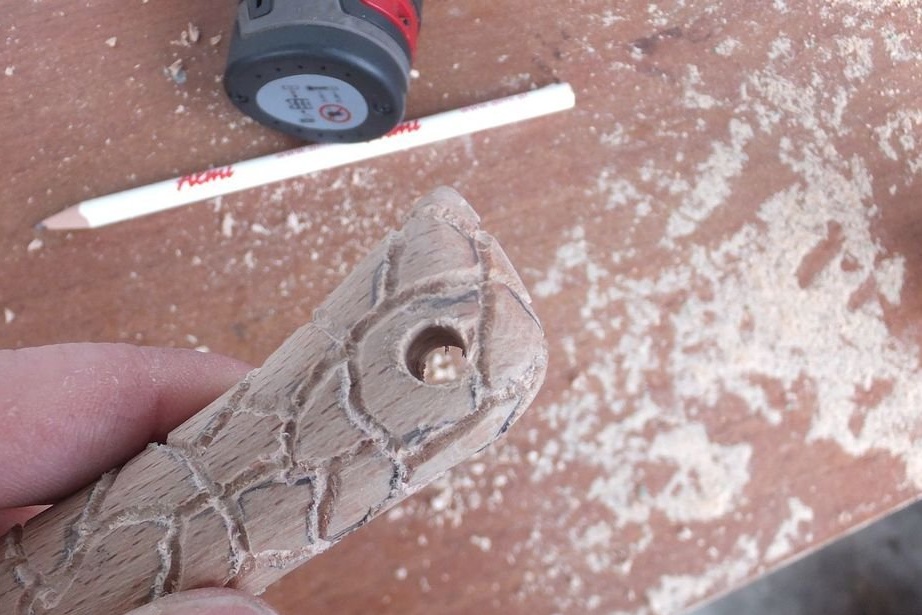
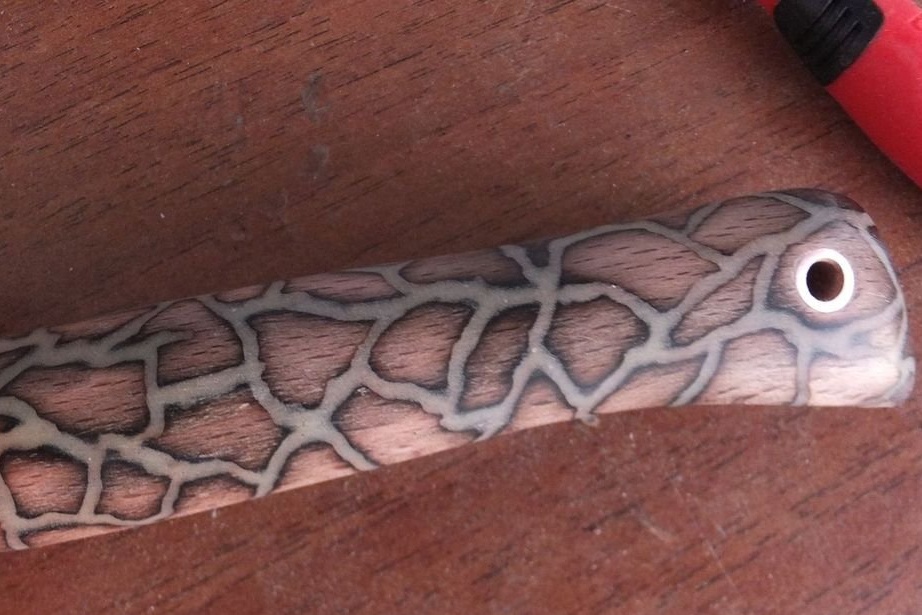
After that, you can start engraving. To make it easier for yourself, you can first apply a pencil drawing. By the way, the author chose a similar drawing for a reason. According to him, he bought the cheapest engraver, which has such a strong beating that it is simply impossible to engrave straight lines. In addition to engraving, at this stage, you can make a hole for a lace or lanyard, for this the author used a piece of a copper tube with an inner diameter of 4 mm, planting it on an epoxy resin. By curing the resin, the protruding parts of the tube are removed with a file, after which all burrs are removed with the 220th sandpaper.

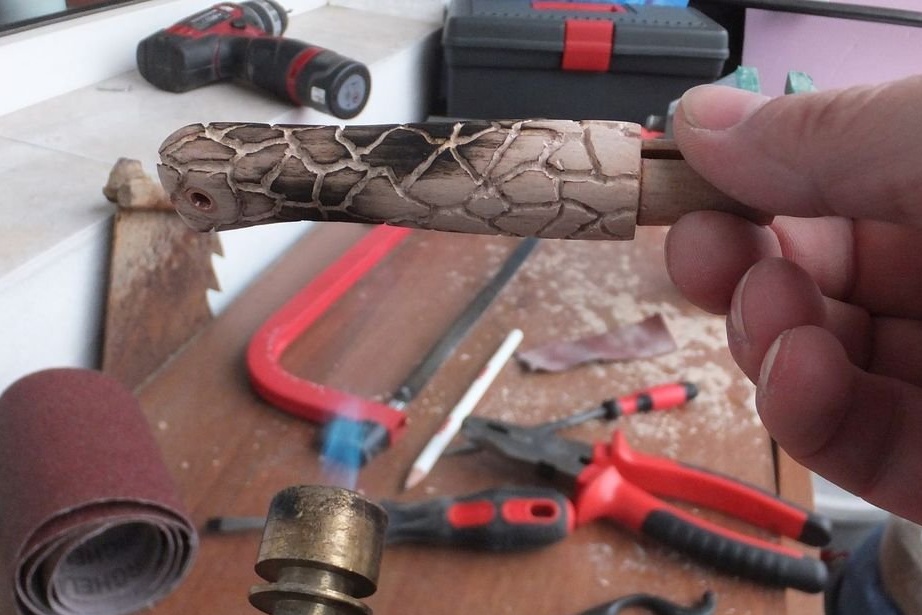
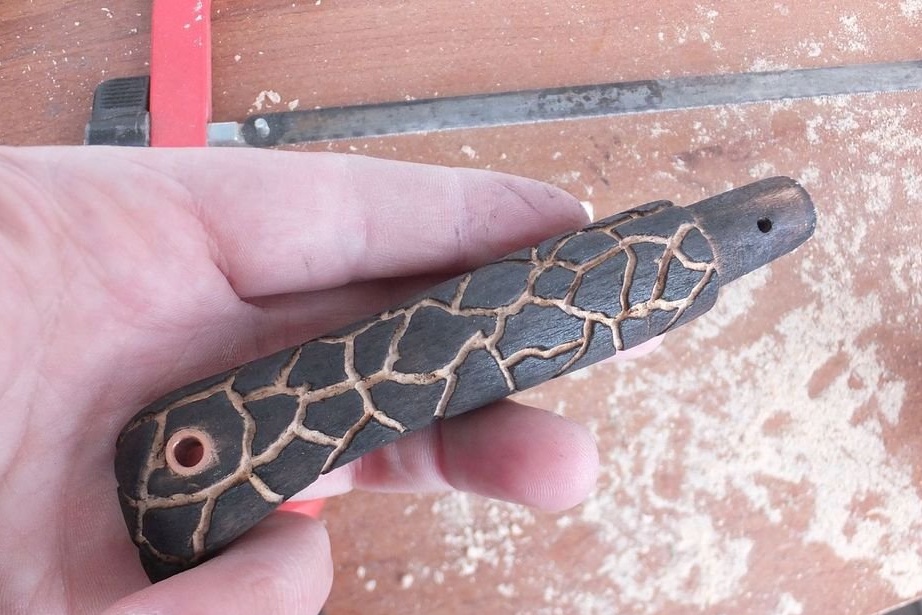
After that, the handle is burned in the flame of the burner, the fragile wood corner formed and polished with sandpaper. To overdo it here is not worth it, at further stages the handle will still be sanded. After that, the handle must be wiped with a damp cloth and allowed to dry for several minutes.
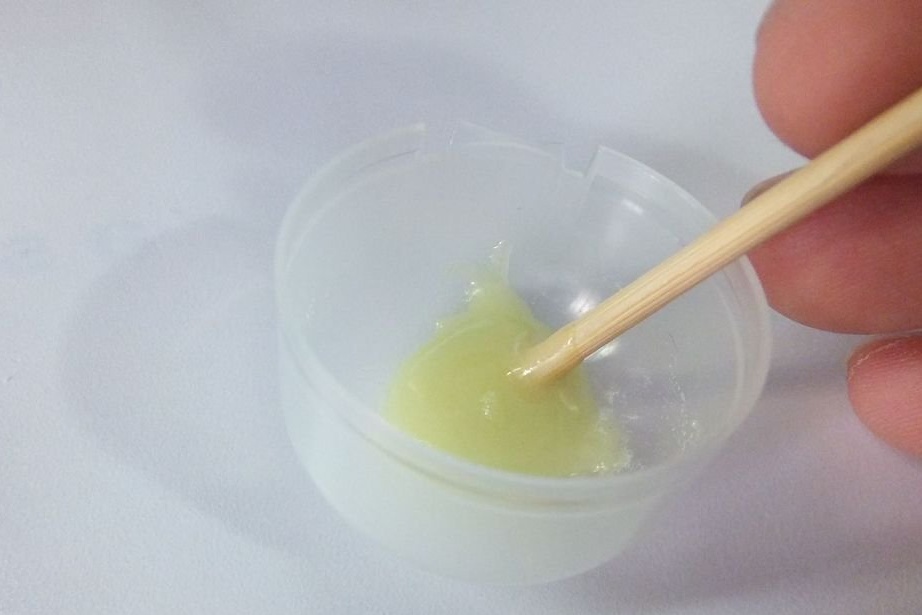
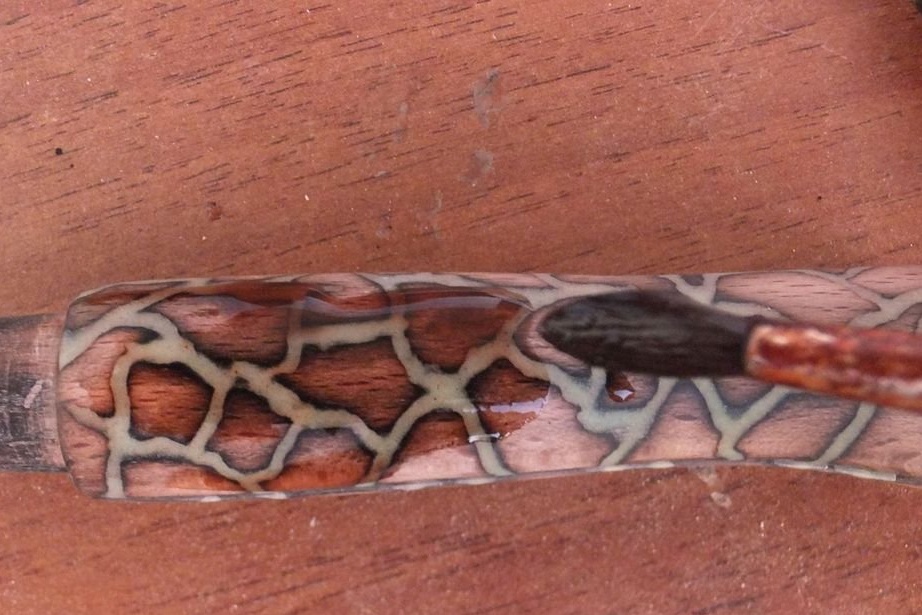
In the meantime, you can begin to mix epoxy with phosphor powder.Regarding the powder itself, unfortunately no information was given, the author only indicated that he had bought it on aliexpress and that he himself did not know the name of the manufacturer's company. Mixing ratio: 2 parts of resin together with hardener, 1 part of powder (by volume). The author used a “five-minute” epoxy, the entire handle was coated in 4 runs, 6 ml of resin was mixed with 3 ml of powder each time, as a result, 24 ml of resin (just one tube) was enough for the entire handle and 12 ml of powder. Of course, measuring bulk solids by volume is fundamentally wrong, but the author does not give proportions in weight. After applying the composition, it must be allowed to polymerize according to the instructions, for “fast” resins it is usually 6-12 hours, but it is better to leave for a day.
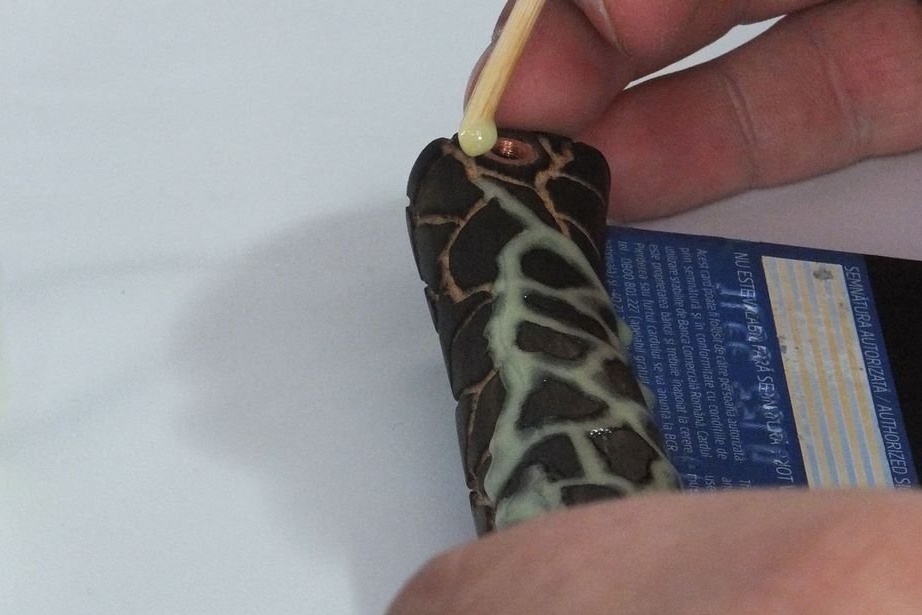


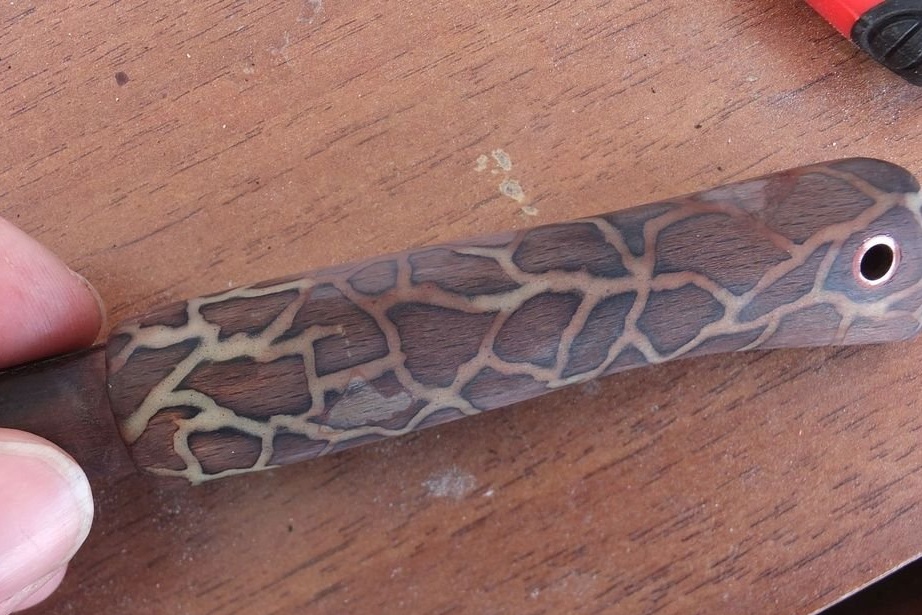
After complete polymerization, excess resin must be removed. To begin with, the author used a file with small teeth, getting to the tree he switched to the 220th sandpaper, and after that to the 600th and 1000th.
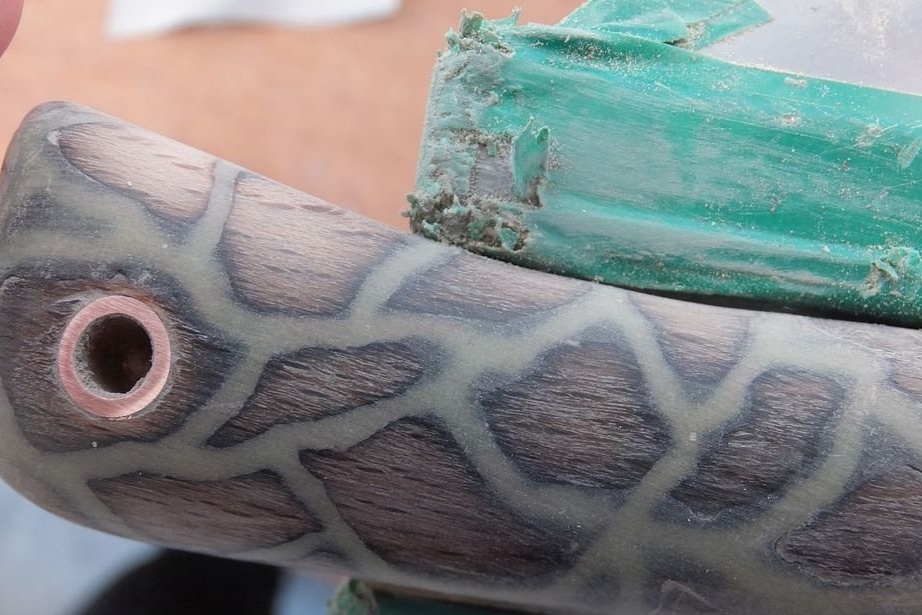
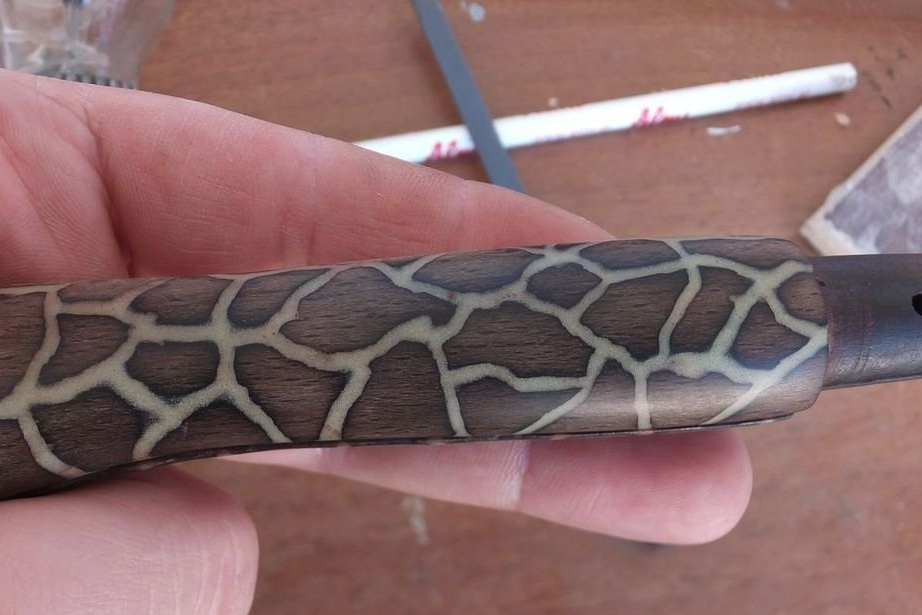
After that, the handle is covered with two or three layers of linseed oil, and you can take it ready!
Push. All opinels have one sore - the handle nourishes moisture. I advise you not just to wipe the handle, but to place it in a suitable jar, where it can be completely filled with oil. After this, the handle should be left at least for a day, preferably for two / three days. If it is possible to pump air out of the can, then night is enough. The simplest vacuum pump can be made from a syringe, dropper and aquarium check valves.
After that, the excess oil is removed, the handle is polished with a soft natural cloth.
Blade
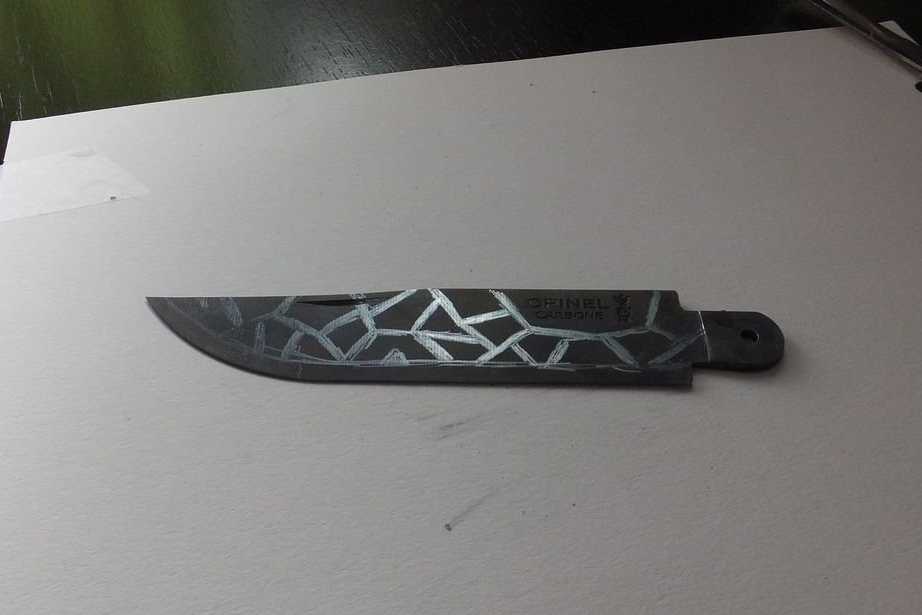
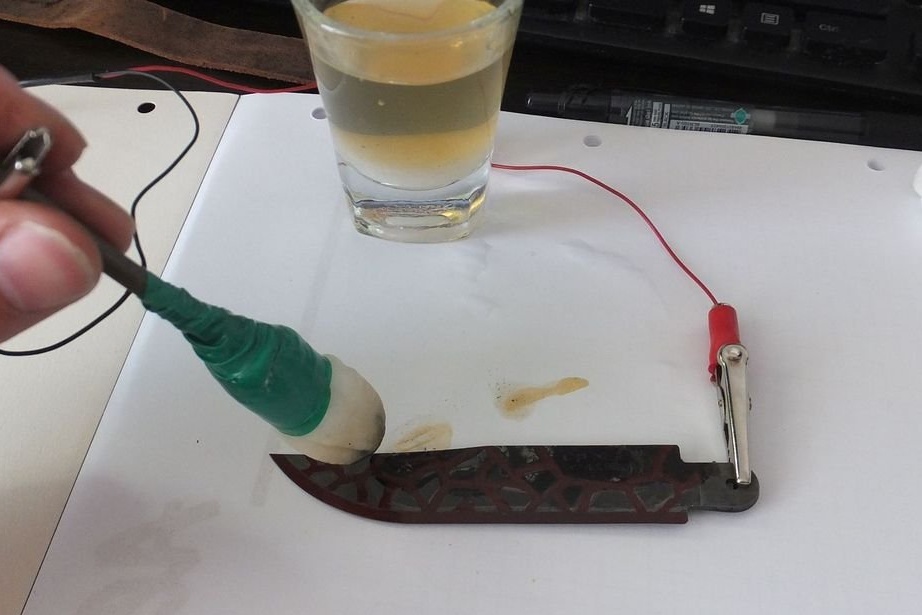
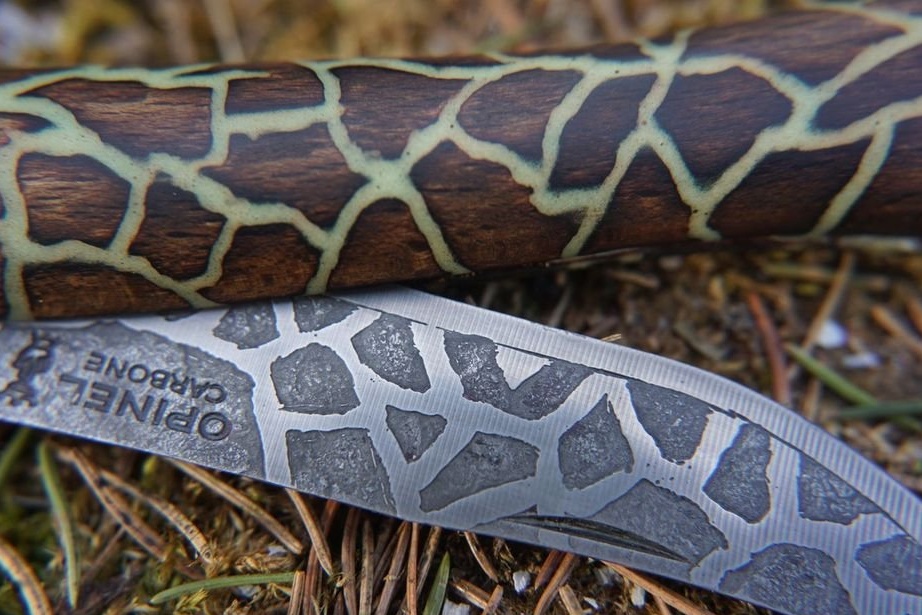
The drawing on the blade is drawn with ordinary nail polish, the areas of the knife protected by it will remain untouched, the rest will be etched. To etch the blade, an electrochemical engraver is required. But do not be alarmed, the devil is not so terrible as he is painted. Such an installation is easily assembled from almost any power supply, for example, a phone charger (5V, 1A). You will also need a large nail, a cotton pad to remove makeup, electrical tape and 2 "crocodiles". The "plus" from the power supply is connected to the blade, the "minus" to an impromptu probe made of a nail and a cotton pad soaked in salt water. With a stylus, we drive along the surface of the knife for about 15-20 seconds, take a break, and again, until a satisfactory result is achieved.
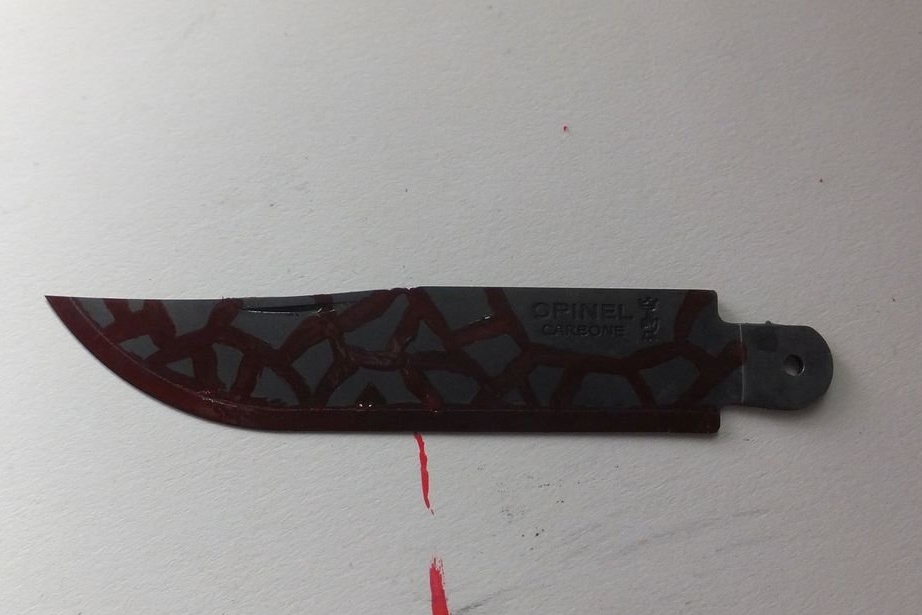
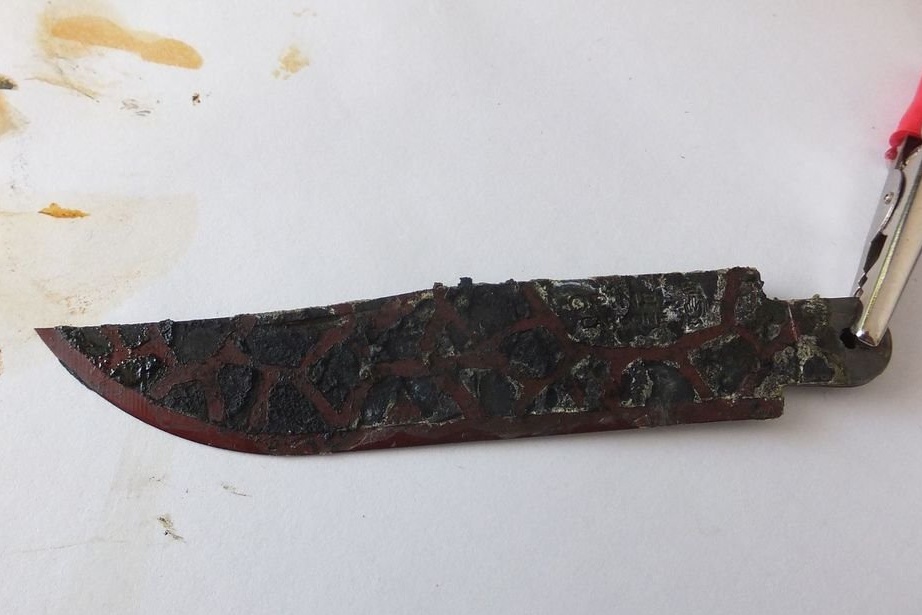
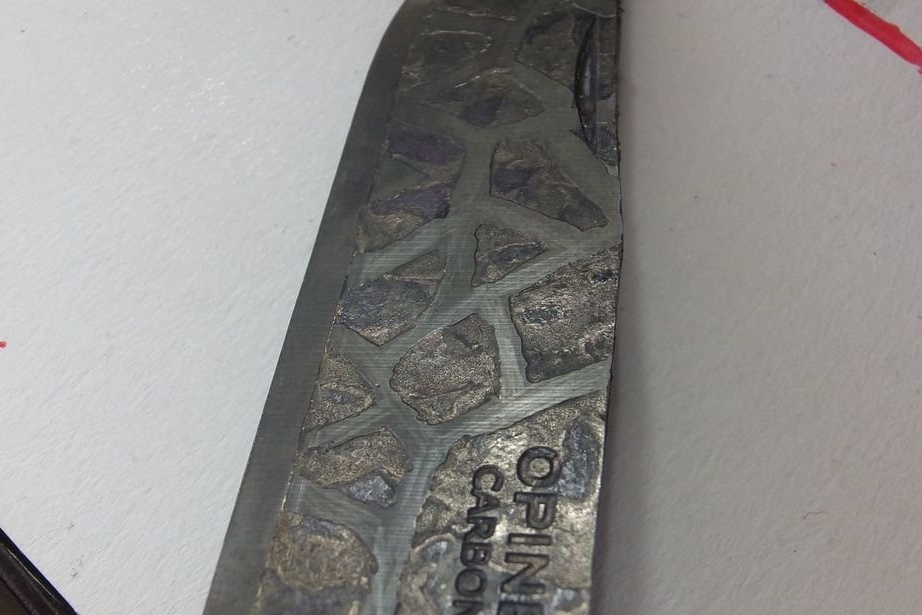
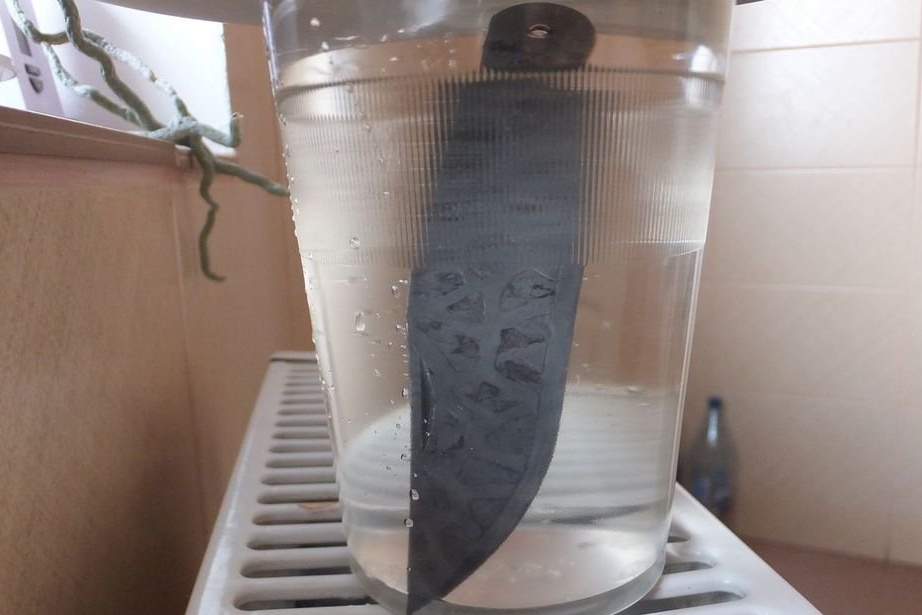
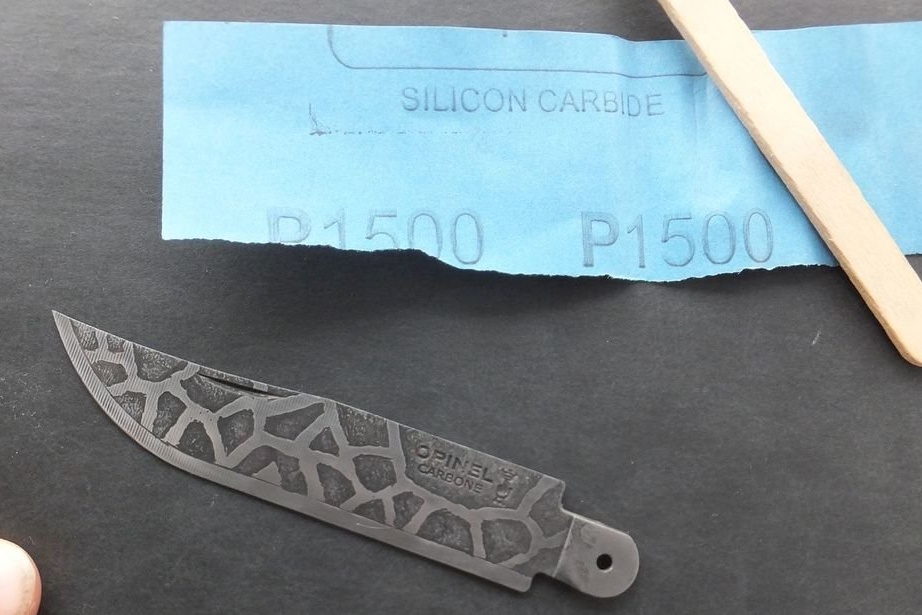
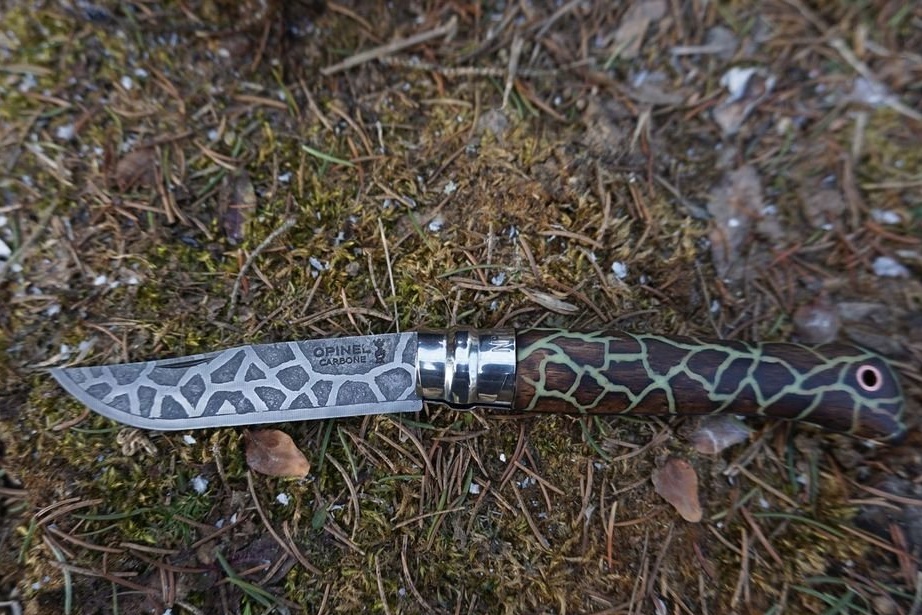
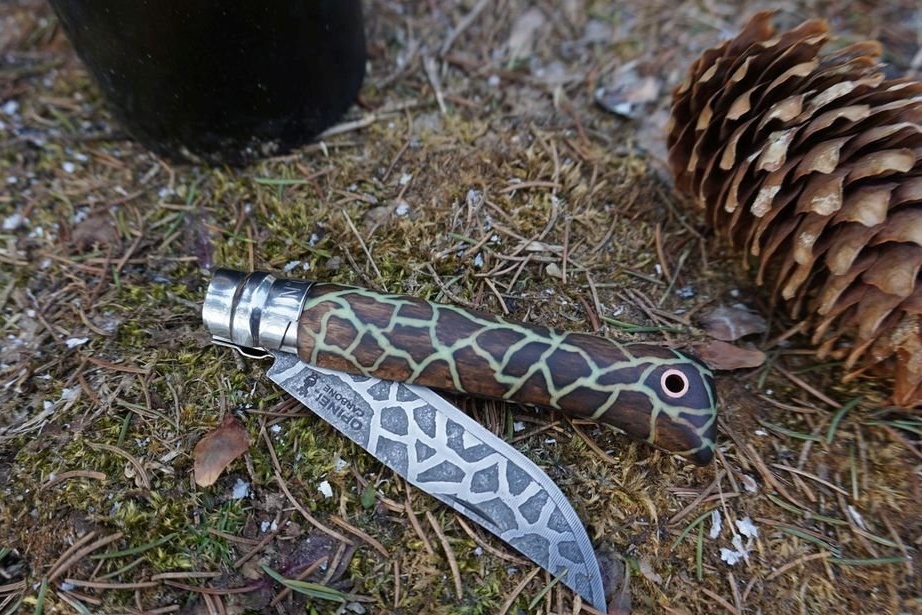
After that, the varnish is removed with acetone (or nail polish remover), it is also well degreased. After that, the knife is placed in a solution of vinegar (you can use citric acid, I would say even more preferably). Every 15-20 minutes, the blade must be removed and washed, removing the resulting dark coating. Once the knife is covered with a satisfactory dark patina, the etching can be completed. After this, the knife should be washed thoroughly with a solution of soda, and then with plain water. To develop a contrasting pattern, the blade is lightly sanded with the 1500th emery cloth wound on an ice cream stick or a piece of glazing bead.
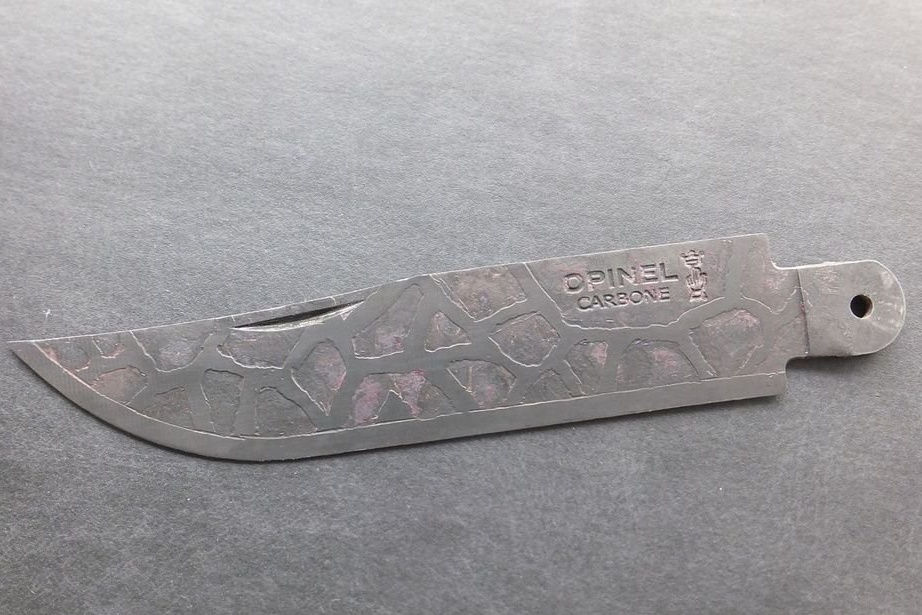
After that, you can assemble and enjoy the result!
Thus, you can not only issue a new knife, but also bring back to life the already old, well-worn fillet.
Good luck to everyone in your work!