
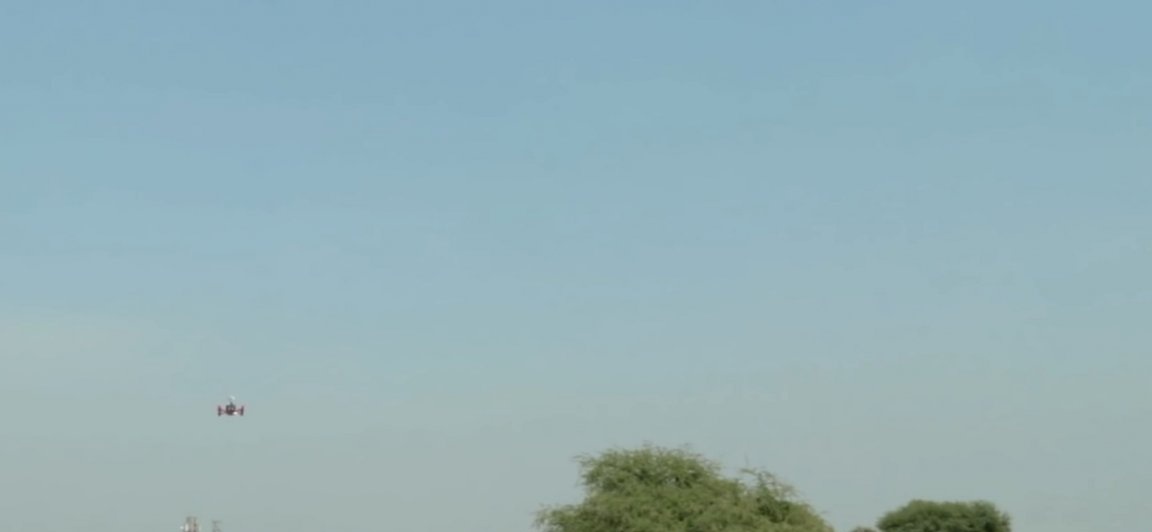
Hello friends. Today we have another very interesting article, namely today we will look at how to make a Mikor-drone with an FPV camera. This homemade perfect for those who want to learn how to drive on racing micro quadrocopters, and do not want to destroy expensive drones in a couple of minutes. It will turn out to be an excellent simulator for both experienced drone guides and children. The homemade product itself will consist of the most inexpensive components, especially in order to allow everyone to be able to. It should also be noted that at the end of the article you can find links to the main components of the homemade product. Well, well, I think you should not delay with a long introduction, we drove.
And so, for this drone we need:
- Frame (purchased or cut from a light and durable material).
- 4pcs microelectric motors.
- Flight controller.
- Connector format "mother" for the battery.
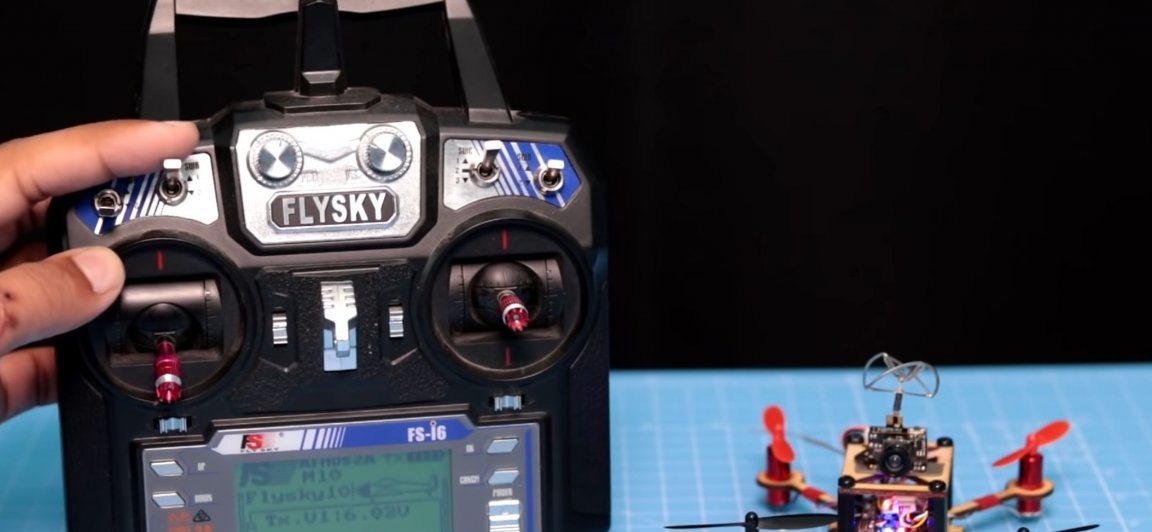
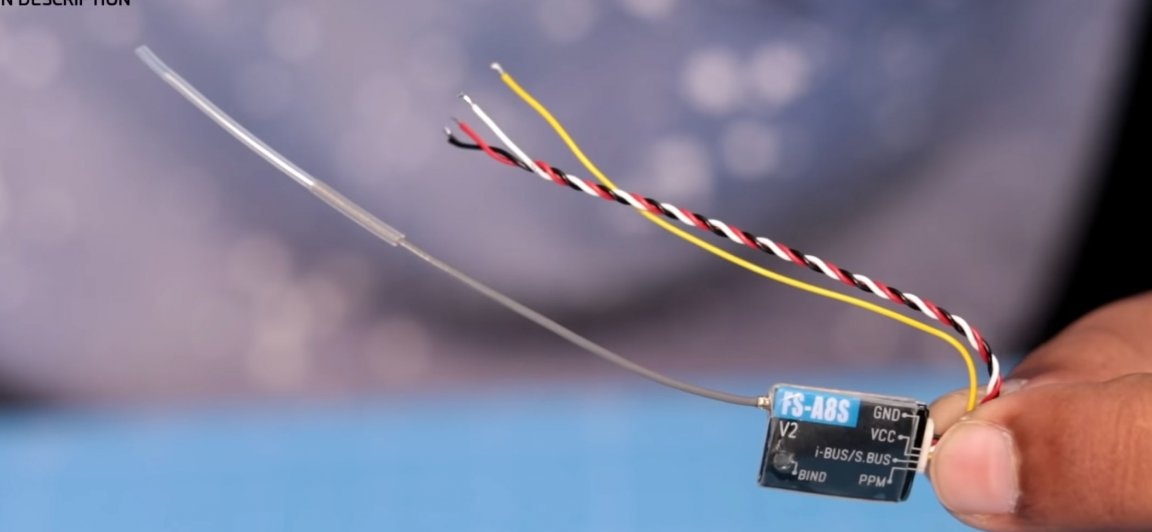
- A receiver for radio control equipment (in this case, from Fly Sky).
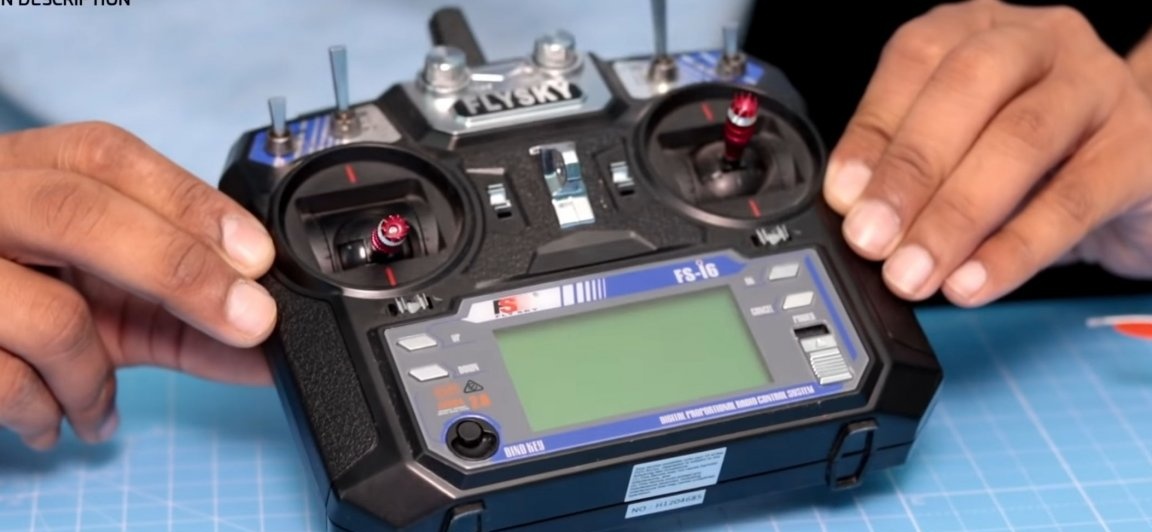
- Radio control equipment
- FPV Camera.
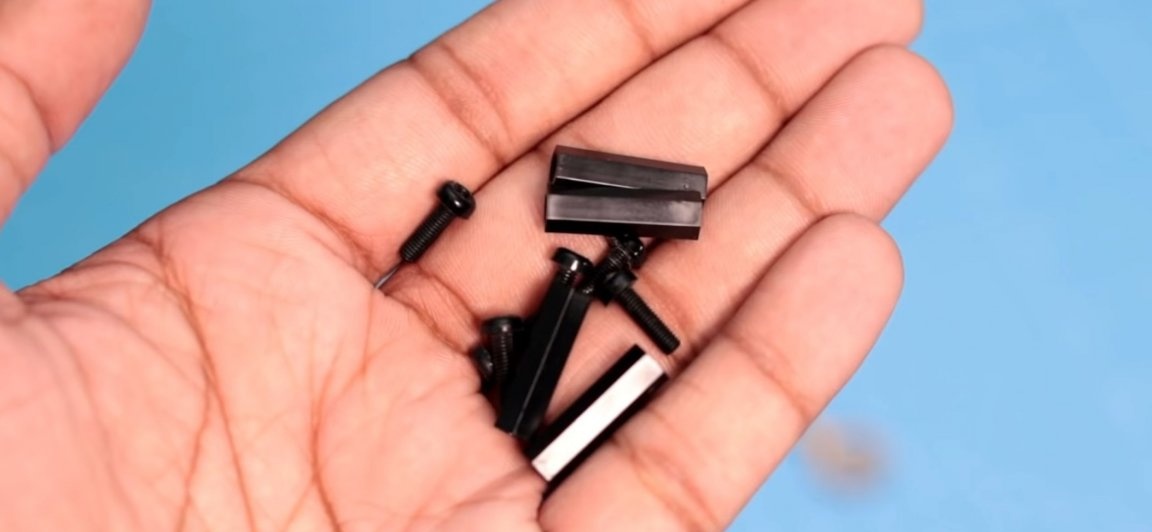
- Screws and racks for printed circuit boards.
- Propellers 4pcs.
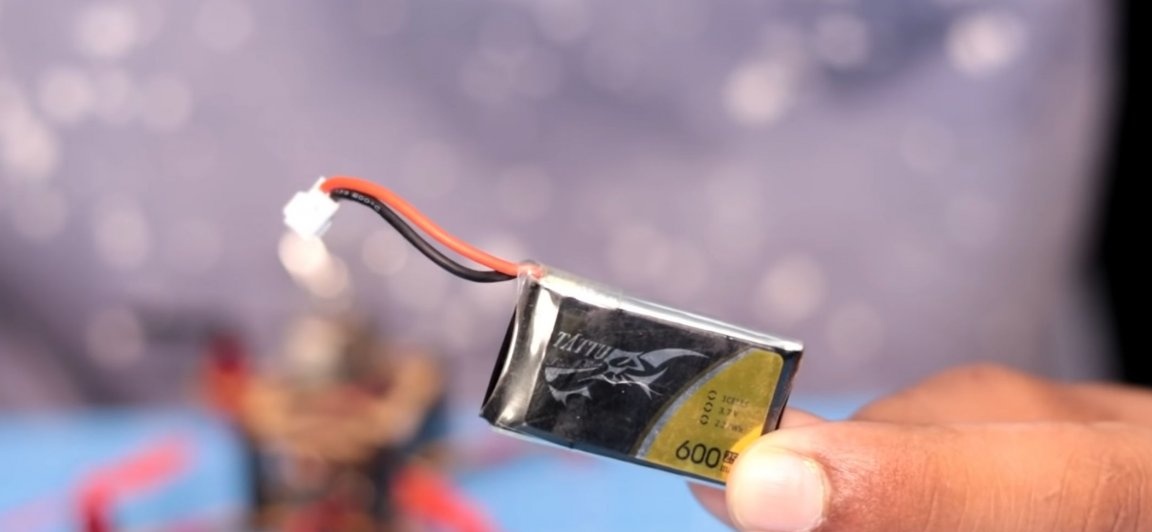
- Battery.
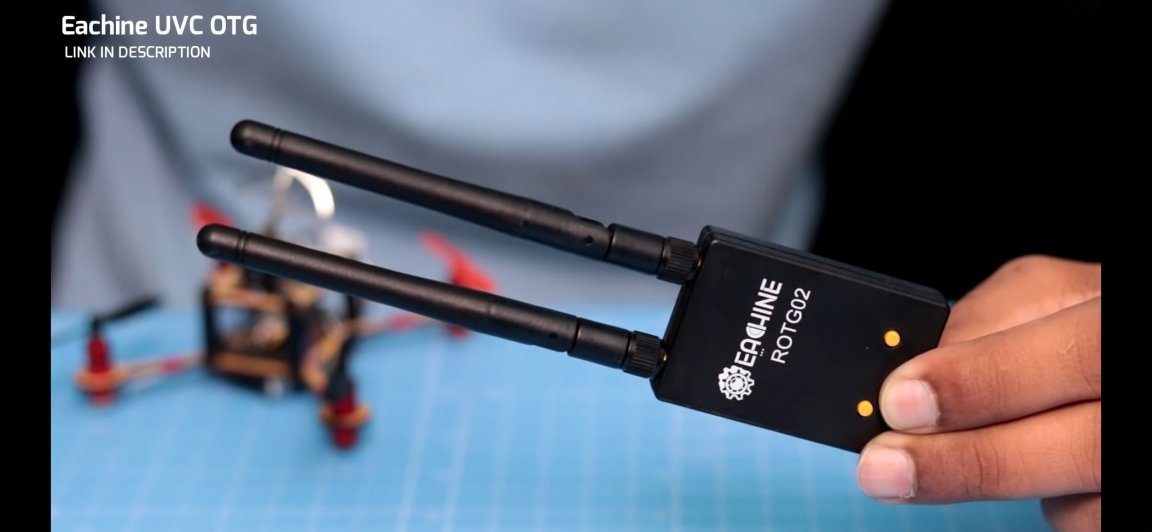
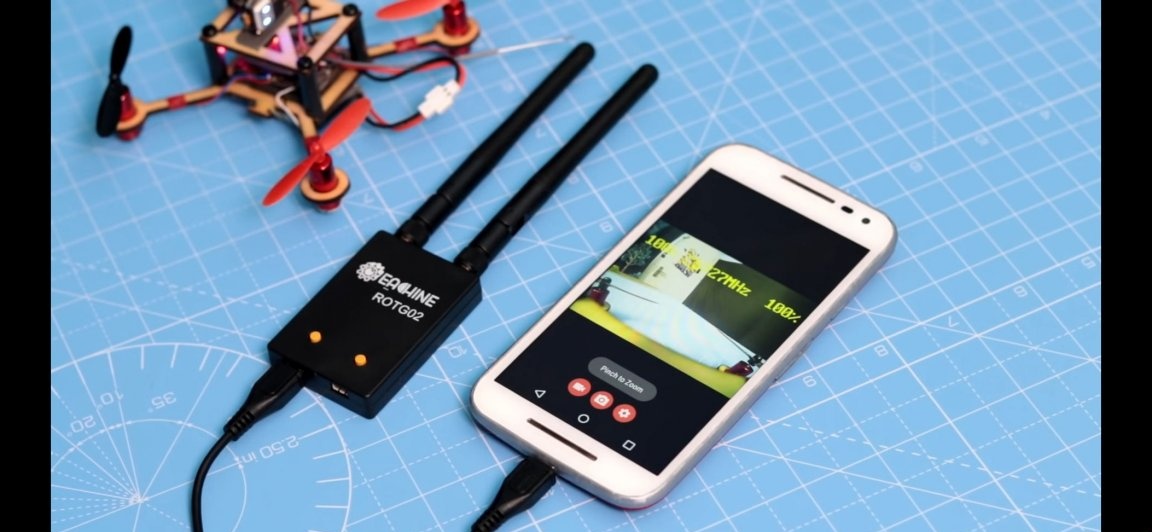
- Receiver for FPV camera (for example FPV helmet).
From the tools you will also need:
- soldering iron
- solder
- Double adhesive tape
- electrical tape
- Nippers
- screwdriver
- Stationery knife
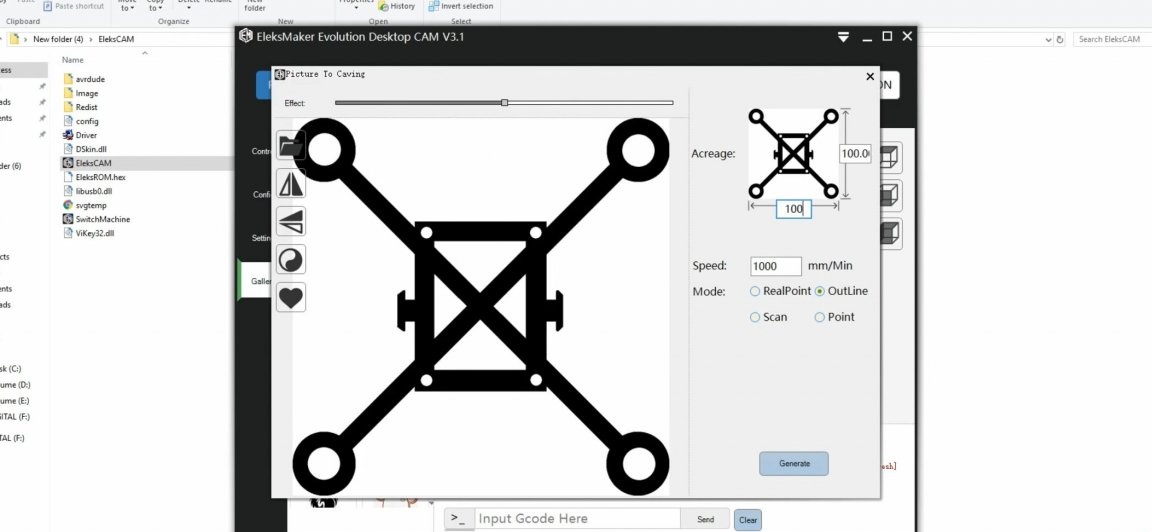
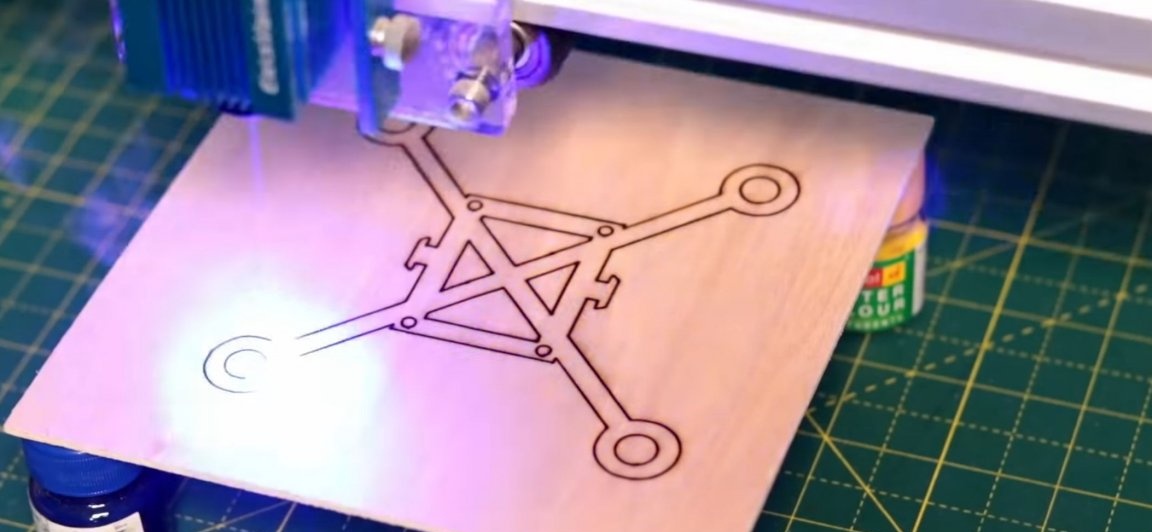
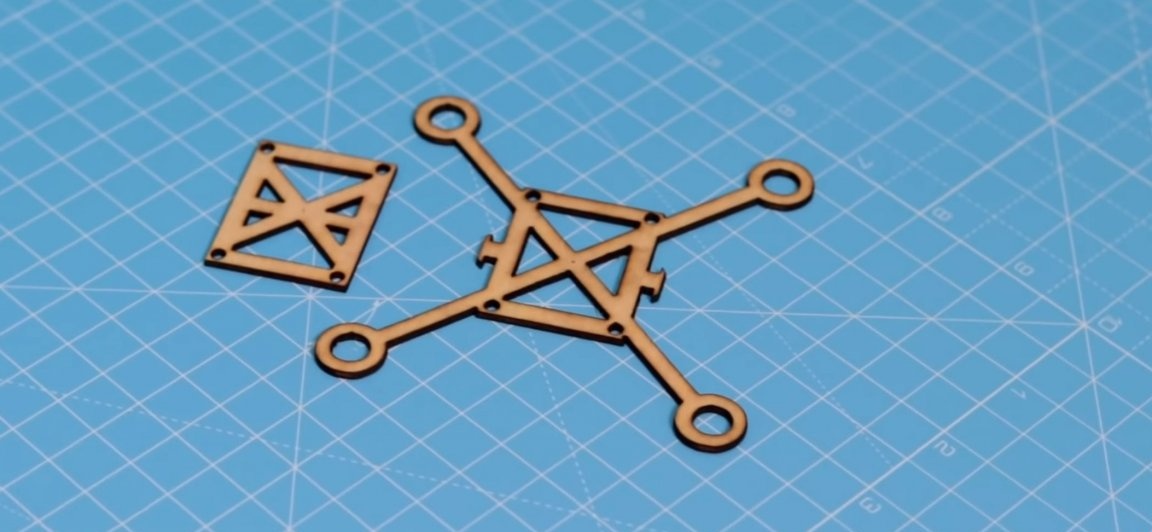
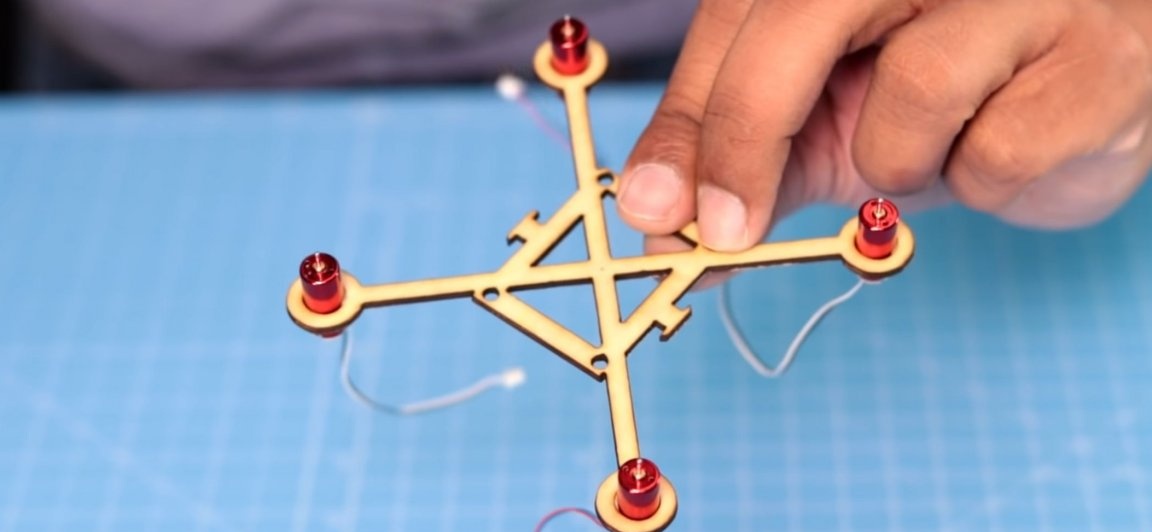
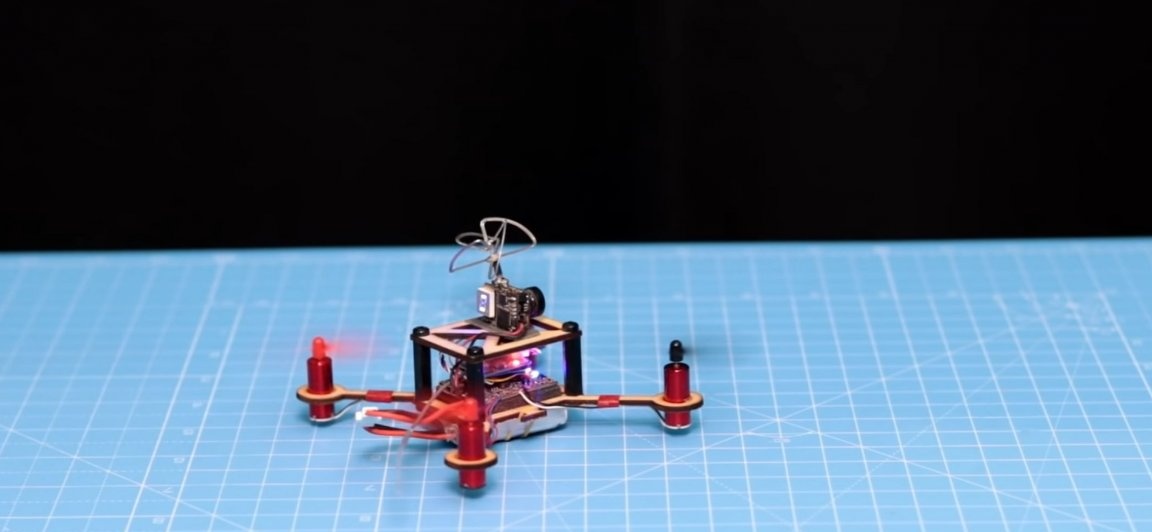
To begin with, you should probably start with the most important thing, namely with the frame of the quadrocopter, since it is on it that our entire structure will be assembled. It should be noted that there are a lot of ready-made frames, but it is not necessary to buy it, since you can take and cut it from some durable and most importantly light material. For example, from an ABS plastic sheet. Everything depends on your interest in the hobby itself, I personally would recommend purchasing a ready-made frame right away so that in the future when tuning the drone you would not have to change it. The frame itself can be cut with your own hands, by finding on the Internet diagrams and drawings (by printing them and gluing to the material from which you are going to cut the frame). Or you can use the services of laser cutting, as the author did.

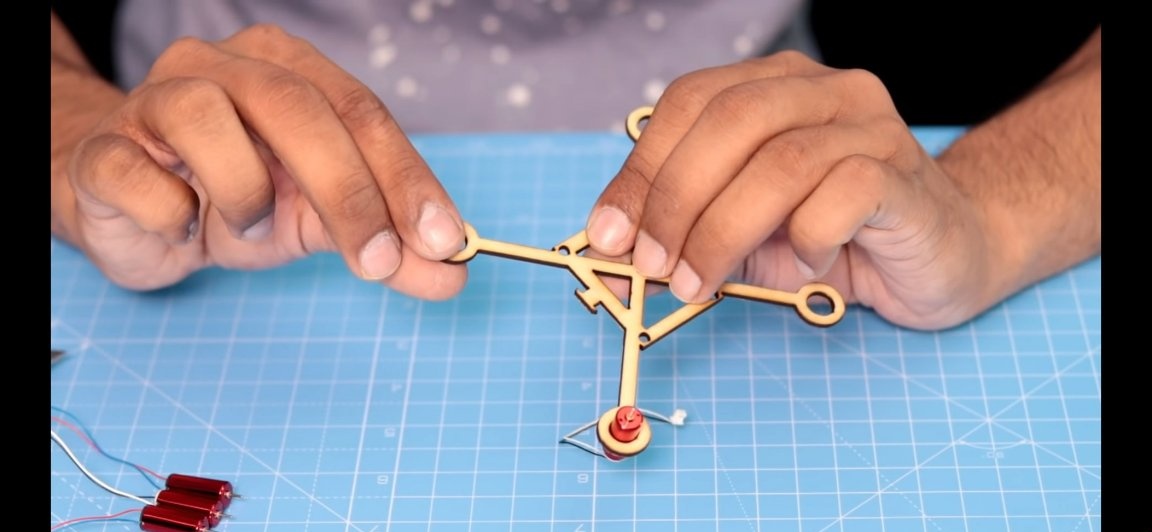
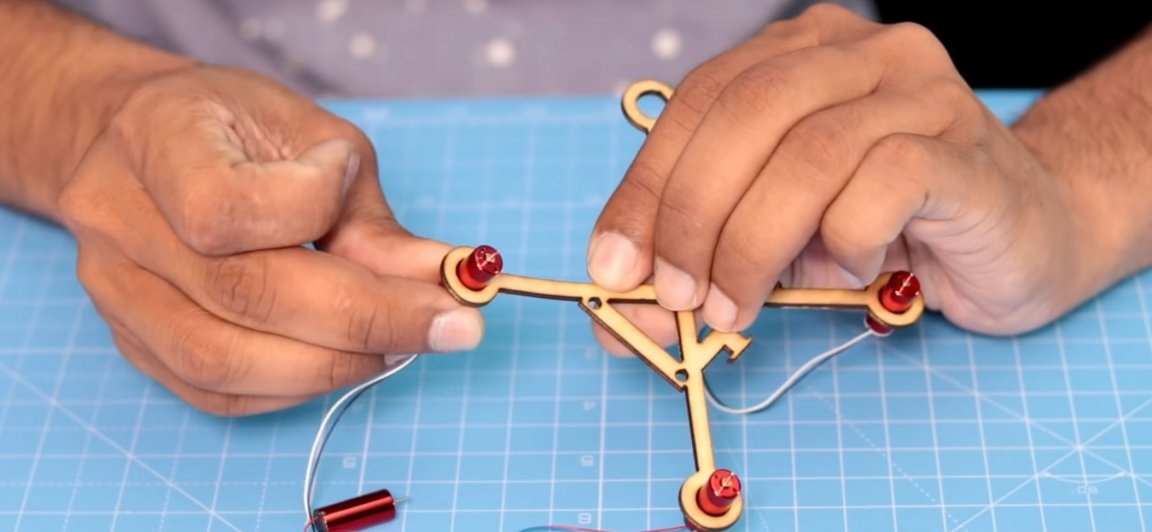
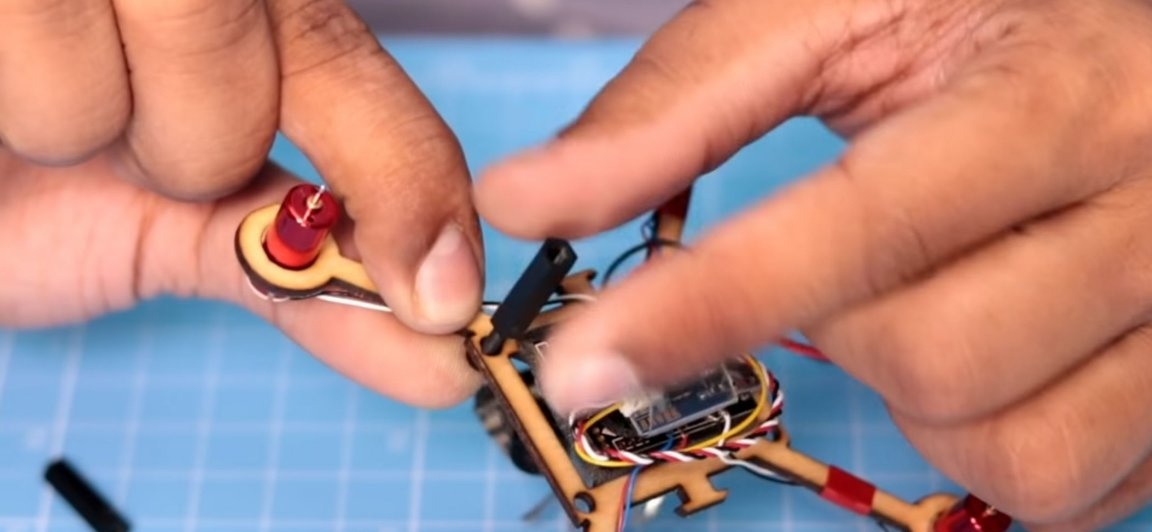
For the next step, we should purchase 4 electric motors; for this, the Racerstar 8520 8.5x20mm engines, which are sold as a set, are perfect. The motors themselves should be installed on the frame in their landing holes, which should have been done earlier. Ideally, when the engines sit tight in place, without any additional fasteners.But if you cut the frame yourself, and you were unable to make the exact holes, then you can use super glue or hot glue, but you should do this in such a way as not to disturb the weight distribution.
Also, when installing engines, one should not forget that the set includes two types of engines, one that rotates clockwise, and the other that counterclockwise. Install such engines should be opposite each other.

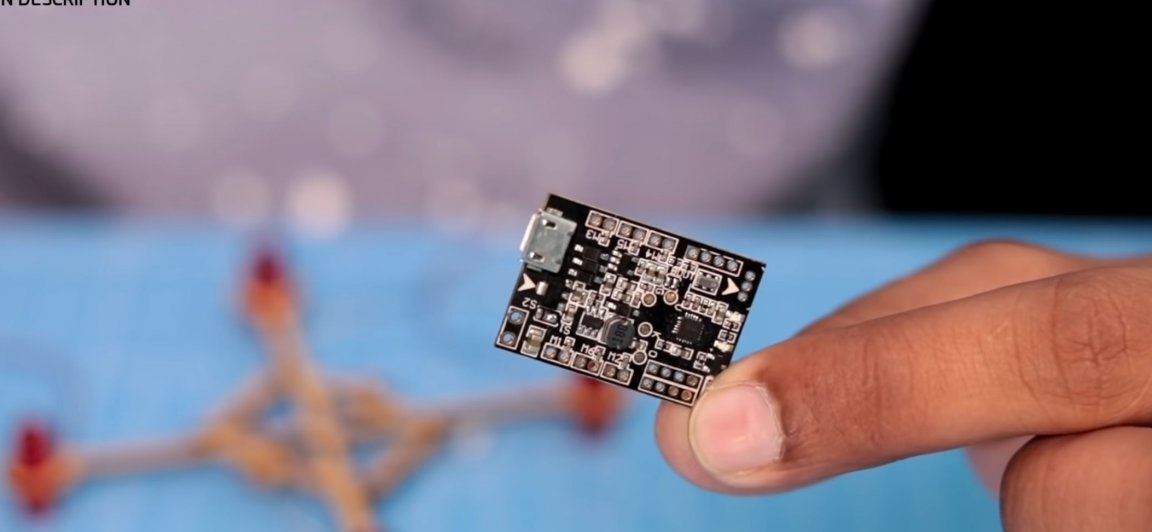
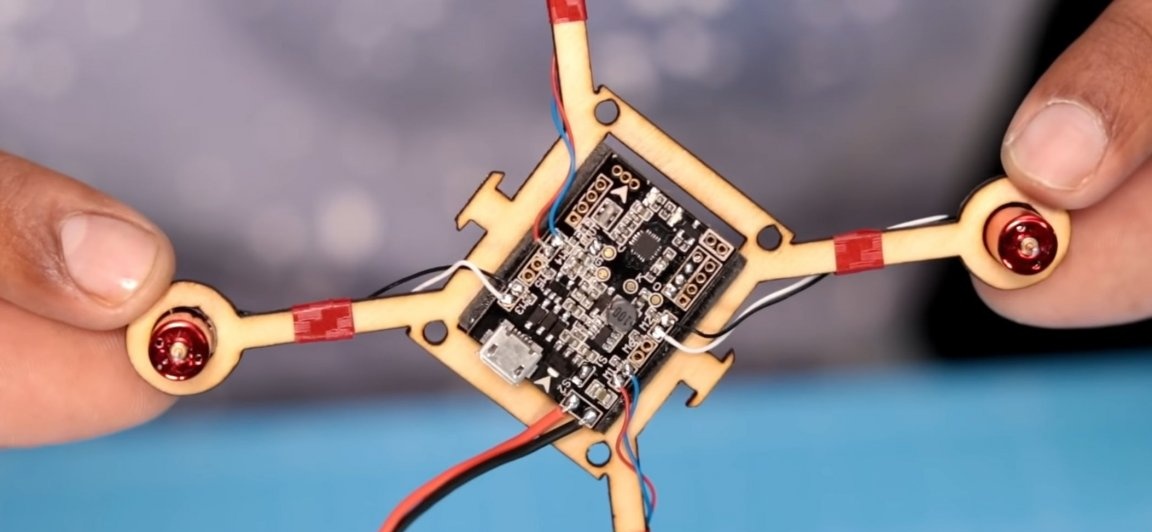
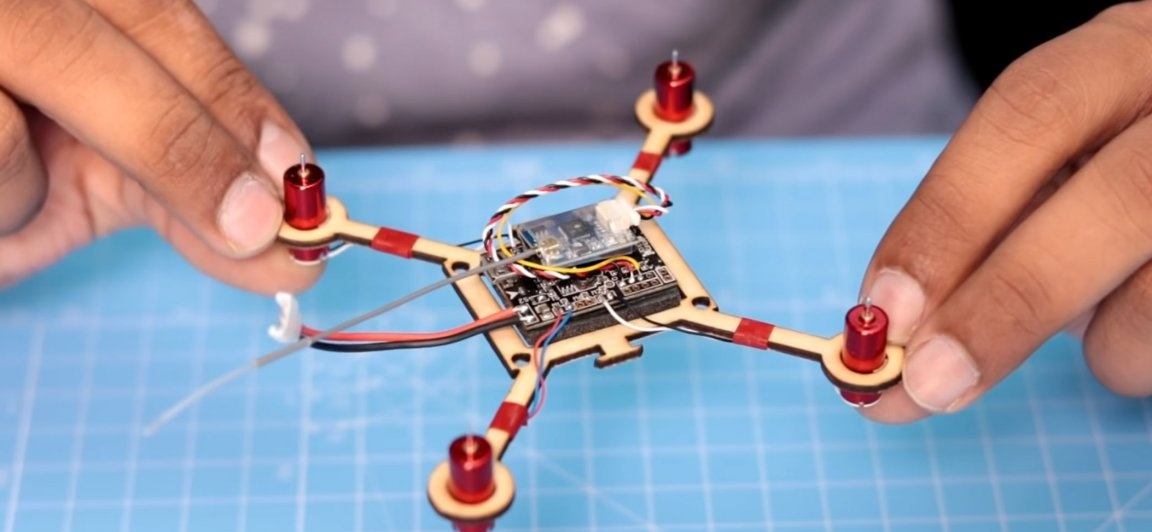
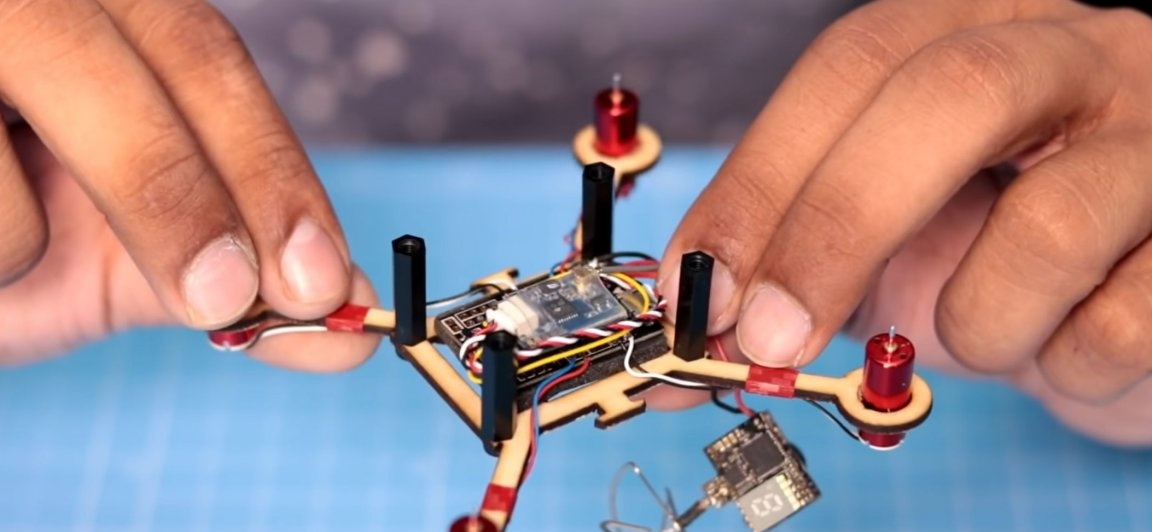
Then we need to take the flight controller. In this case, the flight controller includes functions such as a speed controller, a power supply for the battery, and the flight controller itself. The flight controller should be attached exactly in the center of the frame itself, but not on a rigid mount, since excess vibration, which in this case is almost impossible to get rid of, will create extra control interference. Therefore, double adhesive tape on a soft substrate is perfect for this.
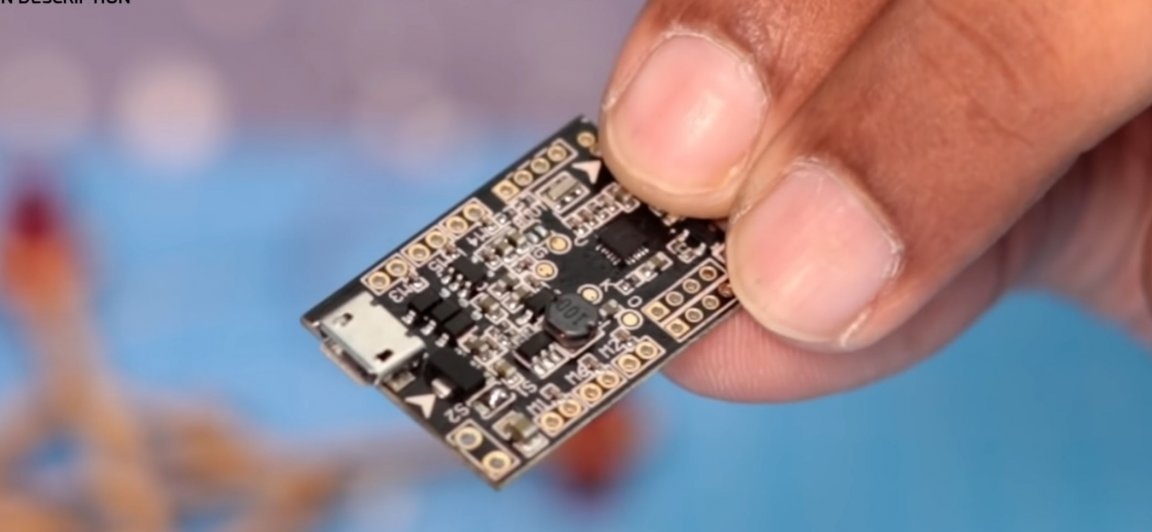

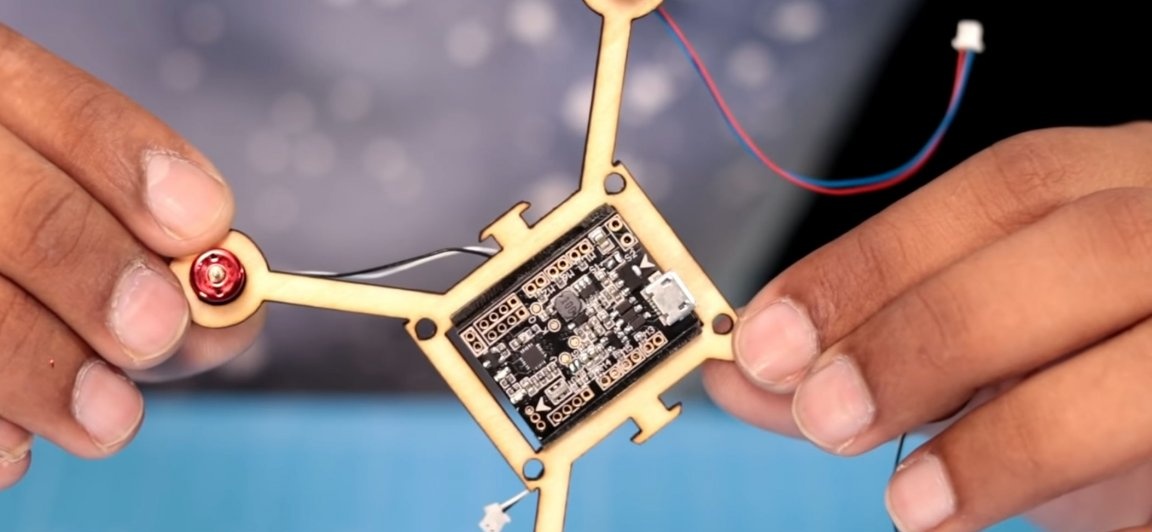
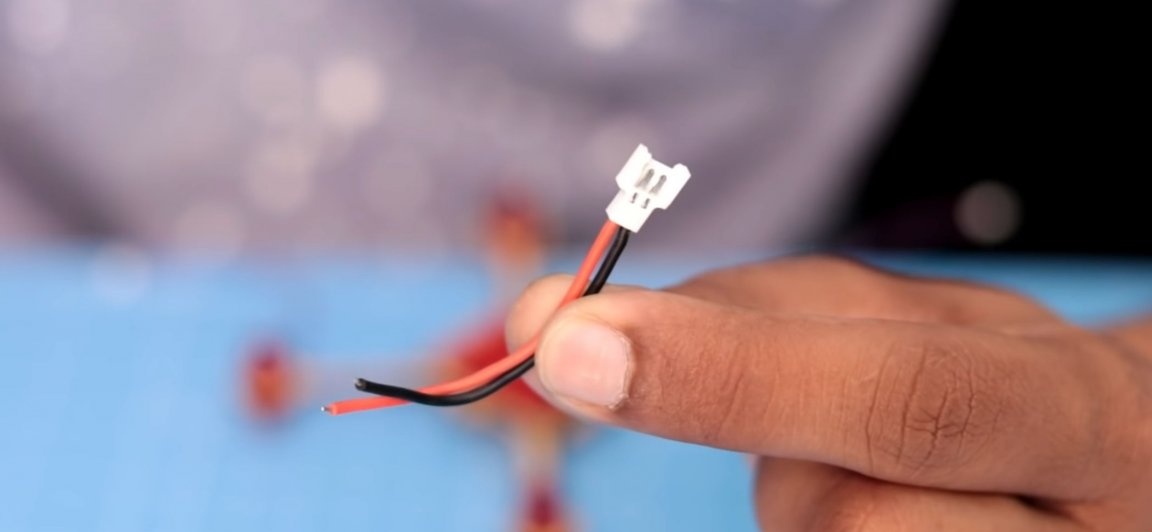
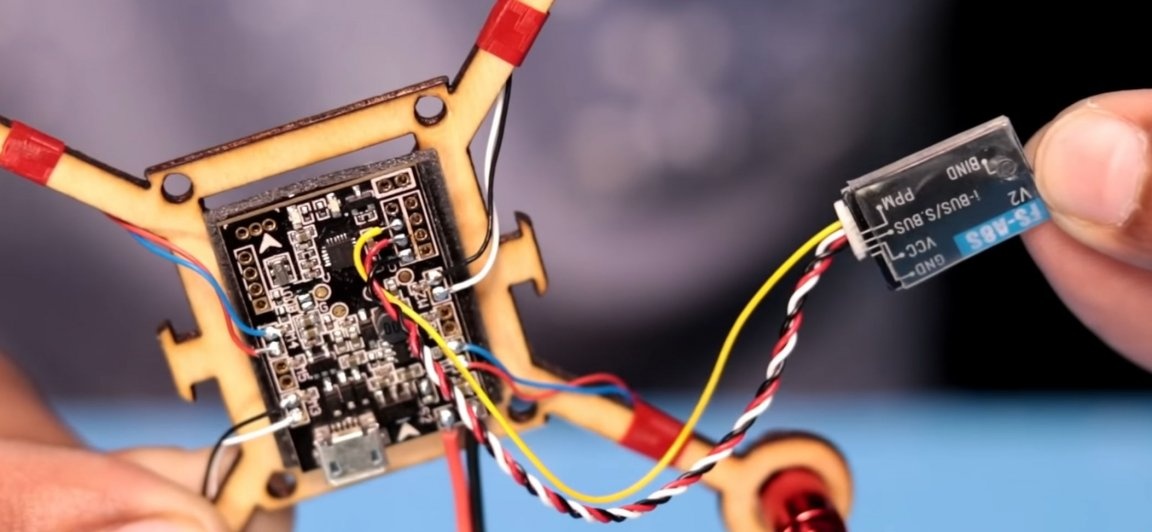
After that, we begin to connect the wires to the flight controller, first we take the connector of the “mother” format (such as in the photo below) and solder it to the contacts on the flight controller, namely to the selected contacts at the power connector (plus wire to the power connector).
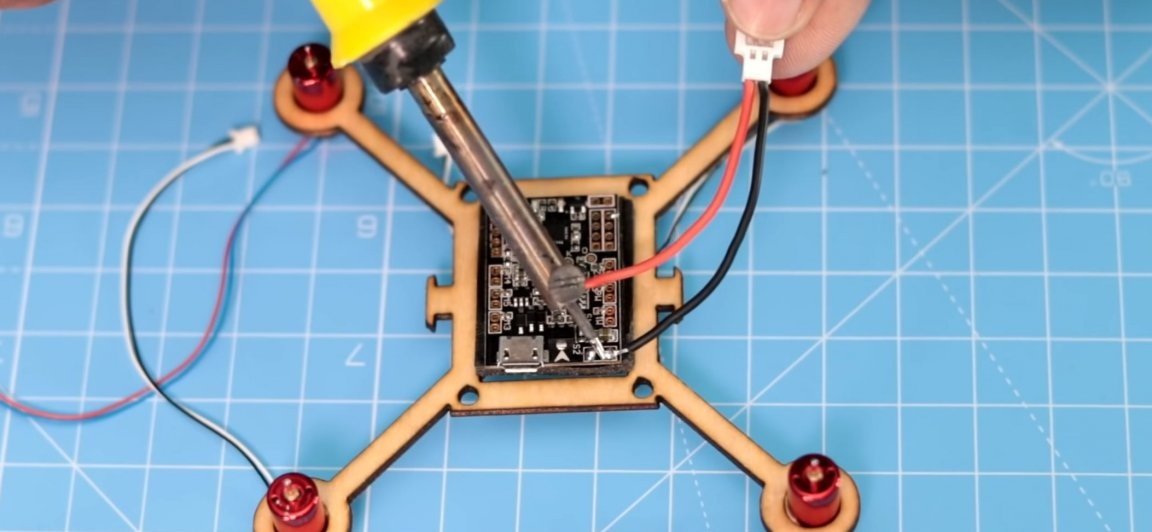
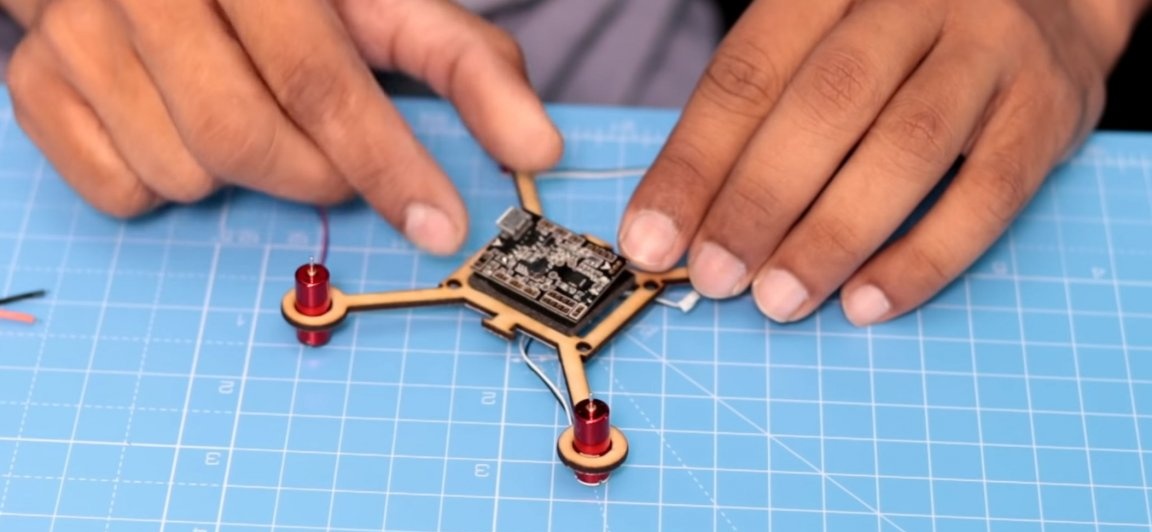
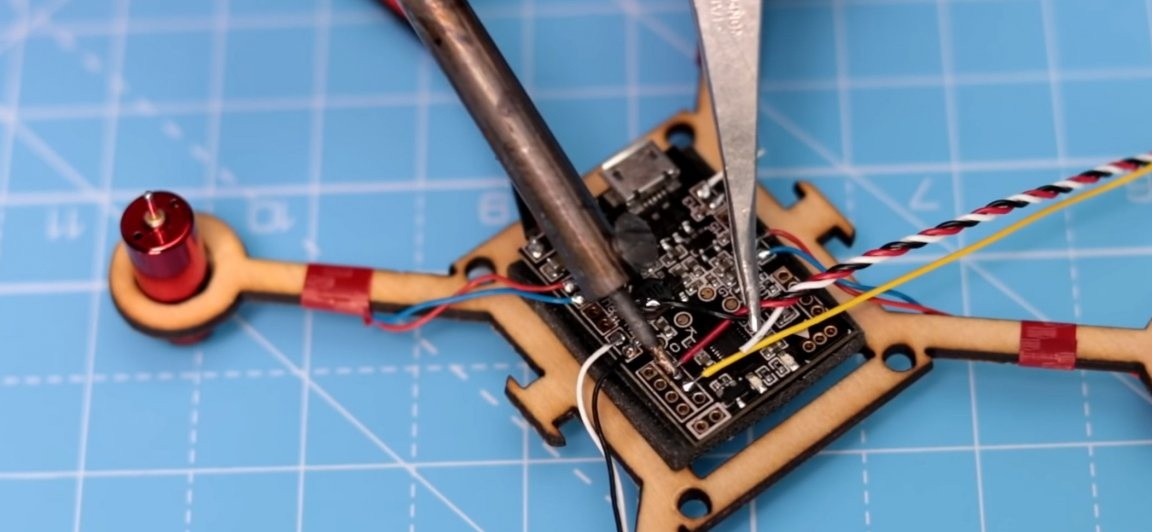
Next, previously installed motors should be connected to the flight controller. But before that, the wires coming from the electric motors should be carefully drawn along the frame and fixed with small pieces of electrical tape. Then, using the wire cutters, we cut off the extra length of the wires and chorus them to the contacts on the flight controller, which are shown below. It is important to solder the wires exactly as shown below.

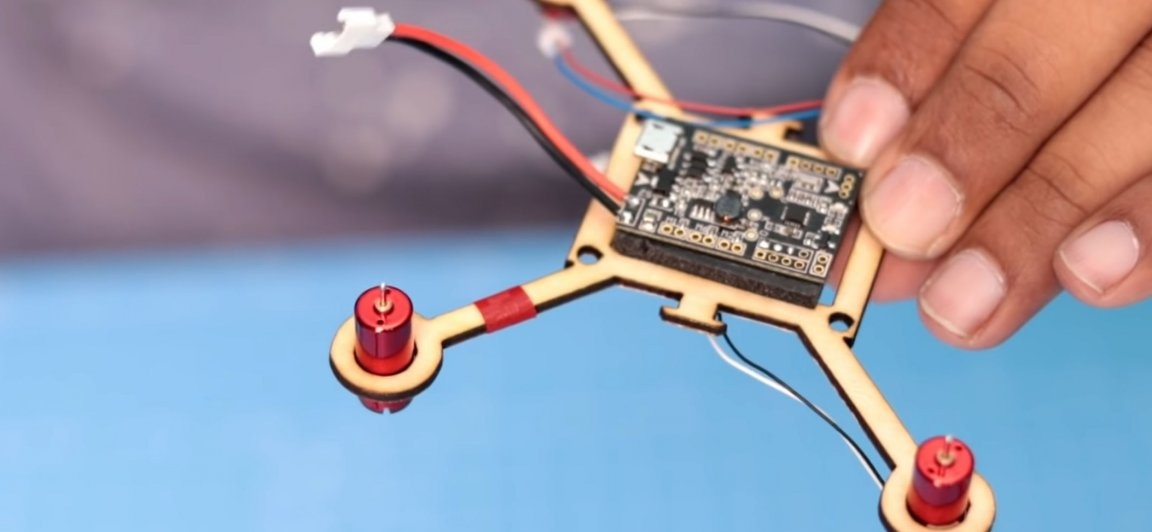
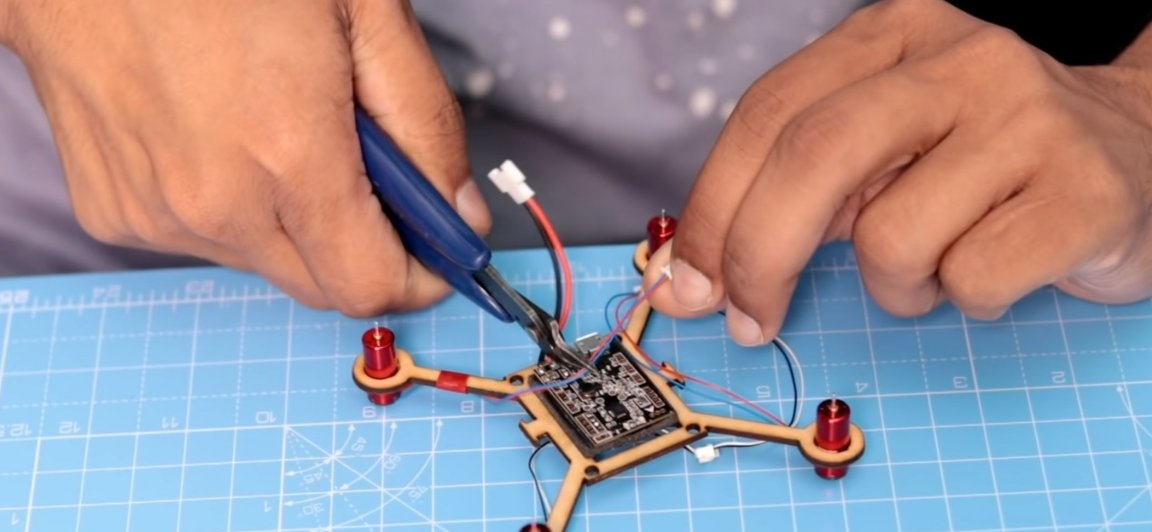
The next step we need to take the receiver from the radio control equipment, which should also be connected to the flight controller. (see photo below). The receiver, as well as the flight controller, is mounted using double tape.
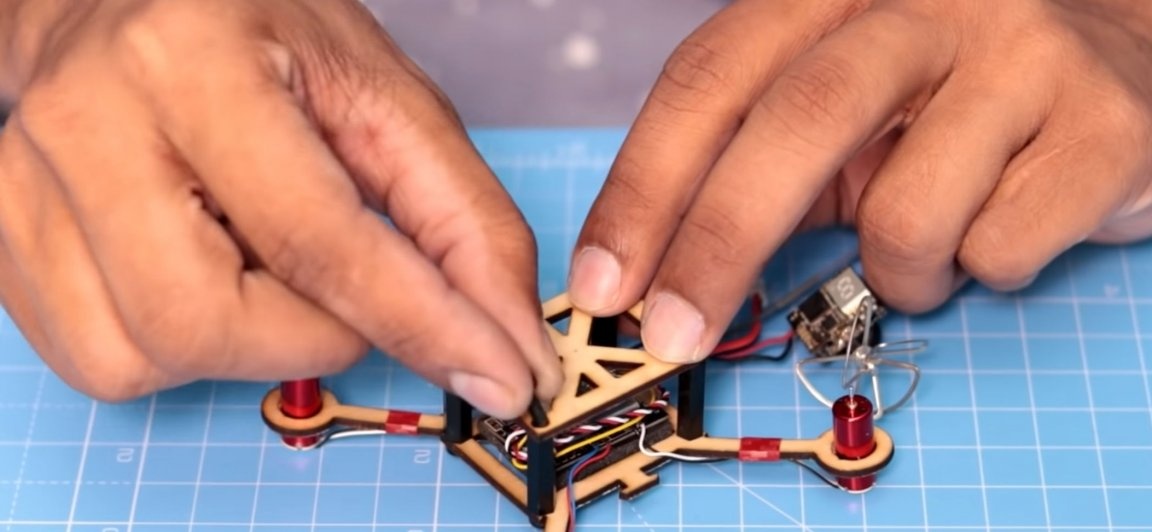
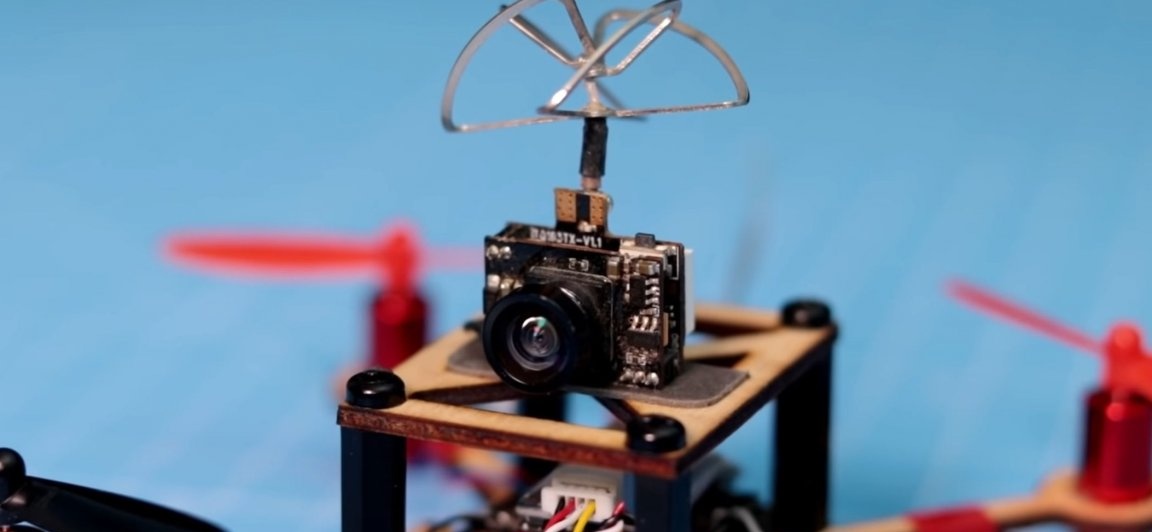
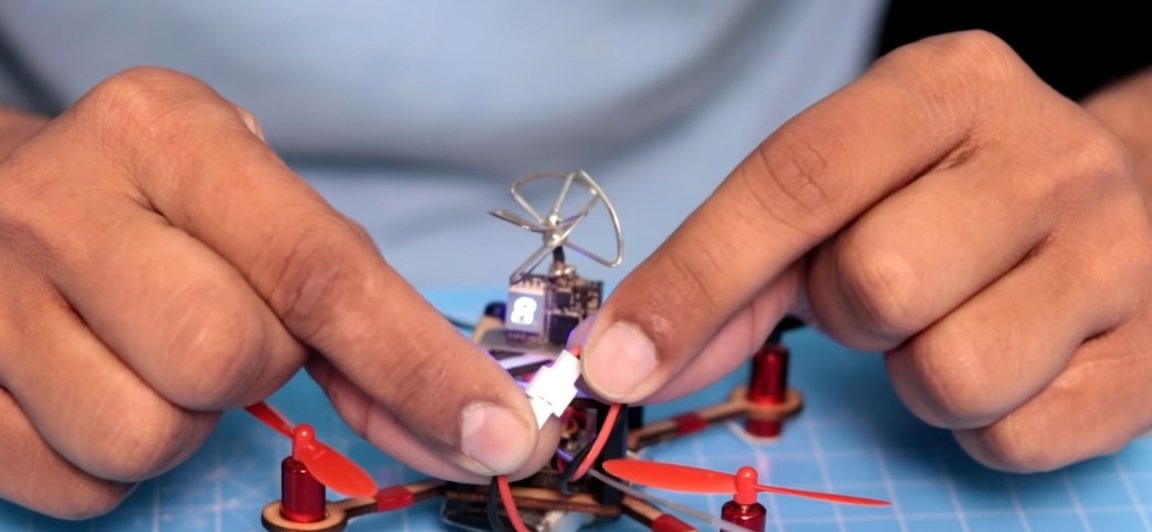
Then we should take the FPV camera and install it on our quadrocopter. In order to install the FPV camera, we should make a special platform for it above the flight controller. The site itself is cut out of the same material that the frame for the quadrocopter was cut out. In order to secure the pad, racks for printed circuit boards can be used. Screwing and tightening them first to the frame, and then attaching the platform, securing it with screws. We fix the FPV camera as well as other components of the homemade product using double adhesive tape, on the site that we just made. The wires from the camera are connected to the wires coming from the battery according to the polarity “+” to “+”, and “-” to “-”.
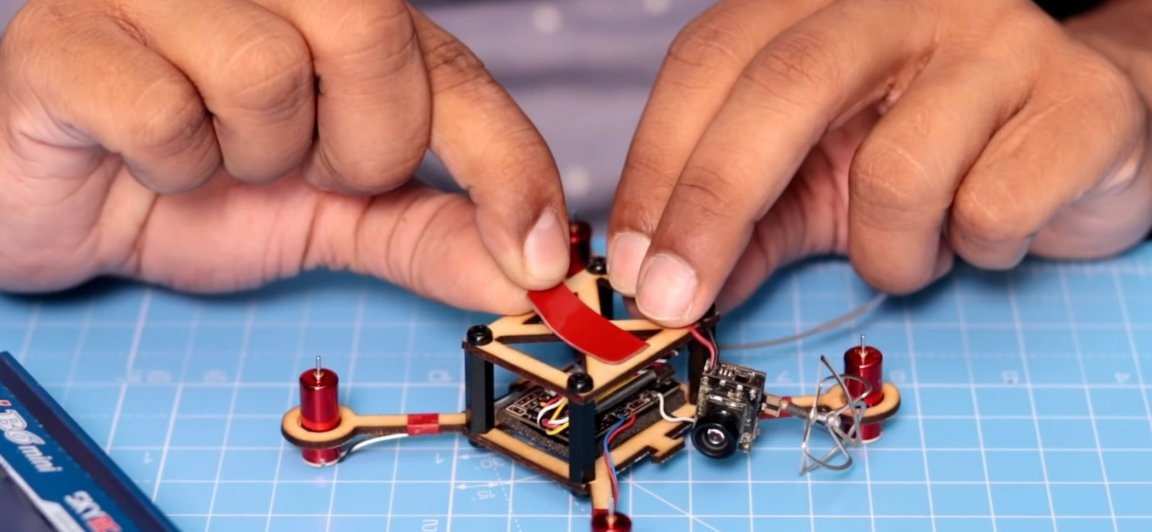
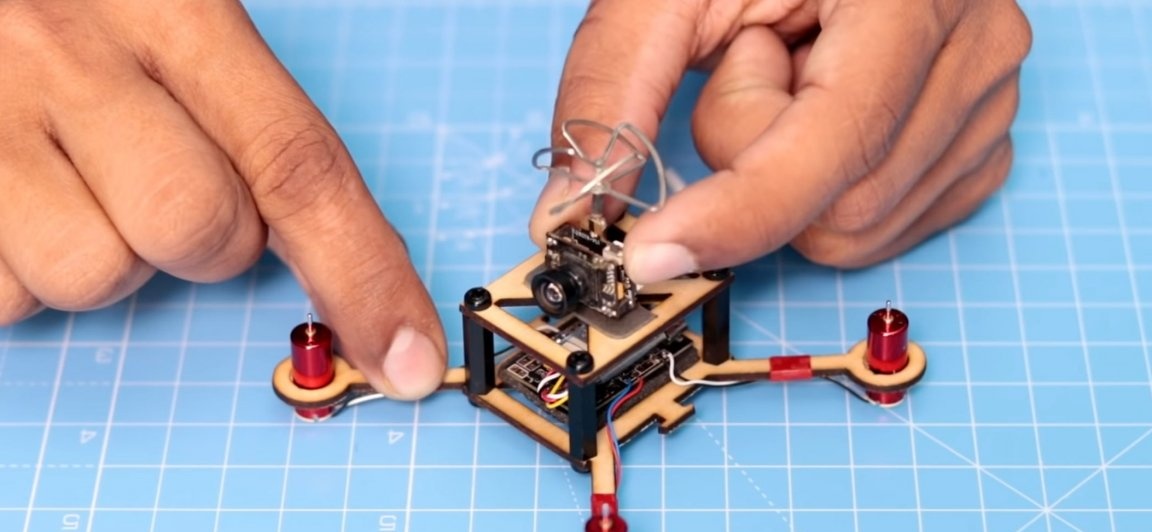
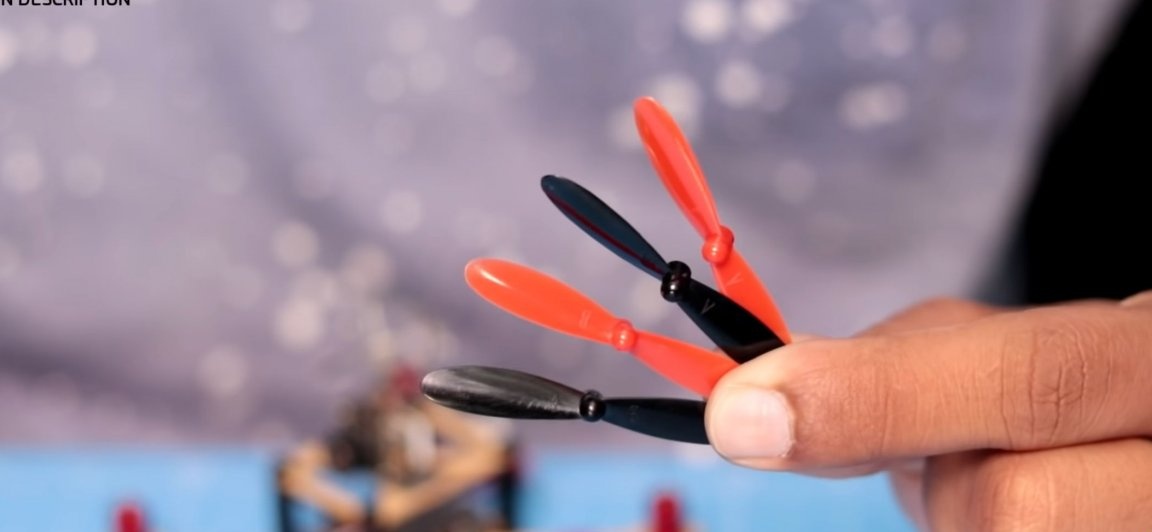
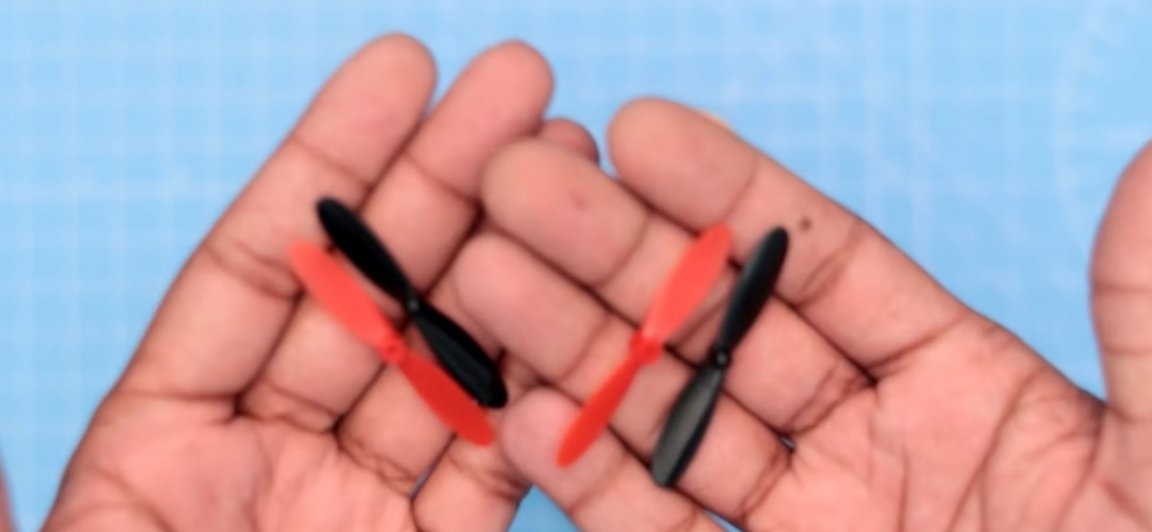
Then we need propellers. It is desirable, but not necessary, that they should be of different colors, for example, two red and two black. This is necessary so that you can determine the "front" and "rear" of the quadrocopter.
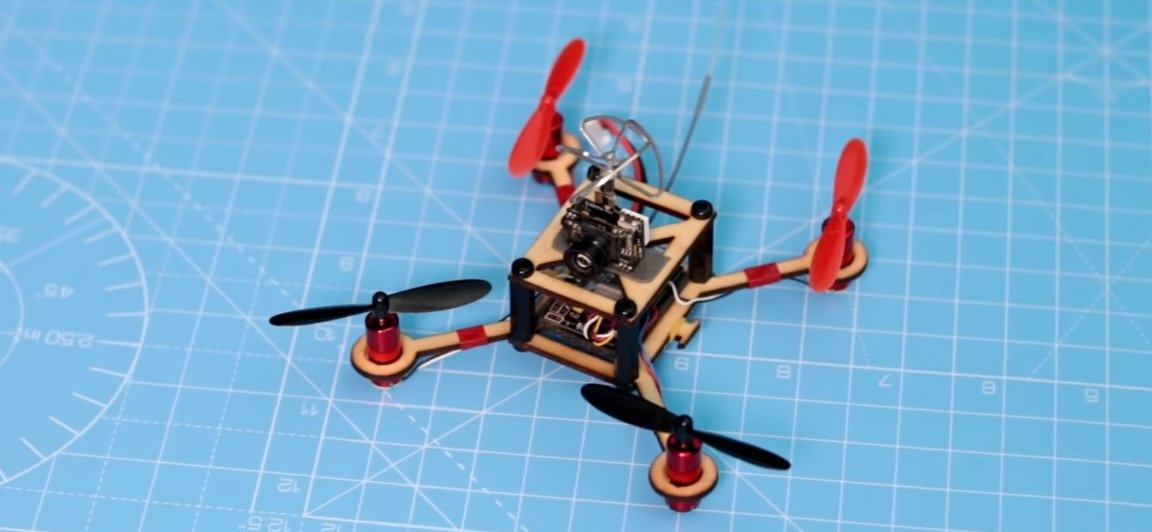
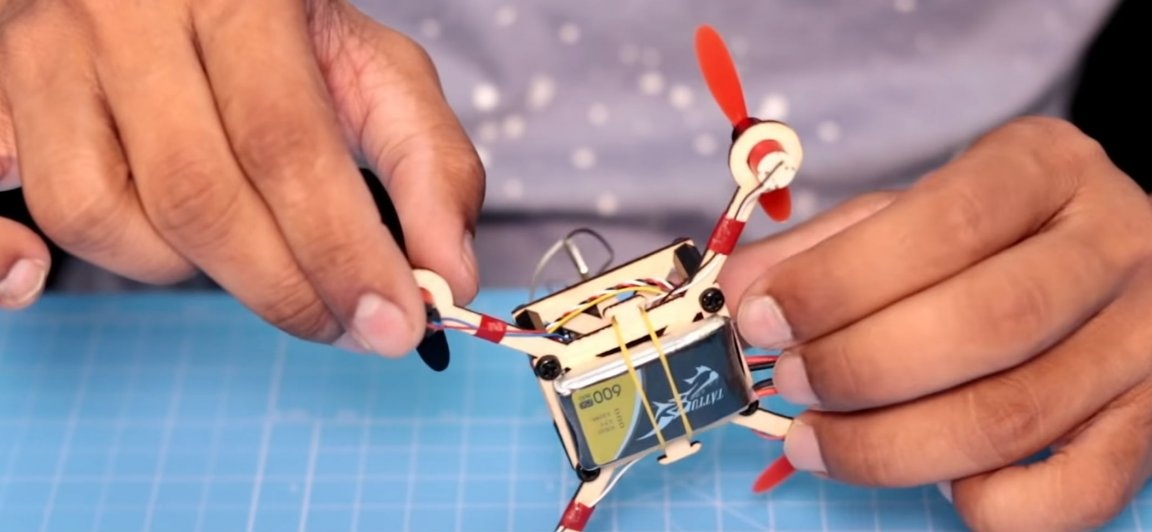
Well, at the end of the assembly, you should fix the battery on the frame of the quadrocopter. This can also be done on double scotch tape or originally secured with rubber, as the author did.
That's it! You have assembled your micro drone. After assembly, you should immediately go to its settings. Namely, we connect the battery to the flight controller, and then the control equipment, if the receiver is “legitimate” with the equipment, then immediately after turning it on they should find each other, if not, then the instructions for your equipment should describe in detail how to do this.
Having connected the equipment with the receiver, we proceed to the setup. Namely, you should slightly raise the drone, carefully adding gas. And if he deviates in either direction, then you should increase the speed of the particular engine in which direction he is flying, and this should be done until the drone is as stable as possible in a confined space and at least keep a point.
Next is the FPV camera. I strongly recommend that if you are serious about the fact that you will really do this, and build this drone for training, and then purchase or build yourself a serious device, you should immediately purchase a good FPV helmet so as not to buy it in the future. If this is more of a toy for you, then you can save and buy the same FPV receiver as the author of the homemade product.To start seeing the broadcast on your smartphone, turn on the drone, then download and open the application on your smartphone specifically (the QR code for downloading the application will be in the instructions), connect the FPV receiver and everything should work.
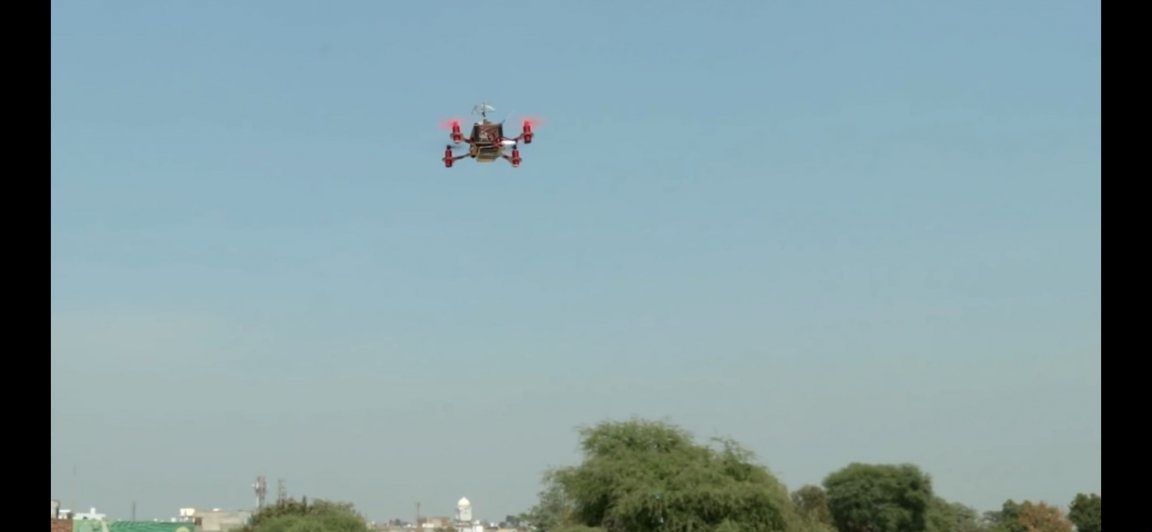
Well, that’s all! As a result, we got something between a toy and a simulator for professionals. But in any case, the homemade product is very interesting and everyone will like it.
You can purchase accessories that can be useful for assembling this homemade product here:
-
-
-
-
-
-
-
Here is a video of the author of the homemade:
Well, thank you all for your attention and good luck in future projects, friends!