

Like so many old broken of bicycles wallowing in the sheds, courtyards and basements of most of us. Many of these bikes are not repairable. The master of this project had long been thinking about how to equip more space for storing bicycles in his house, and the idea of a rack made of old bicycle frames came to mind. This idea is interesting in that it seems that the old, broken and old bicycles that have served their short century are supported by the younger ones who replaced them.
Step 1: Bicycle Klondike (and a pair of pipes)
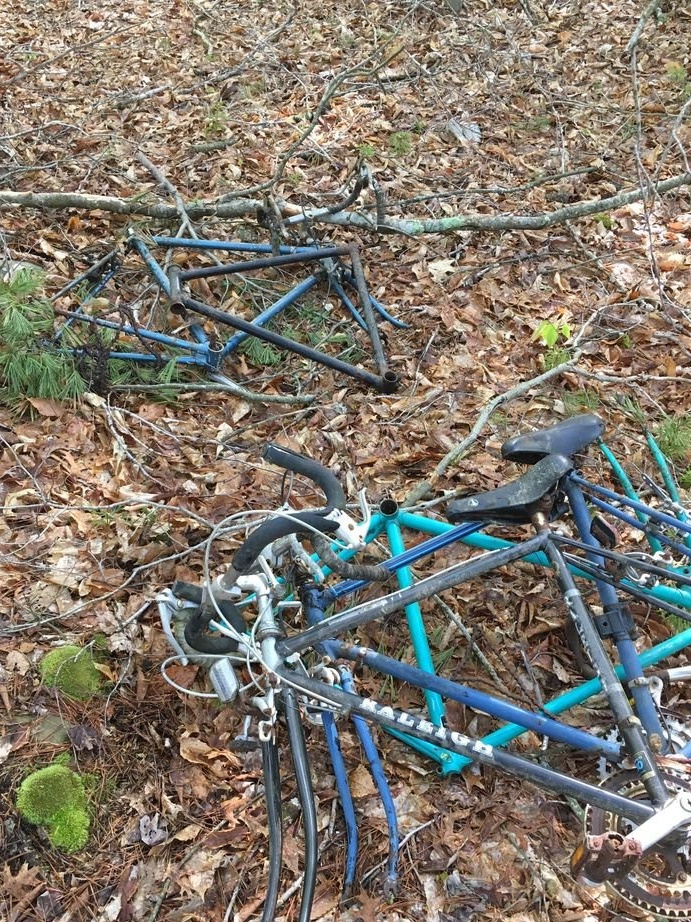
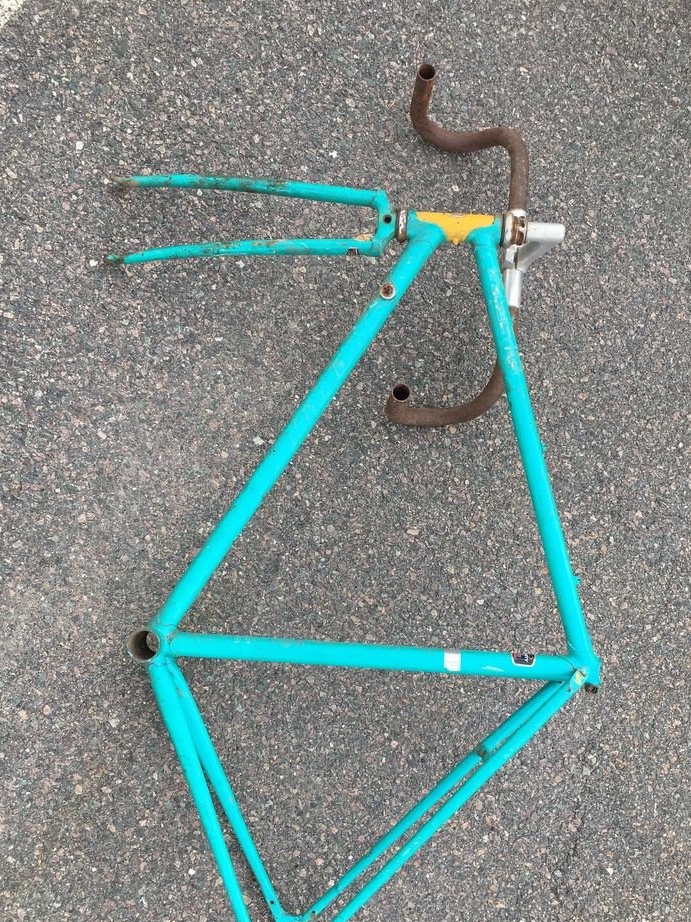
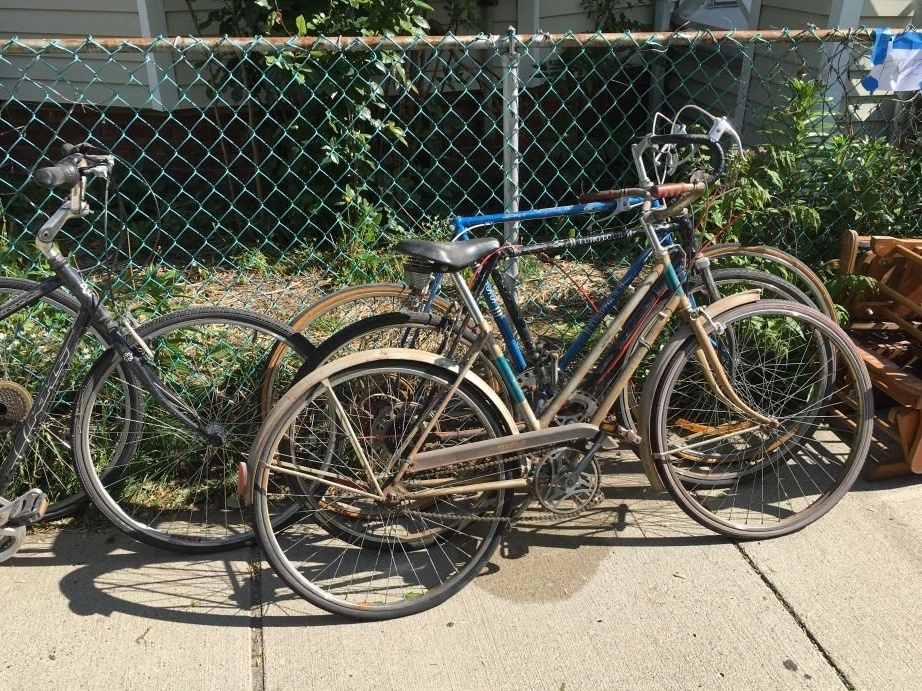
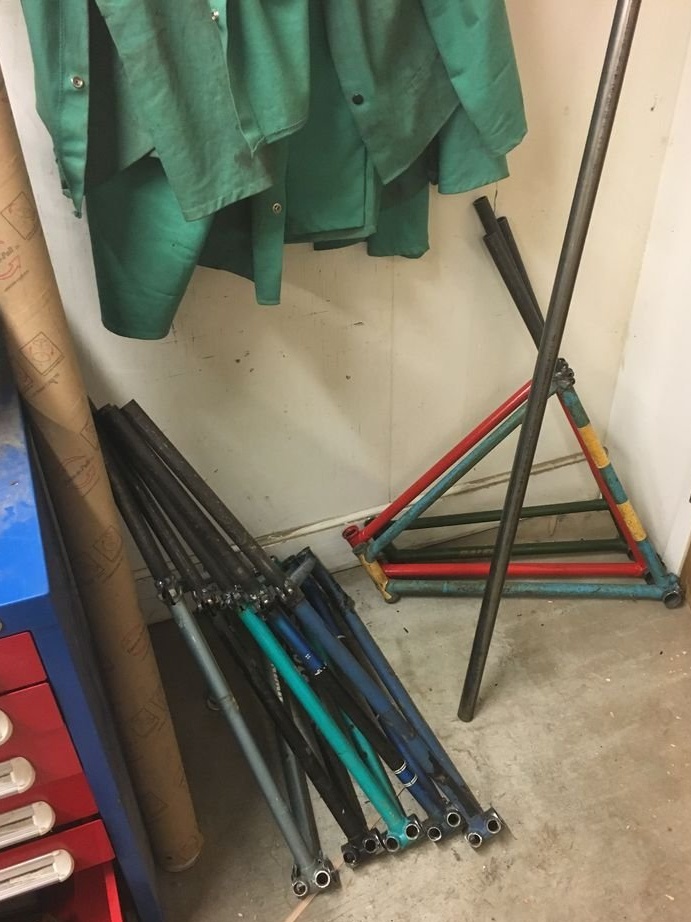
The master, like a true master, is a fan of the reuse of materials in his work. Therefore, when he stumbled upon a bunch of old rusty bicycle frames in his friend’s house, he could not resist and leave this fact unattended. Most of them were unsuitable for their intended use, since the frames were pretty rusty, had cracks and were bent.
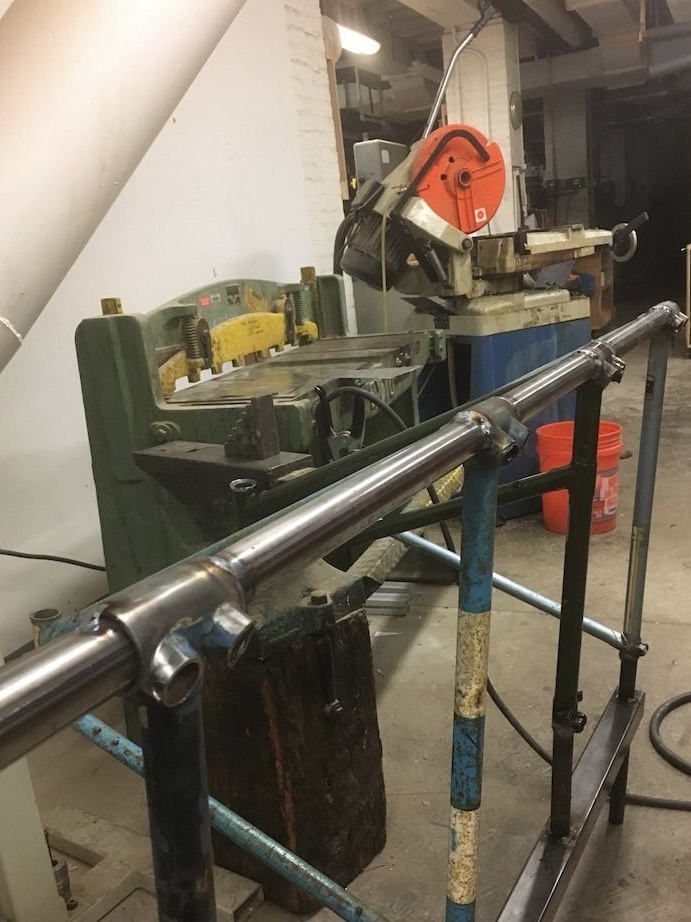
Also for the rack you will need a steel pipe with a diameter of 32 mm to connect the frames together. The pipes must be of sufficient length to provide the necessary length of the entire bike rack. At the master, the length of the rack was 2 m. 80 cm.
In addition, you will need a steel pipe with a diameter of 25 mm. and about 60 cm long for each frame used.
Step 2: disassembling the bicycle frames
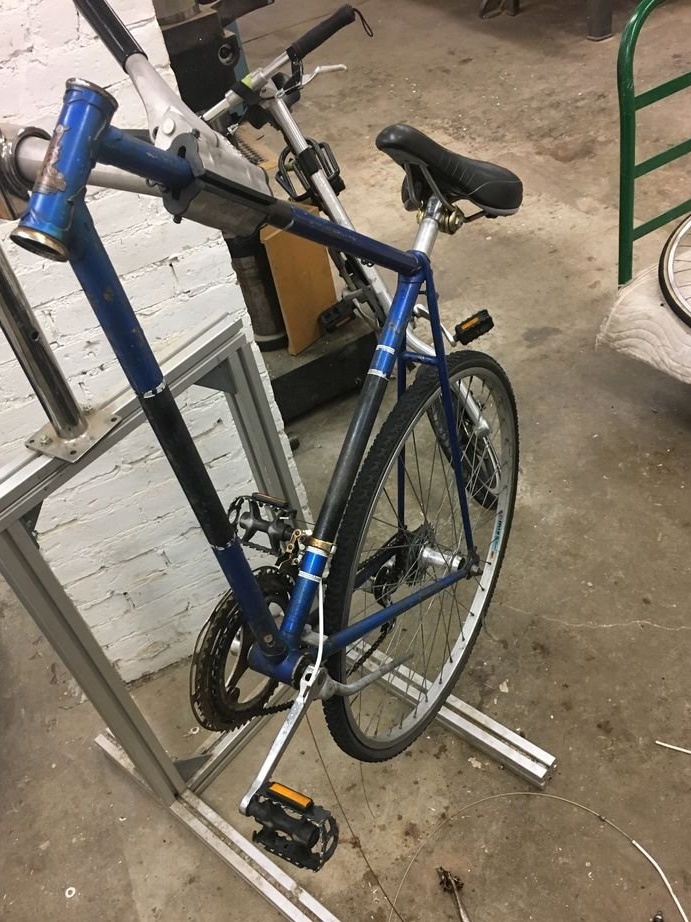
To disassemble, you will need a hacksaw for metal or, as the best option, an angle grinder. All that is required is the front triangle from the frame, so that everything else can be cut off. Get rid of wheels, connecting rods, lower bracket, seat, fork, as well as chains and saddles. It is likely that a couple of garbage cans will be filled with old parts, but they can always be scrapped.
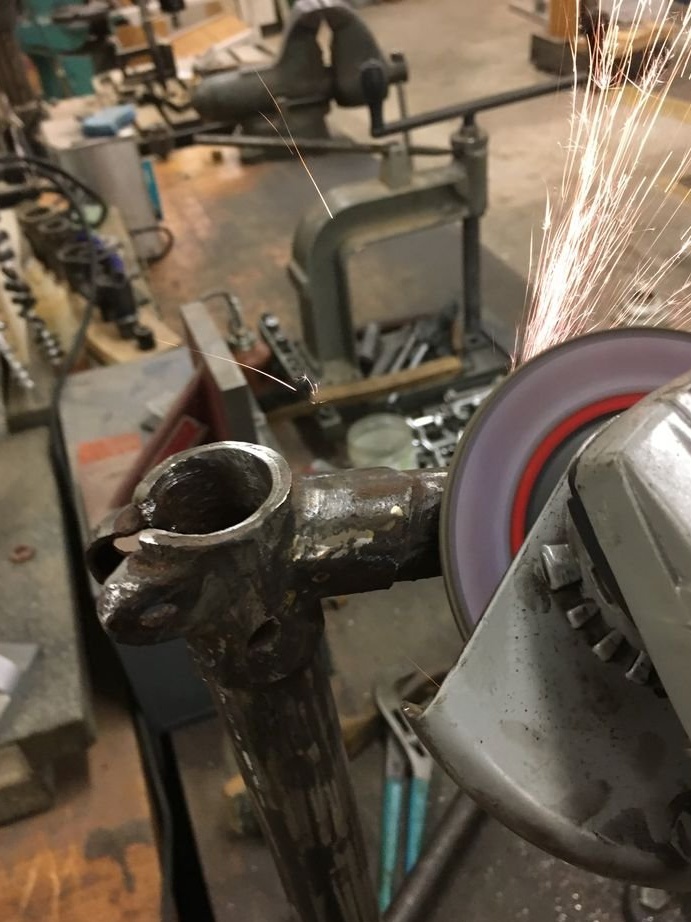
Step 3: Prepare the frames
Before starting welding, it is advisable to get rid of old paint, rust and grease in those places where parts will have to be welded. A sandblasting machine is great for this task, but if it is not, then a wire cord brush and an angle grinder are suitable.The master used a small wire cord disk on a dremel. On those frames in which the paint has been preserved the worst, the master removed all the paint and repainted it. Painting the entire rack together can be done after welding, but the master wanted all the frames to be different colors. This will be difficult to do when they are welded together.
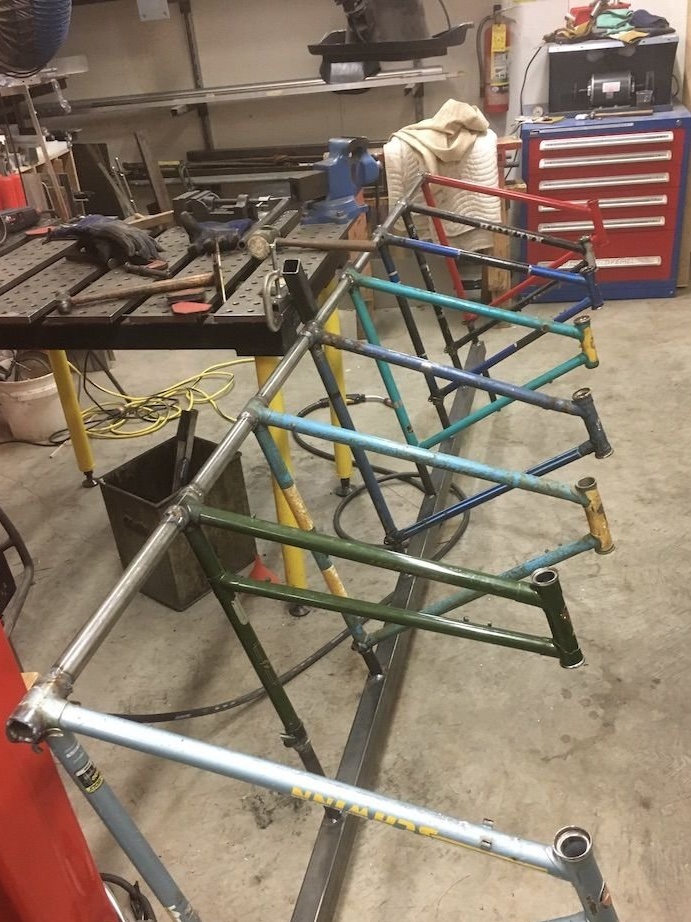
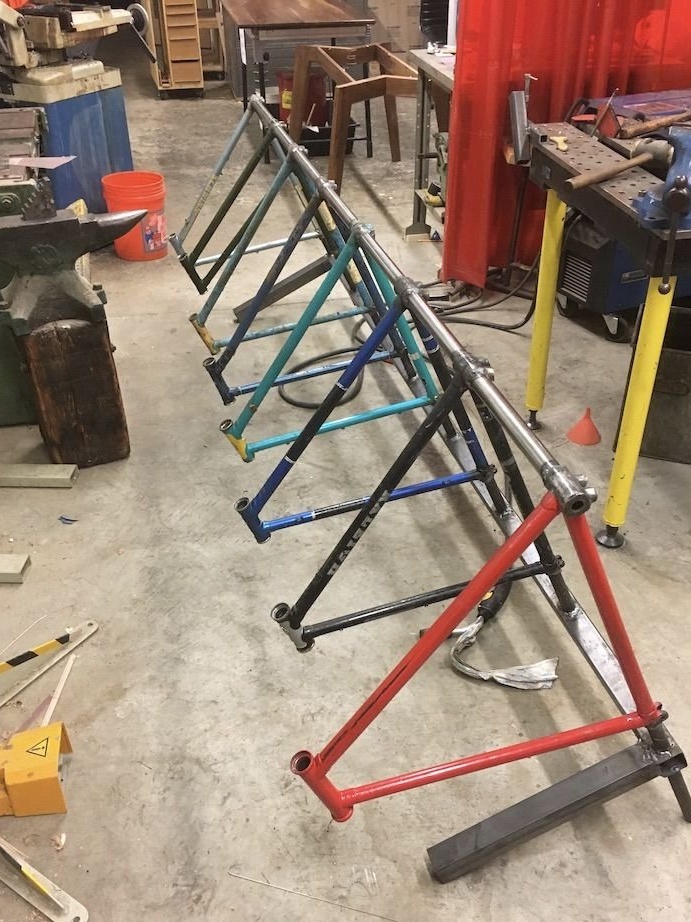
Step 4: Layout of the Future Rack
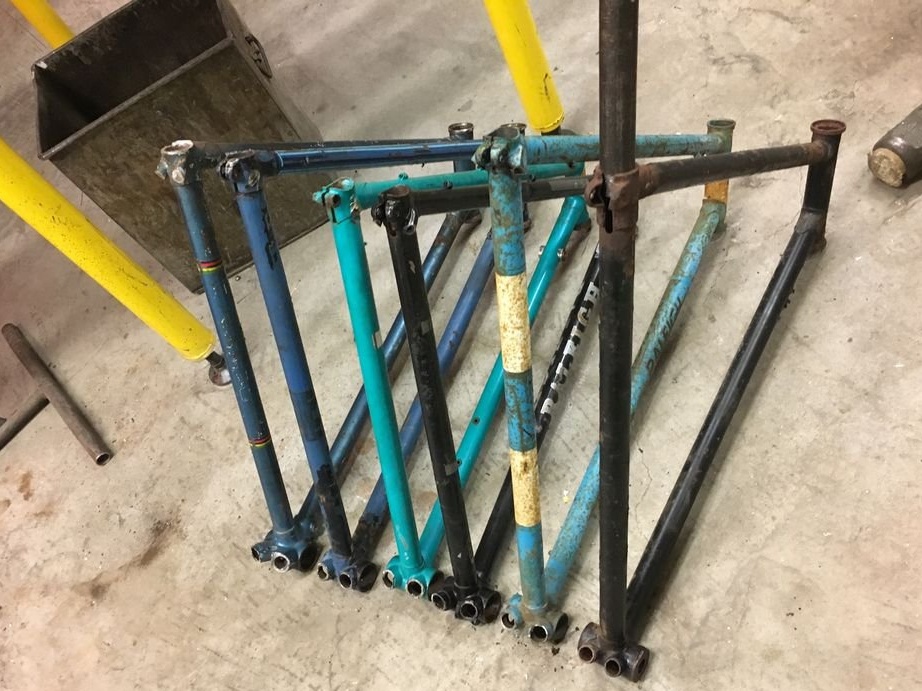
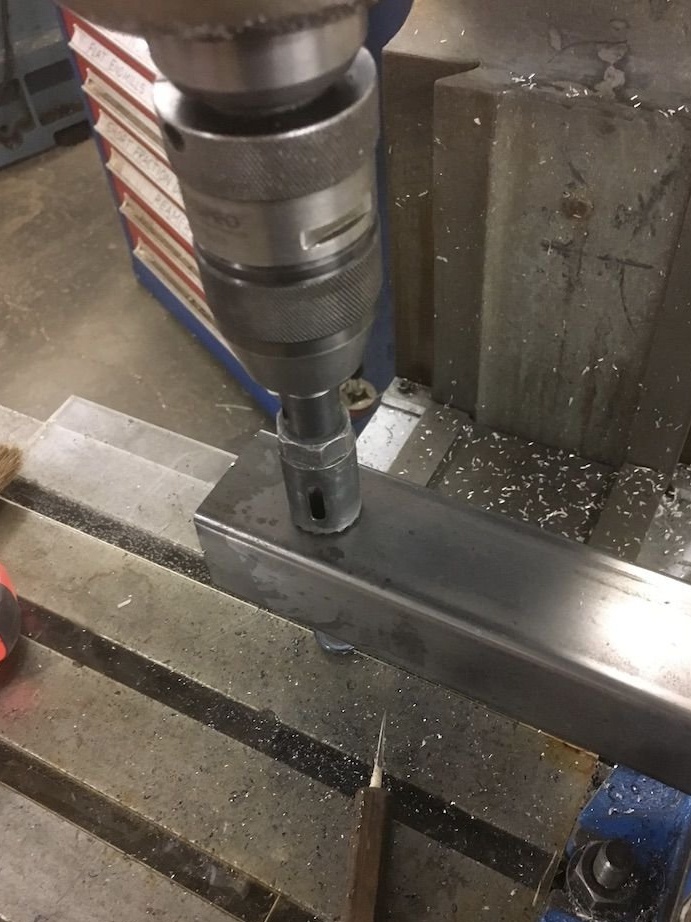
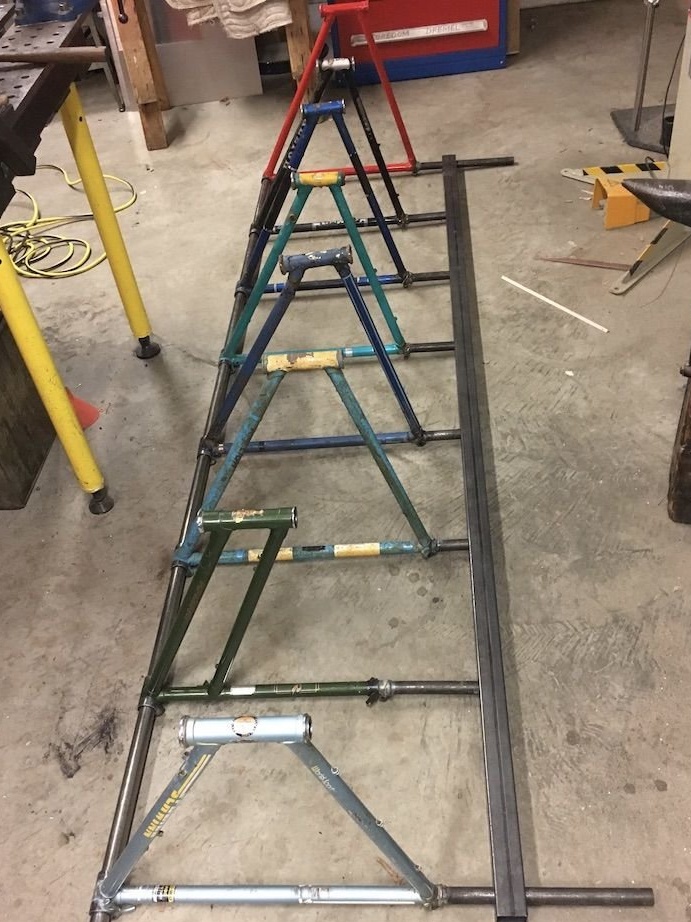
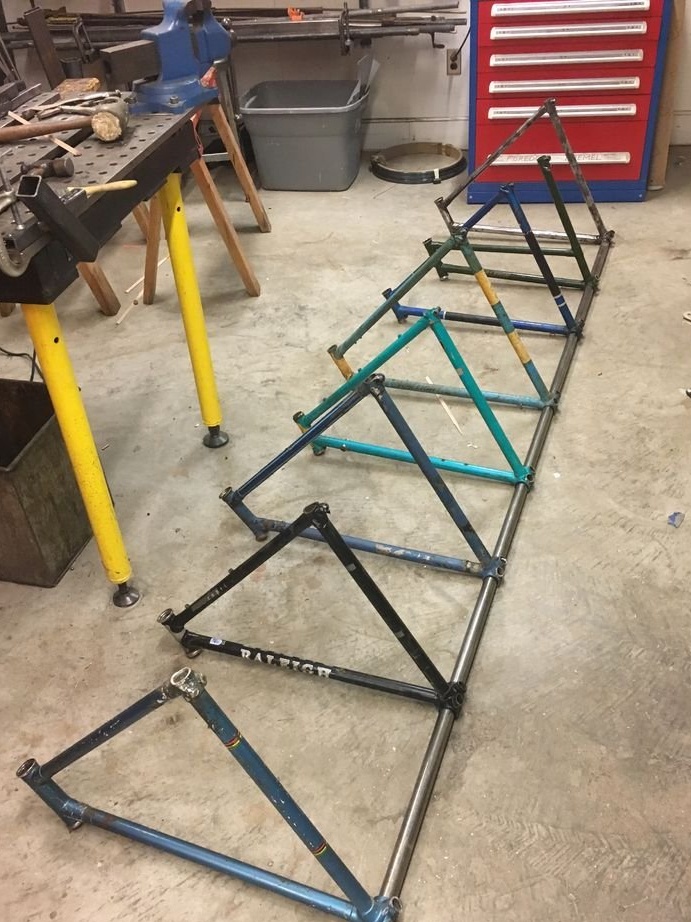
After all your frames have been cut and prepared for welding, pass a long 32 mm pipe through the bottom bracket of each frame and arrange them as you like.
The master also used a 50 mm square profile pipe for the base of the rack. The tubes in which the seat tubes are located have a diameter of 25 mm, so the master drilled 25 mm holes every 38 cm of the square tube. With the bottom brackets connected, he cut off the middle extension tubes of the seat tube to the same length to fit the holes in the square tubes. The master left two tubes from the seats at the ends about 30 cm longer and stuck them through a square tube. They will be sunk in the ground to hold the rack in place more steadily. If you are really worried about the reliability of this rack, you can even concrete it (but the master did not).
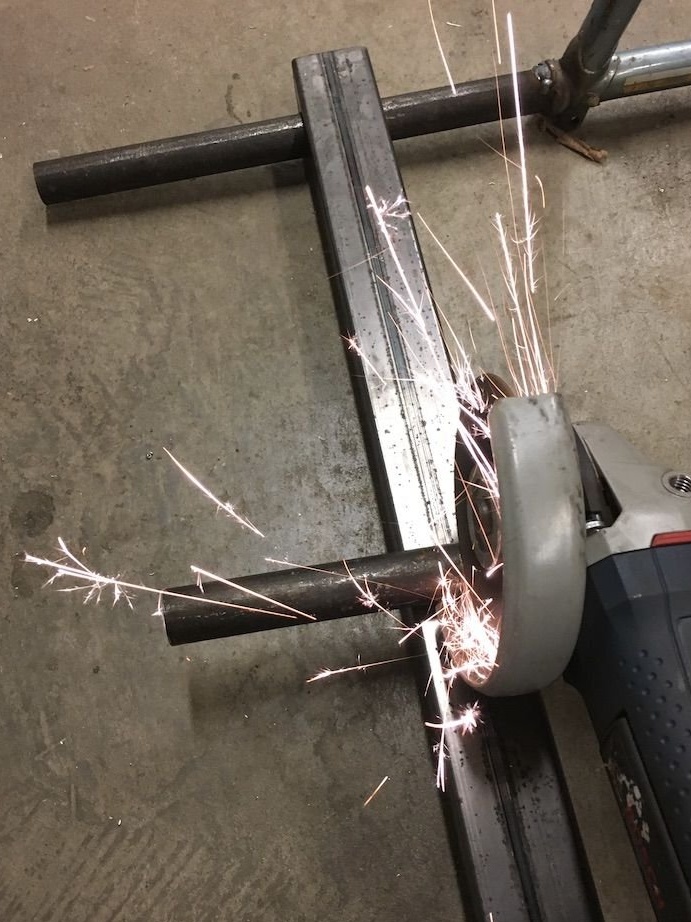
Step 5: Welding
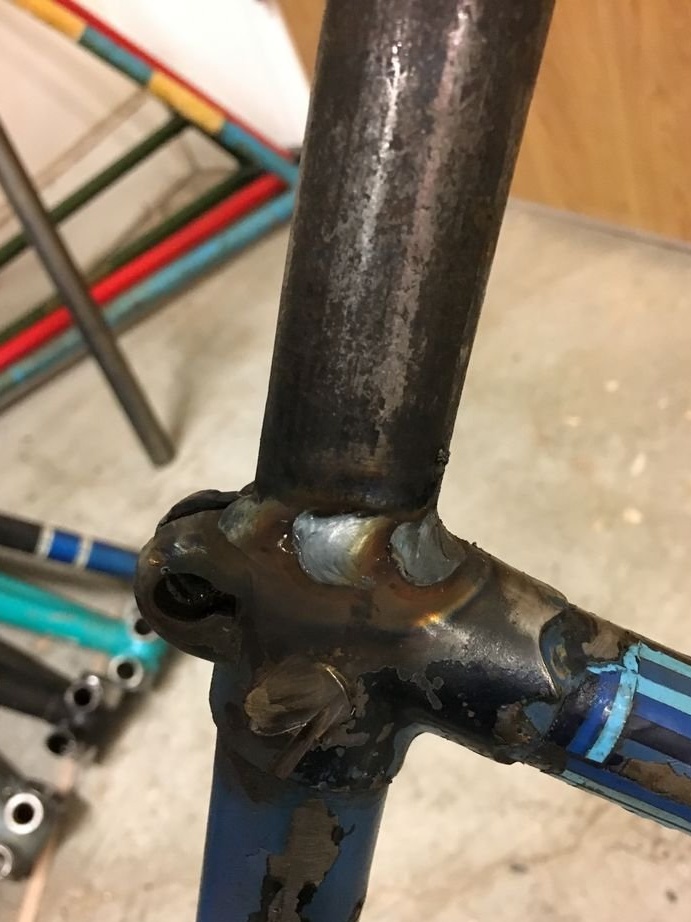
There are two main areas for welding. First you need to weld the main pipe to each of the seat tubes. The master left these pipes long so that they could later be cut to the same length. To perform this work, the master used the type of MIG welding, because this type is the fastest, and the pipe that had to be welded to the saddle tubes is thick and easily welded. If you want to dream, TIG welding is likely to look a lot better here.
The second spot for welding is the pipe between the lower brackets. A 32 mm tube passes very well through this area. Most bicycle frames have a small gap, but the master was not able to straighten it out with this type of welding.
The final welds were made on the bottom square tube. The master also welded two pieces of a square profile pipe perpendicular to the rest of the rack under the frames at the ends of the rack so that the structure was held in an upright position.
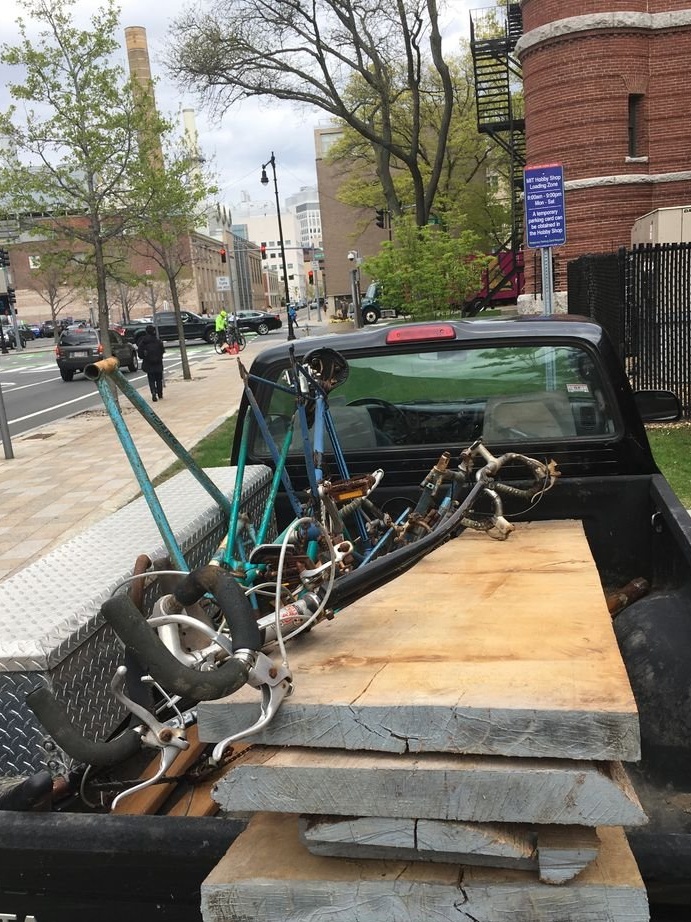
Step 6: Transporting the Product
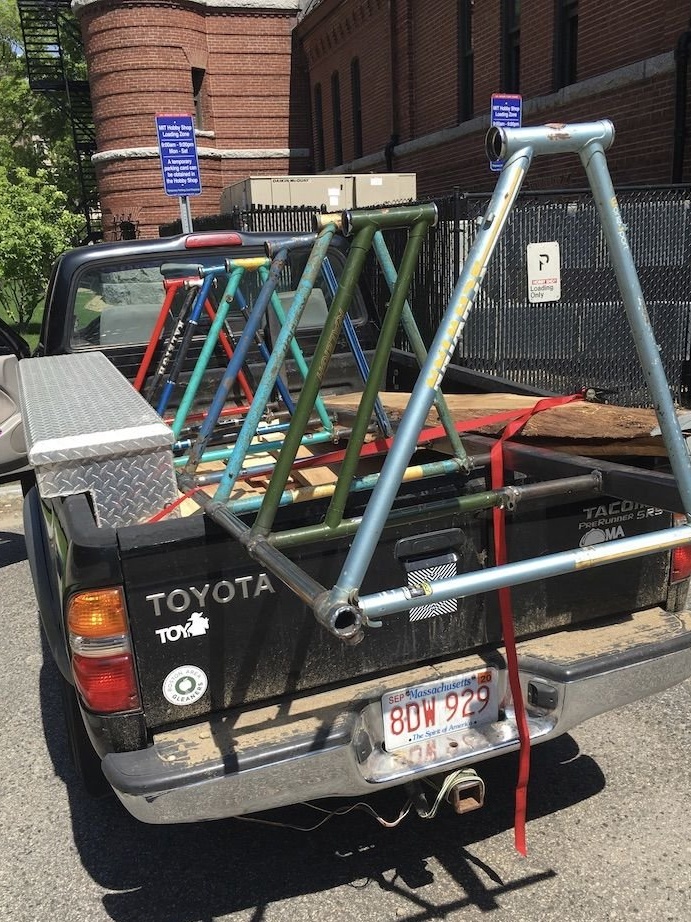
The master has a pickup available. So there were no problems with transportation.
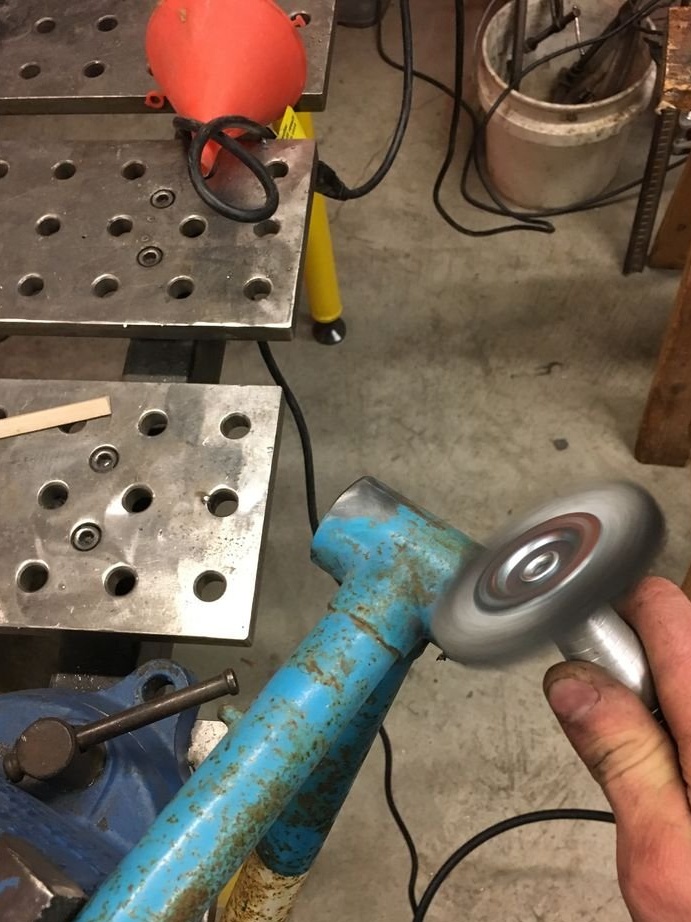
Step 7: Grinding
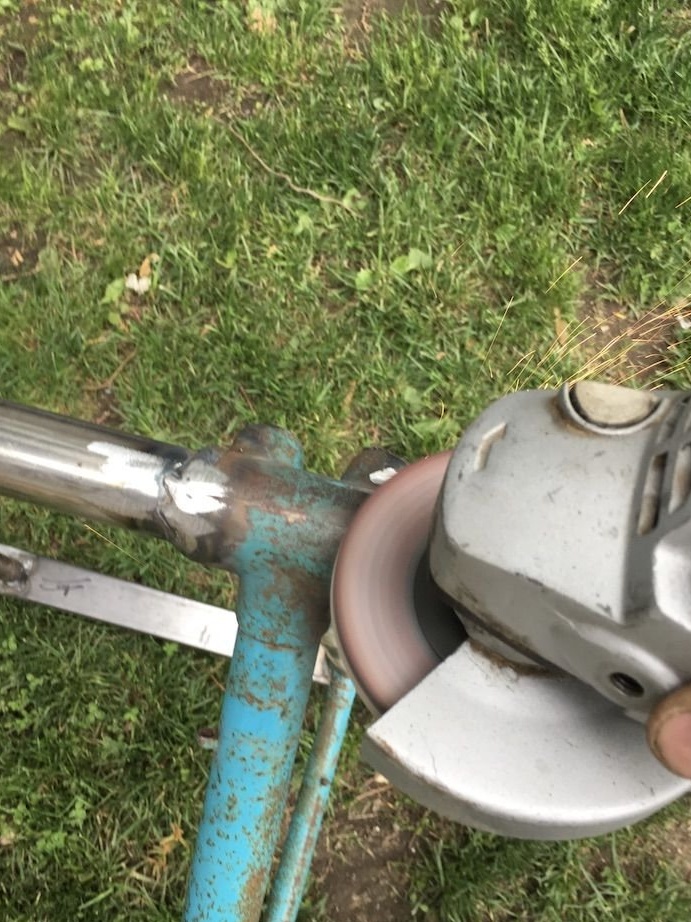
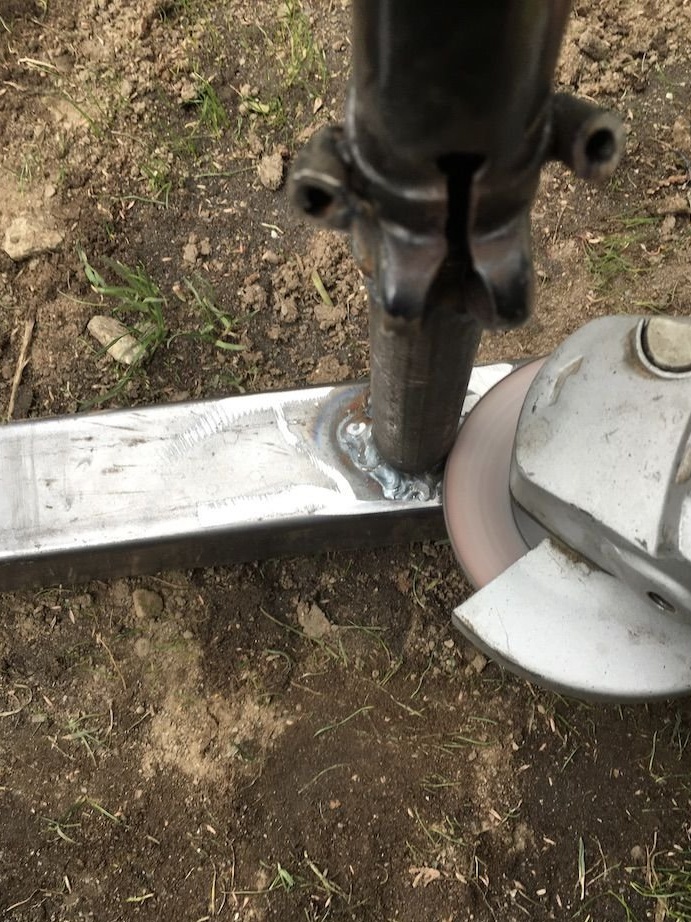
The master is new to welding, so he had to work hard to grind the welds before he could start painting.
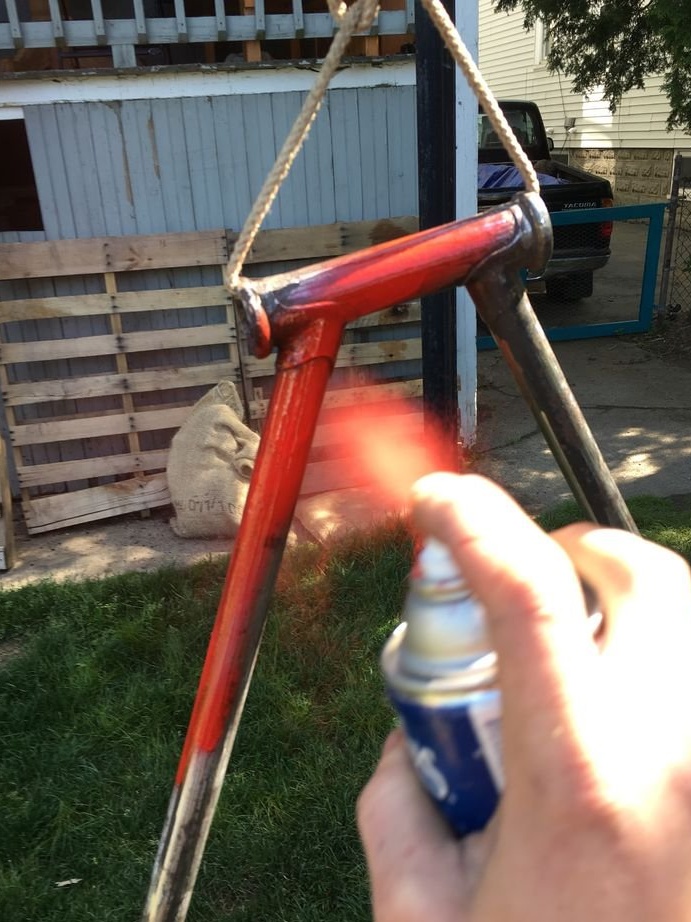
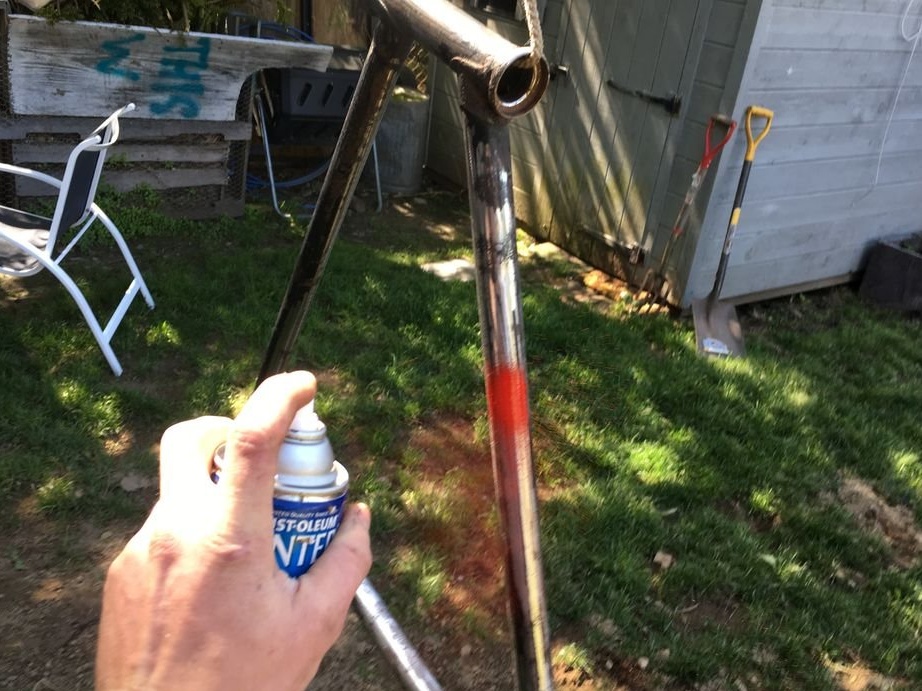
Step 8: Painting the Rack
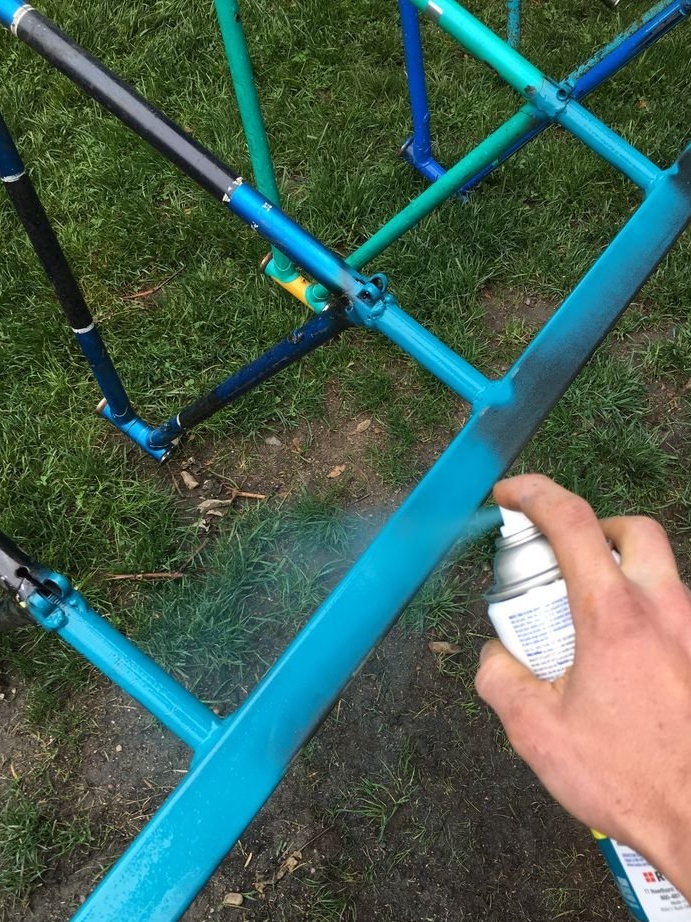
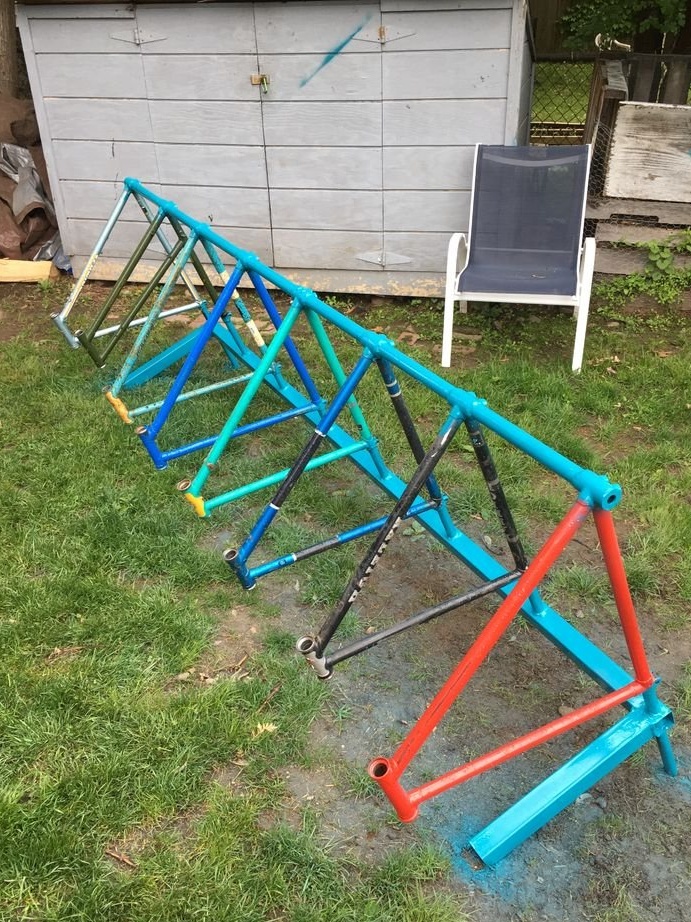
The master wanted to preserve the appearance of the old bicycle frames, so he painted them only in those areas where it was required.
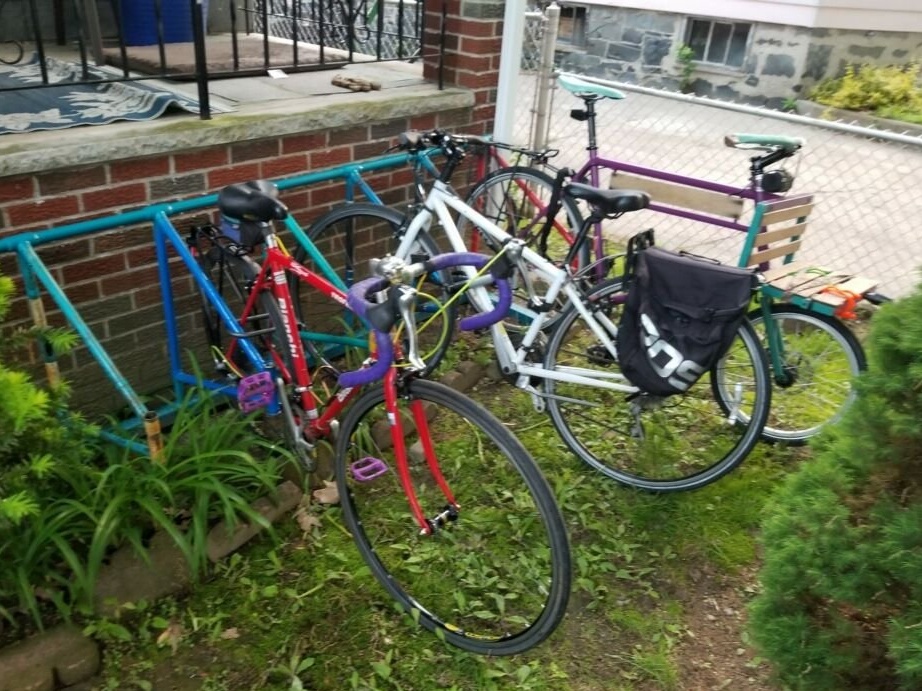
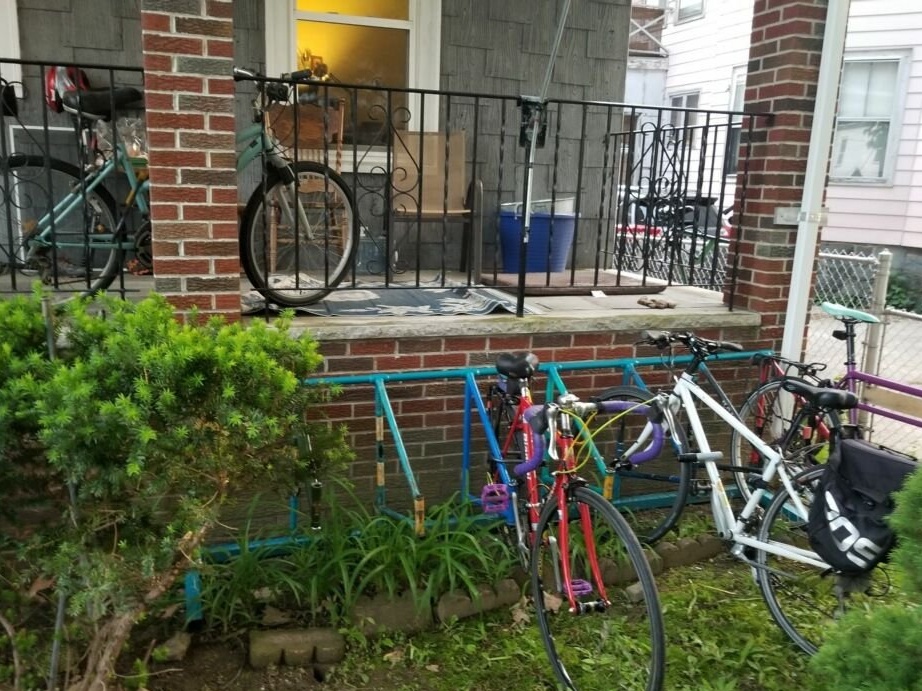
Step 9: Installing the Rack
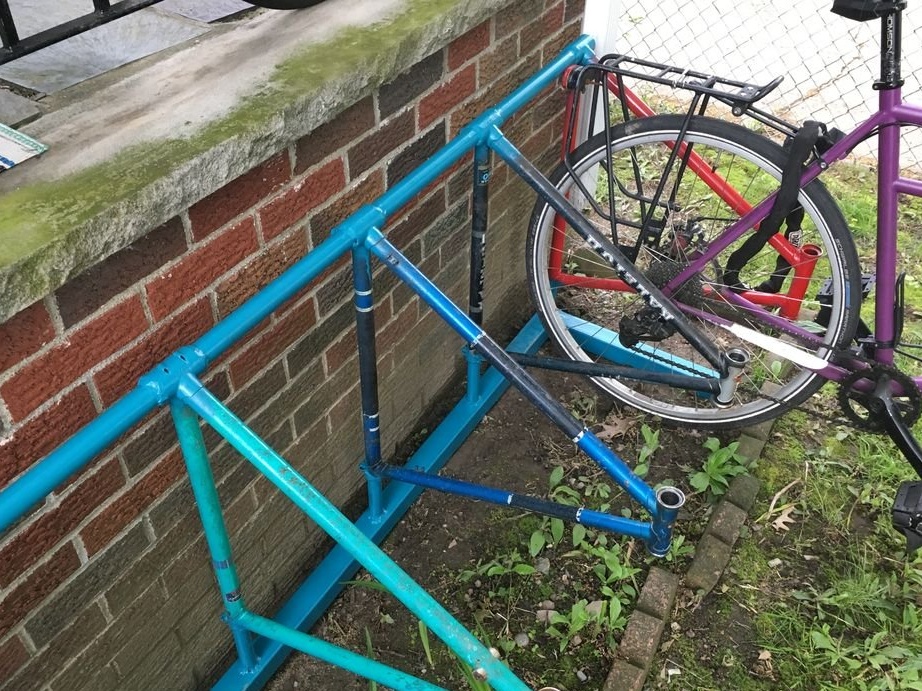
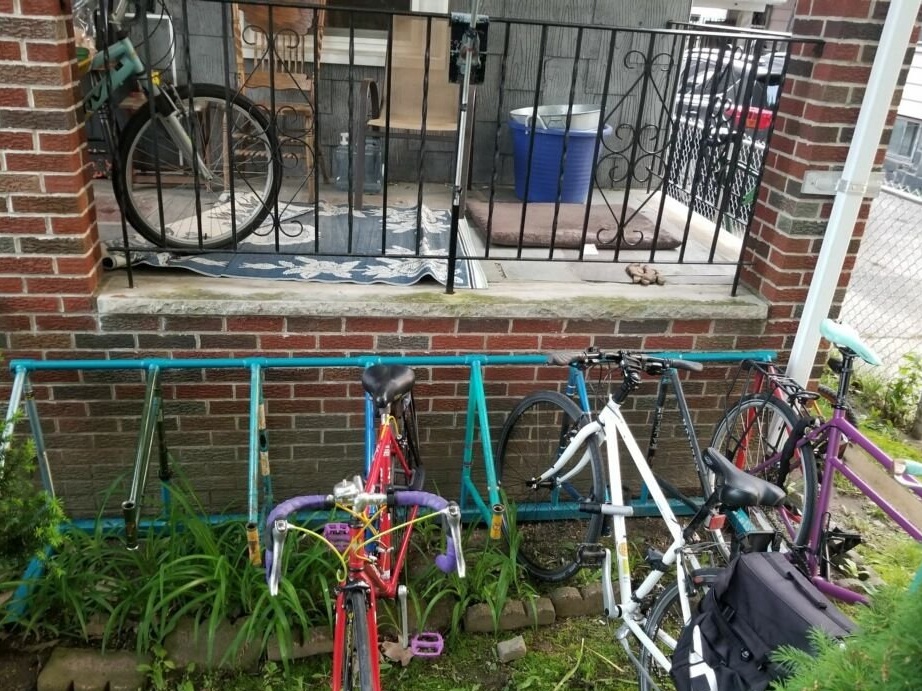
The master simply stuck two vertical pipes passing through the lower support into the ground. Since the stand is located at the master in the yard, there is no need to concrete the base.