
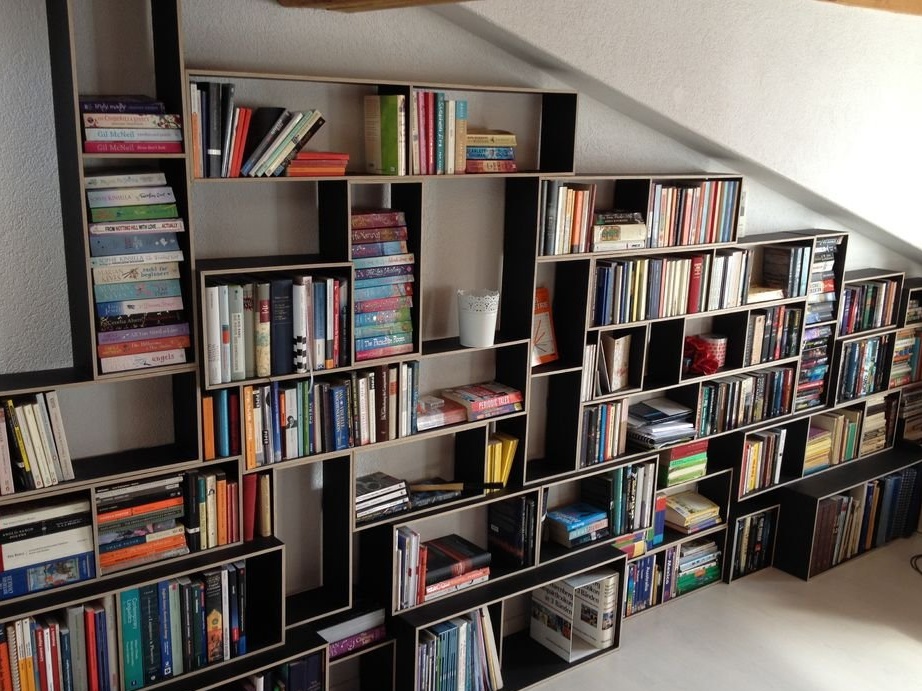

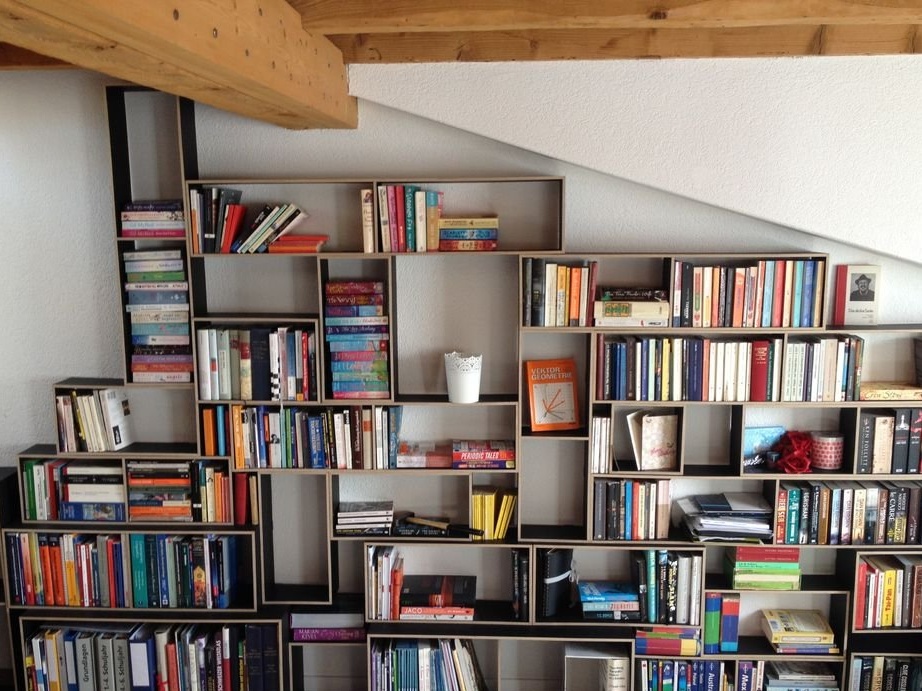
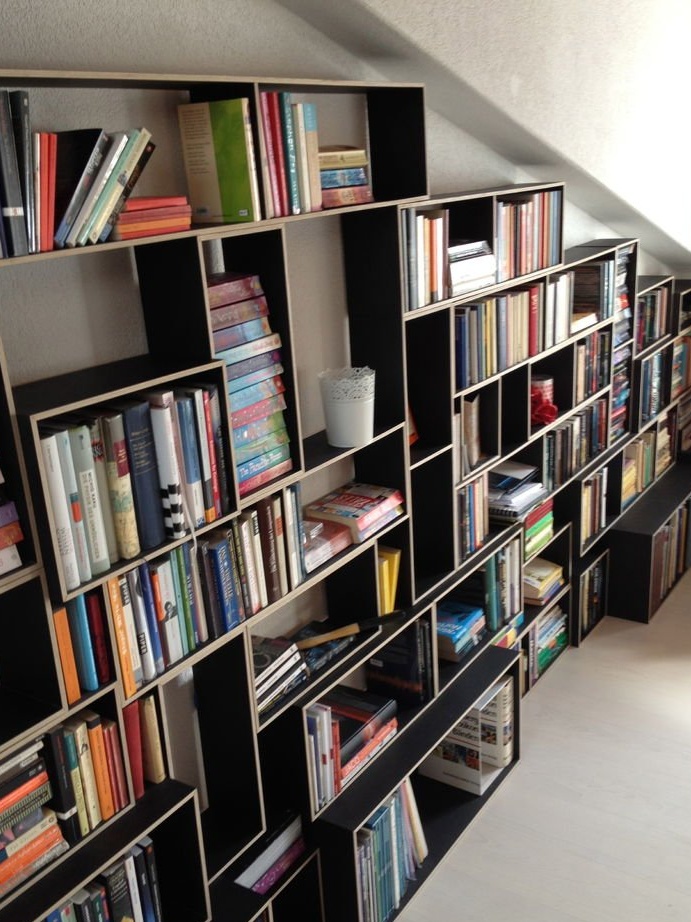
The master wanted to build a beautiful and practical book wall for a new apartment. Since the apartment is on the top floor, the ceiling is angular, and the book wall must be attached to the wall. Therefore, he decided to design it on a modular basis so that it could be easily adapted to various circumstances.
The wall has several great advantages:
- You can rearrange the modules in places when the old layout is tired
- It is easily expandable (by moving or creating more modules)
- creates a “living” wall of books (and / or other things)
- The modules are very light and easy to move, and they take up very little space (for example, in a van)
Step 1: Design
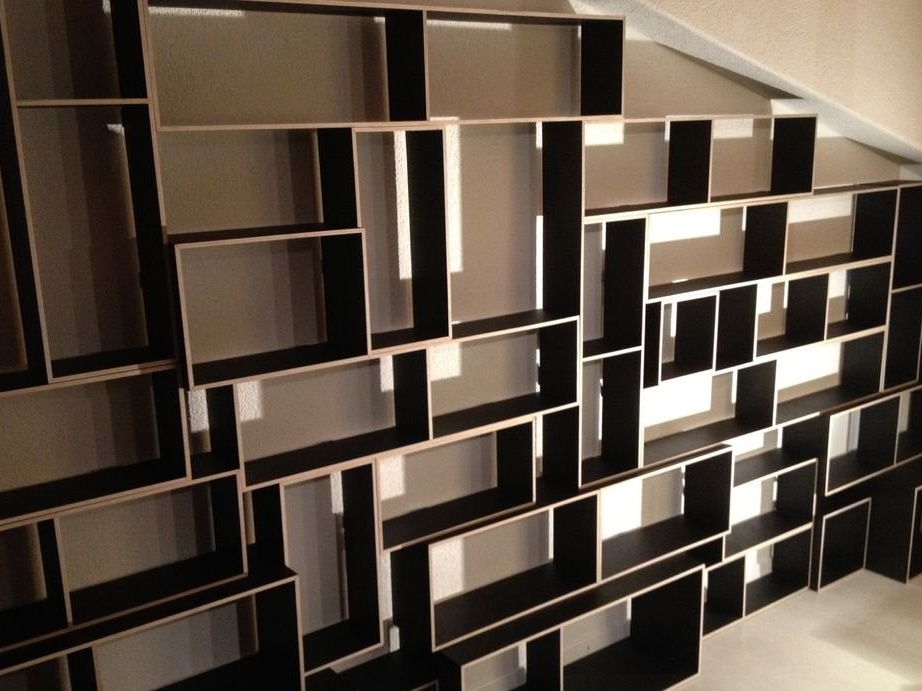


Modules come in different sizes (square or rectangular).
The width in each case is multiplied by the height (in this case, up to 5: 1), so that the modules can be expanded. There are 3 different module heights for placing paperback books, bindings, large books and so on. Different sizes of books / folders also require different depths for the modules, which gives a really good view of the entire book wall.
Longer modules (3: 1 or more) need a middle panel to evenly distribute the weight of the modules above them.
To combine all these different sizes together, the master had to build 2 individual modules that have different sizes (for height adjustment), but apart from that, everything is standardized.
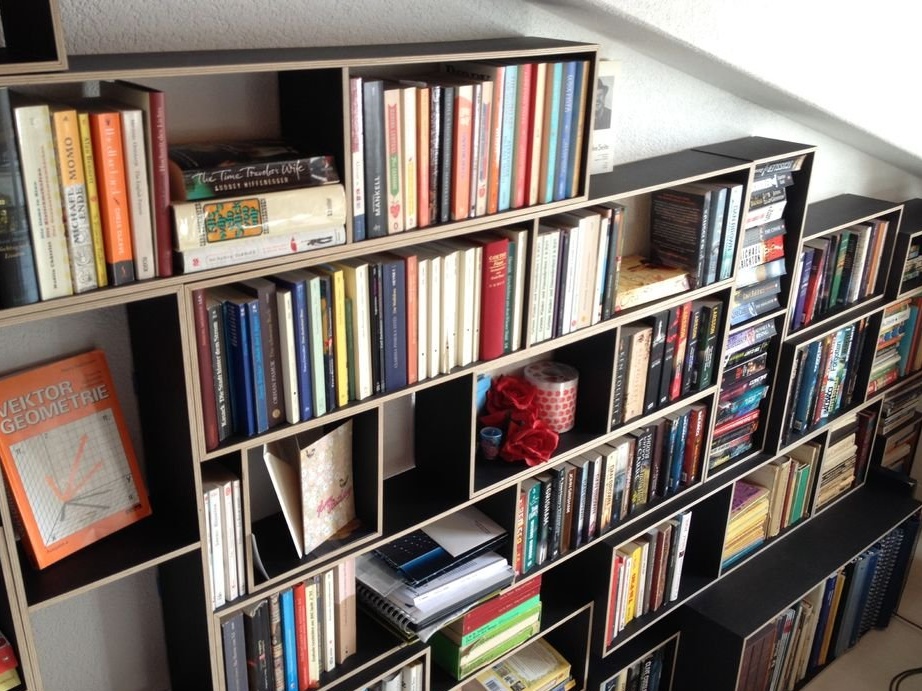
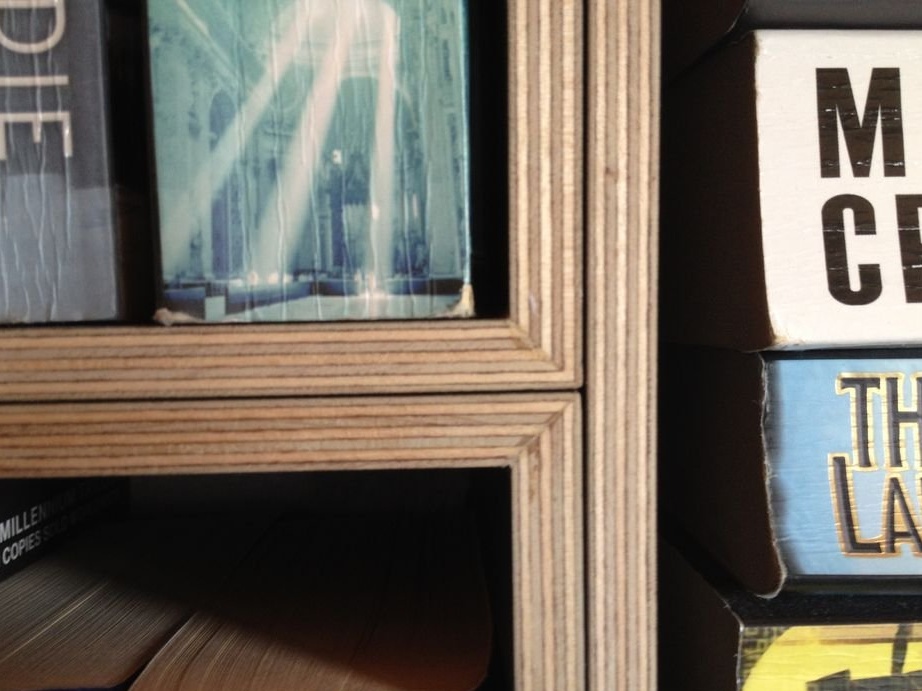
He wanted to assemble the modules as discreetly and smoothly as possible. Equipment is almost not required, since all joints are glued. Jointed seams provide a very elegant design (although it is more difficult to build) and make the whole design very simple.
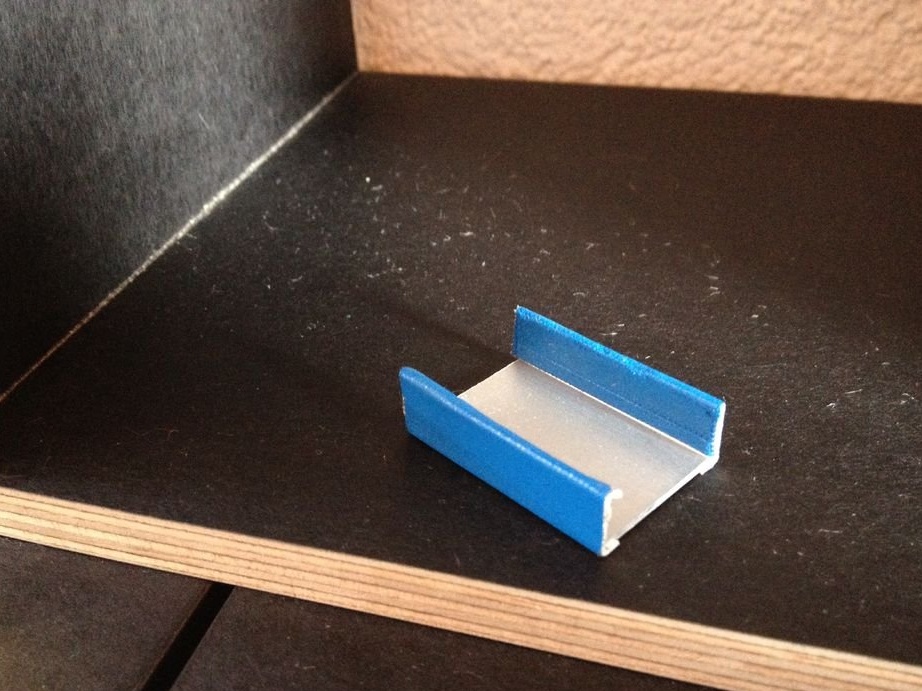
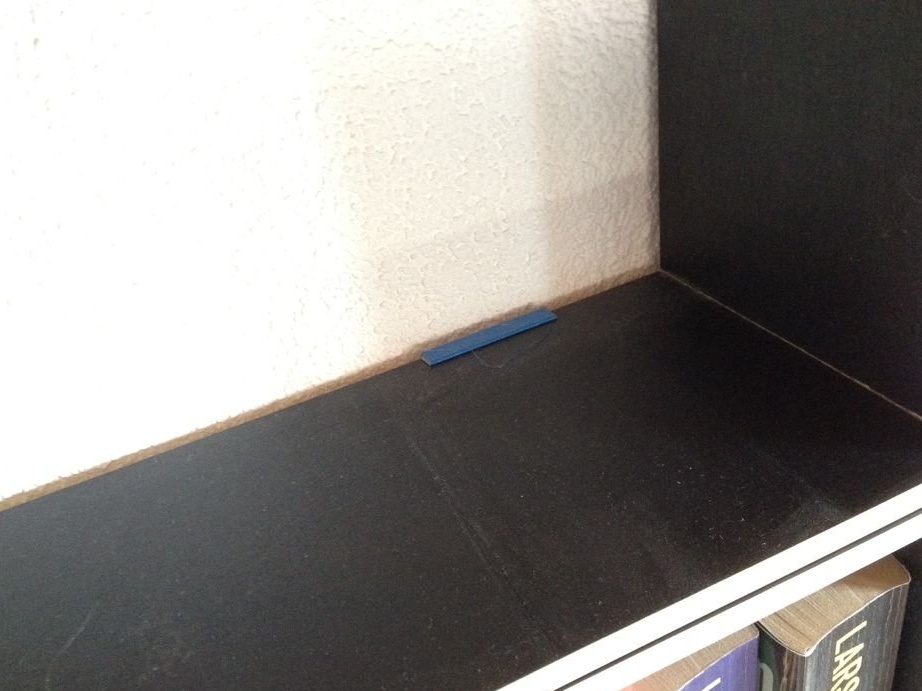
To assemble the entire bookshelf, aluminum clips were made from a U-profile. Sheathed with textile tape, they fasten the modules, making the entire book wall stable and durable.
Step 2: Materials and Tools
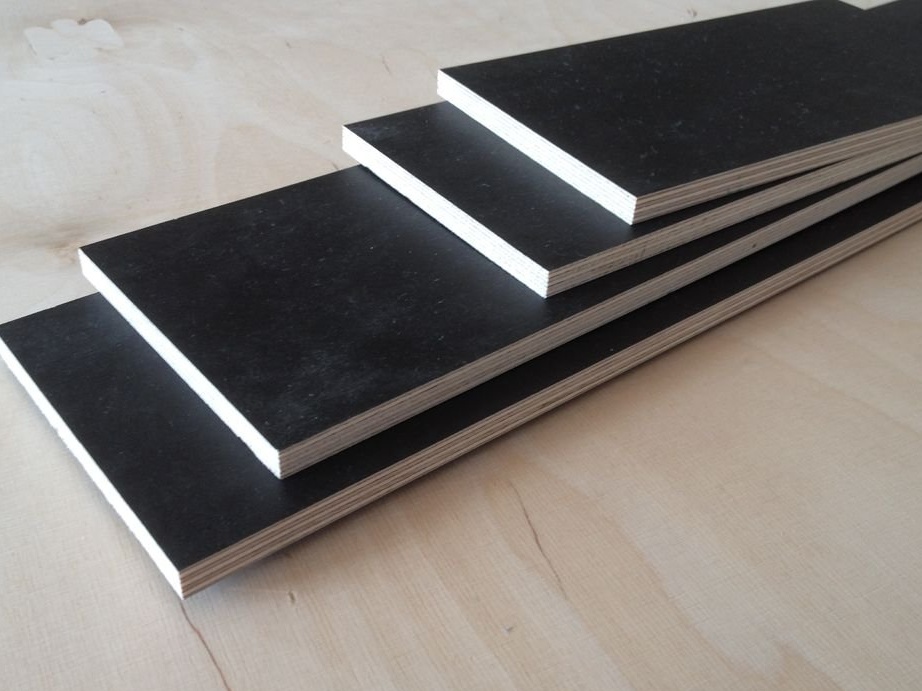

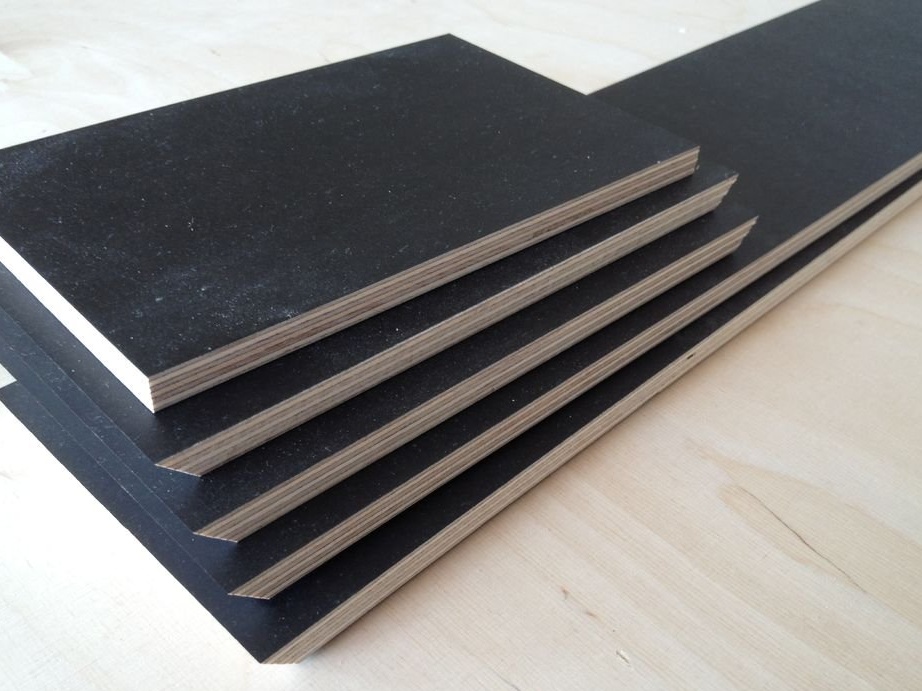
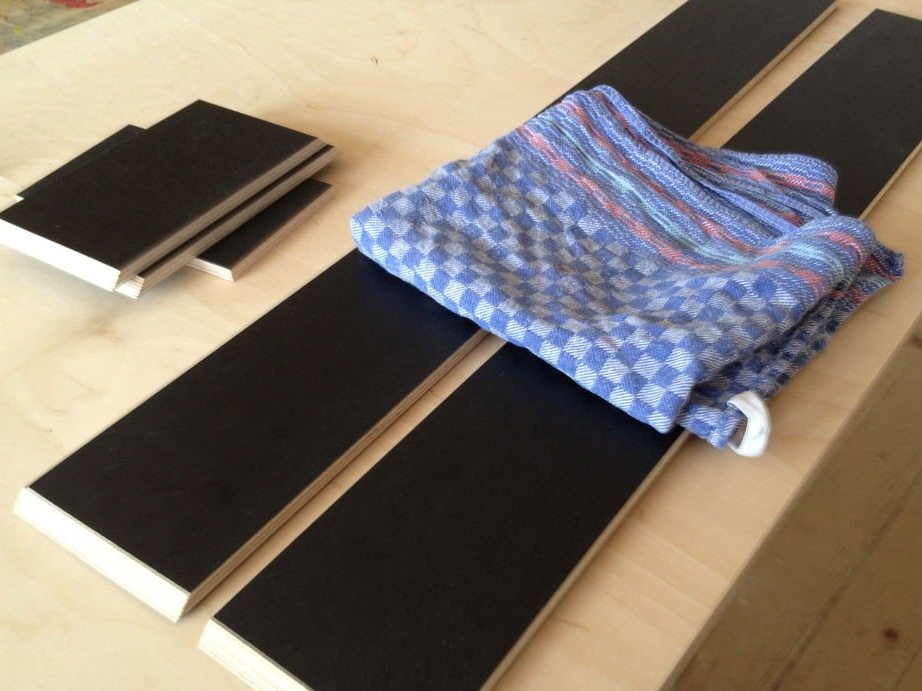
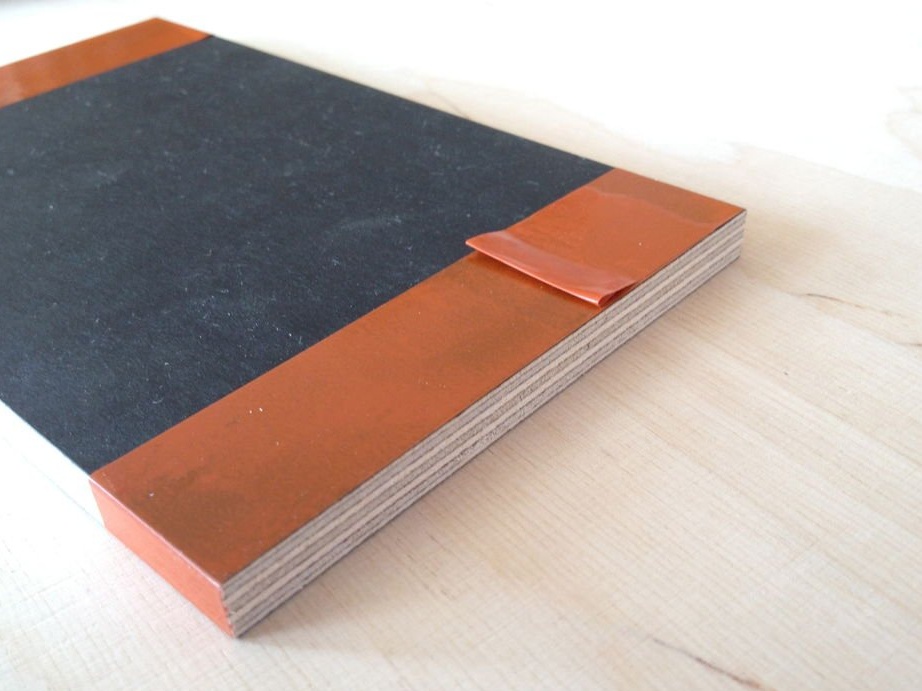
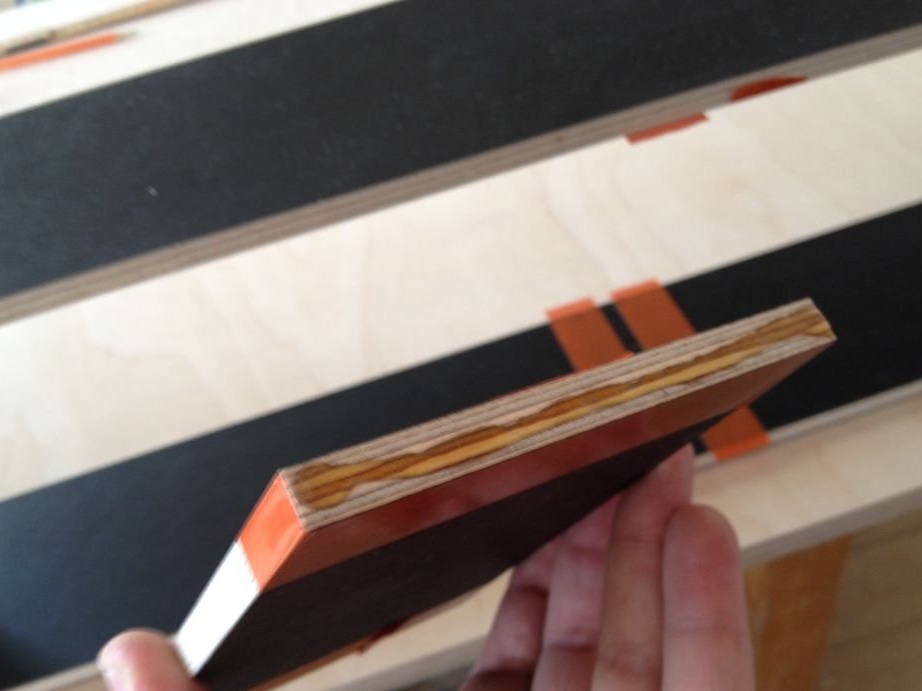
For the book wall, the master chose birch plywood coated with 9 mm phenolic resin. This coated plywood has a very durable and pleasant looking surface, but it is quite expensive. The advantage of plywood is that it is made of a rather thin material (9 mm) and there is no need for coating.
Since the master does not have equipment for cutting large boards, he ordered the material in the form of strips of 3 different sizes of depth. Clean and beautiful cuts are of great importance, since errors are visible from the edges.
Materials:
- plywood strips (width depending on sizes for modules)
- Aluminum U-profile (for the manufacture of clamps)
- Felt for lower modules
Instruments:
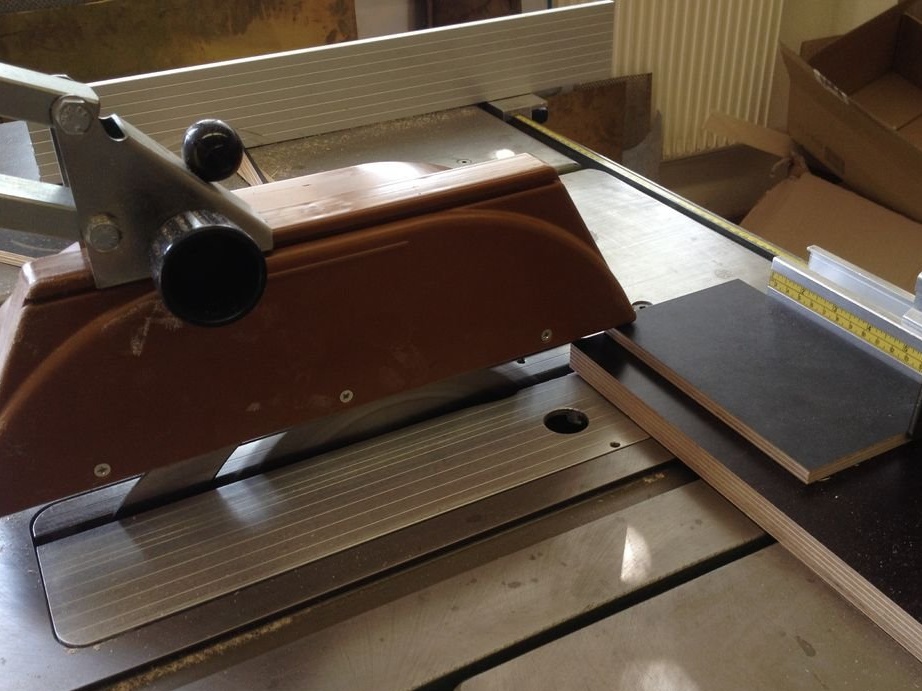
- Table saw with the ability to tilt the saw blade by 45 degrees
- square
- roulette
- a lot of abrasive paper
- very well sharpened chisel
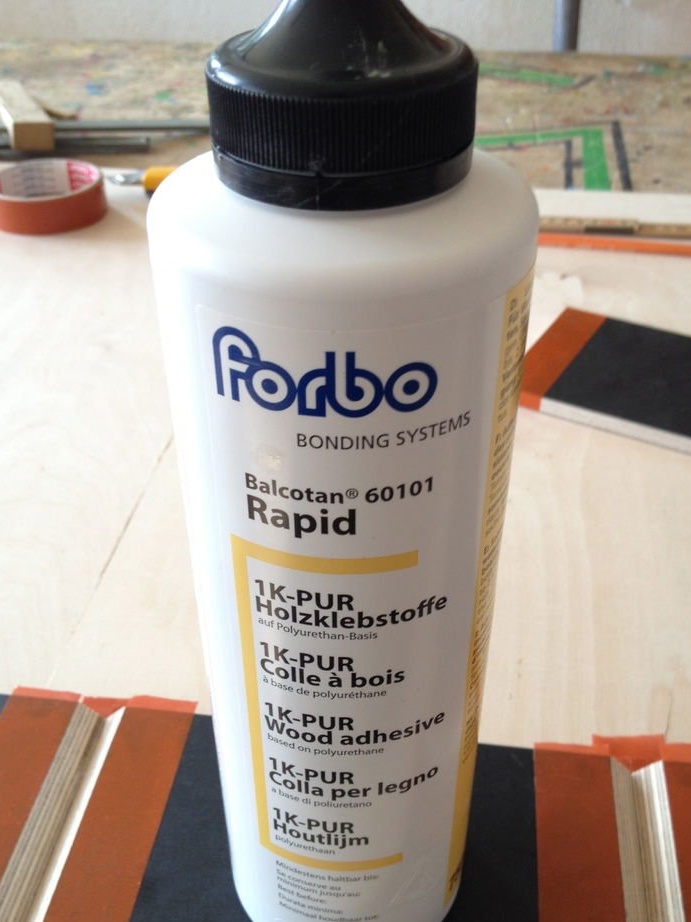
- 1-K PUR glue for wood (it must be very strong, since the surface of the joints is quite small)
- Lots of plastic duct tape
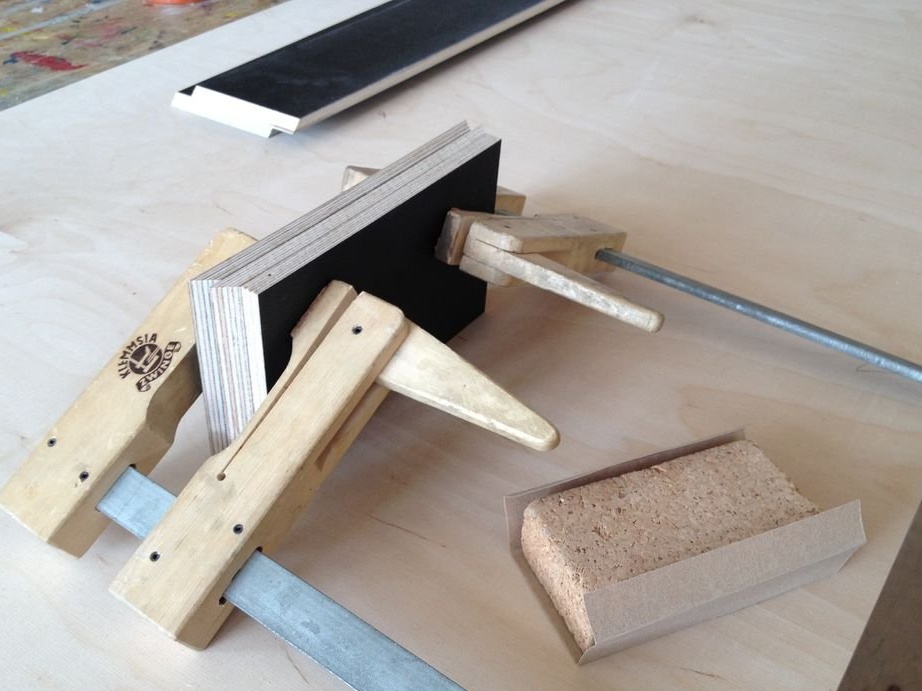
Step 3: Cutting
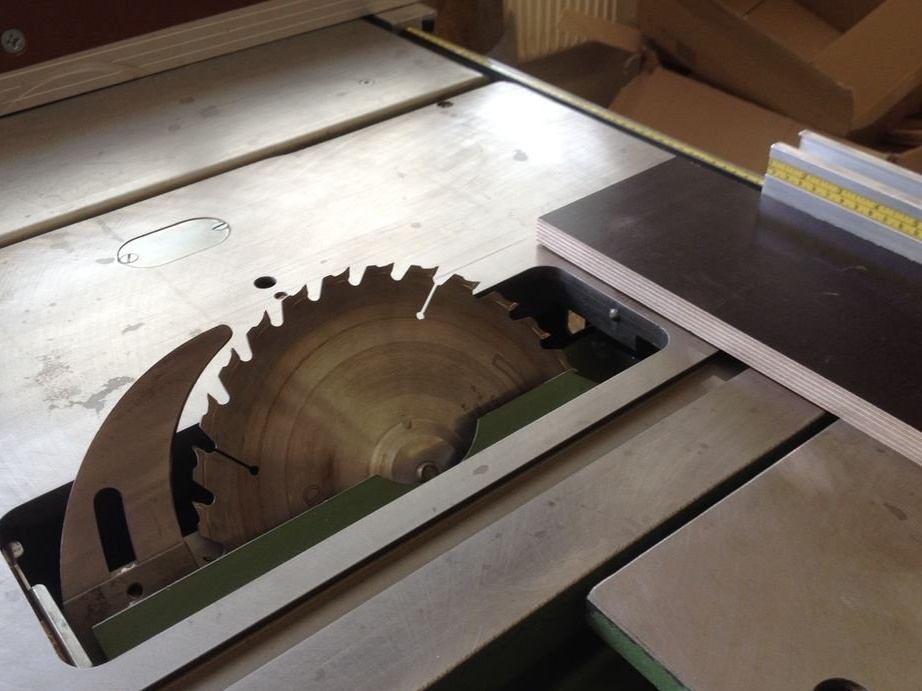
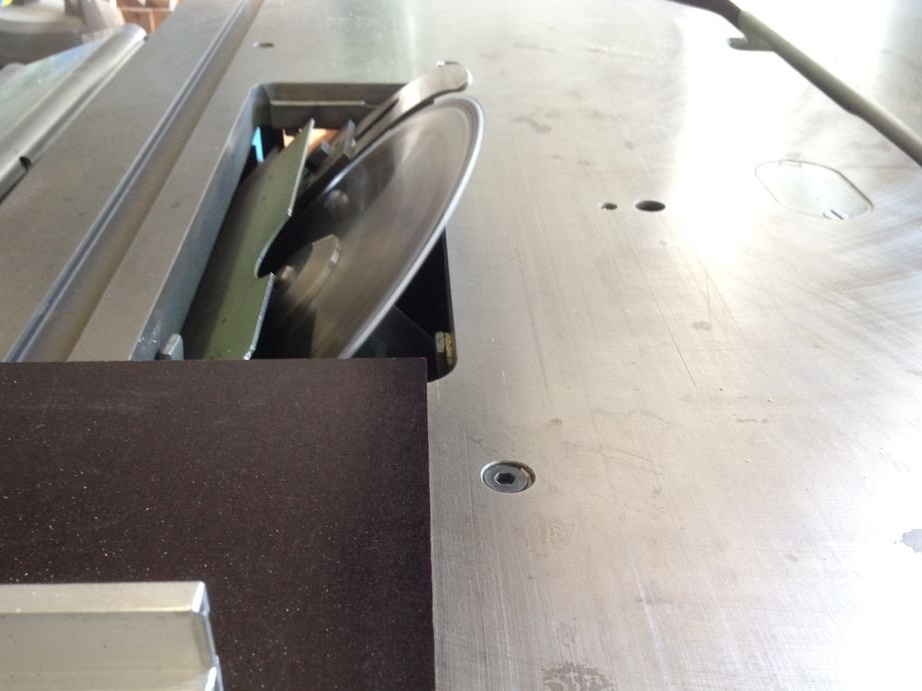

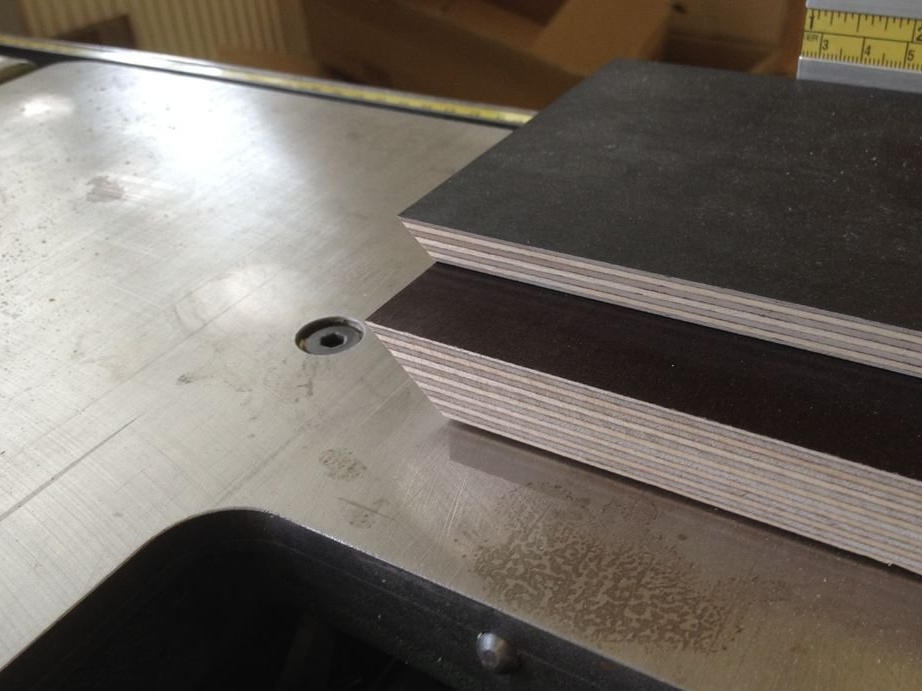
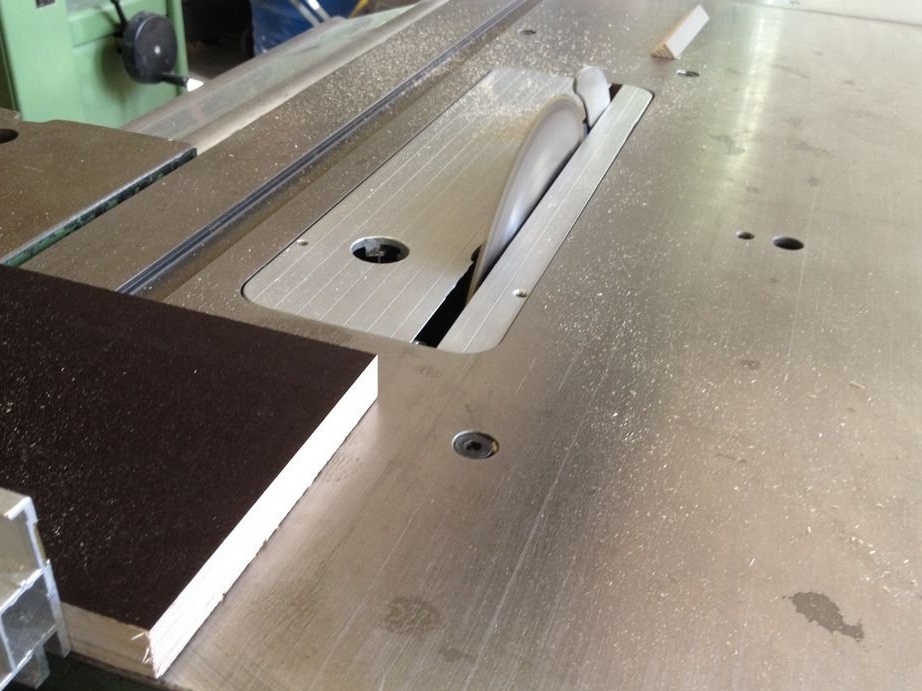
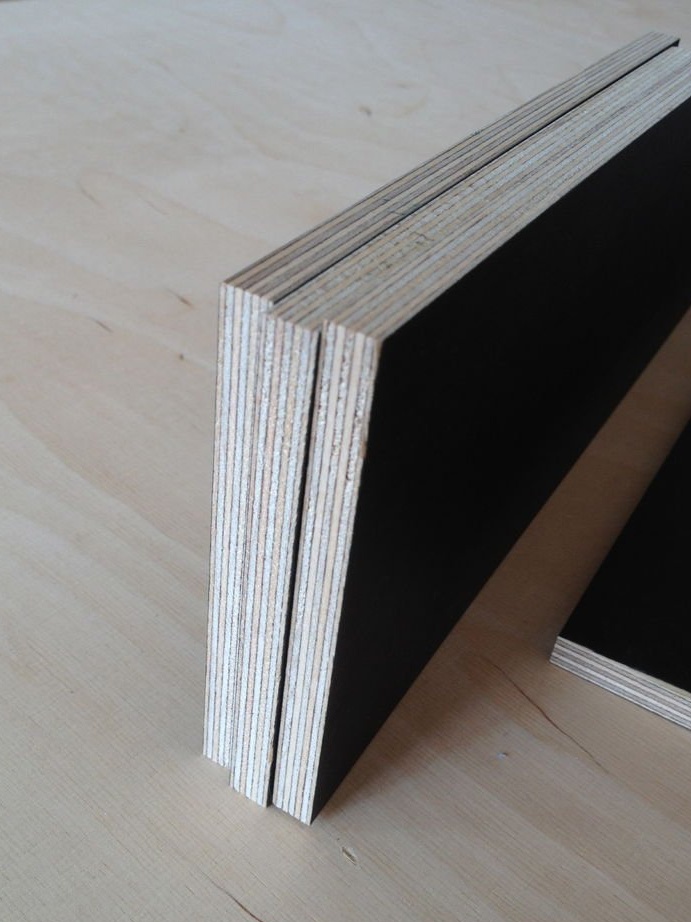
The first step is to cut the plywood strips to the required length. To get very clean cuts, the master uses a piece of thick plywood as a base on which to cut the butt joints (and even the joints for the middle panel). Thus, it does not work chips at the edges.
It is very important to use stops so that the corresponding parts have the same length.
The angle of the saw blade is crucial, as deviation even half a degree can lead to improper fit of the joints. To do this, the master tests the cut on the pieces of wood to very carefully check the angle, until the details fit perfectly.
Step 4: Grinding and Preparing for Assembly


The master wanted to build a beautiful and practical book wall for a new apartment. Since the apartment is on the top floor, the ceiling is angular, and the book wall must be attached to the wall. Therefore, he decided to design it on a modular basis so that it could be easily adapted to various circumstances.
The wall has several great advantages:
- You can rearrange the modules in places when the old layout is tired
- It is easily expandable (by moving or creating more modules)
- creates a “living” wall of books (and / or other things)
- The modules are very light and easy to move, and they take up very little space (for example, in a van)
Step 5: Build
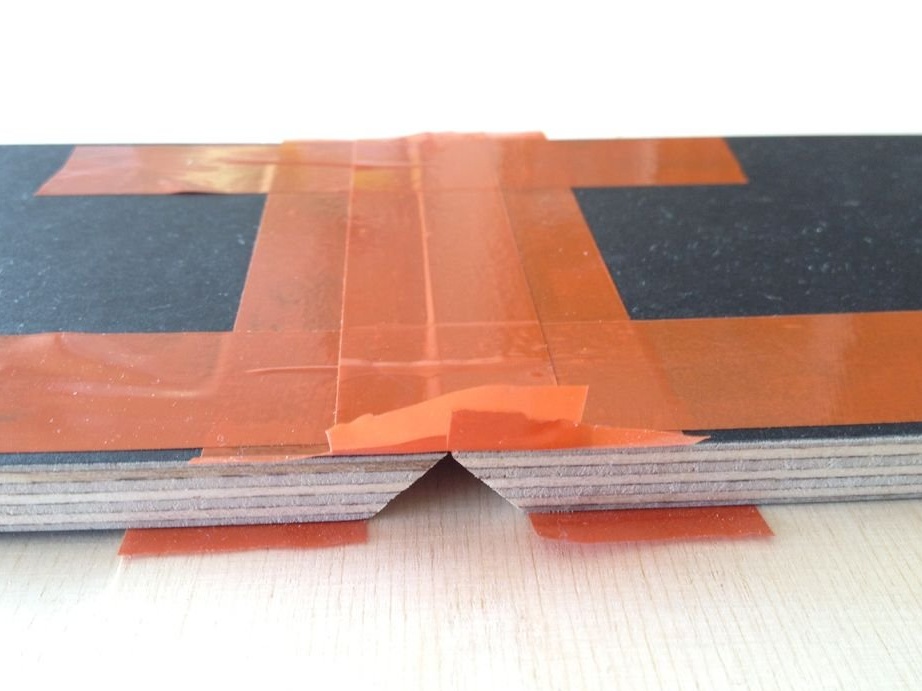
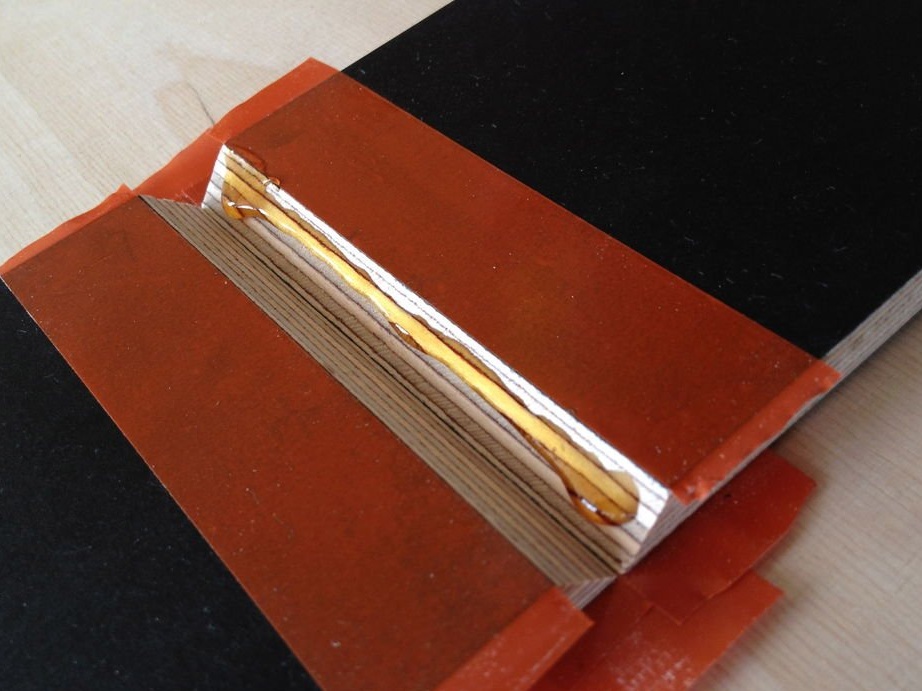
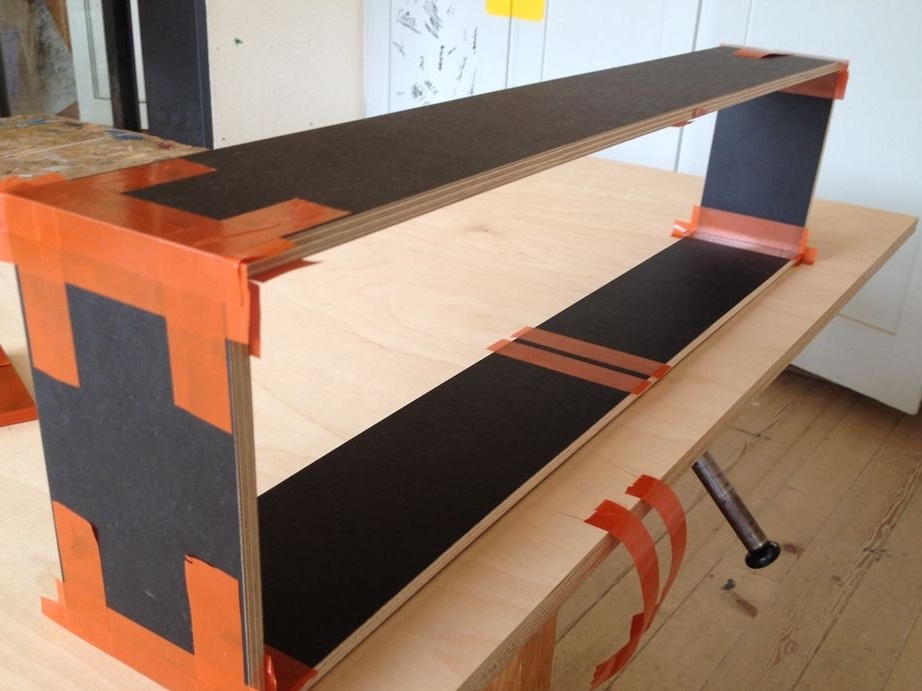
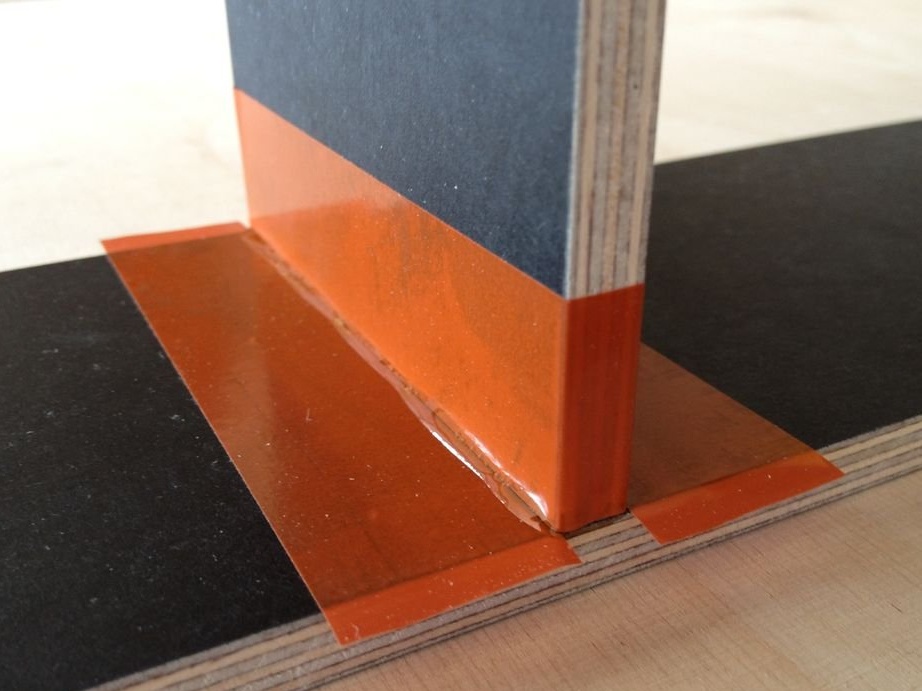
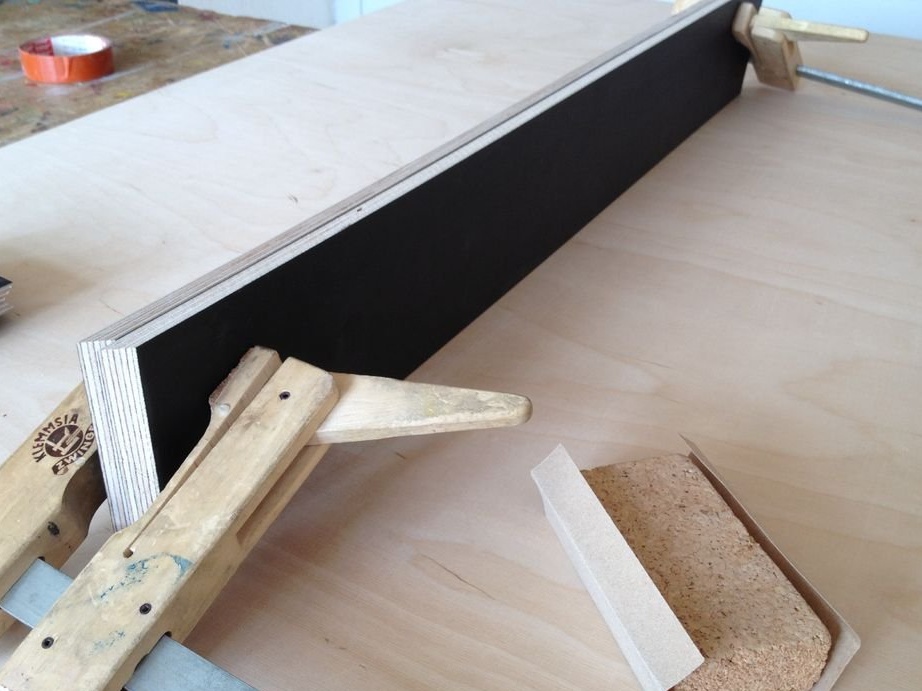
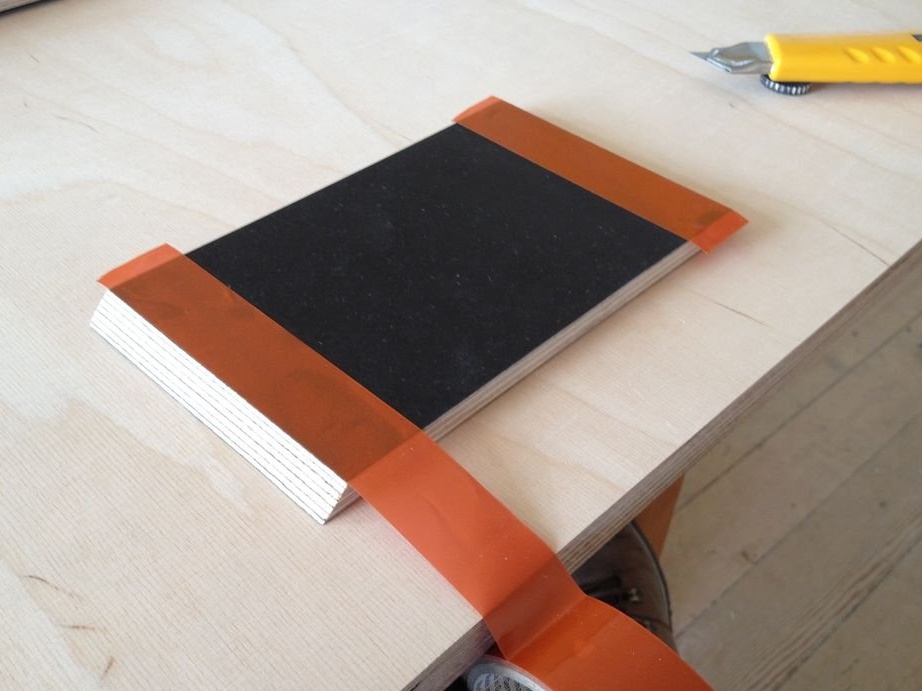
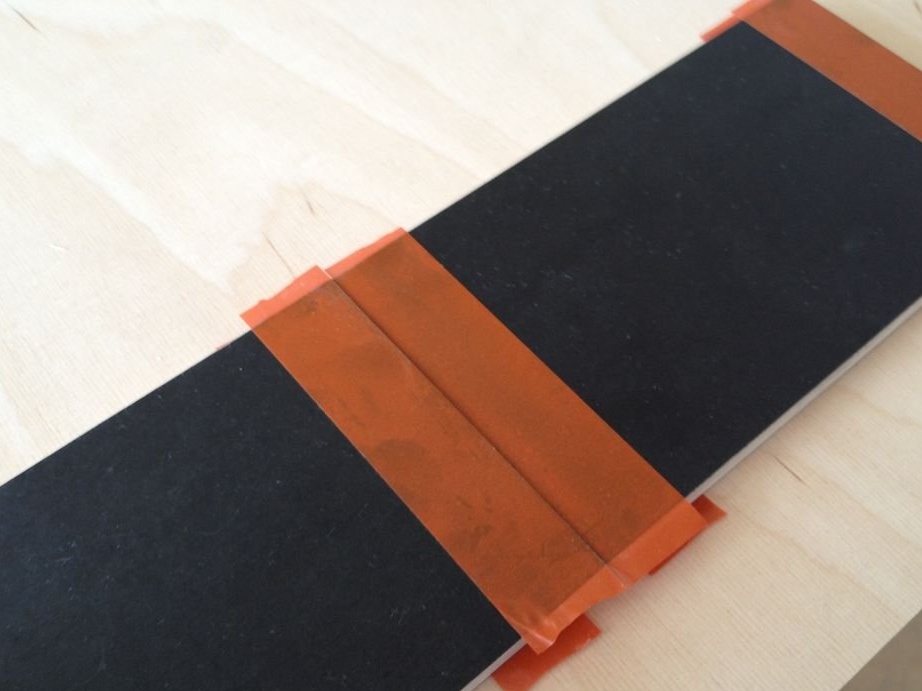
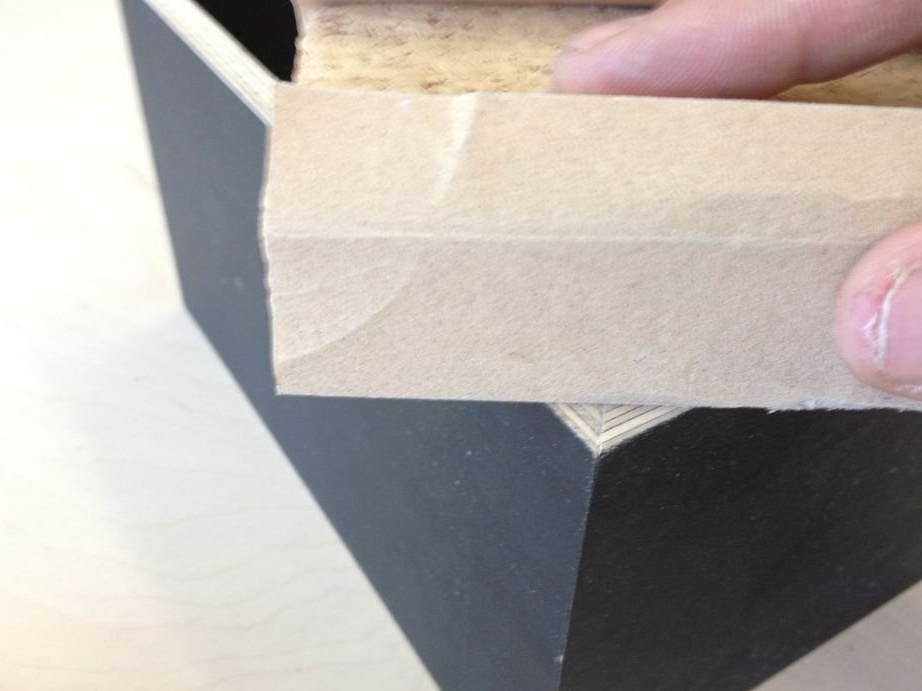
Now it's time to assemble the parts using plastic tape. Place the parts in the correct order on a flat and clean surface and glue them together on the outside. It is very important that the outer edges are perfectly aligned to fit the butt joints. When everything is glued on the outside, the product must be turned upside down. Now you can “fold” the entire module and check if everything fits.
After this check, the master applies glue. It uses glue that expands upon curing, so it is not required much in these compounds. If there is excess glue, do not wash it. PUR glue is disgusting before curing and can be easily removed mechanically after curing.
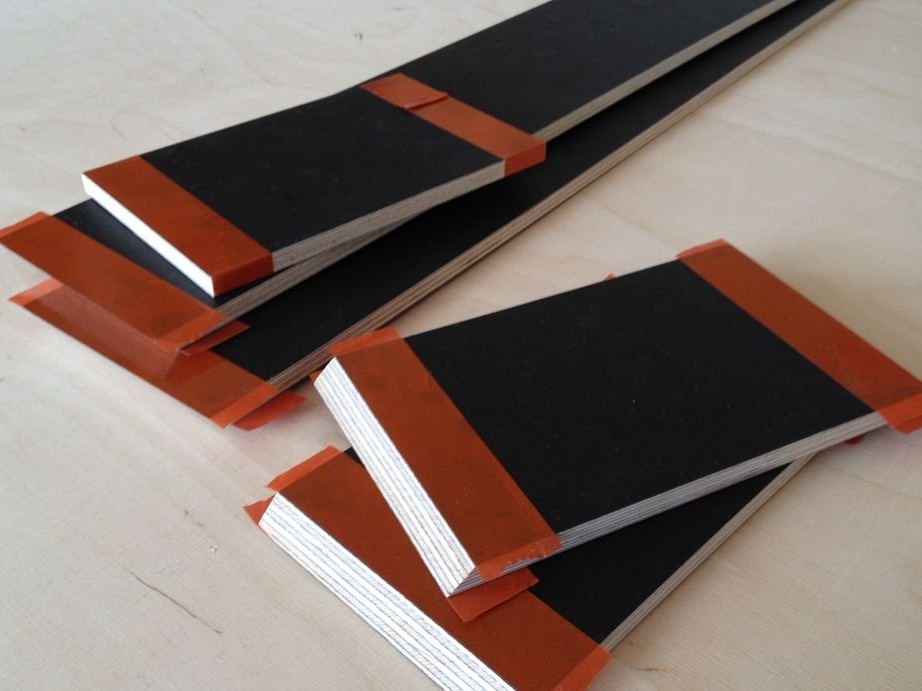
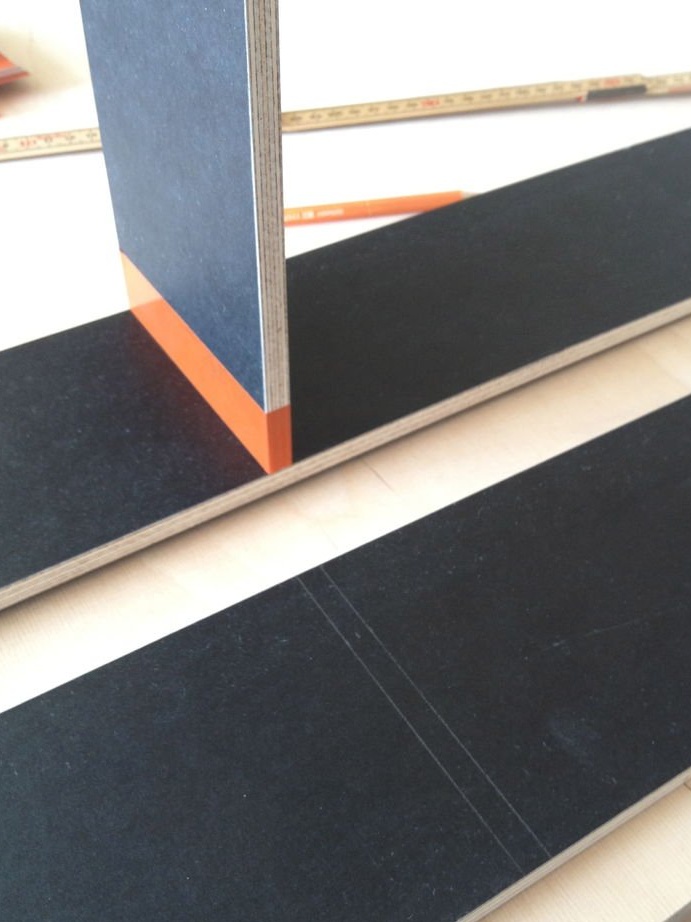
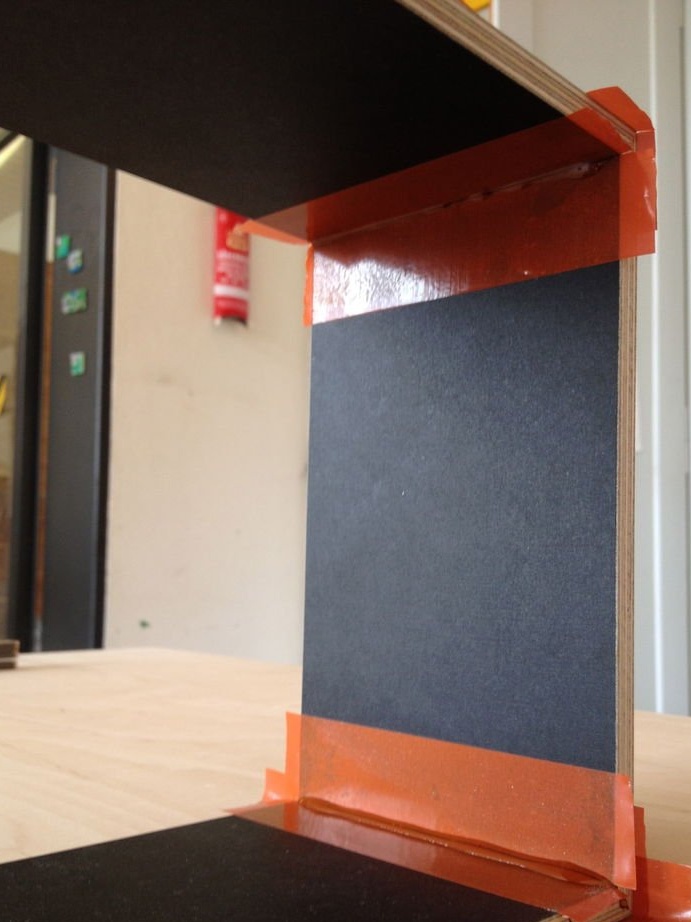
After applying the glue, the master “folds” the parts together and fixes both “open” ends with another plastic tape. Then he checks the angles with a square, because the edges can sometimes move slightly.
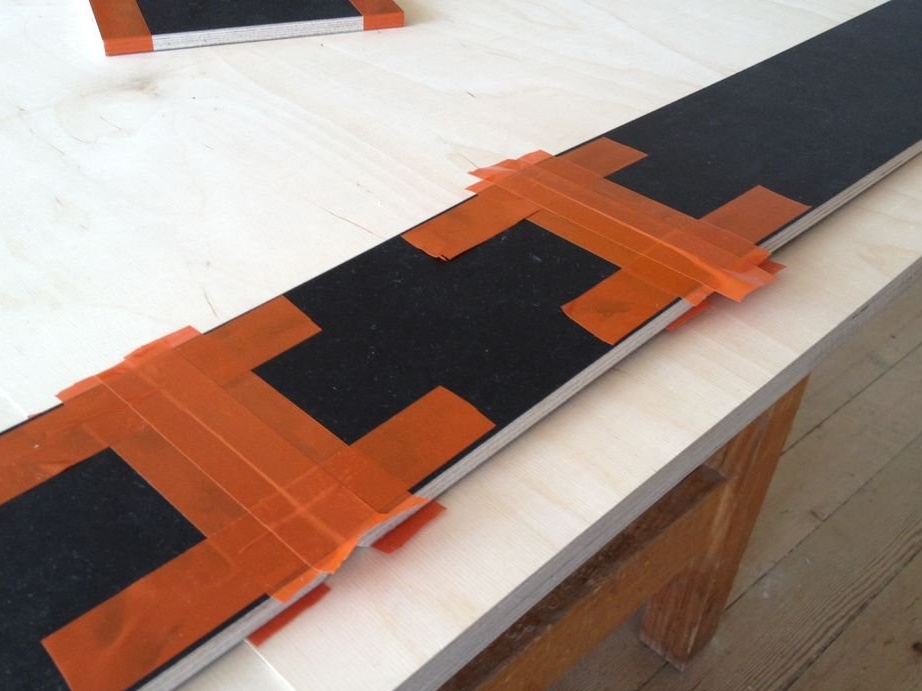
Since plastic tape is also used for the middle panel (where it is planned), it is convenient to insert this panel at this time. The wizard applies glue to the edges of the panel, stretches the module slightly and places the middle panel between them. It is easy to adjust because of the plastic tape, and to be sure, the master again checks the correctness of the angles using a square.
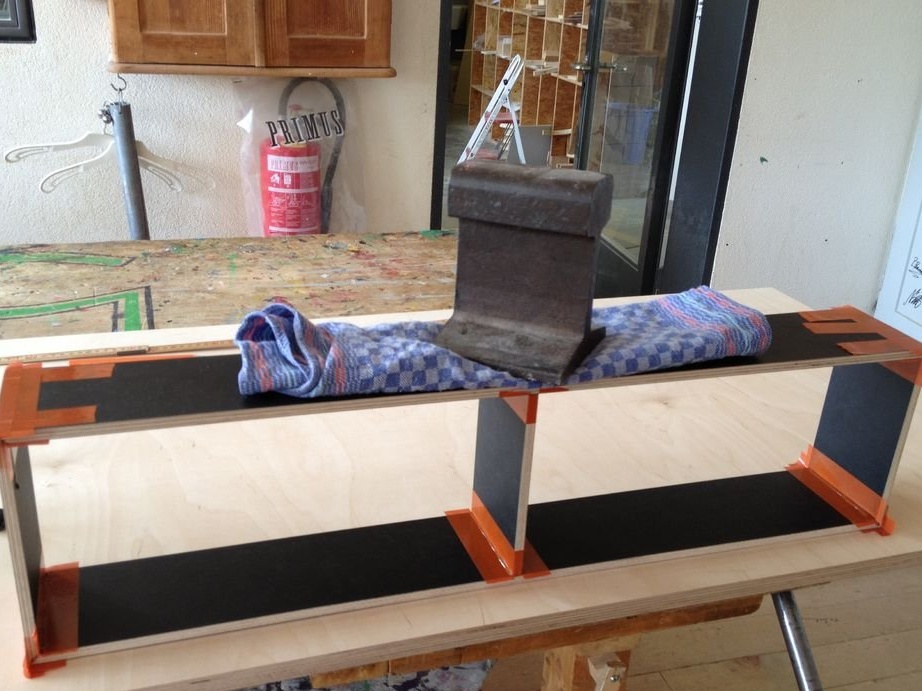
When all angles are checked, the master puts the load on the top of the module so that the middle panel receives the necessary pressure, once again checks all the angles and leaves it for 3 hours (depending on the glue).
Step 6: Final Touch

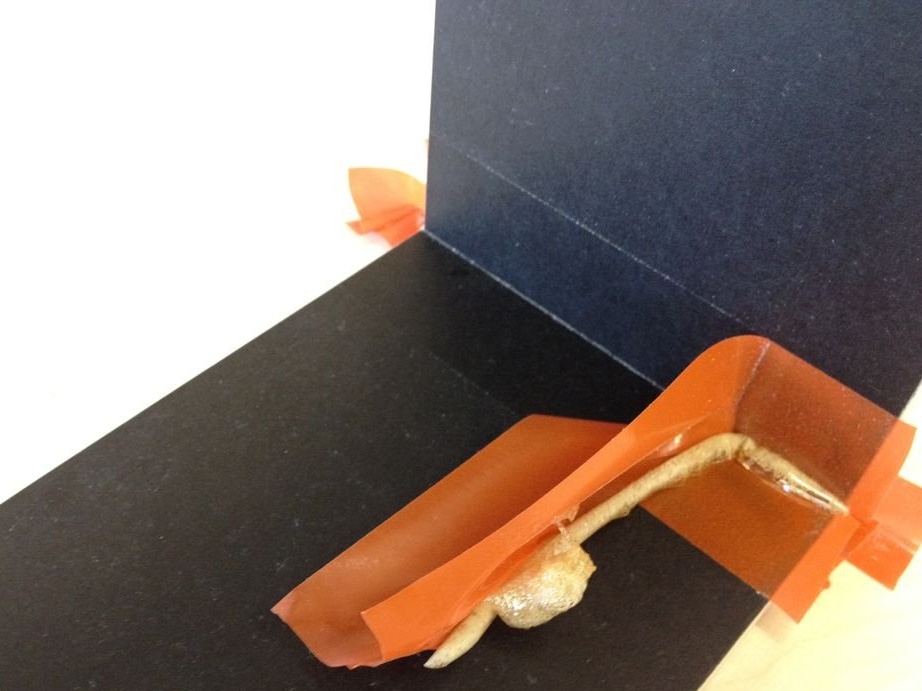
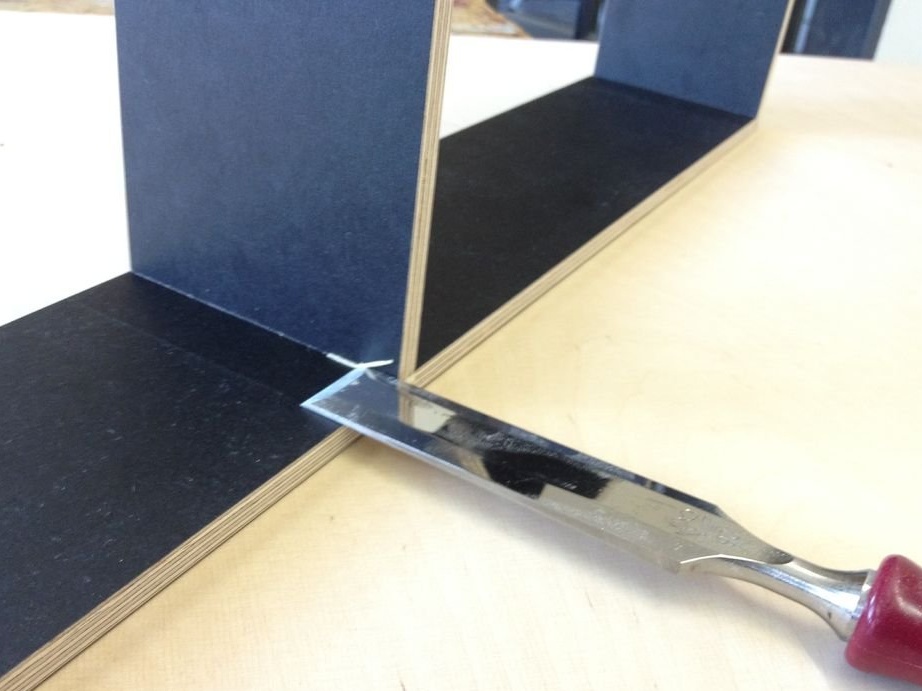

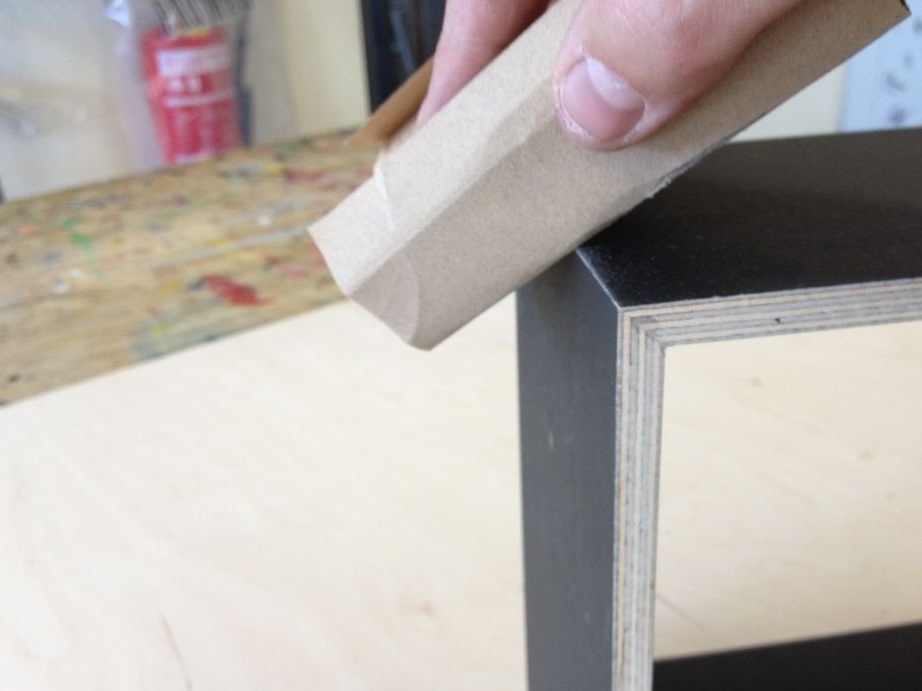

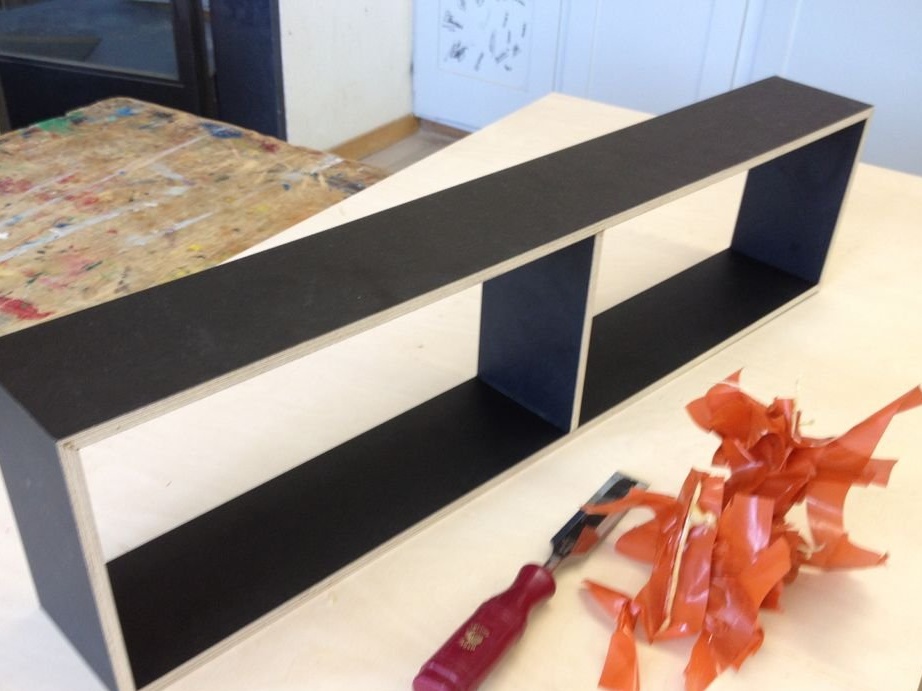
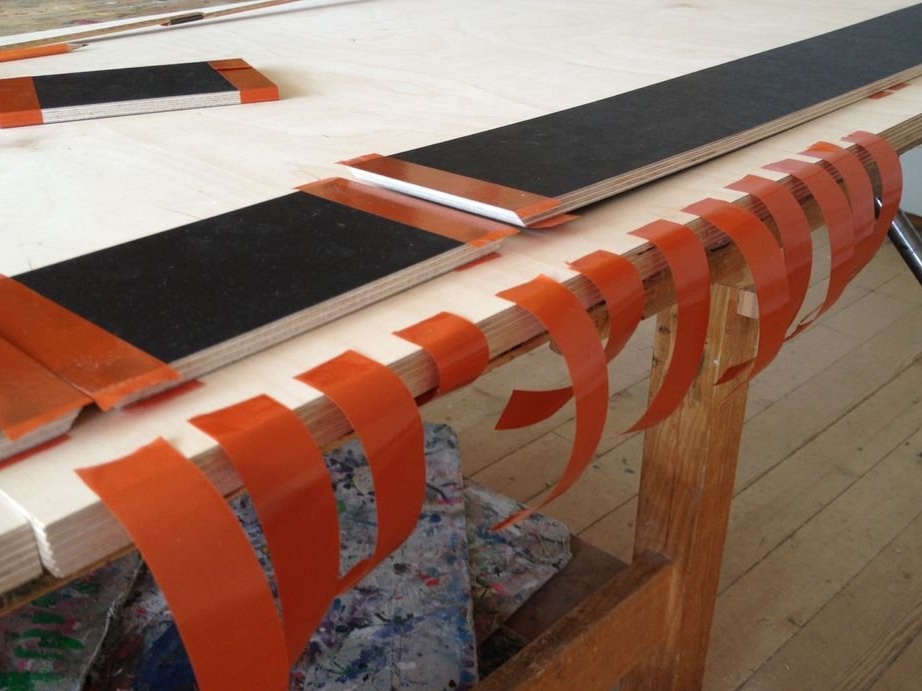
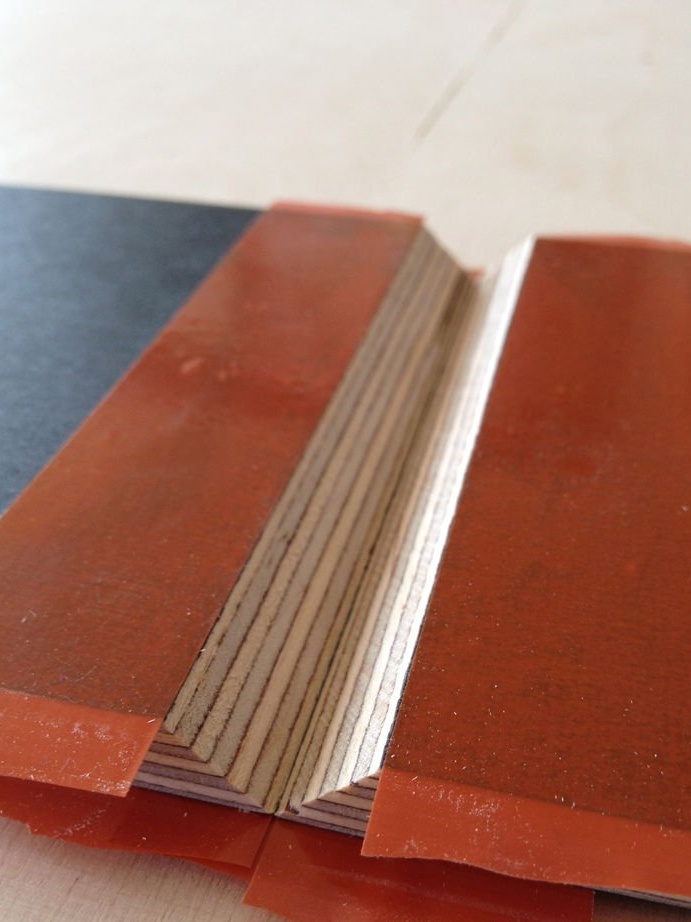
After curing, the entire plastic tape can be removed, which should save almost all of the excess glue. Remains of glue at the edges and corners must be removed very carefully, using a well-sharpened chisel. Glue marks on the edge must be removed by sanding so that the joints look good at an angle.
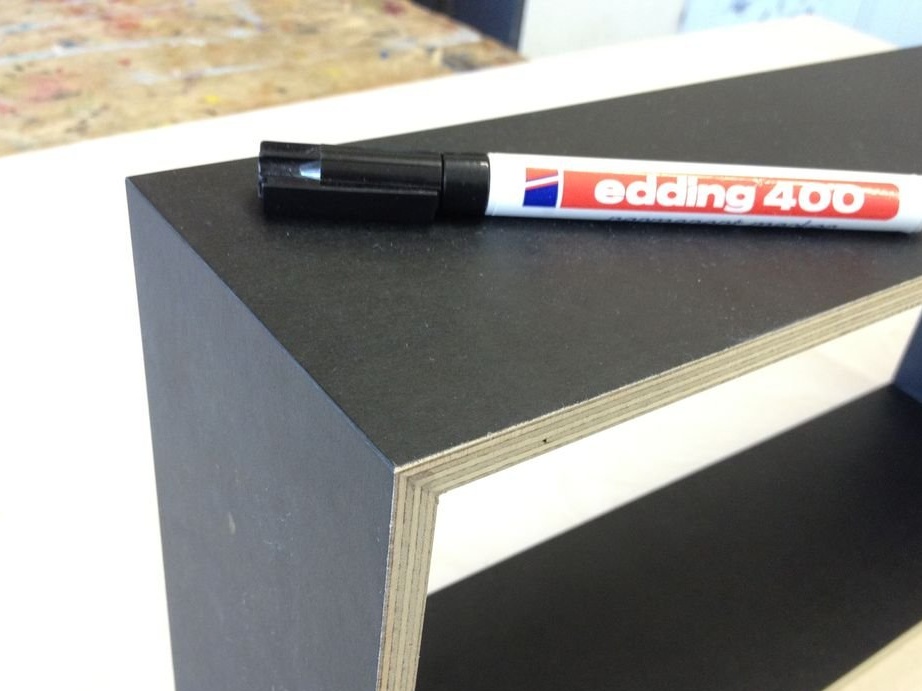
The master removes the chamfers of the connected edges a little and retouch them with a black marker.The marker does not leave marks on this material, but should be checked with other materials.
Then the wizard tests the modules, trying to separate them. After checking all the edges, he decides which side looks better, and marks the less good side to know how to put it all together at home.
Step 7: Finished Product
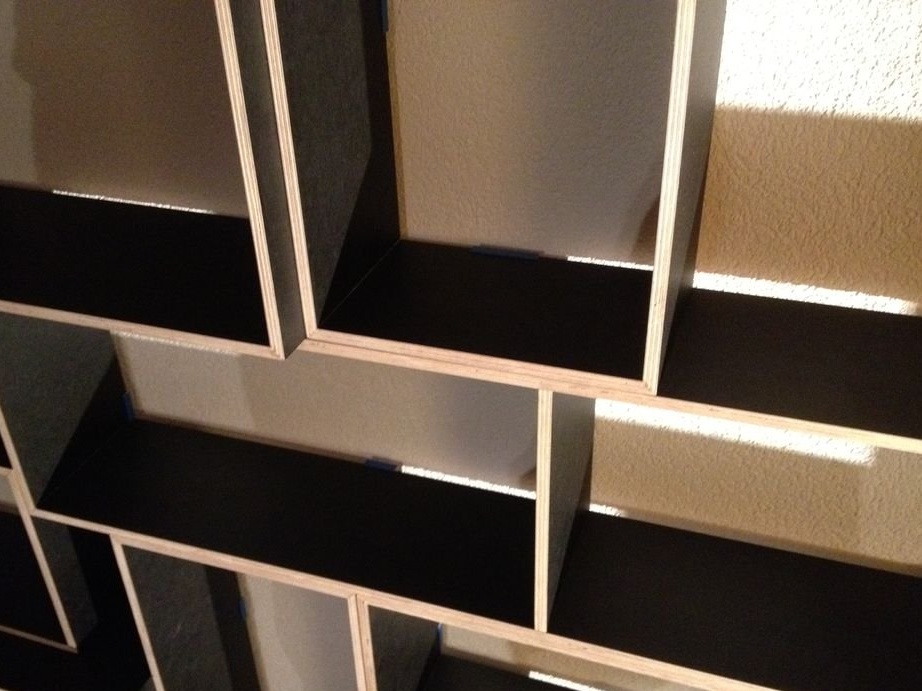
The master wanted to fill the entire wall with these modules. This seems like a lot of work, but producing several modules at the same time is pretty fast. It takes about 1 hour to produce one module (in addition to the curing process). Creating 10 modules may take 5 hours. The more modules will be executed at the same time, the less time will be required.