
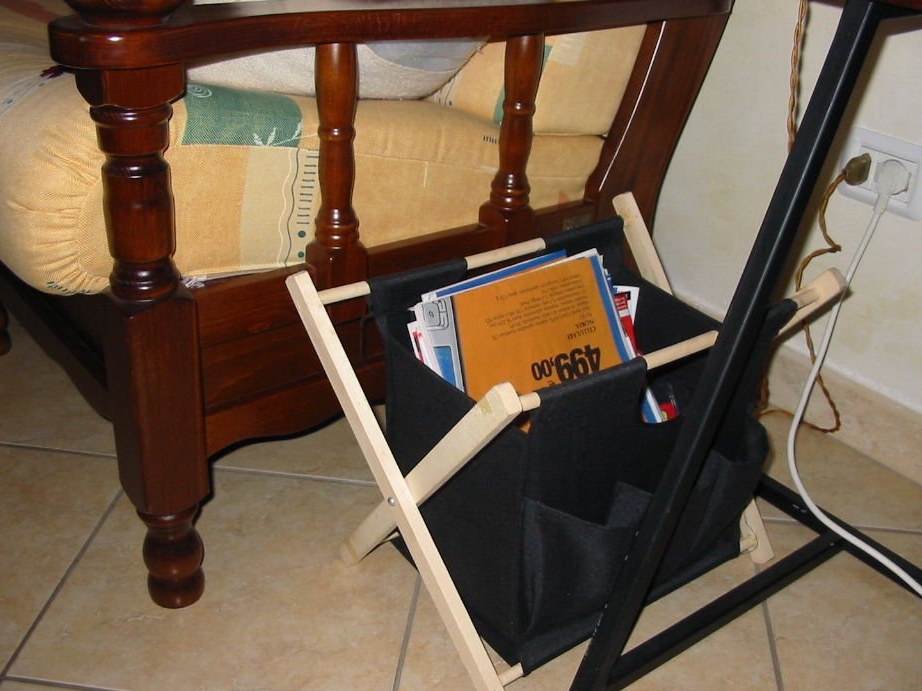
The idea came up with the idea of this counter to the master after he bought a cheap newspaper counter from a wooden frame and cotton fabric several months ago (see photo).
After some time, a thin wooden frame began to bend under a heavy load of magazines. In addition, a stack of paper slid to the bottom of a large container and formed a large stack. He could not find a suitable rack in the market. Therefore, he began to design an individual rack.
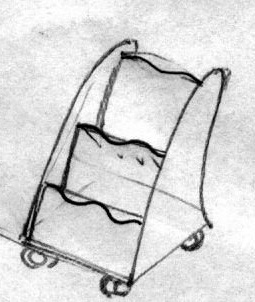
His first idea was to mount the rack on the wheels so that it was easier to move. In second place was the organization of separate spaces so that magazines did not fall into a single pile.
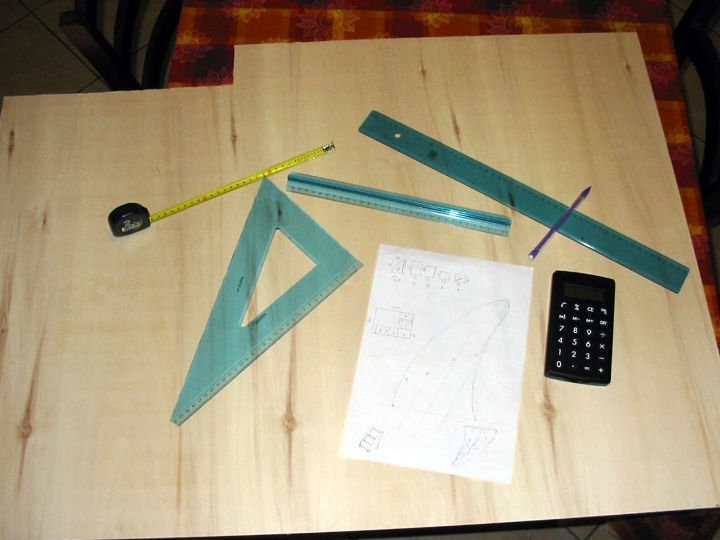
For work, the following materials and tools will be required:
- Plywood as a raw material (about 1m2) (thickness from 0.5 to 2 cm)
The master used 0.5 cm, but thicker - 1 cm. Would be the best solution;
- square;
- roulette;
- a pencil;
- calculator;
- A manual jigsaw, but better electric;
- a small hammer;
- Glue for wood;
- gum;
- Heavy items to be used as a press;
- 4 swivel wheels;
Step 1: Design and construction
Design is a combination of function and form.
1) Function first.
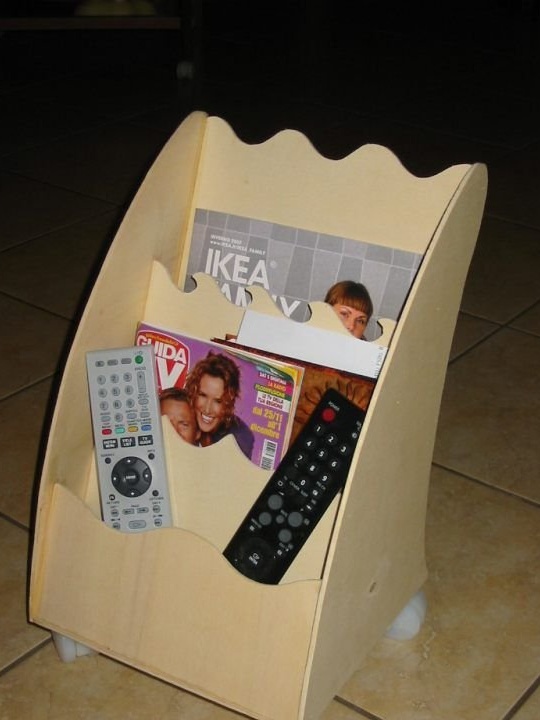
This rack is organized in parallel spaces for magazines, books and other objects, such as remote controllers (essentially remote control panels).
The magazines are arranged in an almost vertical position, so that the counter has a small area, and the paper does not form a stack. Departments have different sizes, so objects and paper correspondence of different sizes can be placed in them. Moreover, various documents can be grouped in separate places. Finally, the swivel wheels make it easier to move the rack in the room.
2) Form.
The master wanted to build a beautiful and original object without copying products on the market. First, he chose an inclined position for rack divider divisions to get a dynamic look.
Secondly, the idea of having departments of different sizes inspired him to design, larger at the base and smaller at the top.
Finally, he came up with a creative design in the form of a dolphin fin for the silhouette of the object. The upper boundary was made in the form of sea waves. The basic structure can be easily customized in different styles by simply changing the shape of the border.
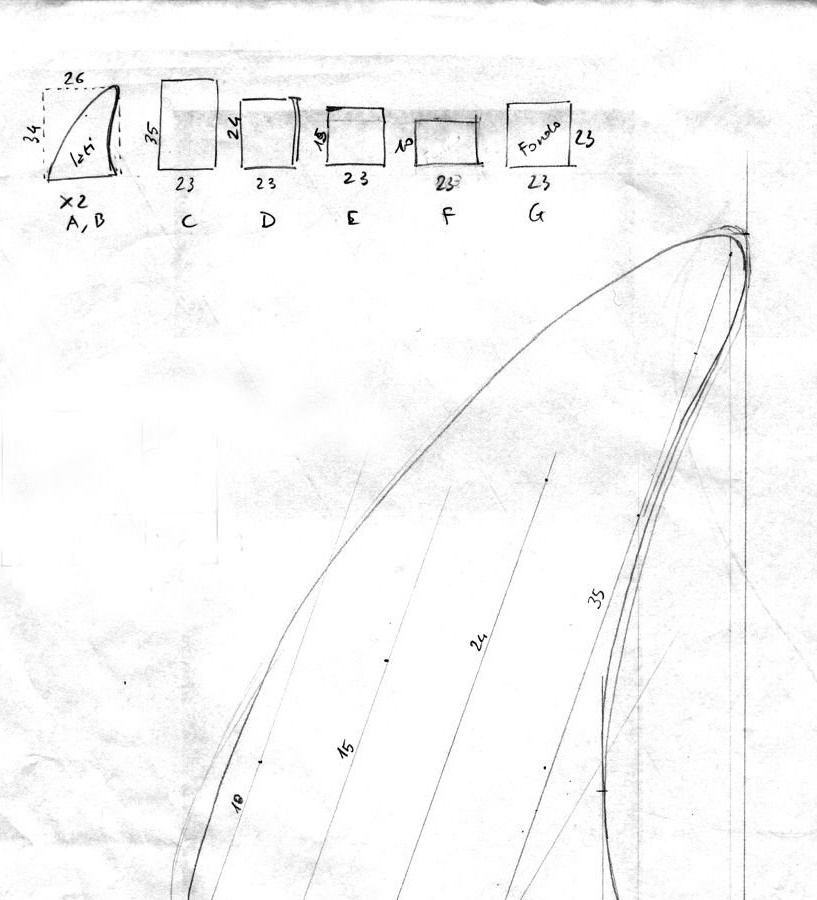
The master developed a side panel plan on a 1: 2 scale using a square and a tape measure.This helped to trace the rounded border on the raw plywood and determine the exact position of the panels at the assembly stages. The dimensions of other panels (bottom and dividers) were simply calculated, and then calculated on plywood without a preliminary large-scale plan. More artistic pieces and rounded borders were designed by hand.
Step 2: Drawing
Panels to be prepared:
Side panel, 26 x 34 cm
B Side panel, 26 x 34 cm.
C Rear panel, 23 x 35 cm
D Intermediate separator, 23 x 24 cm
E Intermediate separator, 23 x 15 cm
F Front panel, 23 x 10 cm
G Bottom panel, 23 x 23 cm
The various parts are designed on a plywood sheet. If you want to minimize waste and sawing, the relative position of the parts may change according to the size of the raw plywood. The master used a plywood sheet measuring 75 by 100 cm. Calculations on paper and a calculator are necessary for the accuracy of the calculations.
After the position of the various parts is determined, zoom in and draw the design directly on the plywood sheet using a pencil and a square.
The final position of the parallel dividers must be calculated on the inner surface of the sides of the rack (see the previous step “Design”). Similar lines should be calculated on the upper side of the bottom panel, where the dividers will be attached to the bottom. These lines will help arrange the dividers during assembly.
Step 3: Cutting the panels
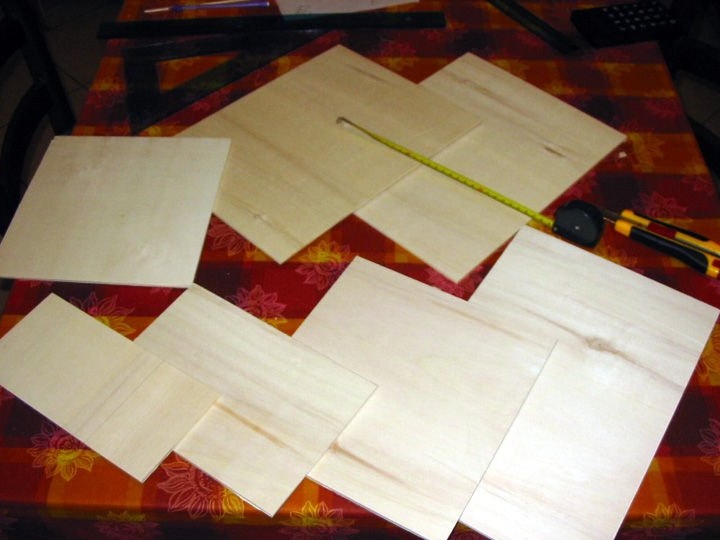
After calculating the rack panels, the master cuts the plywood with a hand jigsaw, but if there is a more complex electric tool available, then the work will be faster.
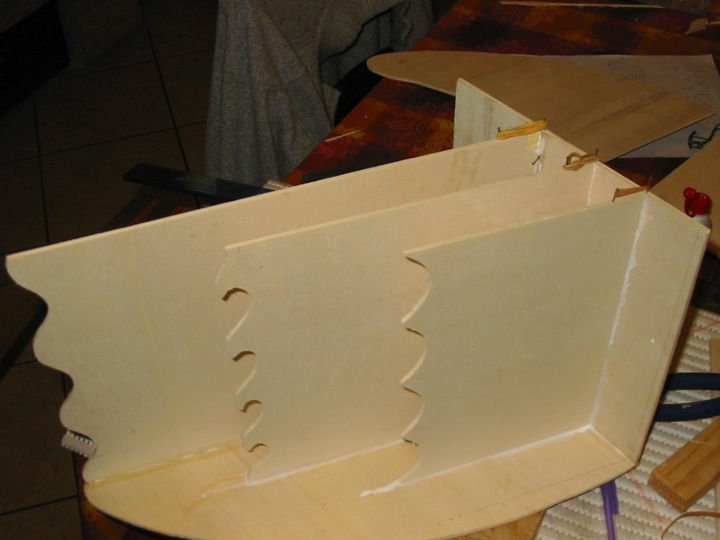
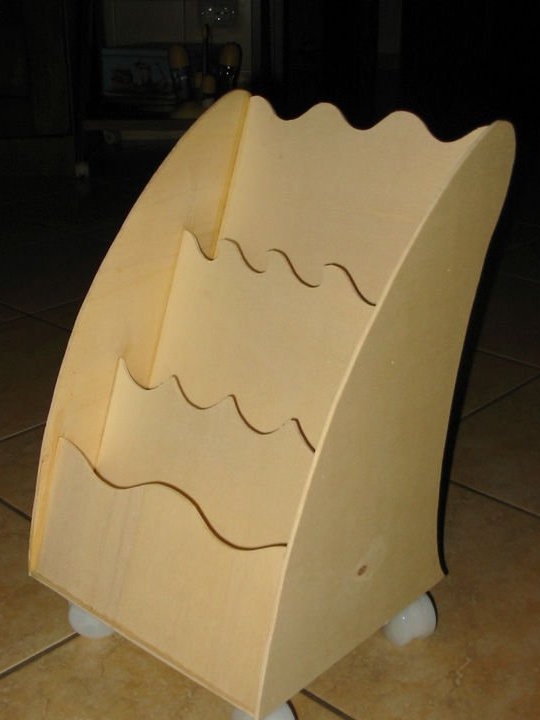
At the first stage, all panels are trimmed as square blanks. The only part that will remain square is the bottom (G). Other panels need the rounded edges described in the next step.
Step 4: Trimming Parts (2)
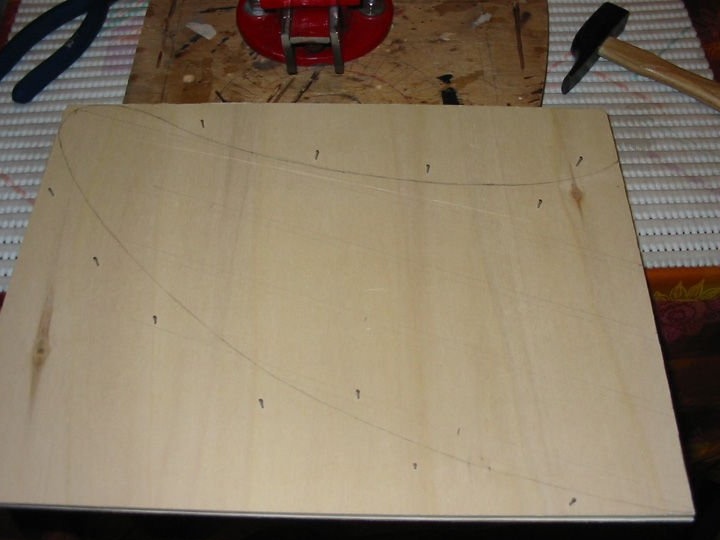
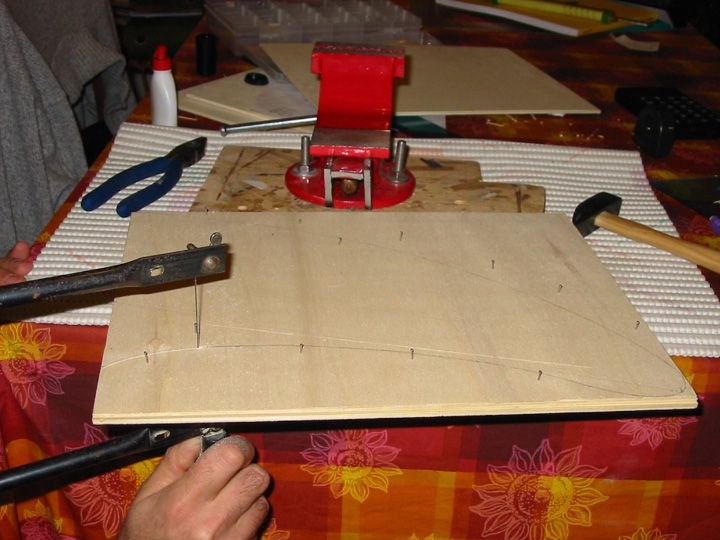
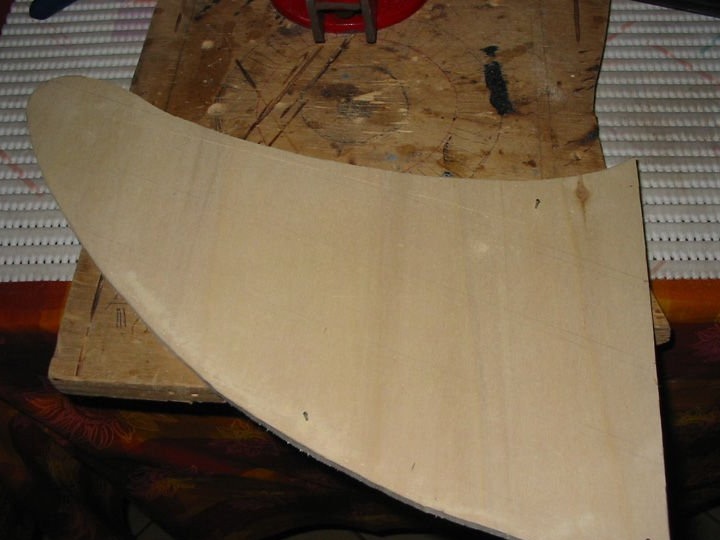
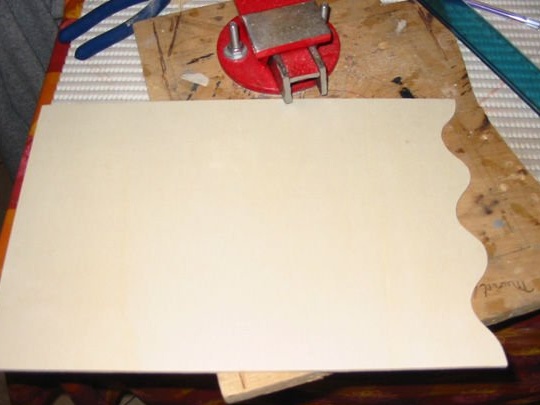
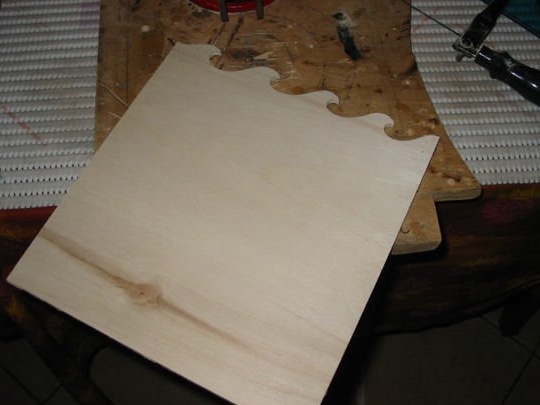
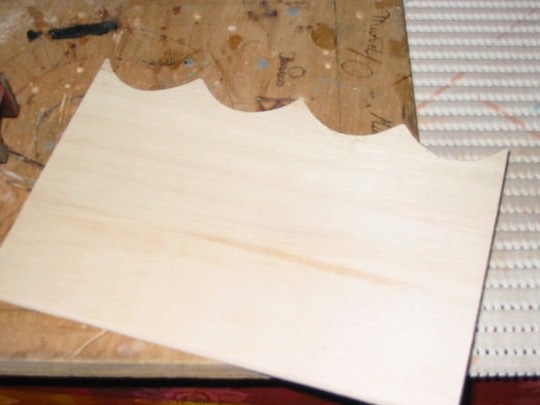
At the second stage, rounded borders are trimmed on pre-prepared square blanks to obtain the final silhouette. This includes the upper border of four vertical panels (C, D, E, and F) and two side panels (A and B) that are fin-shaped. Please note that the two side panels must be identical. To easily get two identical parts, you can connect them in the form of a sandwich with several small nails before cutting a rounded border (a clamp is more convenient)). Thus, you can cut them together, and then you will definitely get two perfectly overlapping parts.
Step 5: Build
This is the most difficult step.
Assembly part 1
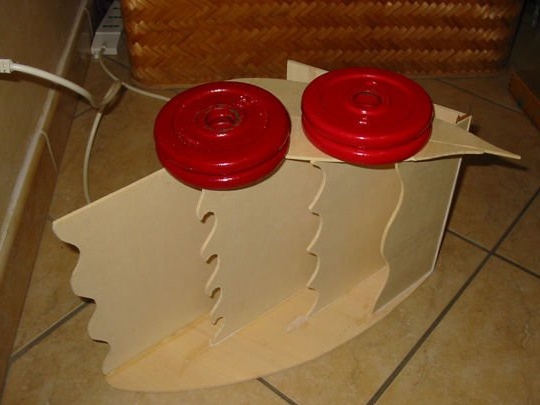
At the first stage, all the details are collected, except for one side panel. Place one side panel on a flat horizontal surface with the inside facing up. Spread a thin layer of glue along the lines where the bottom and dividers will be fixed. Spread a narrow layer of glue on the edges of the panels C, D, E, F and G, which will be attached to the side panel. Place the dividers (C, D, E, and F) and the bottom (G) in an upright position and align them with the lines on the side panel. The lower border of the dividers should coincide with the corresponding lines plotted on the bottom panel.
The vertical panel can be moved until the glue has seized. To keep all the details in place, you can use some tricks. Fasten a few small nails that can be easily removed later to avoid horizontal movement of the vertical parts on the side panel. Some nails attached to the upper edge of the vertical planks can be used to place elastic gum that holds the boards together. If the plywood is thick (1 cm or more), the parts can be easily assembled with screws and glue. But this approach has a drawback. Screws or holes will be visible from the outside.When all the parts are in place and glued, load the top with a few kilograms of cargo and leave the glue to harden overnight.
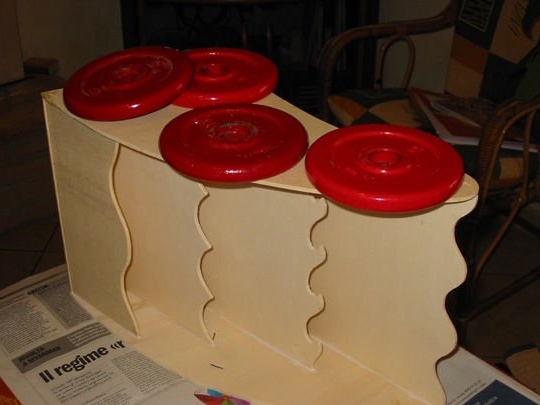
Assembly part 2
When the first gluing has set, proceed with the assembly of the opposite side panel. Place this panel horizontally and add some glue to the line where the dividers and bottom will be placed. Glue the edge of the dividers and the bottom, which will be attached to the side panel. Place the stand assembled in the previous step on the side panel and align the dividers with the circled lines. Load a few pounds on top and wait a few hours.
Step 6: Mobility Rack
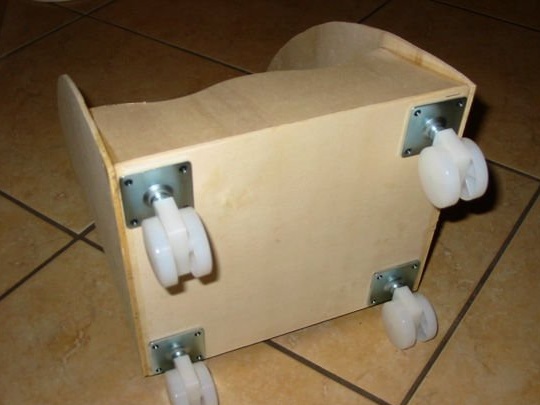
Fix the four swivel wheels under the rack with double-sided adhesive tape (but better of course with screws, screws)).
Step 7: Painting
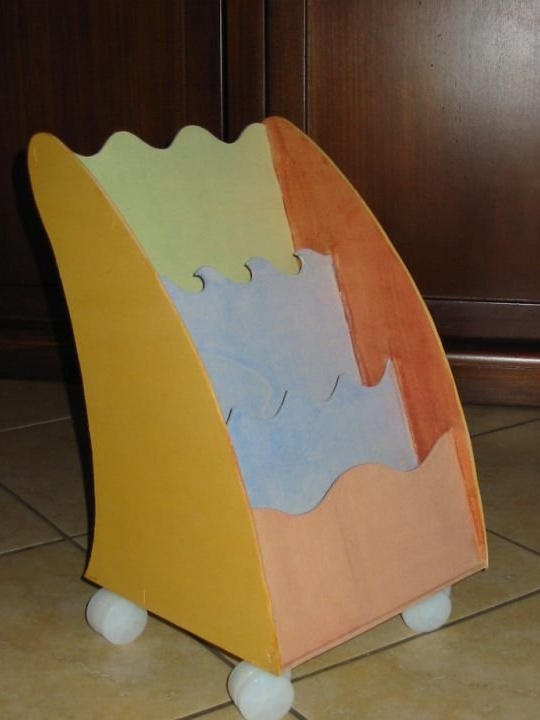
The rack is now ready for use. At will, it can be made colored. The master used water-based paints that leave wooden streaks visible. Yellow for the outside, brown for the inside, light green for the rear panel, light blue for the two intermediate dividers, and red for the small front panel.
Step 8: Evaluate The Difference
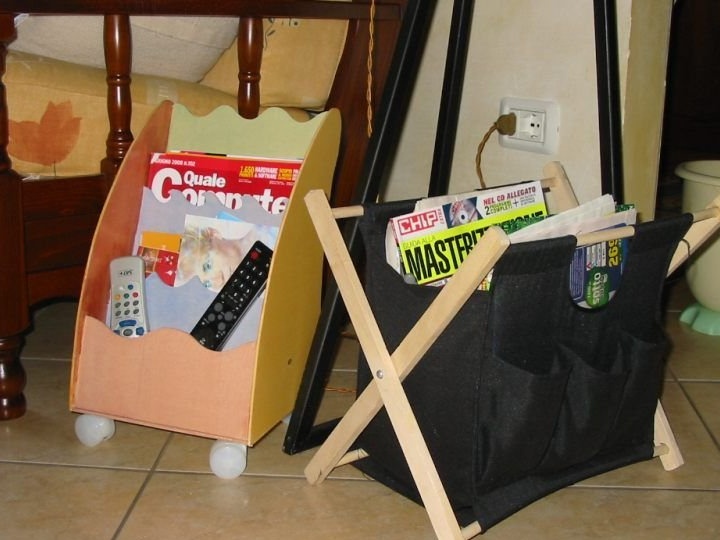
Ready-made shelving compared to an old newspaper container.
After a little operation:
After operation, the master may suggest some improvements.
1. Bigger size would be better
This rack is small for normal use. It holds very few magazines and newspapers. The master understood this only at the end of the work. A stand would be more practical if you increase it in depth and width.
2. Alternative use
Without wheels, this small counter can be used on the table as a shelf for correspondence, notebooks and envelopes.