
First of all, I want to say that this is not a guide to solving all the problems with arduino in the world, but only those that I had to face. Nevertheless, faced with these problems, I spent a lot of time searching for information on how to solve them, so I think the article will be useful. Also, I will not consider problems related to compilation. Compilation errors are programming errors, these are already special cases and they are also considered privately in various forums.
Method 1. Standard firmware
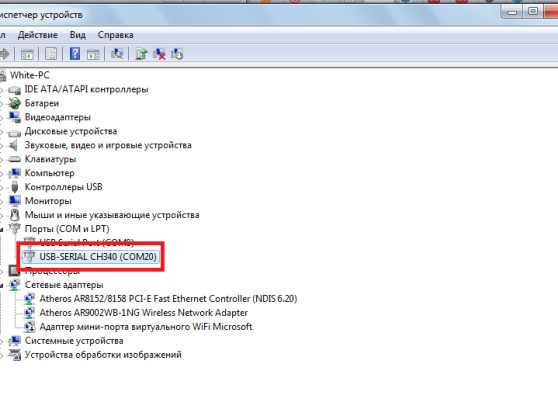
Despite the simplicity of arduino in terms of programming, even at this stage problems can arise. They arise, as a rule, when using Chinese clones. But we will be systematic. To program Arduino the way the developers intended, you need to download and install the development environment from offsite Arduino IDE and install as directed. There are hundreds, if not thousands, of articles about this even in the Russian-language segment of the Internet, so I will not dwell on this. When using original arduino problems should not arise. But with us, as a rule, everyone uses much cheaper Chinese clones. They, in general, are no different from the original, at least in terms of performance. Personally, I have a Chinese layout Arduino Pro Mini with contacts A4 and A5 along with the rest, I like much more than the layout of the original board. But in the same turn, the Chinese, in spite of the communist system, are in fact the most genuine capitalists, and save on everything they can for export. Chips of the USB interface of those arduino also fall under this economy. This is where the problems begin. The fact is that in Chinese clones, the original CH340 chip is not used. And so, we will assume that you have completed all the standard procedures for installing software and drivers, but the arduino is not sewn. First thing we go to START> Control Panel> Device Manager. Here we draw attention to two points: USB controllers and COM LPT ports.
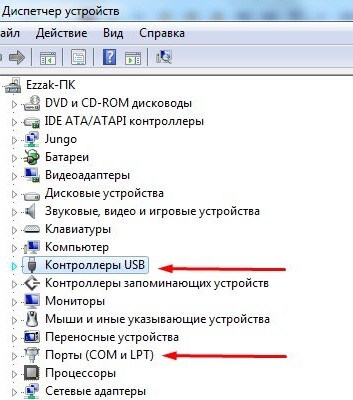
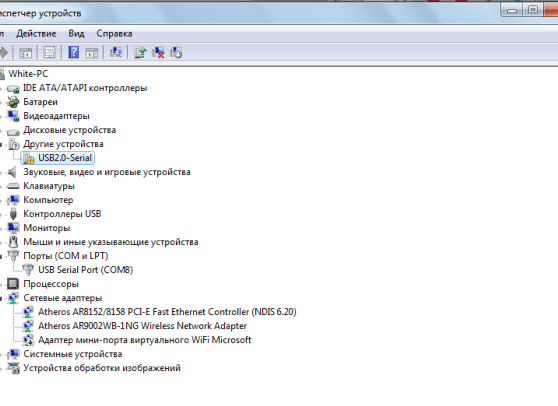
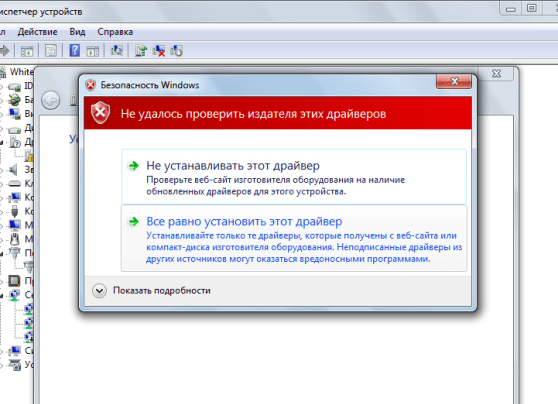
If the item Ports (COM and LPT) no at all, this is the first clue in solving the problem. If all is well, then in which ports a new port should appear when connecting an arduino. If this does not happen, then look what is happening in the "USB controllers". When connecting an arduino, a new device with the inscription USB 2.0 Serial should appear. This is actually a good sign. If the computer sees that they are connected to it, but who can’t understand, then the arduinka is alive, and the problem is firewood. If this does not happen, we read method 2 and method 3. To solve this problem, you must install the new driver manually. Download the driver, put the folder with it in a convenient place. Let's go back to device Manager, Further USB 2.0 Serial> RMB> Properties> Driver> Update> Search for drivers on this computer and select the folder with the driver. After that, the system may begin to swear that the driver is not from trusted sources. Click install anyway.


Driver download
You downloaded the driver, installed, but the arduino is still not sewn. The problem can be both from the factory and the fault of the user, it does not matter. What are we doing? We pass to the second method.
Method 2. Firmware via TTL converter
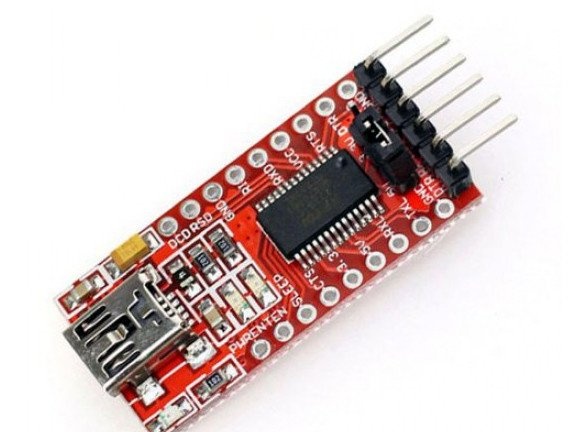
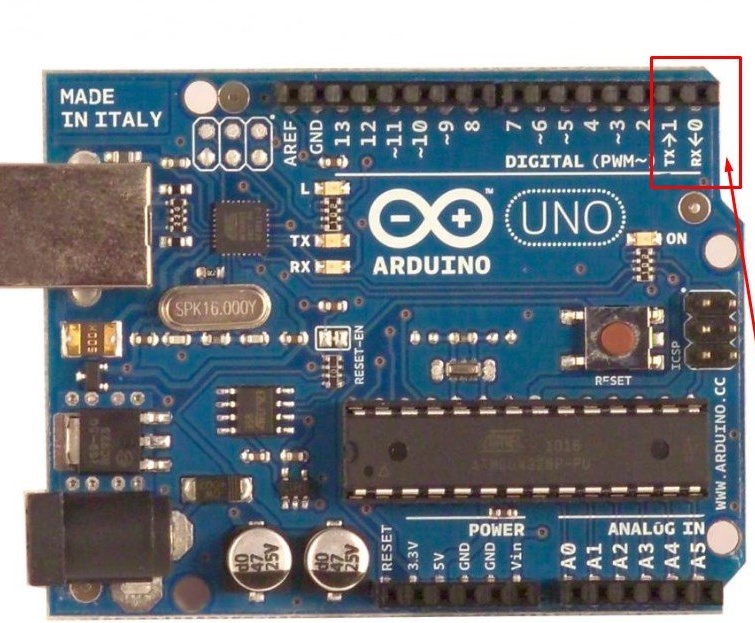
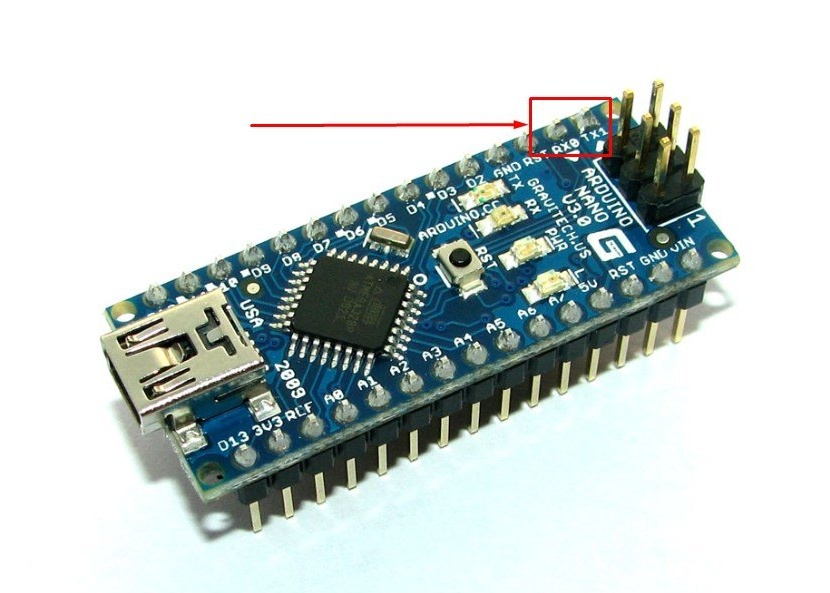
All Arduino boards starting in the series Nanohave a USB interface. Series Mini and Pro mini it does not have one, and is exclusively flashed TTL converter. But the fact is that any other arduinka is sewn by this programmer. If you don’t have it, I strongly recommend buying it, especially since it costs 50-60 rubles (at the time of writing), this is a universal programmer that can come in handy more than once. So, for example, with the help of him, I reflashed my FlySky i6 radio control equipment and Kenwood T2000 walkie-talkie, without buying special branded programmers, which cost much more. But I moved away from the topic. In general, all arduino boards have conclusions Rx and TX (this is the communication interface, "transmission / reception"), with which you can flash arduino bypassing the USB interface chip. These converters, however, also have different versions. When I bought mine, the most common and cheapest was a converter, without output reset. The peculiarity of arduino programming by such a programmer is that exactly at the end of compilation and the start of loading, you need to press the reset button on the board. Here, in fact, we need some skill. If you missed the first time, continue to press the button with a frequency of about 2 seconds. Wednesday gives 10 requests, if you can get into one of them - voila, we asked the arduino. More modern programmers have a fifth pin, which connects to the same reset, and pulls it automatically. But most importantly, I described the nuance. Another moment. Typically, RX needs to be connected to TX and vice versa. But in rare cases (well, the Chinese) you need to connect RX to RX, and TX to TX. Just wrong sign. And so, if this does not help, go to method 3.
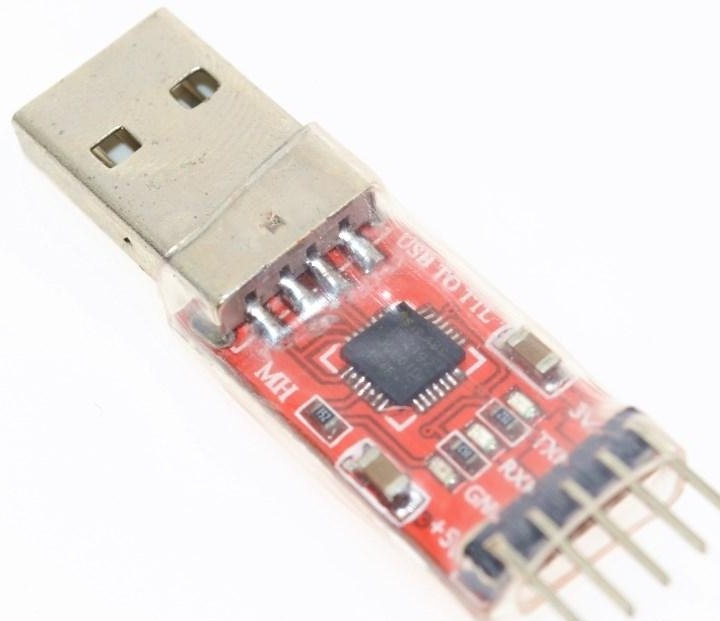
But just attach firewood for CP2102
Features
The programmer requires installing drivers, I have no problems with this, no others have noticed, just put the driver on CP2102, or the one that the manufacturer offers.
Method 3. Direct chip programming
Since version Nano Arduino boards have an in-circuit programming connector ISP . This is a six-pin connector, which, as a rule, no one pays attention to. With it, you can flash the microcontroller directly, directly, bypassing everything that can only be bypassed, both the physical part and the software. That is how I had to flash my latest arduino board. Actually, using this method you can create your own arduino clones by flashing the Arduino bootloader in atmega. I wrote about this in my article about avionics of a sports rocket. But again, not about that. For firmware, you need this kind of programmer:
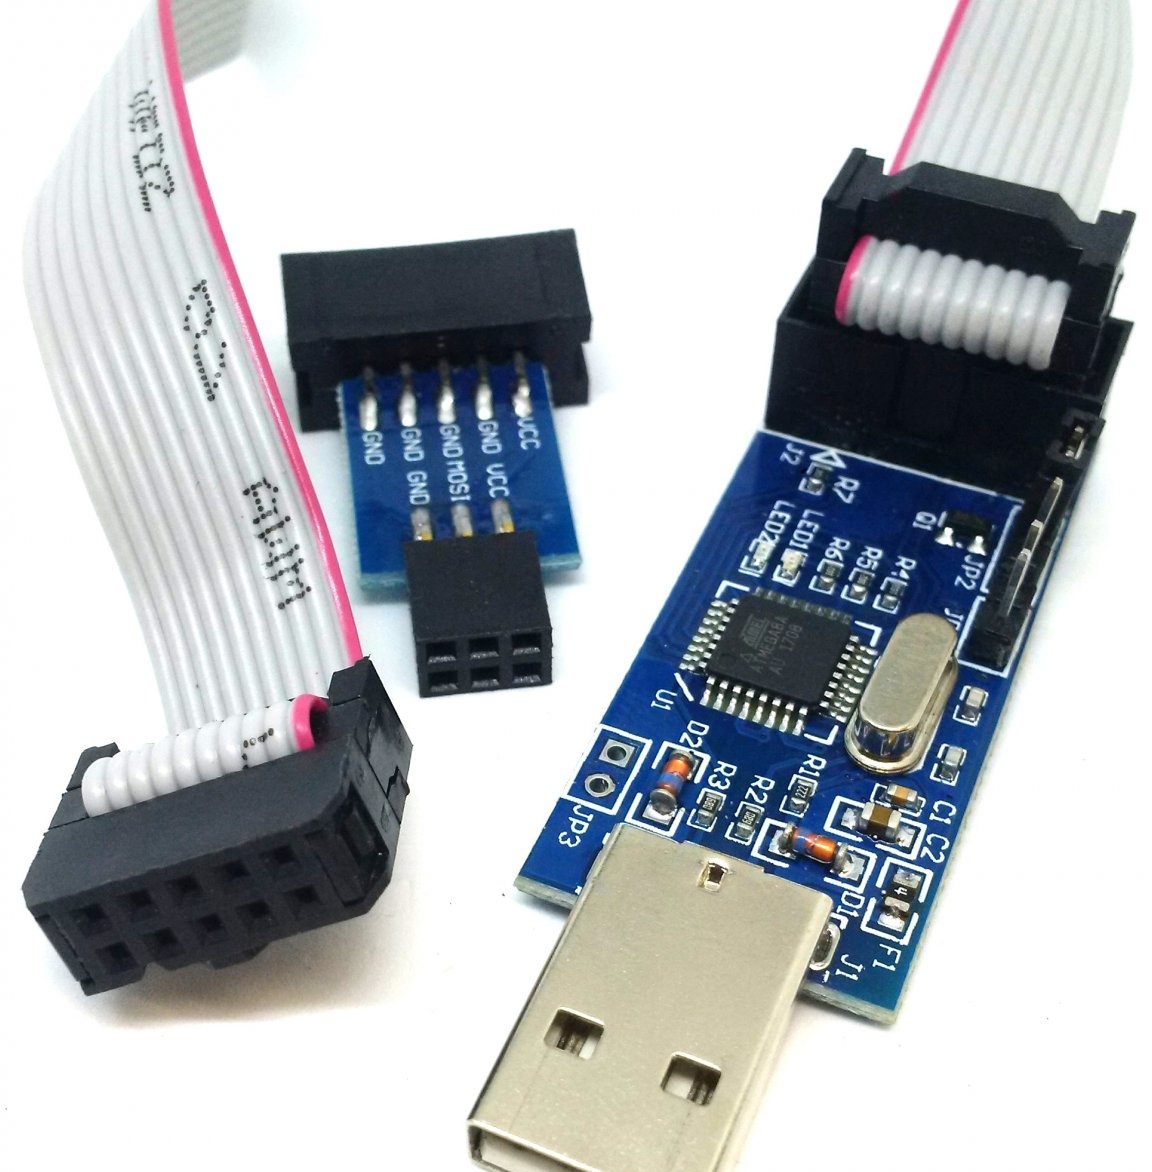
It's ordinary USBasp, the most common AVR microcontroller programmer. It costs ali the same penny.
Features
The programmer has a standard 10-pin connector, however, you can buy a 6-pin adapter in the kit. Of course, you can make it yourself or simply connect it with wires, but it is much easier and more convenient.
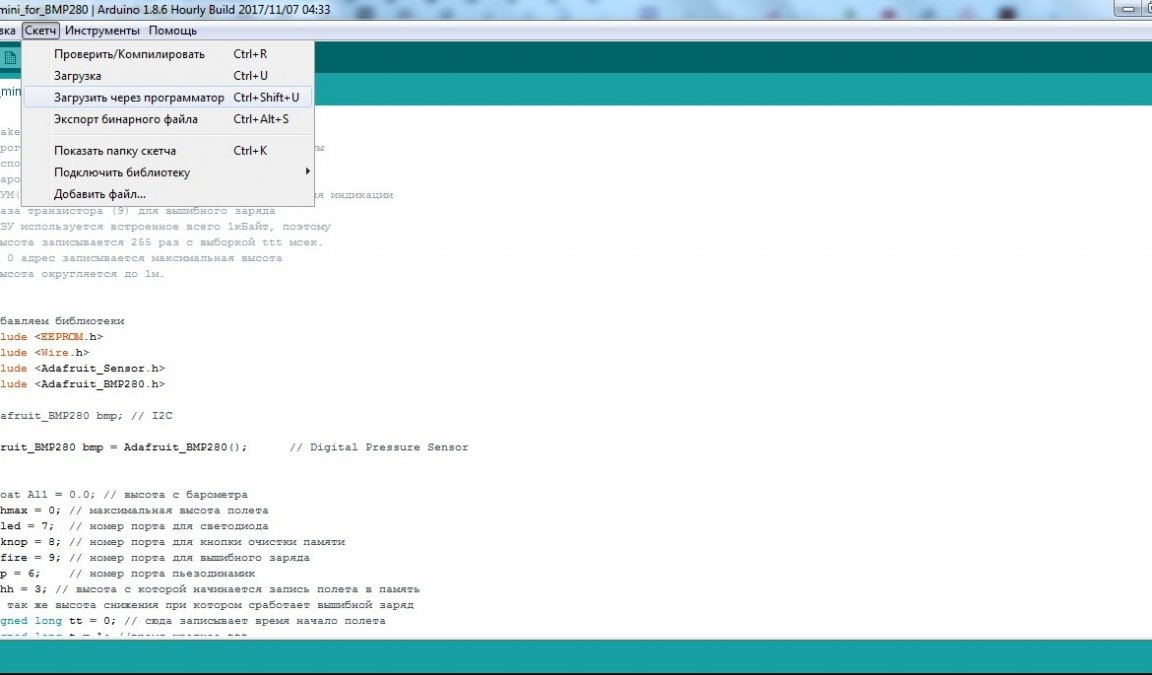
The firmware is not carried out in a standard way. To get started, go to Tools> Programmer> USBasp
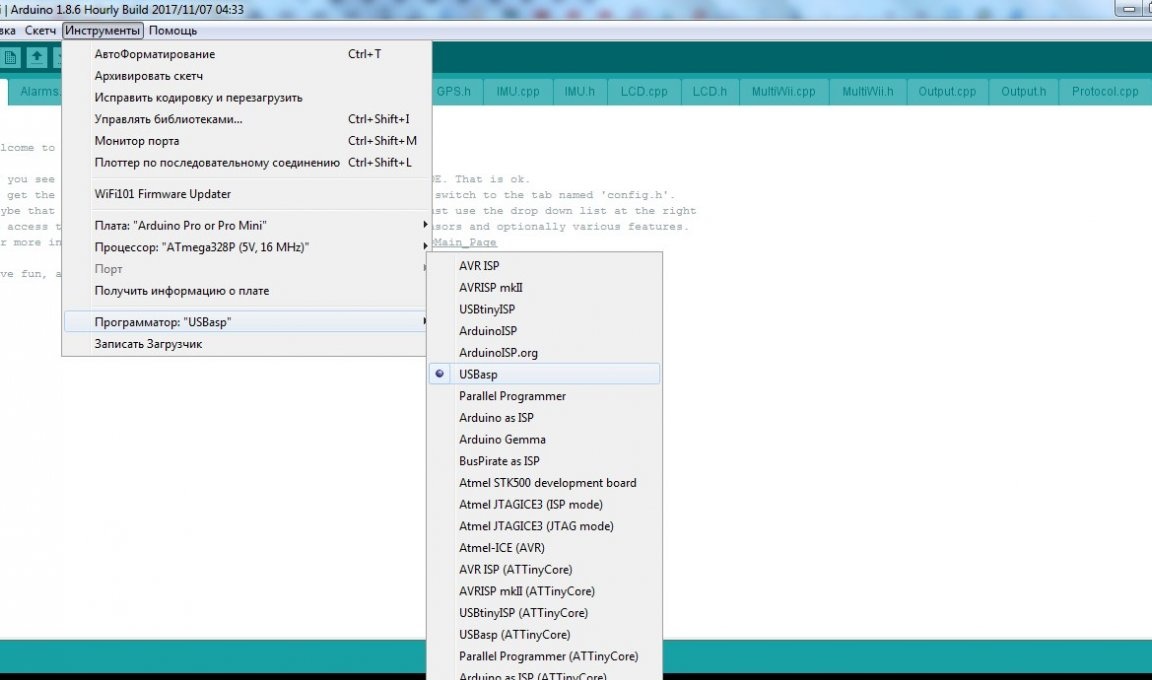
Further Sketch / Download via the programmer.
Problems
As I said, here I describe the problems that I encountered. This programmer also requires drivers. Finding them is not difficult. However, when contacting the Chinese in order to save money, you need to be prepared for unexpected turns. Personally, when working with this programmer, I encountered the following problem, which I once described on a radio cell:
avrdude.exe: error: could not find USB device "USBasp" with vid = 0x16c0 pid = 0x5dcHe struggled for a long time to resolve the disaster, and found it only in foreign forums. So:
1) Following the link Download the LibUSB-64bit.zip archive
2) We connect the programmer to the USB port.
3) Unpack the archive and go along the path where they unpacked \ LibUSB-64bit \ libusb-win32-bin-1.2.1.0 \ bin \ x86
4) Run inf-wizard.exe
5) click Next
6) Choose USBasp and click Next
7) The following fields are filled in this way:
Click Next
8) Save the generated file along the path:
LibUSB-64bit \ libusb-win32-bin-1.2.1.0 \ bin \ amd64 - if you have a 64-bit system or
LibUSB-64bit \ libusb-win32-bin-1.2.1.0 \ bin \ x86 - if 32-bit
9) Click install now
10) The system will notify that the driver is not from trusted sources. Click "Install Anyway"
11) Installation of the driver will begin. During installation, we hear the sound of disconnecting and connecting a USB device. At the end of the installation, click OK.
Some more tips
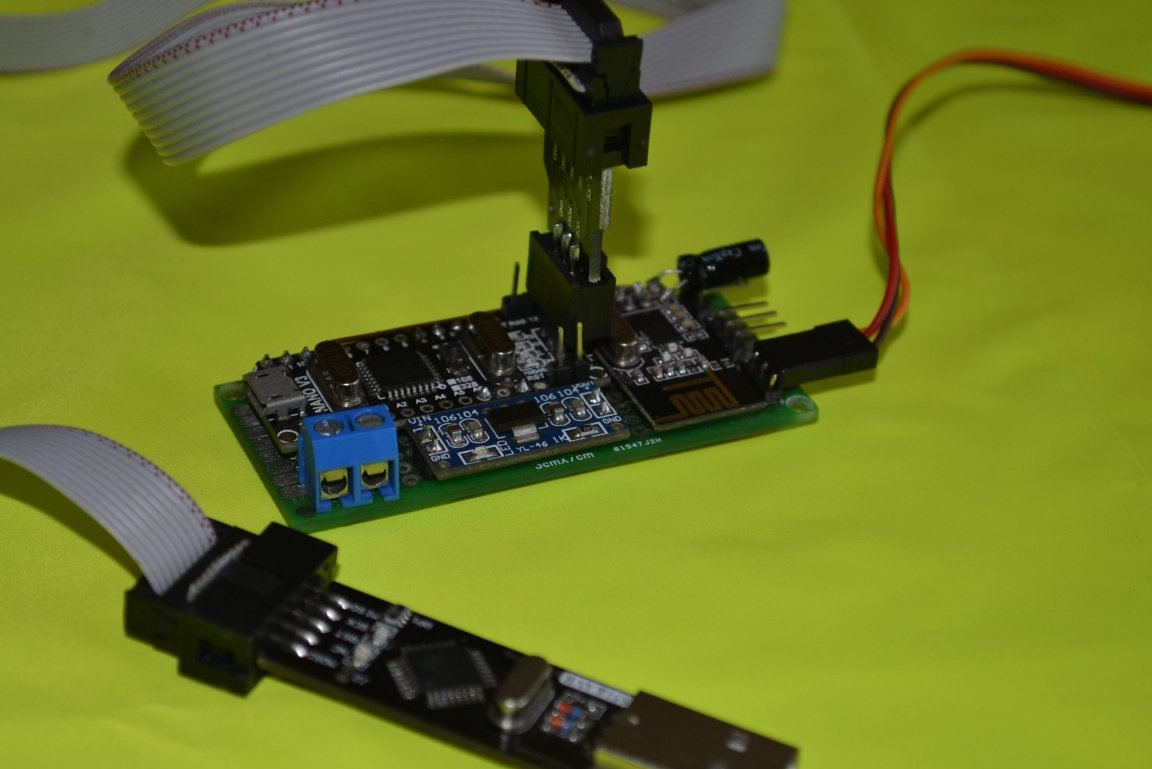
The very common NRF24L01 modules have a large jamb. For normal and stable operation of these modules, it is necessary to hang the capacitor at least 10 μF 5 V for power. Less is not desirable, more is useless. But if not at 10, of course, bet at 22 or 47. It is also advised to hang another ceramic at 10-100 nF in parallel with it. Moreover, as close as possible to the module itself, ideally - to the conclusions. Otherwise, the module seems to be seen, but normally does not transmit.
If the findings Rx and TX some executing device is hanging - the arduinka will not be sewn. First flash, then connect the necessary device to these outputs.
That's all, I hope the information will be useful to someone.
Good luck to everyone in your work!