

I want to share my homemadethat has been serving me for over a year now.
Starting to master Arduino, I thought about what kind of project to implement. I remembered that I have many indoor plants that periodically forget to water, and the issue of watering during vacations and business trips has a place to be.
The system consists of the following components:
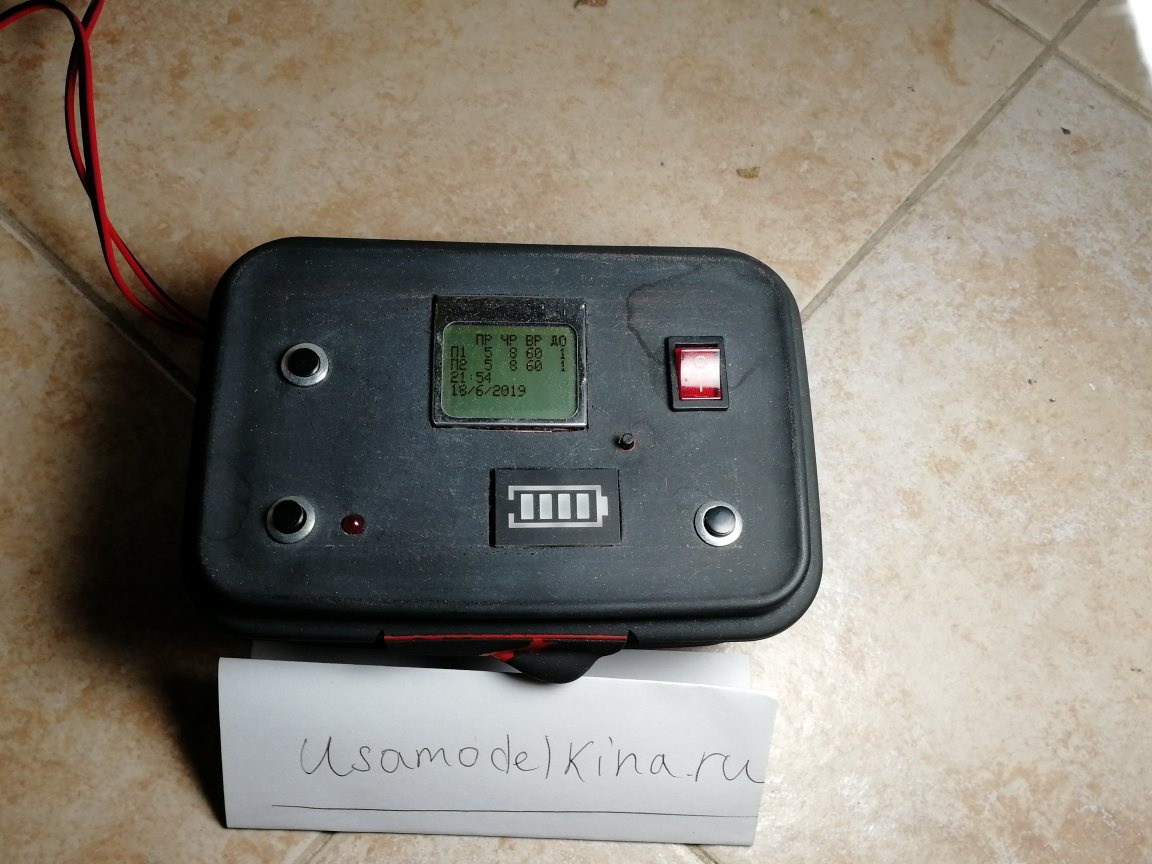
The control unit is the heart of the system. Here are the batteries, Arduino, DS3231 time module, display, voltage converters and controls.
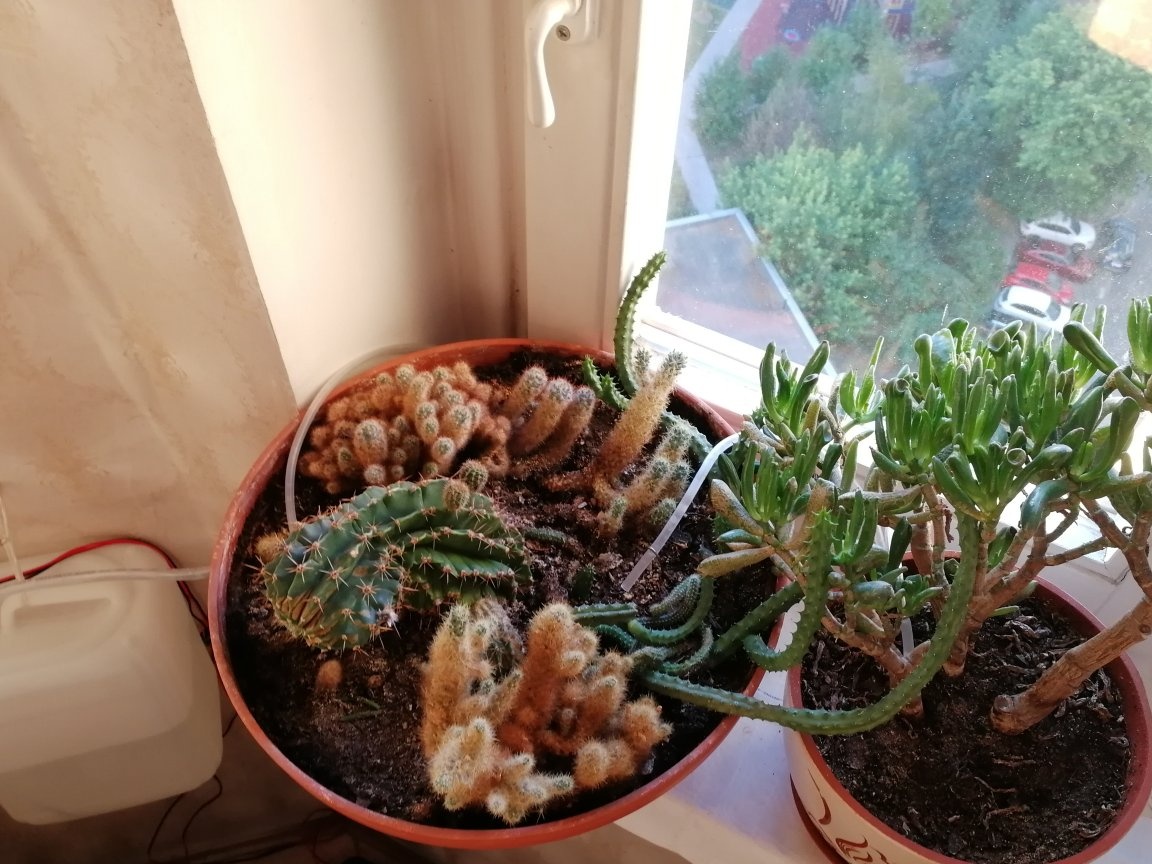
Near the plants is a canister of water. There are submersible pumps in the canister that pump water through pipes into the plants.
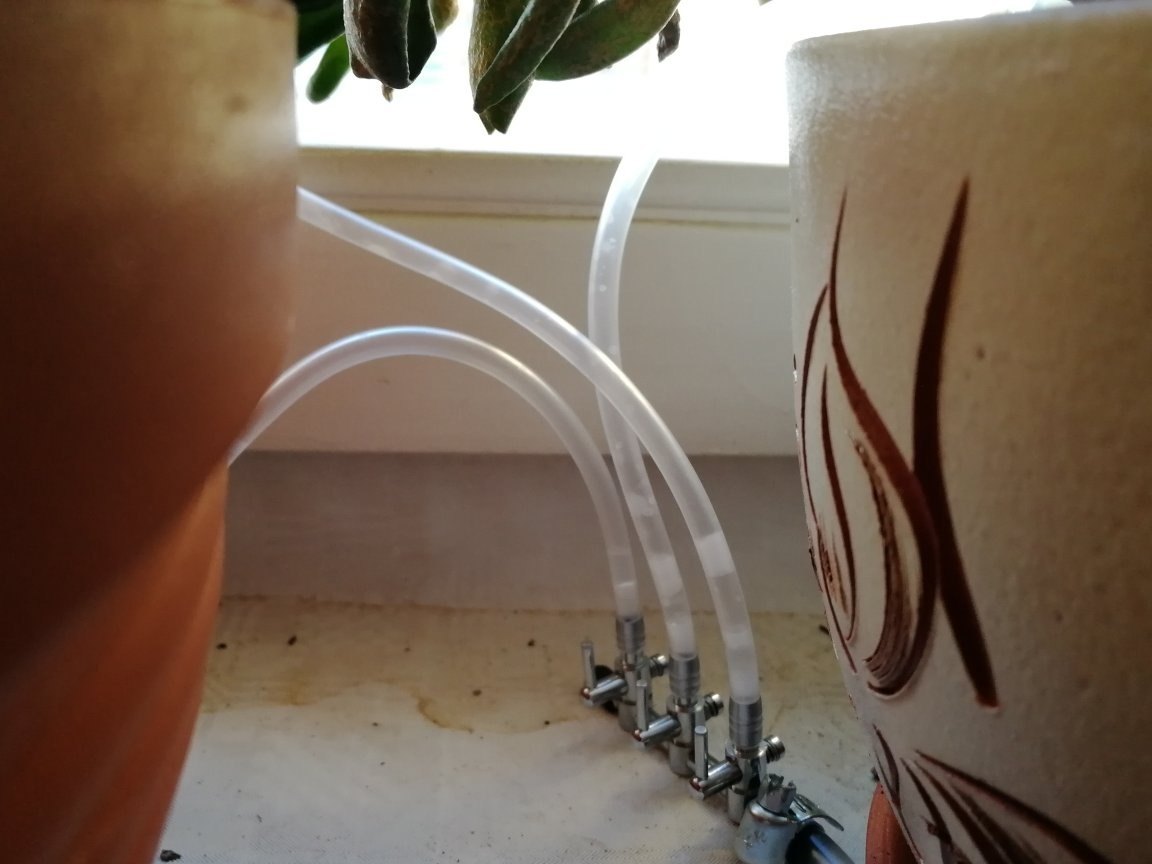
The distribution of water between plants can be further adjusted using a comb with taps.
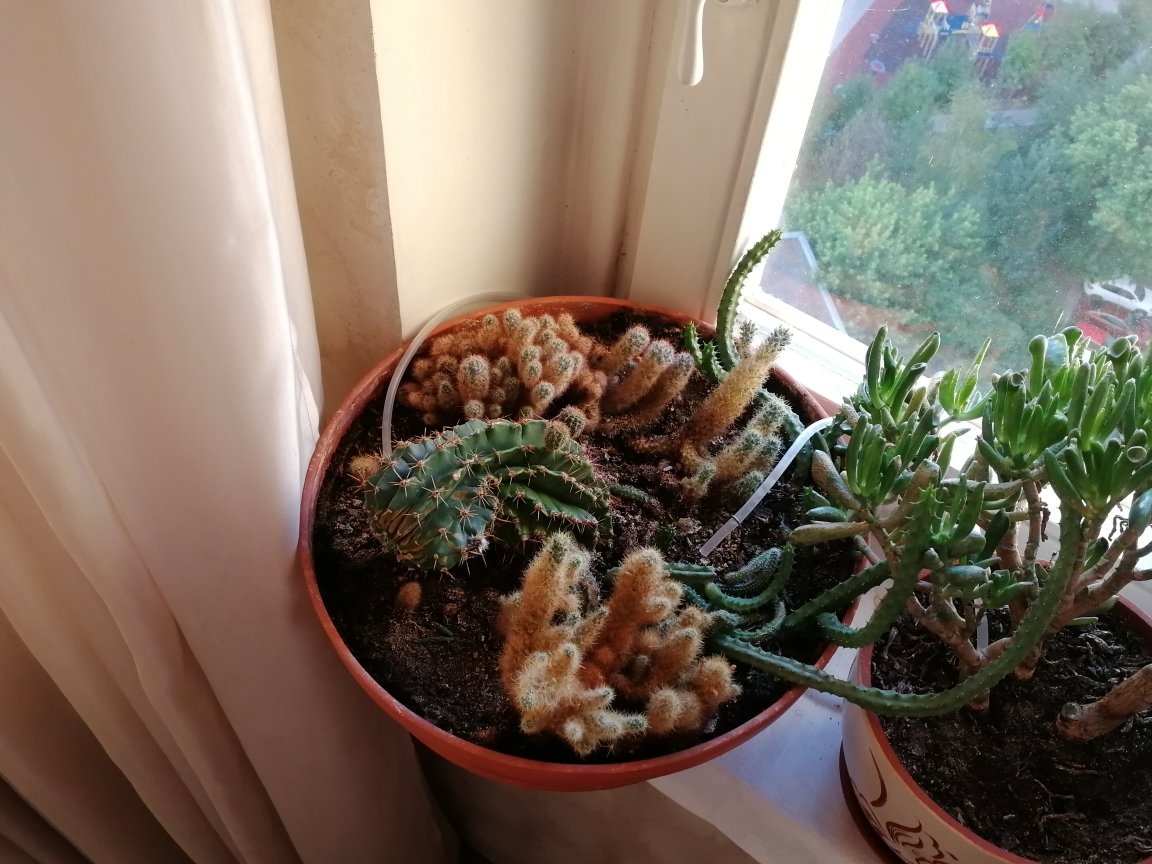
All the technical elements of the system can be hidden behind curtains and pots so that they are not very conspicuous
System Overview:
Key system parameters:
1. Battery life of about 5 months
2. The system supports control of 3 pumps. For each pump, you can connect a comb with 2-4 taps and additionally control the flow of water. Total we get the opportunity to connect up to 12 plants
3. The time is taken from a separate independent watch module DS3231. The pump is triggered when the hour specified in the setting (for example, 8:00).
4. The display shows information
5. Watering settings are indicated in the program code, they can be changed by reflashing Arduino
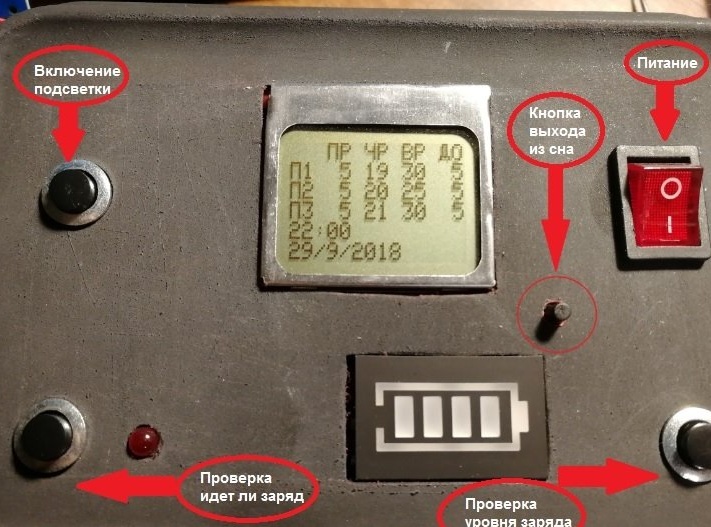
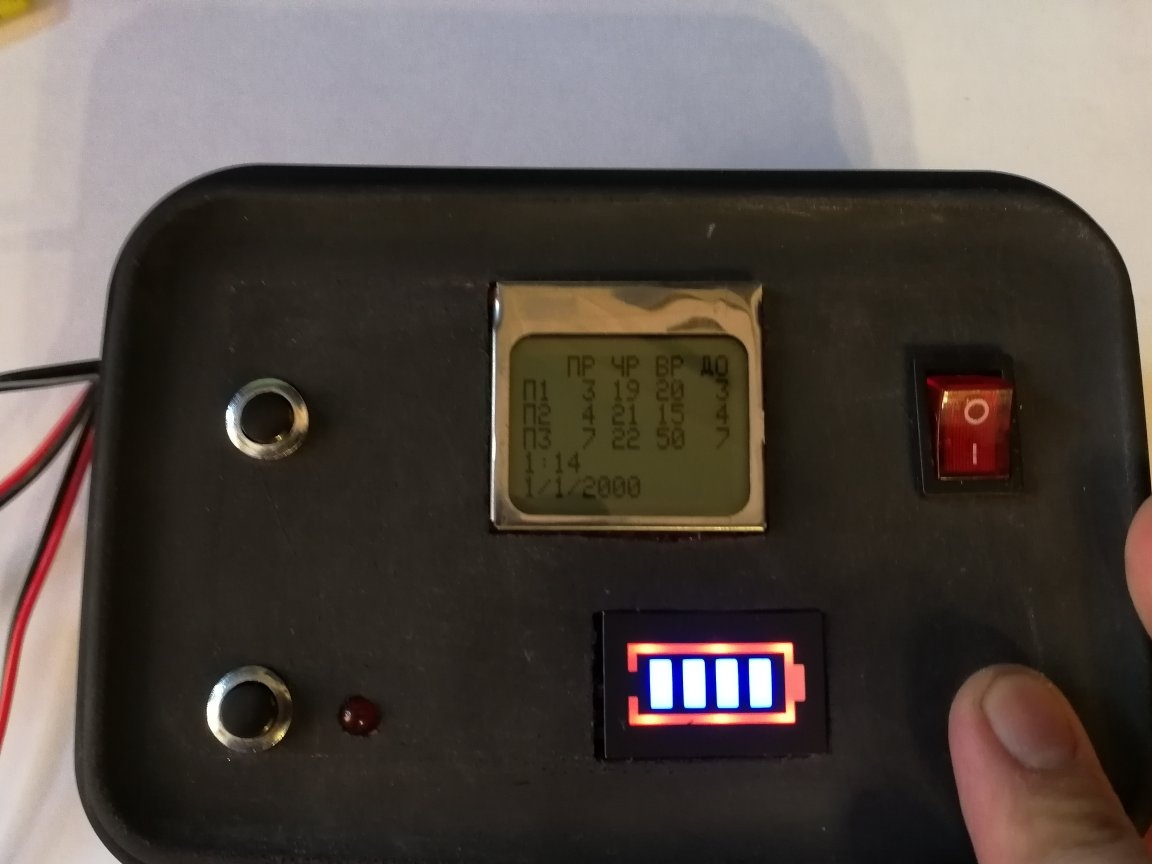
Explanation of the information shown on the display:
The first line is the table header. Each row shows information on the respective pump. The first column - shows the period of work (PR). For example, with a value of "5" - the pump will operate every 5 days. The second column is the hour of operation (PD) - the hour at the beginning of which the pump will turn on. The third column is the run time (BP) - the pump run time in seconds. The fourth column - days left (BEFORE) - shows how many days are left until the next operation. Date and time are also displayed.
The system has no feedback, so the settings need to be selected empirically. It is best to group plants that are close in terms of watering requirements (some tolerate drought well, while others like plentiful watering) and the size of the pots.
The settings are approximately as follows: every 5 days turn on the pump at 8:00 for 30 seconds.
Below, it will be indicated in which part of the code these settings are located.
In the program code, you can disable the 2nd and 3rd pumps. In this case, information will be displayed only on the included pumps.
Autonomy is ensured by:
• Powered by 18650 batteries
• Arduino and goes into a deep sleep (Powerdown) and wakes up by Watсhdog
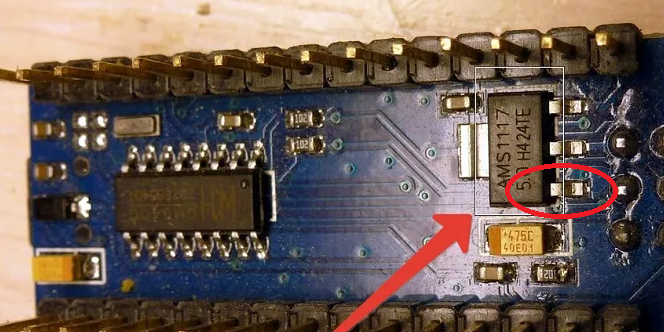
• Arduino voltage stabilizer bit off left leg
• The display is turned off during operation. To activate the display, you need to hold the sleep button for about 10 seconds.
• All indicator LEDs are removed from the modules
The system consumes about 3 mA, 1 pump consumes about 350 mA in operation.
Main Details:
• Food container for housing
• Chinese clone Arduino nano
• DS3231 Real-Time Module
• 18650 batteries
• Boost module up to 5V (current about 1 A)
• Lowering module up to 3.3V to power the display
• Nokia 5110 display
• TP4056 module for charging (+ protection) the battery
• Battery charge indicator
• Various "frizz": field-effect transistors, resistors, capacitors (electrolytic and ceramic)
• Switches and buttons
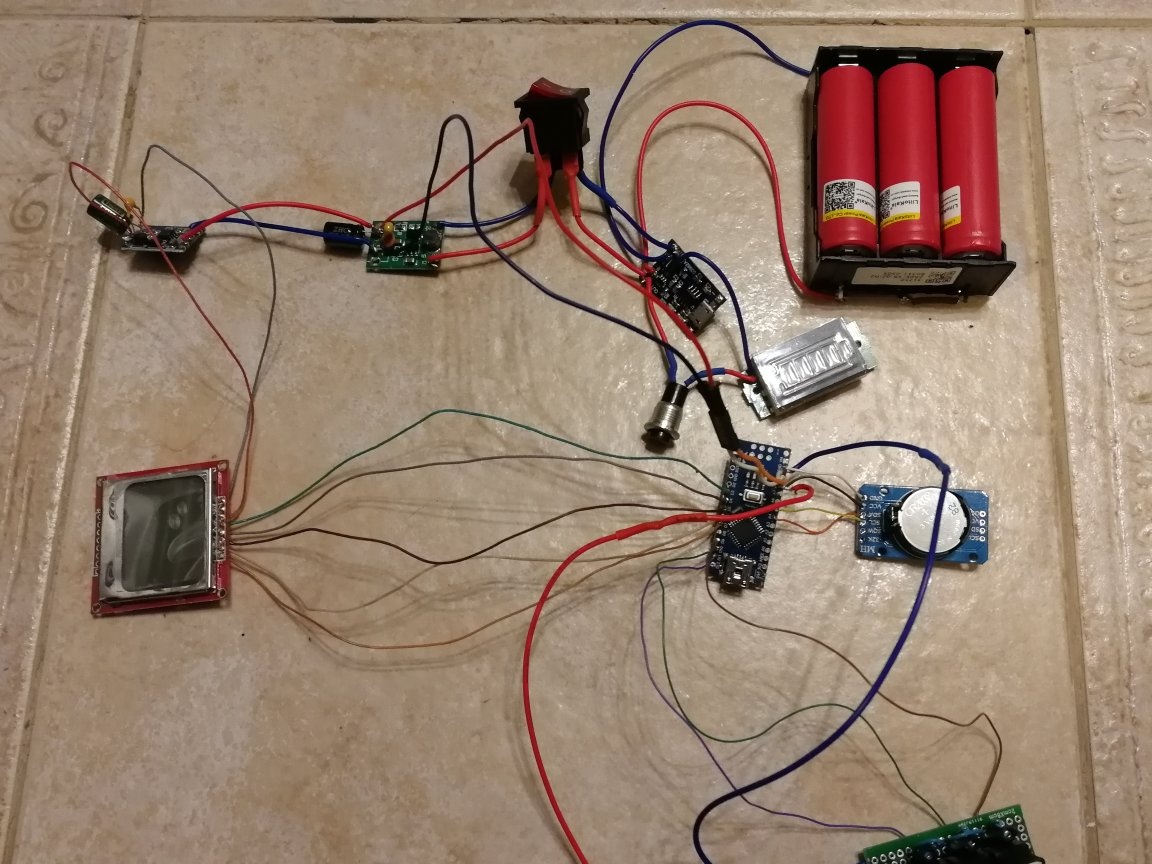
Mounting "scheme" of the device:
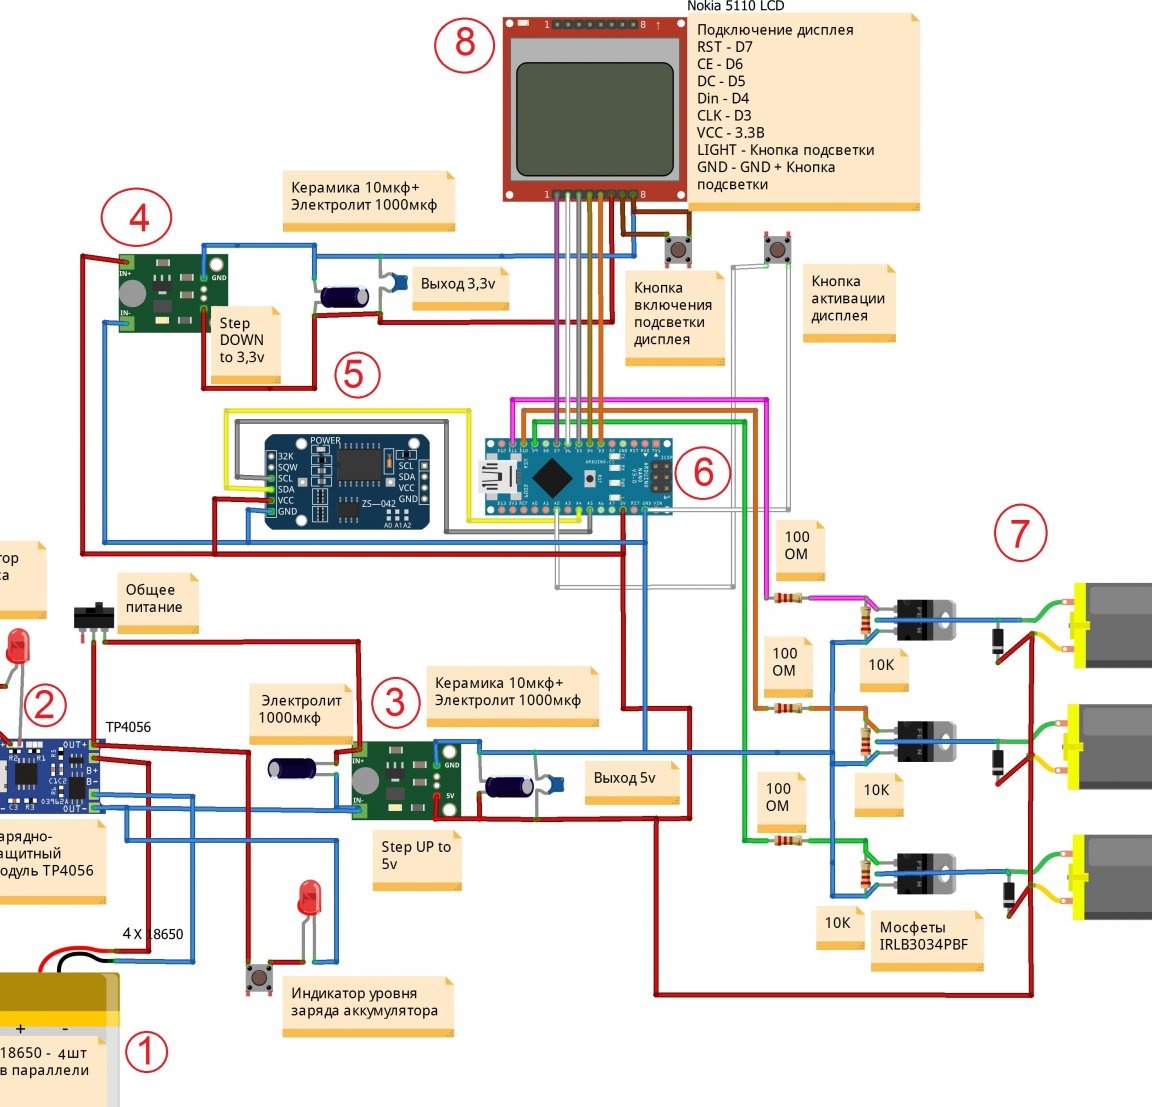
Explanations according to the scheme:
1. 4 18650 batteries are connected in parallel. The total capacity is about 13000 mA / h.
2. The battery is connected to the charging and protective module TP4056. Charging is via the micro USB connector from telephone charging. Charging is needed with a current of at least 1A. Estimated time to fully charge is 13-14 hours. Indicator LEDs can be flashed out and displayed on the chassis.
3. Next, a boost converter up to 5V is connected through the switch. It will power most of the components of the circuit, including pumps. With a decrease in the battery charge level, the voltage will decrease from 4.2V to 2.7V, which is not enough for the circuit to work. The module will provide a stable voltage. A filter made of electrolytic and ceramic capacitors is placed at the output of the module. The electrolytic capacitor performs a smoothing, stabilizing role. Ceramic capacitor is used to combat high frequency interference. If the module “beeps” the inductor during operation, to eliminate this phenomenon, an additional electrolytic capacitor can be placed at the input of the module. Electrolytic capacitors with a capacity of 1000 microfarads at 6.3V. Ceramic capacitors are suitable from 1-2 microfarads. The circuit used at 10 uF, because I had a lot of extra.
4. To power the display, you need a voltage of 3.3V, so a buck converter with similar filters from capacitors is added.
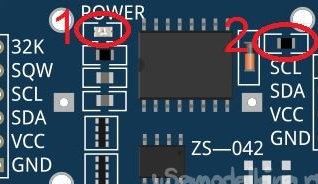
5. DS3231 clock module, needed for a more accurate timing. The Power LED (1) is soldered off on the DS3231 module. This is done for energy saving purposes. If you use ordinary batteries (not rechargeable), then you need to unsolder the resistor (2). The module is designed for rechargeable batteries, including charging them. If the battery is normal, the charging current will quickly render it unusable.
6. The main brain of the system is the Arduino nano platform. For energy saving purposes, you need to unsolder all the LEDs (or at least only Power), as well as bite off the left leg of the voltage regulator.
7. The pump is controlled via field effect transistors. Any that open with 5V voltage and are capable of switching current from 1A will do. At first I used the ready-made ones. I soldered a battery of field-effect transistors + resistors (100 Ohm to protect the Arduino, 10k Ohm to pull the shutter of the transistor to the ground so that the mosfet closes) + also soldered the connectors KF 301-2P for fixing the wires
Later made a more compact battery on AO3400 SMD mosfets

Somewhere in half a year 2 field-effect transistors failed. The reason was that, in braking mode, the collector motor works like a generator. To protect the field effect transistor, you need to use a protective diode. I used 1N4007.
8. The display shows all the information. To wake up the display, you need to hold the button for up to 10 seconds. If you change the minute in hours, the system will go to sleep, and the display will turn off.
Build process:
First tests on a breadboard and writing firmware
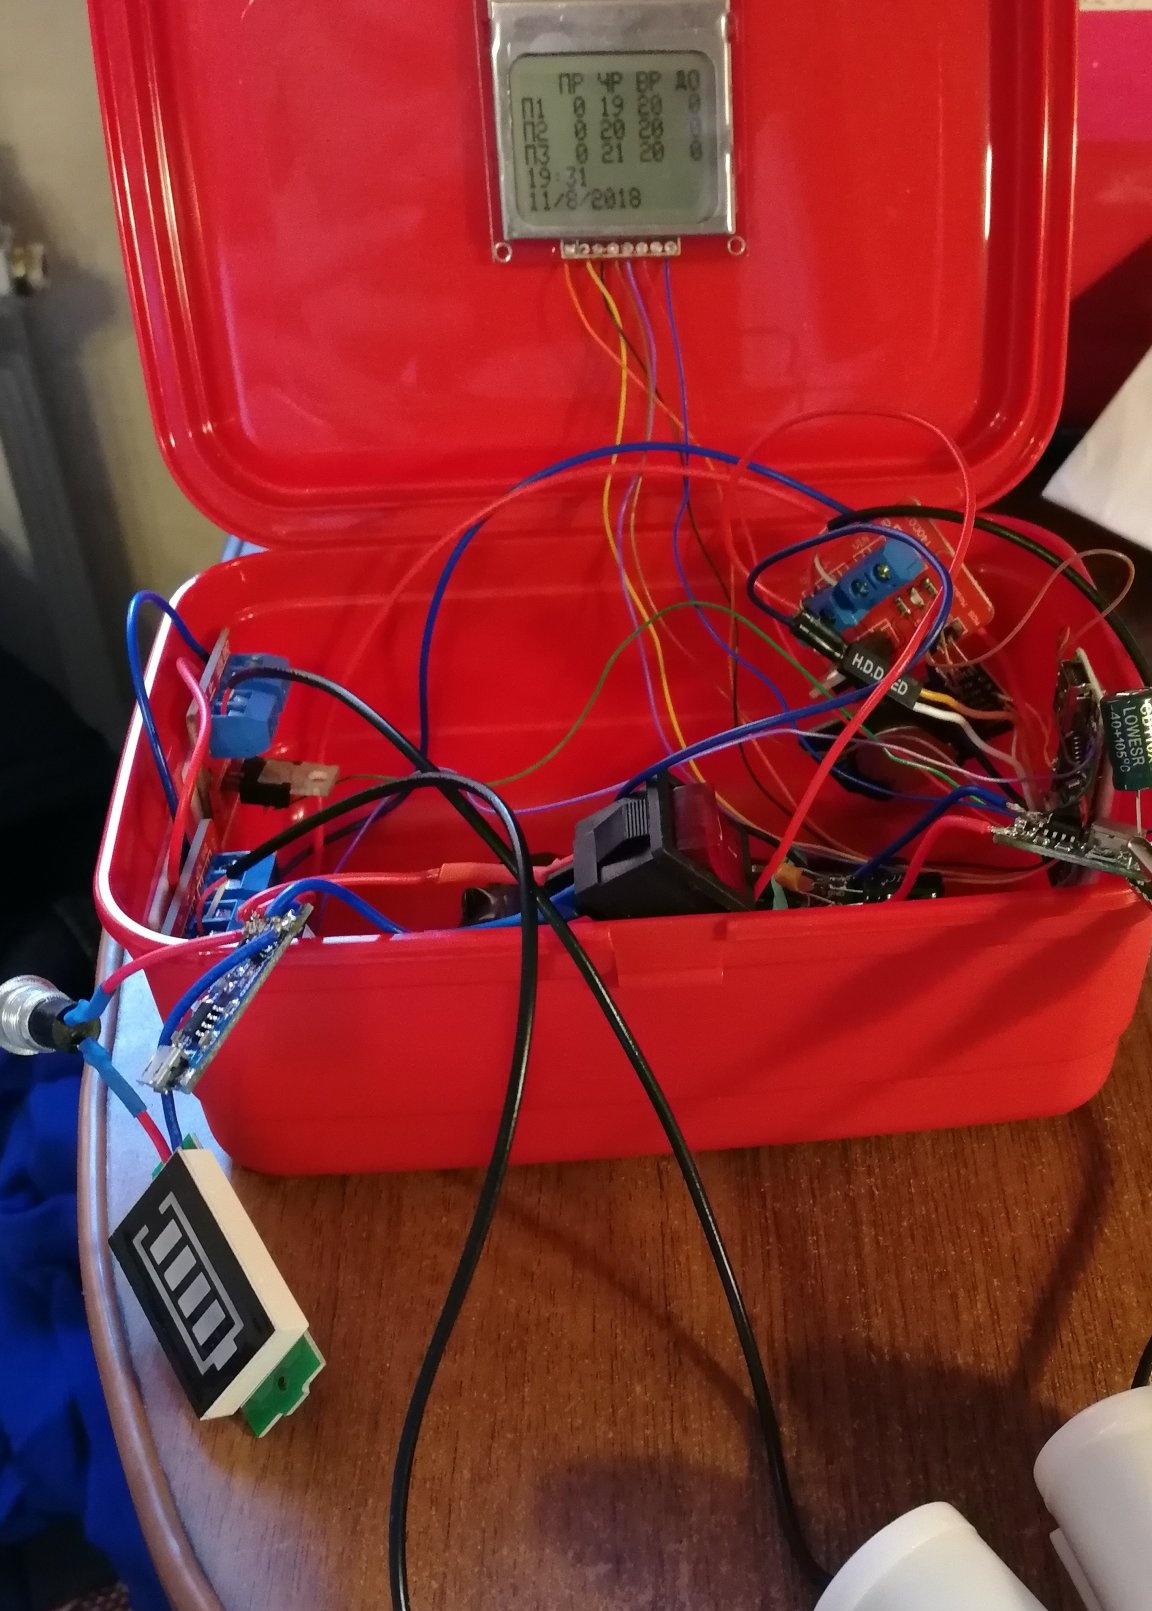
Next, connected everything with a hinged installation
Picked up the body and tested with real pumps
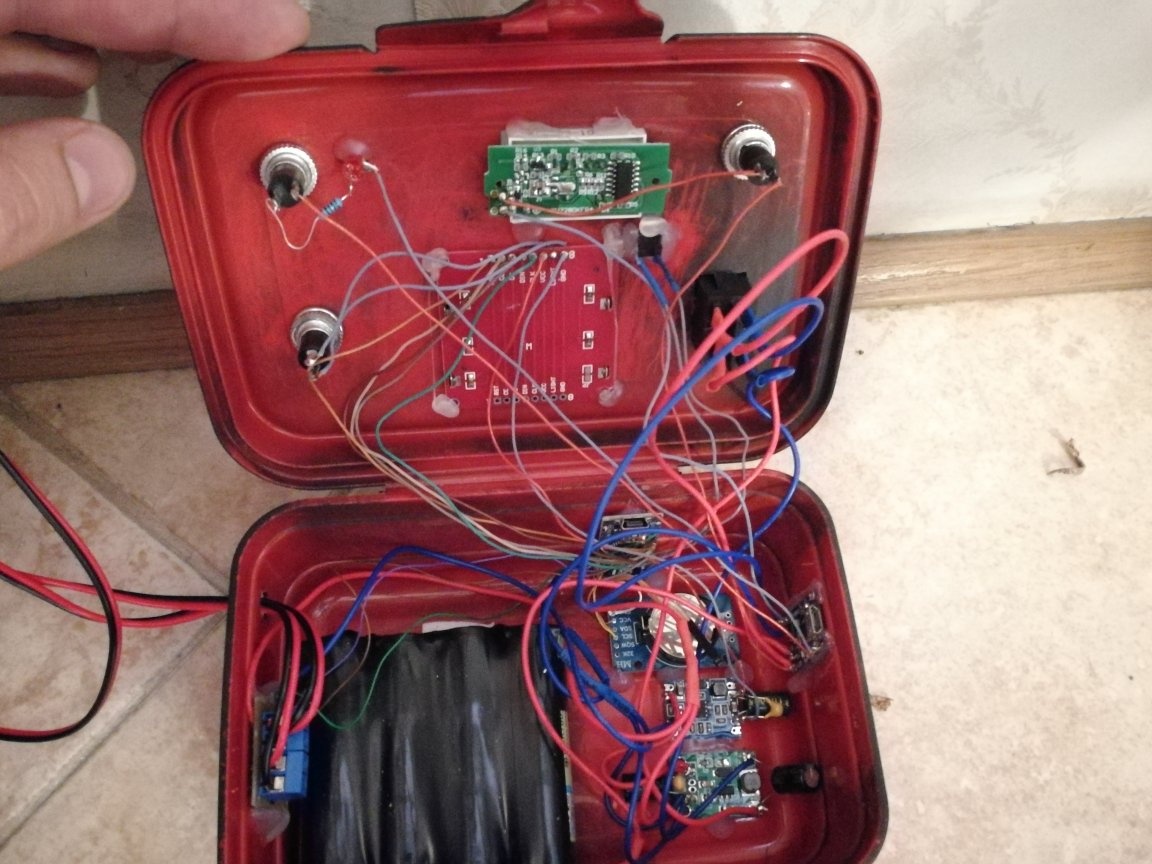
I drilled holes in the case, painted everything with a black matte primer and fixed the components to hot-melt adhesive
Additional assembly points:
• A container of water must always be located below the pots, otherwise there is a risk that water will continue to pour after turning off the pumps.
• The distance from the bottom of the container to the end of the tube must not exceed 70cm. It will be more difficult for the pump to raise water to a greater height.
• On a mini pump with Ali, transparent hoses 6x1.5 mm are great
• It is important that the opening of the water intake pump does not rest against the wall of the water tank, otherwise there will be no normal pressure.
• Do not use iron parts (clamps, wire, etc.) to fasten the hose to the pump. Everything rusts very quickly.
• The pump has short wires. Most likely they will have to be increased. To seal the wires, it is best to use hot melt adhesive, and on top heat shrink.
The logic of the program:
• Arduino gets out of sleep
• DS3231 module readings (date and time) are assigned to variables
• When the date changes, the value of the counter of past days changes
• If the period of work (setting) coincides with the number of days passed, the hour is checked
• If the hour (setting) and the hour from the time module coincide, turn on the pump for the time specified in the settings
• Arduino goes to sleep
• If you hold the sleep button, power is supplied to the display and the Arduino wakes up
Watering settings are indicated here in this part of the code:
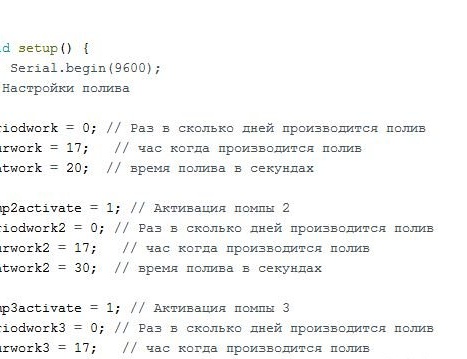
I apply a sketch and libraries
In general, I am satisfied with the system. She regularly watered my plants on the windowsill for about a year. Now I moved the system to another room, and in my own I put together a new, more convenient and interesting one, but that's another story ...