
Different masters have different preferences for a personal instrument. Some people buy it in stores, while others find a homemade tool the best.
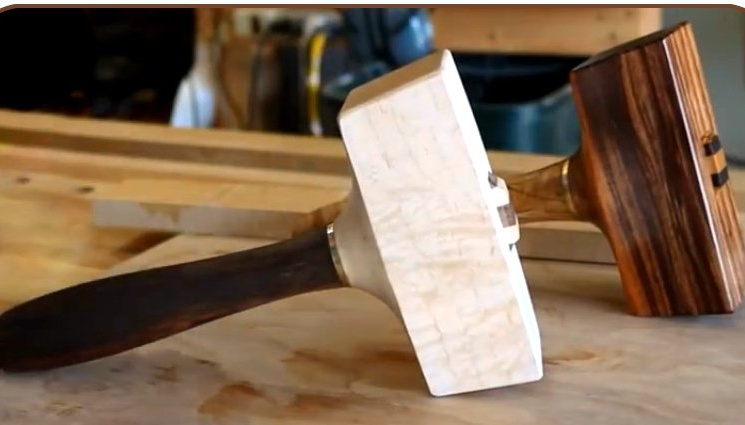
In this article, the author of the Third Coast Craftsman YouTube channel will tell you how he made two original hammers from various valuable varieties of wood.
In addition, this master preferred to make them almost completely by hand. An exception was the processing on a lathe of blanks for handles.
Materials
- Curly Maple Boards, Cocobolo
- Wooden blocks of rosewood and aged maple
- PVA glue
- Two-component epoxy adhesive
- brass plate
- Sandpaper.
Instruments, used by the author.
- Hand drill, jigsaw
- Rasp, file
- Caliper
- Planer, zenzubel
- Workbench, vise, ruler, pencil, square.
Manufacturing process.
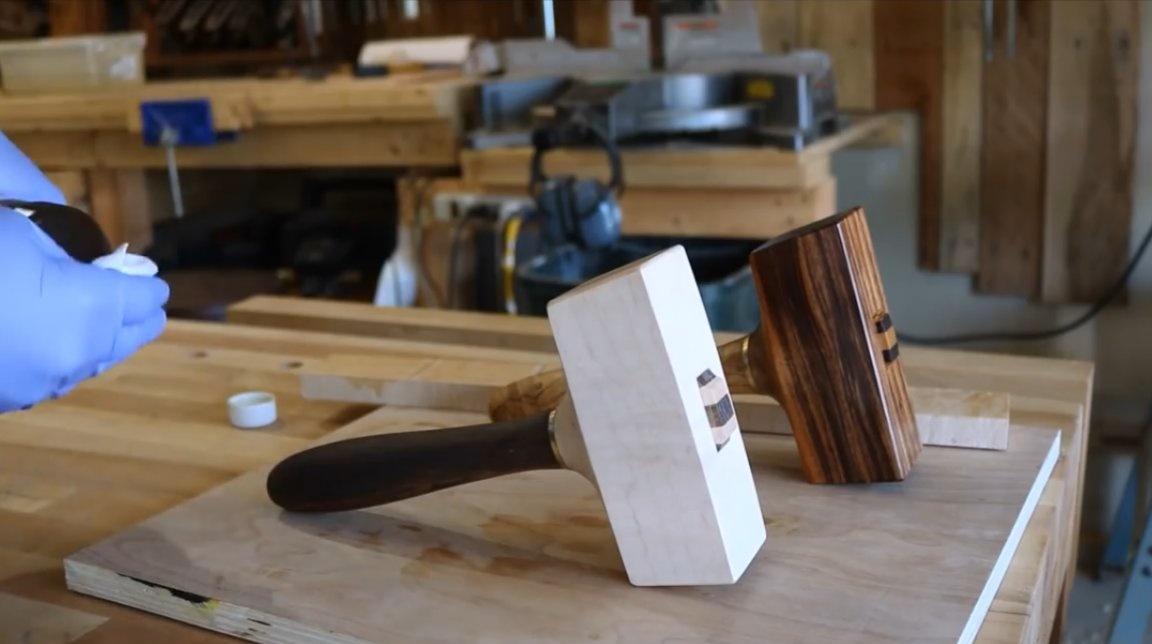
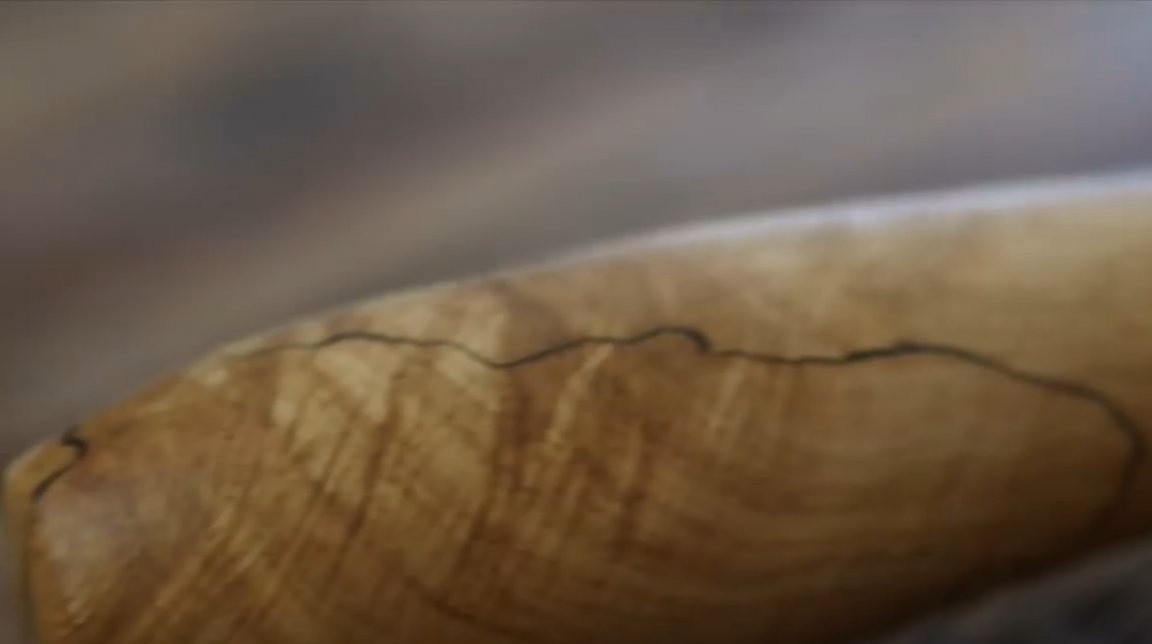
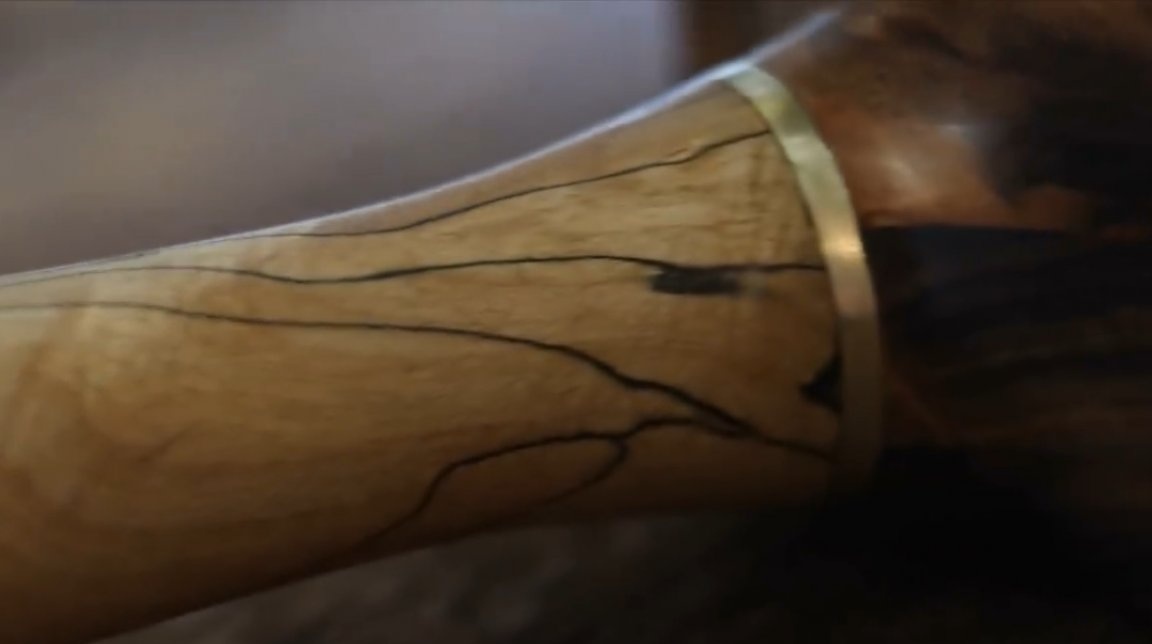
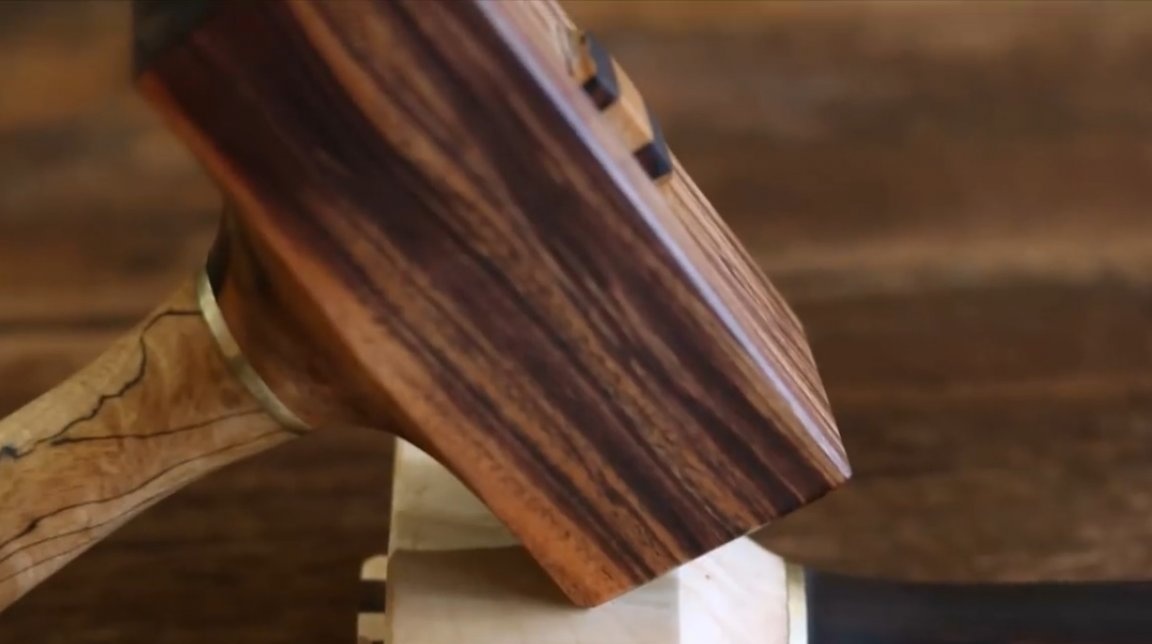
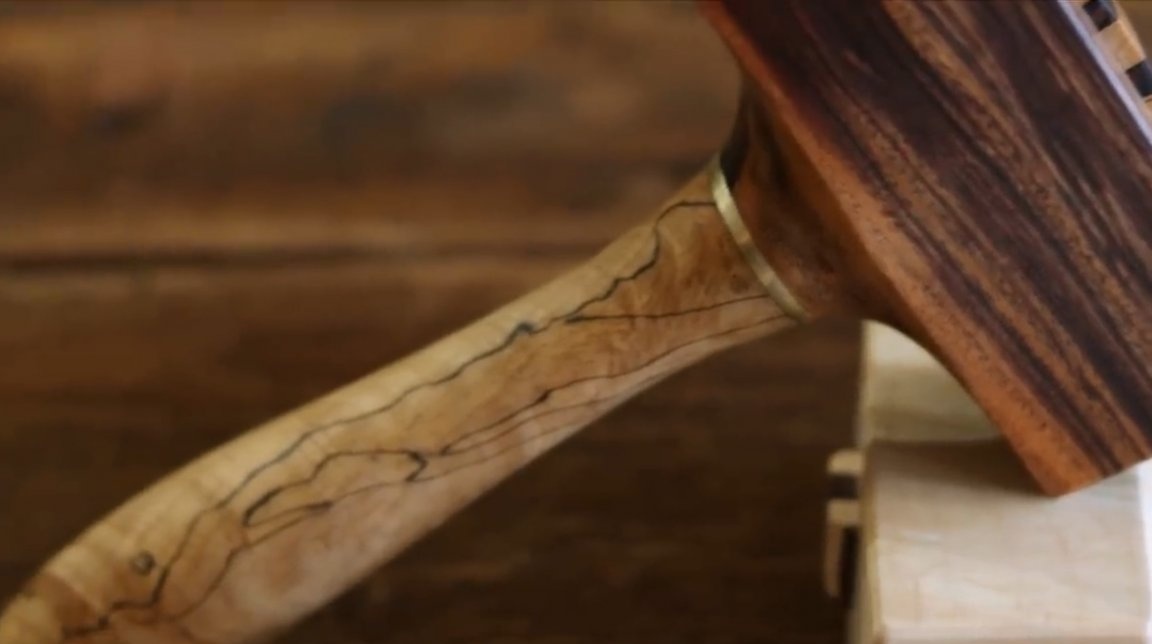
The author will make two mallet. At the first, the head will be made of curly maple wood, and the handle will be made of cocobolo wood; the head of another instrument will be made of Patagonian rosewood - rosewood, the handle - of aged maple wood.
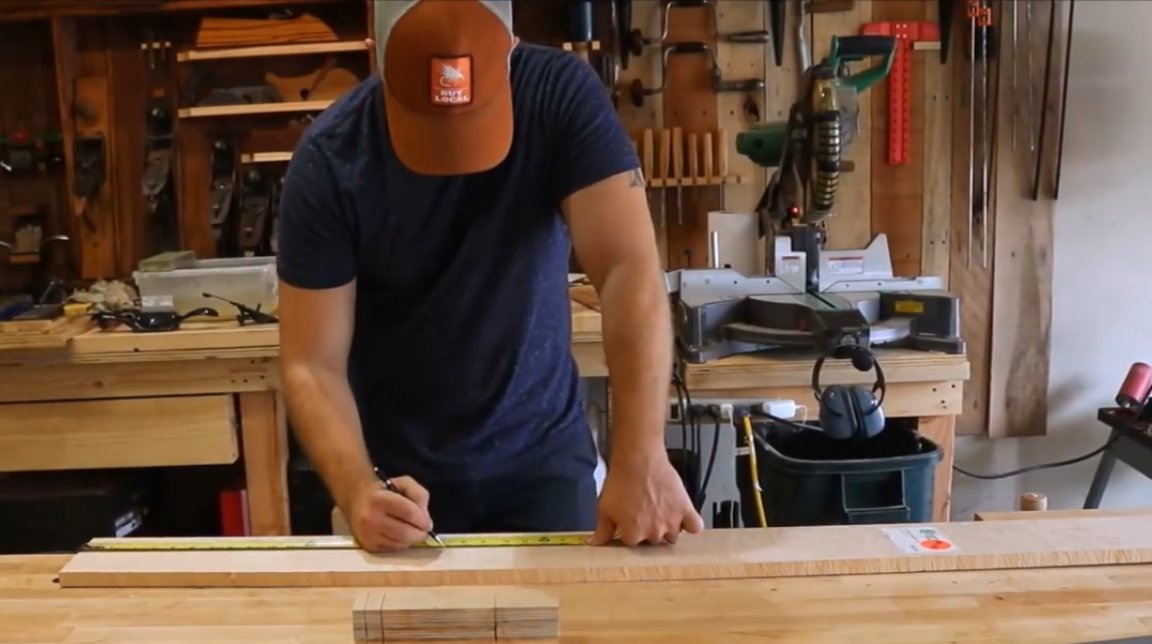
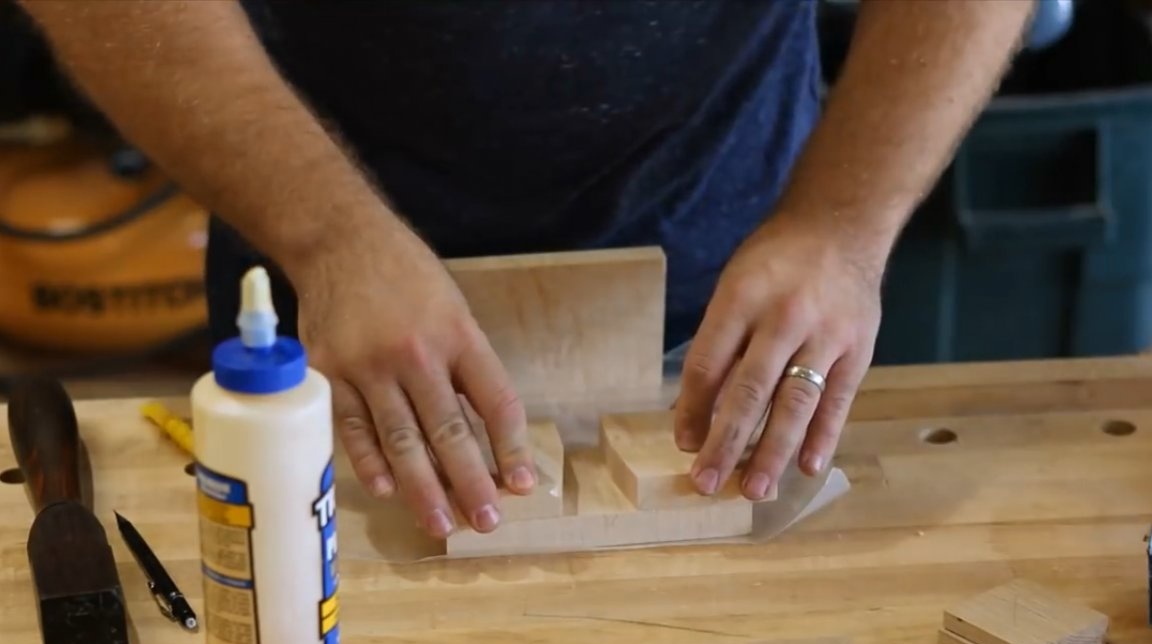
The master did not have wood blanks of such a size that they could be used to make the heads of mallet entirely, because these are quite valuable wood species. And he had to make them from the boards. First, he cuts a curly maple board in size using a Japanese saw.

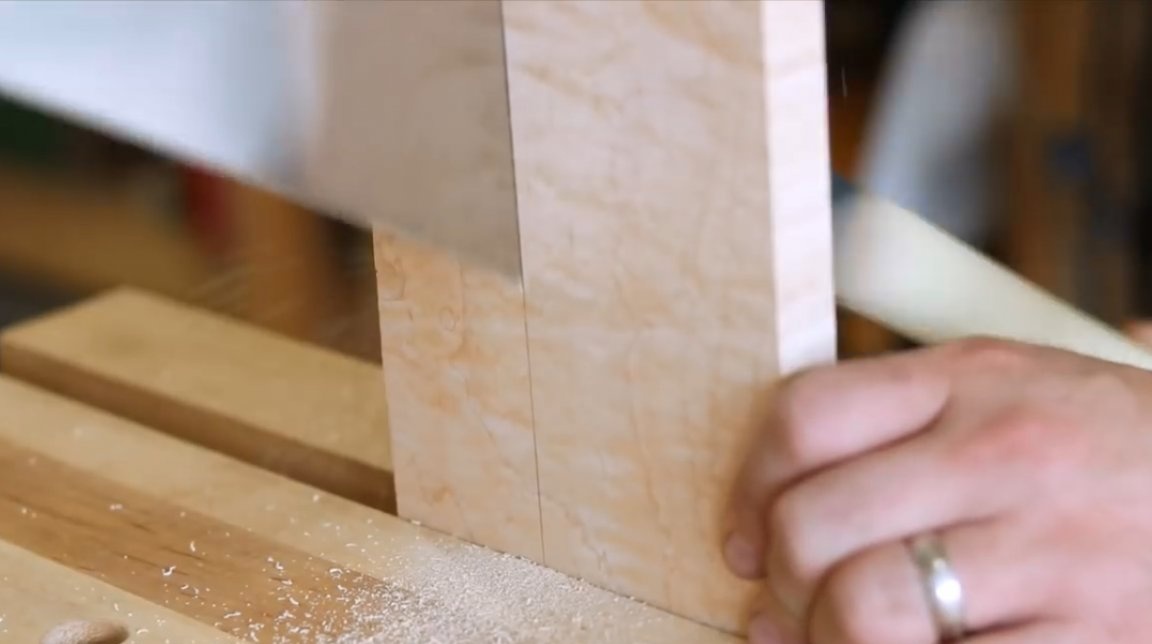


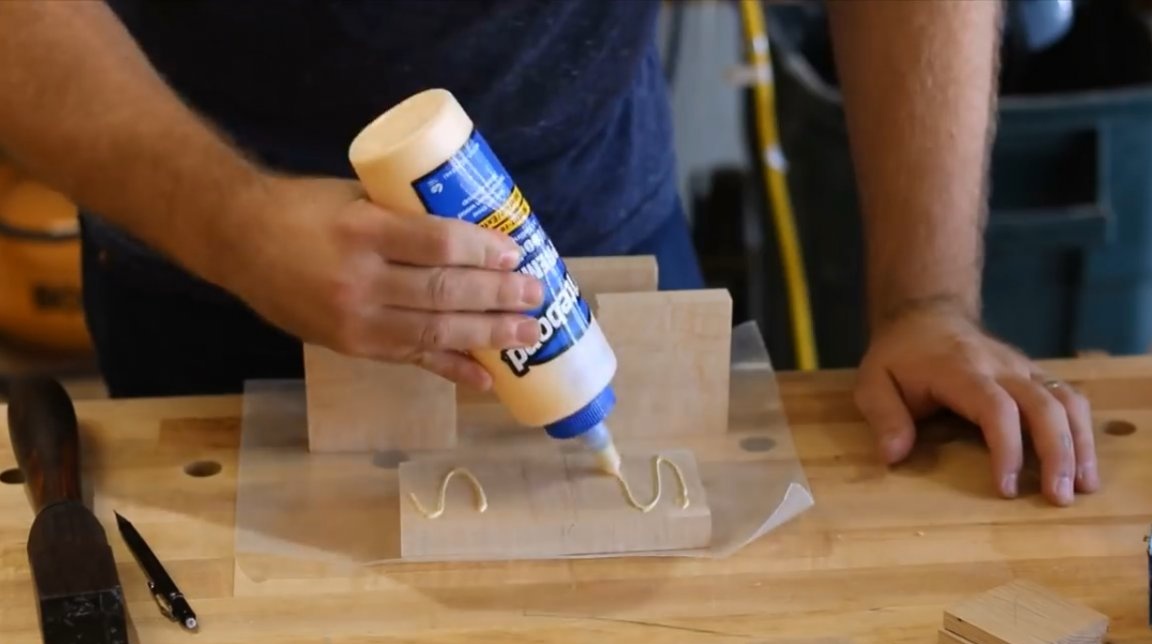
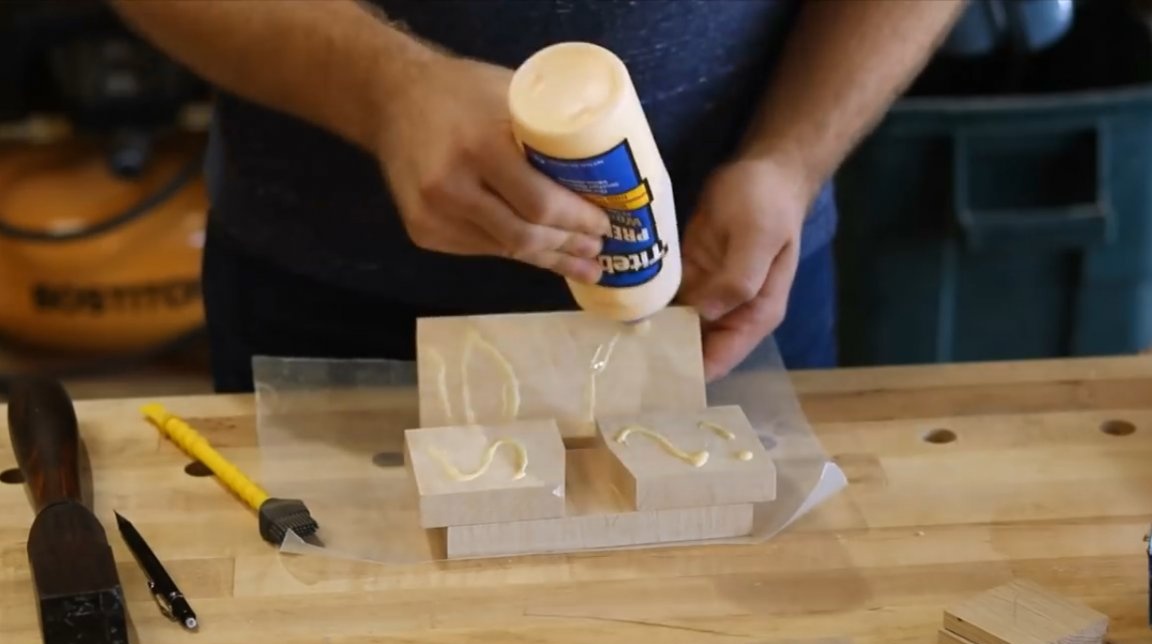
Then it smooths the surfaces with a planer, cuts in half and, before gluing the details with glue, cuts out small bevels on each of the halves of the board. In the future, this will make a groove in the head of the mallet and eliminate the need to hollow out this gap from a single piece. The slot is made at an angle, since the author intends to use a mortise wedge and a spiked connection. With the expansion, the wedges will create a really strong connection.
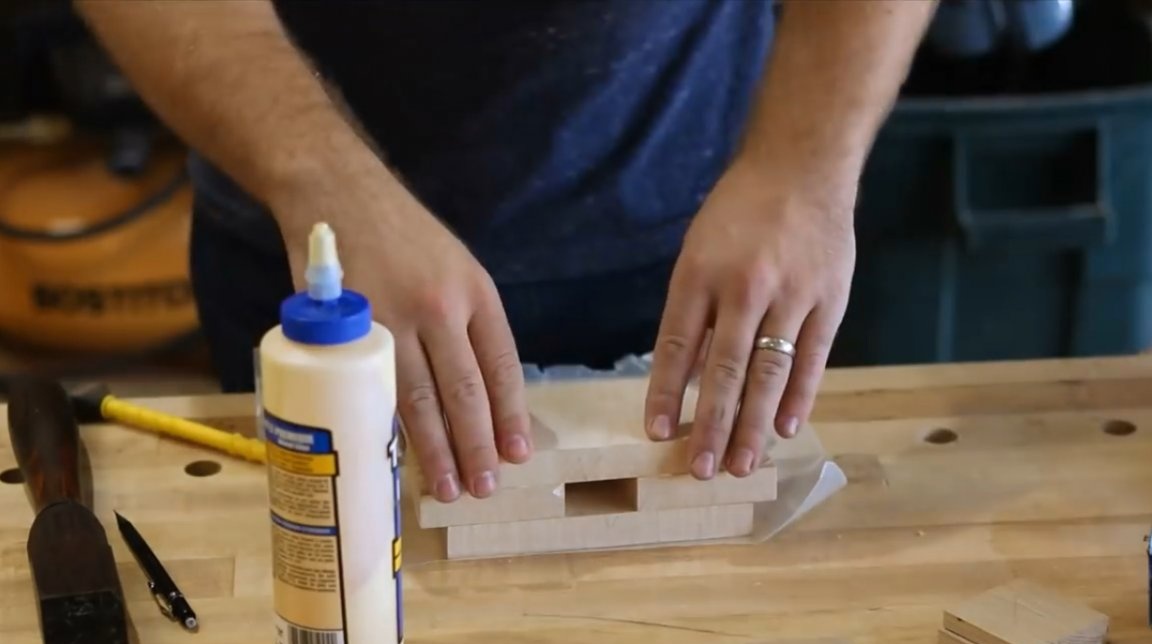
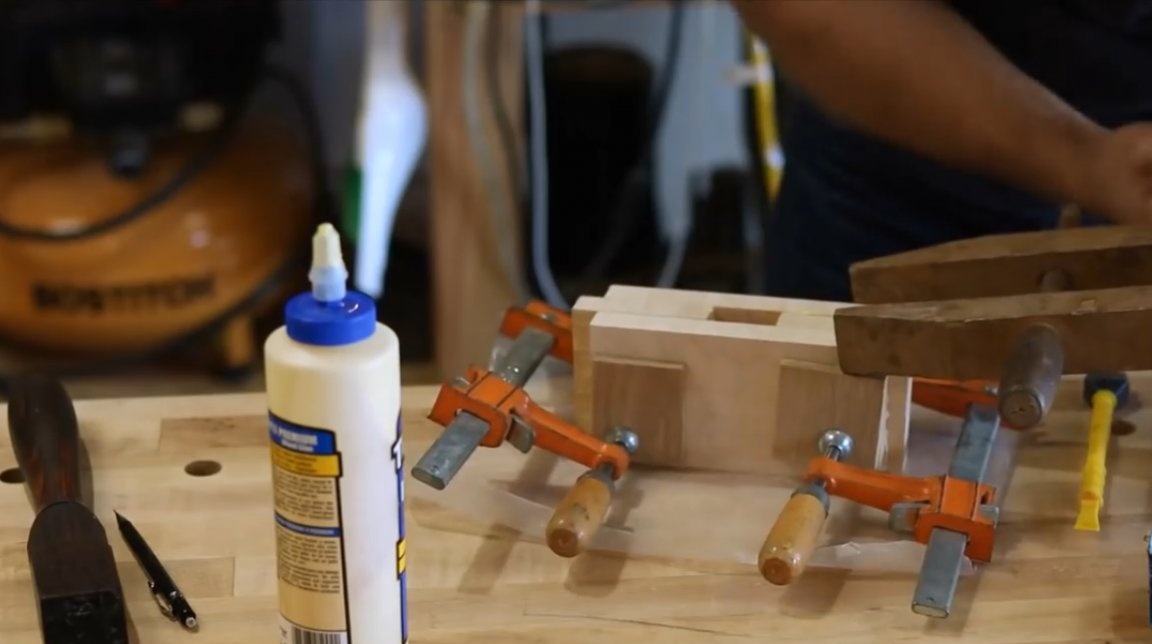
Now all four head elements are glued together and clamped with clamps. Here the internal structure of the head is very clearly visible.
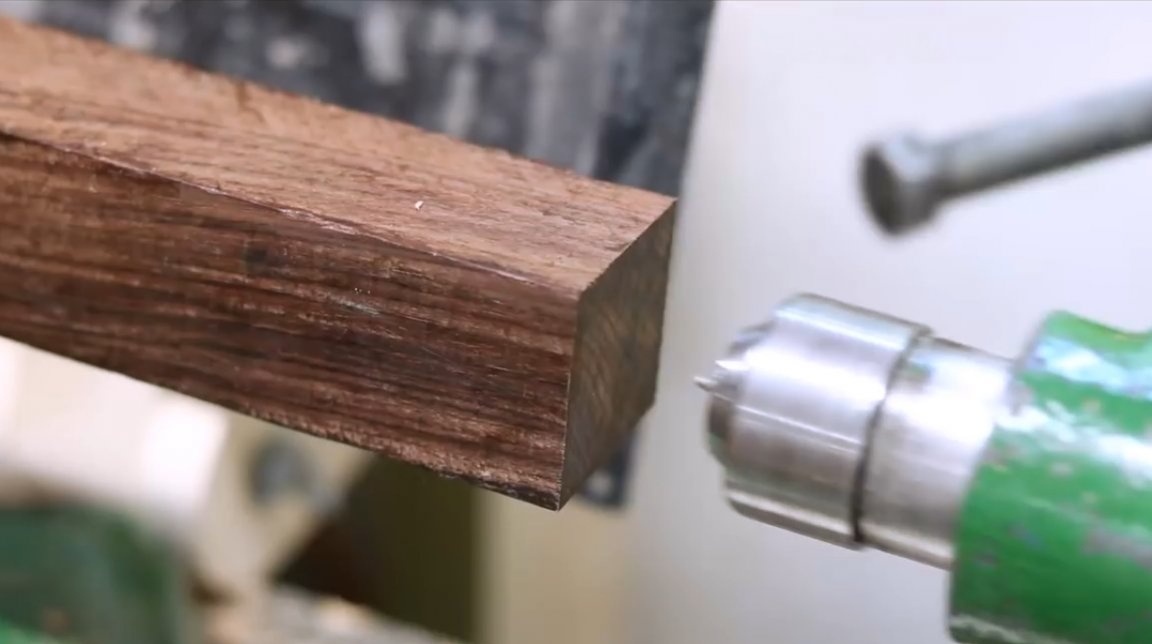
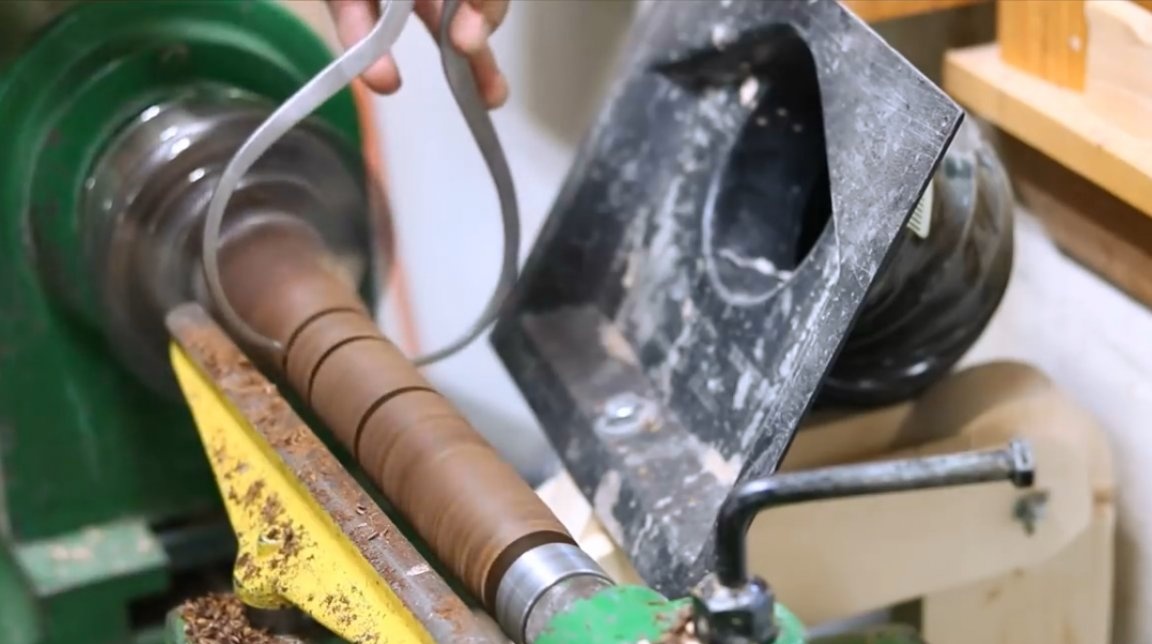
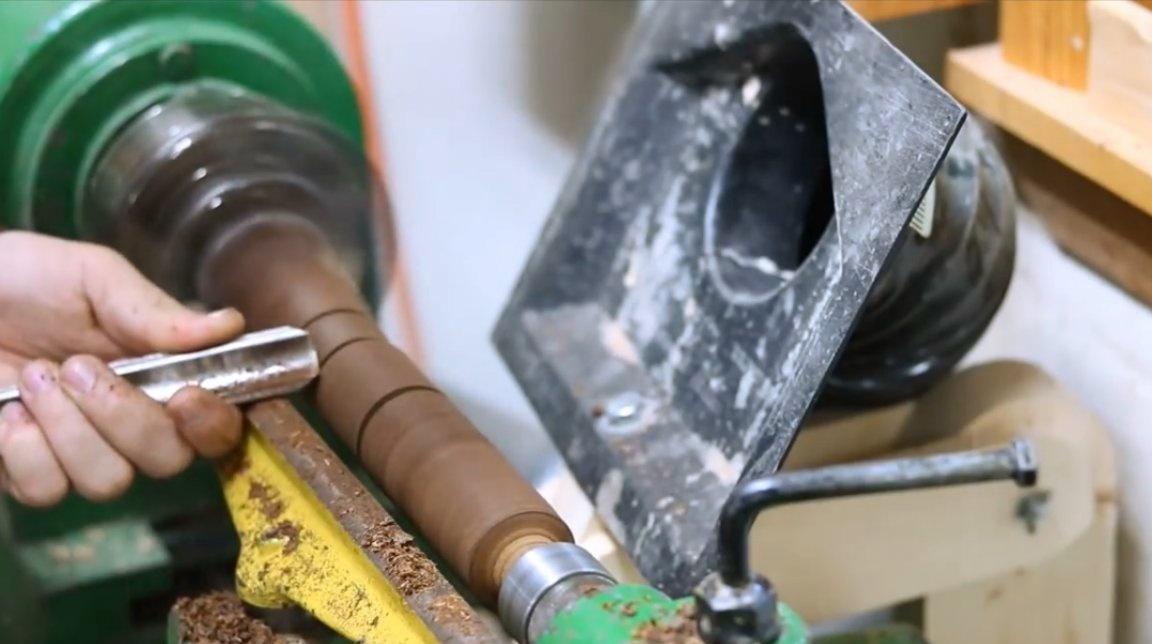
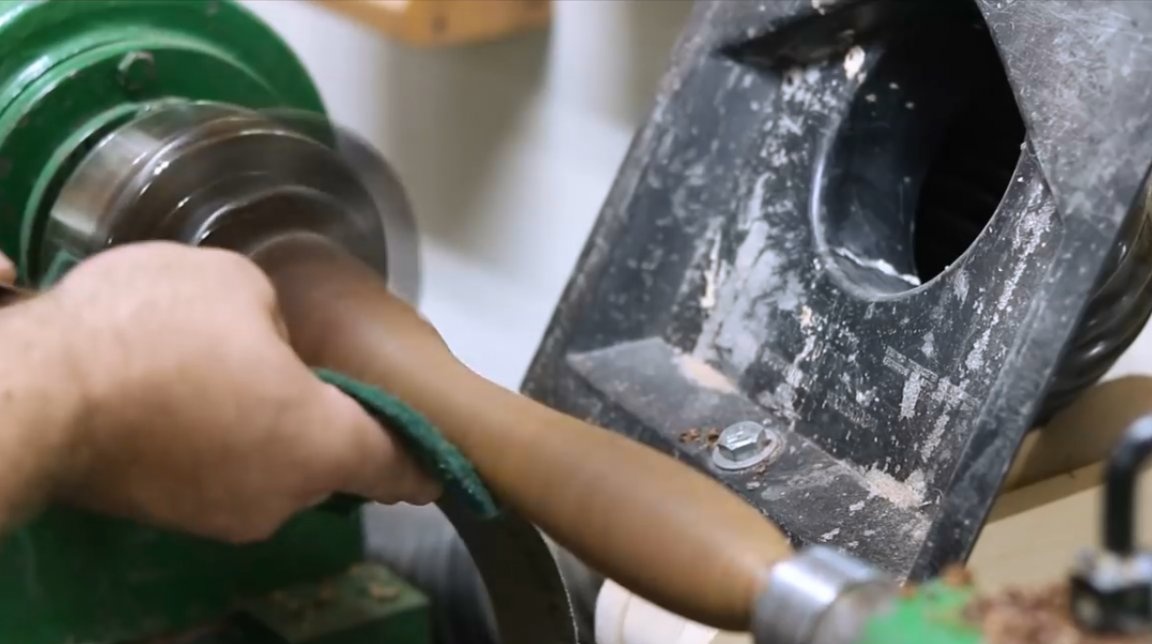
The next step is turning the handles on a lathe. The author fixes the blank of rosewood in a lathe, and pre-processes the bar.

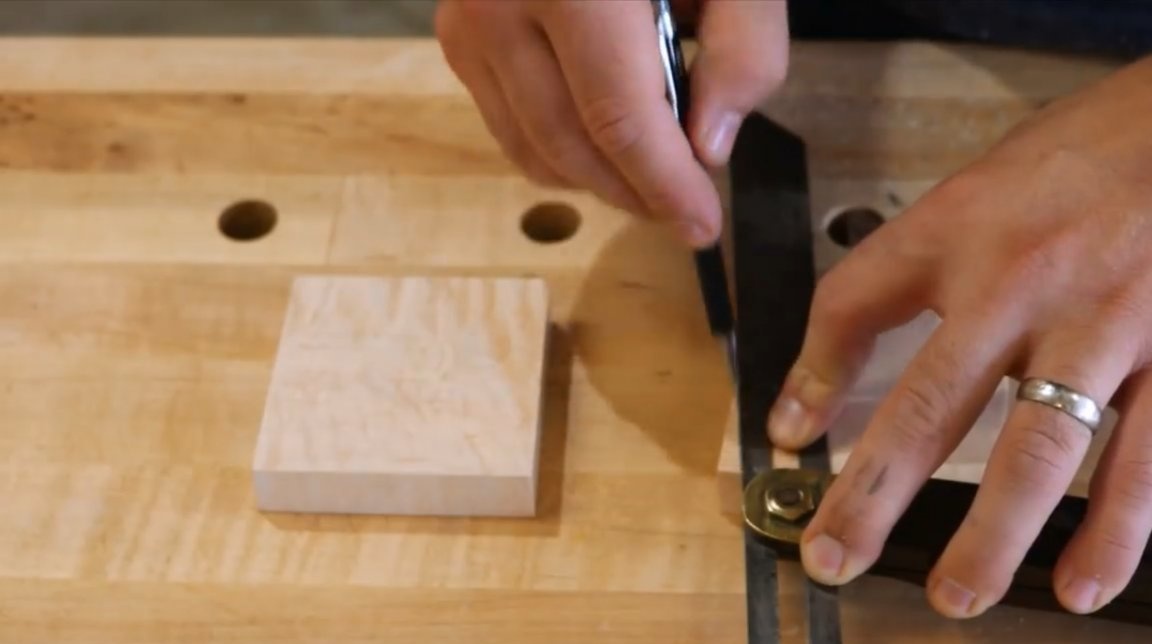
Now he makes markup, and prepares an interesting tool - a caliper. Now you will understand why it is needed.The author will measure the size of the thickness of the handle with this tool in those places where he put marks with a marker.
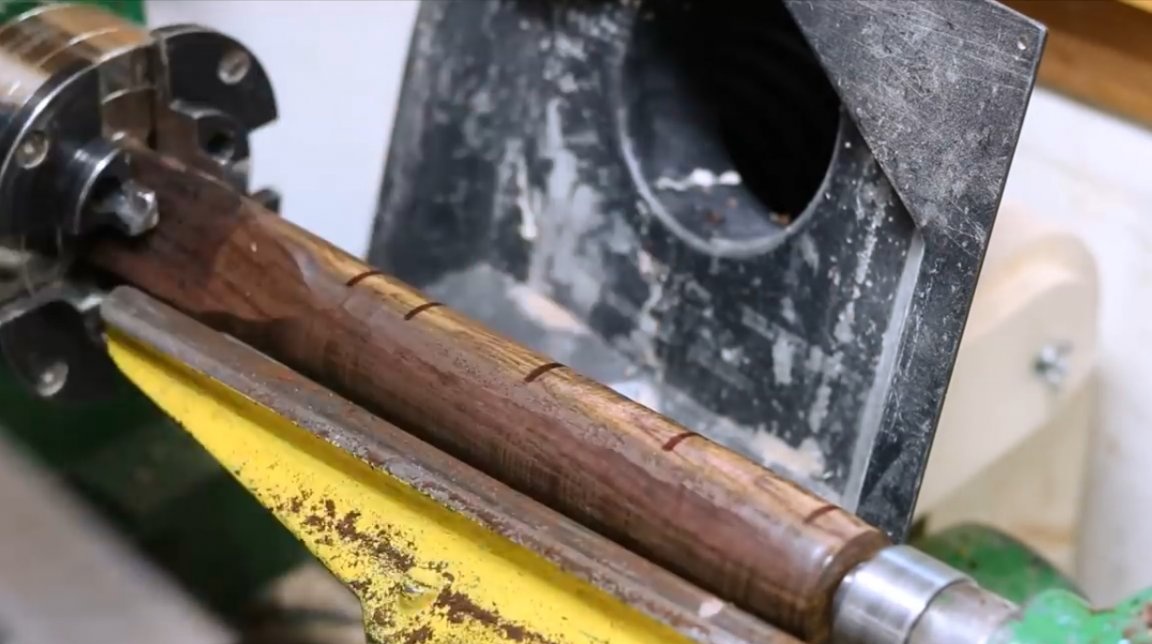
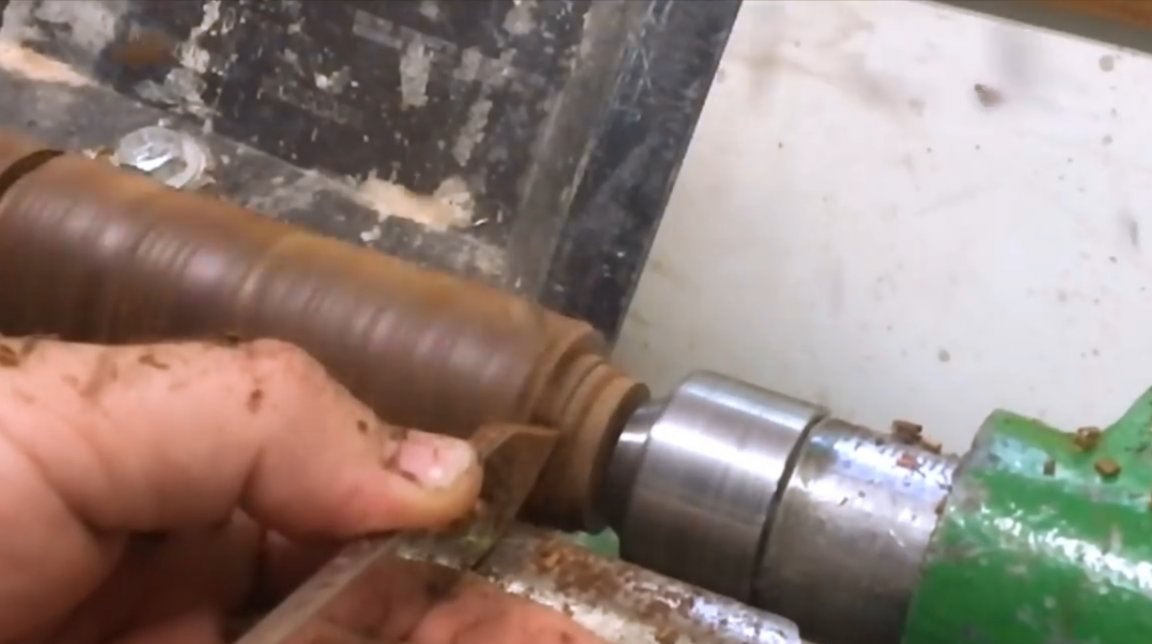
Cutting the shallow grooves in the handle with a cutter, he adjusts the thickness with the help of a caliper. This tool bends the paws quite easily, so you can fix the desired diameter, and check compliance with the drawing.
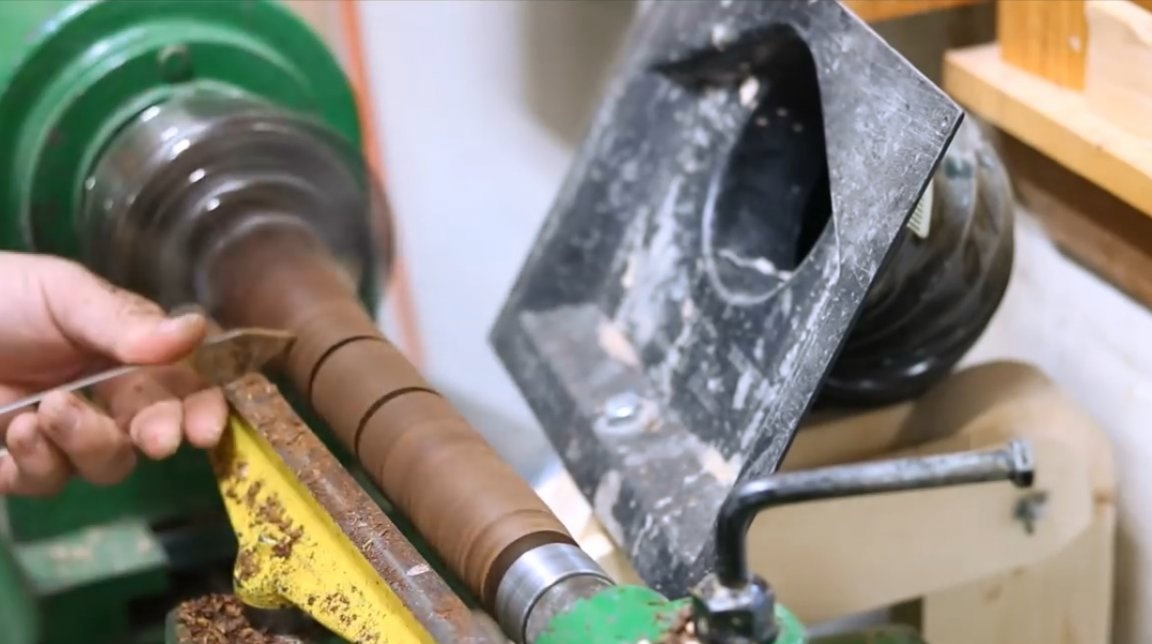
As soon as all the grooves correspond to the required size, all the rest of the material is ground until the tracks from the grooves disappear.
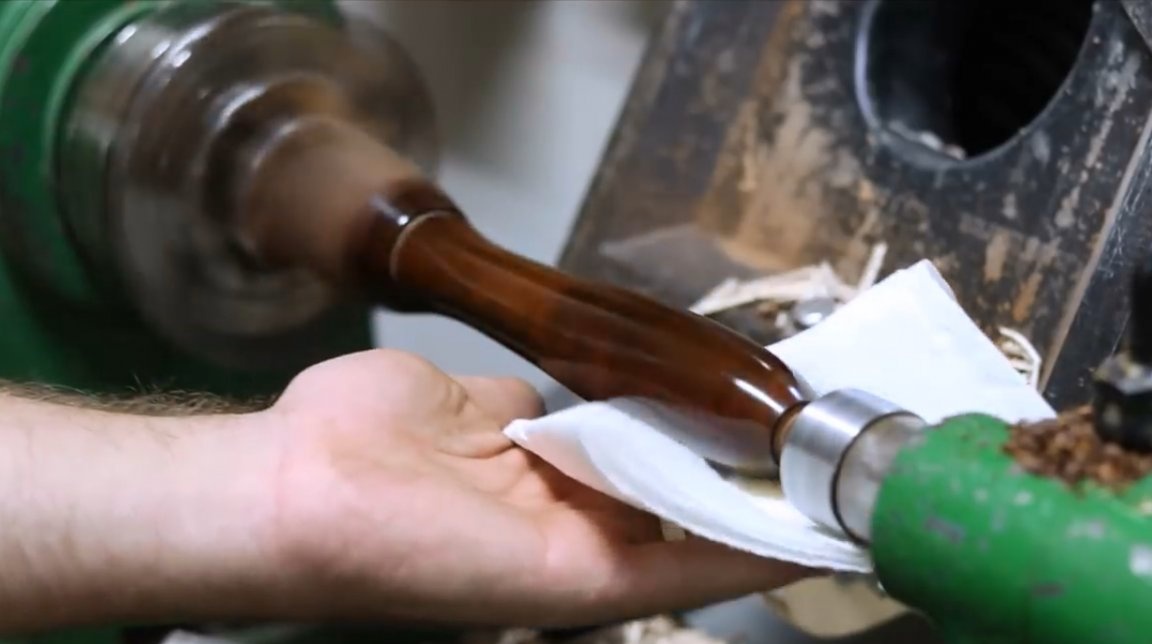
Now the product is sanded with sandpaper. Great handle shape, isn't it?

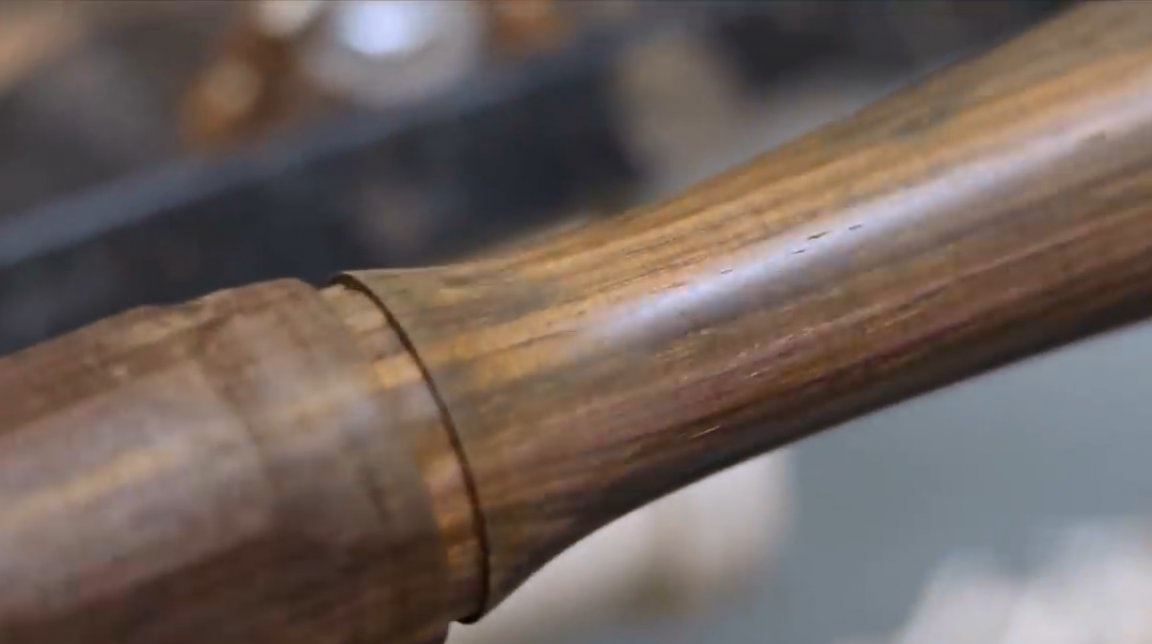
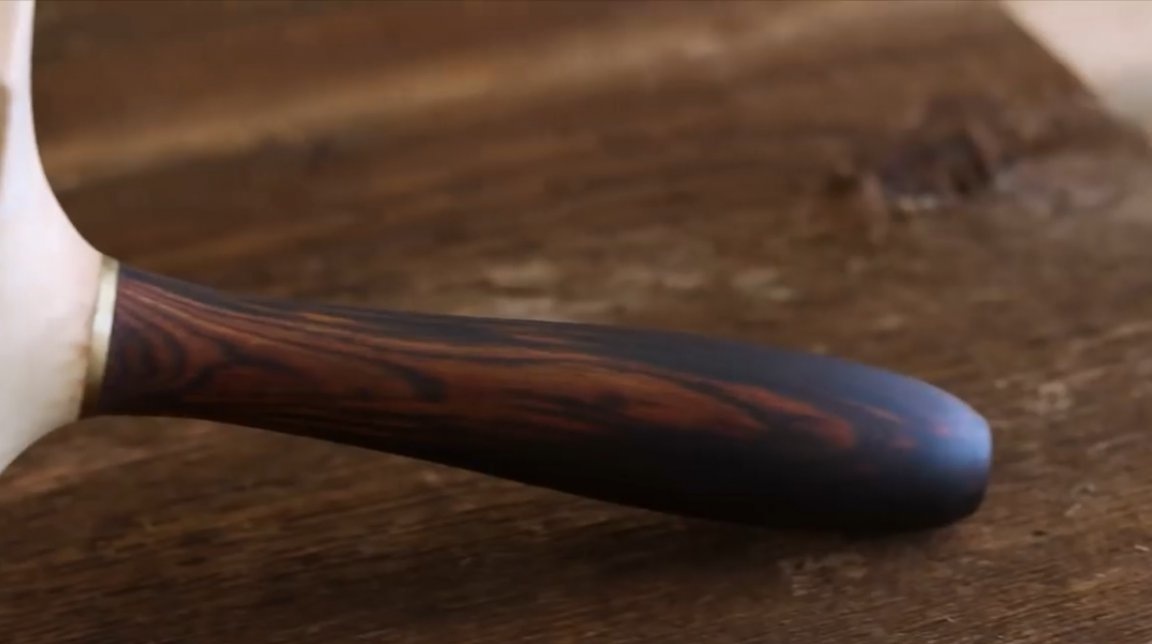
The handle is soaked in linseed oil, the color of the rosewood is just perfect!
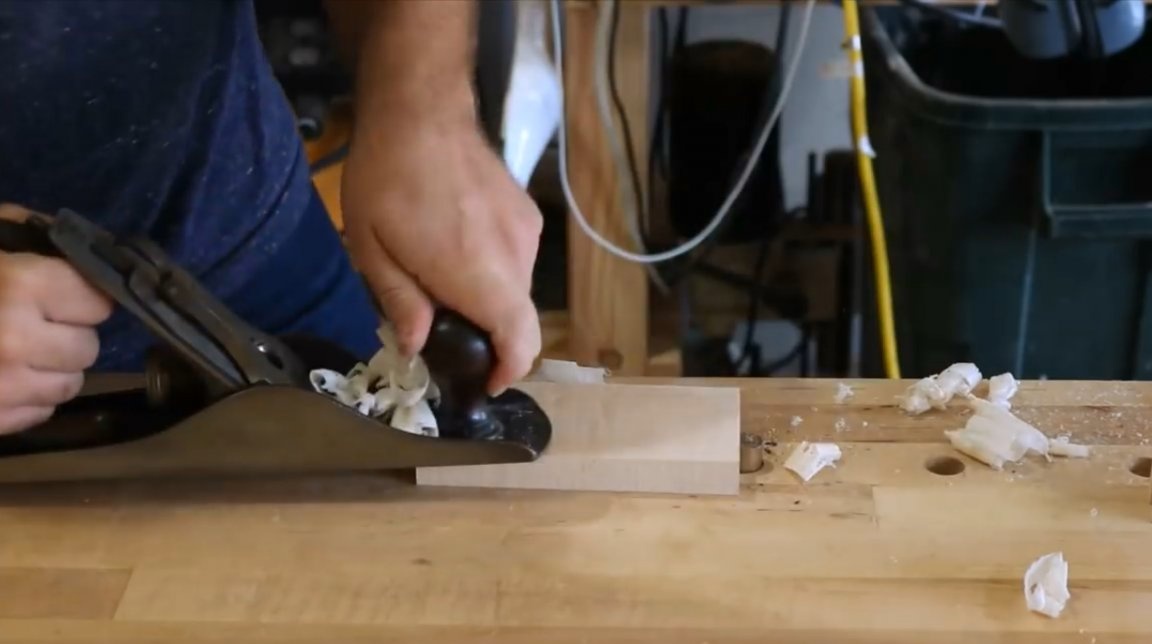
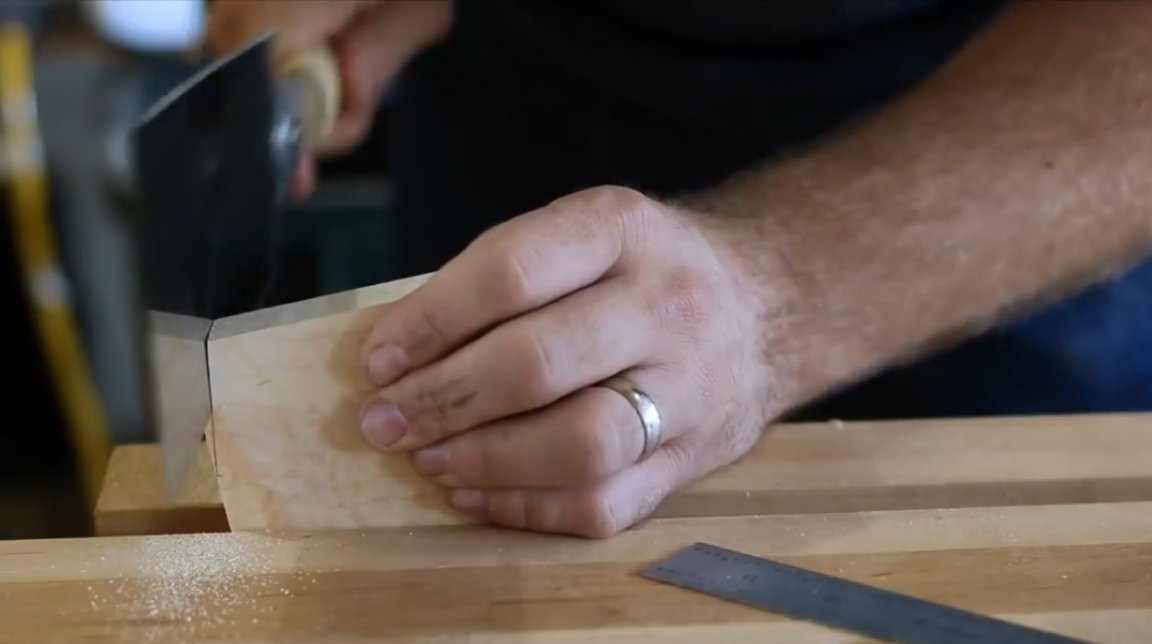
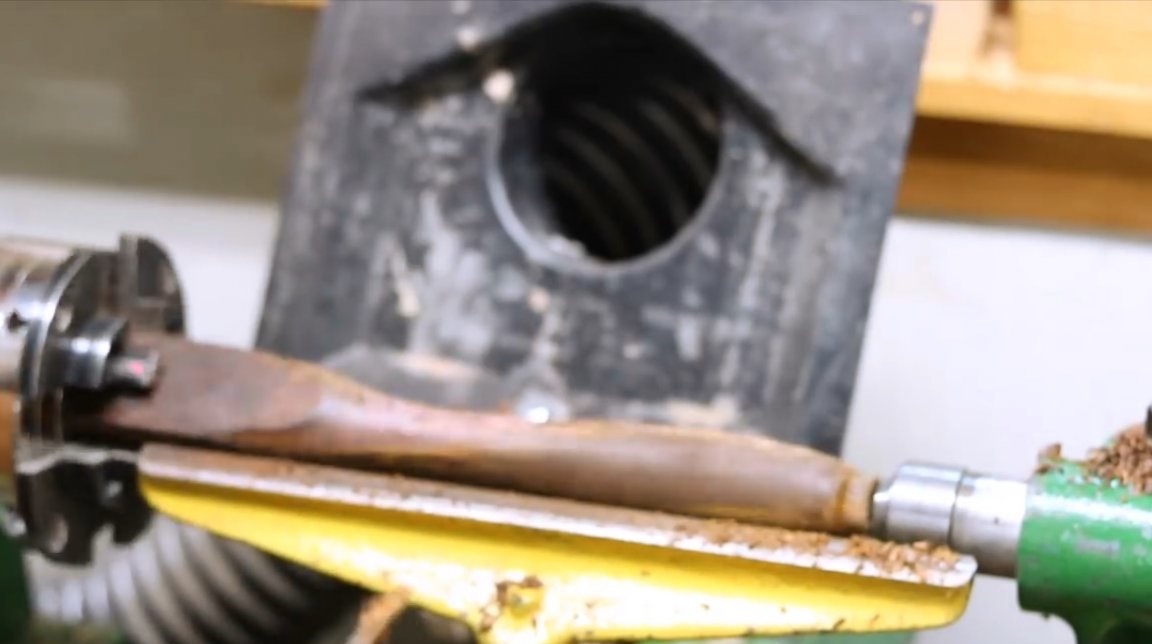
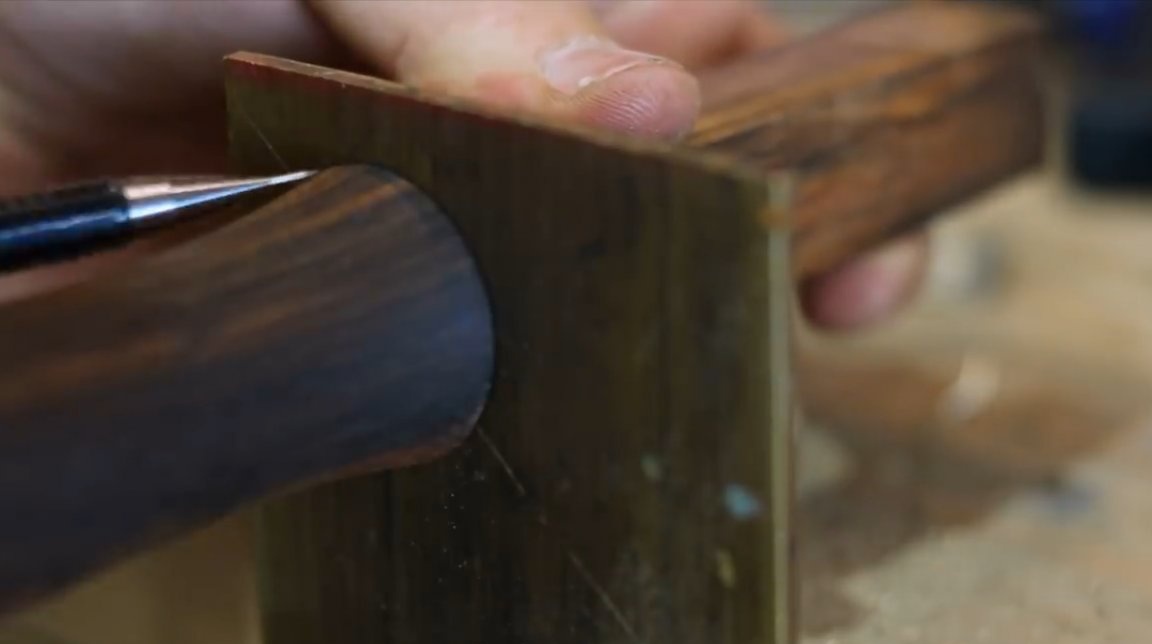
By the next step, the author cuts a spike-like connection under the head of a mallet. The author had previously thought about whether to cut the spike before turning the handle. After all, it is really a difficult task to cut the spike so that it is completely in line with the rounded part of the handle.
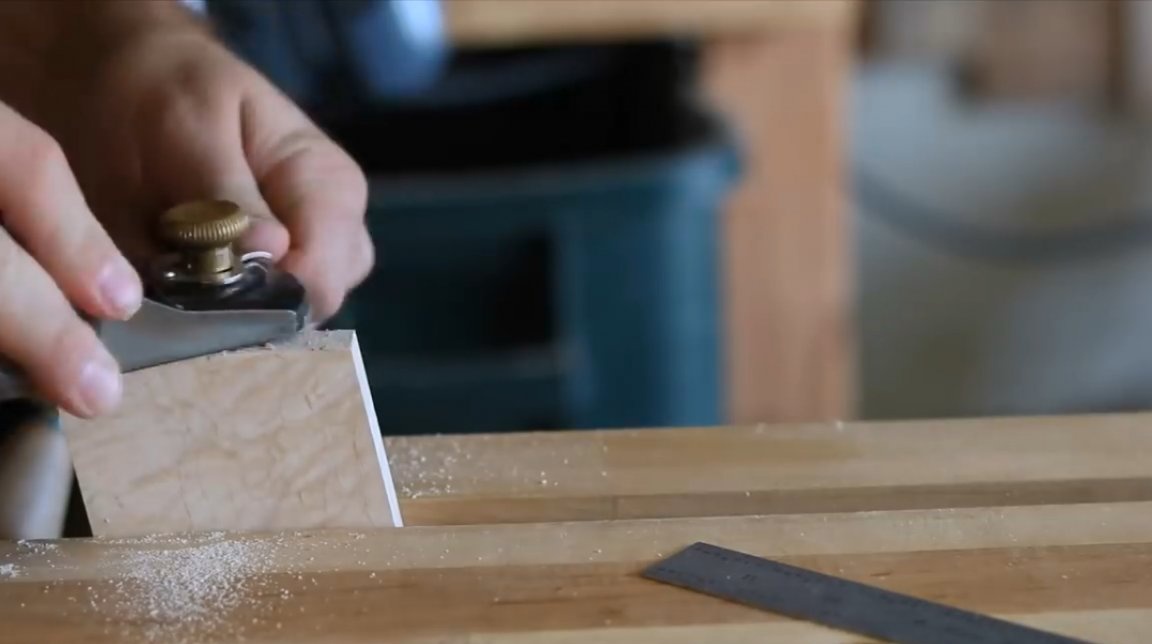
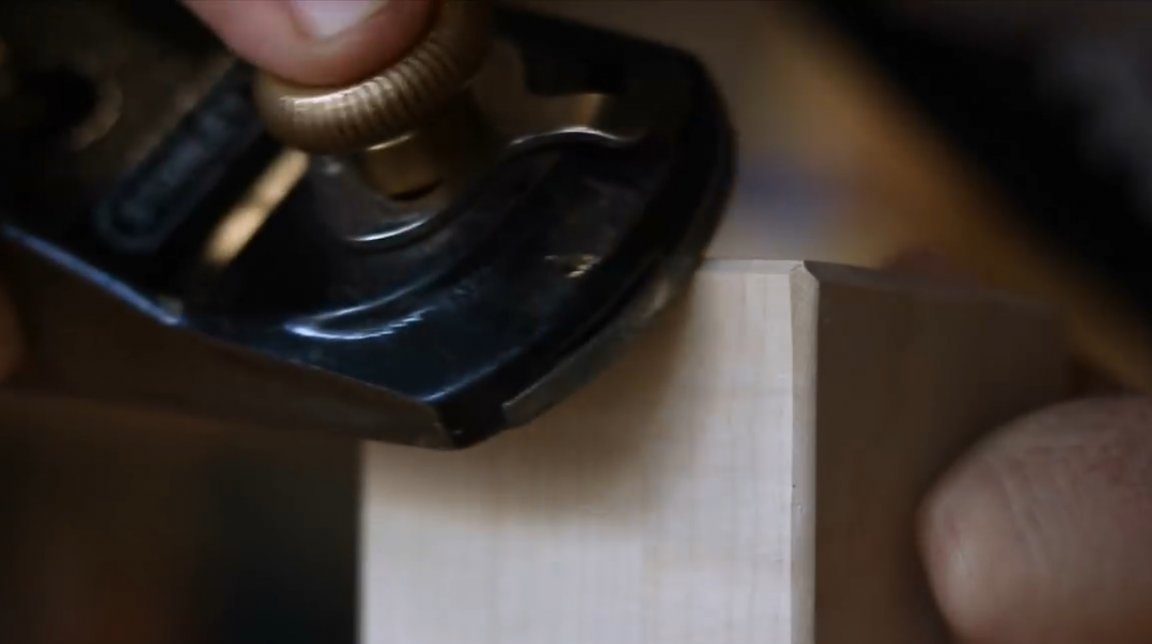
First, it forms two planes on two opposite sides, and cleans them with a zenobel.
Now forms the two remaining. Yes, nevertheless it would be easier for the author to cut the spike first, and only then to round the handle on the machine.
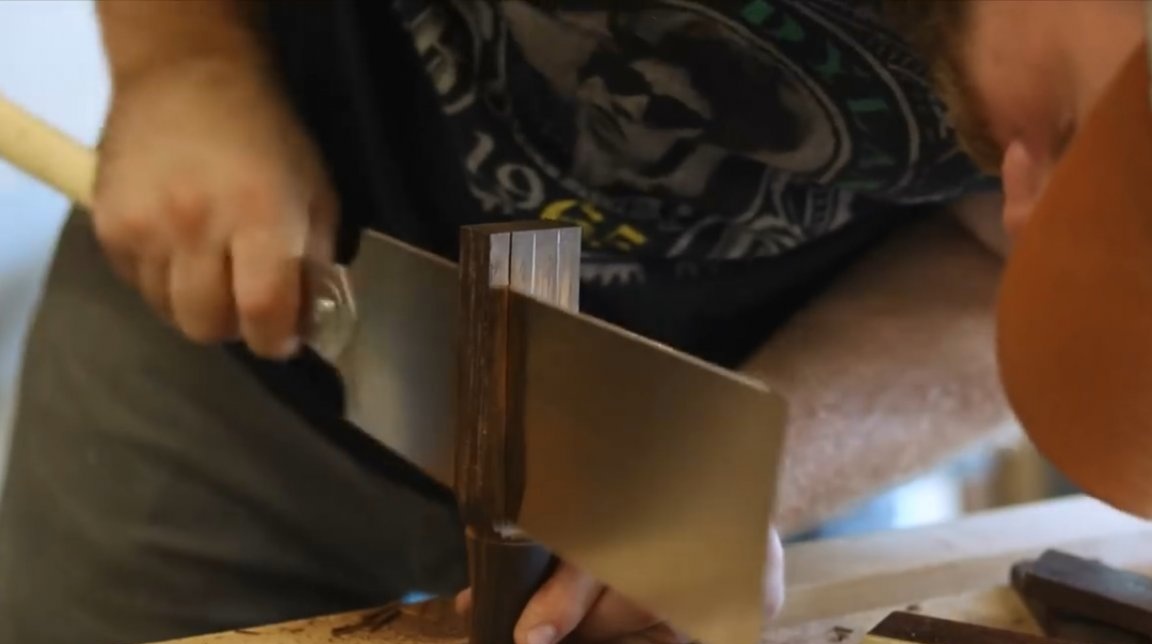

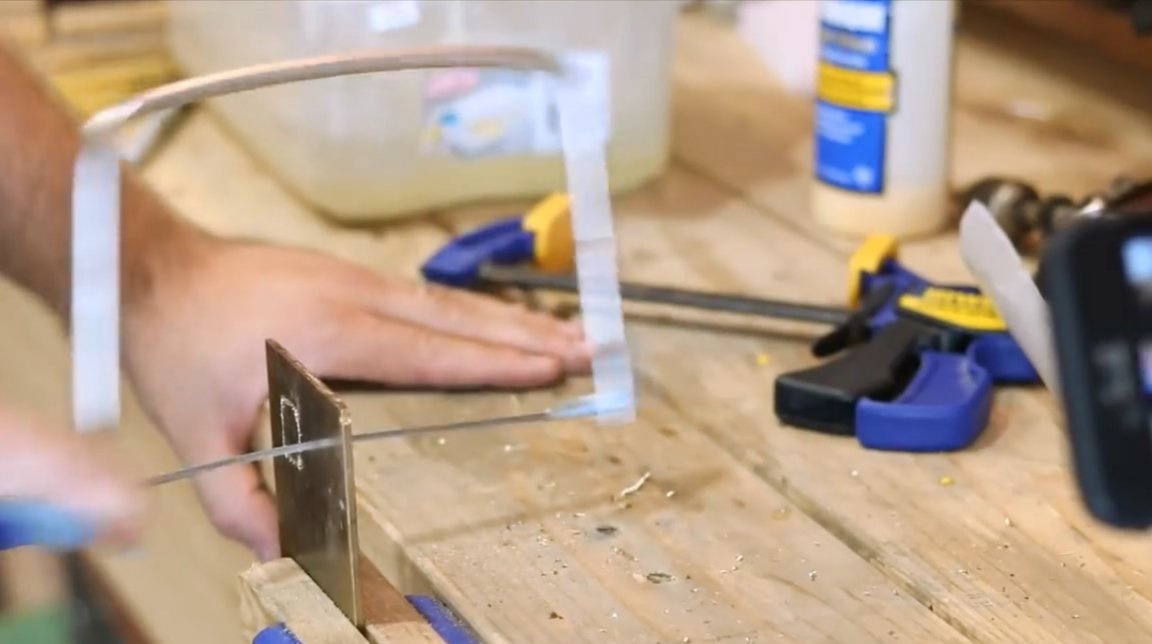
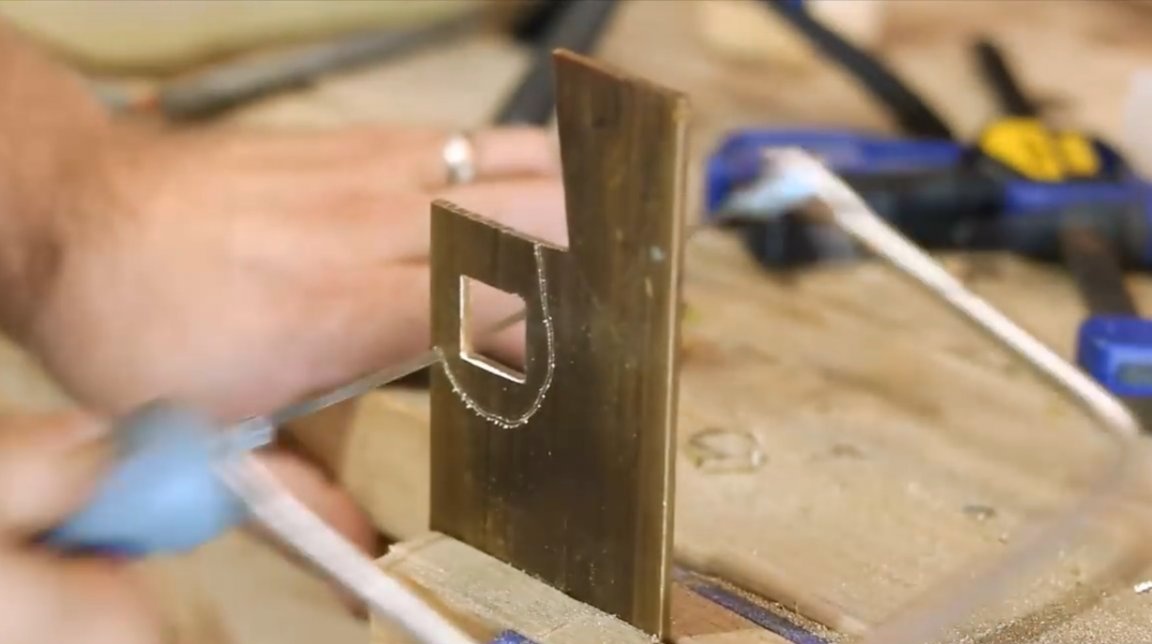
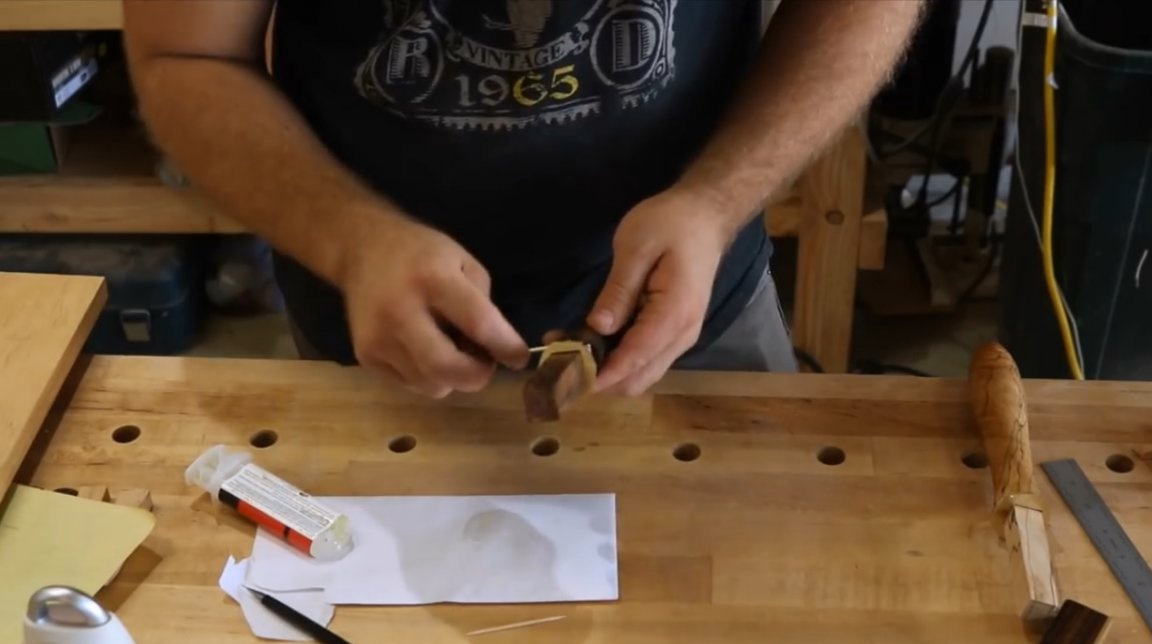
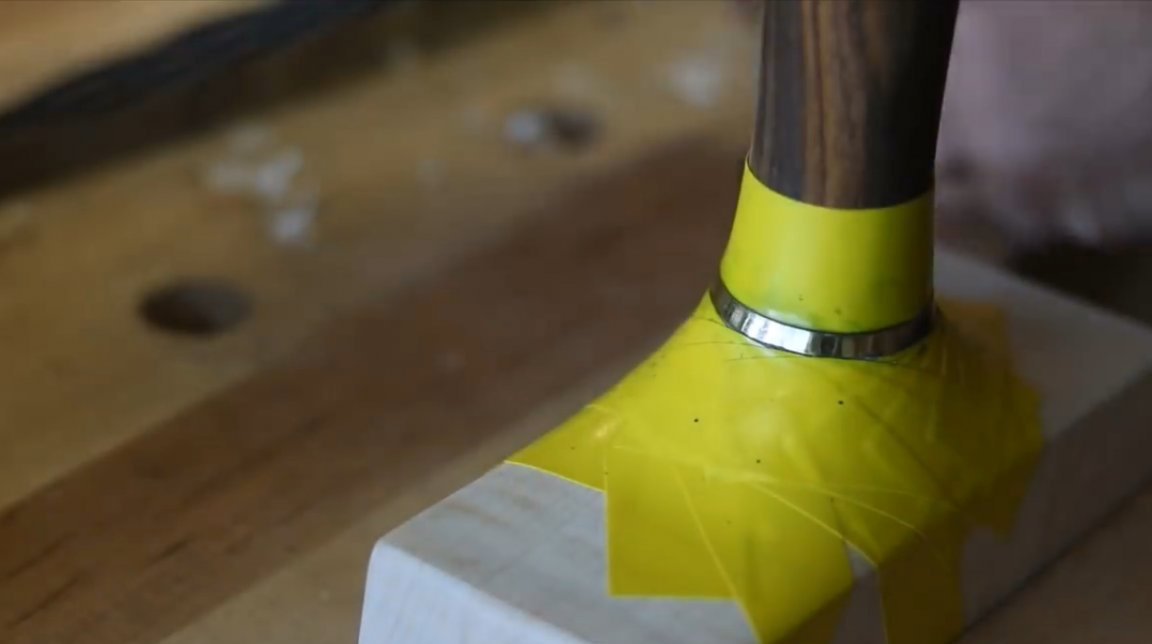
The master wants to make a brass insert between the handle and the head of a mallet. Such an element will give the product some zest. First, he will drill several holes in the corners of the plate to enter the jigsaw blade.
And then cuts a hole for the handle, and processes the edges with a file.
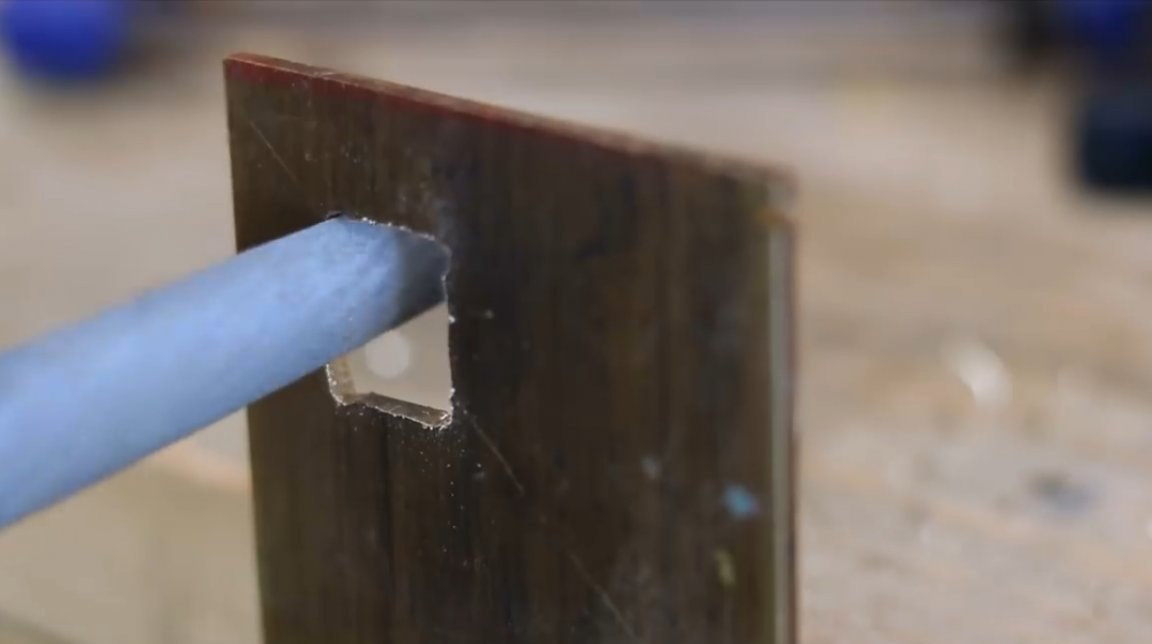
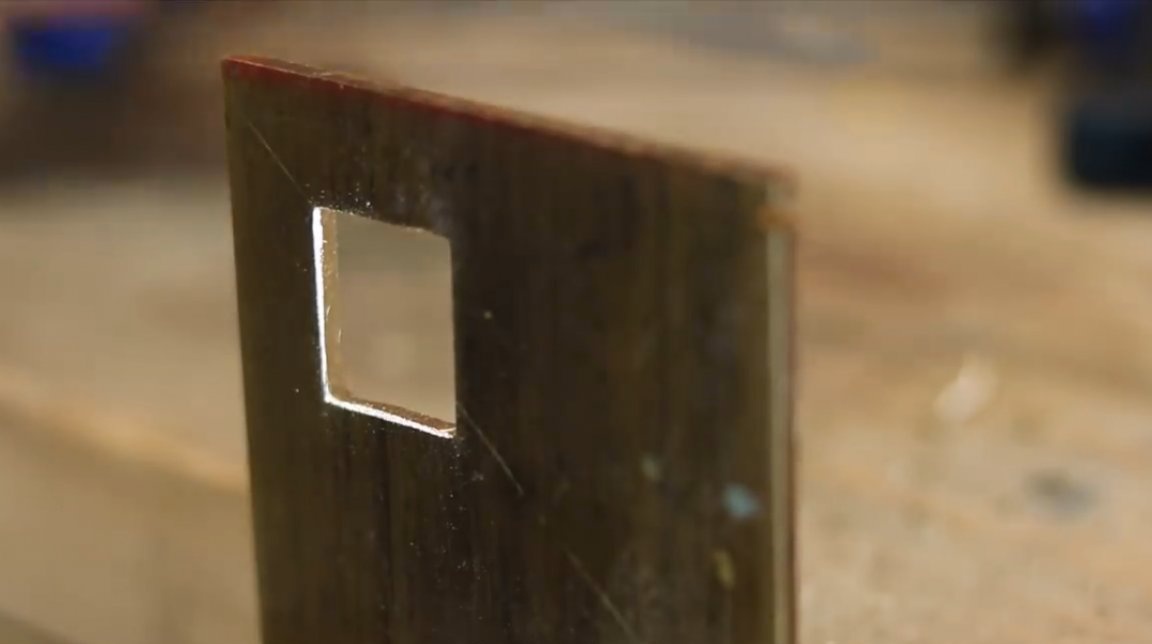
The spike is fitted perfectly, the author marks the outer contour of the handle on the plate.
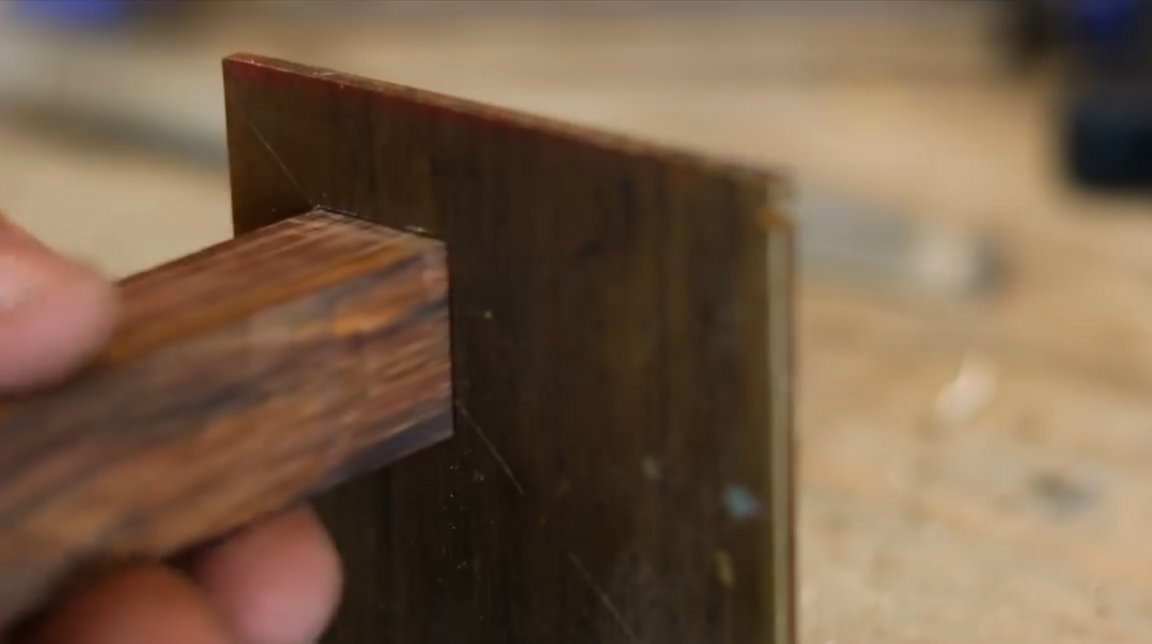
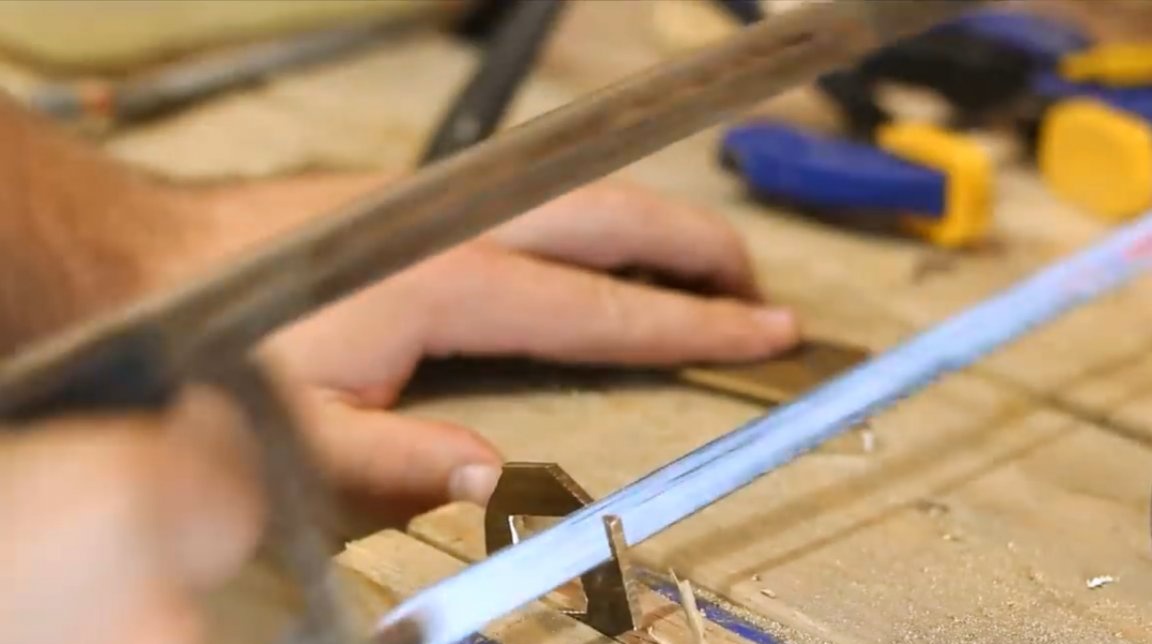
With the same jigsaw, he cuts the outer contour of the plate around the perimeter, repeating the shape of the handle, defects are eliminated by a hacksaw.
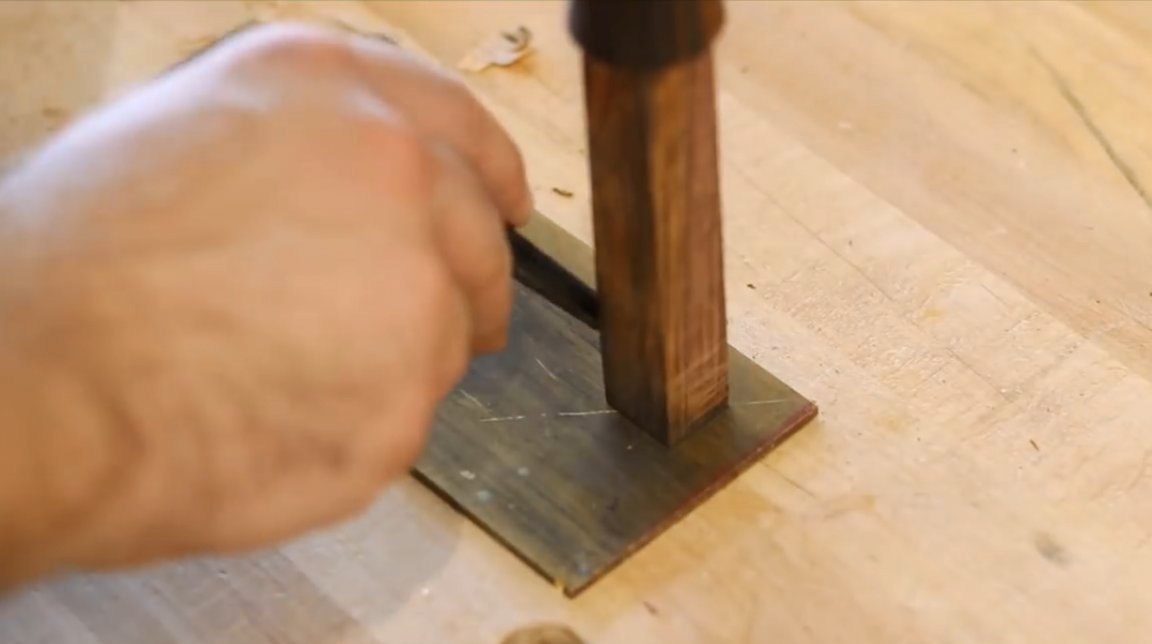
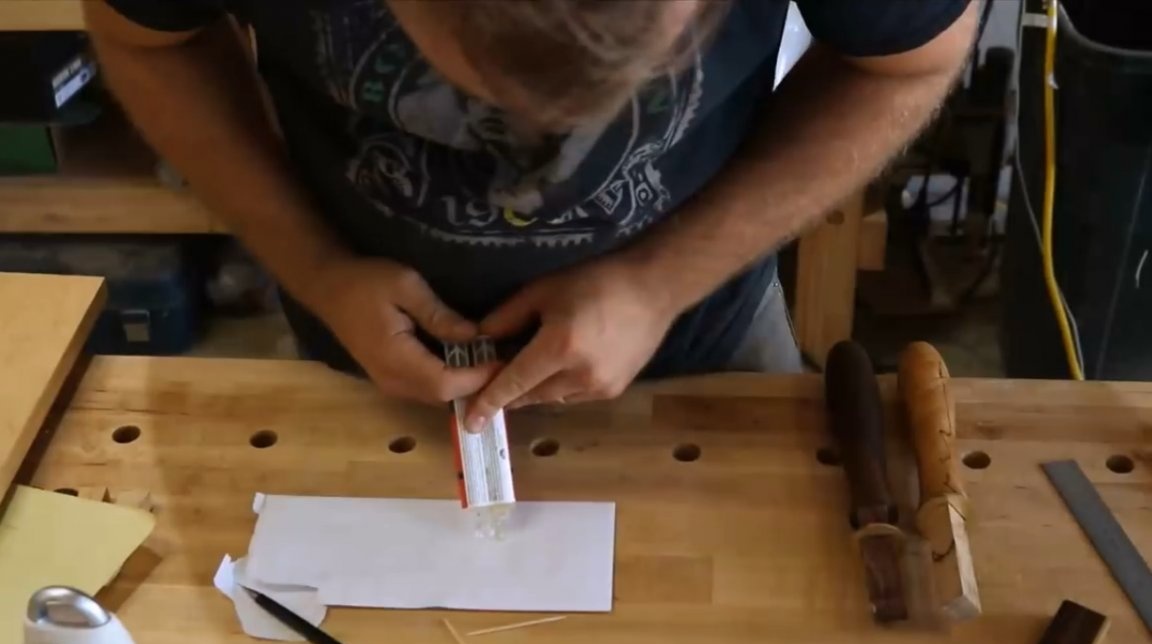
The plate is attached to the handle on a two-component epoxy adhesive.
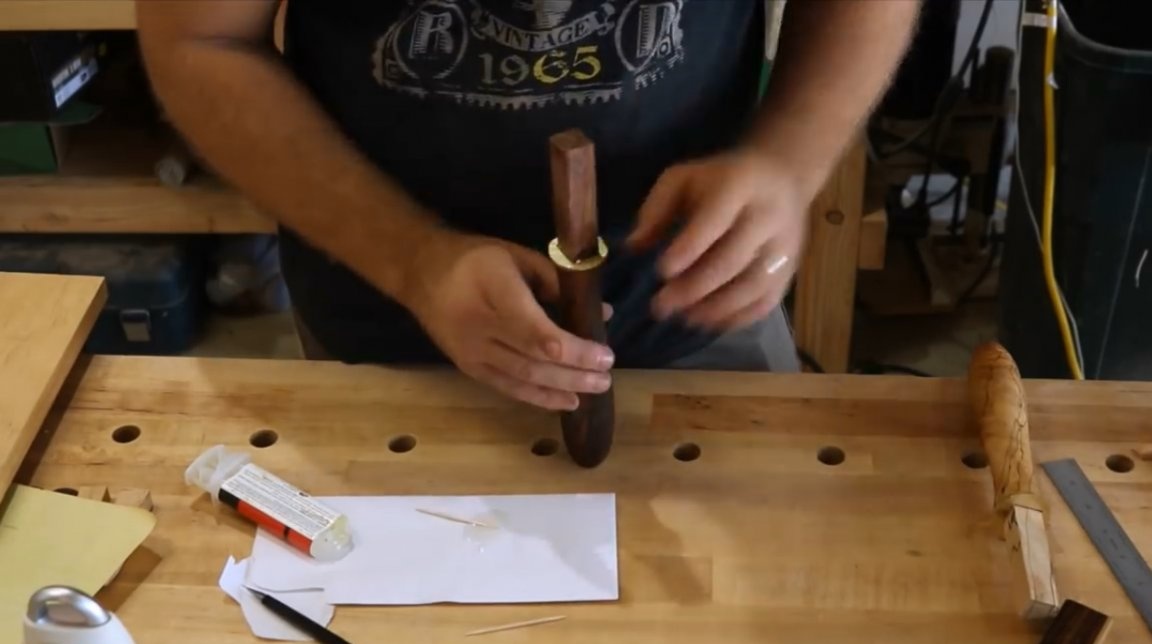
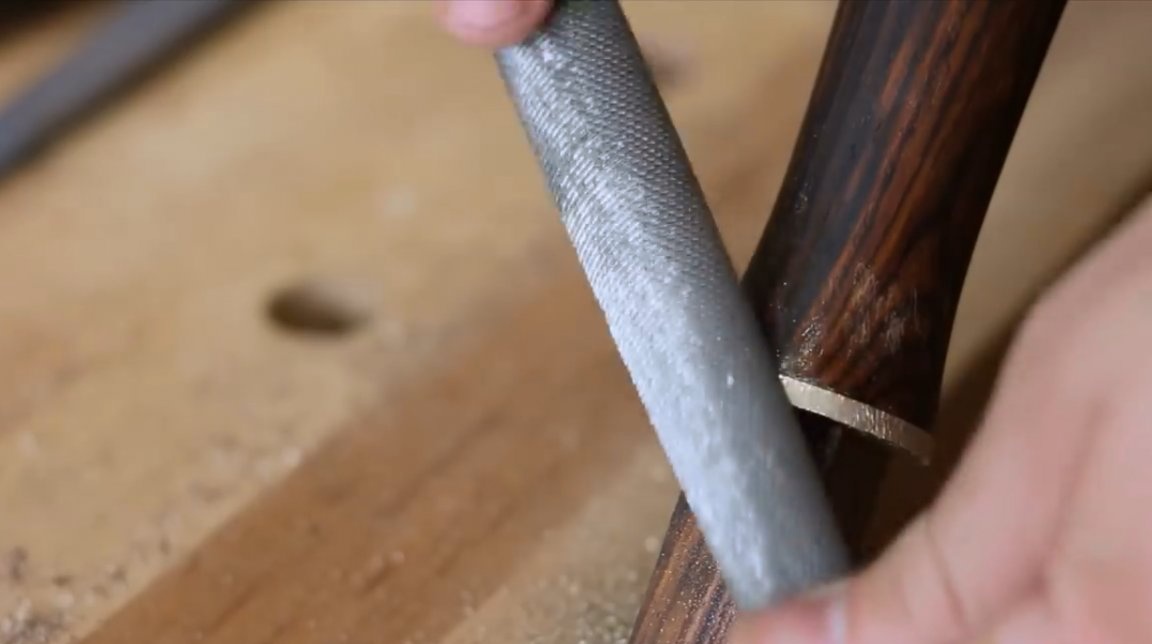
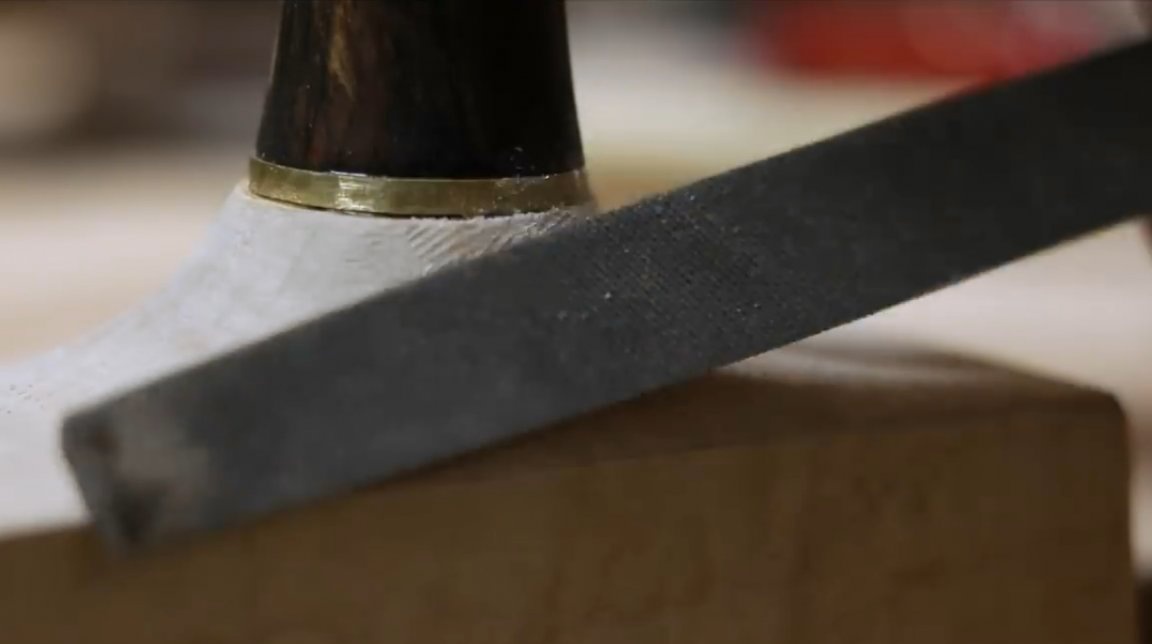
With a file, he adjusts the protruding parts of the plate to the shape of the handle.
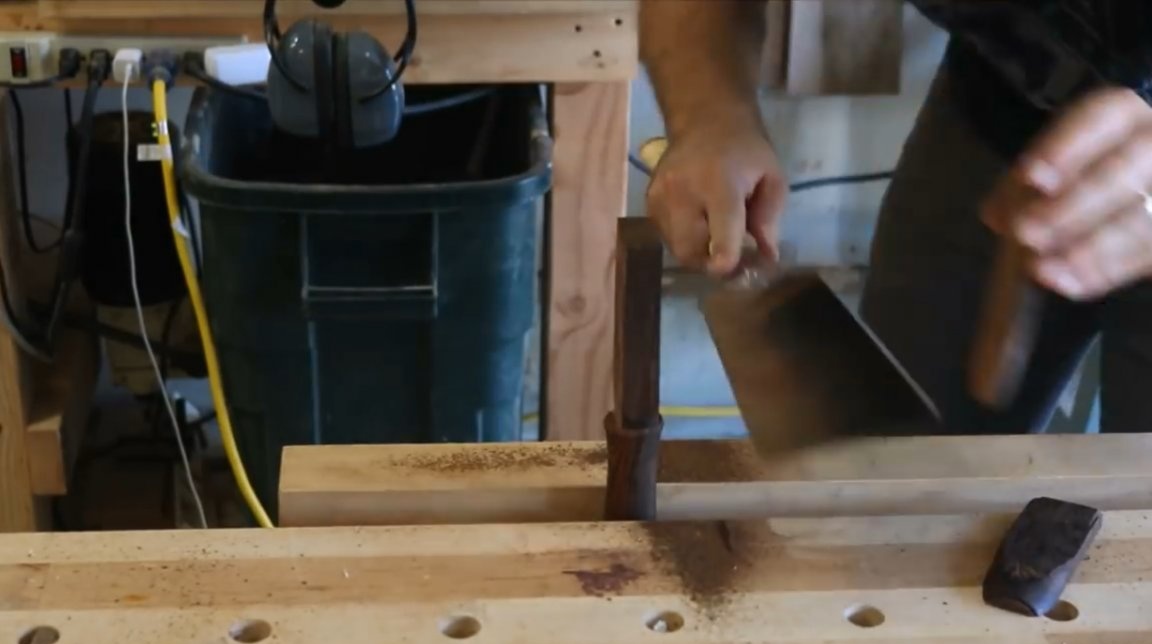
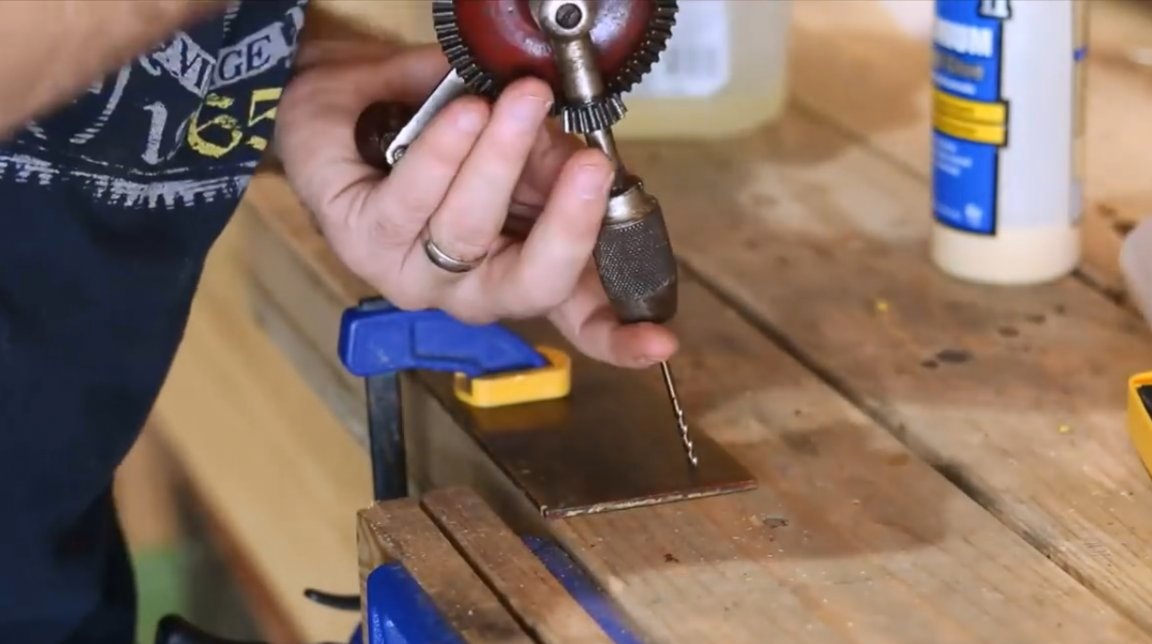
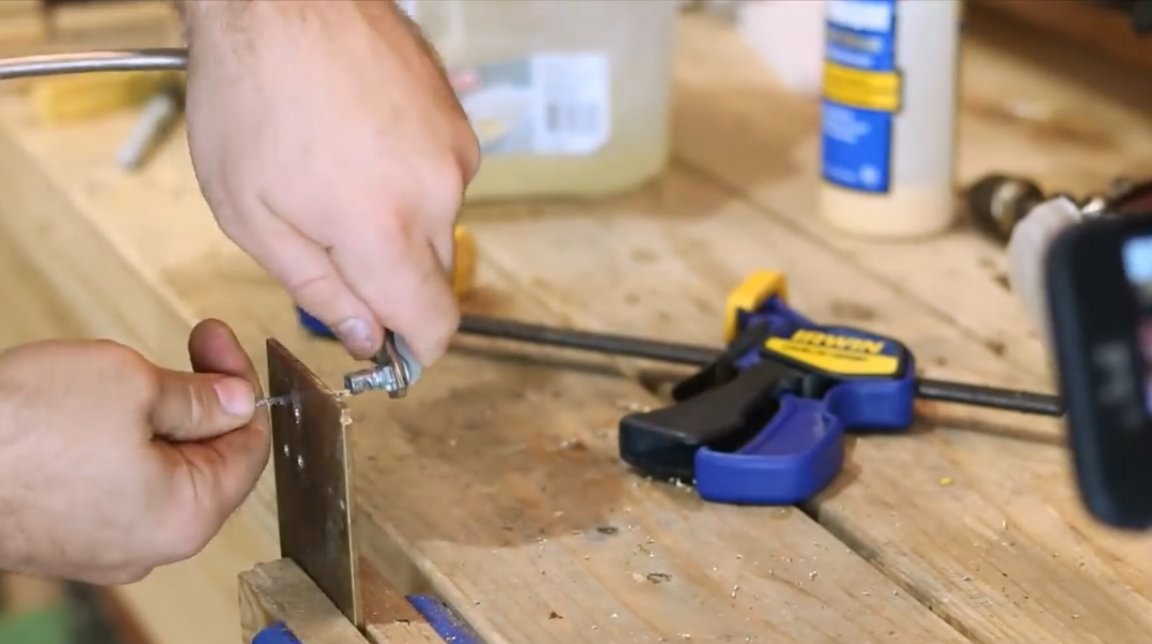
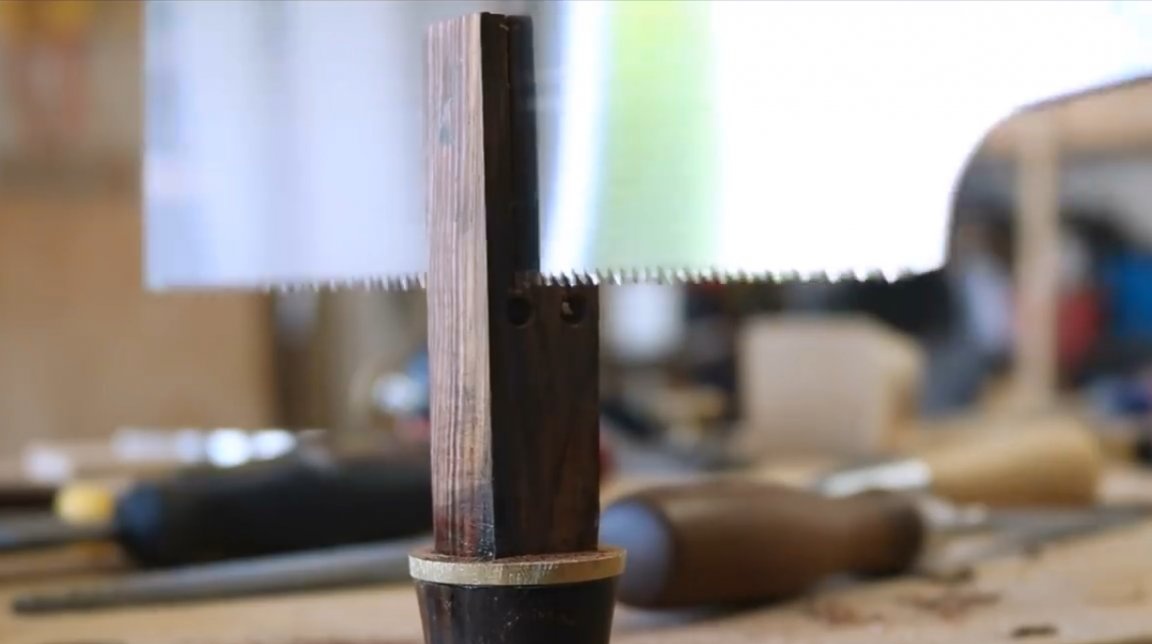
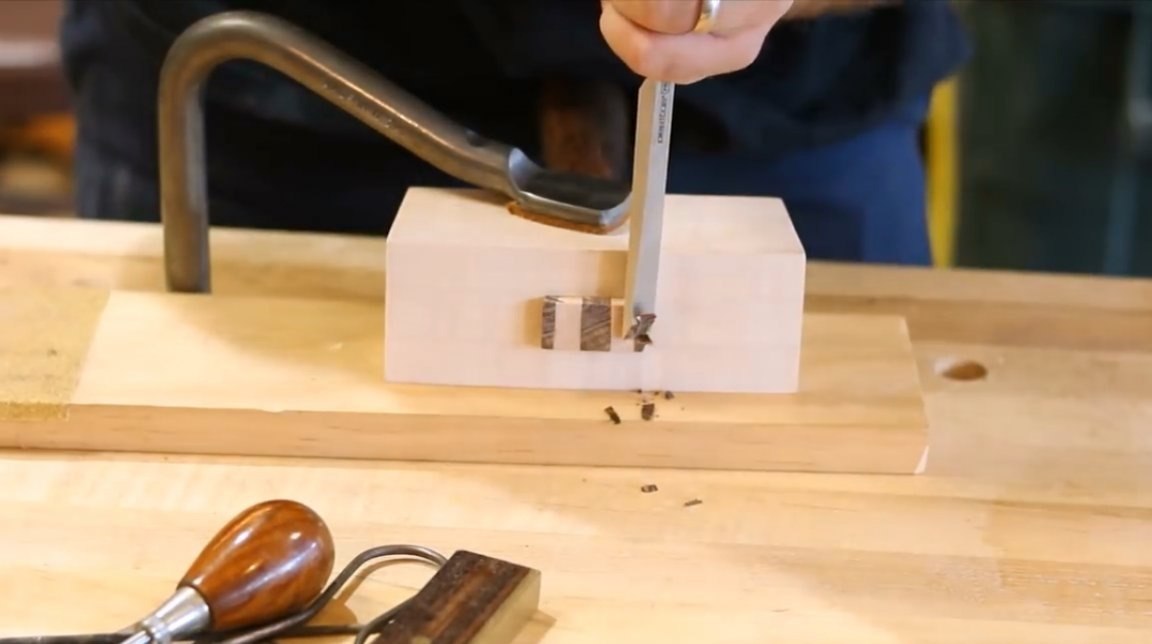
With a hand drill, the master drills a couple of discharge holes in the handle. They will not let the handle crack.
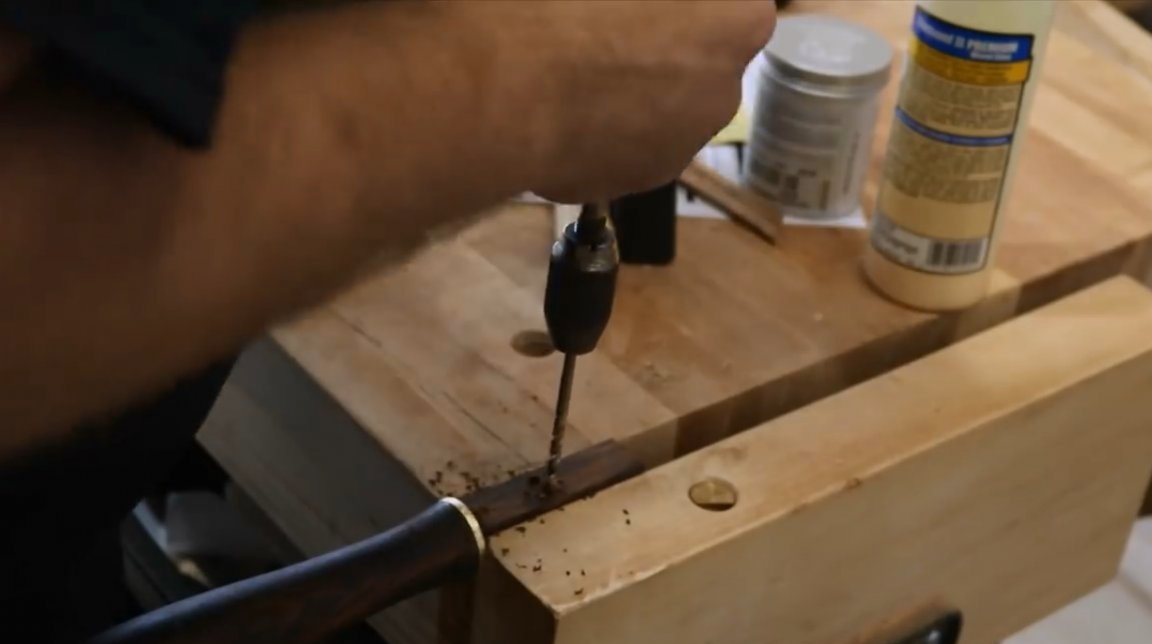
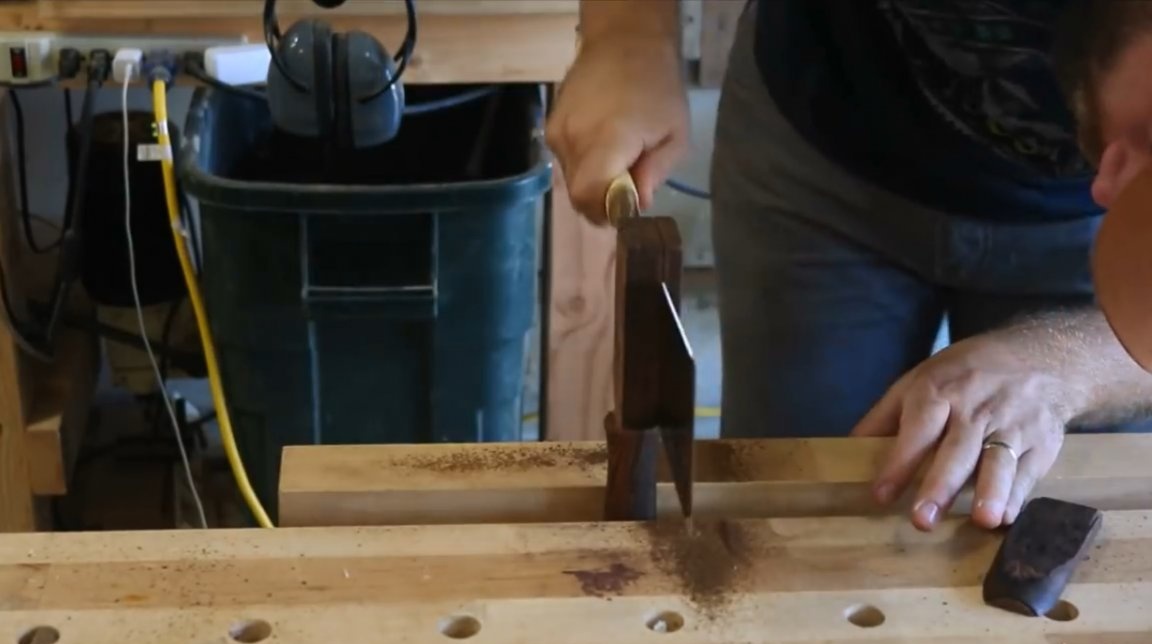
With a Japanese saw, he cuts the hilt right up to these holes. Later, wedges will be driven up to these holes, which will prevent the handle from seating every time under load.
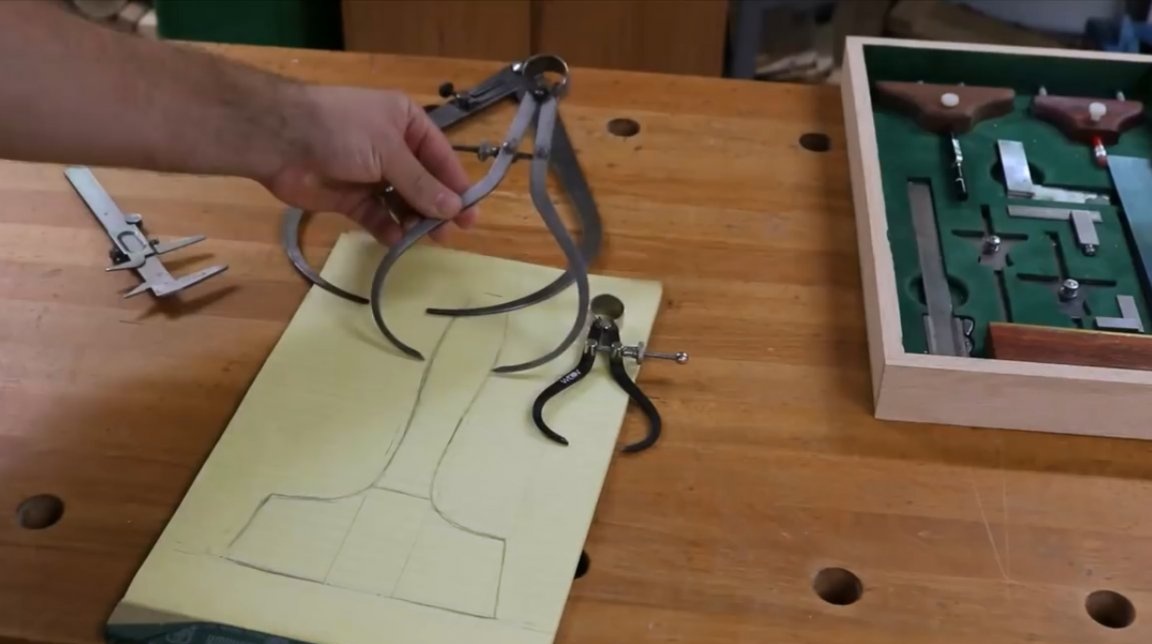
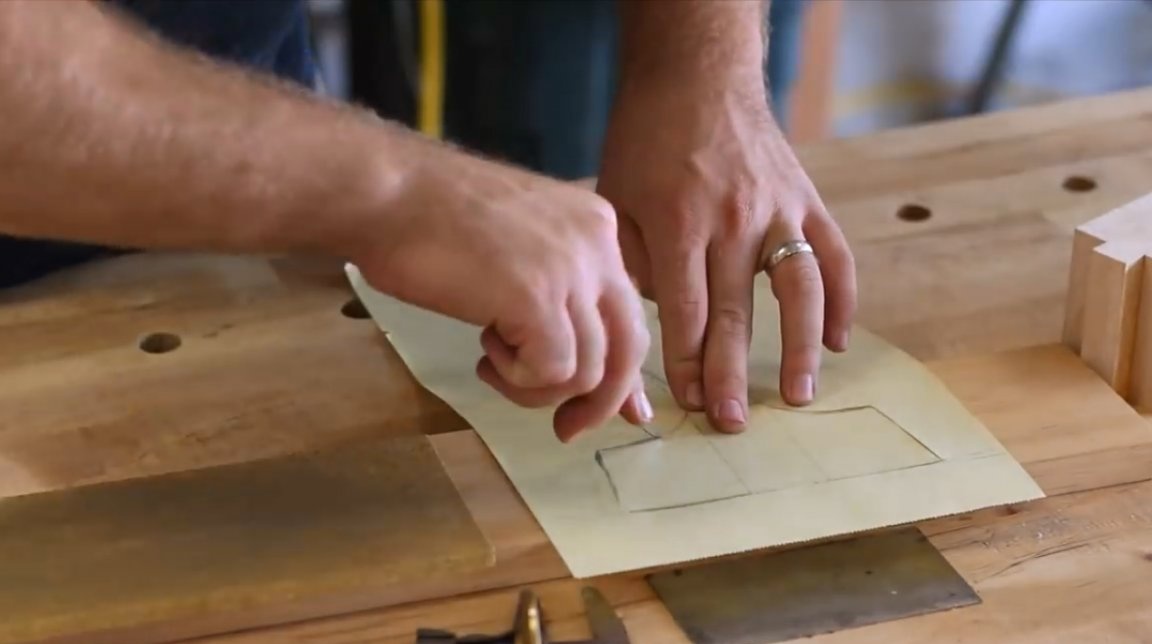
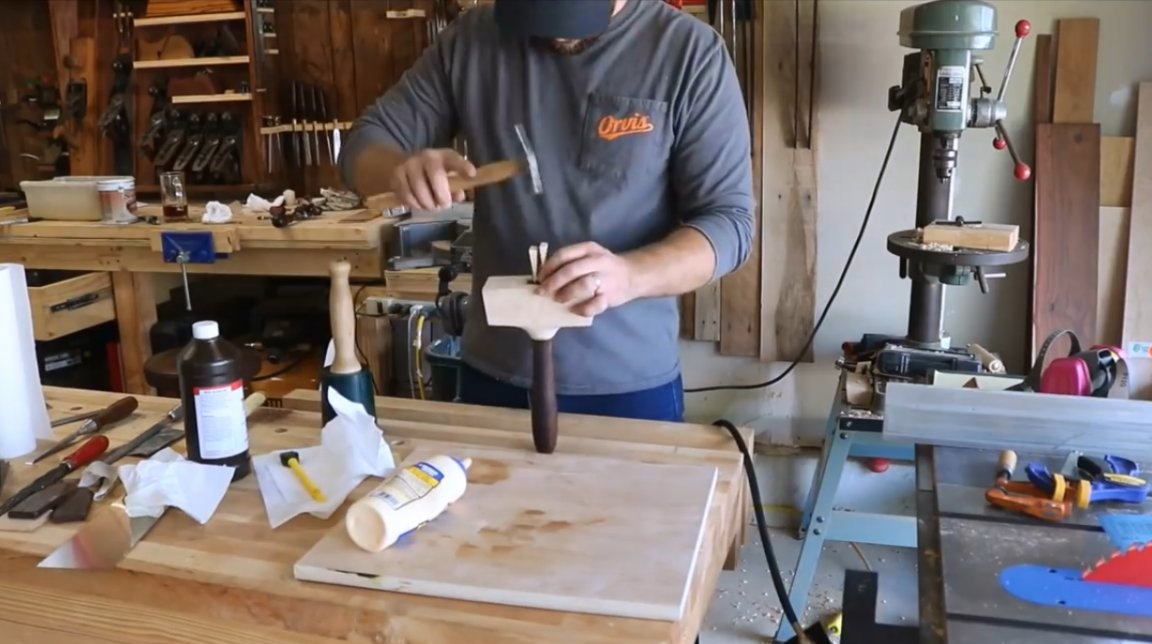
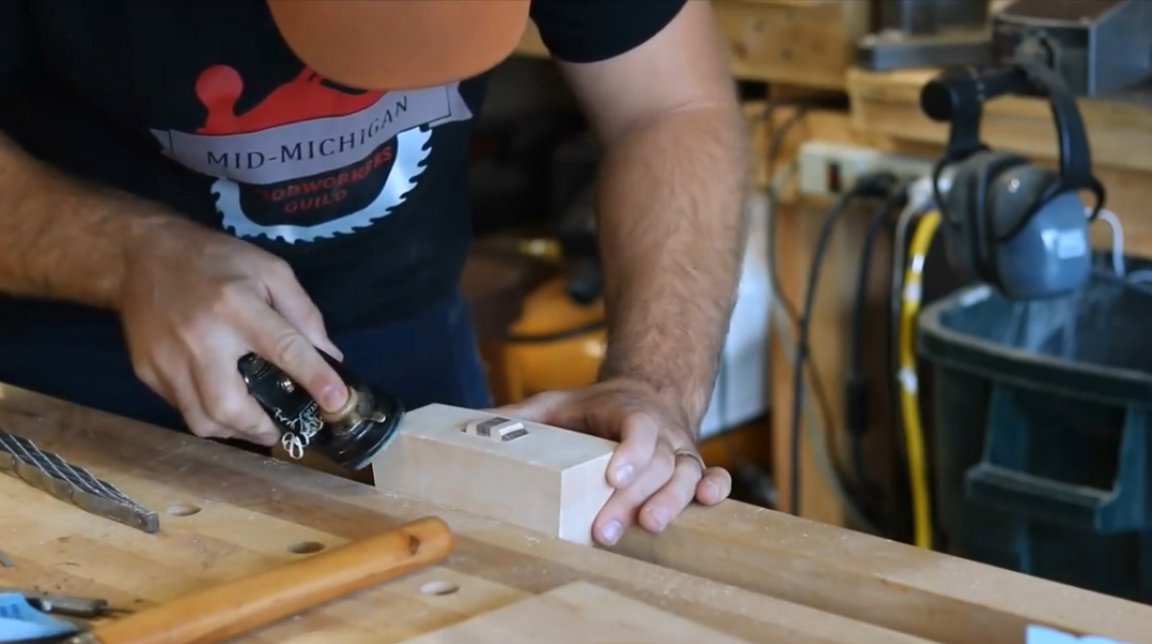
Now the master takes his sketch and cuts out the head of a mallet on it. He folds the sketch in half and uses it as a template. The blank is cut on a band saw.
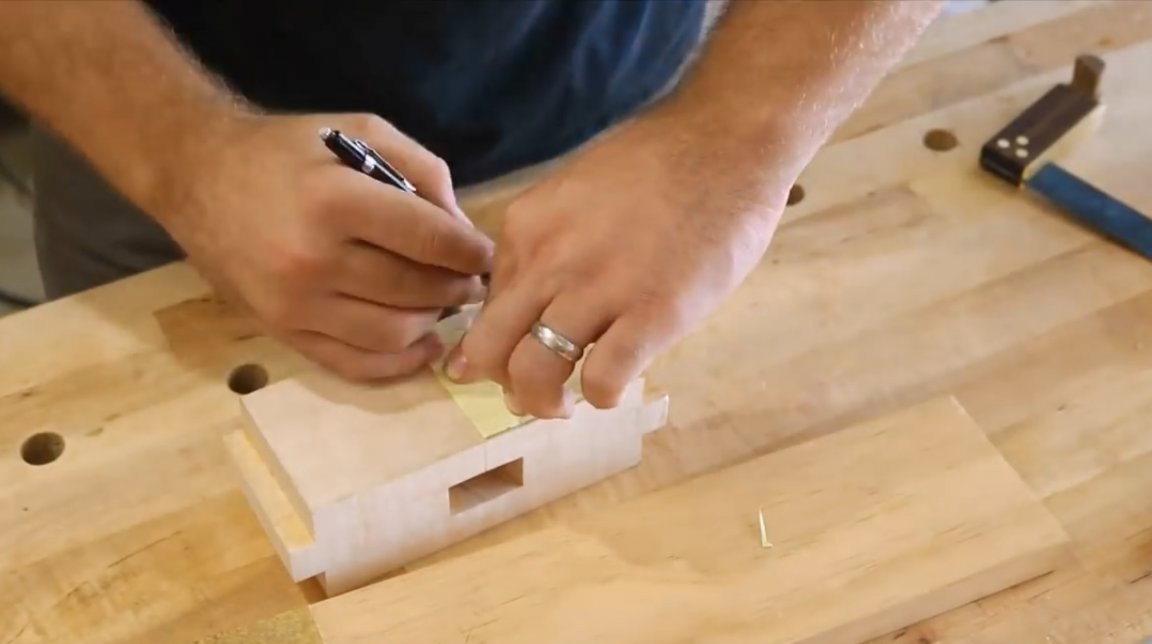
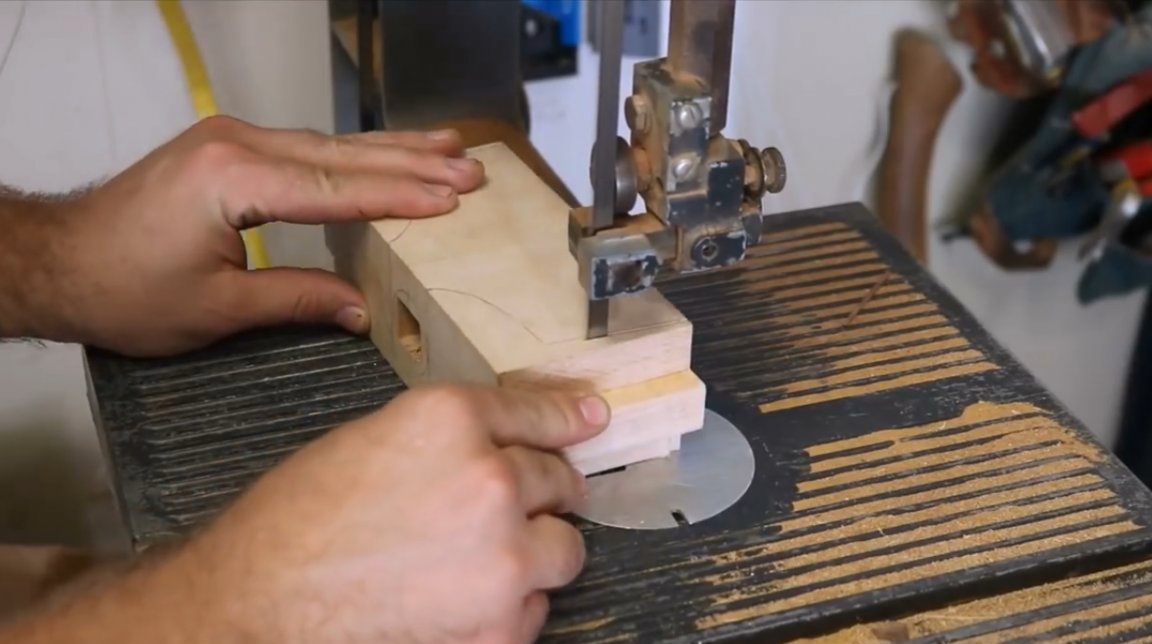
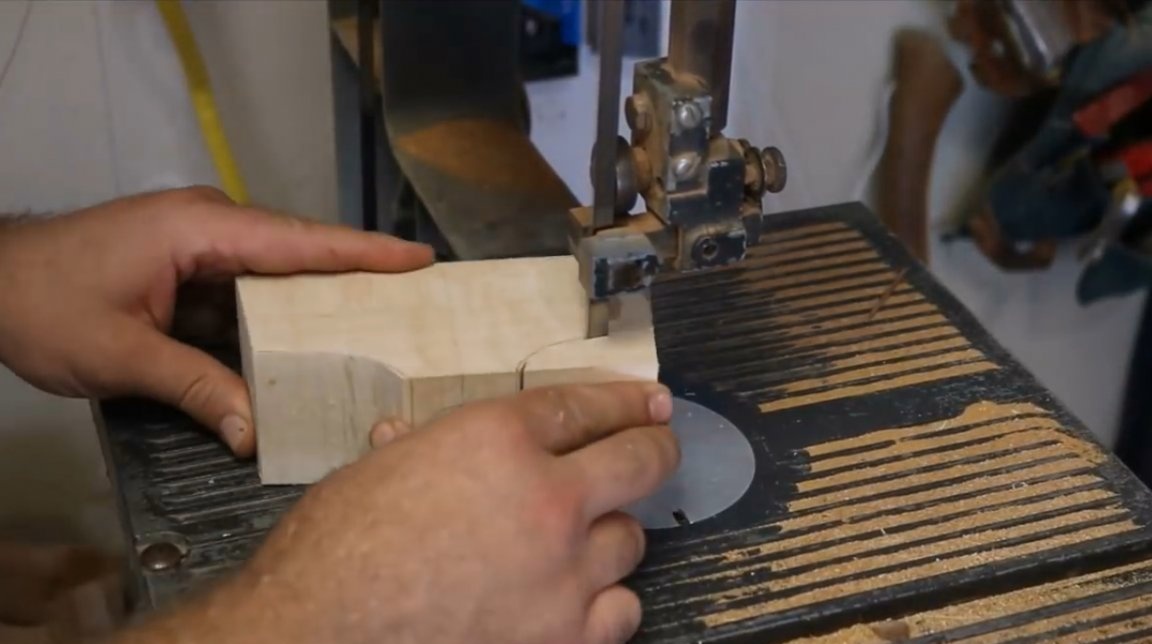
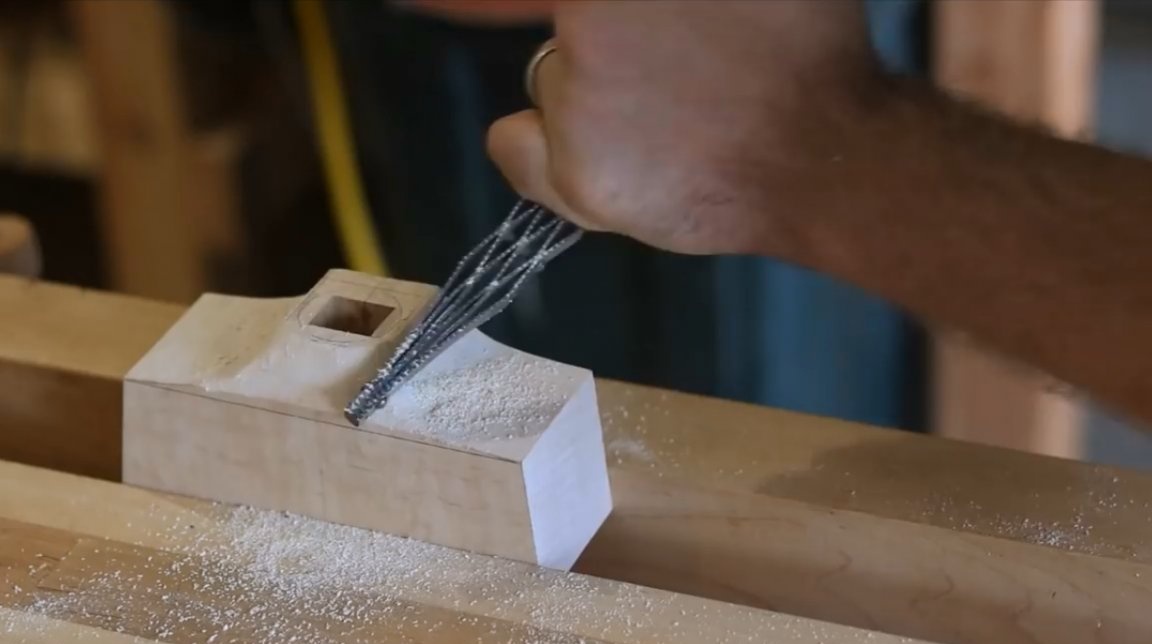
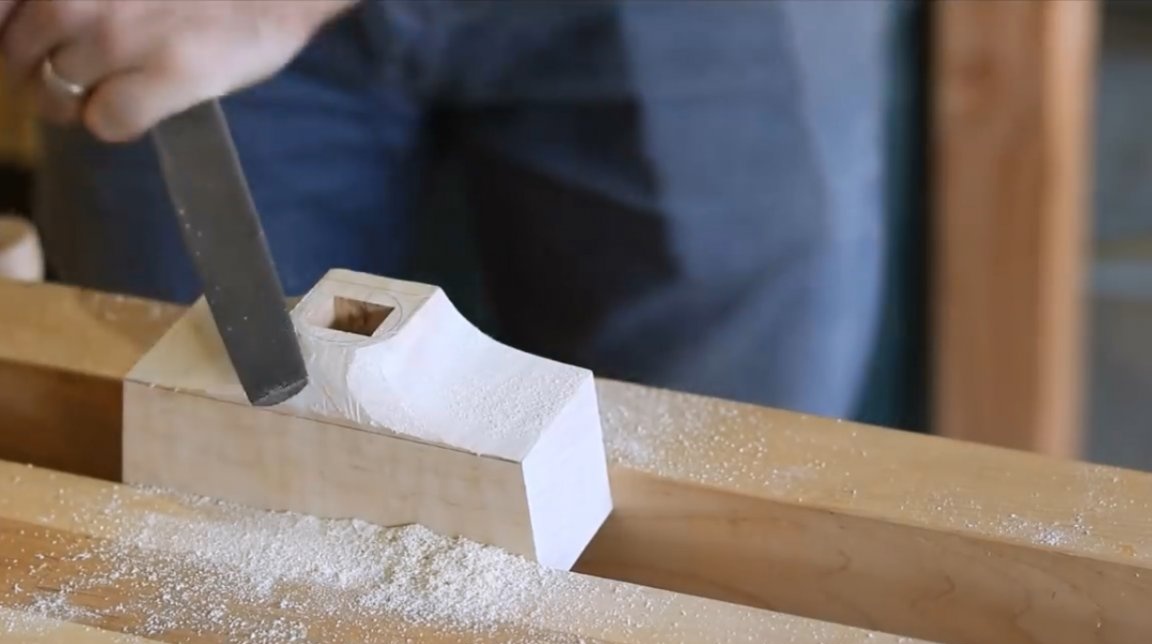
It is then sanded with a rasp and files to give it the desired shape.
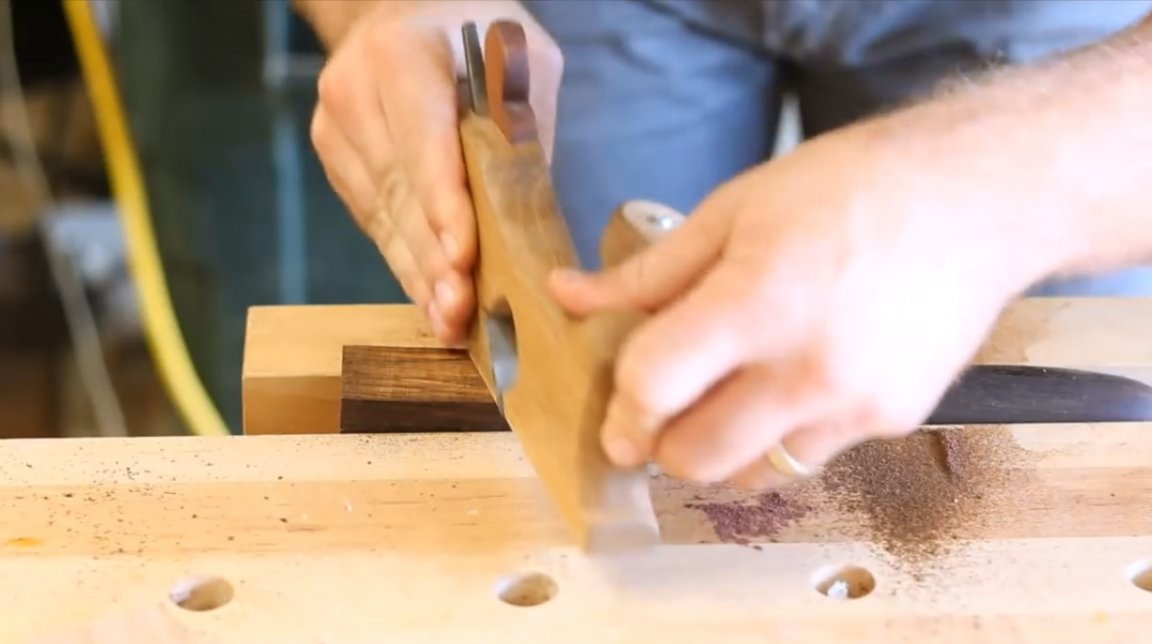
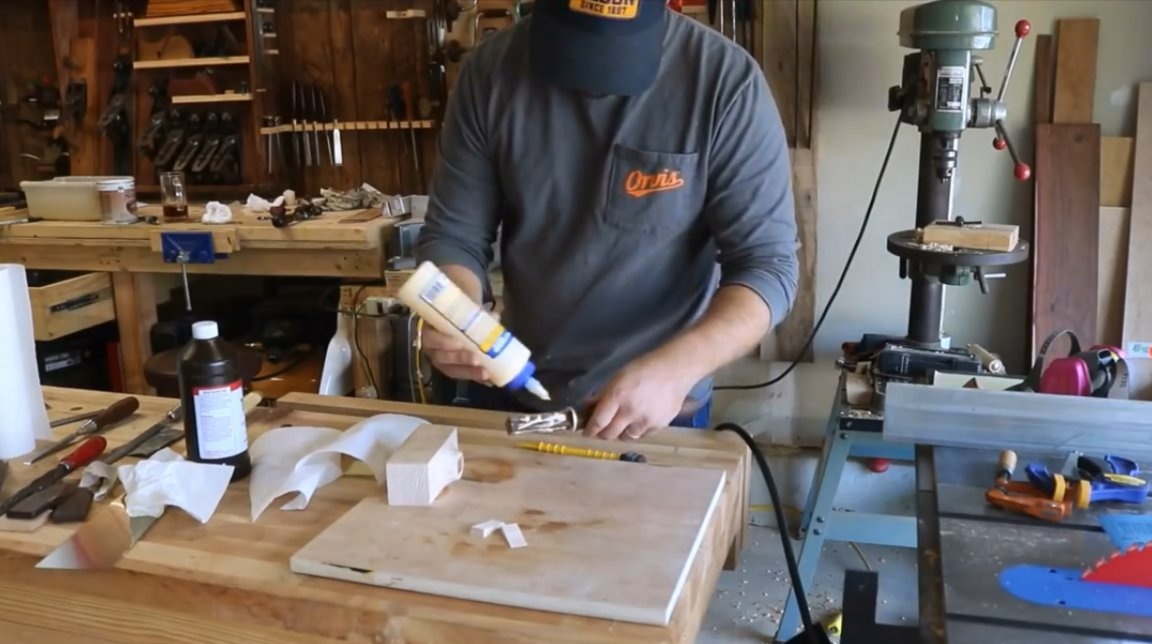
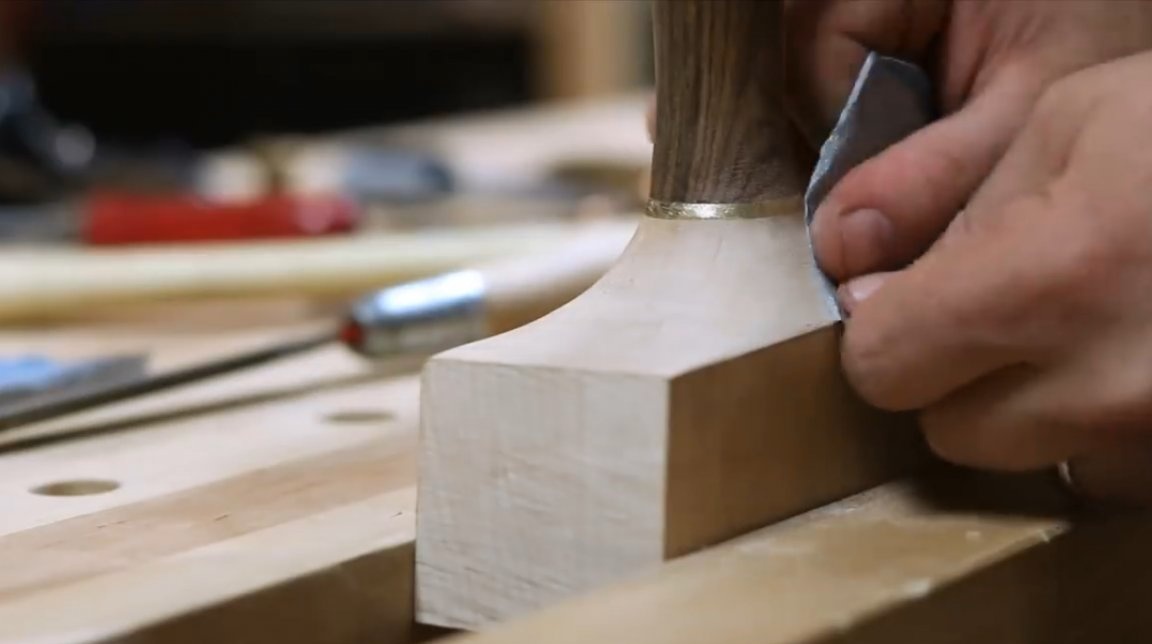
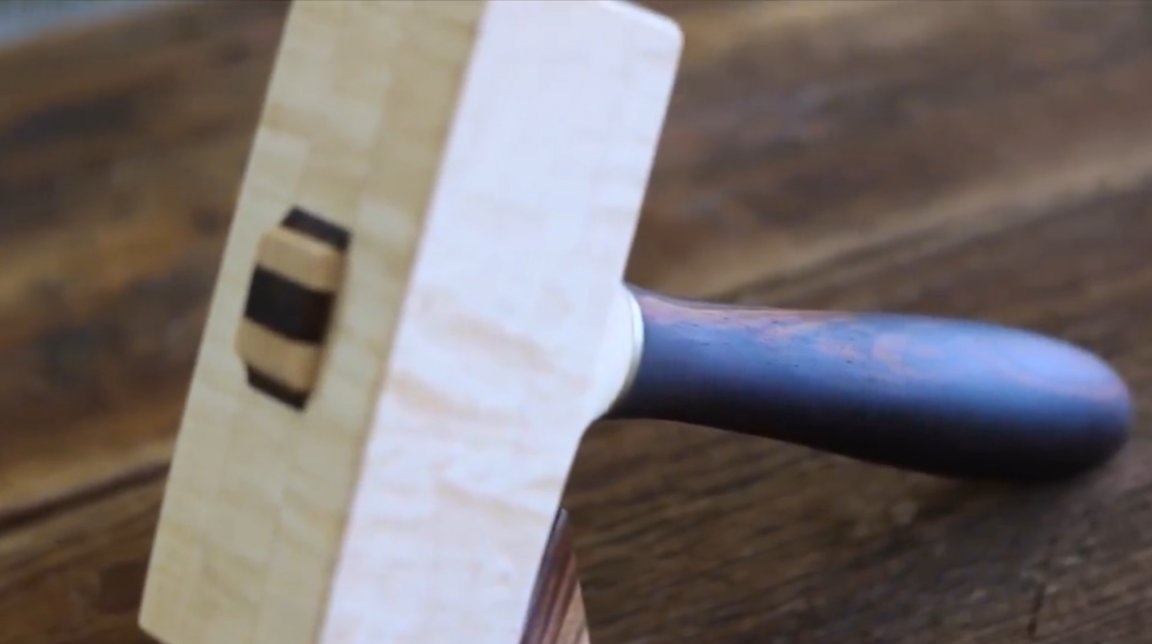
At the end, the master pours a little glue into the head and covers it with a spike. Connects both elements.
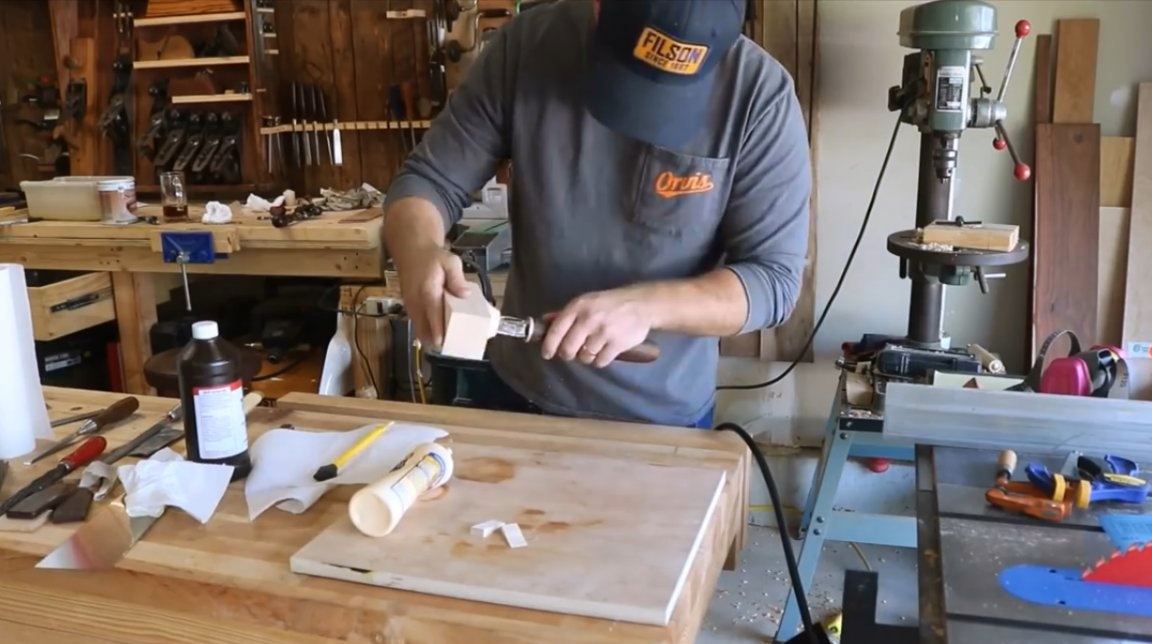
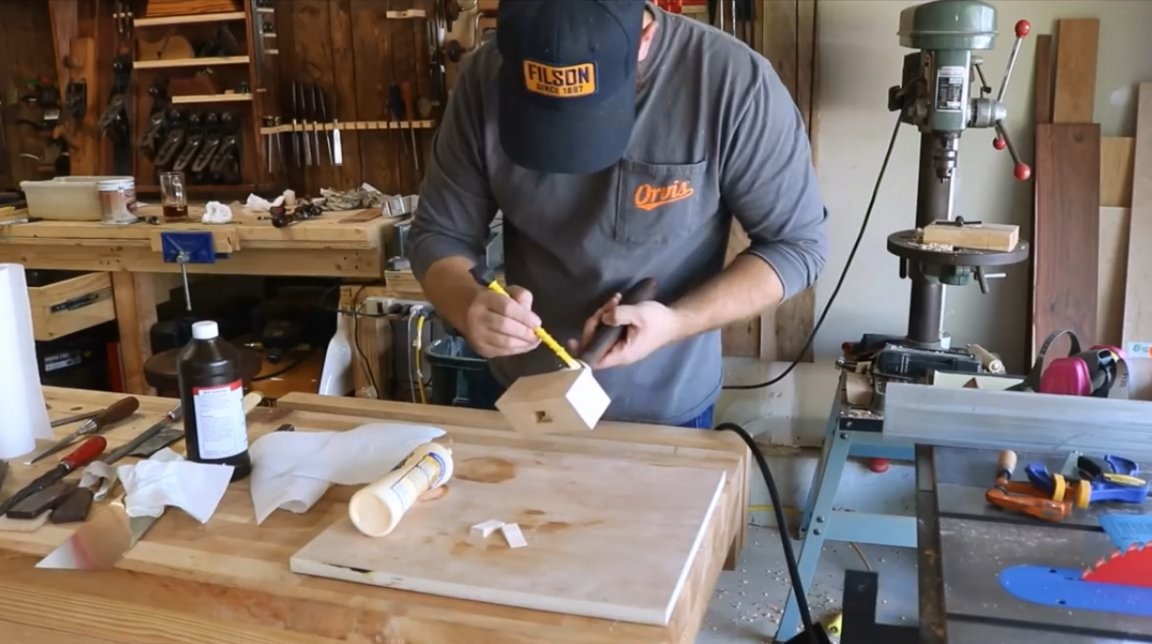
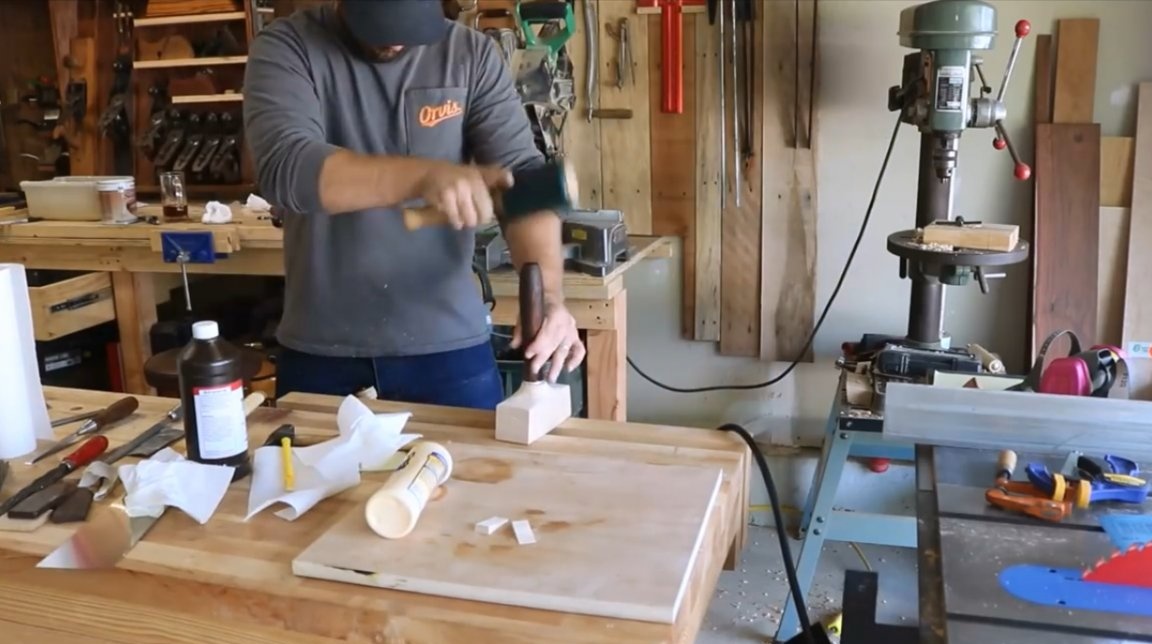
Then drives the wedges. It is important not to drag wood with wedges! Otherwise, the "house" may crack!

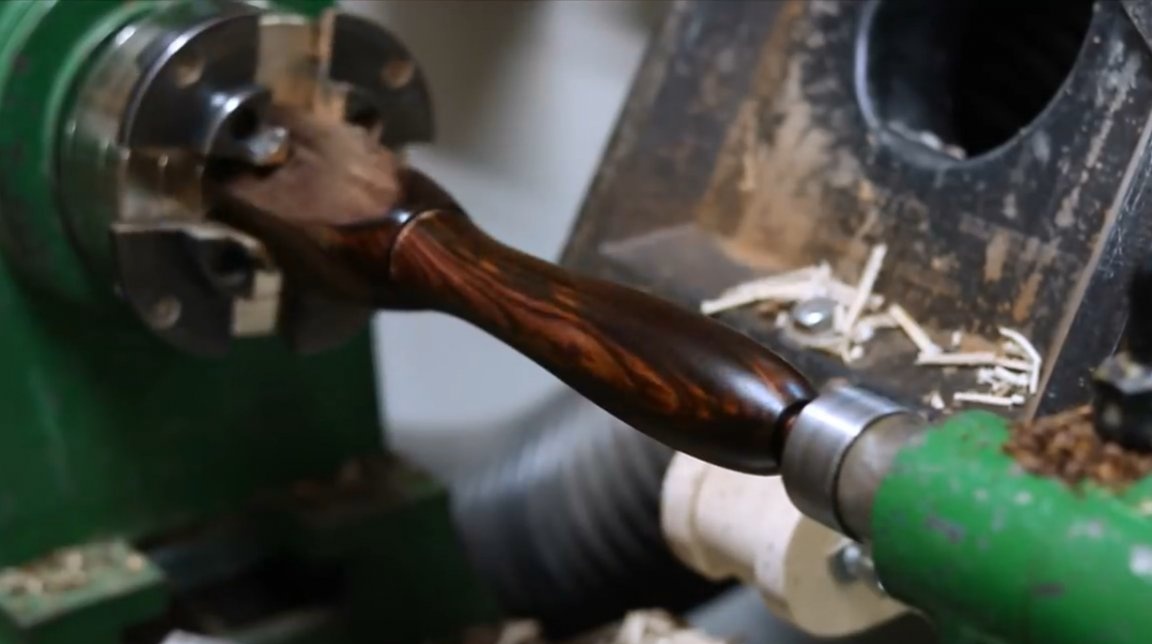
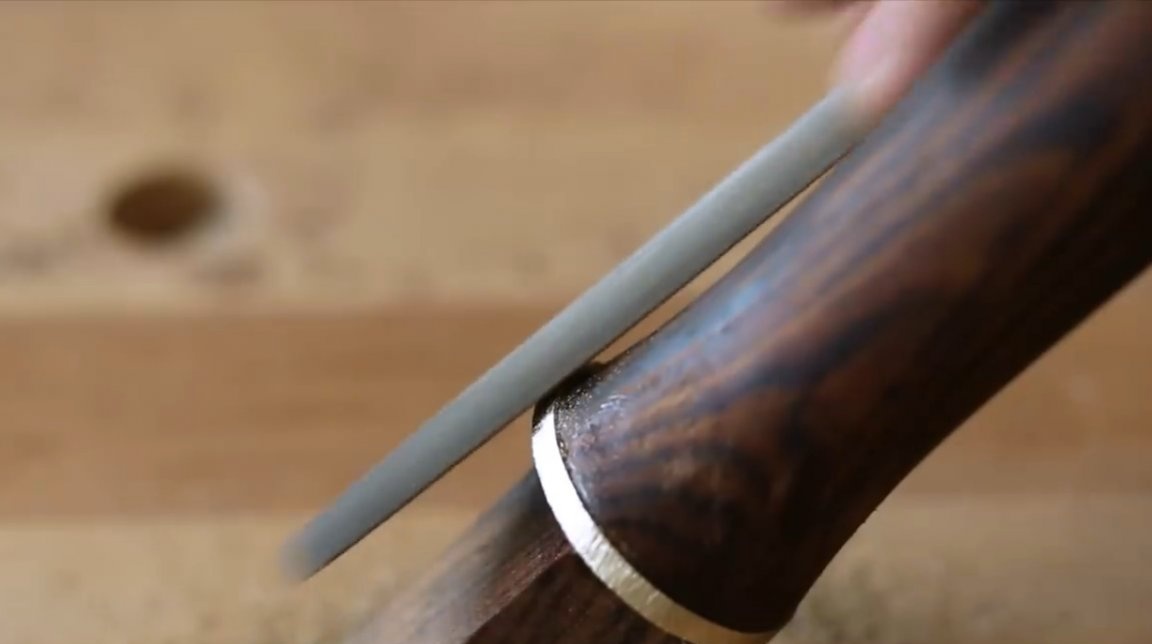
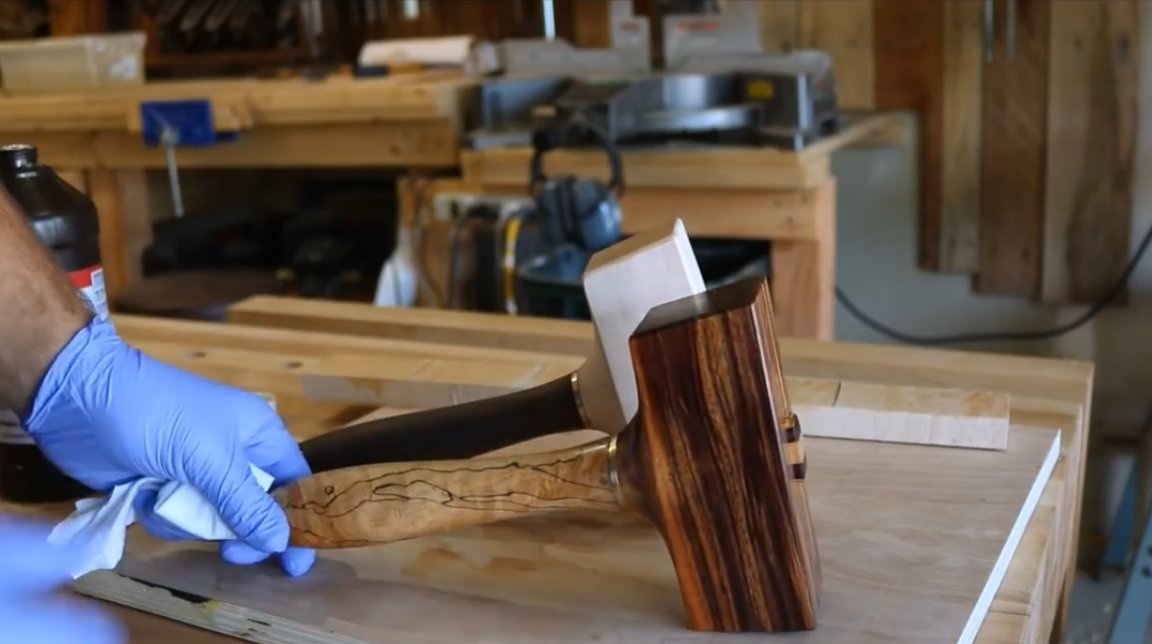
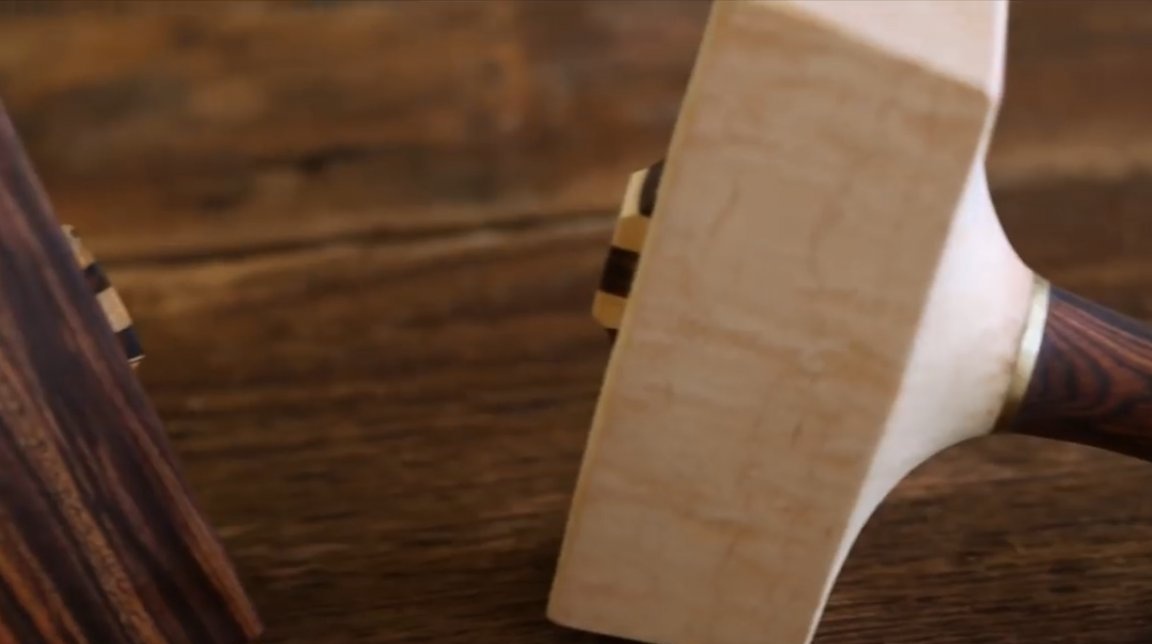
And again grinding, the author is carefully working on the transition. Brass is polished with 1000 grit paper. The final chord is rubbing with a piece of leather belt and polishing.
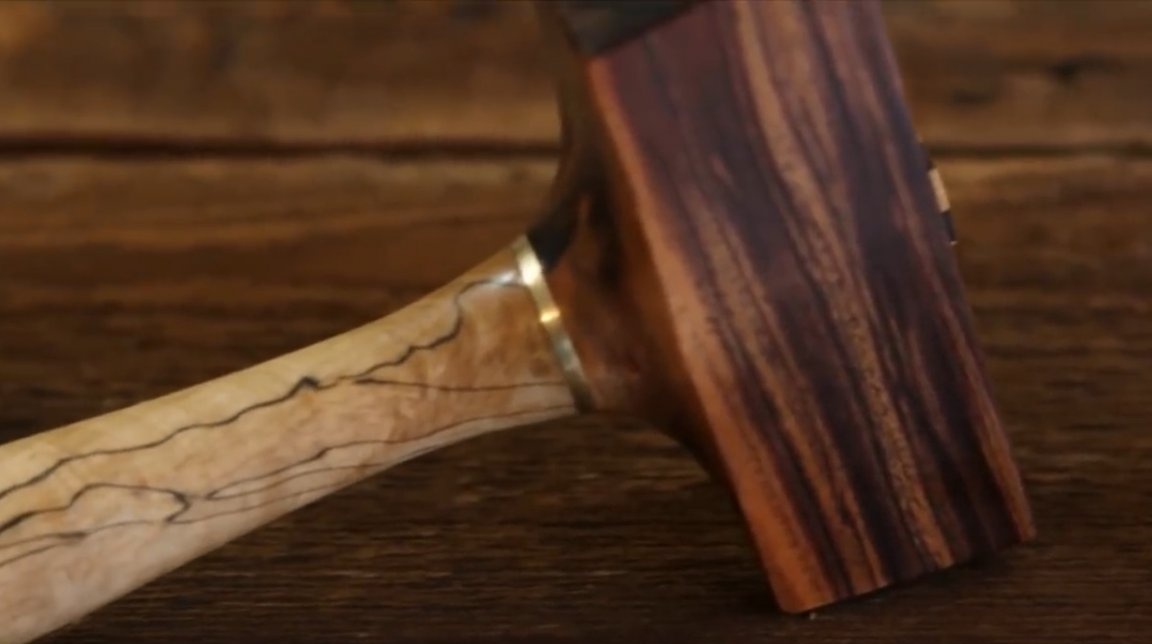
The author is particularly pleased with the connection, a smooth transition from the hammer to the handle. The brass insert also looks very organic.
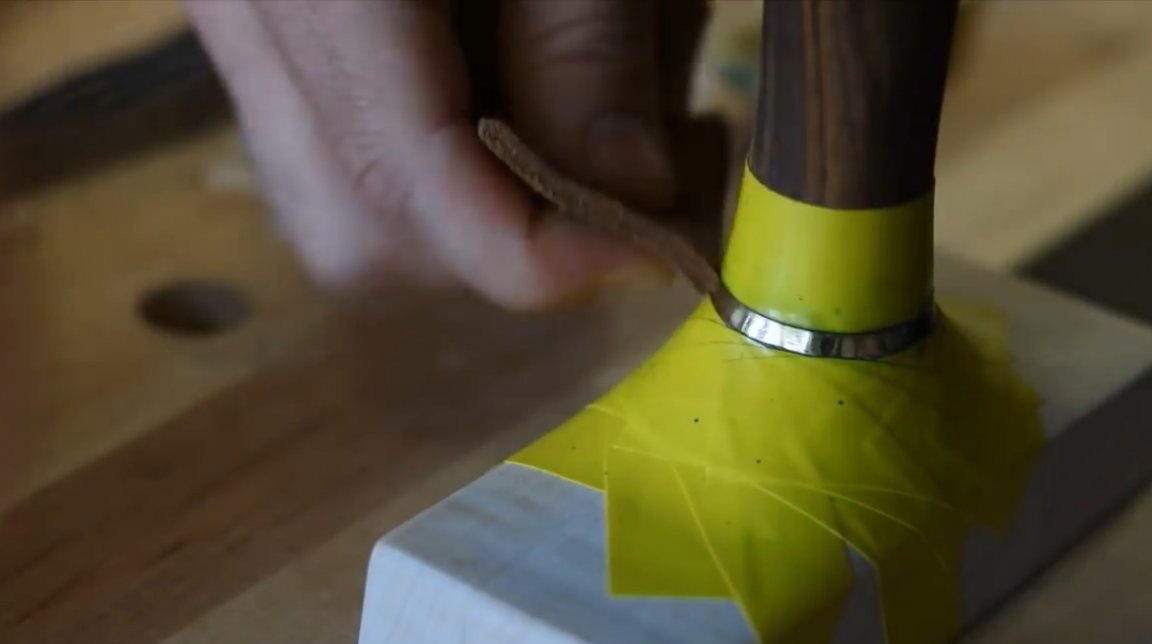
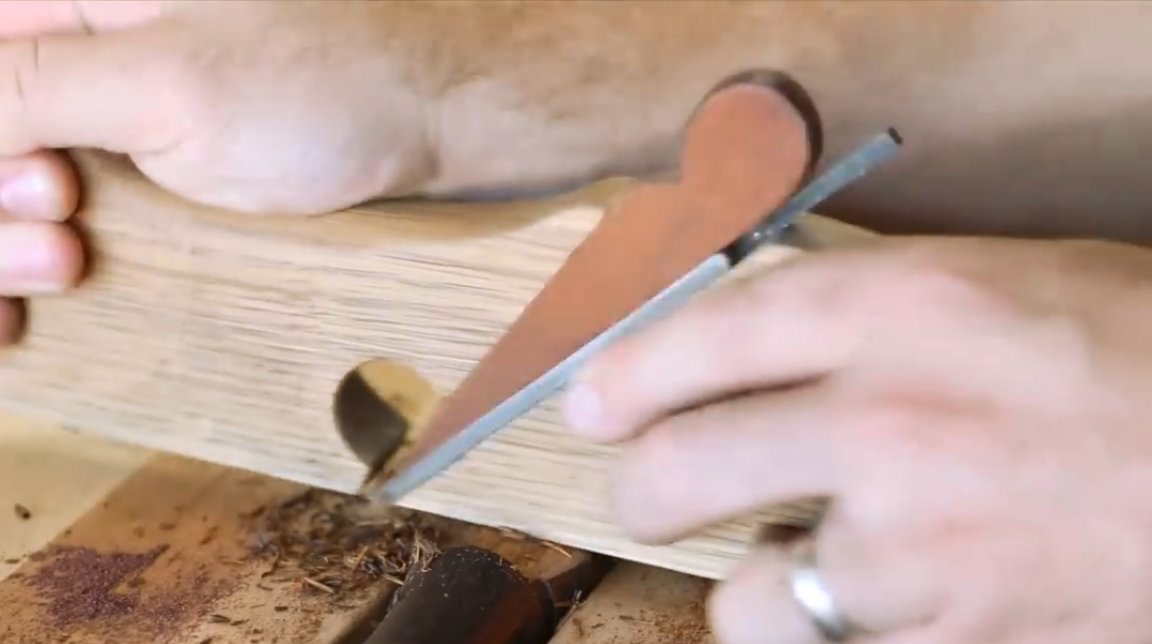
The edges of the wedge joint are cut off and rounded inward, and the edges of the head are slightly cut off.

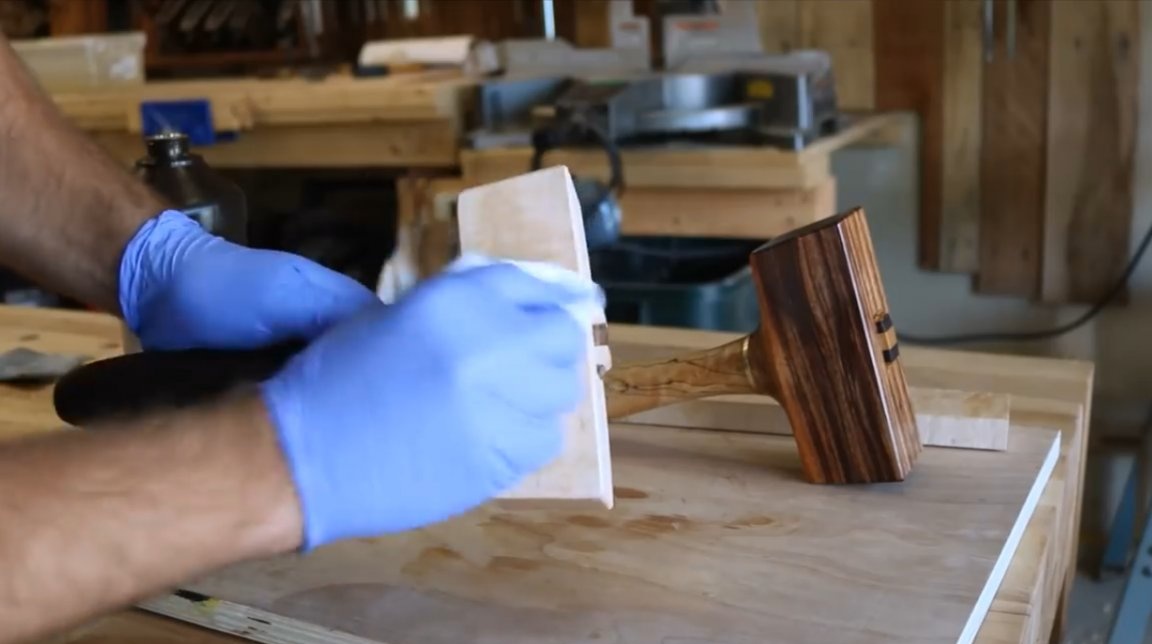
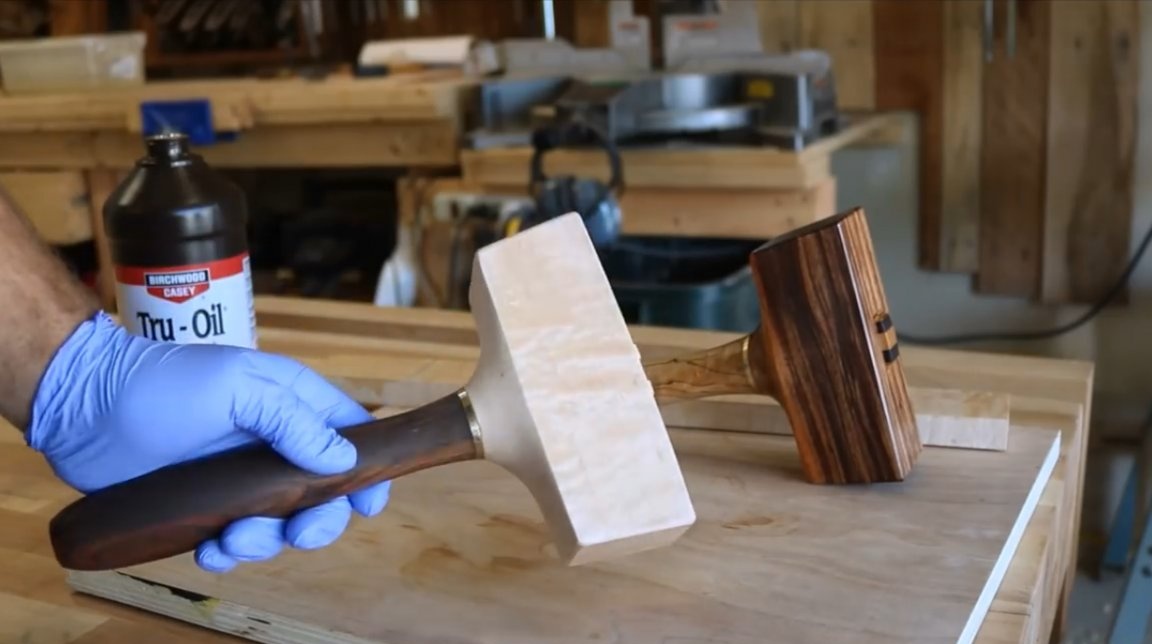
So, these two handsome men turned out from the master, there remains only the final oil impregnation. The master applied a special oil, it is used to process wooden elements of weapons. It is called the Tru-Oil Gun Stock Finish. Later there will be a link to it in the comments under the article.
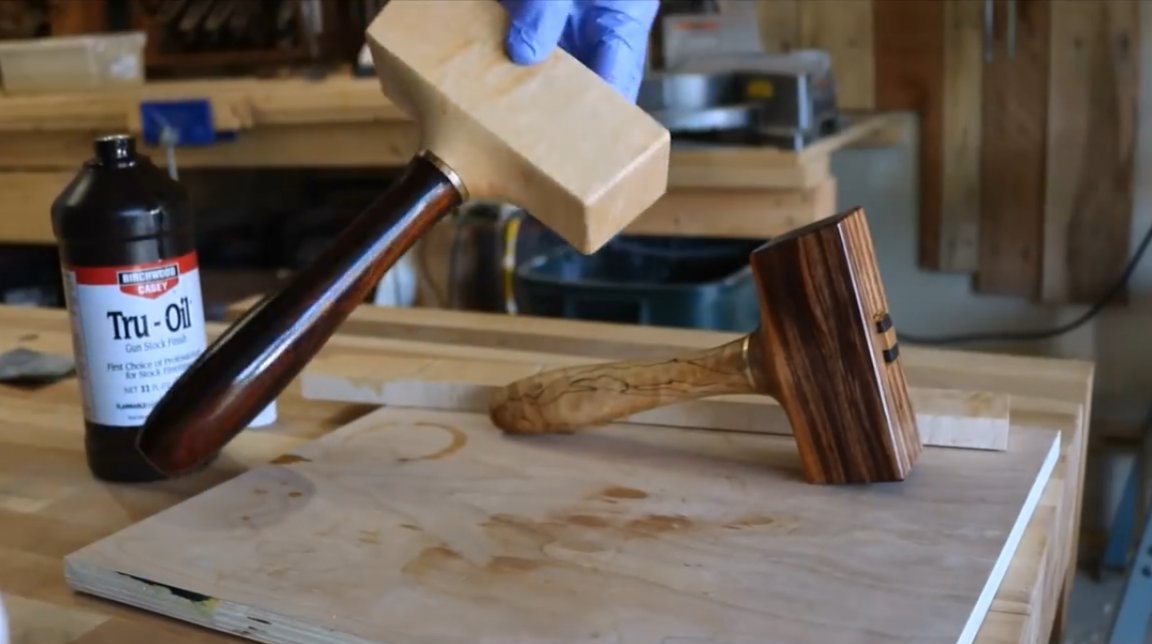
Thanks to the author for the idea of simple but very beautiful malas for the workshop!

All good mood, good luck, and interesting ideas!
Author video can be found here.