

The main materials:
- Bar 45x90x480 mm.
- Plywood 10 mm thick.
- Two M10 studs 250 mm long.
You can adjust the sizes to fit your workbench. M10 thread is enough for me, I do not recommend taking a smaller thread diameter.
Step-by-step manufacturing instructions
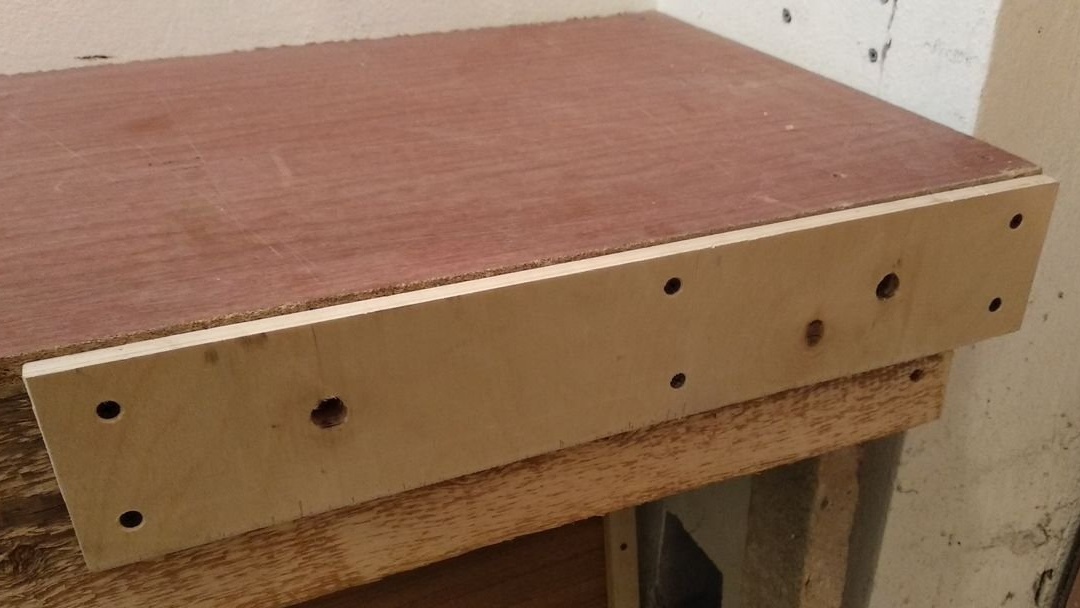
1. We mark holes for screw holes on plywood with a pencil and a square. The distance from the ends is 10 cm.
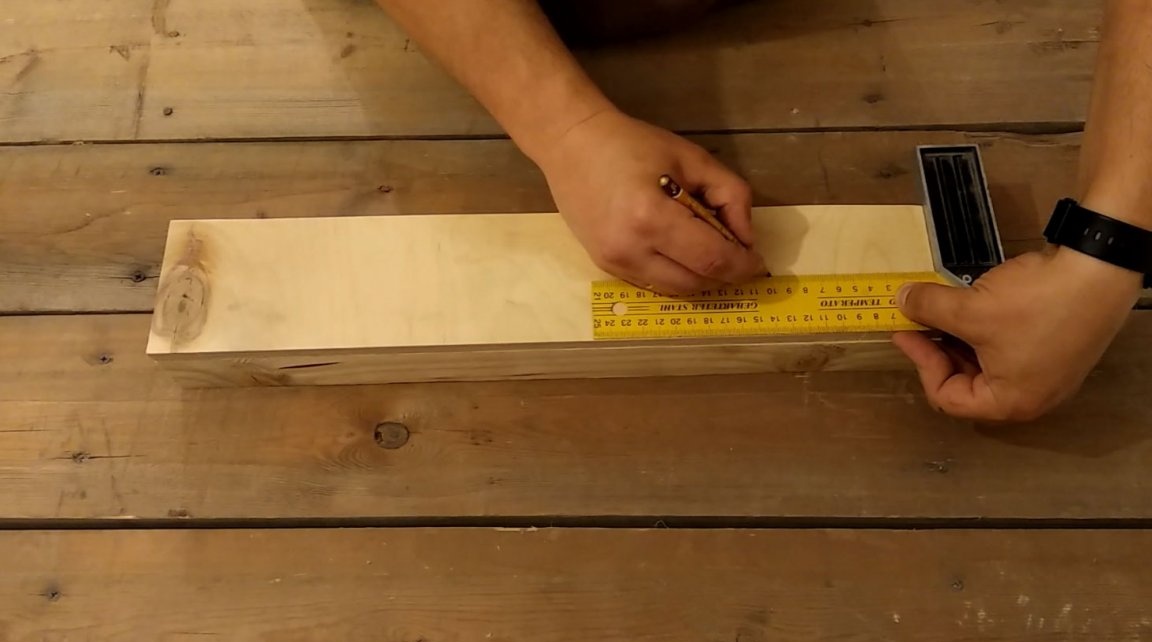
2. We fix two elements of the future vice with clamps.
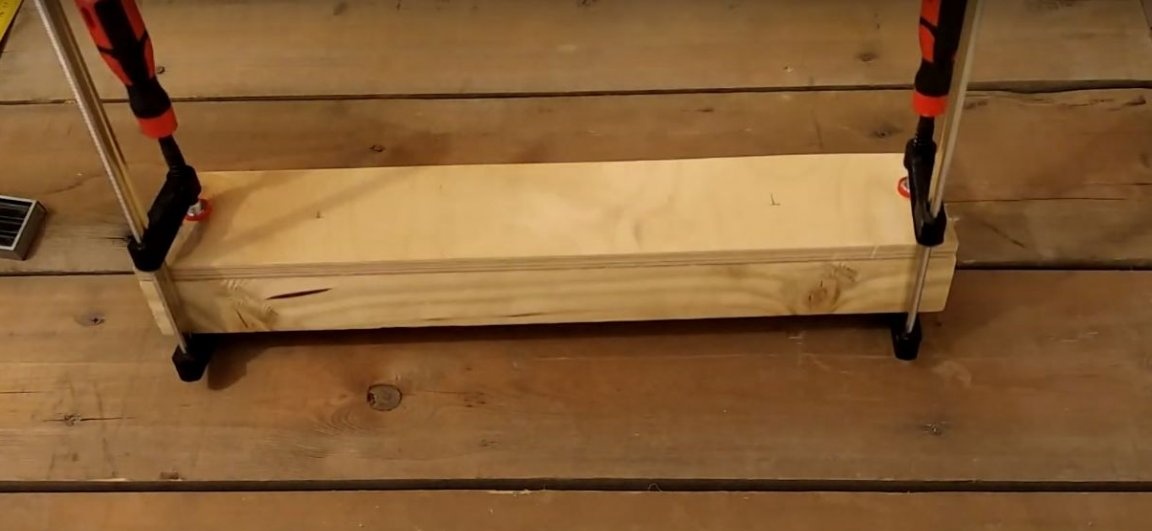
3. Using a screwdriver, drill holes with a diameter of 12 mm in the designated places.
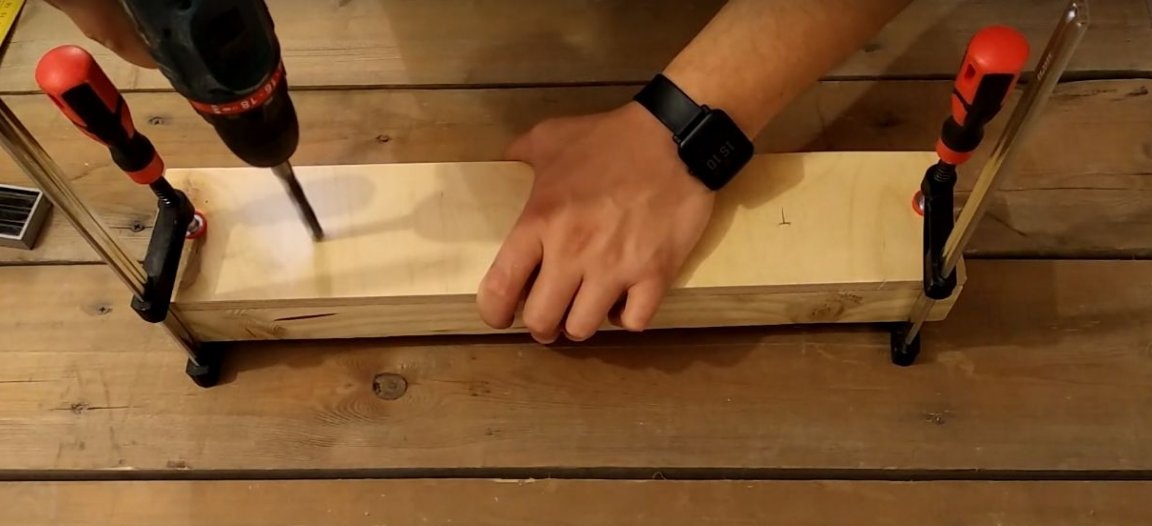
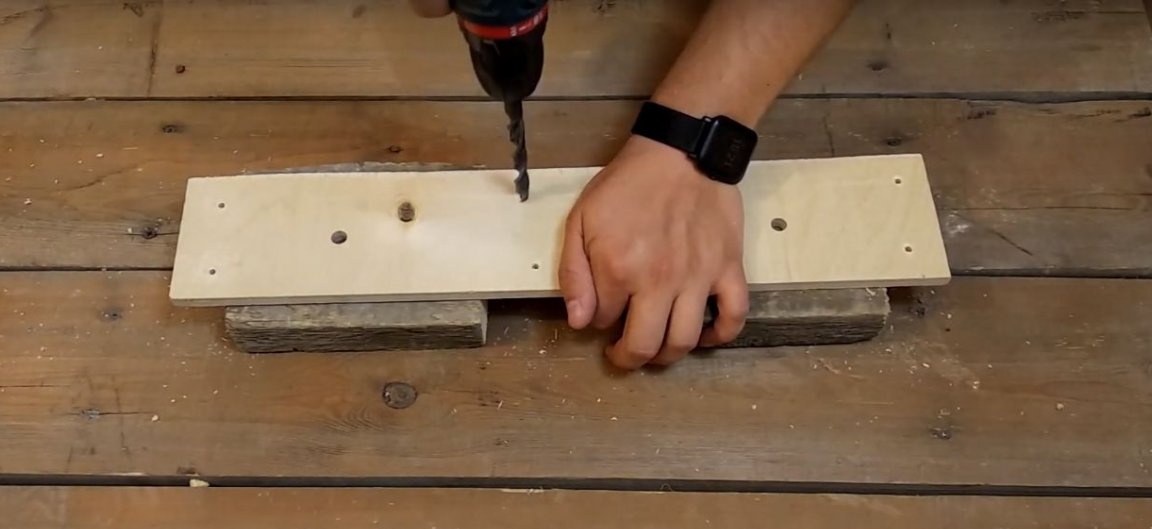
4. We disassemble and separately on a piece of plywood we drill six additional holes with a diameter of 4 mm for self-tapping screws.
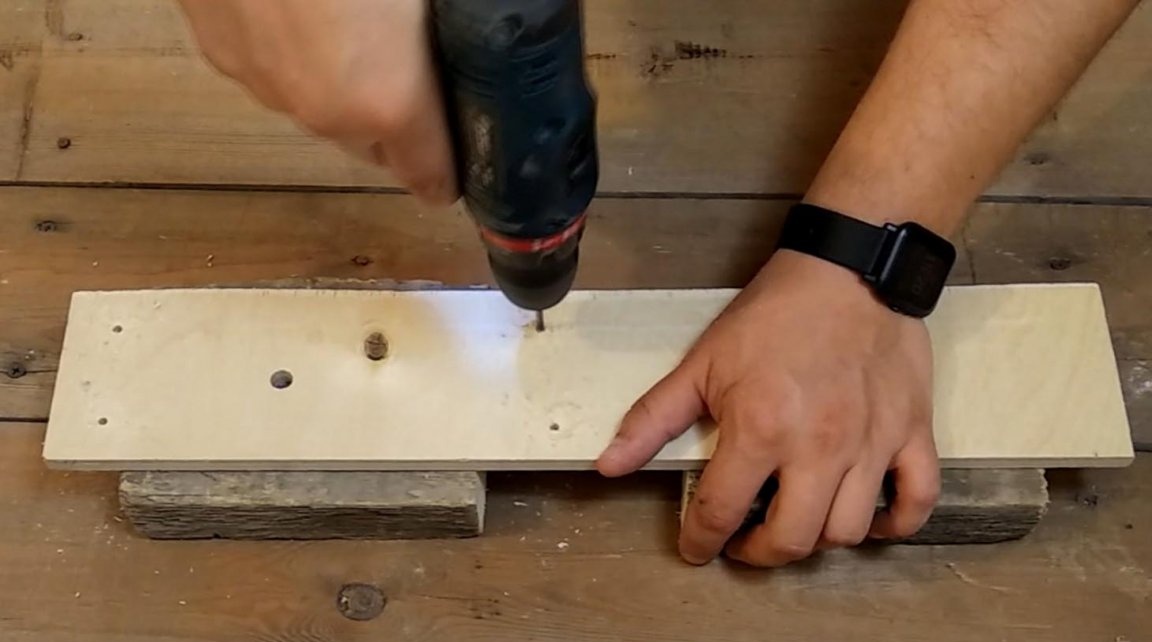
Next, on each hole with a drill for 12, we make chamfers so that the caps of the screws do not protrude.
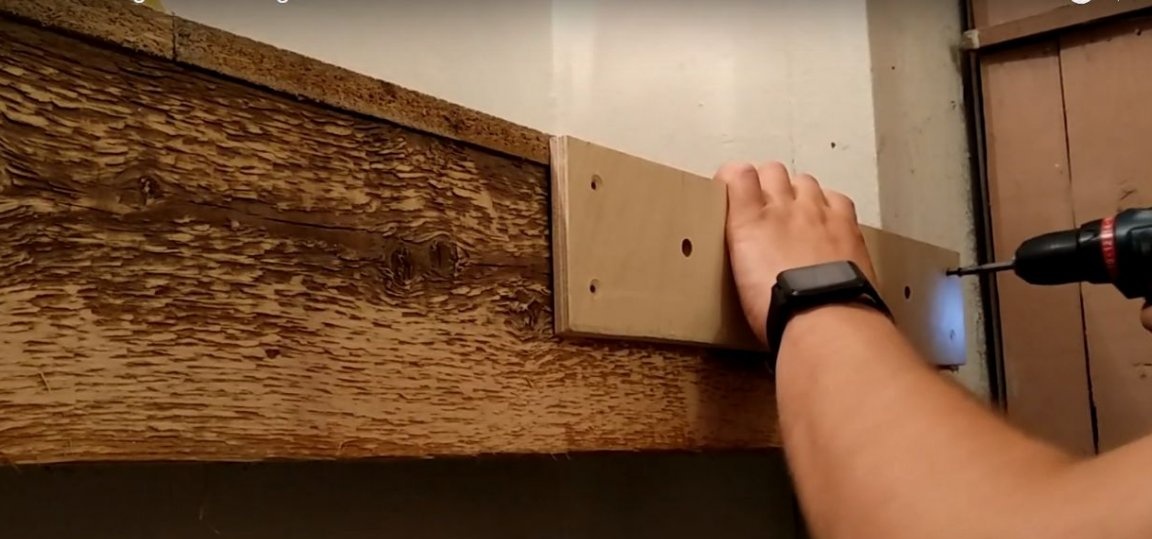
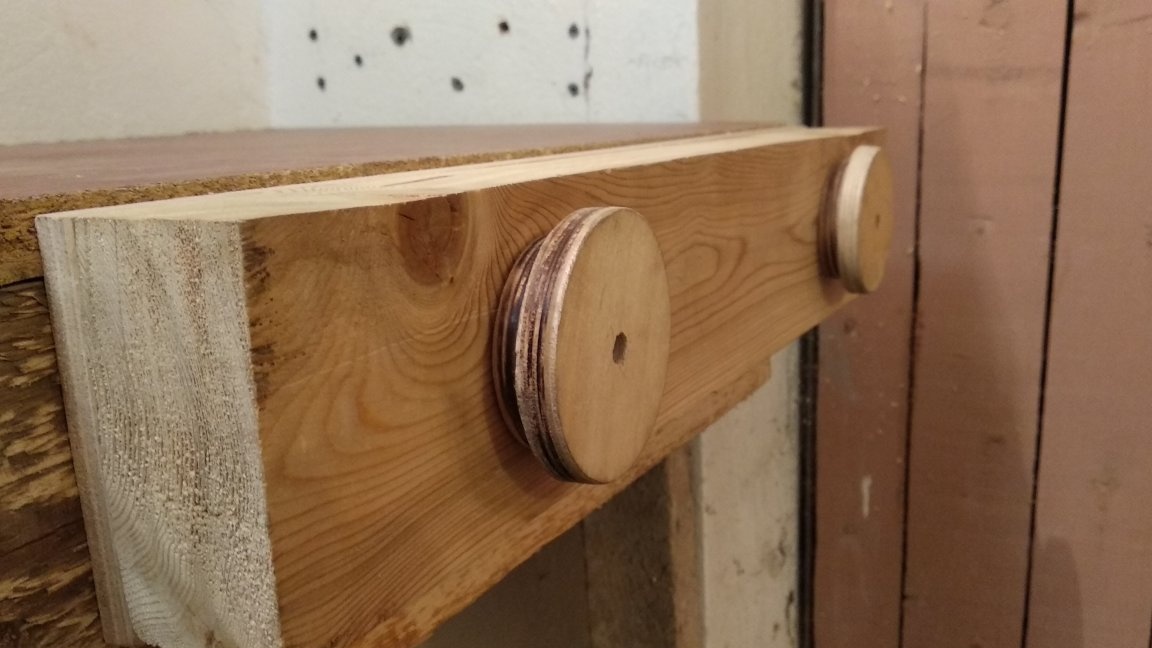
5. Fasten a piece of plywood to the side of the workbench using a screwdriver using six screws on pre-marked holes. Check the perpendicularity relative to the work surface of the workbench using a square. If necessary, place pads under the plywood for alignment.
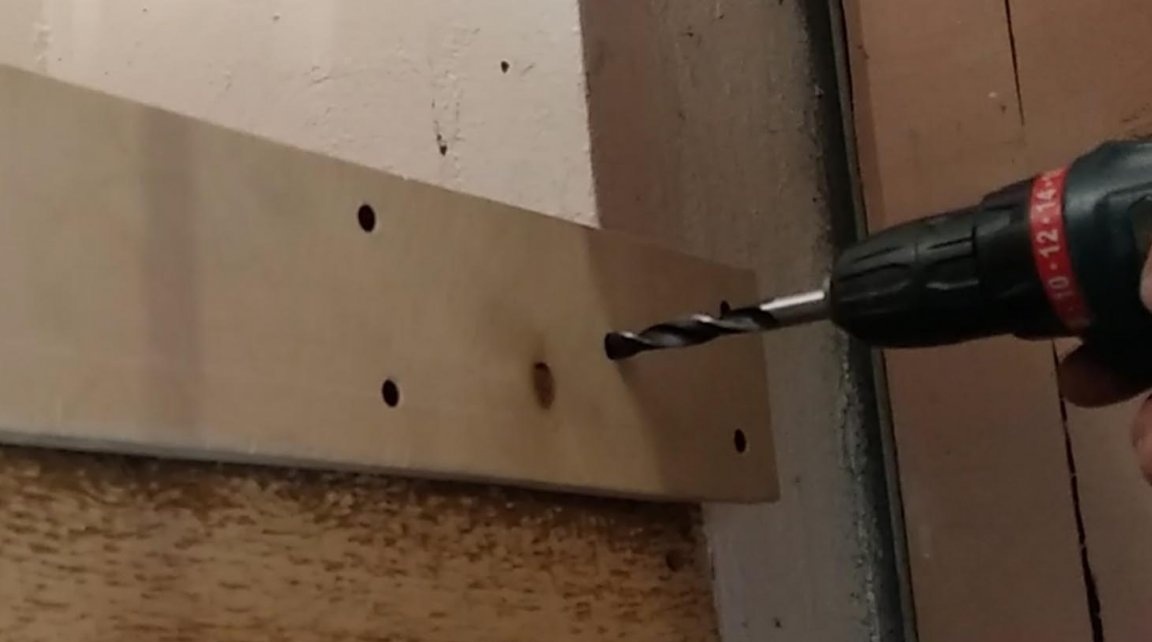
6. Using existing holes for screws as guides, drill holes in a workbench for studs.
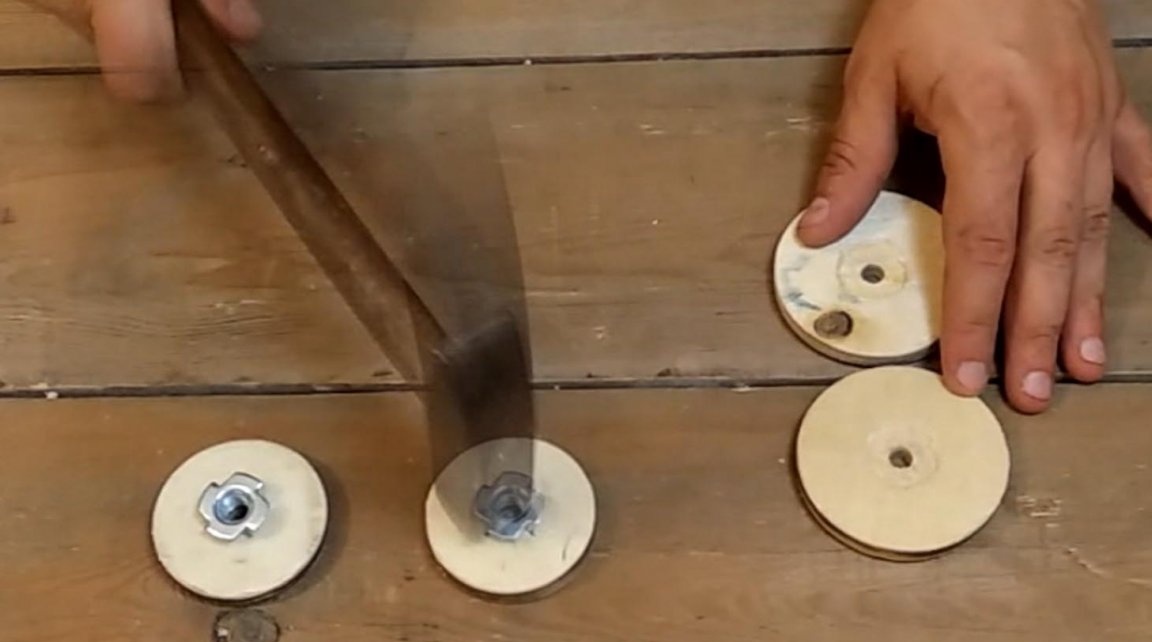
7. We take two driven (mortise) nuts M10.
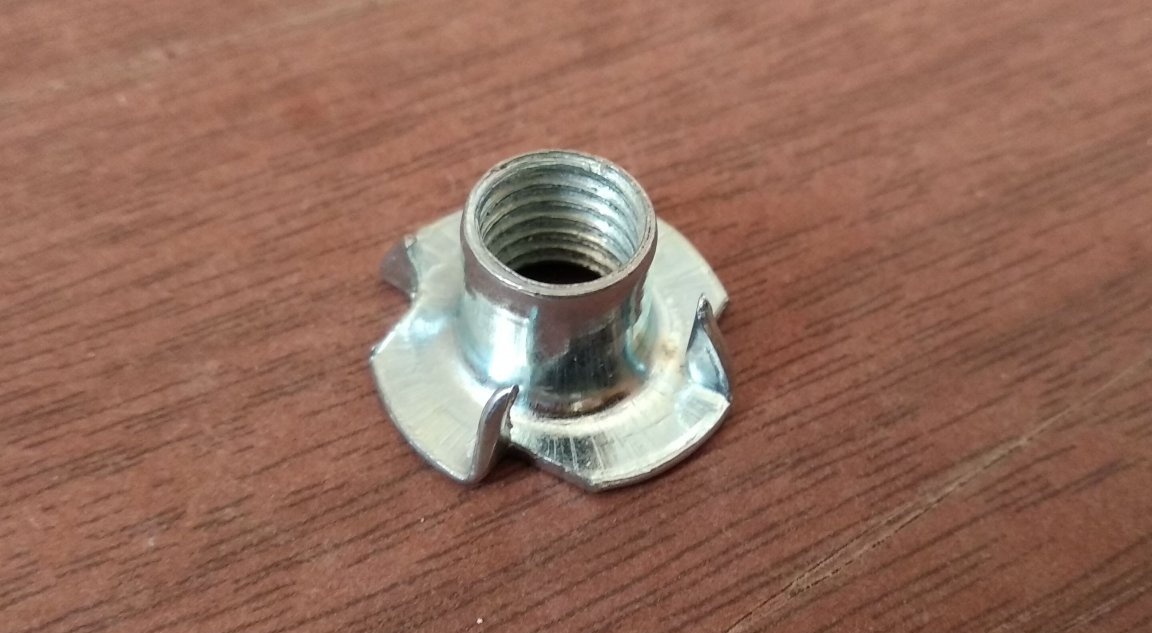
8. On the reverse side of the workbench, hammer the nuts with a hammer into the drilled holes.

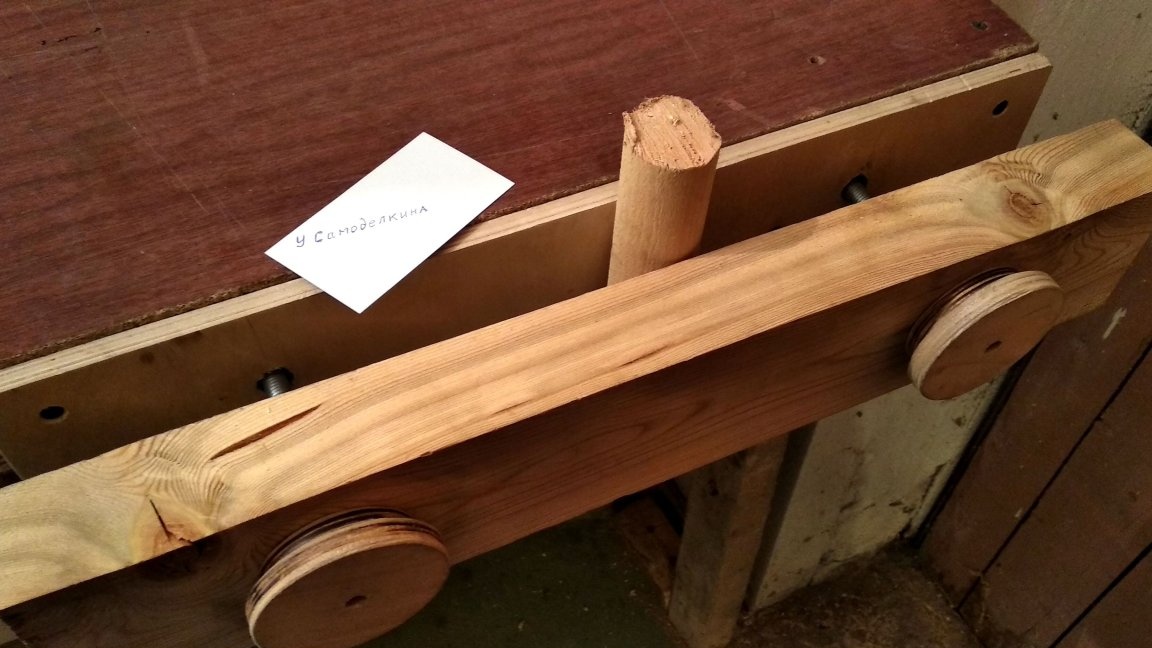
The stationary part of the vise is ready.
9. We make screws. On the second plywood trim, we mark four circles - two large ones with a diameter of 70 mm and two medium ones with a diameter of 50 mm. For marking, I used a set of crowns for wood.
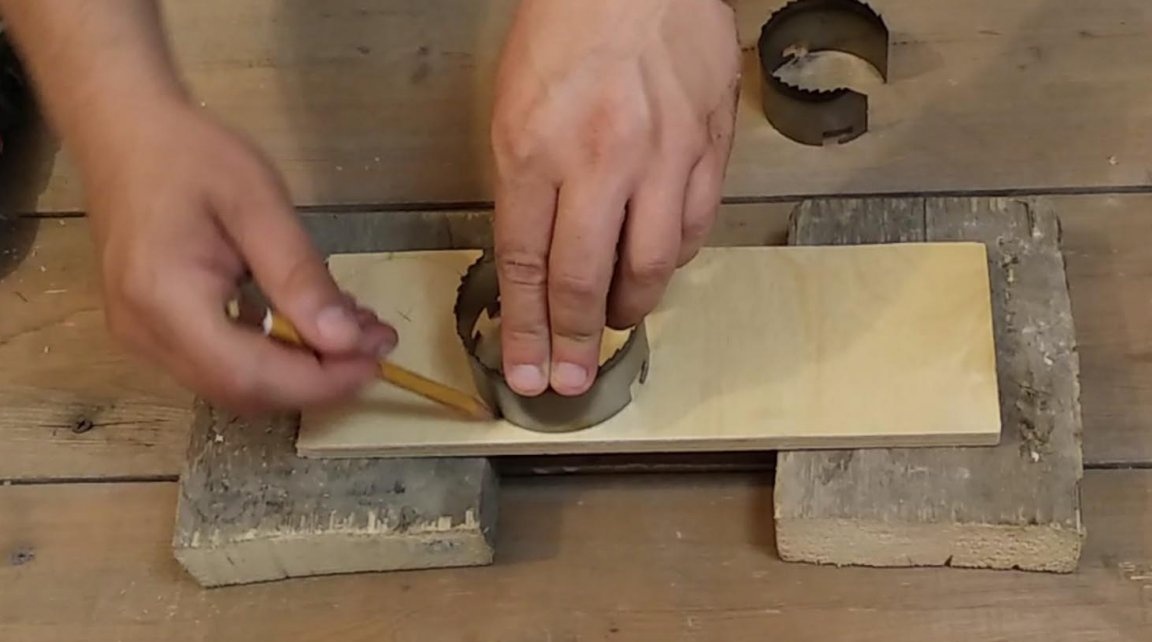
In the center of each circle, mark the point for the future cutout. We cut round blanks for handles using ring crowns on wood.

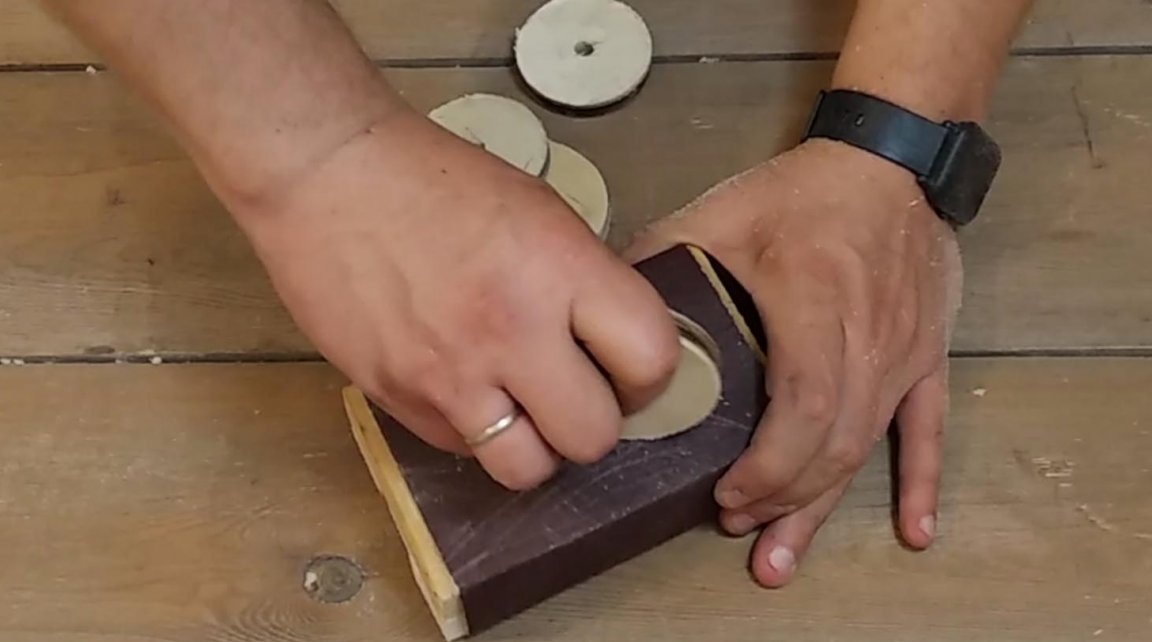
10. We skim the received circles so as not to get a splinter when working with a vise.
11. In circles with a diameter of 50 mm we make 12 holes for the mortise nuts. In large circles - hidden grooves under the caps of the driven nuts.
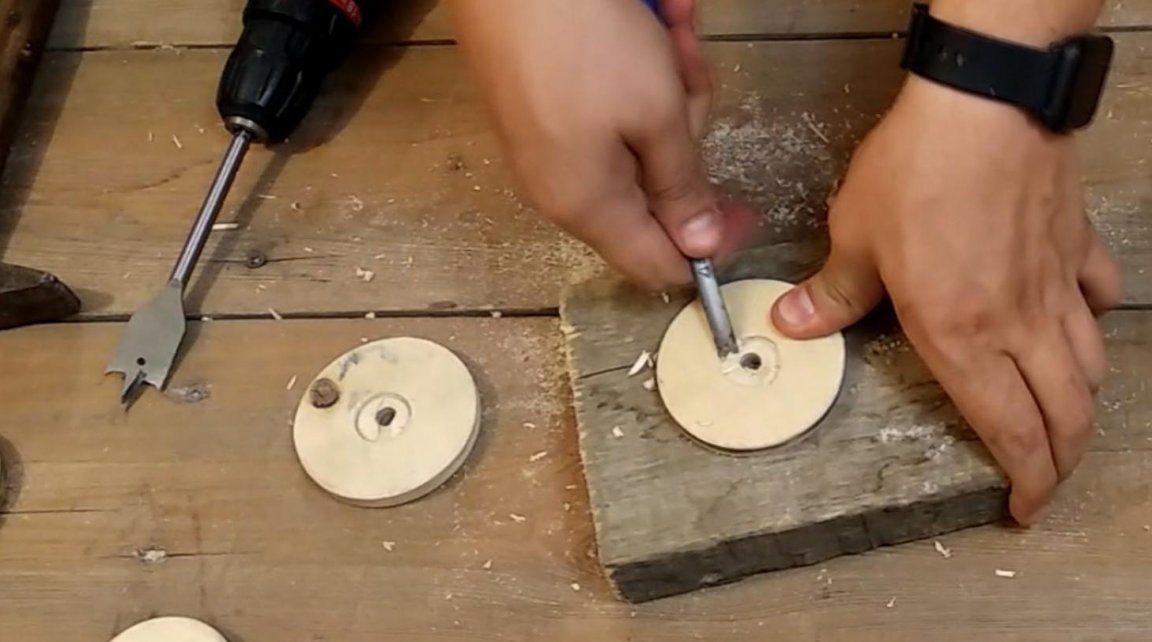
12. Drive the mortise nuts into small circles.
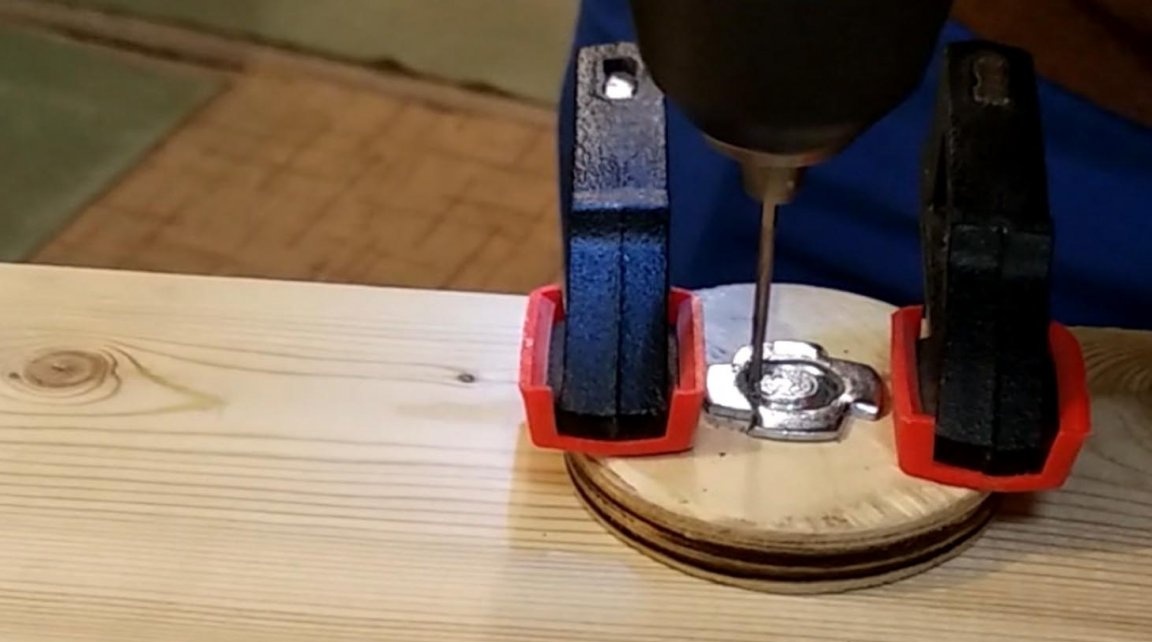
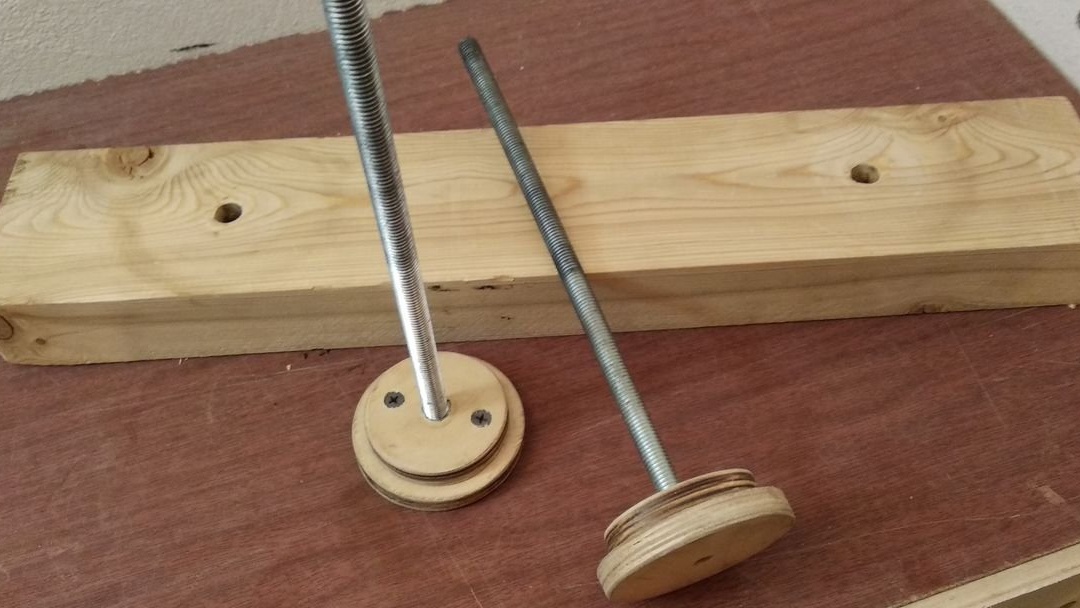
13. Screw the studs into circles and counter with the help of pieces of wire in the end holes.
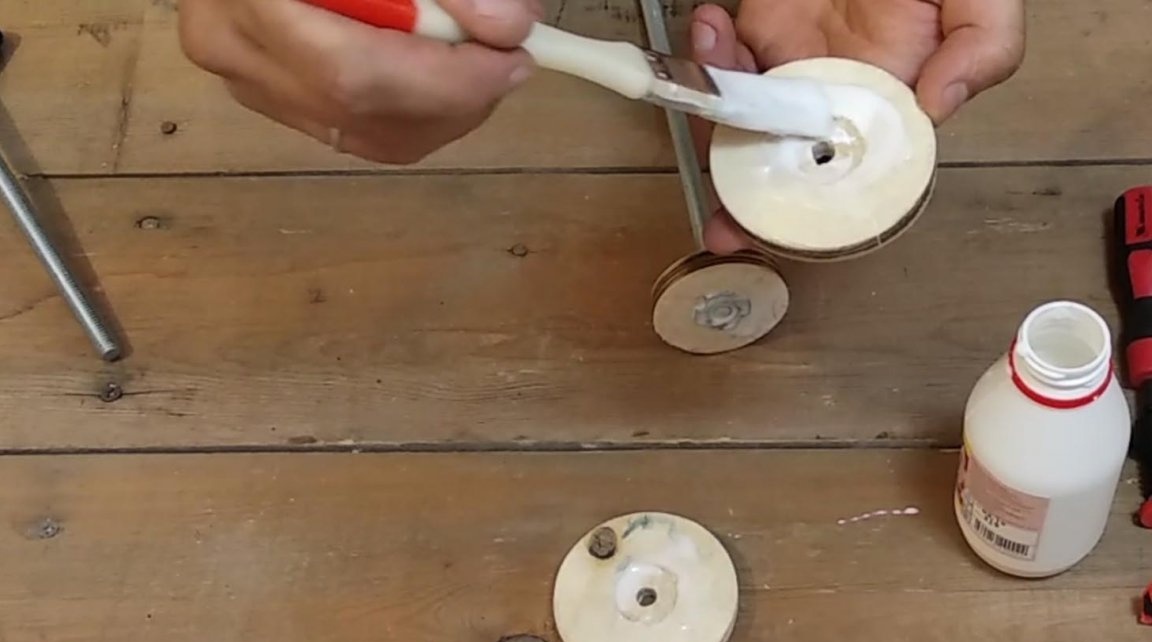
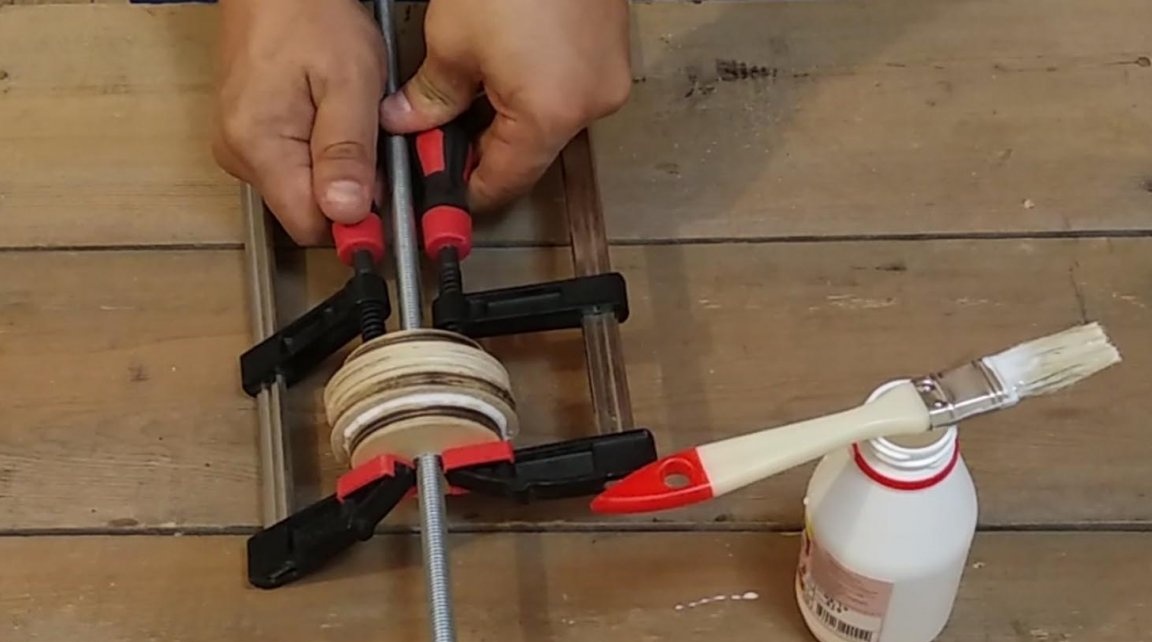
14. Glue the circles together, fixing them together with clamps. The glue should dry.
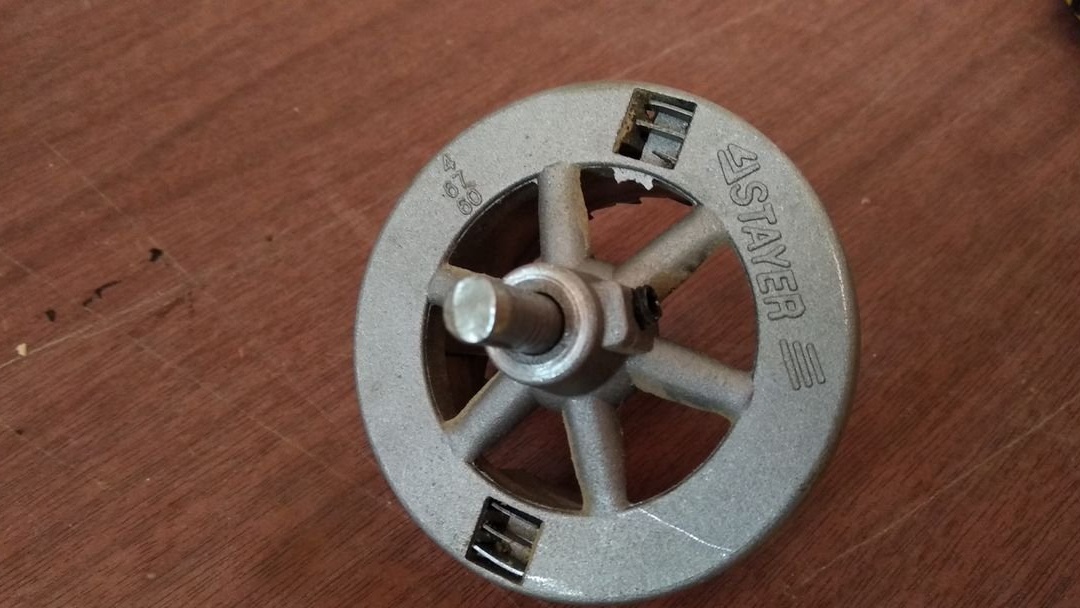
15. On each screw we make diagonal holes for self-tapping screws with a depth of about 12 mm. After that, we screw the screws into these holes. Screws with handles are ready.
16. We collect a vice.
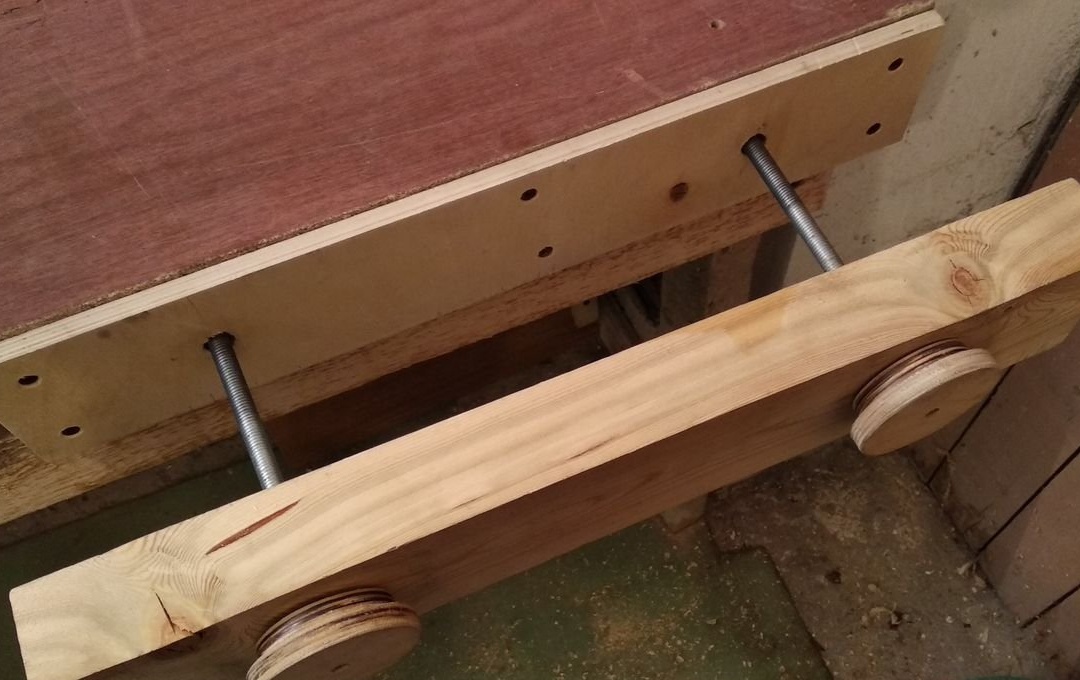
In just a couple of hours of work, you can get a convenient Moxon vice (or rather their stationary version), made by yourself.
At the request of the master, you can cover the vice with varnish, oil or drying oil. In this case, I do not recommend covering the working part of the jaws so that there are no traces of a protective coating on the clamped products. For everyday work, I have enough head clamping force, a vice in work and a detailed manufacturing process you can see in the video.