
There are a great many types of joinery joints without the use of self-tapping screws or other elements.
In this article, the author of the Third Coast Craftsman YouTube channel will devote its readers to the intricacies of creating an end-to-end spike connection with a wedging.
Materials
- Oak and Western European Eucalyptus Boards
—
- PVA glue
Instruments, used by the author.
- Marking planer, planer
—
—
—
—
—
- Awl, square, ruler, vernier caliper, mallet, chisels, hammer
Manufacturing process.
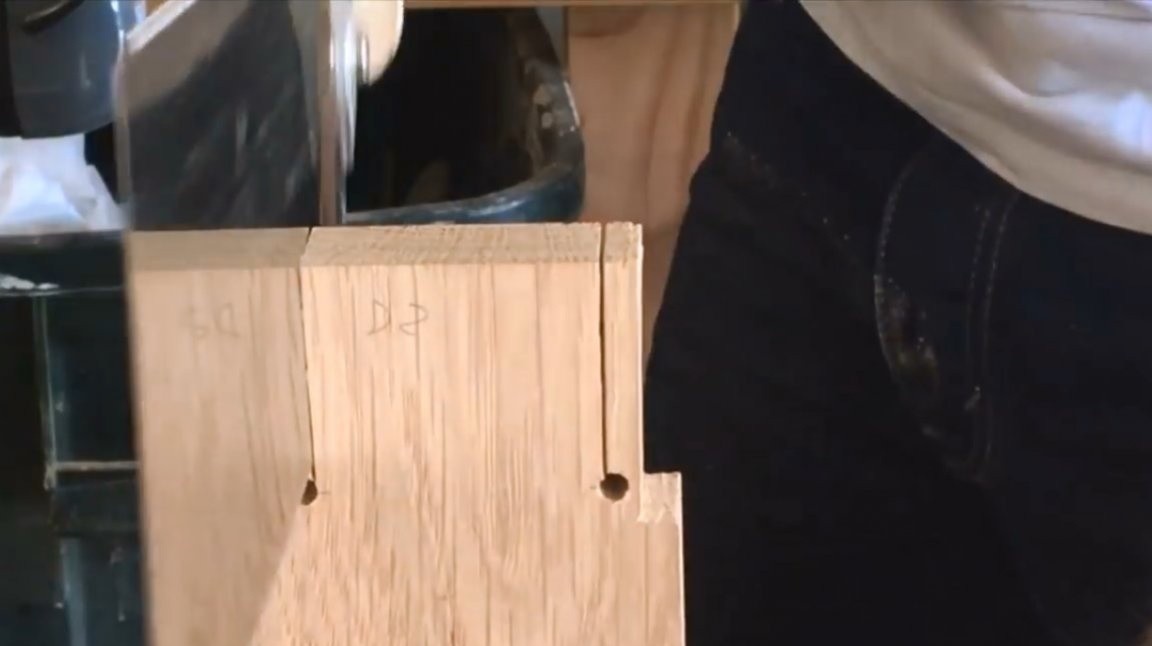
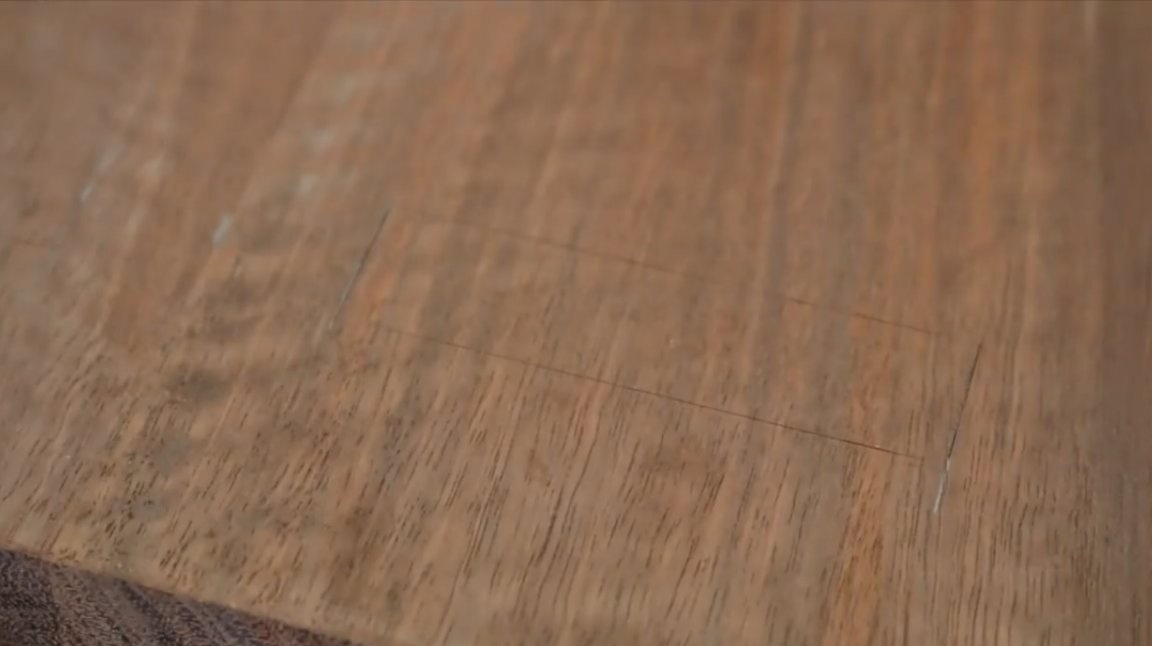
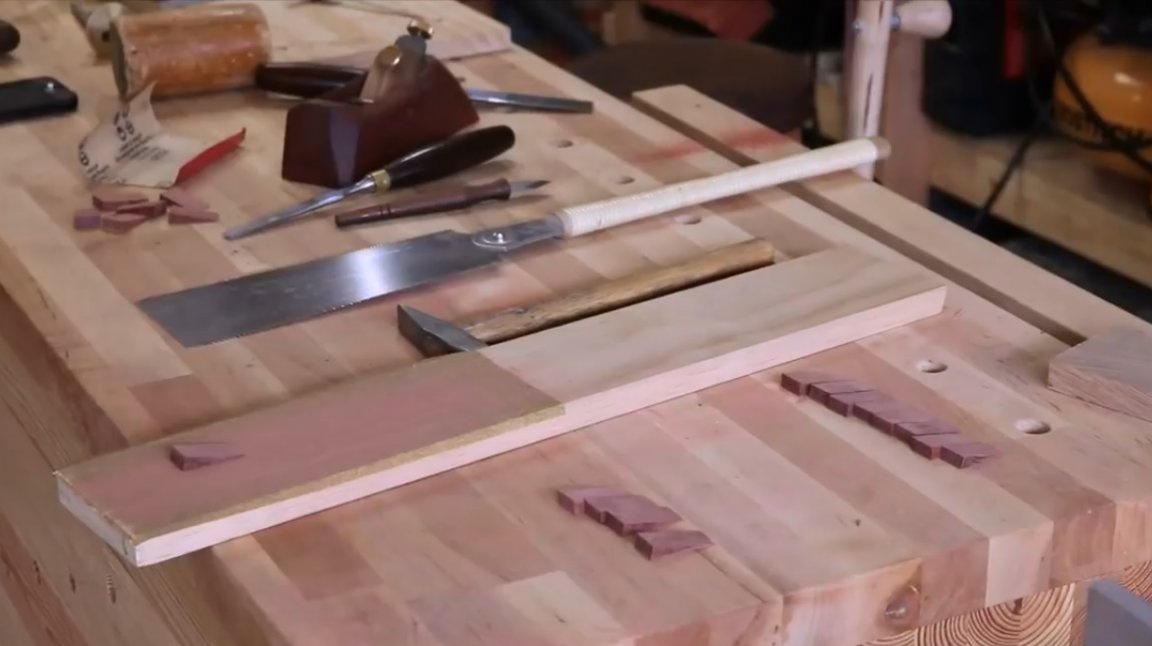
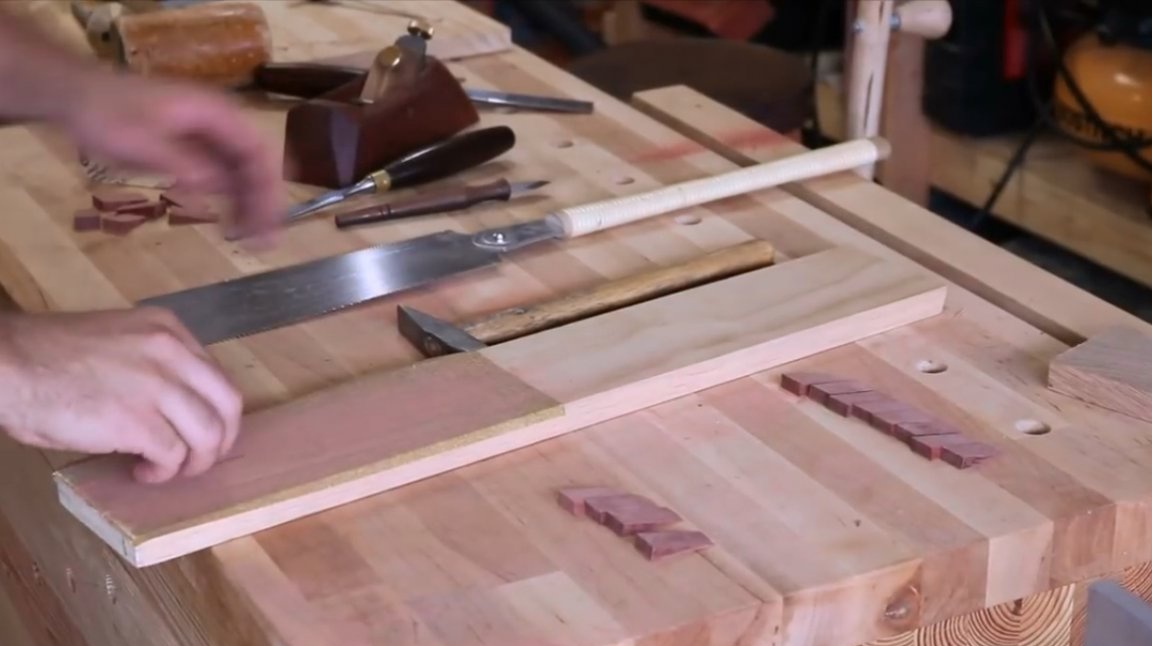
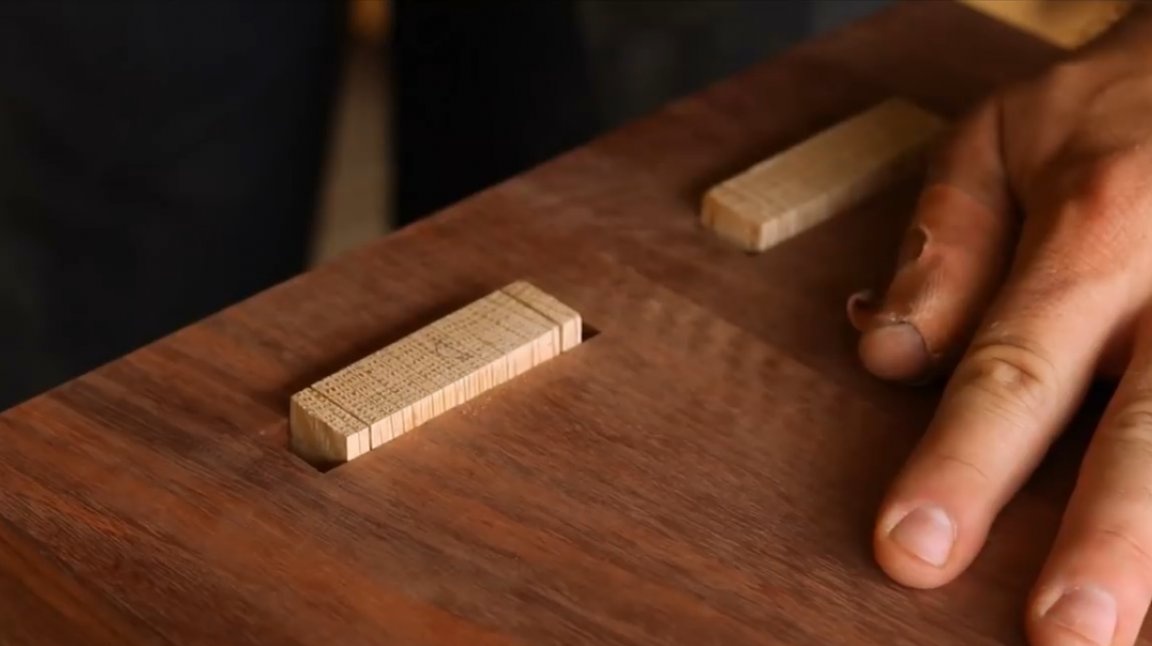
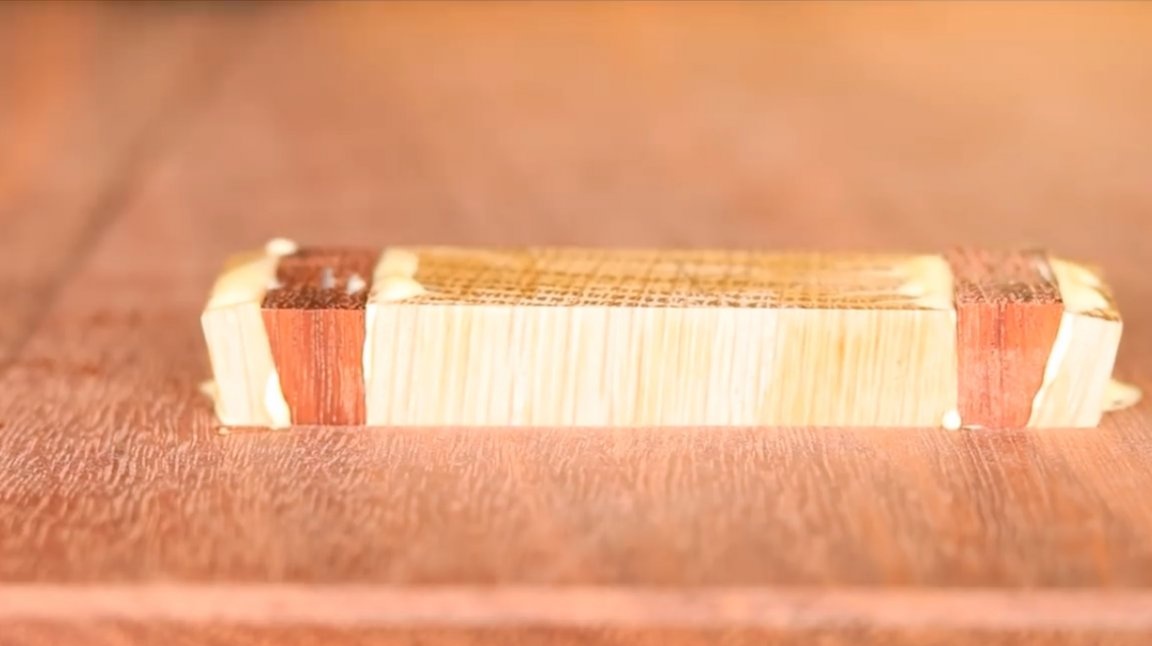
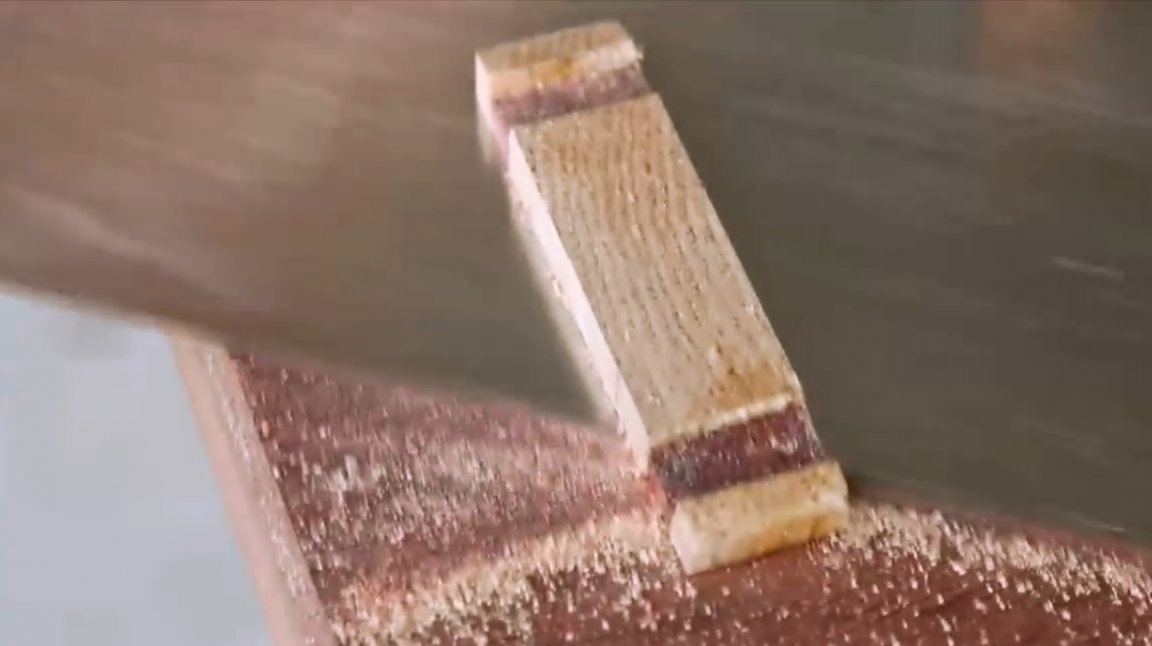
First step: the master cuts the spikes themselves. To do this, he first cuts off the sides of the board. The spike will be over the entire thickness of the board, so the base will not be cut.
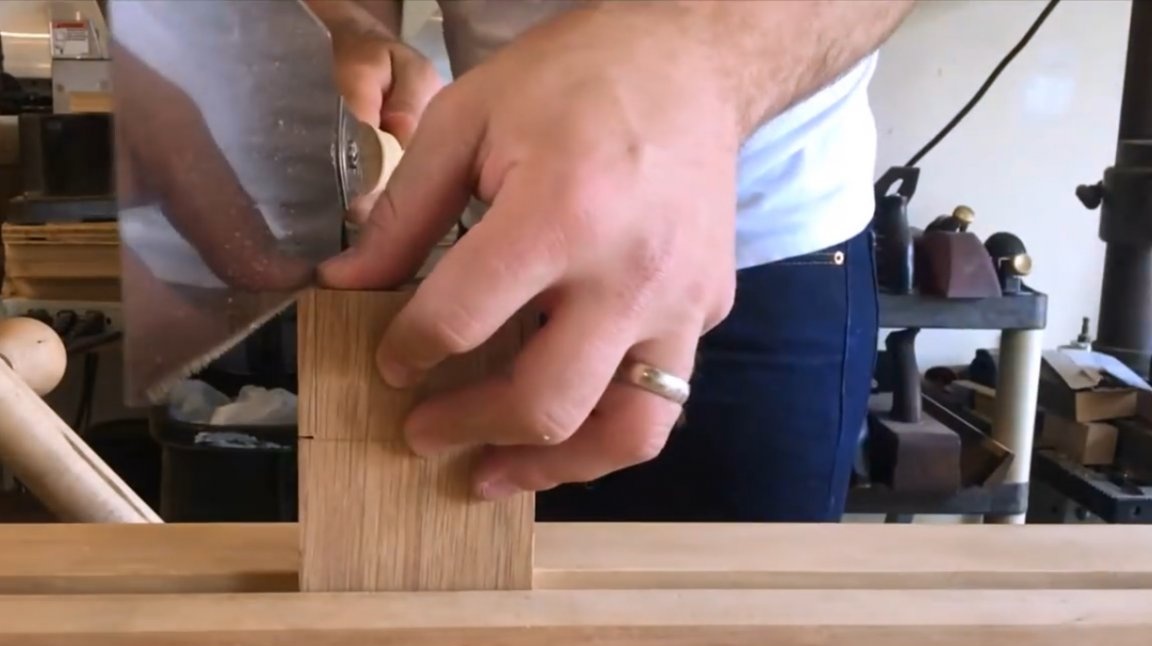
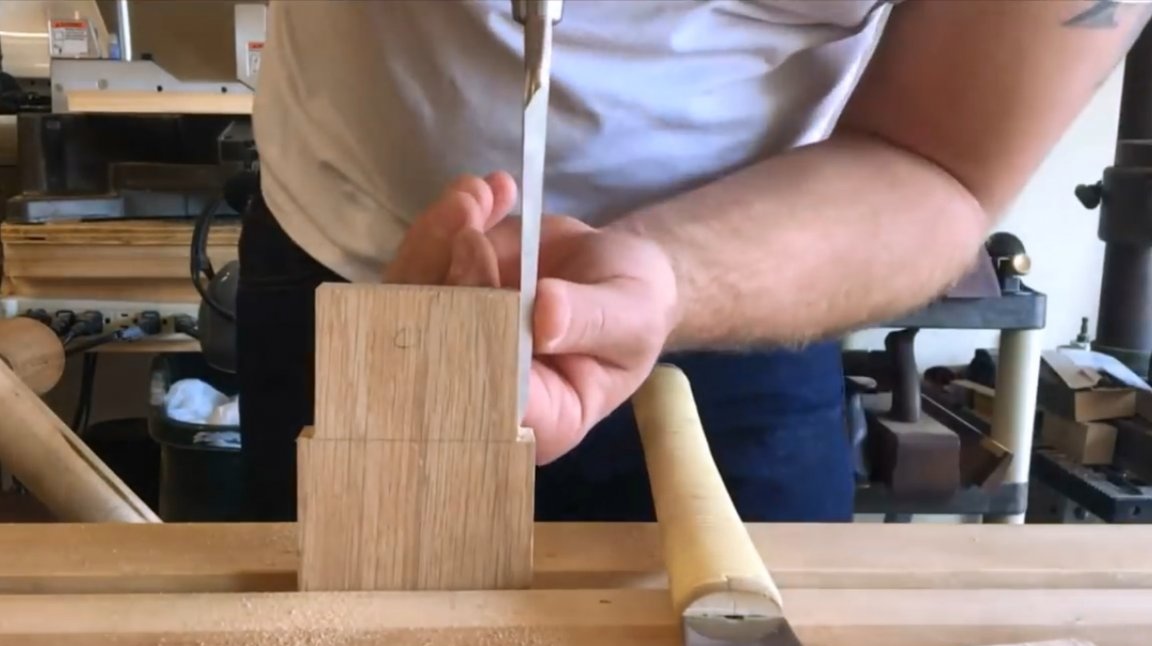
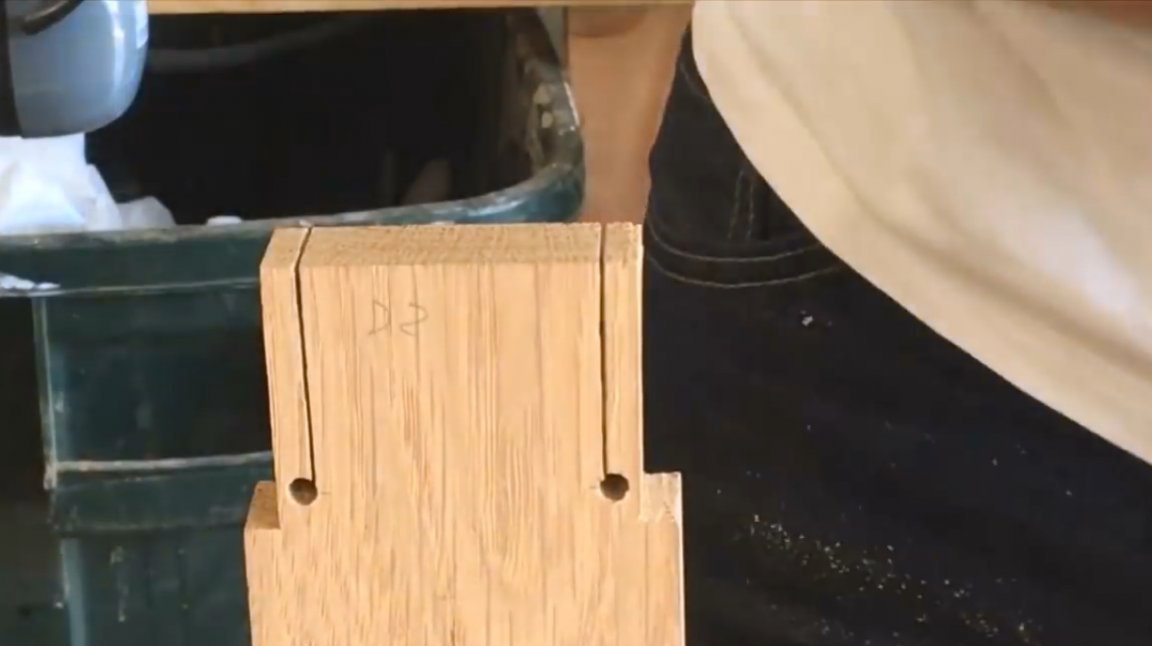
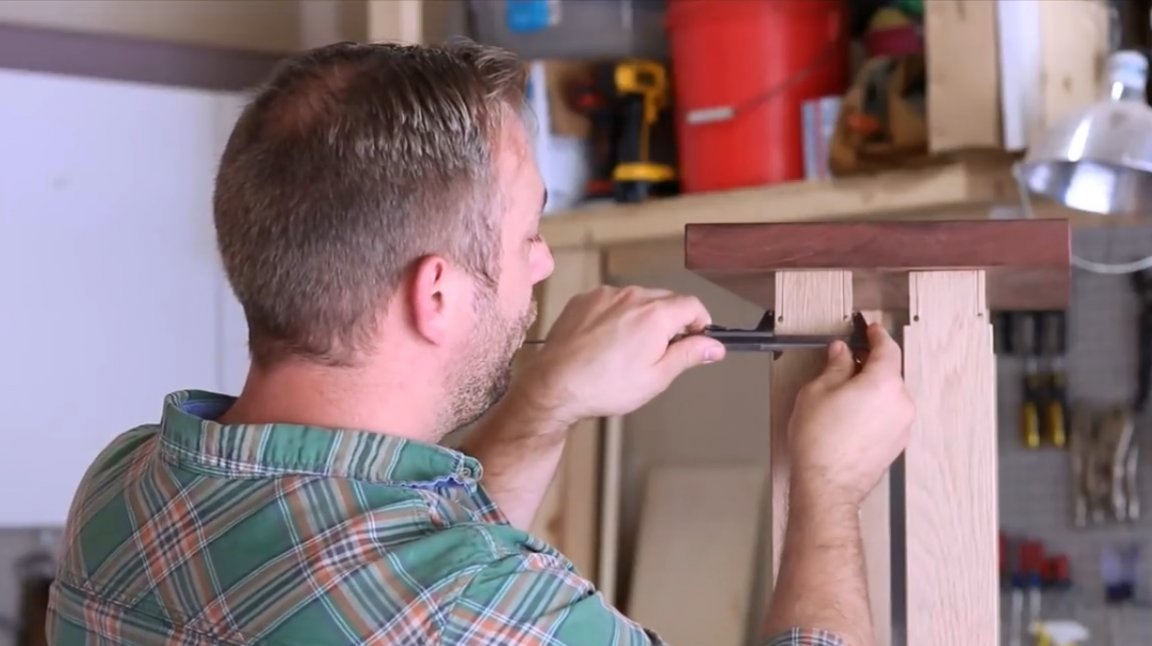
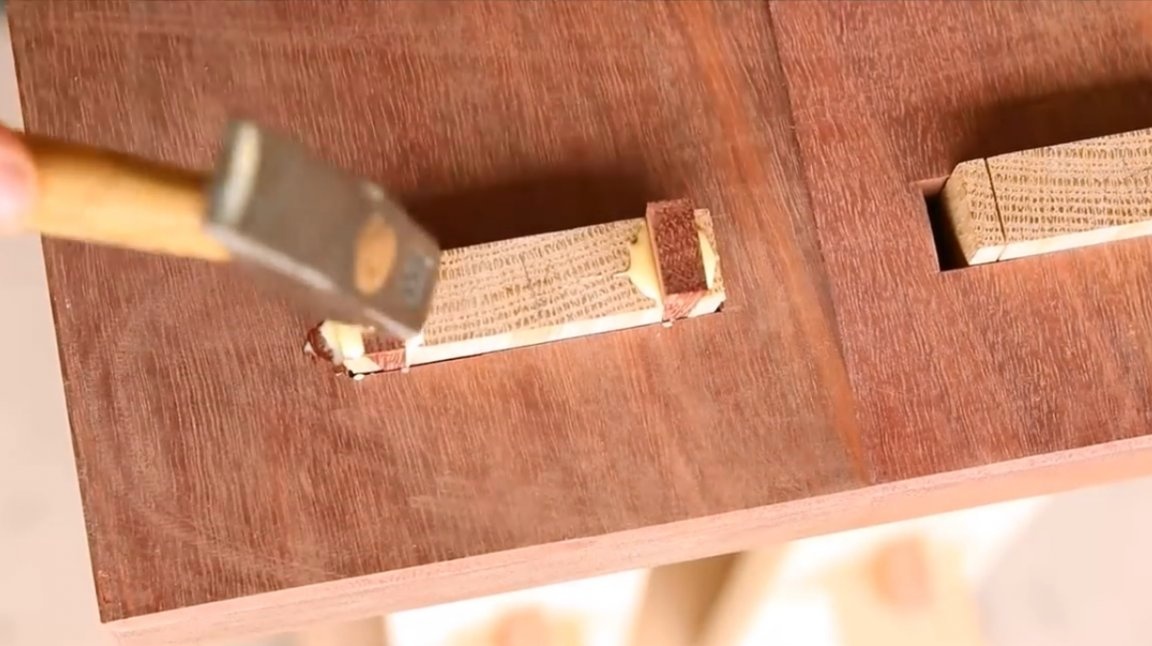
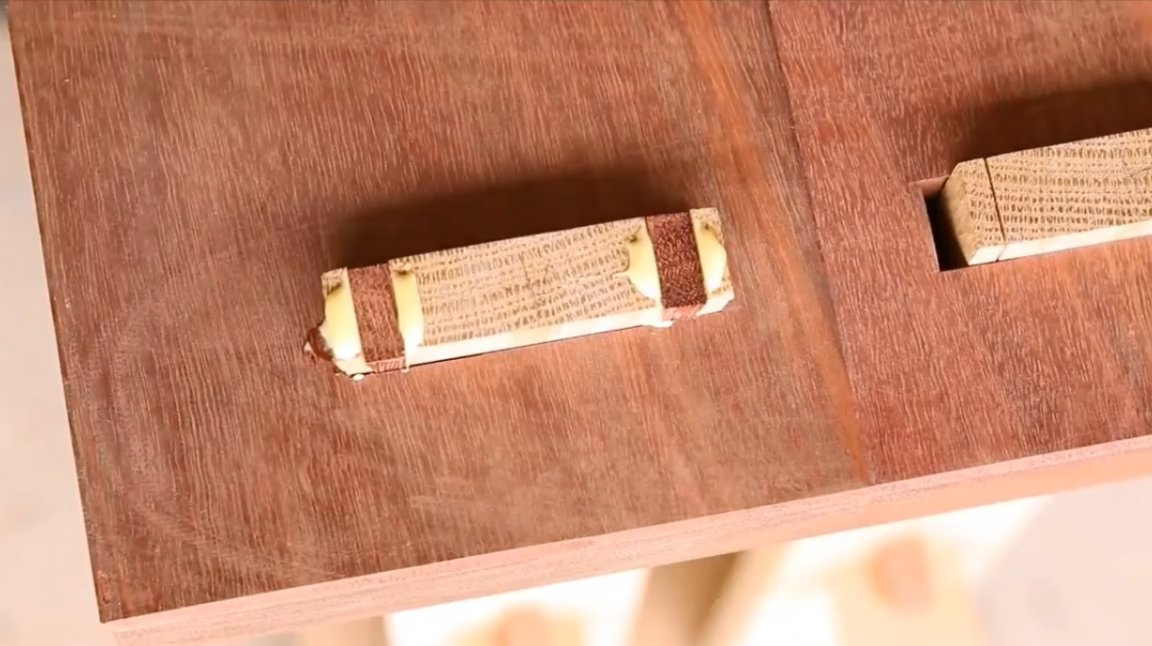
Further, the author marks the places where the discharge holes will be drilled. When the master makes cuts on the spike, and drives the wedges there, these holes will not allow the wood to crack. It is desirable that these holes are extremely close to the edges of the tenon, then the risk of cracking will be minimal.
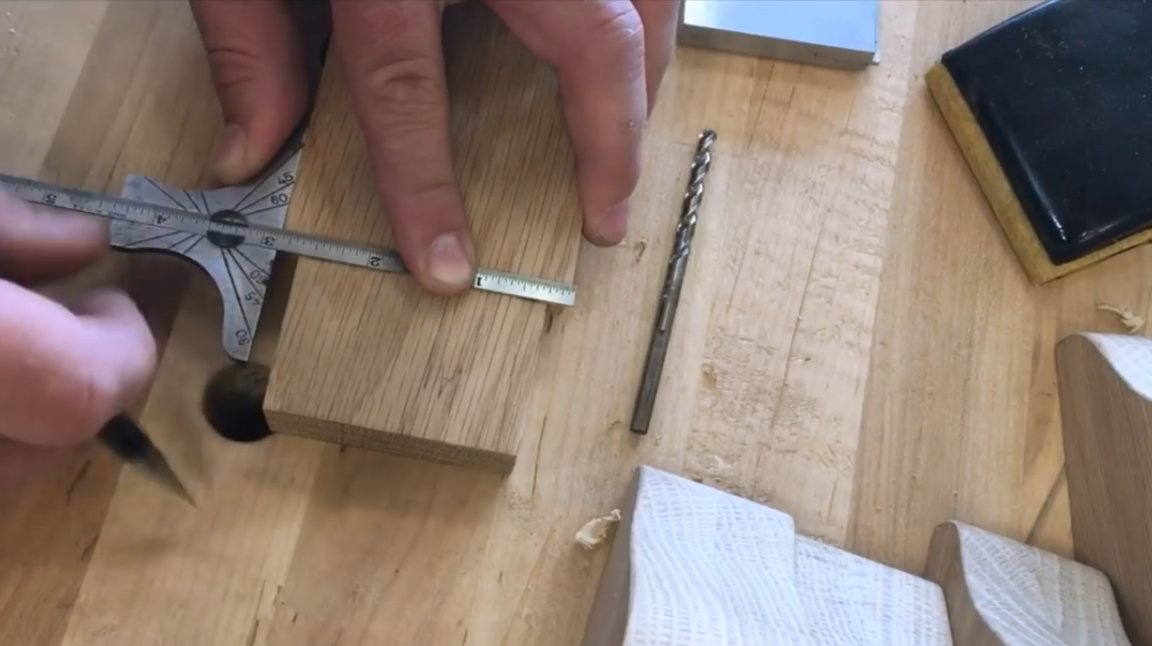
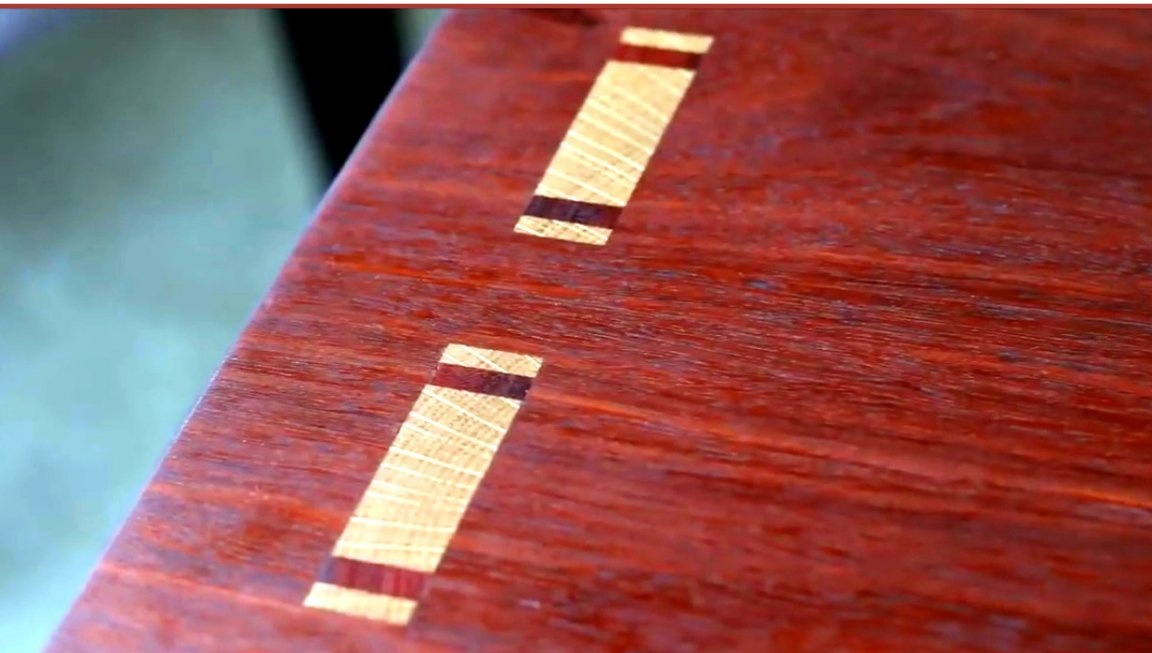
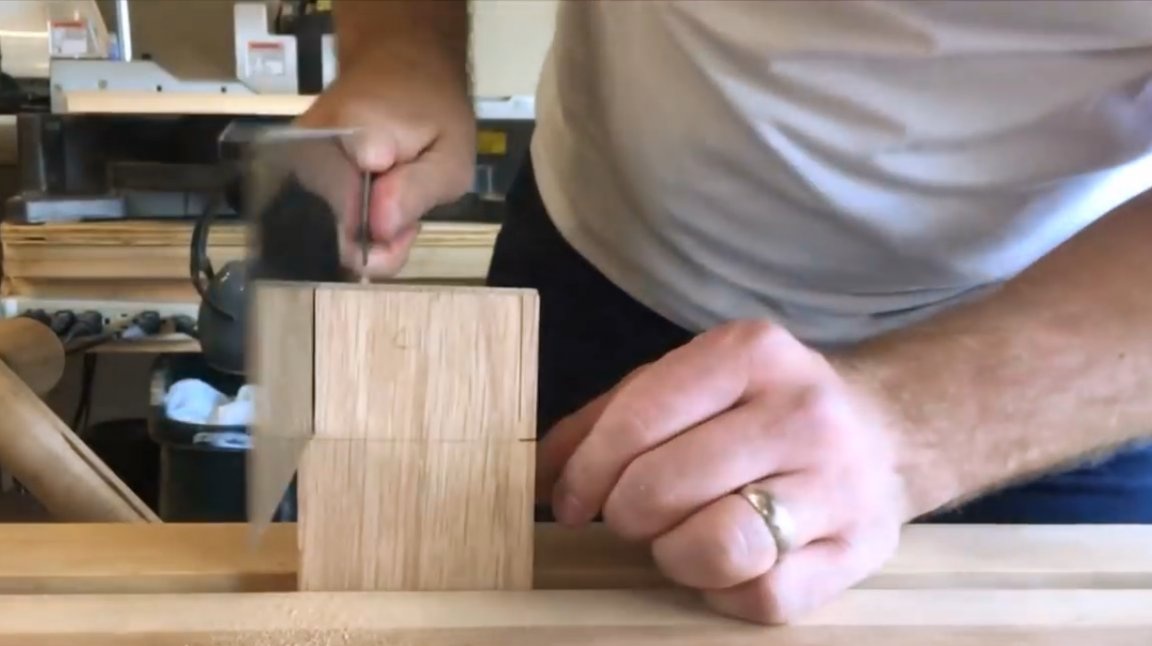
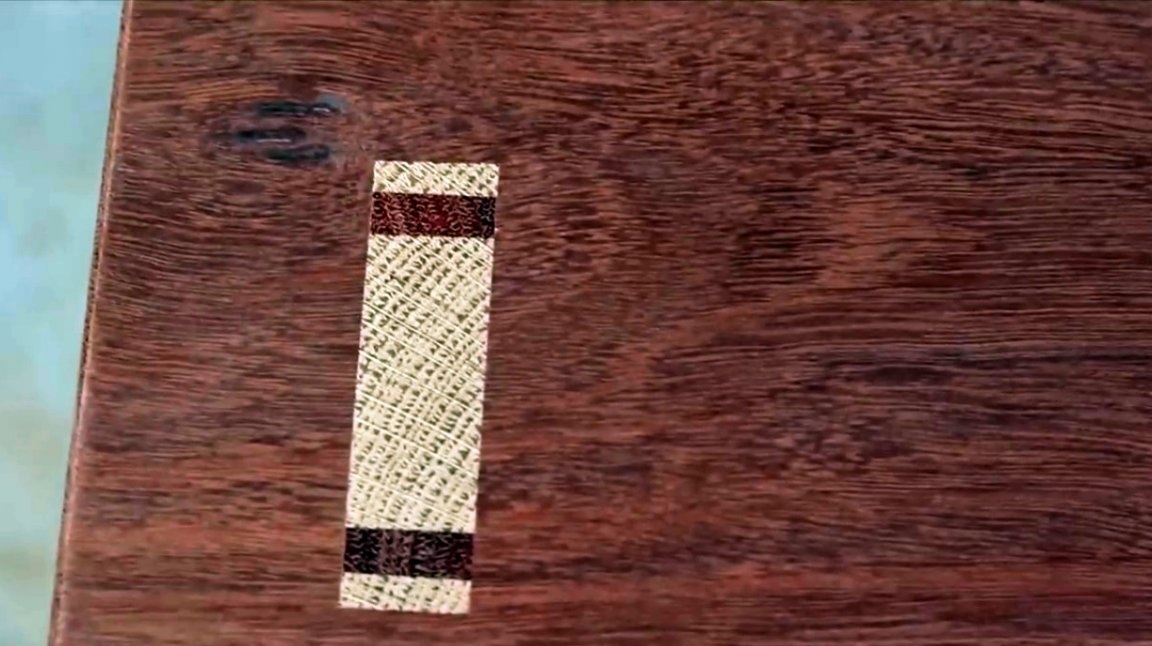
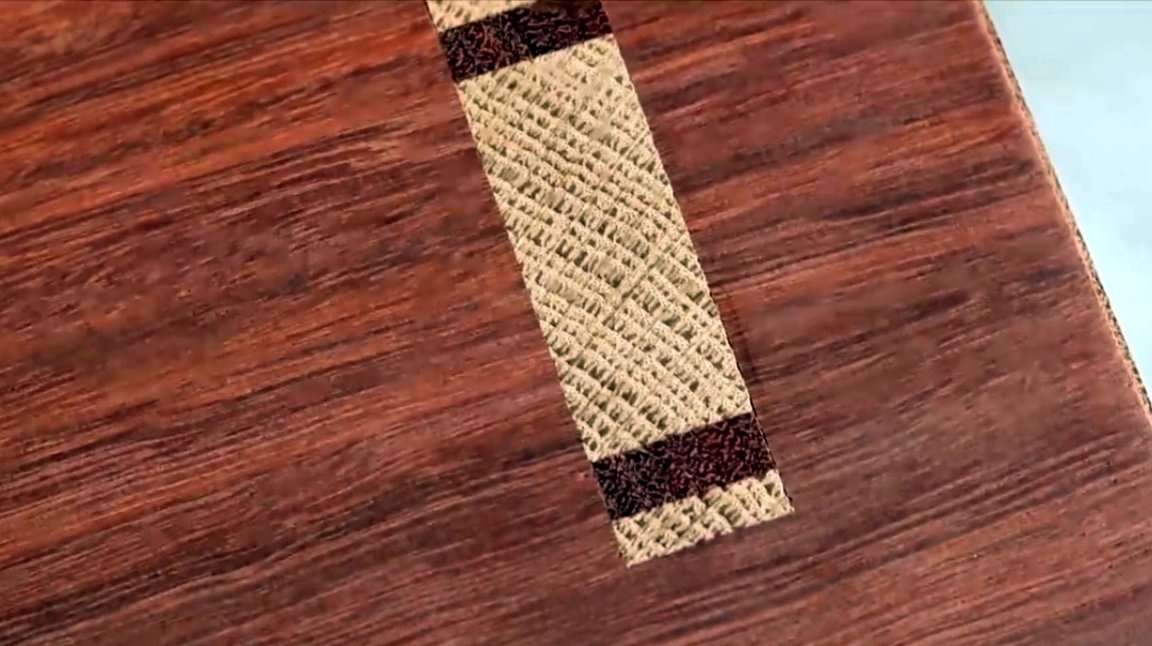
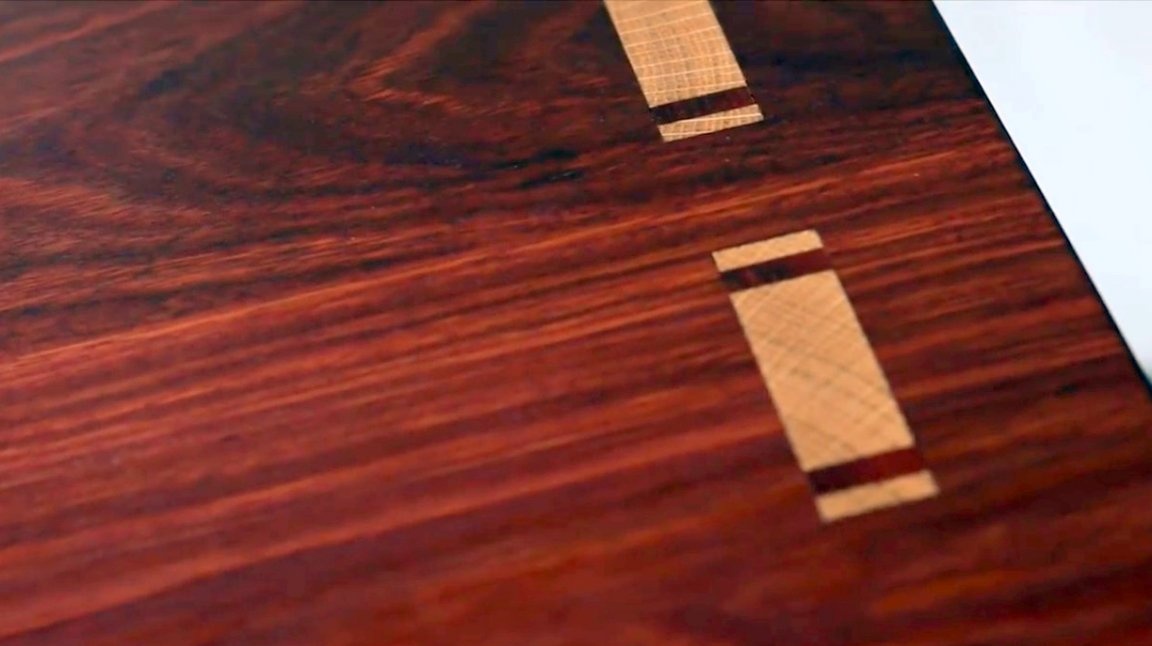
Now the master makes cuts for the wedges at a distance of ¼ (6 mm) inches on each side. Each wedges will also be ¼ inch. The stand itself and the connecting stud on it are made of oak, while the wedges and the entire countertop will be made of dark wood from West Australian eucalyptus. So, in the end, they will create an interesting contrast.
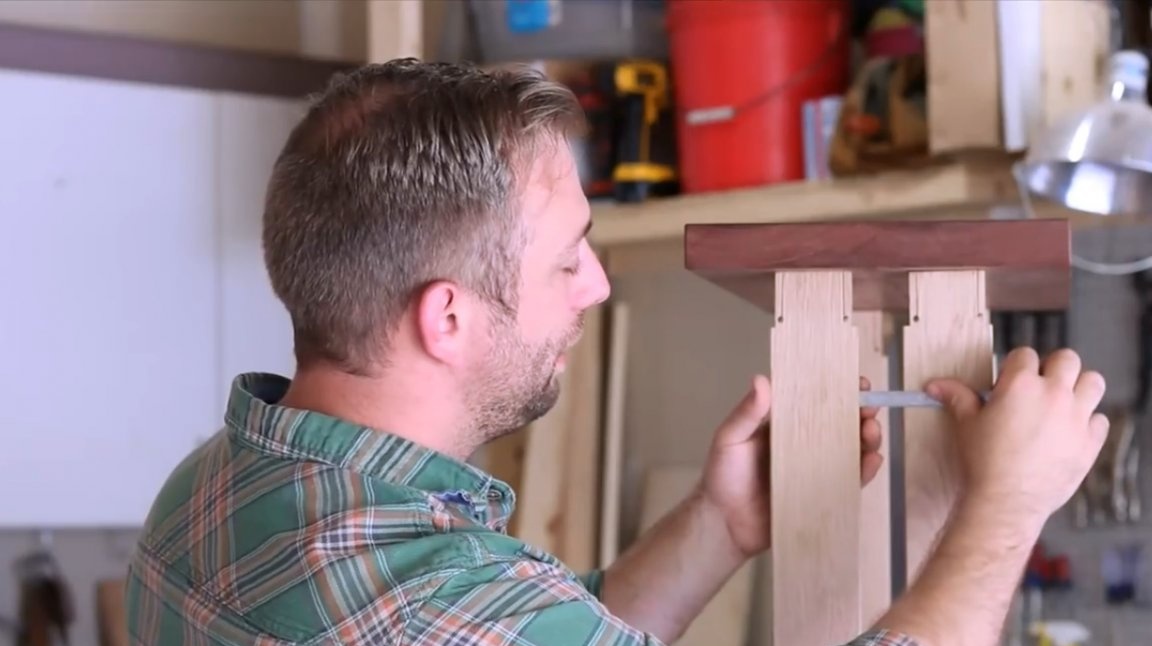
Next, the master takes the usual ruler and measures the distance between the two spikes in this place. He divides the resulting number in half and thus finds the central point on the countertop. Already from it he will put off other distances.
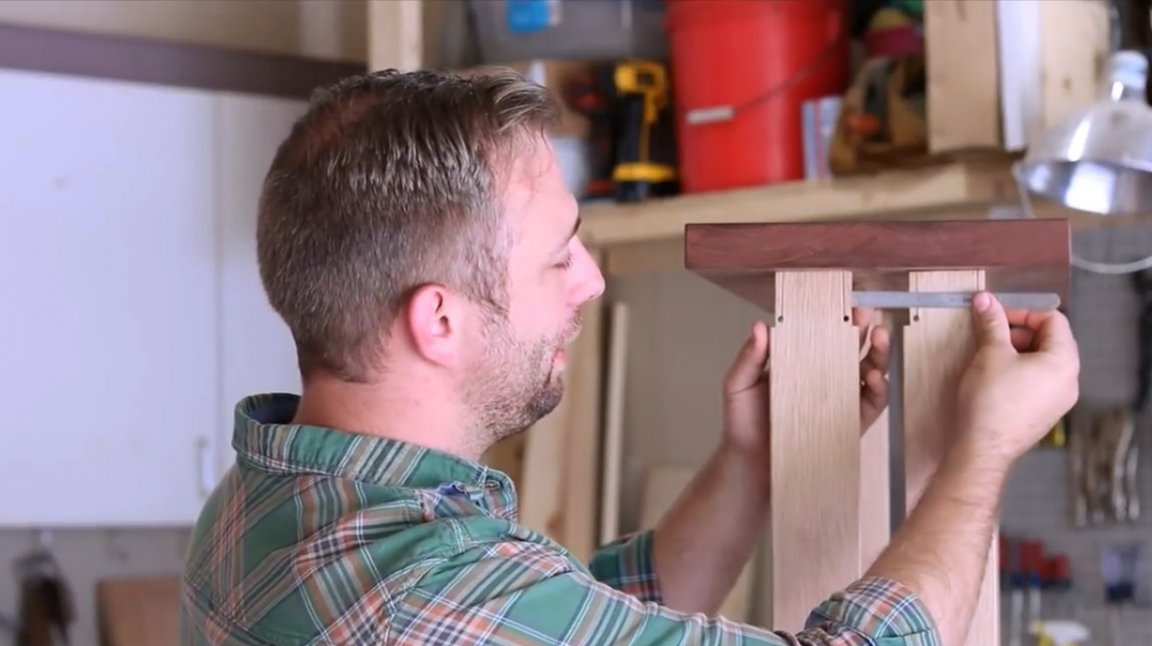
Then with a caliper (this is the easiest and fastest way to make an accurate measurement), the author measures the width of the connecting stud, and transfers the pencil marks to the second side. So, the master now knows the width of the nest from the bottom of the countertop. Using the same caliper and pencil, he transfers all the measurements to the second connection.
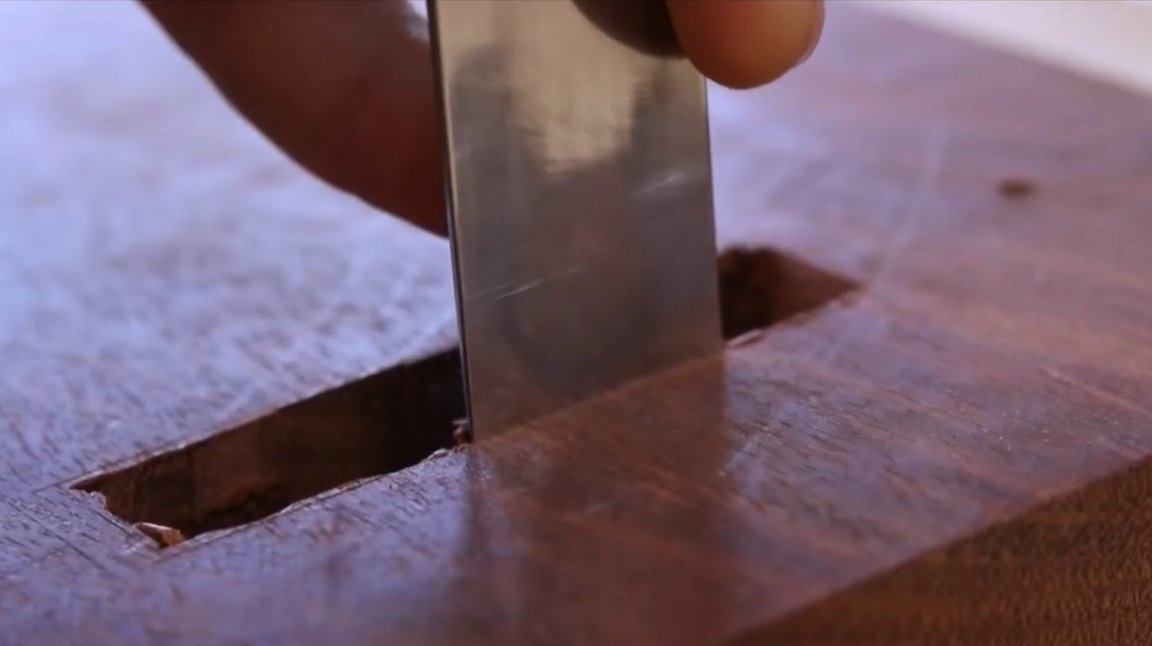
Now you have to calculate the width of the groove in the upper part of the countertop.The fact is that after the wedges are driven into the grooves, they expand slightly, therefore, the shape of the grooves should resemble the Latin letter V with a very small angle. But at the same time, its width as a result should not exceed the width of the rack itself.
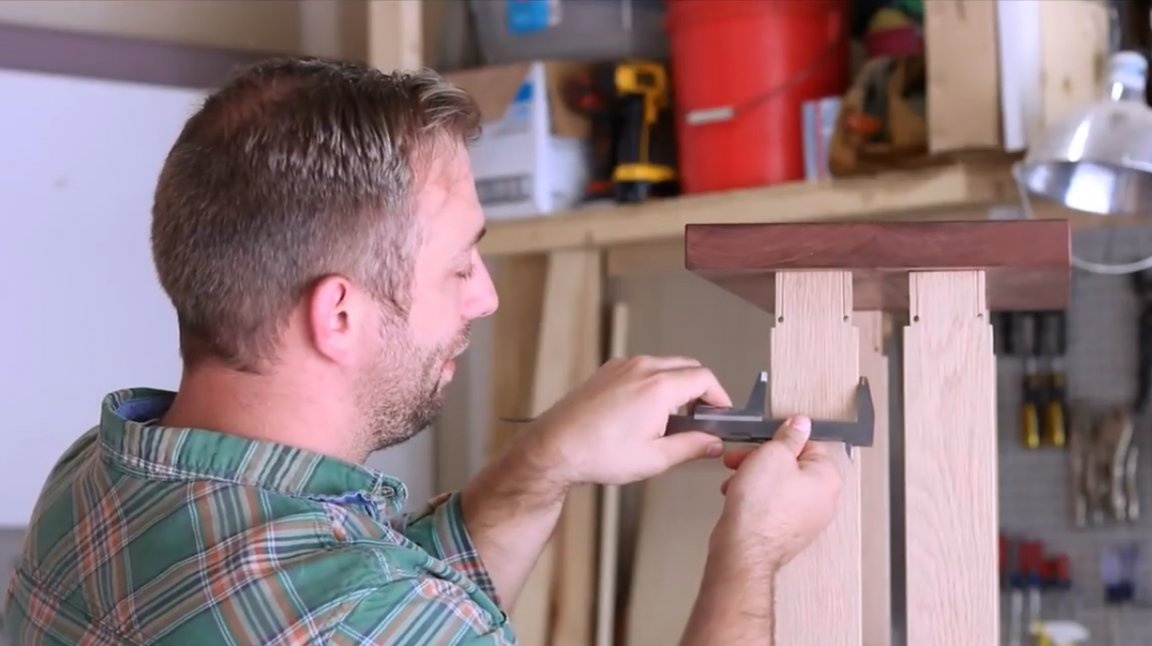
Then the master measures the distance already between the legs (not the spikes) and again divides the resulting figure into two, goes to the top of the countertop and lays the same distance from the center. So, the distance between the two spikes on the top of the countertop is perfectly measured.
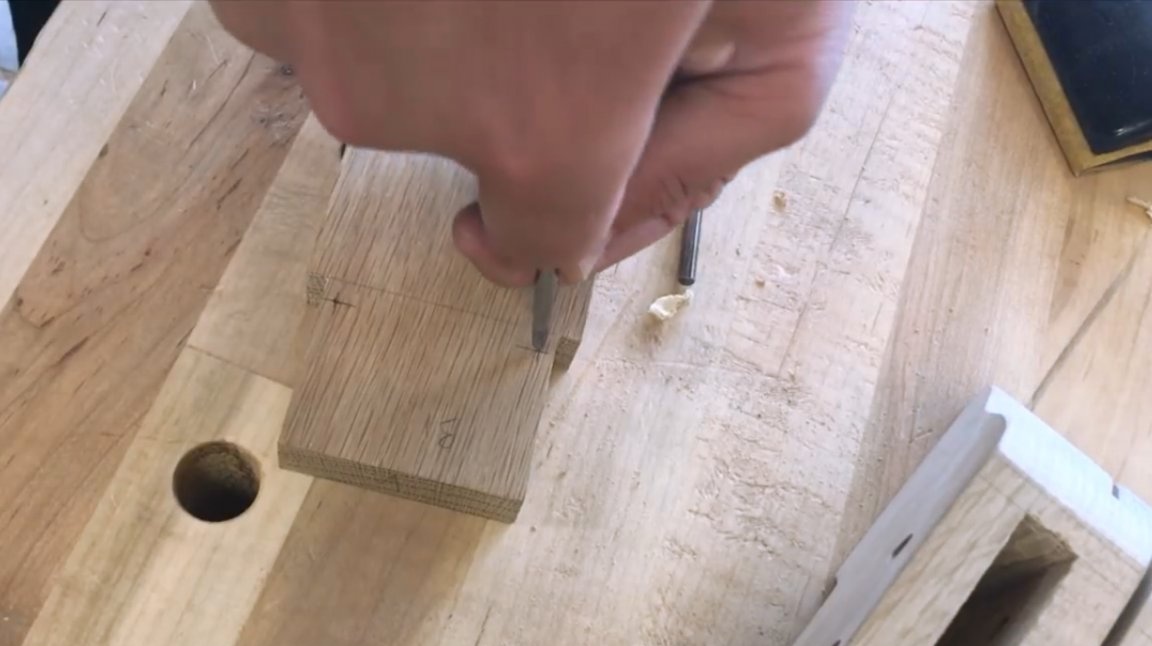
The next step, he measures the width of the racks themselves and transfers these measurements to the upper plane. Now both marks are in front of you: the width of the stand and the width of the spike. And when you will hollow out the groove, pay attention that you go from a wider mark to a narrower one, since the upper part of the groove should be wider than the lower, this is not an inverted letter V! And when the master inserts a spike into the nest, it will be clamped at the base of the groove, while in the upper part a certain gap will be preserved. After he drives the wedges into the cuts, they fill the free space with themselves, and ensure a tight fit of the joint.
Then he exposes the tabletop symmetrically in distance from the legs / racks and makes marks with a pencil from the inside of the legs.
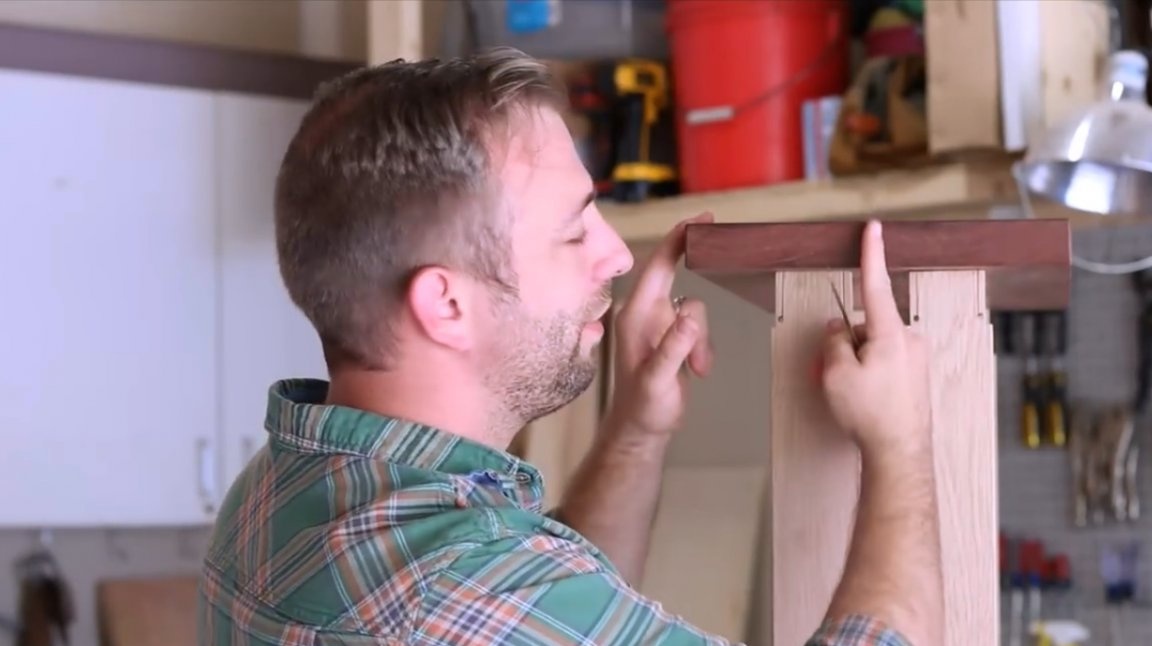
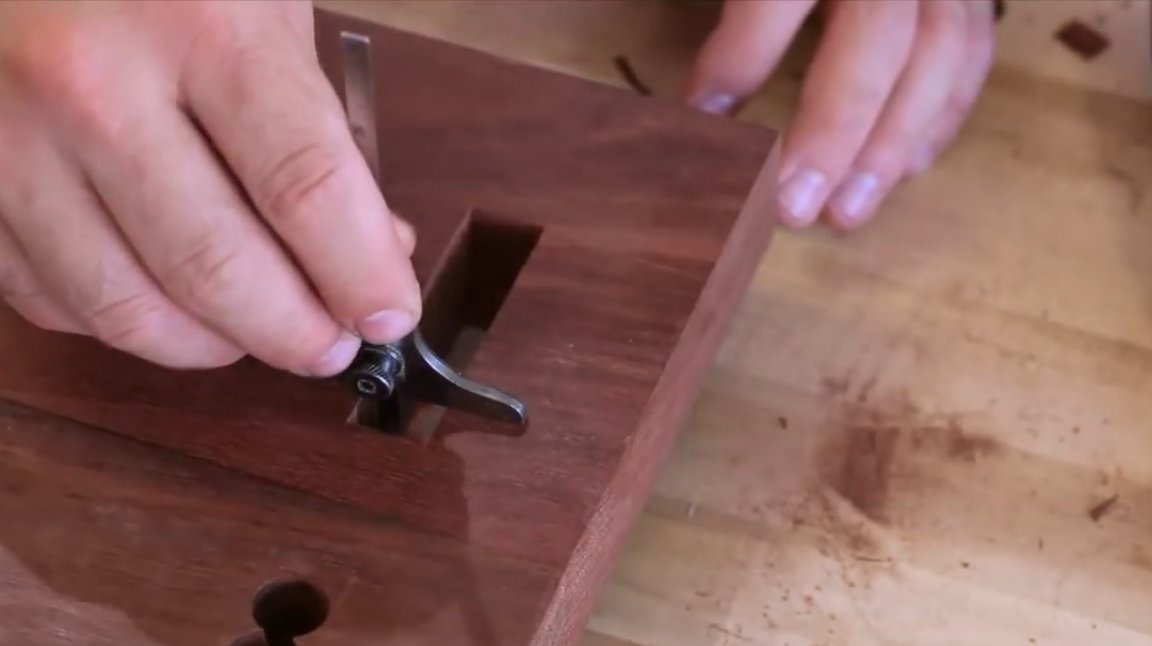
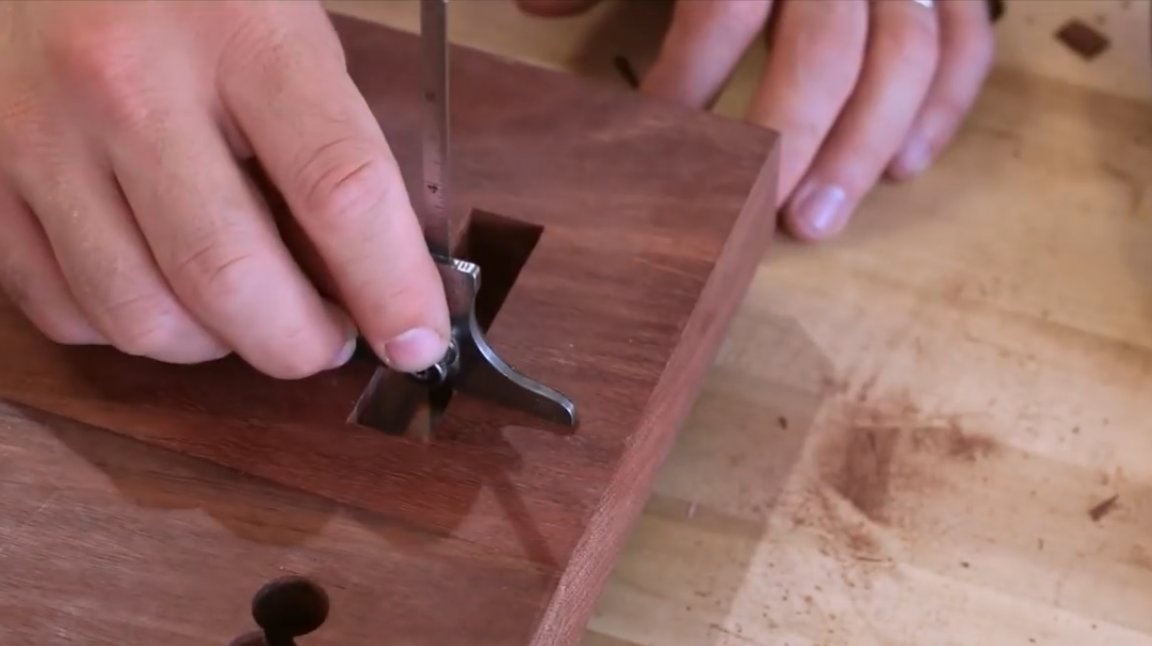
Now he takes a marking surface gage, and puts it on a pencil line. So he learns the distance to one side of the spike. Then the second cutter of the same thicknesser, the master determines the thickness of the spike, and marks it.


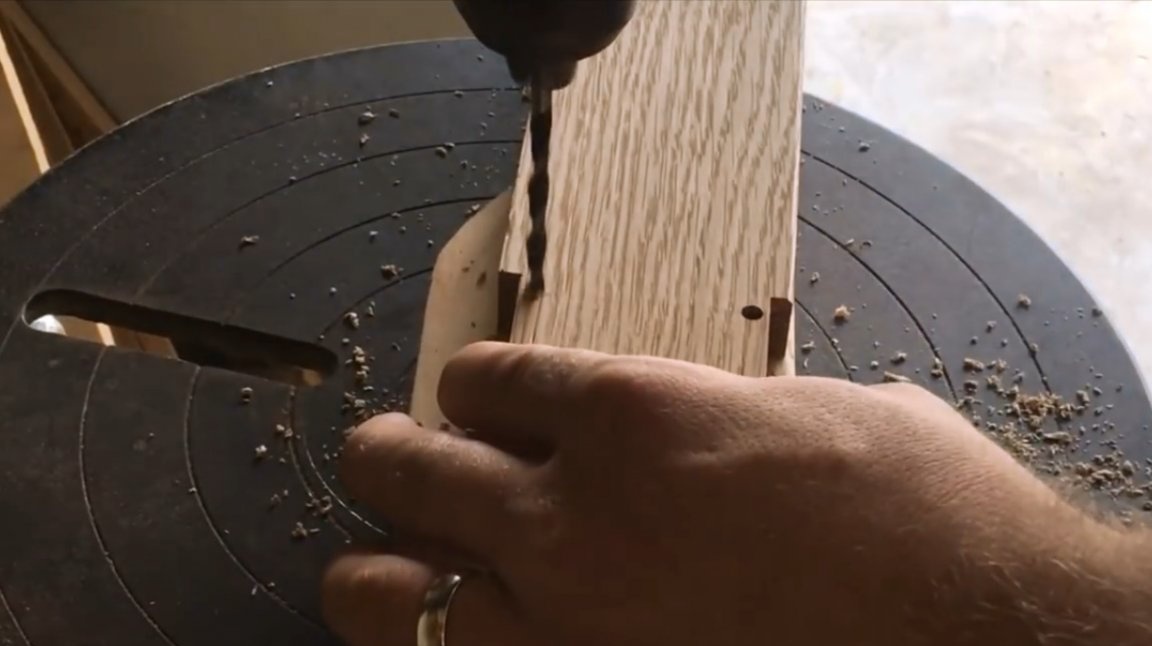
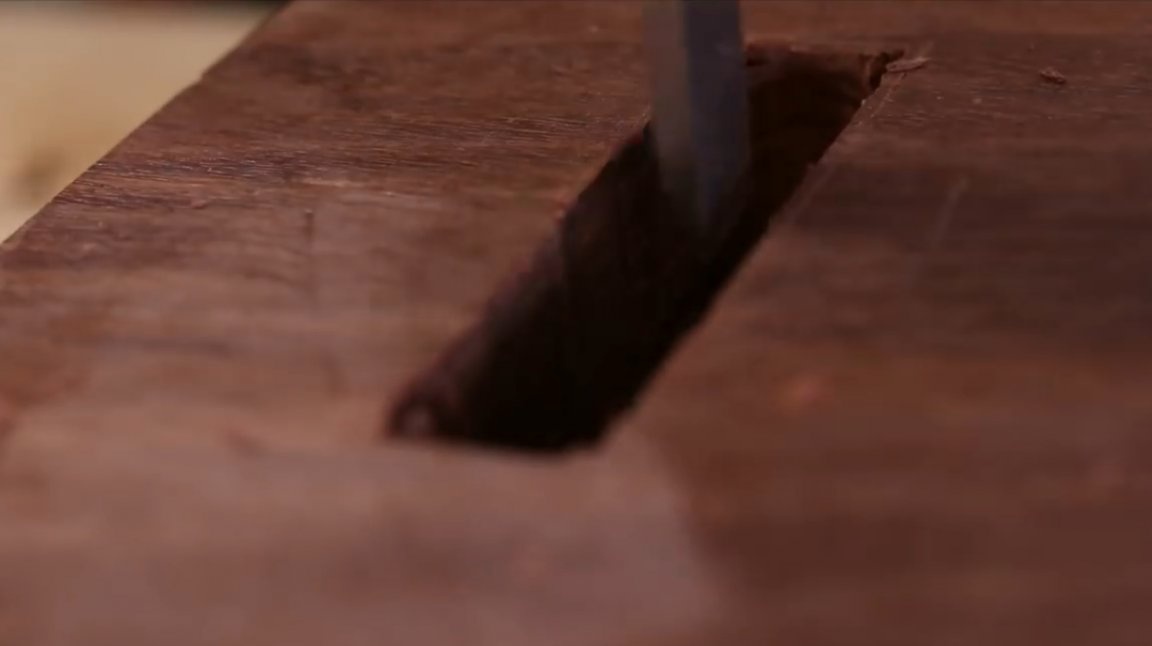
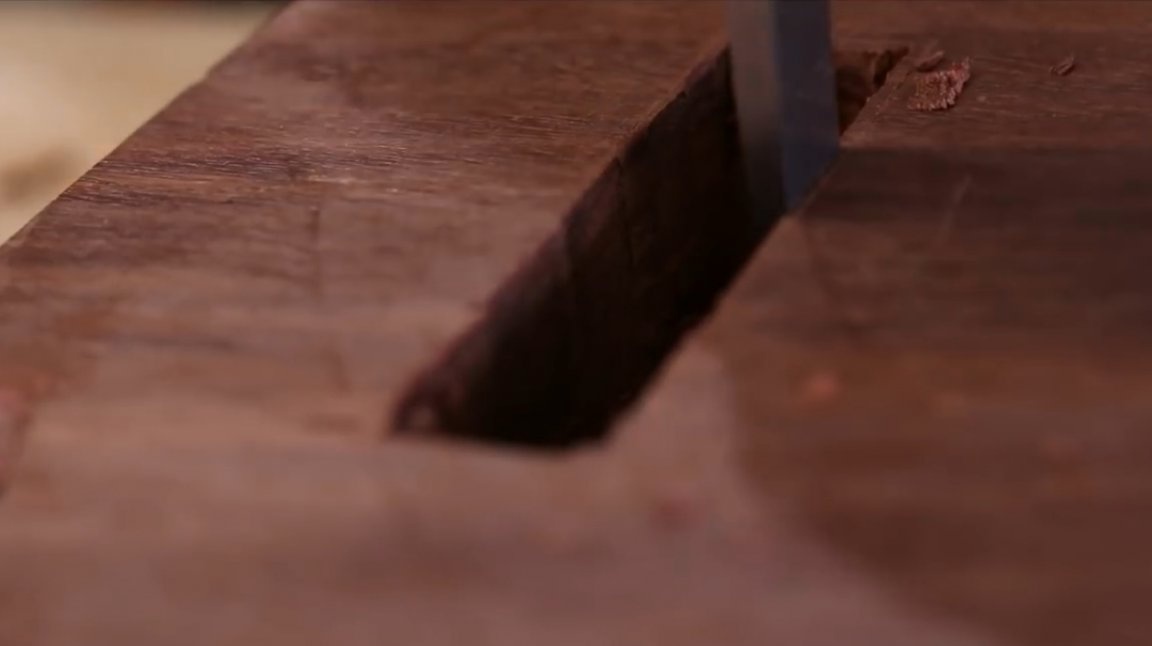
To speed up the process of hollowing out the grooves, the author drilled several parallel holes on a drilling machine.
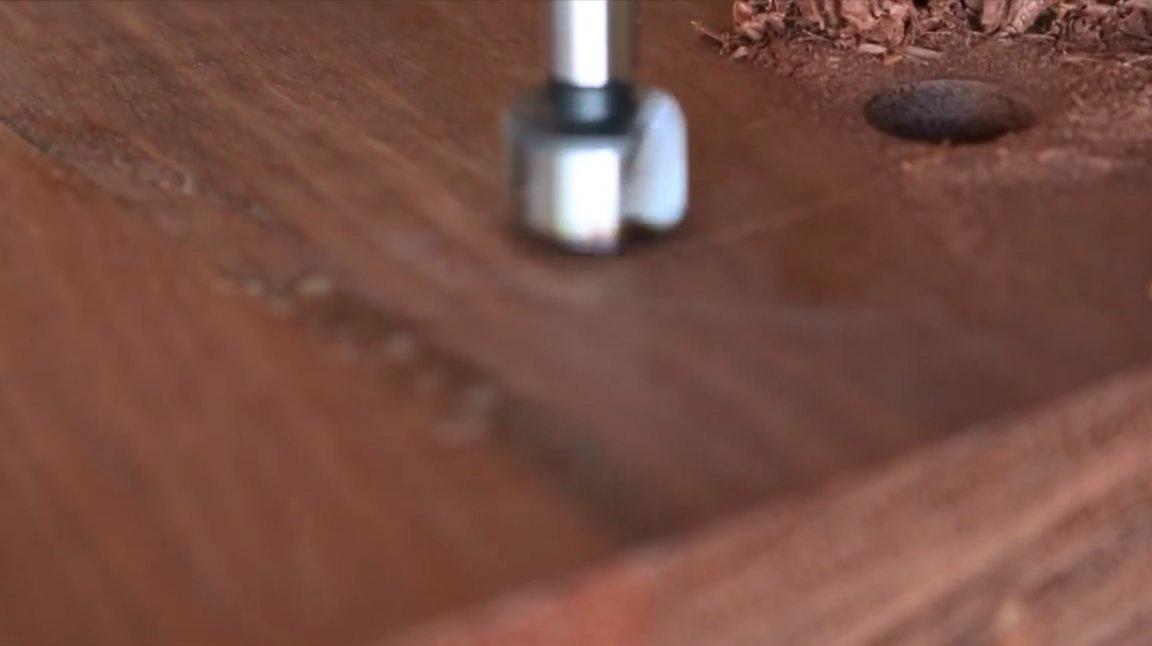
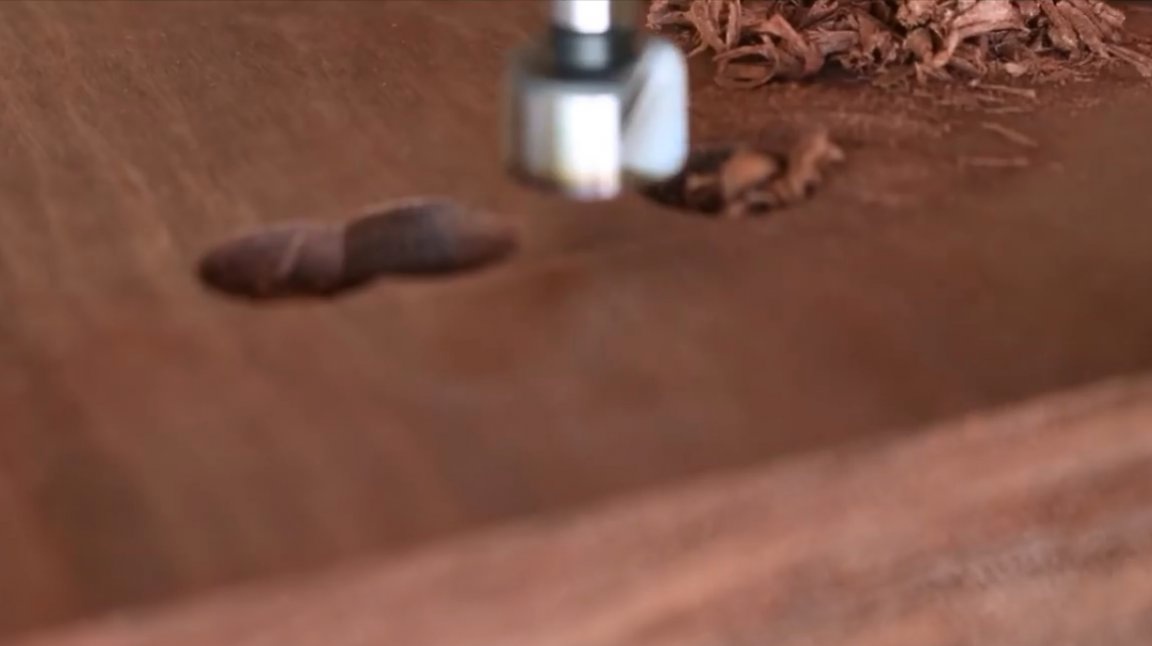
Everything else is done manually with a chisel or chisel. The author advises not to rush, to verify each movement, otherwise you can move away from the line and ruin all the work!
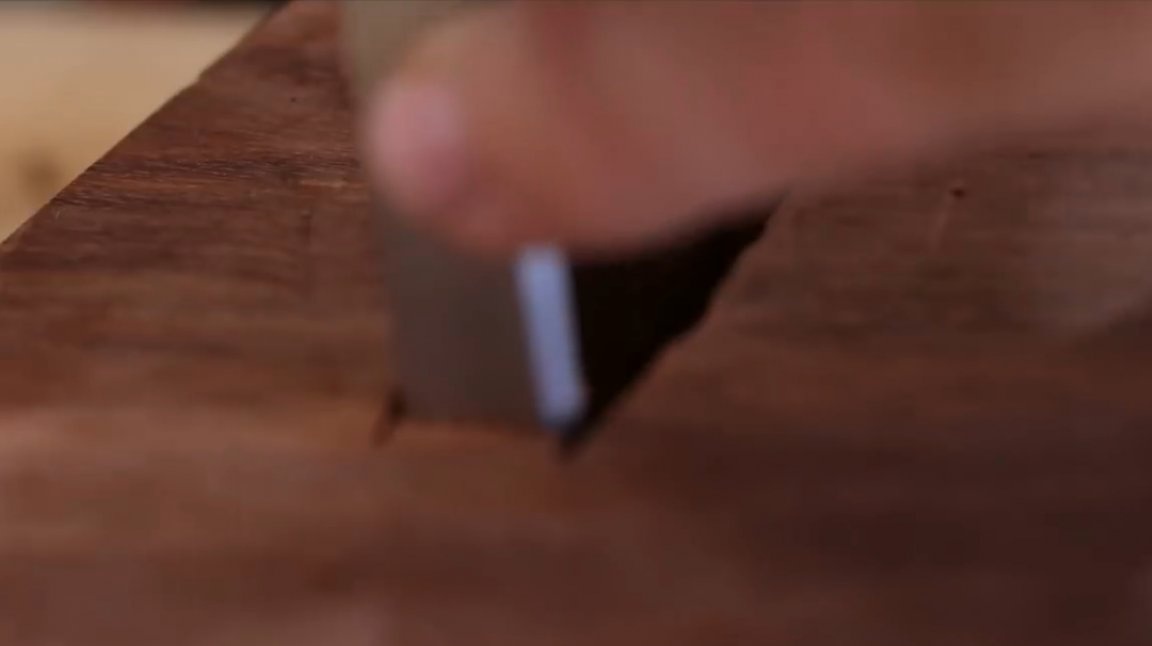
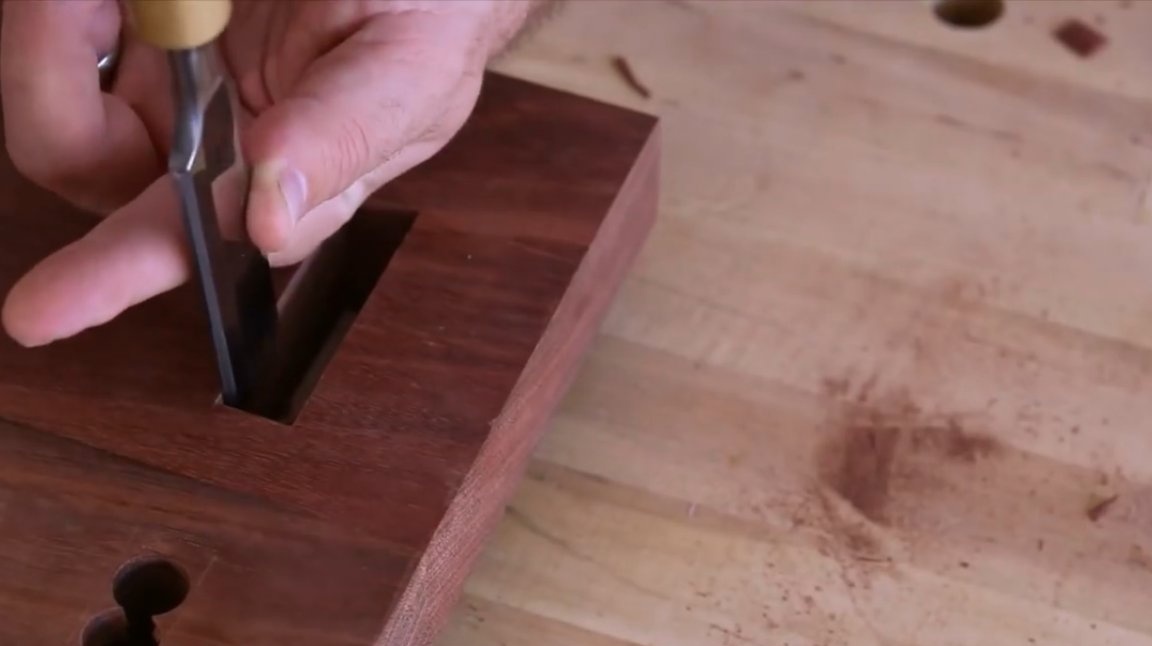
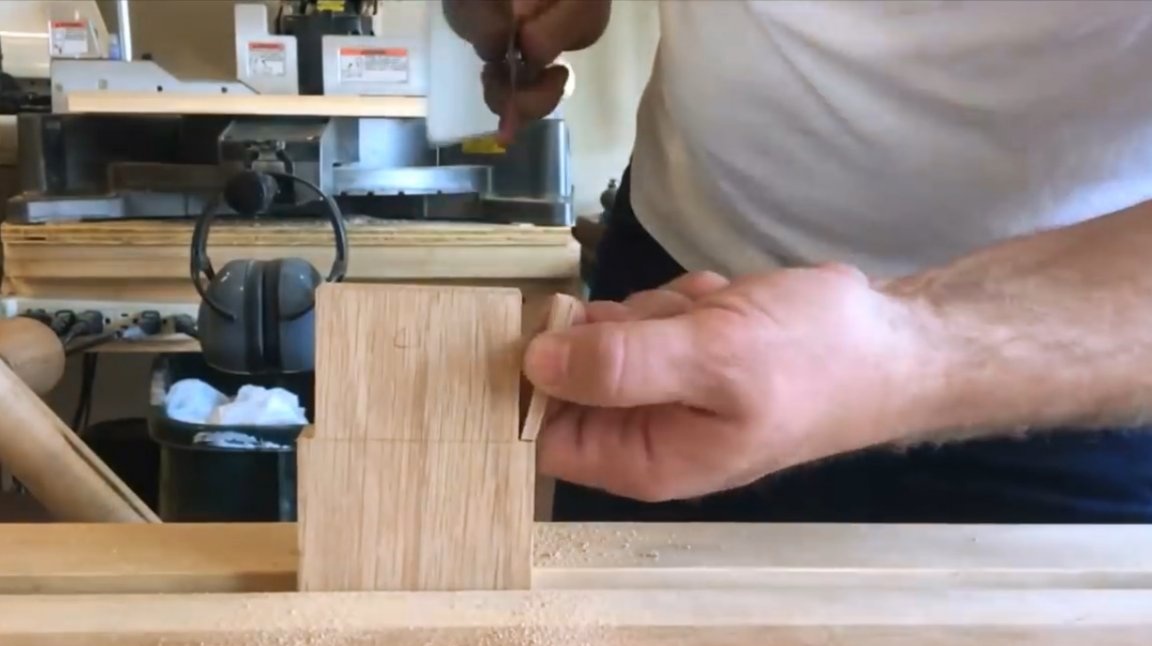
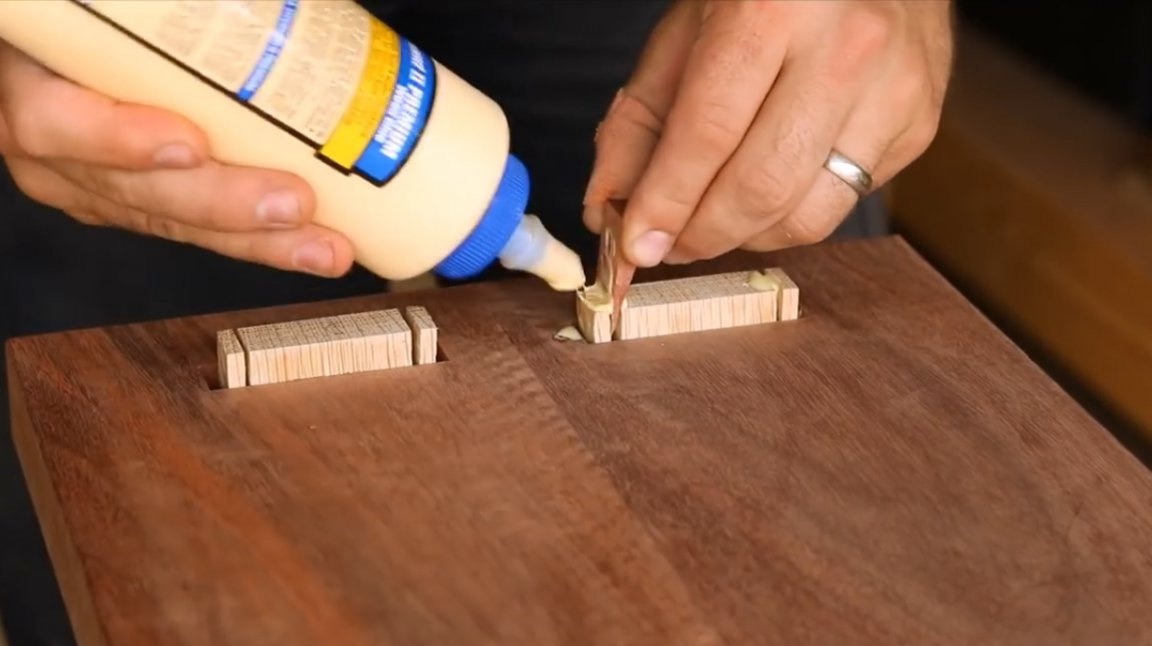
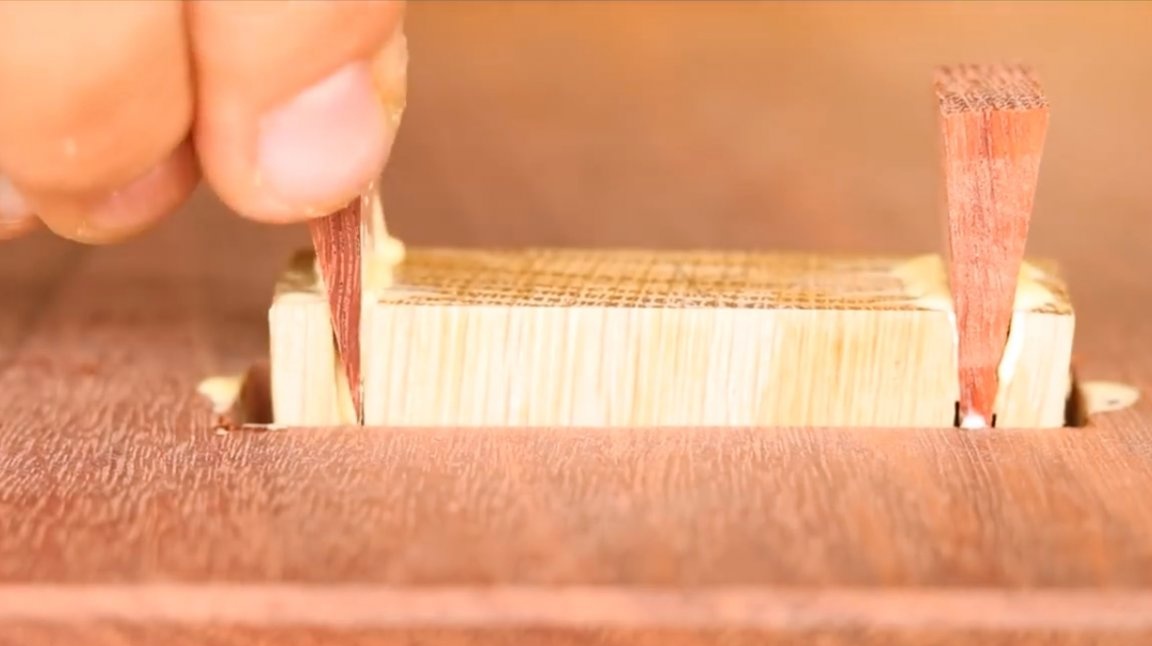
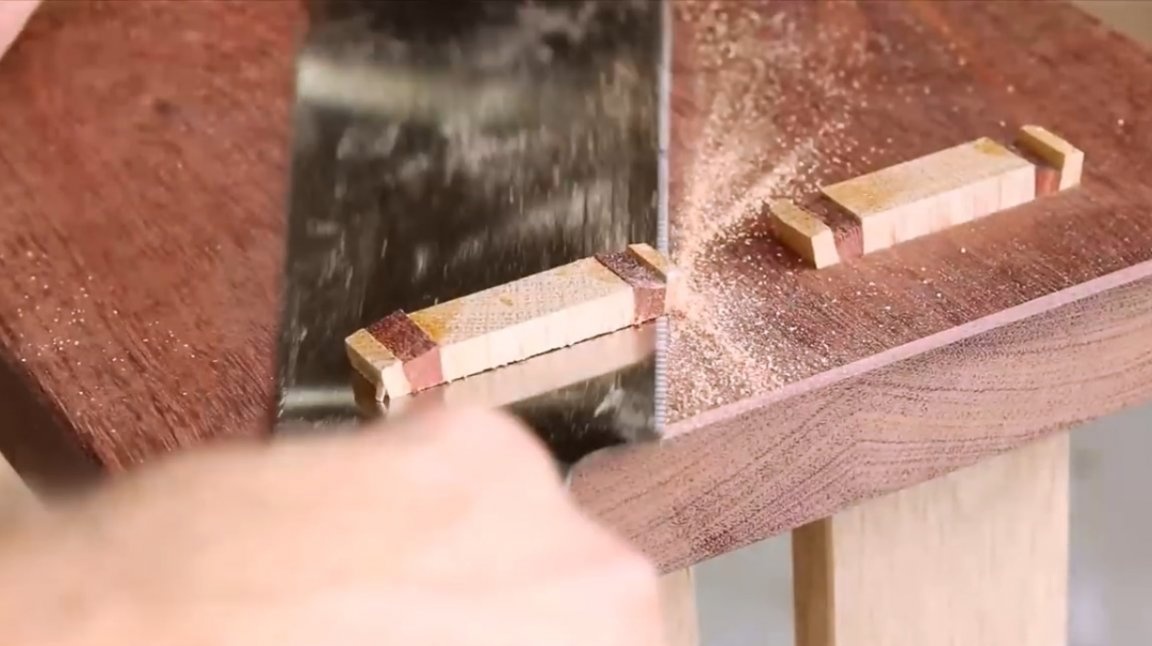
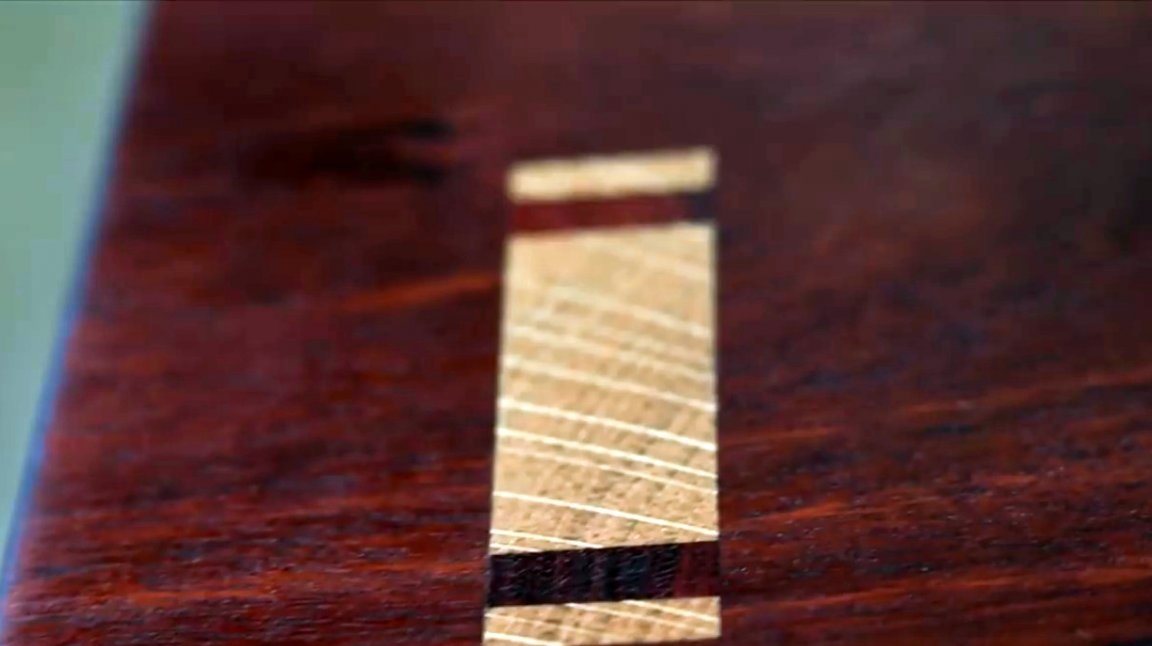
The next step is to cut out the dark wood wedges. It is important here how to measure these elements. Their width should be equal to the thickness of the racks. They should ideally fill the voids, and ensure a tight connection.

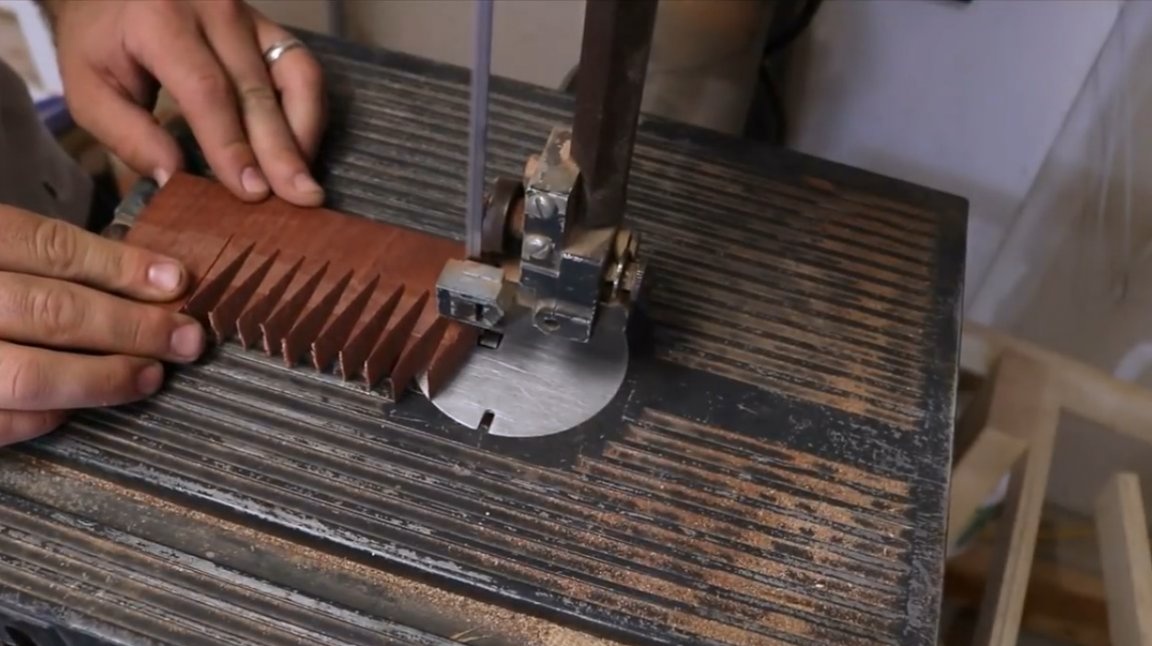
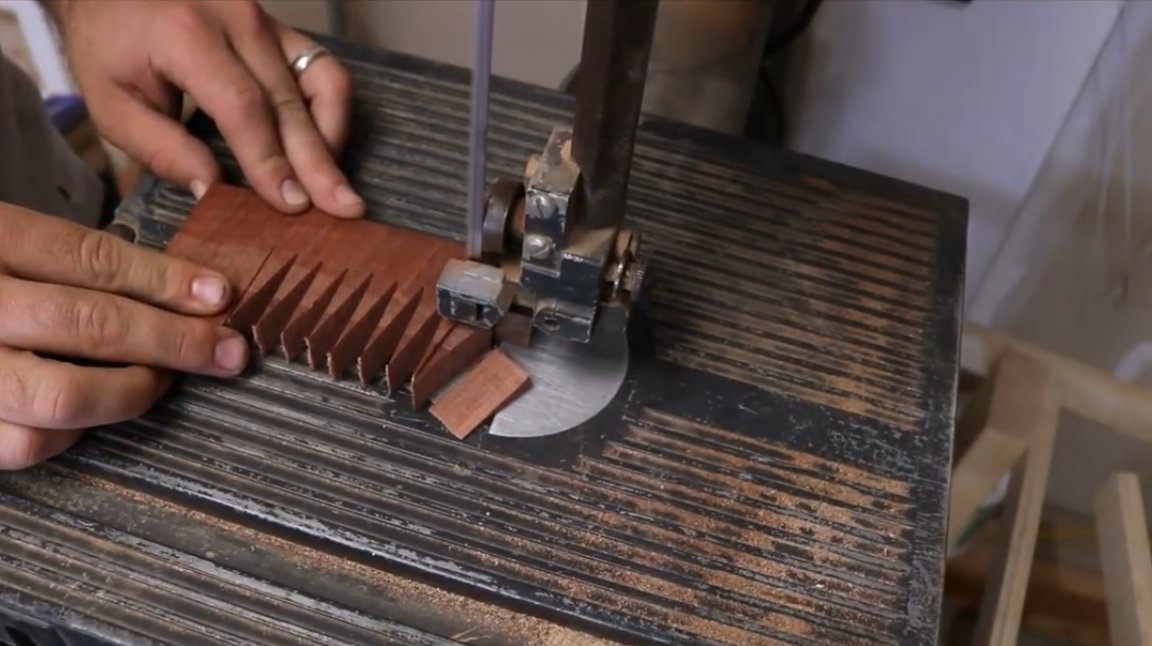

After cutting the wedges on a band saw, their surfaces should be carefully sanded.
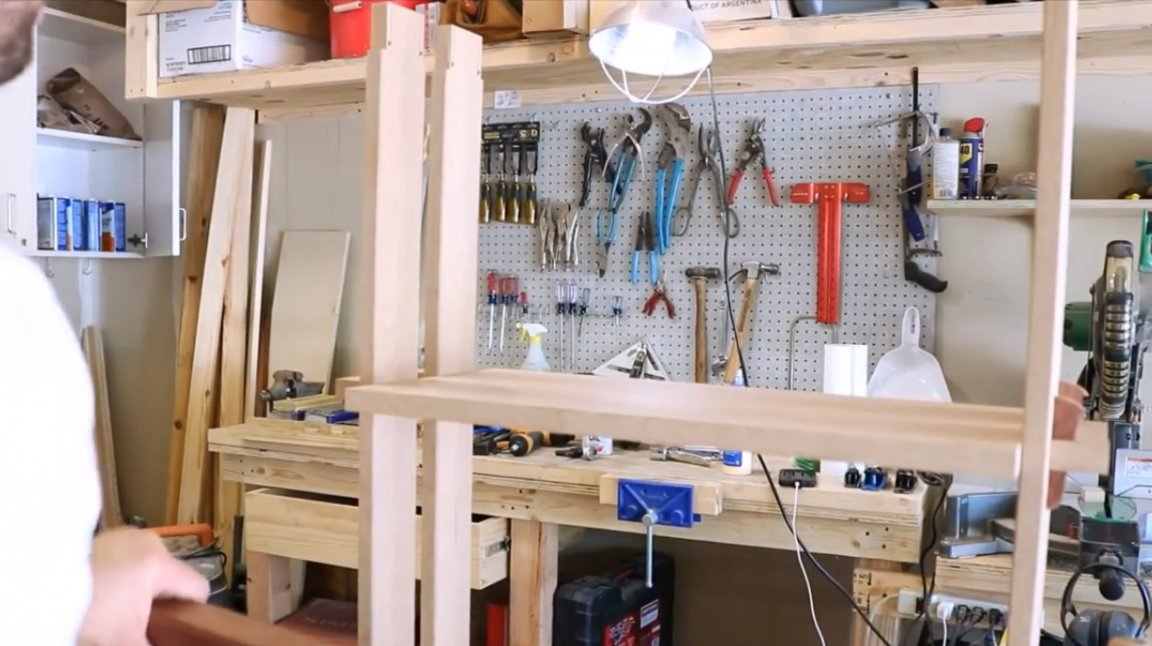
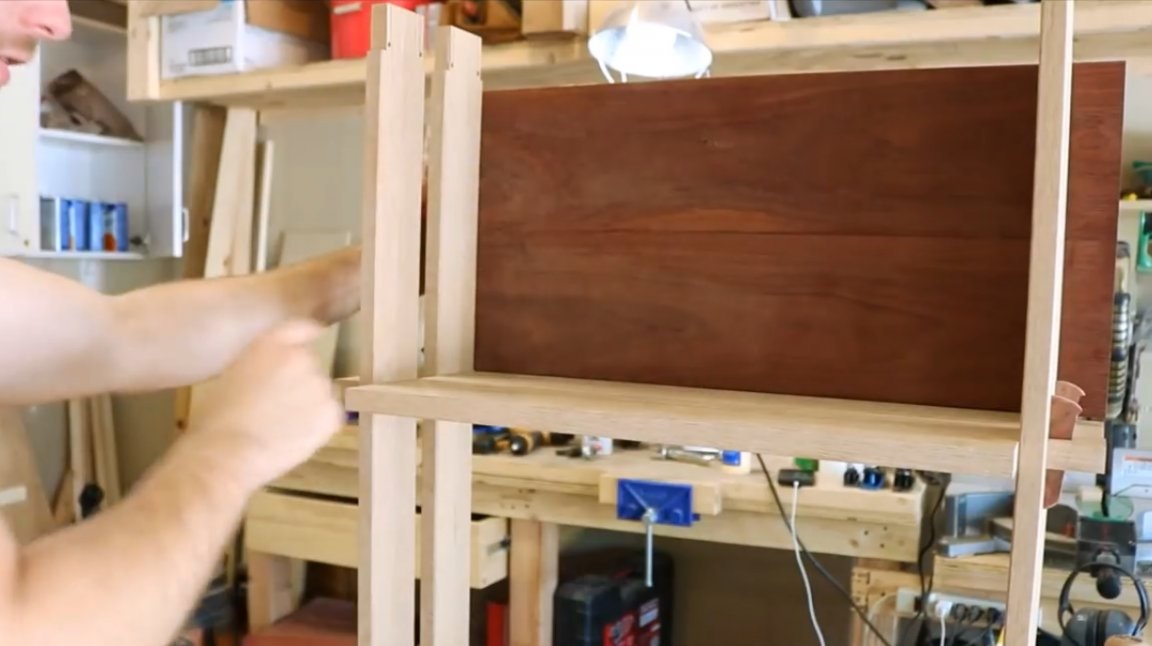
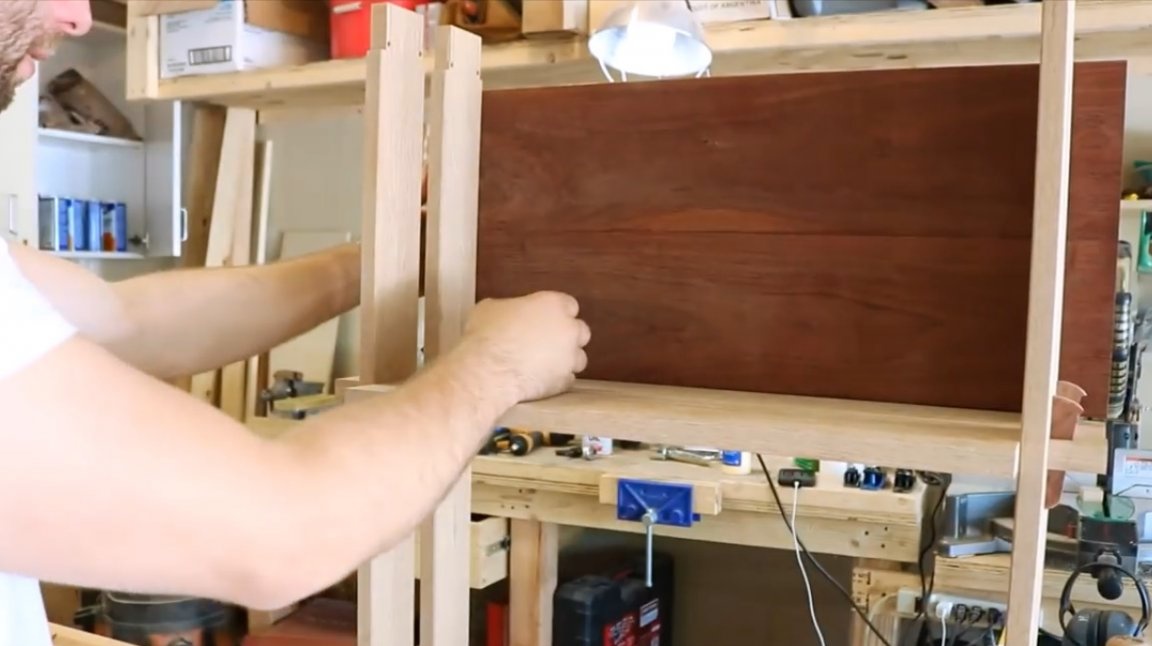
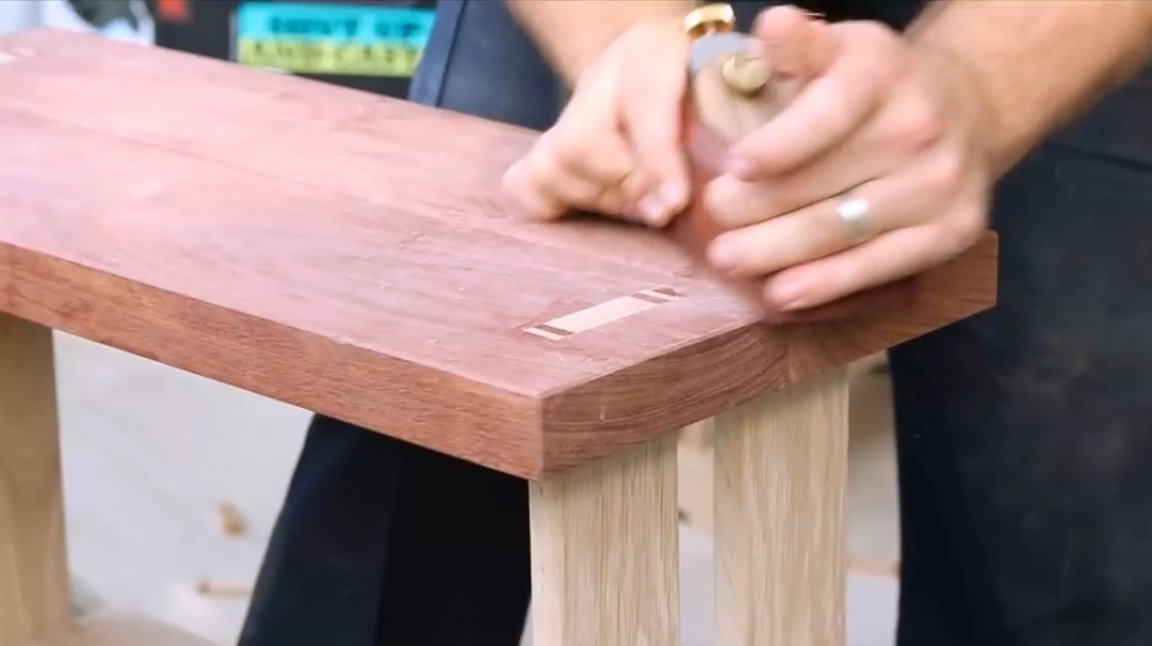
The author puts the countertop on the legs.
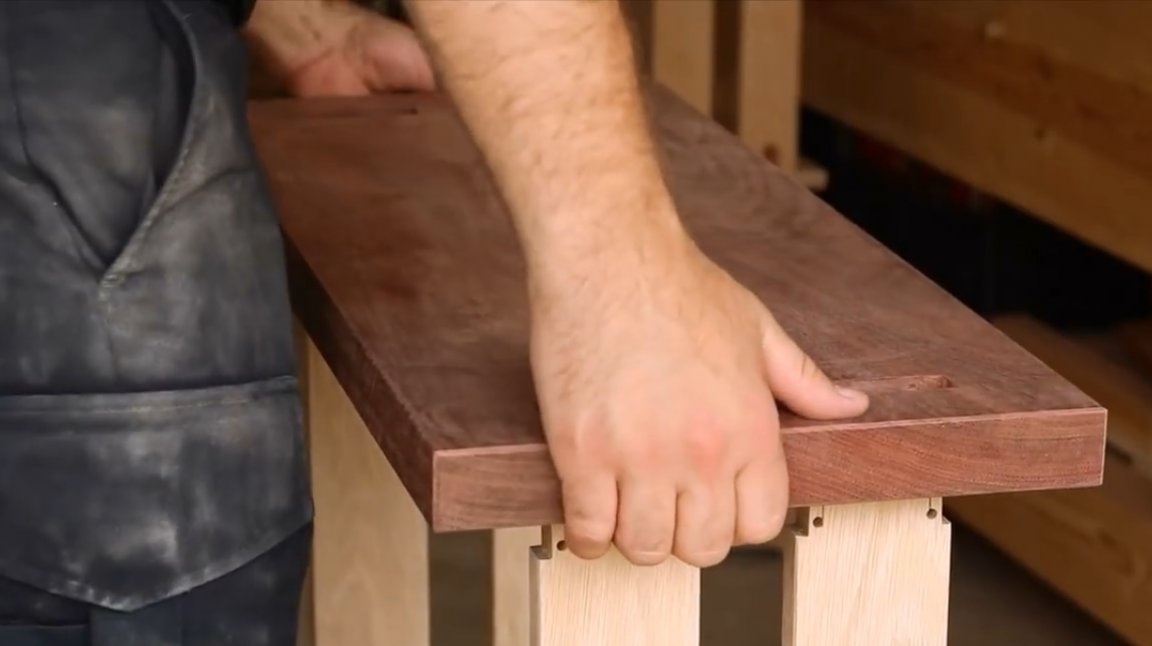
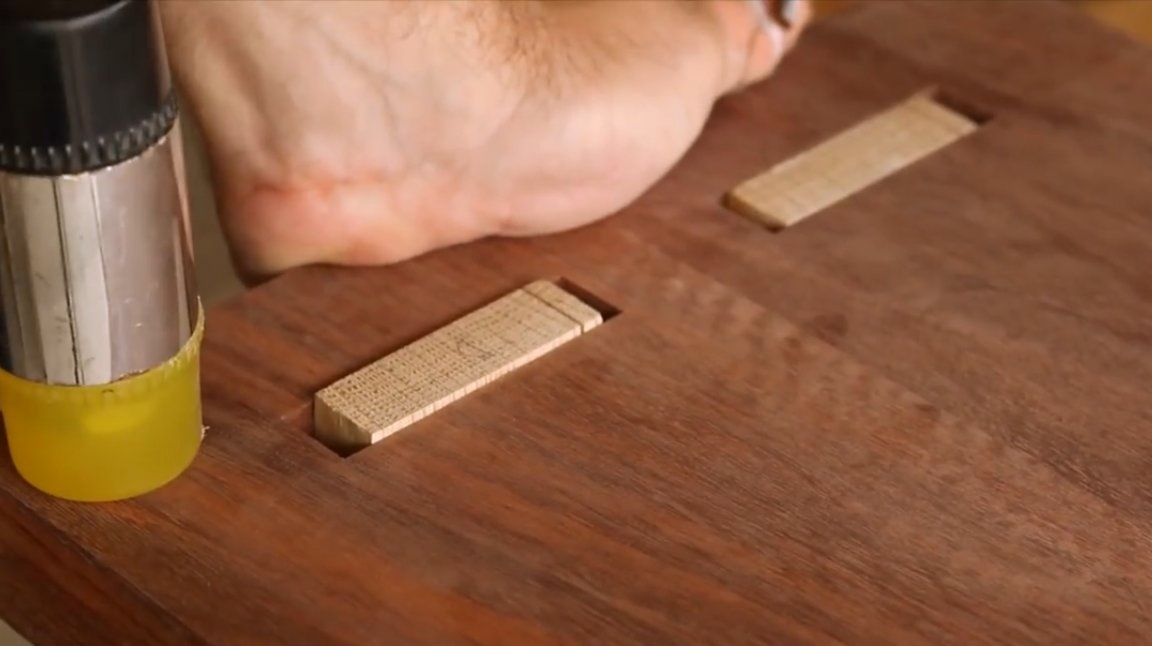
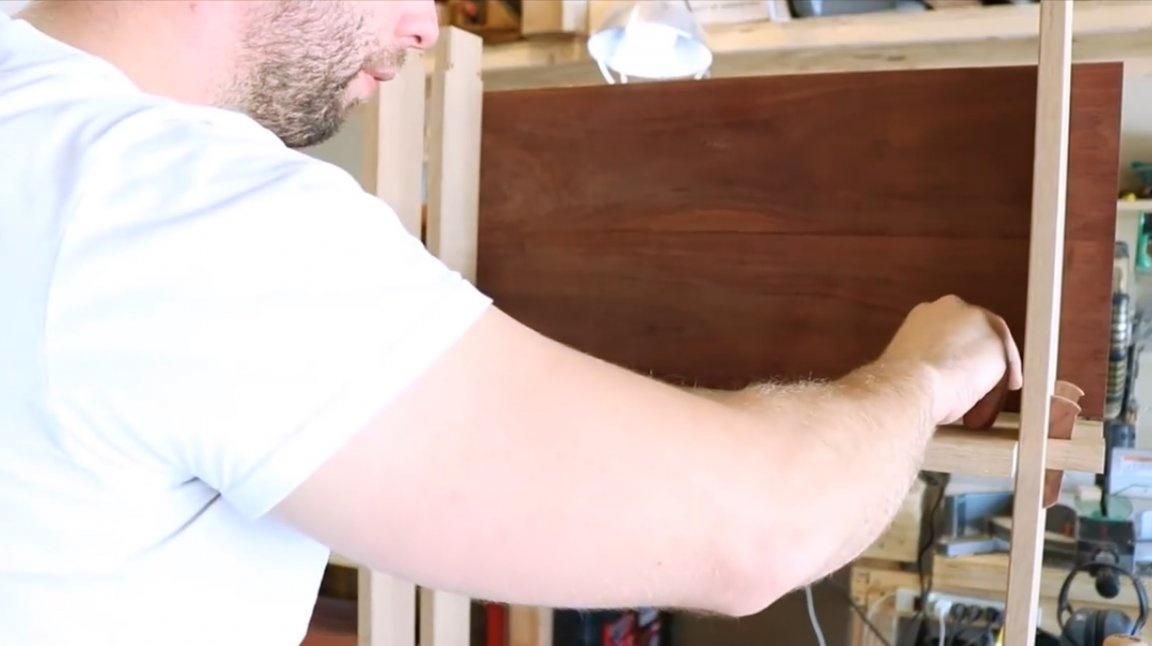
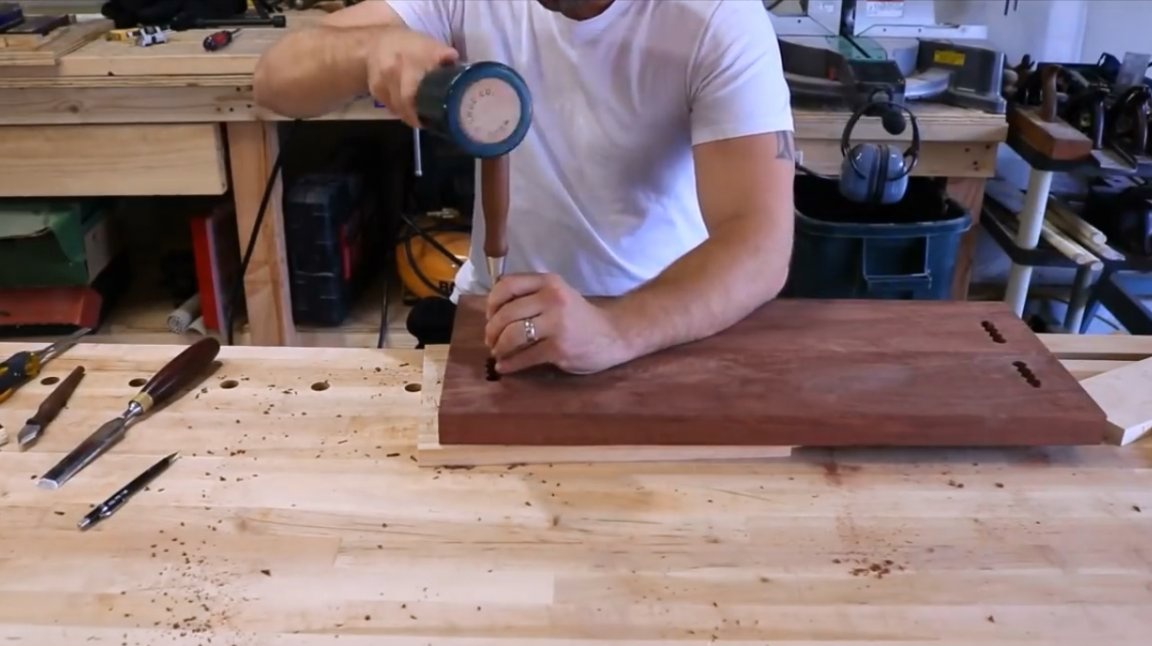
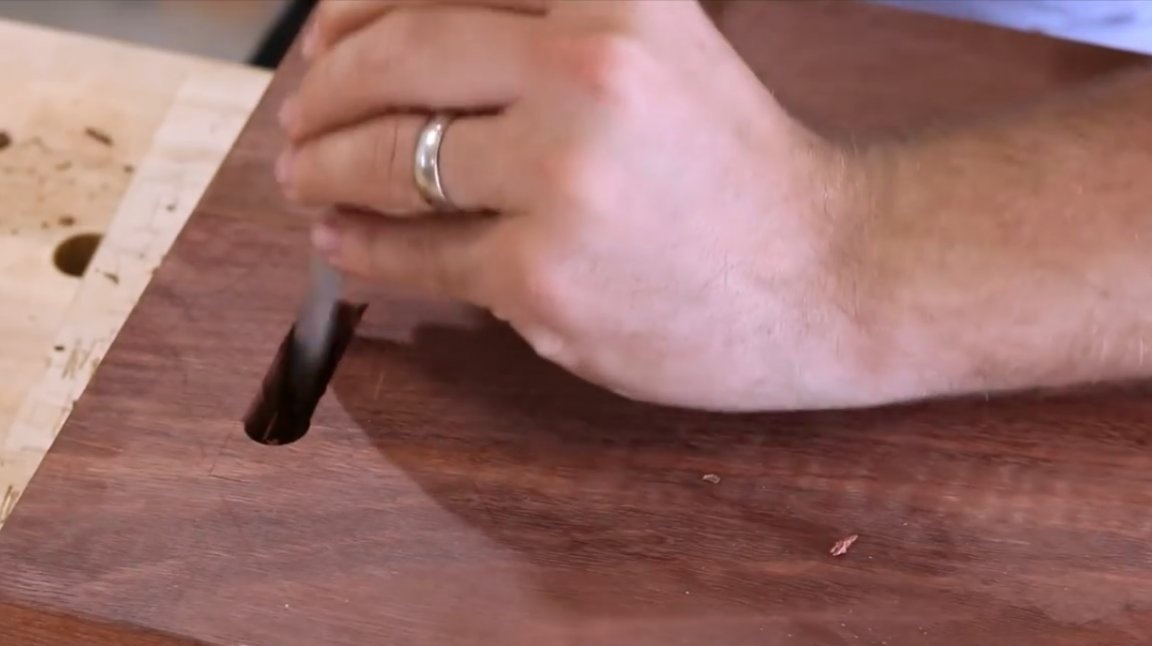
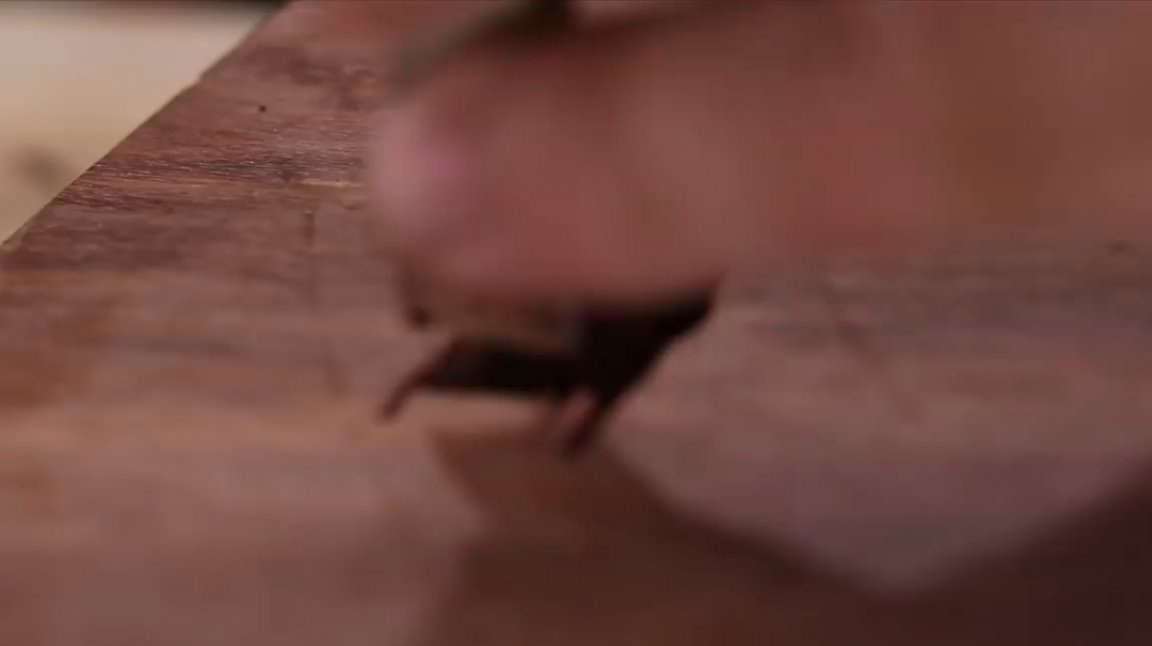
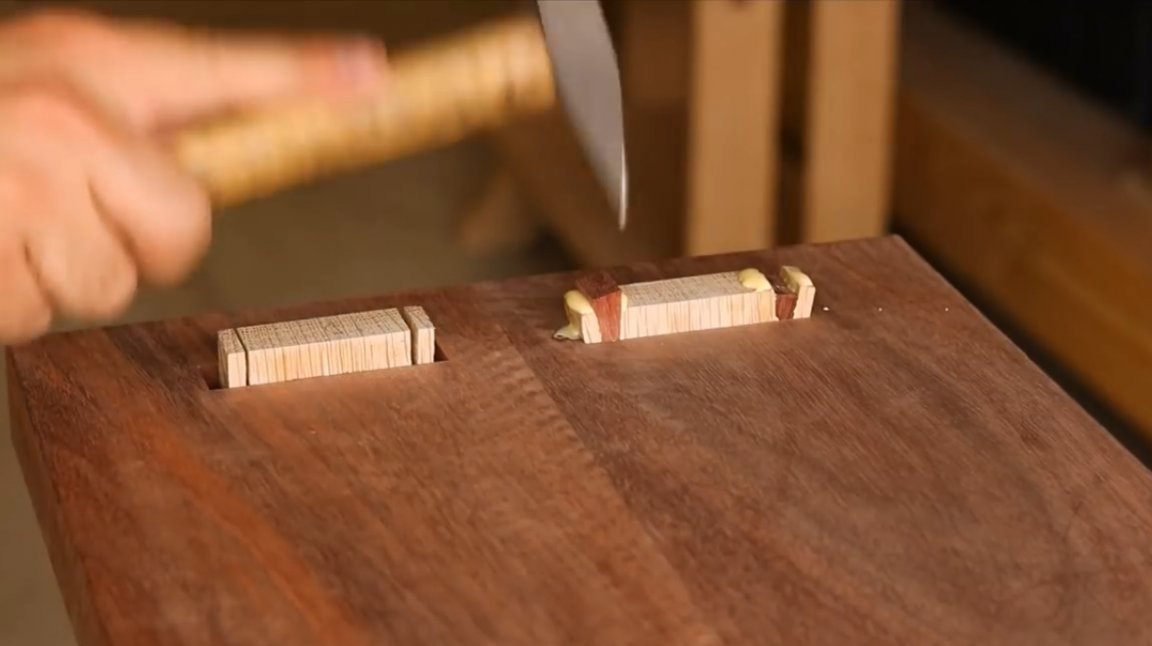
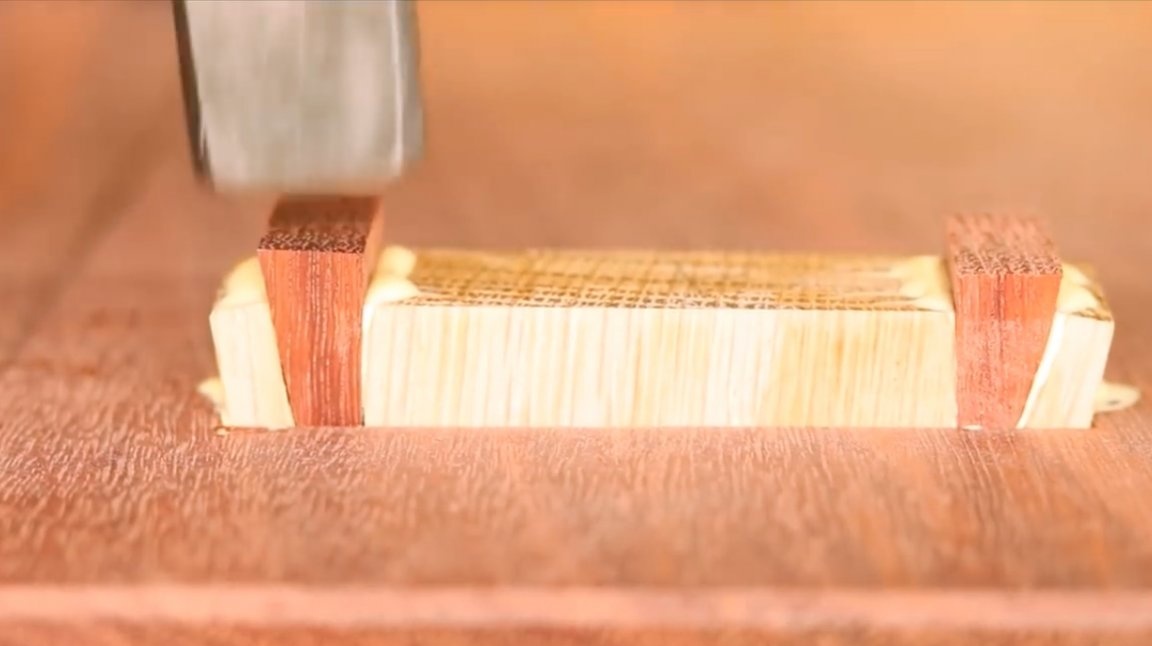
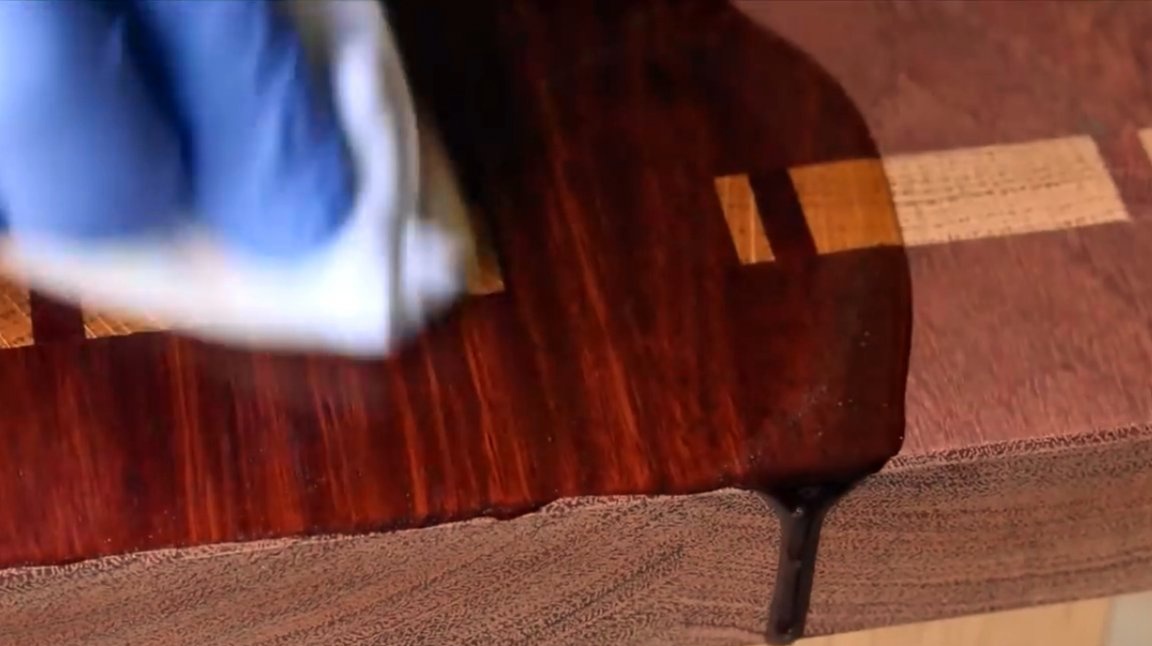
The most dangerous moment: the master digs a little glue into the cuts and inserts wedges into them. Nothing has changed since wedging!
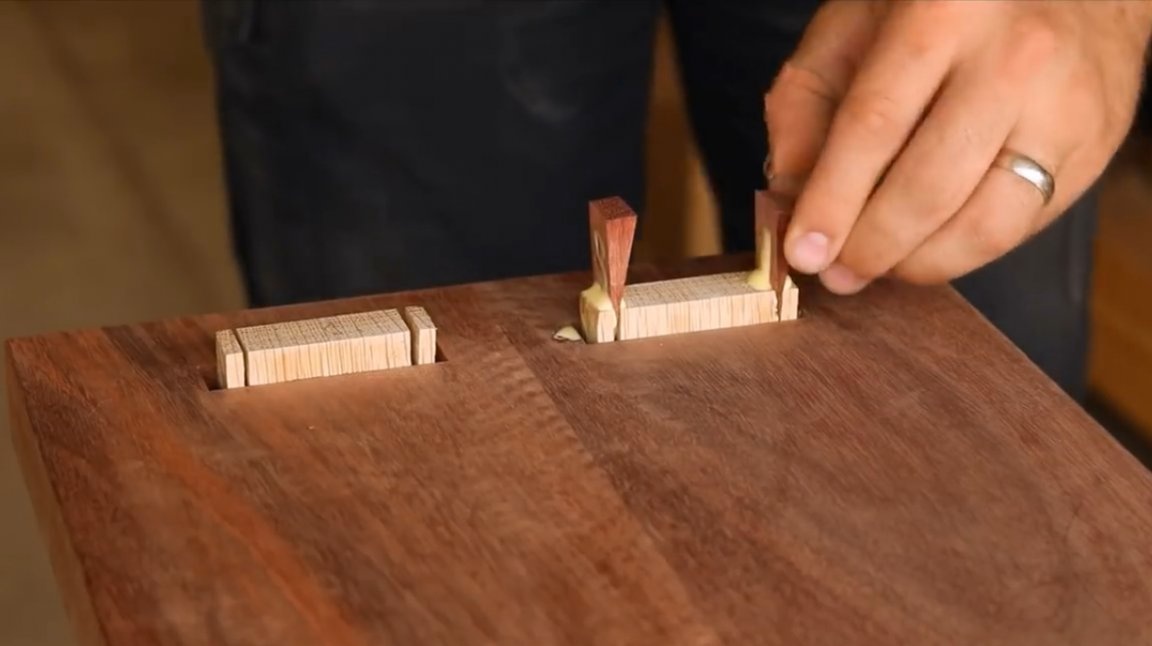
Drive in wedges until the gaps completely disappear. But don't overdo it! Driving them too deep is also not worth it, otherwise the connection may burst!

Excess material is cut with a Japanese saw.

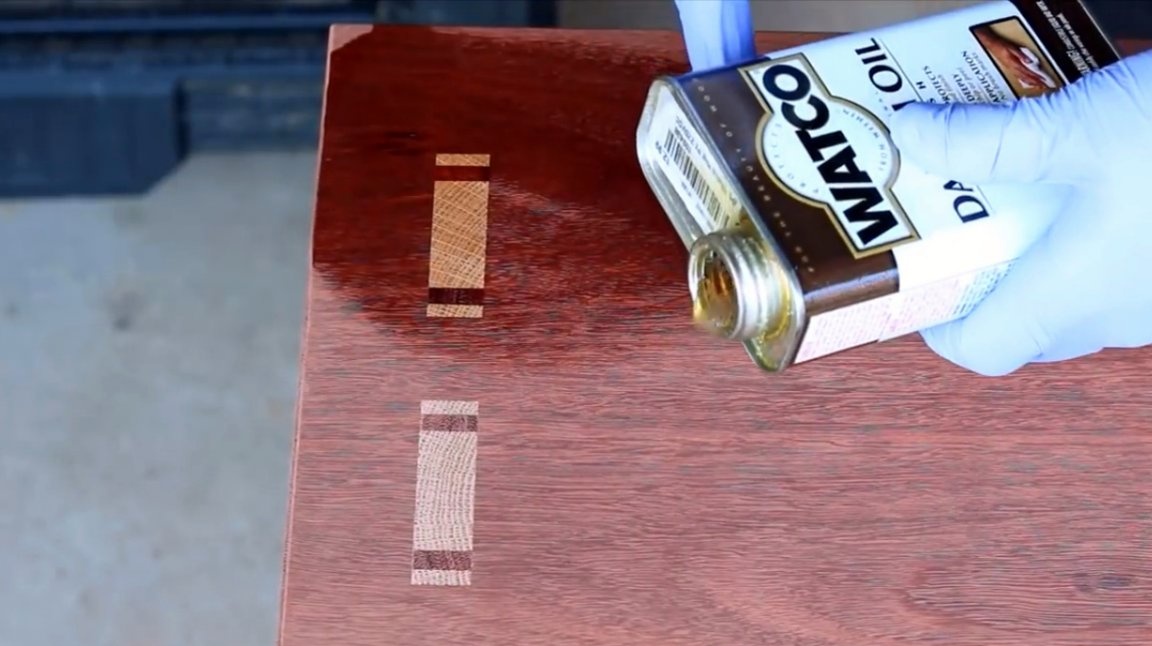
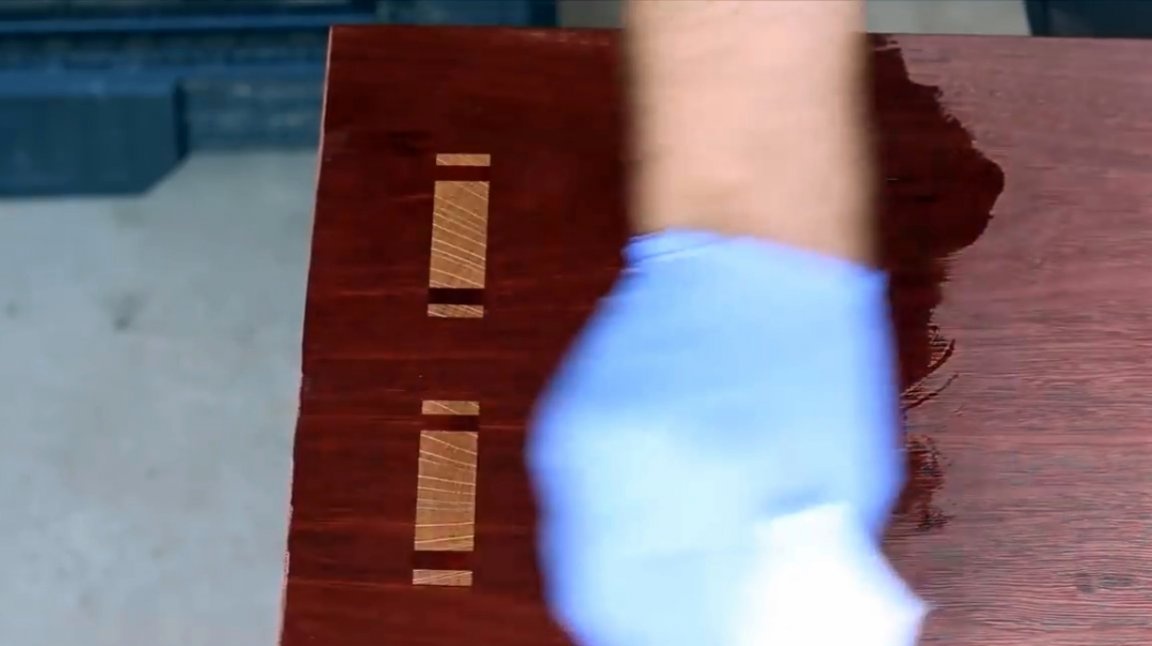
Defects from cutting are aligned with a planer, then the countertop is processed with an orbital sander or sandpaper.
At the end, as always, oil impregnation, revitalizing the woody pattern, and protecting against moisture.
Thanks to the author for a detailed story about a simple but effective and beautiful way to connect!
All good mood, good luck, and interesting ideas!
Author video can be found here.