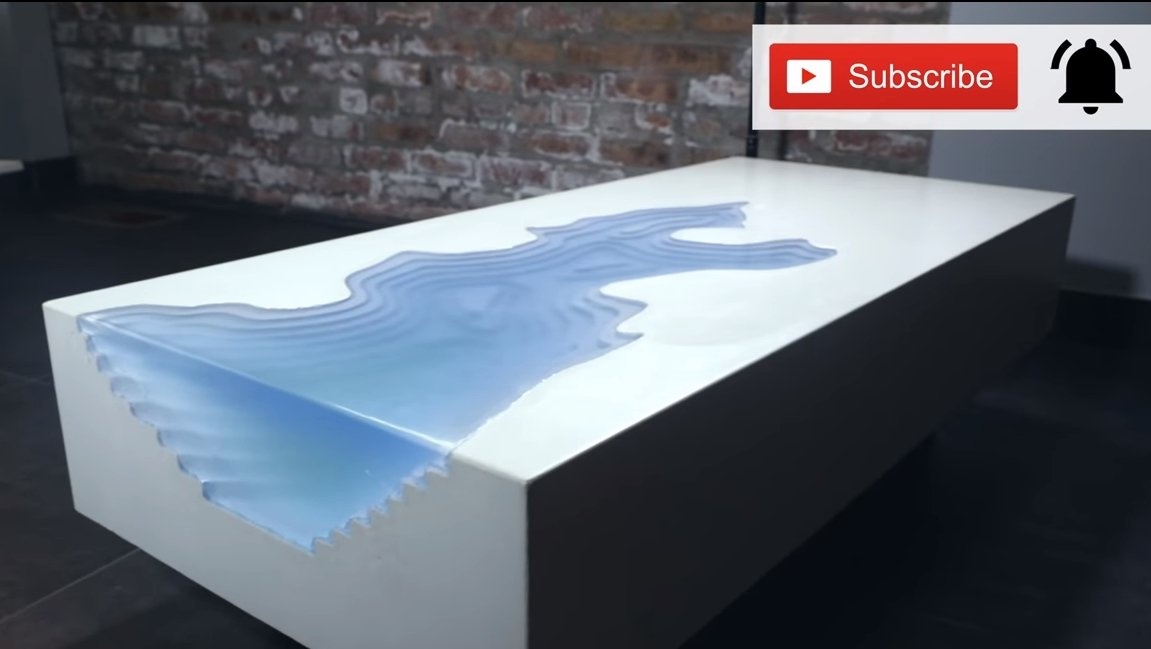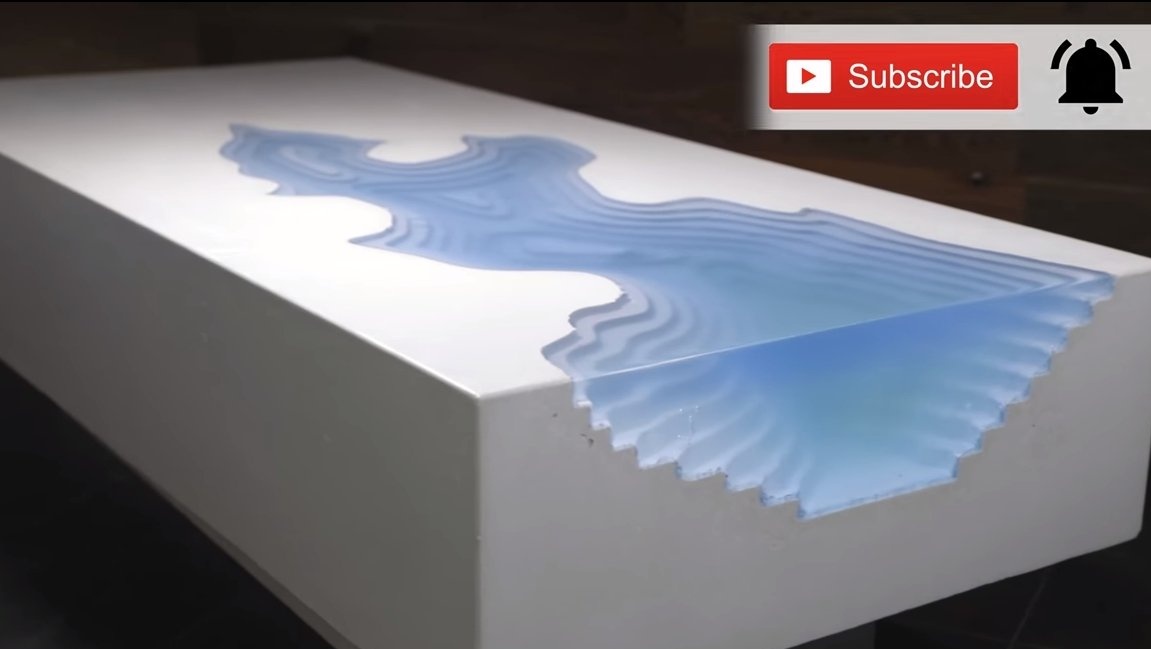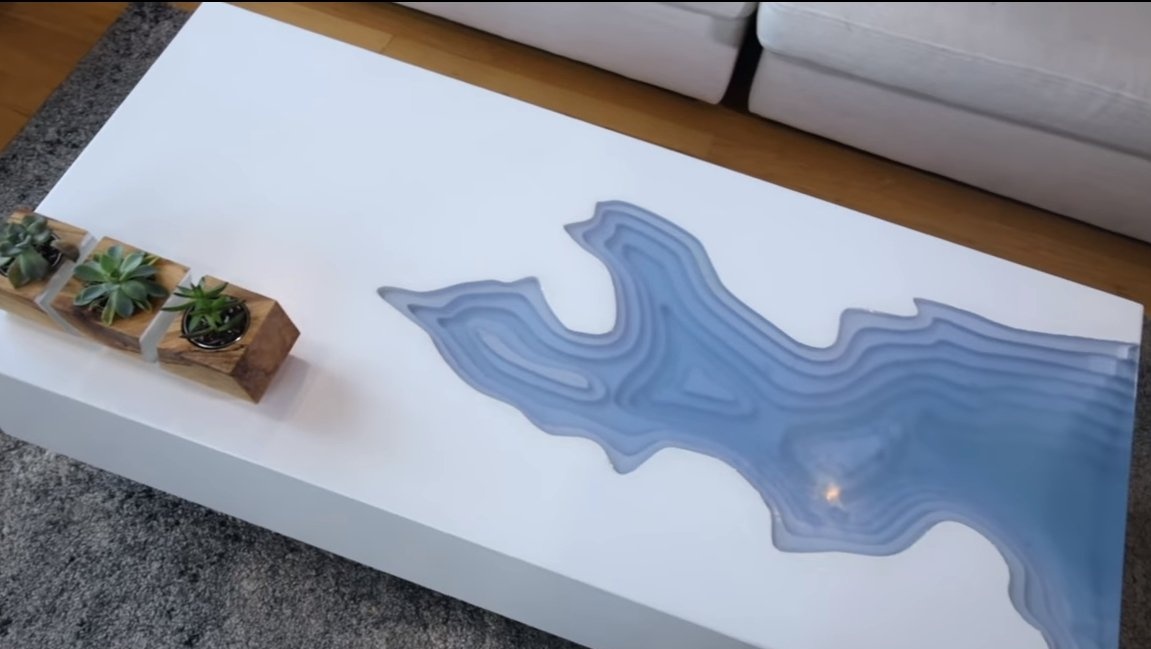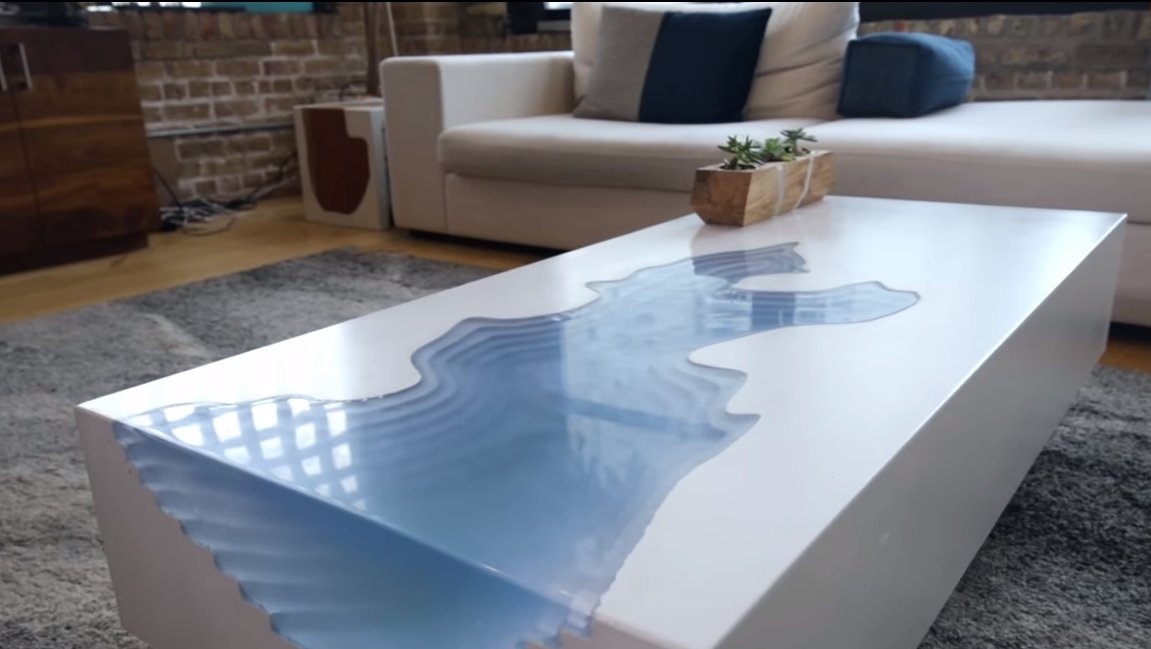

Hello to all lovers of craftsmanship, today we will consider how to make an interesting coffee table made of epoxy resin and concrete. The table looks quite interesting thanks to the special pattern. The author called his project “Arctic Erosion”, the table looks like a melting glacier. The assembly project is not particularly complicated, however, without a workshop it will be difficult to make a table. If you are interested in the project, I propose to study it in more detail!
Materials and tools used by the author:
Material List:
- concrete mix GFRC;
- fiberglass;
- profile pipes;
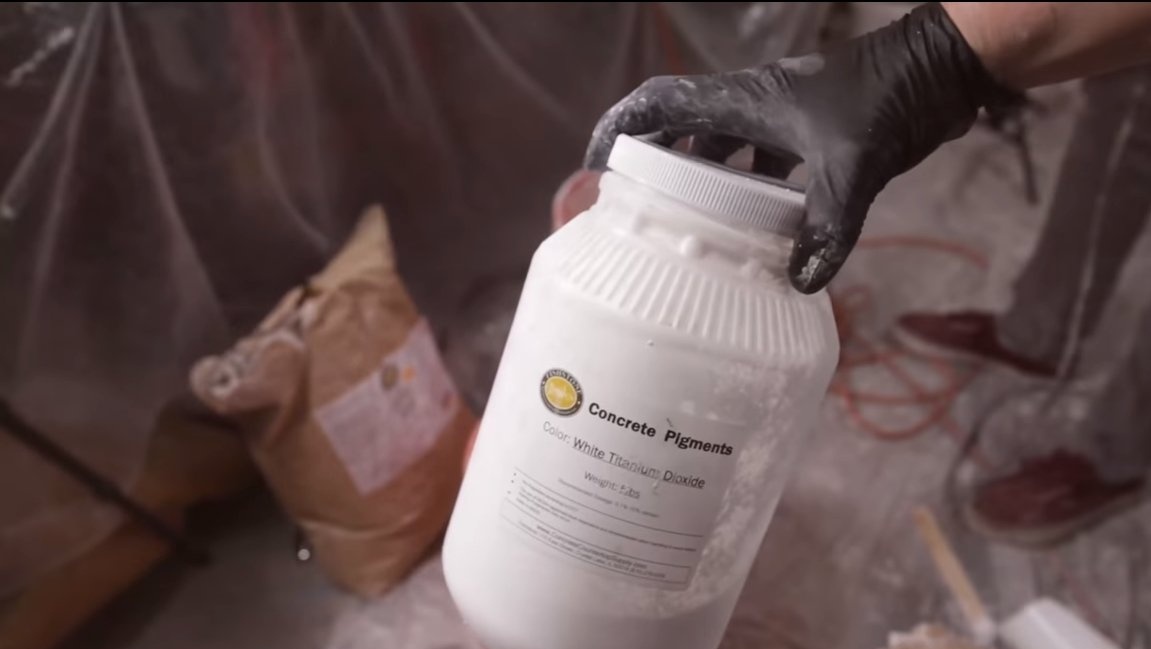
- dye for concrete white;
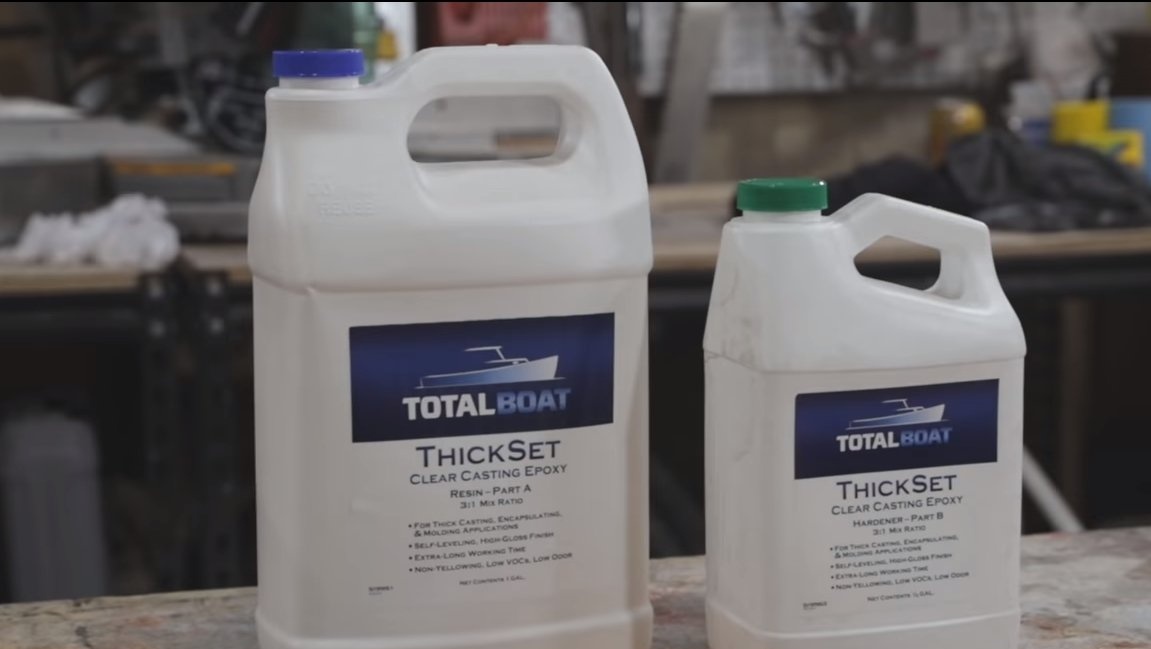
- epoxy resin for pouring large volumes;
- blue dye for resin;
- silicone sealant;
- chipboard;
- separating wax;
- paint, varnish, etc.
Tool List:
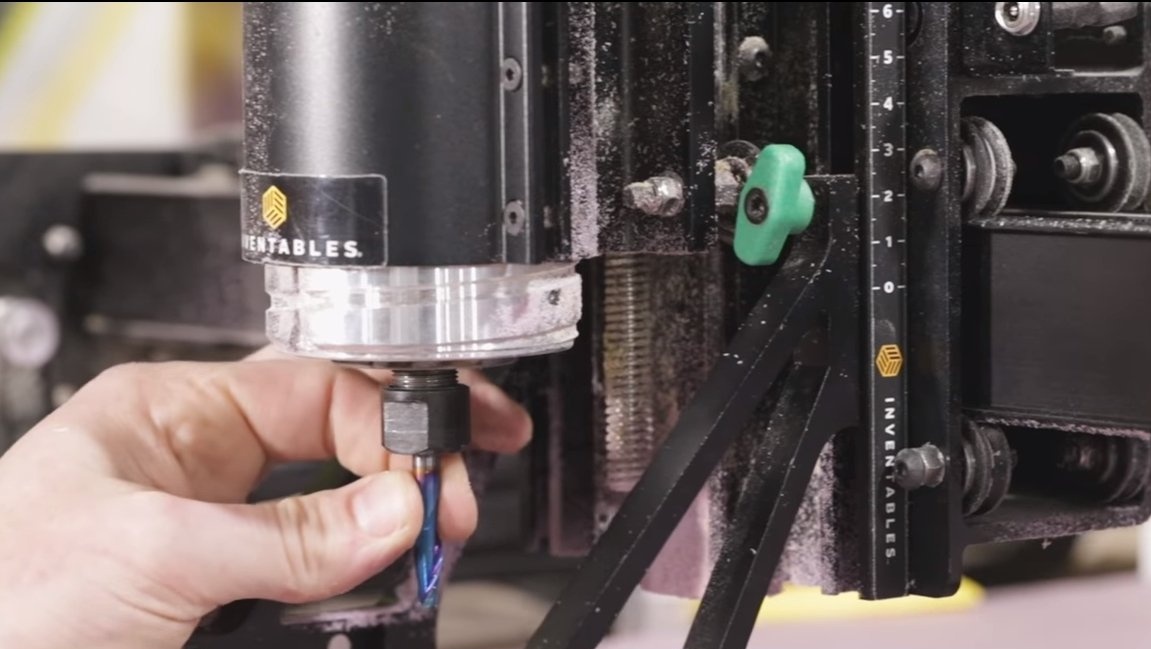
- CNC milling machine;
- orbital sander;
- ;
- a circular saw;
- spray gun with a large capacity;
- gas-burner.
The process of making a table:
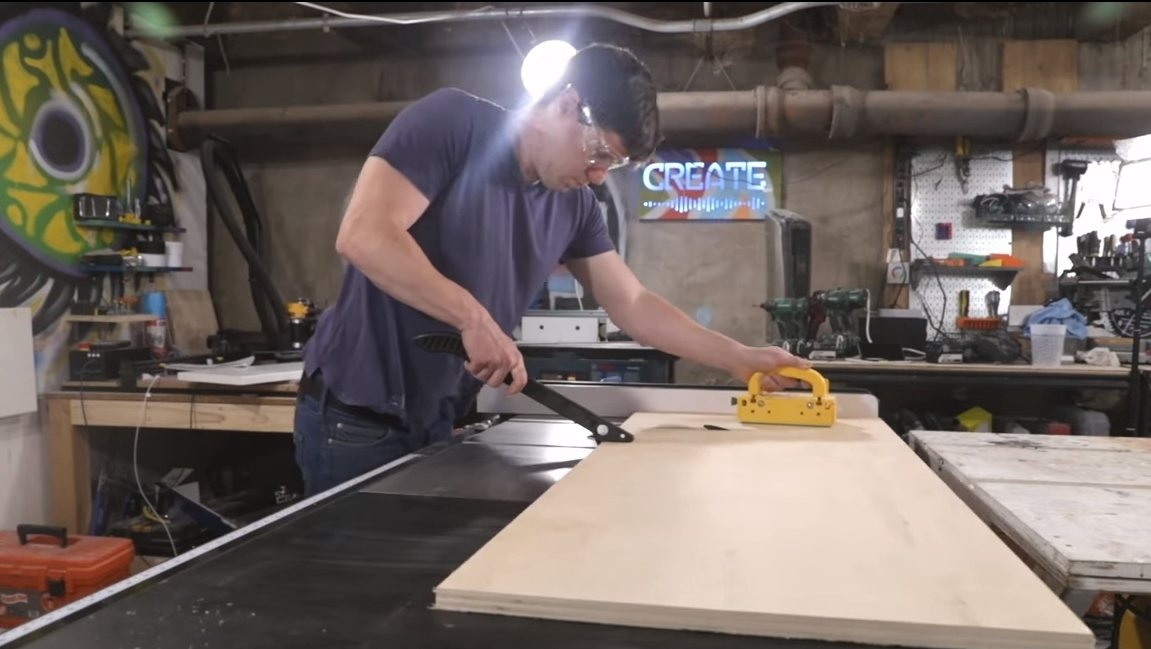
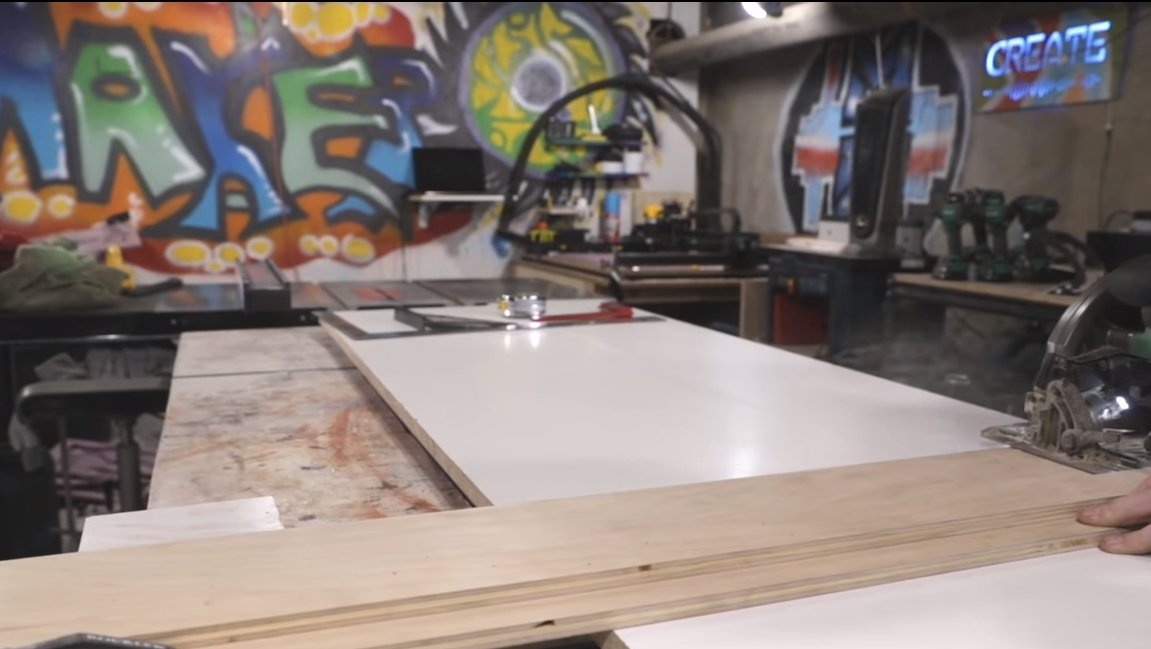
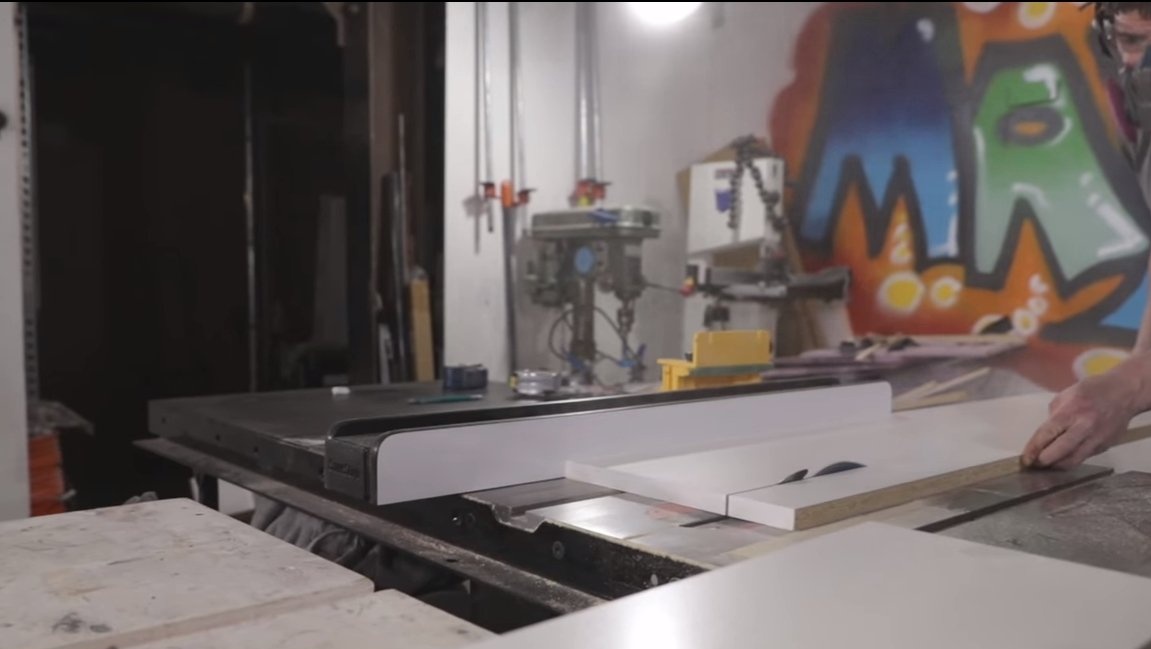
Step one. Blank preparation
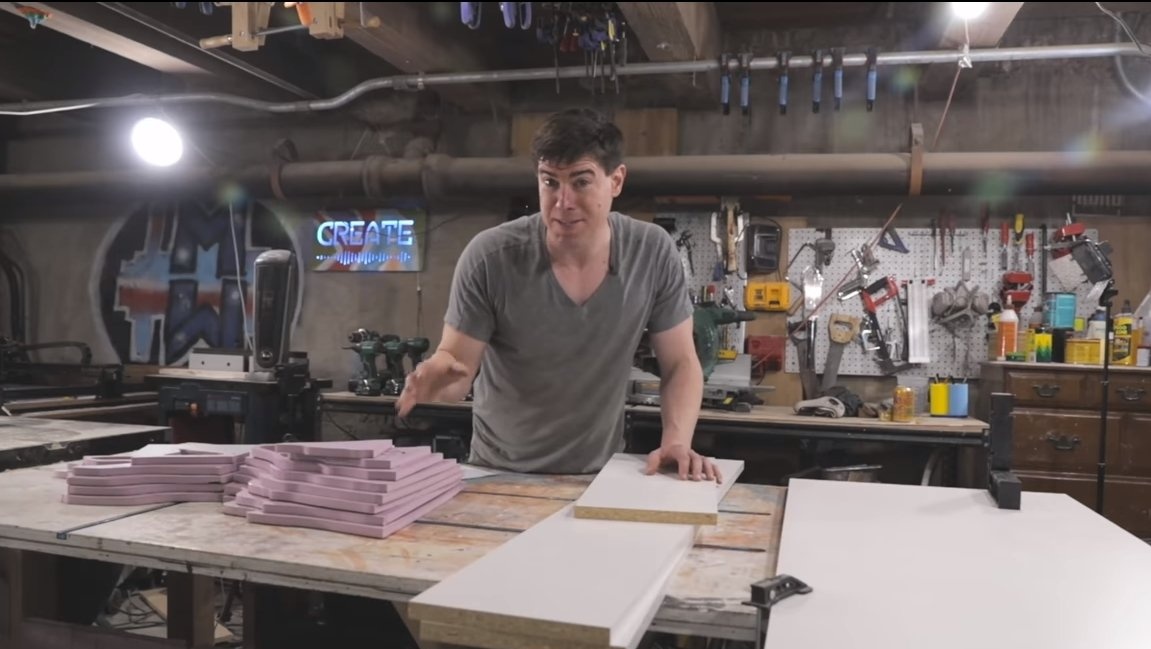
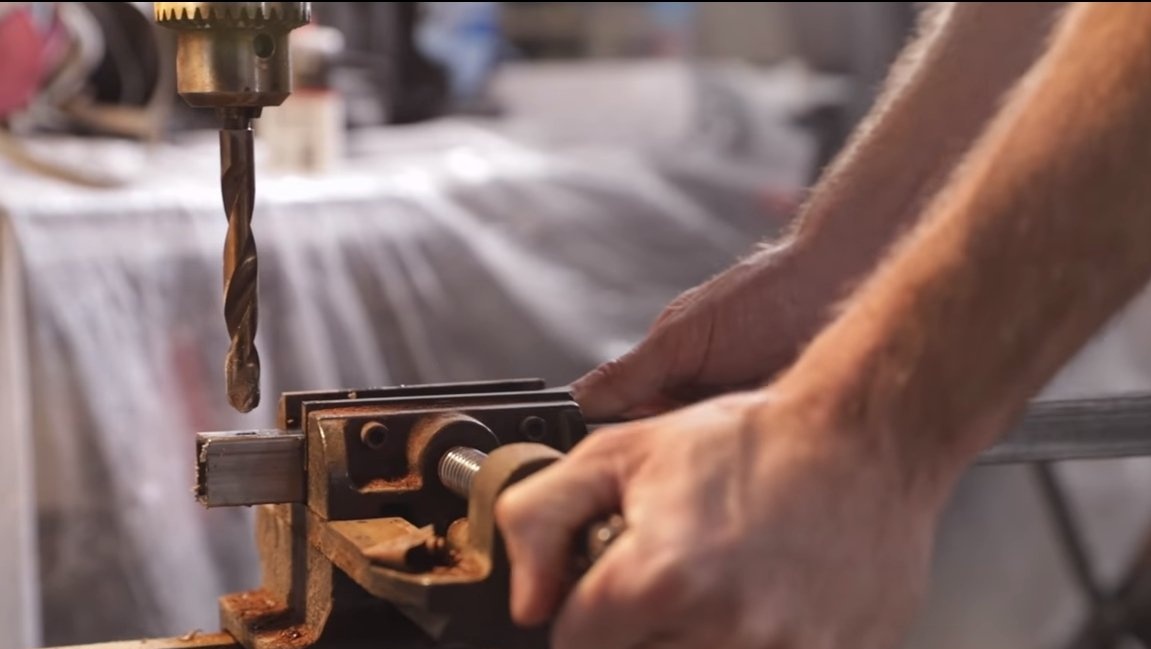
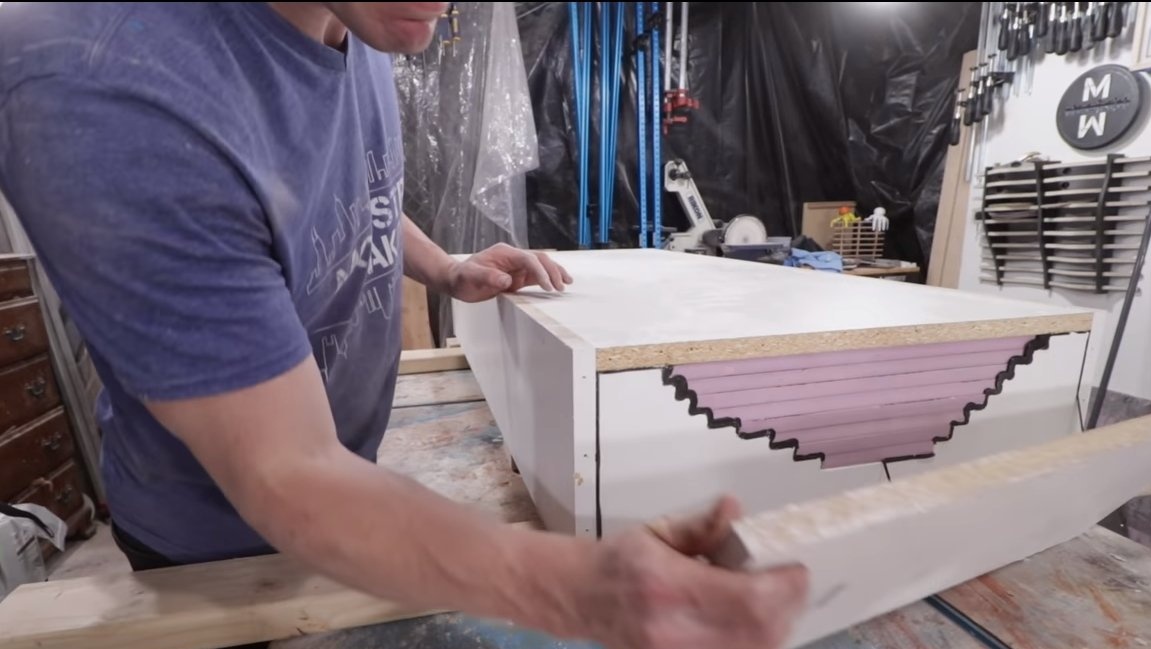
First of all, we need chipboard, from it we will make the formwork. So the first thing we cut the material on a circular saw, we need a bottom and 4 walls.
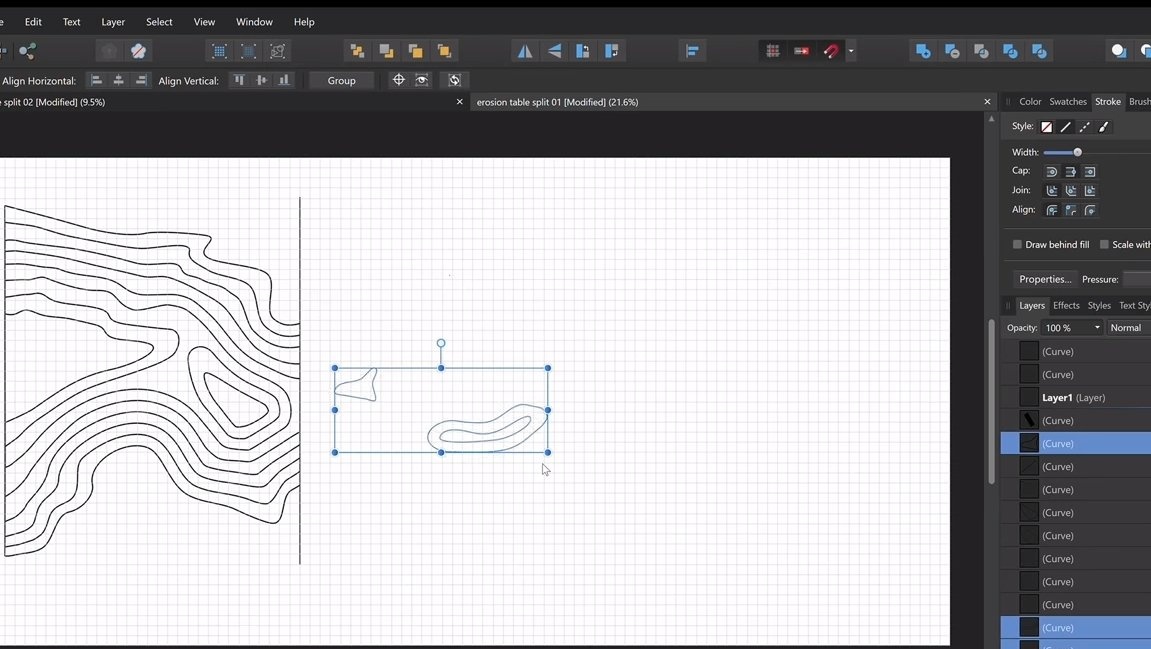
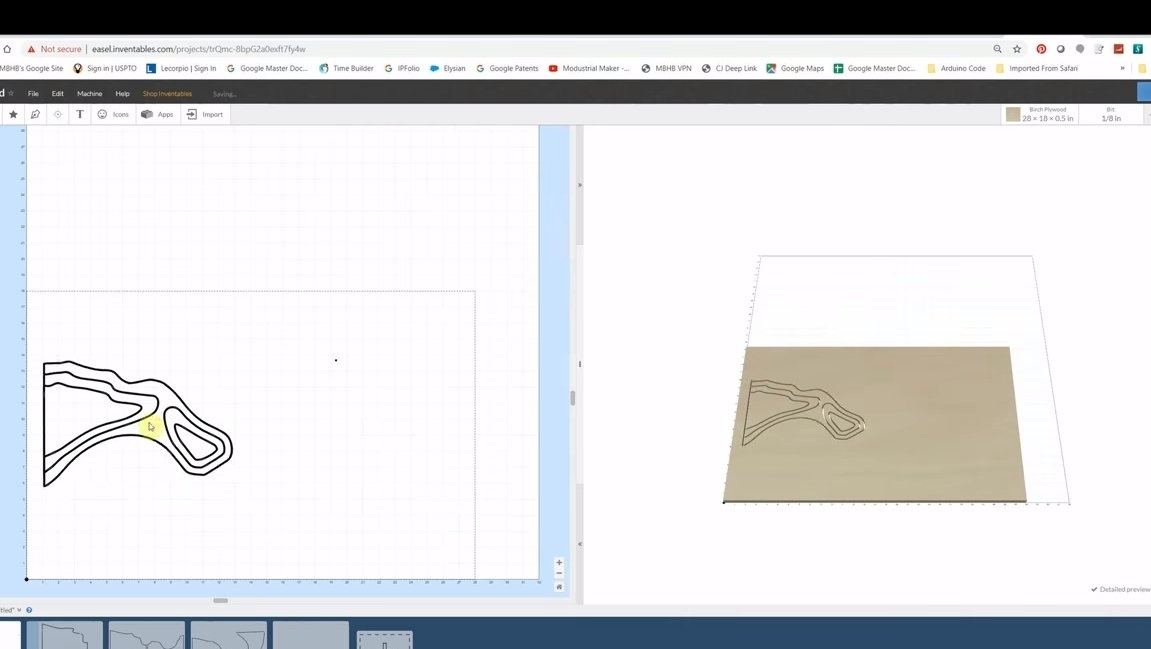
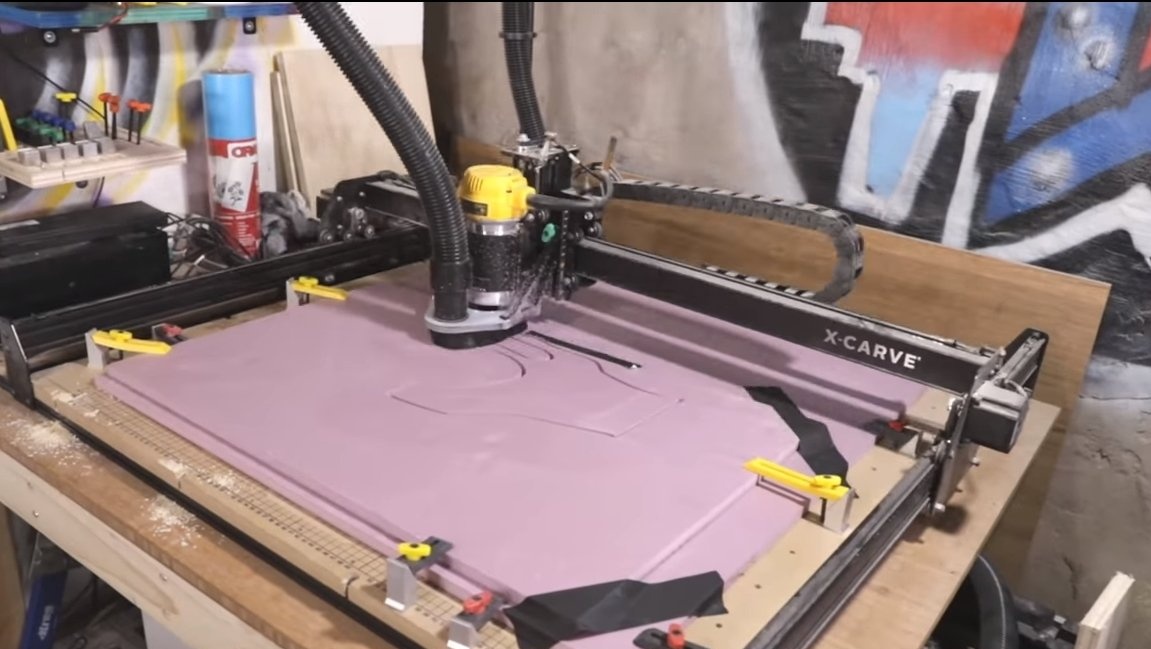
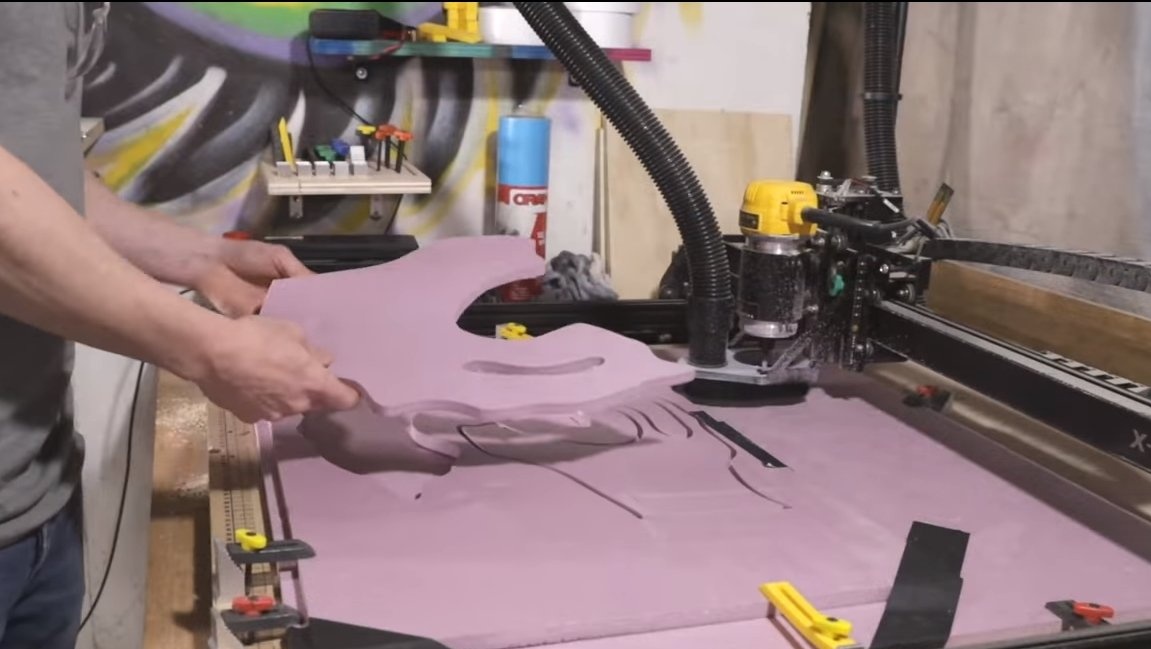
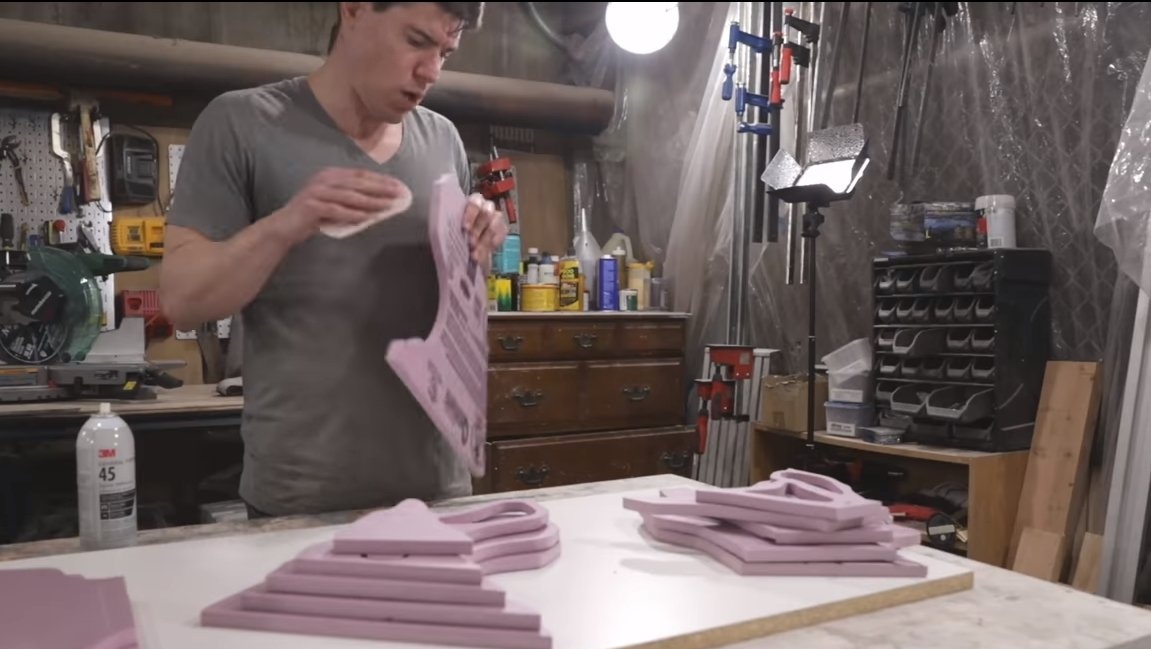
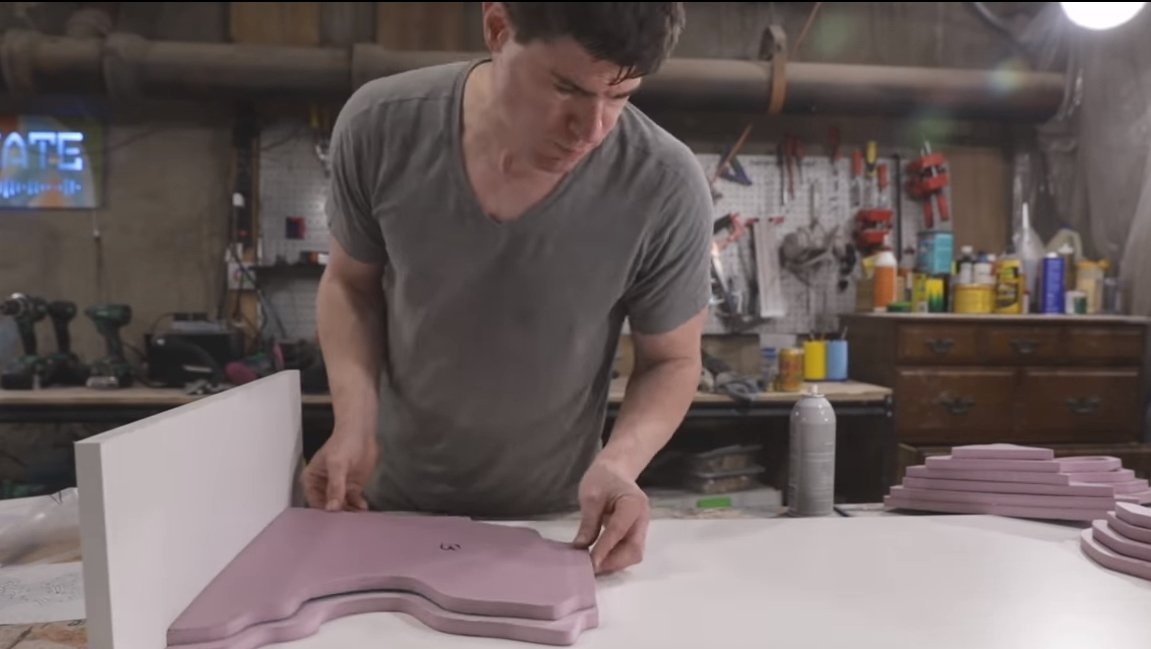
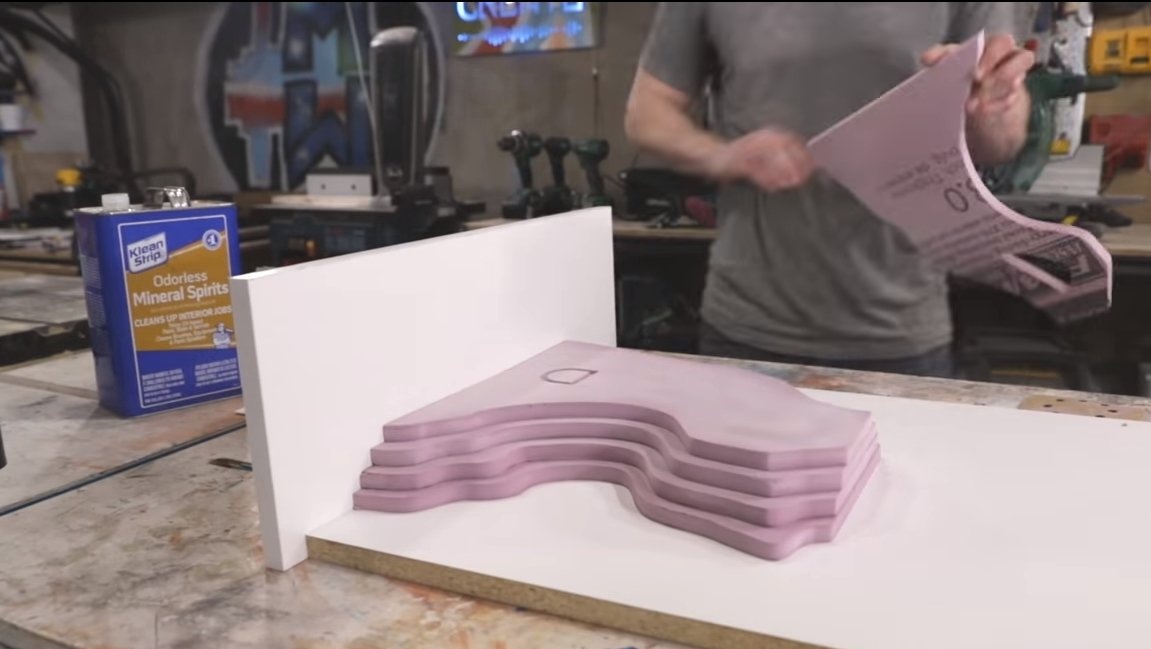
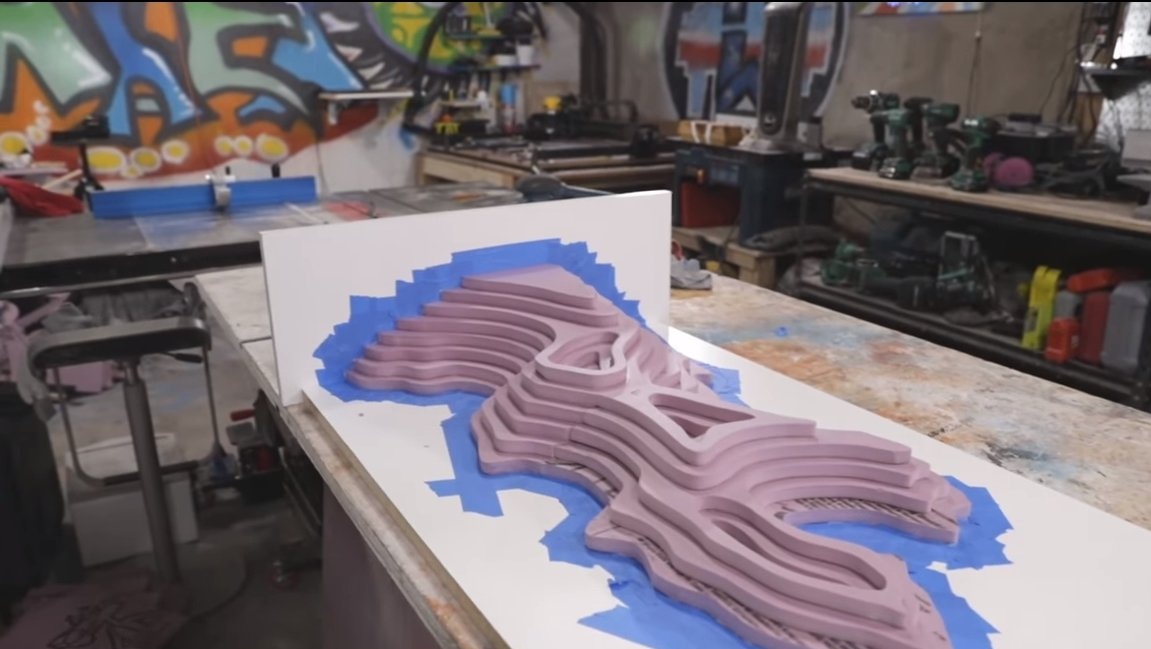
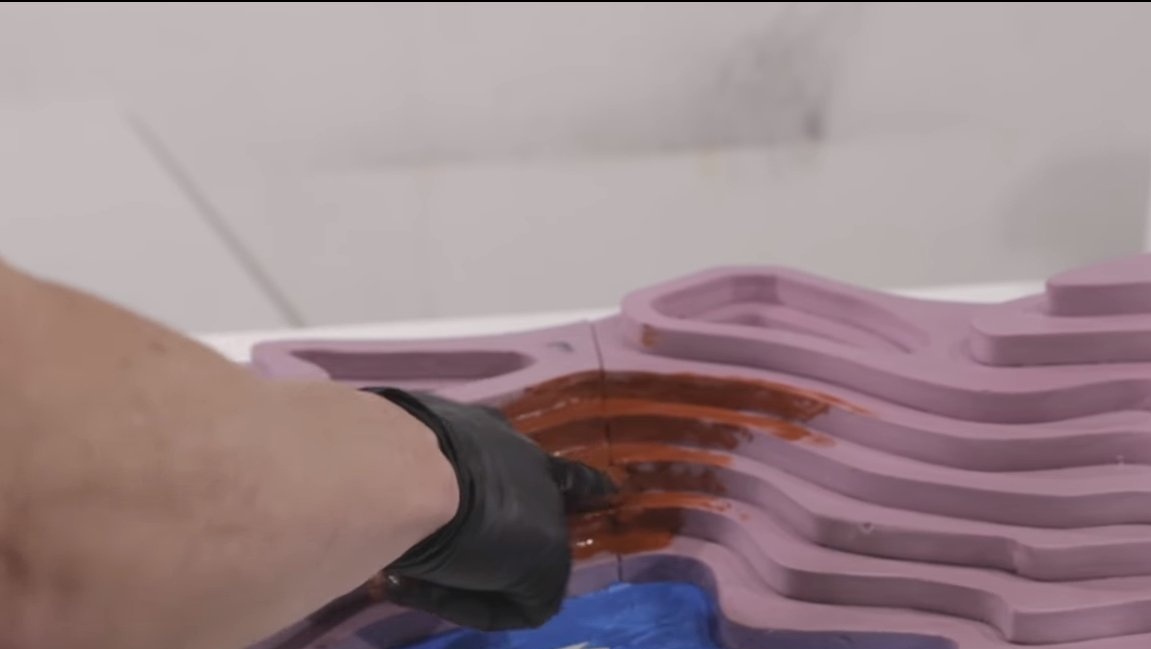
In addition, we need blanks for pouring, with which we will simulate the melting of the glacier. We will need sheet material and it is desirable that it is not too strong, since the form will then have to be removed from concrete. You can find the right material in a hardware store, it can be insulation material or fiberboard of the proper thickness. The author cut the necessary blanks on a CNC milling cutter, having previously compiled a project on a computer. But such blanks can be cut with an electric jigsaw, if a little pokumeku.

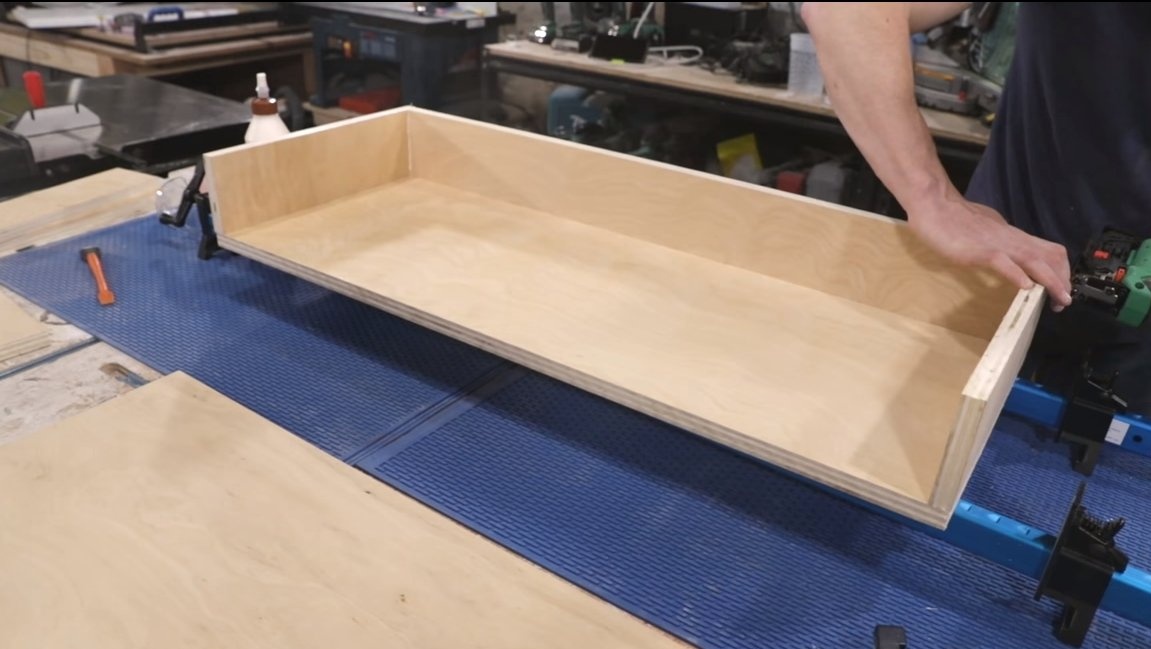
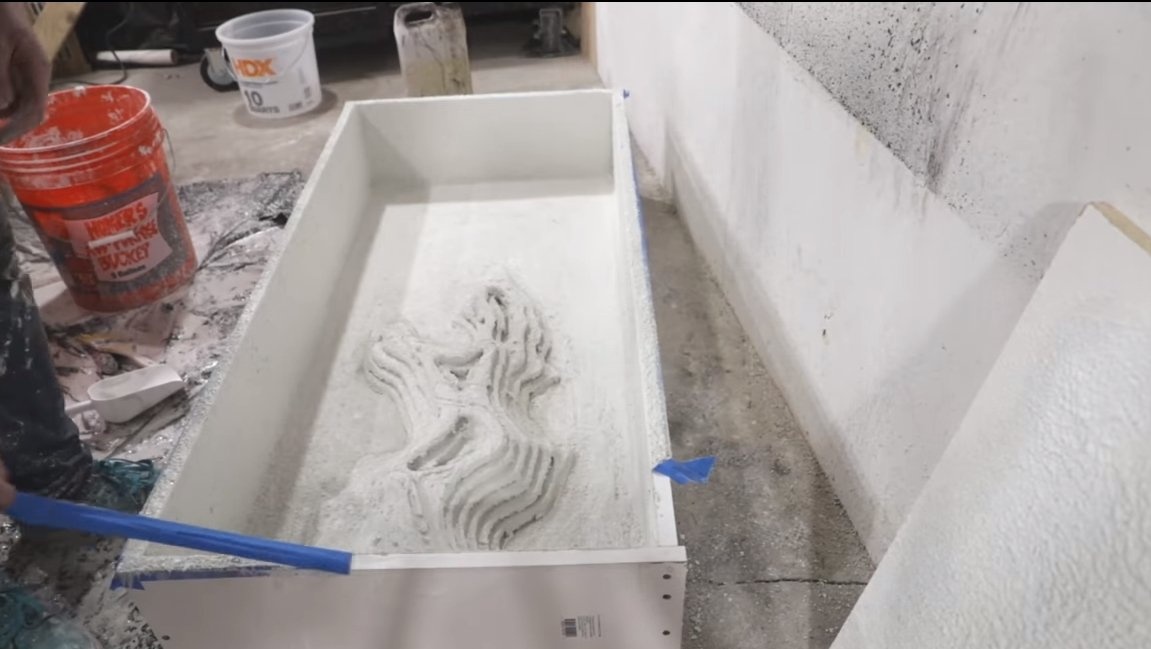
Step Two Formwork assembly and pouring
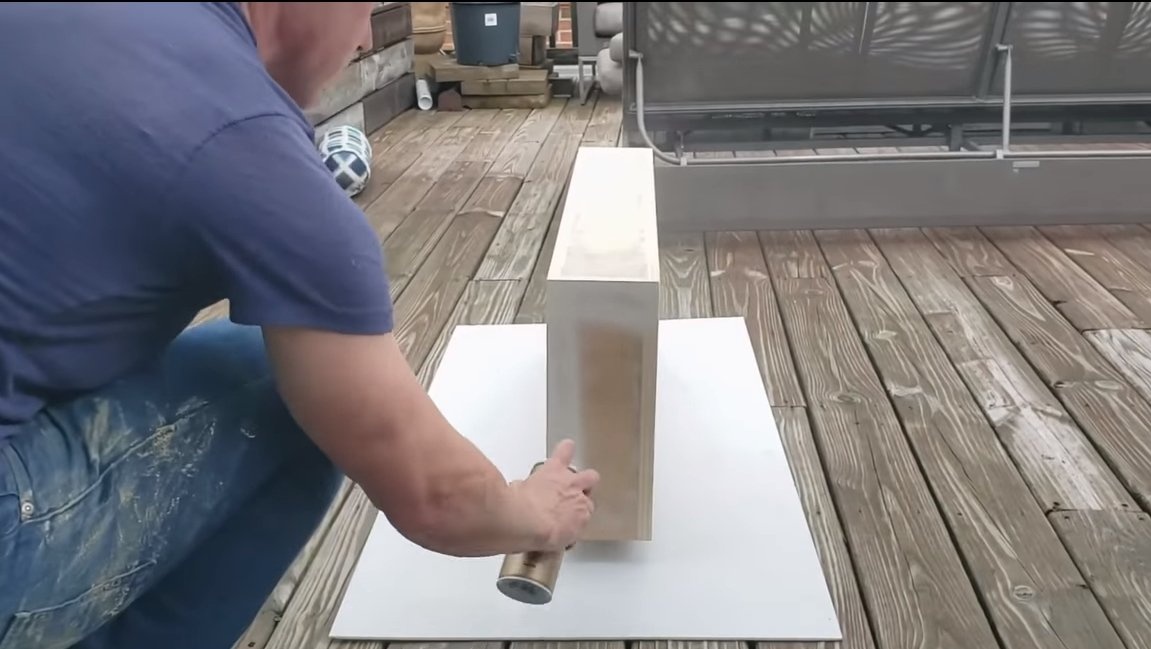
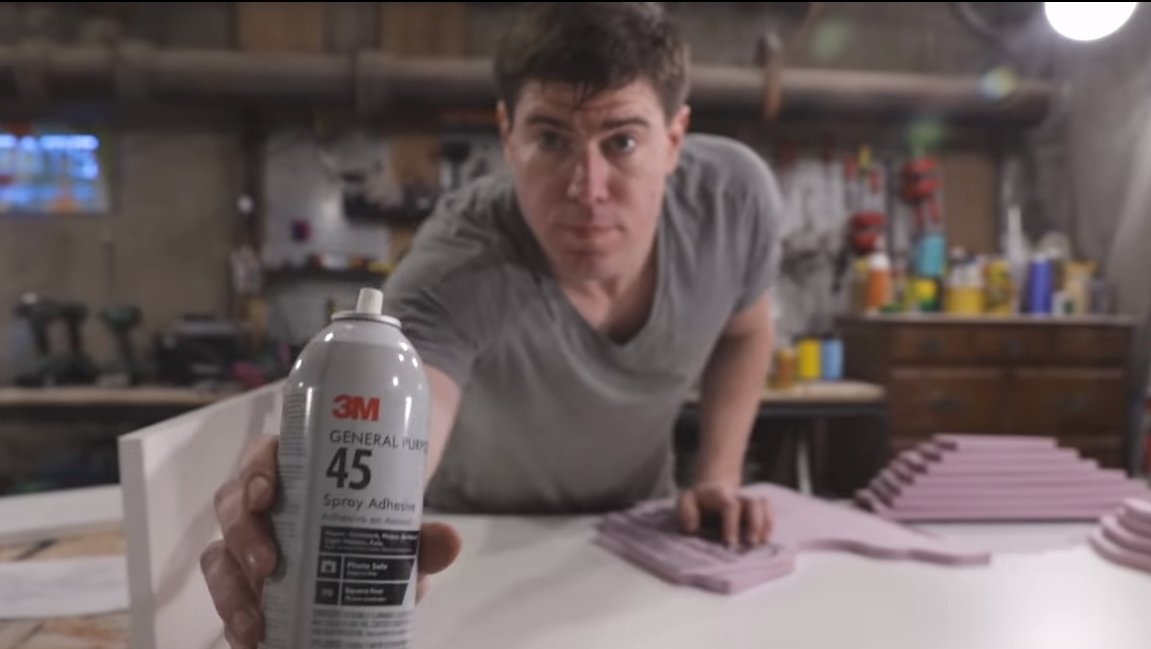
We collect the form for filling, for this, we twist the box of the desired size with screws from chipboard. Next, the filling mold is glued to the bottom, all joints and seams are carefully sealed with silicone sealant.To sealant seams were neat, the author rolls them with a special tool with a ball on the end. At the end, we cover all parts with which the concrete will come into contact with a separating wax.


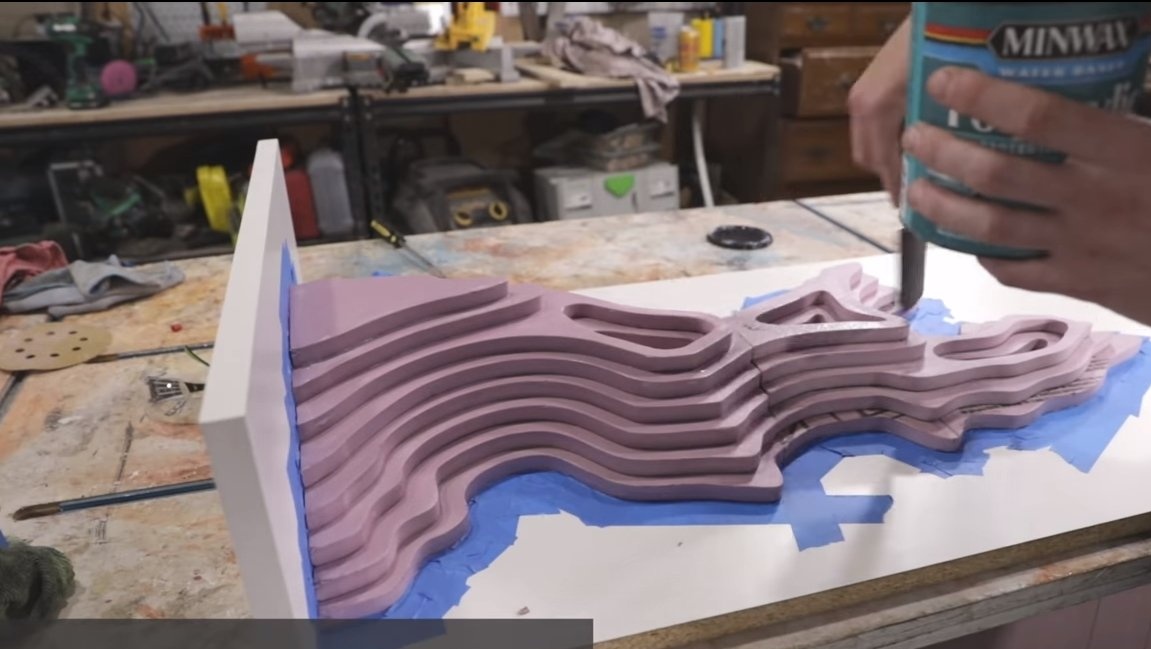


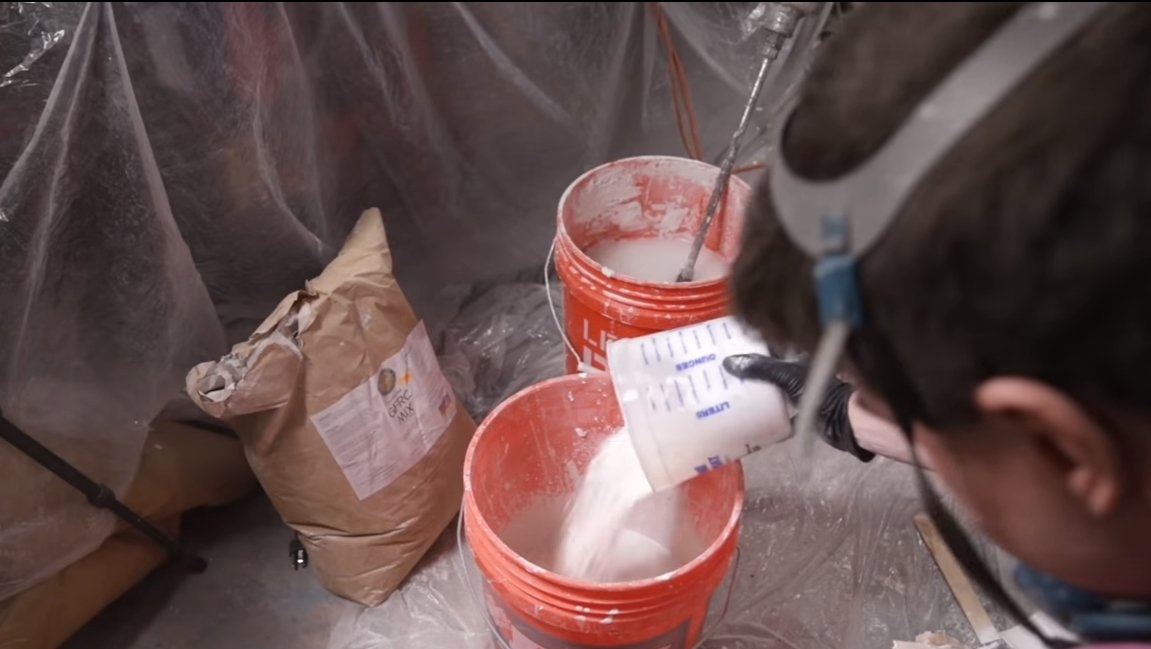
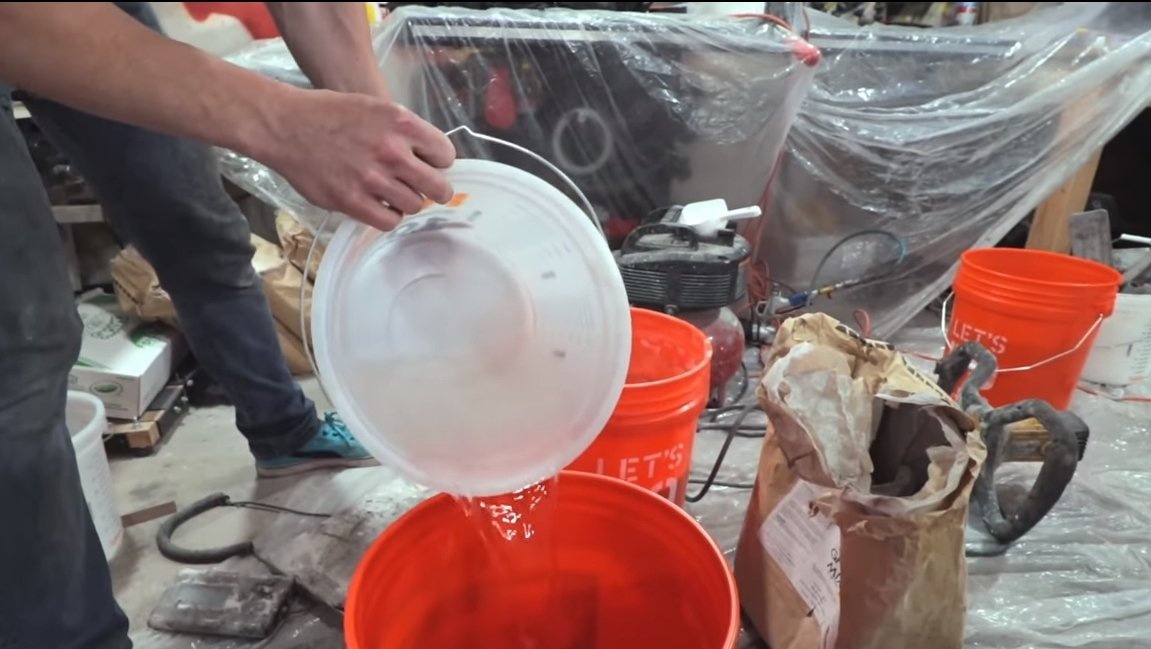
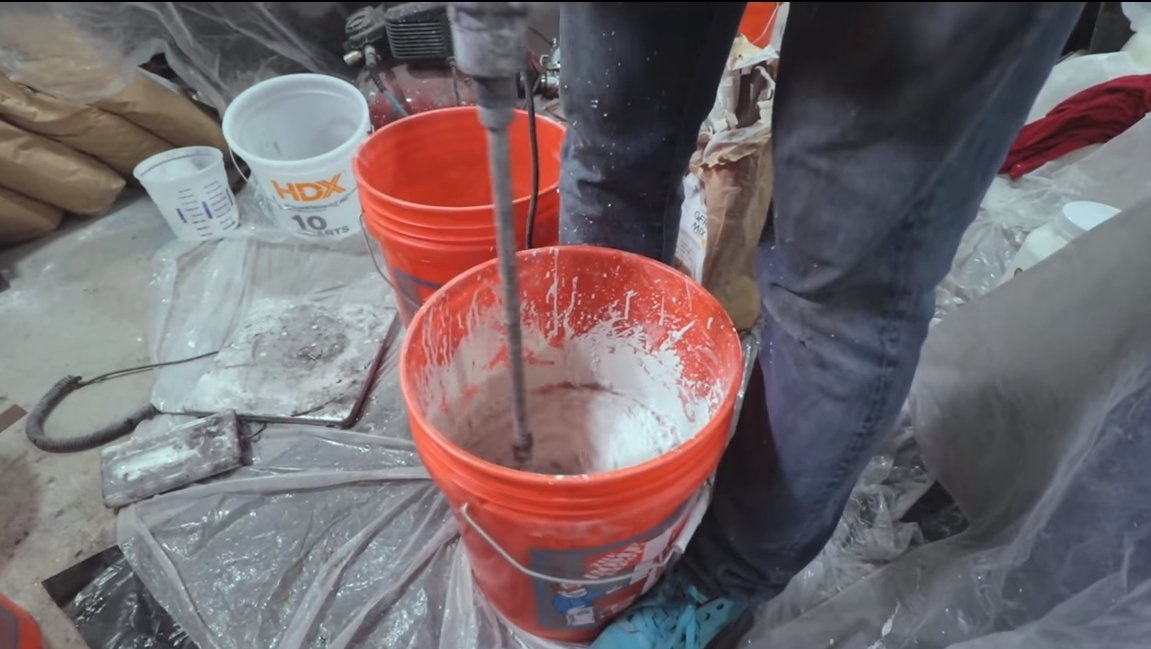
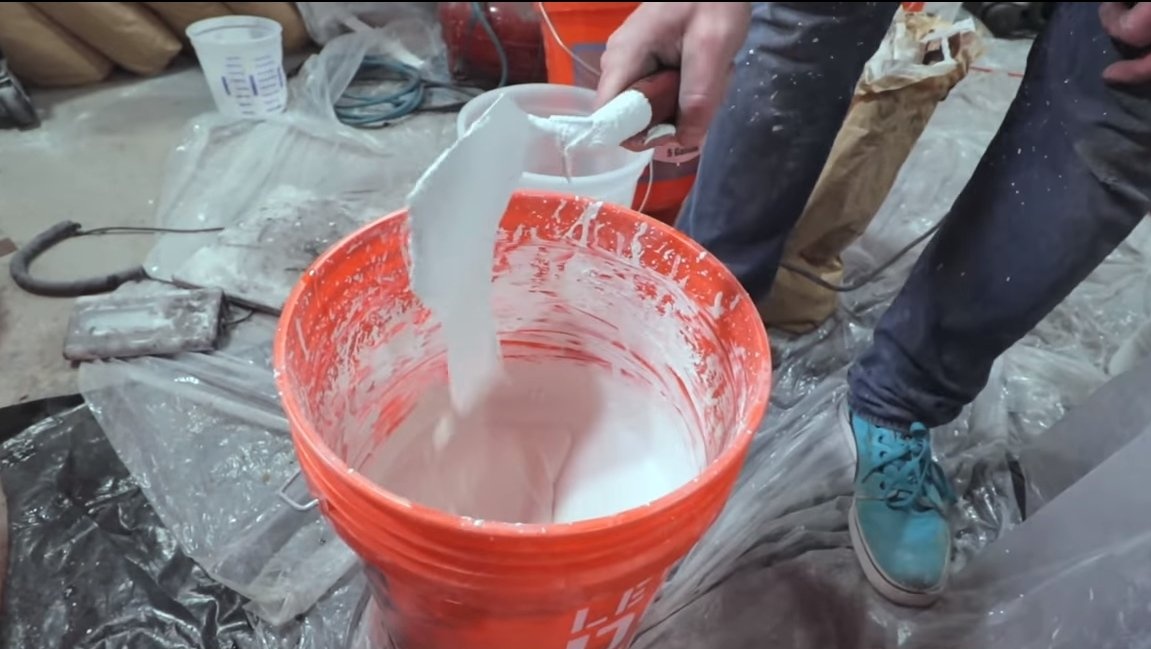
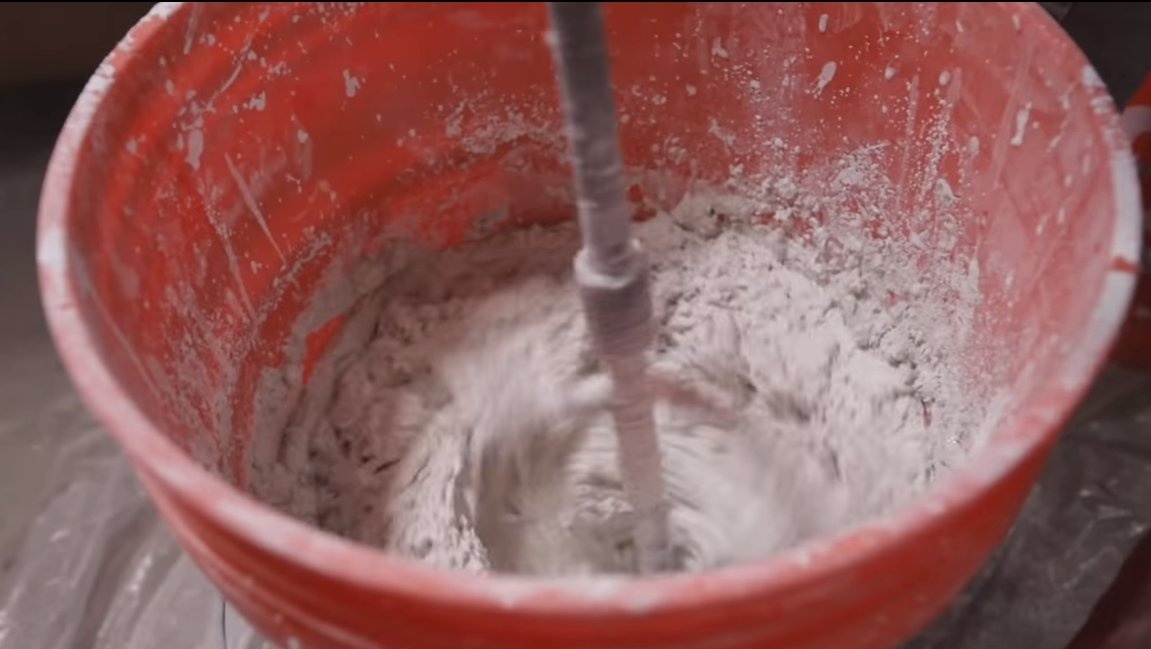
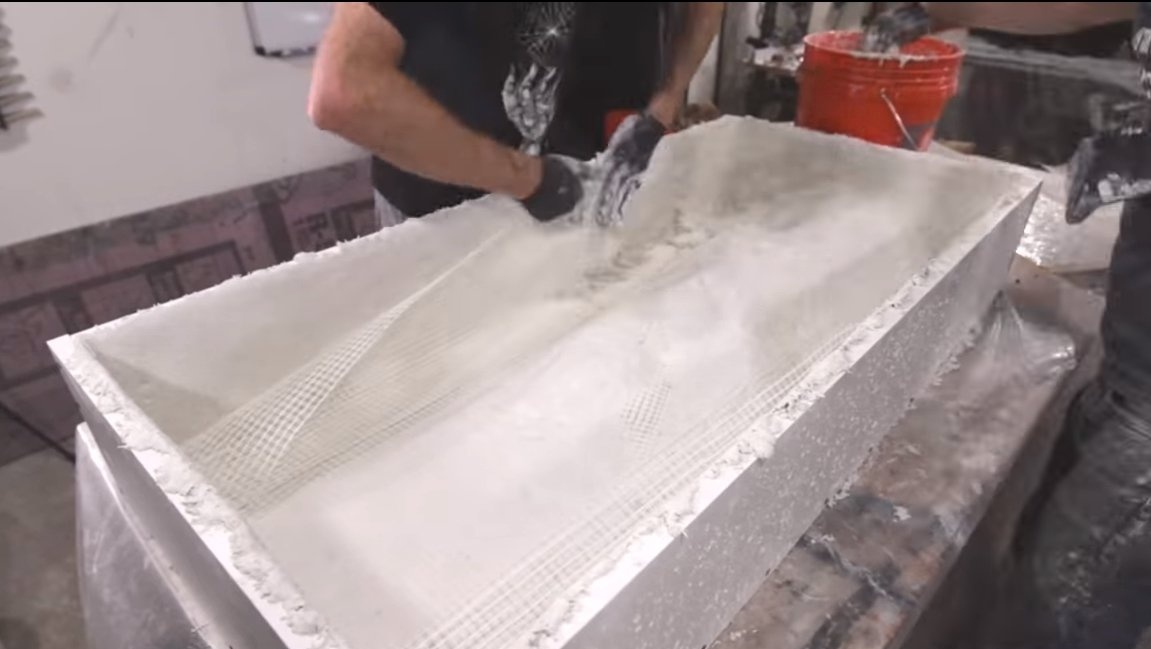
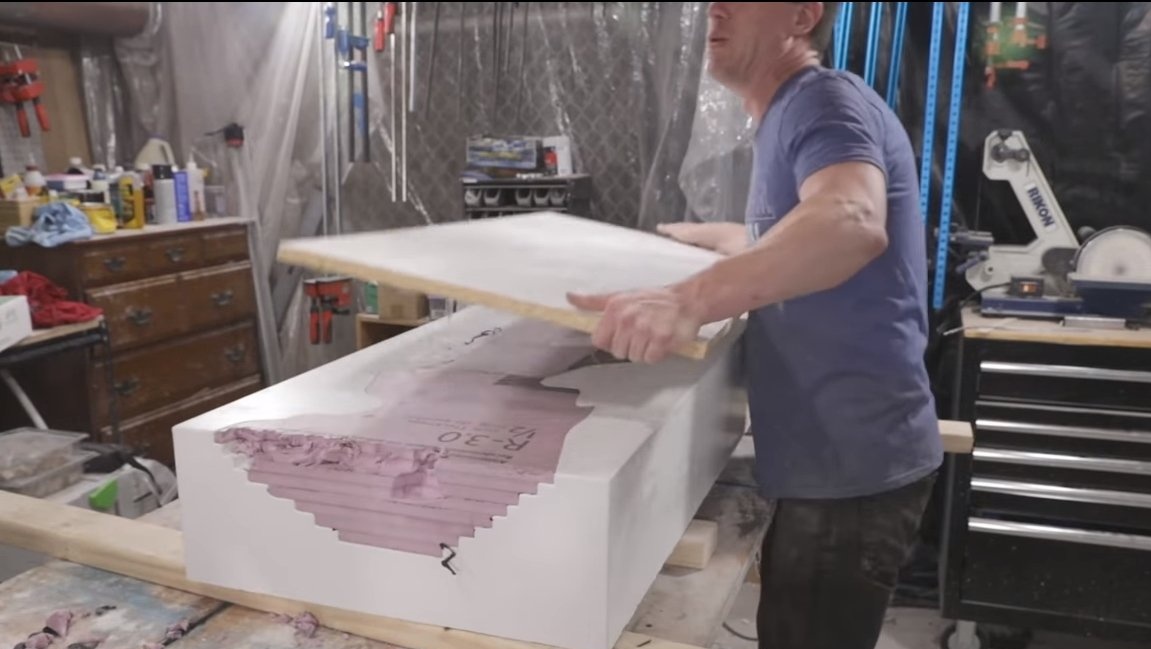
When the form is ready, you can begin to fill. We breed concrete and add white dye to it, the author uses the ready-mixed concrete mix GFRC. To begin with, the concrete mixture is poured into the spray gun and sprayed evenly throughout the entire inner part of the formwork. Where the solution does not lie down, it can be smeared with a brush. After this, wait until the coating dries. As a result, we get a layer on which we then apply the main layer of concrete.
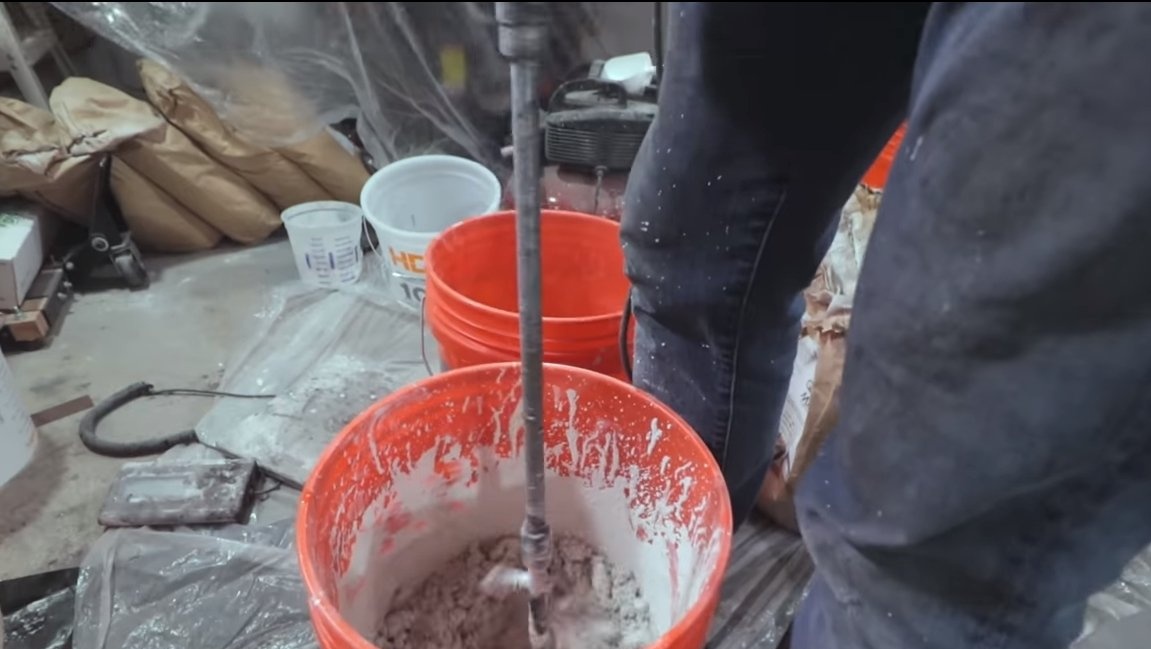
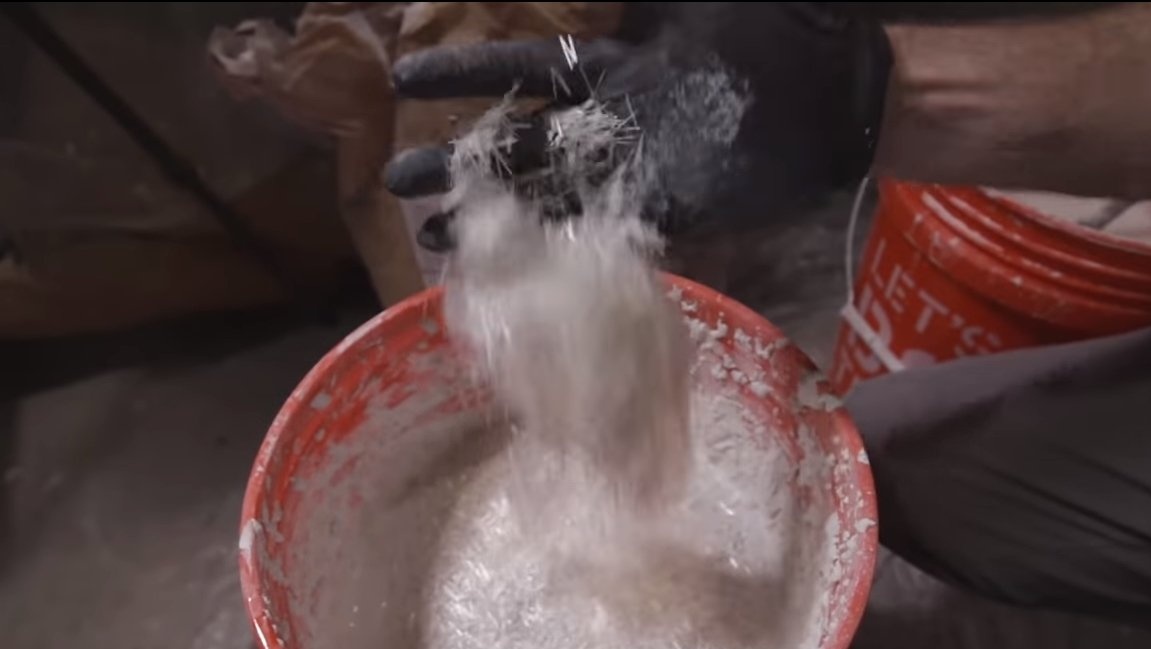
Now we knead the concrete again, but this time we add fiberglass to it to increase strength. The author manually spreads concrete on the inside of the formwork, obtaining a layer of the desired thickness. As a result, the table will not be too heavy and will be quite strong. The side walls of the table are reinforced with a special building mesh. In the end, it remains to wait until the whole thing dries.

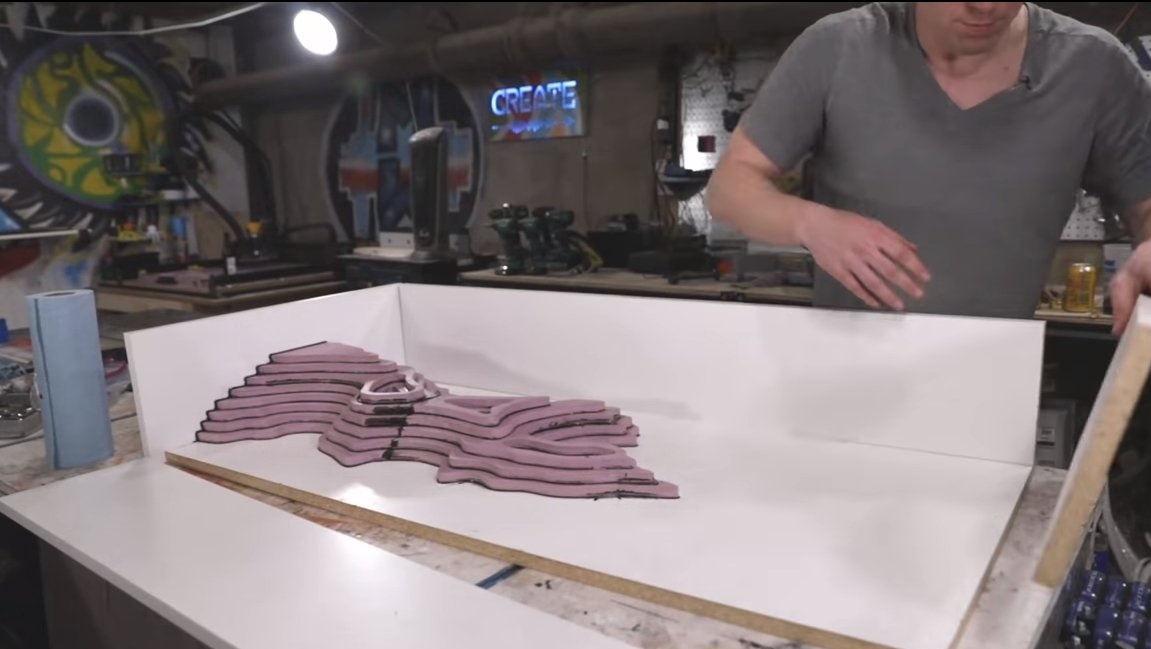
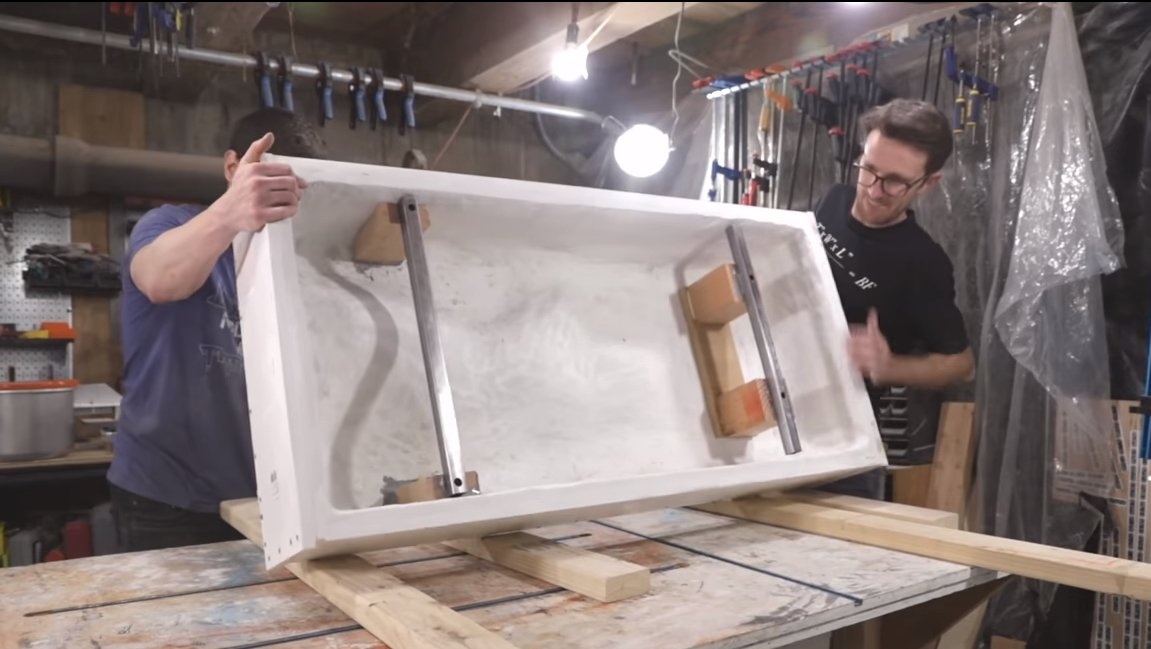
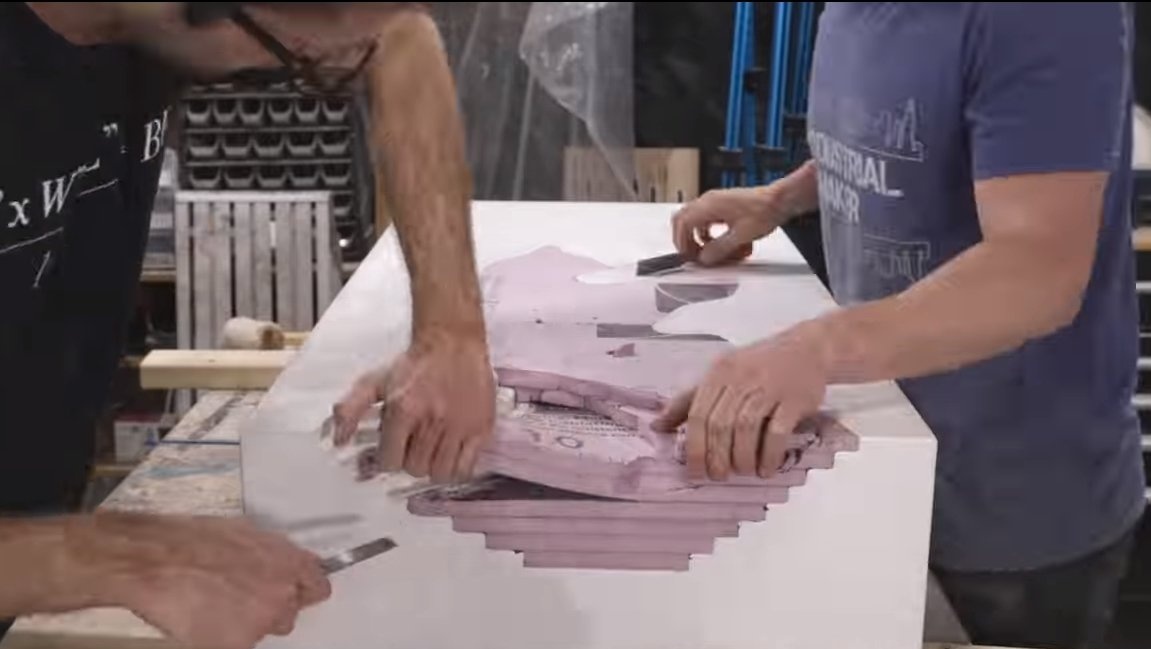
Step Three We disassemble the formwork
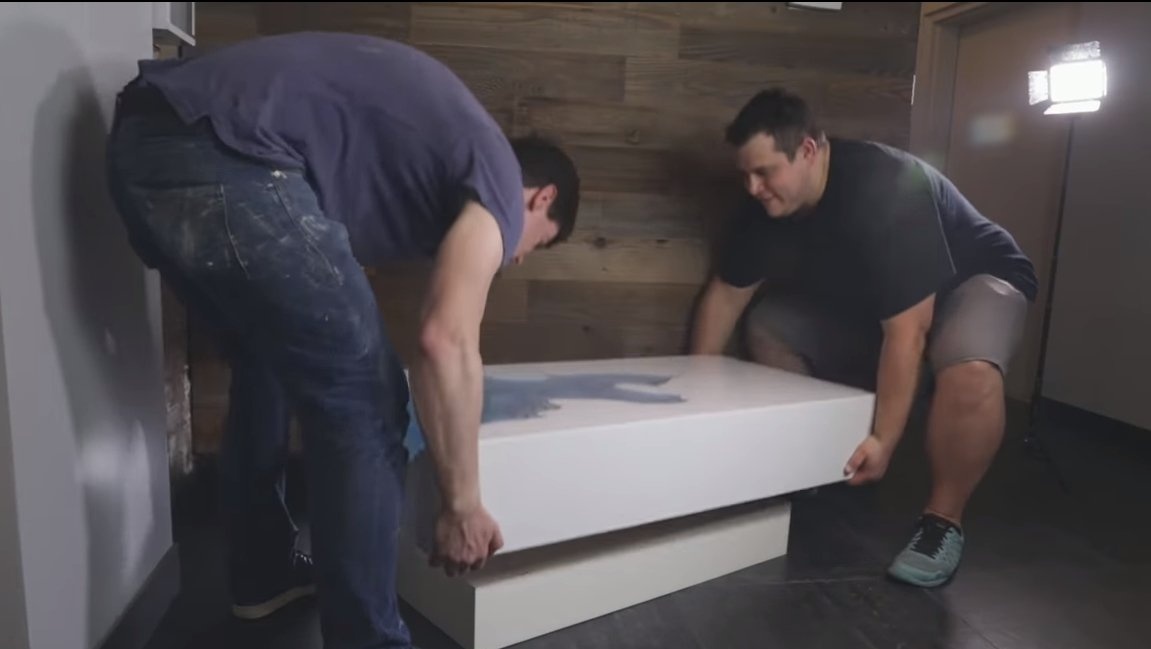
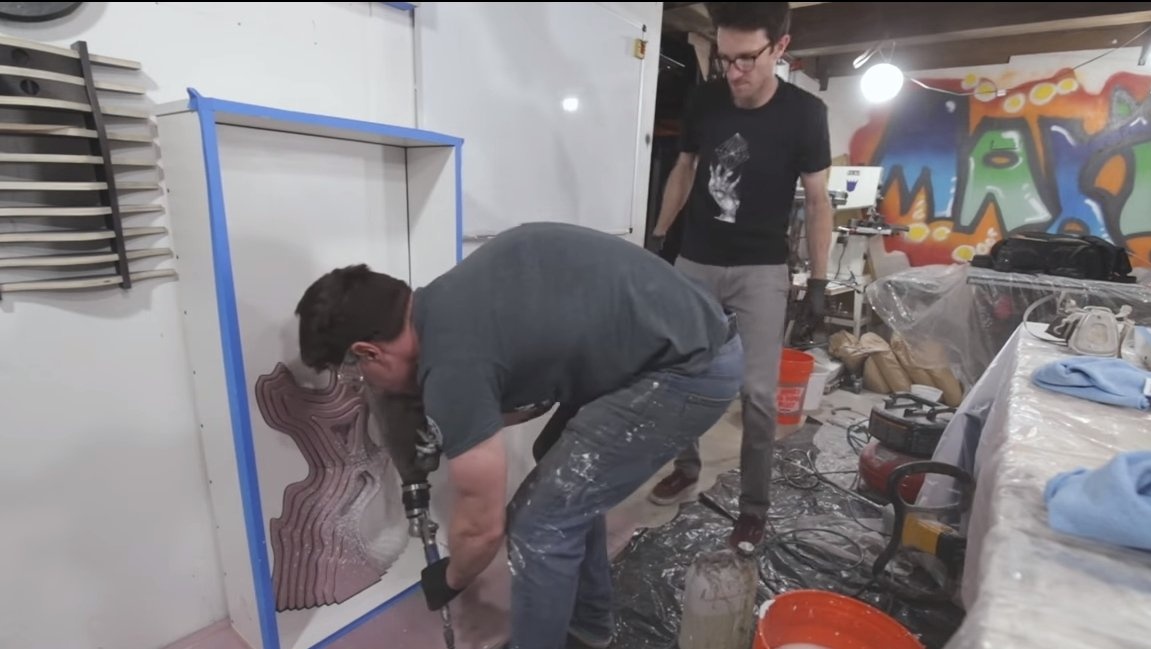
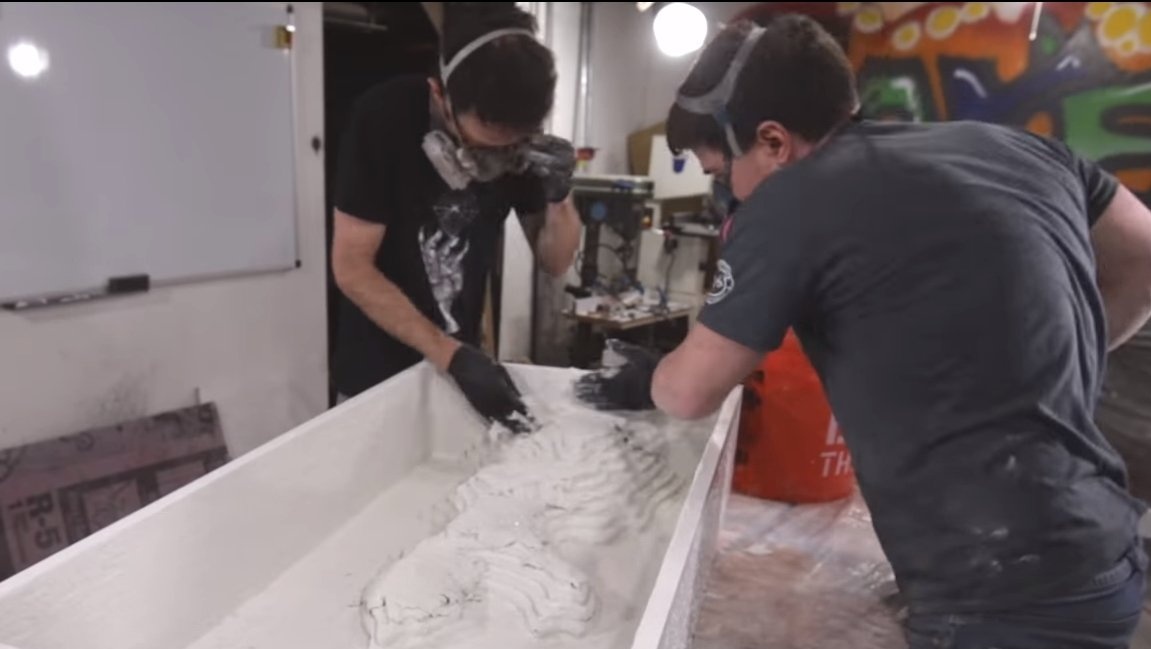
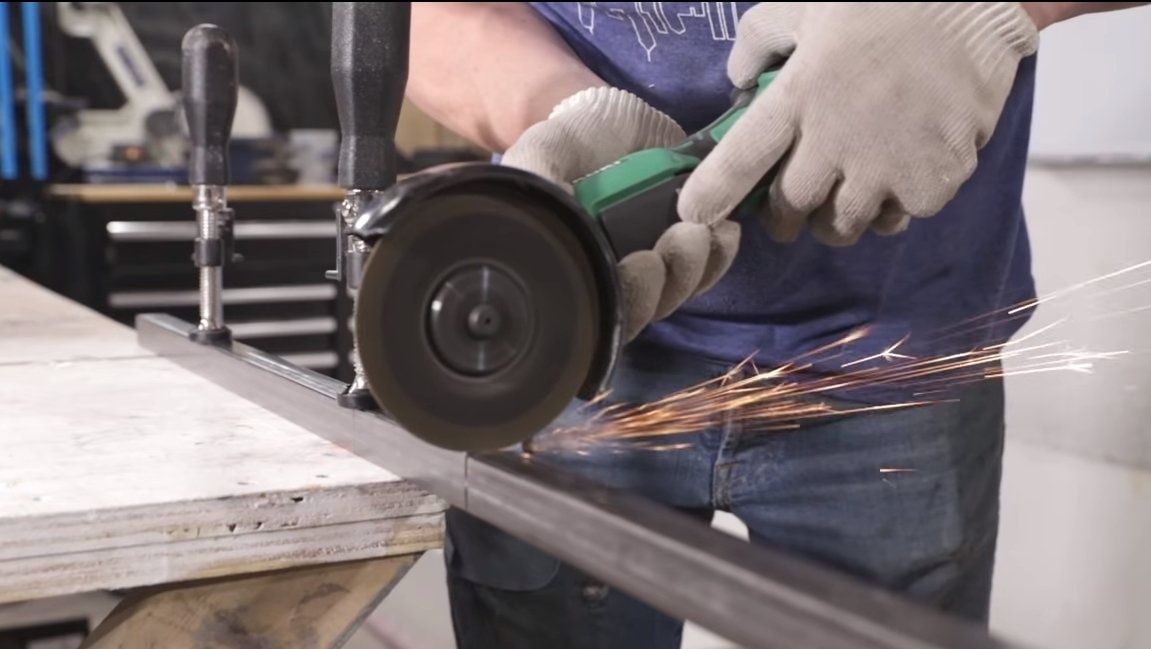
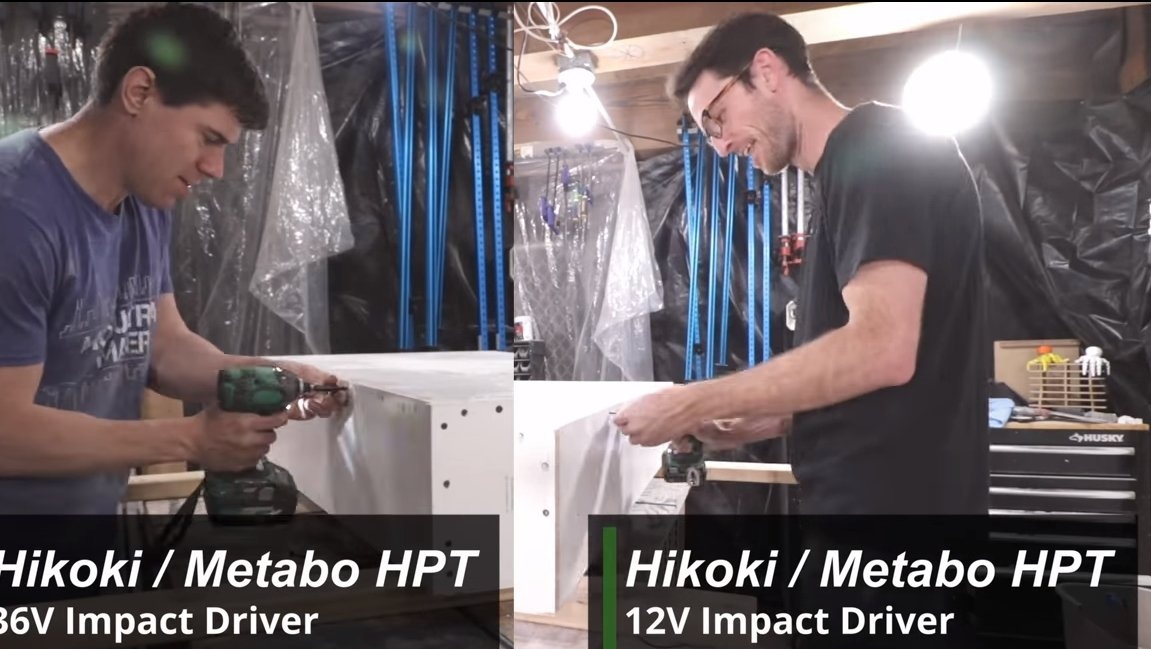
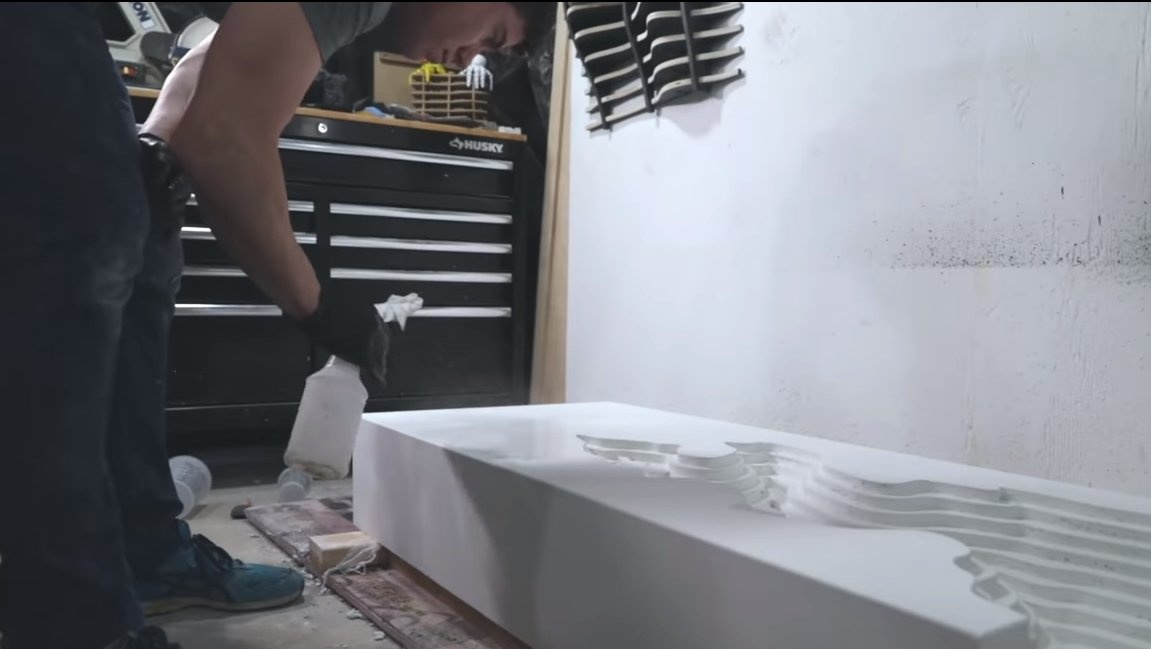
When the solution dries, we process the edges with a grinder with a special grinding nozzle. The author also made legs for the table from wooden blocks and shaped pipes. Now we have to disassemble the formwork, turn the table over and, armed with a screwdriver, get to work. The author disassembles the formwork with a partner, the author has a 36V screwdriver, and the teammate has a 12V screwdriver, as a result, the author disassembles the formwork several times faster, since the 36V screwdriver is very productive.
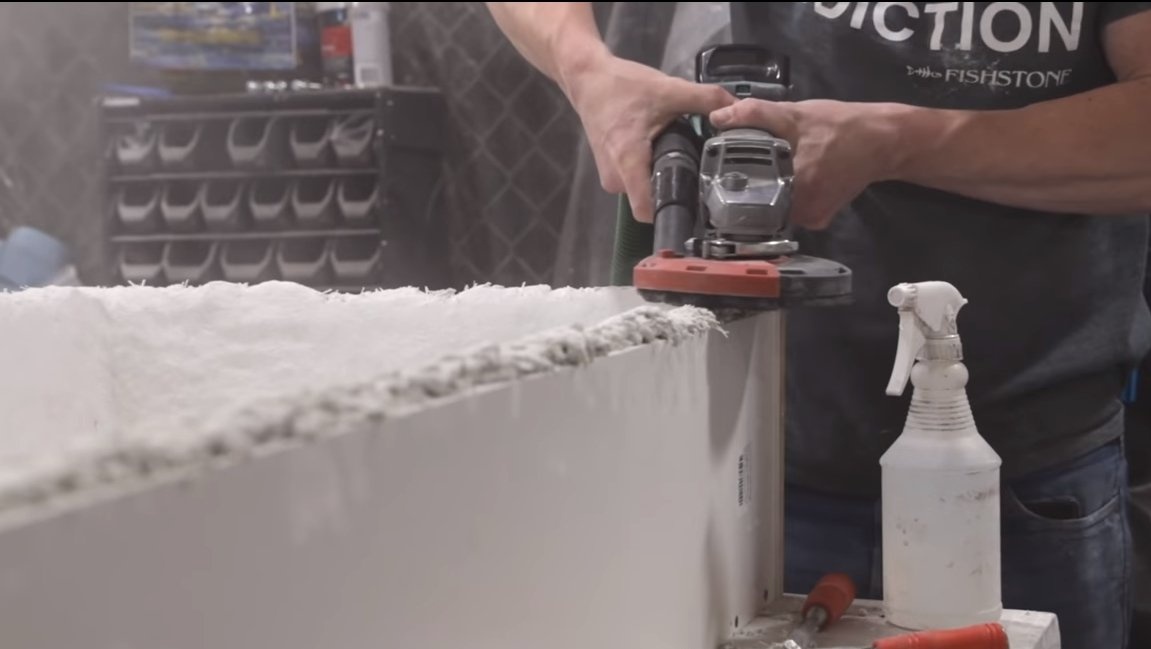
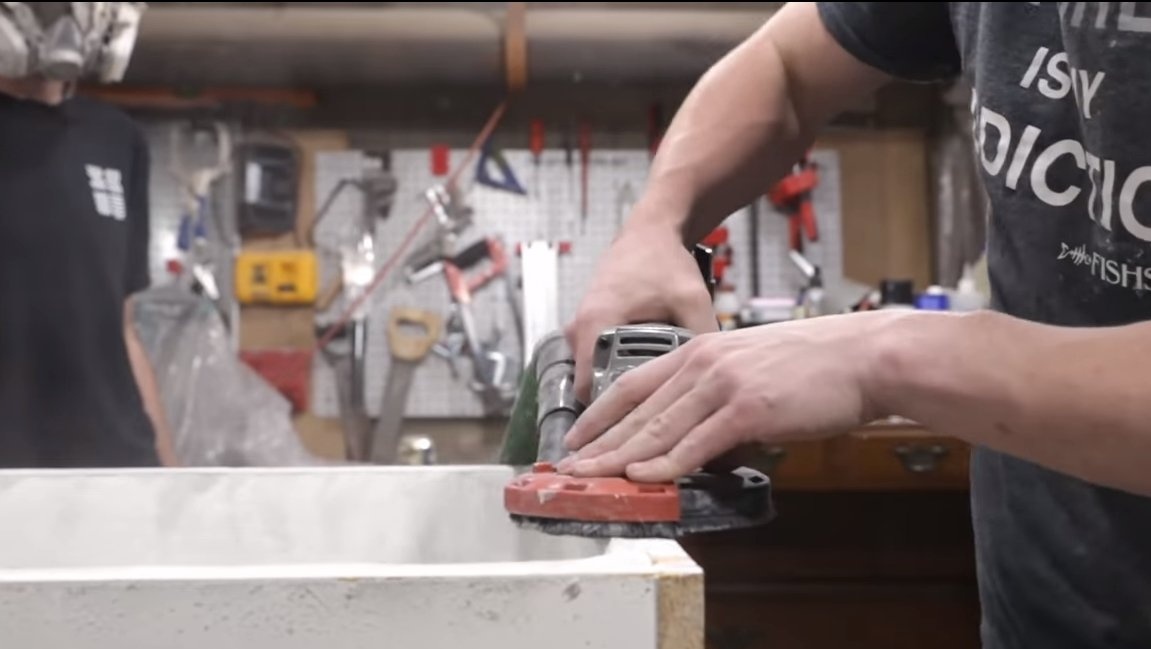

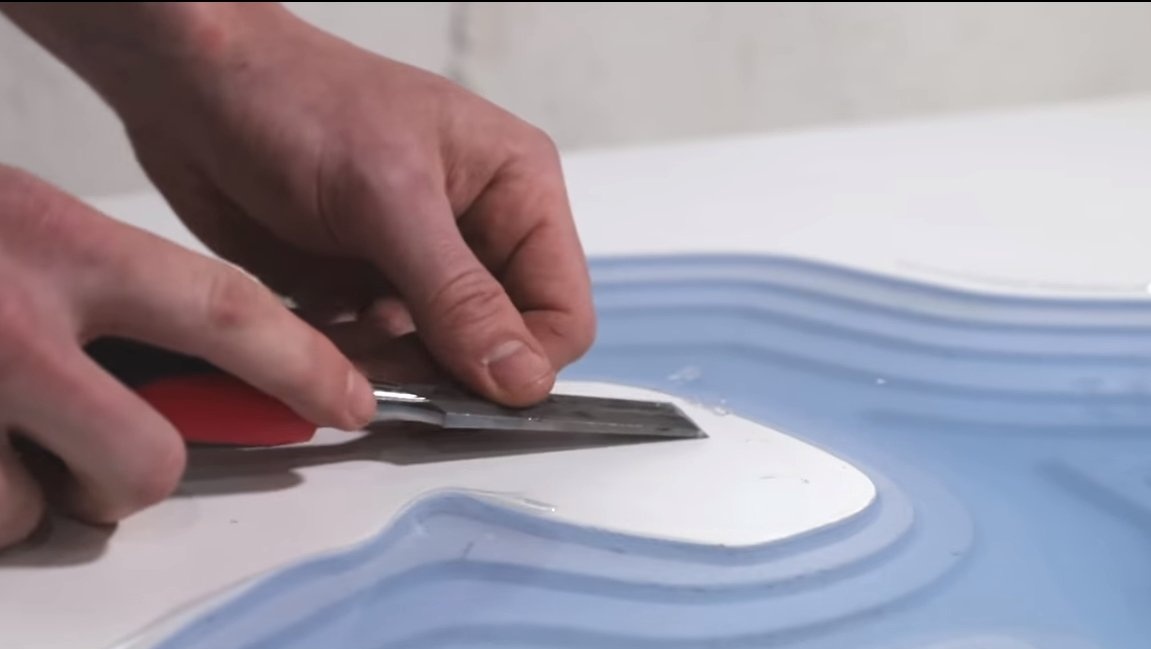
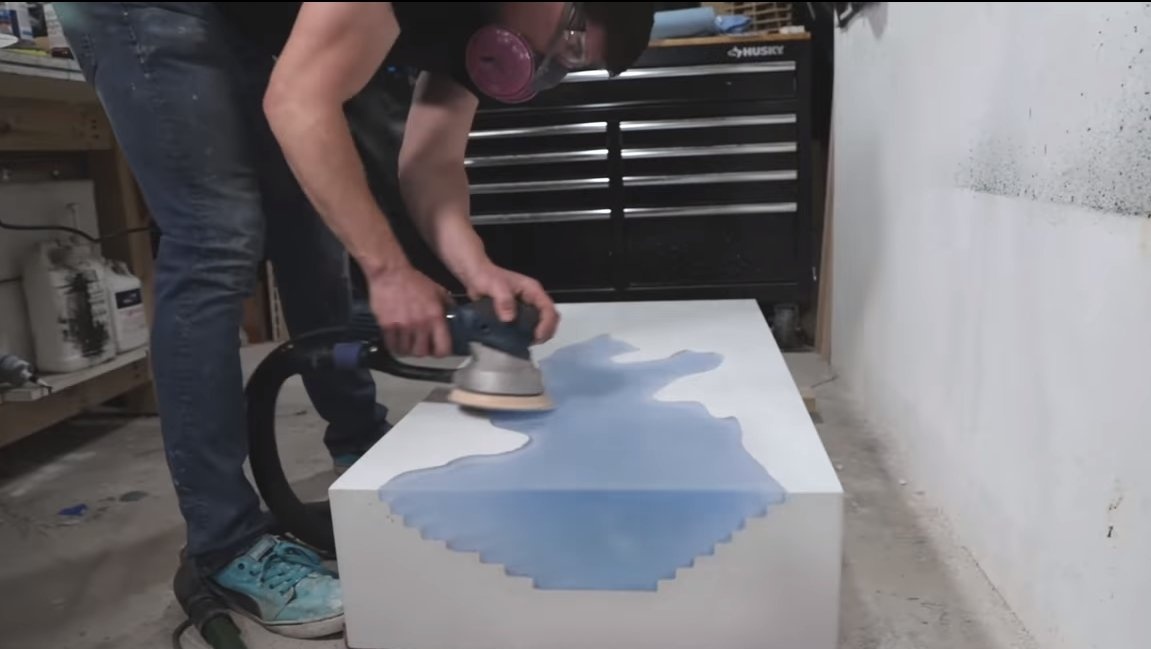
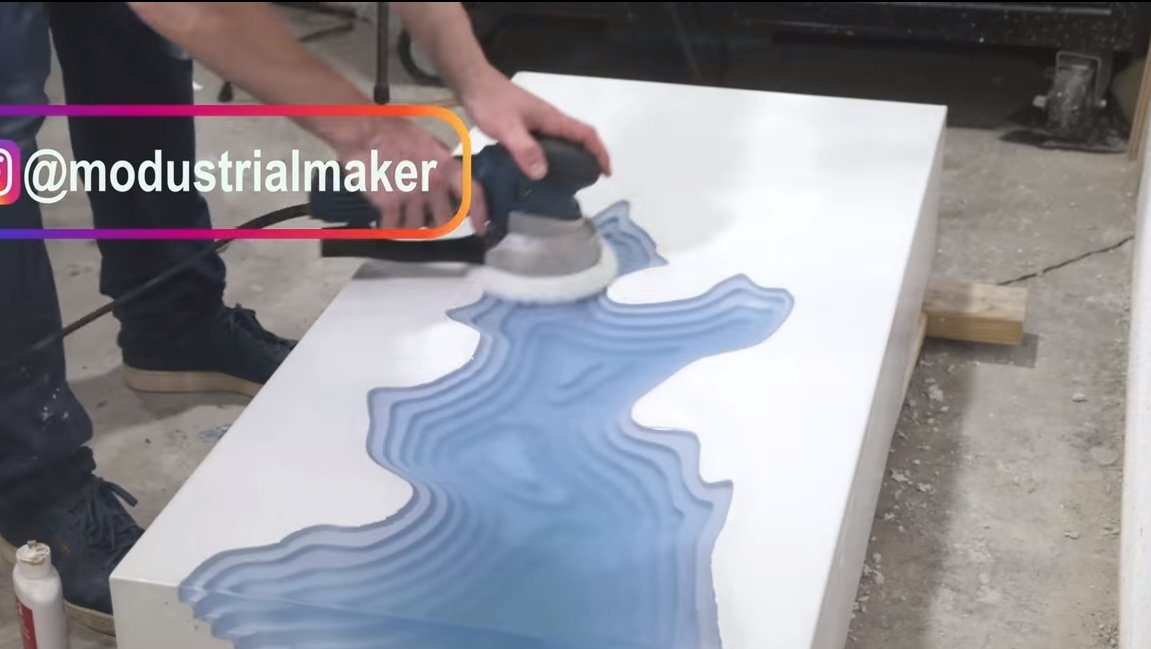
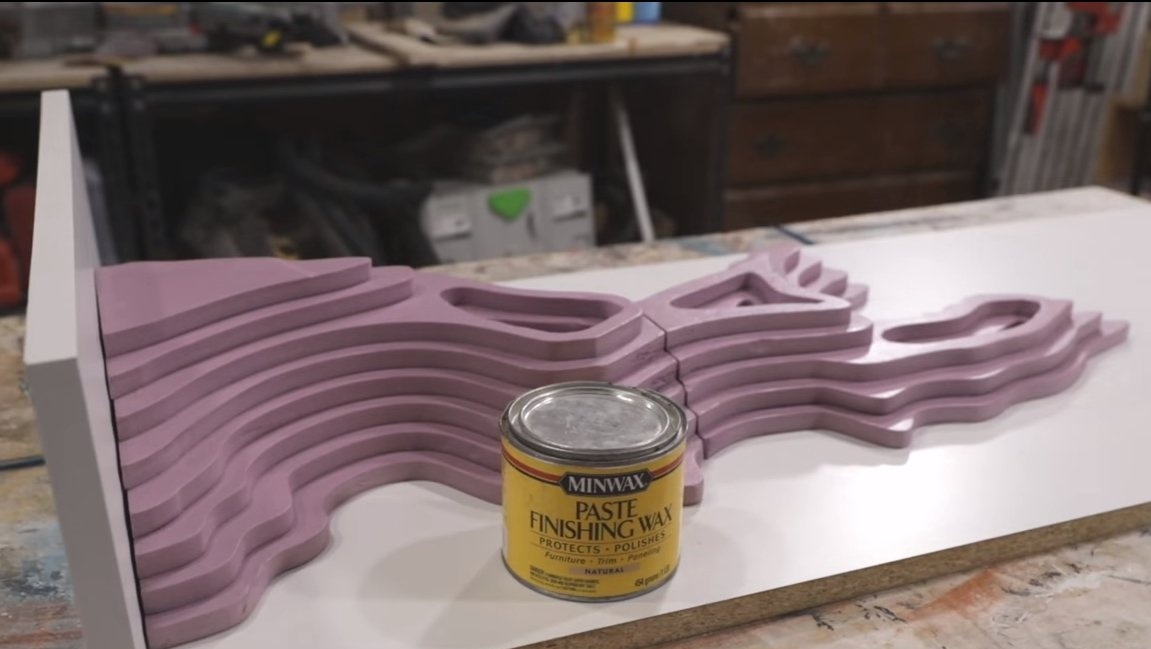
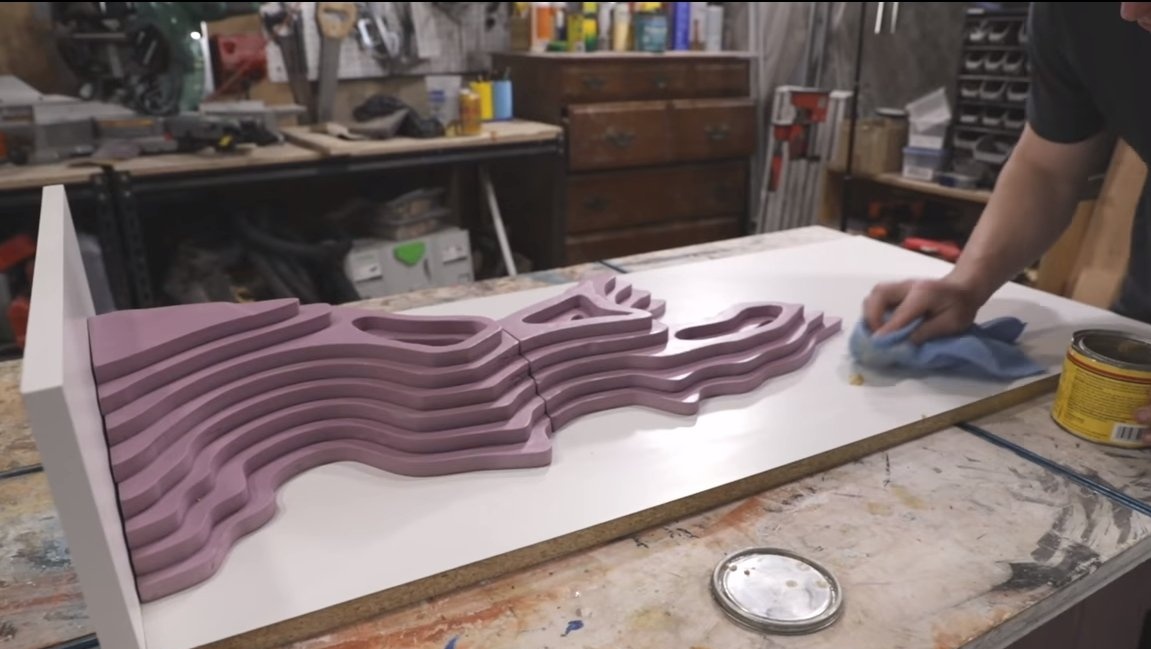
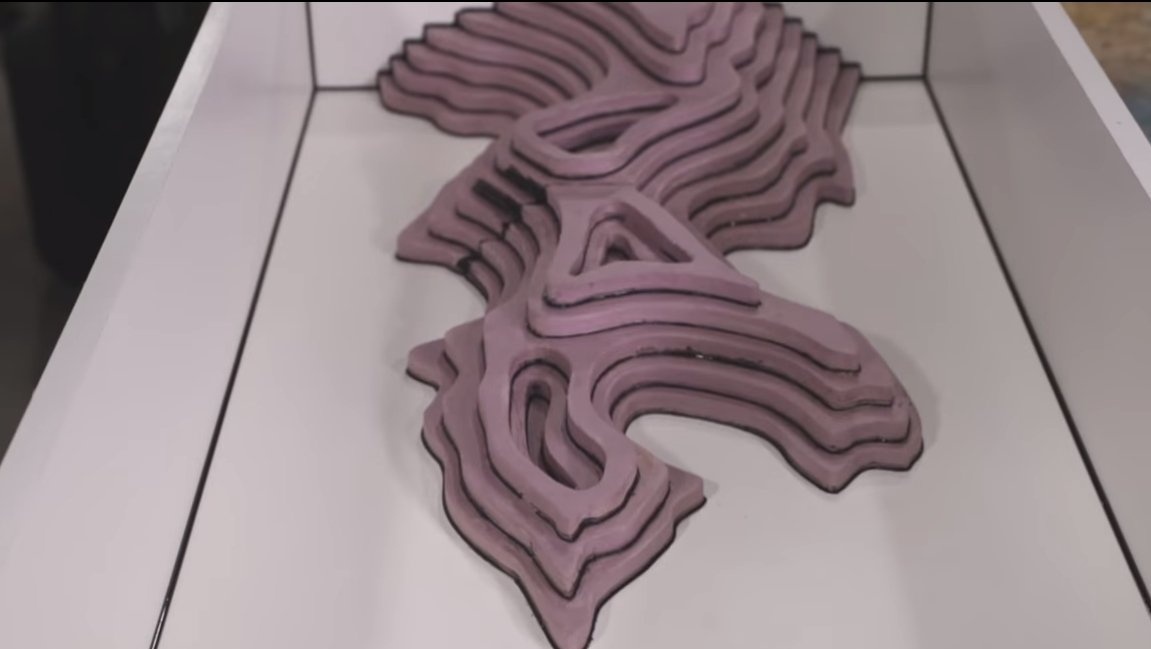
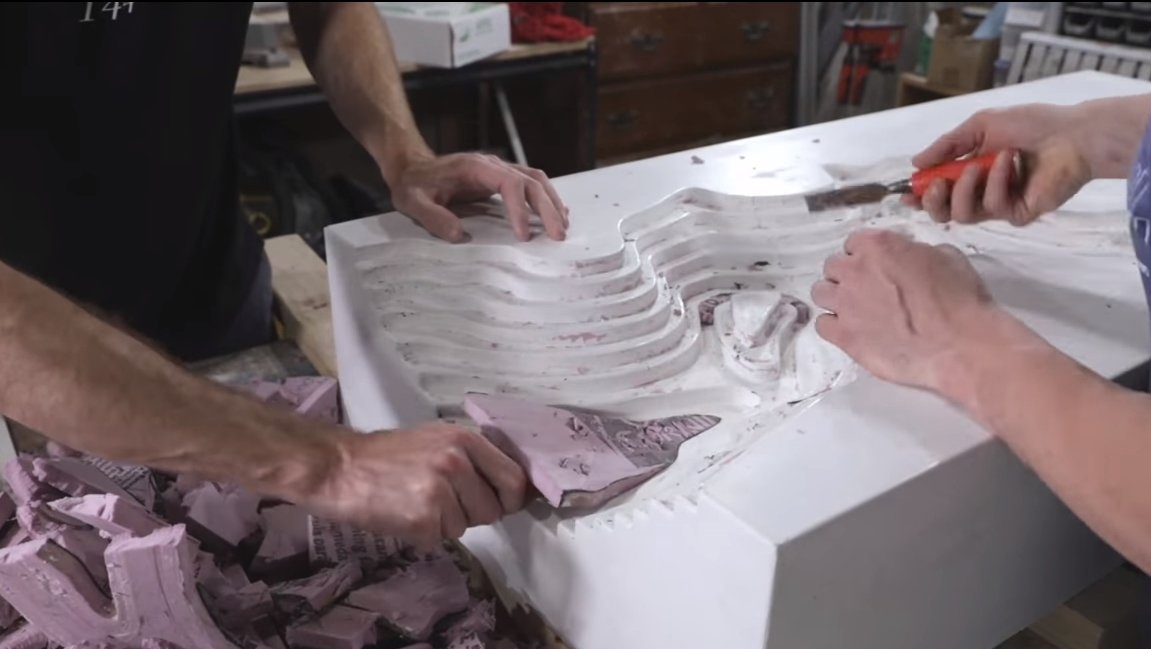
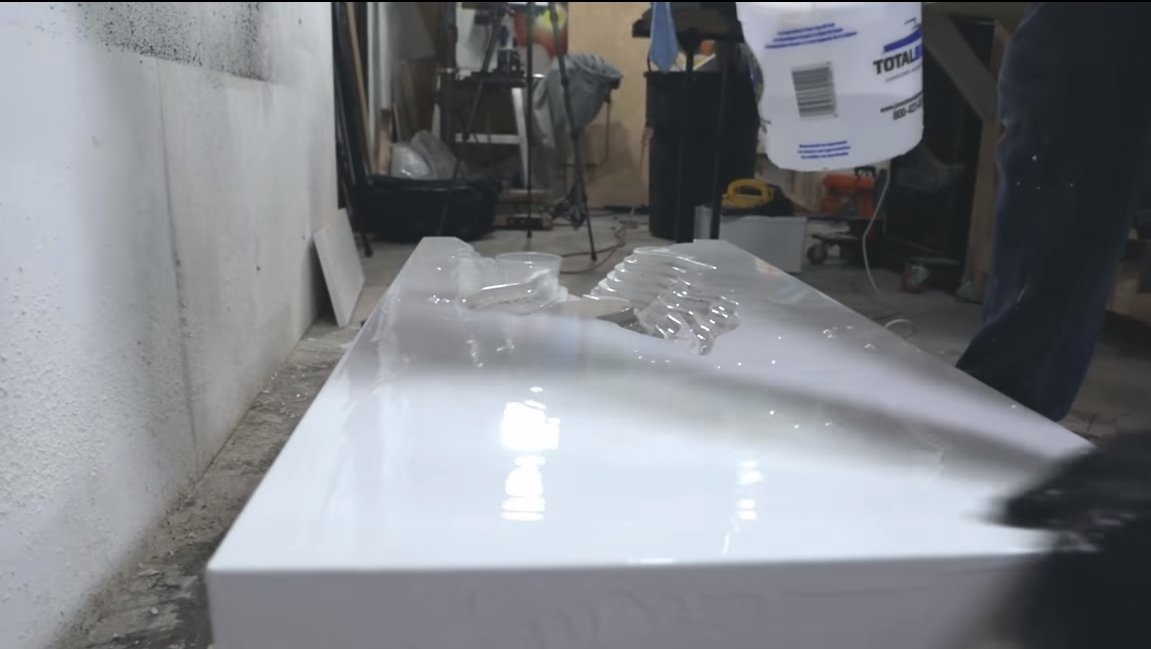
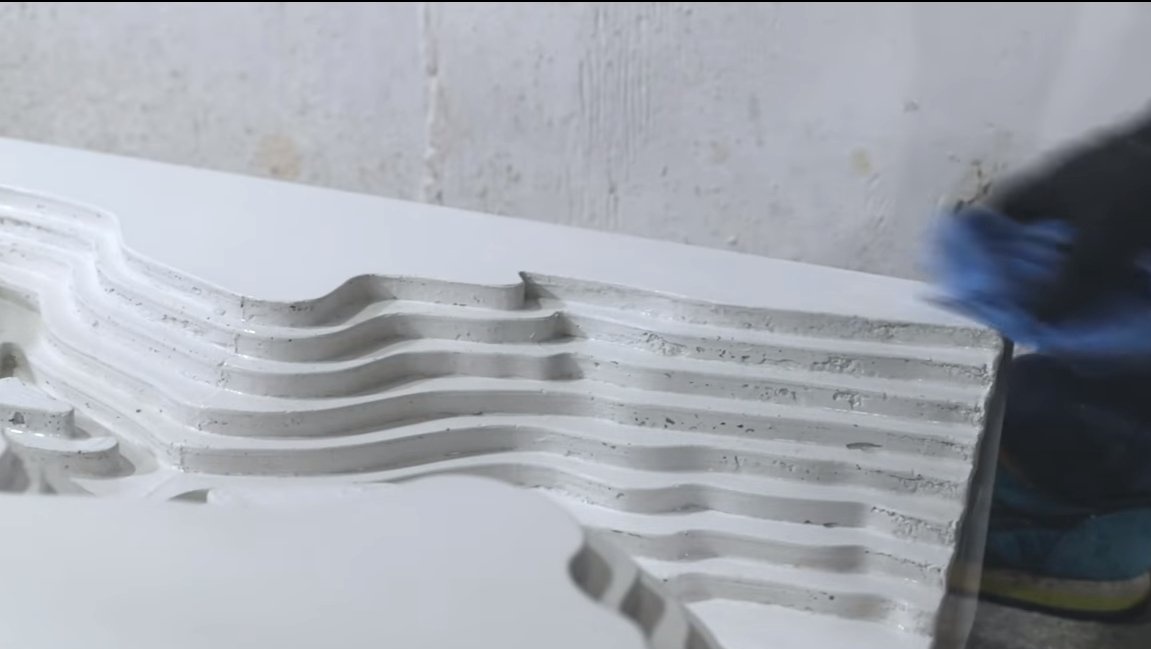
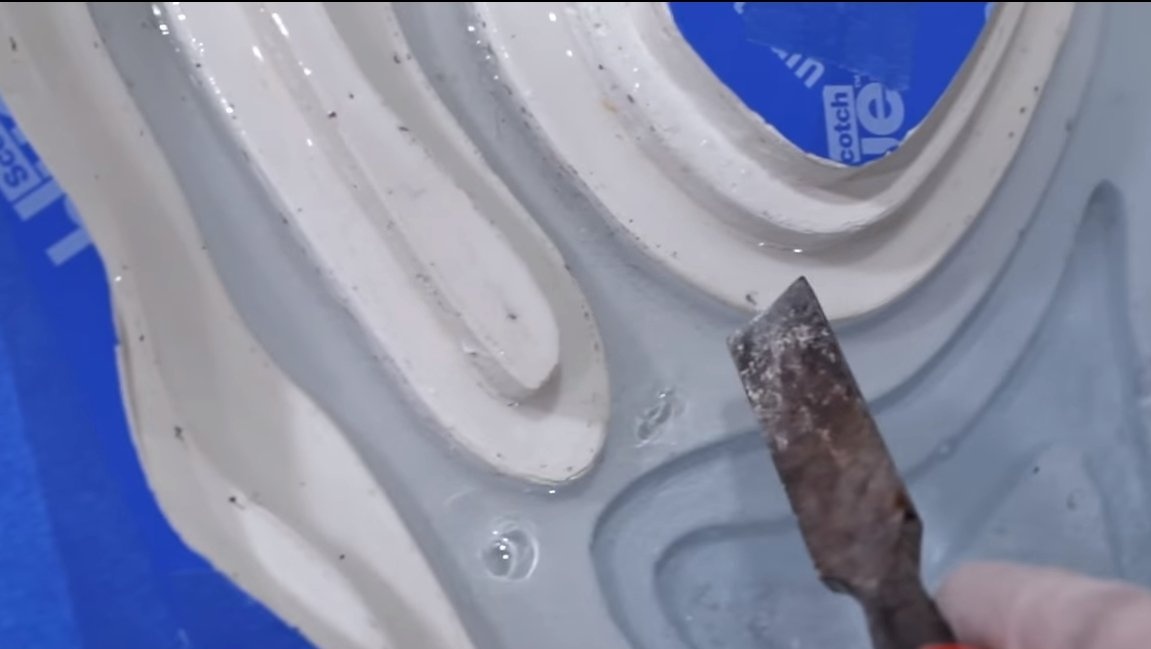
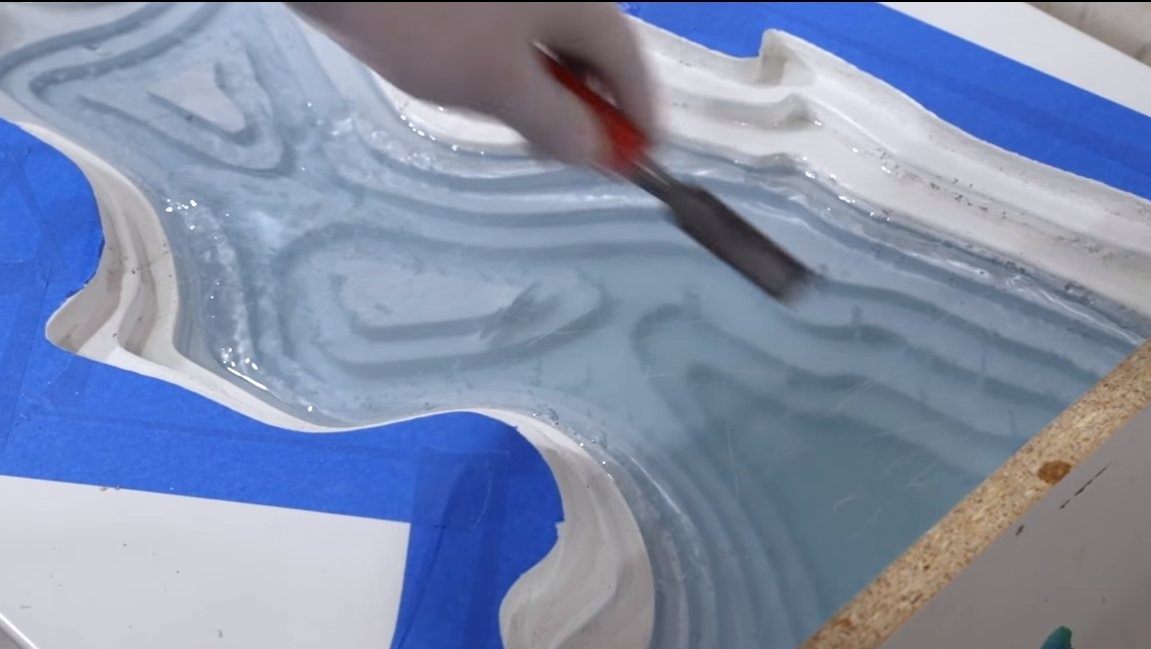
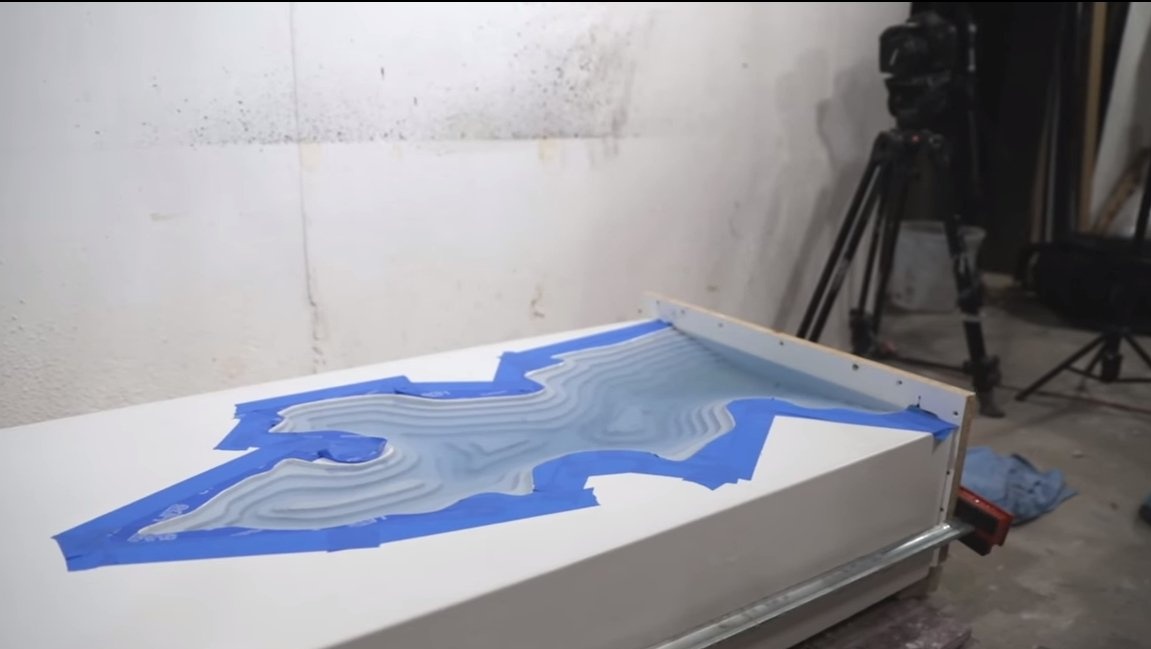
Next, you need to extract a form from concrete that will simulate the melting of a glacier. It can be broken and removed in various ways, the most important thing is not to damage the concrete. When everything is ready, we remove various casting defects, if there are sinks, they can be plastered with cement. Next, the table is carefully sanded with an orbital sander and washed. As a result, concrete looks like ceramic. At the end, the concrete can be coated with liquid glass or another coating.


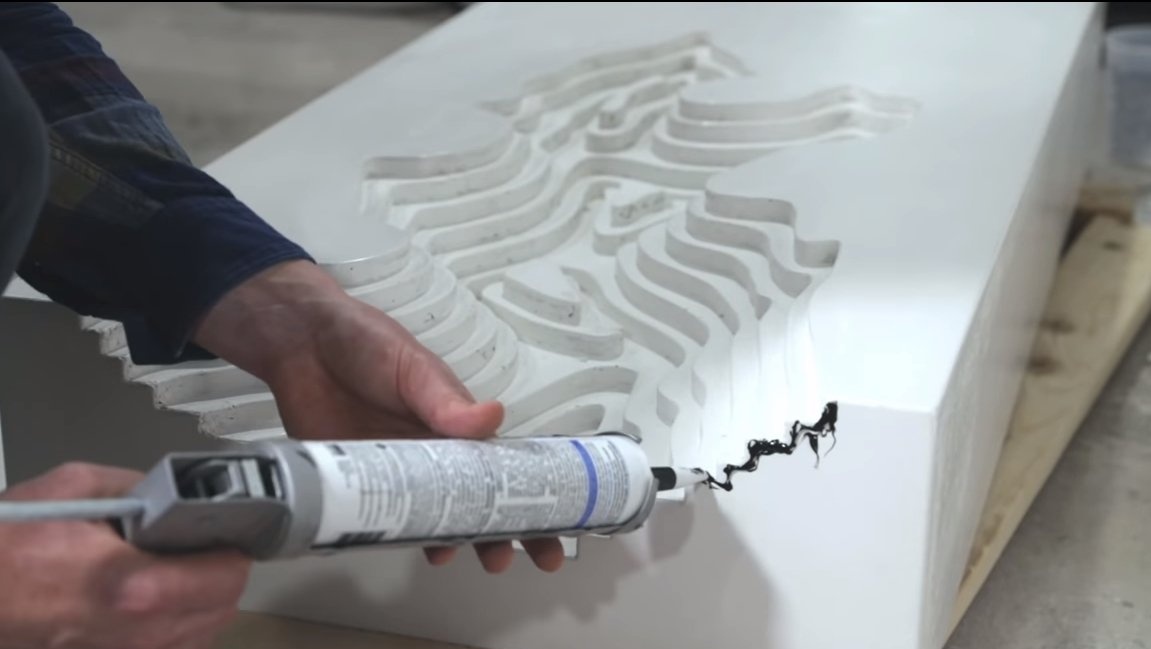
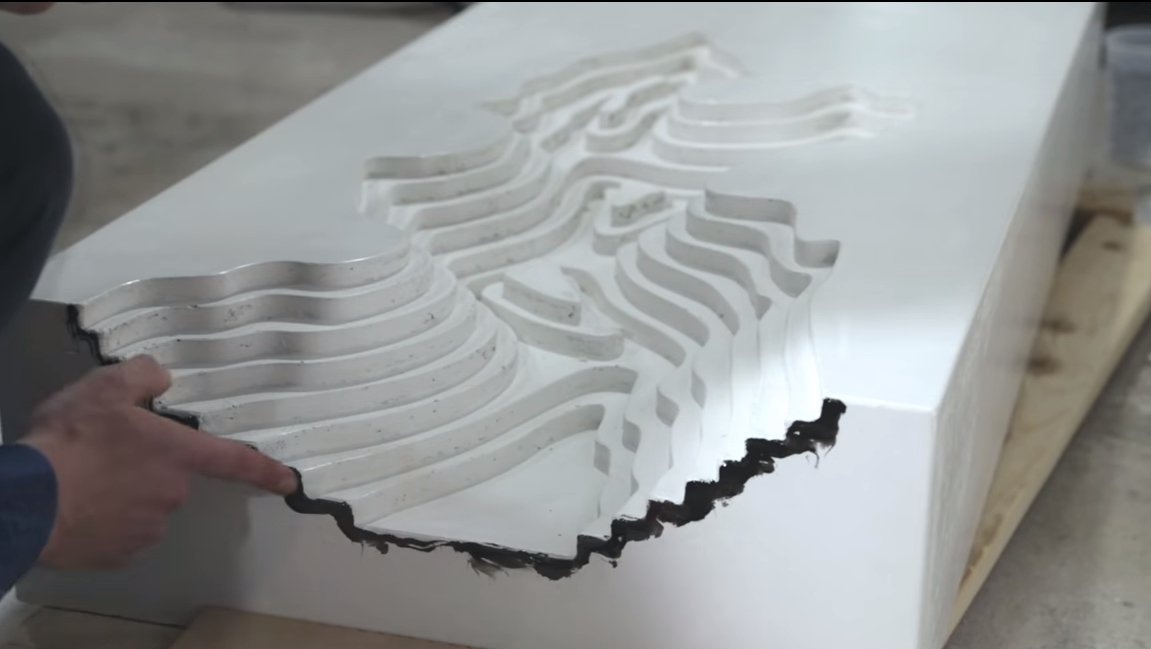

Step Four Resin filling
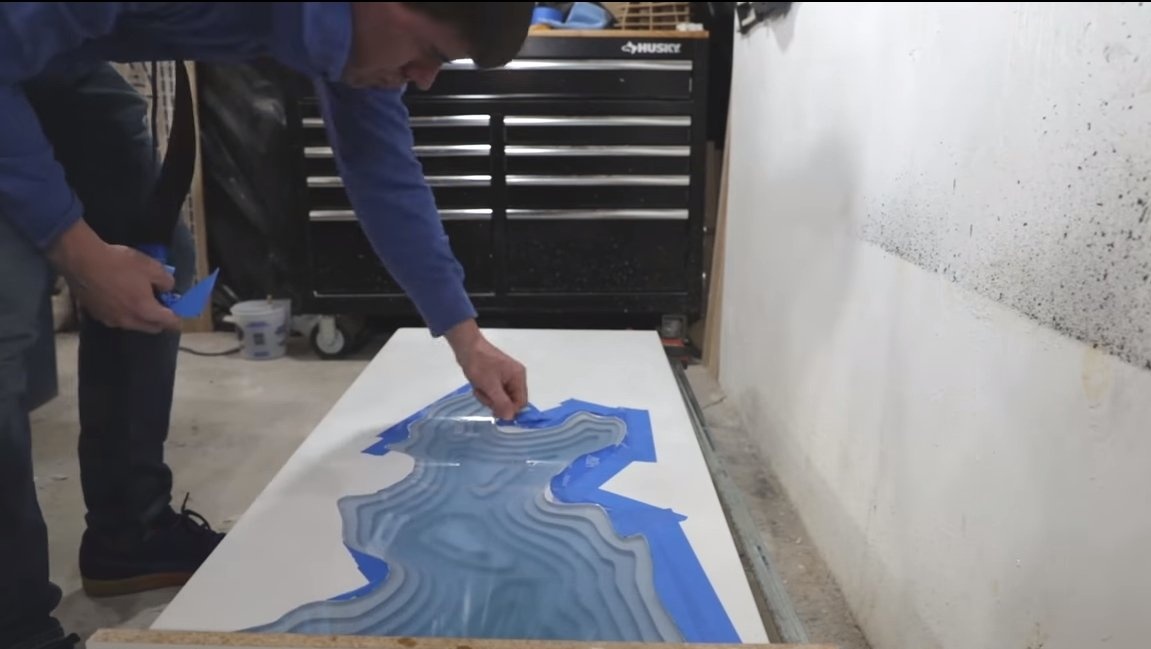
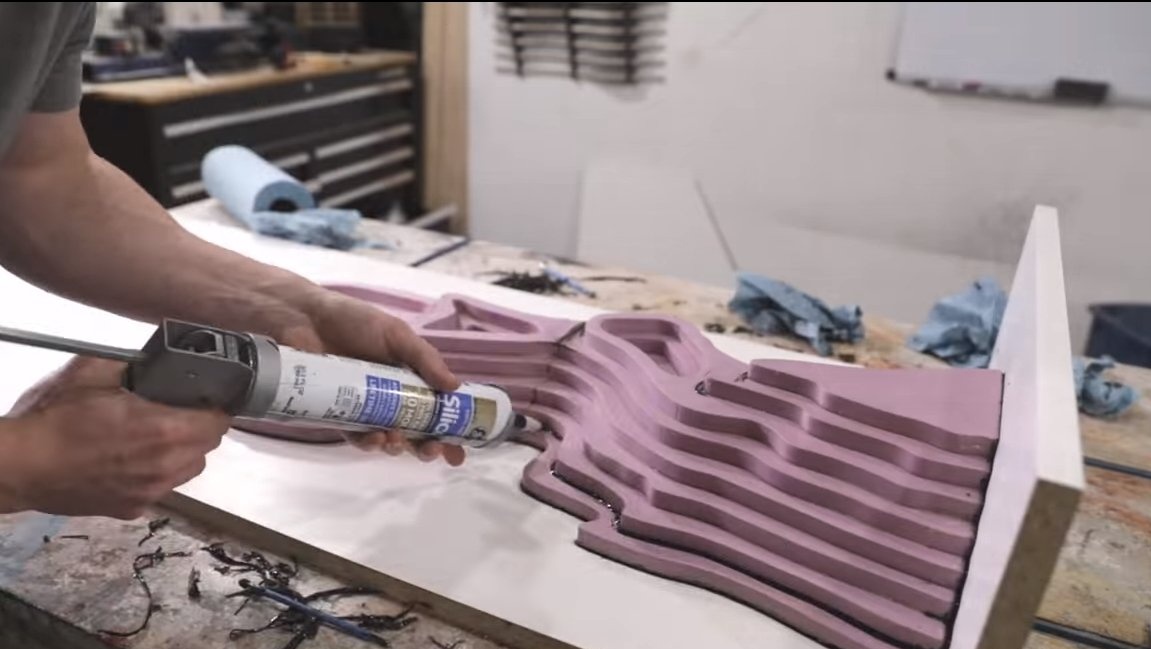
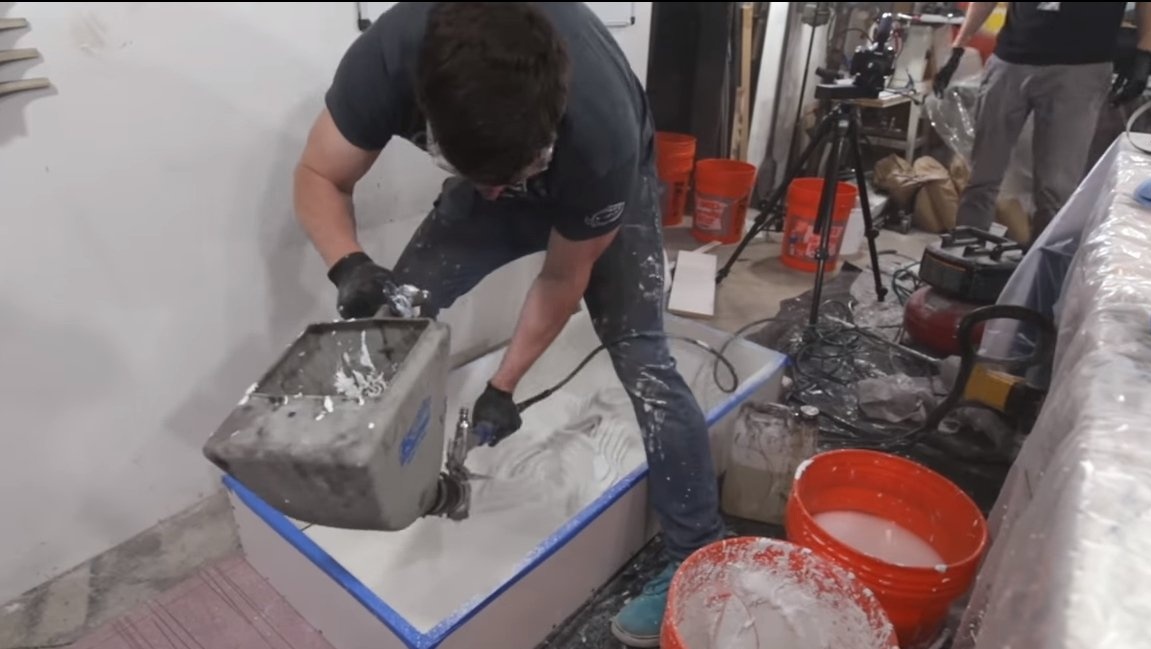
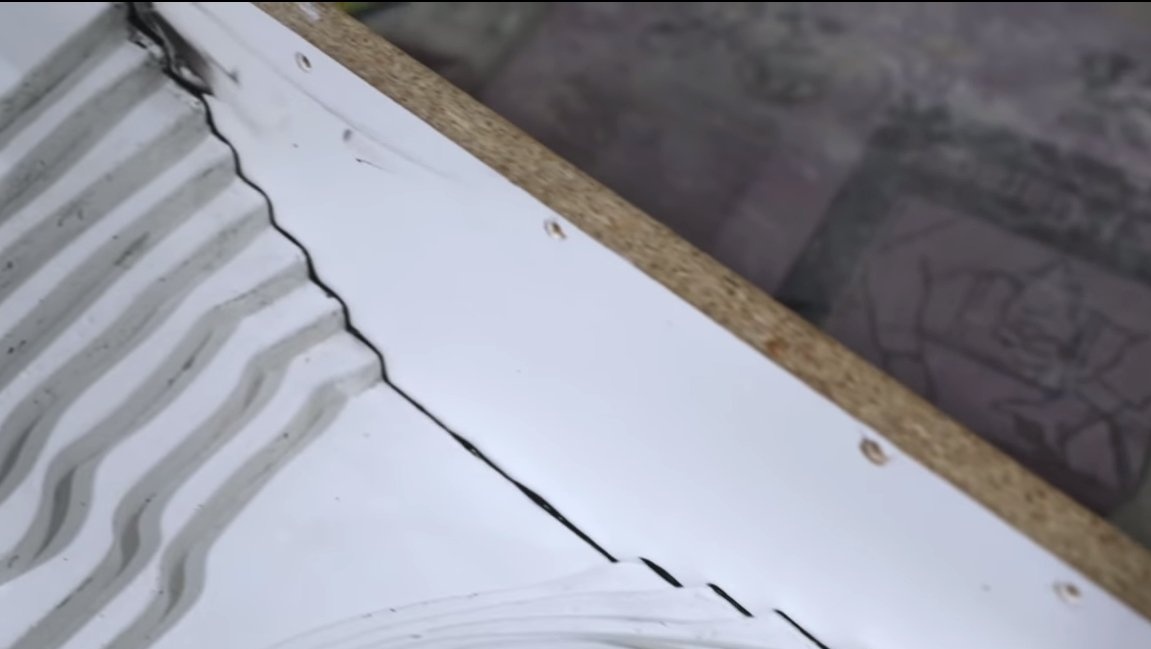
We have almost everything ready for pouring resin, it remains to attach a piece of chipboard, which acts as a formwork, we use silicone sealant for sealing. To fix the formwork, the author uses long ties.
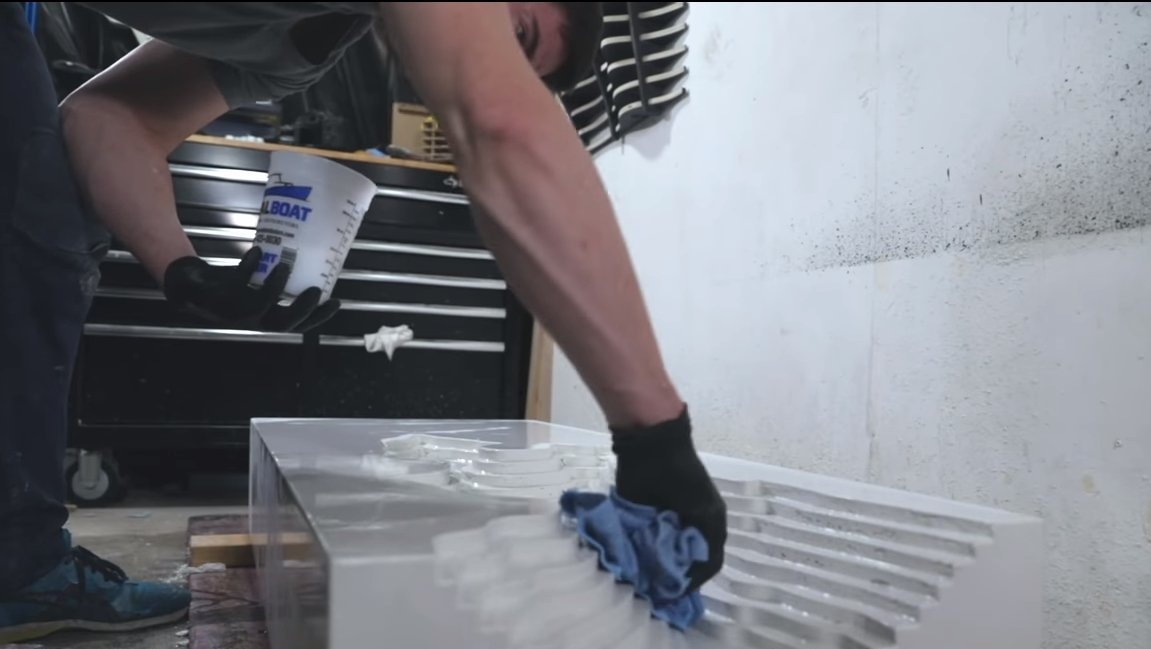
We need a special resin, transparent and which can be poured in large volumes. Add a little blue dye to the resin to simulate water.
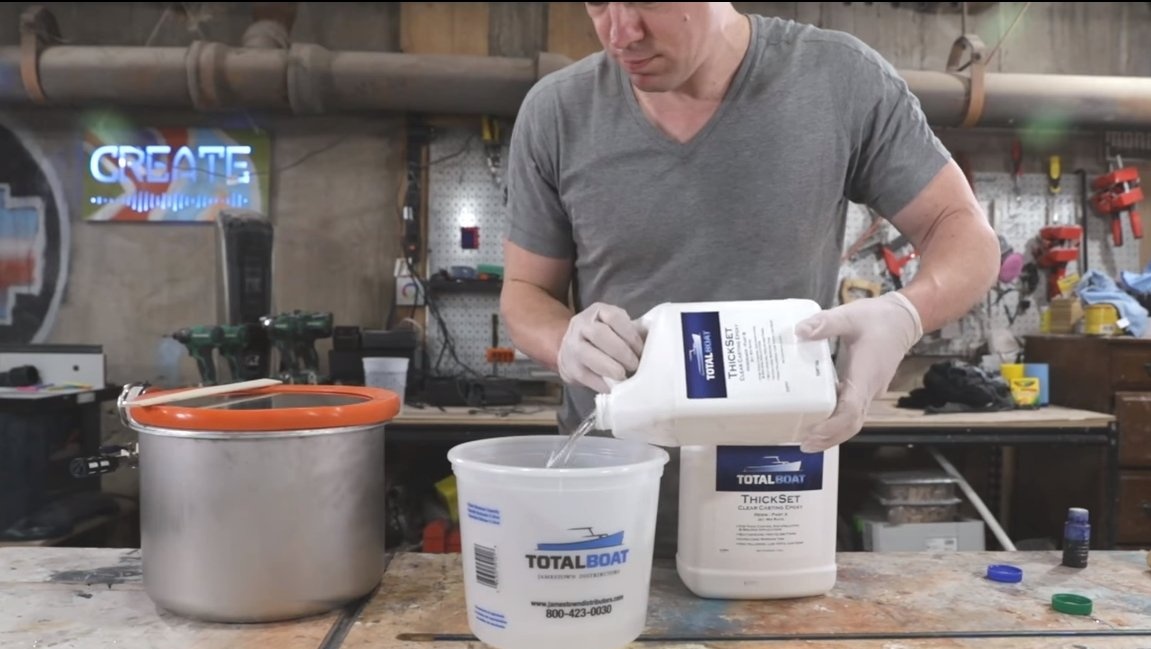
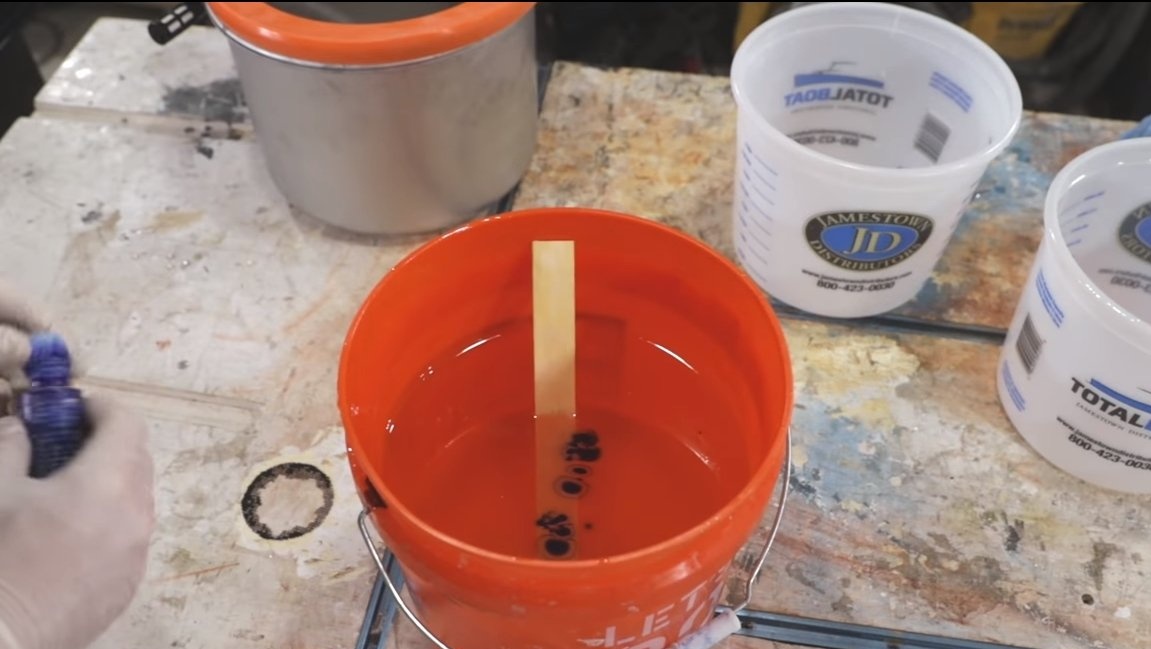
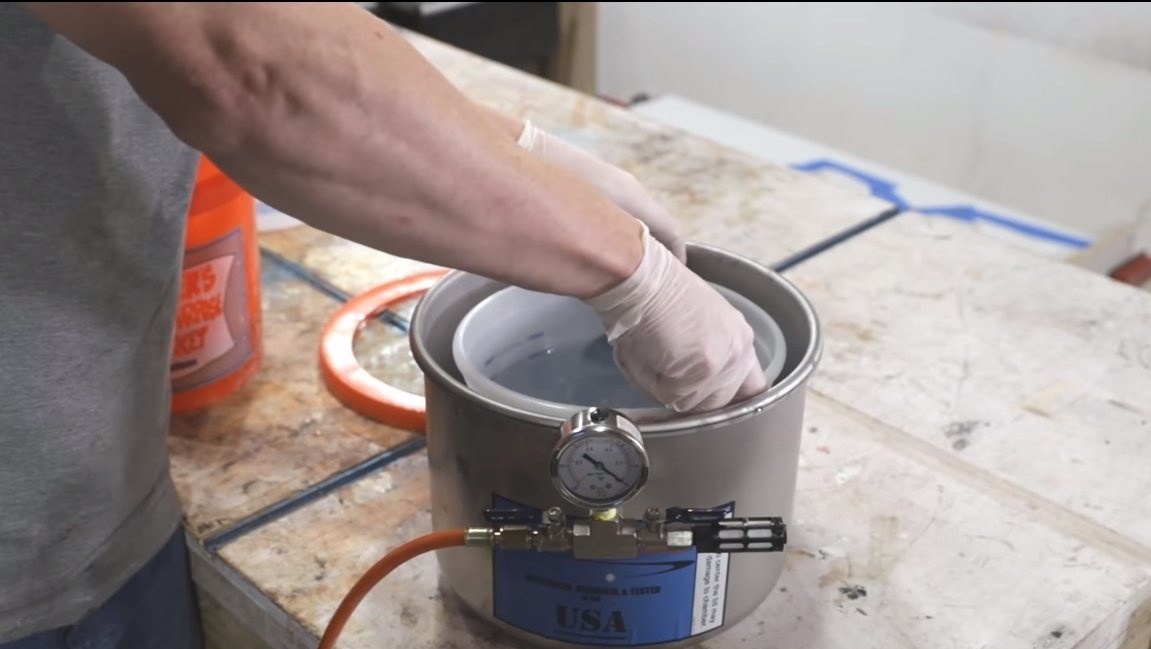
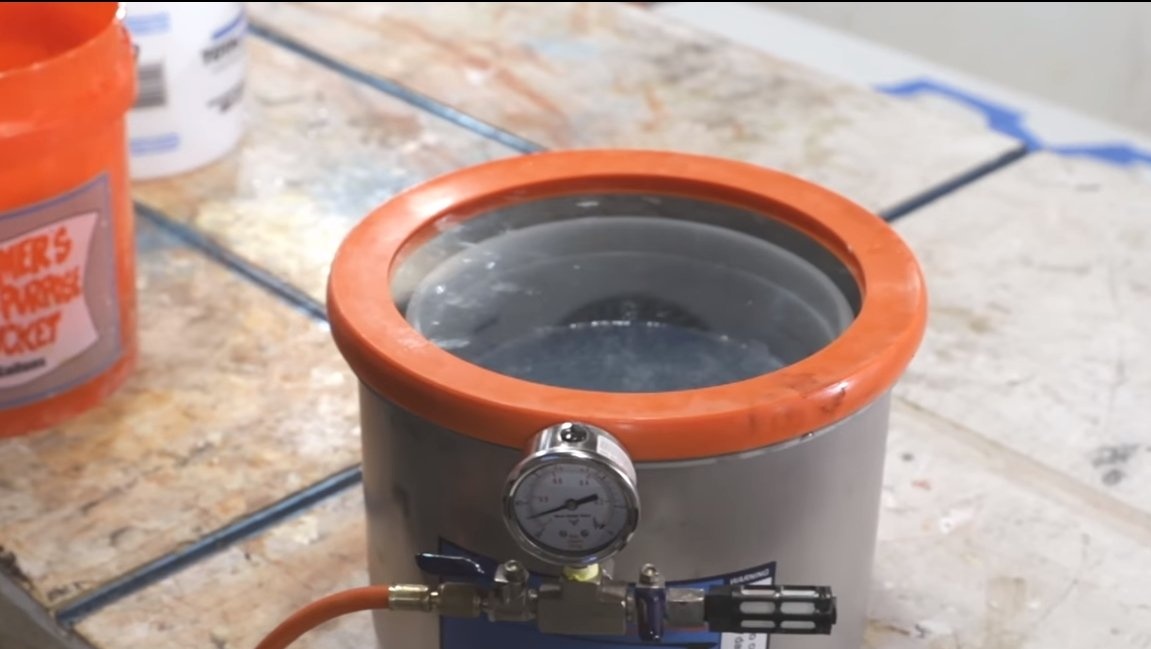
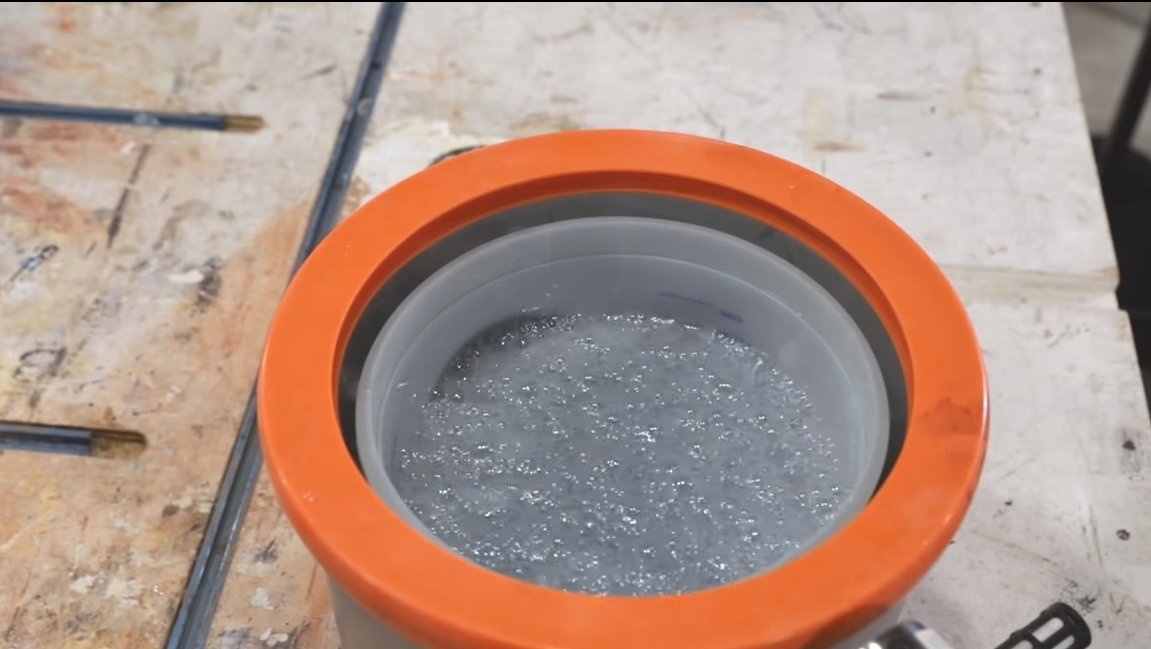
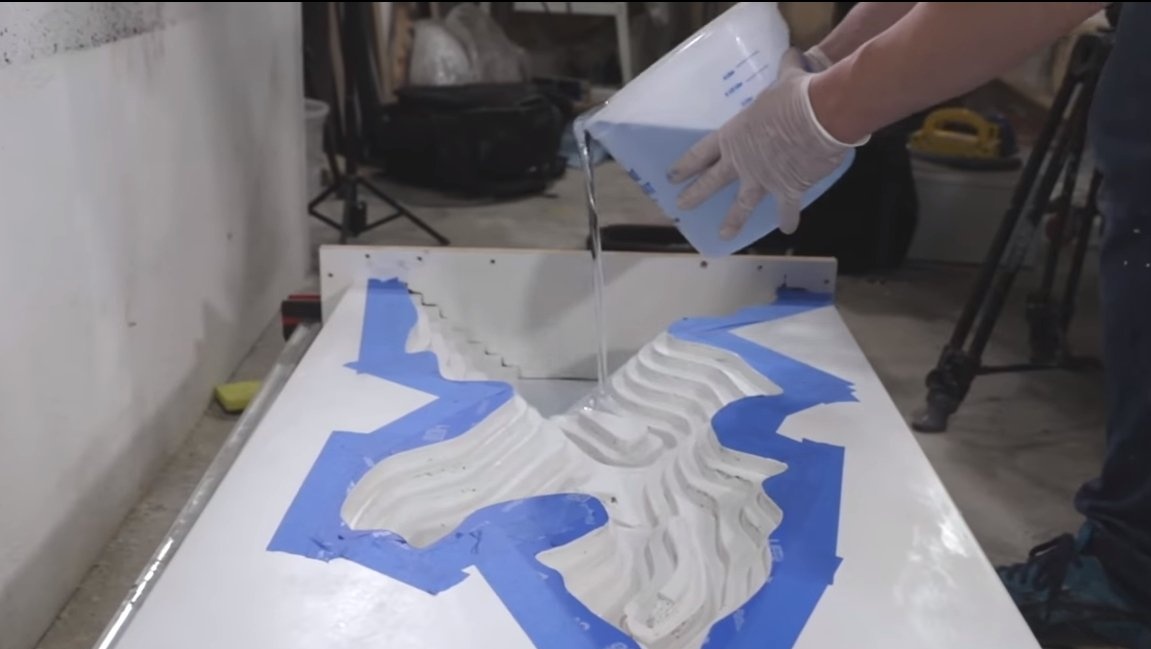
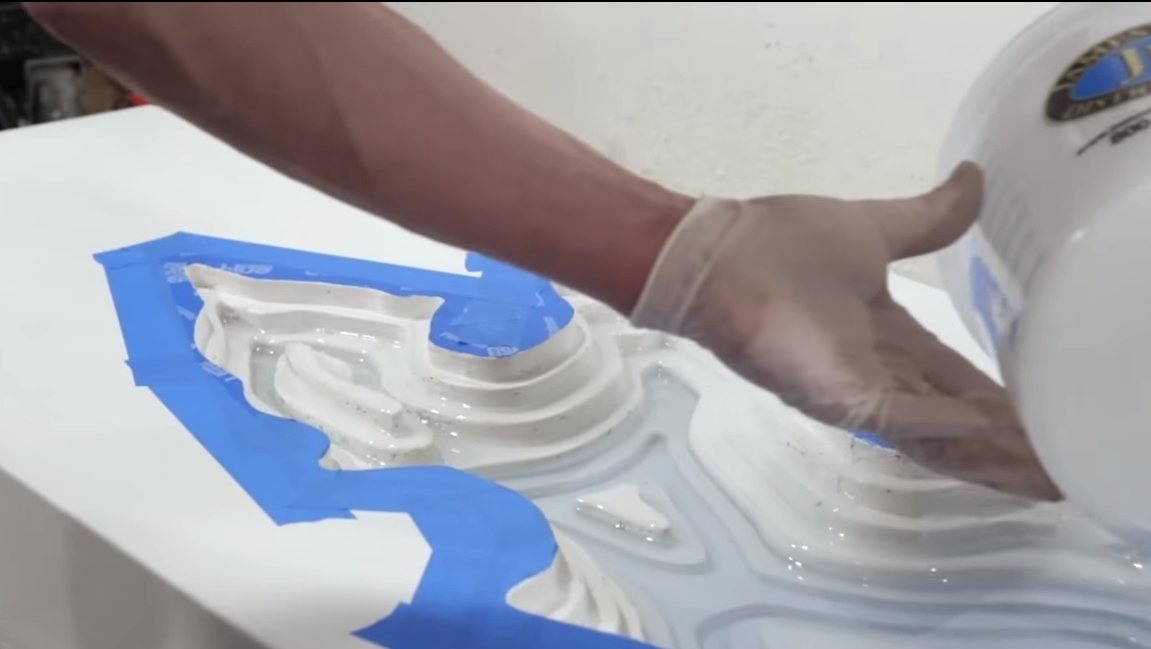
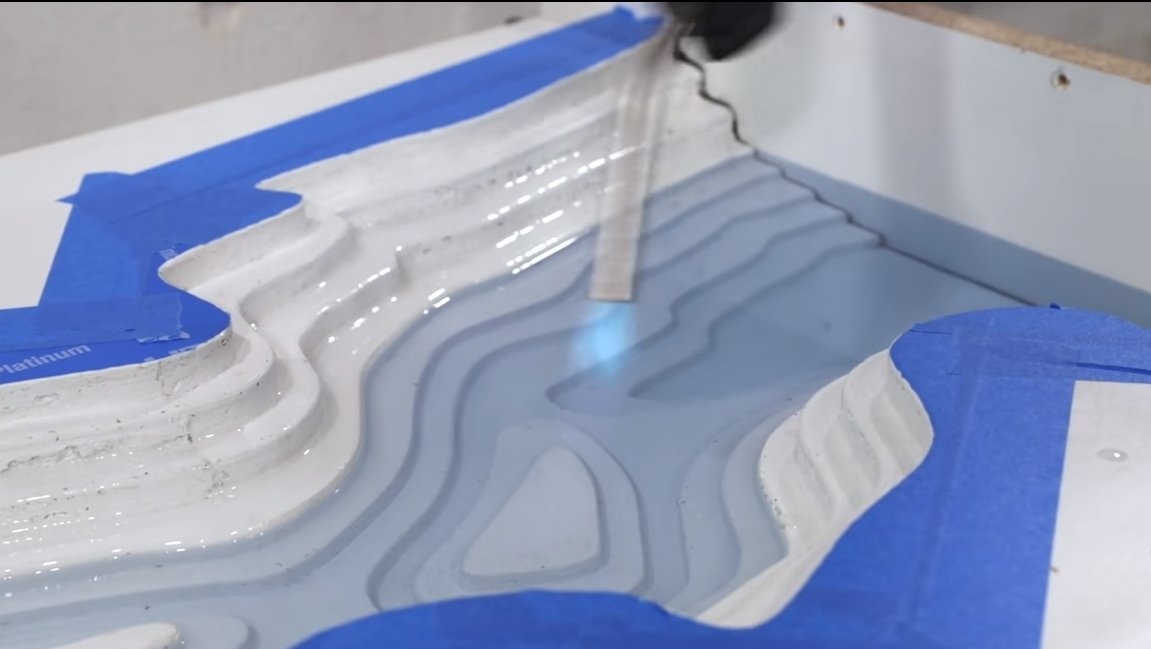
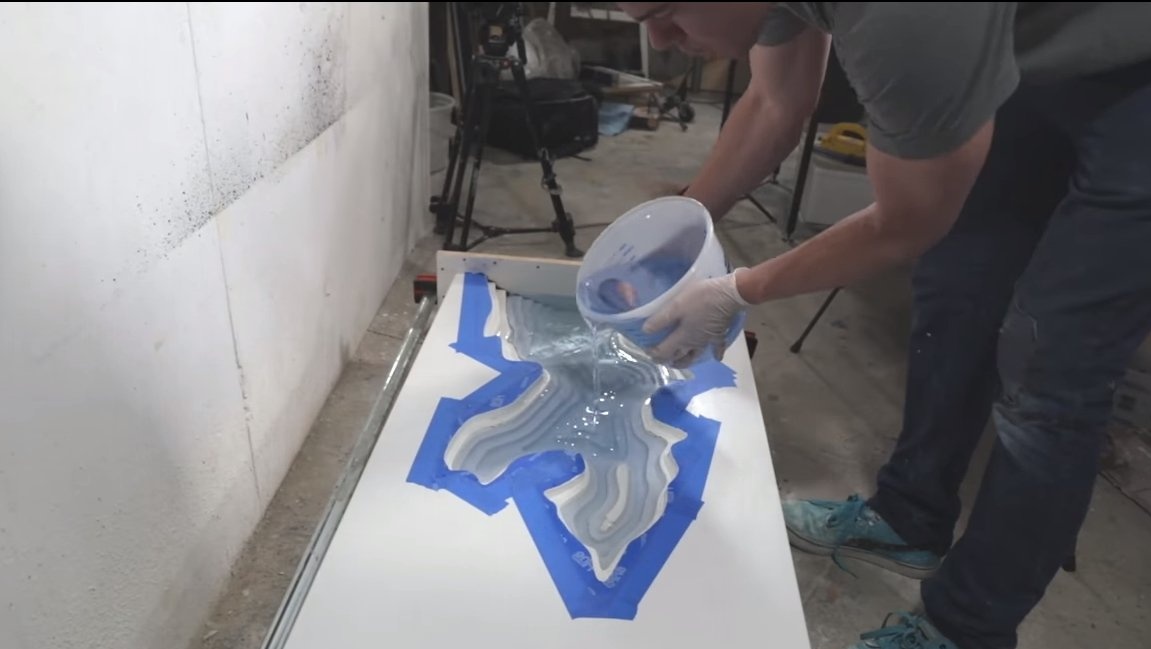
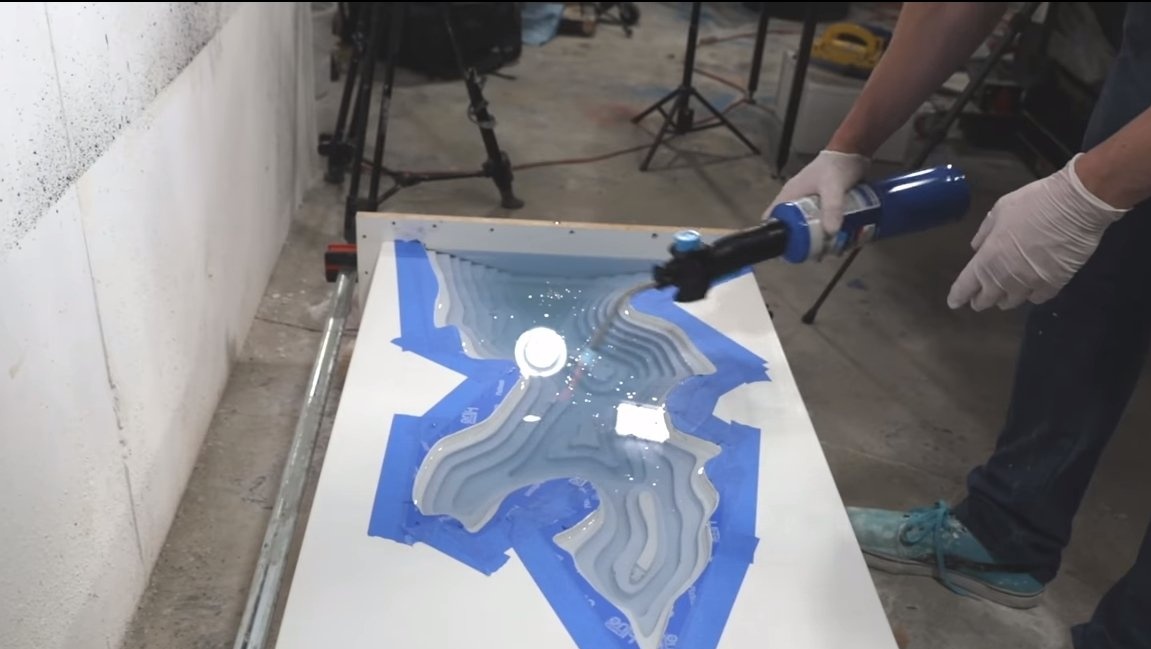
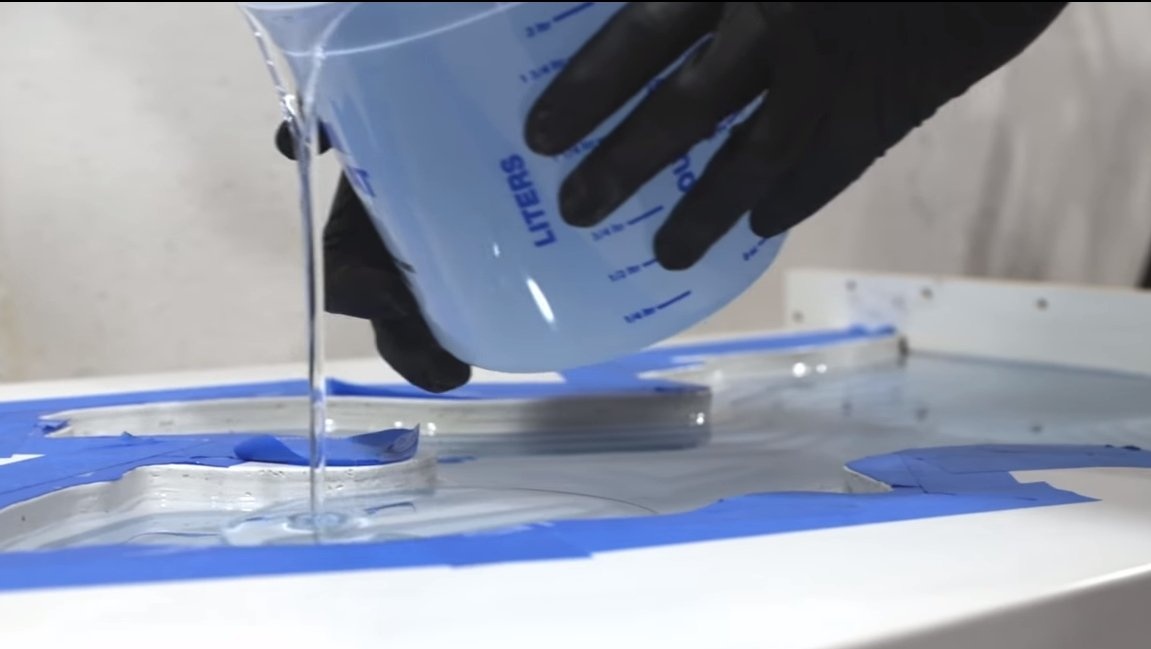
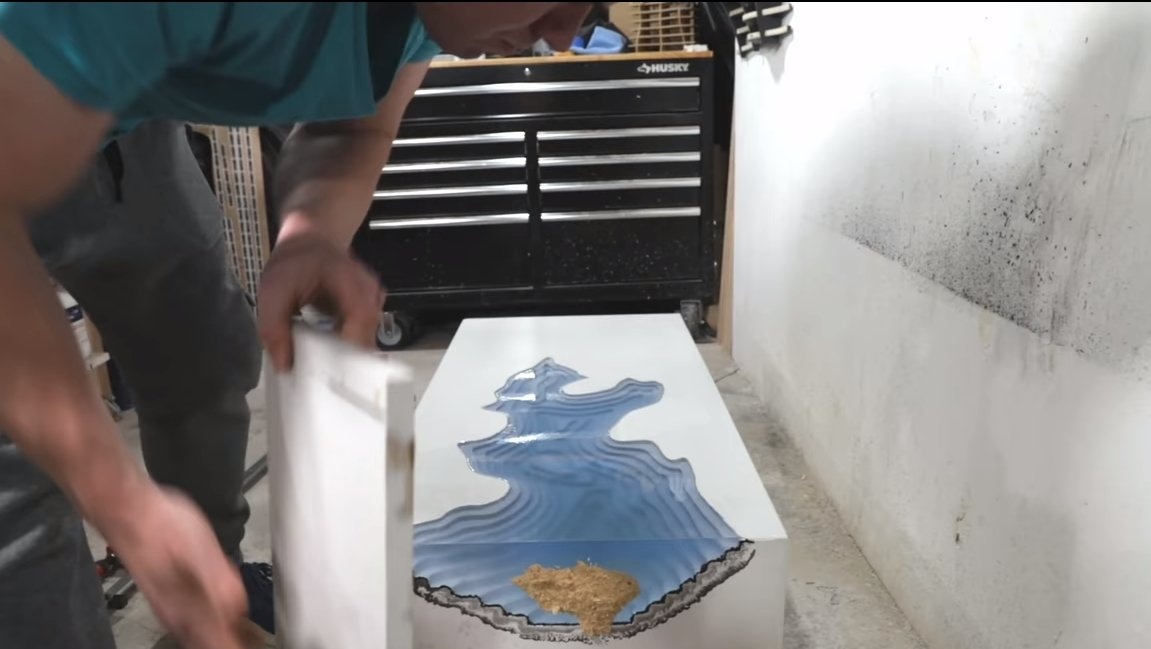
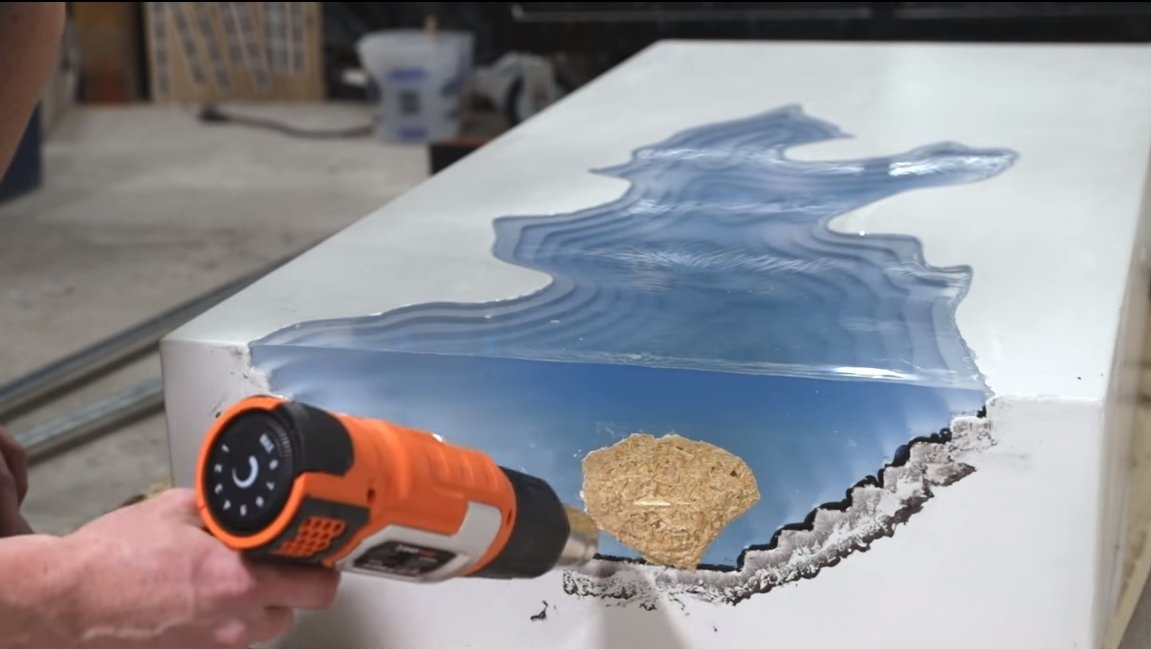
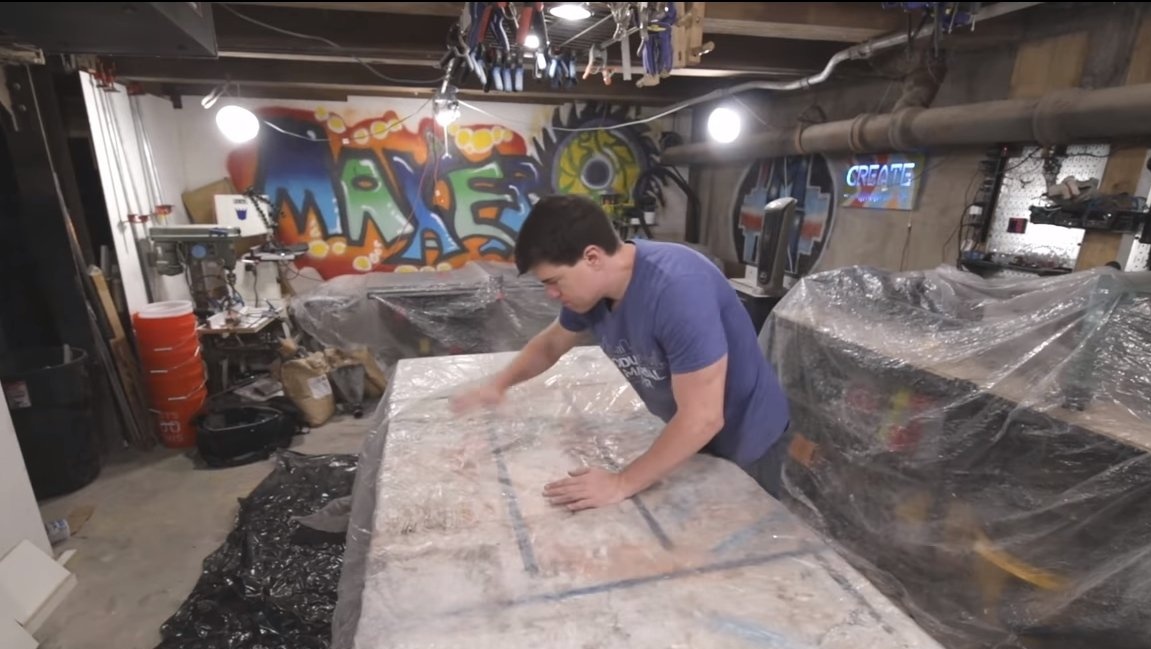
So that there are no bubbles in the resin, we need a vacuum chamber. Before pouring the resin, place it in the chamber and lower the pressure. As a result of pressure reduction, air bubbles increase in volume and float to the surface of the resin. Pour the prepared resin into the mold, pouring the entire volume at once will not work, since the resin compresses when it hardens. Fill the first layer, wait for hardening and fill the next layer. If necessary, you can fill in many layers, and the upper layers can already be filled without dye.
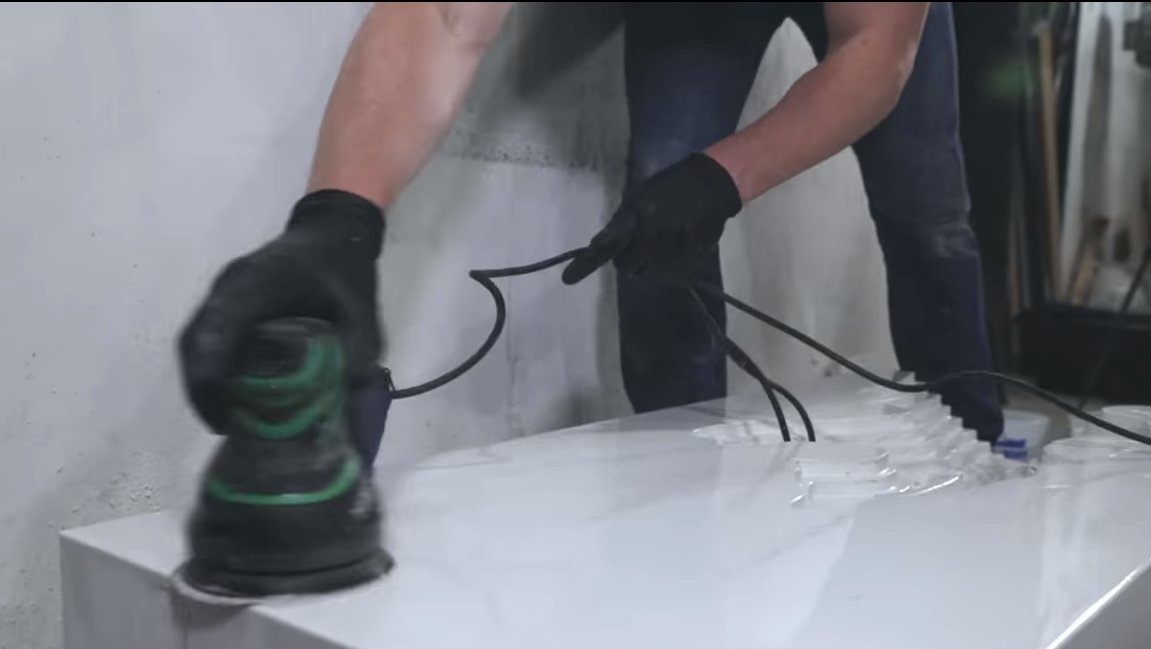
Step Five Final processing
At the end, remove the formwork and polish the table with an orbital machine. As a coating, you can cover everything with epoxy resin, in the end everything looks amazing. Under the table, it remains to make a stand out of plywood, if desired, shelves for books can be made in the stand.
The table looks great, it weighs relatively little, despite the fact that it is made of concrete and a considerable amount of epoxy, and all because its interior is hollow.
This is the end of the project, I hope you enjoyed it and you found useful information for yourself!