In this article, we, together with the master, will consider a method of manufacturing a crucible for a microwave oven.
A microwave crucible is a crucible that you can put in your regular microwave. For heating, a wired heating element or gas is not used. The crucible is coated with silicon carbide and silicon carbide absorbs microwaves and turns them into heat. The master will use the crucible to melt the glass. You can make various decorations from molten glass.
In a microwave oven, the master also melts the wax, makes casting molds and melts metals, but this is a slightly different technology and the master promises to tell about it in subsequent articles.
Tools and materials:
Sodium silicate (water glass);
-Silicon carbide;
- Blanket made of ceramic fiber;
-Gypsum;
-Burner;
-Sugrue (self-hardening plastic);
-Microwave;
-Plastic;
-Insulating tape;
-Marker;
-Libra;
-Bubble with cap for spraying liquid;
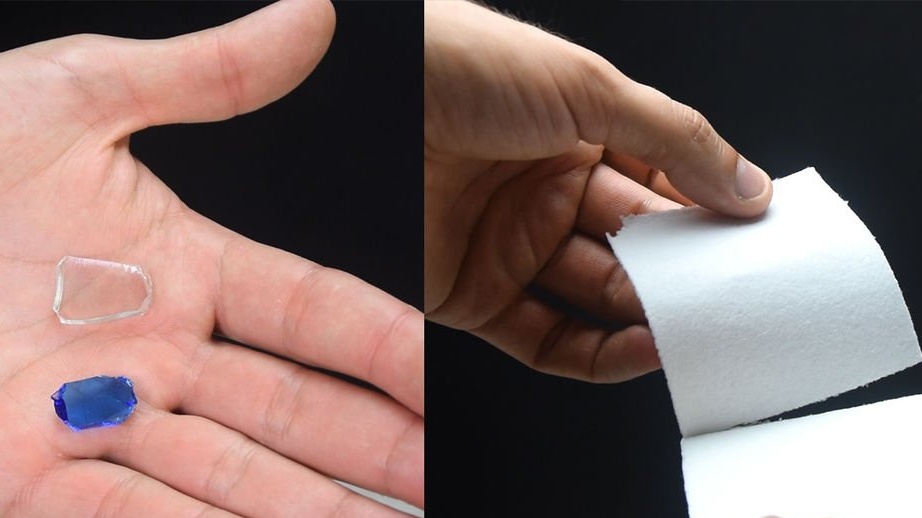
-Glass;
-Knife;
-Yardstick;
-Office gum;
-Dye;
-Various capacities;
- brush;
-Film packaging;
-Scissors;
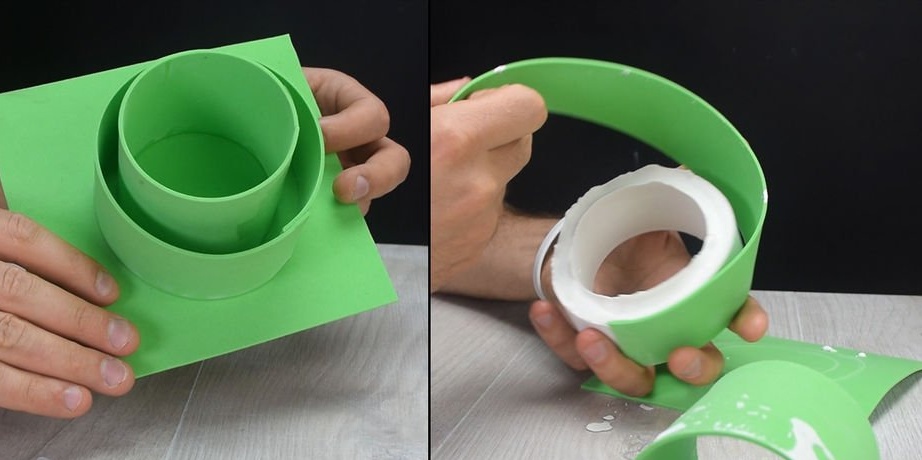
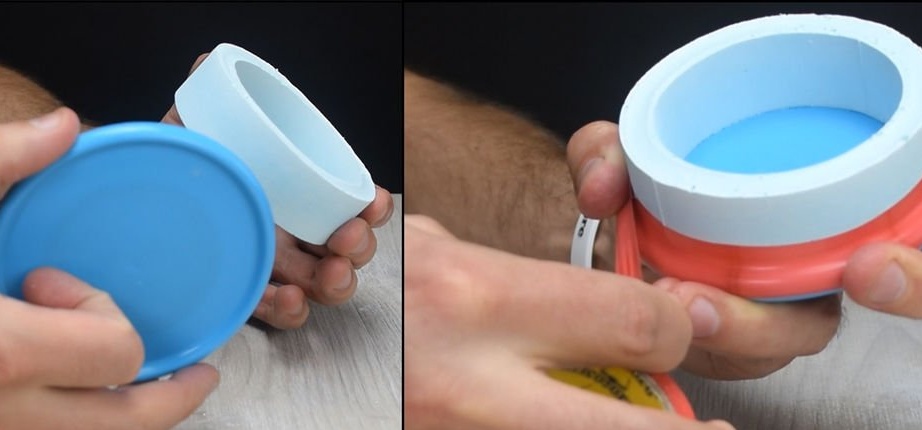
Step One: Making a Plaster Ring
To make a ring of gypsum, you can use strips of plastic or print the form on 3D printeras the master did. The master attaches two plastic rings to the plastic base. Then mix the plaster with water and fill the mold. There are several ways to dry gypsum. You can leave it to dry naturally, preheat in the oven (carefully with plastic), or dry in the microwave. The master dries the microwave workpiece. Withstands the workpiece for about an hour. He puts a napkin on a glass dish, a form on a napkin. At medium power, it takes about 10 minutes to dry. With such drying, the gypsum ring is not completely durable, but this is exactly what you need.
Step Two: Making Silicon Carbide Rings
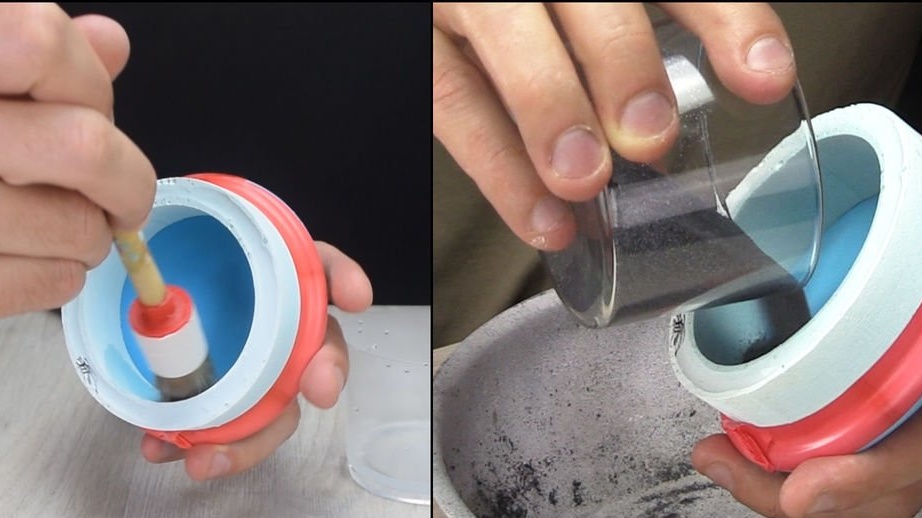
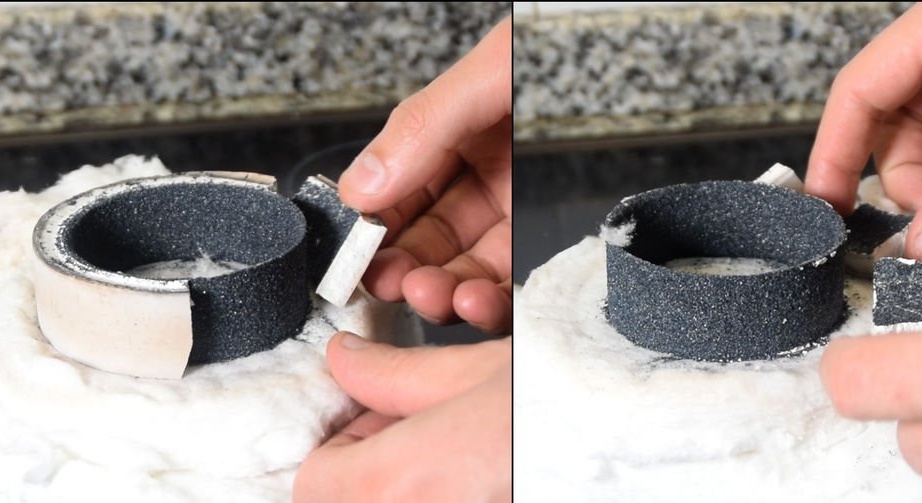
A gypsum ring is needed to make a silicon carbide ring. The craftsman places the gypsum ring on a plastic base and secures it with electrical tape.
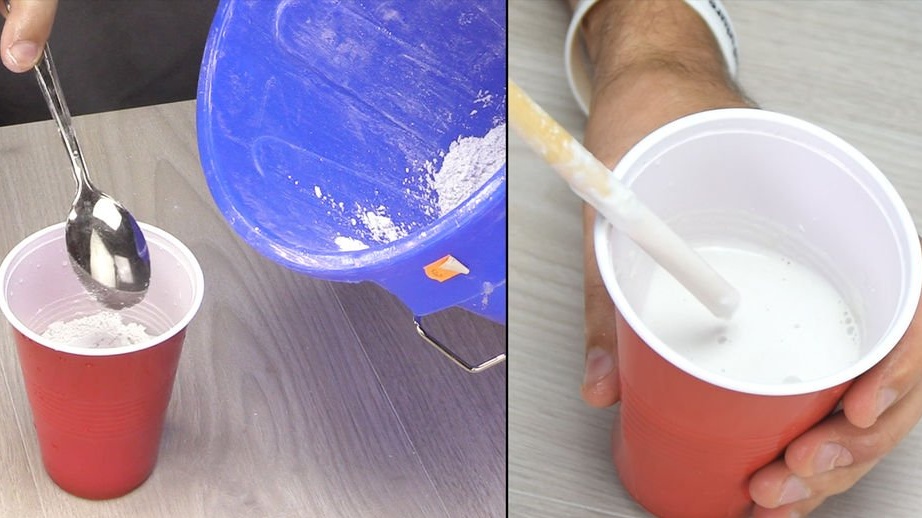
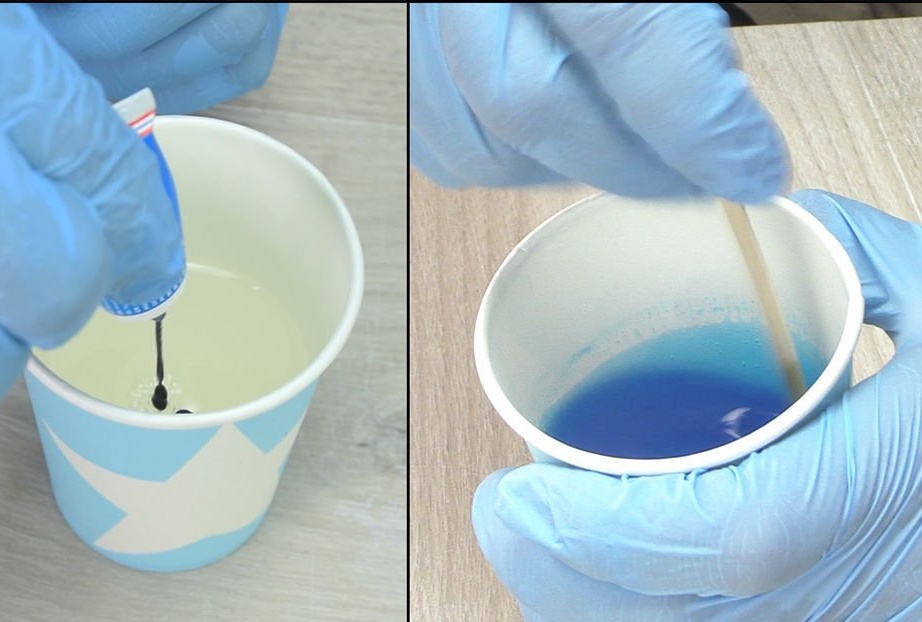
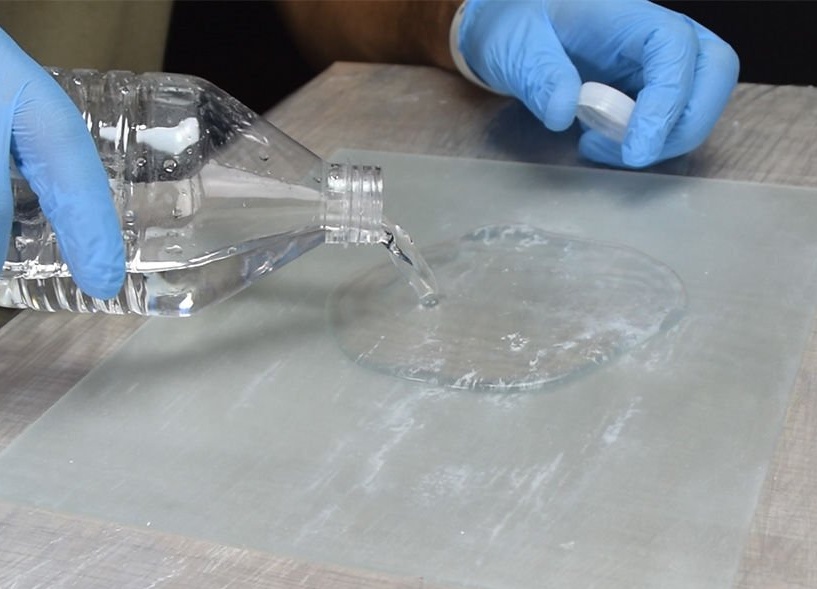
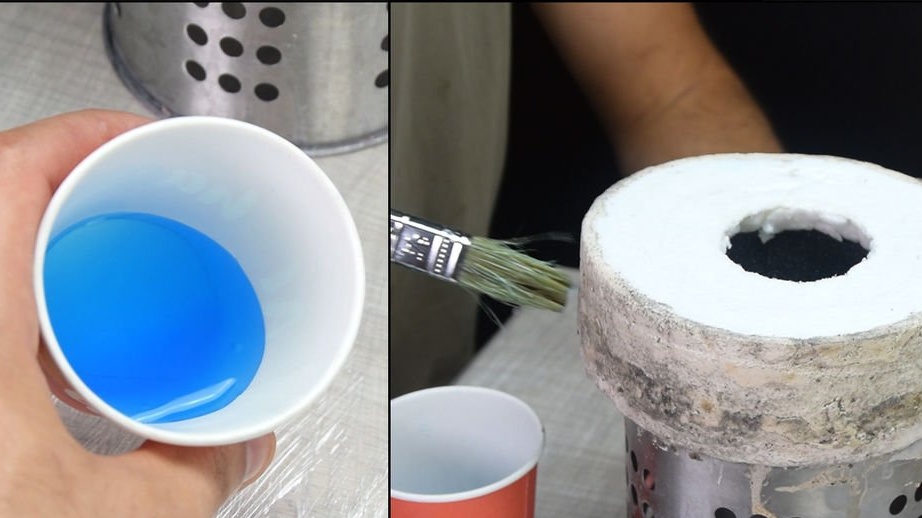
Now you need to prepare a solution with liquid glass. In the photo you can see the cured liquid glass with the addition of dye.
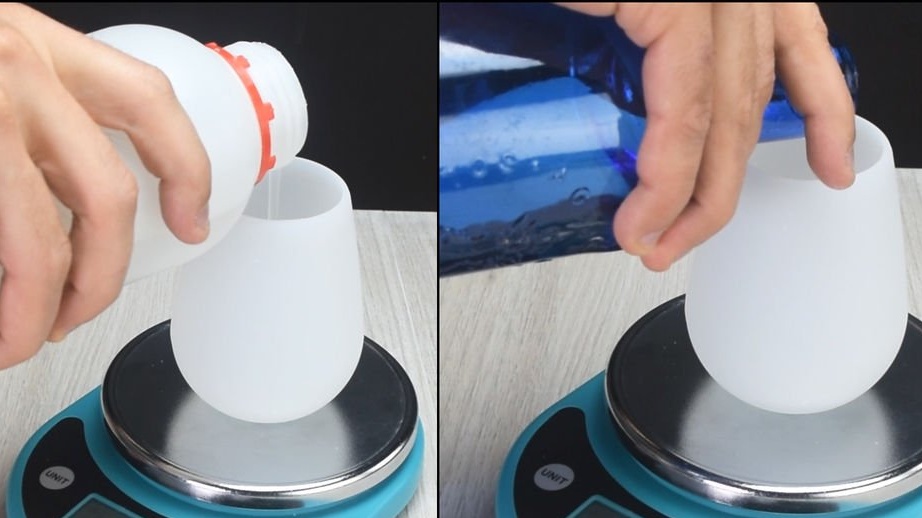
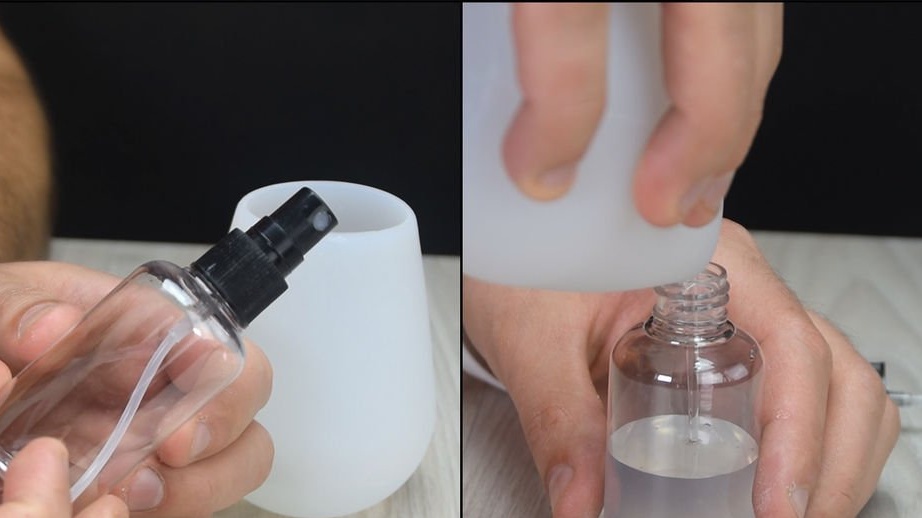
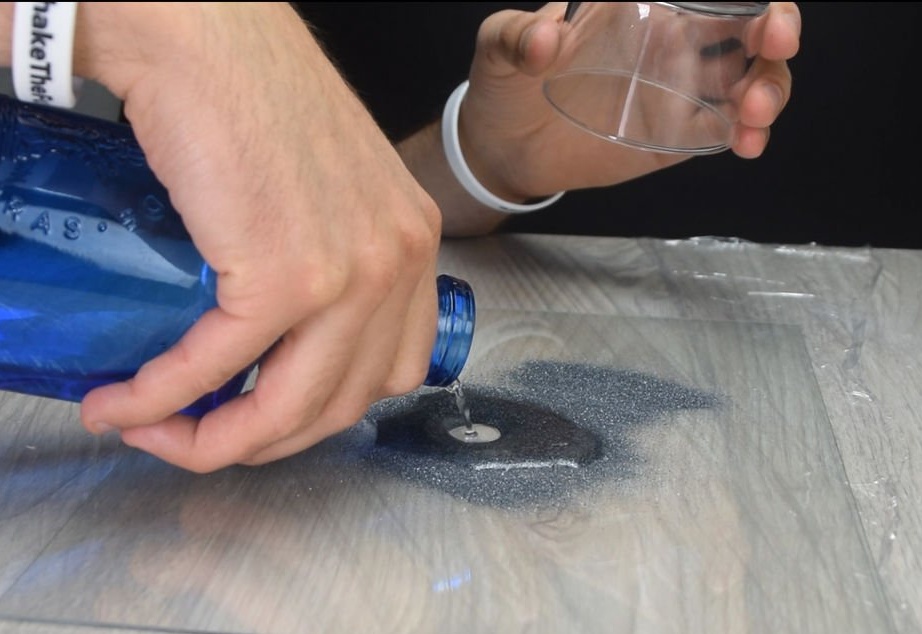
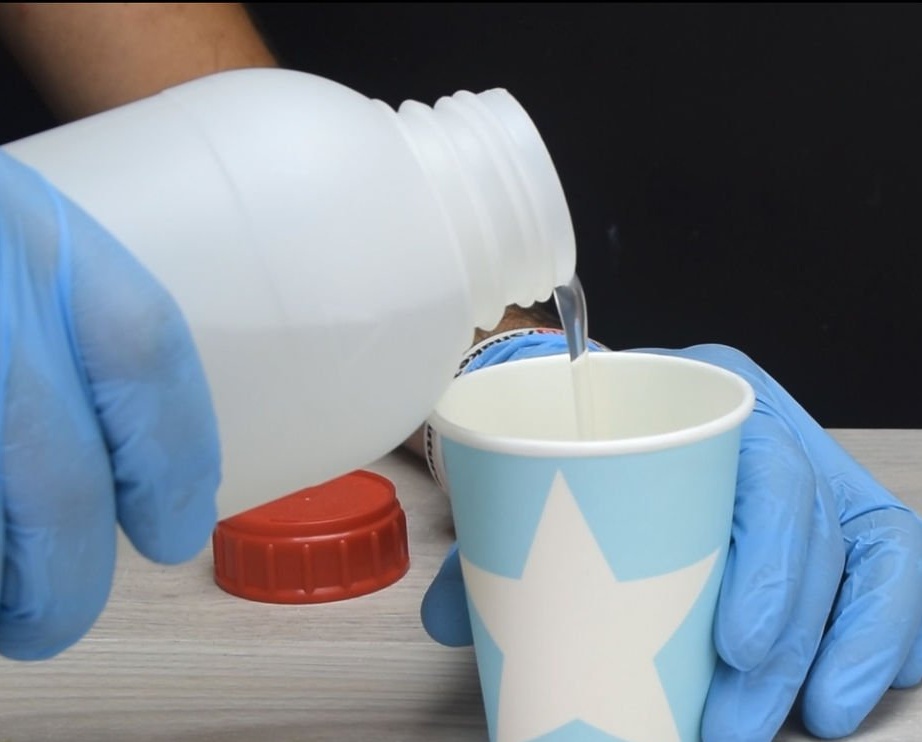
To make a silicon ring, liquid glass is needed in liquid form. The master dilutes the liquid glass with water 1: 2, i.e. for 1 part sodium silicate, you need to take two parts of water, and pour it into a vial with a dispenser.The dispenser should not give out a very large jet, you just need to wet the material.
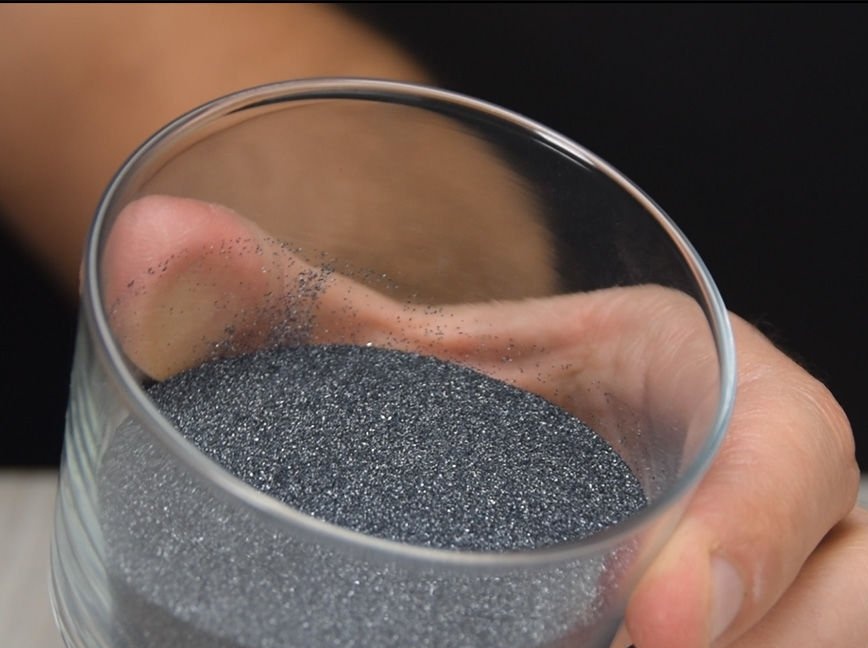
For the manufacture of silicon carbide rings, the master advises you to take a powder with a grain size of 80 to 220.
Now you need to do the following operation.
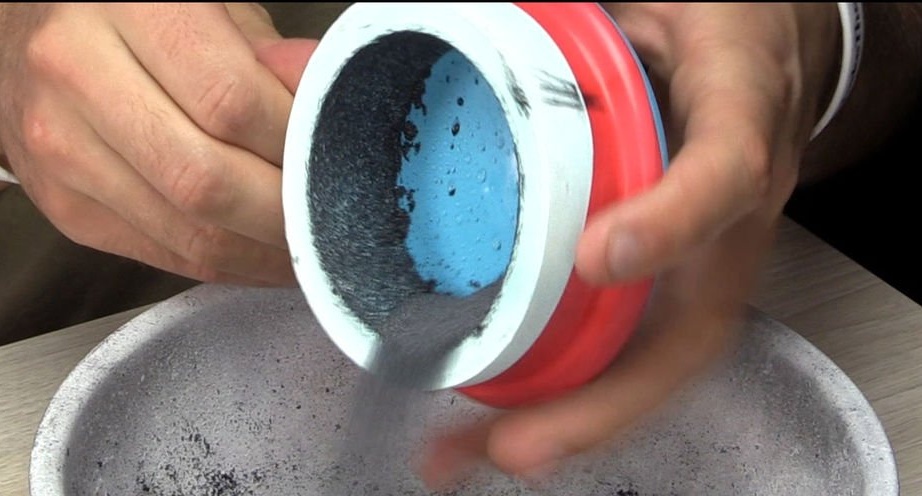
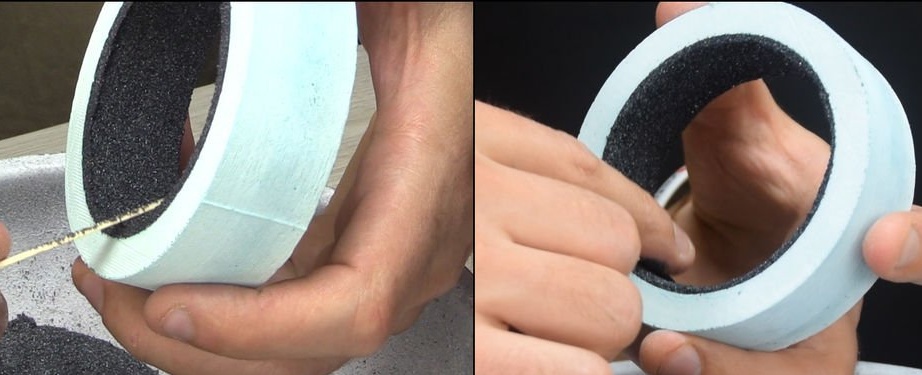
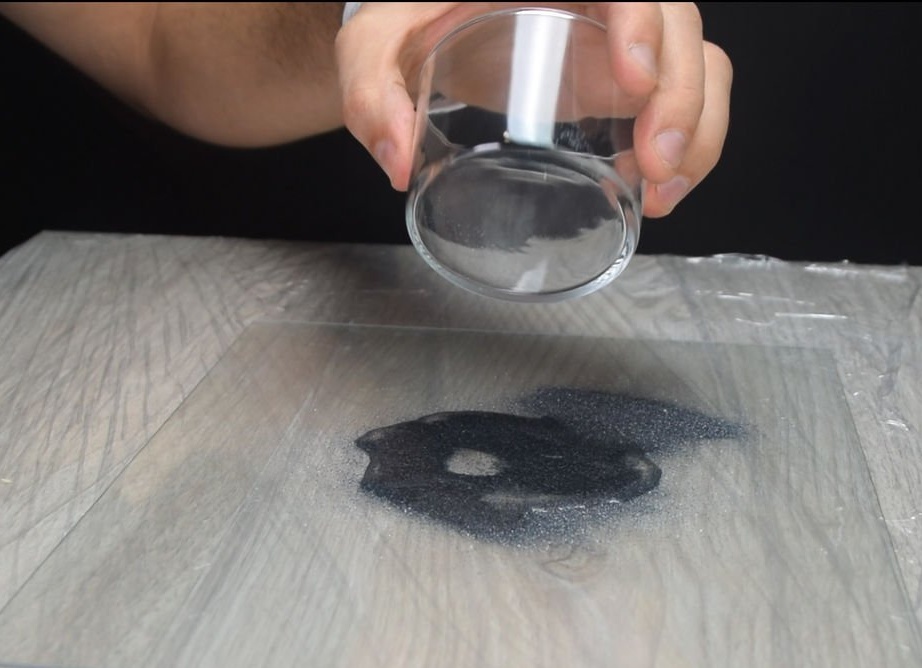
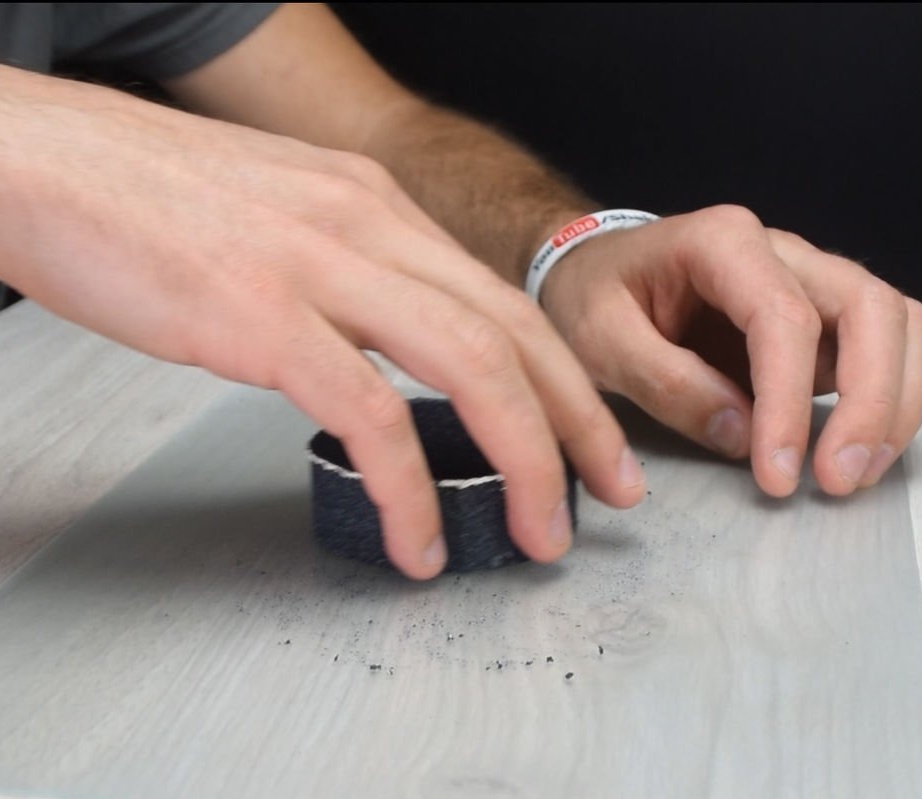
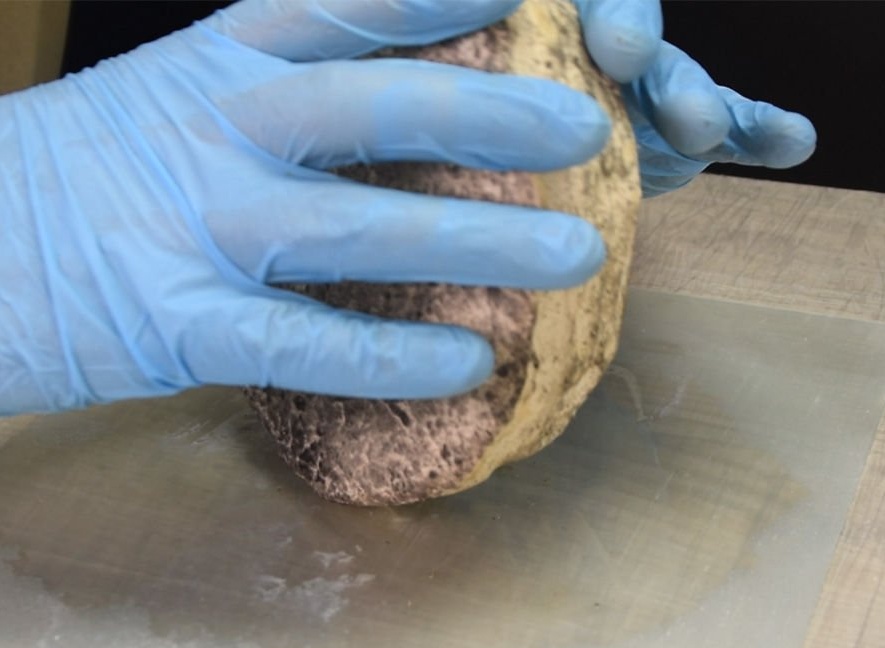
First you need to moisten the walls of the gypsum ring with water and pour silicon powder in a minute. Turn the workpiece so that the powder adheres to its inner wall. You can pin down grains of sand with your finger.
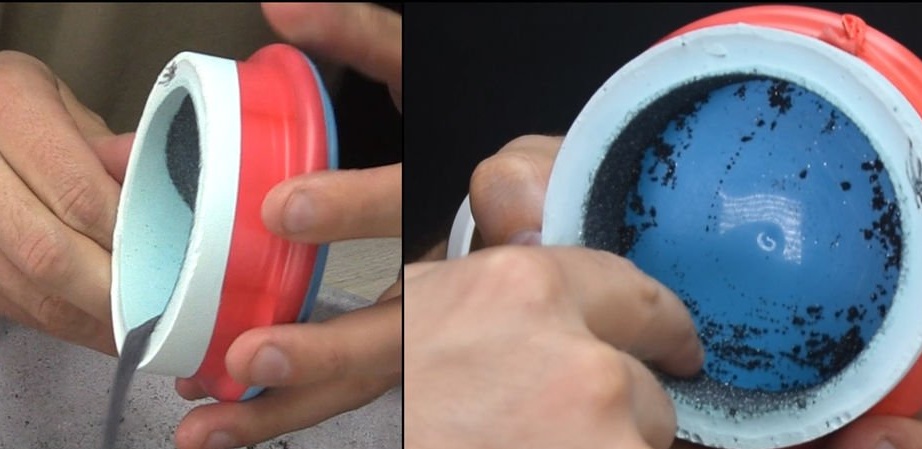
Then the master sprays the walls with liquid glass and again sprinkles the powder. So you need to make several layers. It is important not to spray liquid glass. Silicon carbide should feel slightly moist, but not too wet. There is no need to spray liquid glass after each layer, you need to try the degree of moisture. On average, a master sprayed glass after every 2nd layer. It is important to compact silicon carbide.
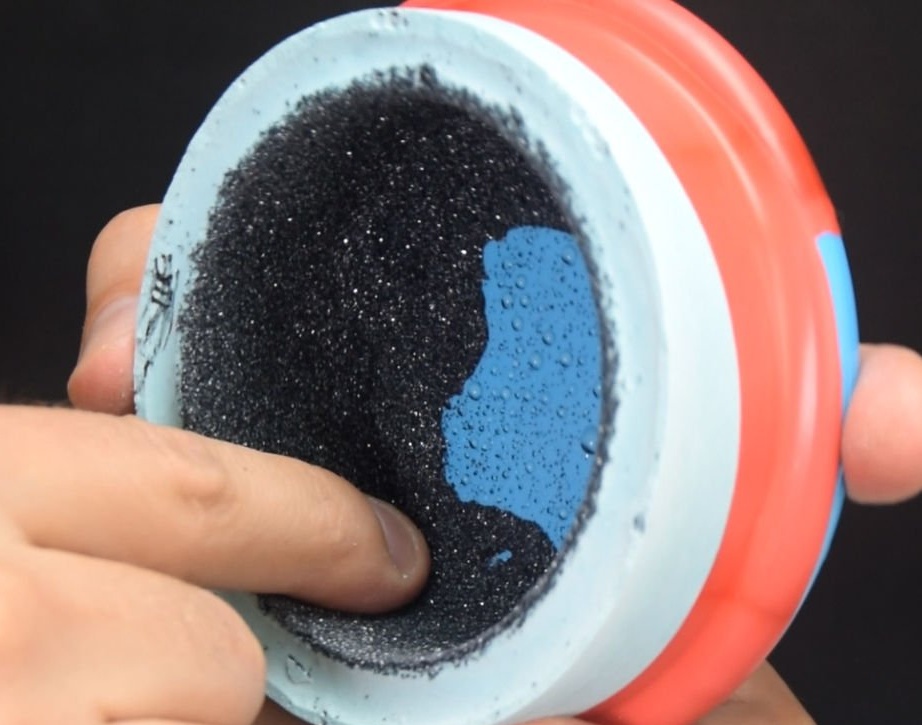
When the desired thickness is reached, excess material must be removed.
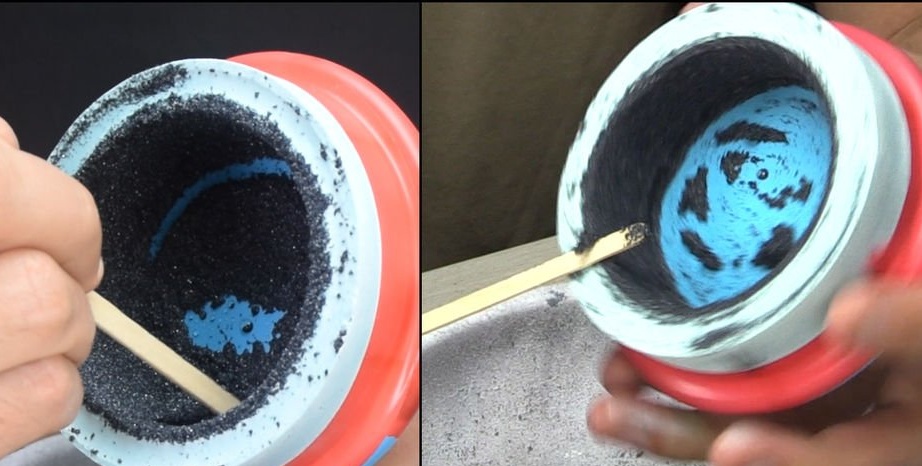
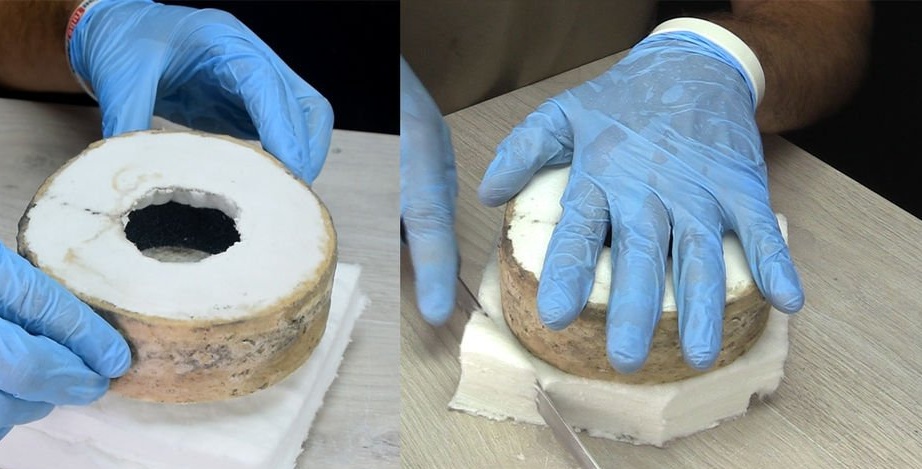
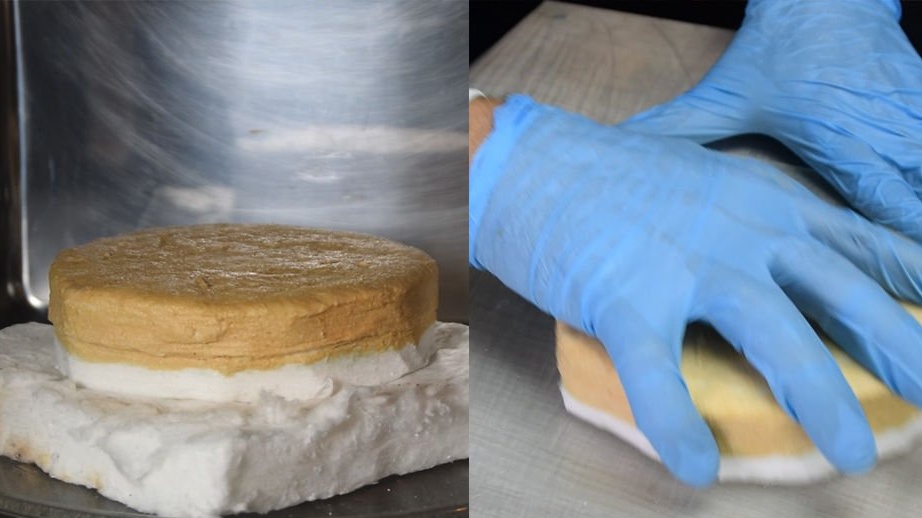
Further, the workpiece is removed from the plastic base.
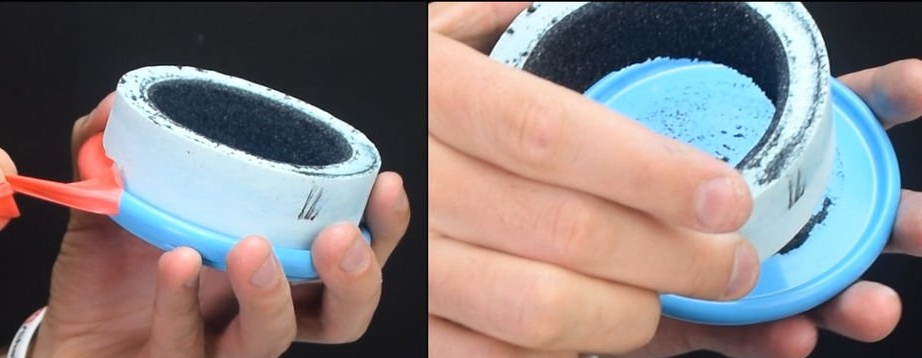

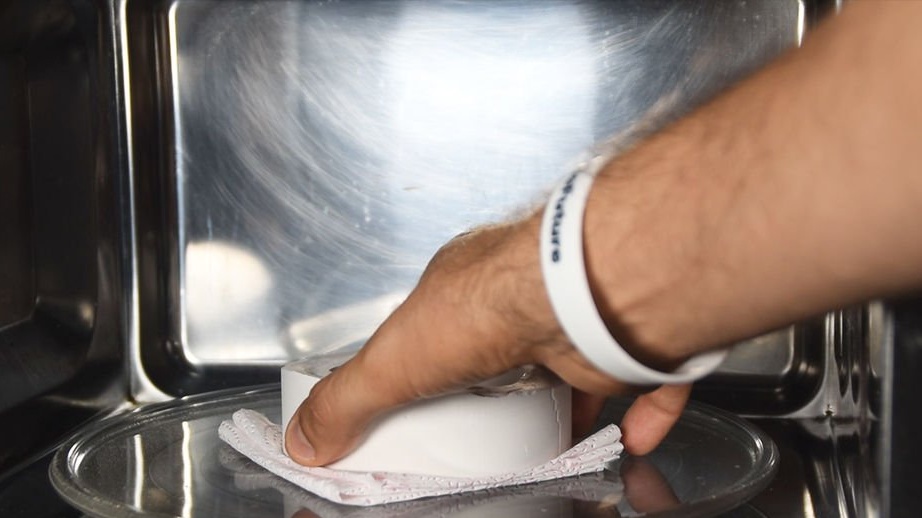
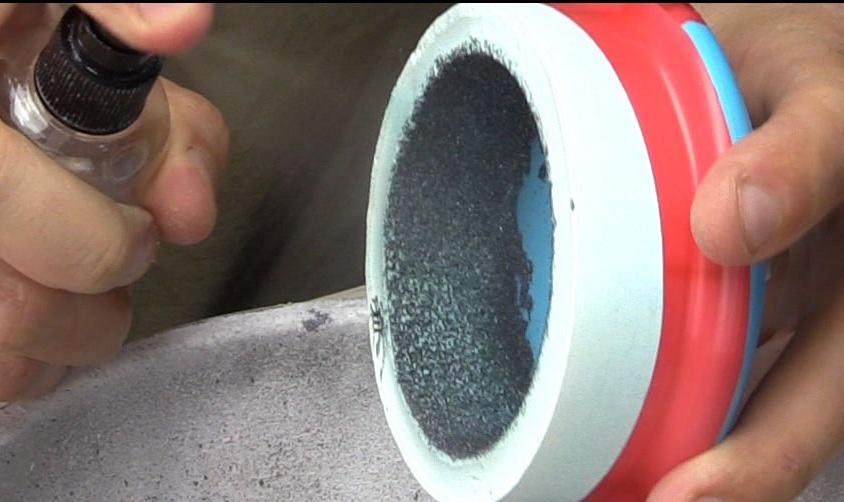
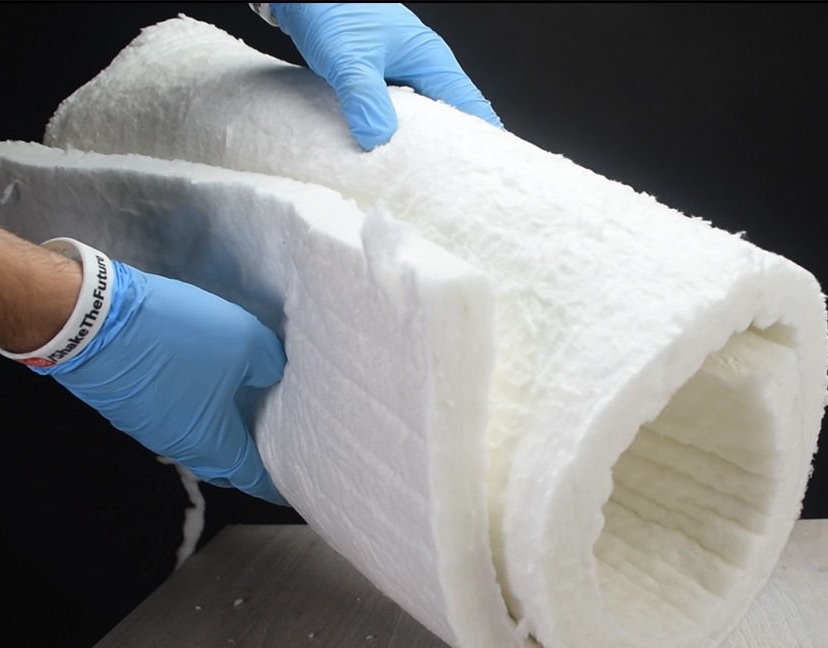
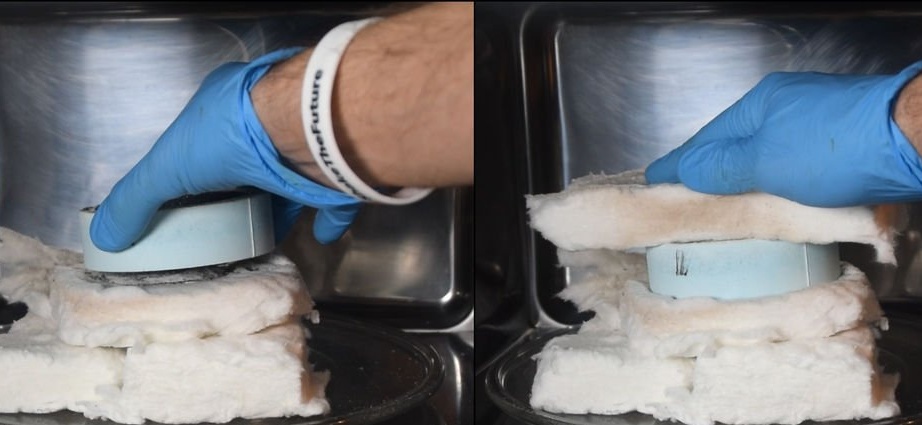
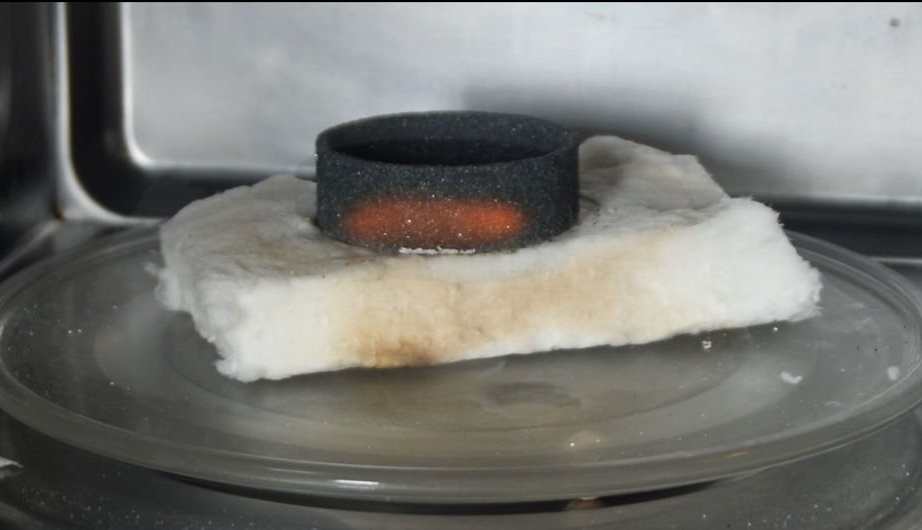
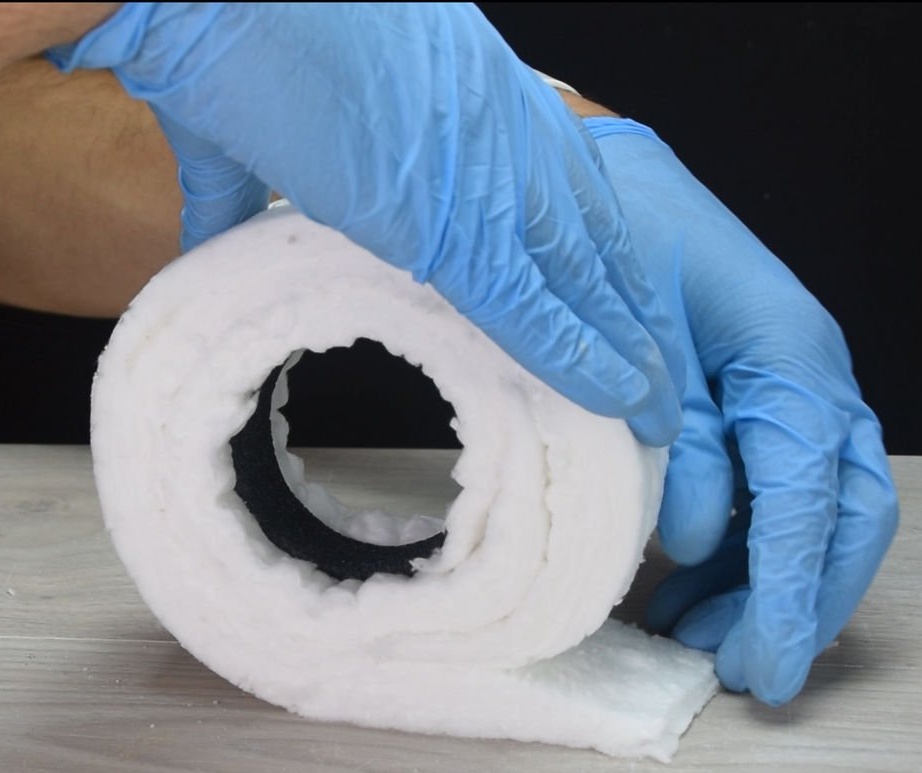
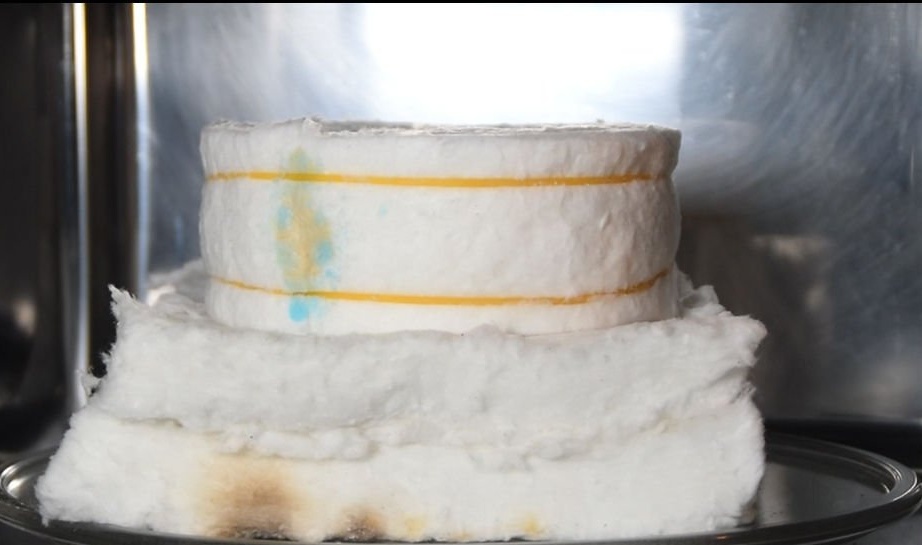
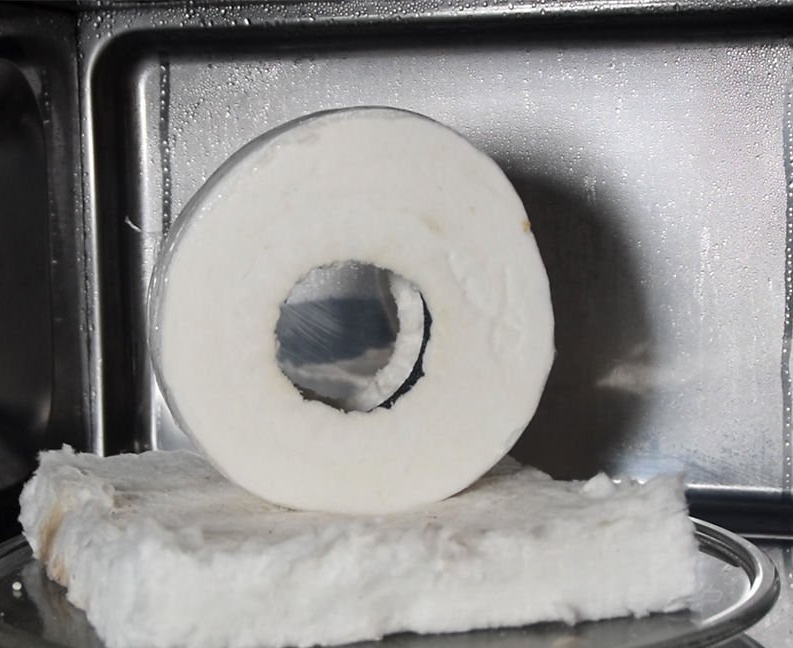
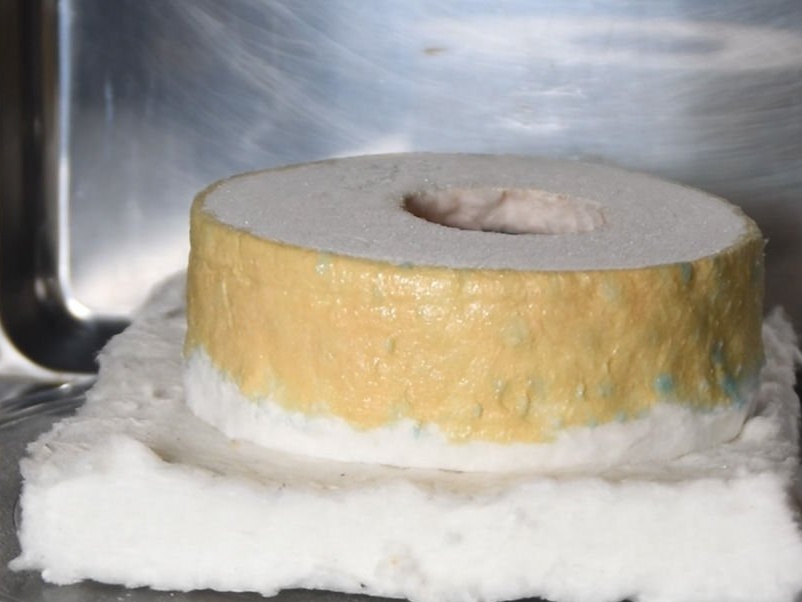
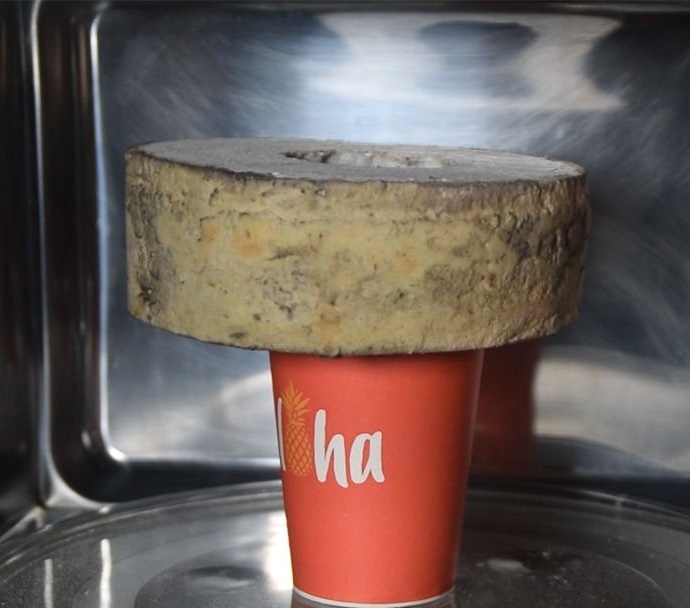
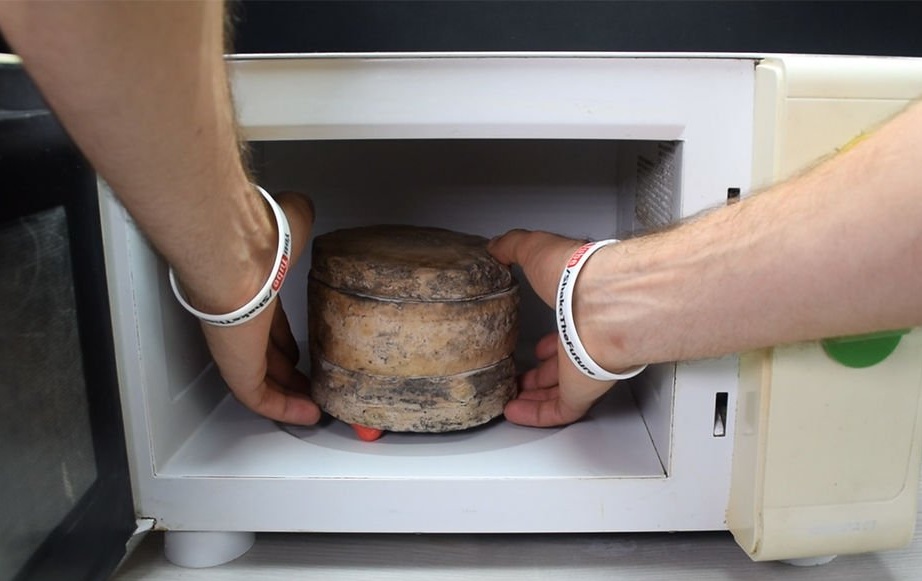
Now you need to dry the workpiece. This can be done with CO2 or in the microwave. The master will use the microwave. Places two layers of ceramic blankets on a microwave dish. Set the blank from above and cover it with another layer of blanket.
When working with ceramic material, gloves and a respirator are required.
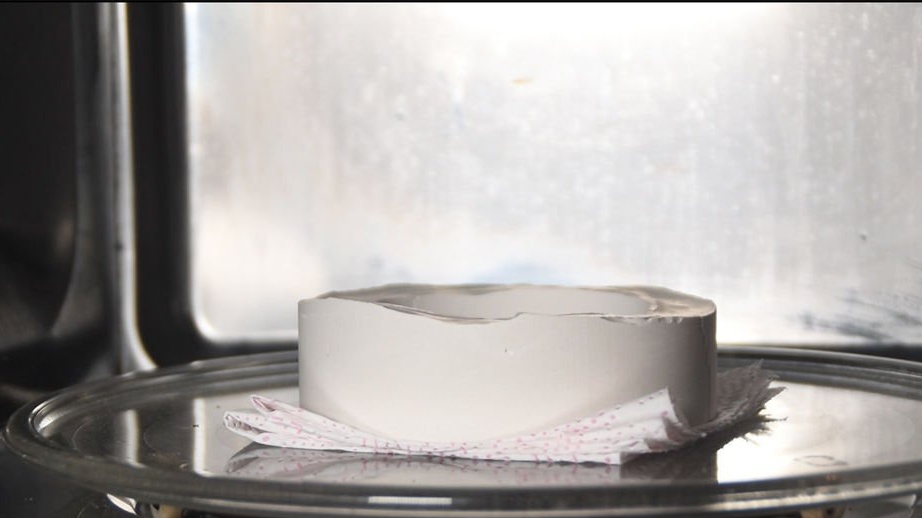
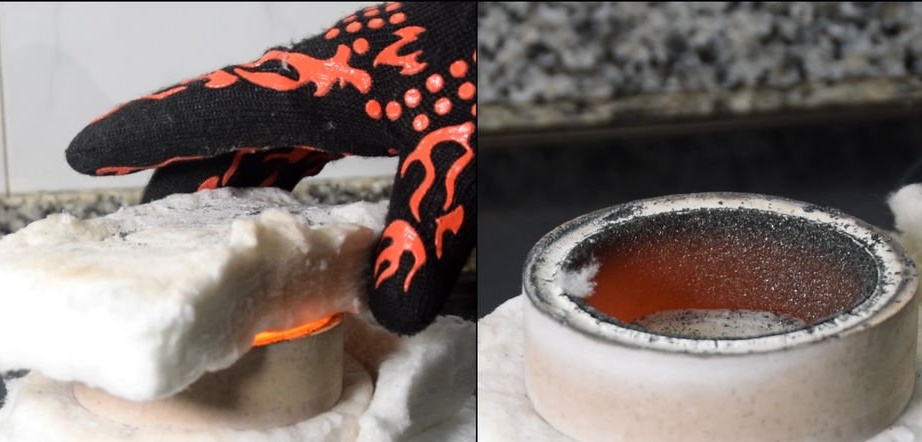
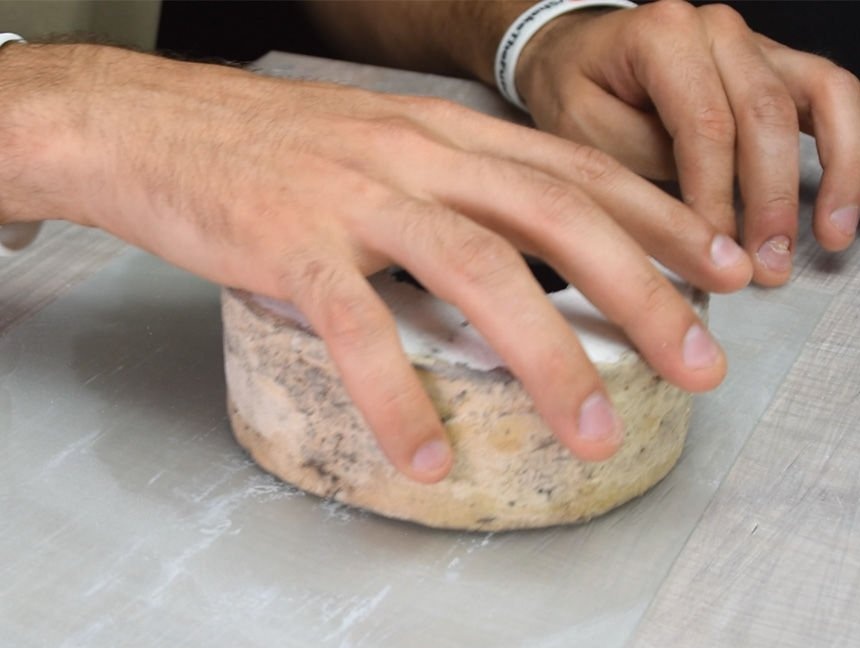
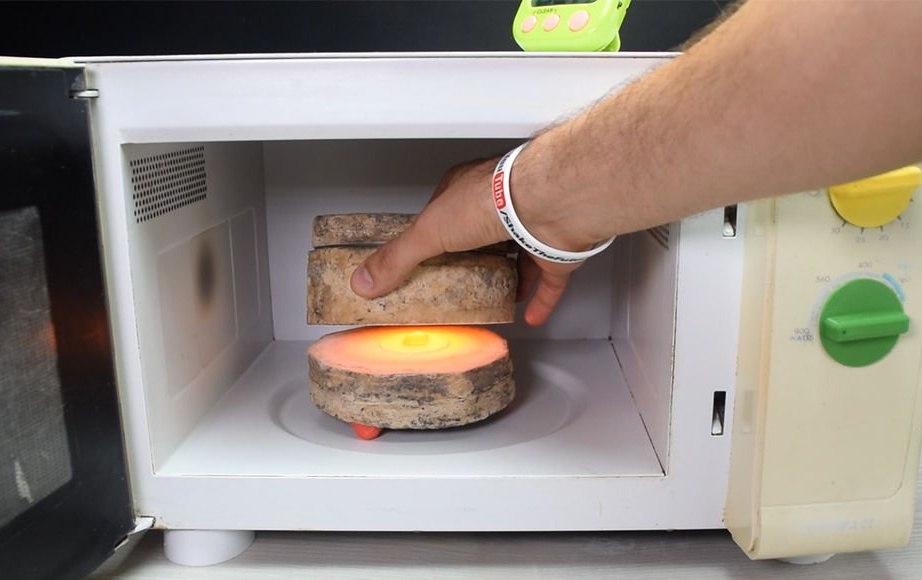
Now you need to turn on the microwave and wait until the ring turns red. Further, the workpiece is removed and cools. After cooling, the gypsum ring is removed.

If the silicon carbide ring cracked, the plaster was probably too strong or you did not press the powder tightly together.
If the gypsum ring was too strong, then the silicon ring will also crumble.
If a lot of liquid glass has been added, the ring will bubble and crack.
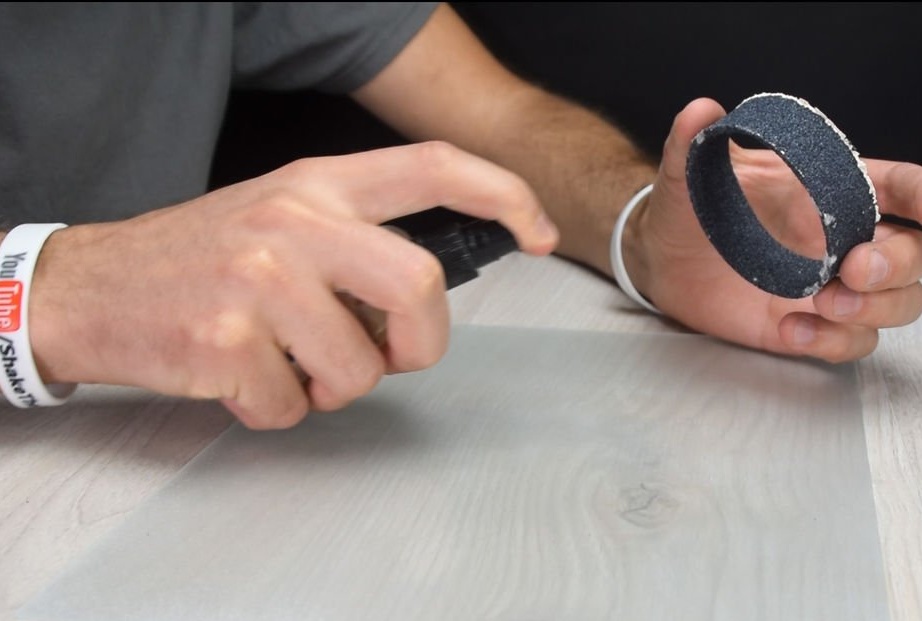
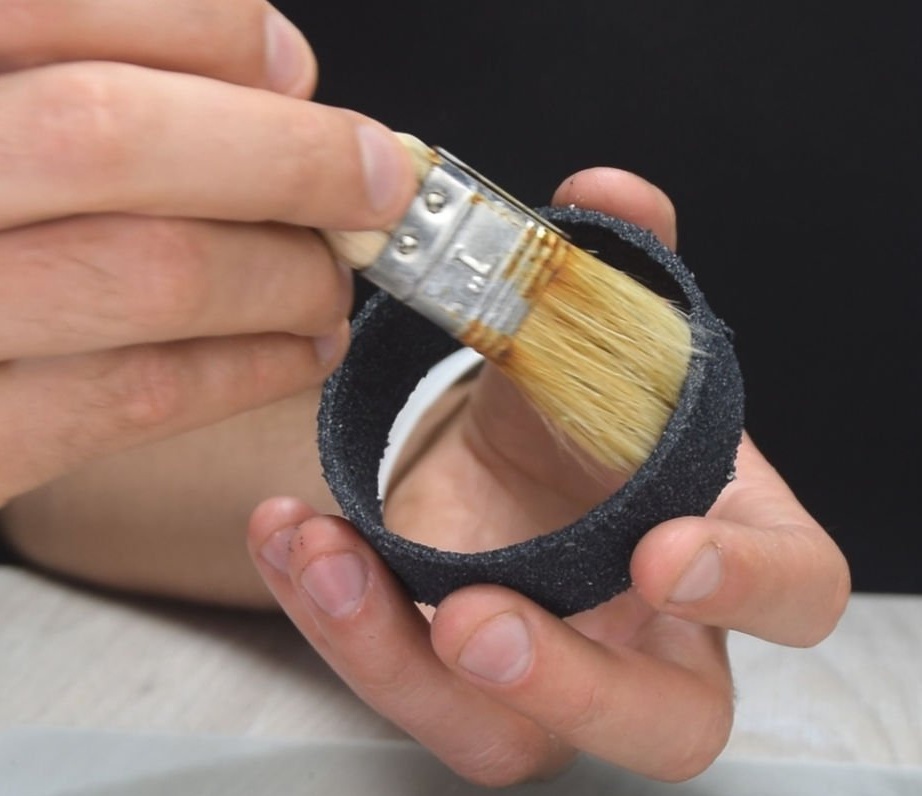
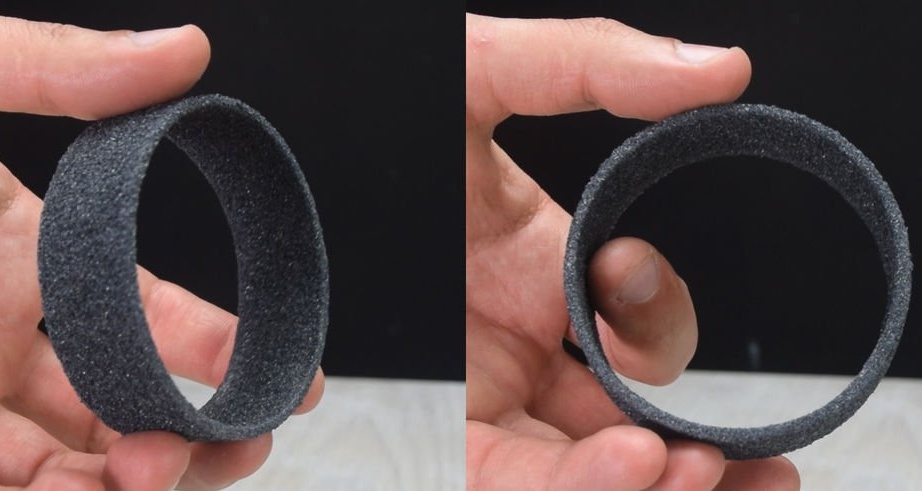
Step Three: Grinding
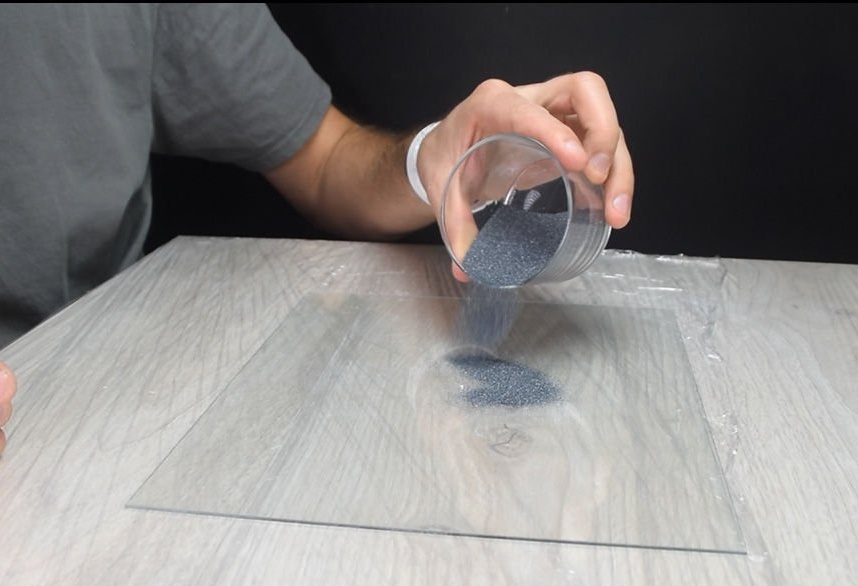
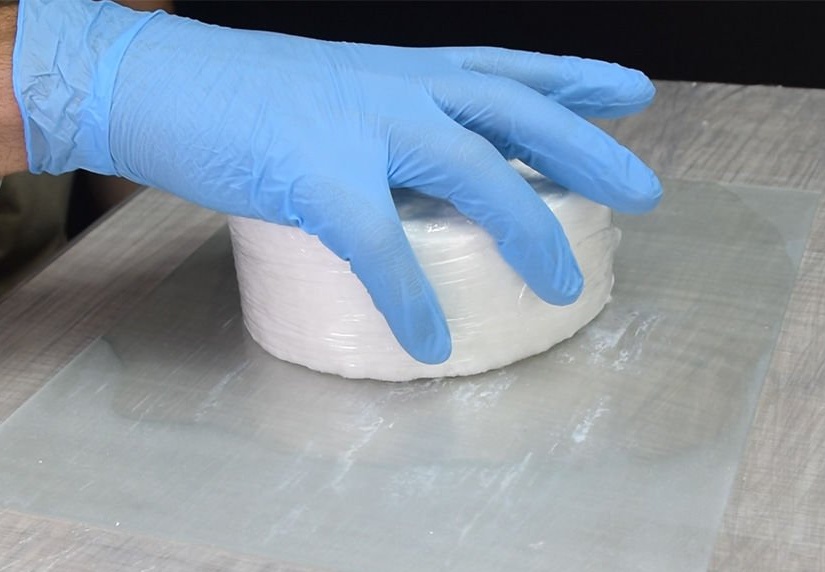
Take a piece of glass. Place a plastic film under the glass so that the glass does not move. Pour a little silicon carbide onto the glass and moisten with water. Use a glass (or any flat piece of glass) to sand it.
Now you can use glass to grind the ring and then bake.
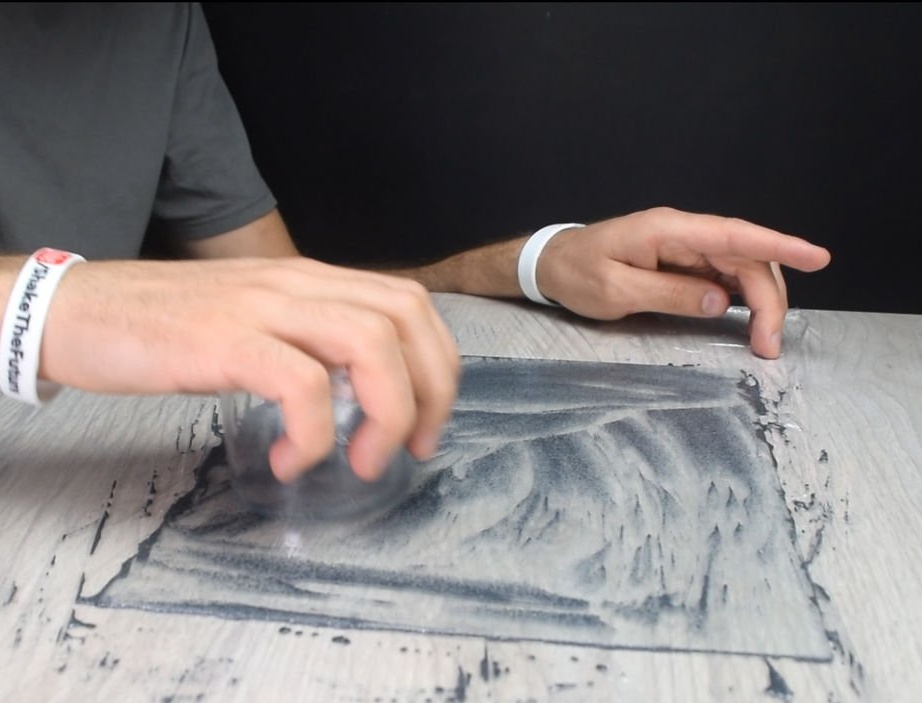
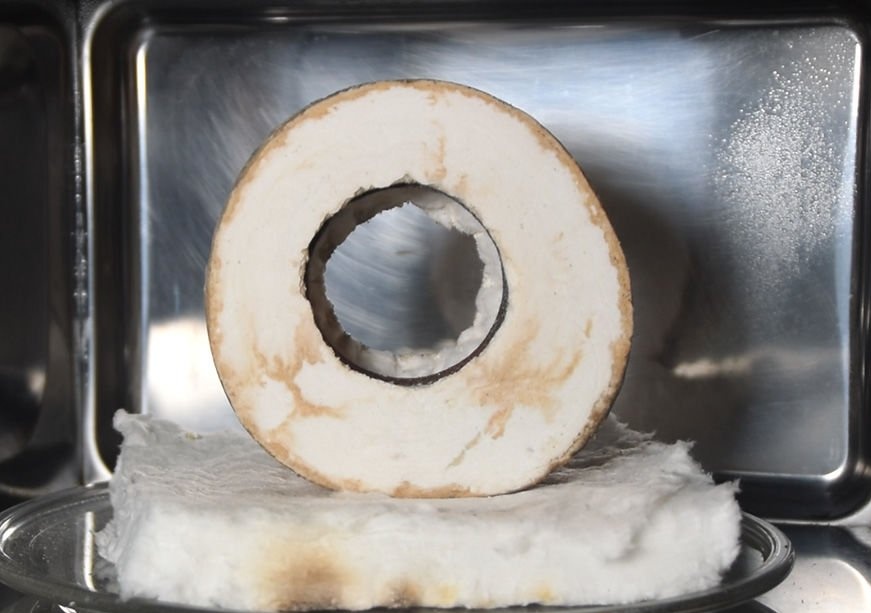
Add some water and sand the ring on both sides. Remove excess crumbs and place the ring in the microwave to dry it.
Then you can spray some more liquid glass (if necessary) to make the ring more durable. After that, dry the ring again.
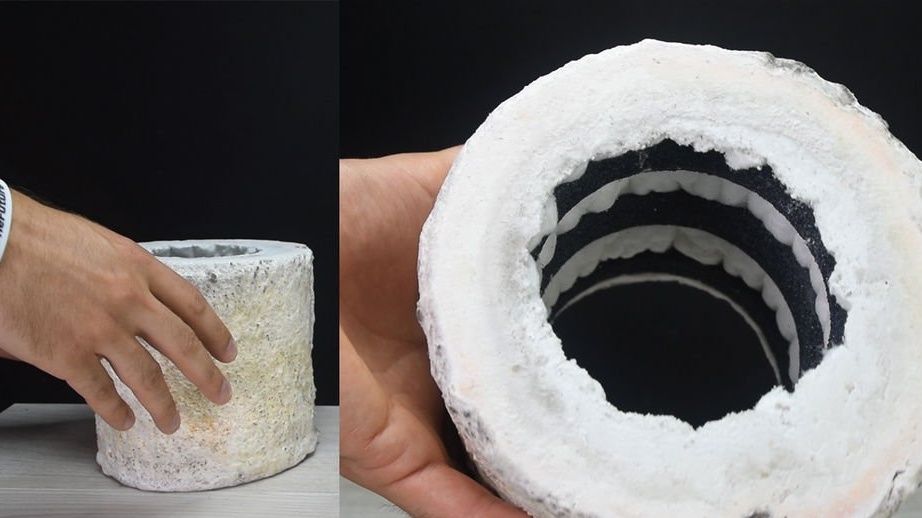
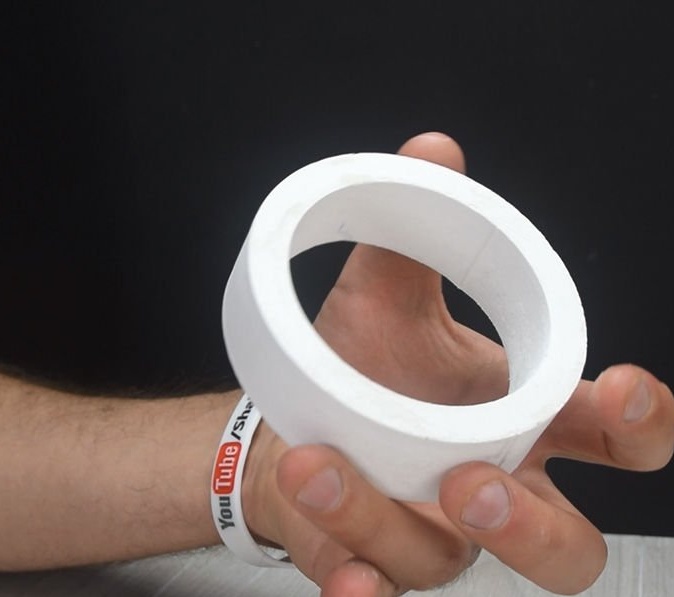
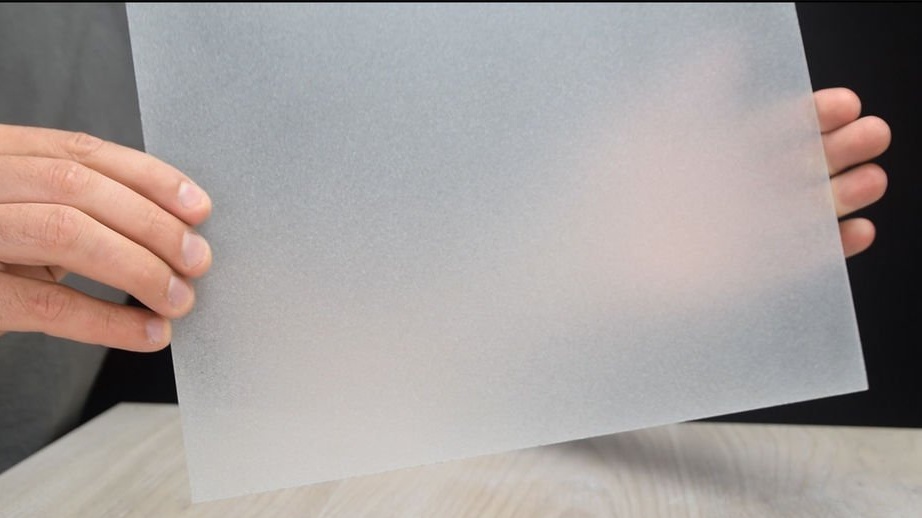
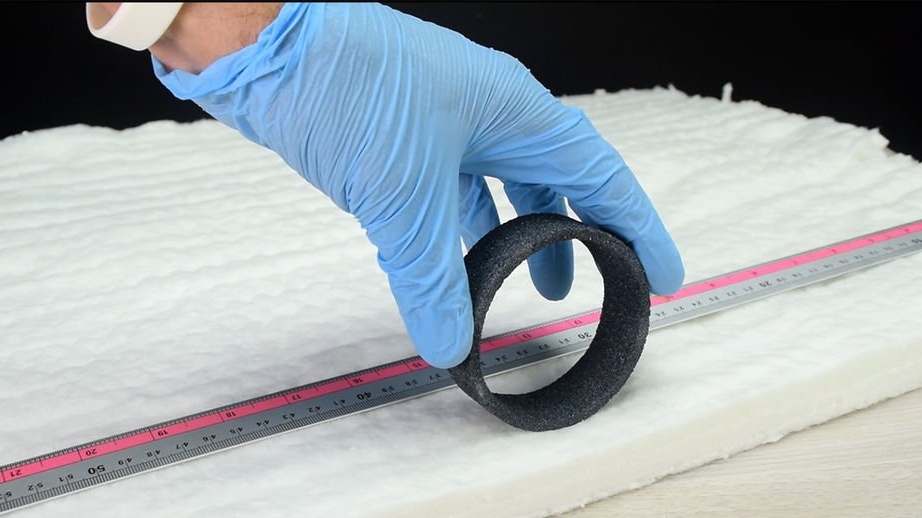
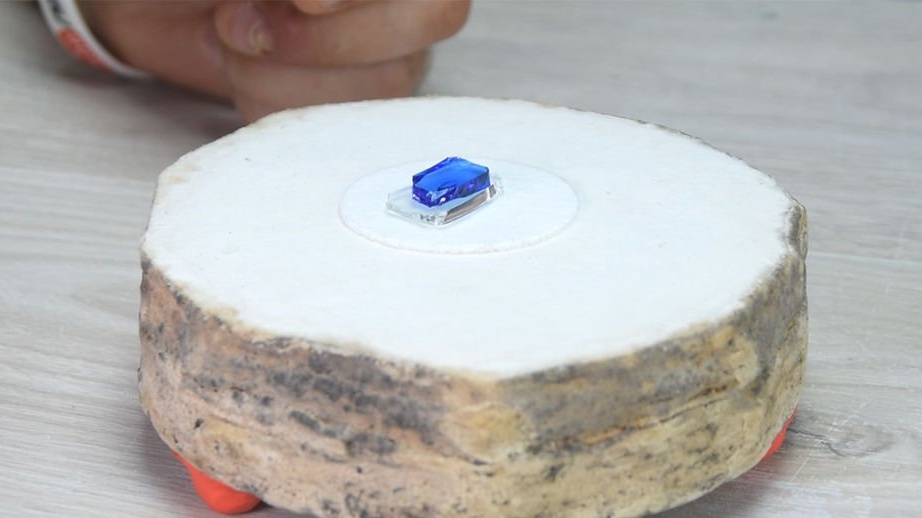
The ring is ready, its weight is about 40 g and has a thickness of 4 mm.
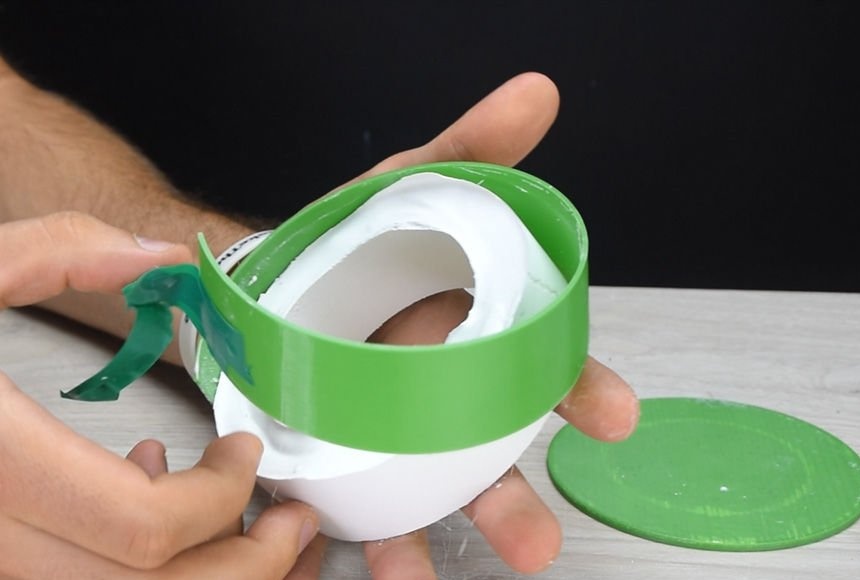
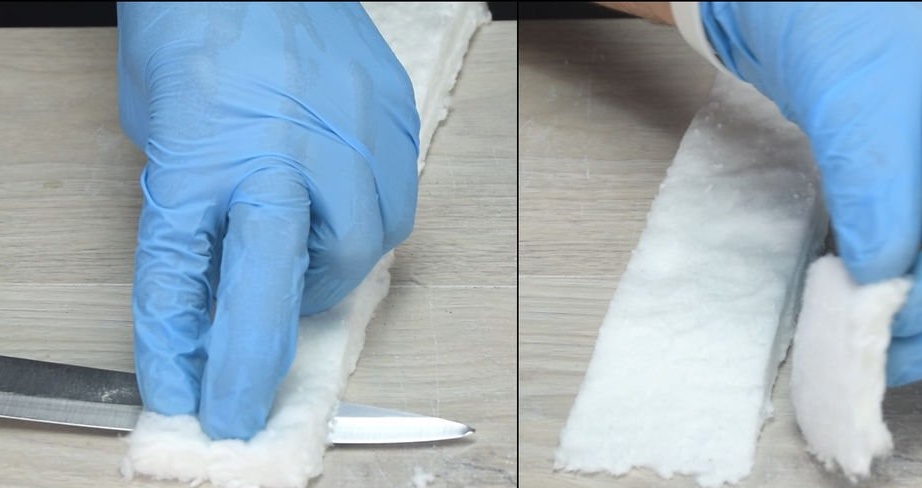
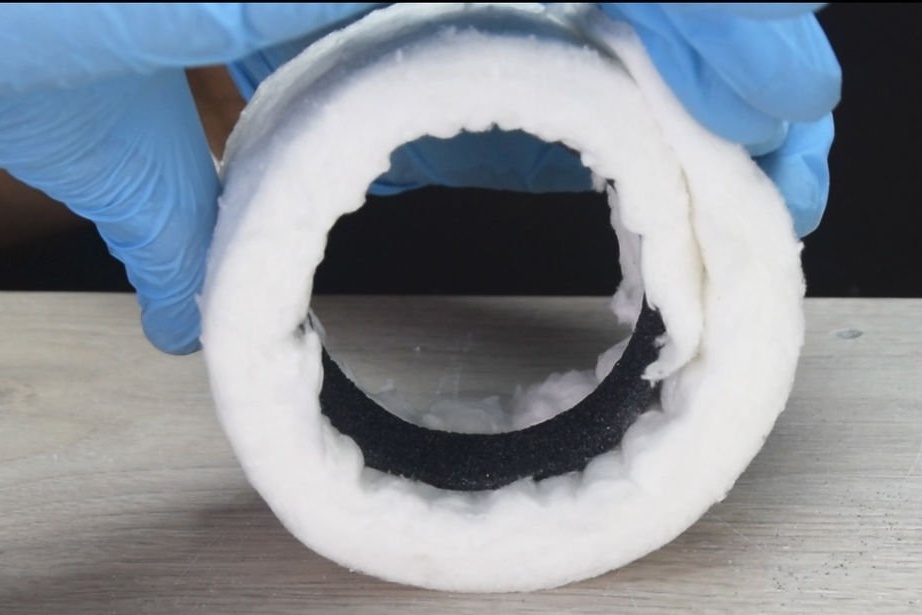
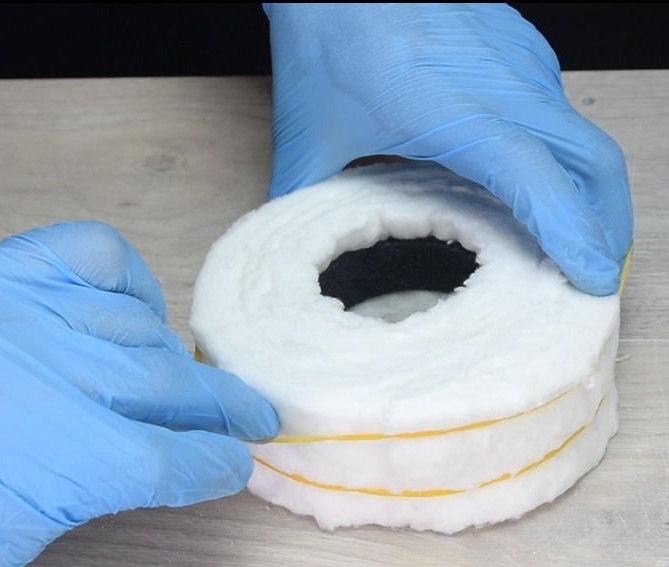
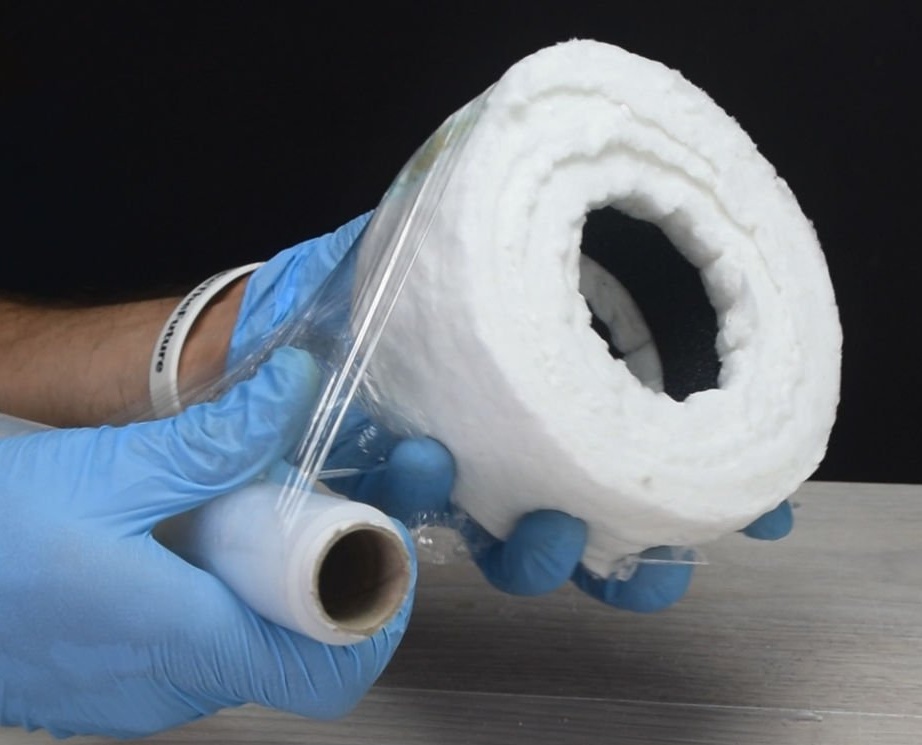
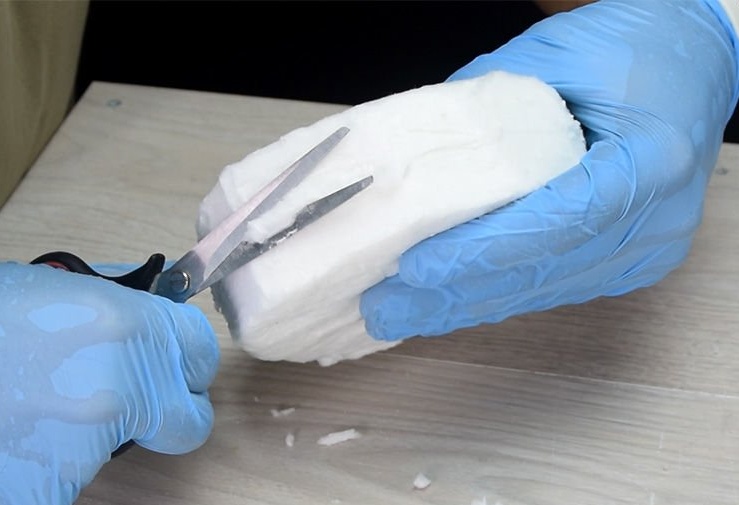
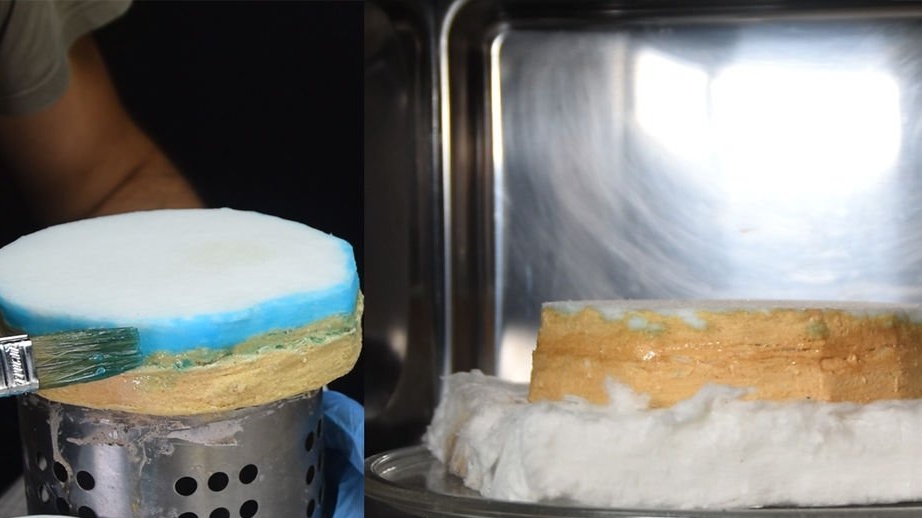
Step Four: Ceramic Blanket Wrap
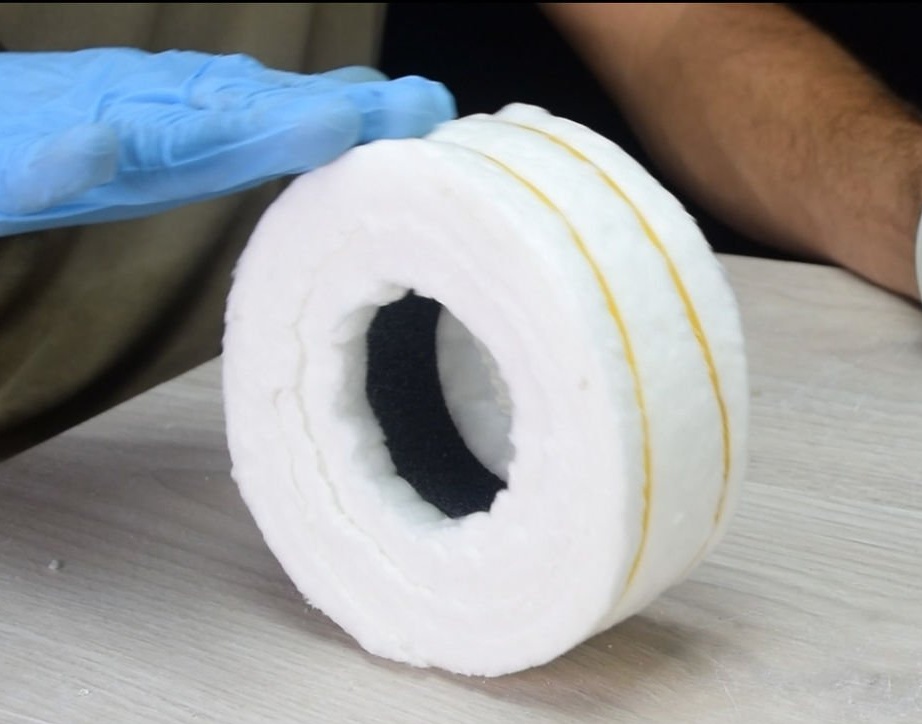
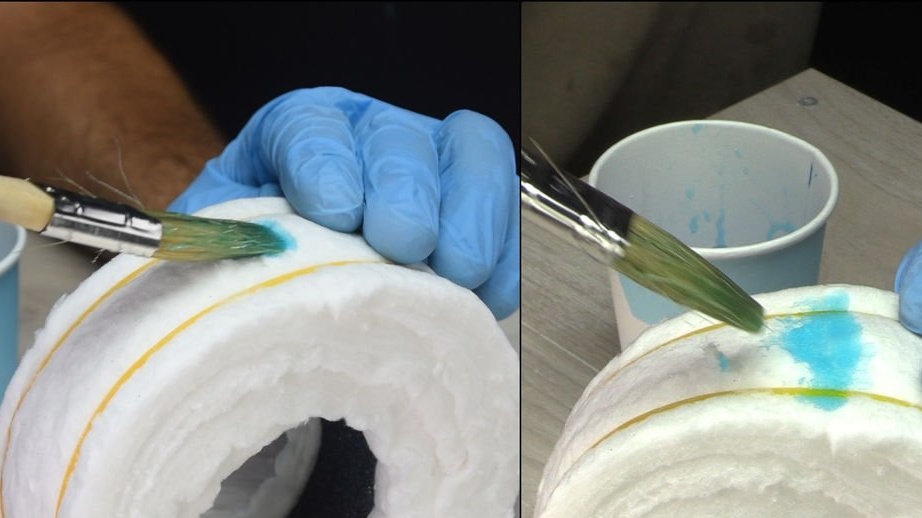
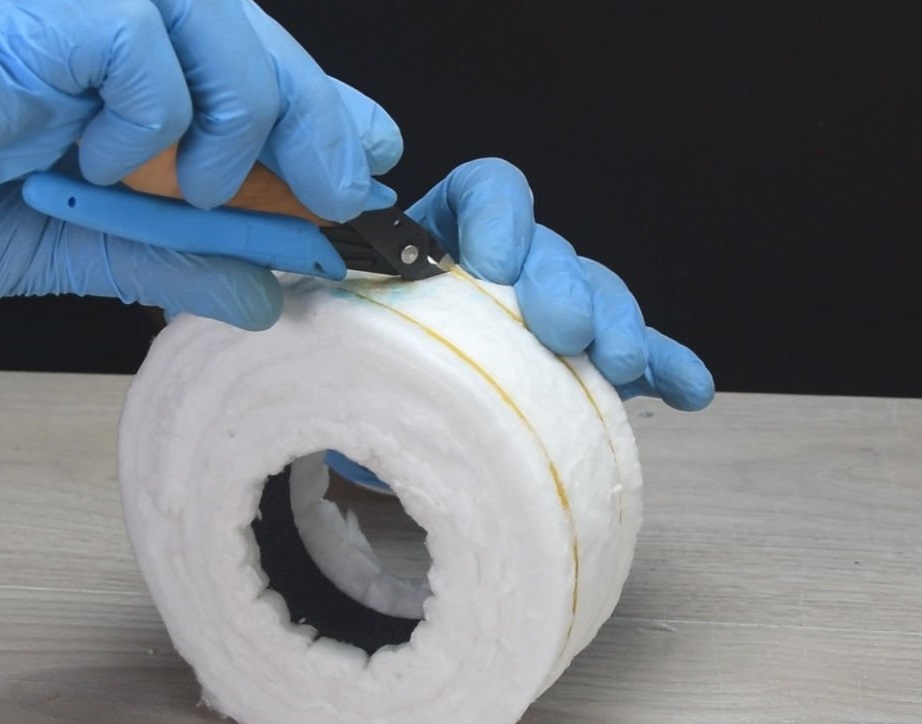
The master cuts two strips of ceramic fiber. Cuts the ends of the strip at an angle and wraps them around the ring. Does the same operation with the second strip. To prevent the strip from being unwound, it fixes it with clerical gum.


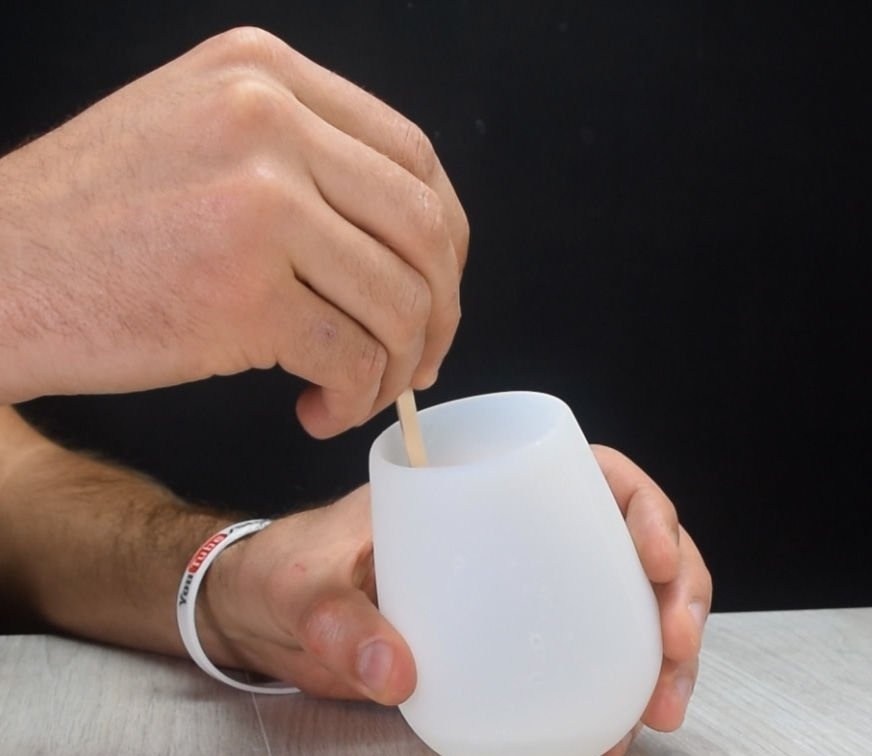
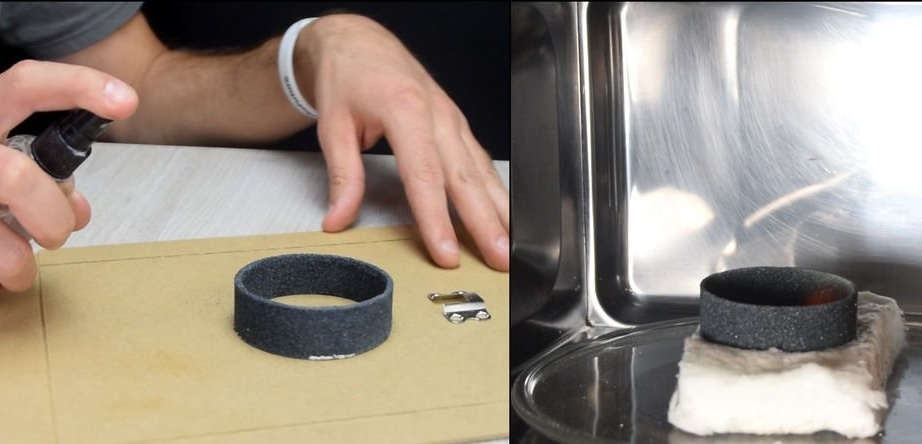
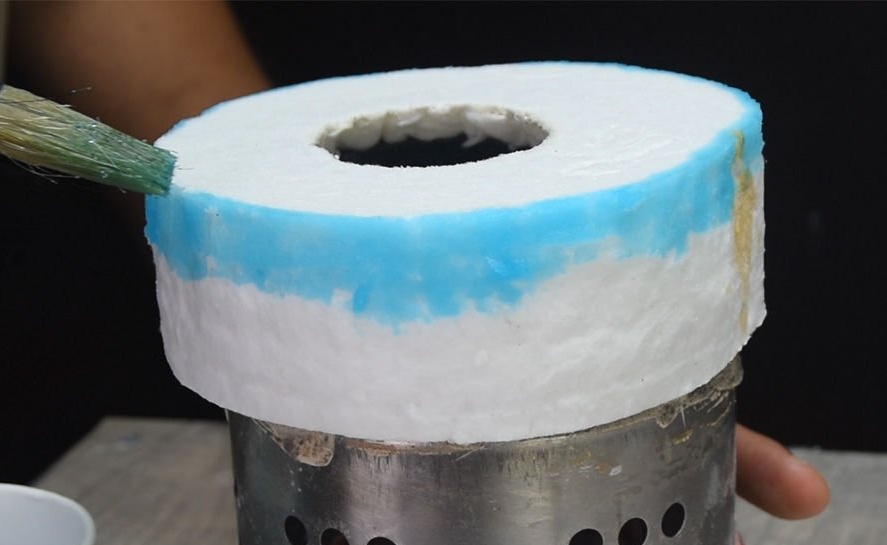
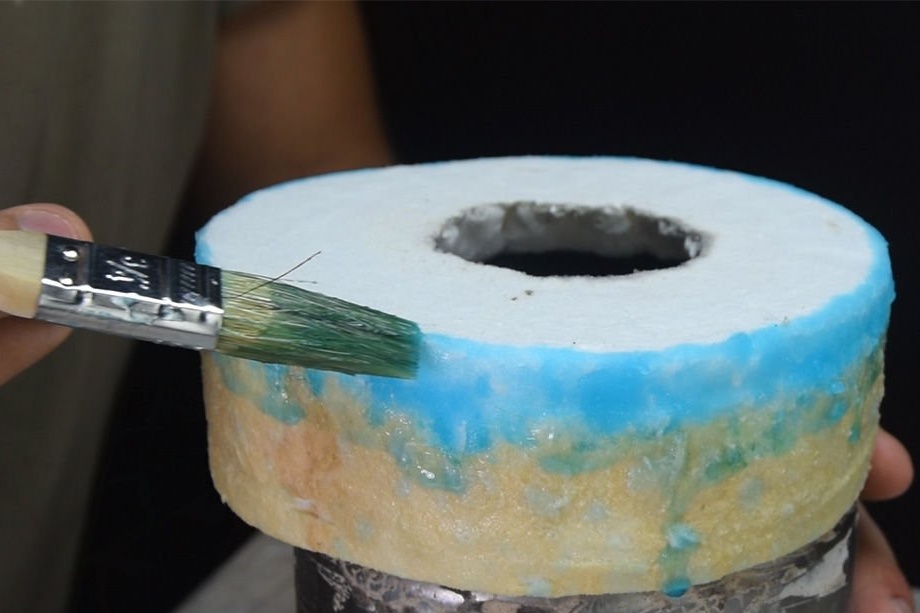
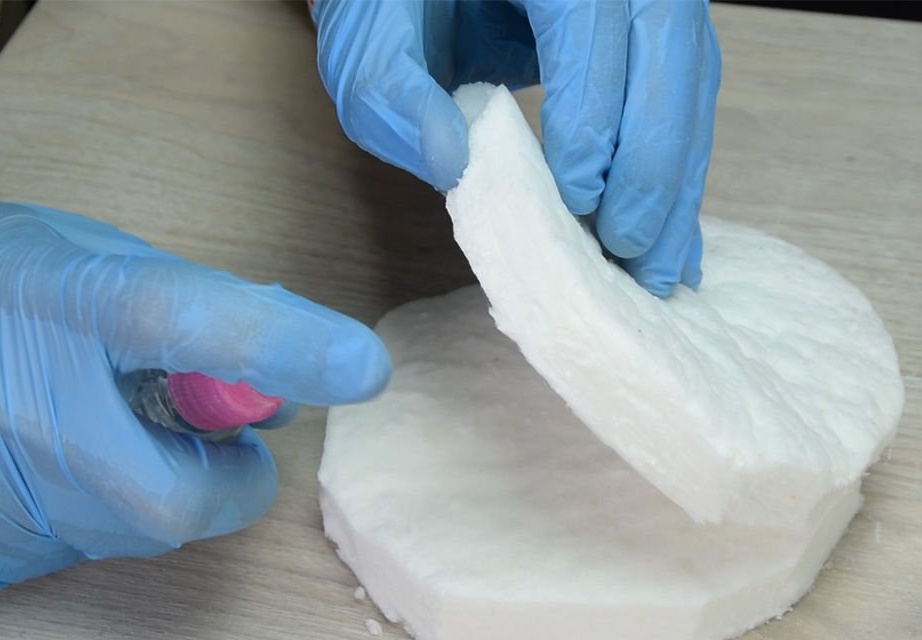
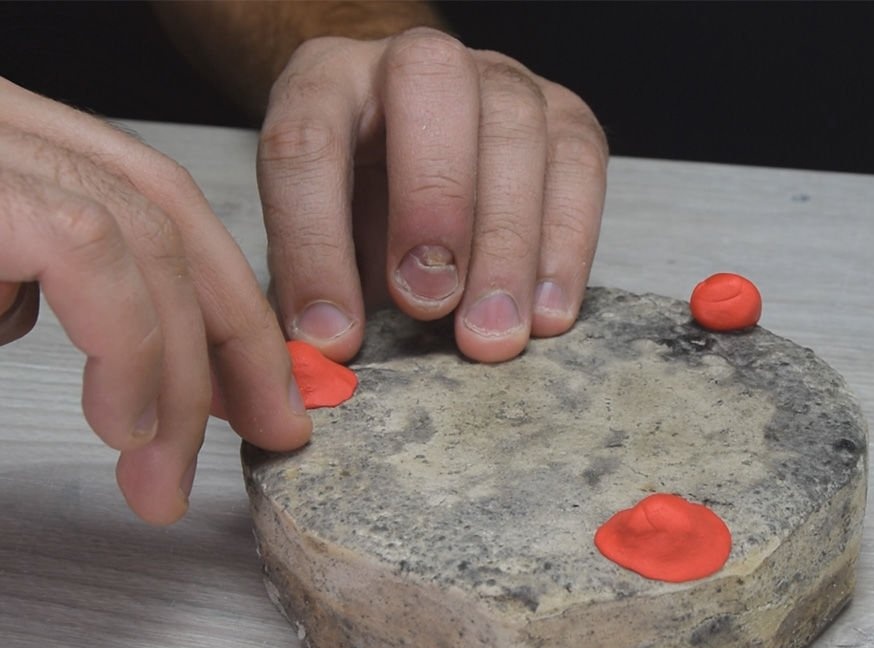
Next, pour liquid glass into the container and add dye.
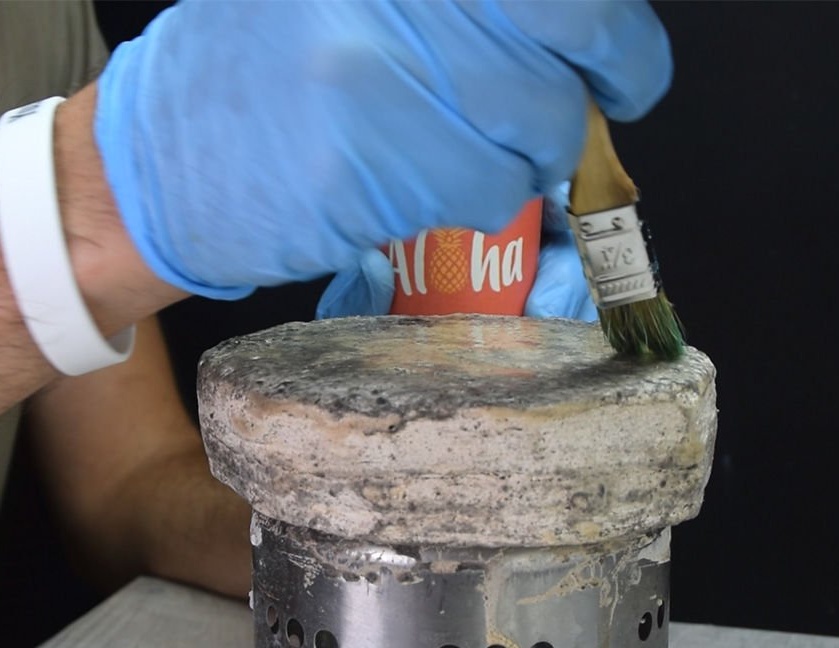
Next, you need to put liquid glass on the joint of the ceramic strip. Only need to be applied on top. Puts the future crucible in the microwave for a few seconds. When the liquid glass dries, the dye changes color to brown. Now you can remove the gum.
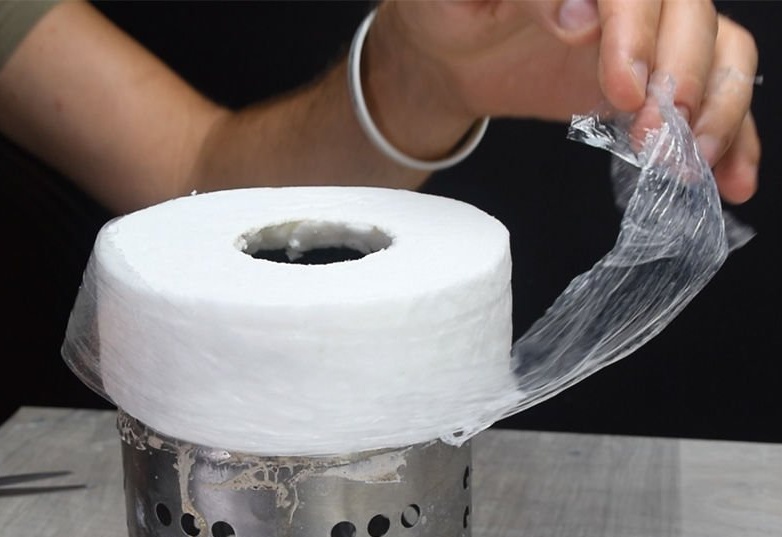
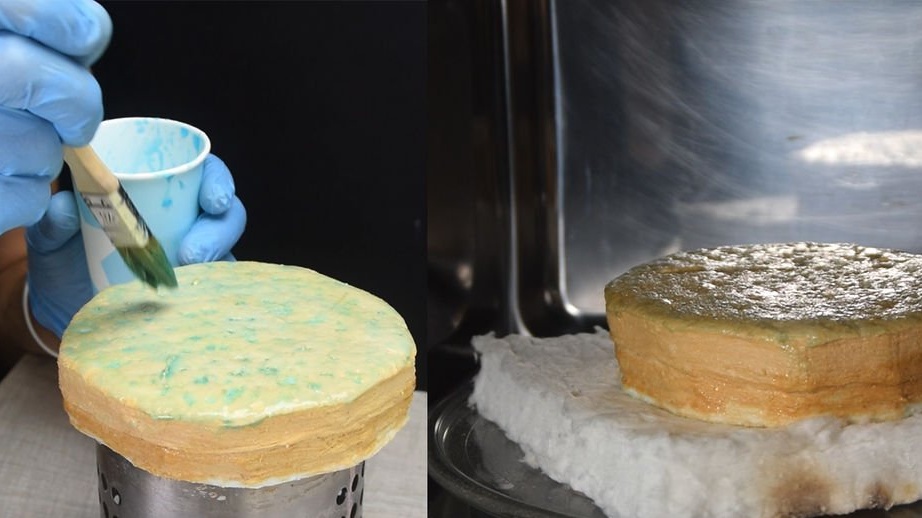
Next, you need to wrap the workpiece with cling film, this is necessary so that it does not open. Wets the ring with water and polishes it on the glass. This must be done on both sides. After grinding, the ring must be dried in the microwave.

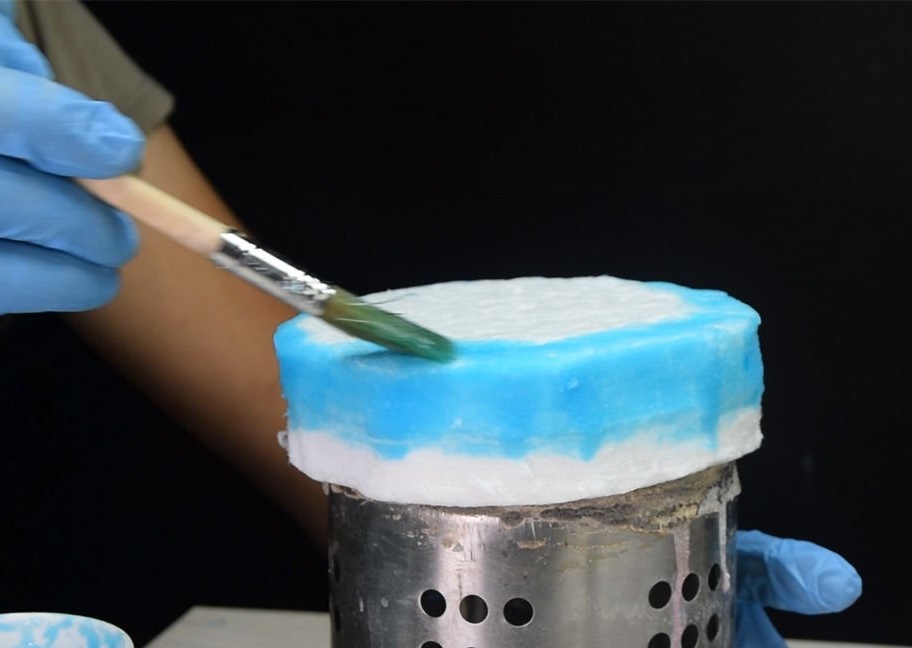
Then the film is removed and the ring is covered with liquid glass with a dye. Then it is again placed in the microwave and slightly dried (without overheating).
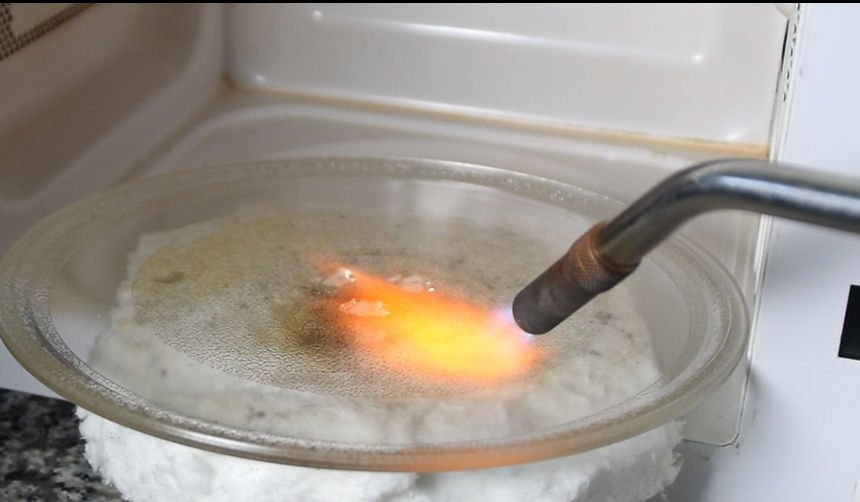
Heats the liquid glass with a hairdryer, and then with a burner. Such an operation will add strength to the strapping.


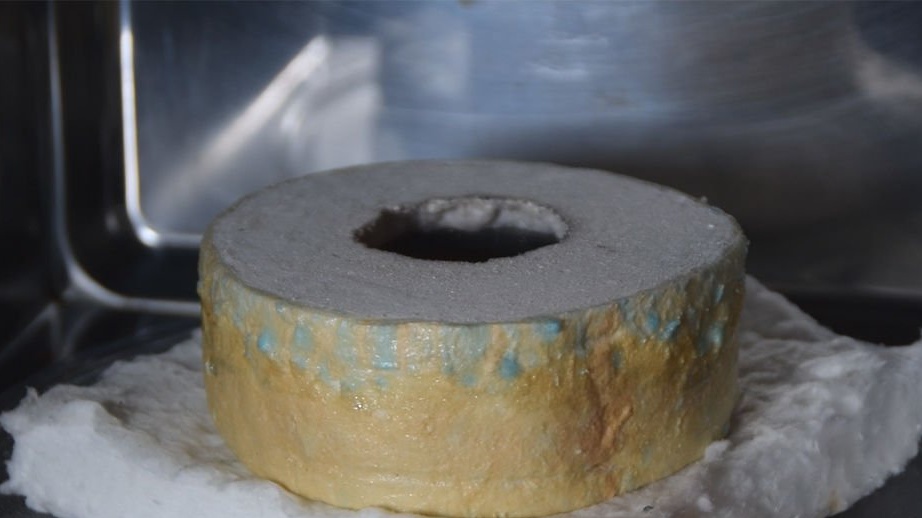
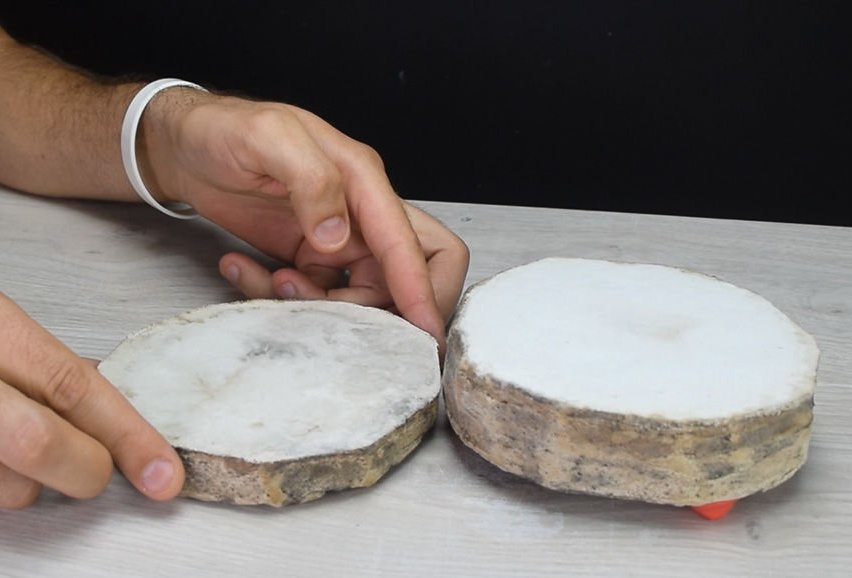
After all these actions, the surface of the workpiece is all in shells and mounds. The master polishes it lightly.
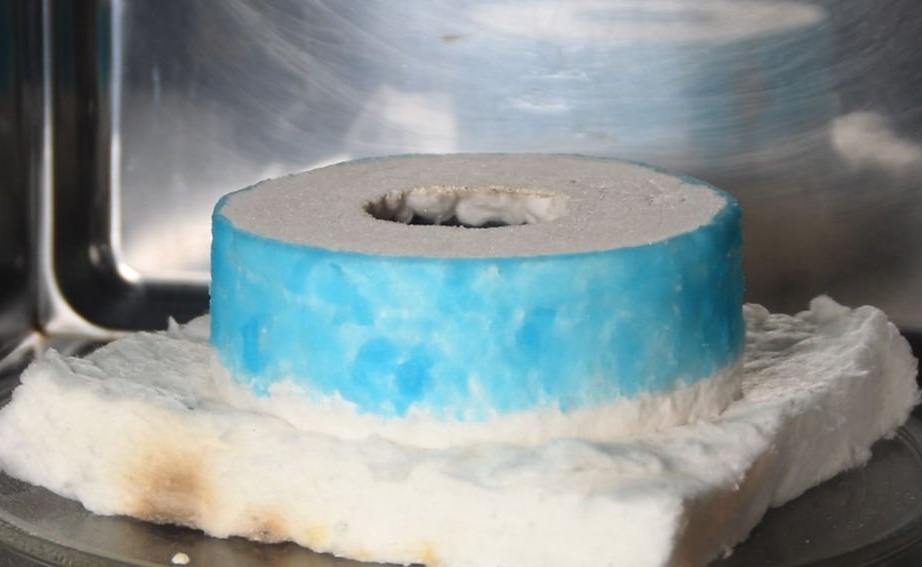
The remainder of liquid glass with a dye is diluted with water 1: 2, applied to the side surface of the workpiece and dried in a microwave.Repeats the operation.
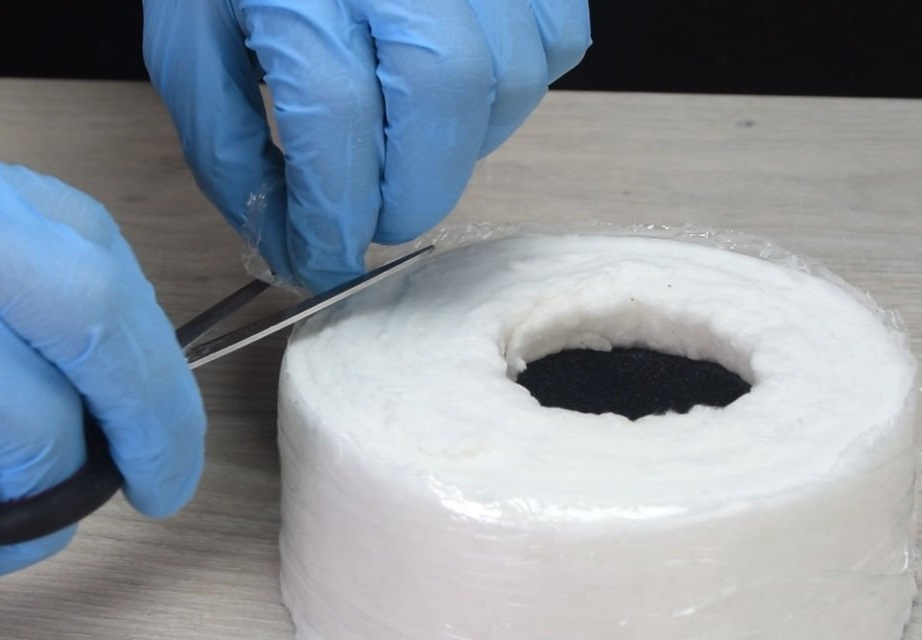
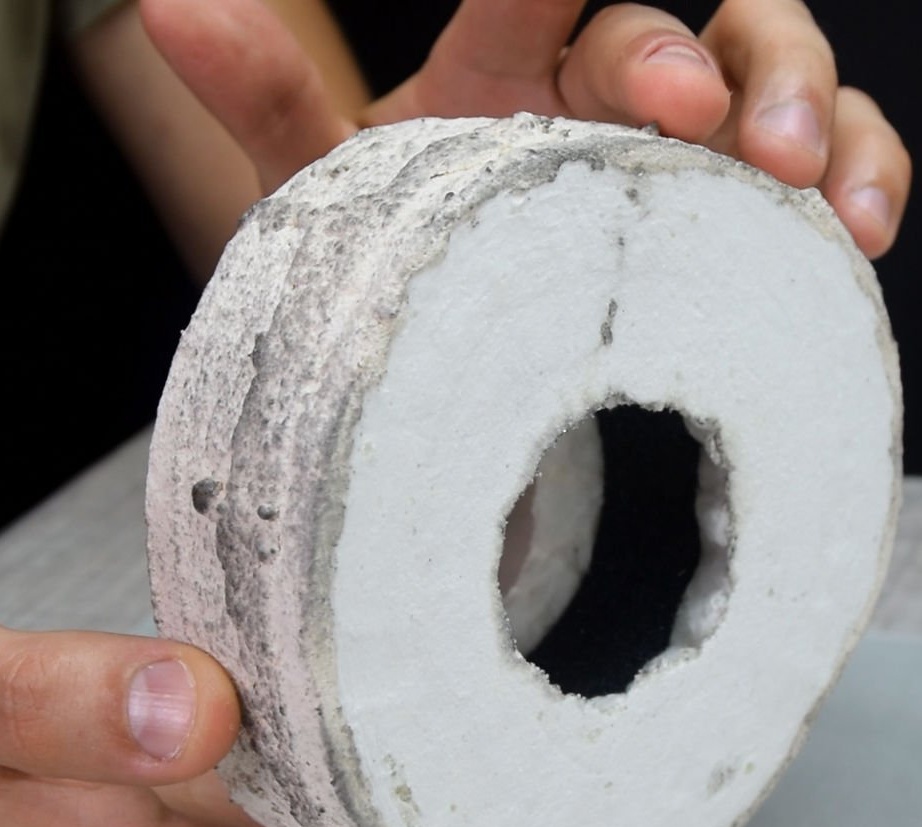
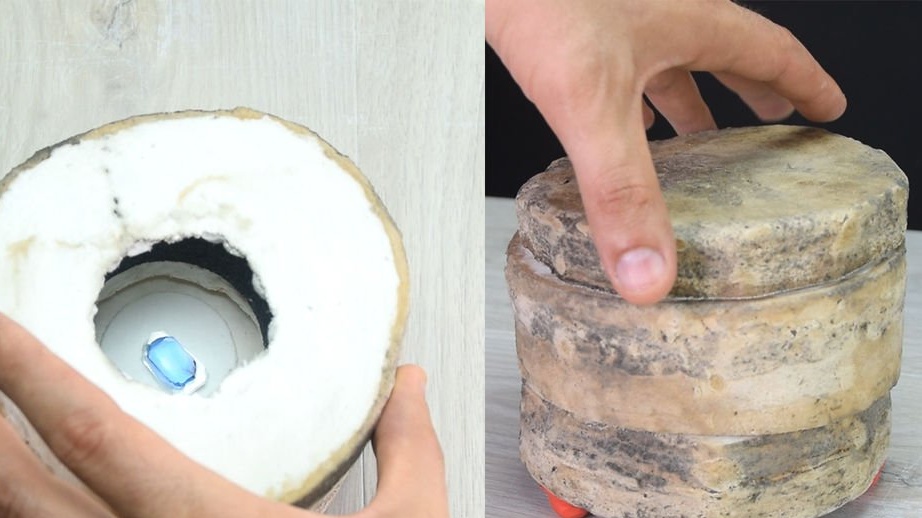
Extends the hole on one side. Grinds and dries in the microwave.

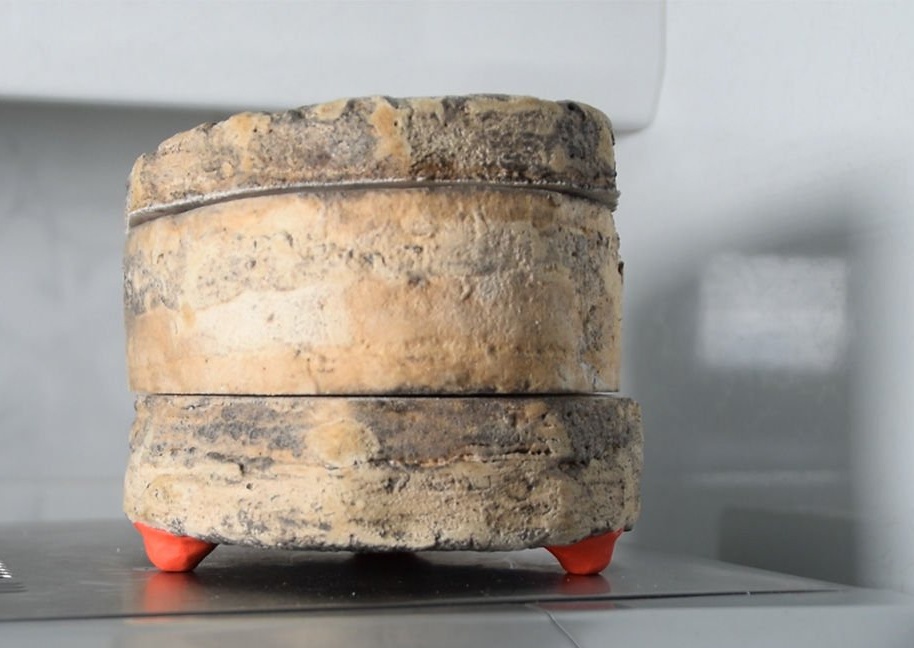
Step Five: Base and Cover
Cut two circles on the diameter of the ring.
Covers the top and side with liquid glass (no need to cover between layers). Dries, polishes and again covers with liquid glass and dries.
Repeats the operation with the burner.

From Sugrue makes legs.
In the same way, the master made a lid, but only in one layer.
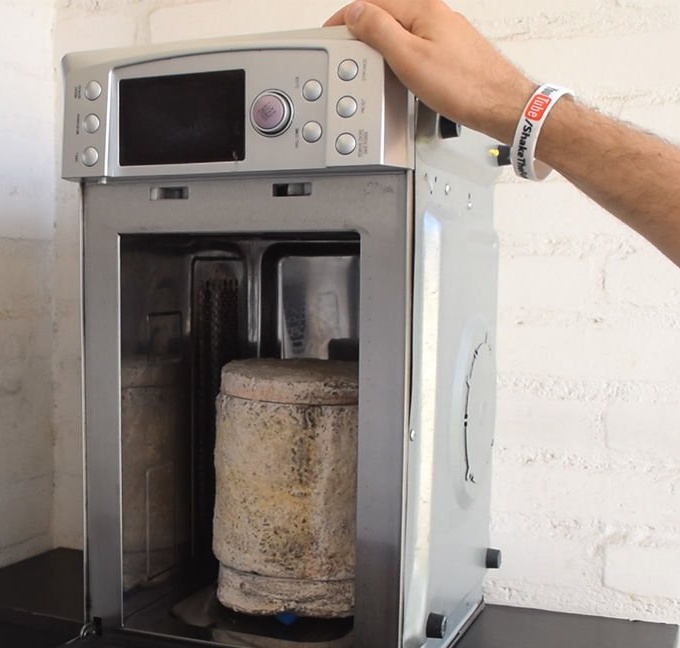
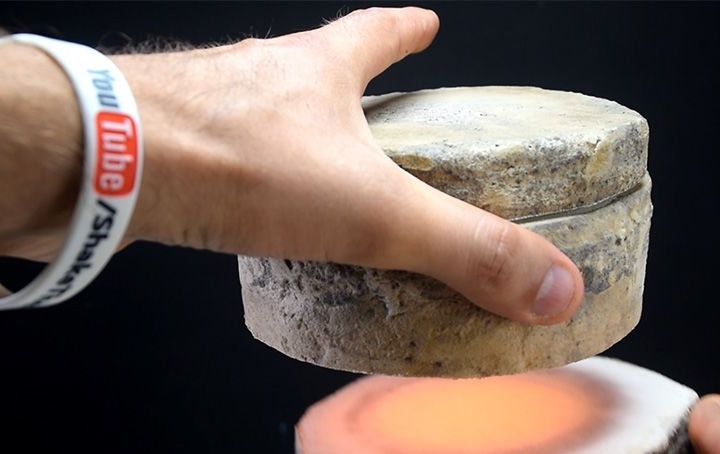
Step Six: Testing
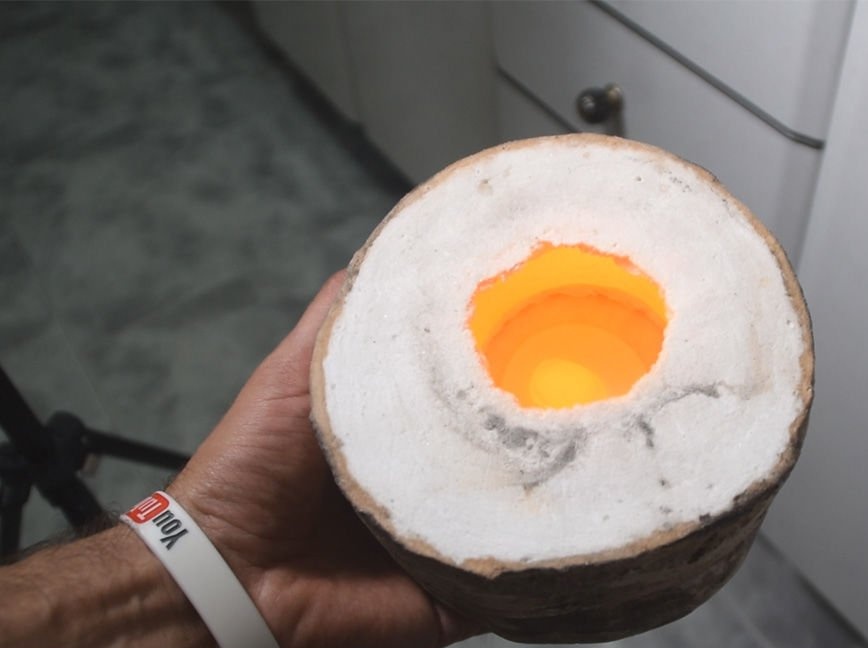
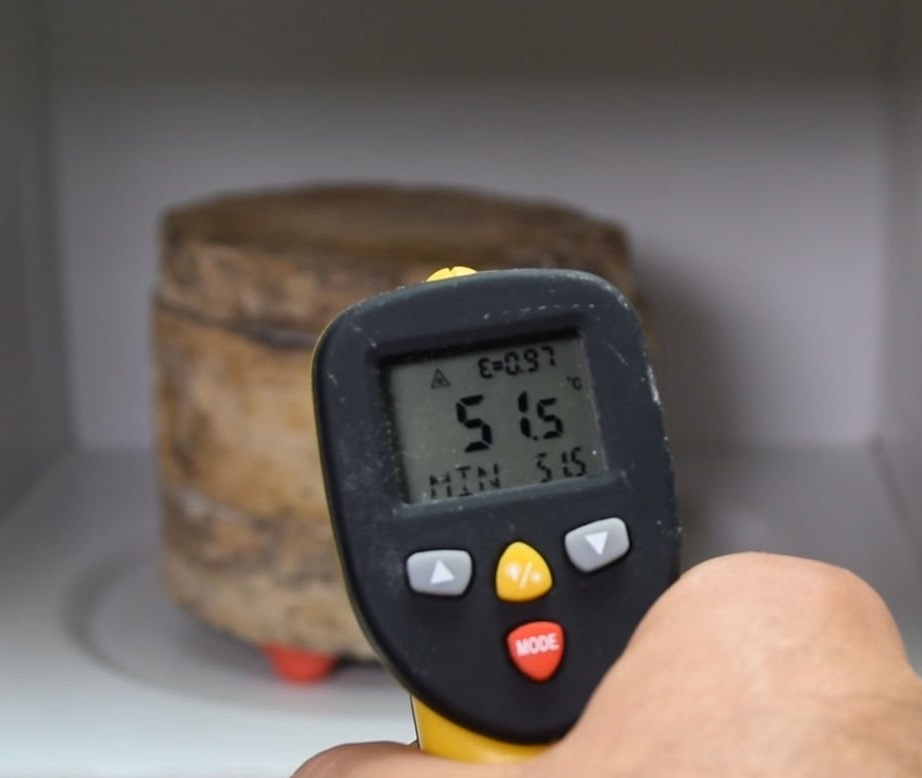
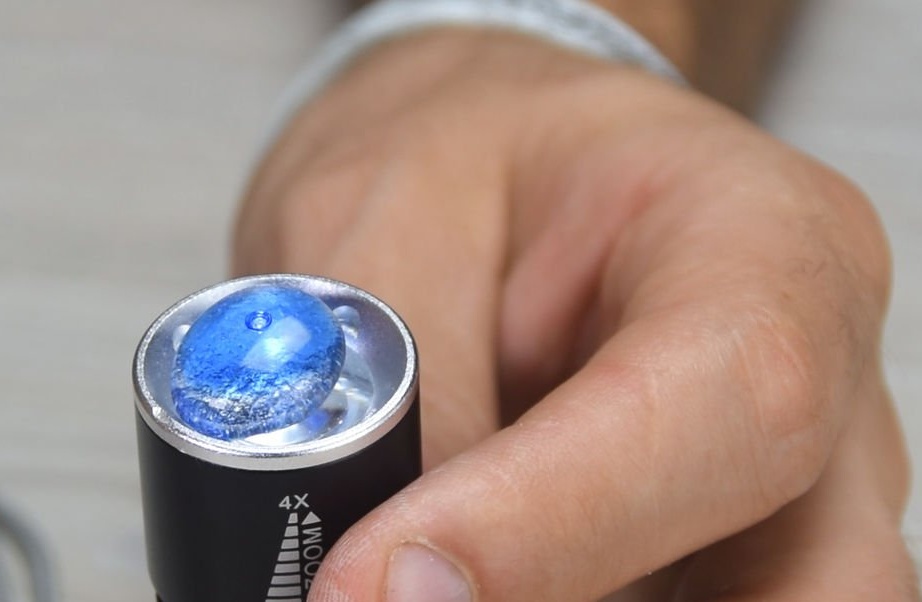
The crucible is ready and now you need to check it in operation. The master puts ceramic paper inside the crucible and already on it a piece of glass. Puts the crucible in the microwave and turns it on. Melting time depends on power. It is in this furnace that the glass melts for about 4 minutes.

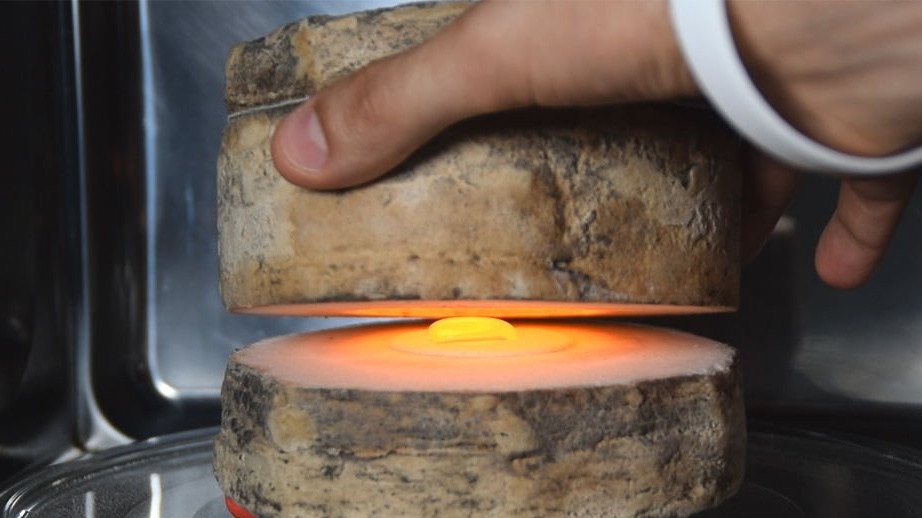
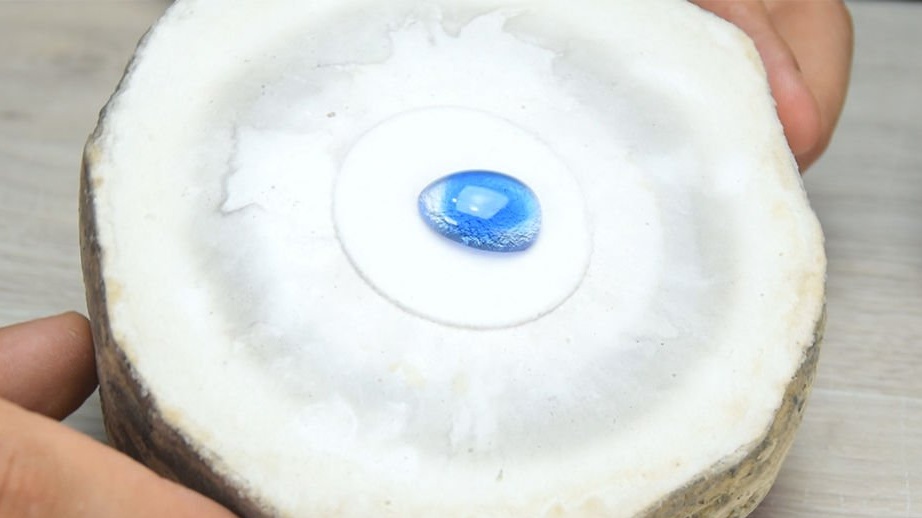
In a 800 W microwave, the glass melts for 3 minutes. But, according to the master, rapid heating is not always good for the material.
Seventh step: subtleties, tricks
In this step, the master explains why you should not cover with liquid glass between the layers of ceramics. This is necessary so that the crucible does not burn out.
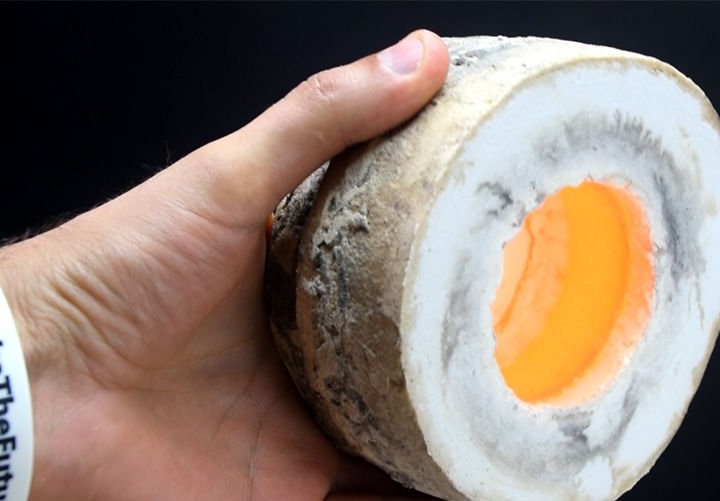
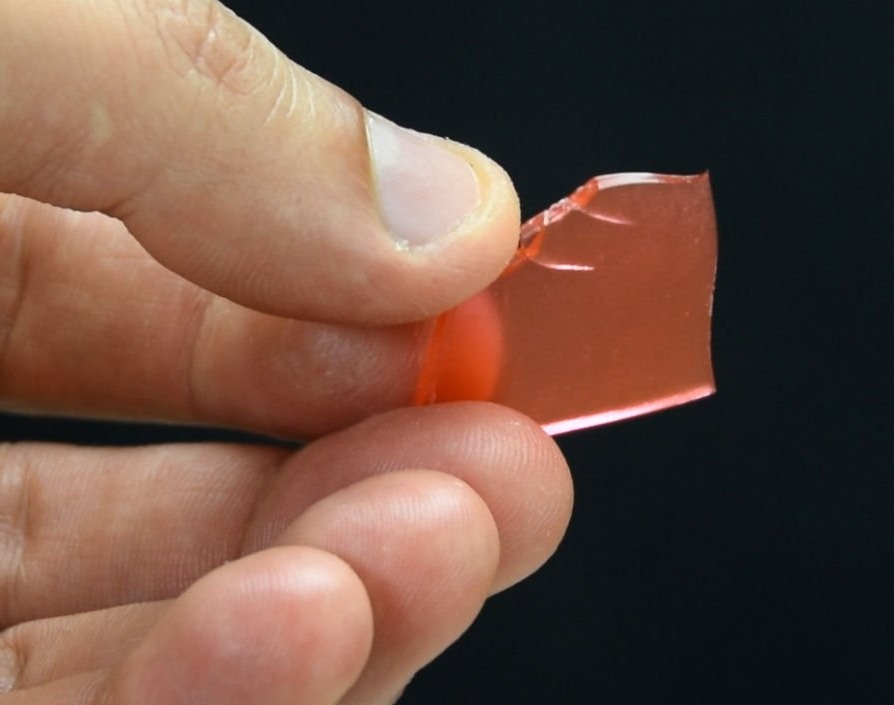
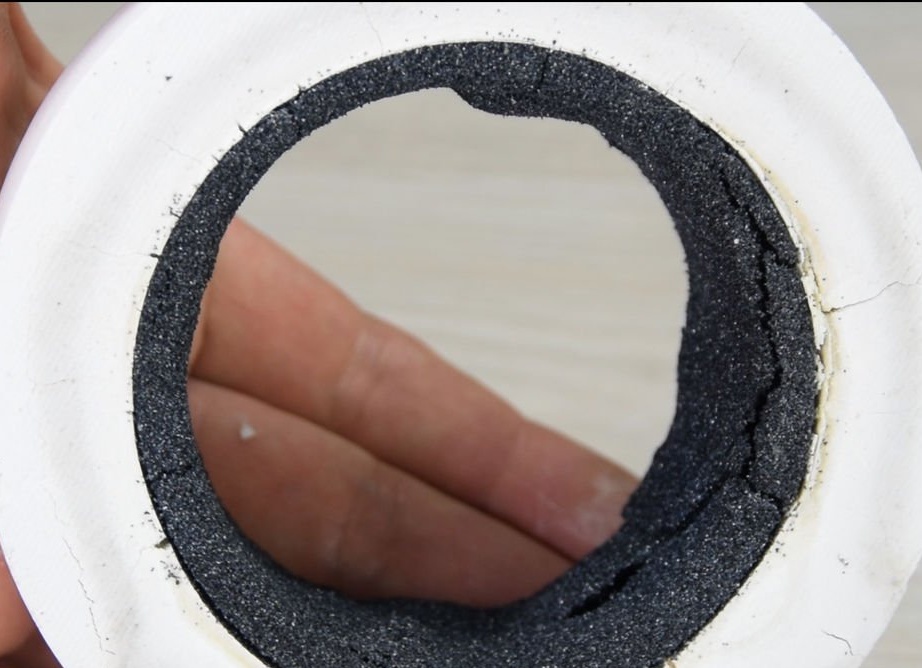
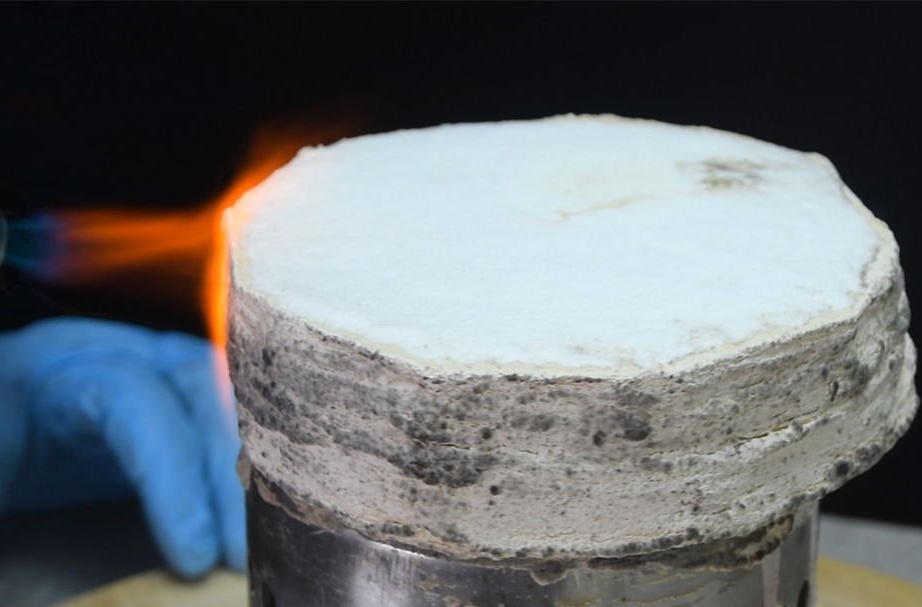
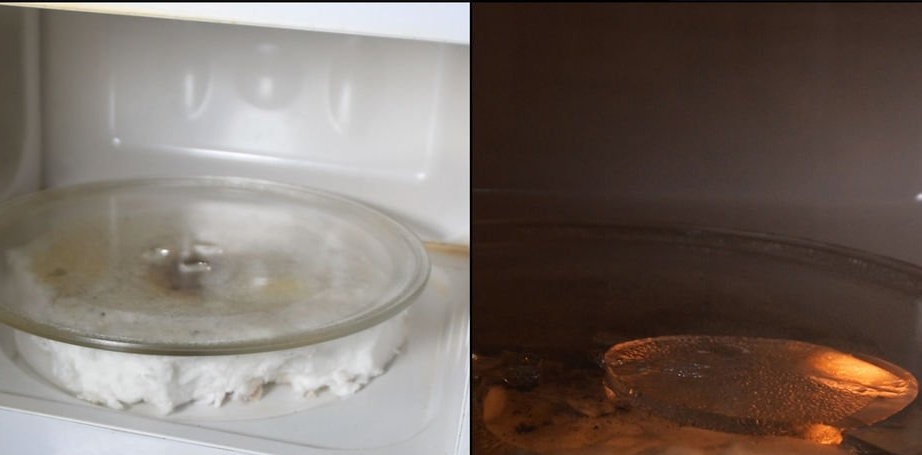
Liquid glass behaves like glass in a microwave. If you heat the glass with a blowtorch in one place and put it in the microwave, it will continue to heat up. The master demonstrates this by heating a glass plate and then placing it in a microwave. This example shows that it continues to heat up. The same can happen with liquid glass.
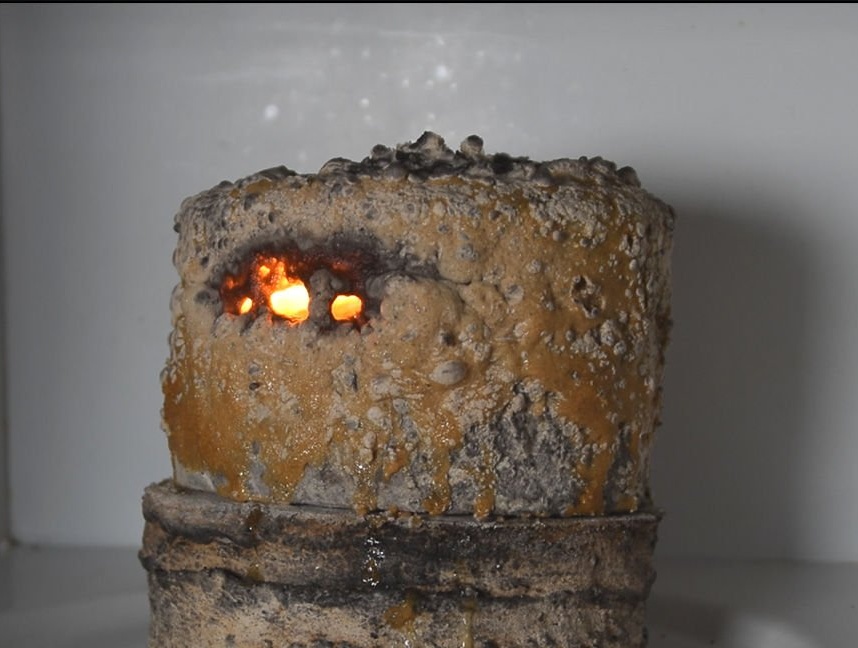
In the photo you can see a crucible with a hole that glows in red. What shines is not silicon carbide, but liquid glass. That is why the master heats it with a blowtorch so that it looks more like a stone than glass.
Grinding is used for the same purpose. The smoother the surface, the less problems there will be with use.
For the same reason, it is not necessary to apply liquid glass between layers of ceramic material.
The master says that such problems do not always arise, some of his crucible models were between the layers with liquid glass, but other crucibles failed.
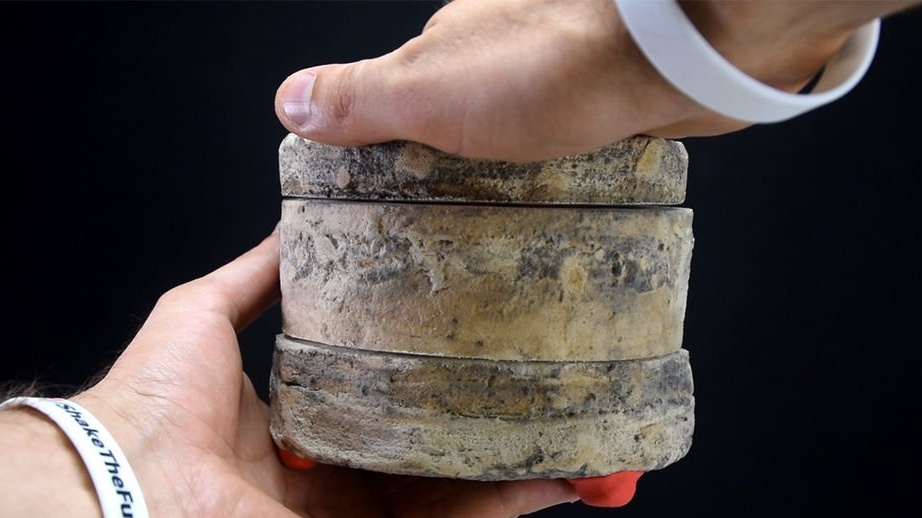
In the arsenal of the master there is also a large crucible that can only be placed in a microwave oven located vertically. This crucible has three silicon carbide rings.