
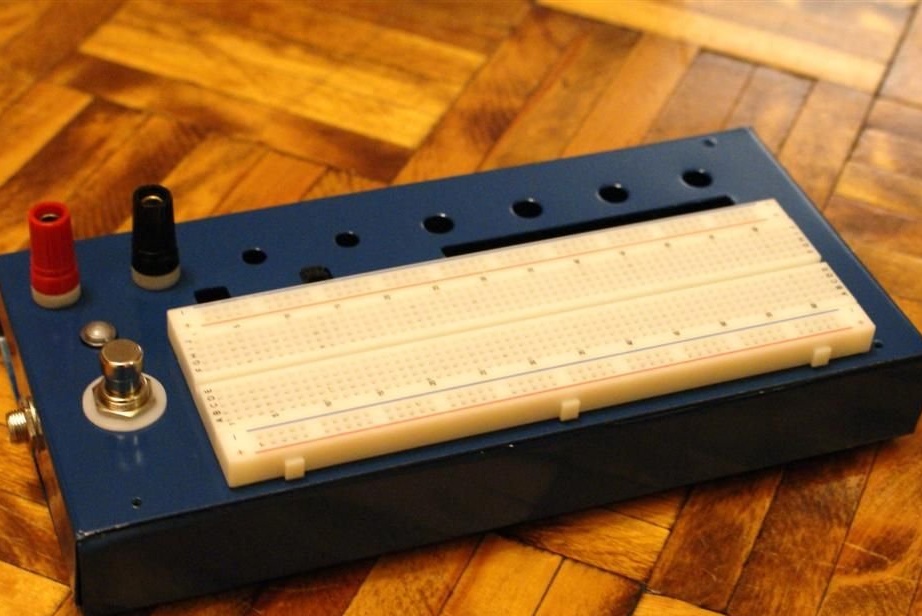
Prototyping the guitar effects, they are also lotions, on a breadboard type breadboard, the author of Instructables under the nickname mattthegamer463 encountered the inconvenience of connecting to it controls, connectors. They lie on the table, they are easy to touch the wires and drop them. The master came to the conclusion that it is better to place such a board on the front panel of the case, where, in addition to it, landing holes are provided. Some of the components are already installed in them before shooting.
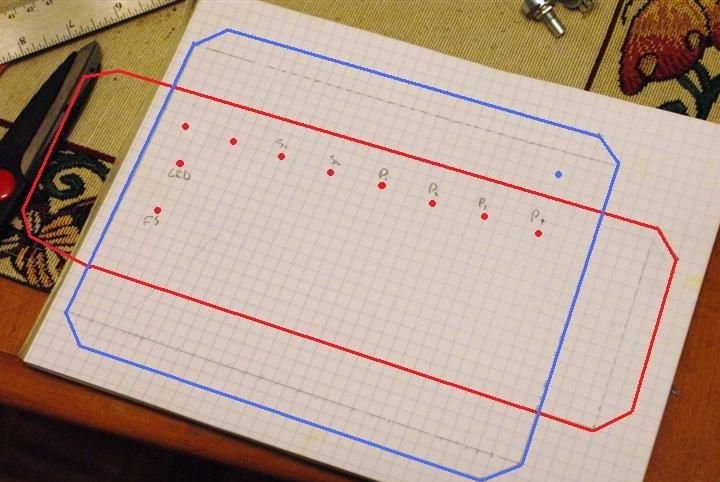
Make case homemade the master decided from an aluminum sheet of the 20th "gauge", for aluminum it is 0.813 mm (for steel it would be 0.912). In England and the USA, there are special “gauge” tables for wires and sheet metal. The developer draws up a drawing of the case:
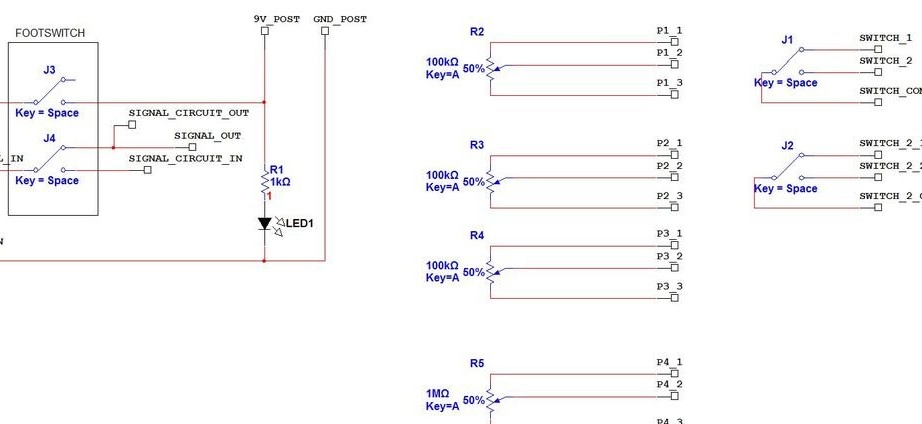
And an electrical diagram showing components installed in the seats on the front panel, as well as the points of their connection to the breadboard. As a pedal, a standard button is used, found in many guitar “lotions”, with two switching contact groups, one of which turns the effect on and off, and the second sends the signal either directly from the input to the output, or through the circuit assembled on the breadboard.
Case dimensions (WxHxD) are selected equal to 8.5x4x4 inches, for convenience, the master marks everything on a sheet in a cage in increments of a quarter of an inch. In the upper horizontal line, the center-to-center distance between any of the adjacent holes is one inch. The distance between the centers of the holes for the LED and the pedal is also one inch, they are the same distance from the left side of the case.
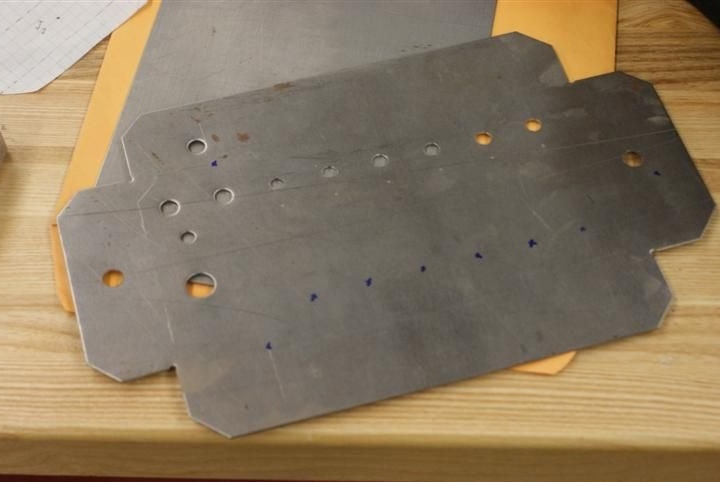
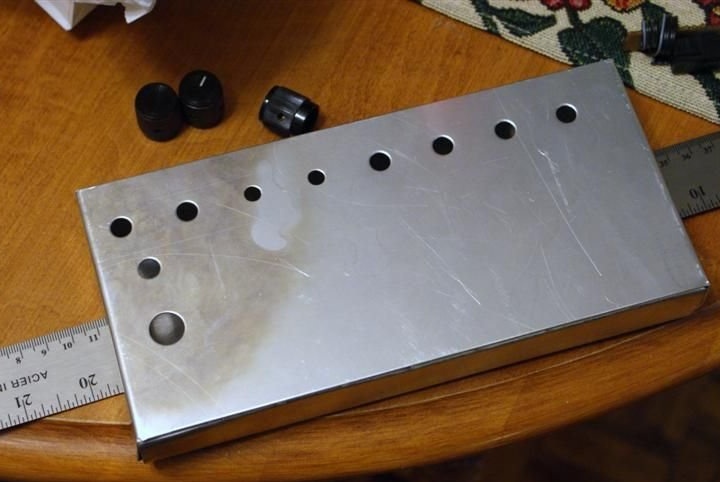
Having cut out the template, the master imposes it on an aluminum sheet, transfers the contour with an awl, after which it cuts out a flat workpiece of the case, core and drills round holes. If you do not know what it will be, you can take it for the preparation of the chassis for something tube ... but alas.
It bends the workpiece ... even more like a chassis for something tube:
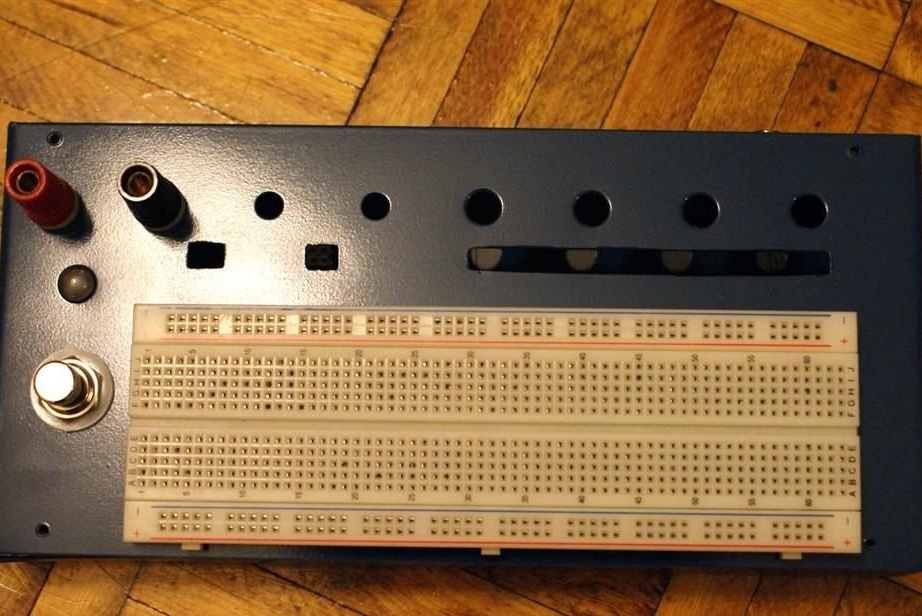
Then the master drills additional holes below the holes in the horizontal row, which then turns the file into rectangular. They are needed to bring out the conductors from the controls and connectors.These conductors can be connected to the required points on the breadboard. Finally, the master paints the workpiece, makes the bottom for the case from a similar aluminum sheet, and also paints. For example, by installing in the holes those components that are not supposed to be replaced (terminals, LED and pedal), they connect them from below according to the diagram, and then glue the breadboard type breadboard on top with double-sided tape:

It connects the bottom with the top cover with two screws on the sides, photographs the finished homemade product near, showing, in particular, the added rectangular holes for the output of the conductors:
Now on the breadboard you can collect guitar effects according to various schemes and compare them with each other. To remove the power from the circuit to make changes to it, just press the pedal.