
I welcome all lovers to craft, today we will consider how to make a unique round table of wood. The design of the project is quite complex and the author used quite serious equipment for the manufacture of the table. The main difficulty is the manufacture of legs and warp, here you will need high precision cutting.
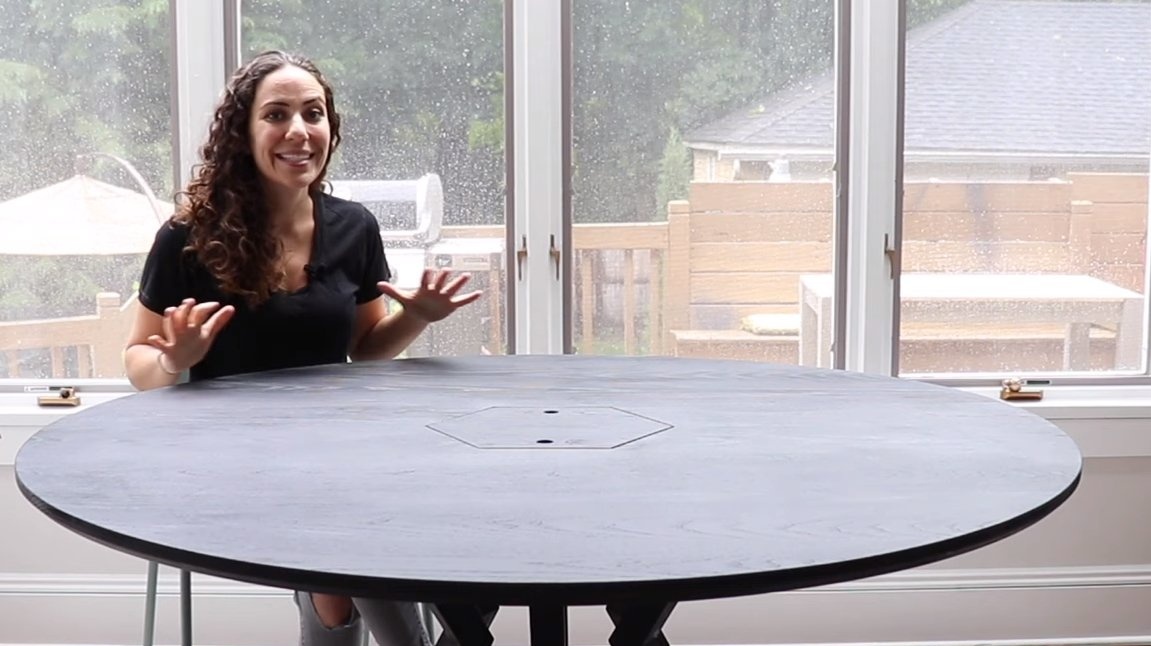
In the center of the table, the author provided a compartment for storing pencils and other office supplies. If the project interests you, I propose to study it in more detail!
Materials and tools used by the author:
Material List:
- boards and bars (from a beautiful and durable wood species);
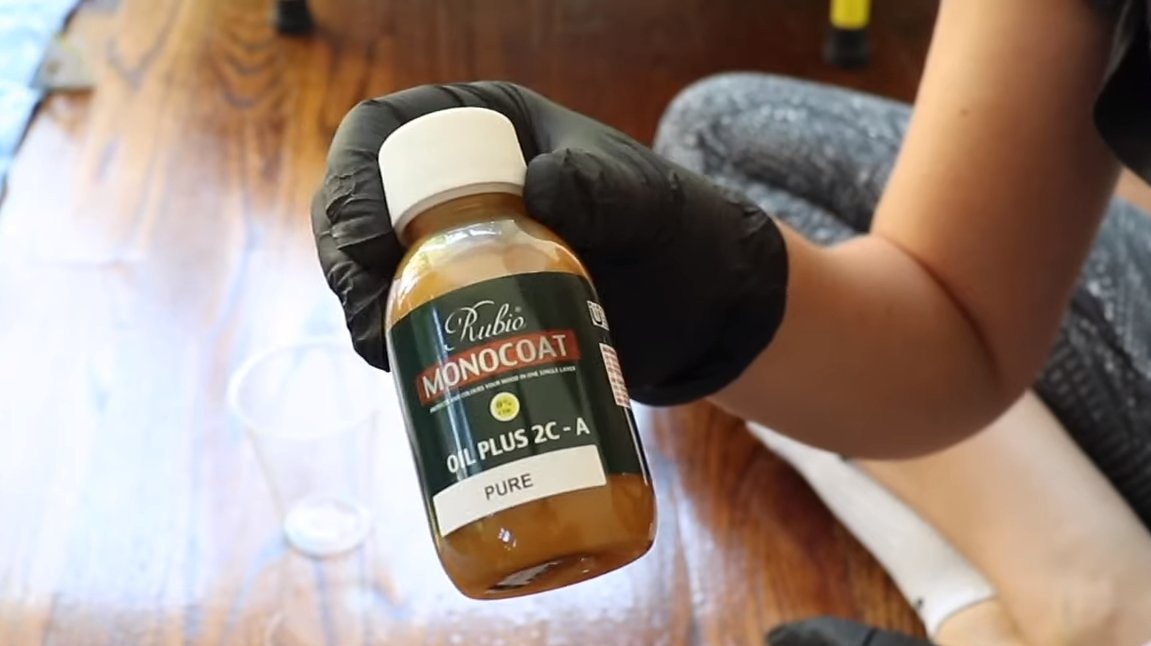
- stain and oil for wood;
- furniture dowels;
- carpentry glue;
- self-tapping screws;
- fixing loops;
- plywood.
Tool List:
- orbital sander;
- a planer;
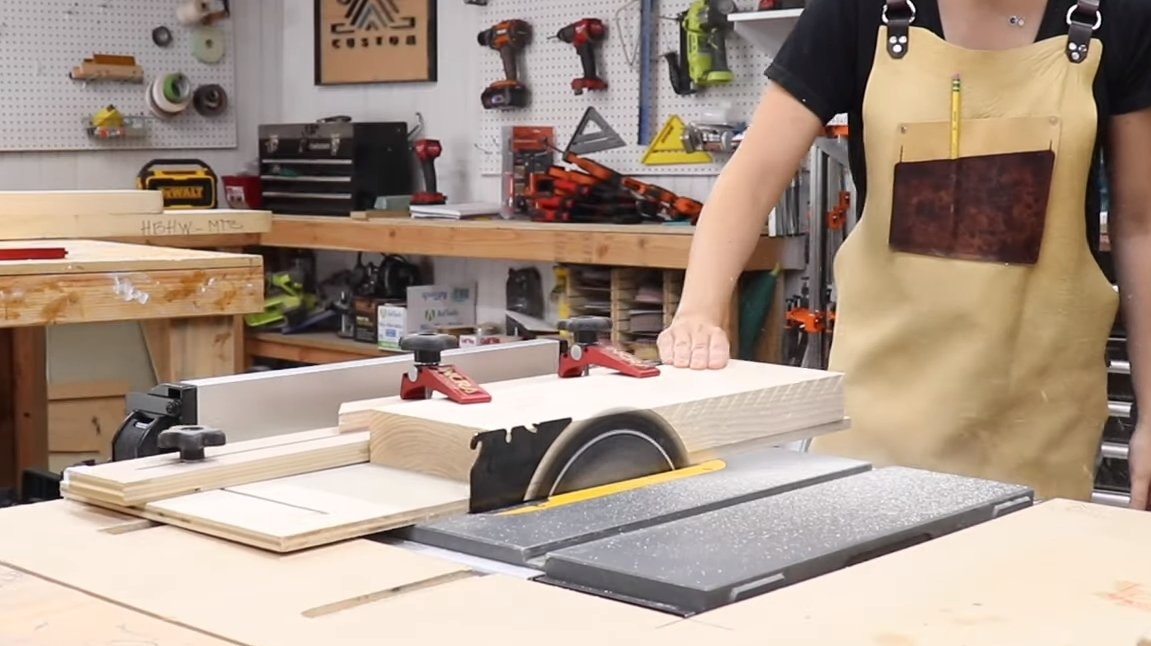
- a circular saw;
- milling machine;
- manual frezer;
- a circular saw;
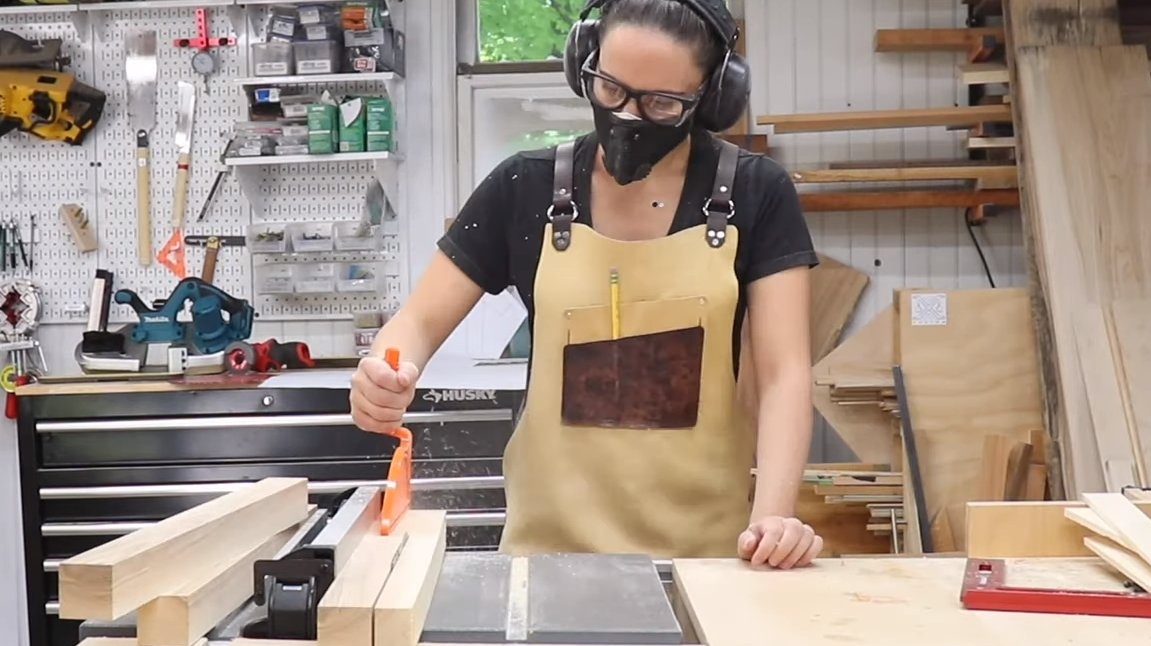
- clamps;
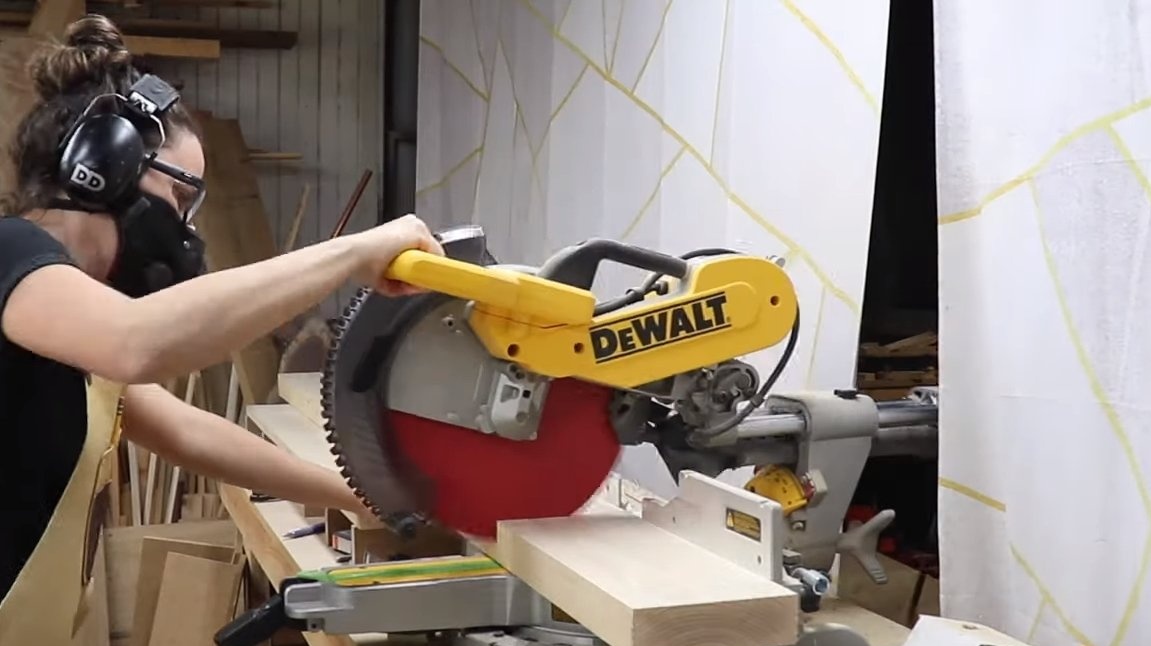
- Miter saw;
- a hacksaw, hammers and more.
Manufacturing process homemade:
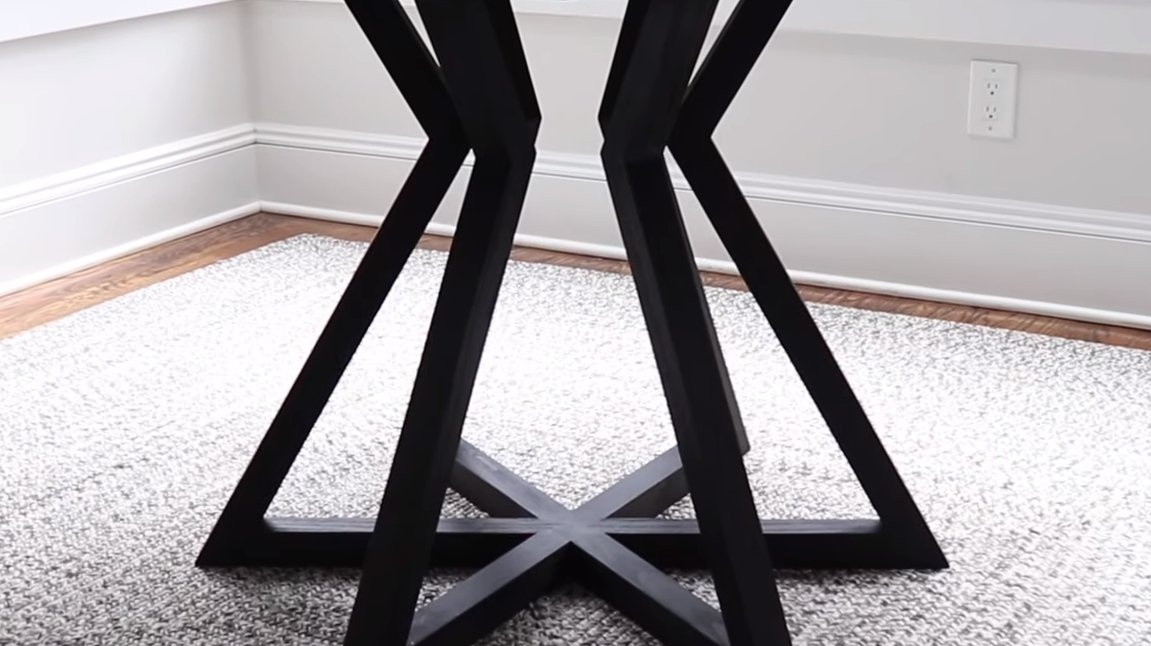
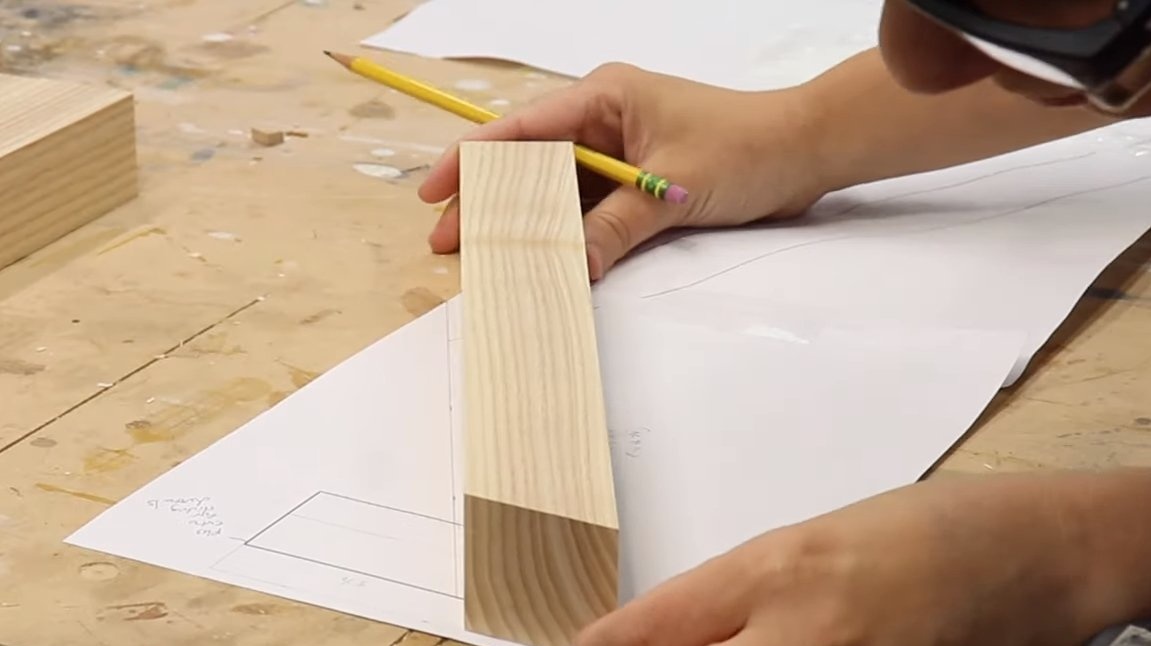
Step one. Legs
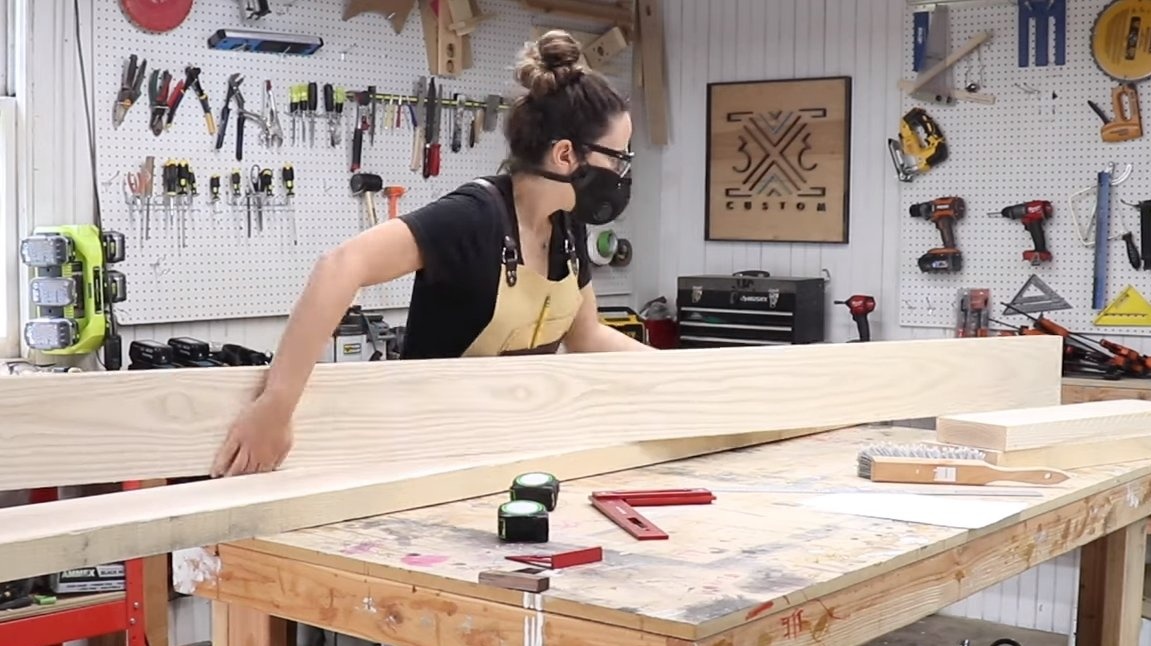
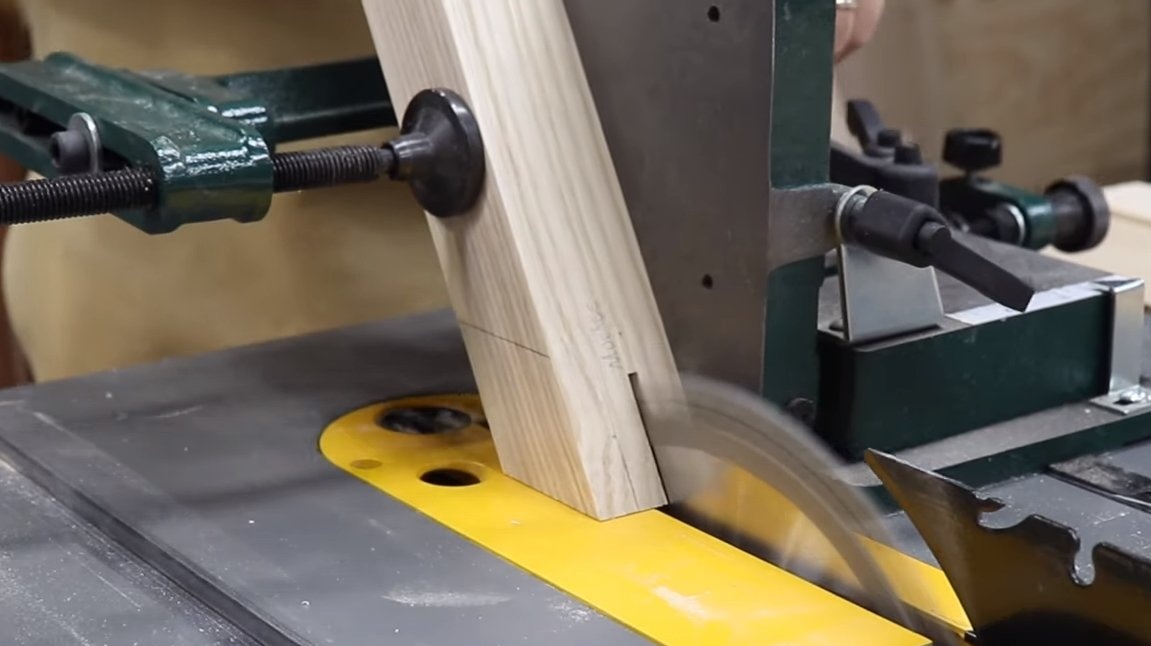
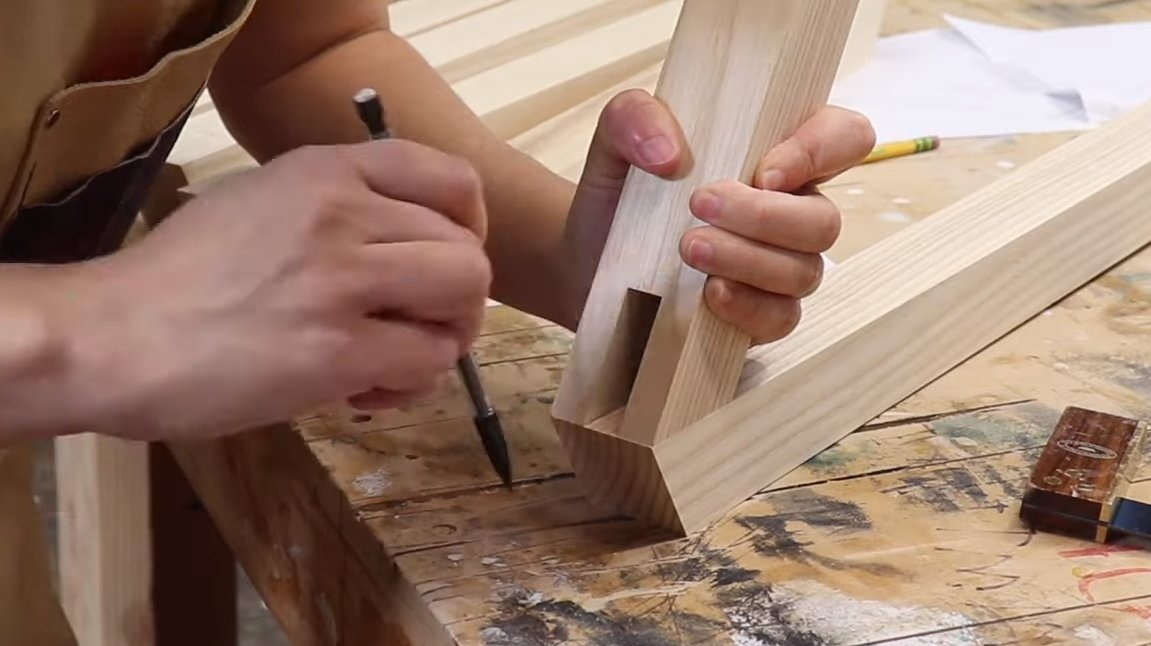
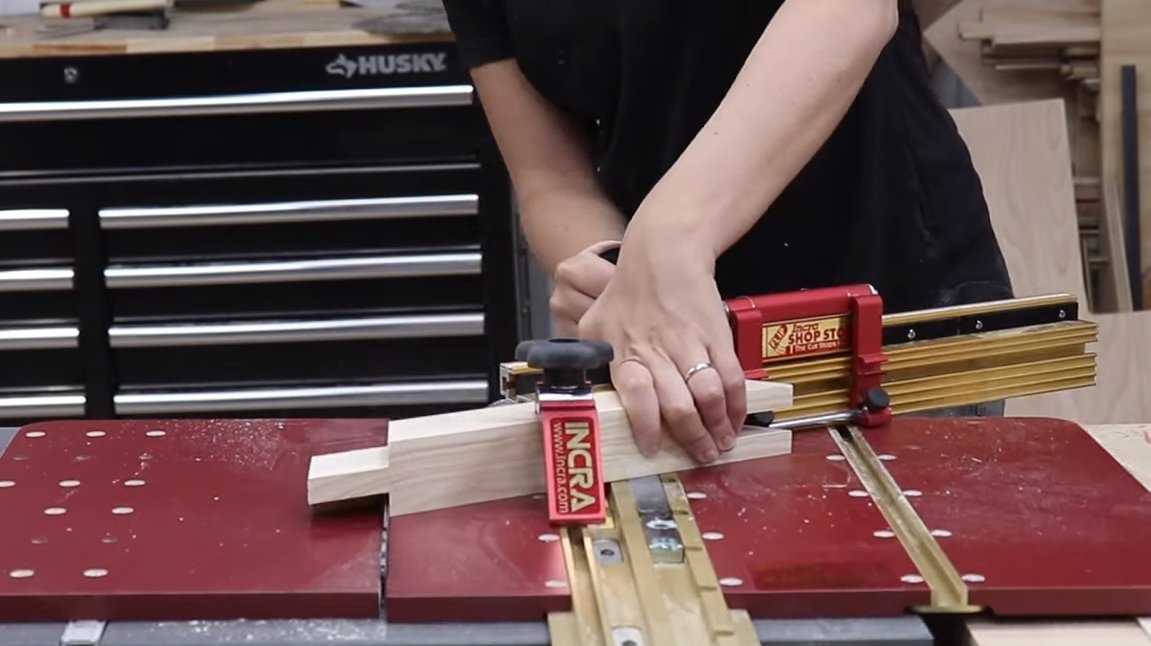
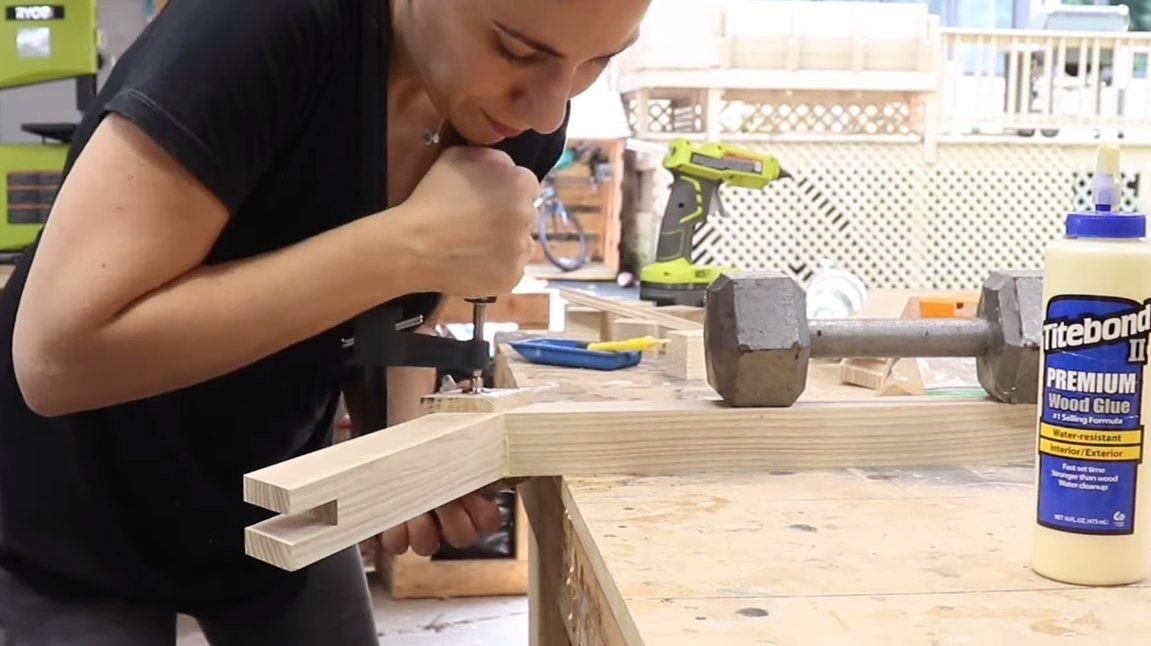
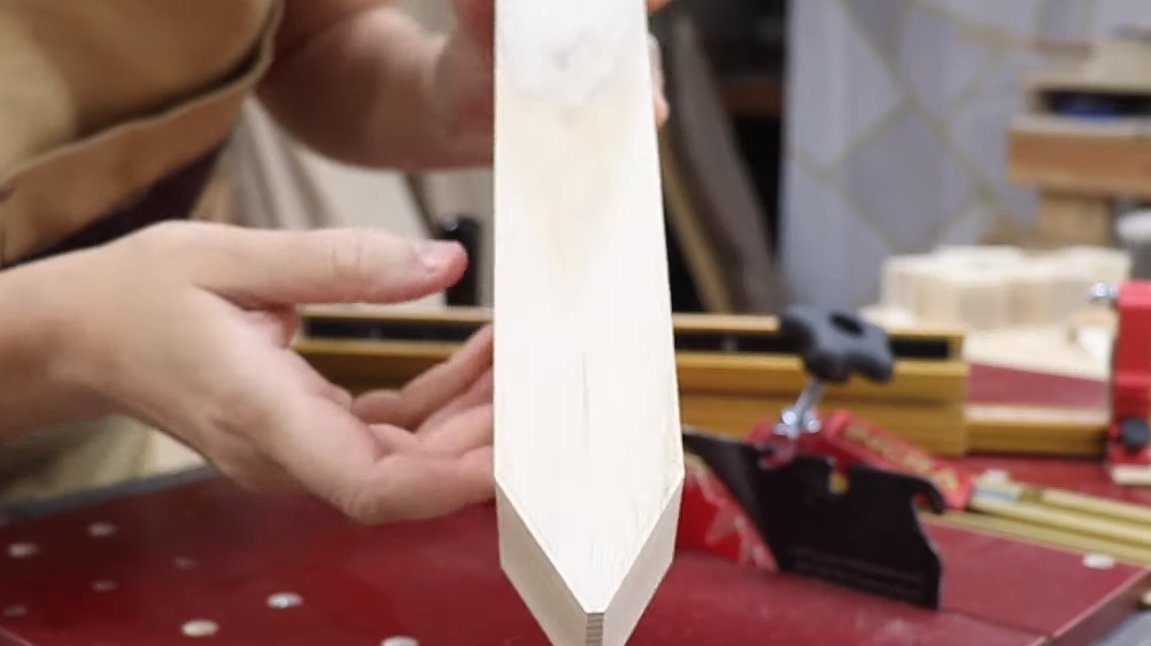
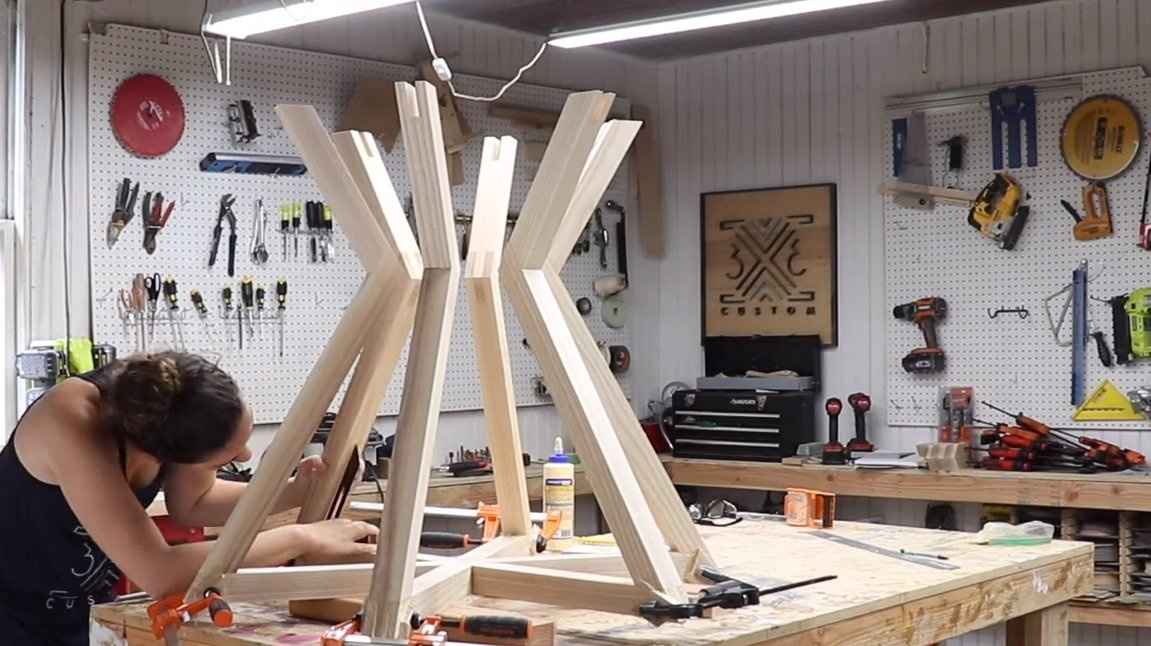
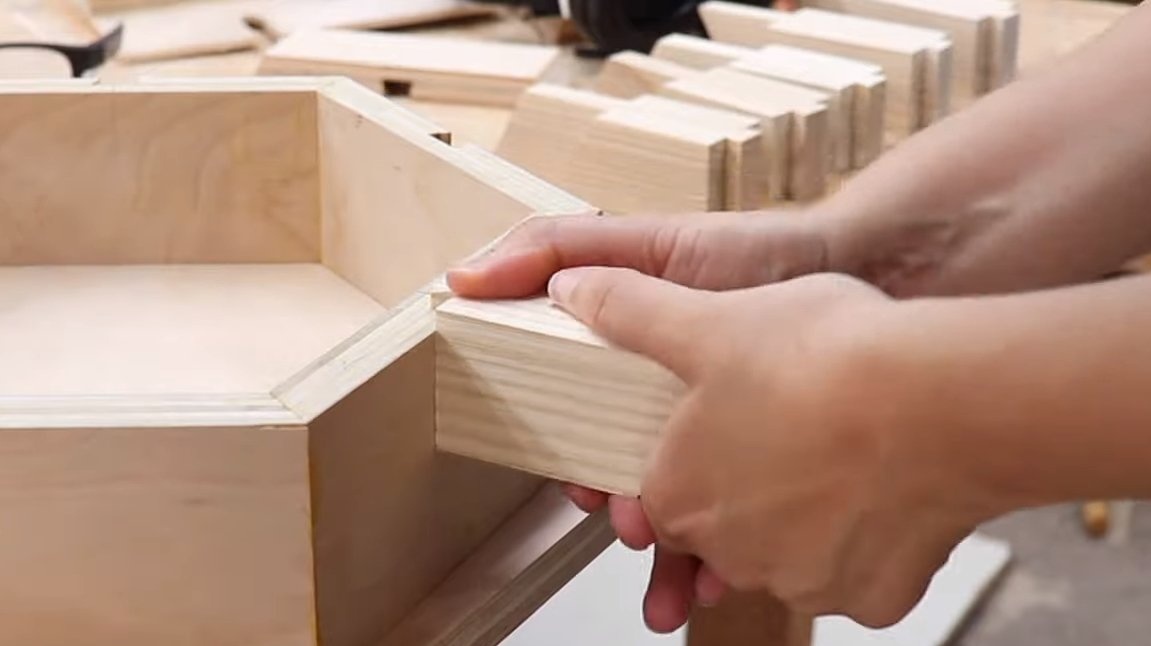
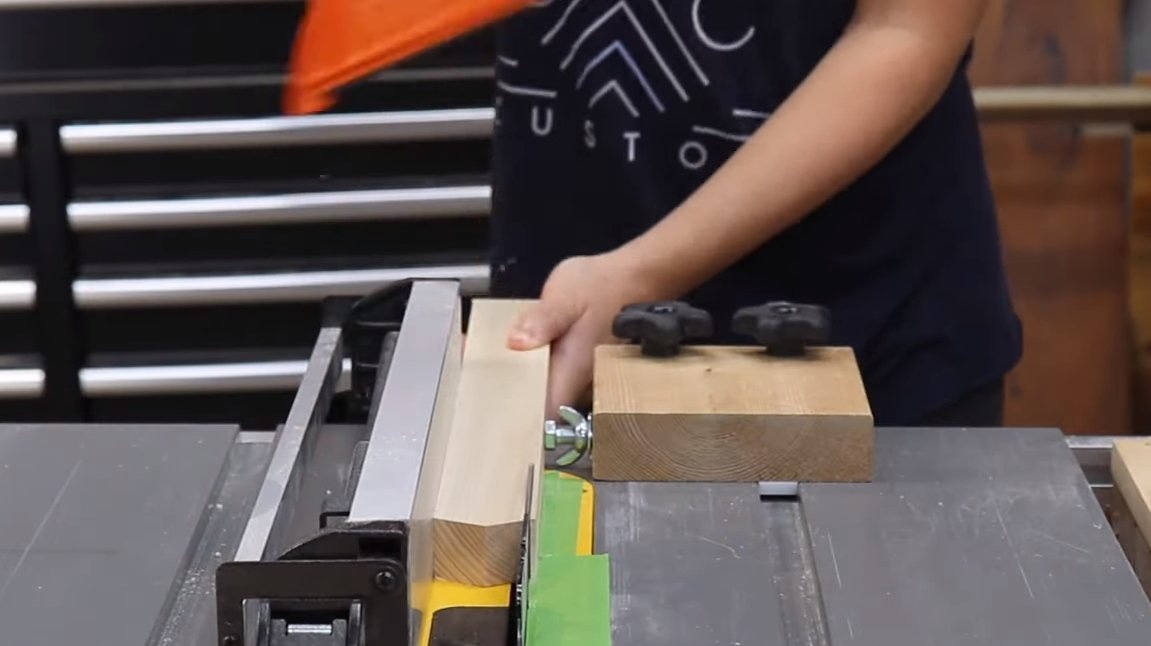
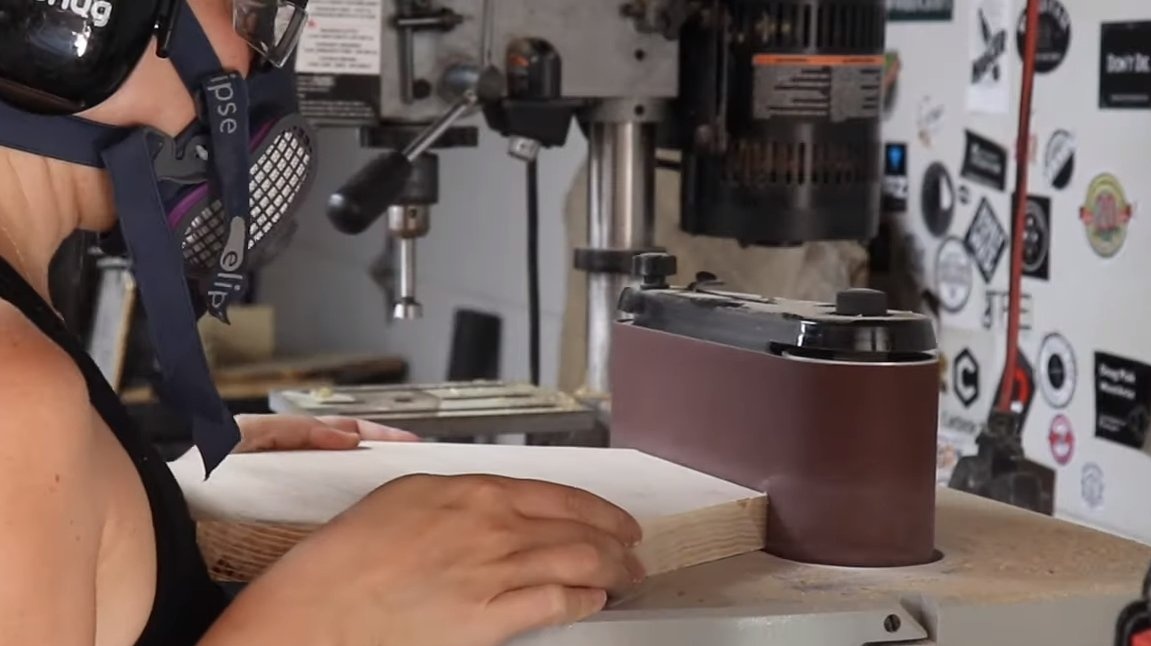
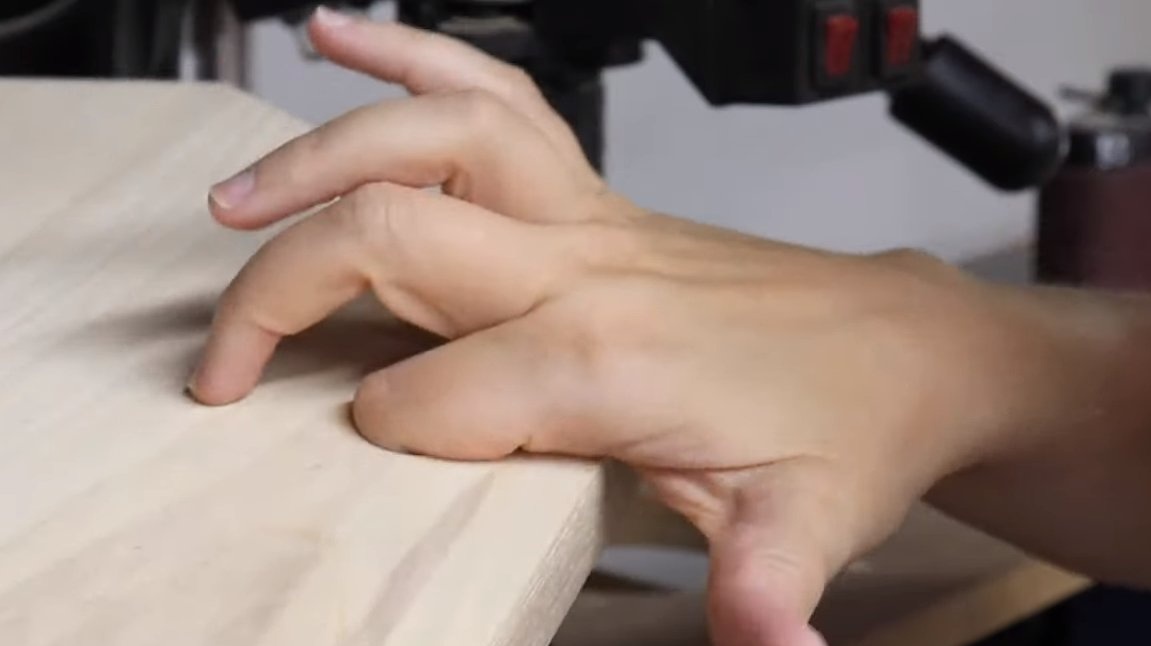
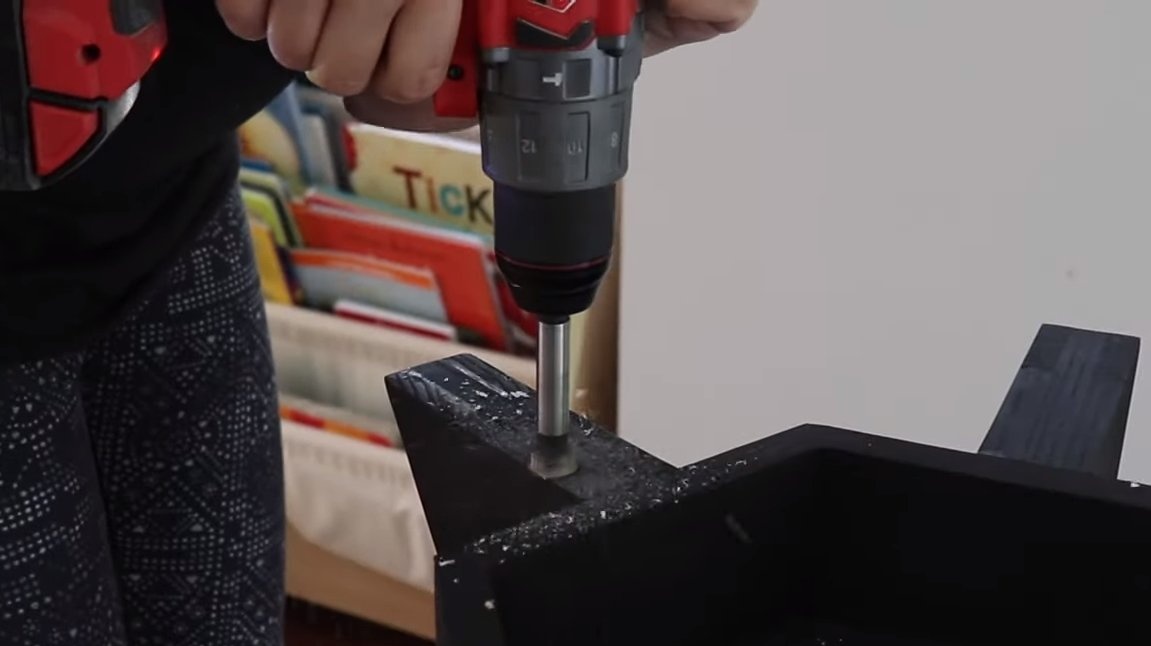
First, we’ll make the legs, there will be 6 of them at the table. For the manufacture of legs you will need bars, if there is no such material, the bars can be cut on a circular saw from thick boards.
Each leg consists of two parts, the parts are interconnected using a spike connection and wood glue. The most important thing is that all the legs are the same, it is important to observe all the corners and glue everything securely.


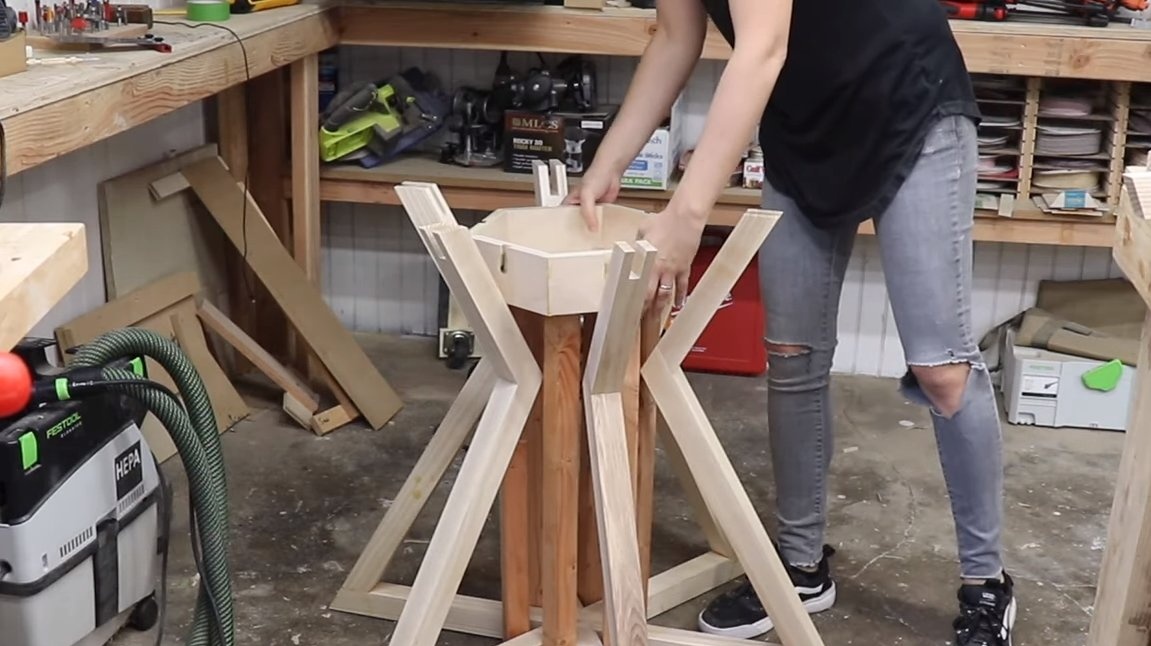
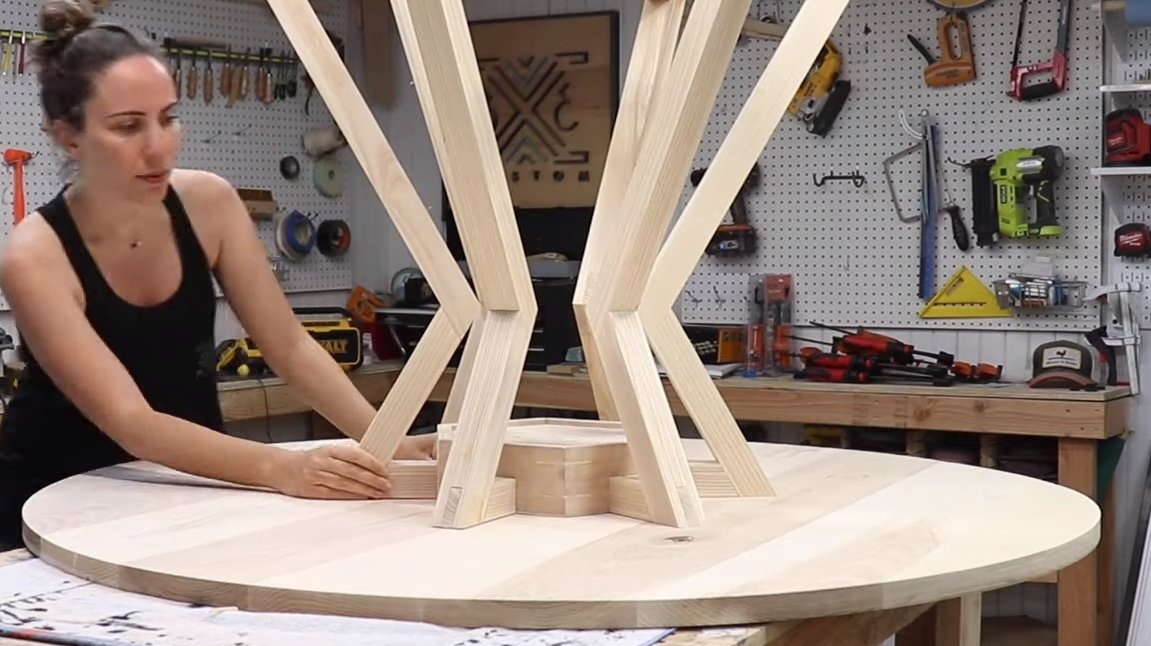
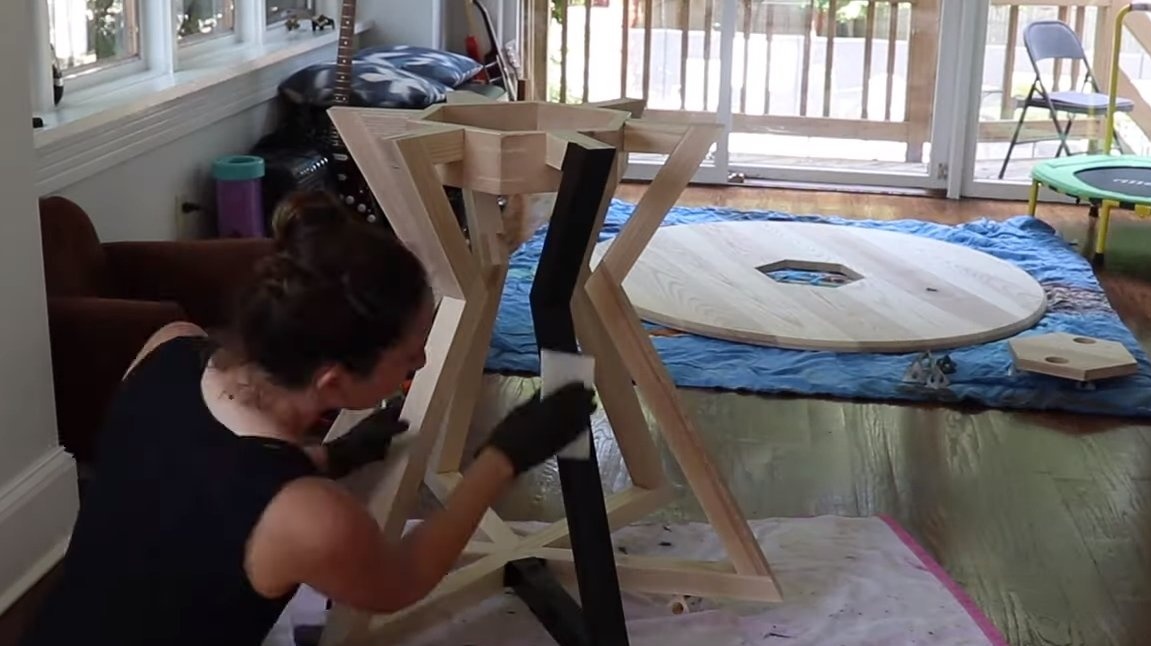
Step Two The foundation
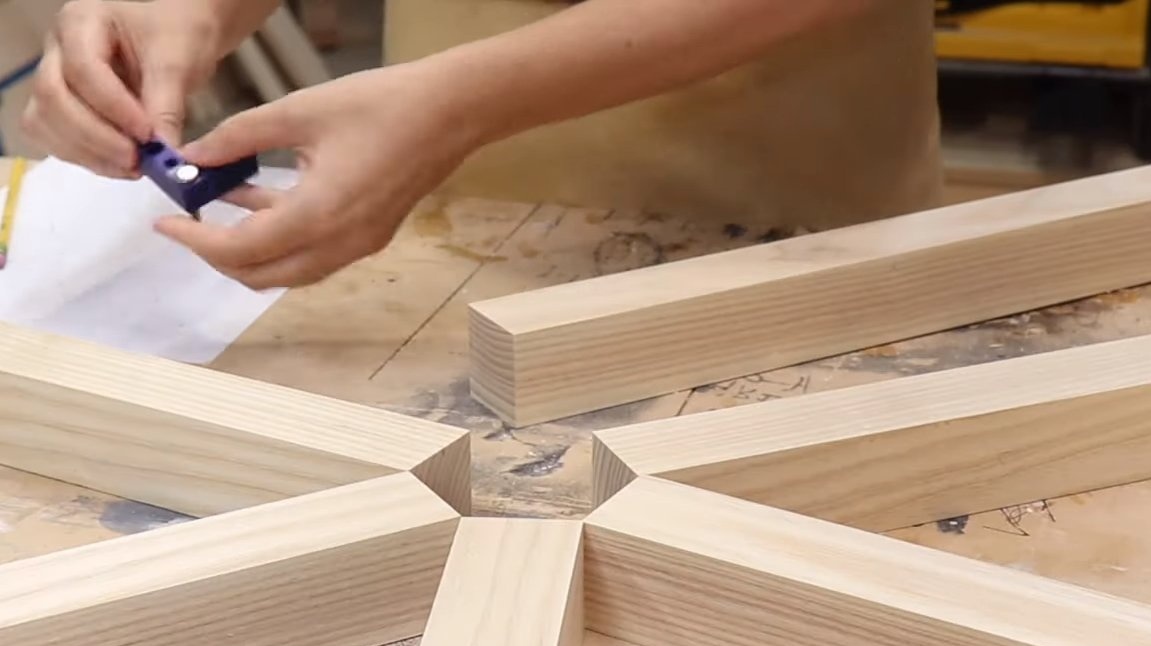
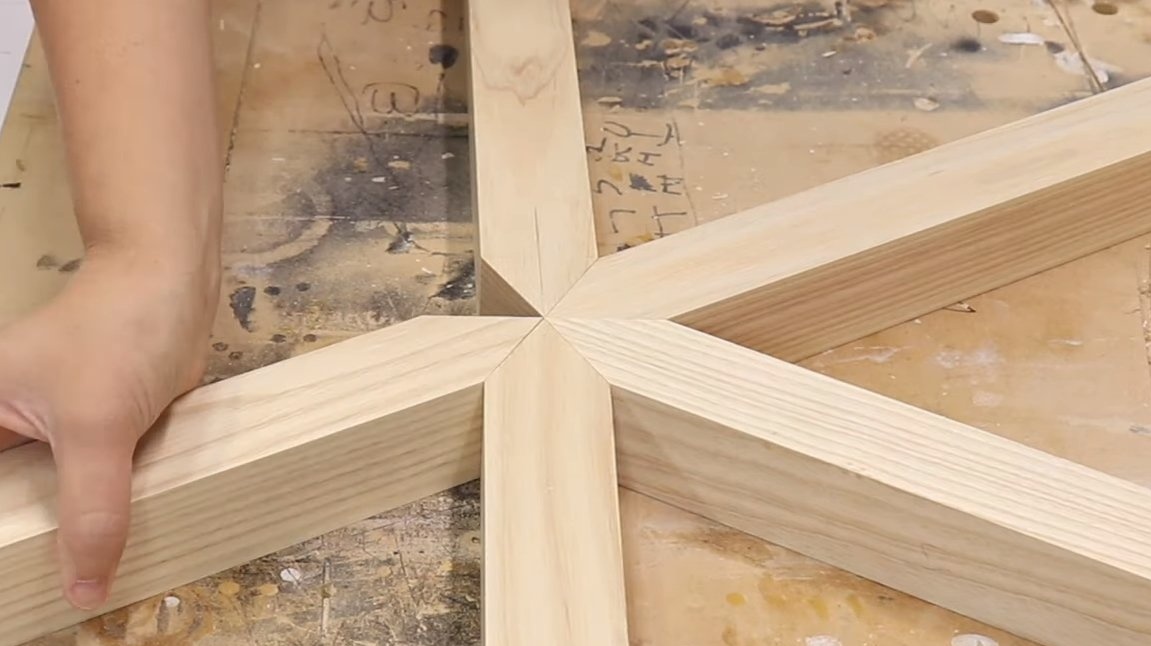
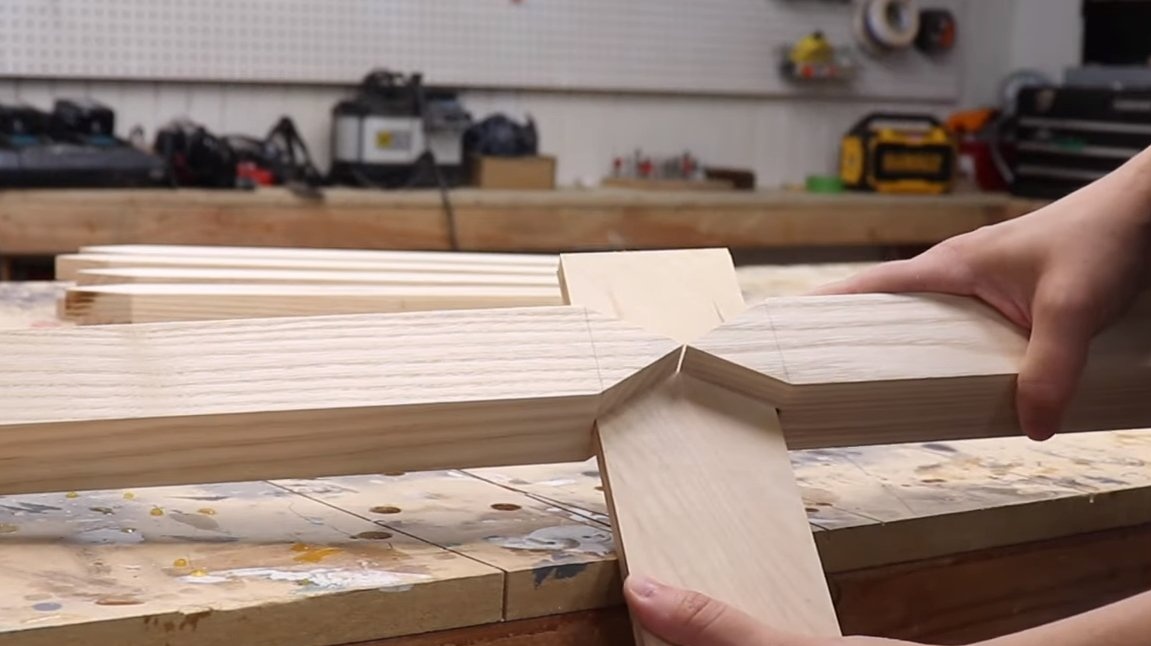
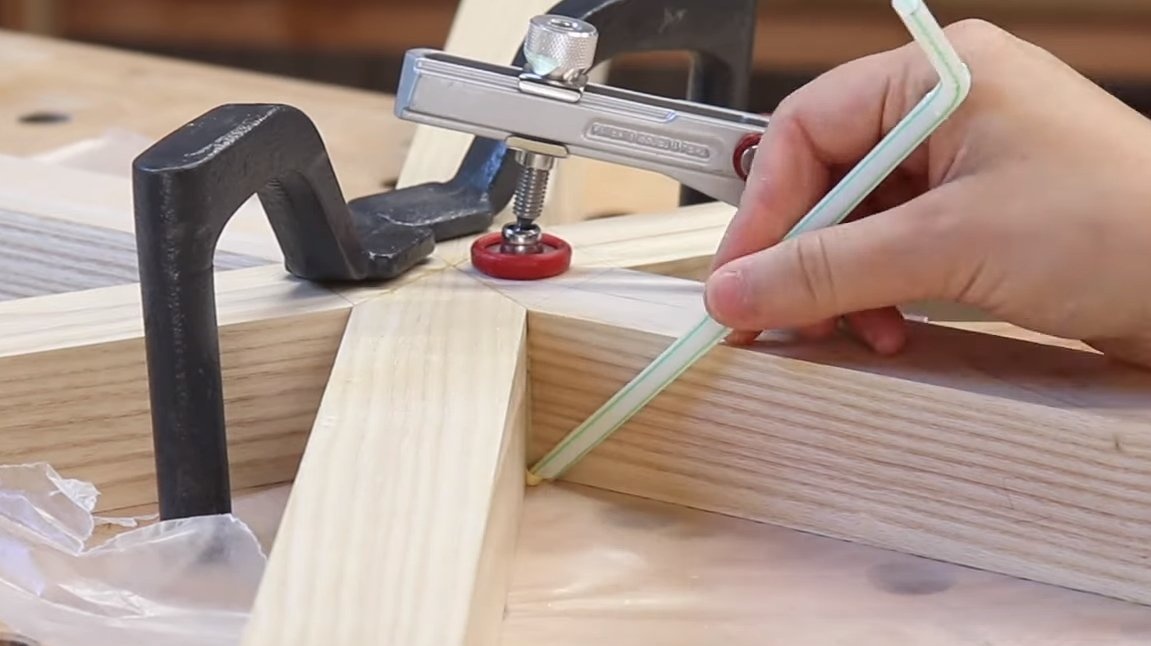
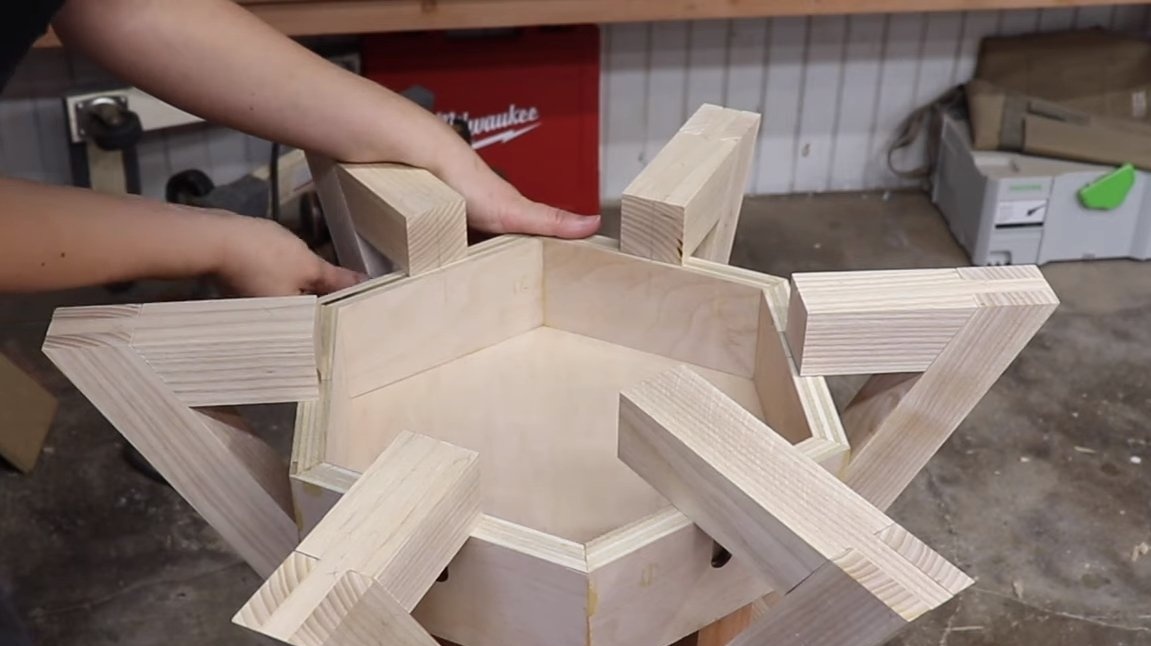
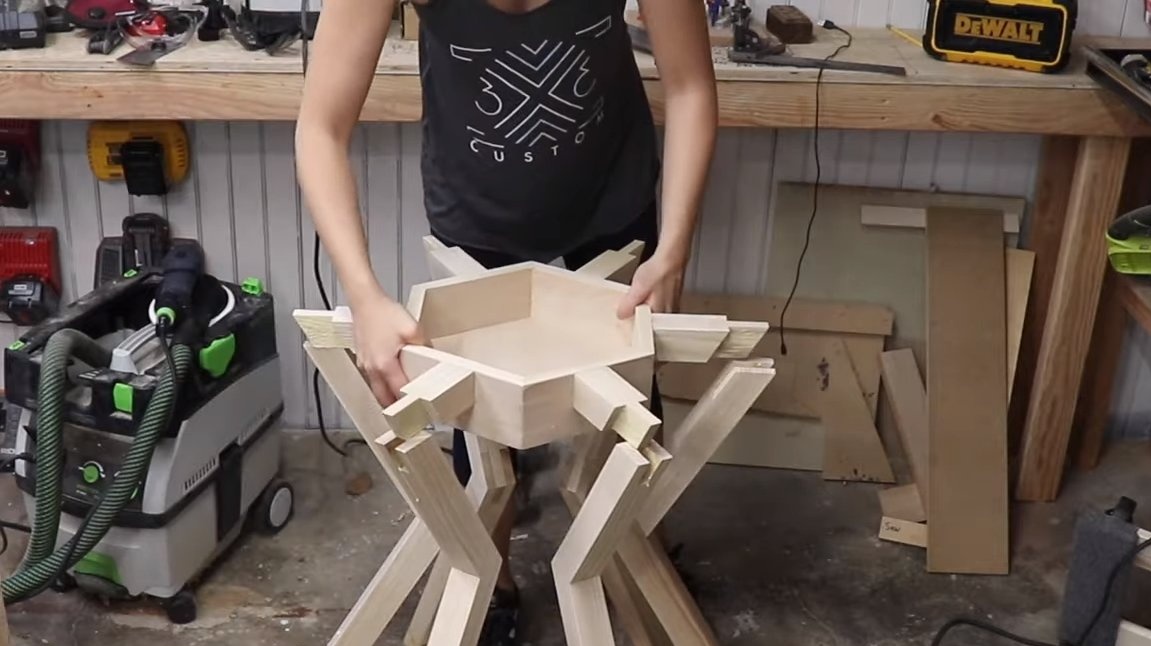
We assemble the base for the table, the necessary base is mainly in order to connect all the legs in a single structure, as a result, everything will hold very tight.
The base is a 6-pointed star, it is assembled from bars. A plywood part is glued in the center of the star, and the legs are attached to the star using a spike connection. When the star is ready, you can install the legs on the base.


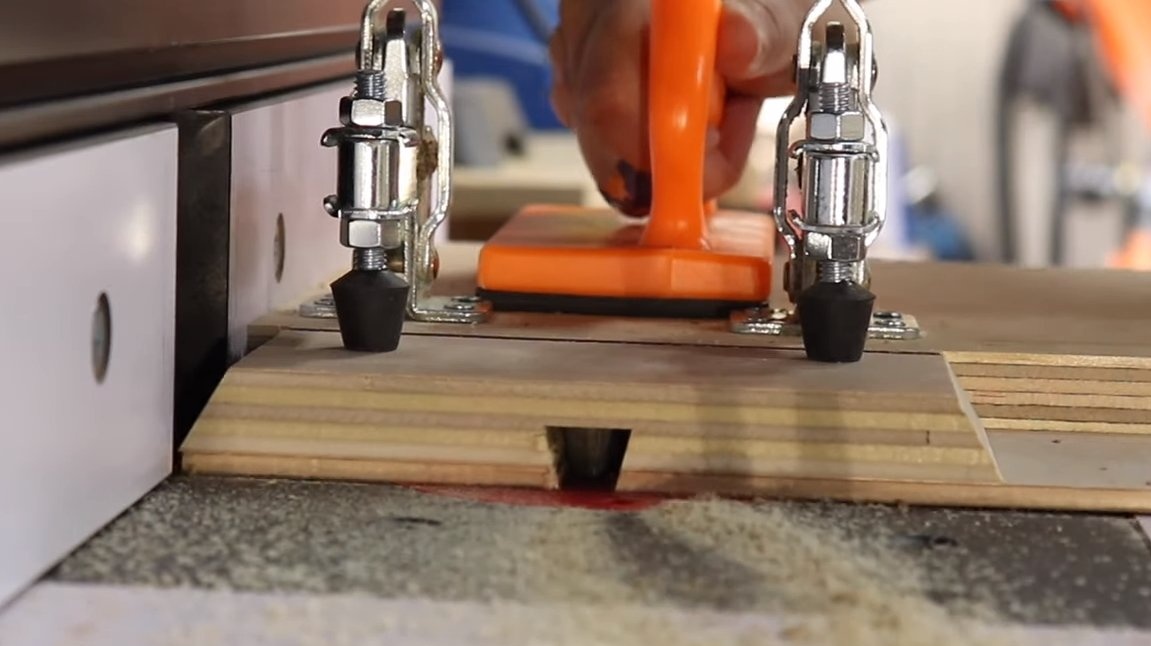
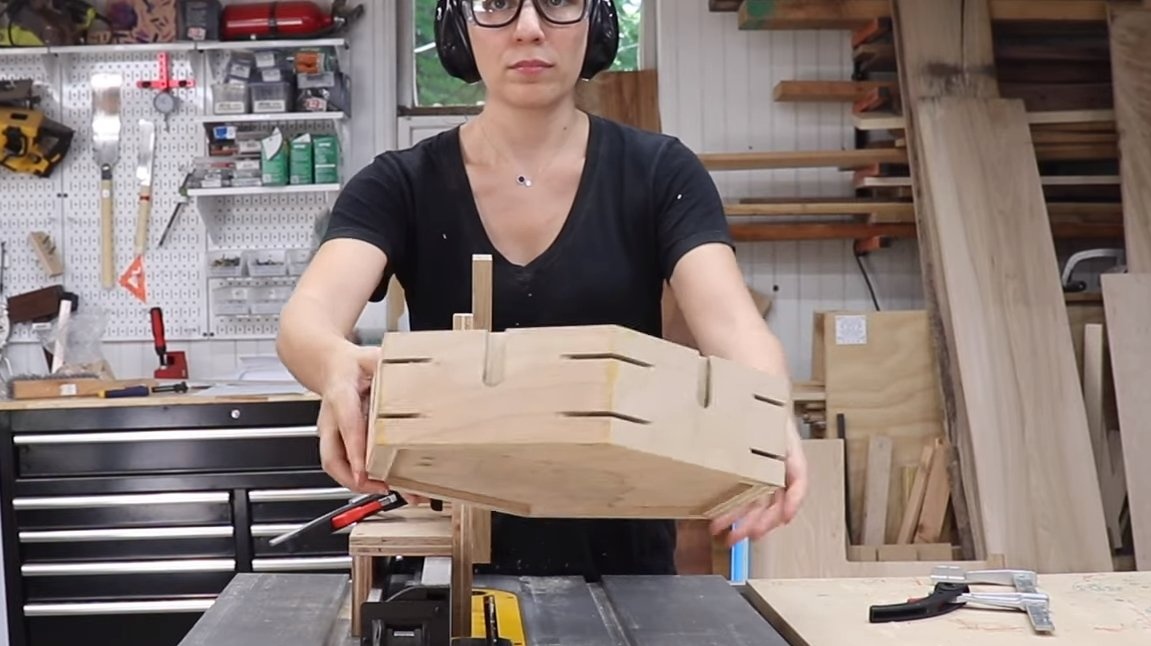
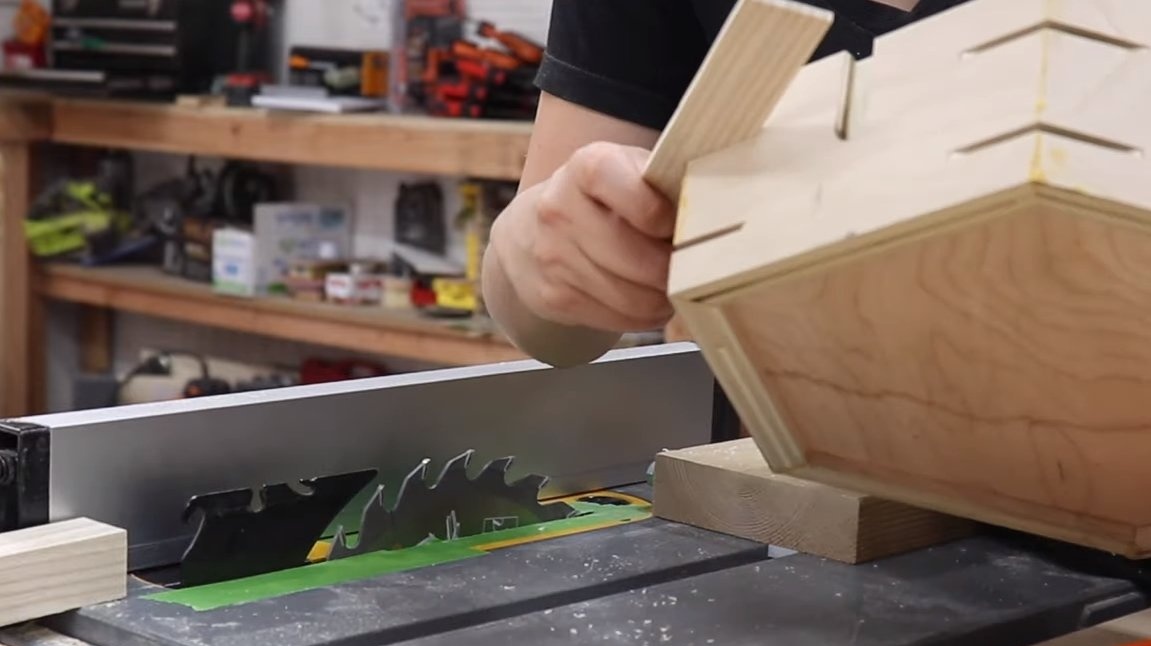
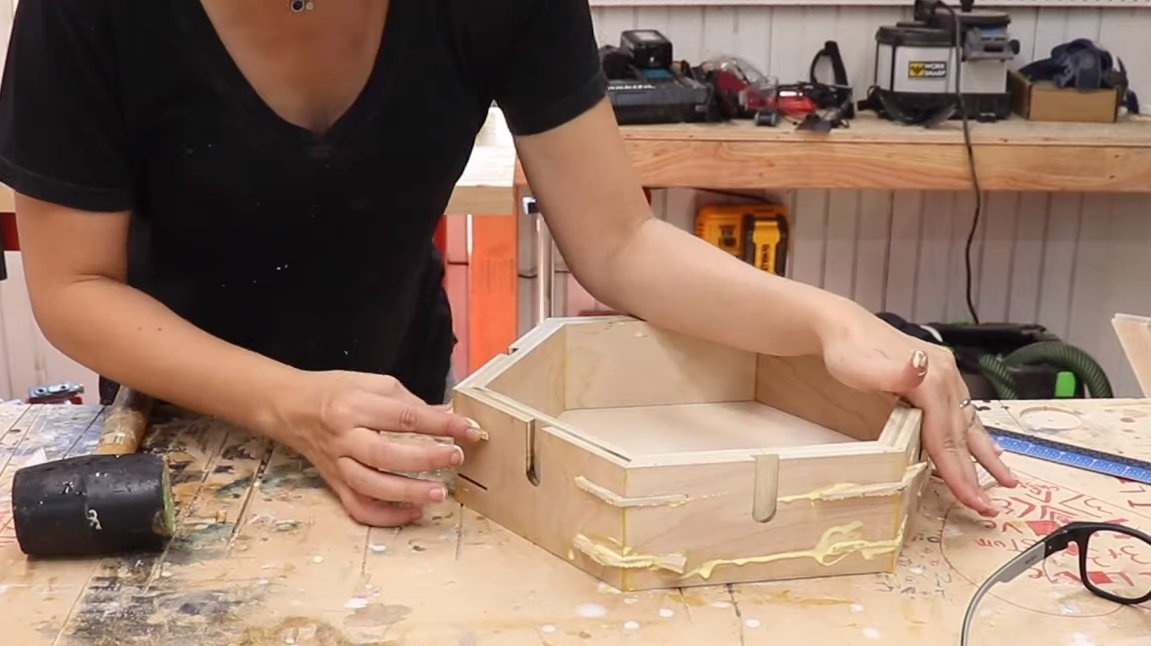
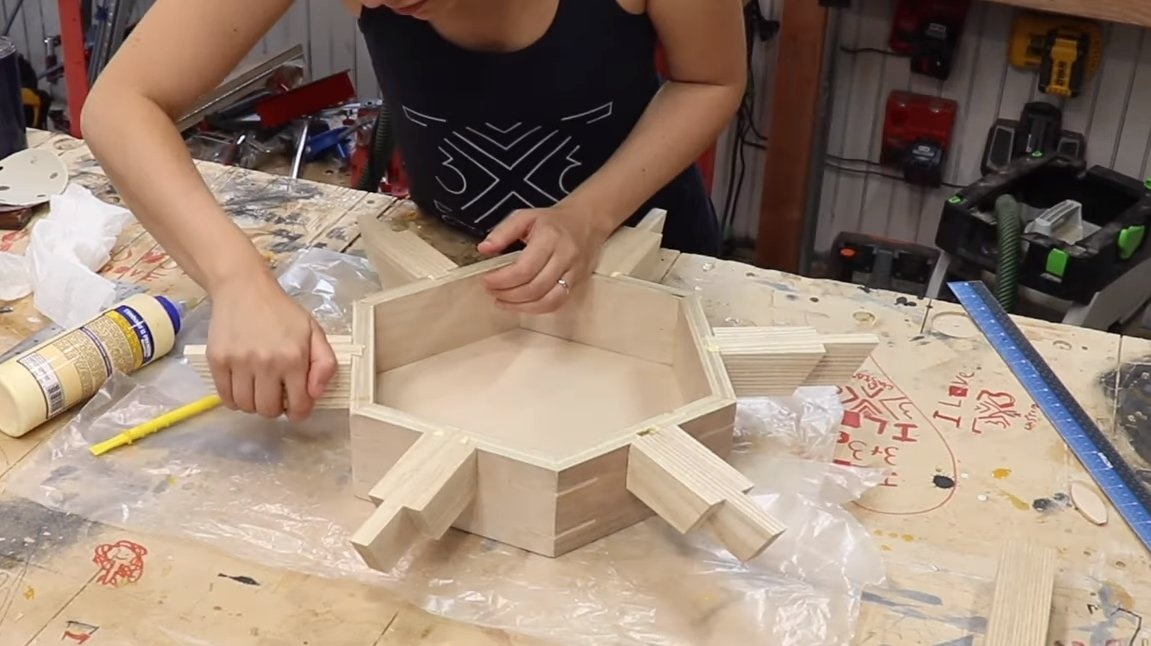
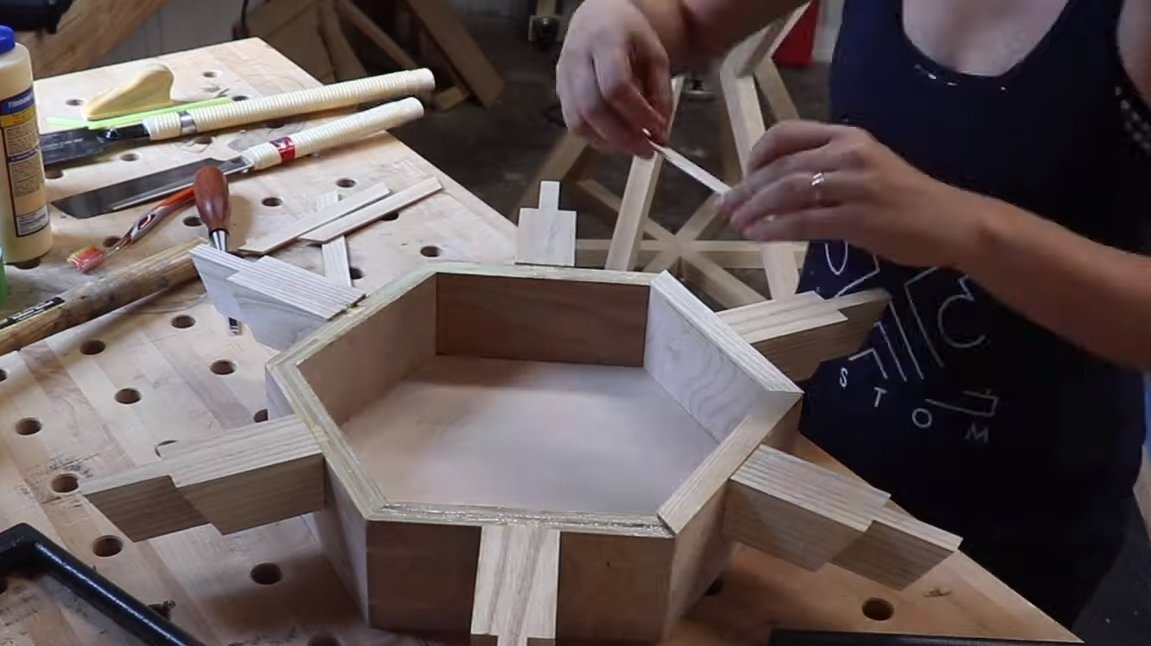
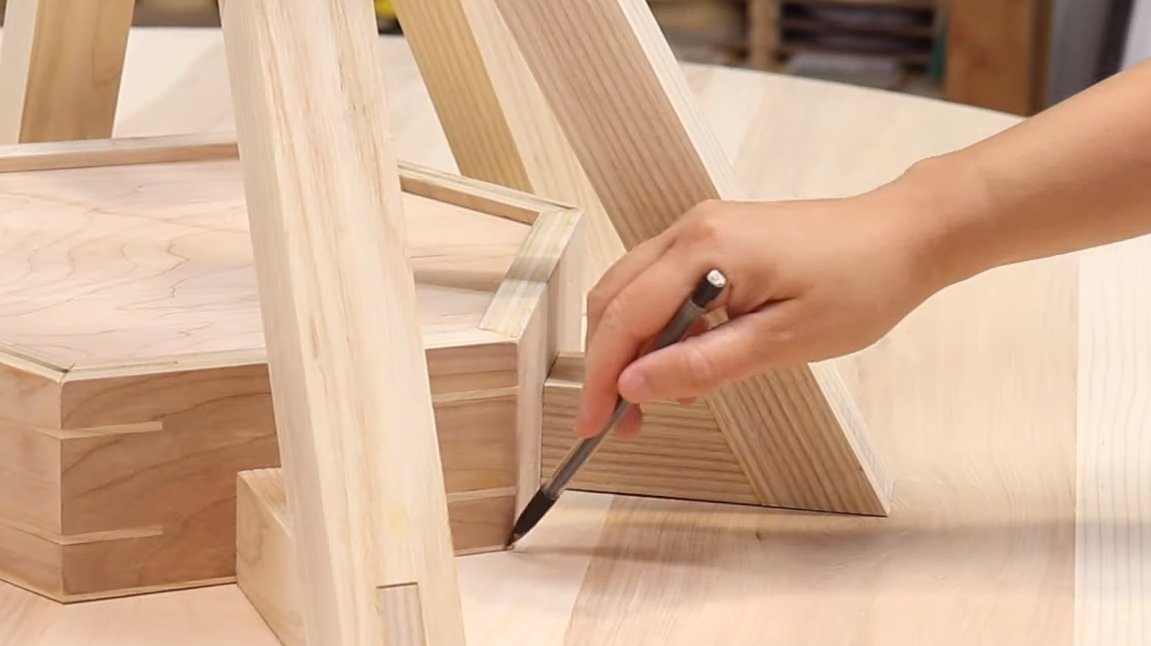
Step Three Production and installation of the box
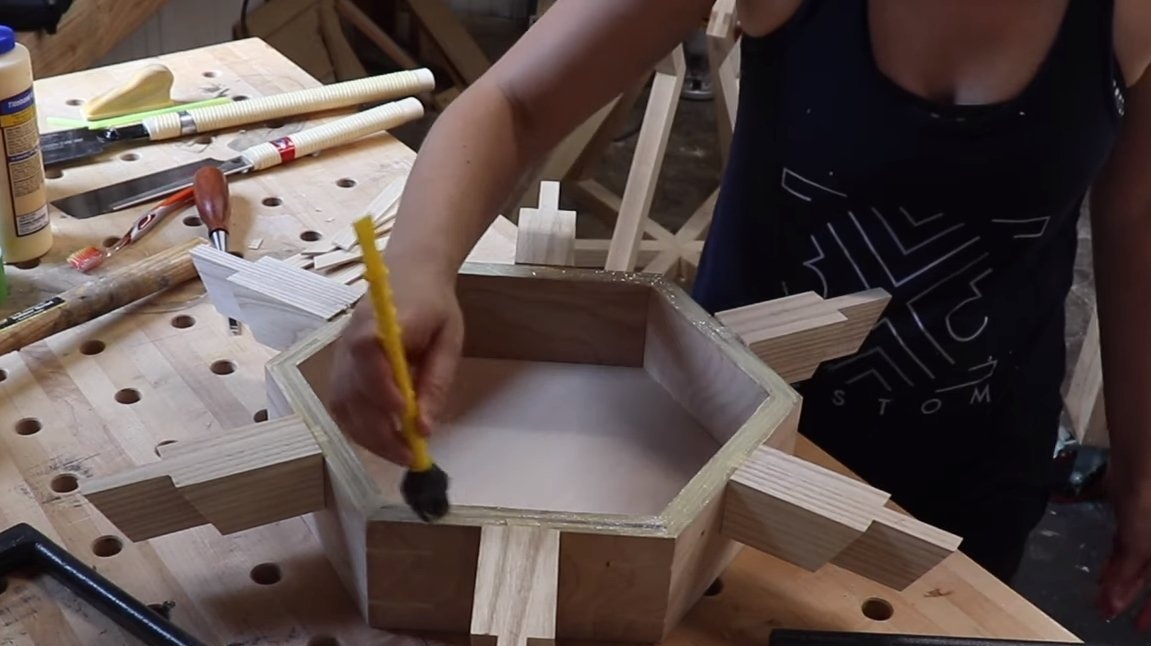
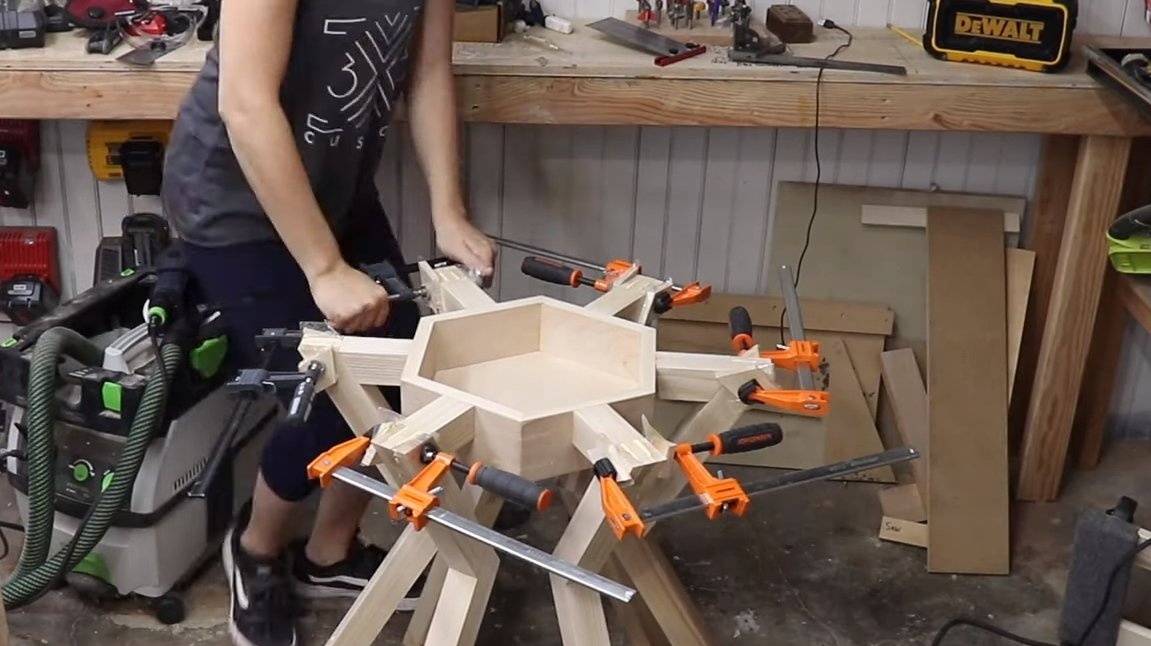
In the center of the table frame there is a countersunk shelf (box), we make it from plywood, this is a strong material that additionally strengthen the table frame from above. The bars are glued to the plywood box itself, the design resembles a star, the principle is the same as at the base. In the end, you just have to stick the whole structure to the top of the frame. Well we tighten everything with clamps and let the glue dry.
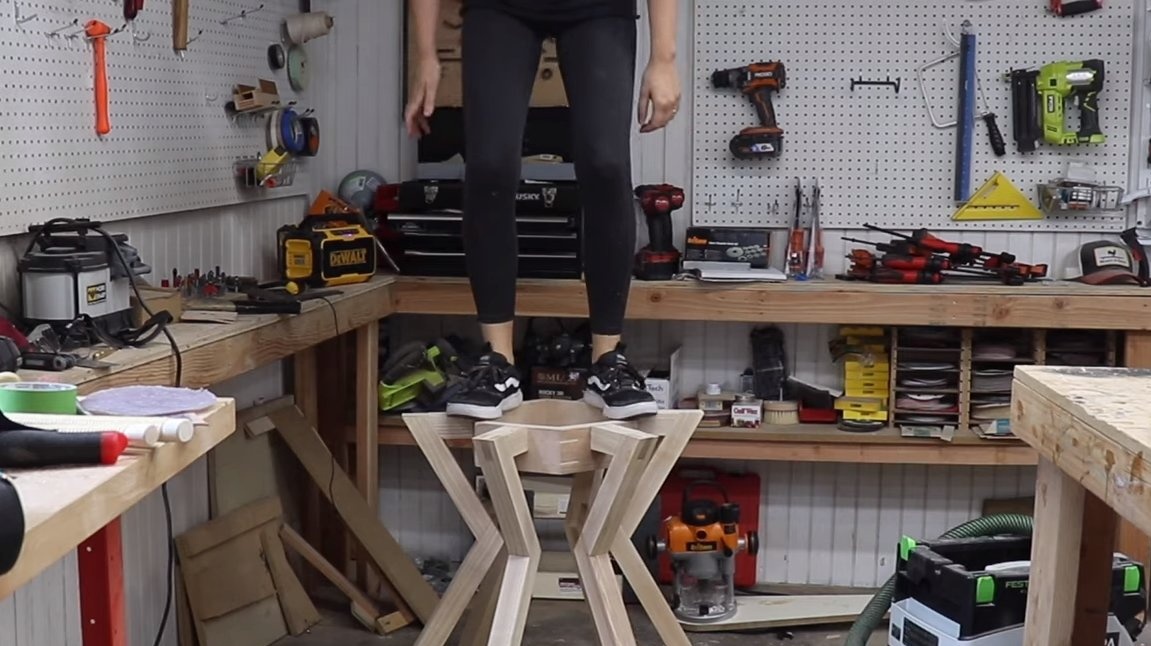
After drying, the author demonstrates the reliability of the structure, he climbed up the structure, the frame is very strong.


Step FourCountertop Assembly
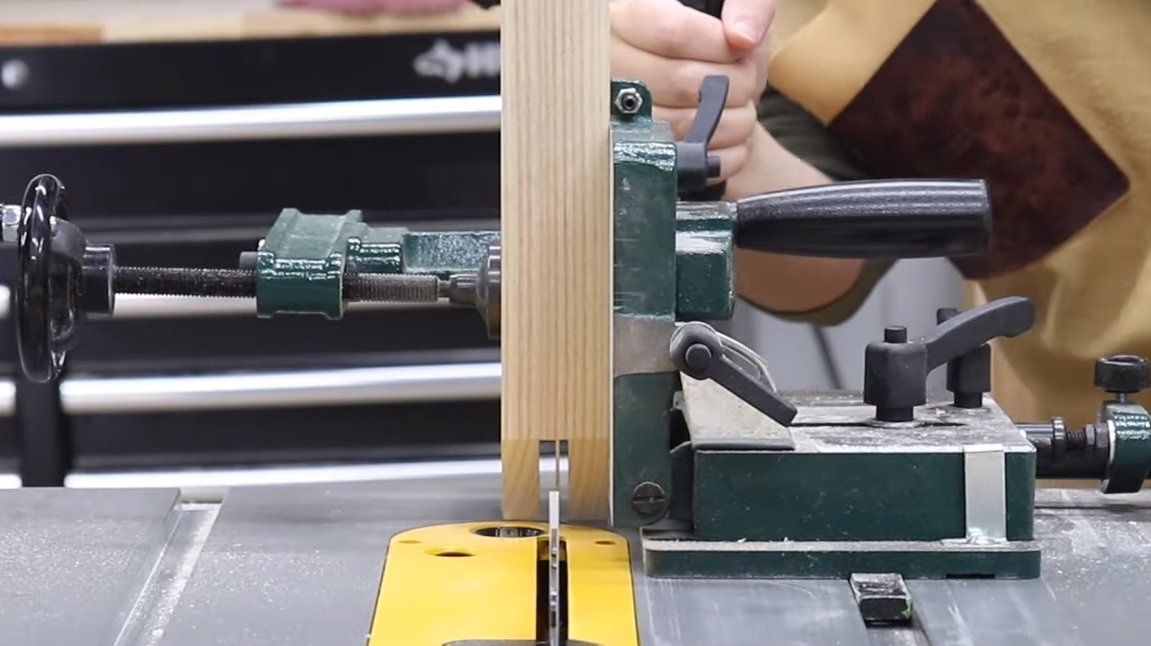
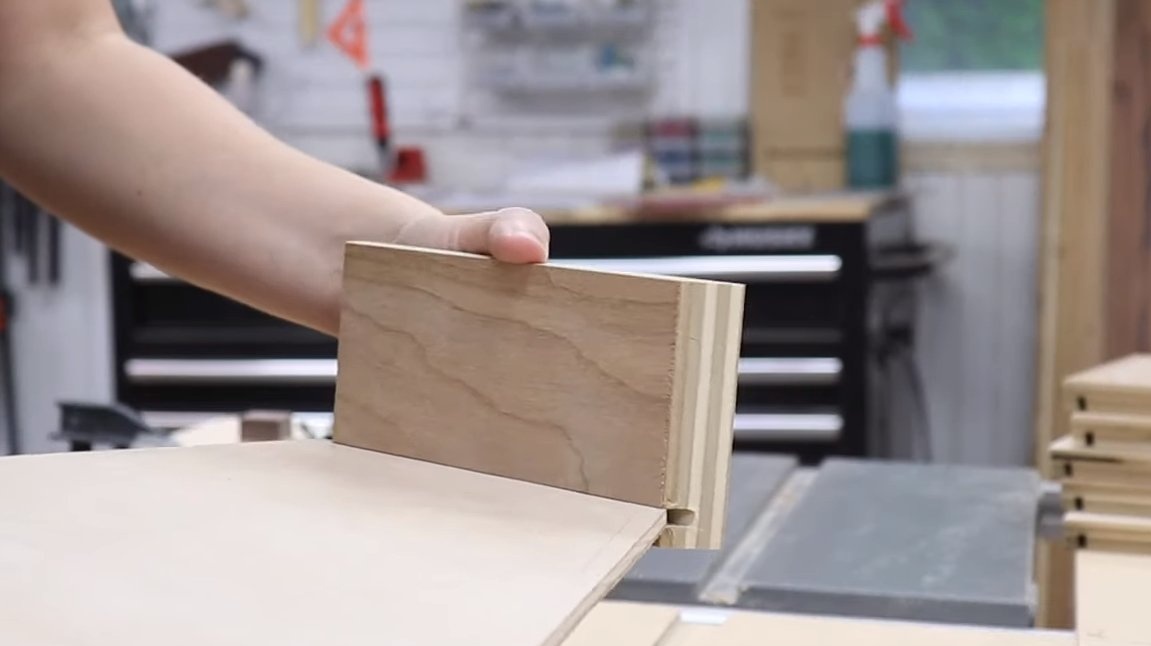
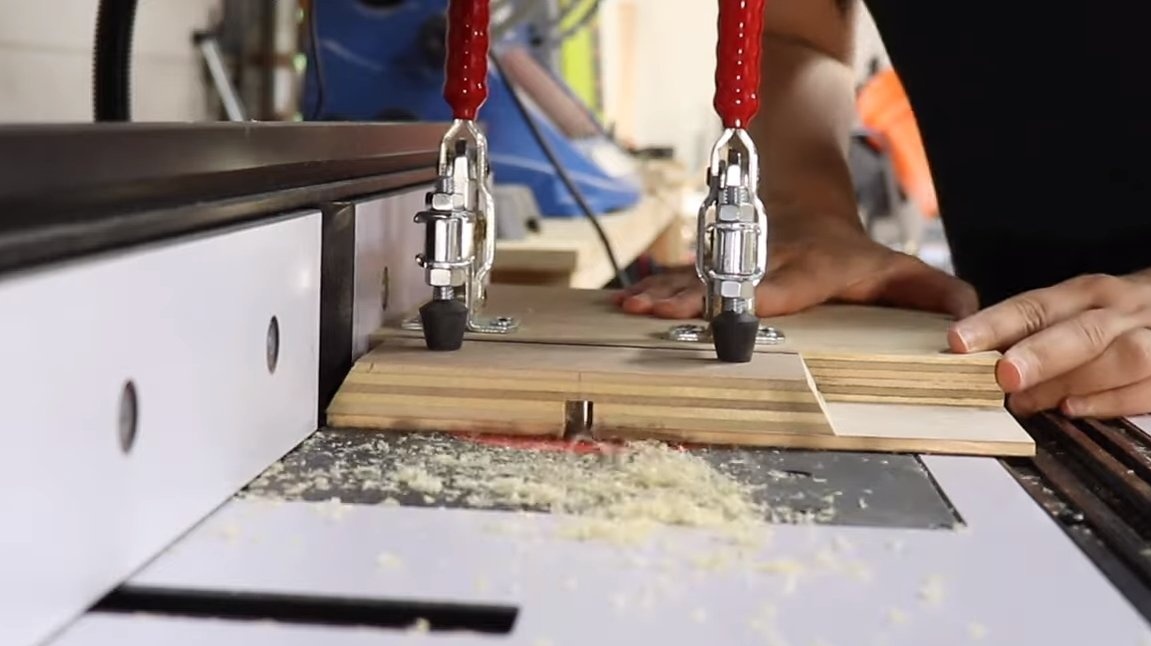
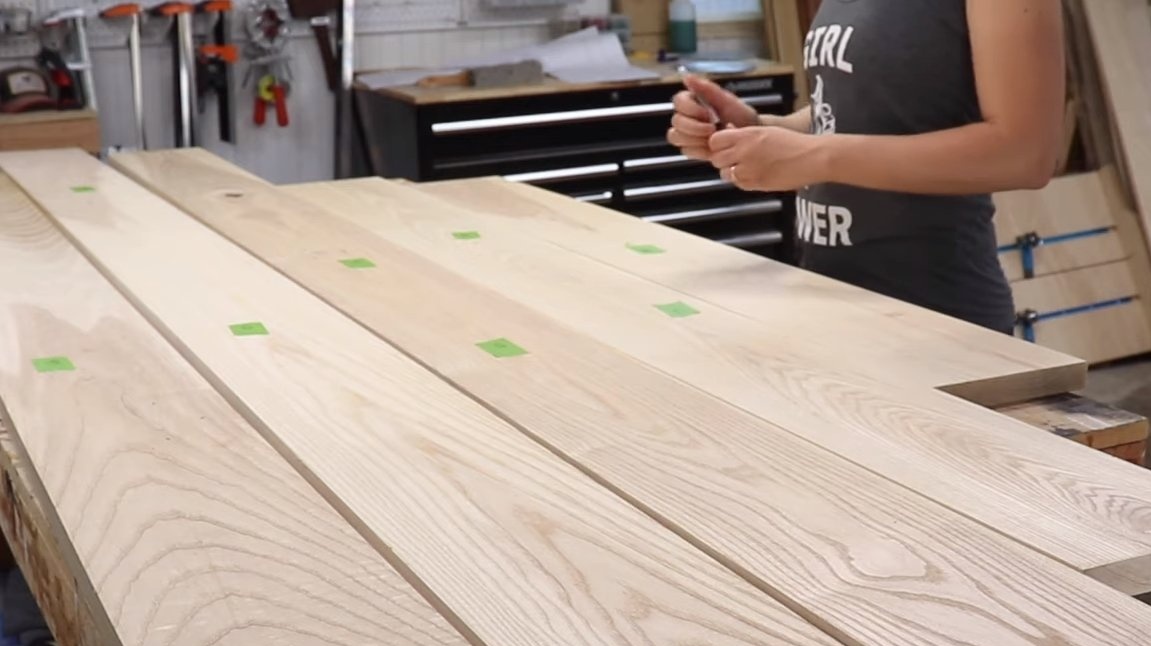
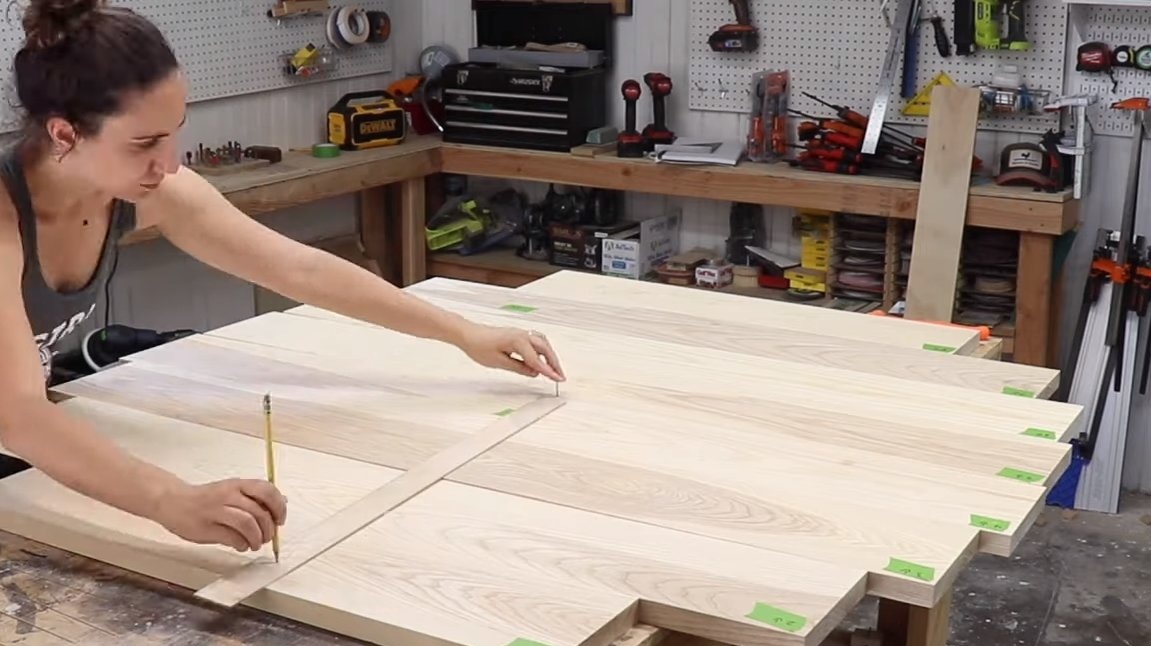
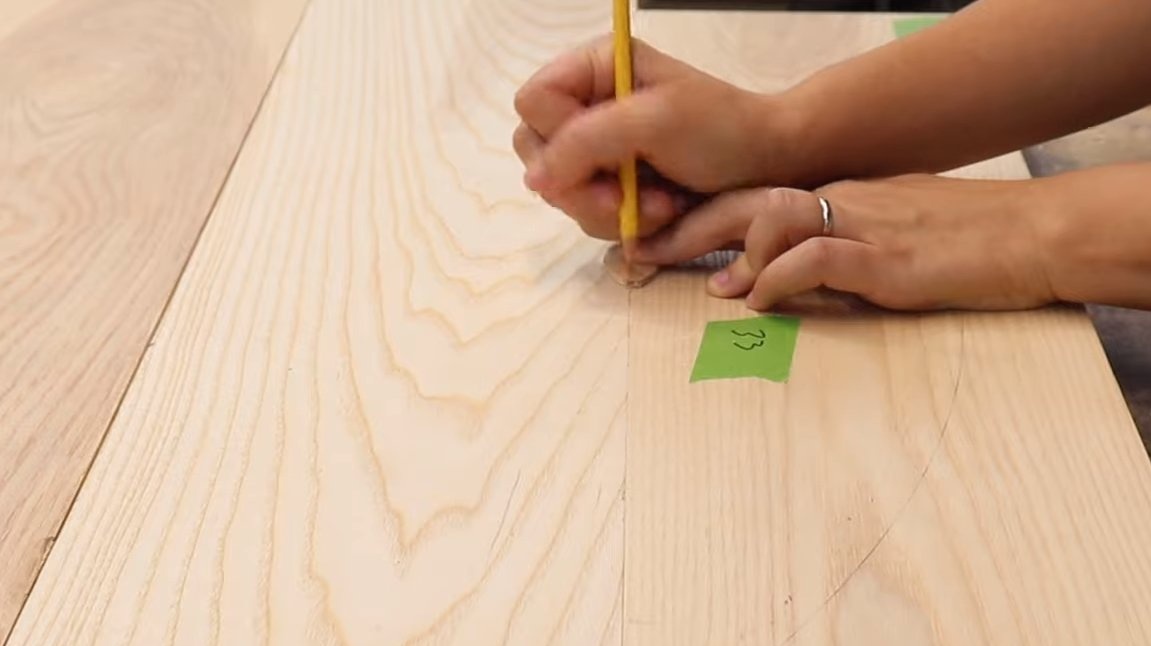
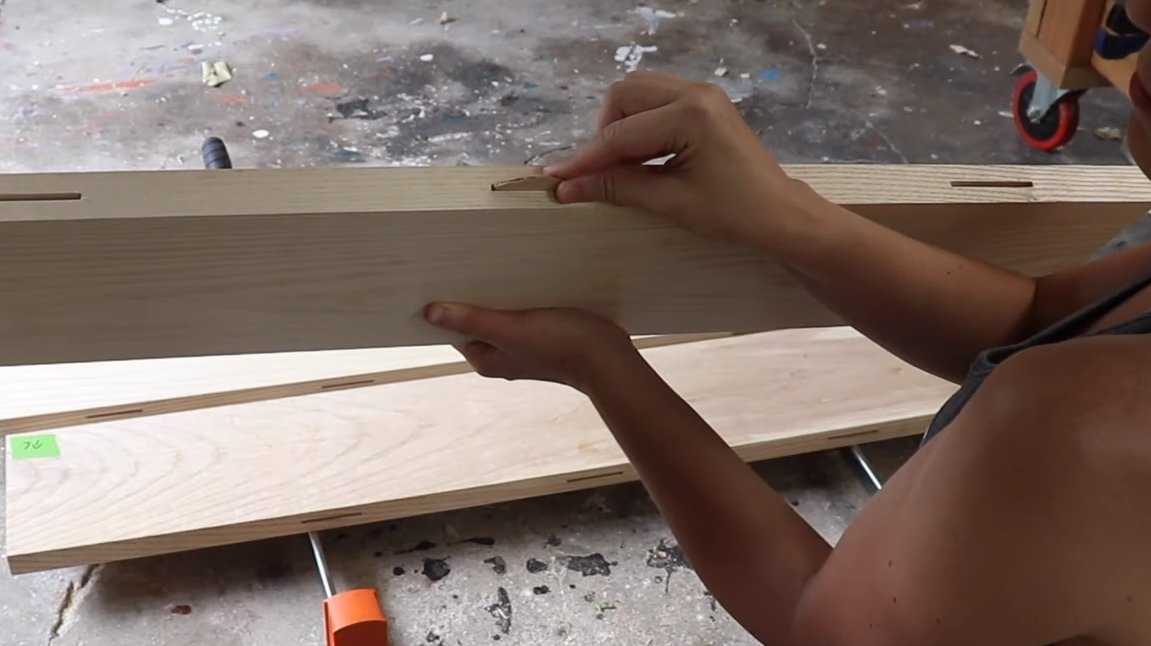
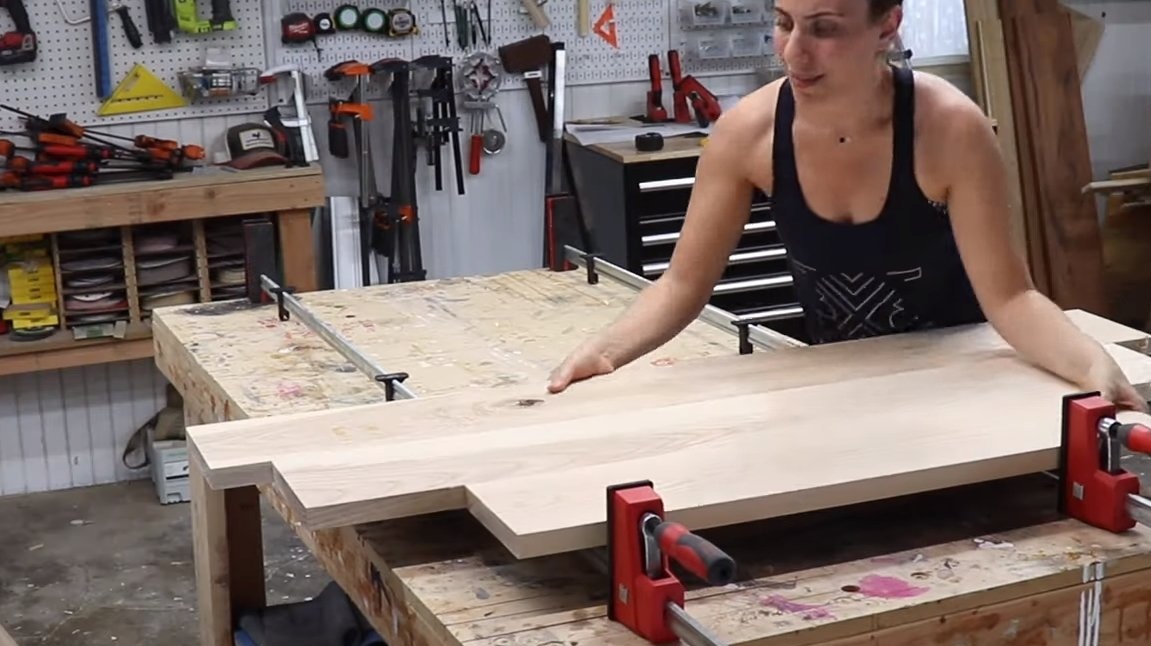
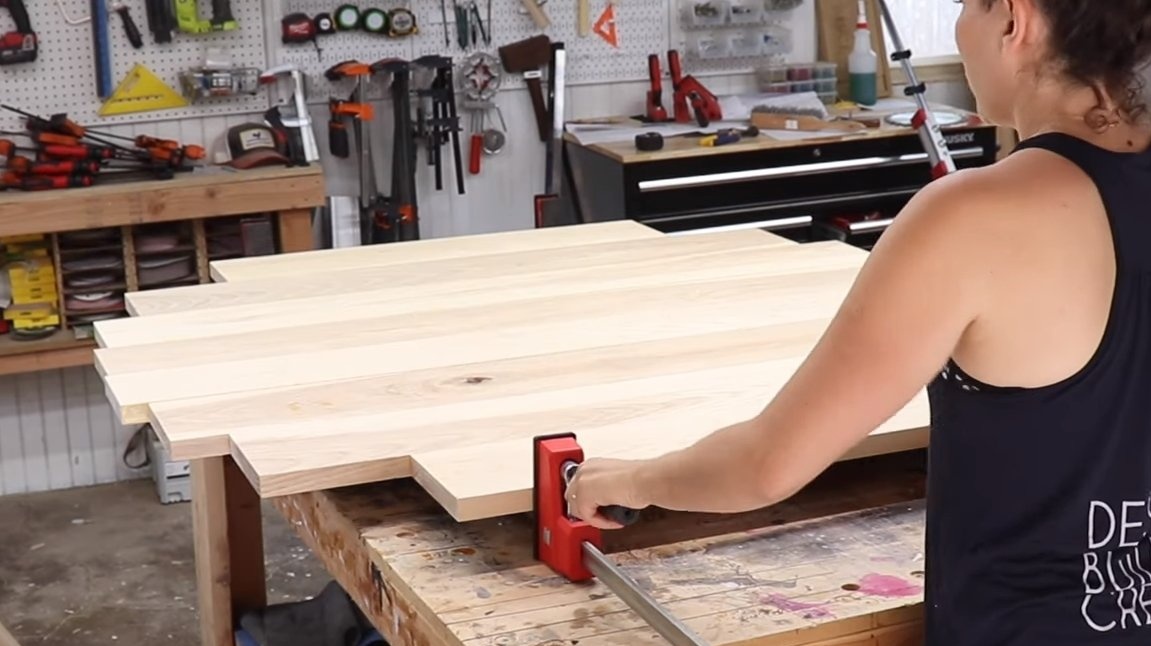
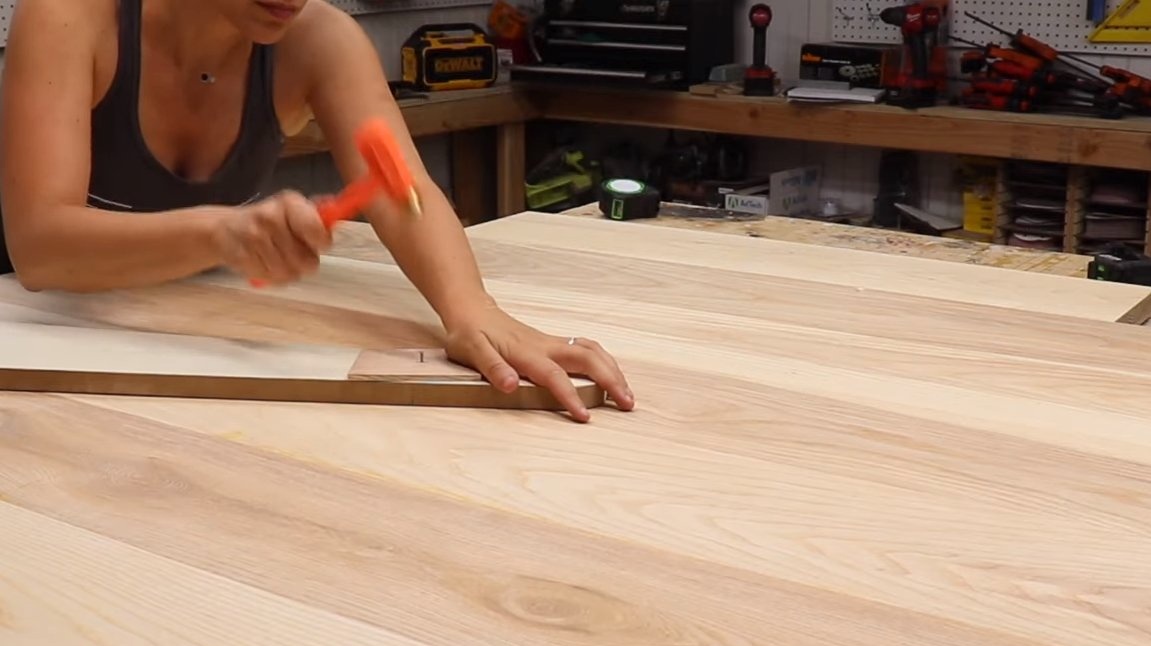
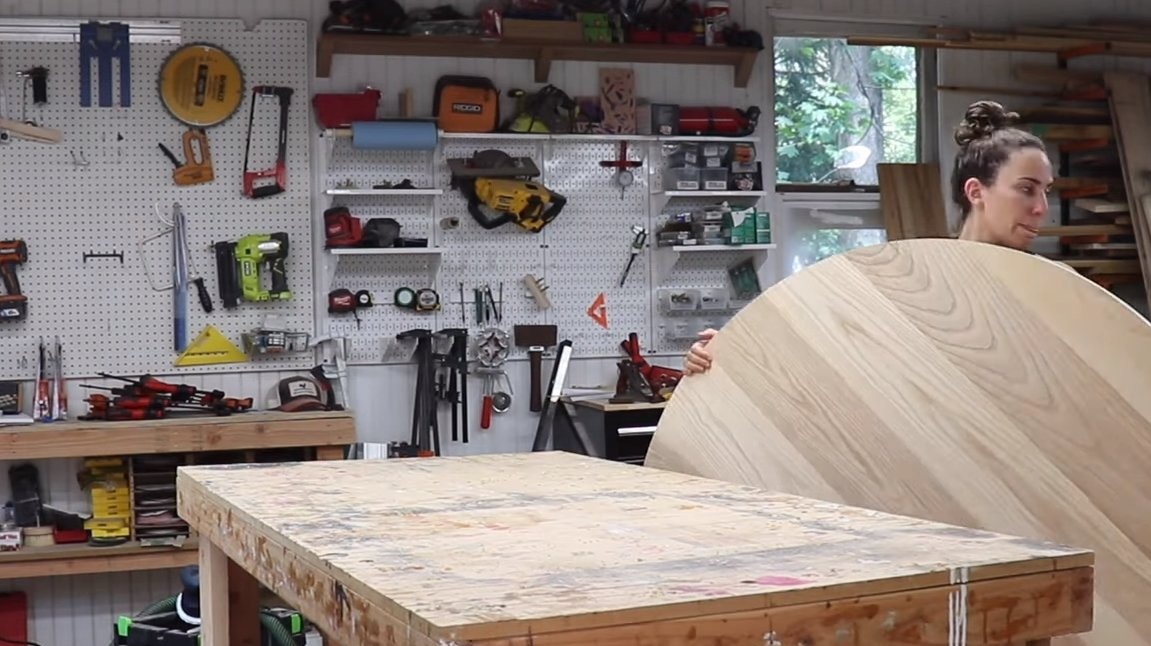
We proceed to the manufacture of tabletops for the table. For these purposes, we need thick boards of the same thickness and with perfectly even edges. From the boards we need to assemble one solid wood slab. For gluing the boards, special dowels are used, we cut the niches under them with a milling cutter.
We tighten the whole wood board with different screeds or rubber bands and leave to dry.
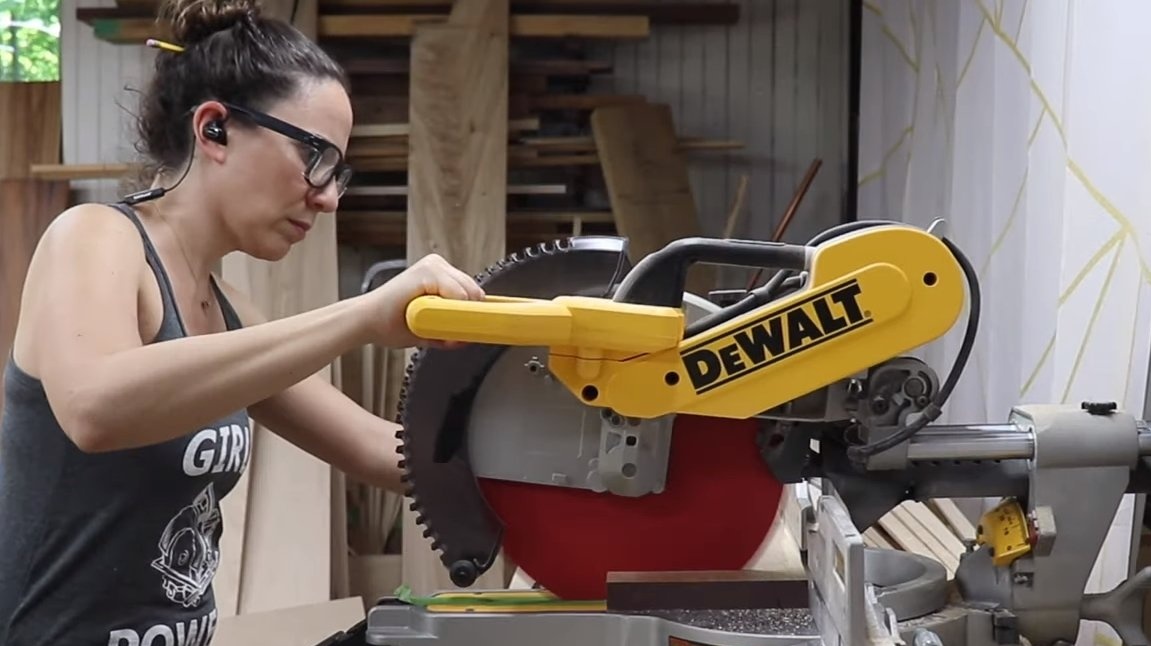

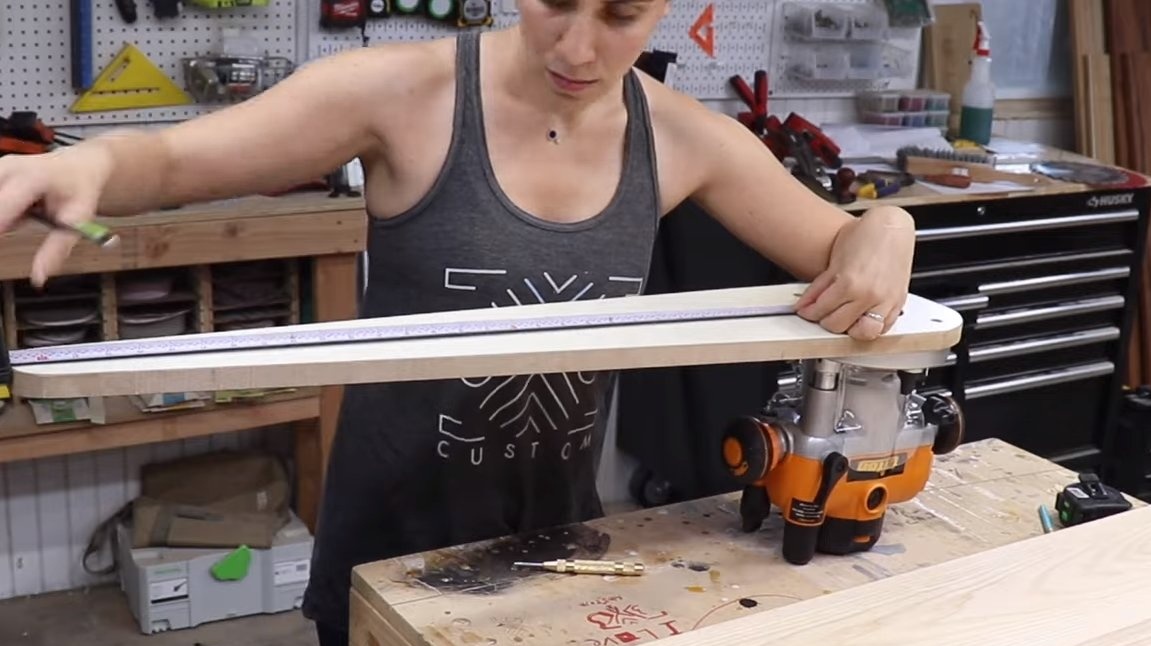
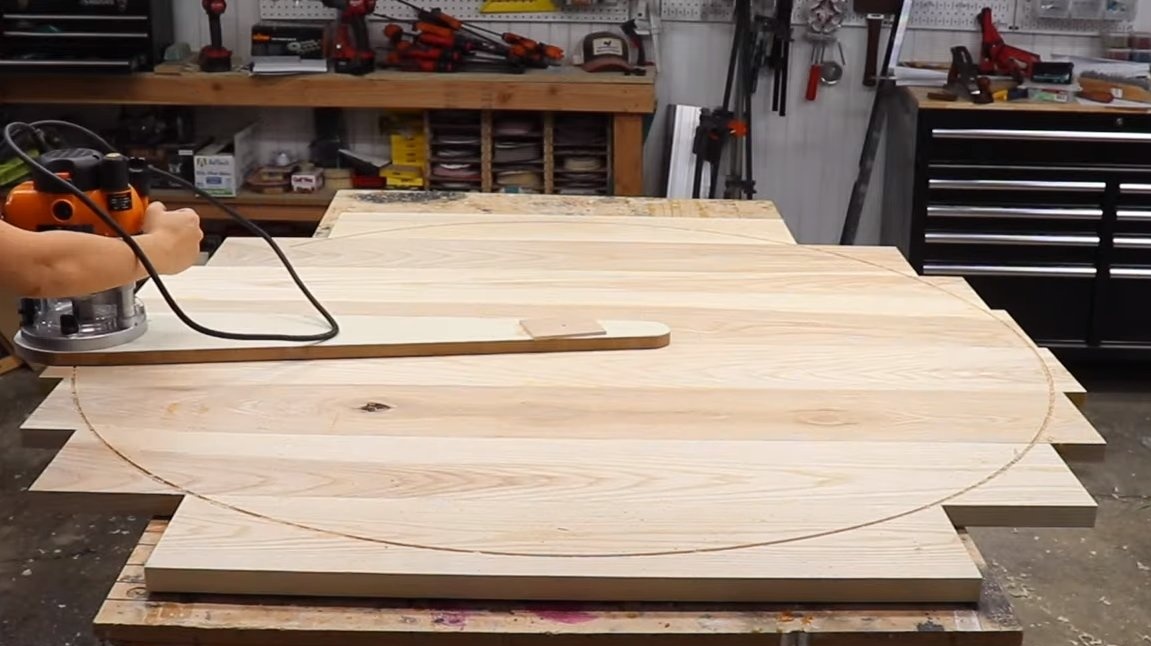
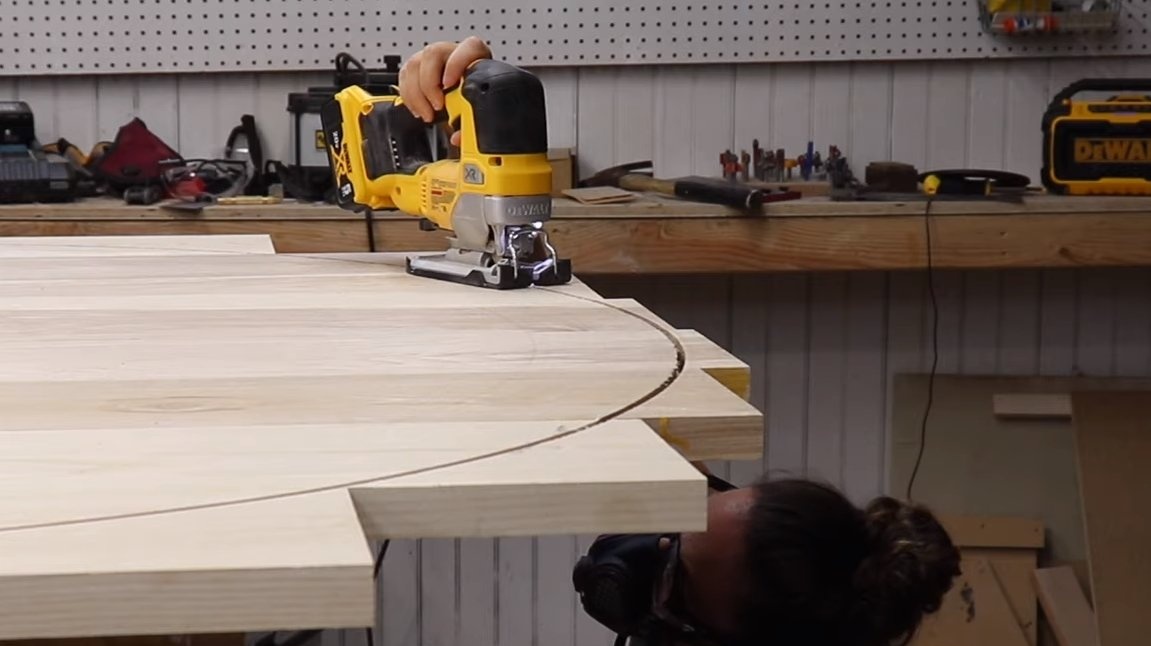
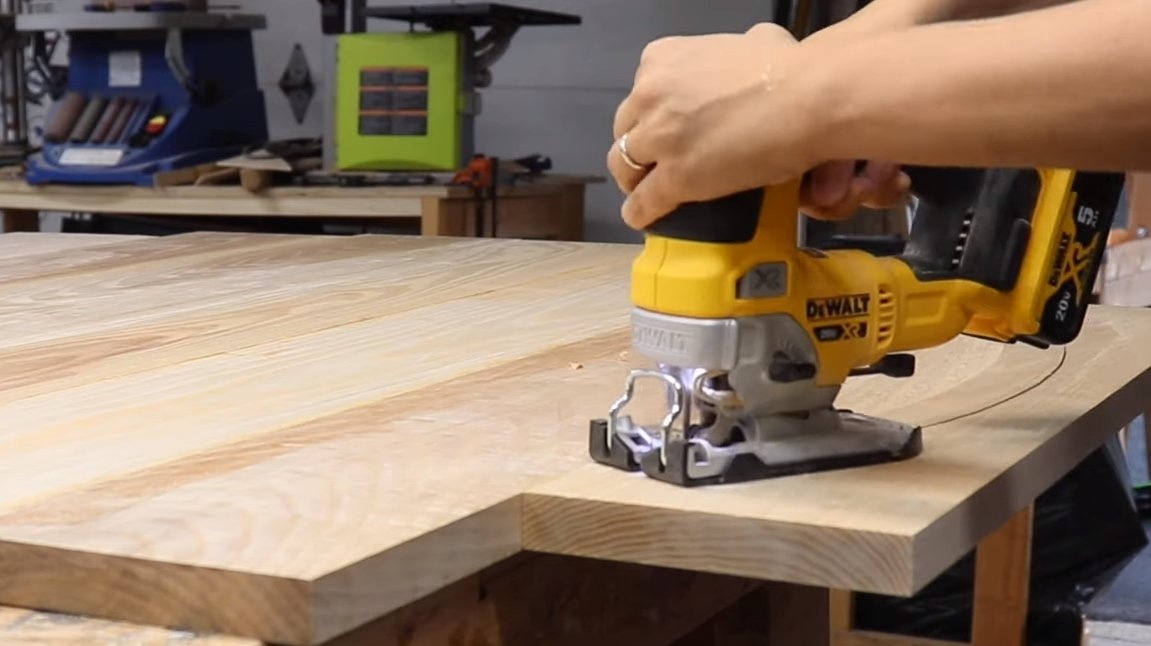

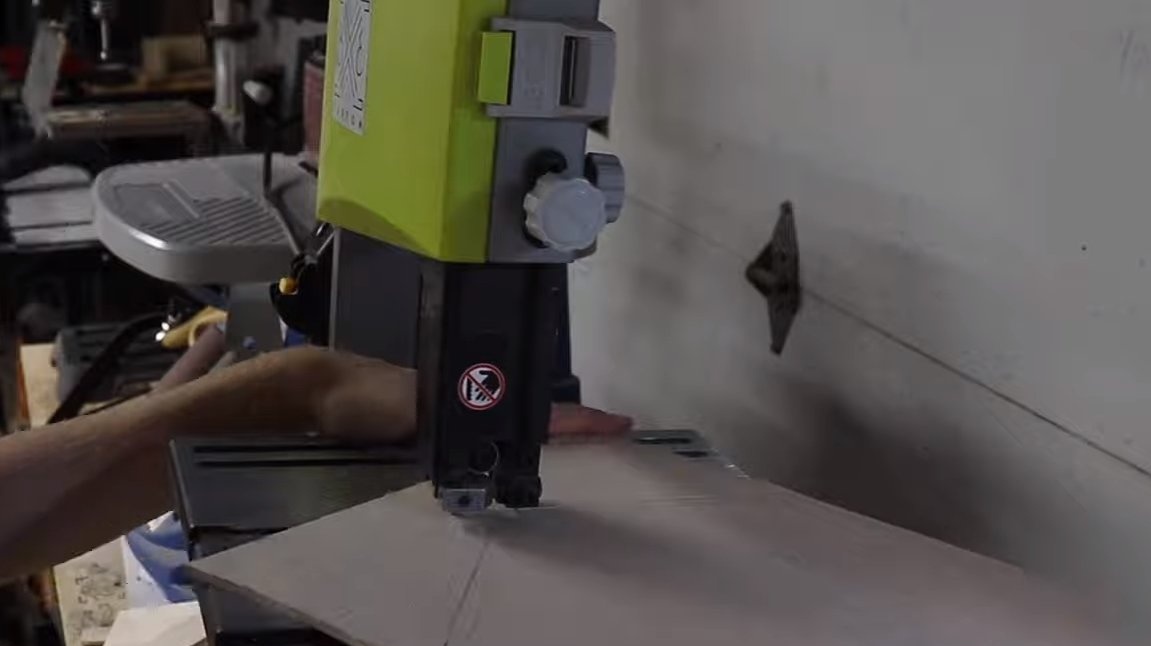
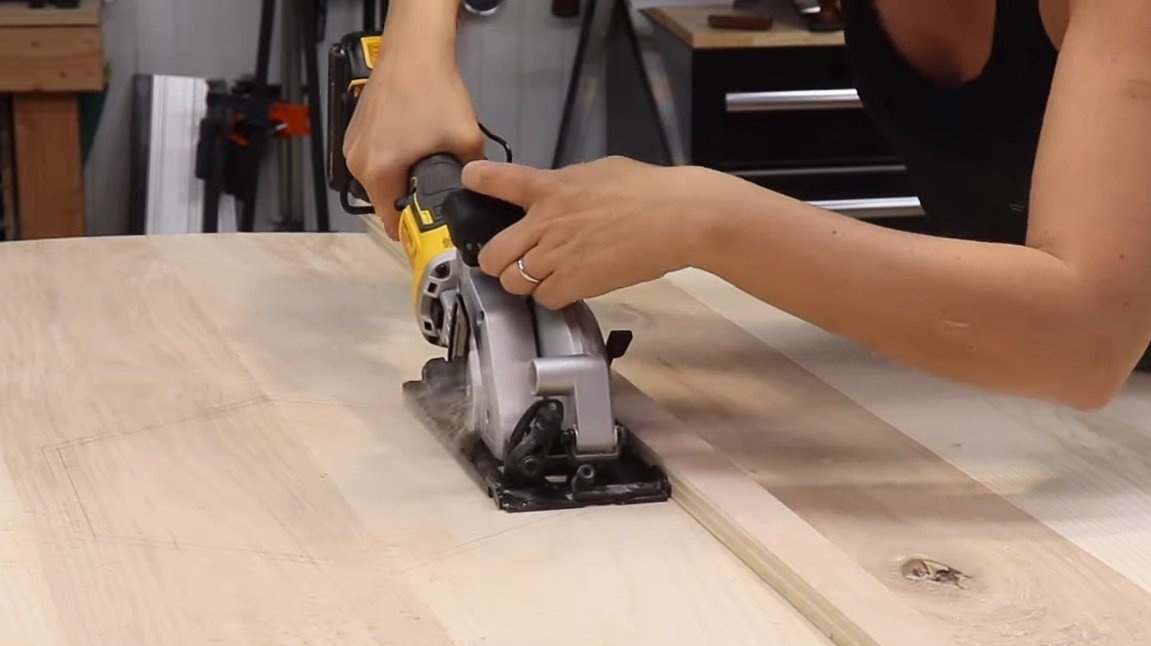
Next, we need a homemade compass from a rope, a nail and a pencil, draw a circle on a wood plate with the help of a compass and proceed to cutting. To begin with, the author went through a manual milling cutter, but the length of the knife was not enough to immediately cut a circle. Then an electric jigsaw came to the rescue.
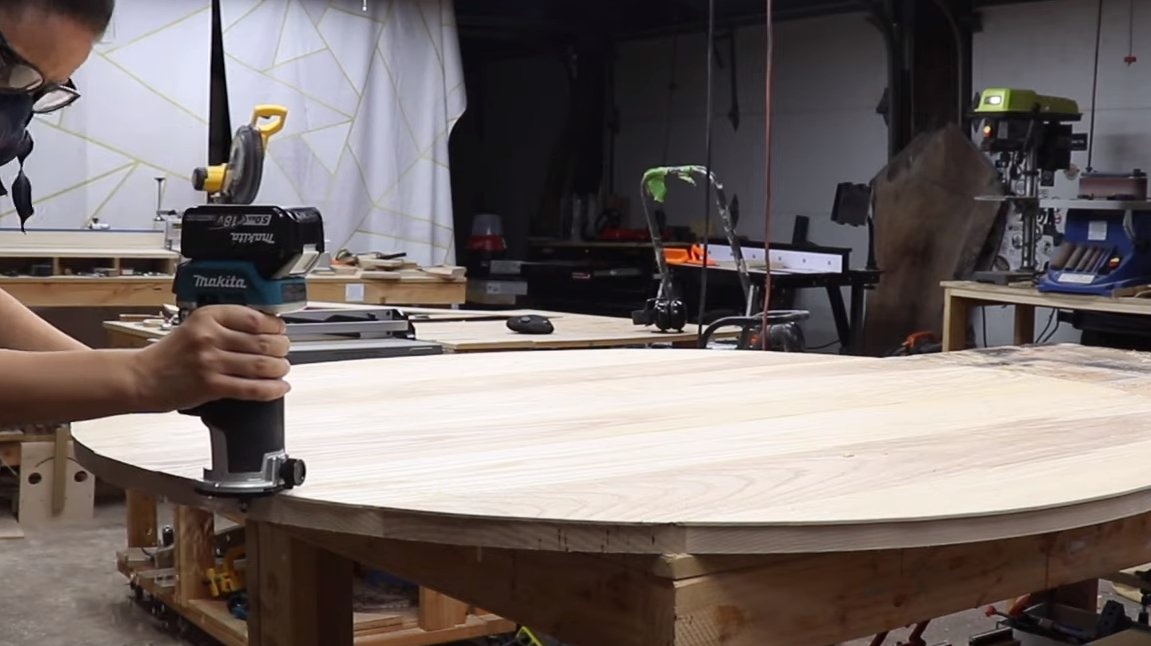
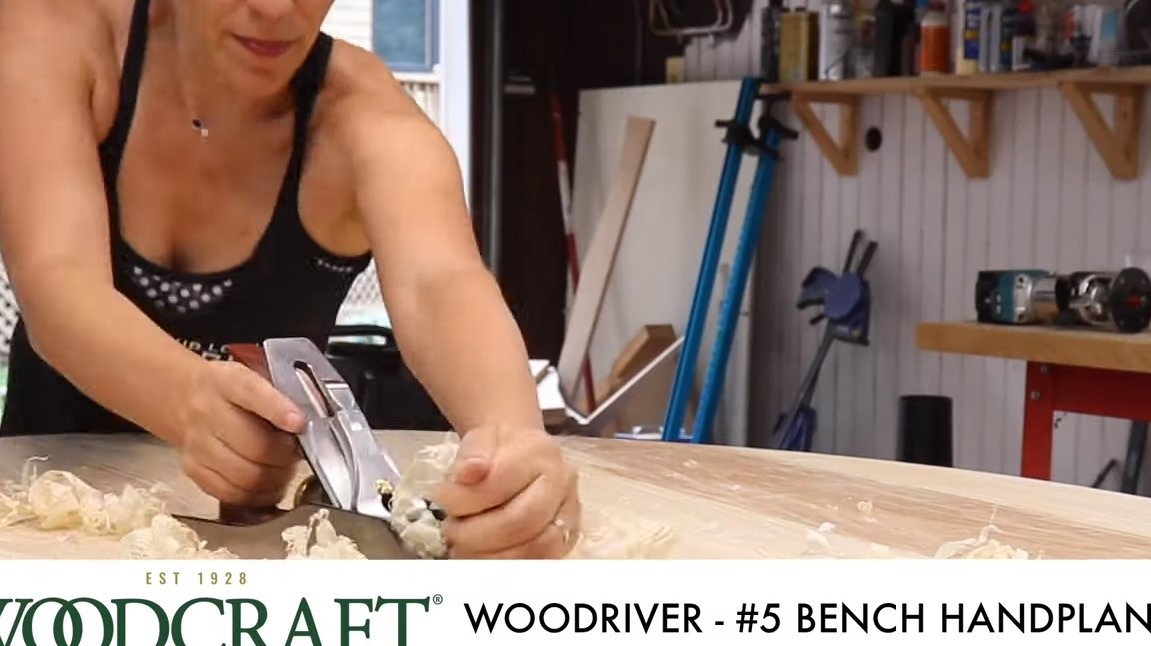
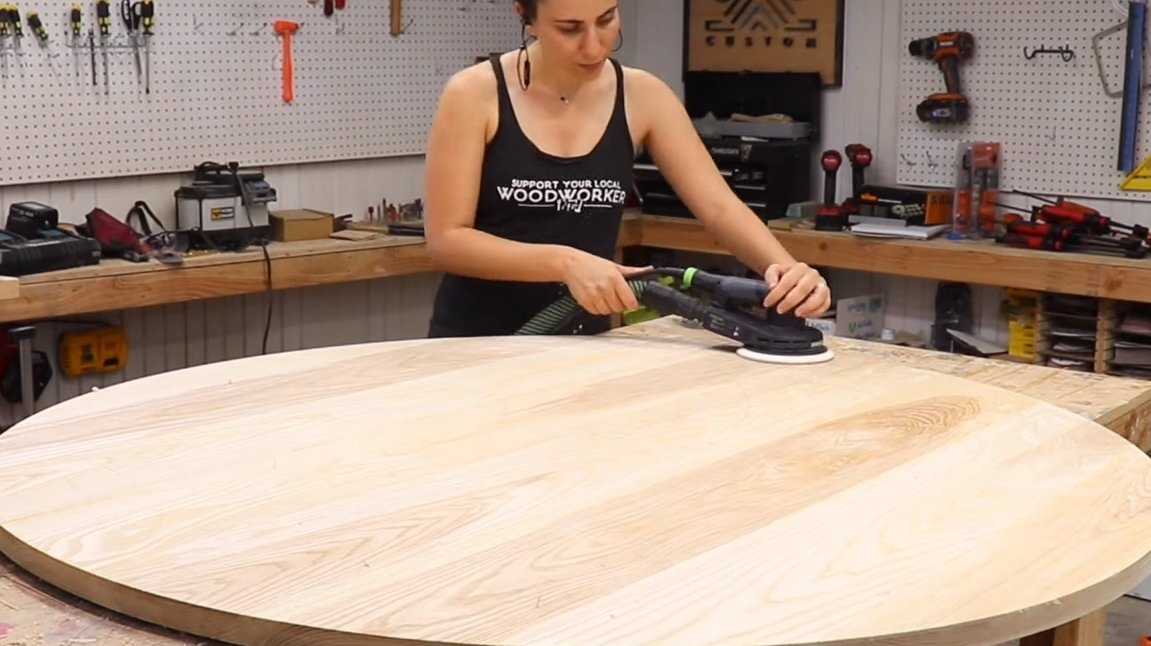
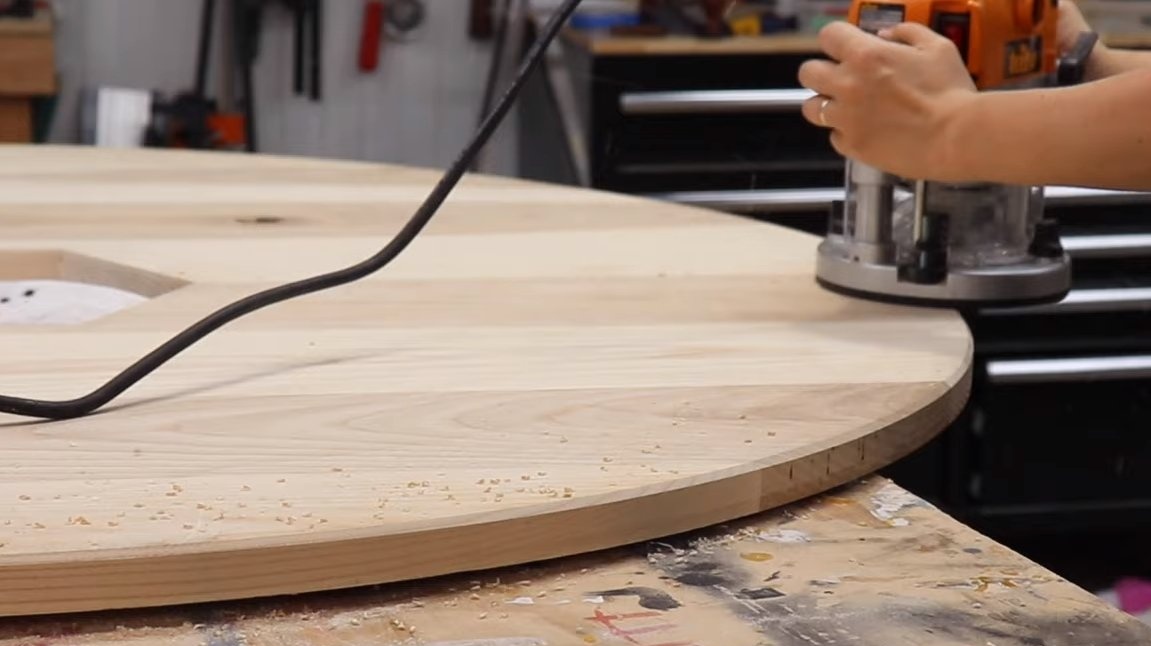
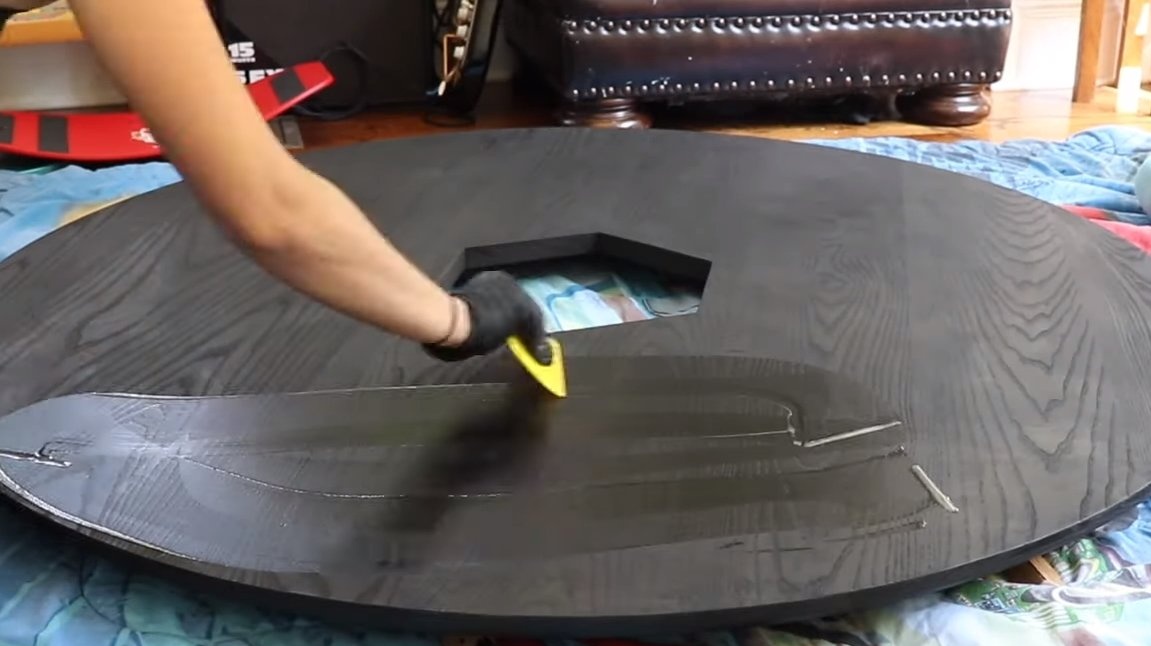
After cutting, we process the edges using a hand milling cutter. That's all, the main work is done, now we align the plane of the countertop with a planer. For finishing use an orbital sander, grind the countertop to a perfectly smooth state.
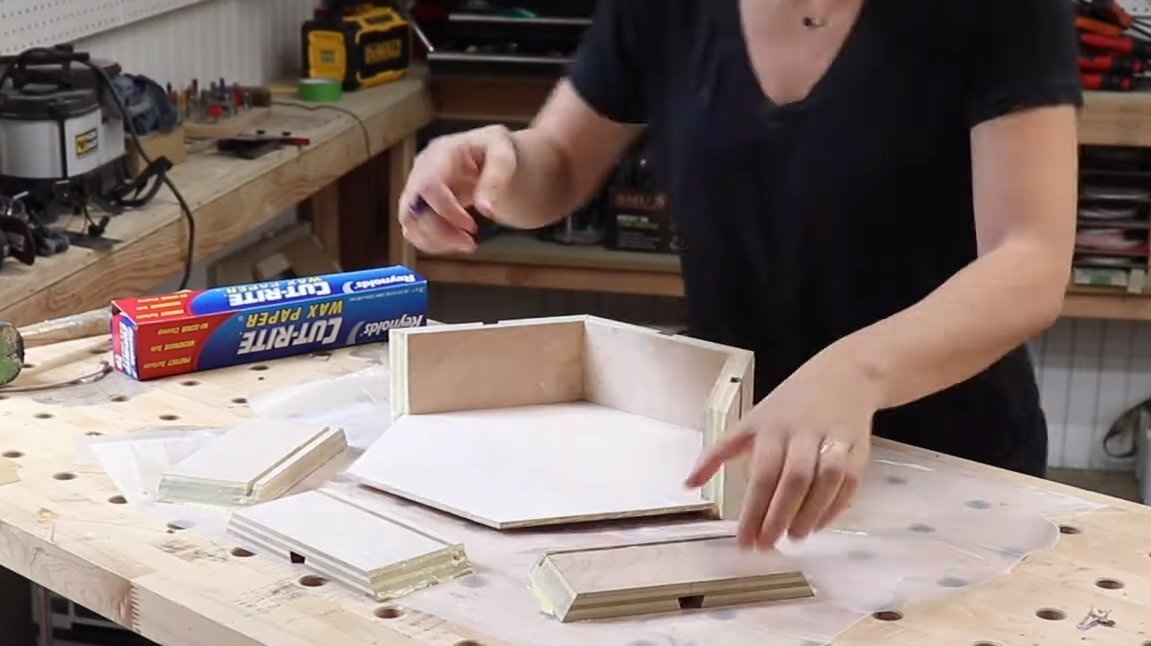
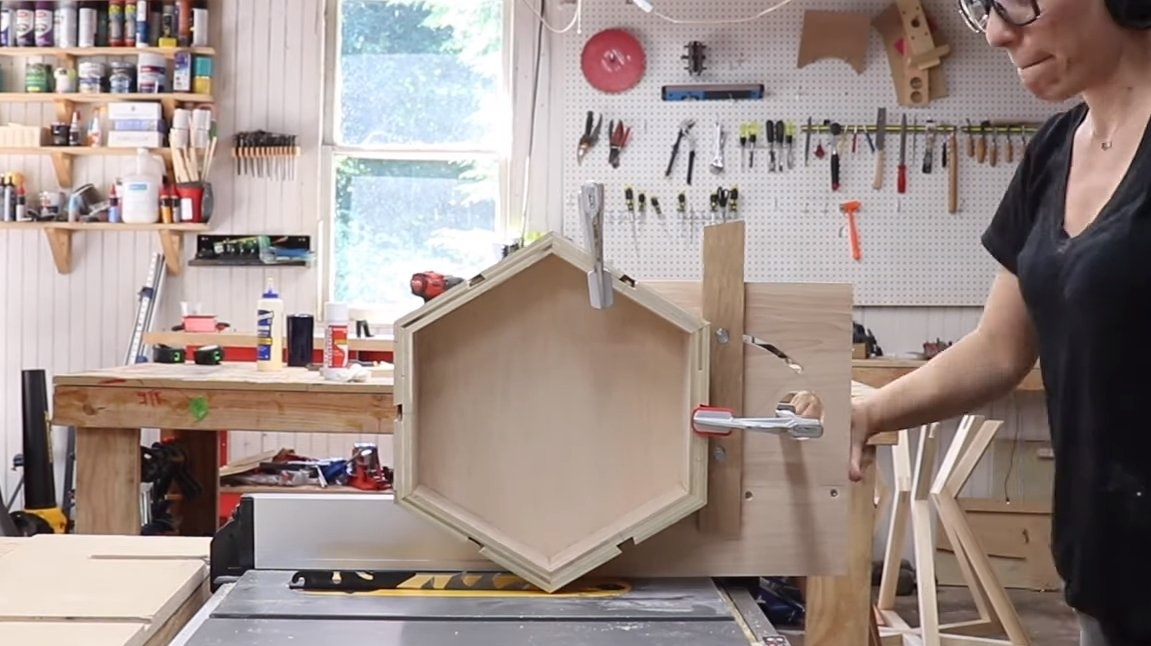
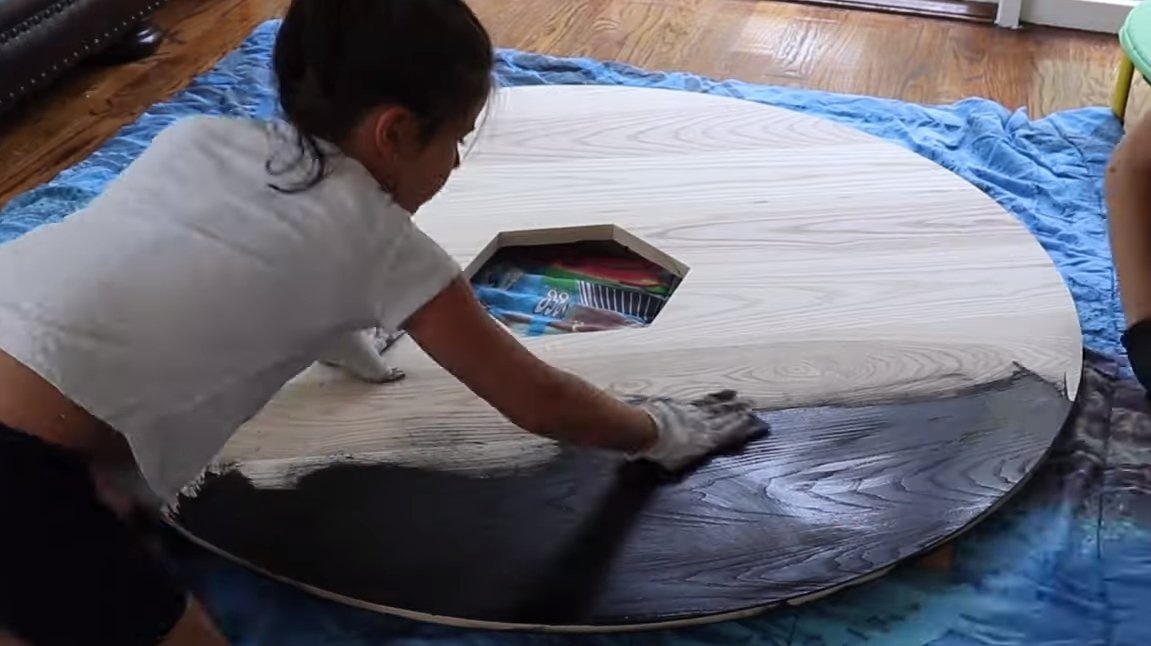
Step Five Cap
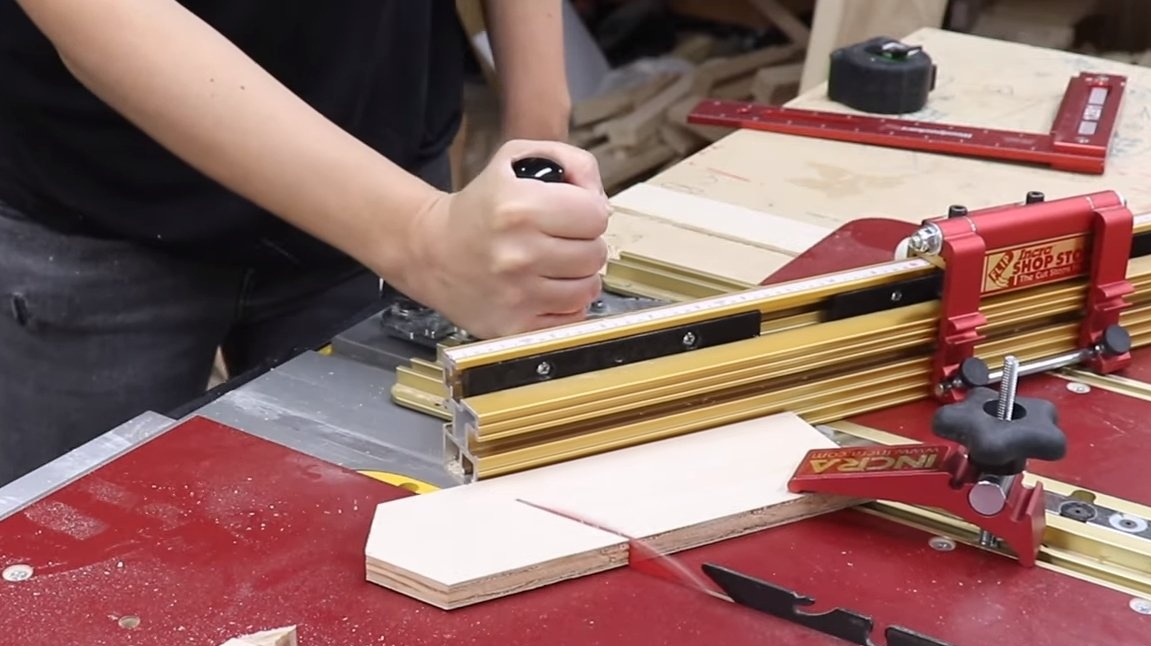
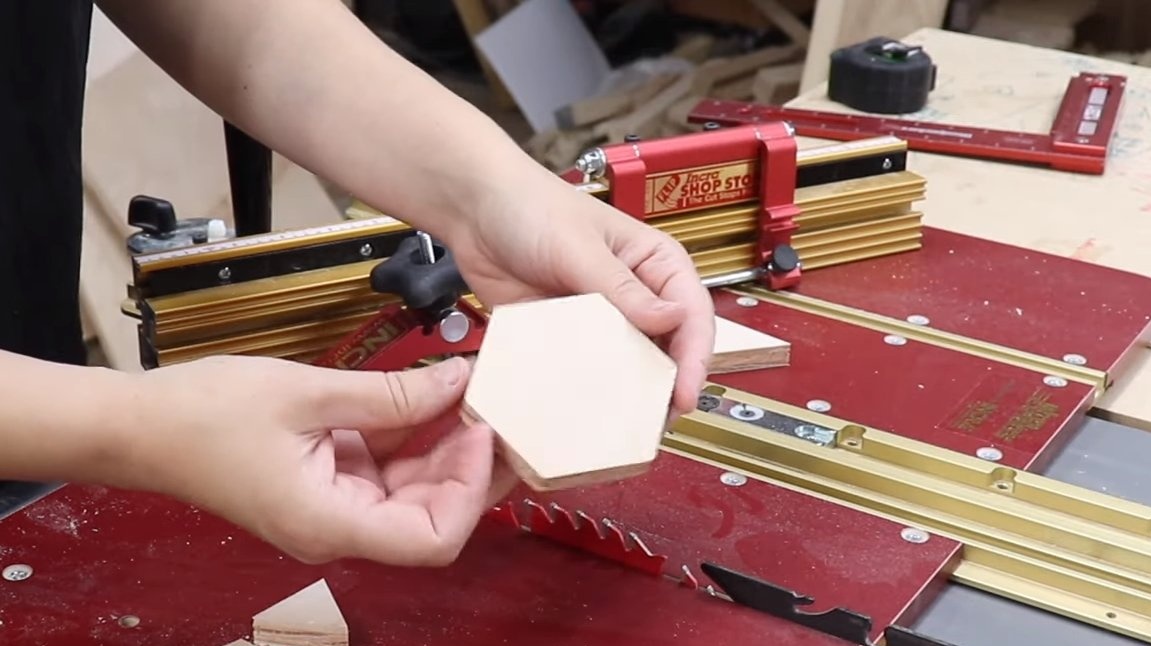
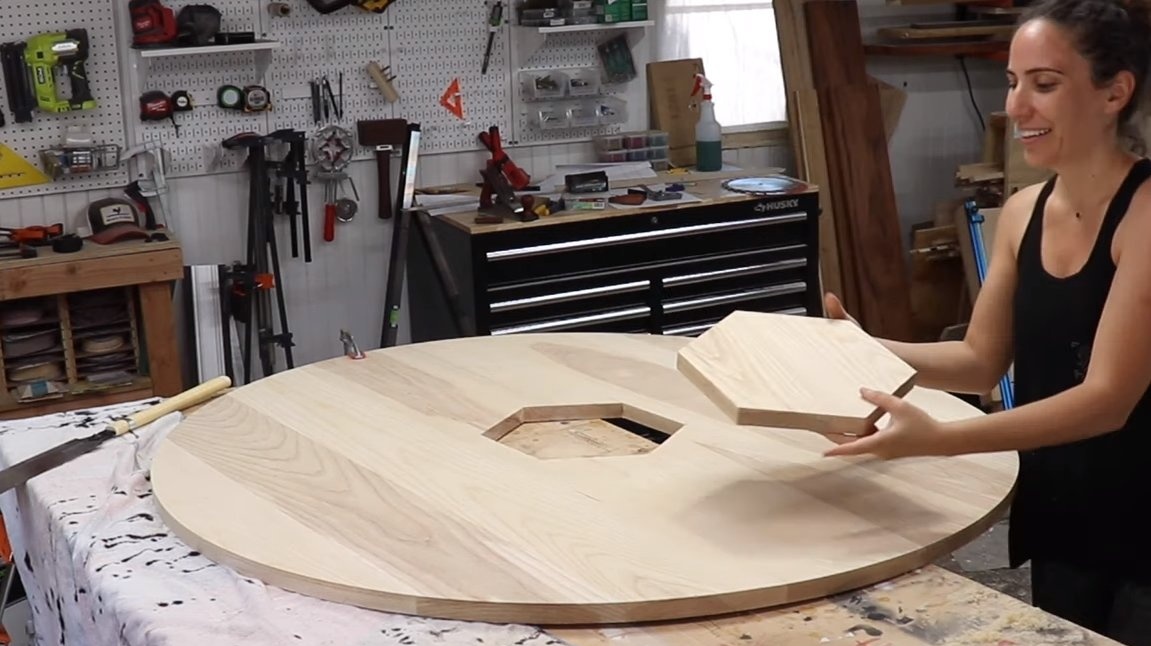
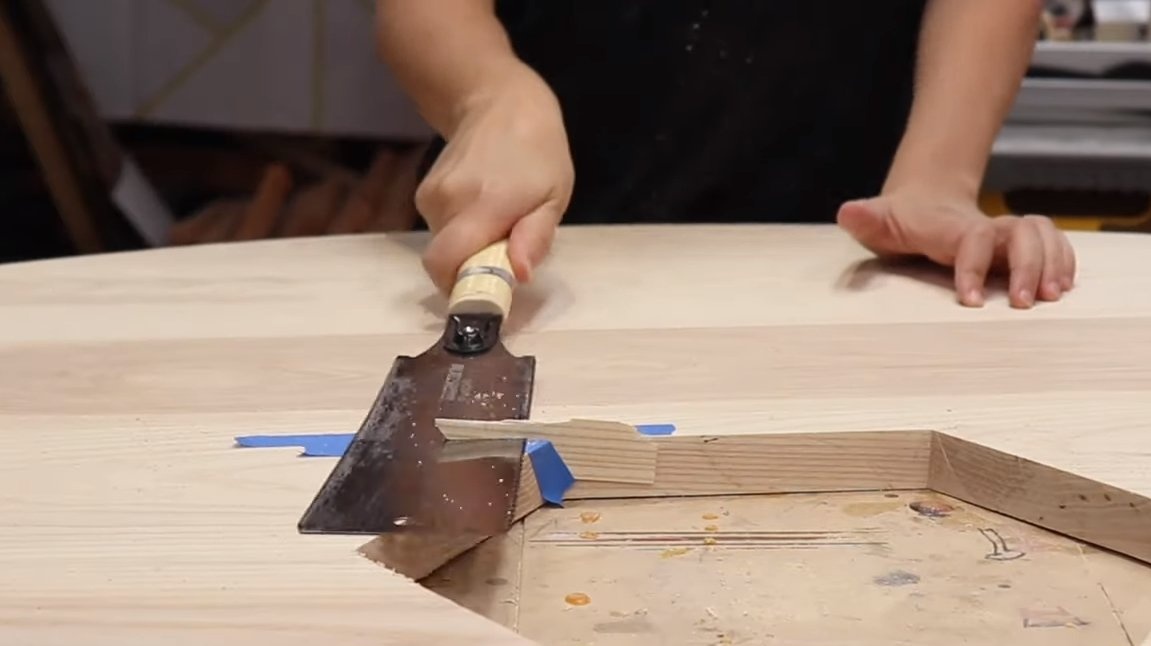
In the countertop, we determine the place exactly in the center and install our frame with a shelf. We circle the hexagon and cut it with a hand circular saw. Next, the hexagon must be well sanded, then there will be a lid from the drawer. Of course, there should be a handle in the lid so that it can be opened by hand. To solve the problem, the author drilled a hole for a finger in the lid.

Step Six Finishing and assembly
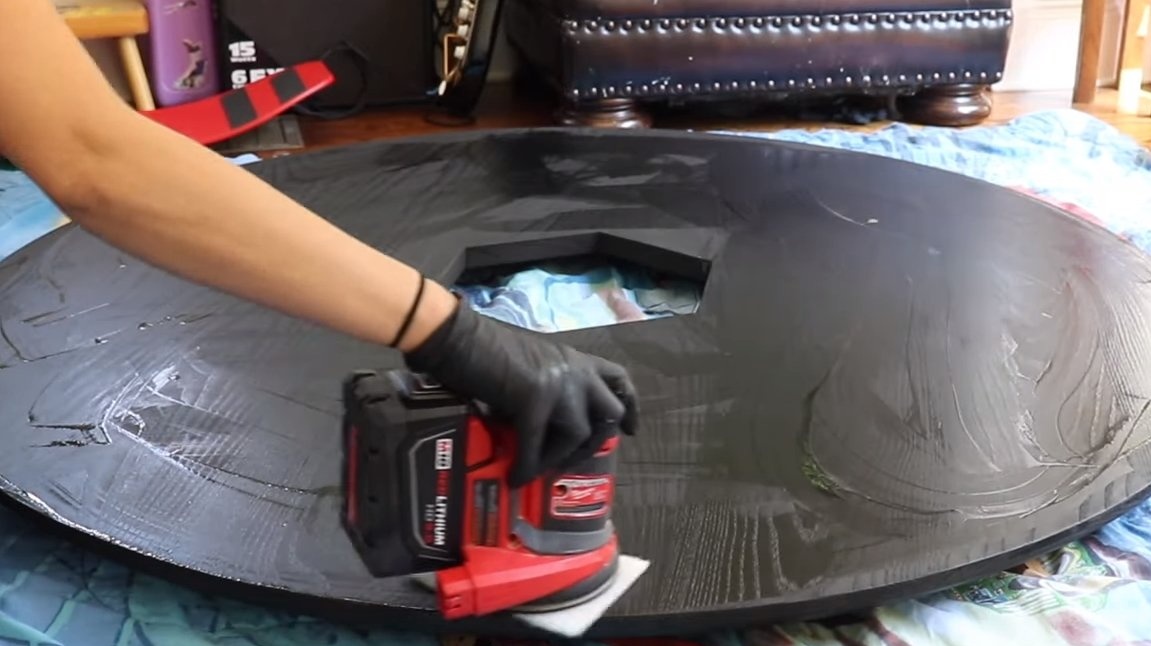
We grind well all the details of the table with a grinder, especially for the countertop. Well, then stain or oil comes to the rescue, the author has black impregnation, everything looks pretty interesting. If desired, you can use varnish or other impregnations for wood.
It would be nice at the end to polish the countertop with a polishing machine to shine.

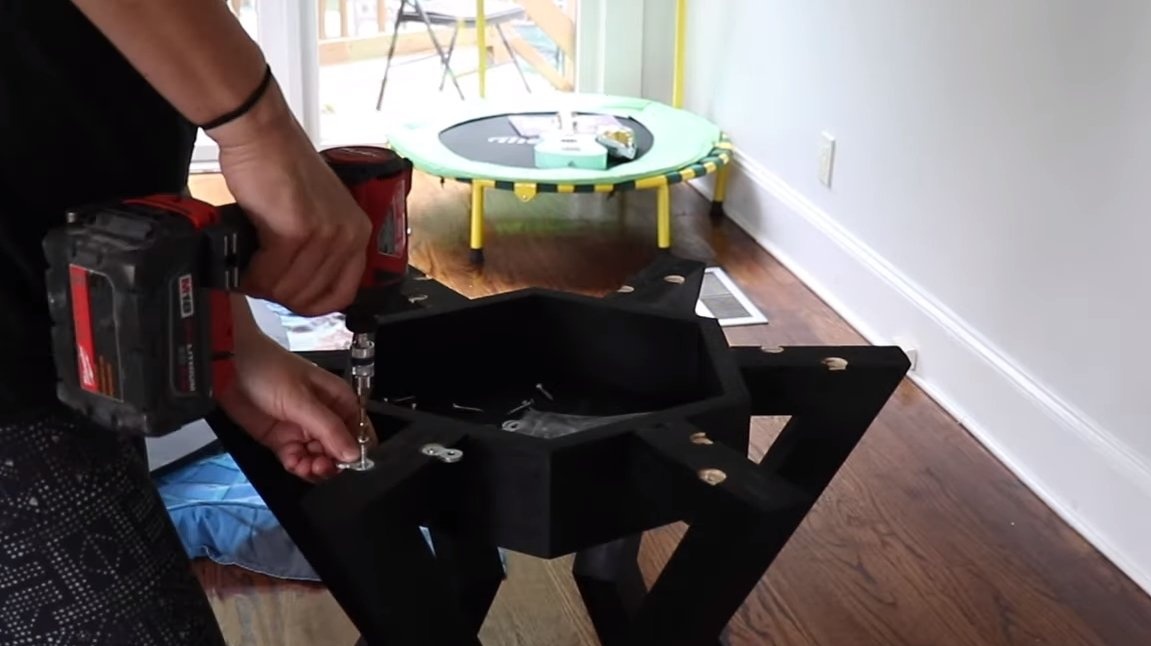
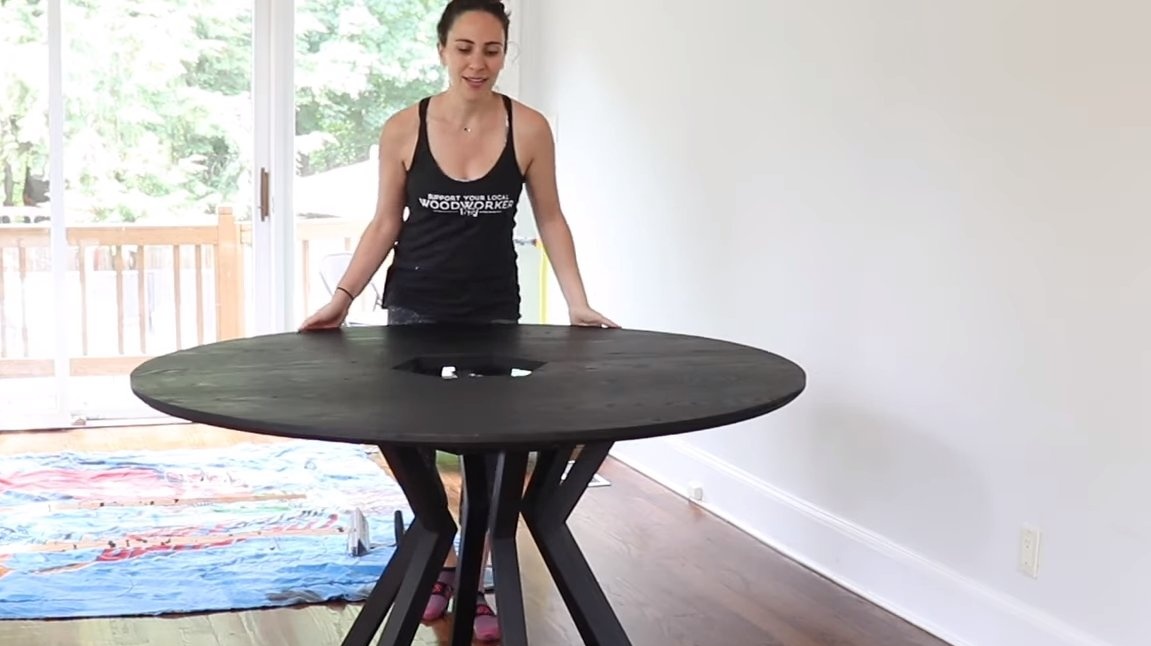
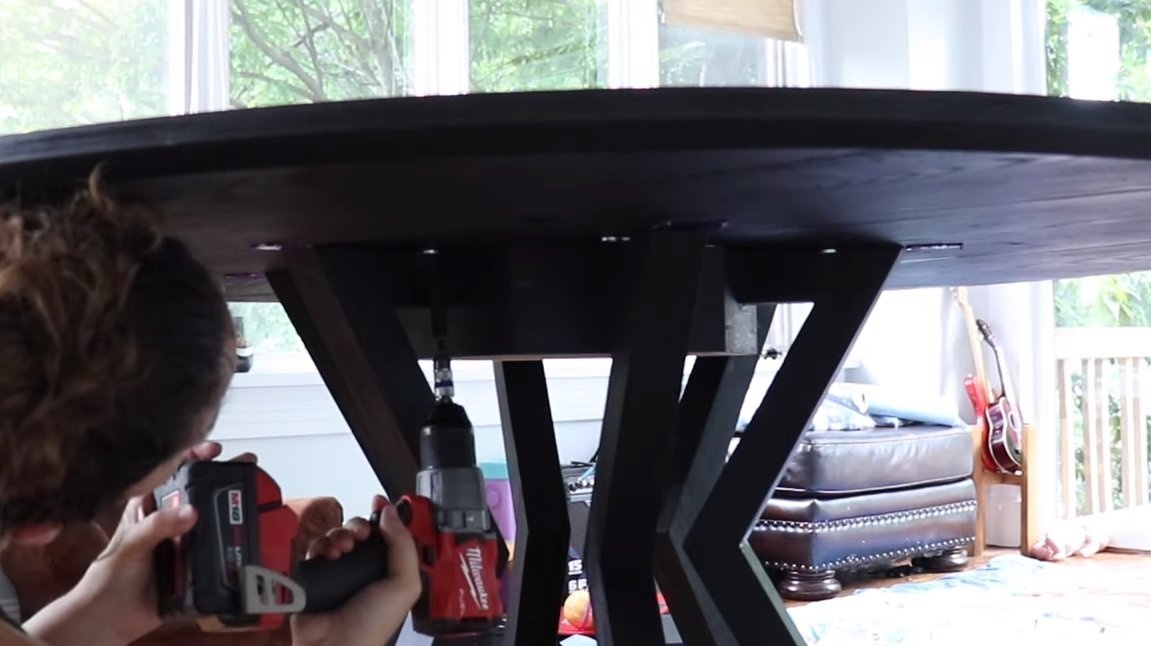
That's all, now the table can be assembled. We need mounting plates, we fasten them to the frame and make recesses so that the loops do not protrude above the surface. Well, then we fasten the countertop using self-tapping screws. That's all, the table is ready, everything turned out pretty interesting, a lot of people can sit at such a table. Of course, if you have experience with the furnitureYou can make such a table with simpler tools.
On this our project is over, I hope you liked the homemade work, and you found useful thoughts for yourself. Good luck and creative inspiration, if you decide to repeat this, do not forget to share your ideas and homemade things with us!