
A pyrometer, which is also a non-contact or remote thermometer, can be considered as the simplest thermal imager with just one pixel. Like a thermal imager, it does not radiate anything (if it has a primitive laser “sight”, it has nothing to do with the sensor, it serves only as a convenience), but it receives long-wave infrared radiation coming from all bodies heated to a temperature above absolute zero ( and others do not exist). This long-wave infrared radiation differs from the short-wave radiation used in optocouplers, remote controls, for the reception of which more simple sensors — photodiodes — are also suitable. The most popular, and therefore affordable, are pyrometers, offered as a replacement for medical thermometers. They are commercially available at many pharmacies. But such a device is a thing in itself from which it is impossible to pull data into an external device for further processing.
A completely different thing - the MLX90614 module with interface I2C. You can connect it to Arduino, Raspberry Pi, any other platform if you can provide software support. But it’s most convenient to connect it to Arduino, because for this platform there is a ready-made Adafruit library that provides support for this module.
The MLX90614 is a two-in-one device: in addition to the pyrometric sensor, it also contains an outdoor temperature sensor. They work independently of each other. The temperature measurement range with a pyrometric sensor is from -70 to +380 ° C, and an air temperature sensor is from -40 to +125 ° C.
The author of Instructables under the nickname Michal Choma wrote a simple sketch for Arduino, which together with the above the library allows you to check the sensor. Sketch text:
#include
#include
mlx = Adafruit_MLX90614 ();
void setup () {
Serial.begin (9600);
mlx.begin ();
}
void loop () {
Serial.println ("Temperature from MLX90614:");
Serial.print ("Ambient:");
Serial.print (mlx.readAmbientTempC ());
Serial.println ("° C");
Serial.print ("Contactless:");
Serial.print (mlx.readObjectTempC ());
Serial.println ("° C");
Serial.println ();
delay (1000);
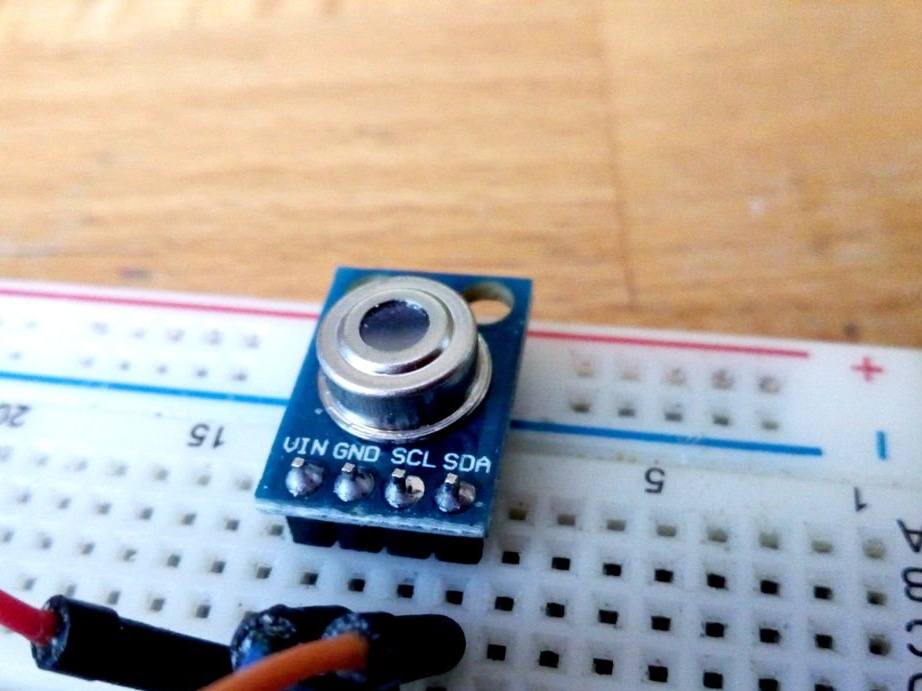
} The power supply bus of the module (plus and common wire) is connected by the master in parallel to the corresponding Arduino buses. The sensor can be powered with voltage of 3.3 or 5 V. SDA line (data) of bus I2C master connects to pin A4 Arduino, line SCL (clock pulses) - to pin A5. In the diagram, it looks like this:

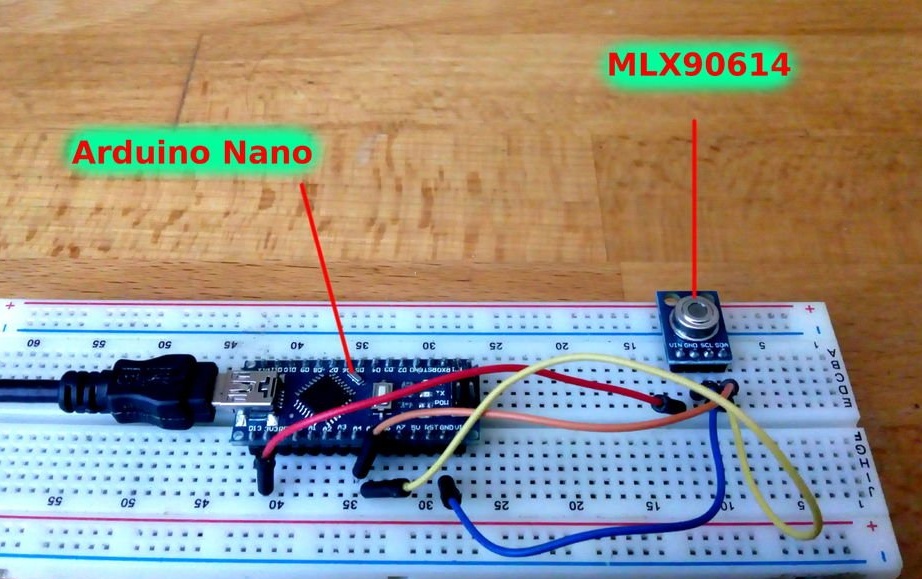
And in real life - like this:
In the above pyrometer from the pharmacy there is a special optics that transmits long-wave infrared rays. It allows you to focus on objects located quite far from the device.It is not here, so you have to bring the sensor to the subject at a distance of about 10 mm.
The wizard tests the connection from the circuit, library and sketch by running the terminal emulator and connecting it to the device / dev / ttyUSB2 (this device may have a different name depending on the OS and its settings). Under the control of the sketch, the Arduino reads data from the module, converts it into a text view and displays it in the port:
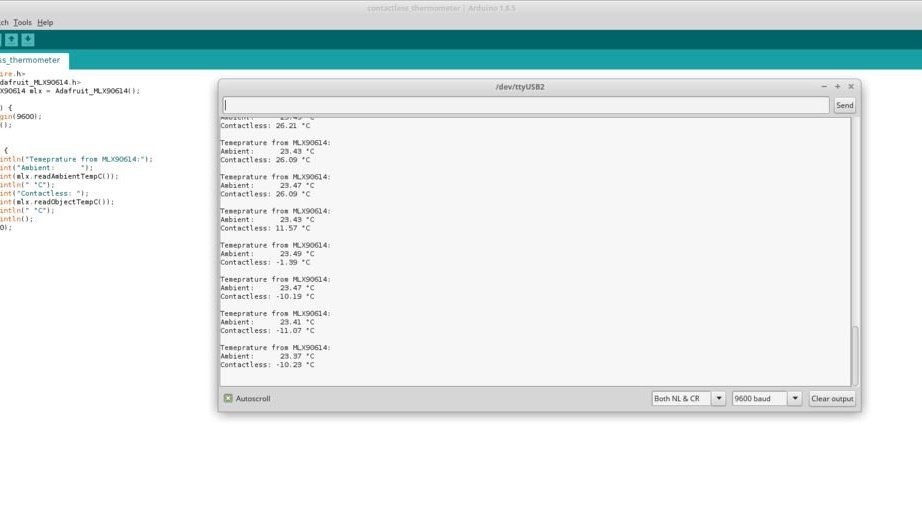
At first, the master did nothing, and then he brought ice cream to the sensor. Its temperature was immediately measured by the pyrometric sensor of the module, but the ambient temperature sensor in it did not have time to cool. Of course, it is better to direct the sensor to the side before this experiment and bring the ice cream to the side.
Having tested the module and making sure that it is working, you can think about its practical application. It’s just not interesting to measure the temperature of the human body, a soldering iron or the same ice cream remotely — a pyrometer from a pharmacy will do for this. It is necessary to use exactly the ability of the sensor to transmit data to external devices for further processing. You can, for example, make a robot “afraid” of too cold or, conversely, too hot objects, and moving away from them. Any other temperature sensors, except pyrometric, are not suitable for this because of inertia. Or try to design a touch button that responds only to the touch of a finger, but not to any other object, including conductive. But such a module for monitoring the temperature of rotating objects is especially good, while the sensor itself remains stationary. Imagine a drill that automatically stops when the drill overheats and does not allow it to “burn”. Yes, there’s a lot more that can be invented for this, for which any other temperature sensors are not suitable if you strain your imagination.