» Electronics » Sound and Acoustics »Build a sound amplifier 2.1 with Bluetooth, USB, Radio and Aux on TDA7379

Build 2.1 Sound Amplifier with Bluetooth, USB, Radio and Aux on TDA7379

Greetings the inhabitants of our site!
This article will show you how to do it yourself assemble one of the options for a 2.1 sound amplifier with an output for connecting a subwoofer.

The following instructions are taken from the Radio-Lab YouTube channel.
This small metal box will be the body of the future amplifier:

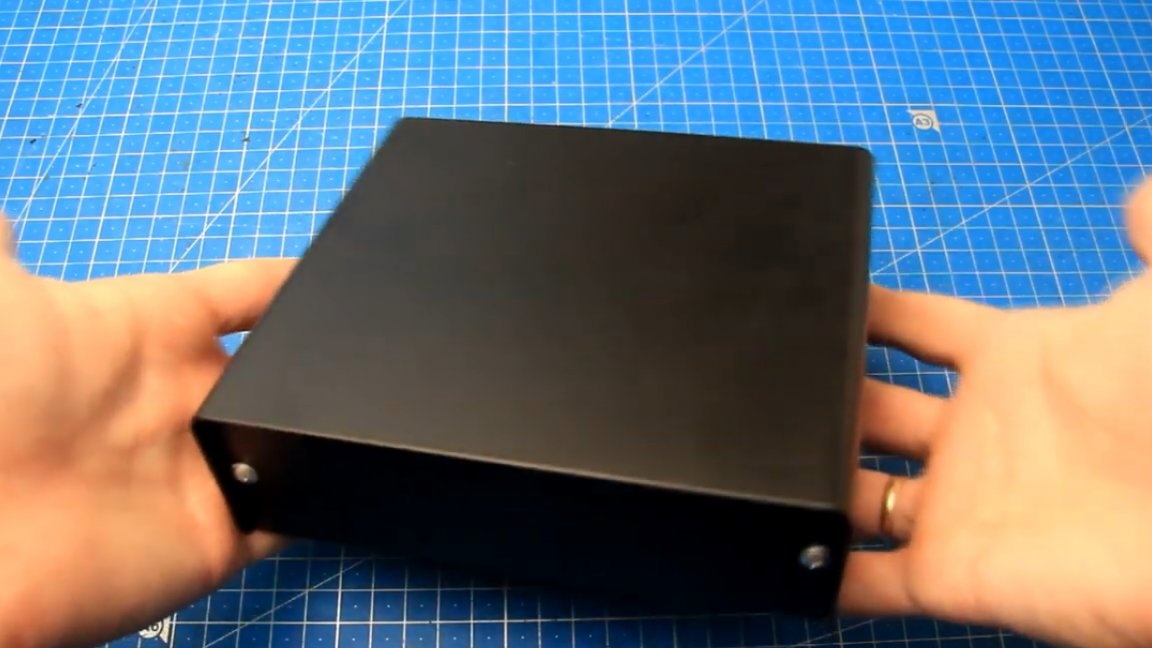
Such a case can be purchased on the radio market or ordered in the online store. Also in our amplifier will be present Bluetooth, USB, Radio and Aux. You can easily connect two speakers + a subwoofer to such an amplifier.

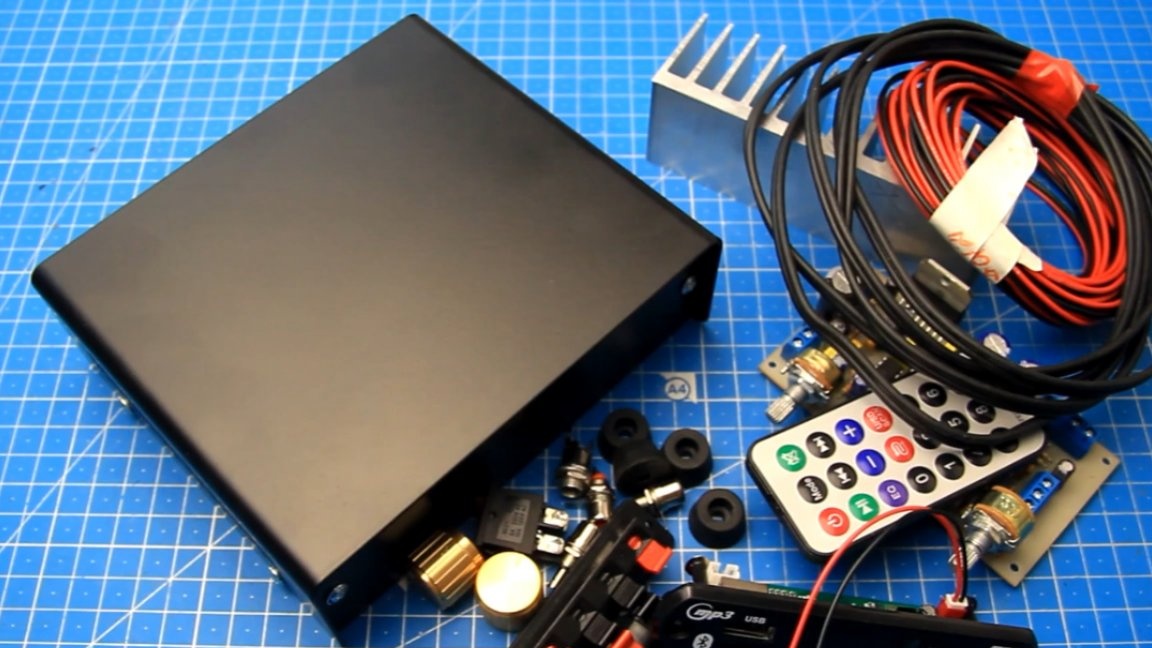
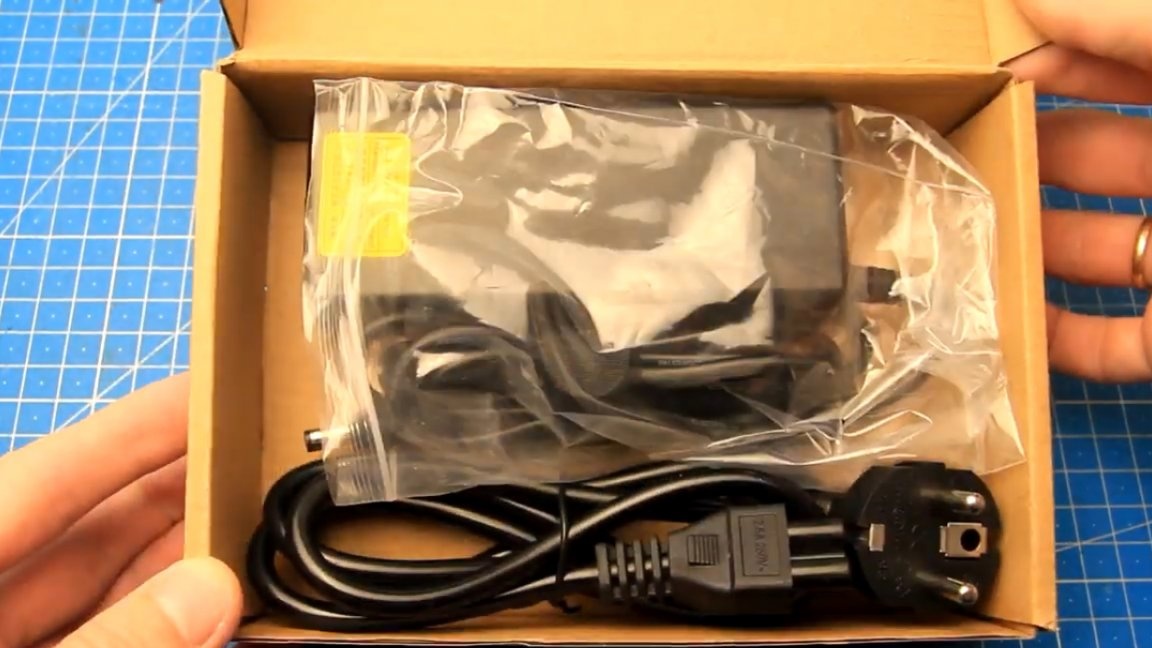
For the independent manufacture of this homemade product you will need:


Case dimensions are as follows: 154mm x 50mm x 134mm. All the necessary parts are available, which means that you can proceed with the assembly. First you need to figure out about where and what will be located. To do this, you will have to unscrew the front and rear walls of the housing.

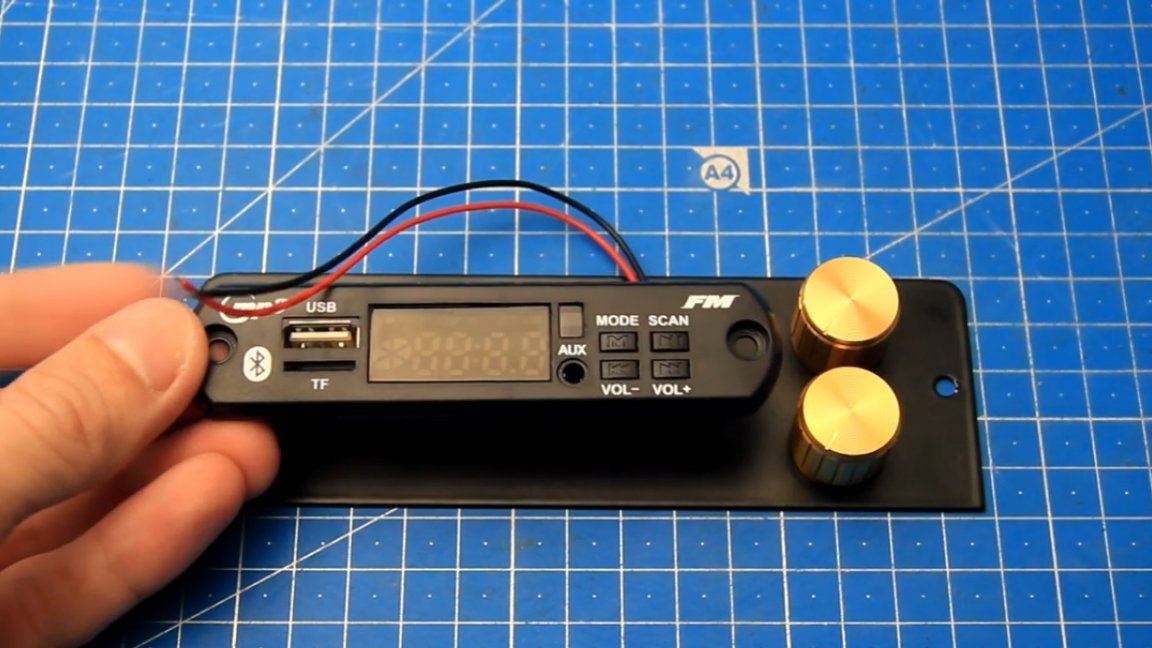
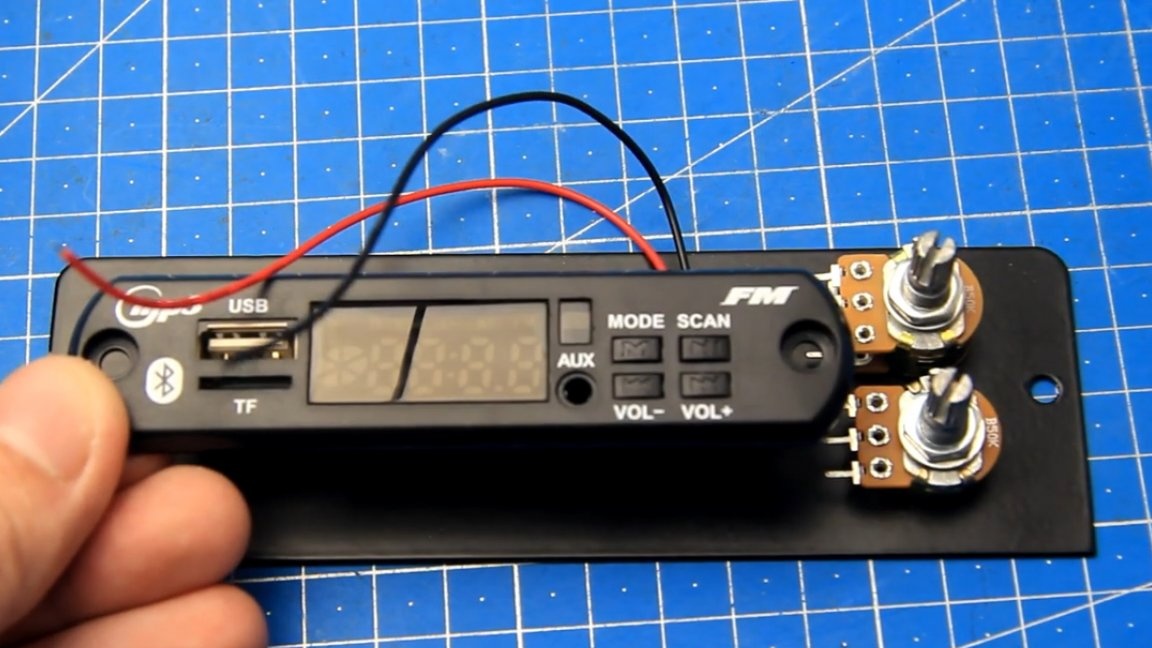
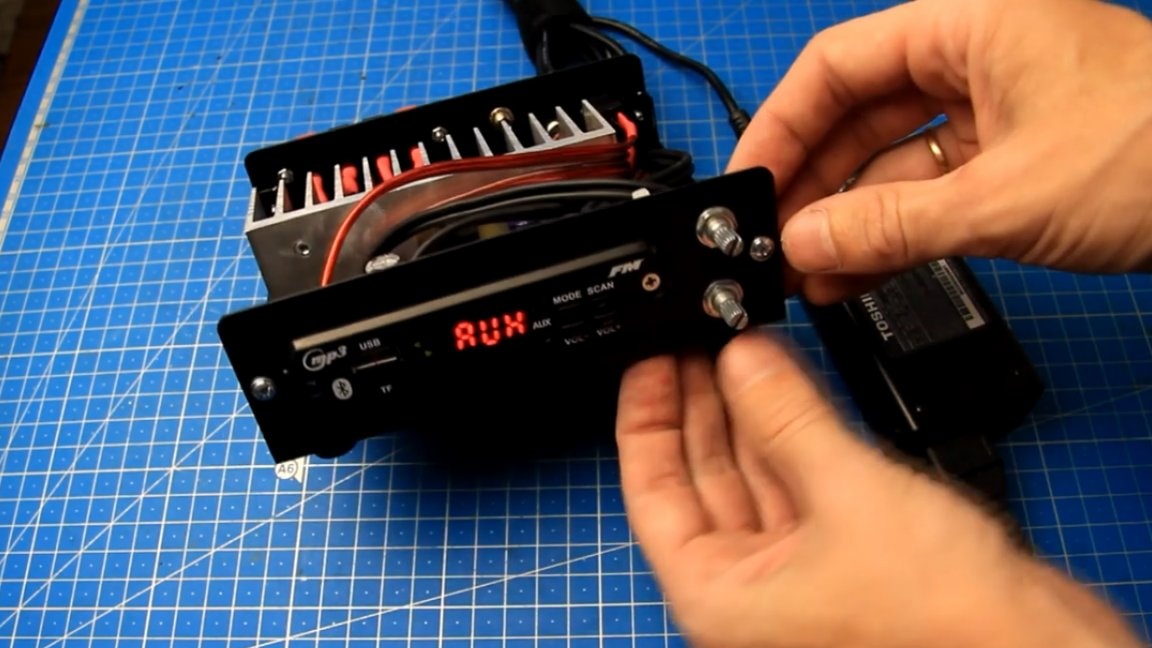
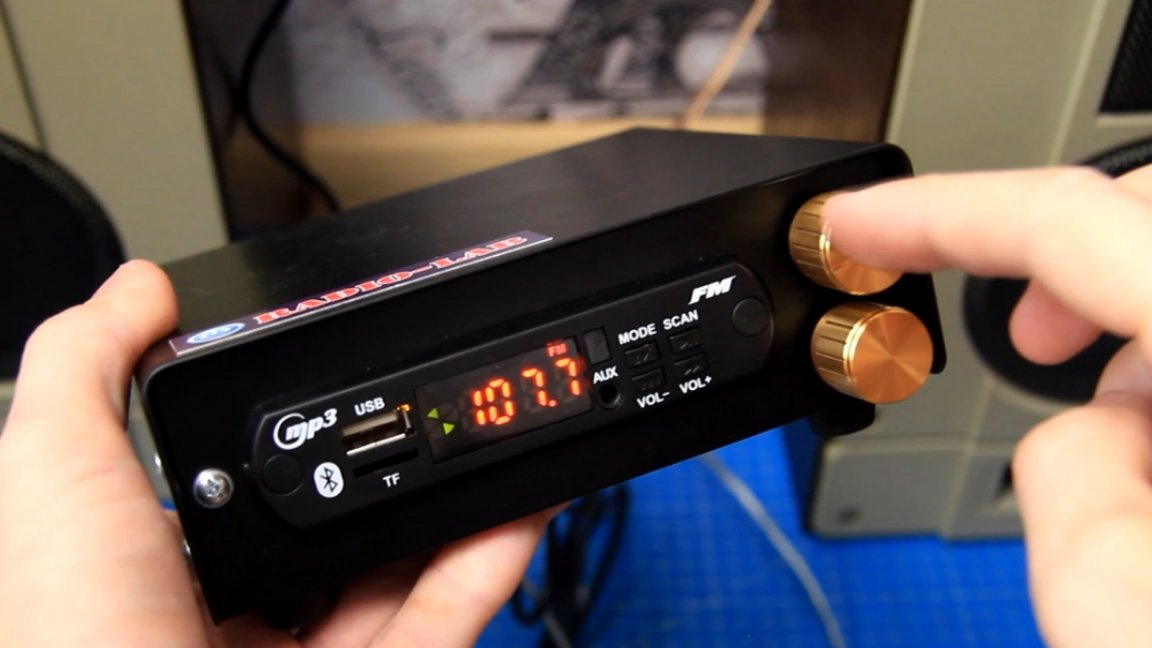
On the front wall we will place a mortise sound module and knobs for adjusting the overall volume and volume of the subwoofer.

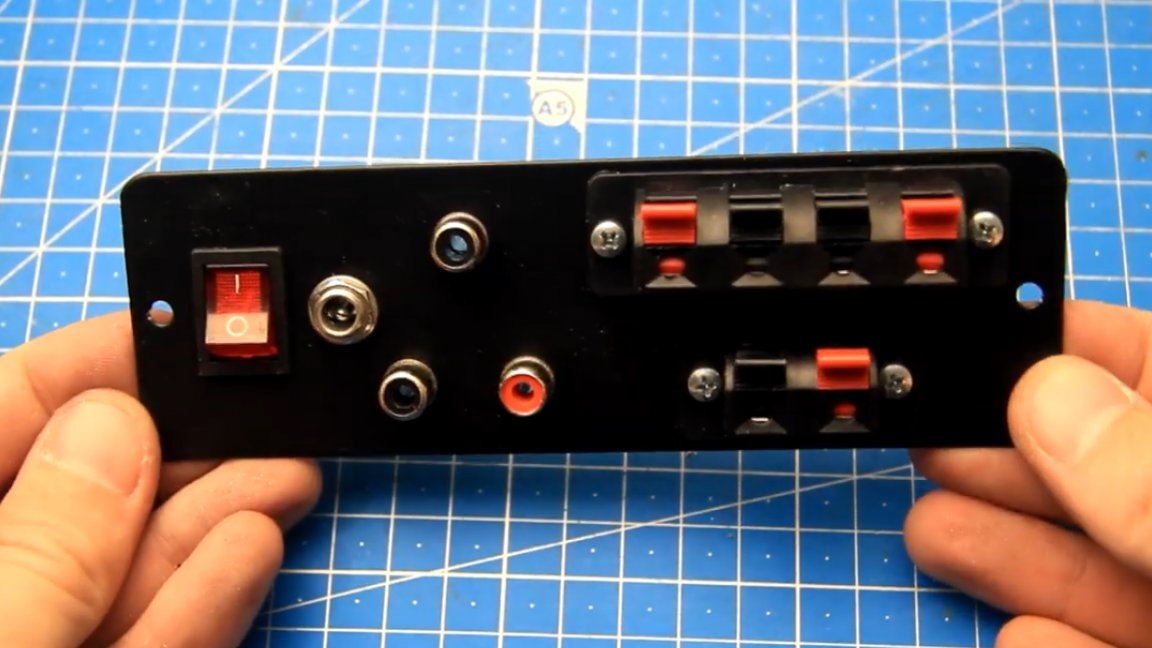
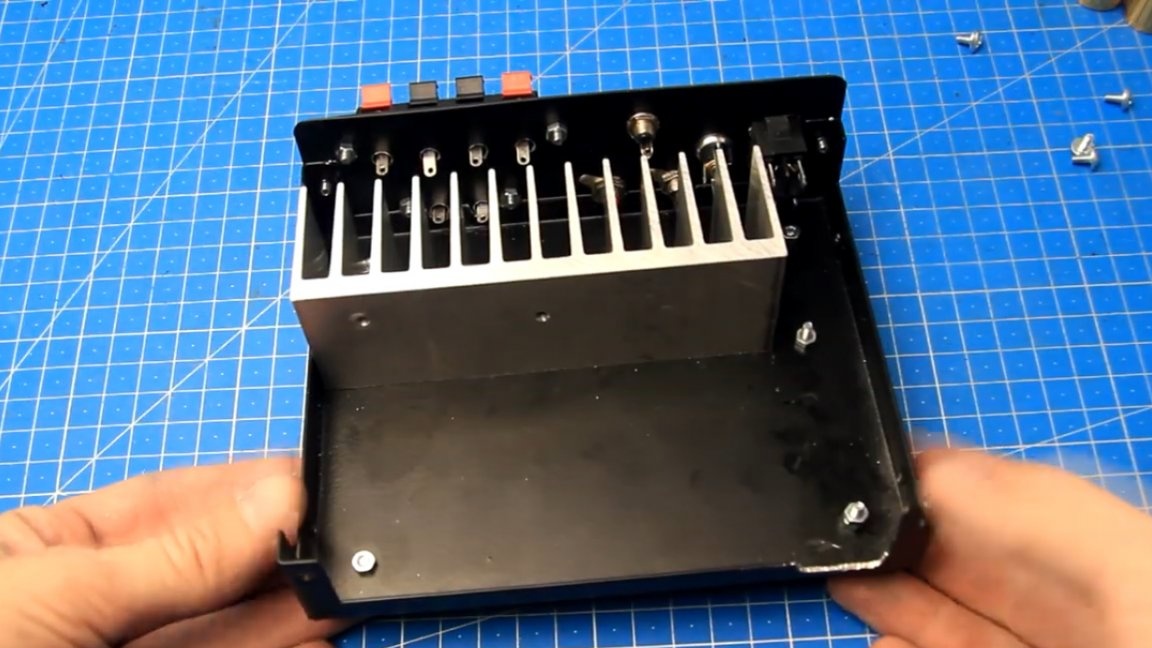
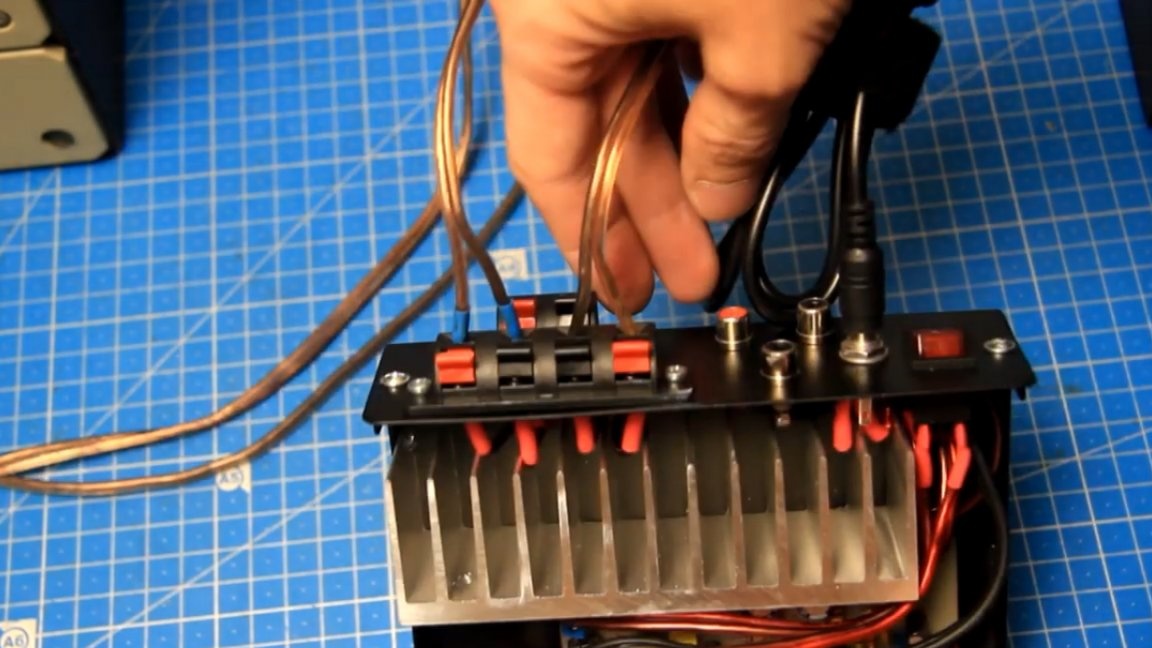
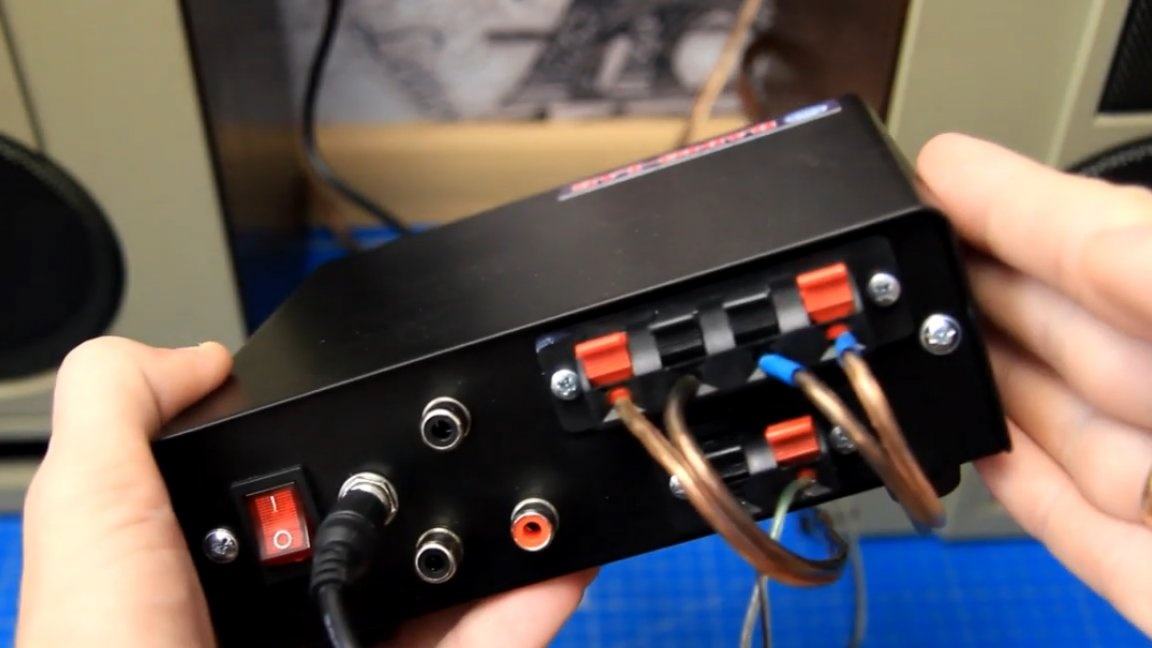
On the opposite wall we’ll place a switch, a power connector, an RCA antenna connector (aka tulip), two RCA line inputs below, and then terminals for connecting speakers.

Variable resistors for volume control will be screwed in this place.

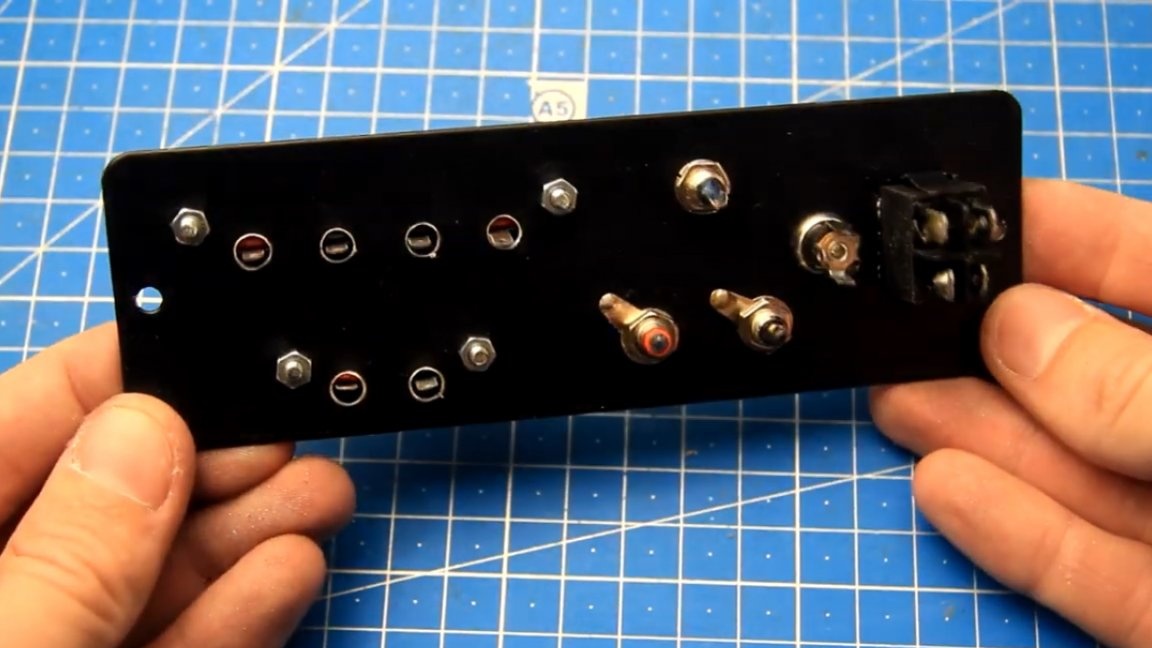
We mark the drilling points, and drill all the main holes. If necessary, expand the holes to the desired diameter. File handling in rectangular openings will not be superfluous.


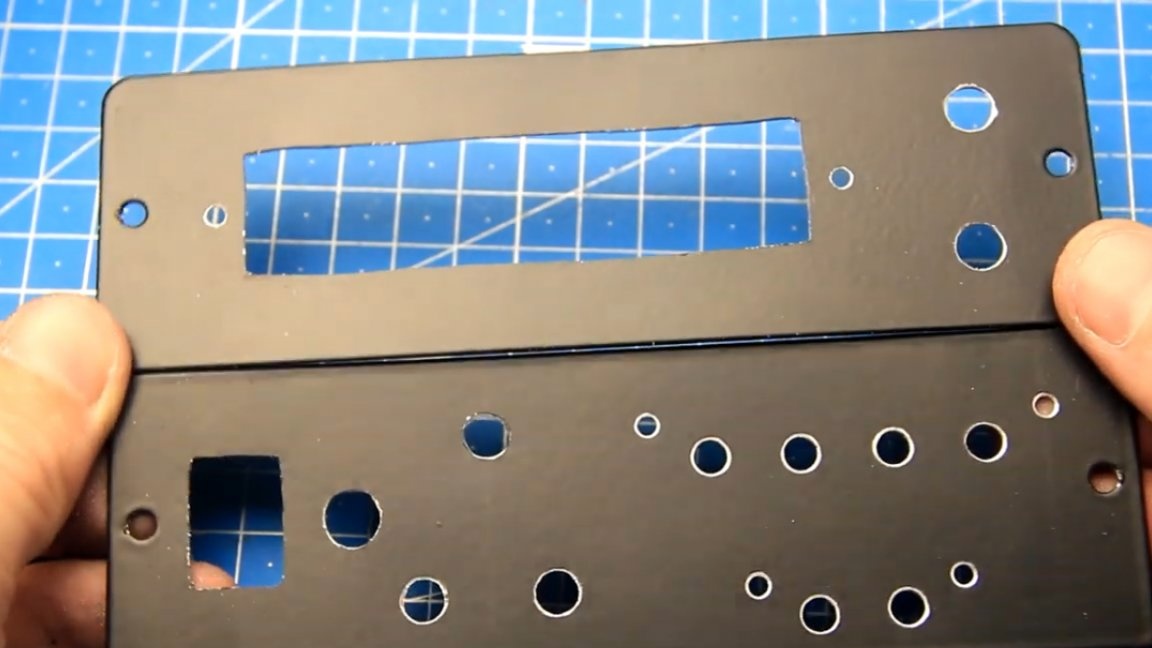
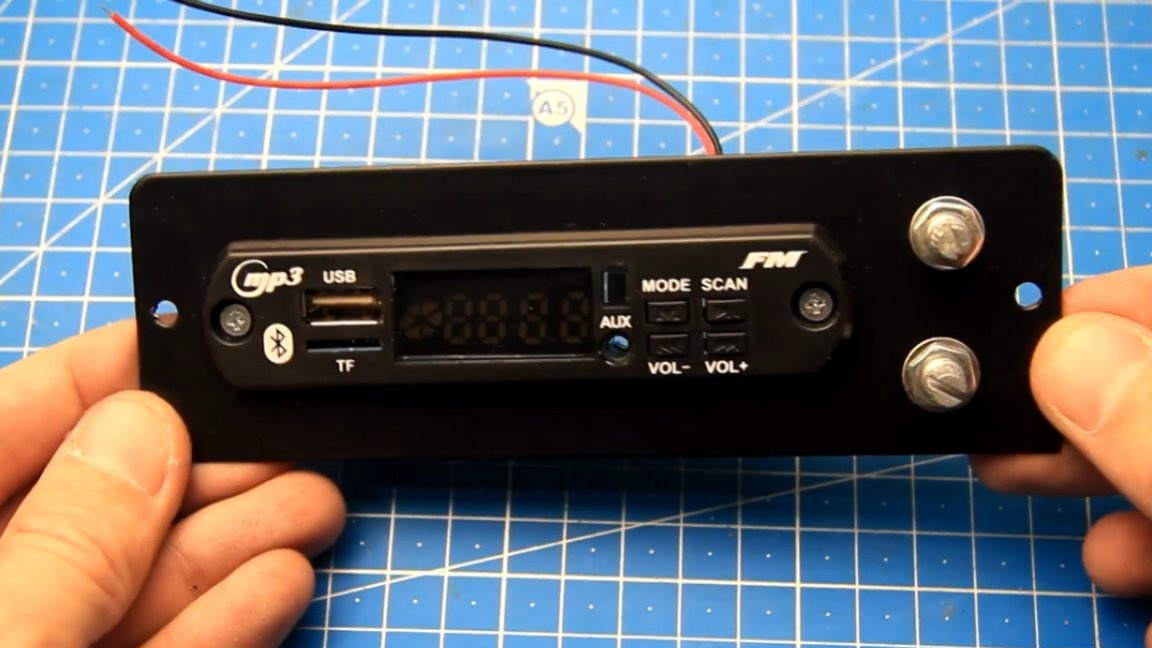
Front and back panels are ready. We install the mortise module and variable resistors on the front wall.


We also install the switch and all the connectors on the back wall. For convenience, you can unscrew the top cover.


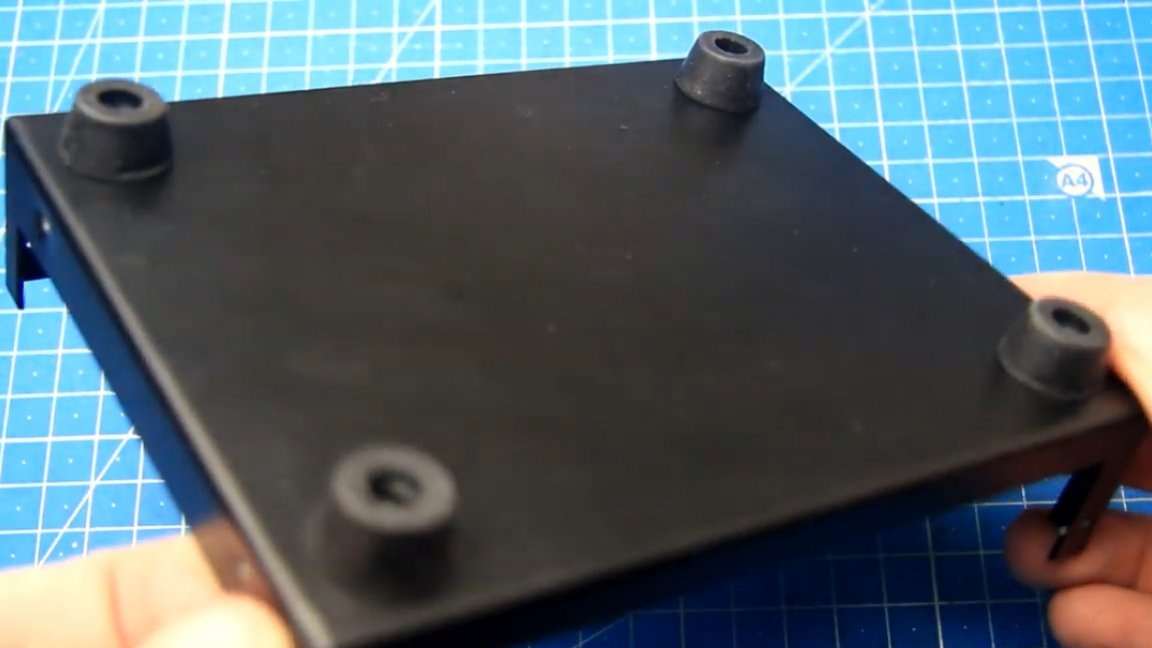
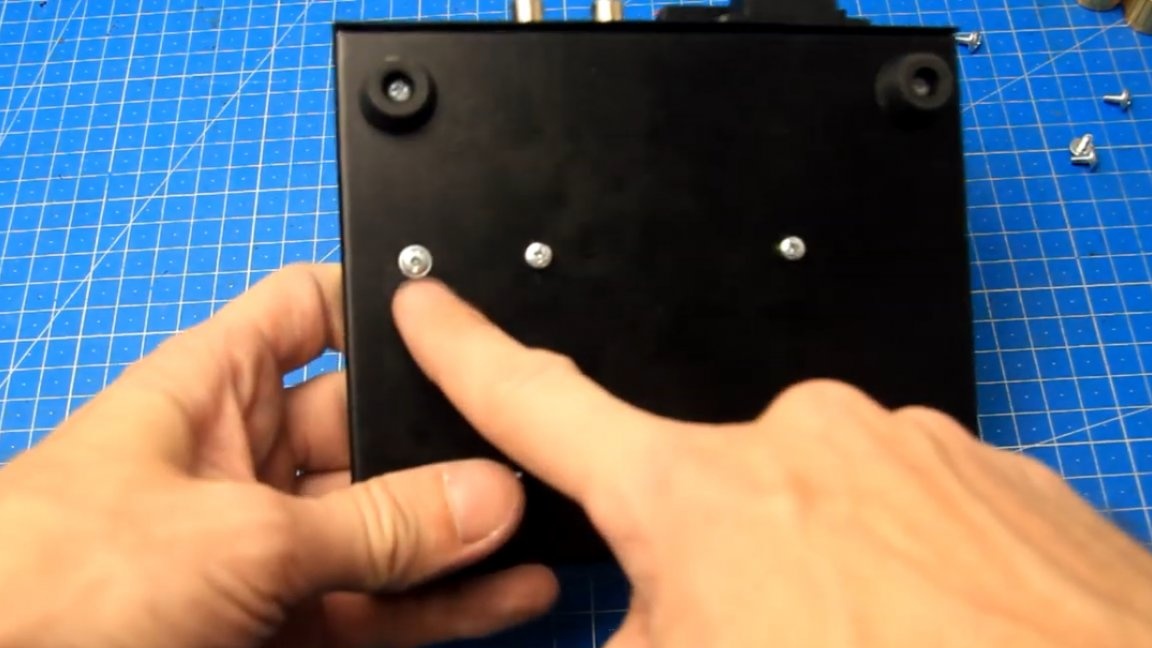
Next, install the legs on the bottom of the amplifier.

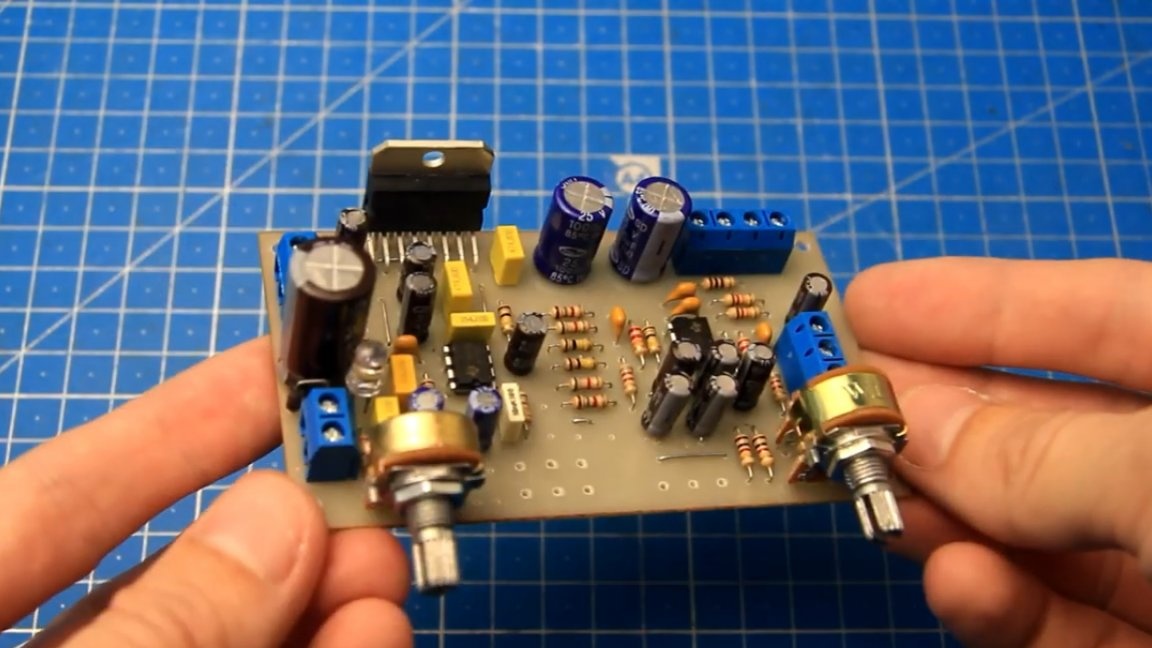
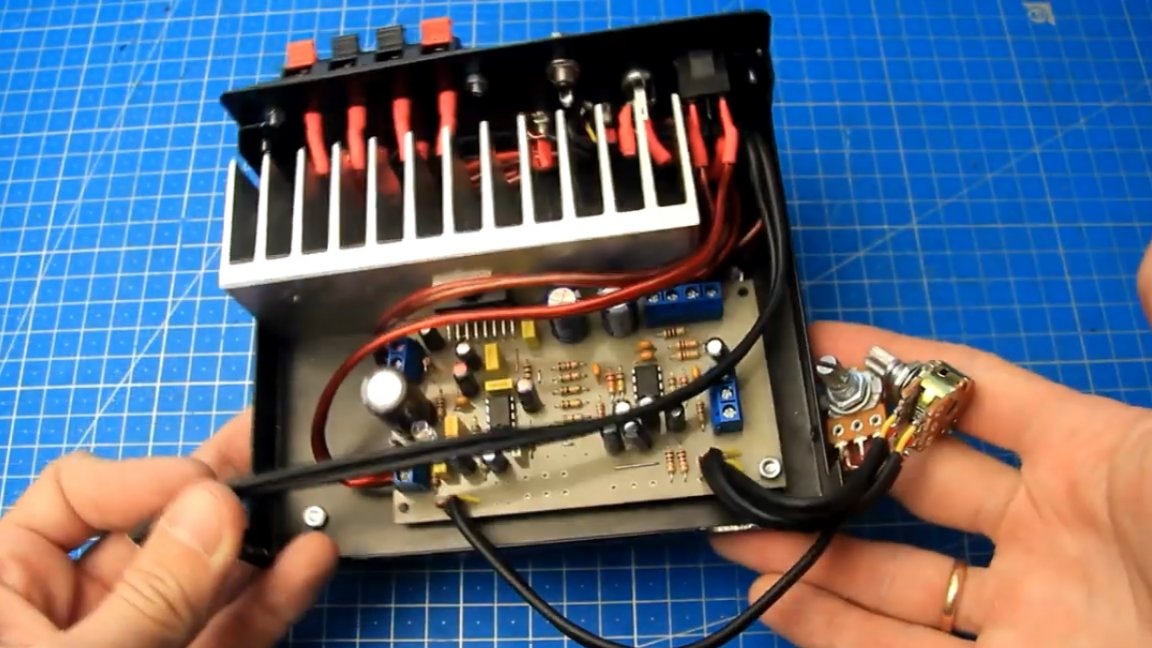
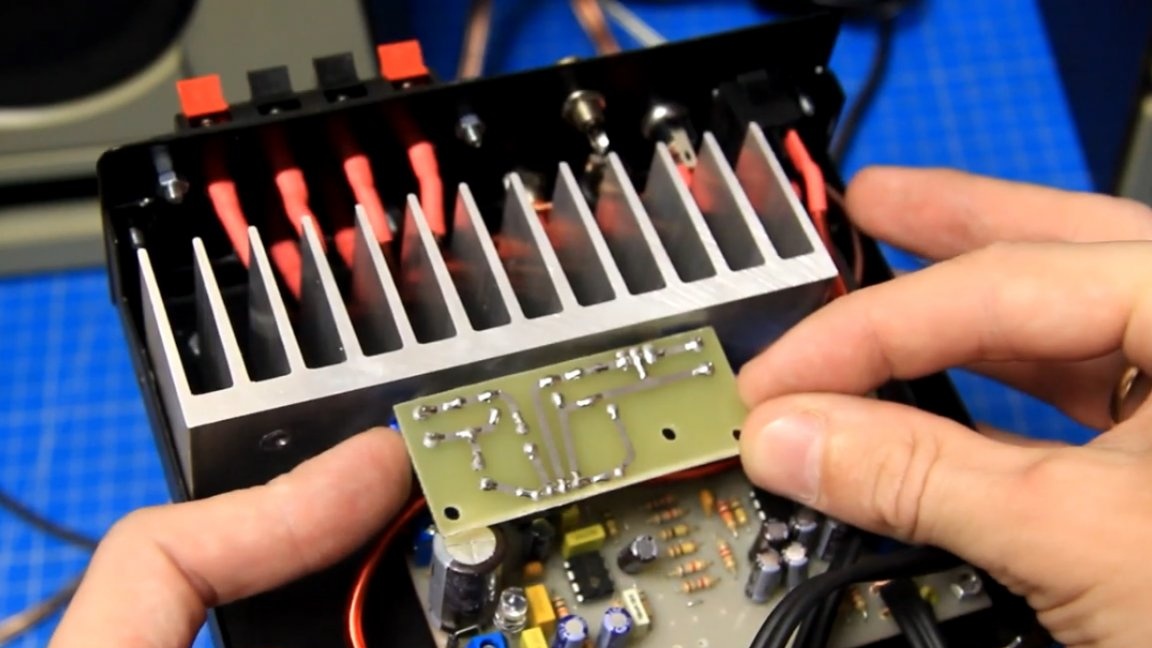
The TDA7379 chip used in this project is an AB class amplifier, and it decently heats up and a radiator is needed to cool it.

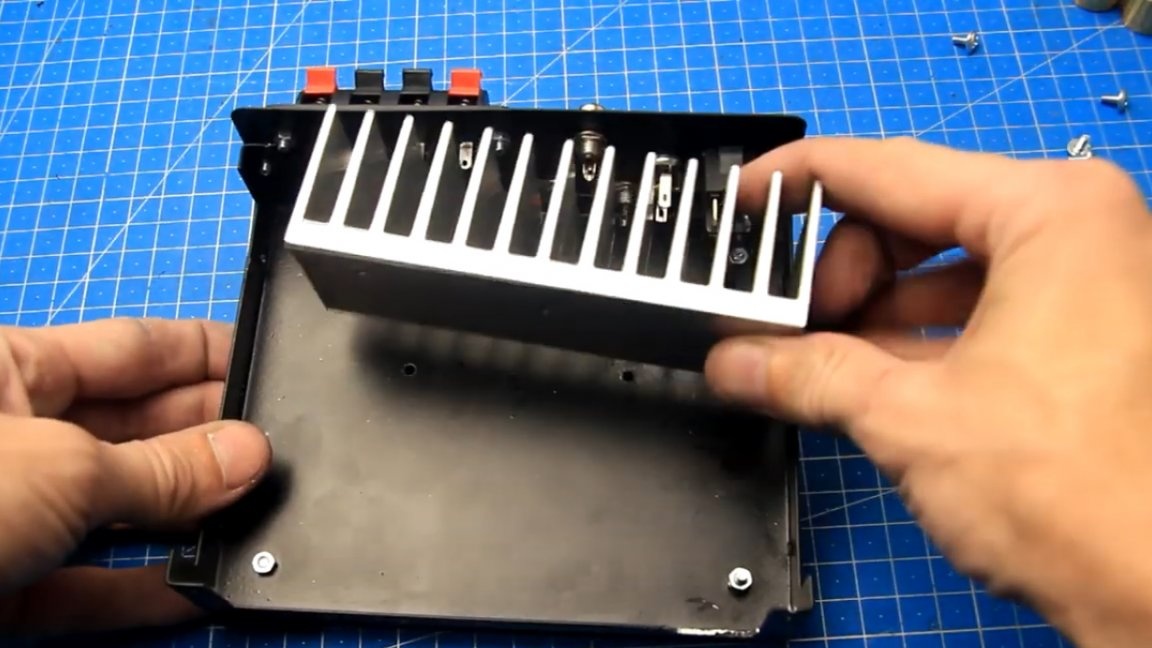
We drill holes, cut the threads and fasten the radiator with M3 bolts to the bottom of the amplifier.


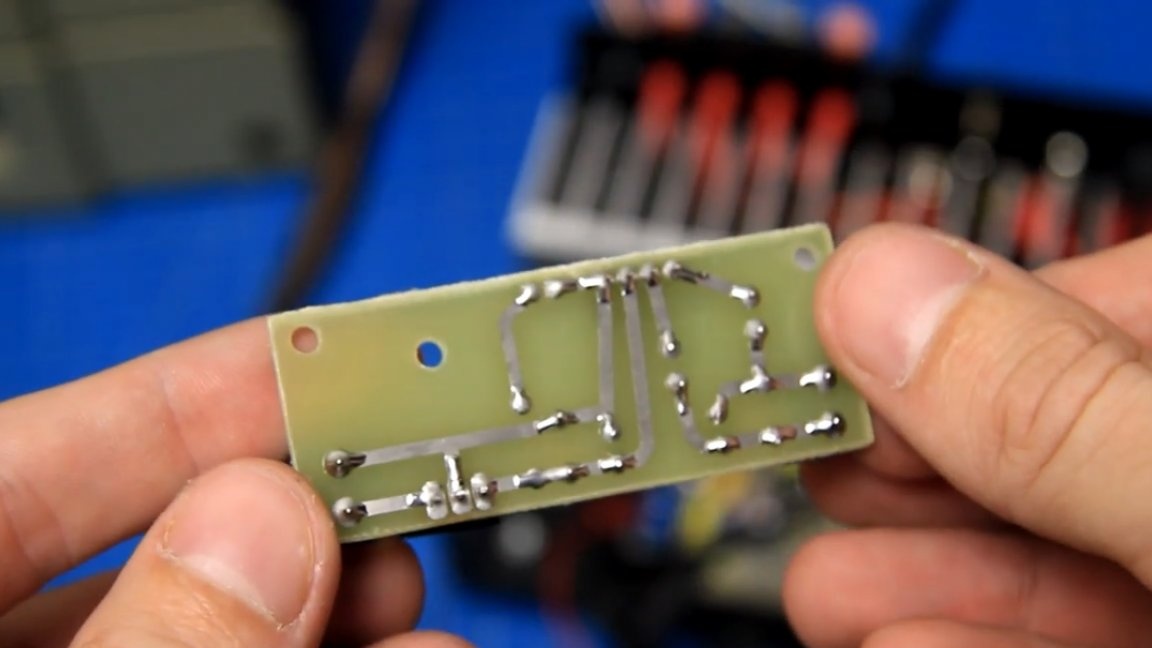
Next, you need to fix the sound amplifier board.


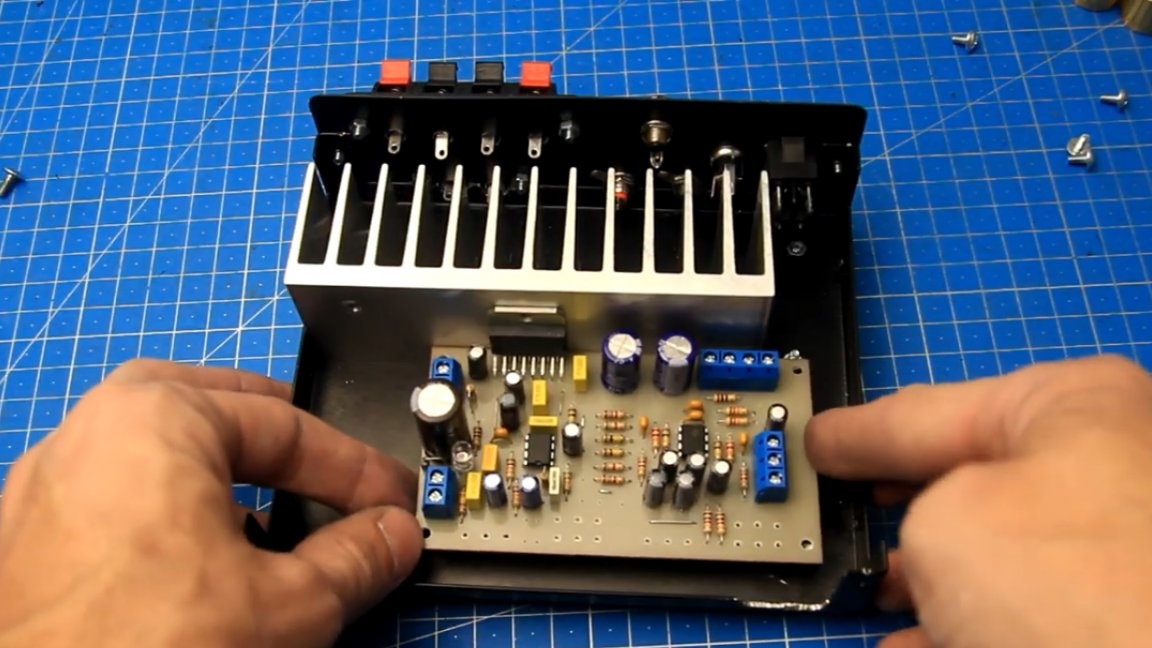
Screw the microcircuit to the radiator for heat removal.

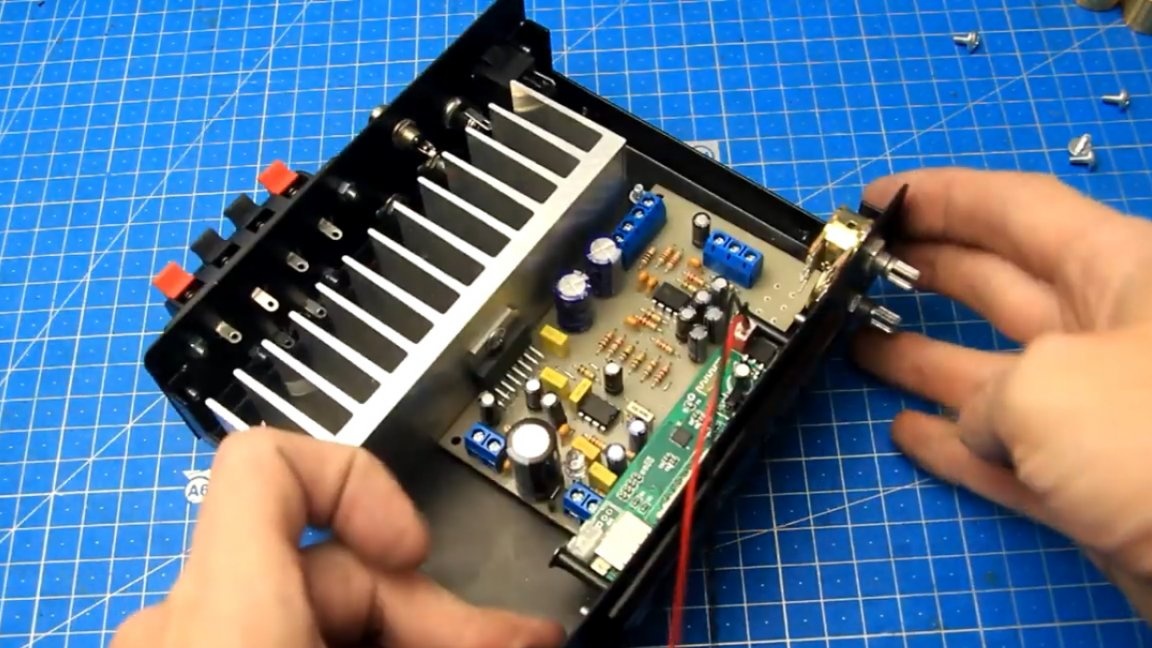
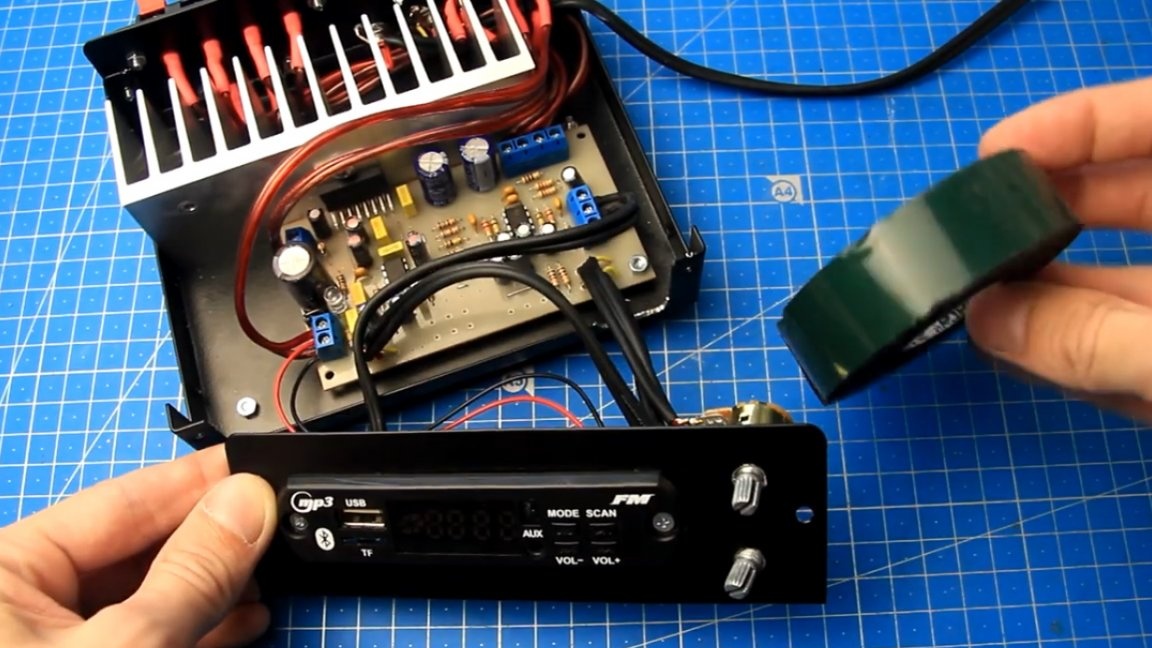
Now you can install the front panel in its place.

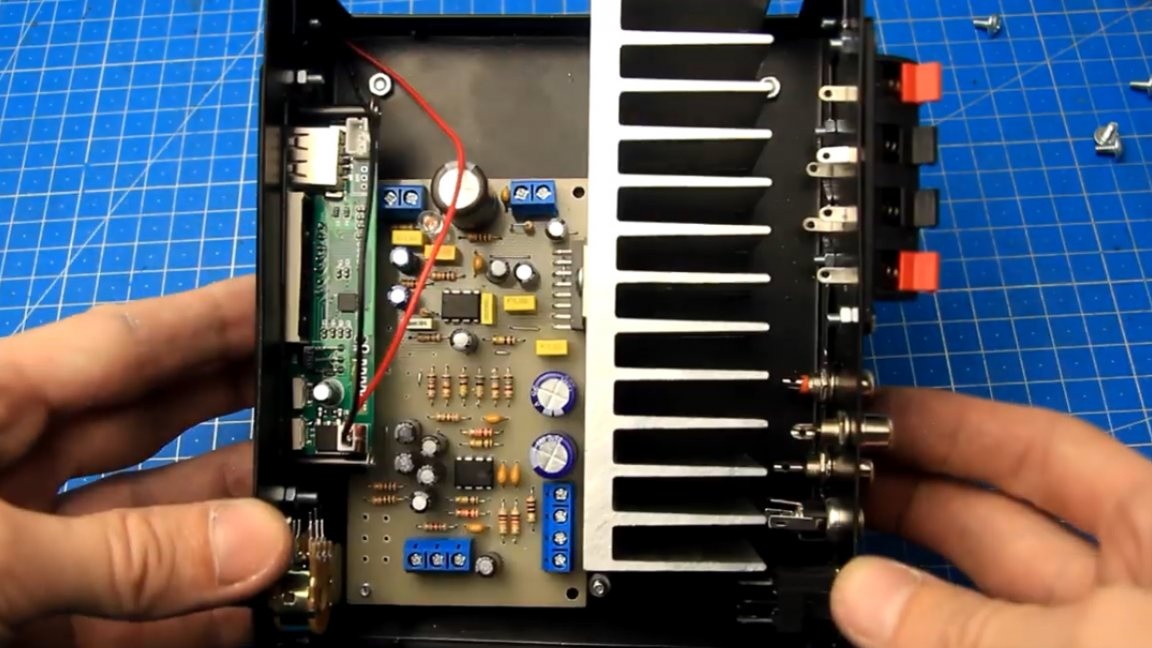
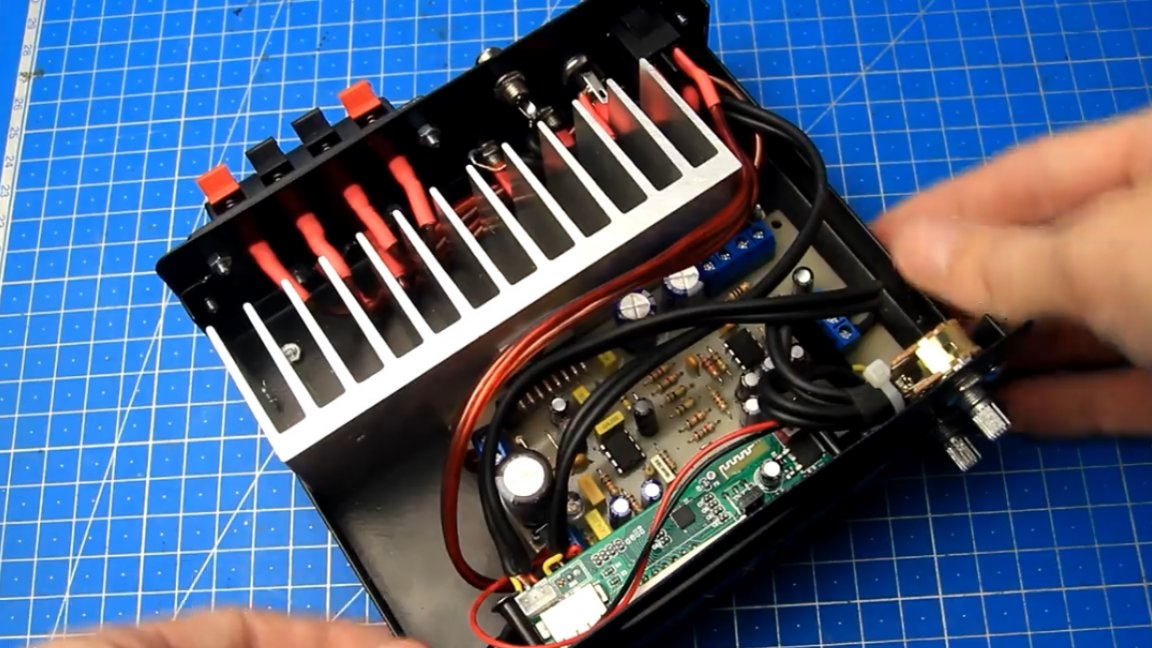
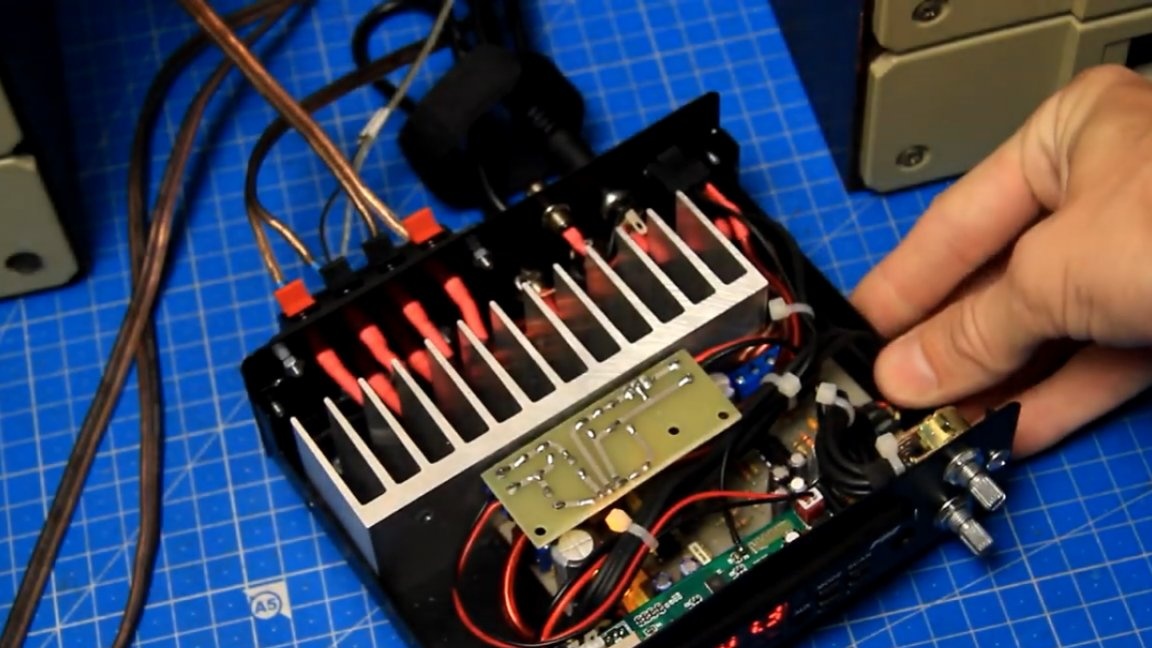
Well, the modules do not interfere with each other and do not touch each other. All modules, heatsink, connectors, etc. already in their places, now all this must be connected into one whole with the help of wires.For variable resistors that will perform the volume control function, it is advisable to use such shielded wires to minimize interference.


To improve the heat sink from the microcircuit to the radiator, it is advisable to use thermal grease.

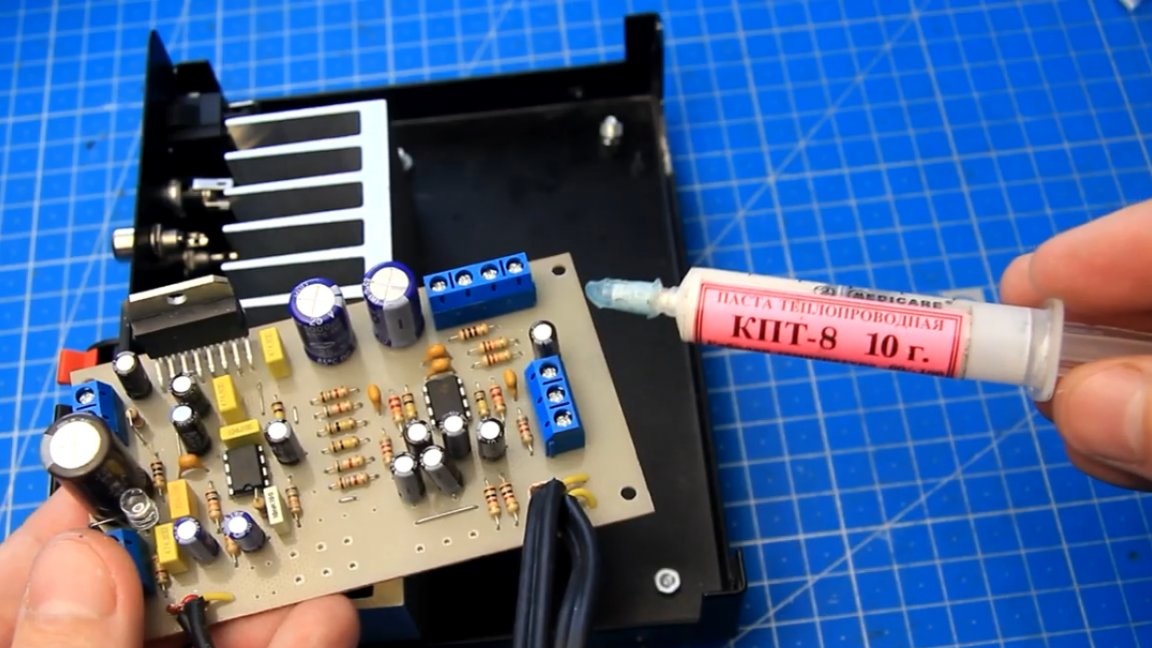
Then we fix the microcircuit, and for reliability, the amplifier board is additionally fixed in the corner on the leg bolt.


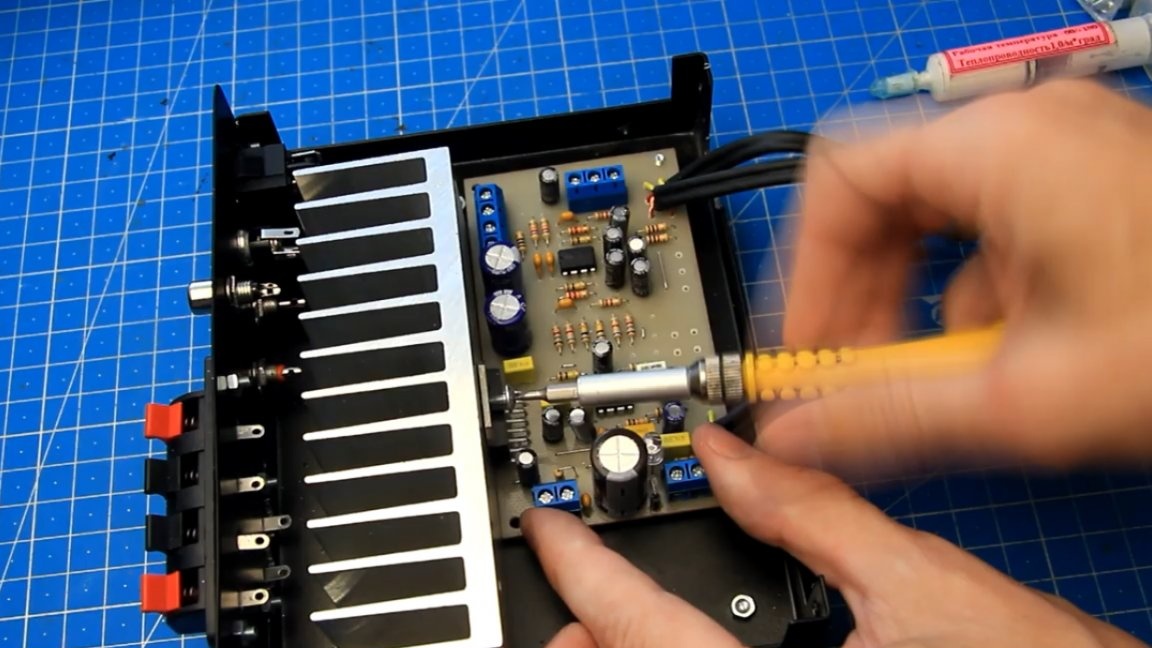
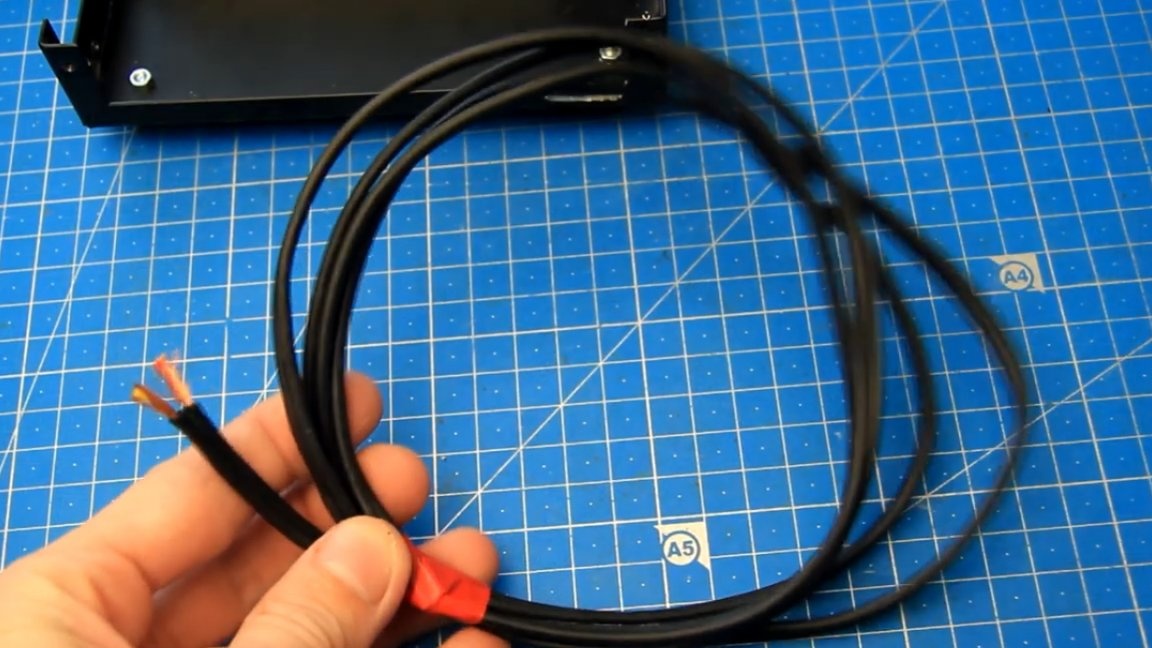
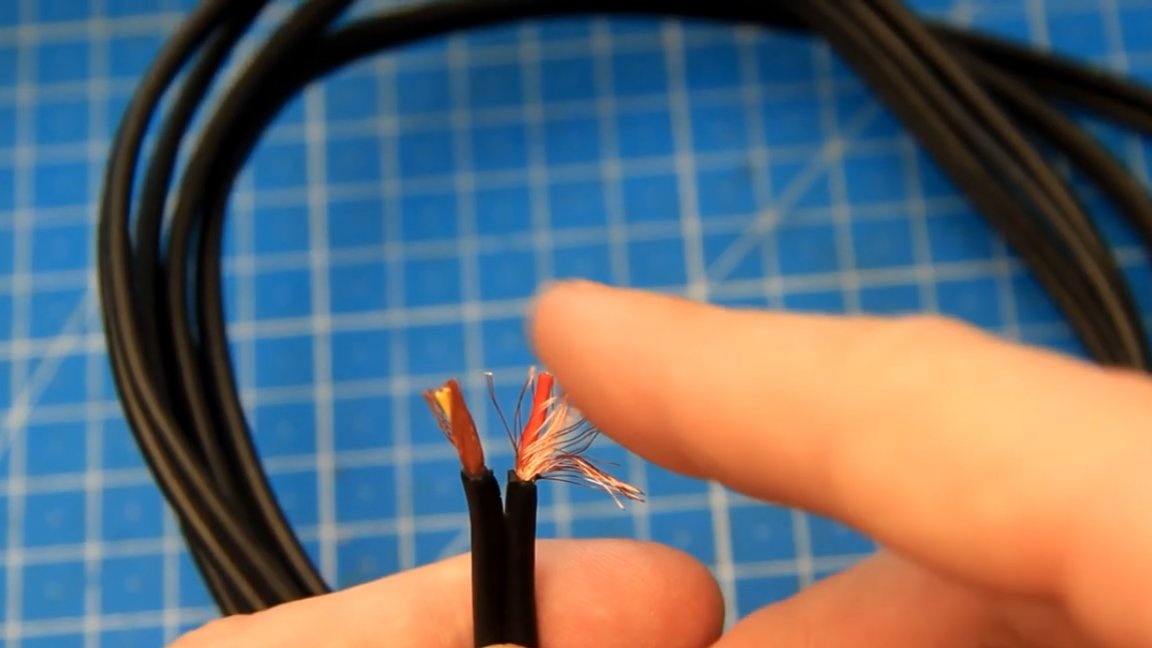
We measure, cut and solder all the wires to the connectors on the back wall. We solder the soldering places with heat shrink.


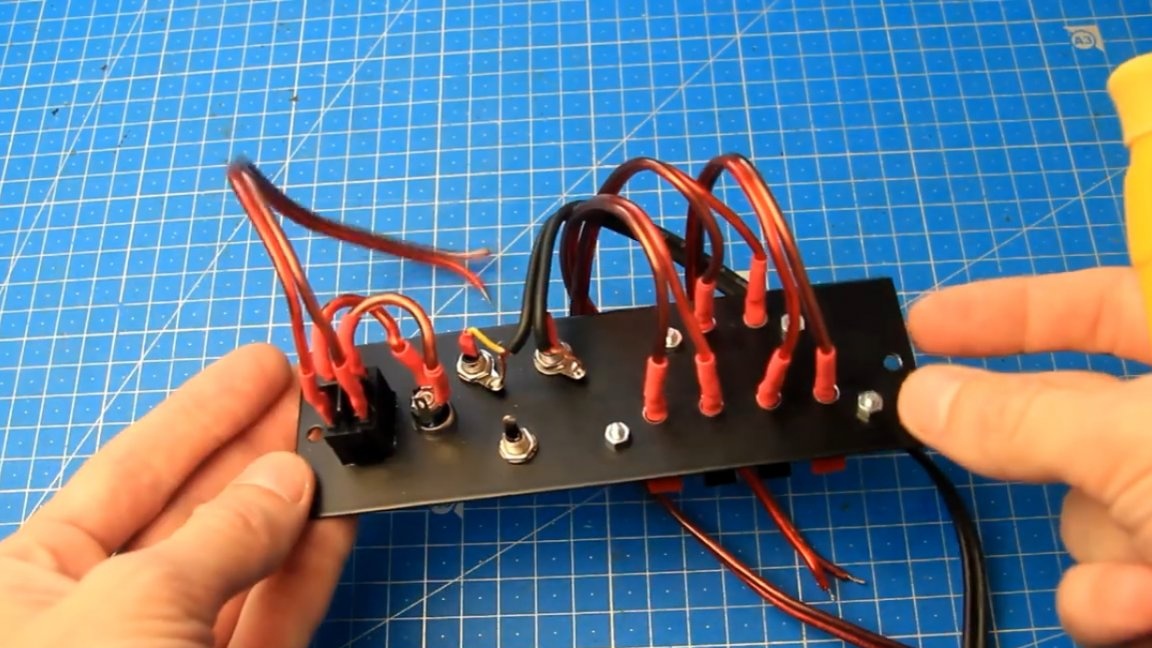
Line input wires are also desirable to use with the screen for the same reason that there are no noise and interference.

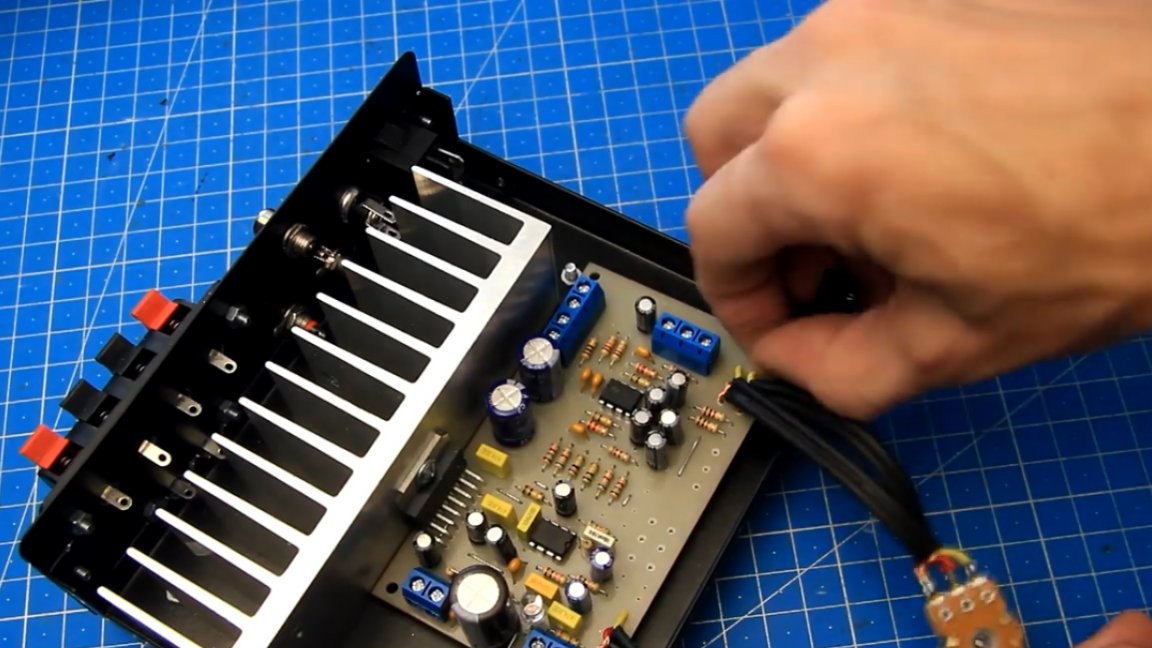
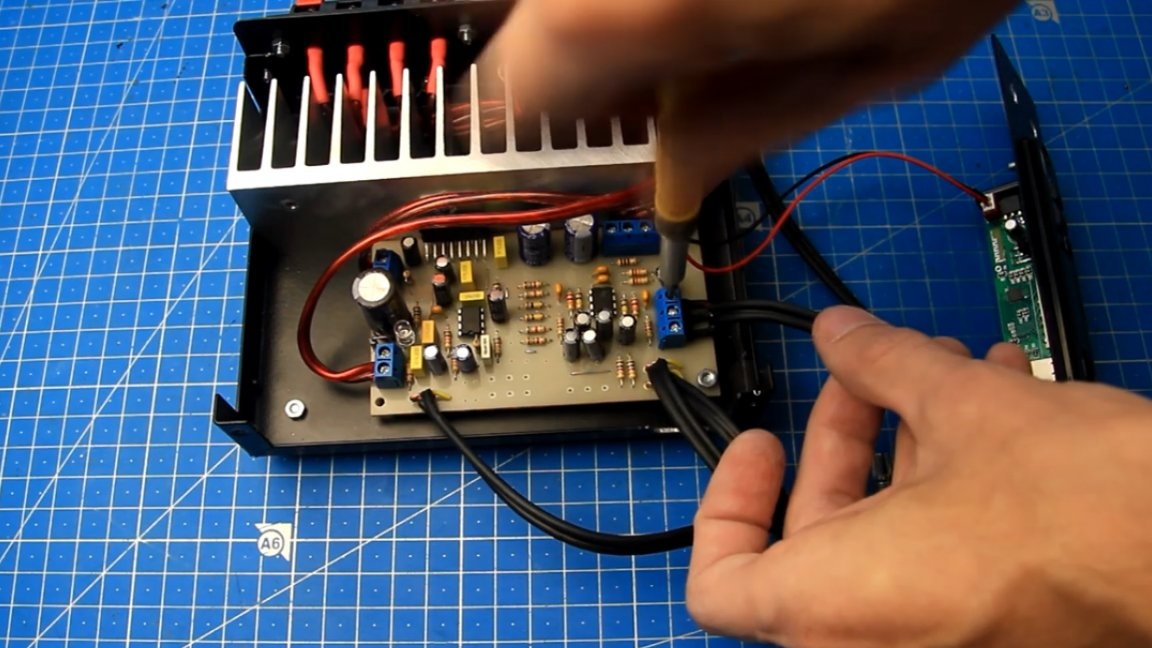
Now the back wall can be installed in its place. Carefully lay the wires under the connectors and connect the output and power wires to the amplifier, while carefully watching so as not to confuse the plus with the minus.

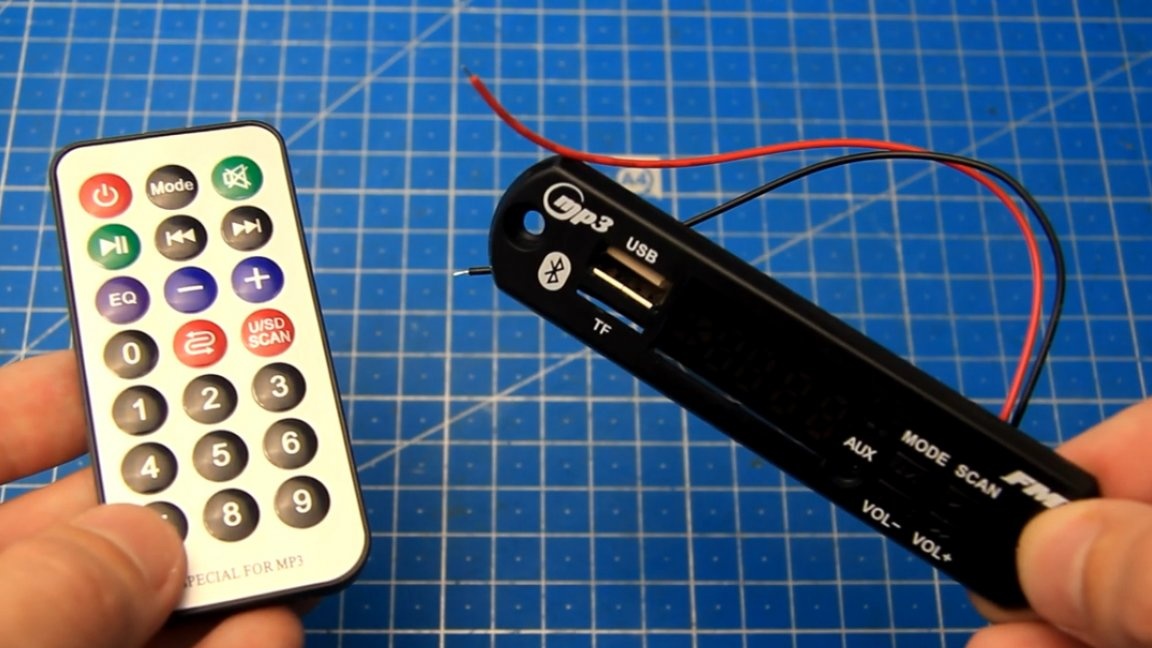
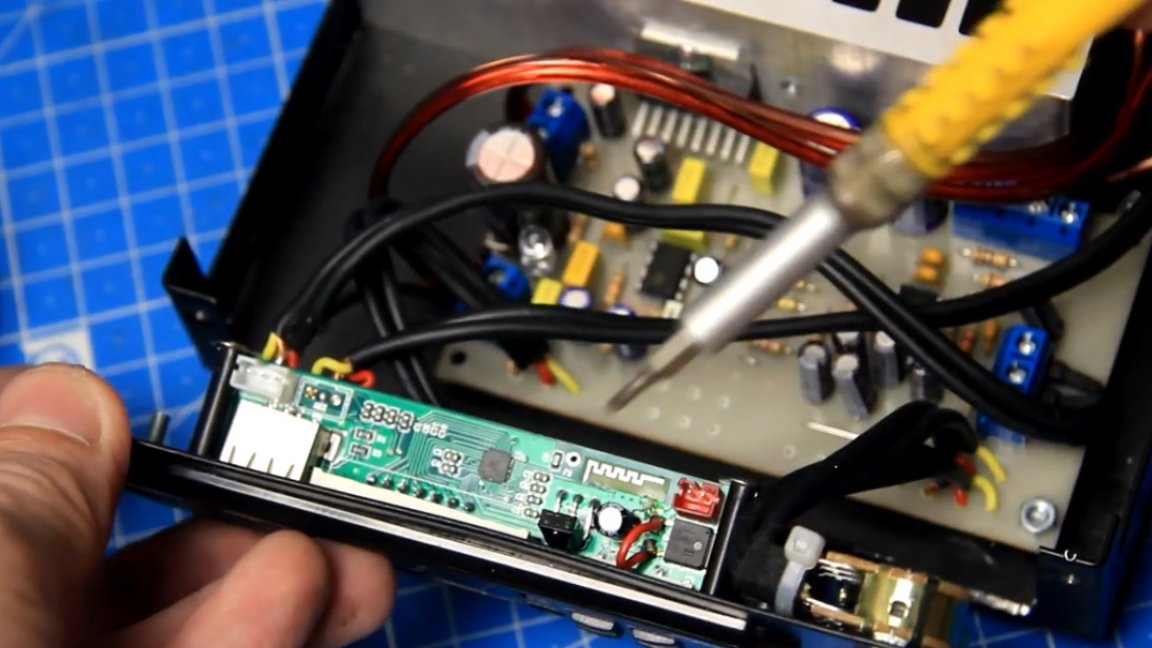
Now let's connect the mortise module. The line output from the module is connected to the input of the sound amplifier. For the test (temporarily) we power the module from the power supply cable of the amplifier. A module from 19V will not burn, but from such a voltage the 78M05 stabilizer installed on the module will not heat up slightly.

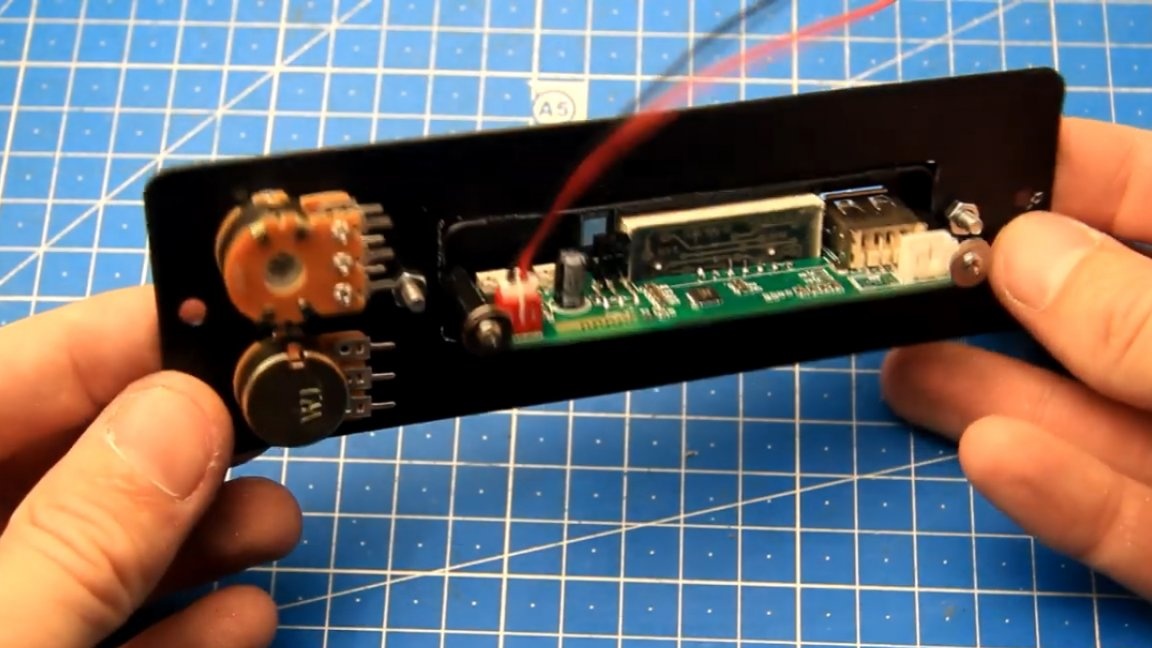
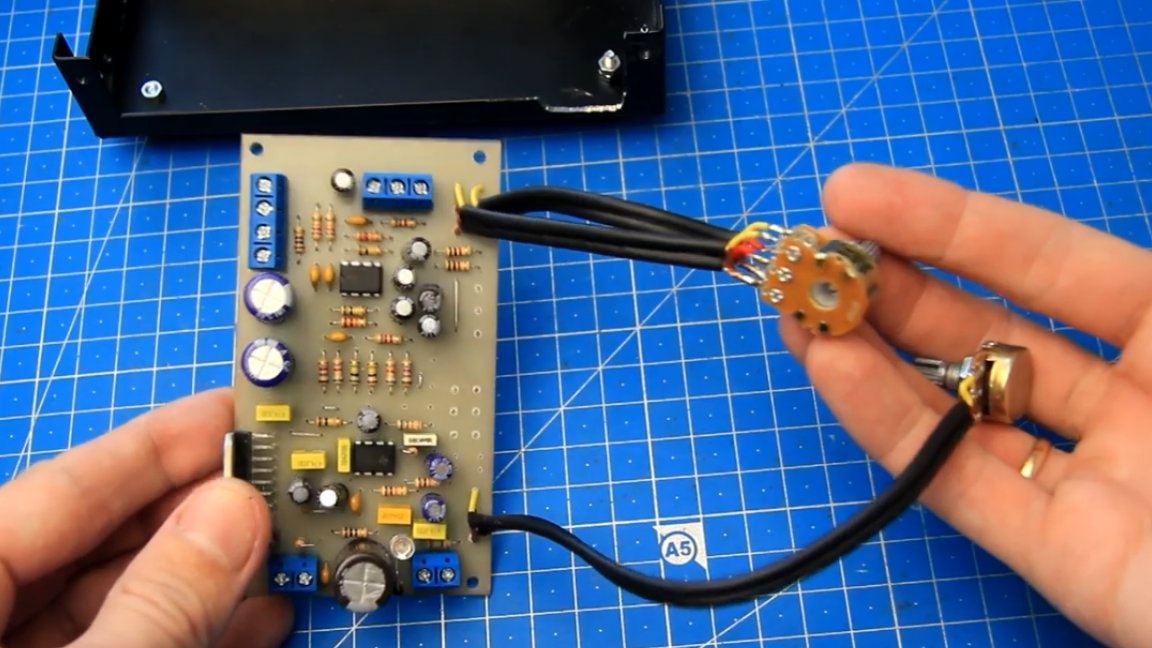
Next, install and fix variable volume resistors. To prevent scrolling, the author uses double-sided adhesive tape and cuts such washers out of it.


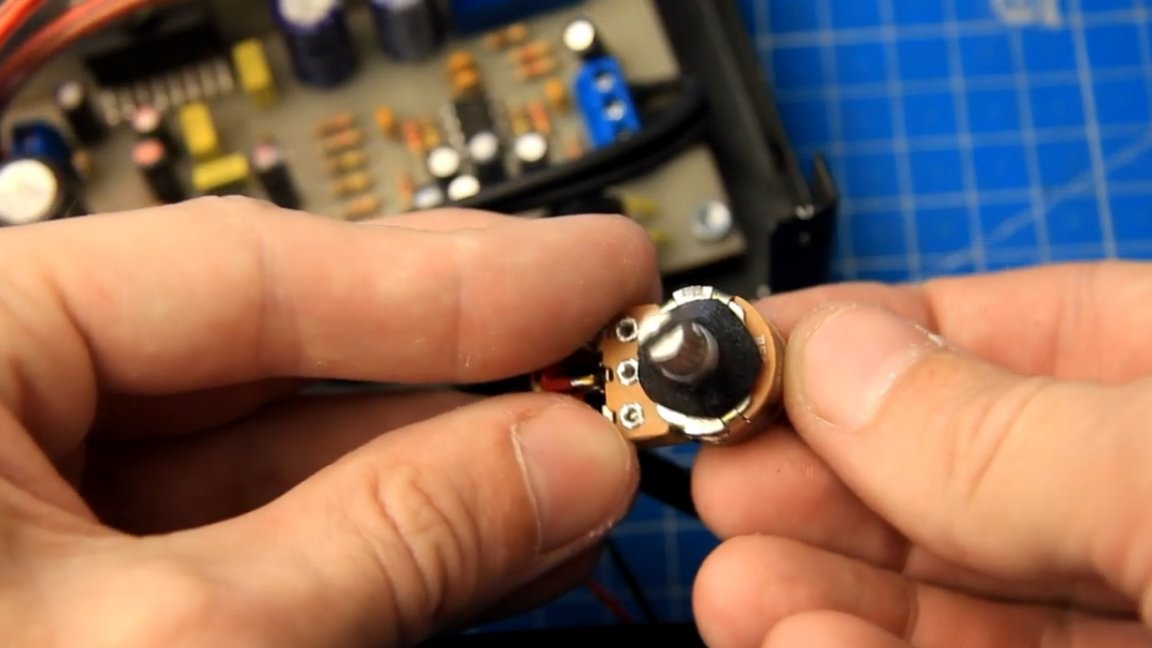
We isolate the contacts of the variable resistors with fabric tape.

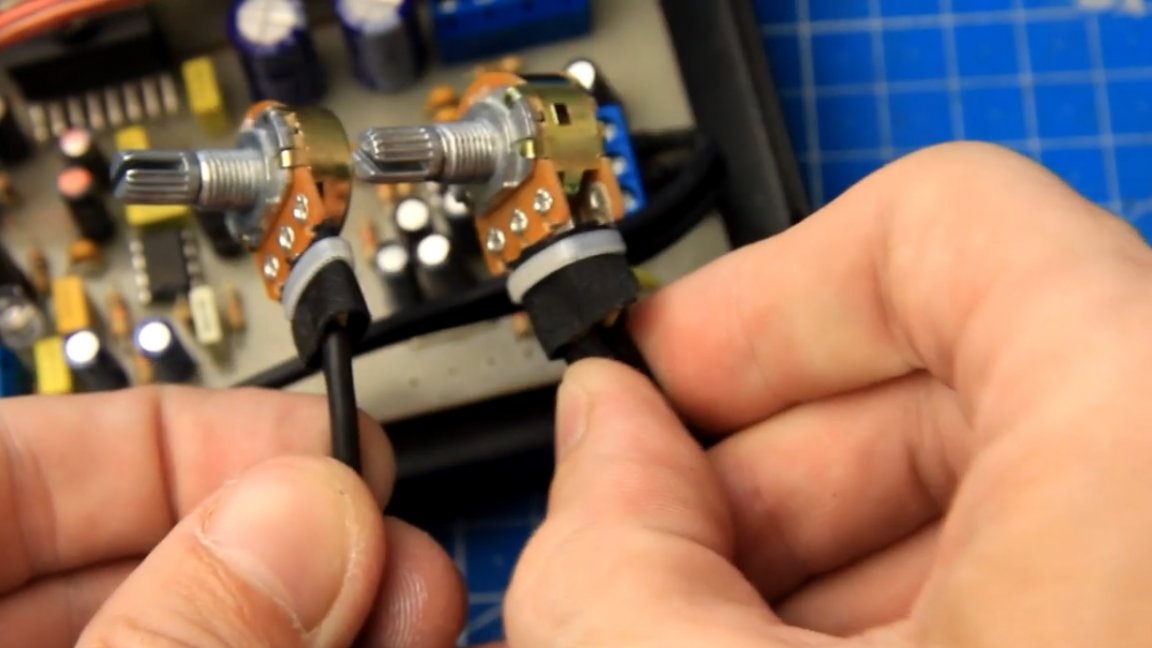
Variable resistors in place. We also need to solder the line input wire from the connectors on the rear wall to the line input of the mortise sound module.

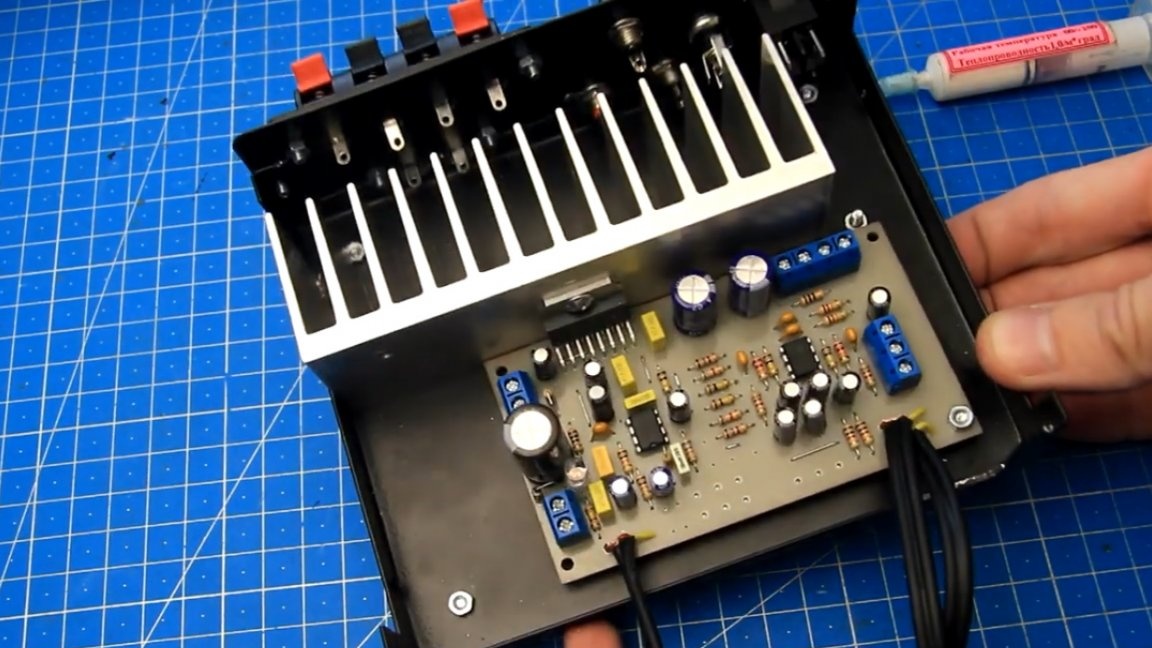
Now connect the output of the power supply to the amplifier.


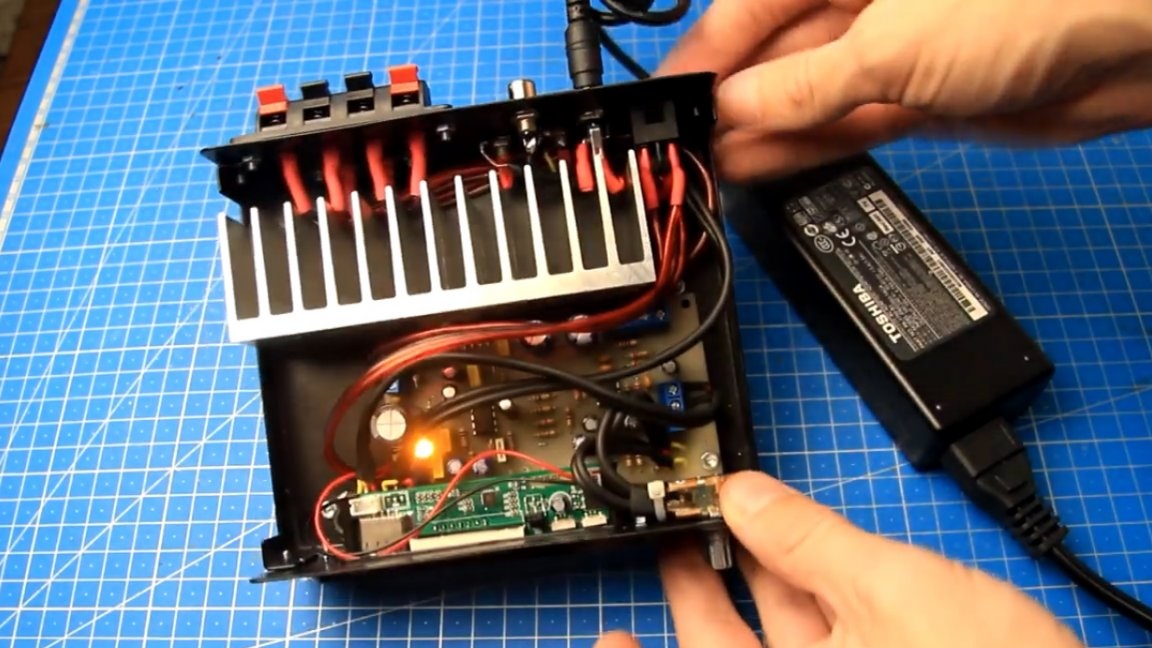
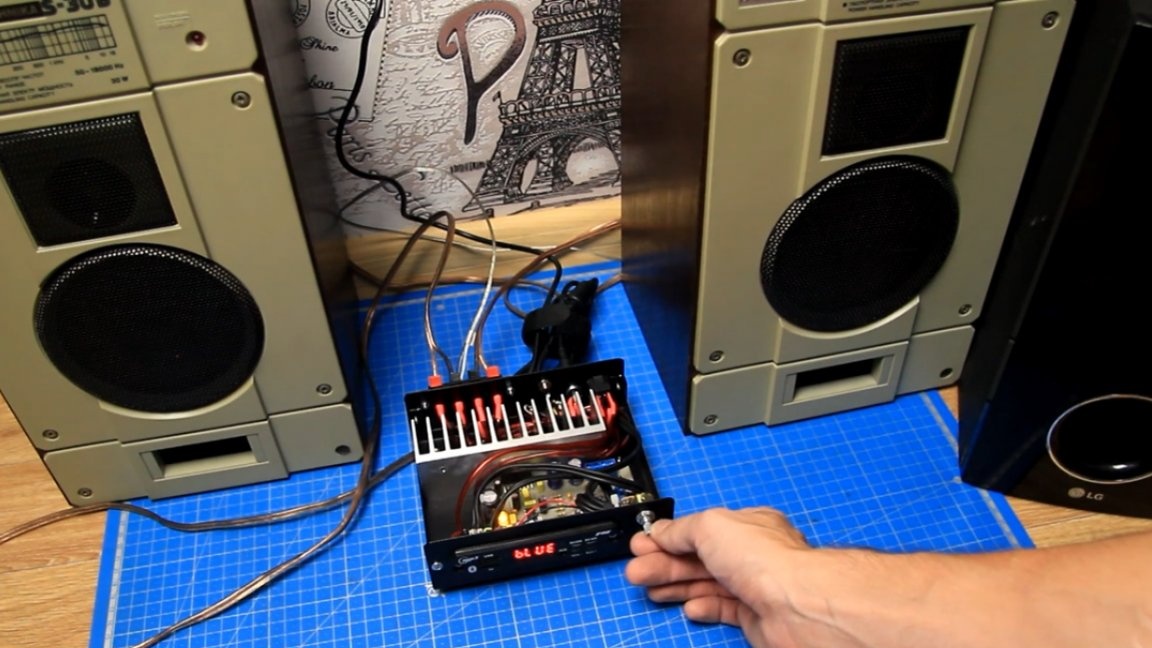
The indicator on the amplifier lights up and a mortise sound module is activated. On nutrition, everything is fine. Now let's connect the acoustics and see how the amplifier works. To do this, you need to connect wires from the speakers and the subwoofer to the terminals, this is not a big deal.

Everything is connected, you can turn on the amplifier.

On the “bluetooth” mode there is a little digital noise, they can be heard, but not loudly. This is due to the fact that the sound ground and minus power are not galvanically isolated. To remove interference, it is necessary to make galvanic isolation on the power supply of the sound module. Such a board based on a DC-DC converter with isolated earth B0505S is suitable for this task.


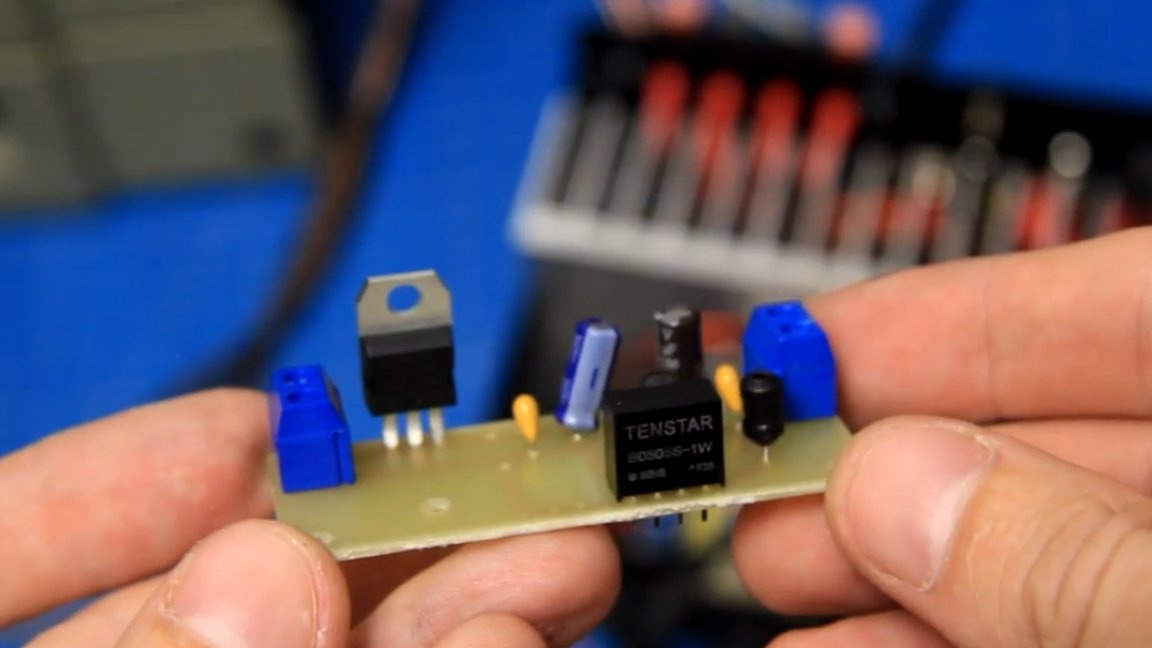
Install the isolation board as follows so that the L7805 linear step-down converter in the TO-220 housing can be screwed to the radiator for cooling.

The galvanic isolation board is connected directly to the gap along the power wires of the mortise module.

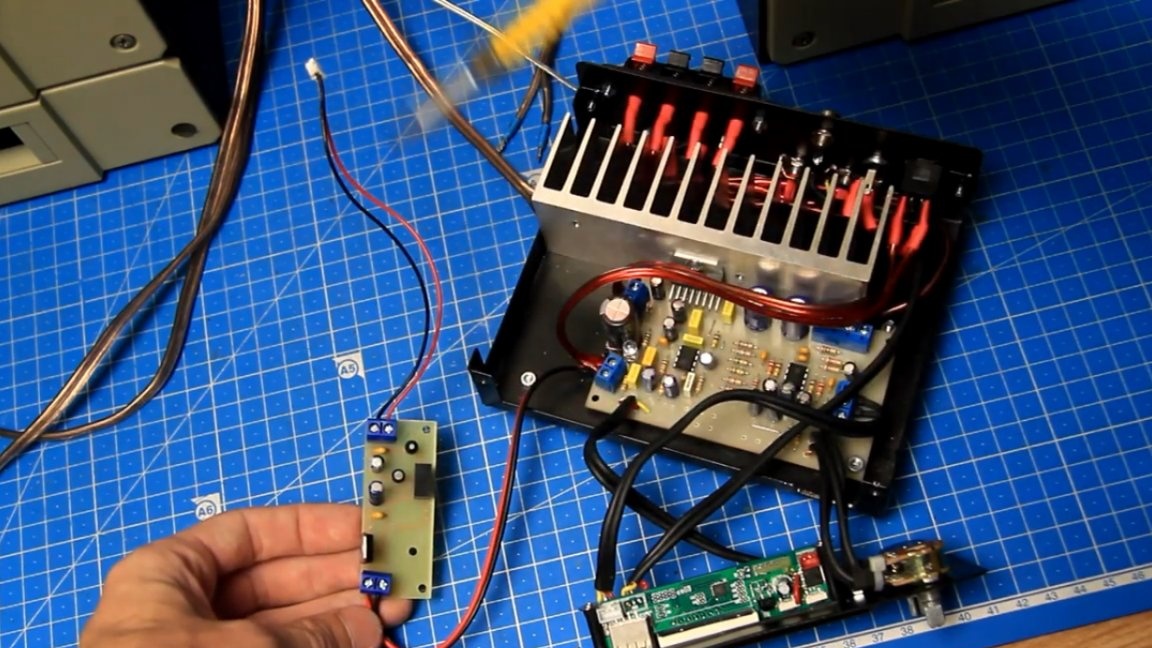
You also need to bypass the wiring (short the input and output) the 78M05 stabilizer on the sound module board, which in fact is no longer needed, because the galvanic isolation board receives 19V, lowers the voltage to 5V, makes the galvanic isolation on power and at the output it has the necessary 5V for the sound processor to work.

So, we installed the power isolation board, now let's repeat the test and see if there will be any extraneous noise. See the test of a homemade amplifier in the author’s video:

Noise disappeared, galvanic isolation on nutrition solved this problem. If you listen to music at a low volume, there is also no noise, only music is heard. To the antenna contact of the sound module, the author soldered a wire that goes from the top RCA connector on the back wall. If necessary, you can connect an external antenna to it.

Carefully with the help of clamps we lay all the wires so that everything is neat and nothing hangs.
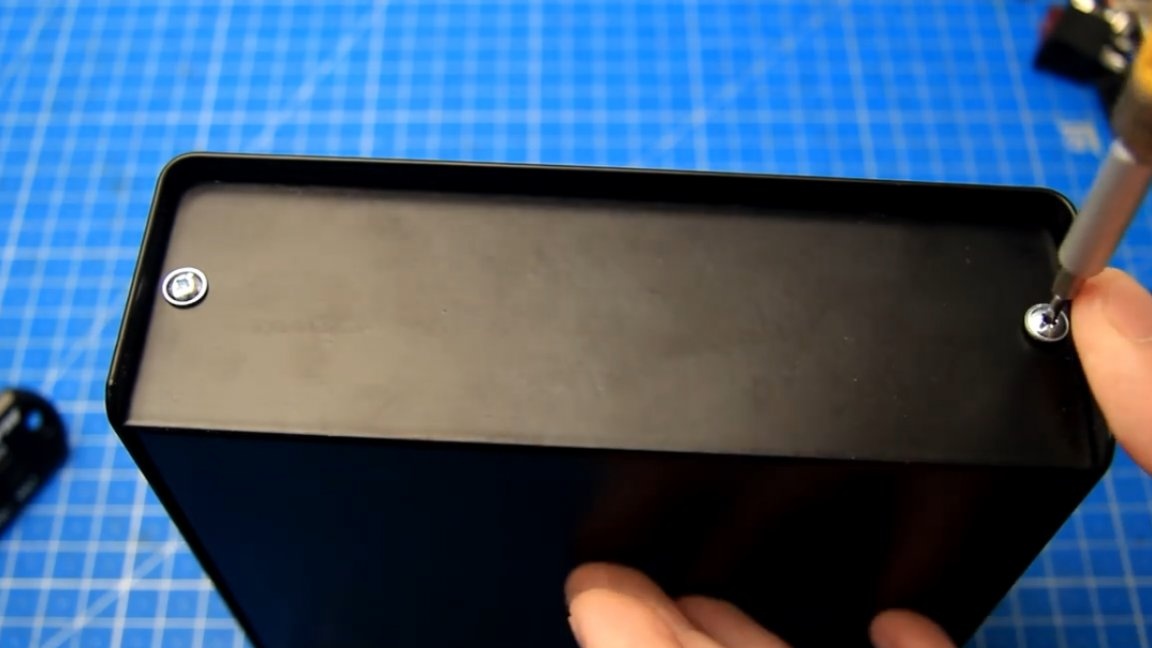
We install the cover and put on handles.


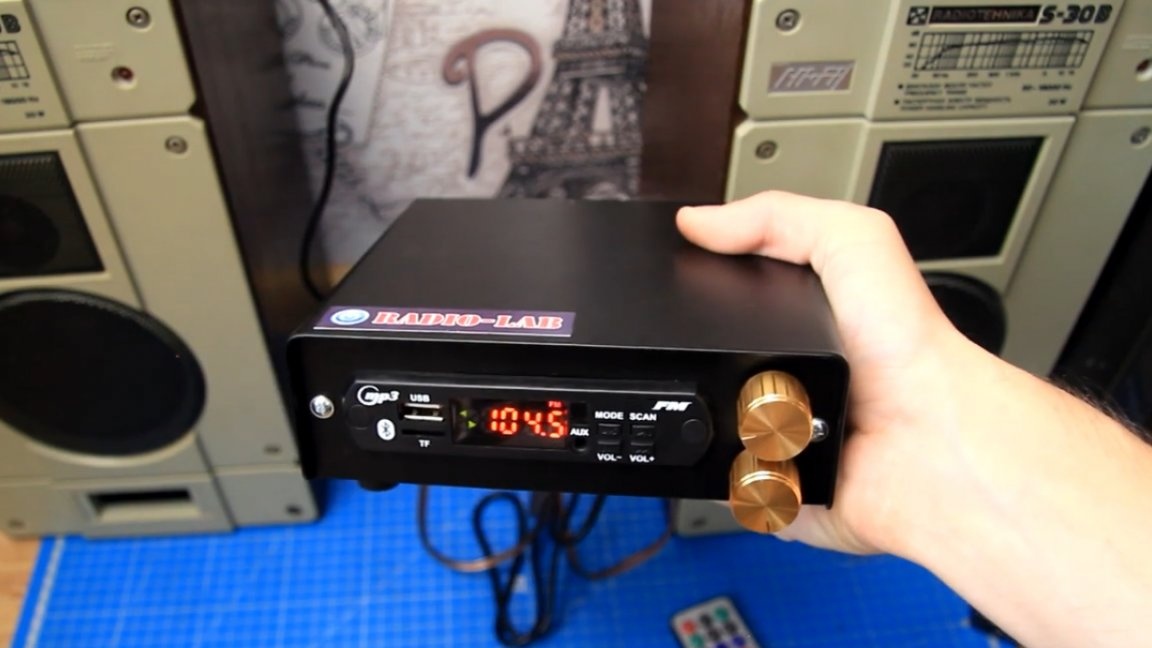
As a result of the work done, we got such a small and convenient 2.1 sound amplifier with Bluetooth, USB, Radio and Aux.

On the front panel there is a mortise module, and variable resistors that allow you to control the overall volume level and the subwoofer separately. On the back wall are all the necessary connectors for power and acoustics, as well as a linear and antenna connector.


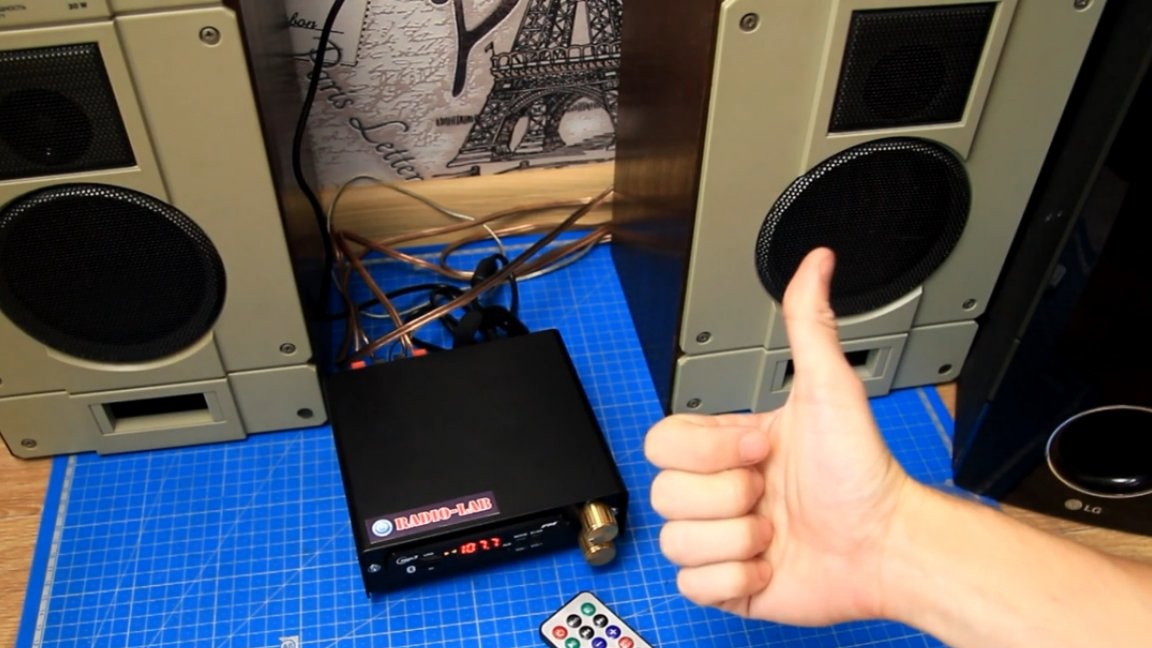
Accessories can not be used exactly the same, you can take the same.An amplifier, for example, a sound module can be bought in a different design, etc., this is not a matter of principle and a matter of taste and financial capabilities, but connecting the modules into one unit will be approximately the same. Often, you can assemble excellent devices yourself that are not even found in the store, just in case of a breakdown, repair will not be expensive and simple. Try, repeat and collect. Thank you for attention. See you soon!
6.7
7
6.9

Add a comment

    • smilesmilesxaxaokdontknowyahoonea
      bossscratchfoolyesyes-yesaggressivesecret
      sorrydancedance2dance3pardonhelpdrinks
      stopfriendsgoodgoodgoodwhistleswoontongue
      smokeclappingcraydeclarederisivedon-t_mentiondownload
      heatirefullaugh1mdameetingmoskingnegative
      not_ipopcornpunishreadscarescaressearch
      tauntthank_youthisto_clueumnikacuteagree
      badbeeeblack_eyeblum3blushboastboredom
      censoredpleasantrysecret2threatenvictoryyusun_bespectacled
      shokrespektlolprevedwelcomekrutoyya_za
      ya_dobryihelperne_huliganne_othodifludbanclose
18 comments
To be more precise, it was raised on the back of the rat (ear), and not printed. Japanese.

And Doc Dew, in fact, only thanks to these videos is popular and has become, I watch it myself. But he doesn’t agree, he doesn’t touch good ideas, he basically trolls the ideas “how to ruin a wrench and make a wrench out of it”. Laugh the most.
Korolev You won’t believe it, but I heard from the corner of my ear that one of the first organs printed on a 3D printer was just the ear xaxa Some kind of tautology turned out. This I remembered Dr. Dew. Somehow seen enough of his videos, but then decided that no longer needed. And then the desire to do homework will disappear. xaxa He unequivocally declares that all our homemade products are complete to ... I, and which ones deserve consideration, they too, well, understood.
brains learn to print on a printer.
- brains can be printed, more important than how and how to fill them
pogranec
After a while, all these devices will be printed at home on a printer
I heard from the corner of my ear that some human organs are already trying to print, and perhaps brains will learn to print on a printer.
Pointless argument
I think a dispute with an intelligent person, and even under a good screw, always makes sense! drinks
A pointless argument. Progress does not stand still. After a while, all these devices will be printed at home on a printer, and current young people will say "are they really friends, nowadays it was necessary to assemble from modules". And then everything will collapse and again they will long and tedious invent a detector receiver.
Marinchenko Vitaliy
Solder the finished blocks in a heap, and even in the factory building, and the fool can.
Right not every fool will be able to solder, but "revive", adjust, adjust, here without knowledge of the basics and some instrumentation (and the ability to work with it) - nowhere! But this is in the old days, today our Chinese friends have greatly simplified the life of beginner hams!
I’m like a hobbyist of an intermediate generation) I began to get carried away when there were no modules at all and slowly they appeared. IMHO, a very convenient thing, especially when it comes to sensor modules - accelerometers, barometers, compass, etc. As well as boosting DC-DC converters, battery protection boards, sensor modules. And the blue-tooth module, with all the desire, cannot be assembled on the knee, and if assembled, it is bulky in size. It is also easier for Arduin to program than directly the ATS controller, at least because you will not lock it. It’s not that I advocate “modular” amateur radio, the Chinese still do not have normal UMHCH modules (10% of the SOI is not normal), but the module that the author used was just a set of noise. But in some cases it is more advisable to use the module than to assemble the circuit yourself. In modern realities, it is necessary to skillfully combine what is best done by yourself and where it is easier to use a ready-made module. Again, IMHO.

In general, if you think so, the use of integrated circuits, all kinds of op-amps and linear stabilizers is also a modular amateur radio))) I generally keep quiet about microcontrollers, you give relay computers to the masses!)))
Marinchenko Vitaliy , You are absolutely right about the fact that it was not customary for us, ham radioists, to assemble the “old” generation from ready-made blocks, and there weren’t any (blocks) of them. And for the NEXT, NEW generation, now assembling from ready-made blocks is considered an achievement, and some, no, not even some, but many boast of it. Almost all of my "colleagues." They say to me, unbelievable, you stole this scheme from the Internet or some magazine. And the Chinese made the circuit board for you! Here they would try to come up with a simple little circuit, details for 12 in all, they would develop a printed circuit board, draw, etch ...... well, we realized that all this is rather complicated. And it worked! Sorry if I offended anyone. Just expressed his opinion. I have the right. boss
Marinchenko Vitaliy
Twenty five again for fish money! Among hams in the old days, what was made from ready-made boards and sets was not considered to be assembled with one's own hand. What is the merit of the author? Solder the finished blocks in a heap, and even in the factory building, and the fool can.
Well done, that correctly assembled from a Chinese designer. And the paste of the Russian KPT-8 smeared the chip. But with this arrangement, the box will not work well. It is necessary to somehow separate the insides of the screens from interference and improve the cooling system. Since the heatsink of the microcircuit is located inside the case and its removal to the outside means the end, I recommend that you drill holes in the lower and upper parts of the case and put the fan from the computer on the top so that it drives hot air up. And so, I like it.
Guest Sergey187
Improvement is not significant. The normal solution is to cut the back wall of the case and slide it back with the board so that the radiator fins are completely outside
Guest Sergey187
Cool technical solution - a radiator in a sealed enclosure. A switching power supply for audio can still be assumed, given that there will still be no normal sound from the bluetooth module from aliexpress. Well, the question arises as to the output for the subwoofer: for which subwoofer? How to adjust the cutoff frequency and level?
AndrejMU
And where is the sound? There is no sound, amplify the TV through it.
Yes, fans are a good thing, though sometimes they spoil the quality of things. For example, you listen to a good amplifier at low volume, and the cooler is noisy in it. I often put a simple scheme where the fan speed depends on the temperature inside the unit. By the way, I’m going to publish the scheme, very simple and effective. For amplifiers and power supplies.
In this case, the fan will not help: a hut without windows, without doors.
Ivan_Pokhmelev
there is an assumption that at full power it will not last long because of overheating
I didn’t have time, you got ahead of me, I think the perforation of the lower and upper covers in the area of ​​the radiator could improve cooling somewhat. scratch
There is such a commentator on YouTube under the nickname Pikachu062, he suggests putting fans in all the equipment. In this case, he is right.
It would be necessary to give a link to the amplifier board used by the author.
According to the product itself: there is an assumption that it will not last long at full power due to overheating.

We advise you to read:

Hand it for the smartphone ...