
If the doorbell informs you that you need to open the door, then the doorbell indicates that it has already been opened. It is used where the door is not locked for the whole working day so that visitors can enter. And it can also be electronic, as, for example, performed by the author of Instructables under the nickname Gleemon.
The following is shown. homemadelaid on the table in the working position - bottom to bottom:
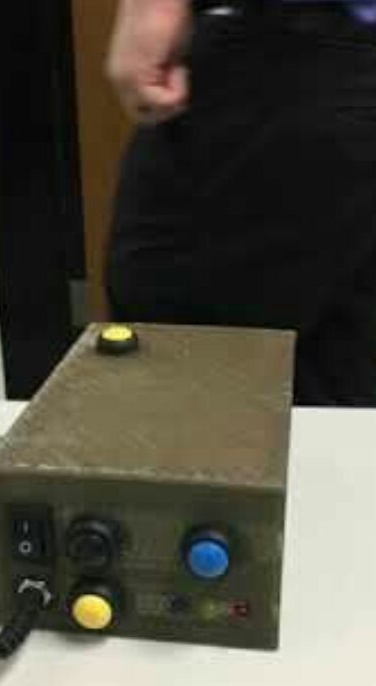
On its front panel there is a power supply connector, a switch and three buttons: bypass (when an employee enters, he presses this button and the device becomes insensitive for 6 seconds), pauses (each odd press turns off the device, each even press turns on) and reset. Parallel to the pause button, another one located on the top cover is connected. An ultrasonic rangefinder is located on the wall of the housing opposite the front panel. Here it is not visible, but visible on the KDPV.
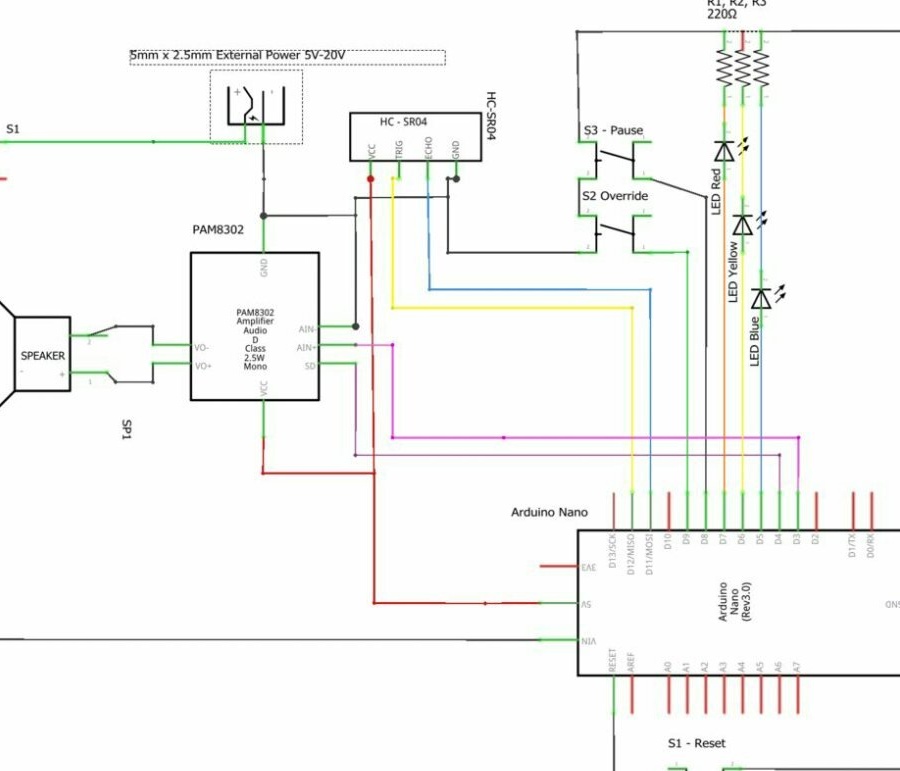
The wizard begins work on the device by modeling the circuit in the Fritzing simulator. Do not be surprised that the buttons and LEDs there are depicted located directly on the breadboard, this is a convention.
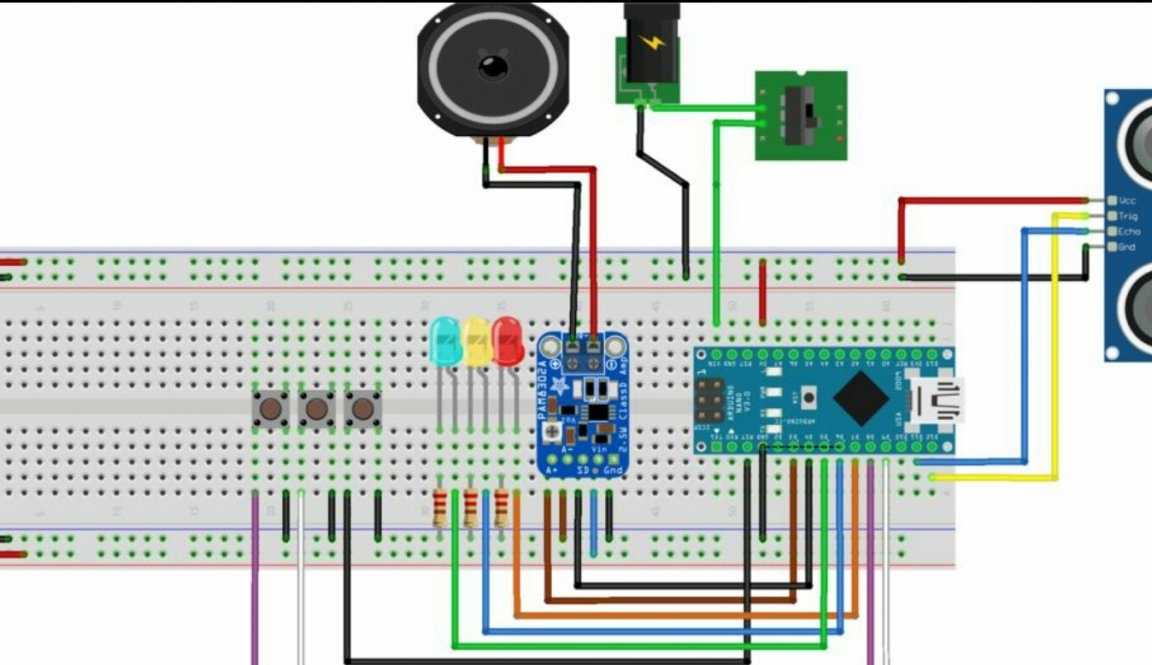
"Brains" of the device - Arduino Nano, rangefinder - HC-SR04, Class D amplifier - PAM8302. Even if you set the minimum volume, it turns out to be excessive. You can further reduce it by replacing the 4-ohm dynamic head with an 8-ohm one. Or by eliminating the amplifier and loading the corresponding Arduino output onto the piezodynamic.
Fritzing is often criticized for accustoming only the wiring diagram without the principle. This is not so; the function of drawing up a circuit diagram is also there. The program does not consider itself smarter than the user, it allows you to assign the designation S1 to two different components - the power switch and the reset button.
Firmware the wizard compiles in the online Arduino Create environment. Sketch uses the PlayRTTTL library, which plays tunes in the RTTTL format (ringtone text transfer language, by Nokia). Due to its compactness and popularity among arduino players, this format, along with MML, is currently undergoing a rebirth.
Then the master proceeds with the design of the case, it turns out this:

STL files: body and bottom
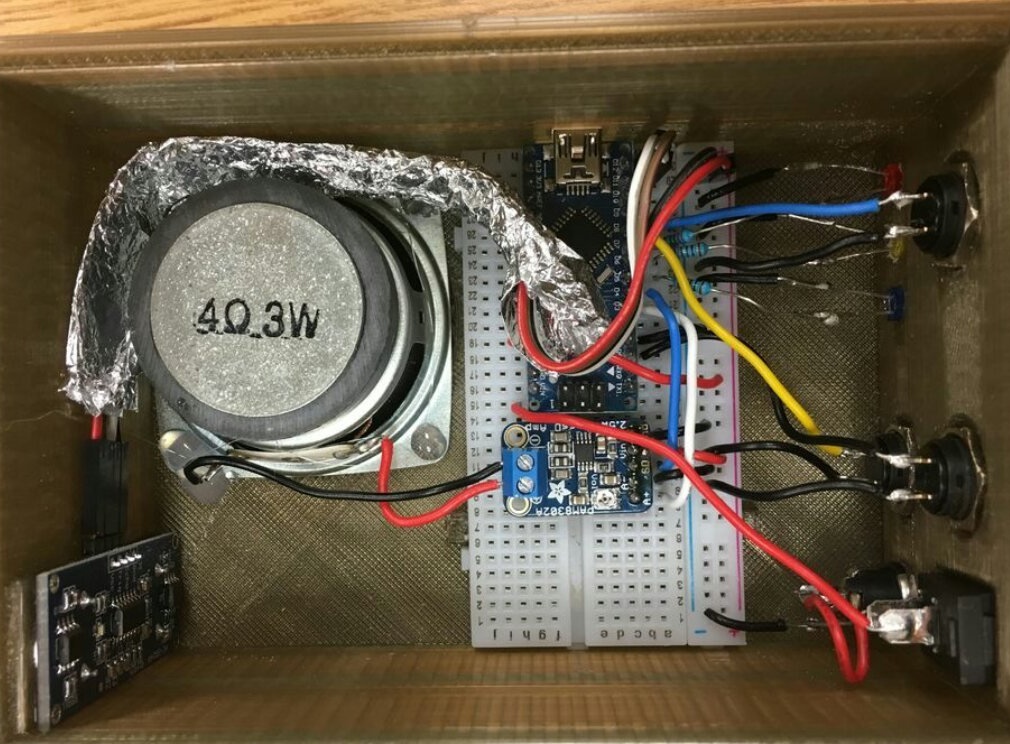
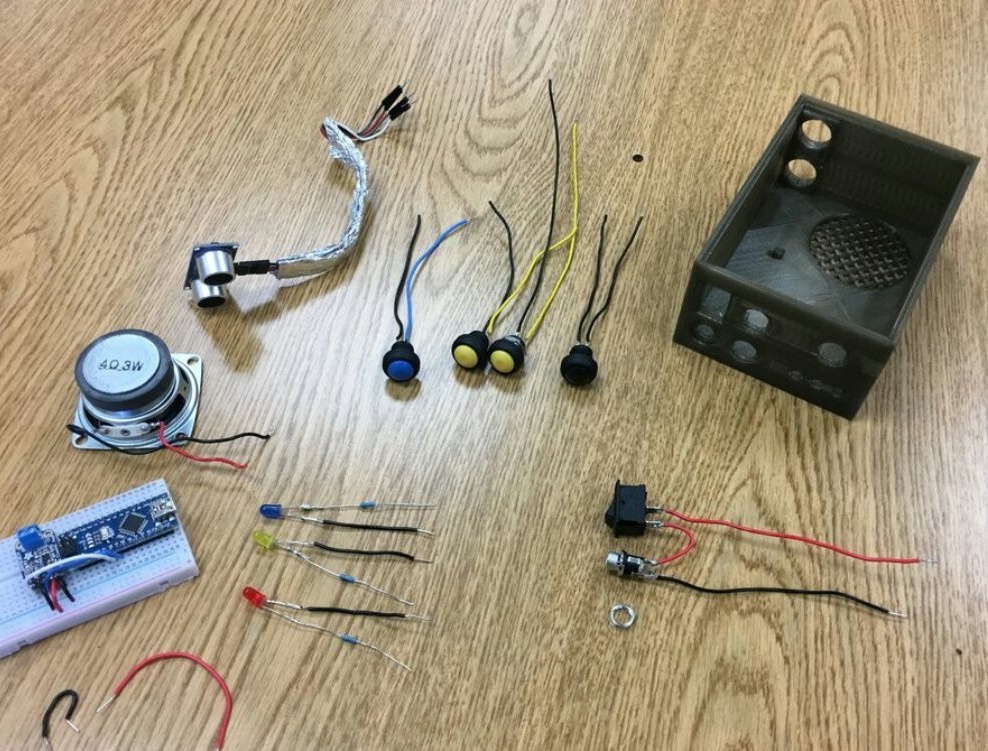
Having printed the case, the master prepares all the components:
And collects everything:
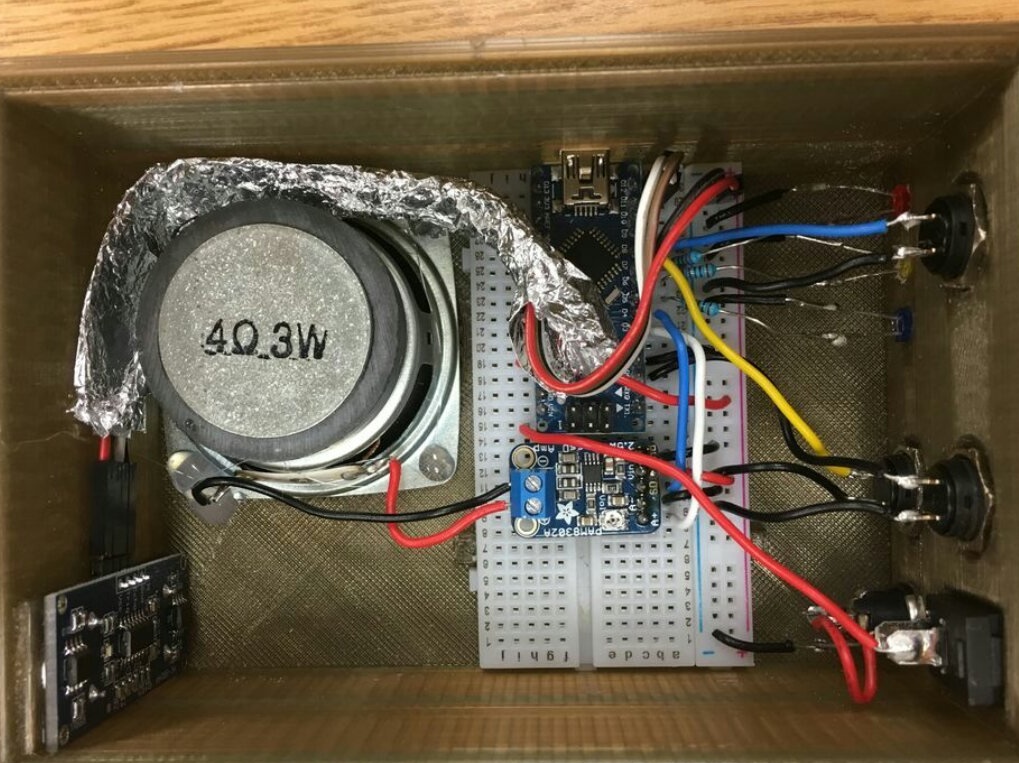
As it turned out when using the device, the conductors going from the range finder to the Arduino must be shielded, of course, without allowing the screen to contact the surrounding components. After that, everything worked as it should, and the device took a seat at the door of the technical support office, where the master works.