
Before I post a description of the manufacture and photos of my brazier, I looked at the available material on the site. There are many interesting options, there are similar ones. But, nevertheless, I decided to introduce you to my option.

1. Background.
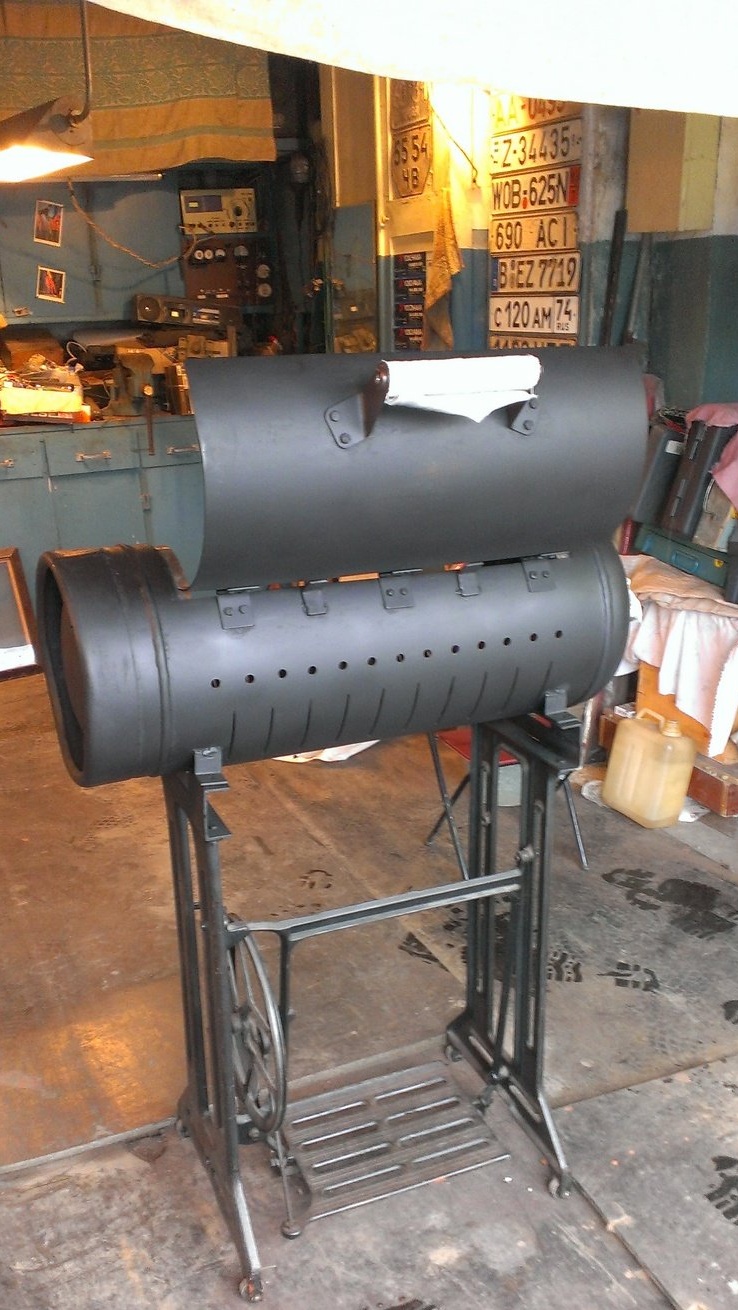
The old brazier, a folding storefront - lasting several years, completely warped from heating. Painfully thin walls were, only 2 mm. So I decided to do something more solid and interesting. The choice fell on a gas cylinder, its walls are very decent in thickness.
As always, I got acquainted with the designs of other craftsmen. I liked to use the most liked moments in the planned work. I confess right away that I have not implemented all my plans. For example, did not make an auxiliary table.
Work began with a barbecue zone.
2. Creating a mangal zone.
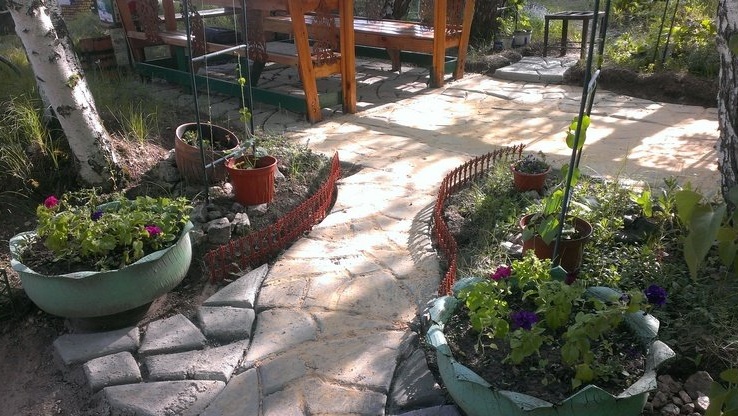
For a new brazier at a gazebo familiar to you, I decided to make a brazier zone. That would be, so to speak, barbecue got in the heat of the heat right on the table.
I planned the site and using two forms for casting garden tiles, I also wrote about them.
Filled the selected site. It became a continuation of the floor of the gazebo. To remove cracks between the tiles I used simple sand.
3. Materials and tools for creating a brazier.
1. Gas cylinder.
2. Bed from the sewing machine.
3. Several corners of the 36th profile, 500 mm long.
4. Furniture or small (type garage) hinges.
5. Door handle with a wooden handle.
6. A pipe with a diameter of 60 - 70 mm. 700 mm long.
7. Metal plates with a width of 30 - 40 mm and a thickness of 1.2 - 2 mm.
8. Drill.
9. Drills with a diameter of 11 mm, 4.5 mm (when screwing loops).
10. The Bulgarian.
11. Fasteners, I used bolts with M6 thread.
12. The welding machine.
13. Heat resistant paint.
And so, balloon!?!?
Then someone is lucky. Someone has more than one. I found it in the store, but there it was used for 2000 rubles. Then I realized that at gas gas stations you can try to get it. Then the balloon cost me 250 rubles. The cylinder went with a safety cap for the valve. I also used it in creating the brazier. Brought to garage. Knowing firsthand about the insidiousness of gas cylinders, the first thing I did was unscrew the valve and let out the rest of the gas. Did it on the street. Then, armed with a gas key, he unscrewed the valve himself from the cylinder.I had to tinker a bit, but I was lucky, the valve was not very soured. Then he brought the cylinder into the garage, set it aside and filled it with water, while the remaining gas was removed from the cylinder. In this condition, the cylinder left for a week, because before I could not start working with it.
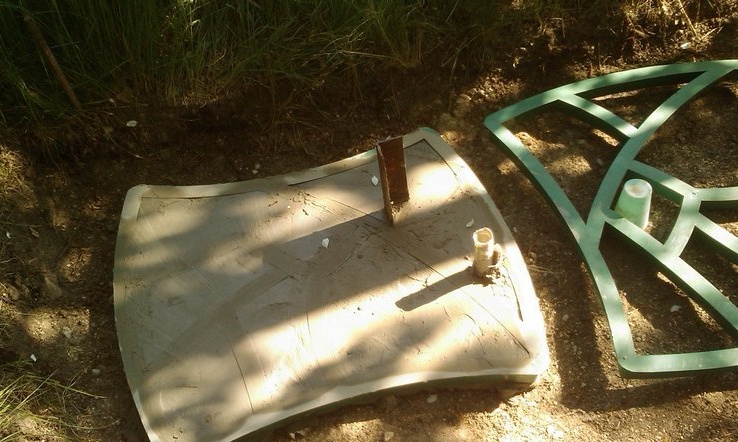
Used this time to purchase a barbecue stand. As her, I decided to use a table from an old sewing machine.
4. Production.
In order to navigate when marking the balloon, I used the seams on the balloon. One longitudinal and two transverse (circular). Having previously poured water from the cylinder, I made a markup.
The basis was a longitudinal seam. He laid 240 mm from it in one direction - this will be the line of holes for the skewer. Then he laid aside another 100 mm from it. - this will be the top (back) edge of the barbecue cover.
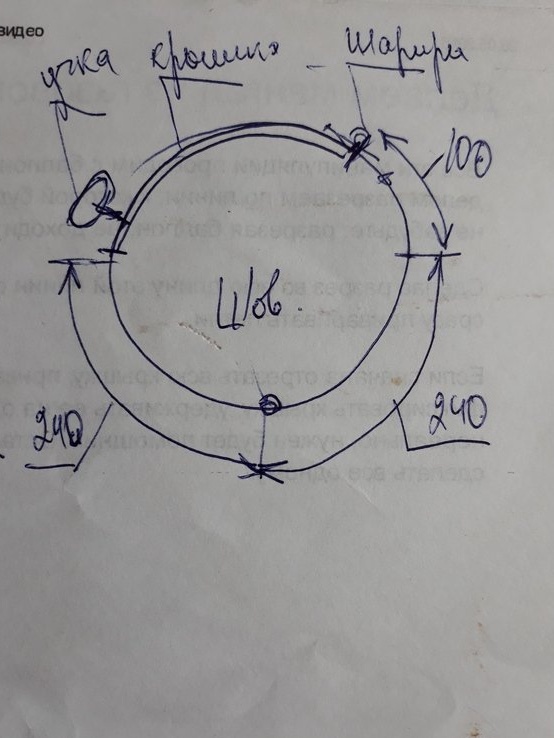
Then he returned to the longitudinal seam and laid aside in the opposite direction from the markings already made, another 240 mm. This will be the lower (front) edge of the barbecue cover.
Then he put aside 30 mm from the circular seams to the middle (along the length) of the cylinder. He drew lines parallel to the circular seams, between the already marked upper and lower lines of the lid.
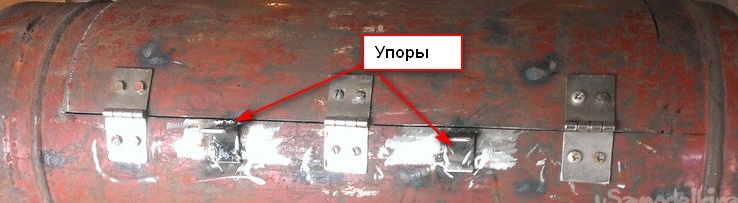
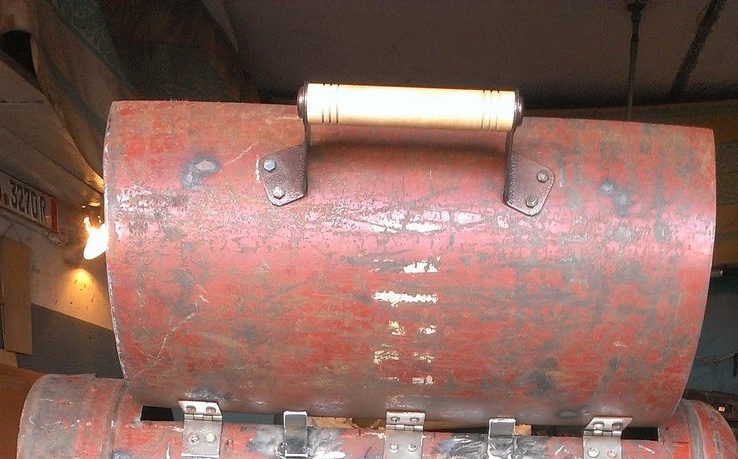
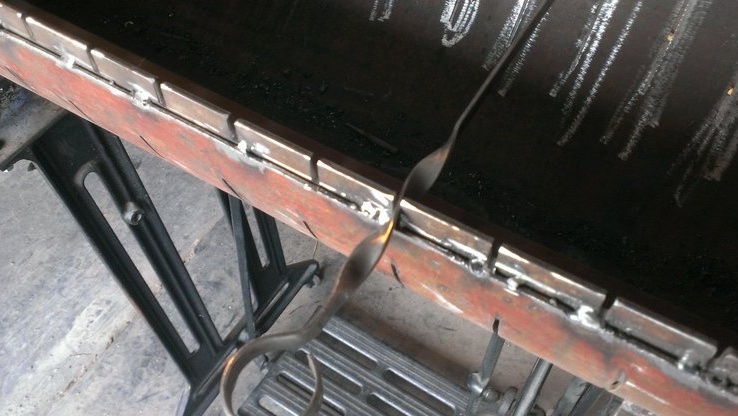
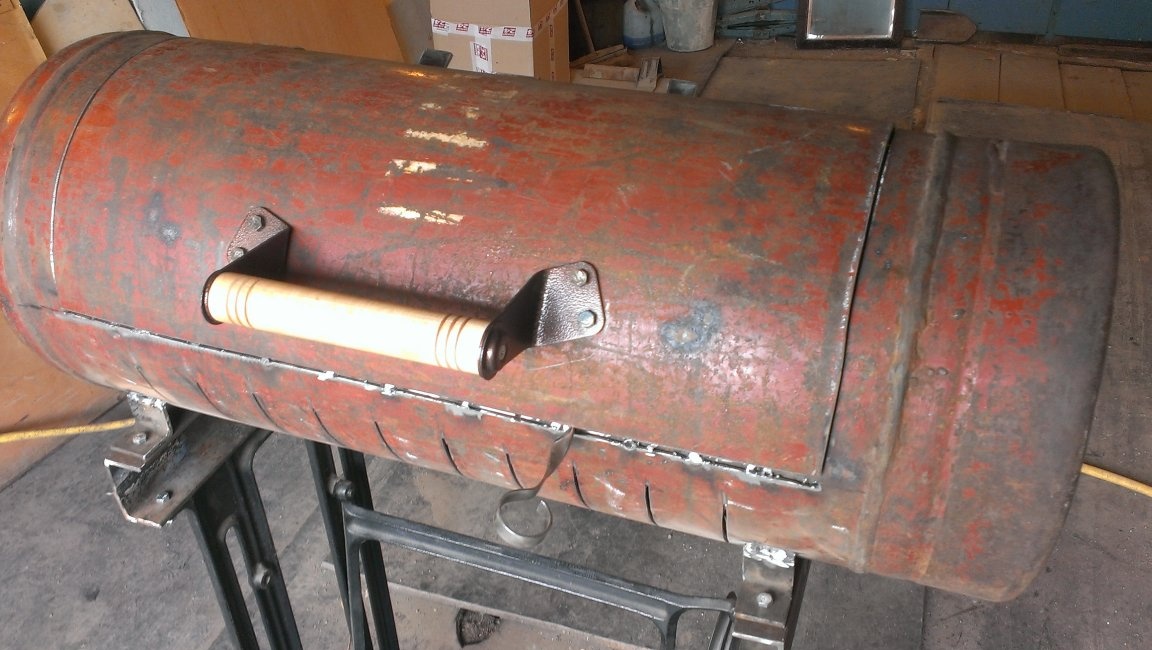
Setting the cylinder horizontally, fixed it. Began to cut the grill cover on its upper (back) edge. Cutting through the marking, I immediately marked the installation locations of the hinges. This is important because it eliminates the possibility of skewing the cover.
After marking the hinges, they can be welded if they are of the garage type, but small. We immediately weld the stops for the cover made of 36 corners. I have 3 furniture hinges installed, since there were no others at hand. I, according to the marking, drilled them in place and numbered so that there would be no further confusion and each loop fell into place during assembly.
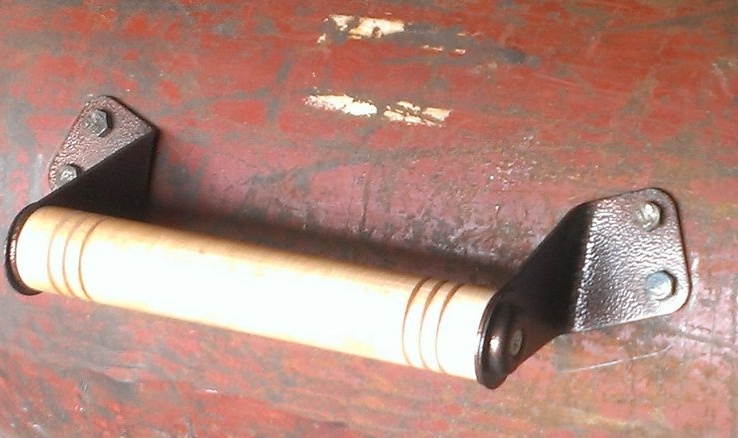
Next, I marked the installation location of the handle to open the lid. I’ve bought it, so I drilled it in place.
Then he continued to cut the lid. Here, I want to warn you that a surprise may await you, as in my case. Removing the cap, I found in the tank, in addition to metal shavings and abrasive from the grinder circle, about ¾ bucket of dirt. Had to clean.
Set the hinges and the handle in its place.
Two corners 32 of the profile were welded on the inside of the cut lid for stiffness of the lid and protection against deformation during heating.
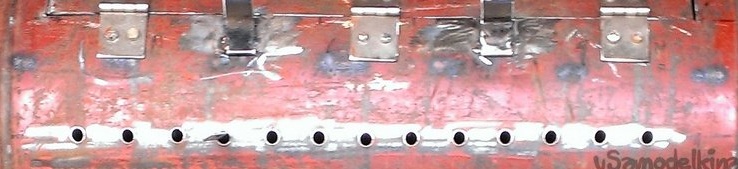
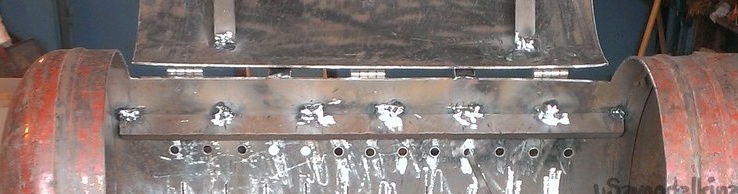
Next, on the marking line of the holes for the skewer, I laid aside 55 mm from the lower annular seam of the cylinder, and then we make marks every 40 mm, and then core them. It turns out 13 markings for holes. I have a skewer 10 mm wide, so I drilled holes for marking with a diameter of 11 mm. In the centers, it was pre-drilled with a drill of 5 mm, and then already 11 mm. It turned out like this.
We return to the longitudinal seam on the cylinder and continue the marking.
From the seam, he set aside 100 mm to the left and right, then another 100 mm in each direction.
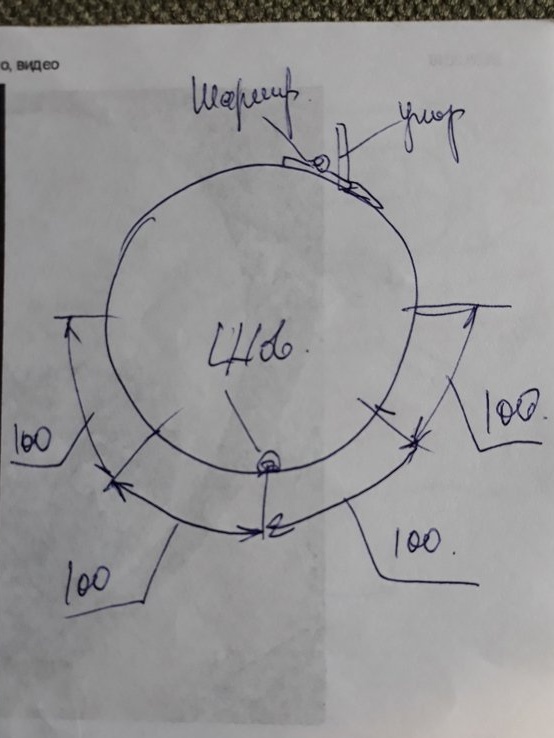
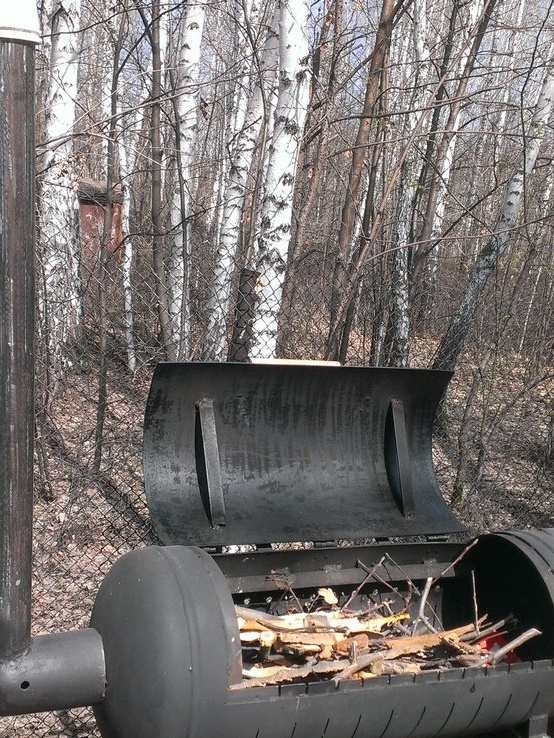
Then, again, 80 mm from the lower circumferential seam (on the cylinder), and then every 50 mm made marks. At these places there will be cuts with a grinder for air access to the brazier, since it is equipped with a lid. It turns out 10 slots on each side of the grill.

These slots are designed to allow air to flow directly to the coals with the lid closed and create traction in the skewer zone, which means they maintain the combustion temperature of the coals.
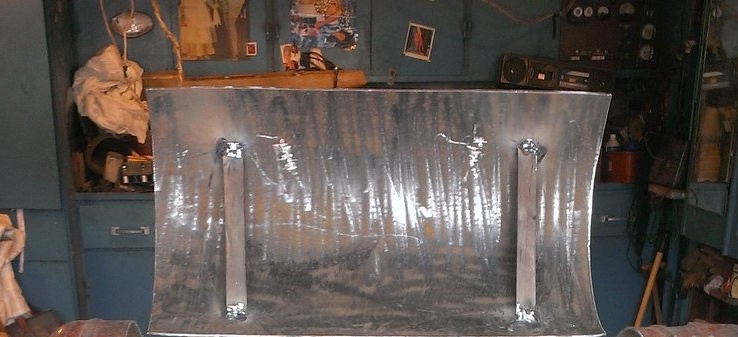
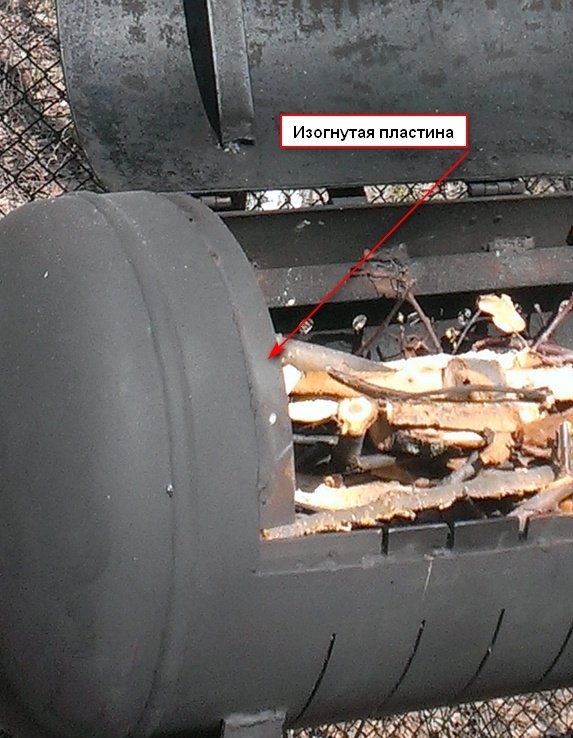
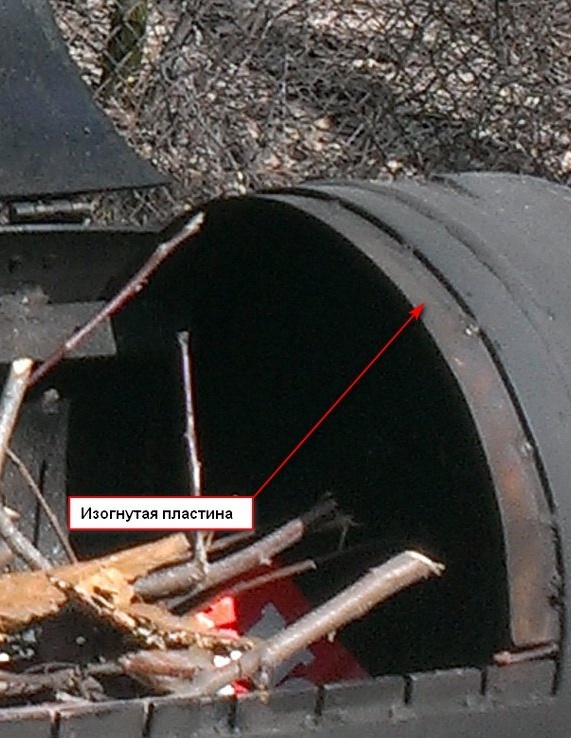
In order to prevent the lid from failing during the operation of the brazier, inside the brazier from the sides, plates with a width of 30-40 mm bent along the radius of the cylinder are welded.
On the front edge of the hatch, welded corner 36-profile. It makes the same markup as for holes for skewers. By marking, cuts are made by a grinder. It should turn out like this - on against each hole in the back wall, it should be cut at the corner of the front wall.

This corner has a triple purpose. Serves as a stiffener and guide for skewers, as well as device for turning skewers.
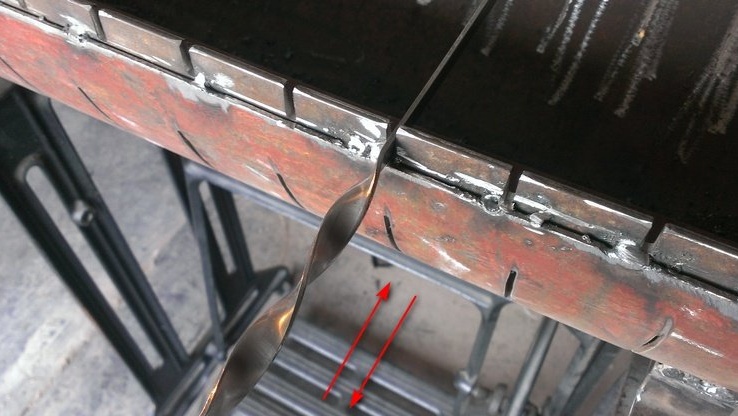
When moving the skewer horizontally, due to the cut of the barbecue and the turn of the skewer, it rotates relative to the coals.
At the rear of the edge of the hatch, I also welded a corner of the same profile, only with an angle inside the firebox. It is located above the skewer holes.
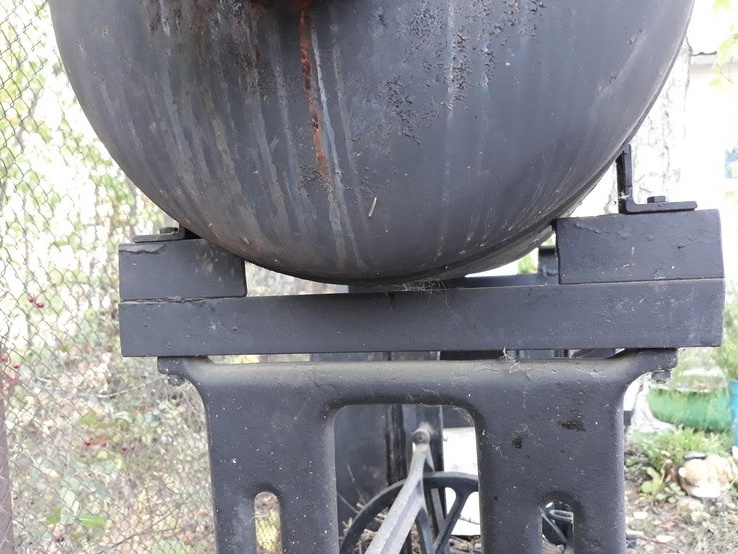
It remains to build a spacer - brazier fasteners to the base of the sewing machine. It was supposed to just cut a semicircle at the base so that the balloon would enter. But, when trying on, it turned out that the height of the barbecue on the ground was lower than necessary, convenient, so to speak. Yes, and saw the base, something did not want to. Violate the harmony of an already not very cool picture. So I came up with a connecting spacer. Its construction is visible from the outline sketch.
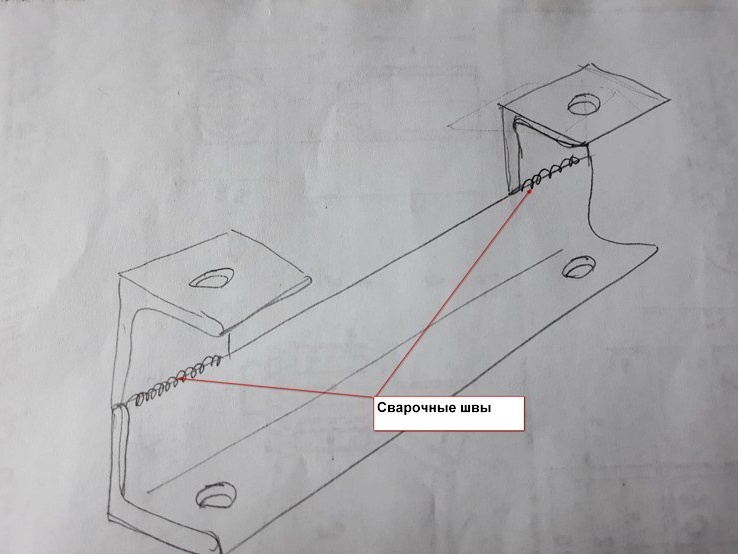
The length of the bottom corner (340 mm) is taken along the width of the warp of the sewing machine, holes are marked and drilled for existing fasteners. Corners are mounted on the base, a brazier is installed on them, in the position in which it will be operated. On it specifically marked - the length of the upper corners (80 mm) and their position. And, the positions of the mounting holes for the installation angles of the barbecue are also determined.
The upper corners of the spacer and the installation corners of the barbecue are prepared according to measurements, the holes are drilled. Then all the parts are assembled, where by welding, and where by bolts. It turns out here is such a design.
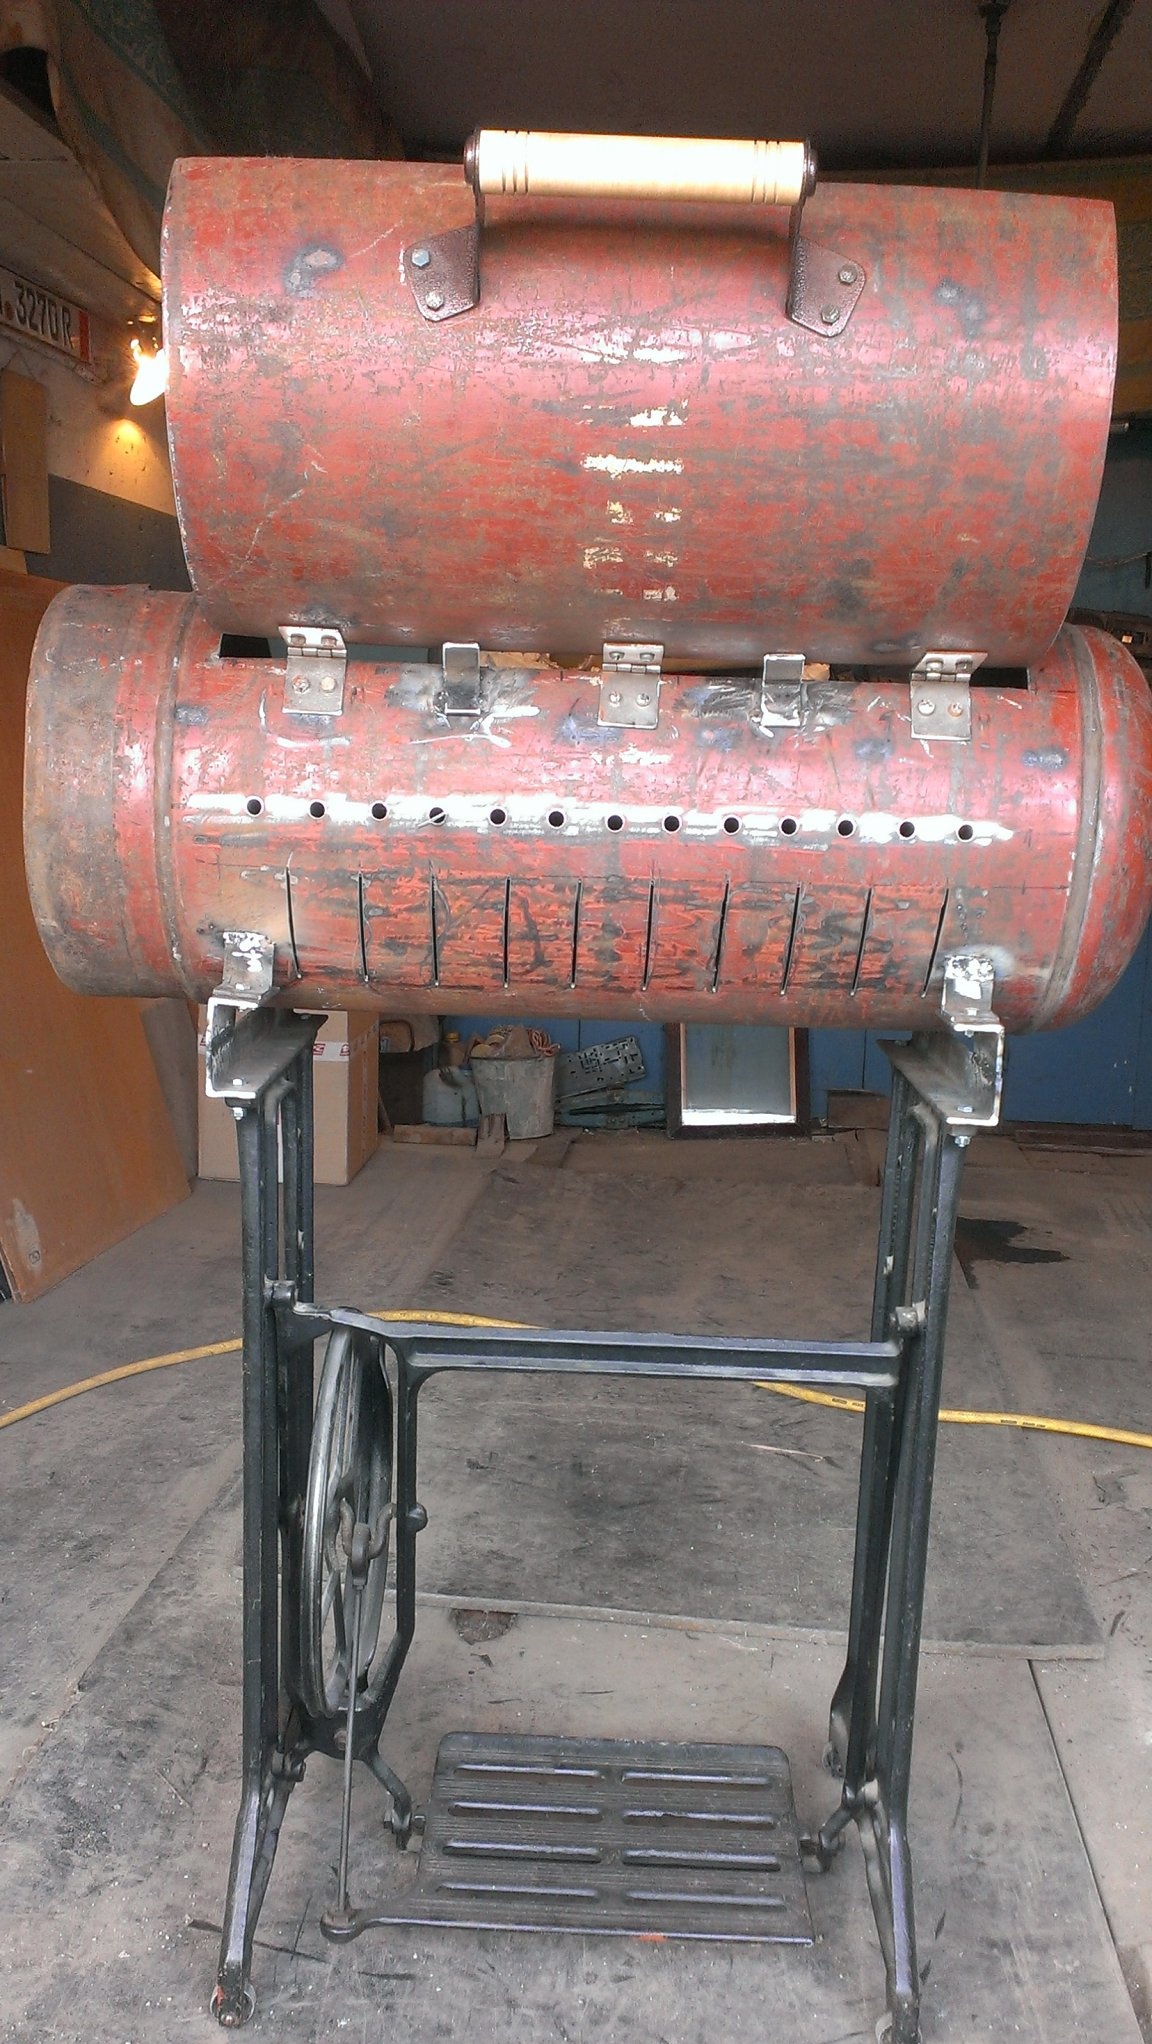
And in the near.
Ah, this is a side view.
5. Last item.
The last one remains.
Make a chimney. Since the entire design of the barbecue is collapsible, as it is intended for transporting it to the garden by car. That cut off, the tide on the cylinder, where the cap is screwed in and just weld the exhaust pipe, does not work. Too bulky.
I did so. On the assembled brazier, screwed the cap and marked the vertical position of the exhaust pipe. I cut the part of the cap with a grinder, at the right angle. The length of the chimney was determined so that the cap with a welded chimney could be wound on the assembled barbecue. One end of the pipe, as you understand, is cut at the right angle. The cap and exhaust pipe welded together the joint.
It turns out like this.
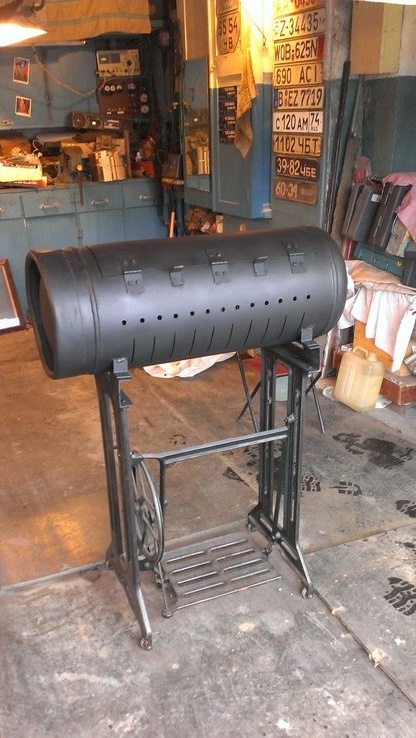
Further, all seams and slots with holes are cleaned, the edges are dulled, the corners are rounded so as not to injure hands in the future. The old paint is cleaned over the entire surface of the barbecue. Barbecue is painted with heat-resistant spray paint. I must say right away that for a good painting you need two spray cans. One is enough end to end.
And there wasn’t enough paint on it (the pipe), and on the brazier’s body, in some places it’s not enough.
On the top of the pipe, of course, you can make a fungus or something else. I close the millet with a bucket. And further. I thought the hole from the valve would be small for the hood, but as the operation of the barbecue showed, it is quite enough.
Well, that’s all I wanted to show and tell you.
See, criticize, advise, ask.
Regards, Starp.