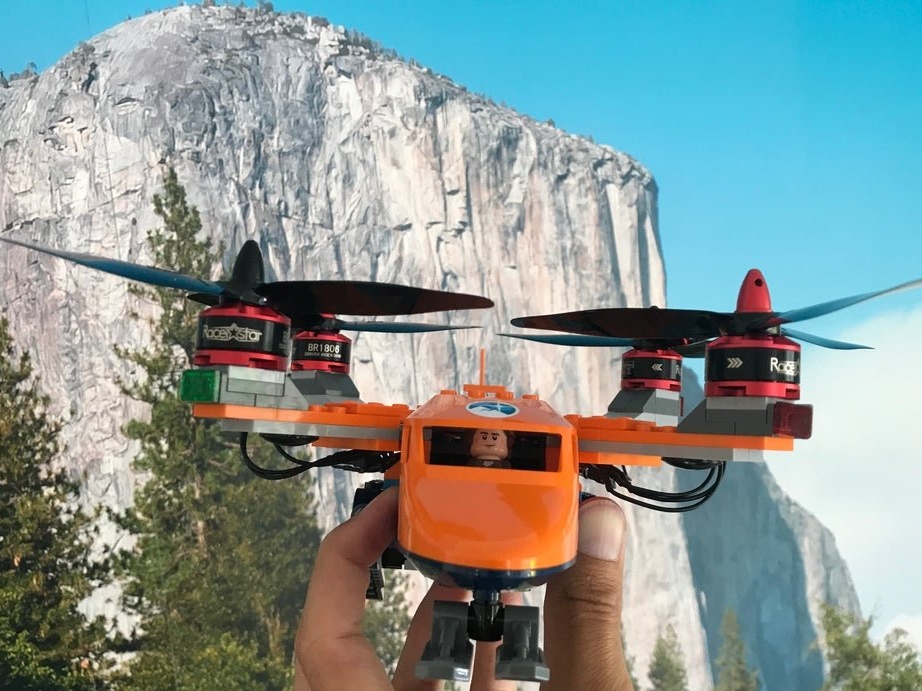
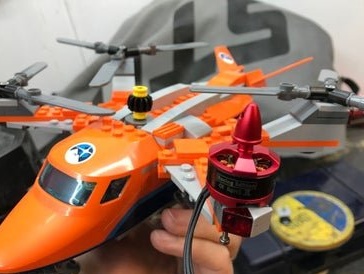
In this article, the Wizard will show us how he made the acting Lego 60193 Arctic Air Transport helicopter model quadrocopter. The main task in the manufacture of the quadrocopter, in addition to flying qualities, was to save as many original parts as possible.
Let's see a short video demonstrating the operation of the quadrocopter.
So, for the manufacture of such a quadrocopter, the master used the following
Tools and materials:
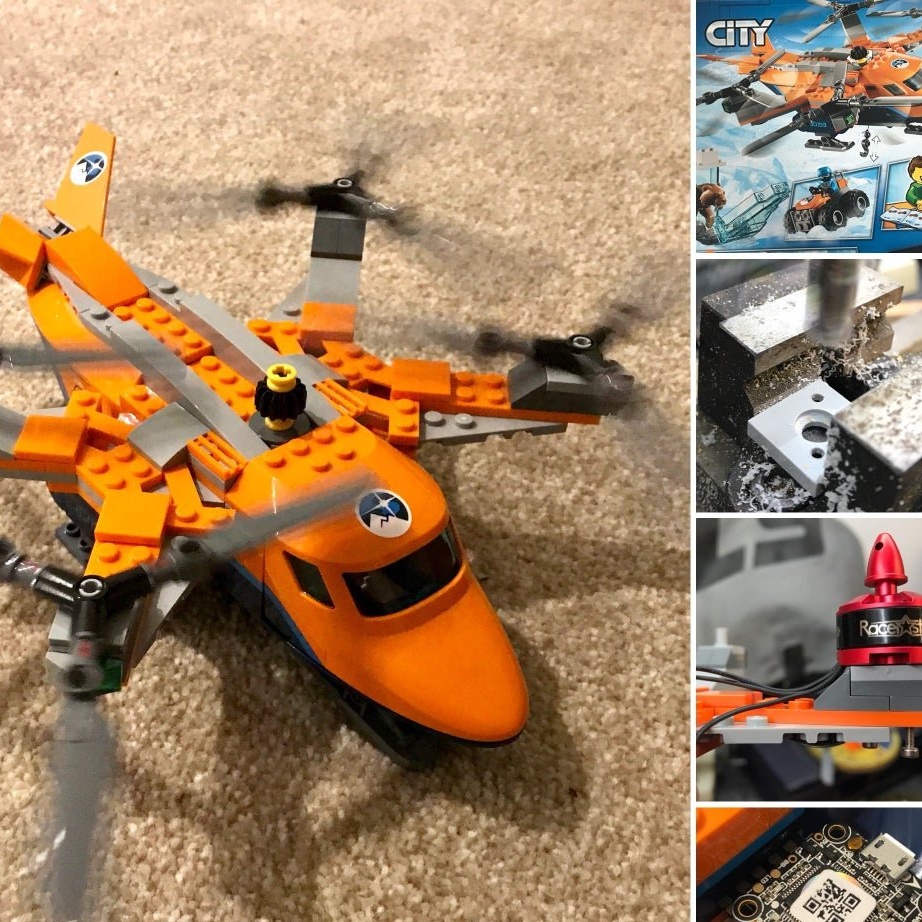
-LEGO City Arctic Helicopter - 60193:
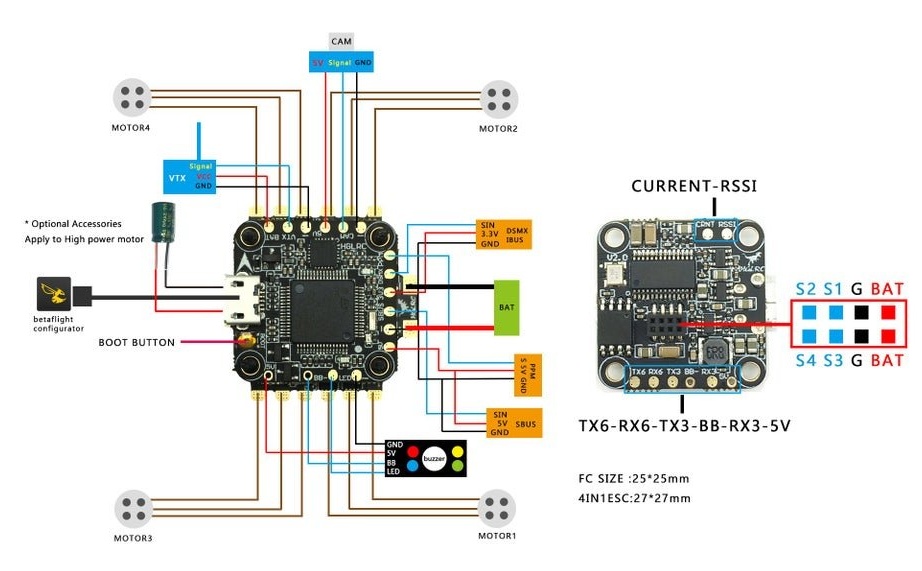
- Controller and ESC 20x20 mm, for example, HGLRC XJB F428 Micro F4 AIO OSD;
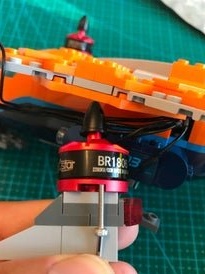
- Brushless motors - 4 pcs;
Propellers
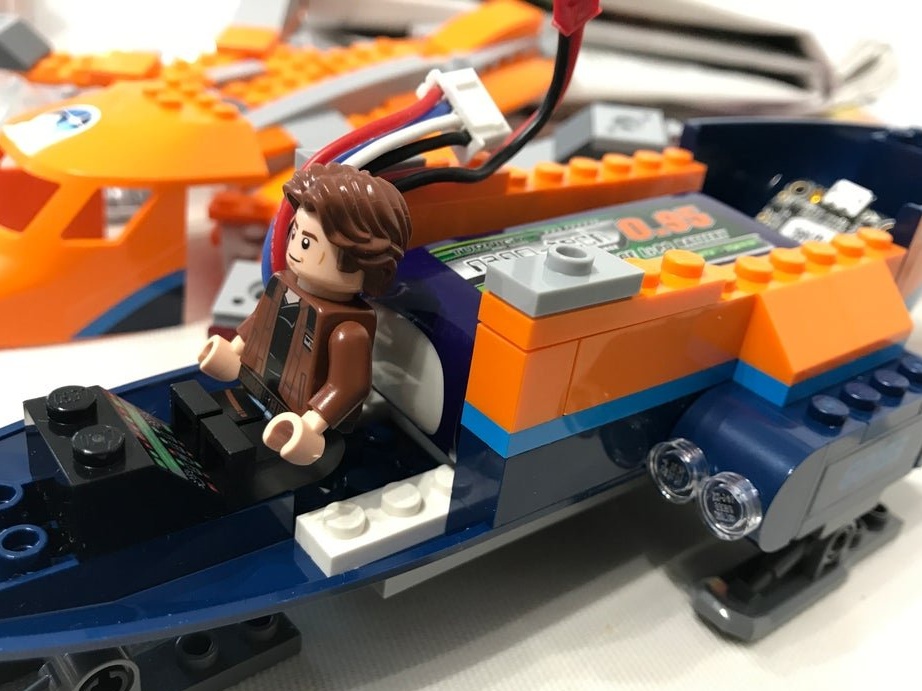
-Battery 950 mAh;
-Connectors;
-Wire;
-Radio module (transmitter and receiver);
-Fasteners;
-Knife;
-Soldering iron;
-Glue gun;
-Screwdriver;
-Drill;
Step One: Lego Build
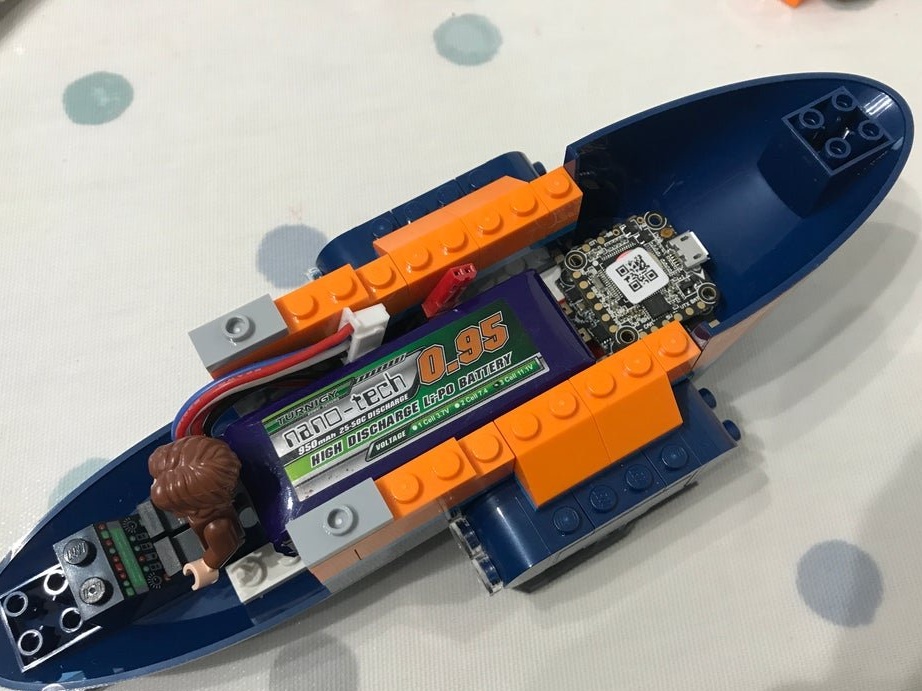
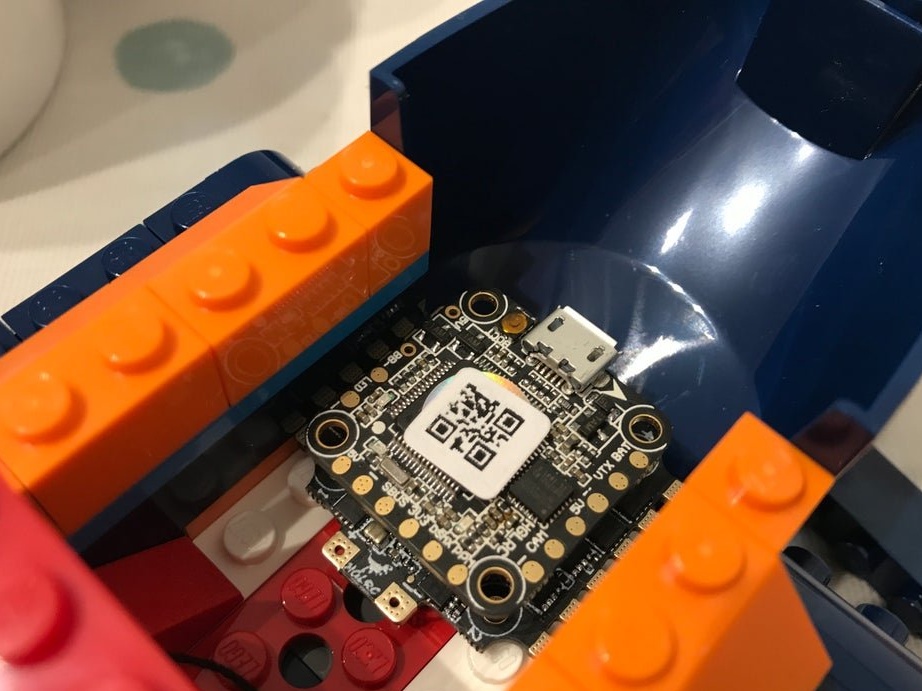
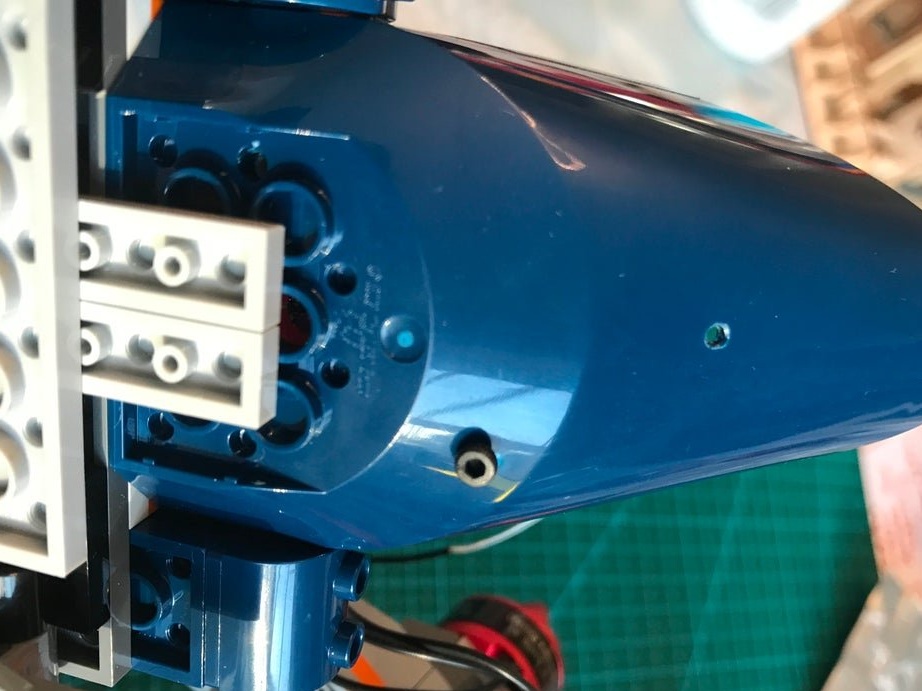
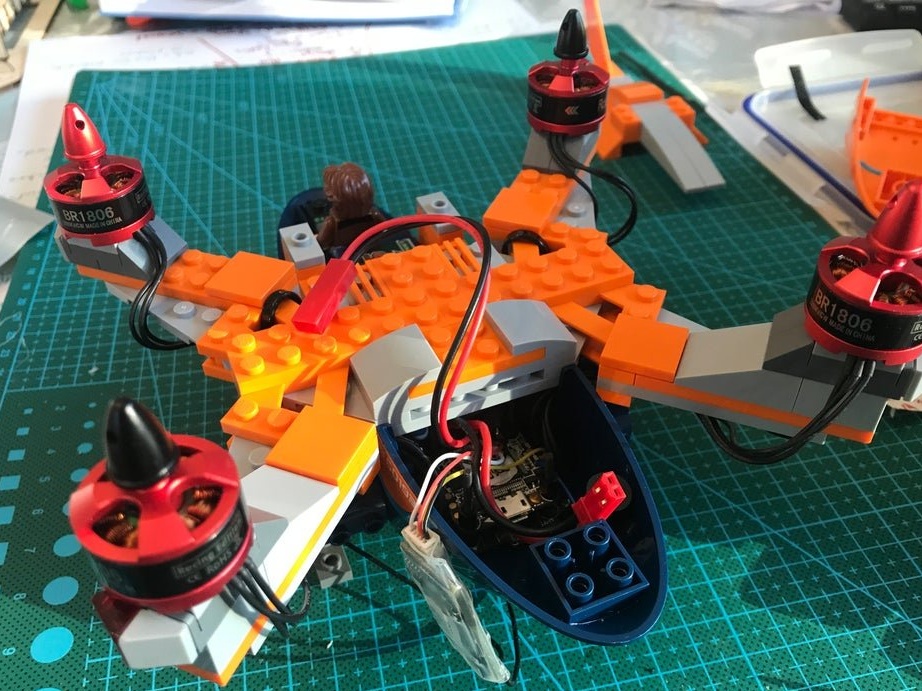
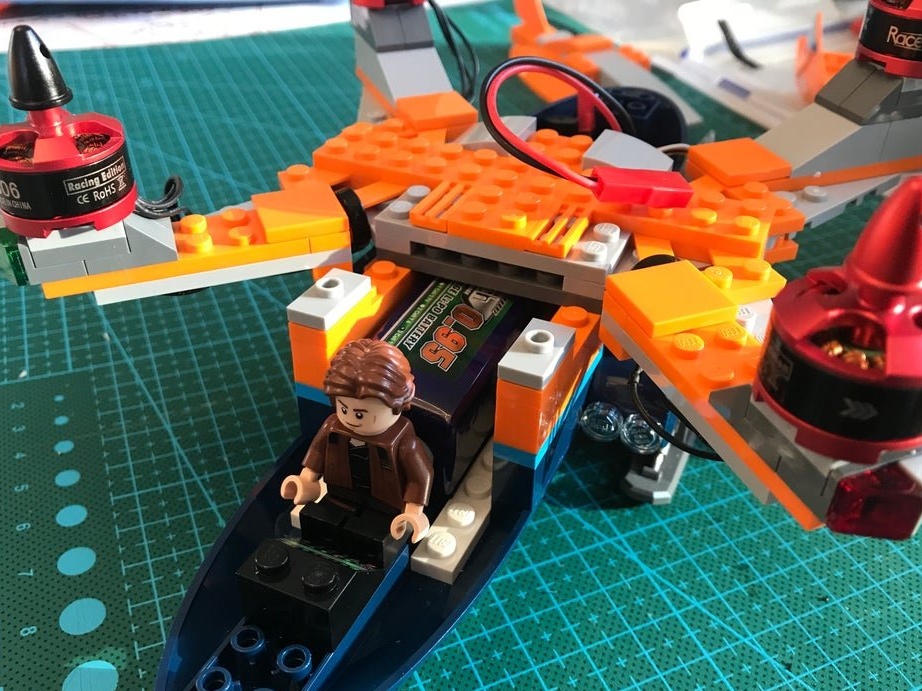
First, the master collects the LEGO-Arctic. Then the model is partially disassembled. Inside, you need to place the battery and controller, observing the balancing of the model.

Step Two: Engine Mount
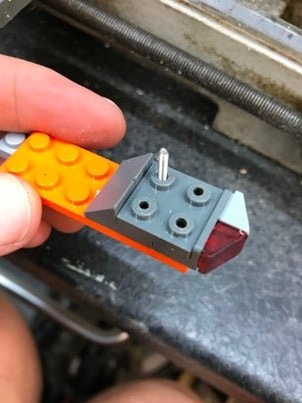
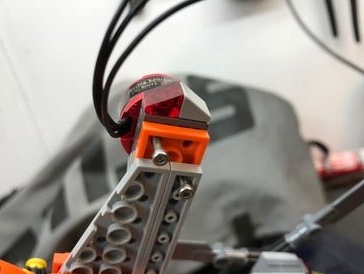
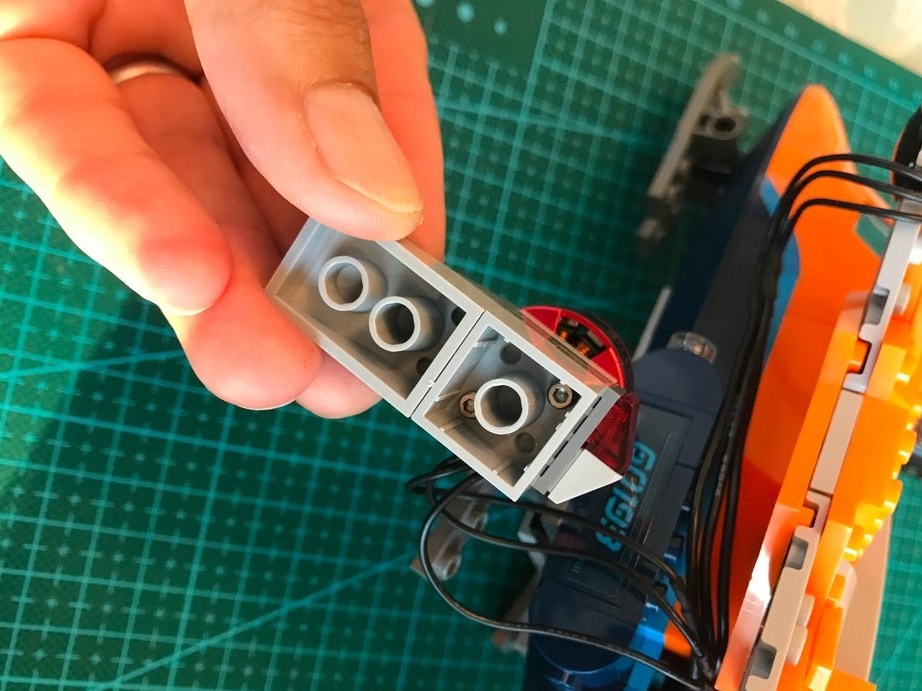
The mounting holes for the standard 1806 brushless motor are pretty much the same as the studs on the standard LEGO 2x2 plate. Each “engine” mount on a quadrocopter has a 2x2 dark gray tile (LEGO 3022) and a 2x2 light gray tile with a vertical pin (LEGO 2460), which is usually held on the hubs of a LEGO propeller on top.
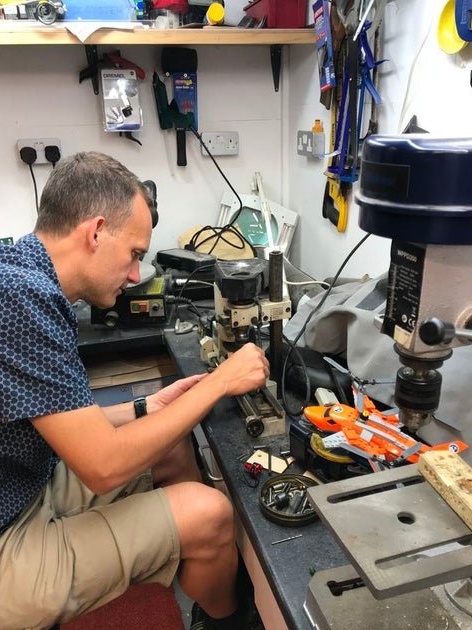
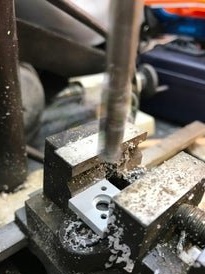
The master drills the mounting holes. On motors, in the center there is a low tide. A hole under it is drilled in the center of the tile. Secures engines.
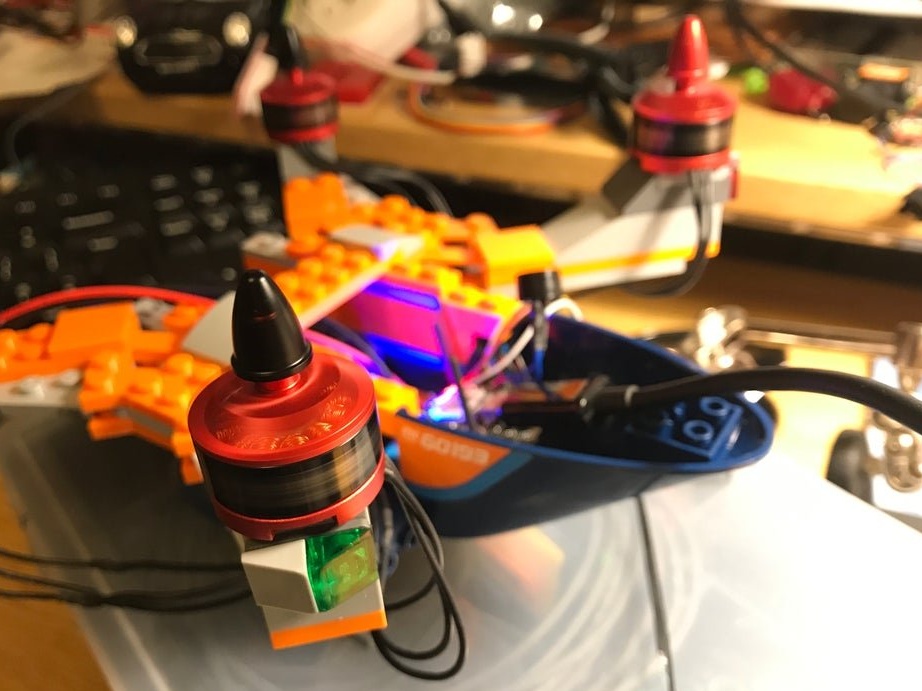
Step Three: Shoulders
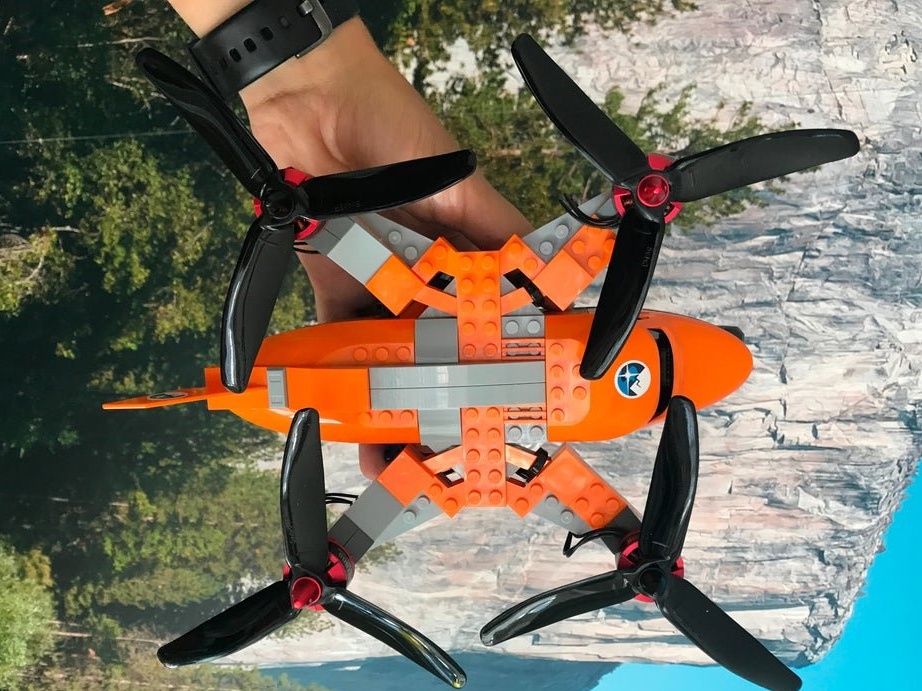
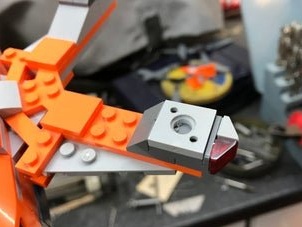
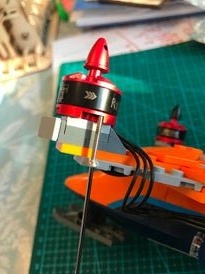
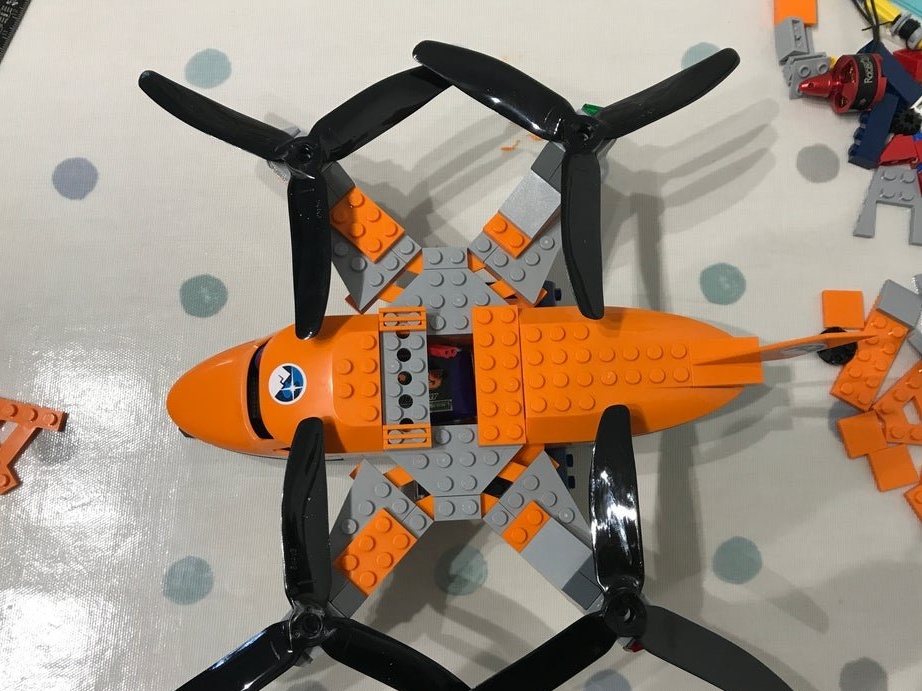
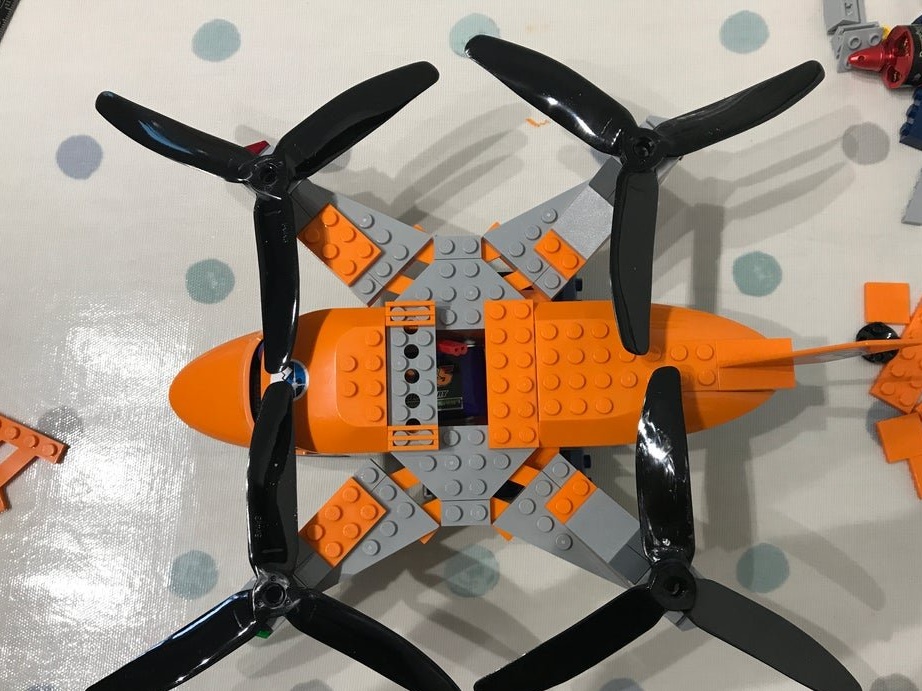
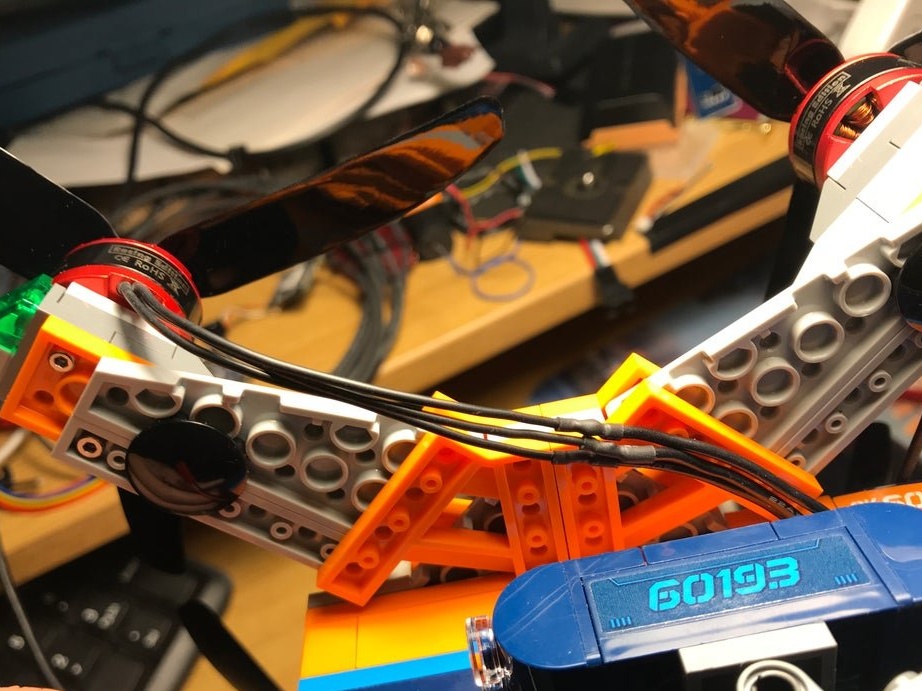
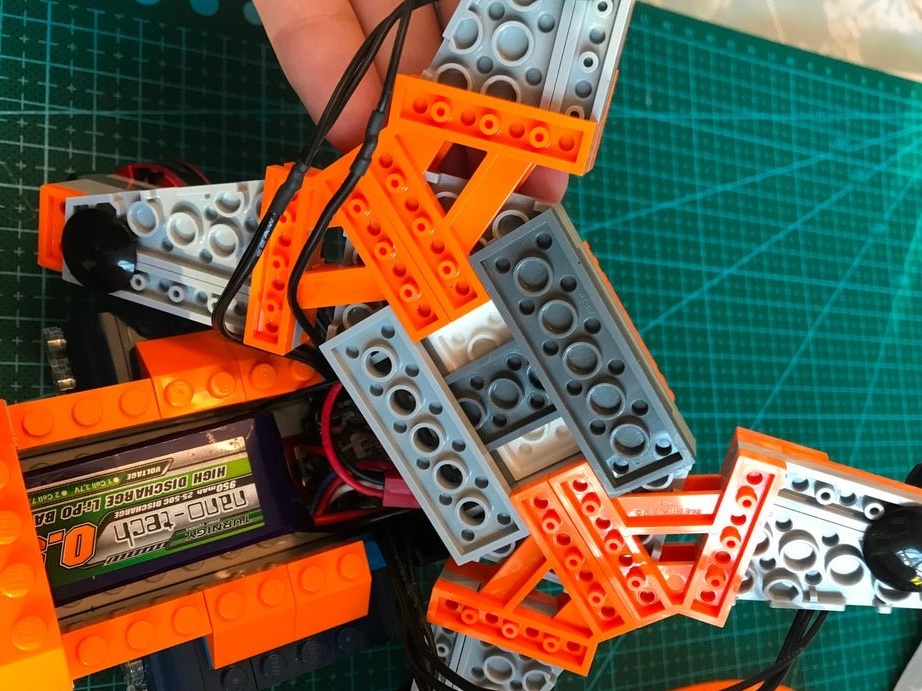
Rearranging the “shoulders” of the quadrocopter, you can slightly change the layout to provide a wider or narrower arrangement of the engines and the location of the screws relative to each other.
The standard LEGO assembly (first photo) has “shoulders” and engines located wide (horizontally) with a rather large screw overlap. The master remakes the “shoulders” and makes the engine and, accordingly, the screws.

Step Four: electronics
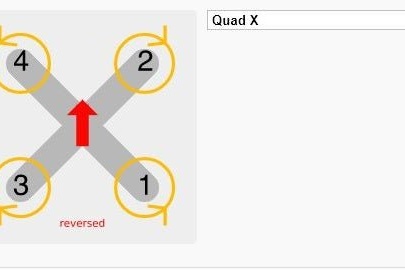
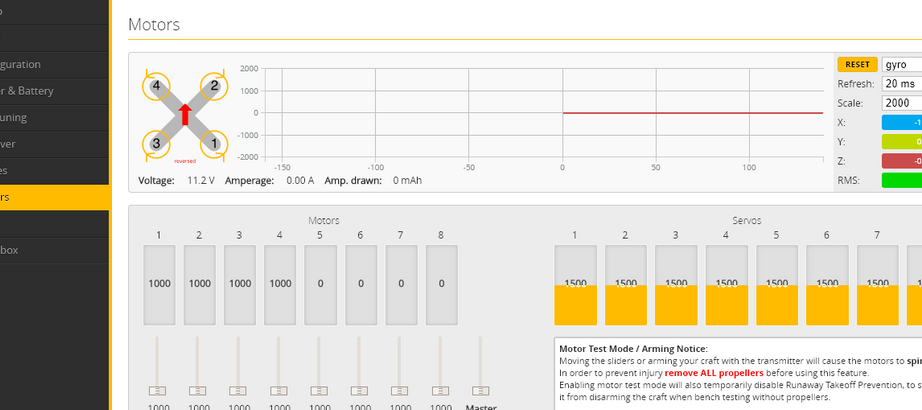
According to the scheme, it installs electronics. The first photo shows a diagram of the direction of rotation of the engines. The direction of rotation can also be changed at the programming stage.
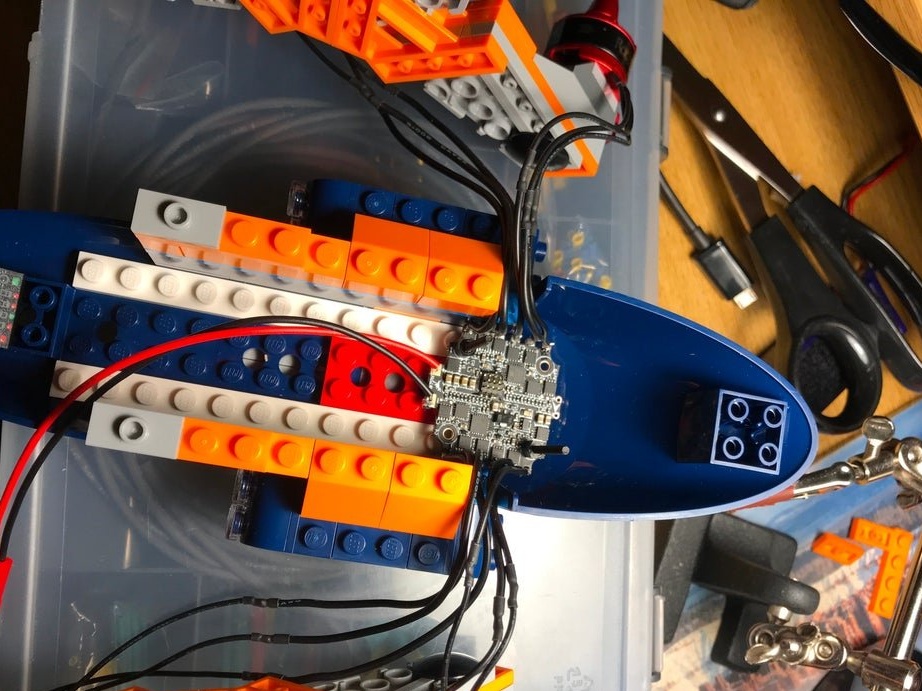
After the installation is completed, and before connecting the battery, the wizard checks the connections to prevent breakage or short circuit.
When you turn on the power, you should see the lights on the flight controller and a few beeps from the ESC.
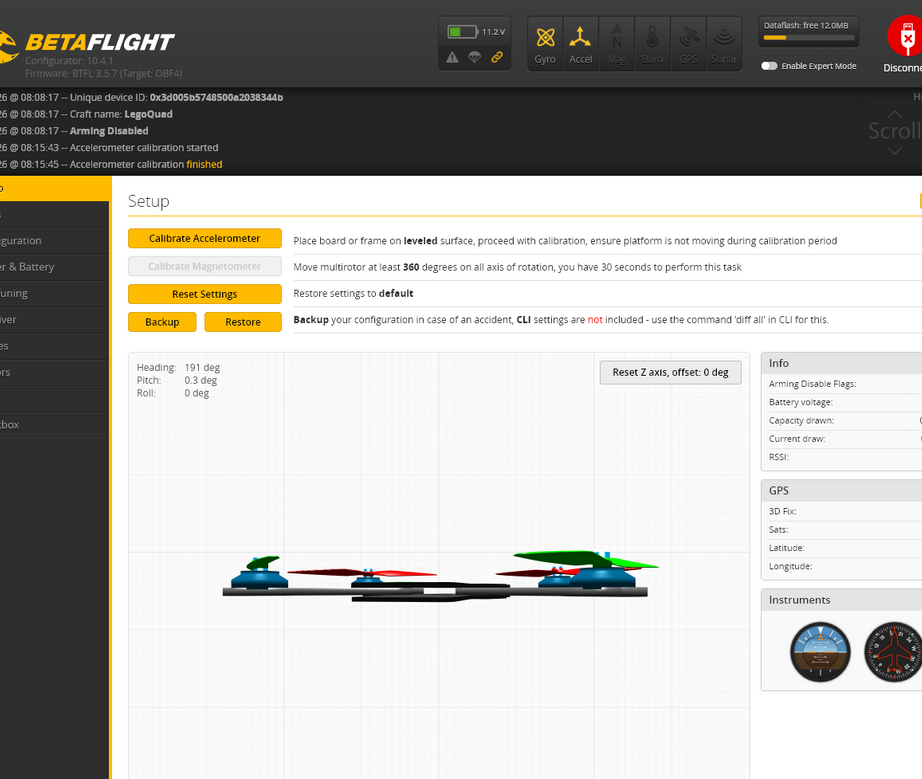
Step Five: Setup
Now that everything is connected, it's time to configure the controller.This means downloading software (firmware) that performs the task of decoding the control signals from the RC transmitter, processing the sensor input signal (accelerator, gyroscopes) and providing control signals for the ESC to rotate the engines at a given speed.
Remove the propellers for safety! A battery is not required for the first few setup steps, only USB power.
Download Beta Configurator
Connect the micro USB cable to the flight controller. Please note that this may be easier to do if the controller is not screwed to the chassis.
Download and upload the appropriate firmware for the flight controller.
betaflight-settings-legoquad.txt
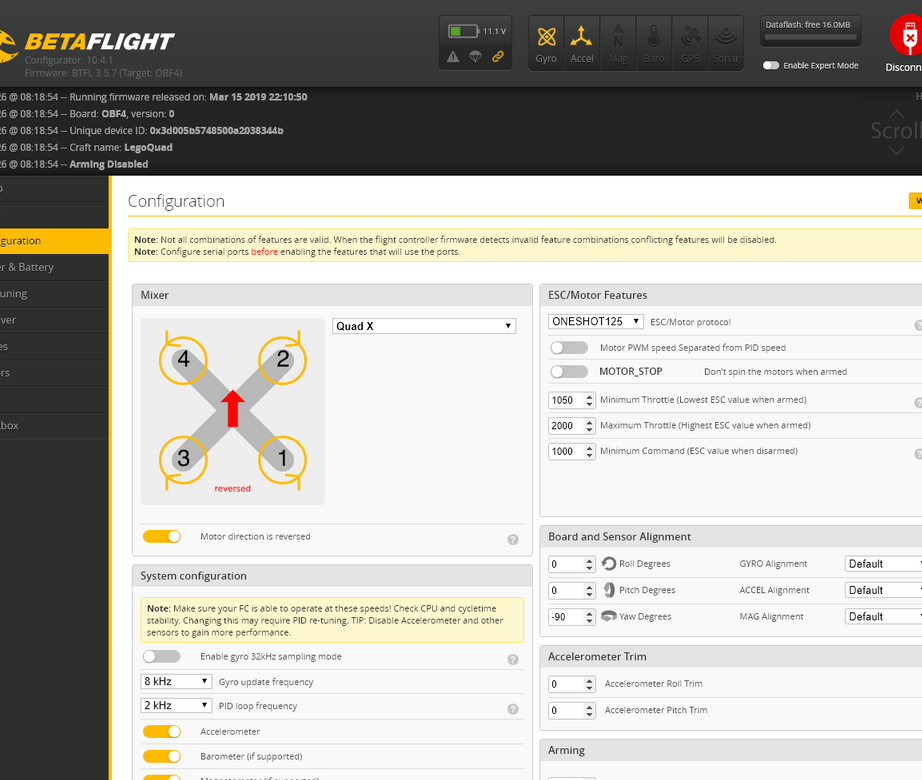
Click the “Connect” button and configure the following settings:
1. Setup - model calibration of engines
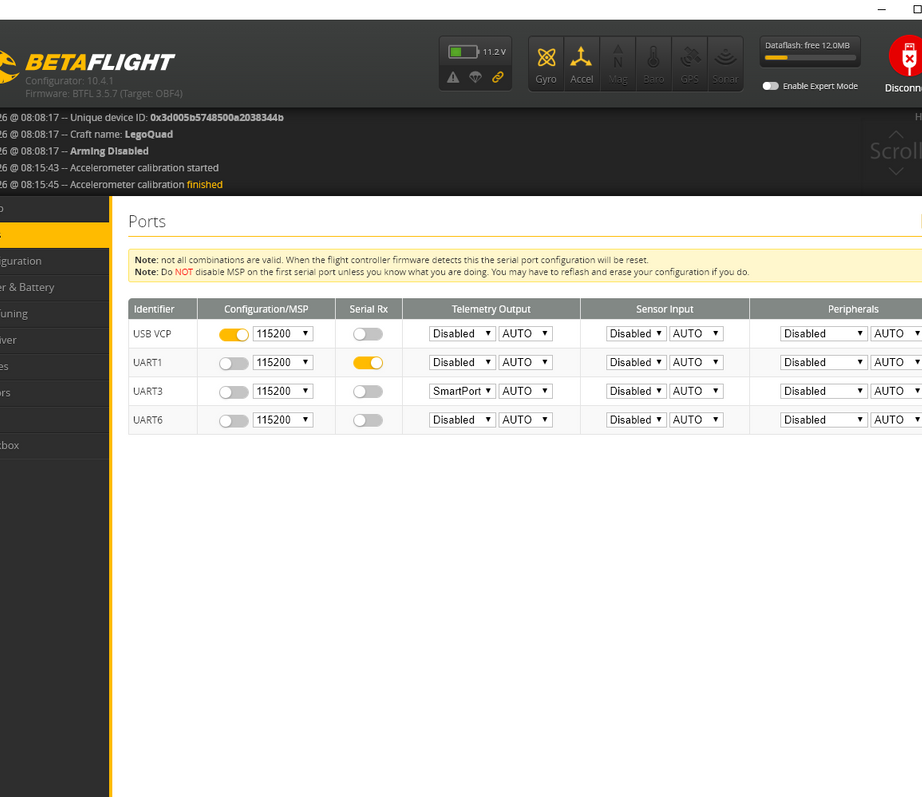
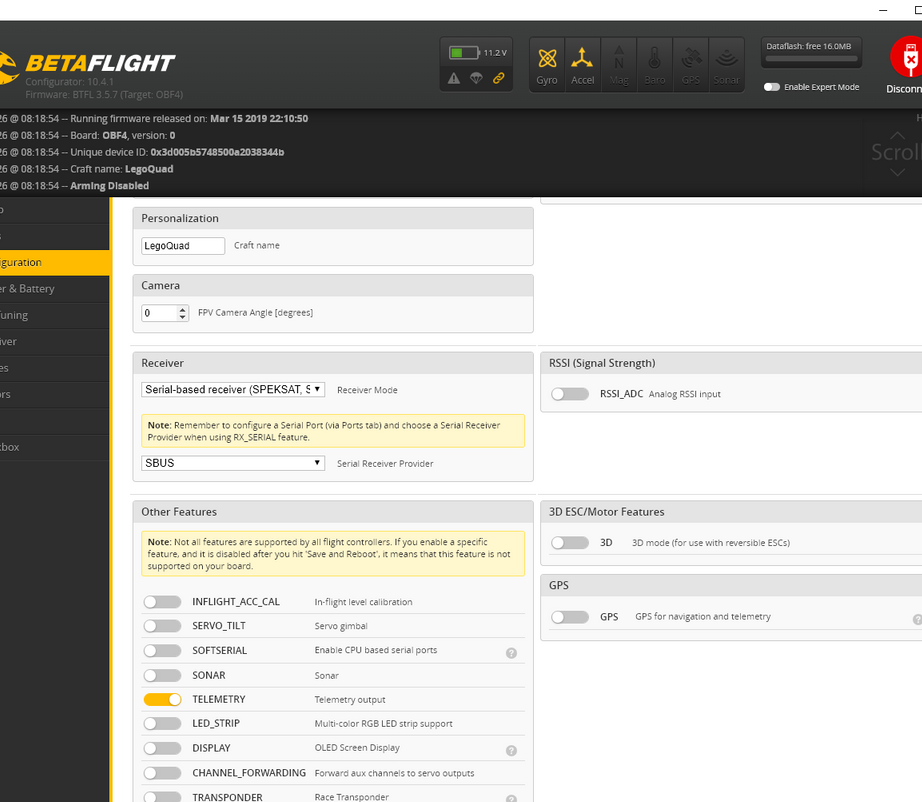
2. Specify the ports - UART1 - Serial RX for connecting SBUS RC receiver
3. Saving and rebooting
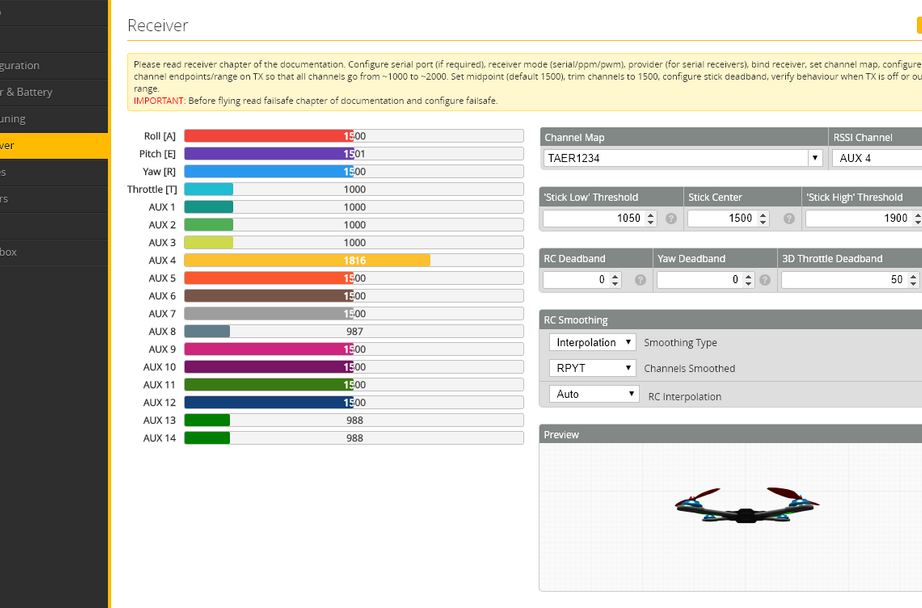
4. Establish a connection between the receiver and the transmitter
5. Overload
6. The value for the PID master is set to 250
7 Connect the battery
8. Adjust the voltage.
9. Make sure that your channel display and control direction are correct, when everything is set up, the quadcopter model image in the lower right corner should move in all correct directions when moving the joysticks on the RC controller.
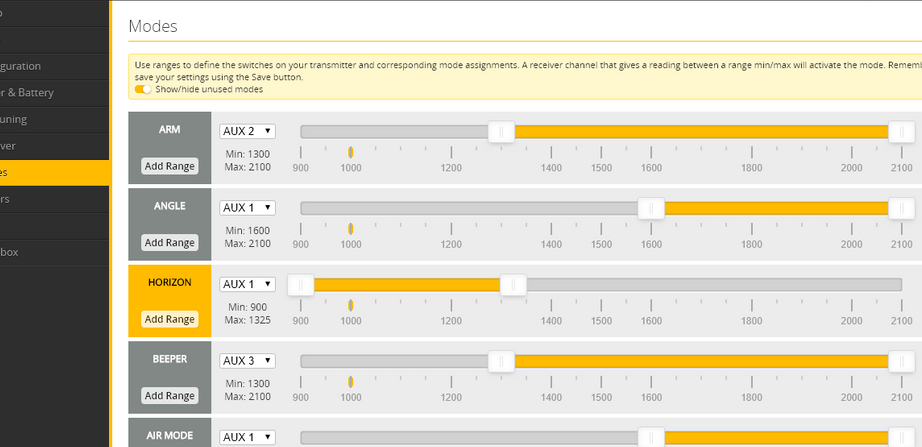
Configures the modes.
ARM on / off
HORIZON self-leveling / ACRO for traditional FPV flight
BEEPER - Useful if you lose the model in tall grass or bushes.
“Motors” tab - use this option to check each engine individually, and, importantly, mark the direction of rotation of each of them
Correct any wrong direction of rotation with the BLHELI configurator
After all these steps, you can disconnect the USB and the battery, and then turn on the power and check that everything works:
Turn on the transmitter and power
Connect the battery and mount the quadrocopter on a flat surface
Turn on the ARM switch and the motors should start spinning at a low speed.
Check the throttle while increasing speed
In horizontal mode, try tilting the quadrocopter and make sure that the engines react appropriately, for example, tilt it forward and the front engines will accelerate.


Step Six: Final Assembly
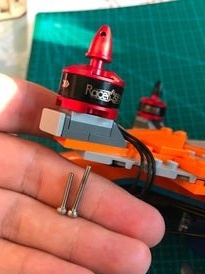
Virtually the entire structure of the case is held with mounting locks. The master only uses hot-melt adhesive to mount the motors.
Everything is ready and you can test.