
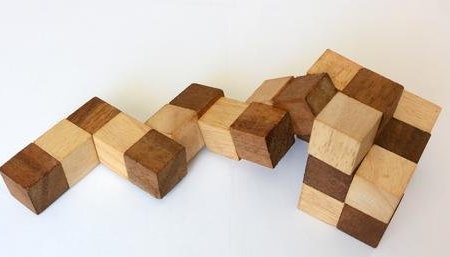
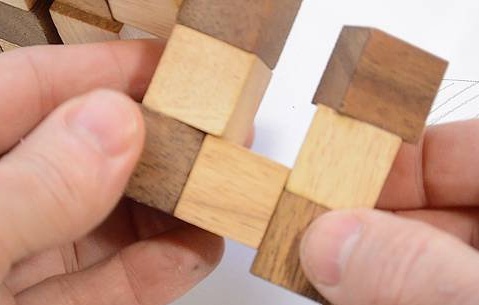
From the article below you will learn how to do it yourself make a puzzle "snake" from wooden cubes. The following description and instructions are taken from the Matthias Wandel YouTube channel.
Once the master was presented with a snake puzzle. He brought it to the party and, to his surprise, some of the guests were completely immersed in solving and solving the puzzle.
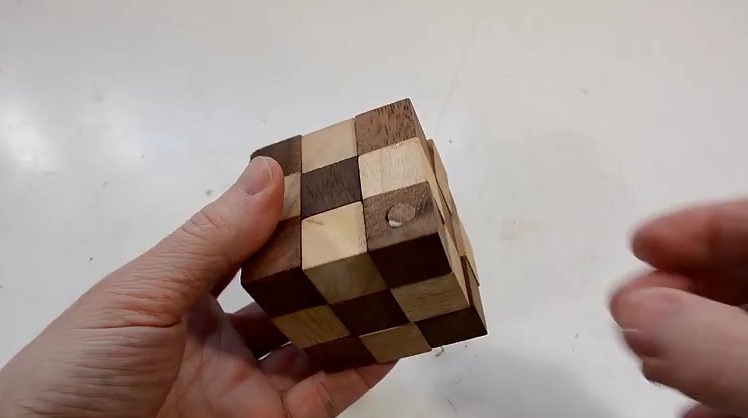
So the master thought it would be good to understand how to make such a puzzle with your own hands. The cubes are held together by a rope that stretches through the holes along the entire length of the "snake".
Step 1: Materials and Tools Required
- table saw;
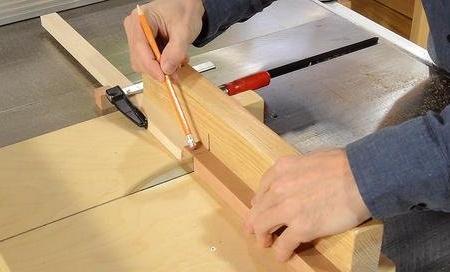
- a pencil;
- drilling machine;
- roulette;
- clamps;
- rope;
- waste mahogany and maple;
- emery;
- building hair dryer;
- pliers;
- a chisel;
- PVA carpentry glue;
- conical crown;
- band-saw;
- a drill with a diameter slightly larger than a rope;
- brush;
- varnish;
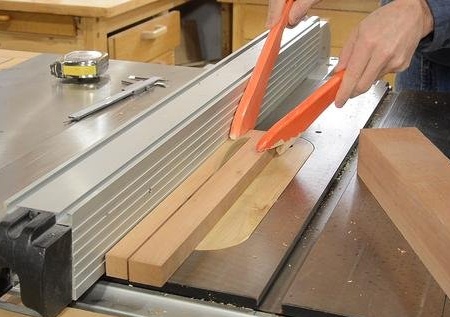
The master began making the puzzle by cutting a maple and mahogany tree onto 2x2 cm small blocks.

Further, the master cut out 2 cm cubes from these blocks with the help of a sleigh for a table saw, using an emphasis attached by a clamp.
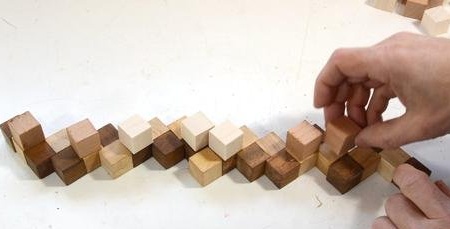
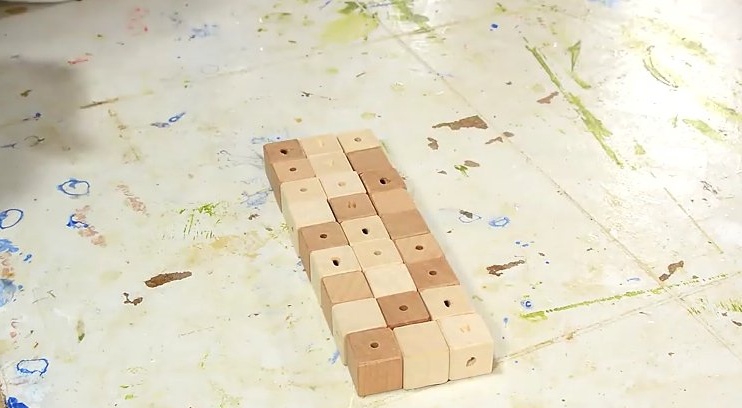
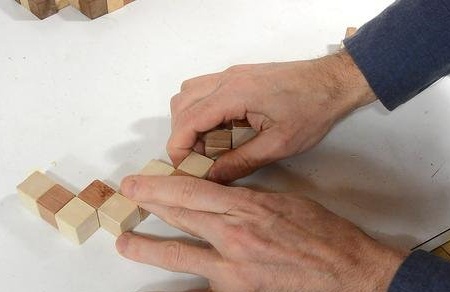
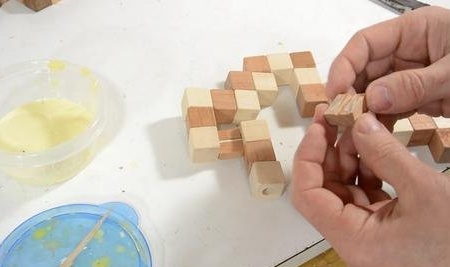
The master began manufacturing with direct fragments. These are parts that are attached at opposite ends. He simply placed his cubes on top of the puzzle to find out how much material and what color would be required.
If you want to create your own puzzle, then you need an image of the disassembled cube in a 1: 1 ratio. To make a puzzle out of cubes with a side of 2 cm, print this PDF document with the function "fit to page" disabled to print the image at a scale of 1: 1.
Template file
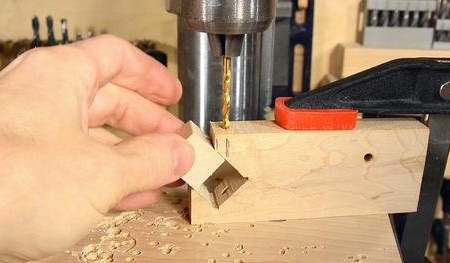
Step 2: Drilling Straight Parts
The wizard uses the drill bit more than is required to connect the blocks together.
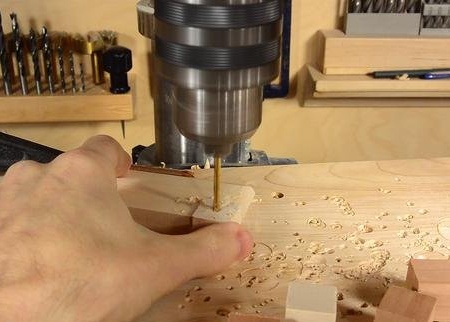
To position the part as it drilled, the master used a piece of wood with a square neckline.
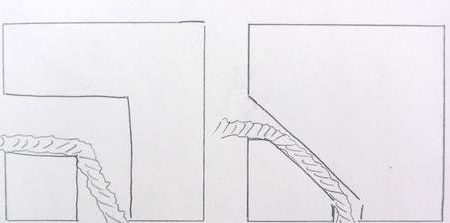
If you drill two holes in the cubes, where the rope passes through an angle that is too large, much larger than the rope itself, the connection will be unreliable.
The master’s puzzle, which he was presented with, has precisely large holes drilled, so the cubes are very fond of sliding around the corners.
Instead of large holes, the master decided to drill two shallow holes in the middle of the faces, and then a diagonal hole to connect them. He did not want to rely solely on the diagonal hole, because it is difficult to precisely align, and the sharp edge of the hole can damage the rope.
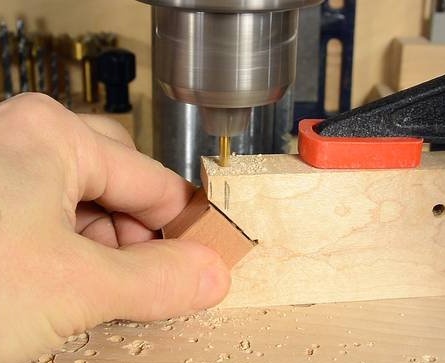
He made a simple template to arrange everything. This template holds the workpiece and drill. Clamping device It is close enough to the chuck so that the drill is never completely pulled out of the jig.

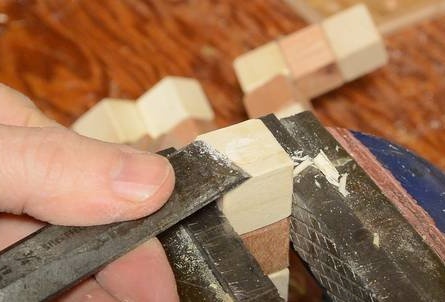
After drilling, the master polished the chamfer along all the edges of the cube to make them easy to handle. This step is time consuming.
The master had the foresight to chamfer the cubes when they were not yet cut and were in the form of bars. Thus, part of the faces have already been pre-processed.
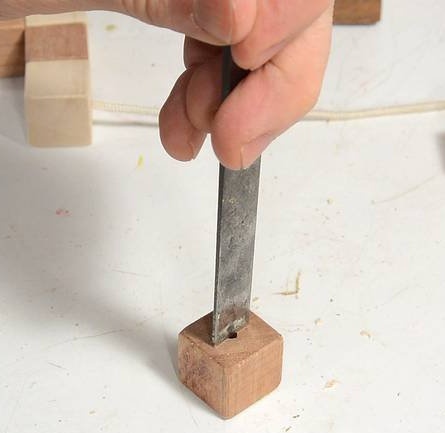
Step 3: Fixing the rope in the end cubes
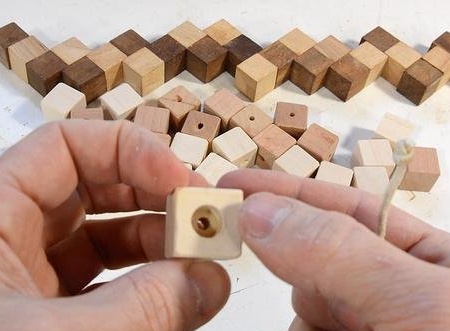
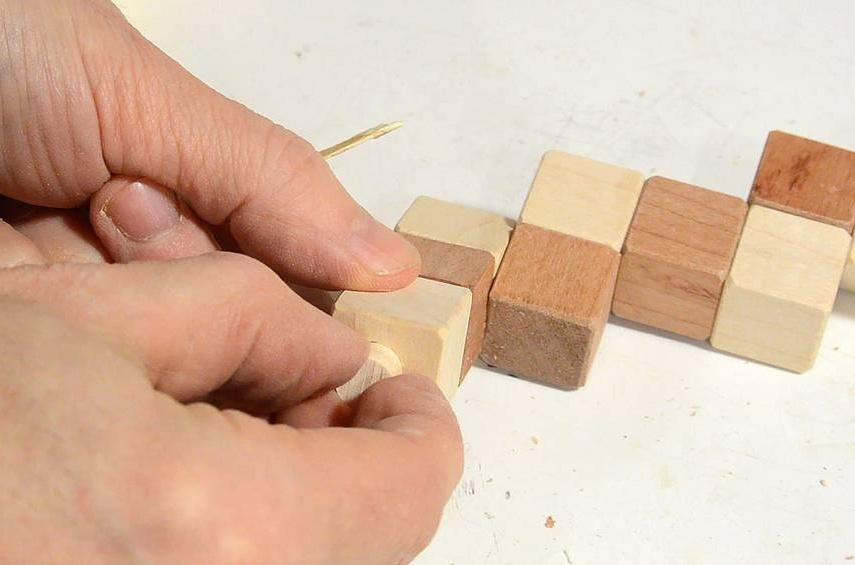
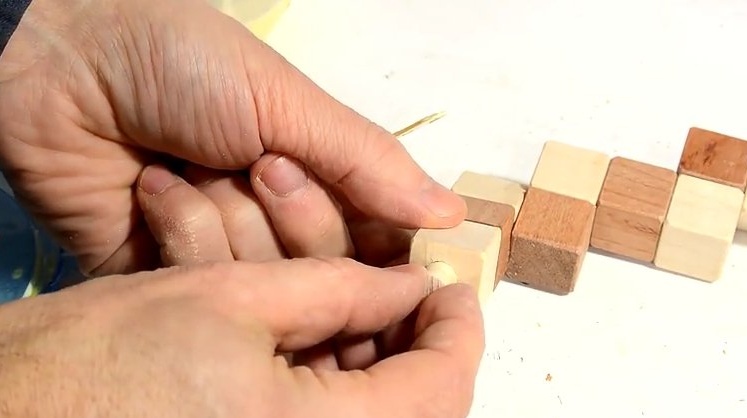
The master drilled a hole with a diameter of 10 mm in the end cubes, approximately 3/4 of the through hole. In this hole is a knot at the end of the rope.
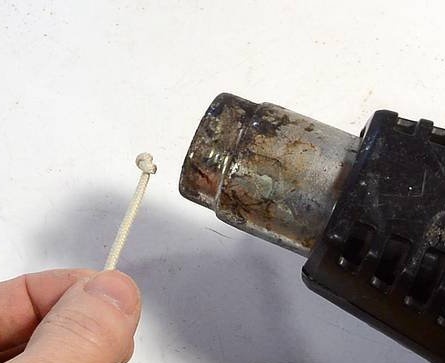
The master tied a knot at one end of the rope and partially melted it with a heat gun to make sure that he would not untie.
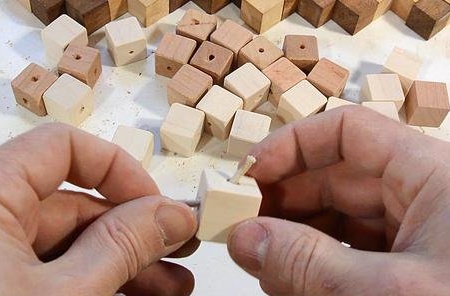
Stringing cubes on a rope. Thanks to the diagonal holes, the corner cubes were as easy to string on the rope as the rectangular ones.

The rope is tucked in and taut. Health Check.
Step 4: Varnishing the Product

The master wanted to put a little varnish on his cubes, so he again disassembled them and coated them with a paper towel. He did not want to use the brush, because from the brush always a lot of varnish gets into the holes. Spraying would solve this problem, but the master does not like the spray gun.
According to the master, it is better to varnish the cubes before drilling. Better yet, varnish square cubes before cutting cubes out of them. Thus, it would remain only to varnish the end surfaces of the cubes.
Step 5: pulling the rope
The next task requiring an extraordinary solution is how to tighten the rope, because the nodes must be recessed in the holes in the extreme cubes. It is not possible to move the knot along the rope with the desired tension.
Therefore, the master divided one of the cubes into two parts to put on the second part after the rope is pulled.
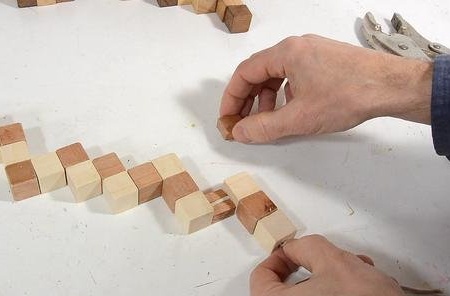
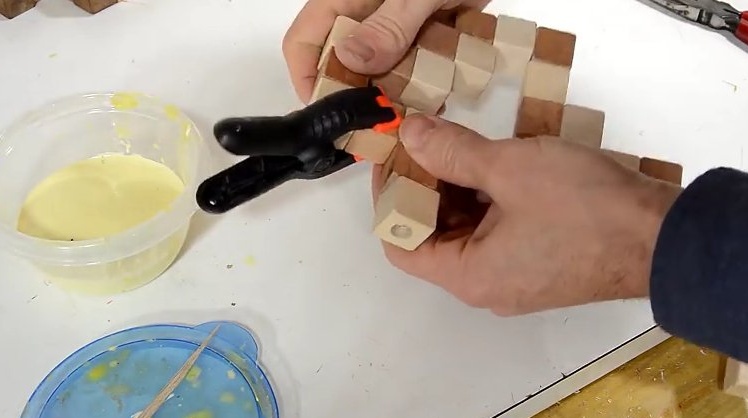
But even with an extra die, you need to make sure that the rope is tightly tightened along the entire snake. Since the rope passes through a large number of angles, the friction is too great to just pull it from one end. Therefore, the master pulled the rope in parts, shifting several cubes.
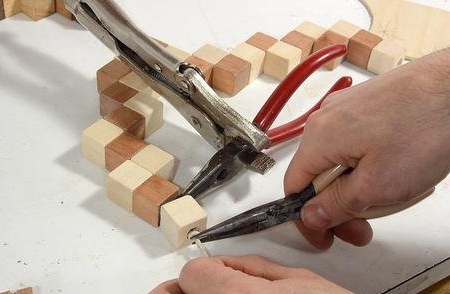
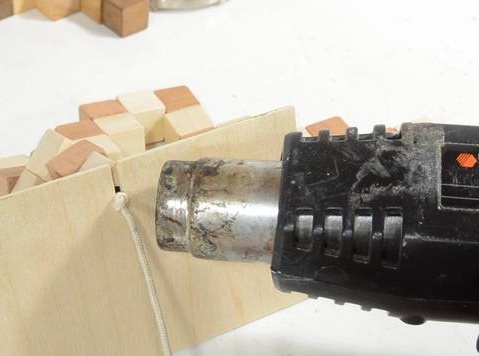
Then the master used several pliers to keep the rope in tension while working with the knot mainly in the hole. Again, the master partially melted the knot with a construction hairdryer to make sure that it would not untie.
Finally, it remains to insert the halves of the last cube and glue them together.
Why not use elastic rubber in this puzzle?
Some people suggested that the master use an elastic cord. But that won't do. A sufficiently high tension is formed in the rubber, more than the stretchable cord can withstand to hold the cubes together. In addition, the rubber, while remaining stretched, collapses over time.
Step 6: Final Touch
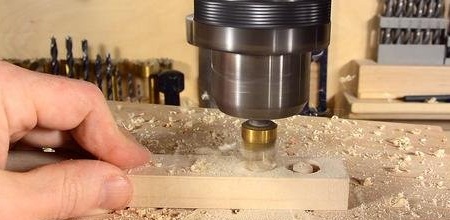
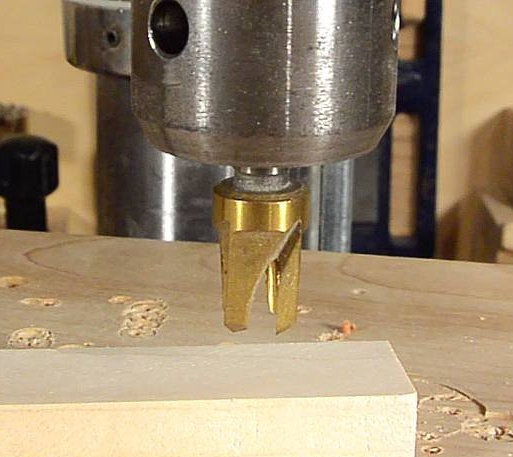
To close the holes in which the nodes are hidden, the master made plugs. To do this, he used a drill stand with a suitable conical crown.
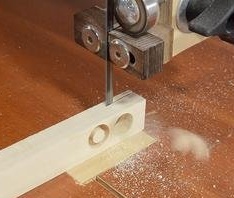
The plugs are released by cutting wood on a band saw. The plugs are tapered, just push them in until they fit snugly ...
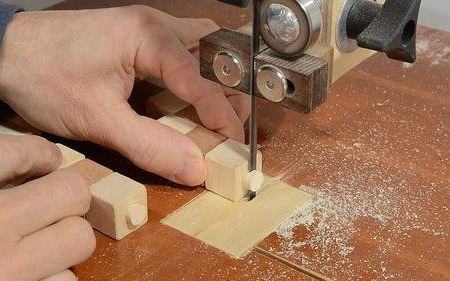
... after installing the plugs, the excess material must be cut flush.
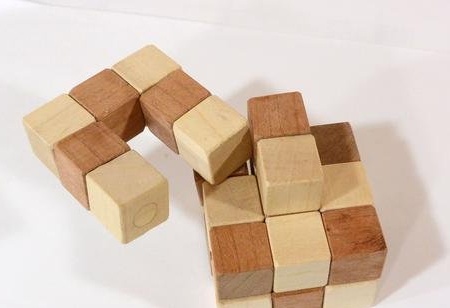
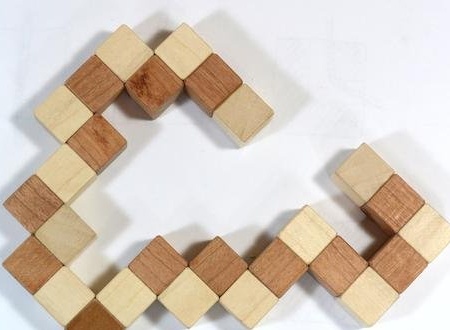
Ready "snake".
If you like homemade author, then try to repeat and make.
Thank you for attention.
See you soon!