» Electronics »Case for component tester

Case for component tester


Good day to all! I somehow got myself a tester for electronic components at a famous Chinese site.

However, there were a couple of problems:
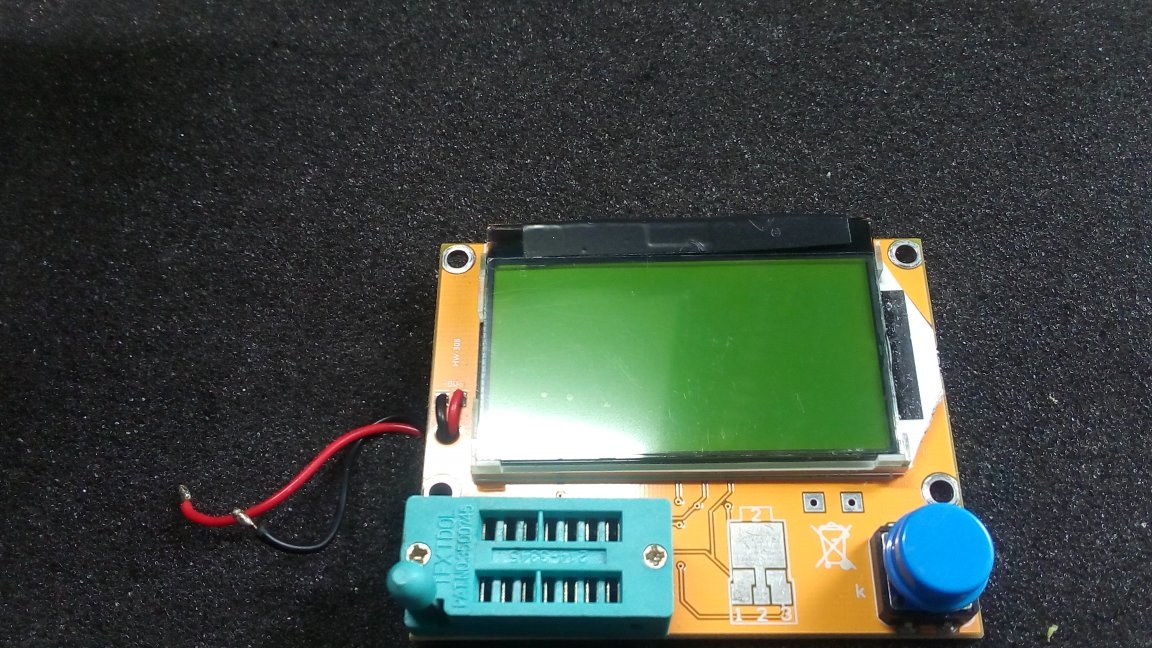
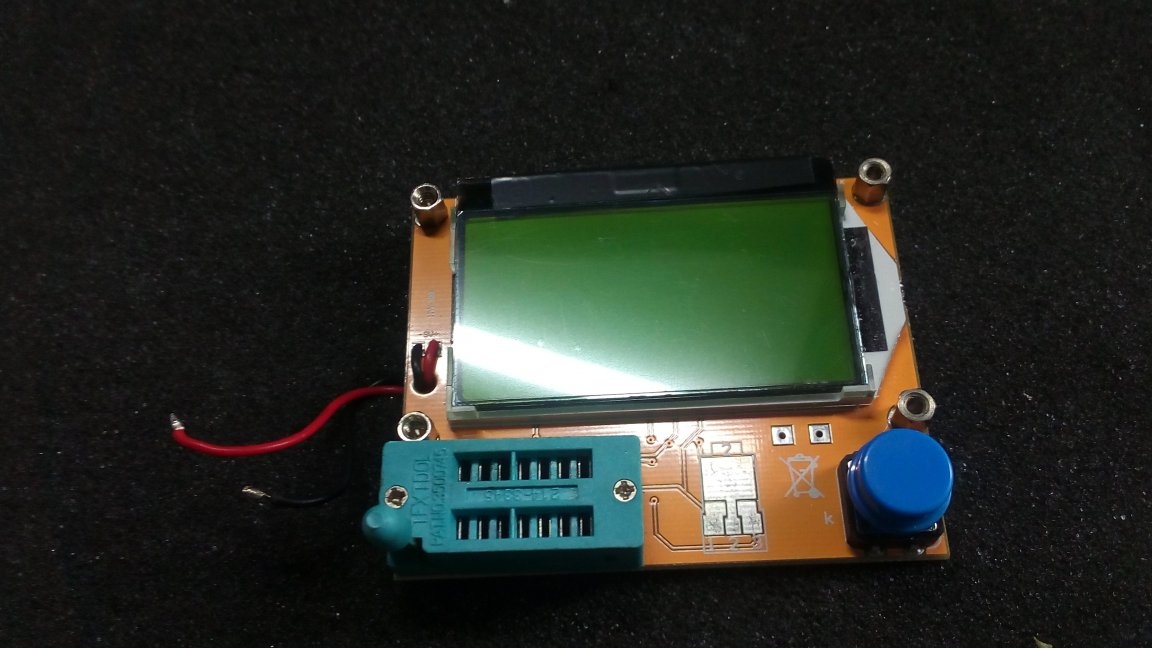
- The device was powered by a crown battery (9V)
- The board and display of the device were not protected by the case

It was decided to make a case for the device and get away from power by means of a crown (they cost not at all cheaply).

Materials and tools:
- External boxing for automatic machines / modules for 2 devices (1 pc)
- Spring-loaded acoustic terminal (1 pc.)
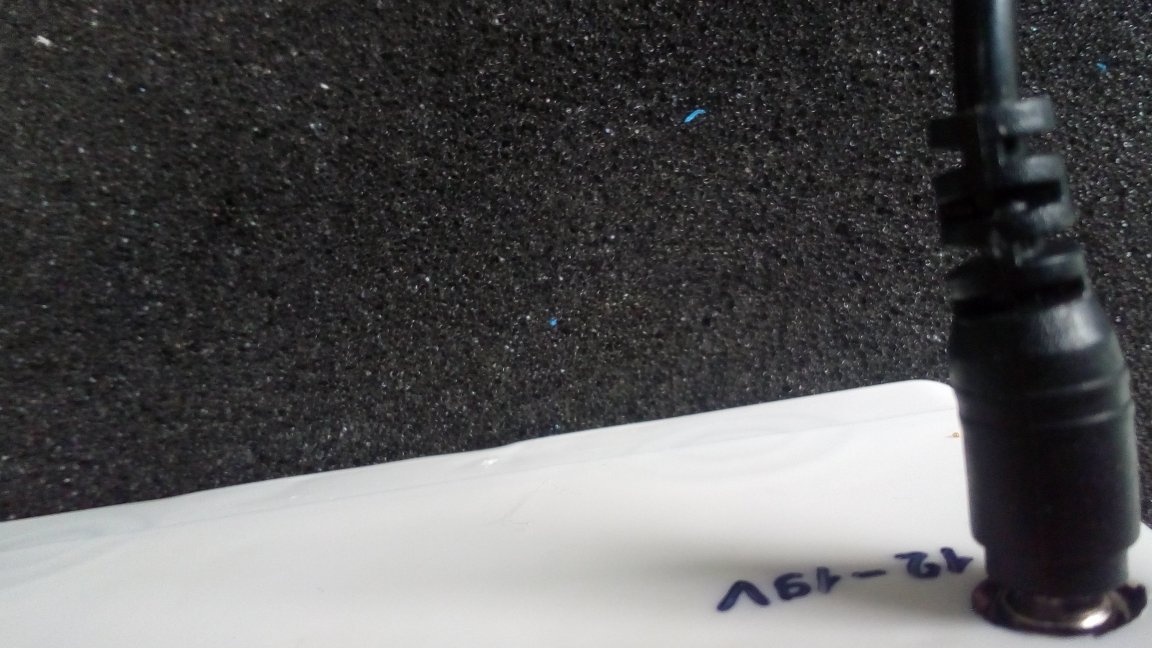
- DC power connector with terminal block (1 pc)
- Car sealant in a tube (1 pc)
- Clay moment crystal
- Acoustic wire (cross-section 2x0.5mm square. 30cm)
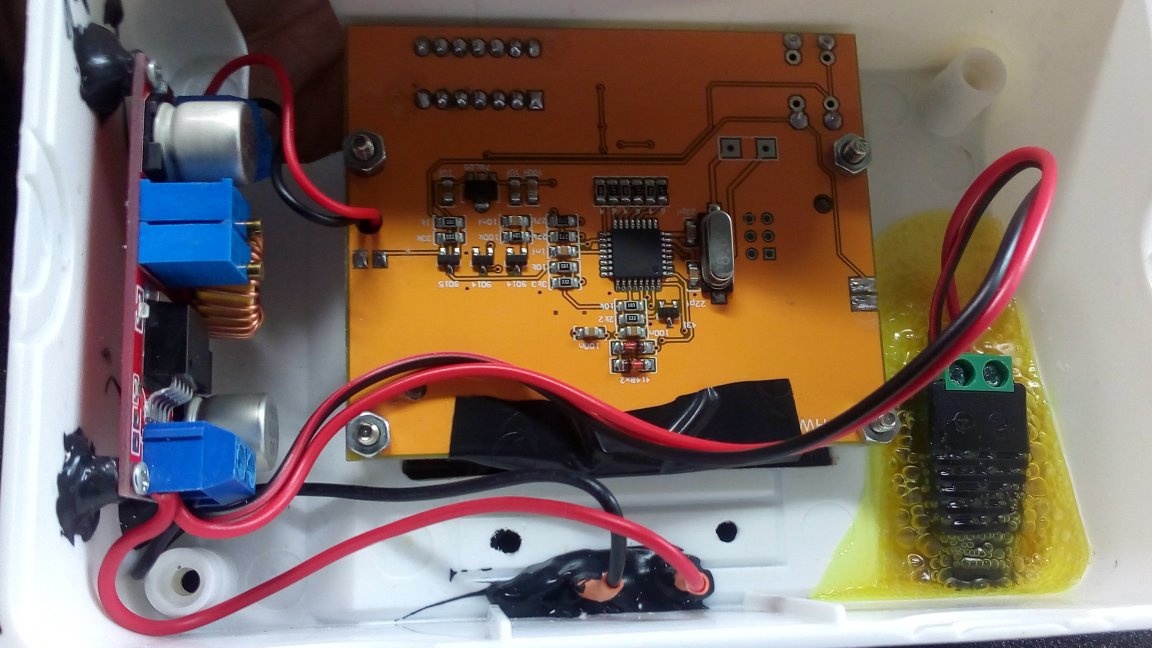
- DC - DC step-down module with voltage regulation (1 pc.)
- Plastic box from a CD disc or a piece of thin plexiglass (size 10x10cm)
- Stands for motherboards and nuts
- heat shrink tubes
- 4 screws (selected empirically for m3 or m4 racks)
- soldering iron, multimeter, screwdriver, screwdriver / drill, file or file with a small pitch, drills.

So let's get started.

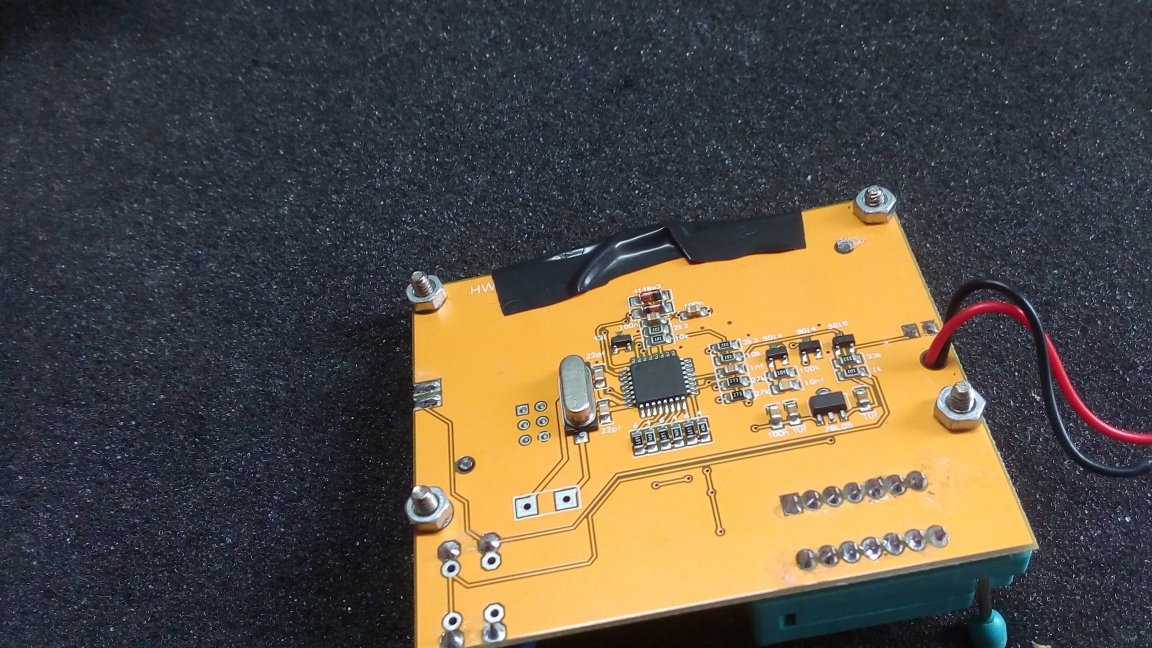
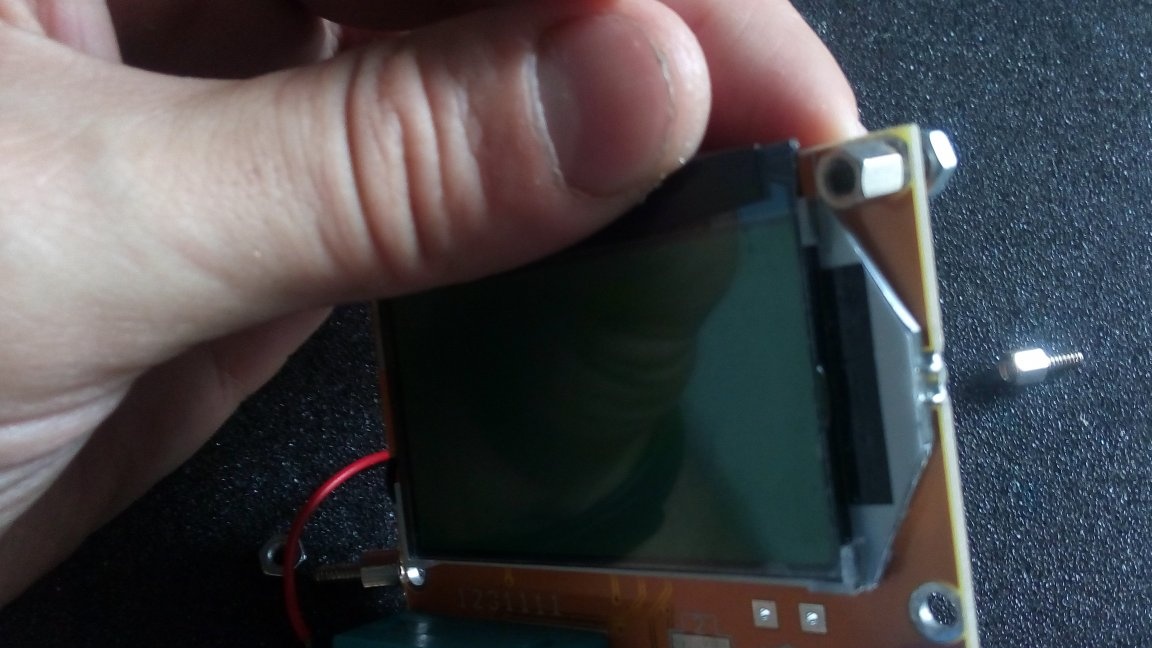
step 1. Cut off the connector for connecting the crown.


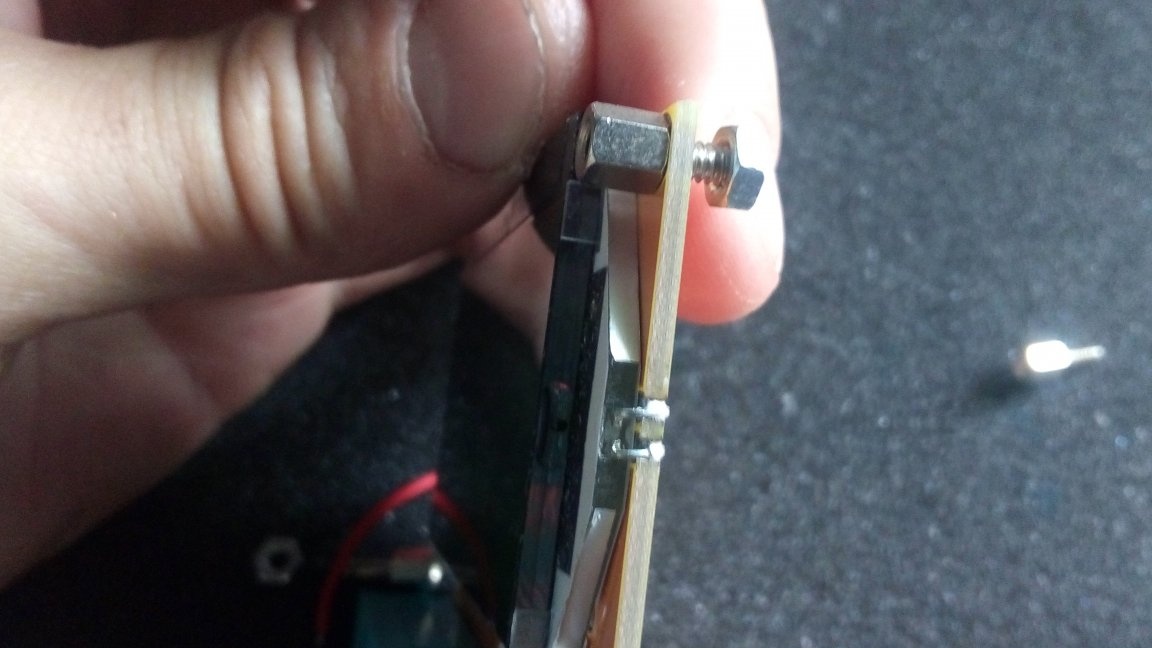
step 2. We fasten the rack device to the circuit board and fix the nuts.


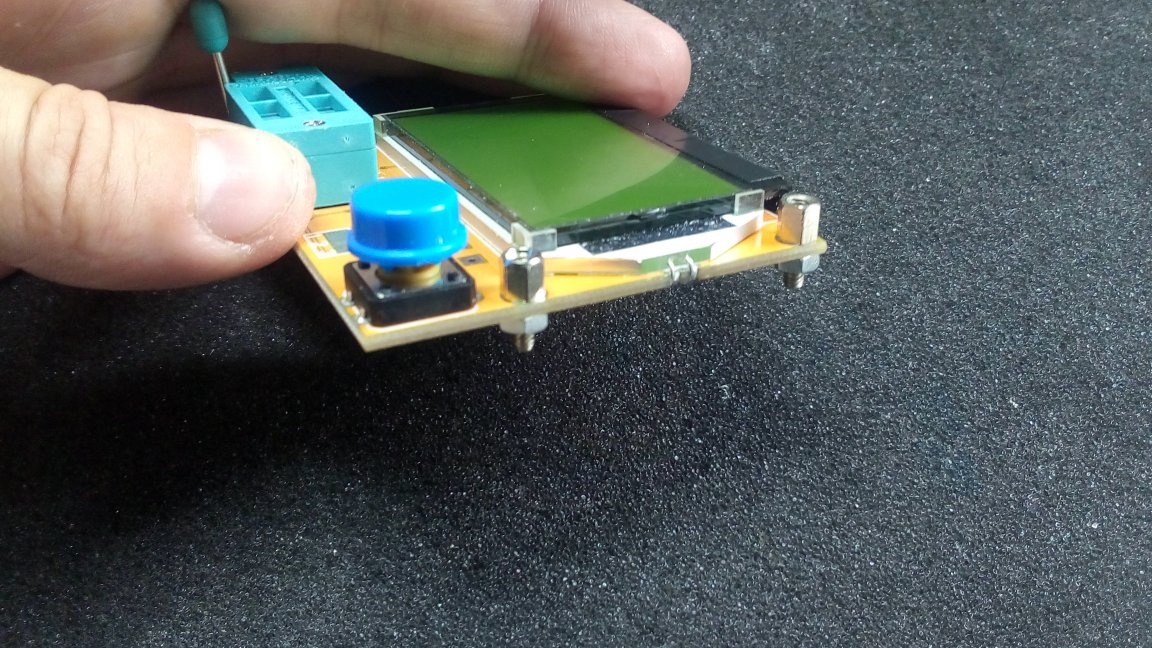
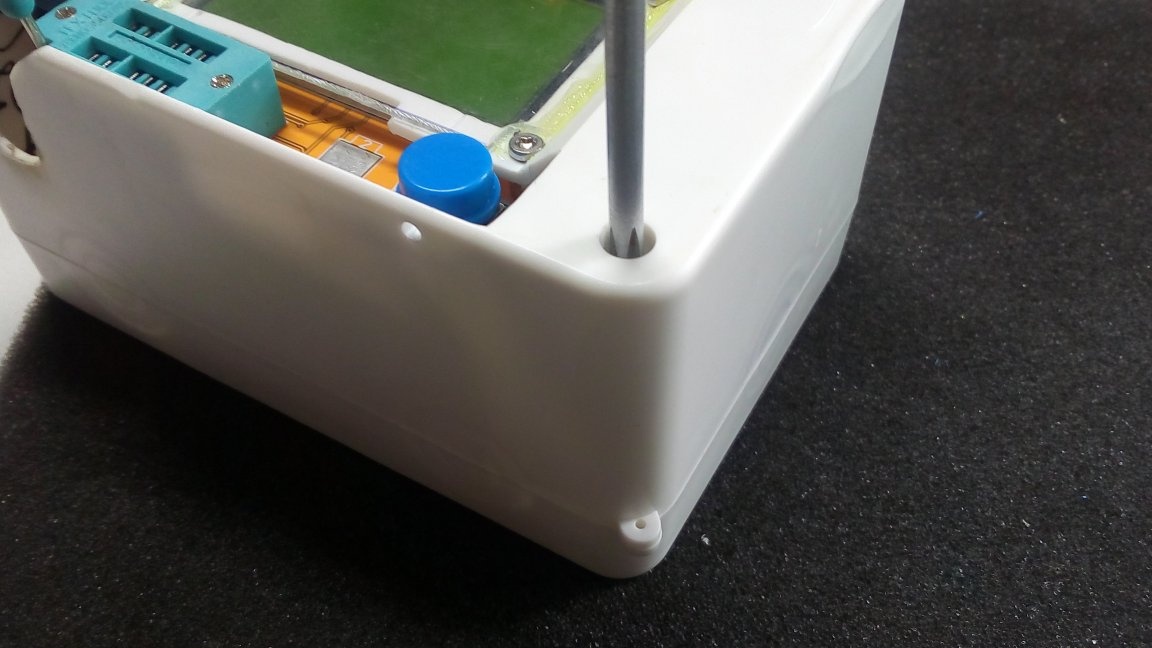
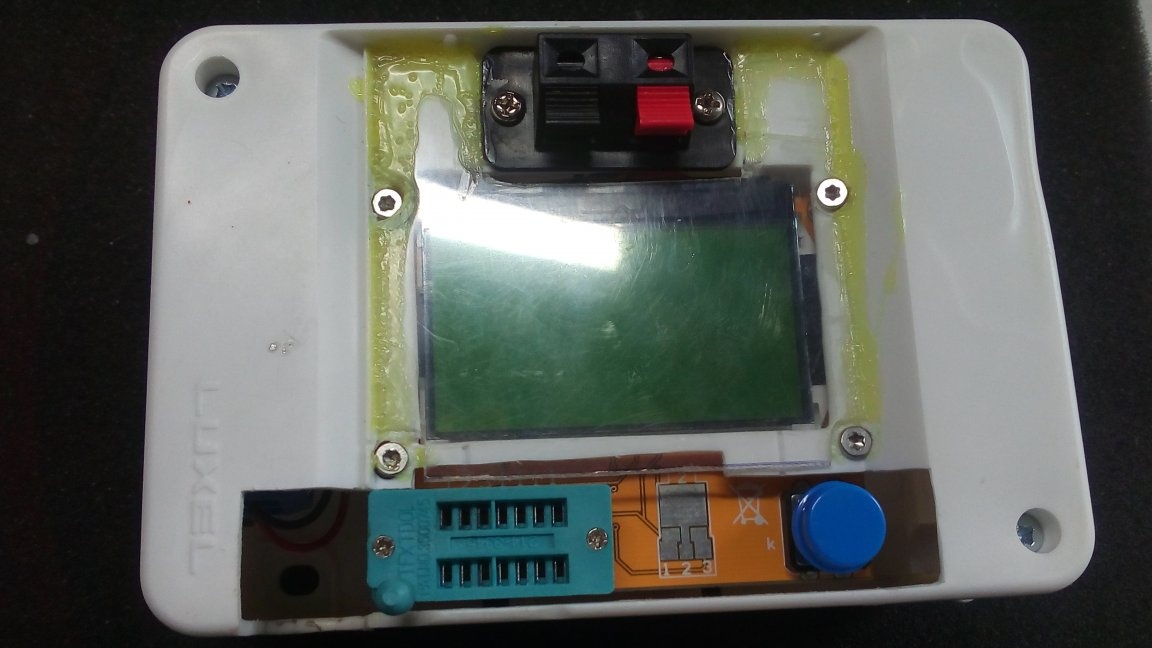
step 3. We disassemble the case and cut out the place for the display, pads, buttons and make holes for the screws to secure the board, cut out a piece of glass and glue it on top to protect the display.


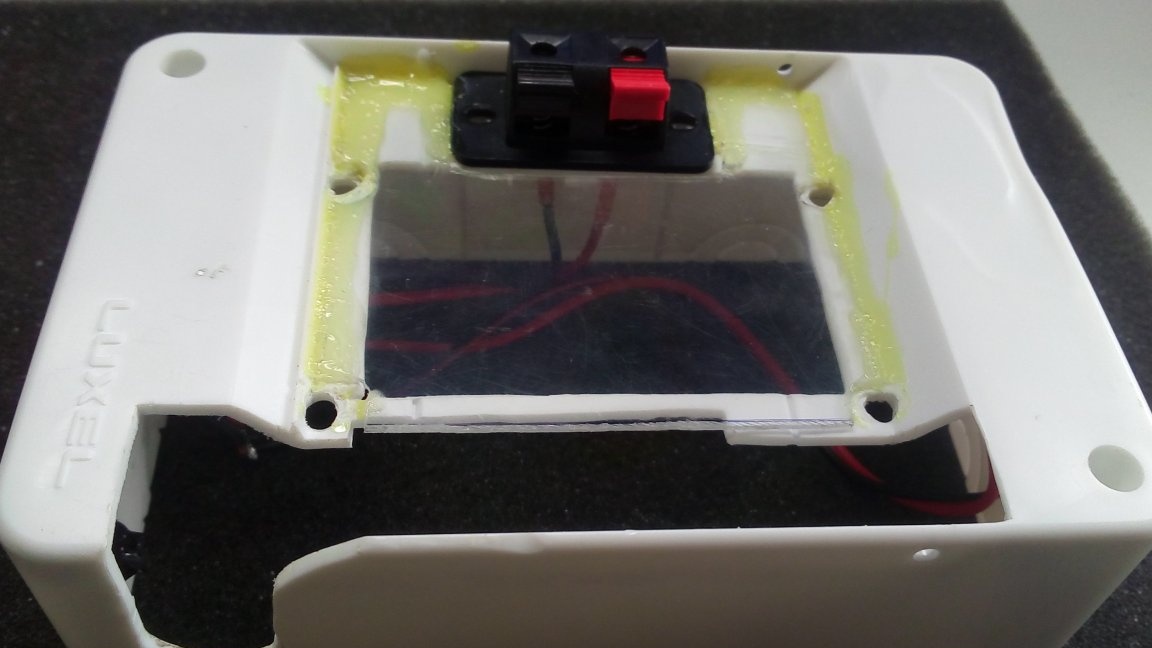
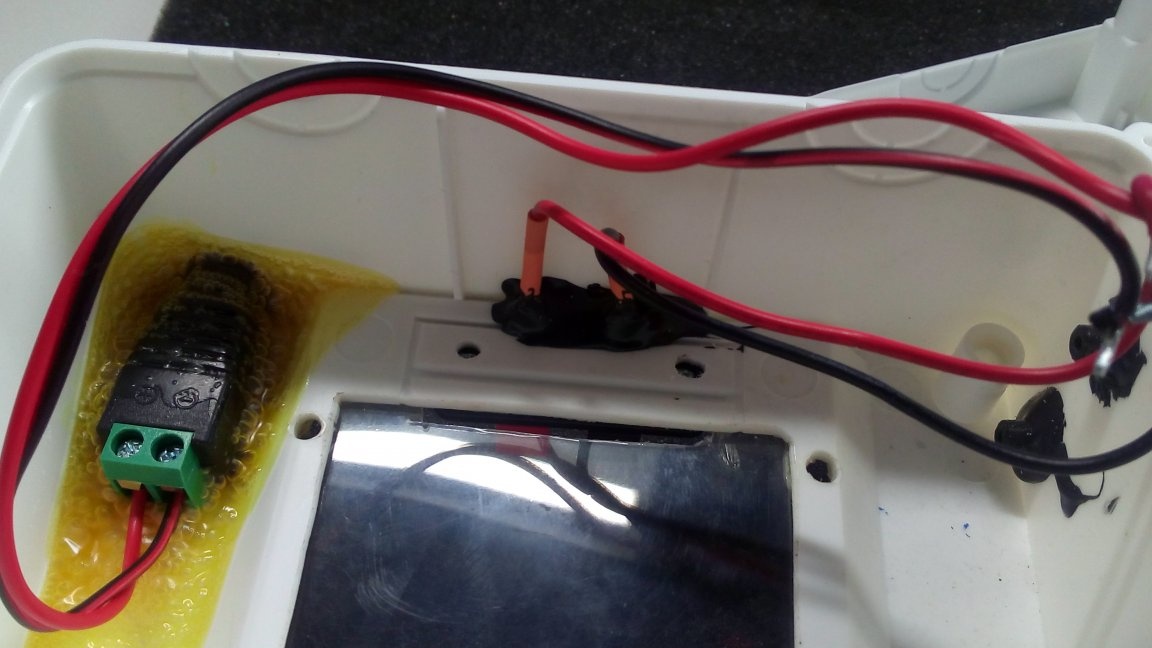
step 4. We drill a hole with a diameter of 8 mm for the power connector and acoustic pads. we fix the block with screws and nuts m3, fill the power connector with glue.


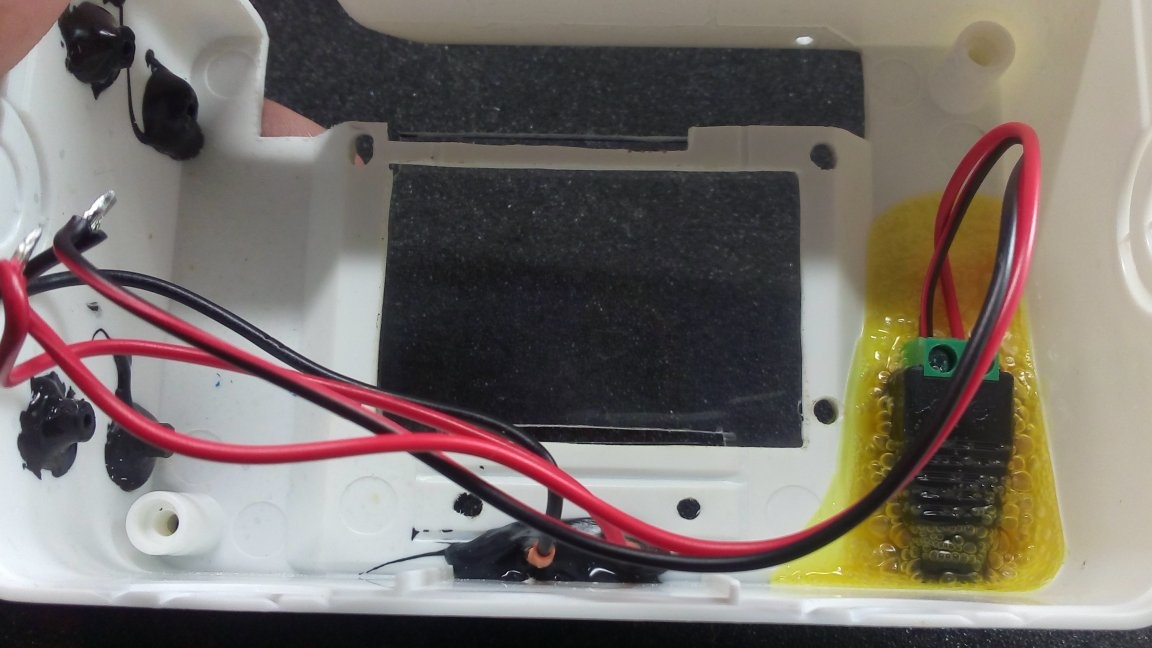
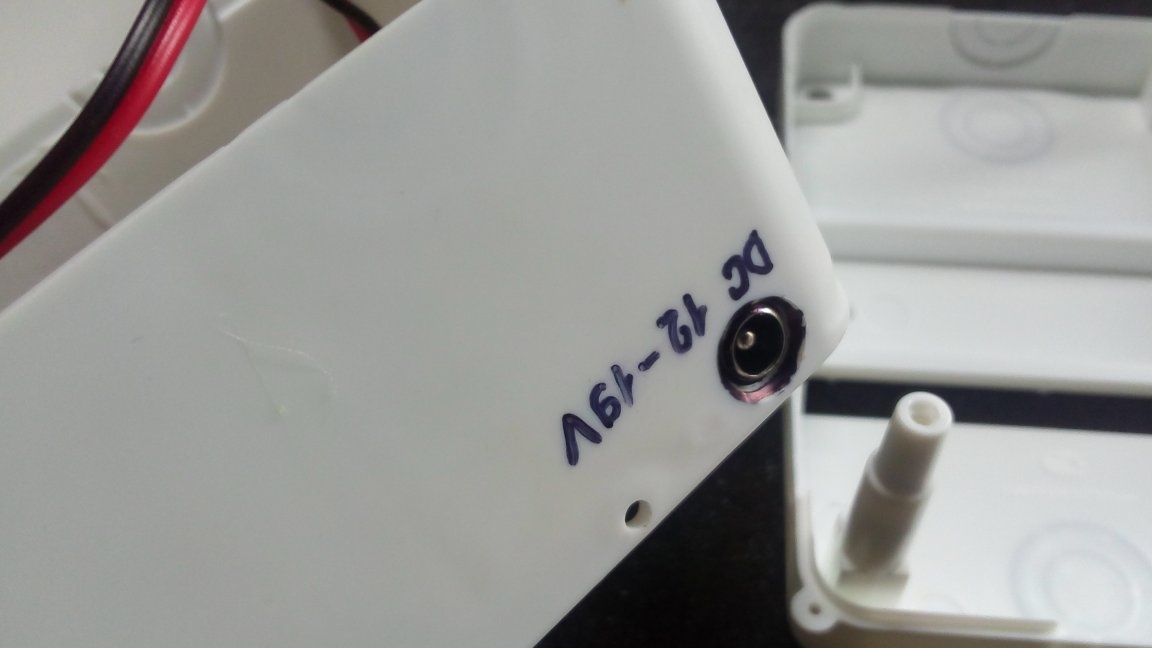
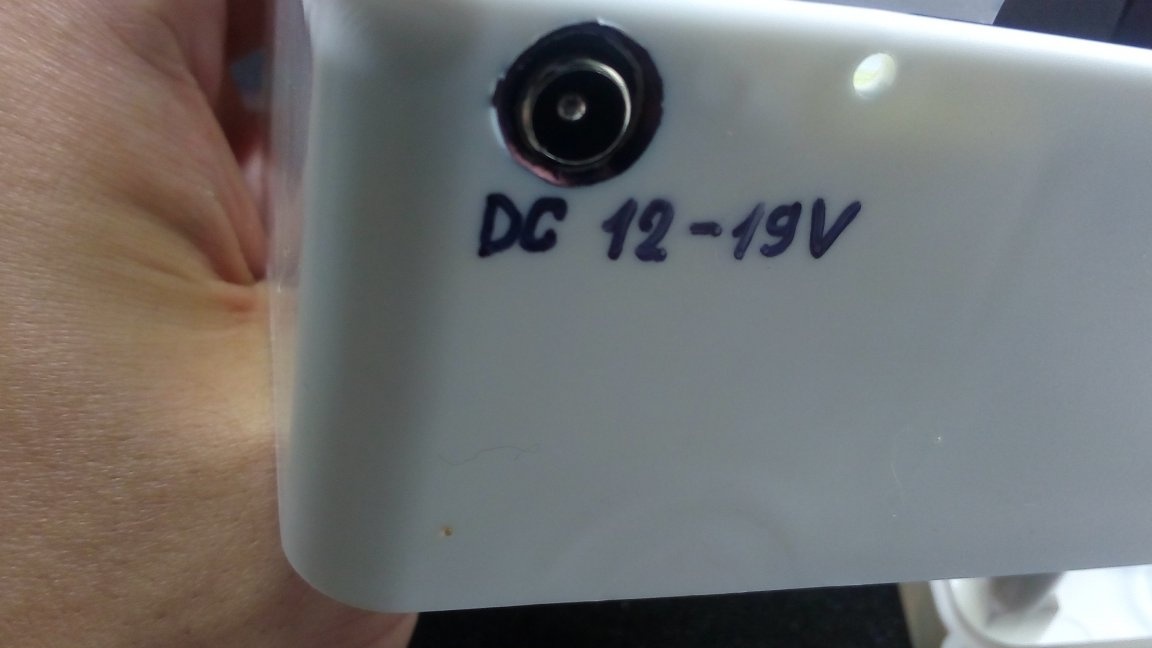
step 5. Soldering wires. Cut the heat shrink to size + a margin of 1 cm on the legs of the acoustic block, put on the wire and solder according to the color of the terminals (Red - red, black - black), then heat shrink and cut off another piece of wire to connect to the power connector (in the center +, around -) , tin and tighten in the connector. We expose the power connector and fill it with glue or car sealant. Then we solder the ends of the wires going from the power connector and the pads (red - red, black - black).


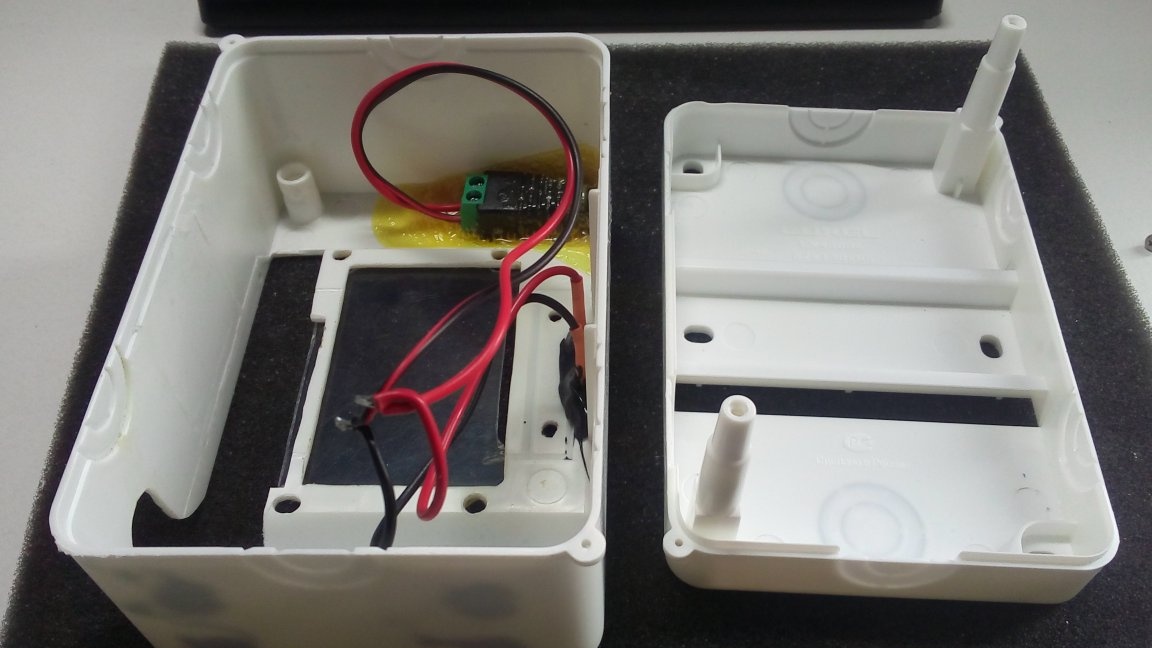
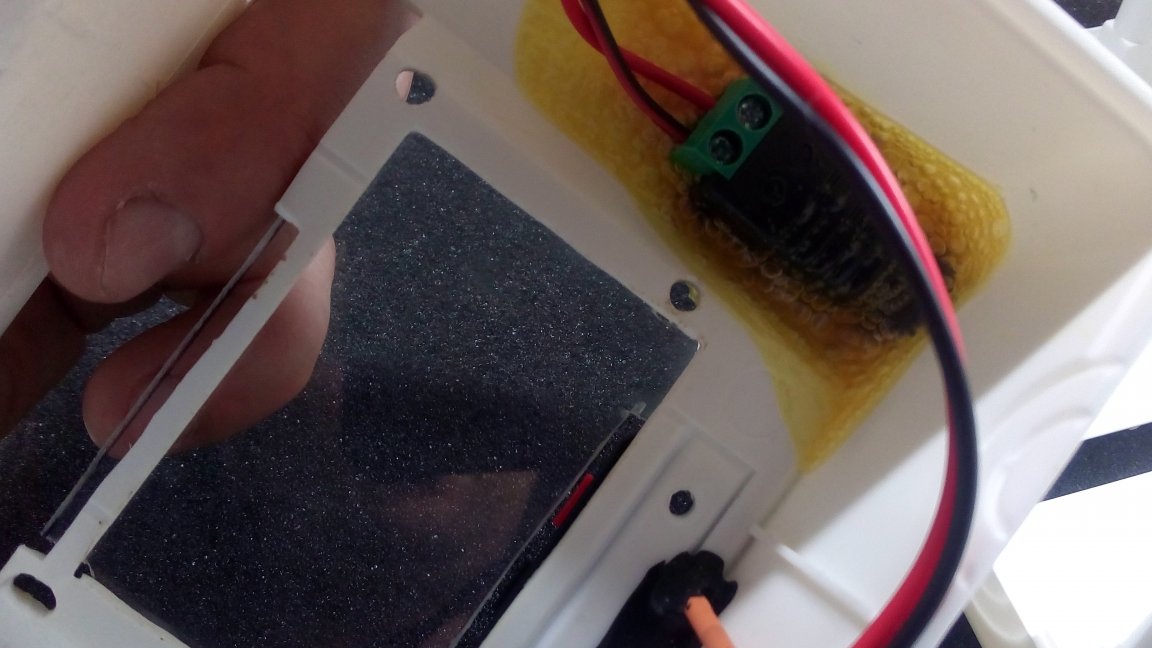
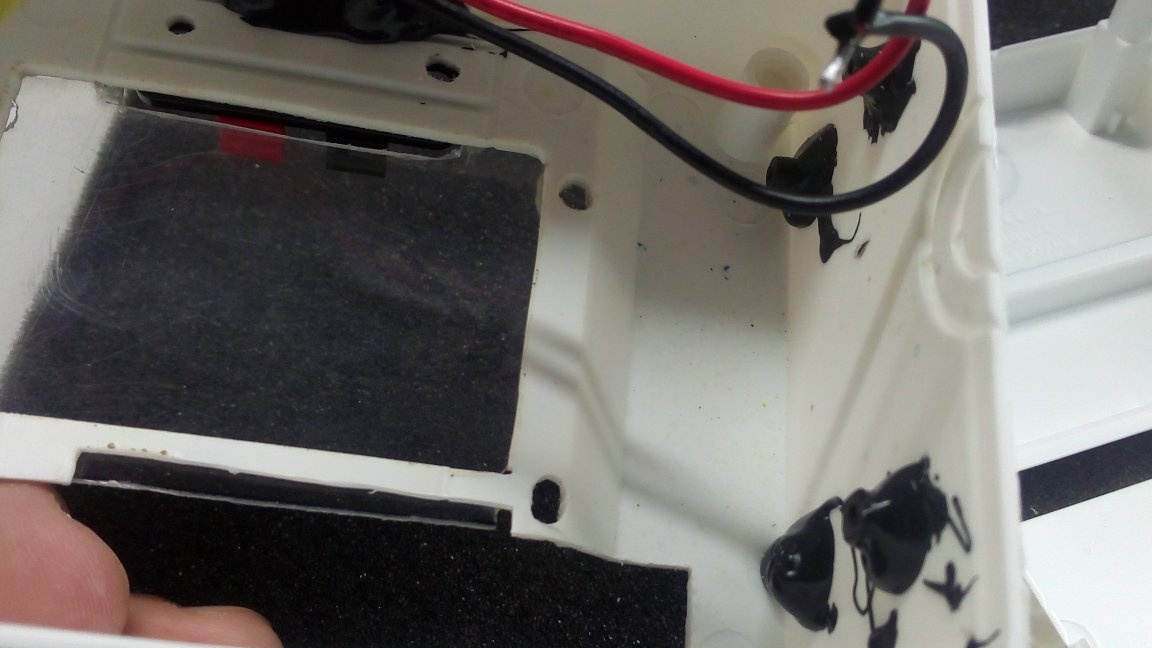
step 6. module fixation. We cut legs from any old technique for self-tapping screws, or we cut the rod from the gel pen into equal pieces. and fasten to the side wall of the housing with glue or sealant, make sure that the mounting holes on the module board coincide with these legs.


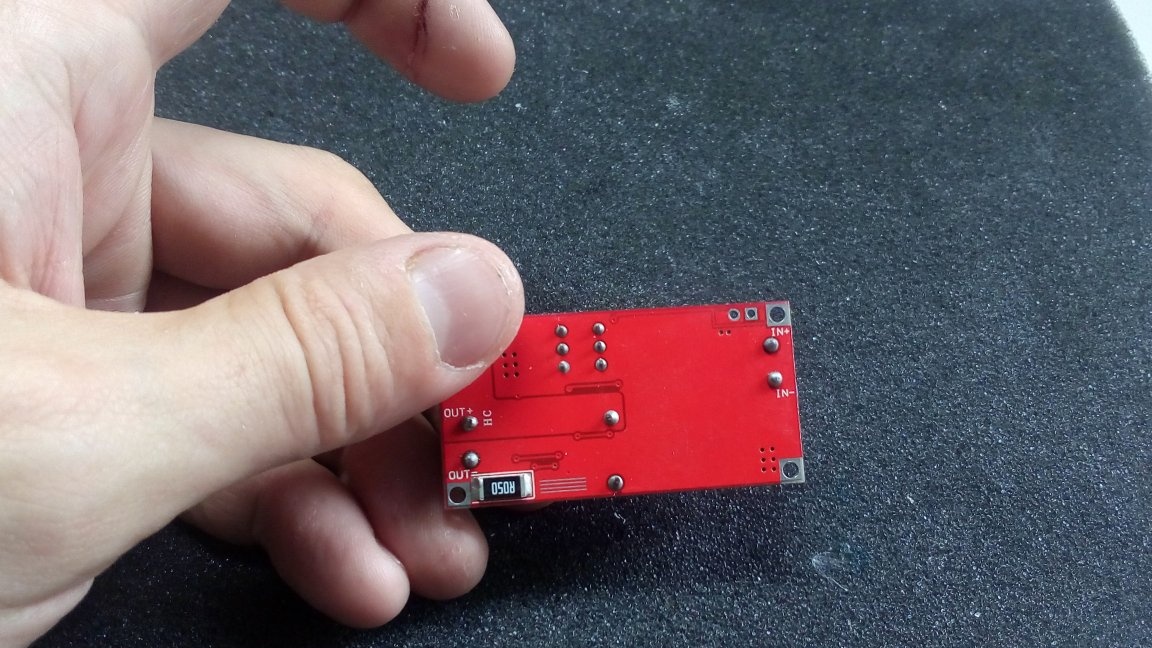
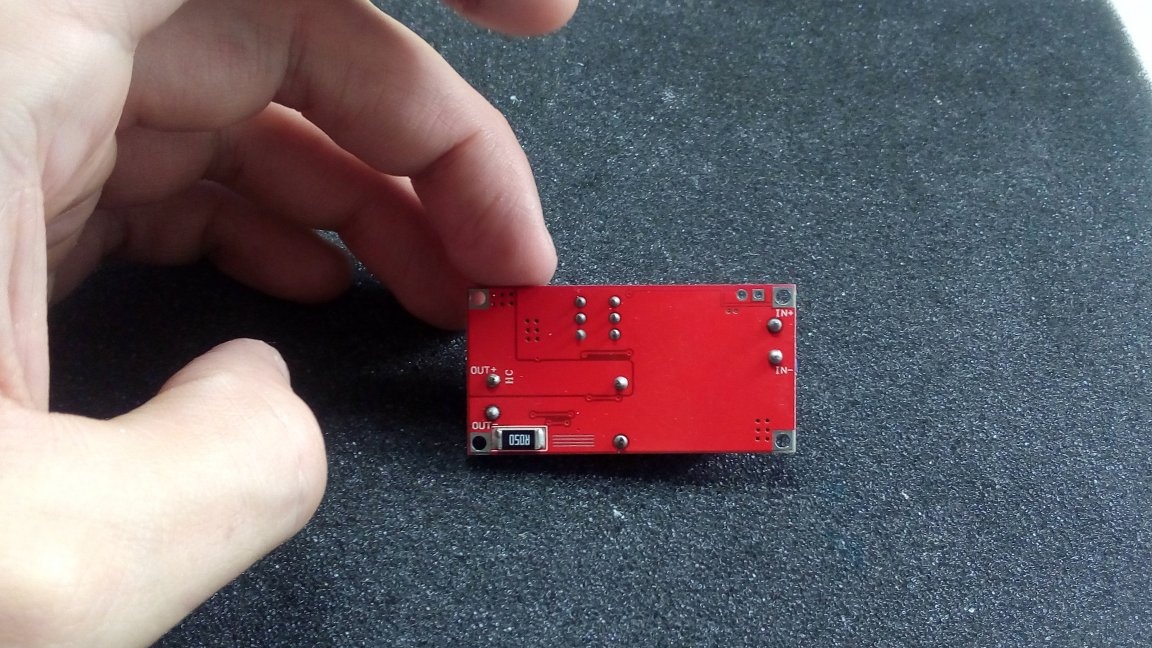
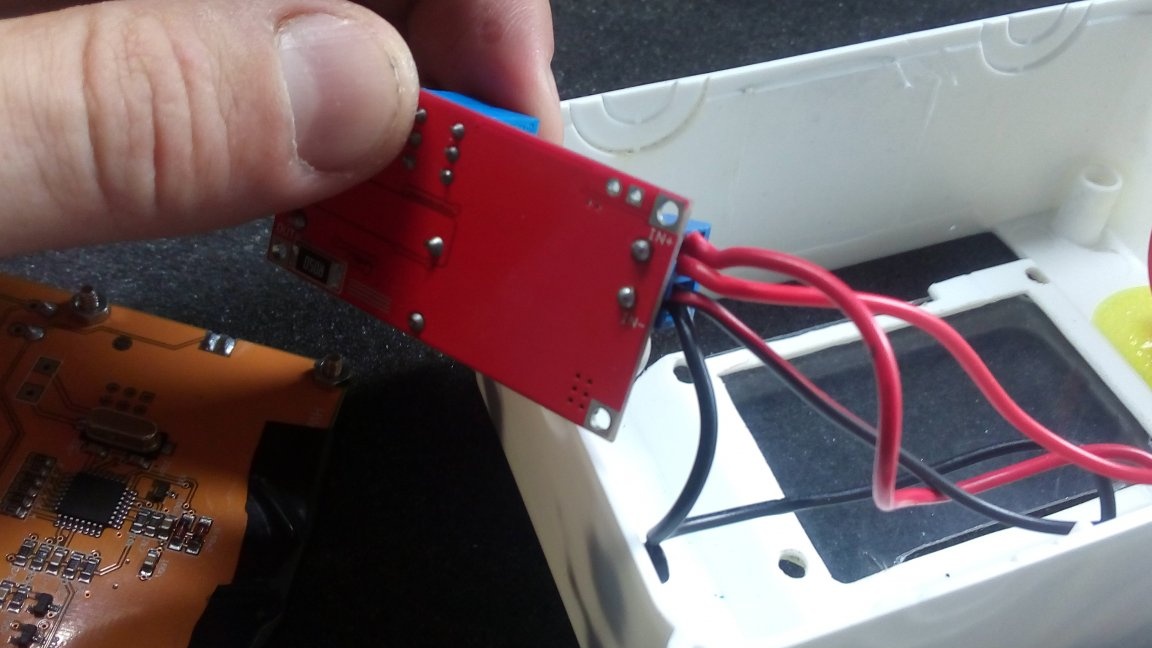
step 7. Module setup. If the crown power is 9 volts, respectively, and at the output from the module should be 9 volts. And where is the module input, and where is the output ????? Everything is simple here. There are signatures under the terminals on the back of the module.IN + means incoming plus, IN- means incoming minus. OUT + and OUT- outgoing plus and minus, respectively. Having fixed the module, we connect soldered wires from the power connector and pads to the IN + connector red, the IN- connector is black.


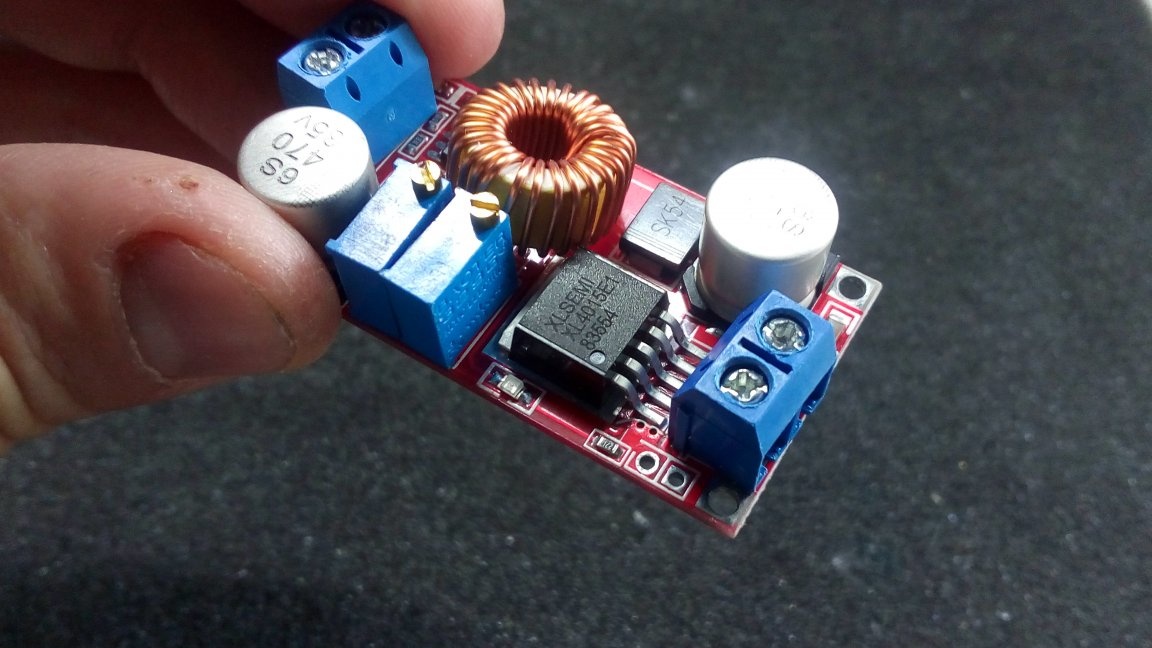
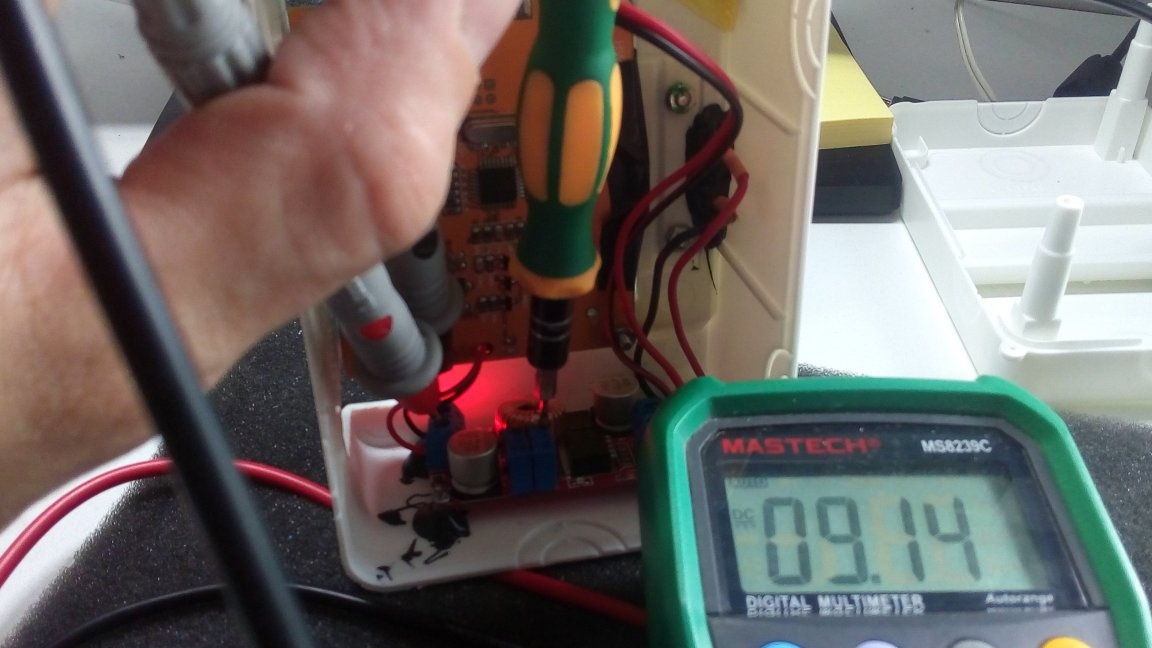
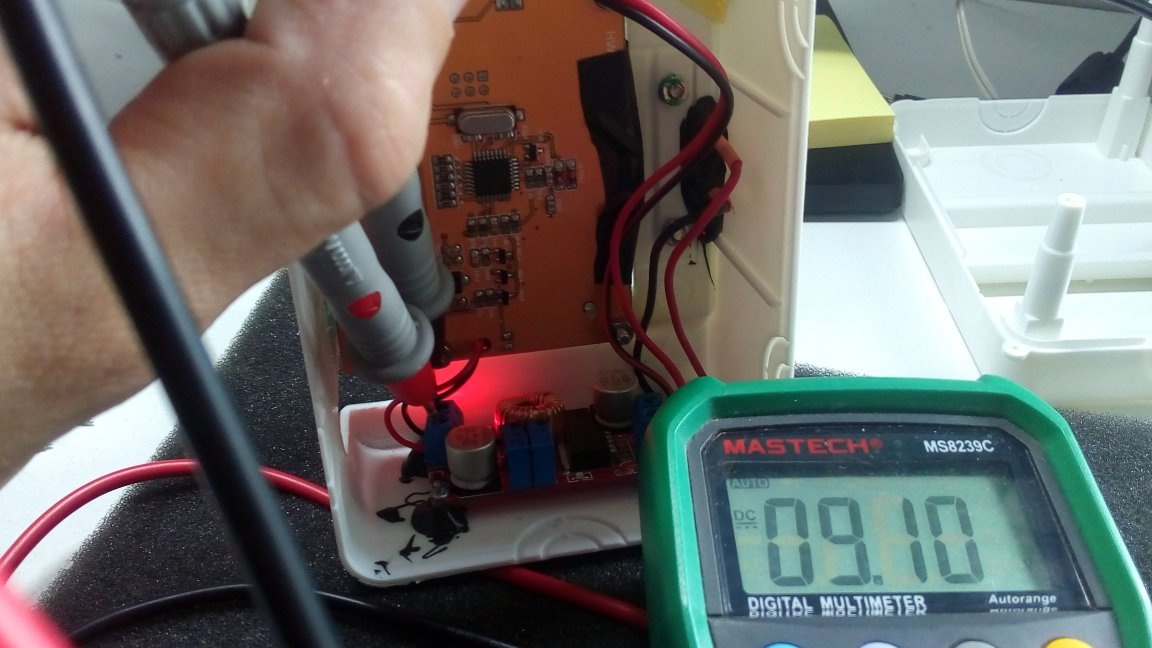
step 8. Setting the output voltage of the module. Here you will need a multimeter and a power source, for me this source was a Chinese 12V power supply connected to the power connector. After connecting, we take a multimeter and set it to the DC voltage test mode. We install the probes on the outputs OUT + (Red probe) and OUT- (Black probe) and with a thin screwdriver we begin to turn the potentiometer until we see the 9c we need on the multimeter display. This completes the configuration of the module.


step 9. Device connection. We disconnect the power source and take the wires from our component tester and connect to the terminals of the terminals of the OUT + (Red) OUT- (Black) step-down module. and fix the module on the prepared legs with small screws.


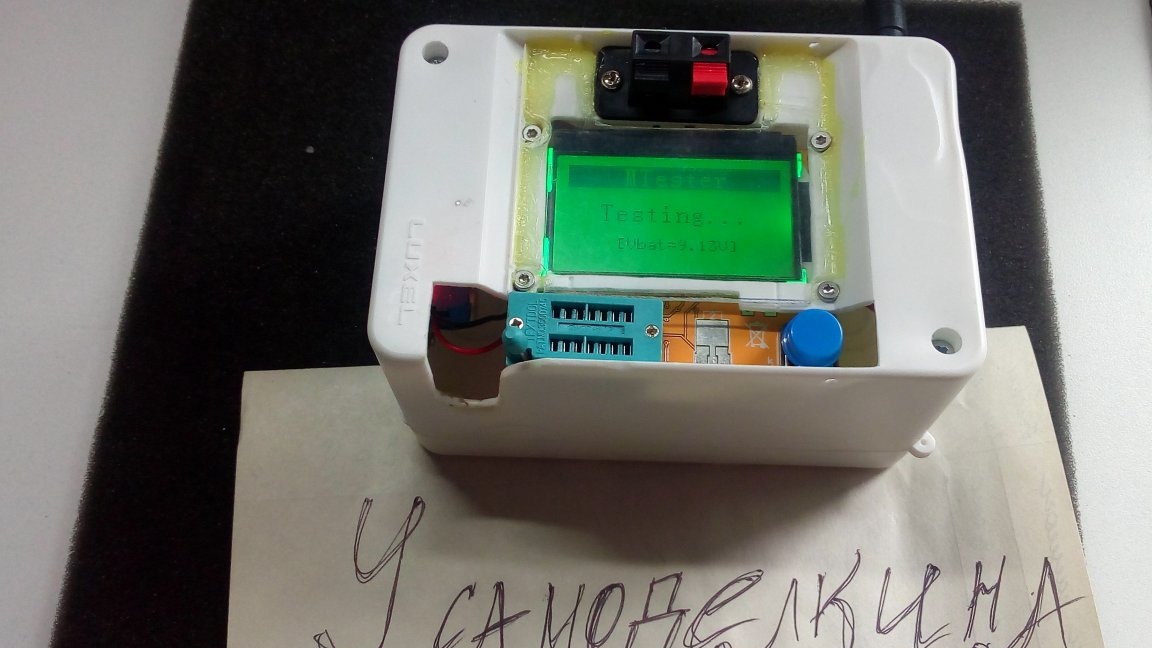
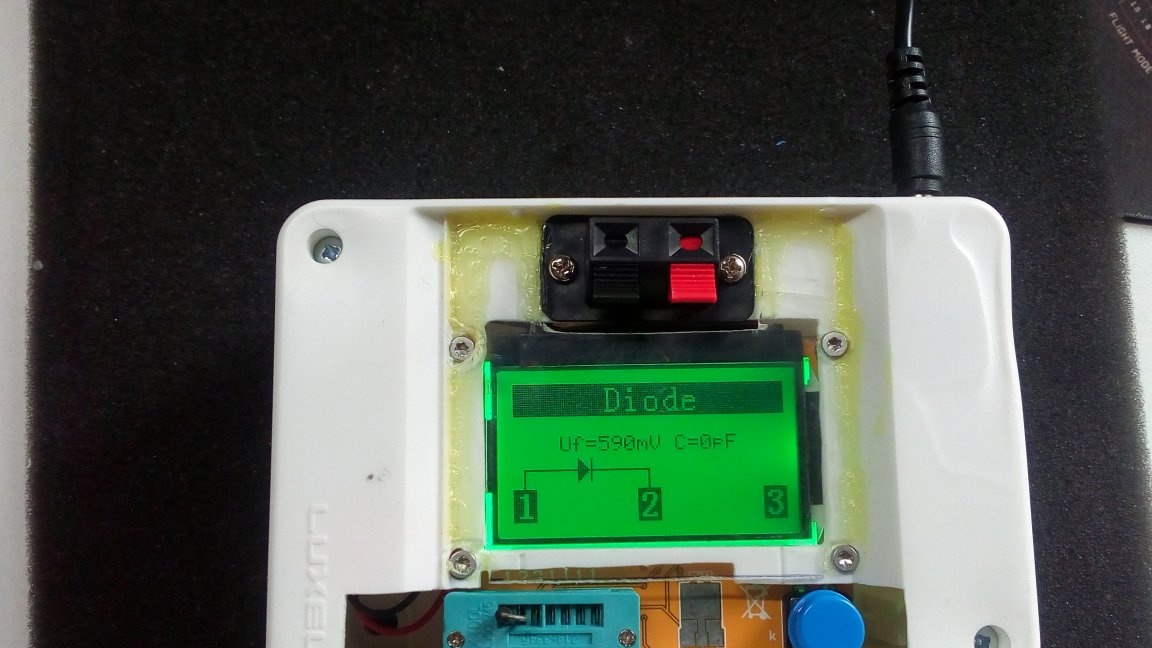
step 10. Assembly and inspection. We select the wires, check the reliable fastening of the wires in the terminals, assemble the case and connect the power source and check. Now you can take the device with you and not worry that it will break or crack, you can still buy or take a suitable power supply, especially since they cost a little more than the crown, and their resource is higher. Good luck to everyone, health and goodness! Do not judge strictly, this is my first post.


9
9.7
9.2

Add a comment

    • smilesmilesxaxaokdontknowyahoonea
      bossscratchfoolyesyes-yesaggressivesecret
      sorrydancedance2dance3pardonhelpdrinks
      stopfriendsgoodgoodgoodwhistleswoontongue
      smokeclappingcraydeclarederisivedon-t_mentiondownload
      heatirefullaugh1mdameetingmoskingnegative
      not_ipopcornpunishreadscarescaressearch
      tauntthank_youthisto_clueumnikacuteagree
      badbeeeblack_eyeblum3blushboastboredom
      censoredpleasantrysecret2threatenvictoryyusun_bespectacled
      shokrespektlolprevedwelcomekrutoyya_za
      ya_dobryihelperne_huliganne_othodifludbanclose
19 comments
Guest Anatoly
I ordered with a case
Please throw off the reference, I'm also looking right away in the case. Unpacked managed to ditch, a separately ordered case did not fit! scratch
Guest Anatoly
I ordered with a case.
And the fact that these two batteries are priced as a power supply will come out
And yet the batteries require attention, fail at the most inopportune moment. And even when I had to work in the field, I always threw a powerful UPS into the car, and 220 V in the field is not a problem! yes
Author
And the fact that these two batteries at a price like a power supply will not come out the top of dibilism?
Guest Anatoly
The top of dibilism is to tie a stand-alone device to a network with a wire. Two 18650 batteries in series, instead of the crown. They give a voltage of 8.5 volts. The device works stably until a voltage drop of 6.5 volts. With such batteries, one charge lasts for half a year.
I have preserved 2 cases of the first-aid kit. Usually, I made my devices in them and drove them to the military. Crohn there, of course, as a power source. But, the first aid kit lid was hard to close.
Morphine was seized in the medicine cabinet, and taren were forgotten (taren in case of poisoning by Phos). In a normal state, it causes hallucinations. I have not tried it myself, I saw notes on my friends.
Ivan_Pokhmelev
Could be perverted, cut the bottom under the battery
A hammer "Crown" flatten, weak? xaxa
P.S Sorry, something my sores let me go today, instead of sarcasm humor popper!
Ivan_Pokhmelev
Switching power to the entire network is not an optimal solution
I agree, autonomy, mobility, are sometimes very useful! smile
Transferring power to the entire network is not an optimal solution. I would leave the possibility of switching to battery power: the applied power module, due to its interference, will degrade the accuracy and reproducibility of the measurement results.
Author
This is a rational solution.
Ivan_Pokhmelev
I stuffed a similar module with the Krona and the power switch into the case from an individual first-aid kit
And I ordered the case on Ali, did not fit through the holes, apparently another model, now I will order immediately in the case, to replace the singed one! yes
Author
Blister is also possible. But I didn’t have it at hand
Author
There was no suitable container. dontknow Sawed from improvised means
Quote: Korolev
I will buy immediately in the case!
I stuffed a similar module with the Krona and the power switch into the case from an individual first-aid kit. The thickness of the “Krona” slightly does not allow the lid to close completely. It would be possible to pervert, cut the bottom under the battery, but I was fine with that.
Scarfikator90
I screwed up 1 box, from 2 times it turned out fine
I would take plastic from the packaging (blister) and cut out with scissors! yes
Author
False glass yahoo
Scarfikator90
And glass is made simply. Take a plastic box from the cd disk.
This is exactly what I wanted to say that plastic is not glass! smile
Author
Thanks. And glass is made simply. Take a plastic box from the cd disk. We need a transparent top. We put it on top of the box, draw a marker with a marker a bit with a margin (about 3 mm), attach a steel clip to the soldering iron and melt it. We remove the chamfer with a file. But you have to do it very carefully. The kink plastic is weak. I screwed up 1 box, it turned out fine 2 times. Thank you for your appreciation and success to you!
Glue use moment crystal. At my fingertips was only from Price's fix. He left a lot of bubbles.
Z.Y. I sympathize with the device burned by the capacitor. I almost cut the display cable from my device. Tape away from sin with tape
place for display, pads, buttons and make holes for the screws to secure the board, cut a piece glass and glue on top to protect the display
Actually, this is not just a button, it is a joystick, you need to take into account the slight movement of the key! About glass in more detail, please! In general, I like it when a person adapts to his goals what is at hand, rather than looking for CNC, well done! I had a similar task, but while thinking - burned, did not discharge the tested capacitor! I will buy immediately in the case! good

We advise you to read:

Hand it for the smartphone ...