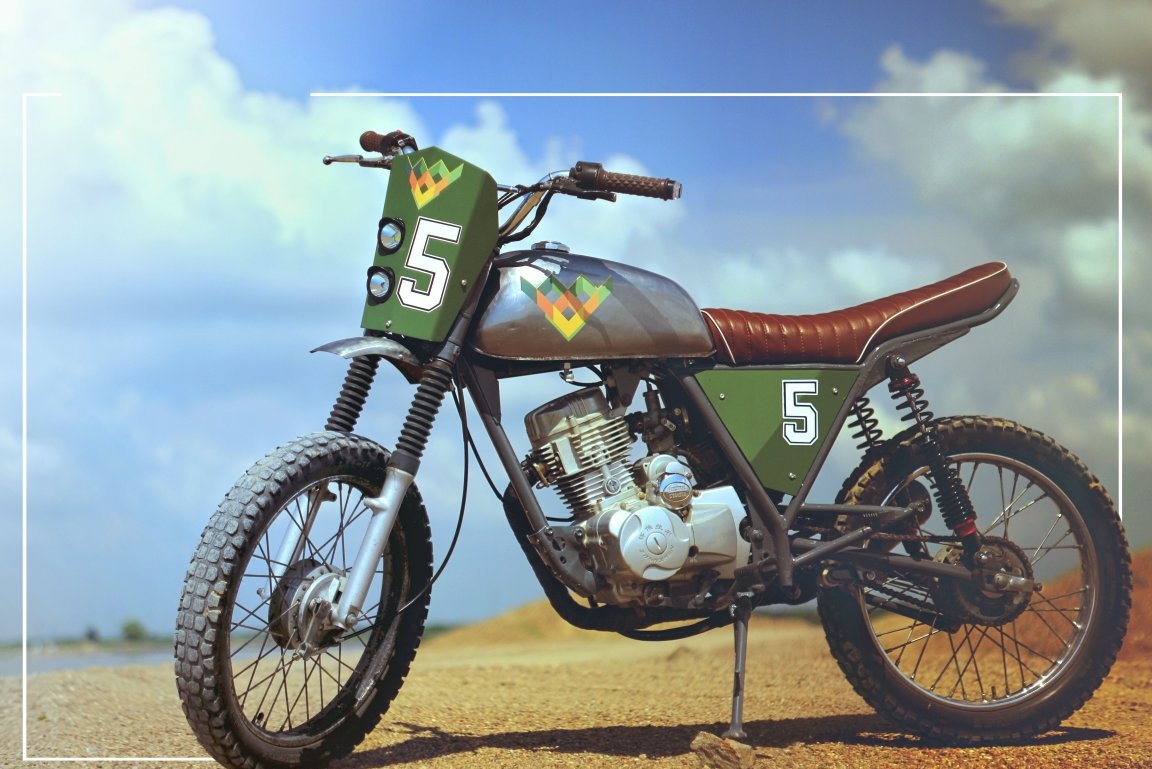
Main distinguishing feature auto or moto custom projects, are the unique parts used in the construction. Uniqueness as a rule means that the part is manufactured or modified and differs constructively or visually from the factory (mass) counterpart. We will talk about manufacturing such a part from scratch. So make a motorcycle saddle do it yourself!
When I had a need to replace the saddle, I tried to take the old factory as a basis, remake its frame and foam filler, and then re-tighten it with “leather”. This option seemed the simplest and fastest (it seemed to me that way, but it was a big mistake). I will not delve into the description of many different unsuccessful attempts, but rather I will immediately describe the option that fully satisfied the stated requirements.
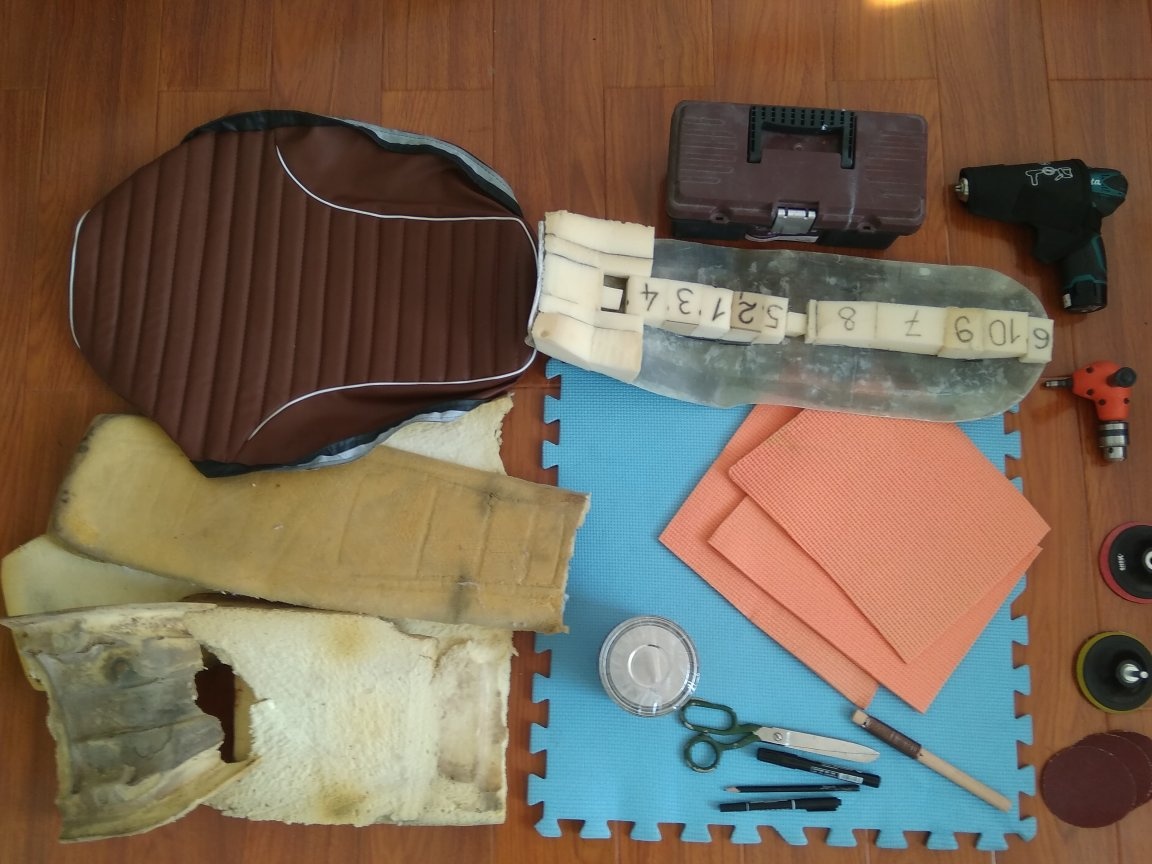
Materials:
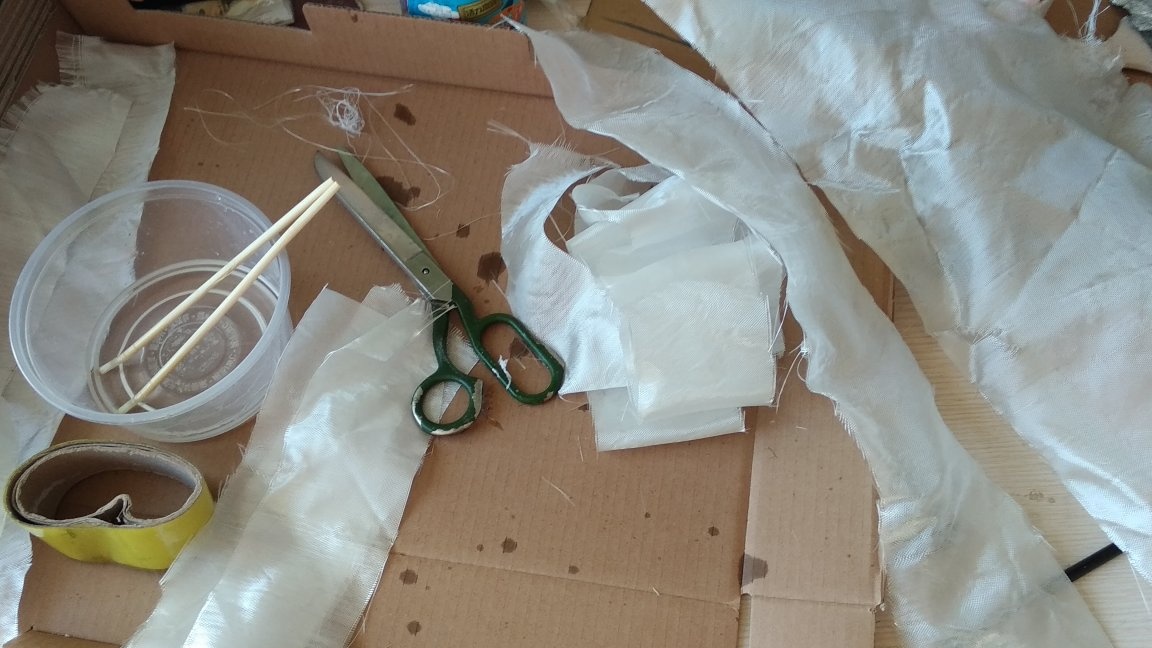
1. Fiberglass 2 m \ p
2. Epoxy resin 1.5 L + 500 ml hardener
3. Bolts
4. Reinforcing mesh (just in case)
5. Scotch tape
6. Molar adhesive tape with plastic film
7. Sandpaper
8. Pencil, ruler, marker
9. Cladding material or finished cladding (Link Taobao)
Instruments:
1. Hacksaw
2. Files
3. Stationery knife
4. Scissors
5. Tray for mixing epoxy
6. Spatula
7. Drill and drill
8. Screws
Step 1.
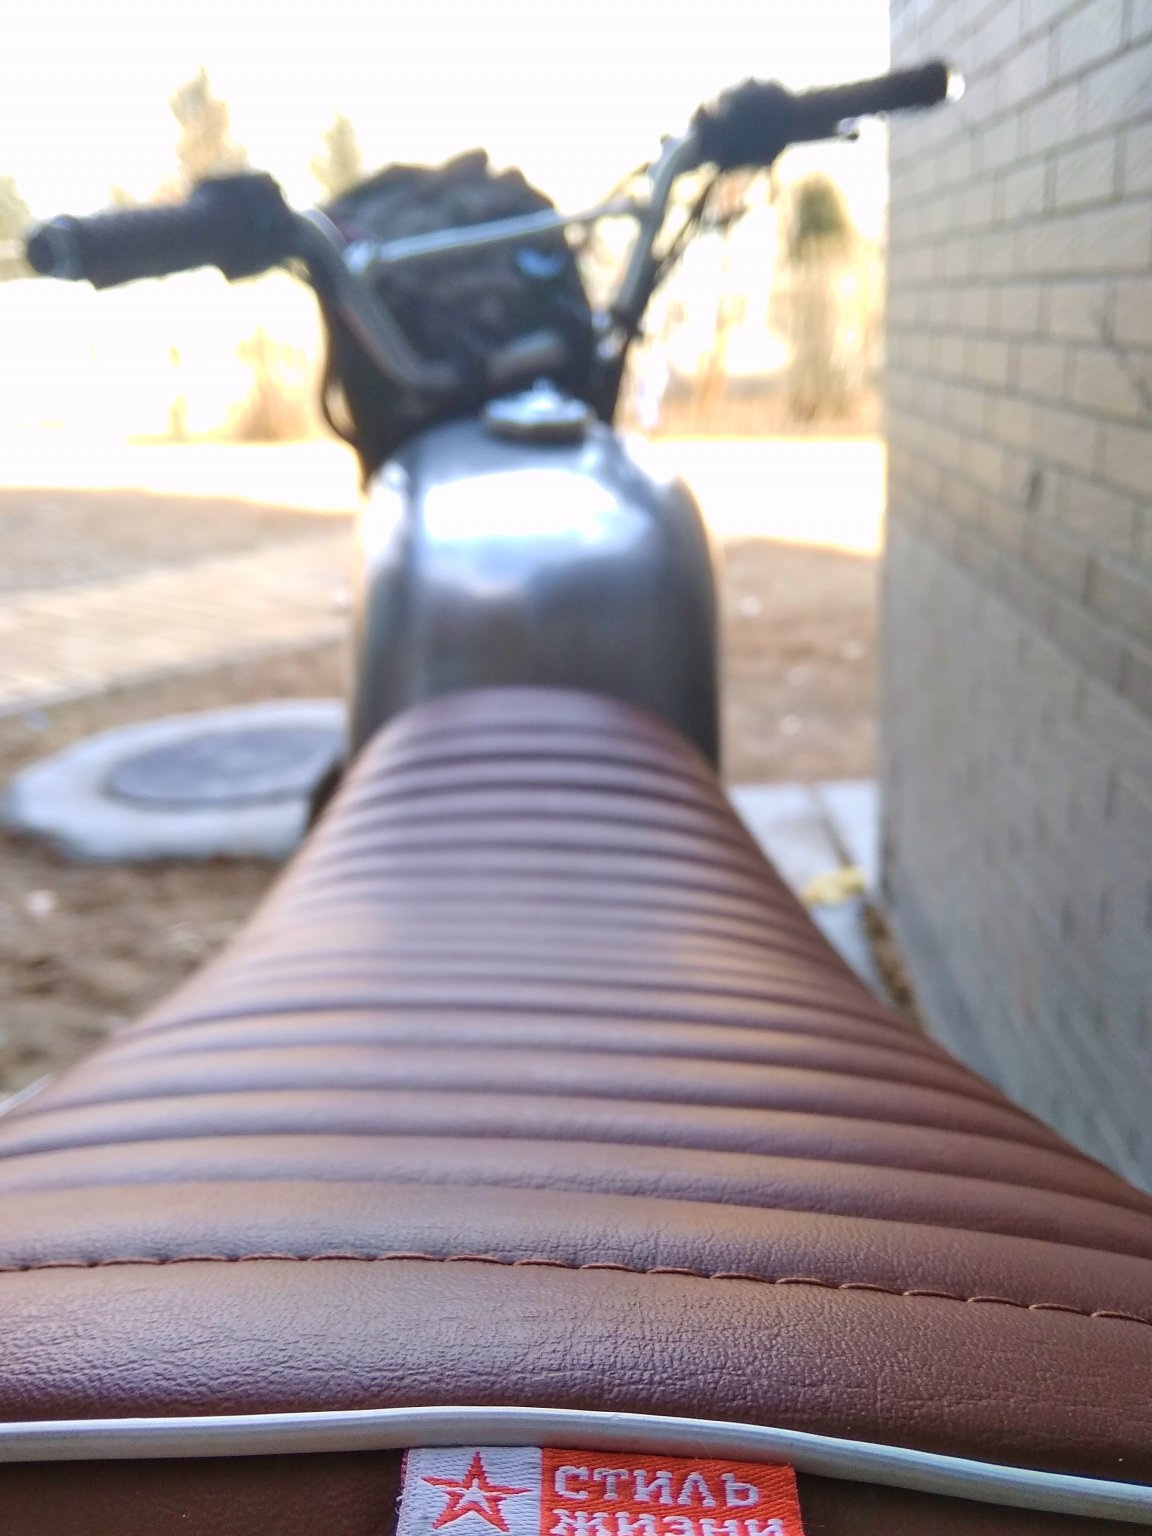
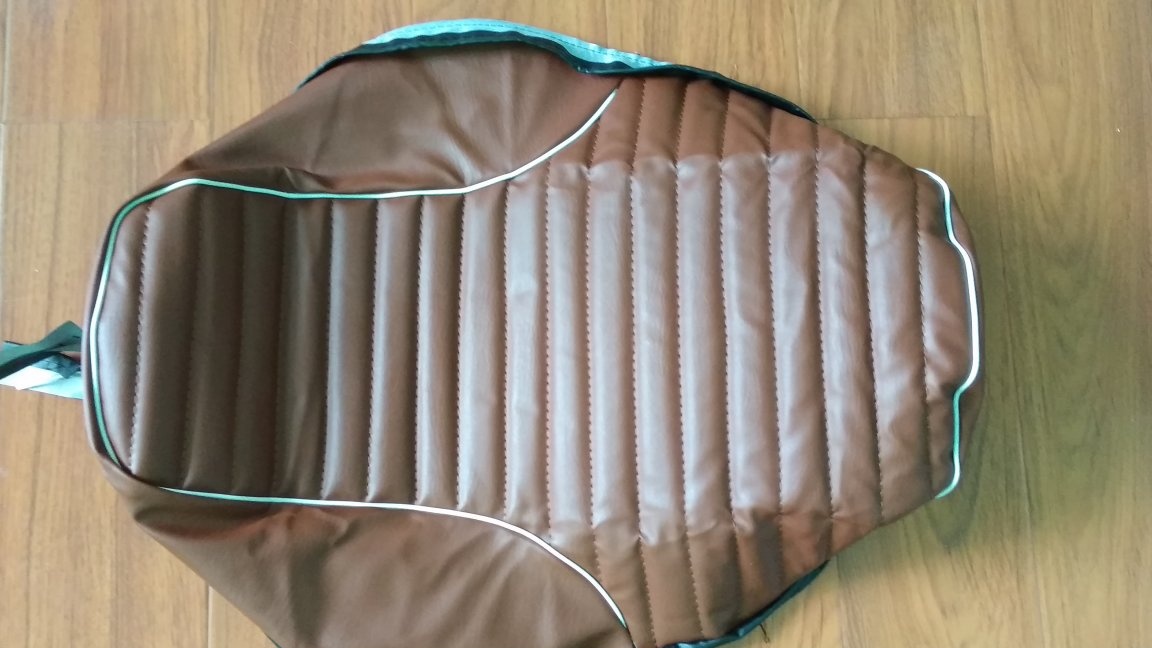
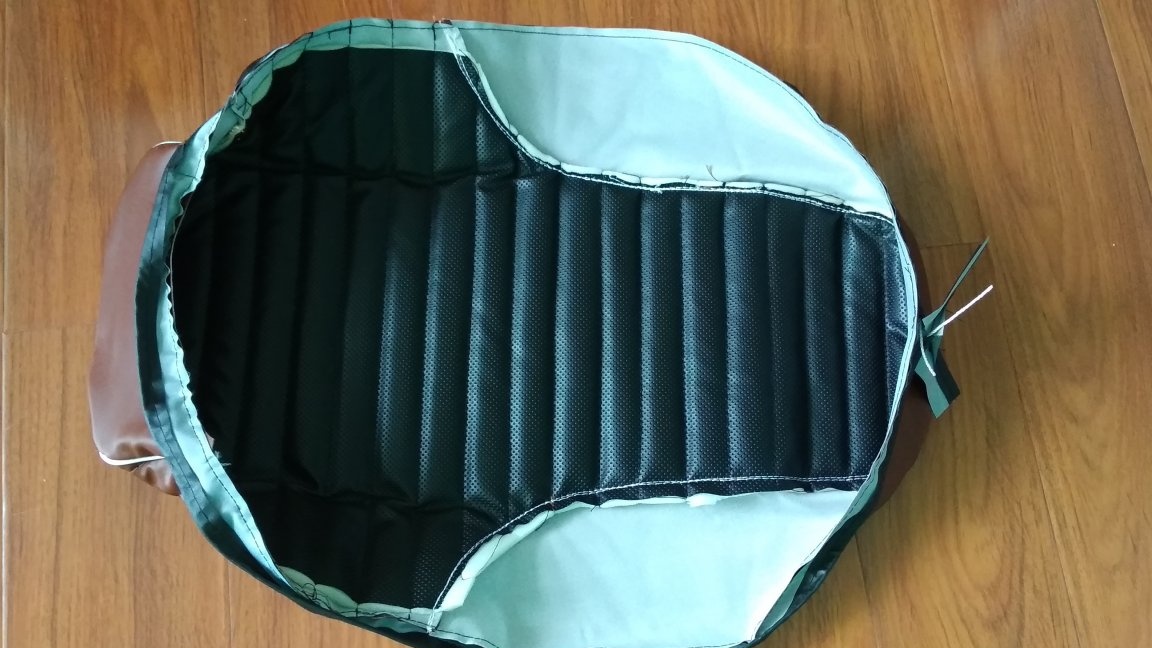
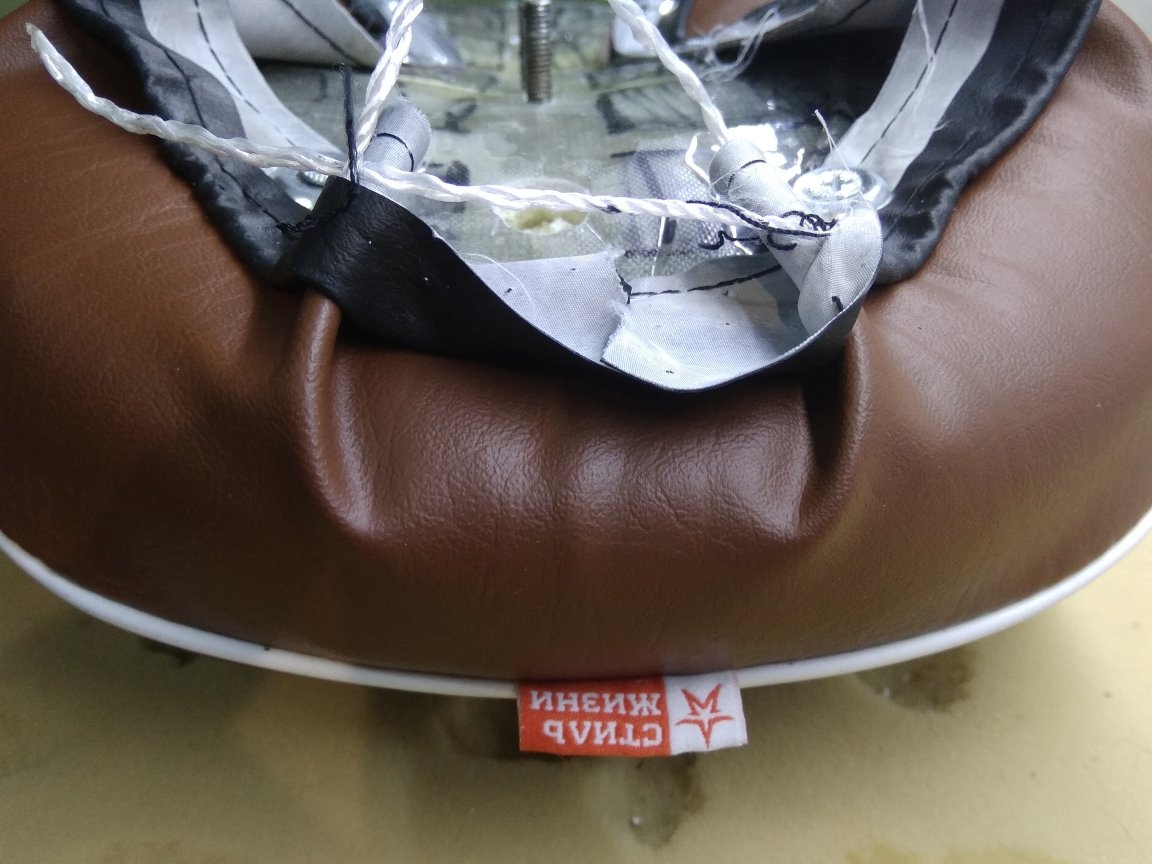
Since I don’t have a sewing machine, I just ordered the saddle trim on the Internet. Chose by color and style. And then, already under the cut, I adjusted all the other parameters of the future seat. Of course, it would be better to sew the skin under motorcyclerather than building a motorcycle for the skin. But there was no opportunity to sew, and the option to order in the studio, where professionals will fulfill any whim for your money, turned out to be too expensive. As a result, I bought a finished sheathing and added a shortcut from a T-shirt for beauty. It seems to me that just such little things make casting interesting. Actually around this label, the whole motorcycle design was later developed, but this is a completely different story.

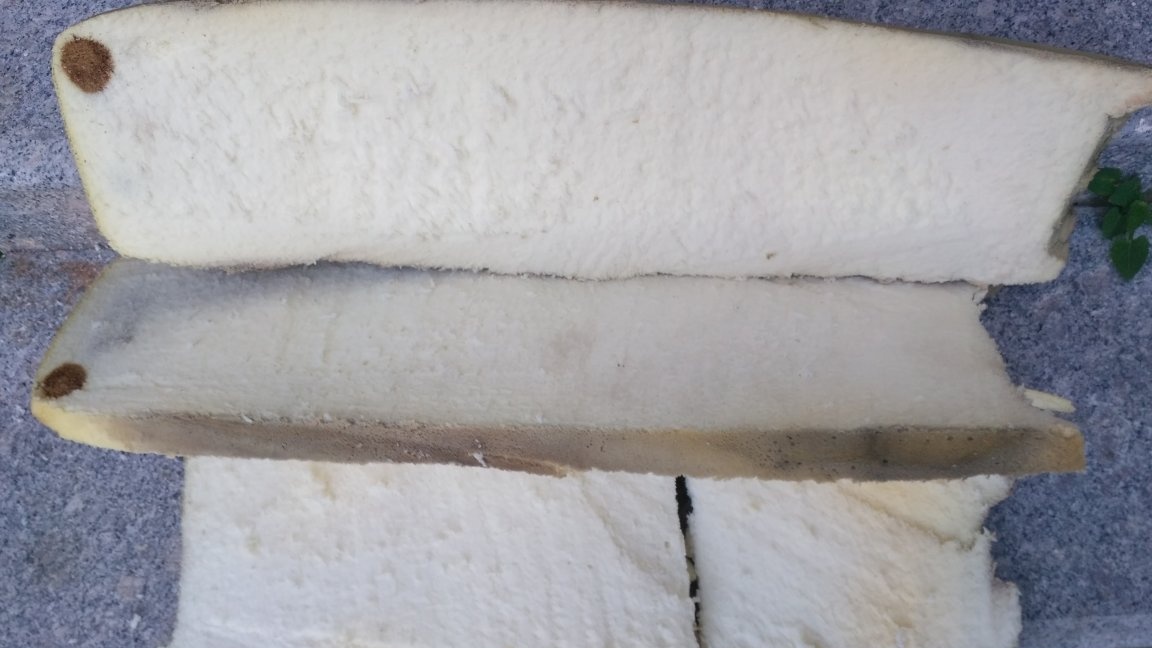
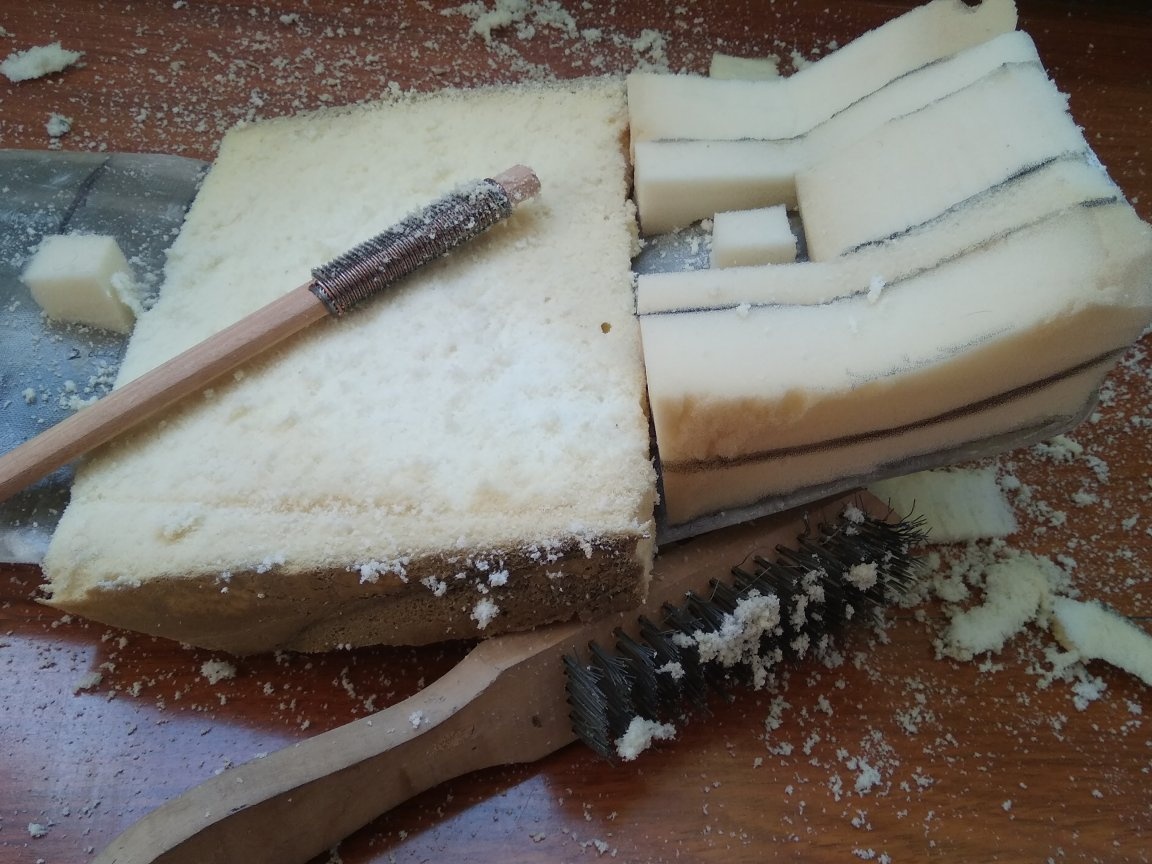
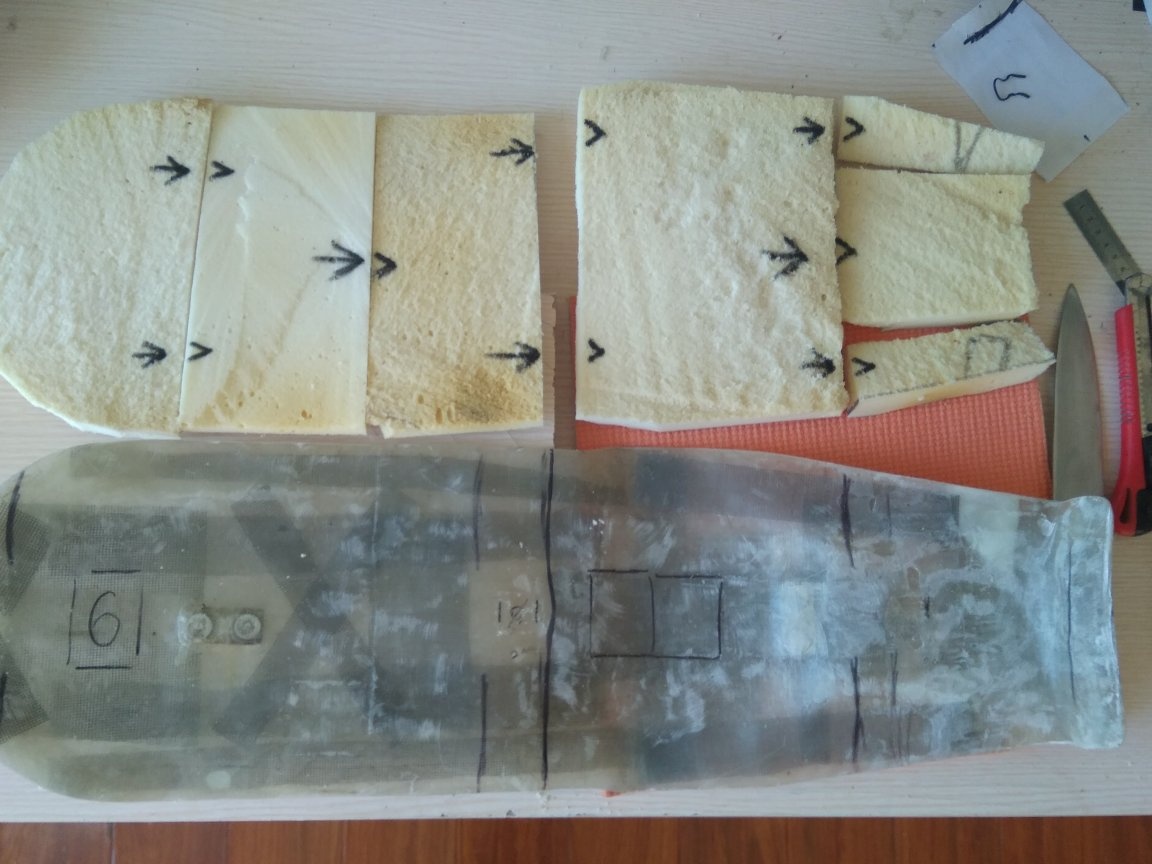
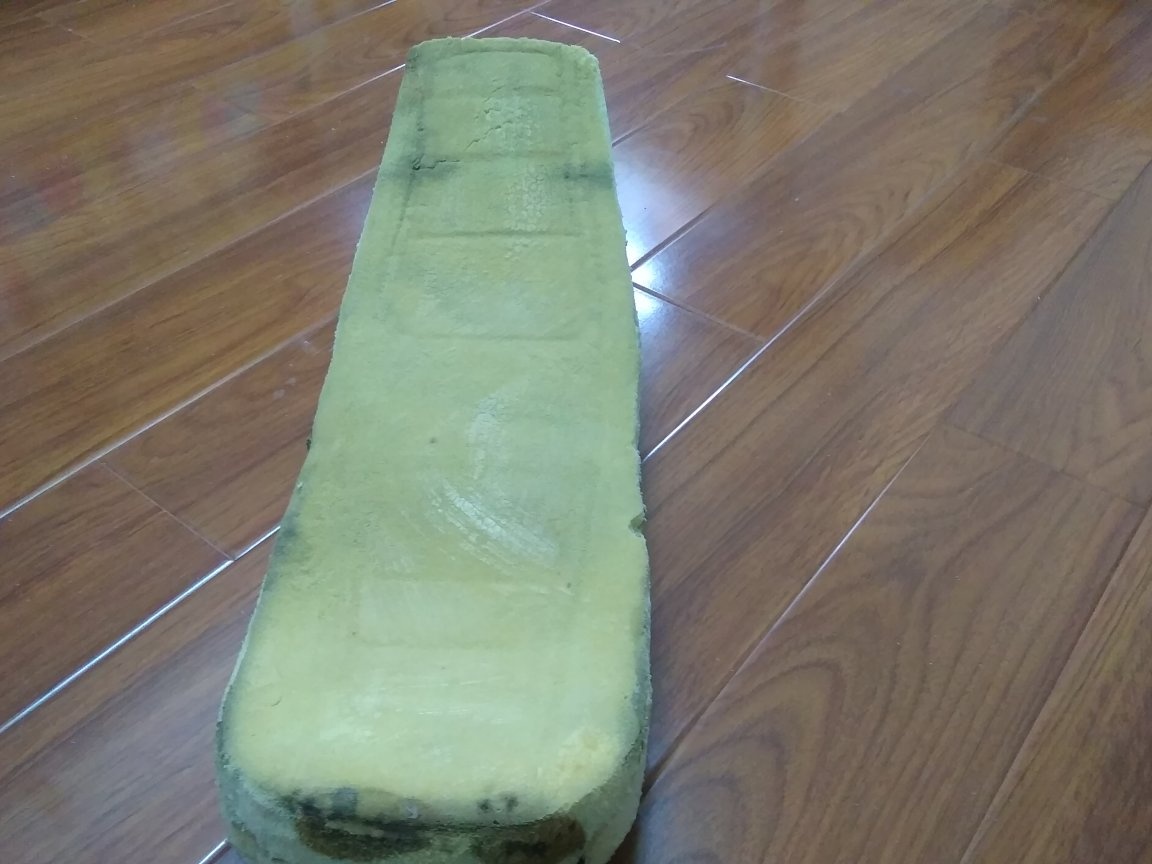
Foam rubber initially used furniture, but after making a trial version of the saddle, it refused such a decision. The problem was that if you cut enough narrow elements out of it, then this foam rubber is too soft, although it seems to be a solid sheet.Then there was the option of polyurethane (tourist rugs) laid in layers, but it was already too tough. In general, it turned out that invent bike pointless and the best option is just to use foam rubber from your own seat.
Initially, I thought that this foam rubber is simply not enough for a new seat, because geometrically they have completely different shapes. But still, this option turned out to be optimal. As a result, he sawed the old foam rubber with layers, so that later he could assemble the desired shape from the fragments (as in Tetris). Looking ahead, I’ll say that there was only enough, and there were no more than a handful of very small scraps left over.

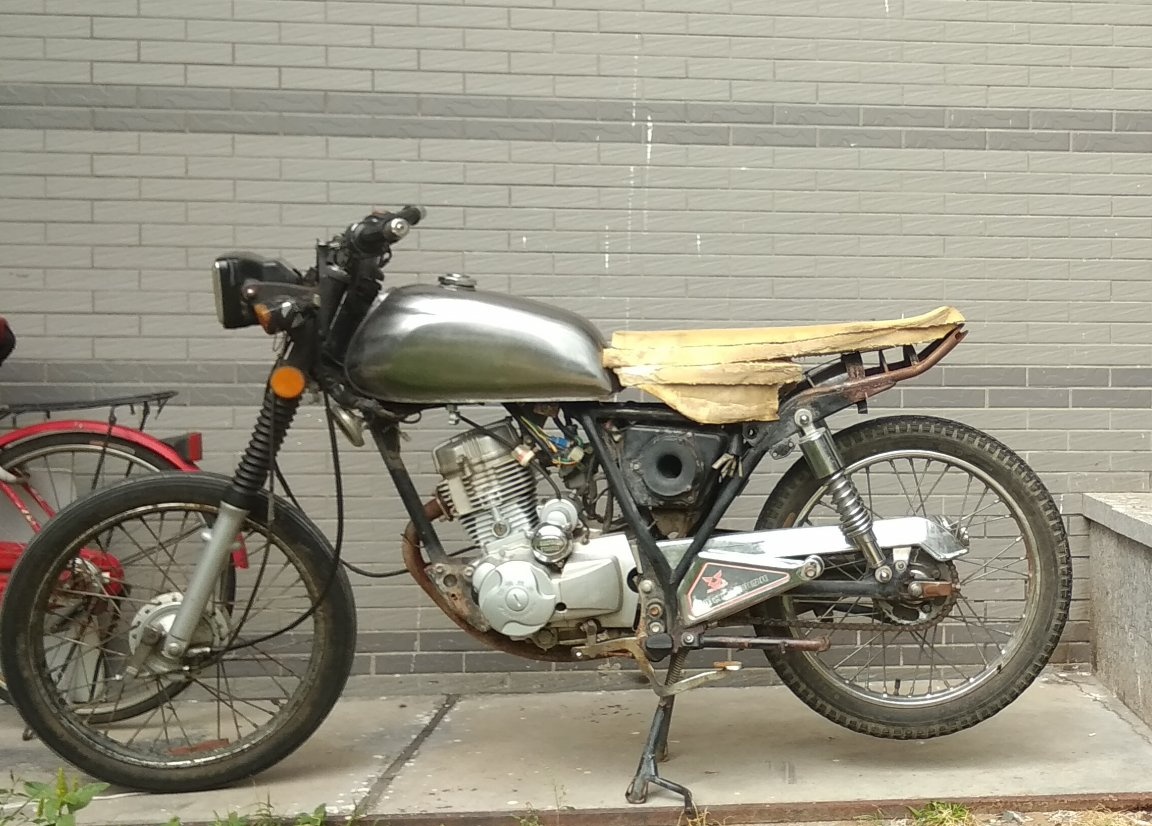
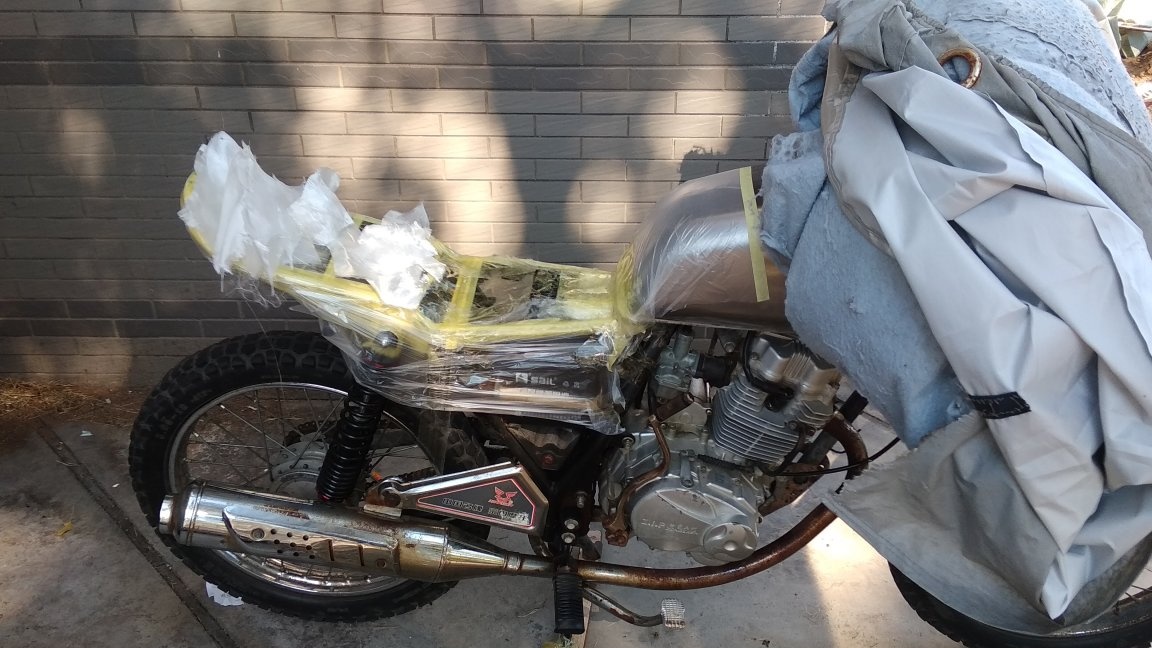
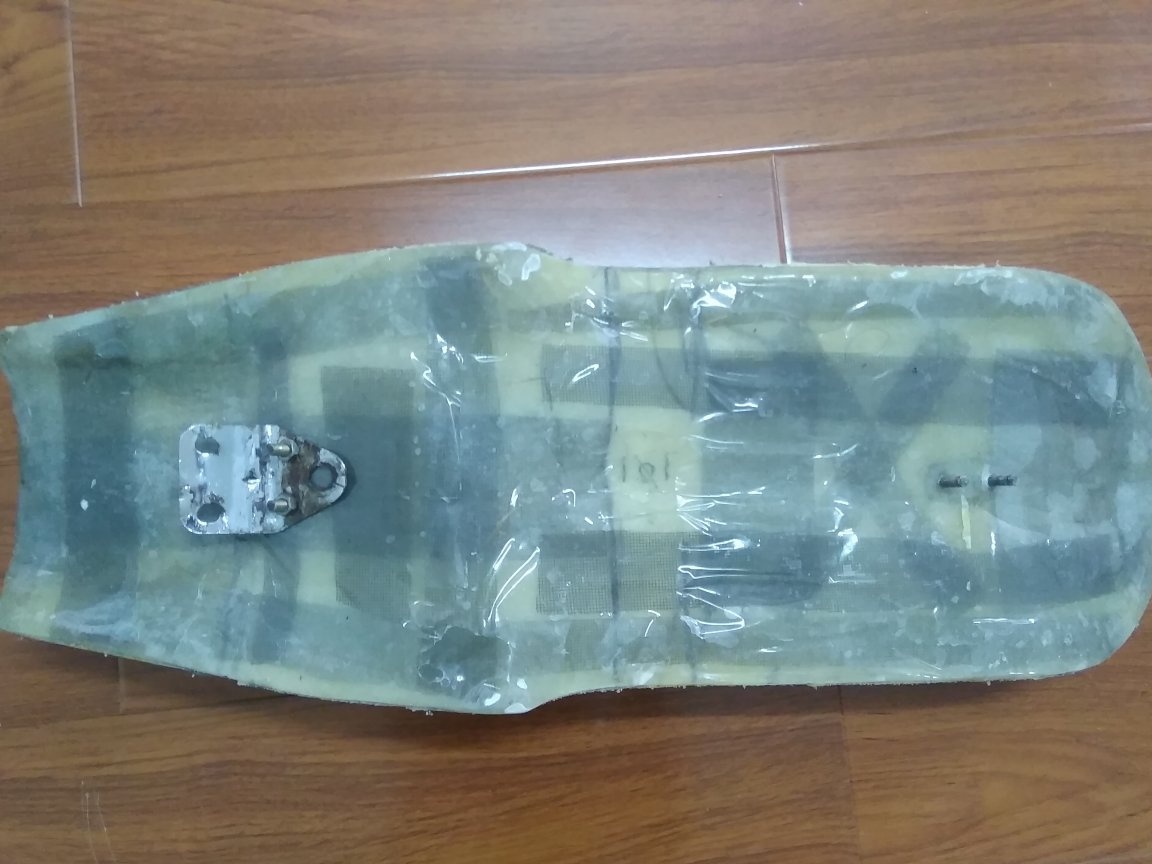
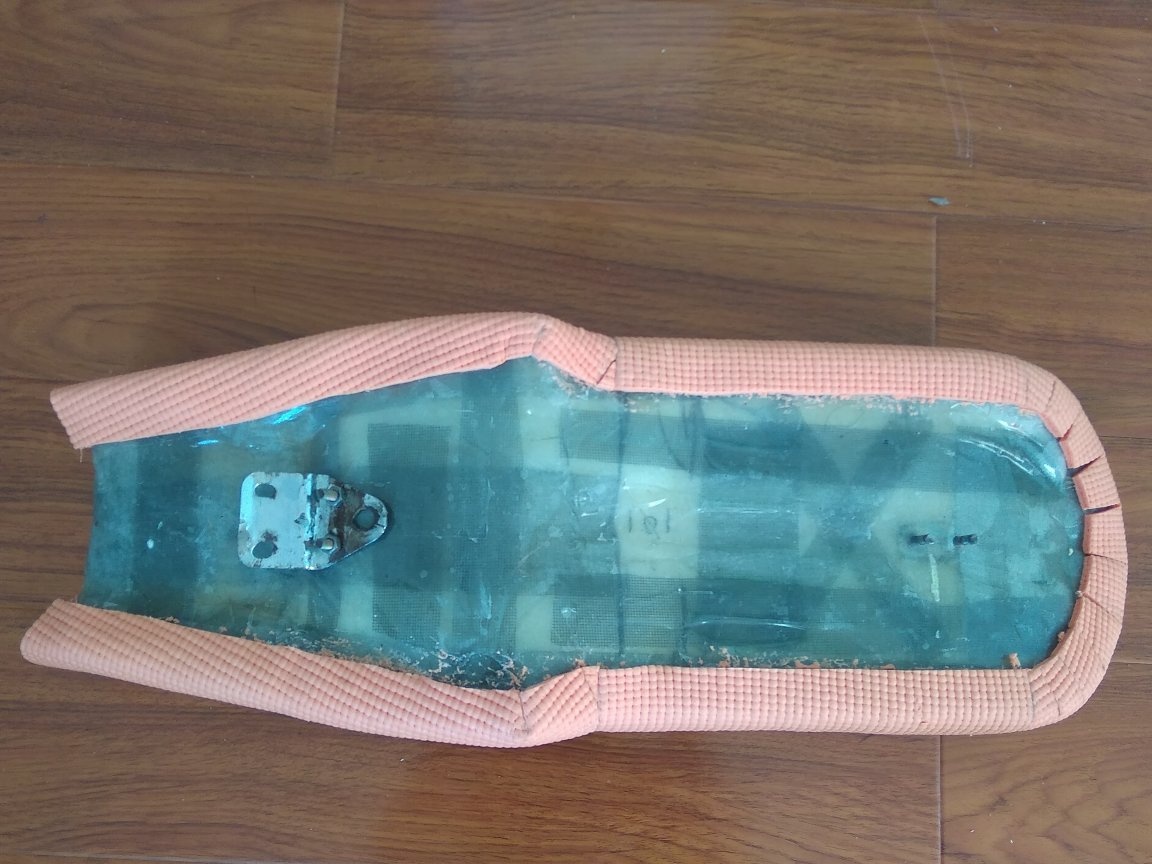
I tried to make the rigid frame of the saddle, which rests on the frame of the motorcycle, from low-pressure plastic (such as water cans), but since I do not have an industrial hairdryer, I heated this plastic with a gas burner. Much later, when I spent a lot of time and effort, they explained to me that open fire for such material is contraindicated. They say that, in principle, a good framework can be made of this plastic. I can not agree with this statement, as I can not refute. In general, after all the experiments, I had to order a good old epoxy and fiberglass. I would not want to avoid this dirty, long and toxic method, but still I could not get out.
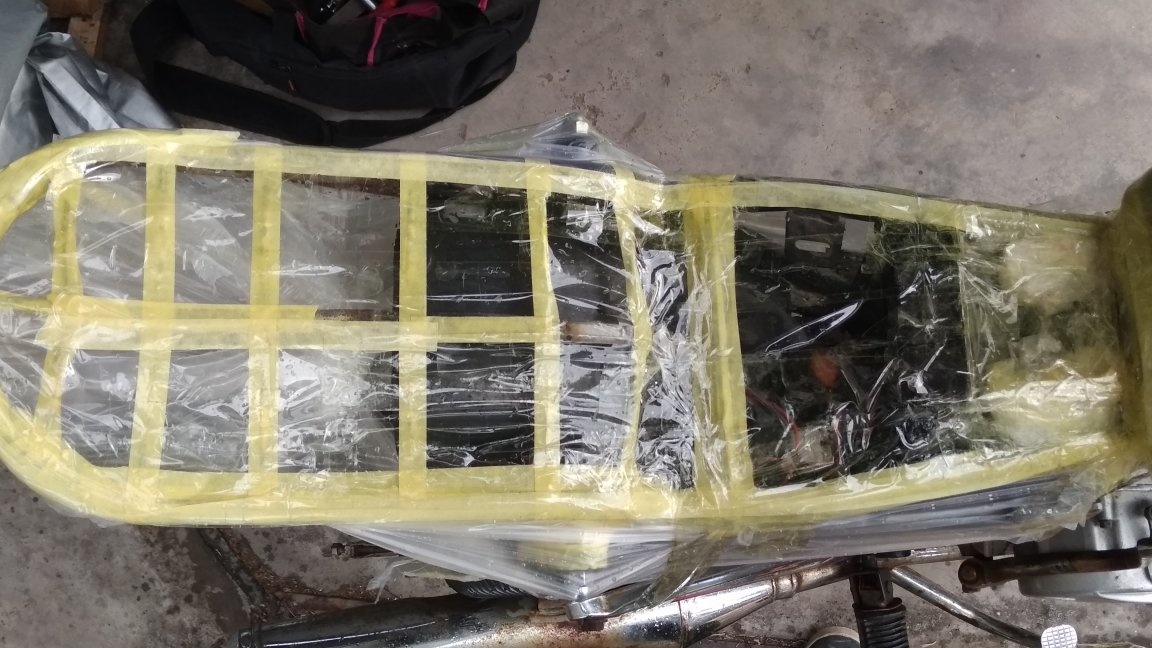
Step 2
I glued the frame and part of the gas tank with molar tape and covered it with polyethylene. Here I did not take into account the fact that excess resin will drip down from the sloping surface. As a result, the muffler and the footboards are pretty smudged with resin. It’s good that all this was planned for a replacement, but still it’s worth being more careful.

Next, we begin to lay in layers pre-cut strips of fiberglass, carefully impregnated with resin. therefore I will tell only in general terms.
In those places where there will be increased load, the layer was made thicker. I also used a mosquito net from windows for reinforcement, it is woven from fiberglass fibers doused with rubber. Of course, this is a moot point, but it seemed to me that the whole design would be more reliable. This mesh was laid in small fragments between the layers of fiberglass, as if creating stiffeners. For the convenience of laying fiberglass, after drying of each layer, you can go through it with a large emery cloth. Because if something sticks out somewhere, then when laying the next layer an unwanted bubble may form.
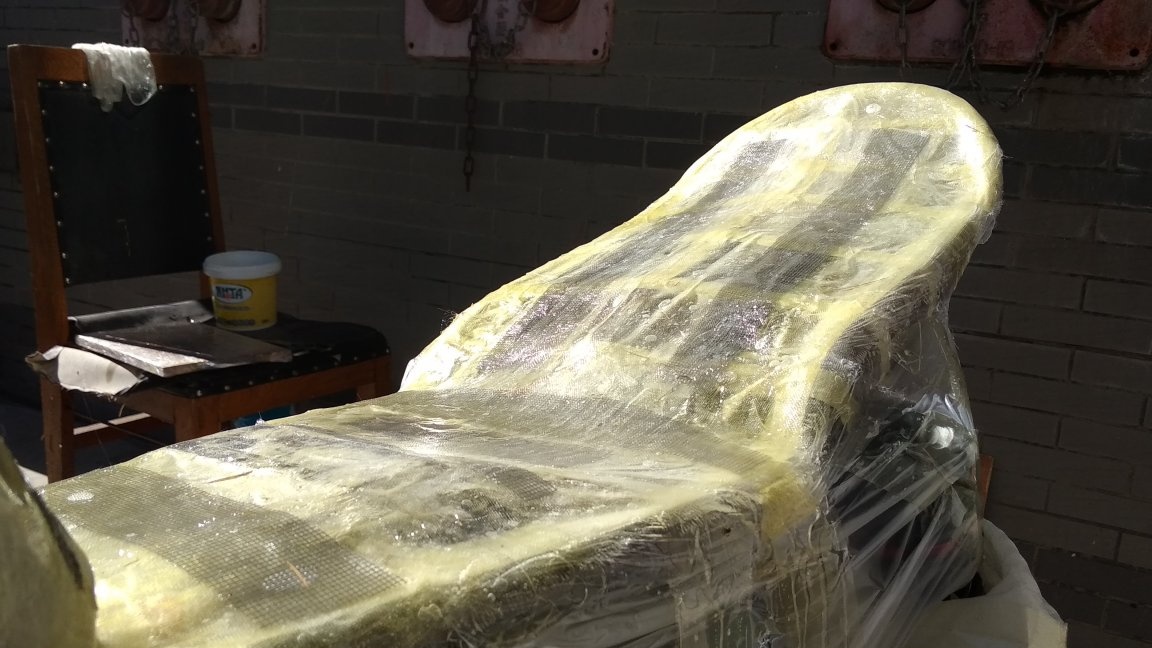
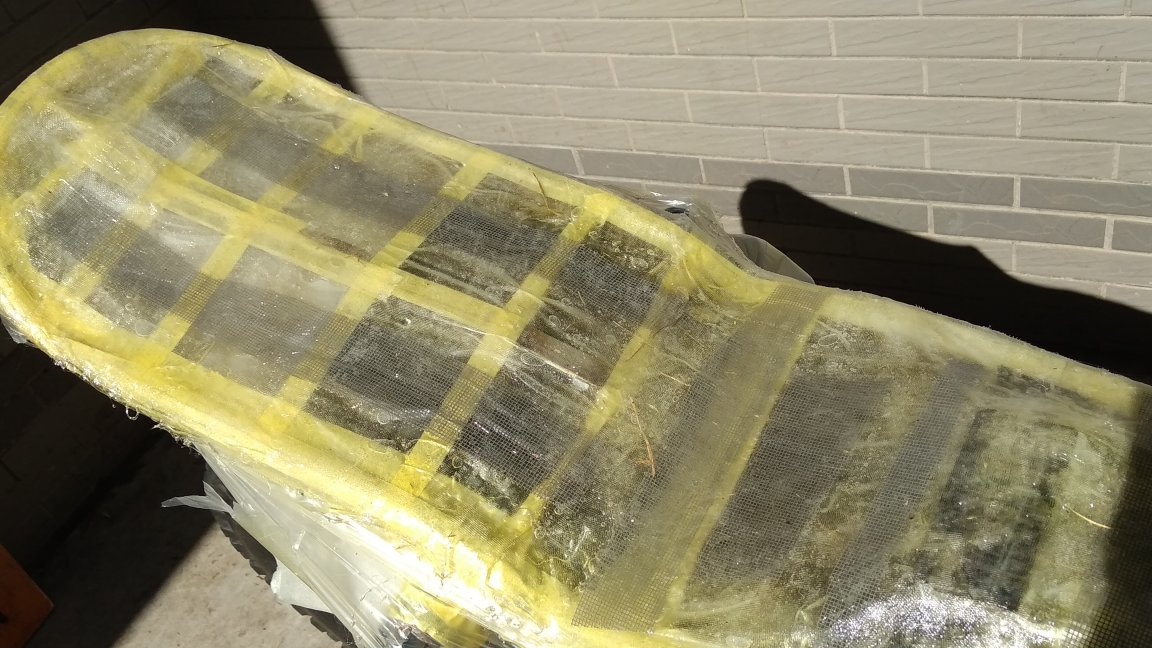
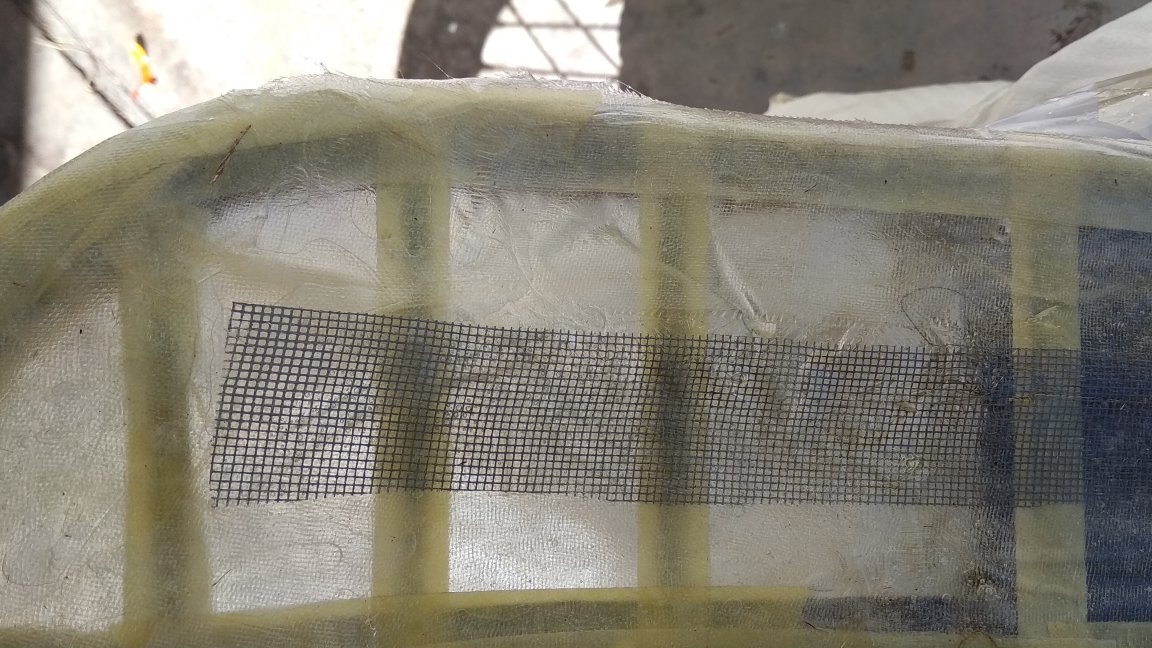
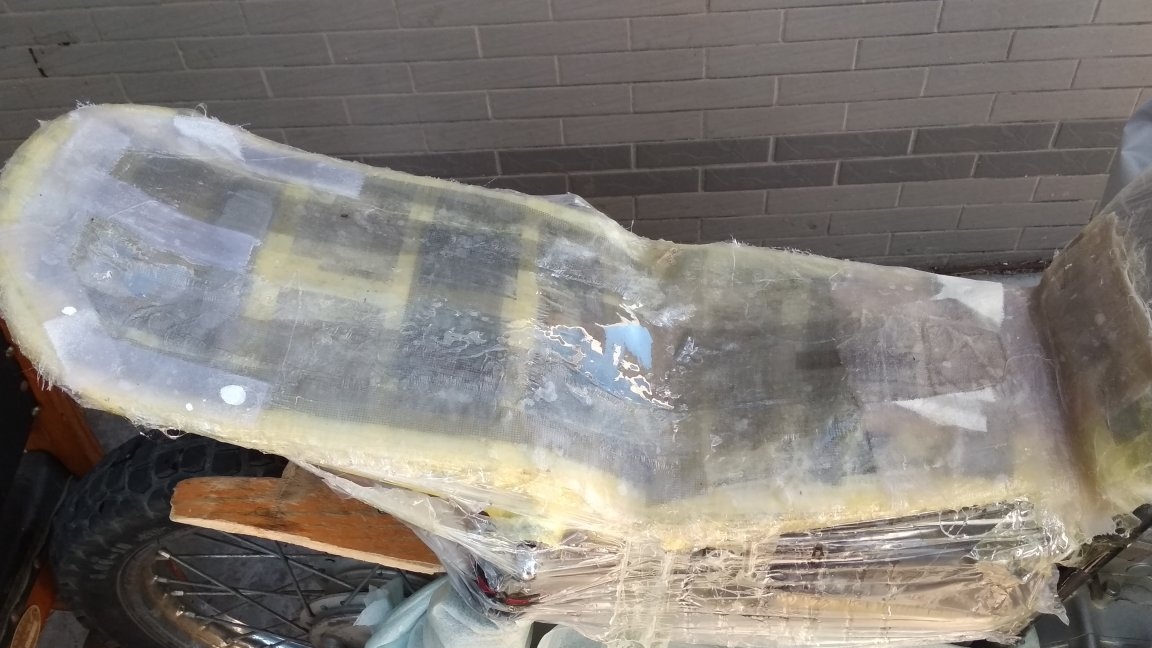
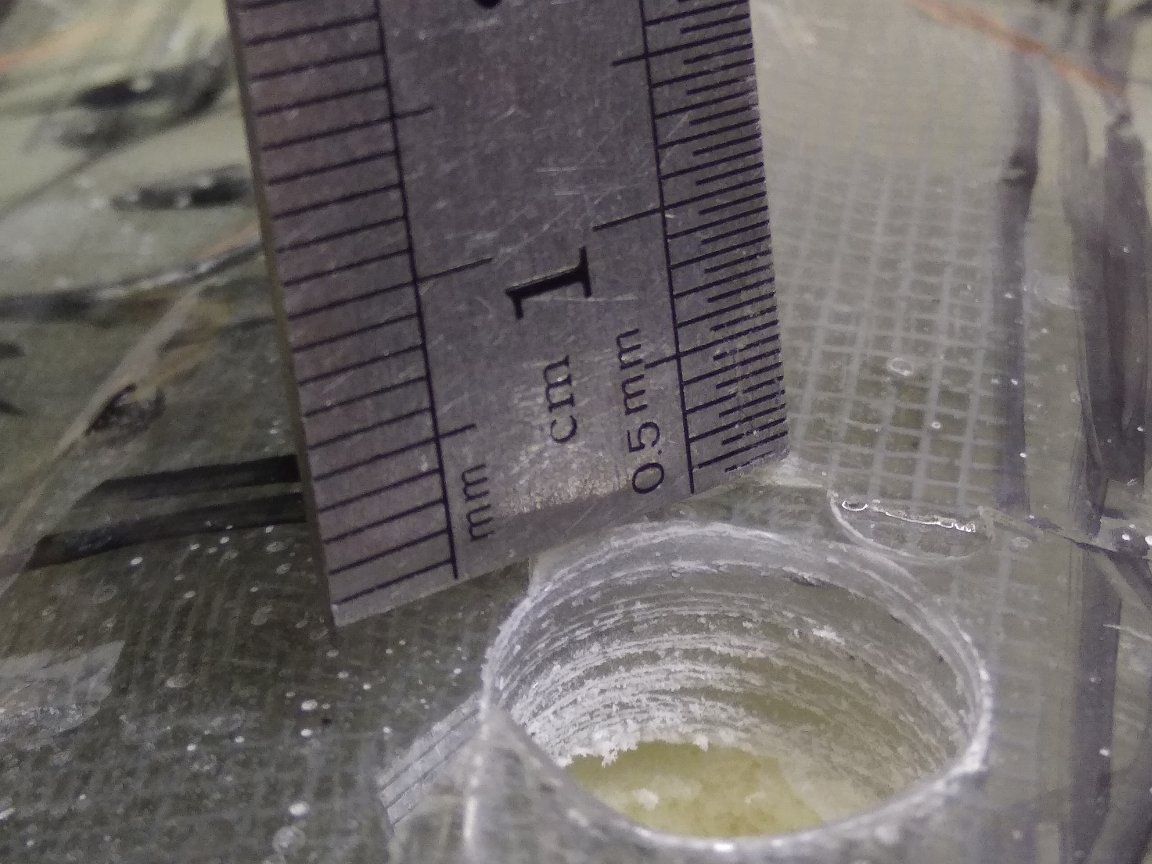
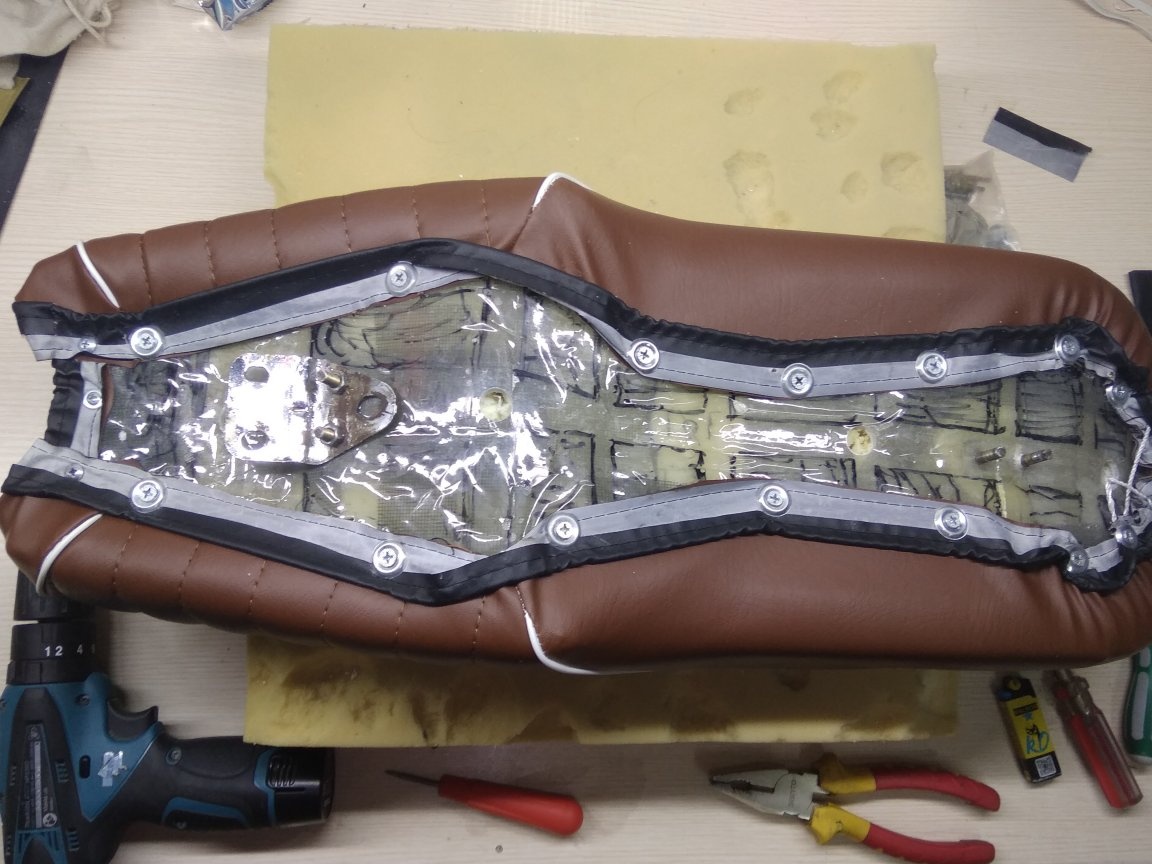
The number of layers of fiberglass turned out from 6 to 10, plus a mosquito net. In the most “critical” places, the thickness of the structure is up to 8 mm. Between the fourth and fifth layers, in the back of the saddle, I drilled holes and inserted a metal plate with welded bolts. With these bolts, the seat will be attached to the frame. There will also be a mount near the gas tank. It was more convenient for me to make it after the end of epoxy work. At this stage, you need to drill ventilation holes through which air will exit when landing in the saddle.
Step 3
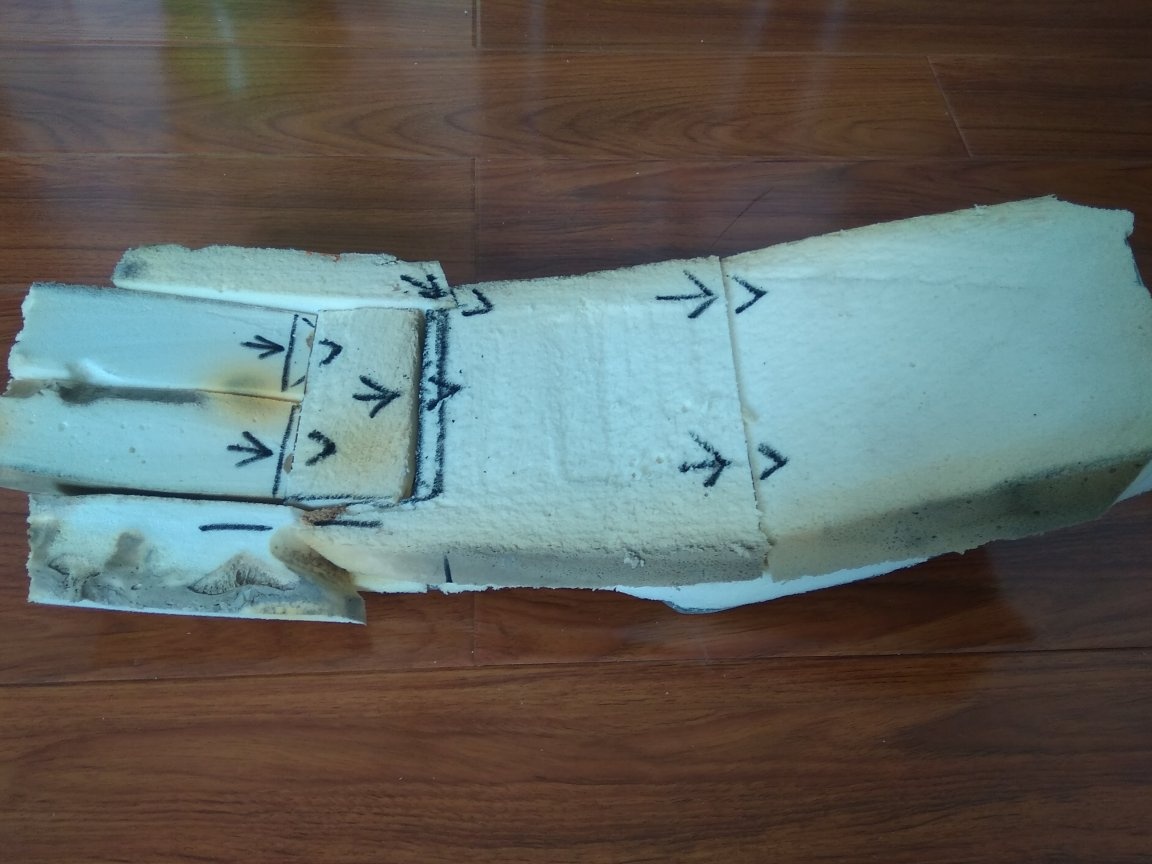
The first layer of foam can be called corrective, because its task is to create a flat surface for laying the second layer. From below, this layer should repeat the shape of the rigid frame as accurately as possible and lay on it like the details of a puzzle, then after gluing there will be no seals anywhere, and the entire foam padding of the seat will be uniform to the touch. Otherwise, it will be uncomfortable to sit on lumps. For the same reason, all pieces of foam should be as symmetrical as possible. And ideally, to make a filler from a monolithic piece, without using glue at all.
When all the pieces fit to the frame and to each other, we smear the frame with glue for foam. It is better not to apply glue to the foam rubber at all, or to apply a little, otherwise the glue may be deeply absorbed and, as a result, the surface of the saddle is deformed. Also, do not apply glue to vertical seams, because such a seam, even after drying, crumple under load and hold this shape for a very long time.

Ideally, the next layer should consist of a single piece of foam, but I did not have this opportunity and I again used several pieces of a small size.It is important here that the seams of the first and second layers do not coincide, so that the finished saddle is as uniform to the touch as possible.
Cut excess foam, it is better after the next layer is glued and dried. The fact is that when you try on dry foam rubber to the frame, it lies a little differently than already smeared with glue. Therefore, there is a risk that the pre-cut parts, somewhere just do not match.
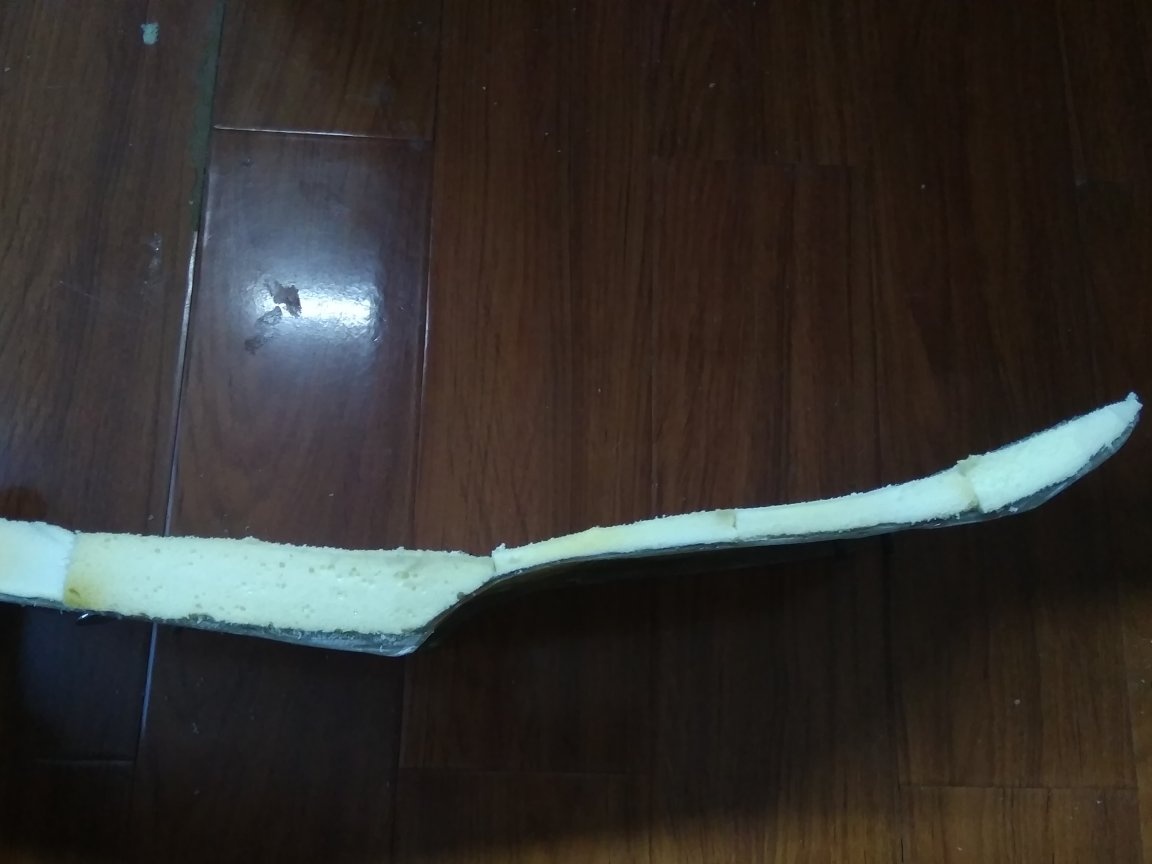
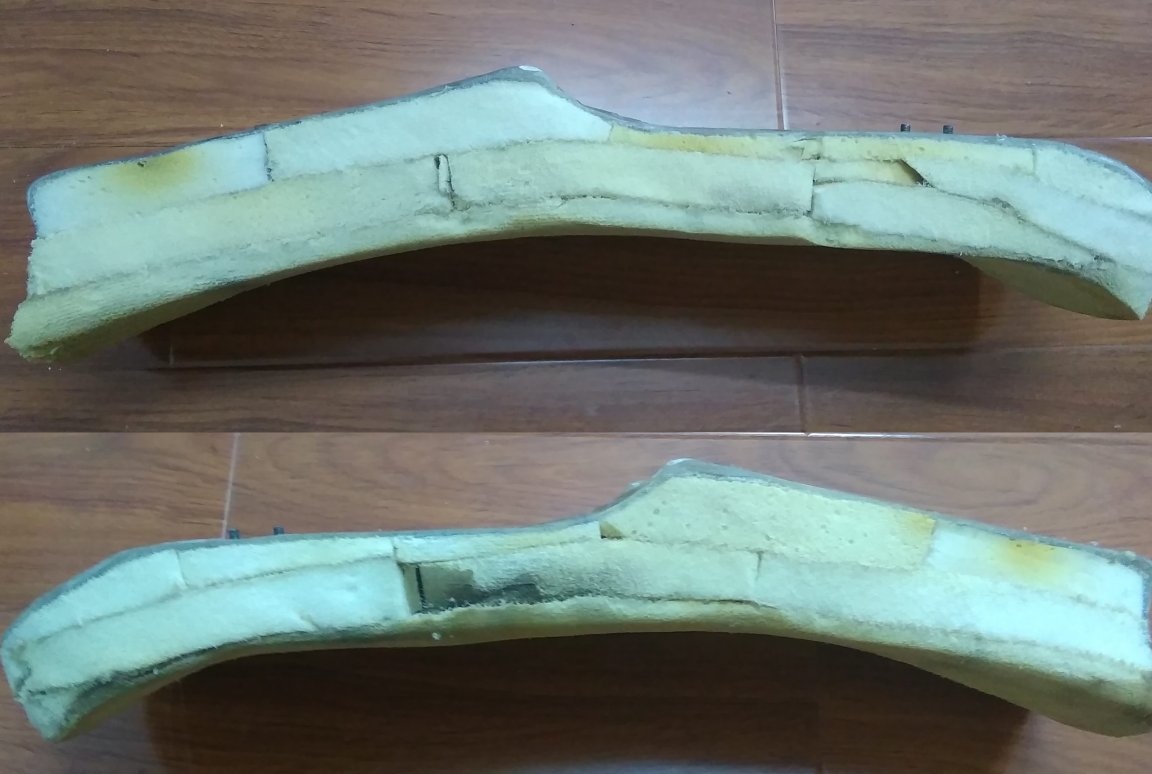
The third layer must be integral. It is a binder and evenly distributes the load on the entire volume of the filler and the stiffness of the seat is obtained as uniform as possible regardless of the thickness of the foam in each particular place. Now you can proceed to the formation of the shape of the saddle and to try on directly to the motorcycle. In my case, the back of the seat was too lifted up. We draw with a marker a more suitable bend and grind to the desired parameters.
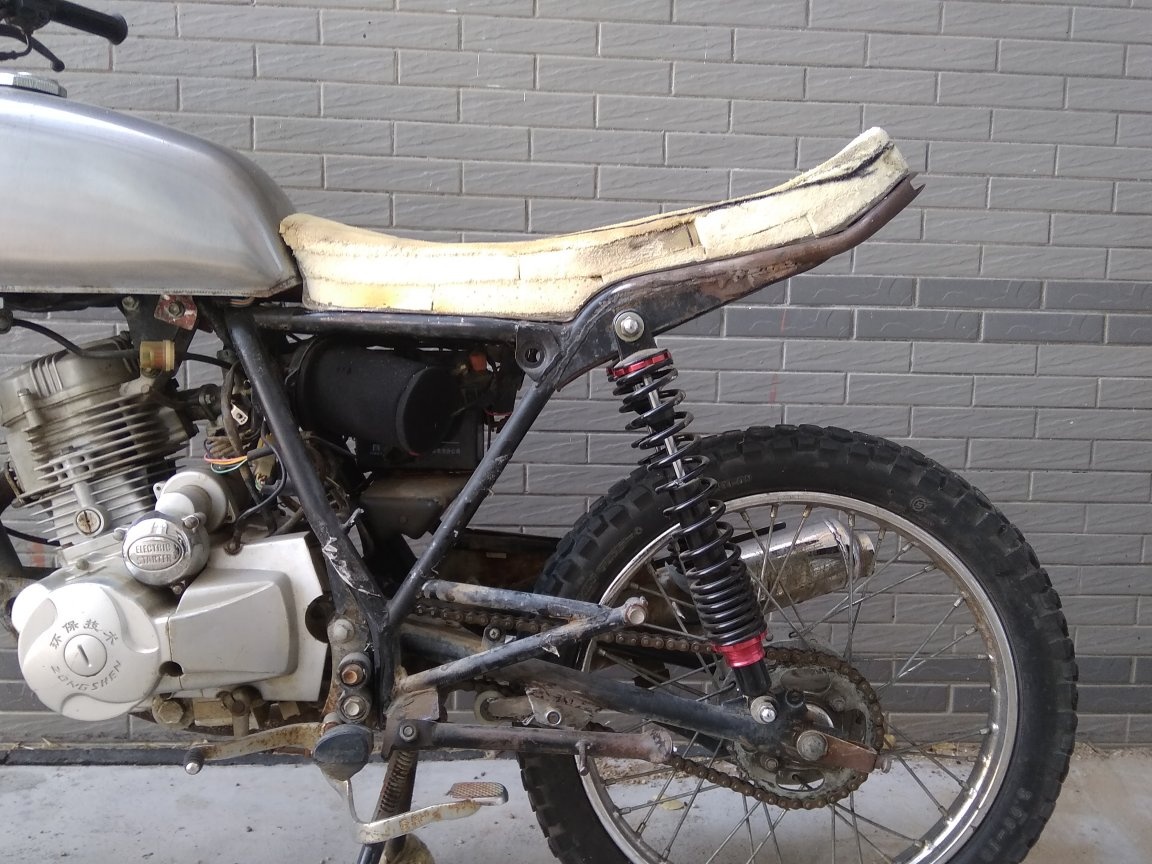
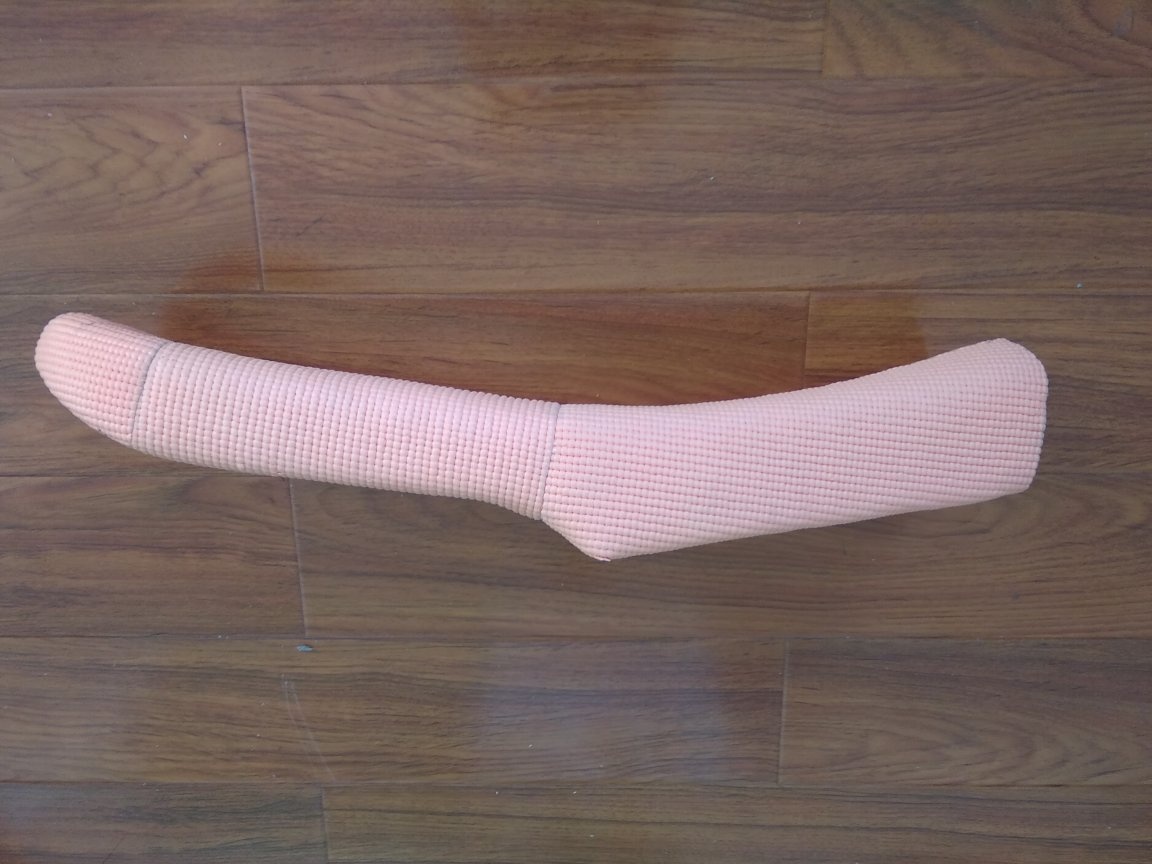
Next, I decided to glue the ends of the seat around the perimeter with a gymnastic rug. Firstly, so that the skin does not rub against the edges of the fiberglass frame, but comes in contact with a soft rug. This is important because the saddle around the perimeter will lie directly on the frame. And secondly, the structure of the foam layers will not appear through a thin dermatine sheathing.
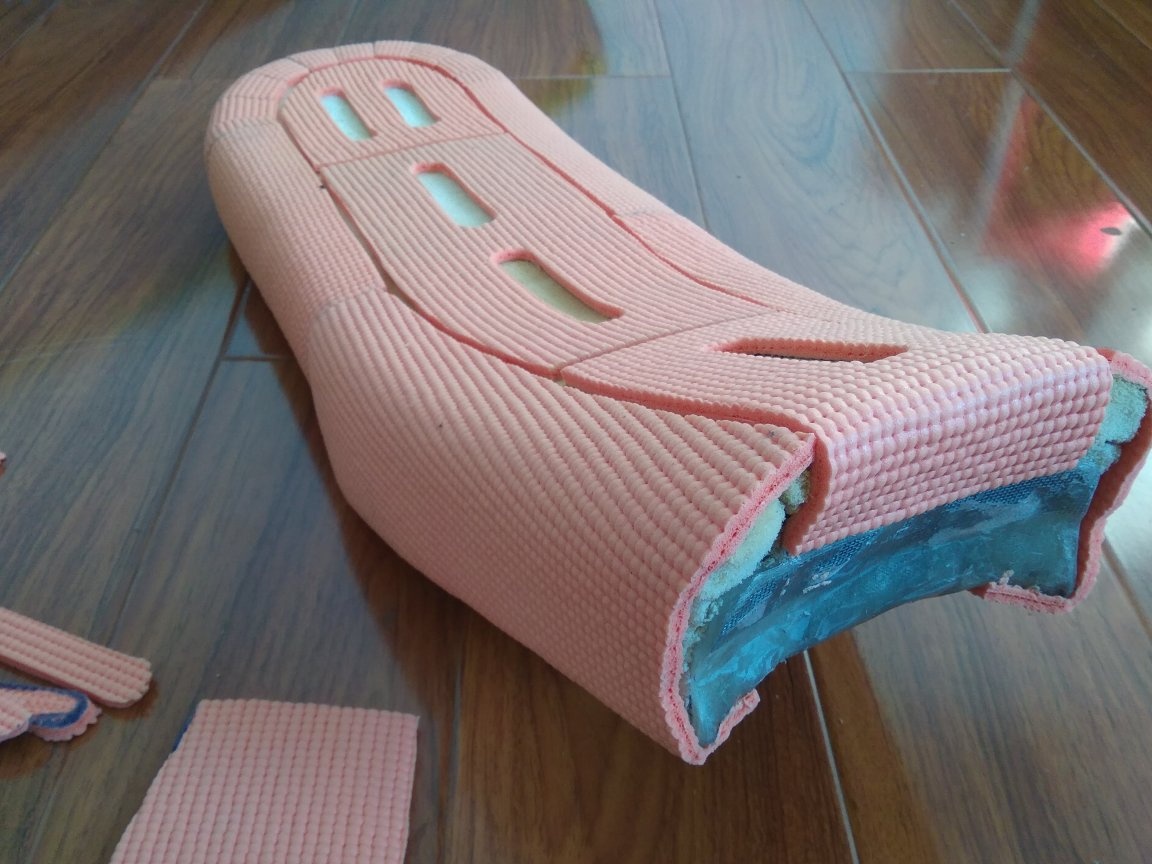
We try on again and immediately mark the places where you can screw the screws (I shaded them with a marker) and where you can’t (for example, in places of tight fit to the frame it’s clearly not worth it)
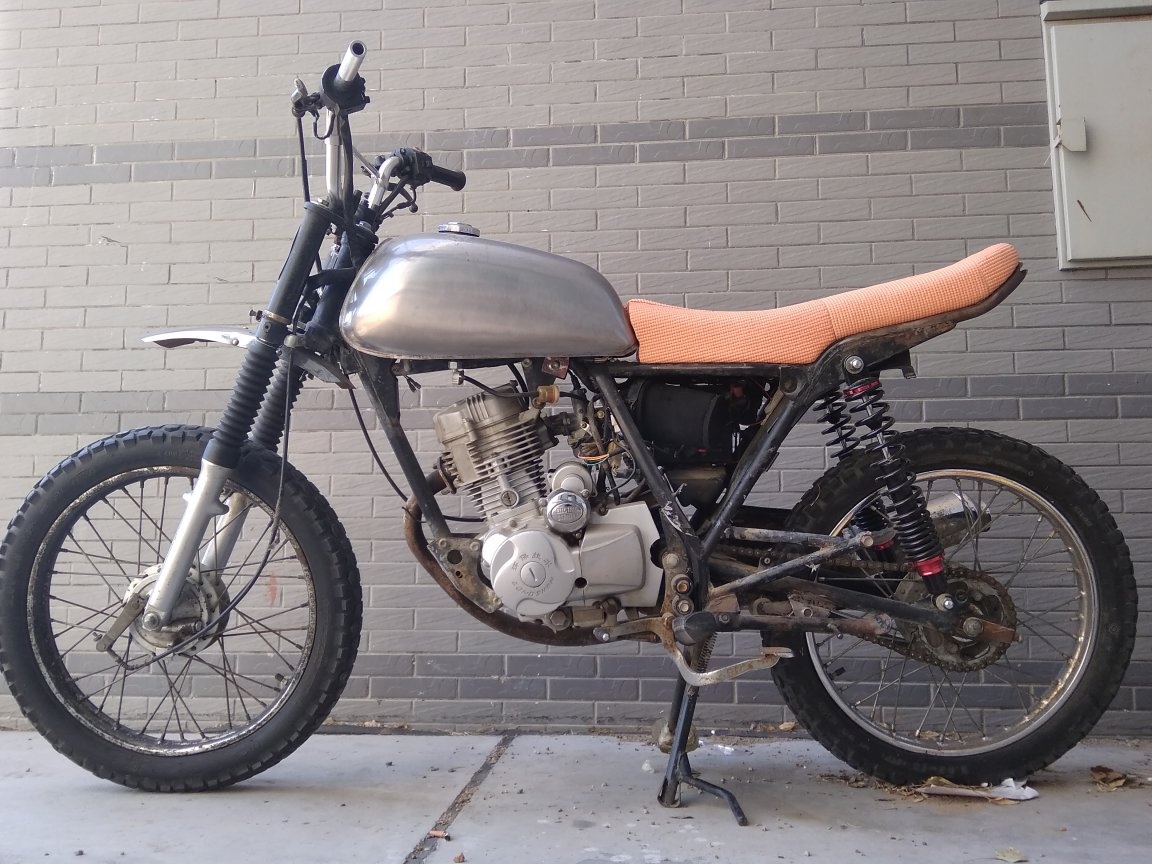
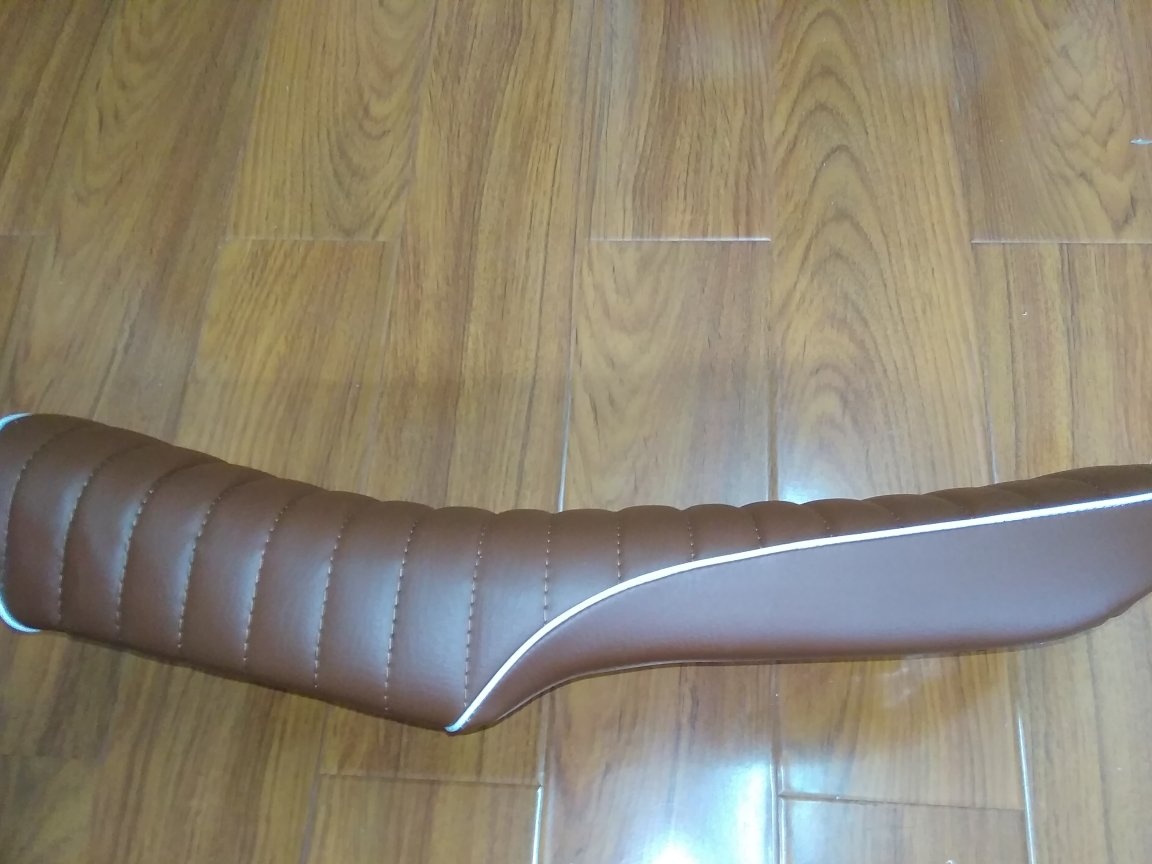
It’s better to ride a bit to check the saddle in action. The result pleased me - it is fastened firmly without backlashes, sitting softly, you can’t move anywhere. It would be nice to try with the passenger.
Step 4
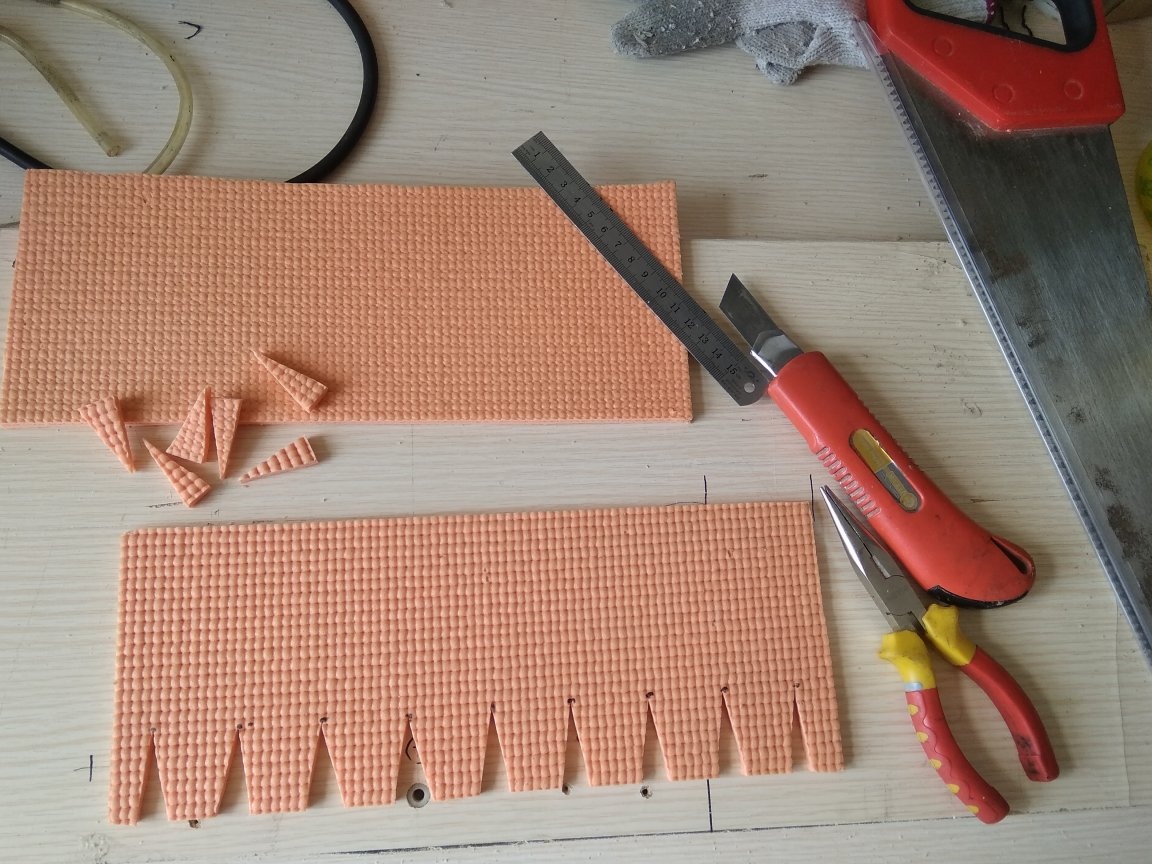
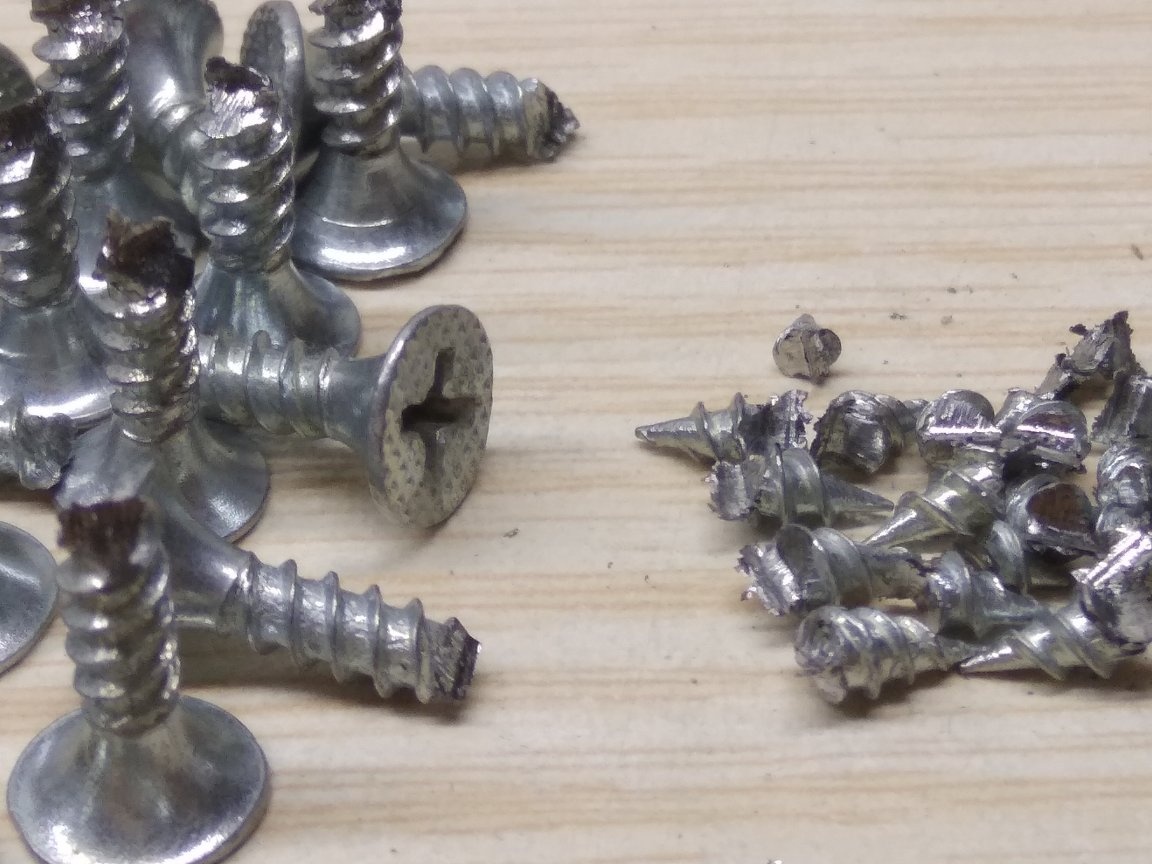
Long thought how to fasten the skin of a young dermantine on the frame. The furniture stapler immediately fell away - he could not cope with the composite. Different adhesives are also not an option - not reliable. He stopped on self-tapping screws and large washers. But then I ran into a ridiculous problem - the complete absence of short self-tapping screws. He went around all the shops - NO. Our town is small and can only be ordered on the Internet, but this is already too much. I decided to trim the existing screws to the length I need.

Then everything is simple - we stretch the casing, drill holes and screw the screws with washers. The only difficulty was that in the back there was a large fold, which had to be tinkered with for a long time. It seems to be not scary, just one is sweet, but she spoiled the view pretty well, for a long time she couldn’t hide it out of sight. The solution came up with the following - instead of one large fold, I made many small ones, but not protruding onto the visible surface. Ideally, it is worth making triangular undercuts on the casing and stitching on a sewing machine.

Conclusion
Previously, I did not have to work with epoxy, or with foam rubber, or with dermantine. Now I can say that this is nothing complicated. In the worst case, with not quite straight arms (like mine), you risk only wasting time, but the result is quite acceptable. The most difficult thing is to decide on all this, and then, as they say, the road will be overpowered by the going one.
During operation, it turned out that water (rain, spray) seeps through the transverse line of the casing and there is nothing to be done about it - the functionality was sacrificed to the style. As a result, a wet spot remains on the pants for several days after the rain. I advise you to consider this moment. And of course, do not forget that using cheap low-quality materials, you will have to try hard to get an acceptable result.
Good luck and thank you for your attention!