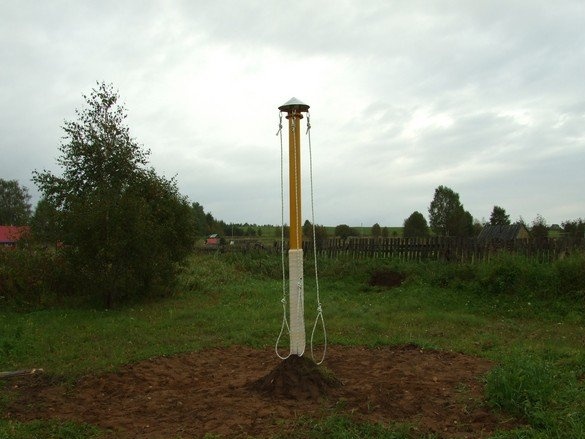
We live on the edge of a tiny village and somehow the idea was born to make such a shell for a village kid. We found a suitable place in the wasteland near the store (center!), Obtained the consent of the local administration.
What was needed for the manufacture and installation of the carousel
Tools, equipment, materials
Angle grinder with accessories, including goggles and earphones, another needed locksmith tool. A set of marking tools, a welding inverter with accessories, a good electric extension cord. Set for painting - paintwork, rags, brushes, wire brush for cleaning, dishes. Set of trench tool, ladder. Pieces of pipe ø 160 mm, pieces of channel, corner, front wheel hub from auto Ode, synthetic cable, thimbles, carbines. Materials tools and equipment for the preparation of concrete.
Rotating knot
First, I proceeded to the most complex part - the upper rotating unit. As much as possible, he cleaned up the stocked car hub, soaked the rusted fasteners with kerosene and unscrewed the excess. Stalled, cleaned.
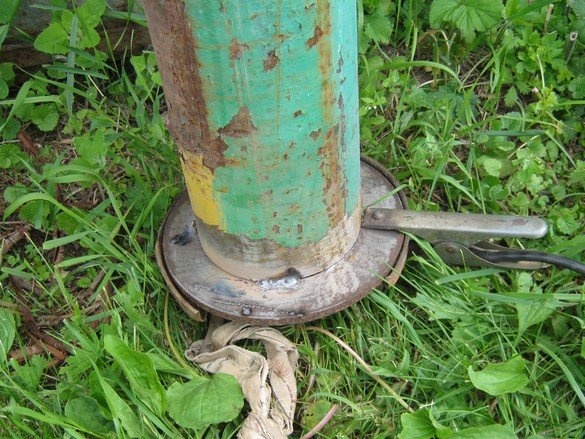
The column consists of two pieces of pipes, each about 2 m long. The short section can be positioned vertically for easy top-down welding. He grabbed the hub in several places with short seams, then carefully boiled the entire seam.
Outside, on the sticking out glands and the tides of the hub, it was possible to pick up and adapt a thick plate-pad.
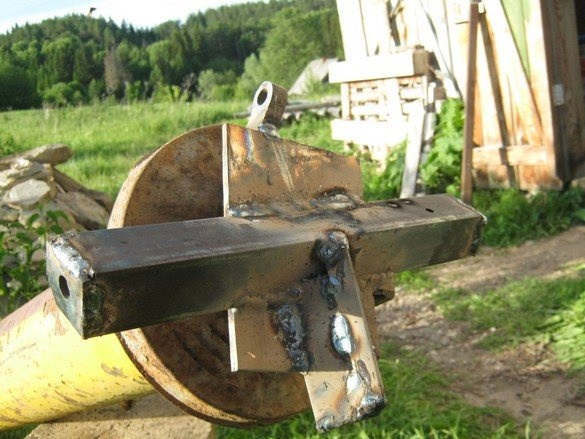
The carousel has four pendants for the ropes, one of them, an already finished ring - a regular protruding part of the hub. I made three more from pieces of a powerful corner with a muffled butt.
The most important mechanism was decided to protect with an umbrella. We made it of galvanized steel roofing. On an umbrella, cut out, marked the installation site and riveted with rivets, three racks. The umbrella assembly was welded to the top, the galvanized part was removed until better times, so as not to damage during further evolutions and transportation.
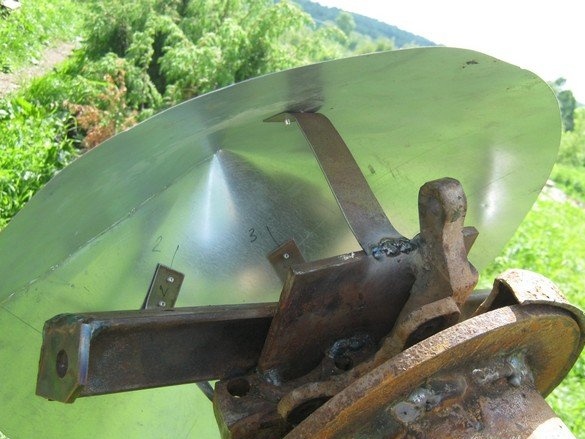
The finished unit was painted in two layers with enamel on rust.Yellow.
"Field work
The next stage - while the entire structure is in the form of relatively small elements, drag them with the tractor closer to the installation site.
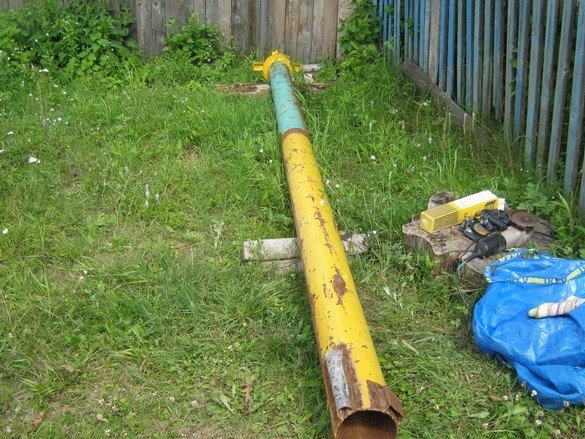
Settled for assembly behind the fence of the neighbors closest to the future playground. They agreed to share electricity. Welded both parts of the carousel column.
Of all that was at our disposal, they composed the construction of the underground part.
Assembly
Having picked up a day dry, they cried out among the citizens - they needed an assistant to bring-hold. The assistant, however, stole up with the profession - the installer of metal structures and had to keep-wear your submissive.
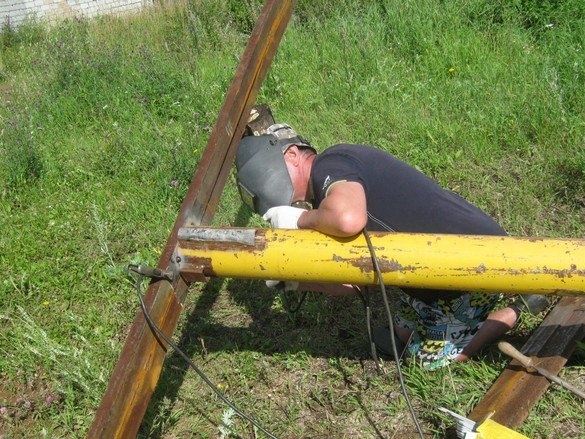
The crosspiece was mounted on a column lying slightly raised on wooden stumps. They acted like this - they dragged one paw to a raised column, holding it, a paw, put it over the edge in weight to the right place. In several places, they made short seams-potholders, as the artists, after several strokes on the canvas, departed to admire. If necessary, the location of the parts (not enough "right" angle) was specified, scalded to death.
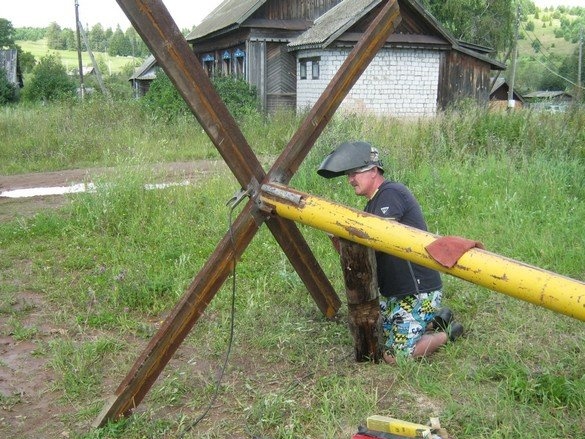
Paw No. 2 was mounted in the same way - we placed our T-shaped structure on a relatively high stump and put a second paw. Their mutual position was found experimentally, after several iterations. They grabbed, specified, scalded. In the photo - Ivan Emelyanovich with an open visor.
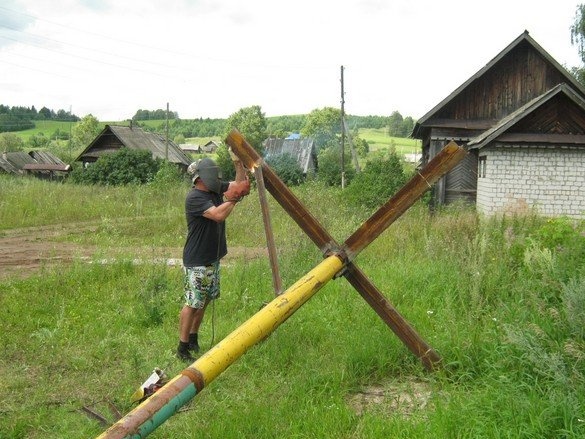
And finally, the braces. Using roulette and crayon, their seats were uniformly marked, grabbed, scalded. The edges of the brace loosely fitting to the pipe were molded as needed with a magic sledgehammer, but what about.
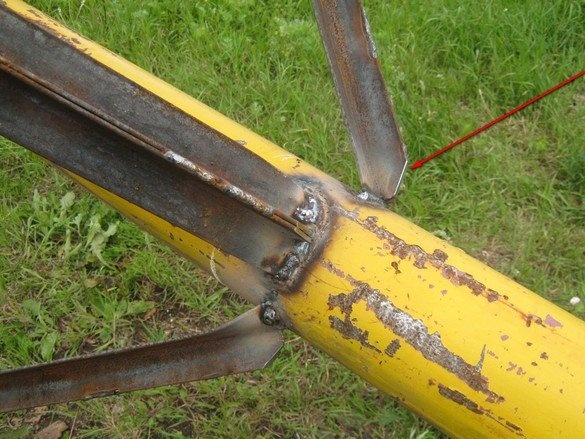
The sharp protruding edges of the braces, probably future protruding from the ground, cut and dull the sharp edges.
Underground Finishing
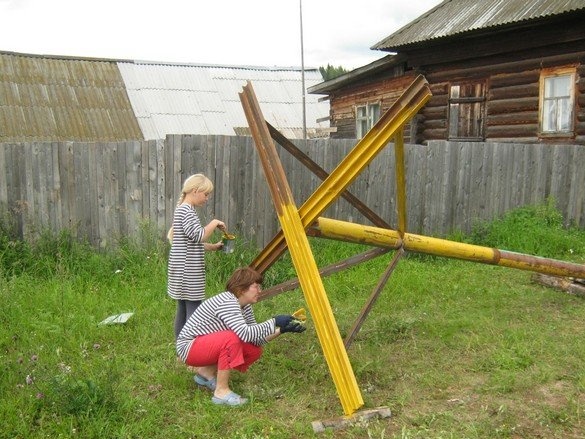
The underground part of the carousel will not be completely immersed in concrete, therefore, it requires protection against corrosion. We decided to paint it thoroughly. The channel on our paws is old, of various degrees of rust, but the braces from the corner are new, from the warehouse - the fly, as the movers said, was not engaged in rowing. We treated all this with a wire brush and in two layers with intermediate drying we painted it with rust enamel. The aerial part of the column was not painted, for fear of tearing it off with a tractor when rearranging it.
Installation
After preparing the metal part, we expanded our cruciform pit and reduced its depth to 70 cm. We persuaded the local tractor driver to do a good deed - dragged the finished carousel, put it in the pit.
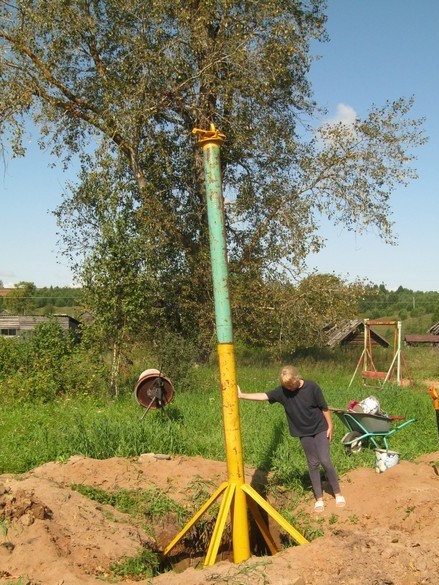
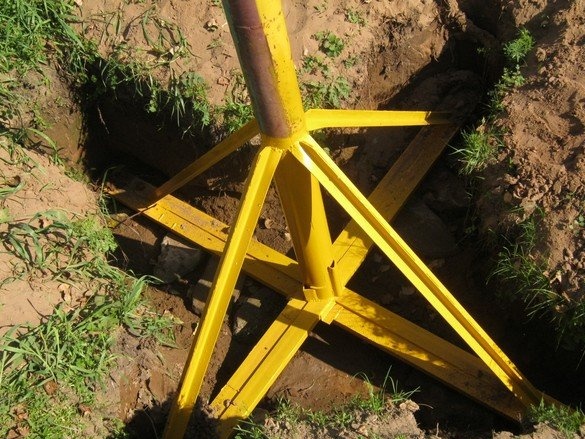
At the bottom of the pit, large flat stones were laid so that the ends of the paws and the middle of the cross were hanging in the air. We are concreting these places. Before the concrete work, the carousel column was leveled up, laying stones in the right places.
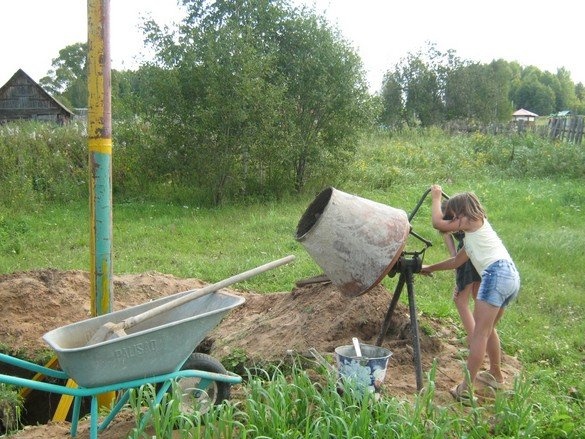
For concreting, we dragged our semi-automatic concrete mixer. In the words of Semyon-Semyonitch Gorbunkov: “Far, but necessary!” Among other things, I did not have to pull the wires far to connect. Local girls asked for a twist. Persuaded.
They poured concrete from a large (cornerstone?) Stone at the ends of each paw. In combination with their considerable paws, length (large lever), the carousel is protected from overturning quite reliably.
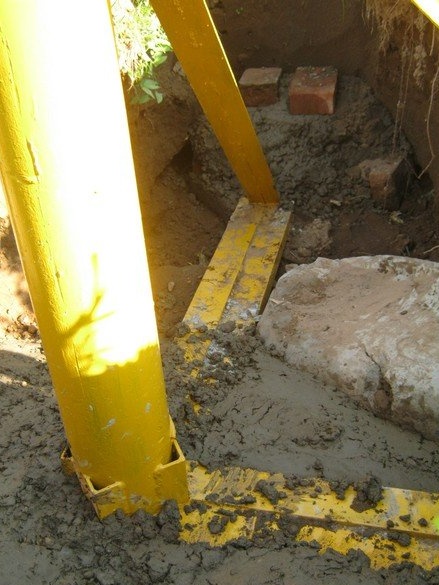
When preparing concrete, an intermediate tank-trough was not used - the finished mixture fell out immediately into the pit, to the right place. I had to tinker with the installation and rearrangement of the concrete mixer exactly in the right places, but a lot of effort was saved on the intermediate reloading of concrete.
Under the central column and the nearest parts of the paws, also filled a large concrete pillow-support.
At the end of the day, when the hard concrete had already hardened somewhat, covered the castings with plastic wrap so that the removed dry sandy soil did not absorb excess moisture from the concrete and filled the pit - the weather turned out to be very wet, heavy rain was expected.
Final little things
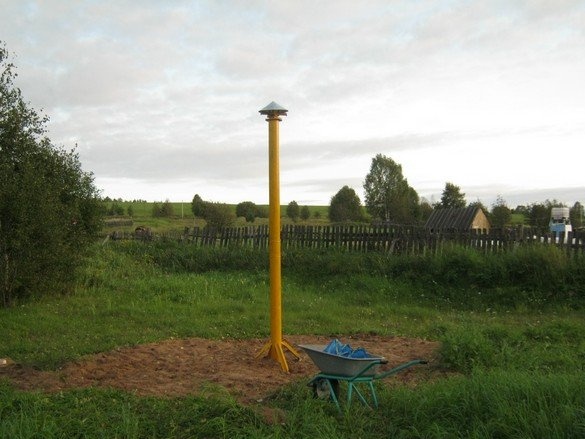
Again, picking up the weather without rain, went down a small staircase, riveted the lid and painted the column. They painted as well as the underground part - in two layers with intermediate drying. Previously, everything that was possible was cleaned with a wire brush.Here, of course, we were re-cautioning - we should have painted everything together in a lying position, and the possible damage to the coating after transportation should be repaired from the stairs. However, the elevated height of our structure is not too great, they coped without difficulty.
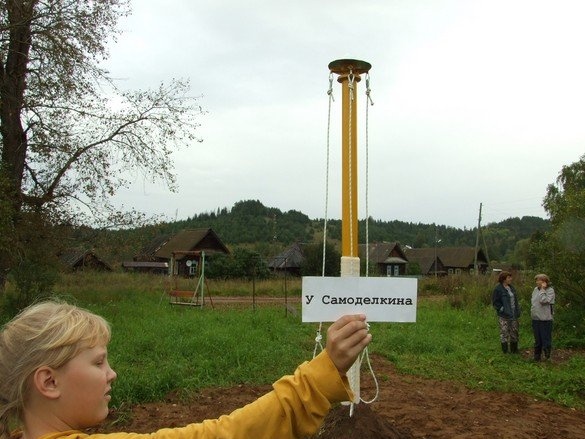
A part of the braces protruding from the ground was blocked up with soil, so that no one would get stuck on a little one and just wrap up the bottom of the column with soft material just in case. They didn’t stint on the ropes, they acquired ropes of a fair thickness, so that they would not press on the ass. From above, to the metal holes of the rope are fastened through standard carbines, each rope bend is equipped with a thimble. All ends are fixed by nodes.
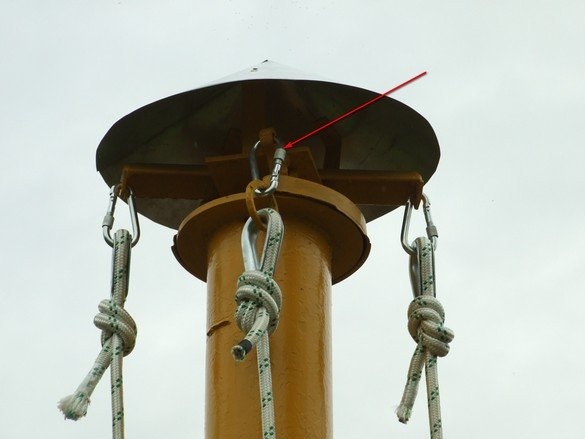
The widest ring on the rotating unit did not allow the carbine to be used in the same way as the other three; I had to use an additional ring.
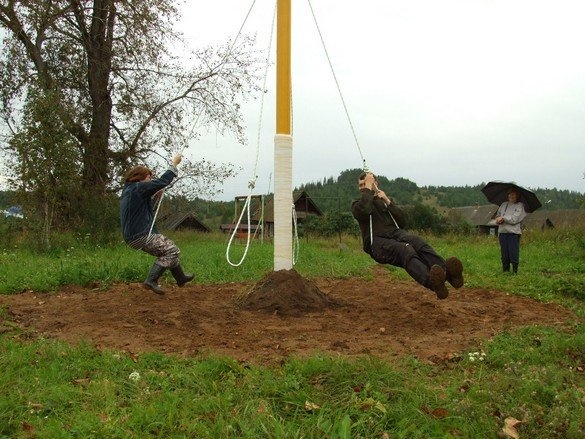
Acknowledgments
We thank the indifferent residents of the village who somehow participated in the construction, Natasha and Andrei Kozlov - our business friends and Ilya Yuryevich Lykasov from "Technical Equipment", for the donated glands. Without your help, nothing would have happened.
Babay Mazay, September, 2019

