

Hello dear readers and the inhabitants of our site!
Surely many of you like fishing, but the prices for consumable gear are quite high.
In this article I want to tell you how you yourself can make a feeder for feeder fishing from improvised materials. I must say right away that it was not me who invented it, but stumbled upon an idea on the Internet and decided to try it myself, which I hasten to share with you.
Materials for fixtures (conductor):
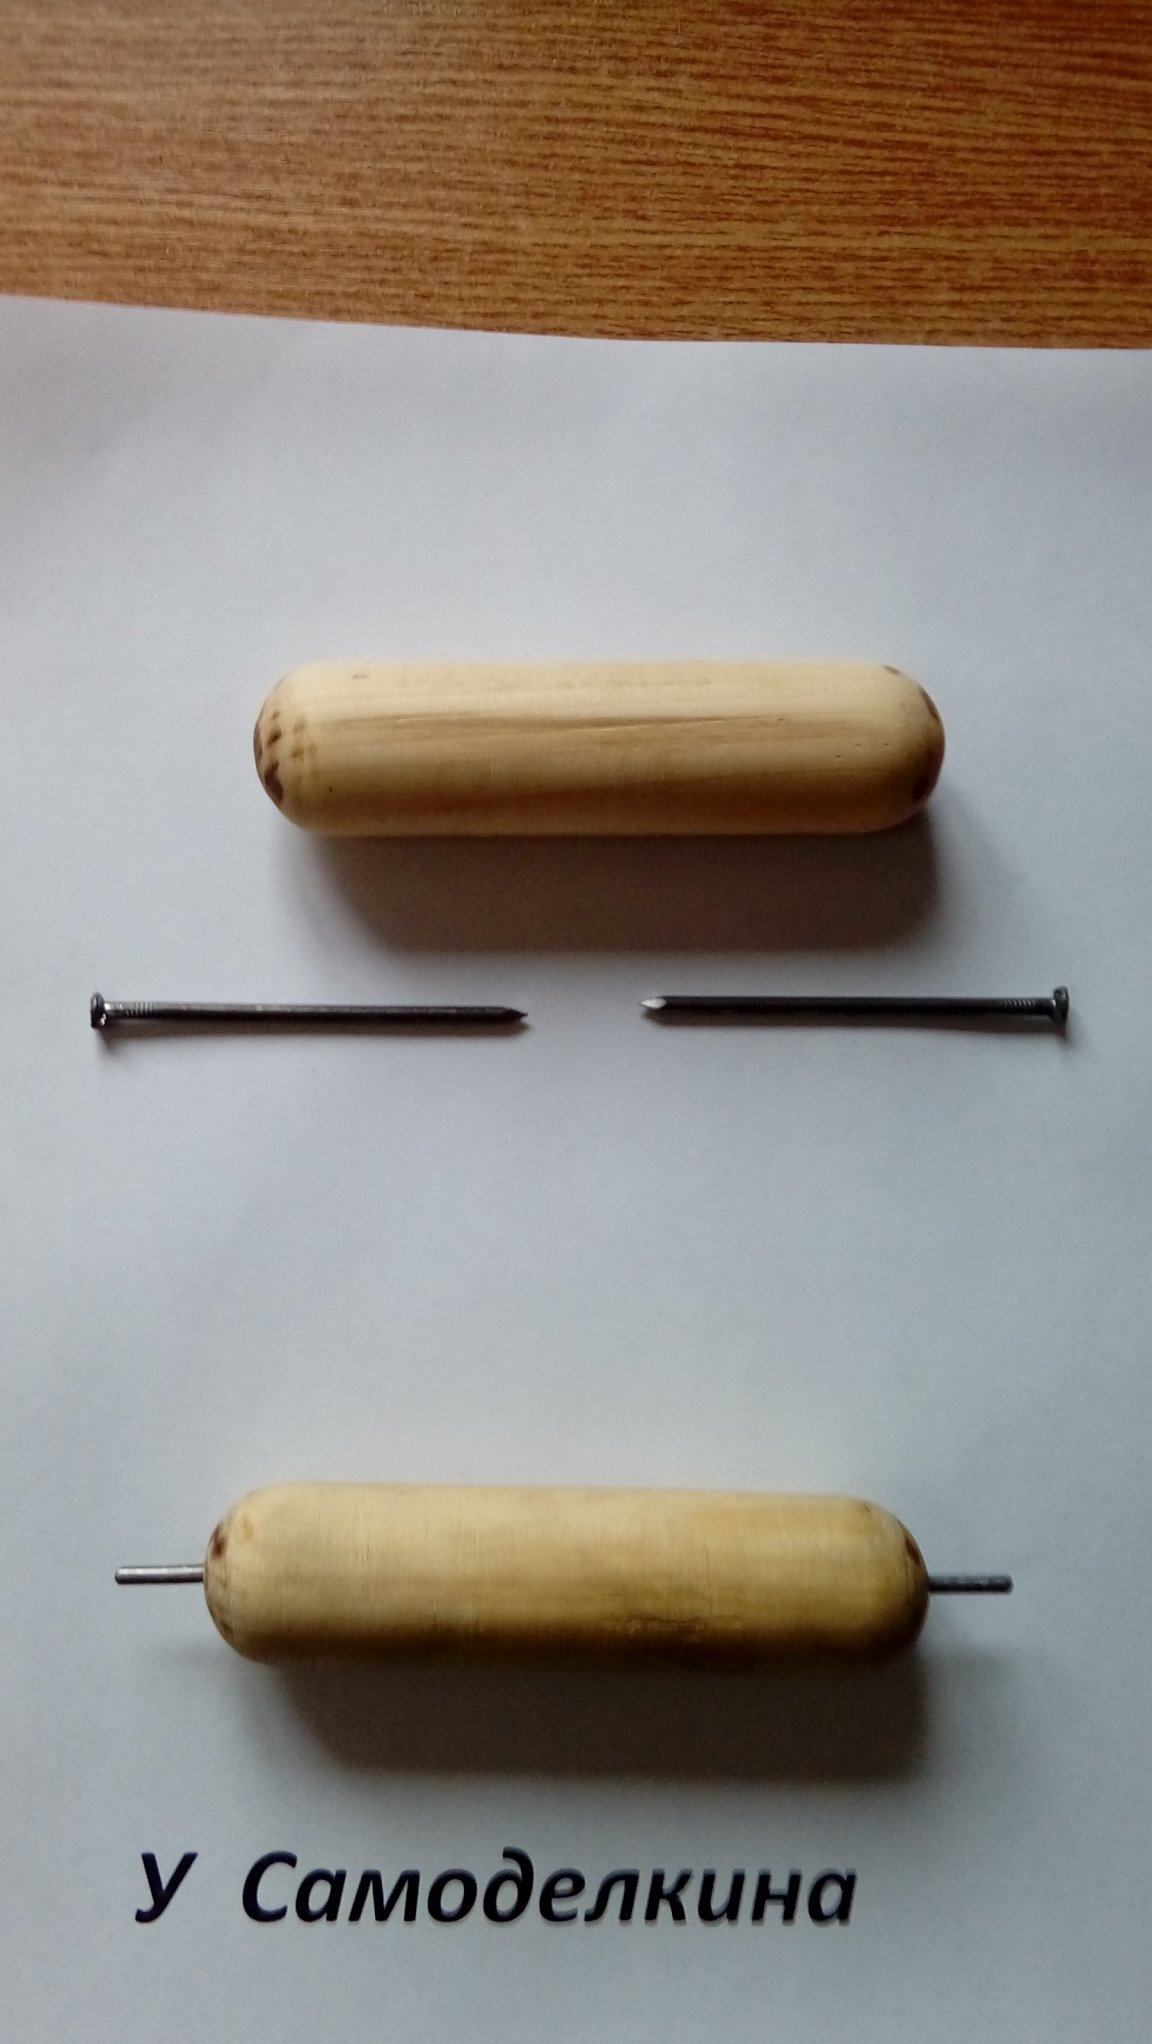
- A piece of cuttings with a diameter of 25 mm and a length of 10-15 cm
- Two nails (in my case 70mm)
Materials for the feeder itself:
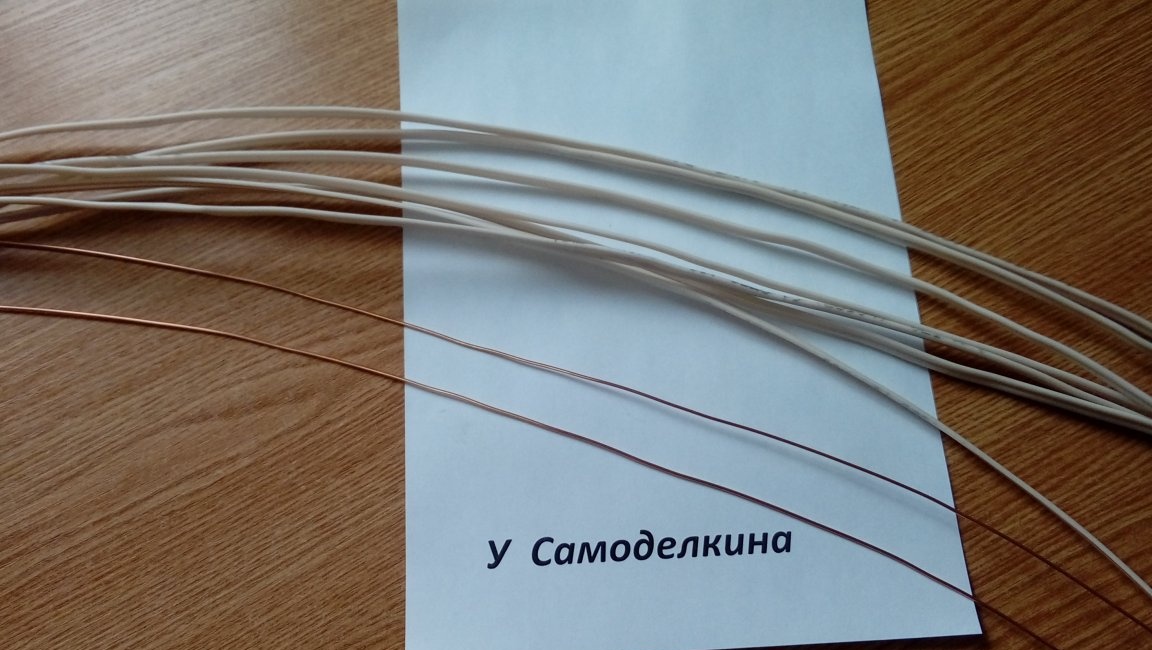
- Wire (copper, aluminum, knitting) of your choice
- plastic tube (empty paste from the handle, cotton swab, stick from chupachupsa, etc.)
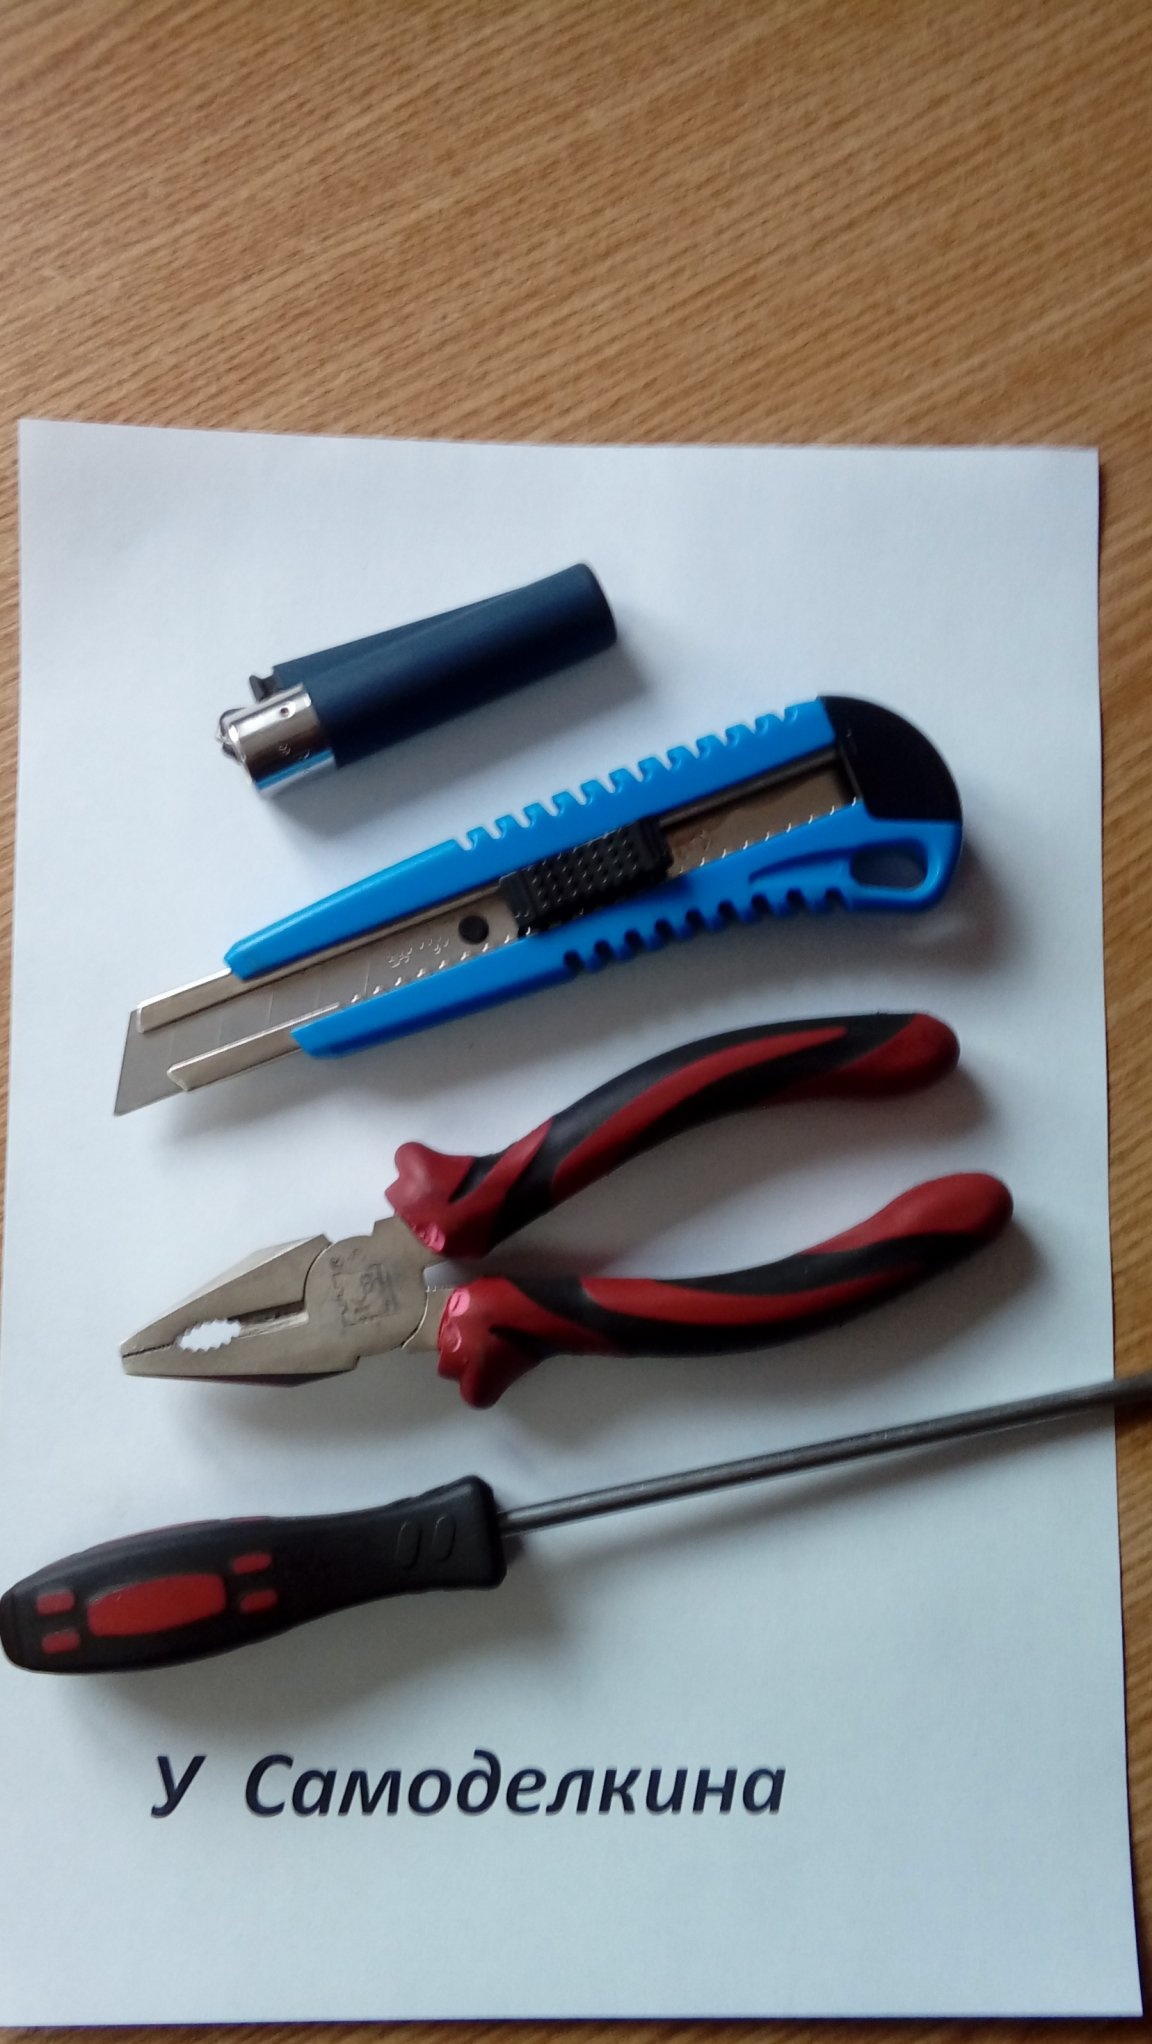
matches or lighter
Instruments:
- A piece of sandpaper (for processing the cuttings)
- Hacksaw
- pliers
- Flat screwdriver
- Knife
Conductor manufacturing process.
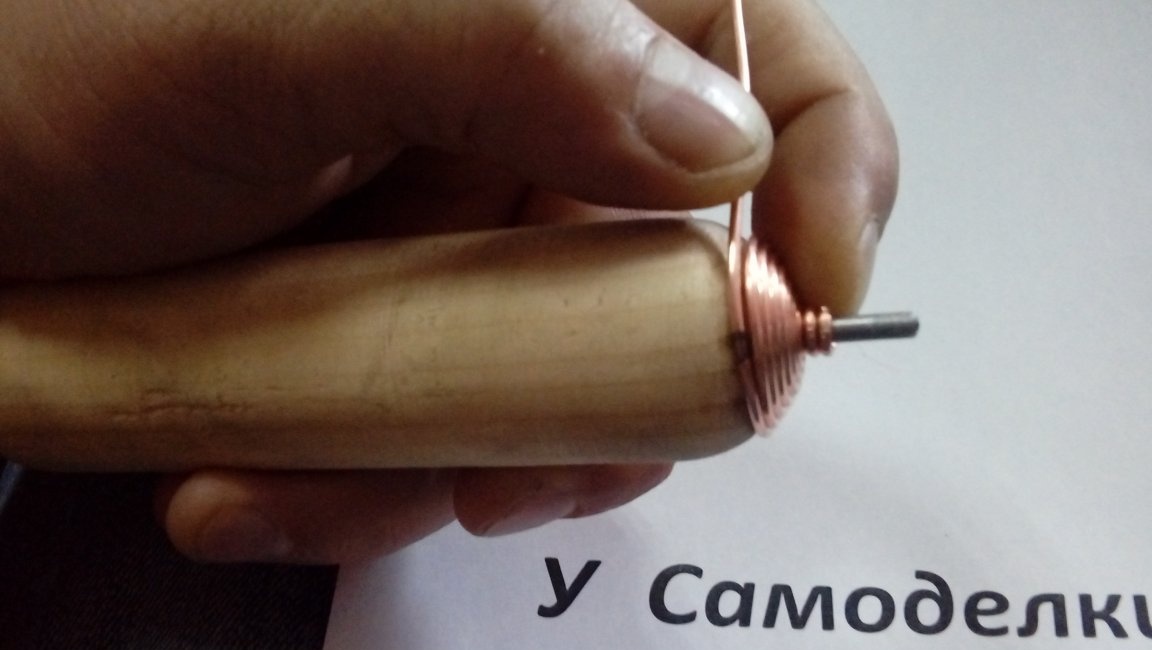
We take a piece of the handle (in my case, the handle is from a rake with a diameter of 25 mm and a length of 11 cm) and with the help of sandpaper we round its ends. Then we drive in the nails (in my case, the nails are 70 mm in the same way as their diameter matches the diameter of the paste from the handle that I will use in the center of the feeder) in the center of each side, leave a centimeter and a half centimeters long and saw off the excess. It should be something like this ...
Everything, our conductor is ready. Now we can begin to manufacture the feeder itself.
Feeder manufacturing process
Next we need a tool and hands.
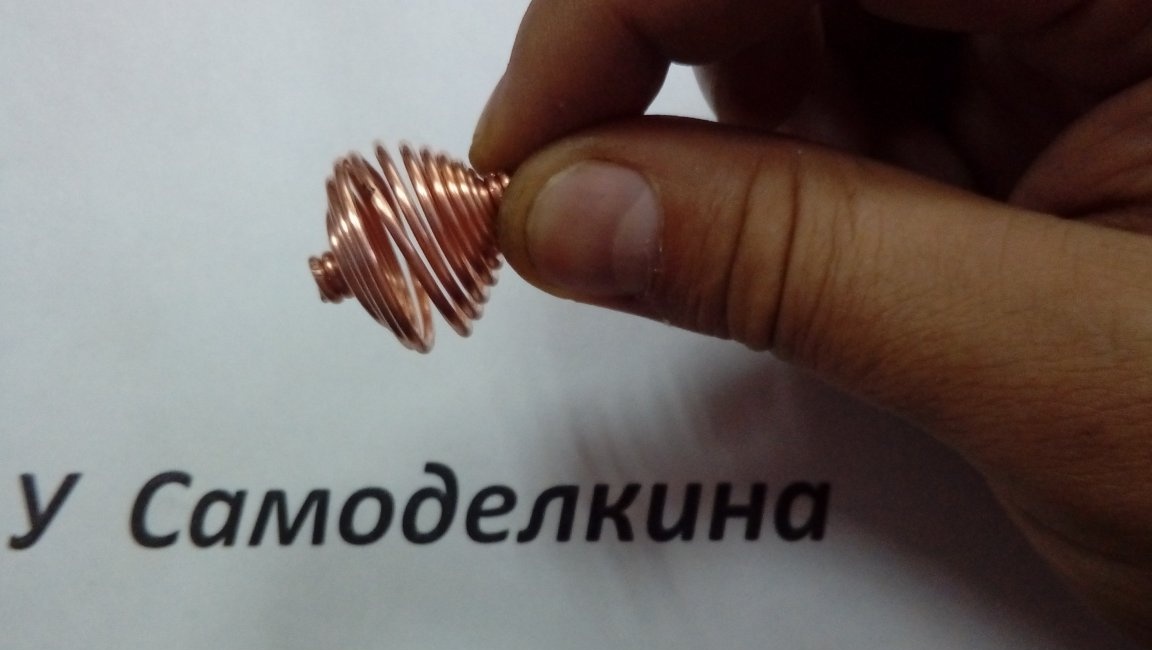
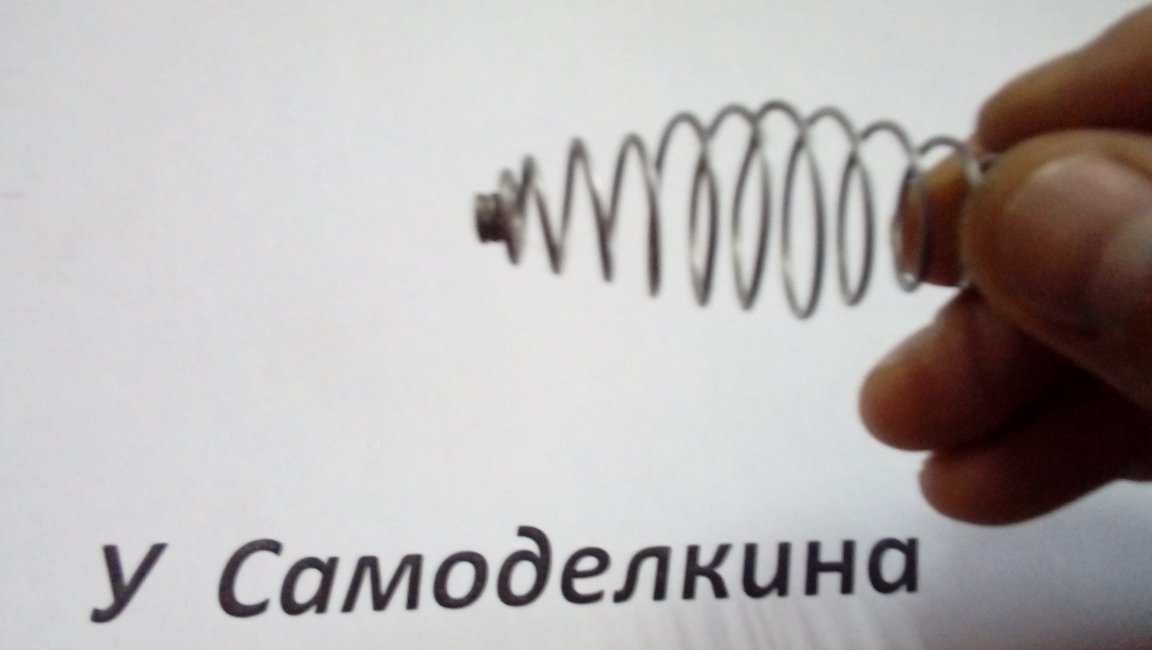
We take any wire (for starters, I took a 1.5 mm thick copper wire), remove the insulation from it (if any), but very carefully so as not to chipping. In my case, I cut it 70 cm long (but you can cut more and less, the final size of the feeder will depend on this). On the cleaned wire, mark the middle with a marker (since the ends of the feeder are mirror, we will do them one at a time).
First we do one side.
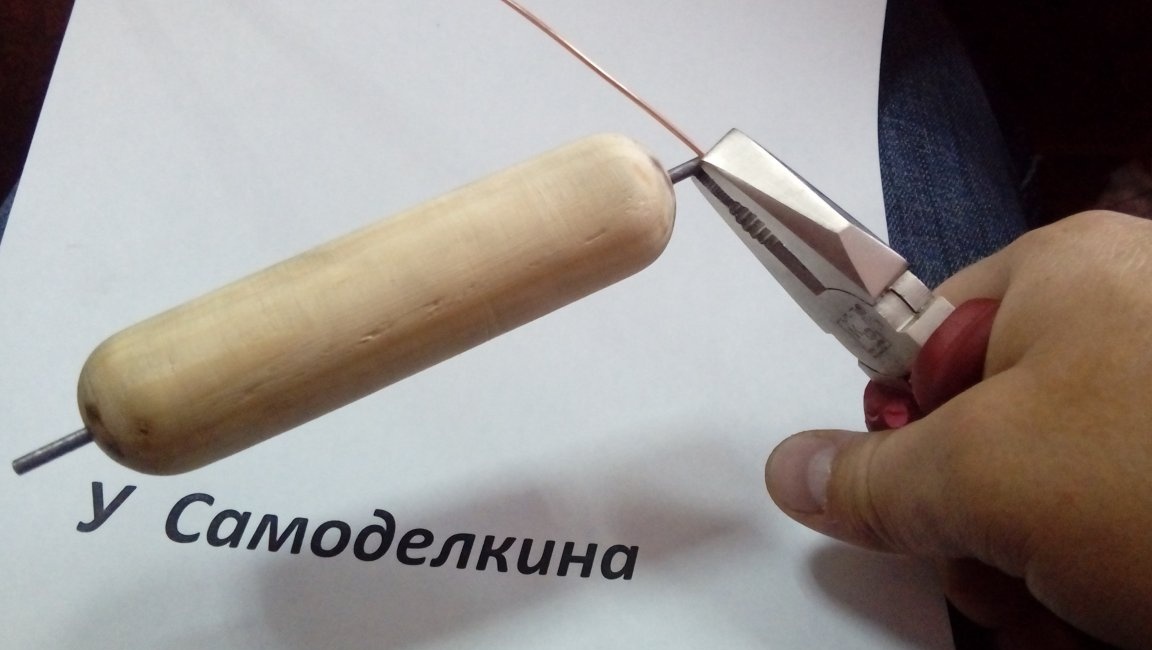
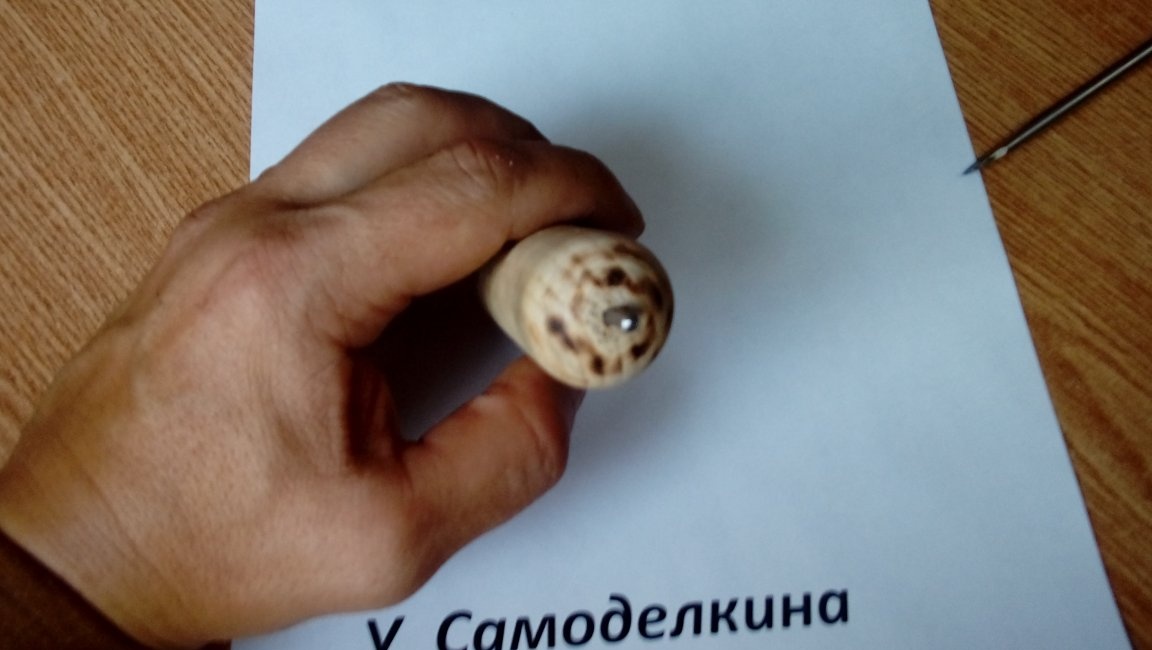
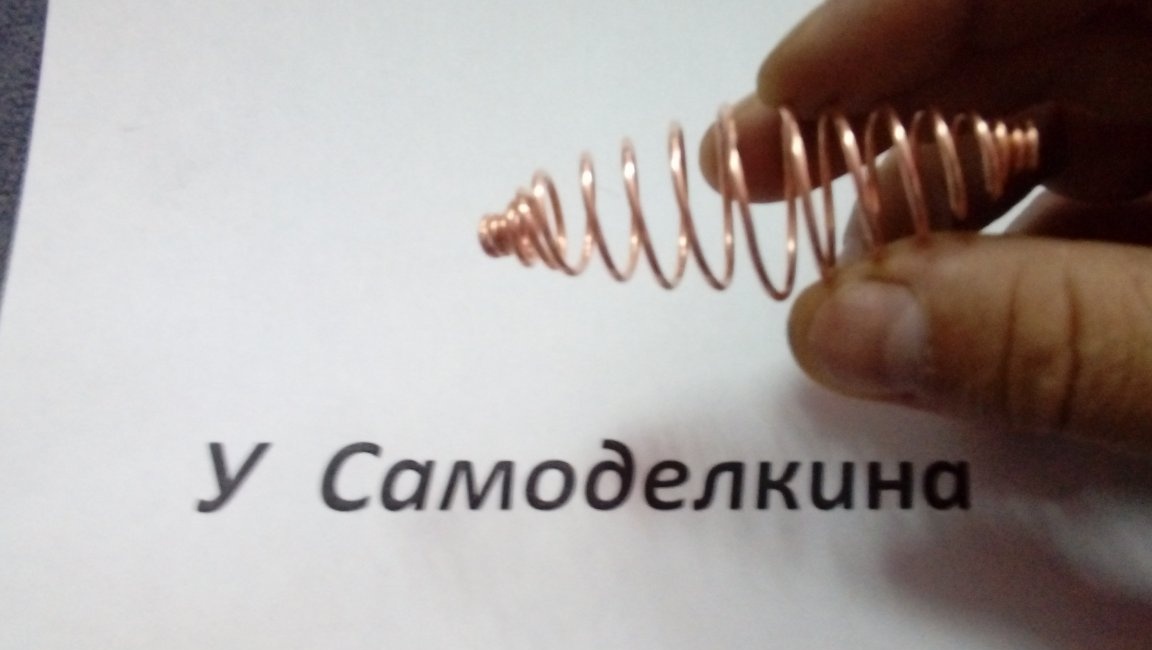
Clamping the end of the wire, we make several revolutions around the nail.
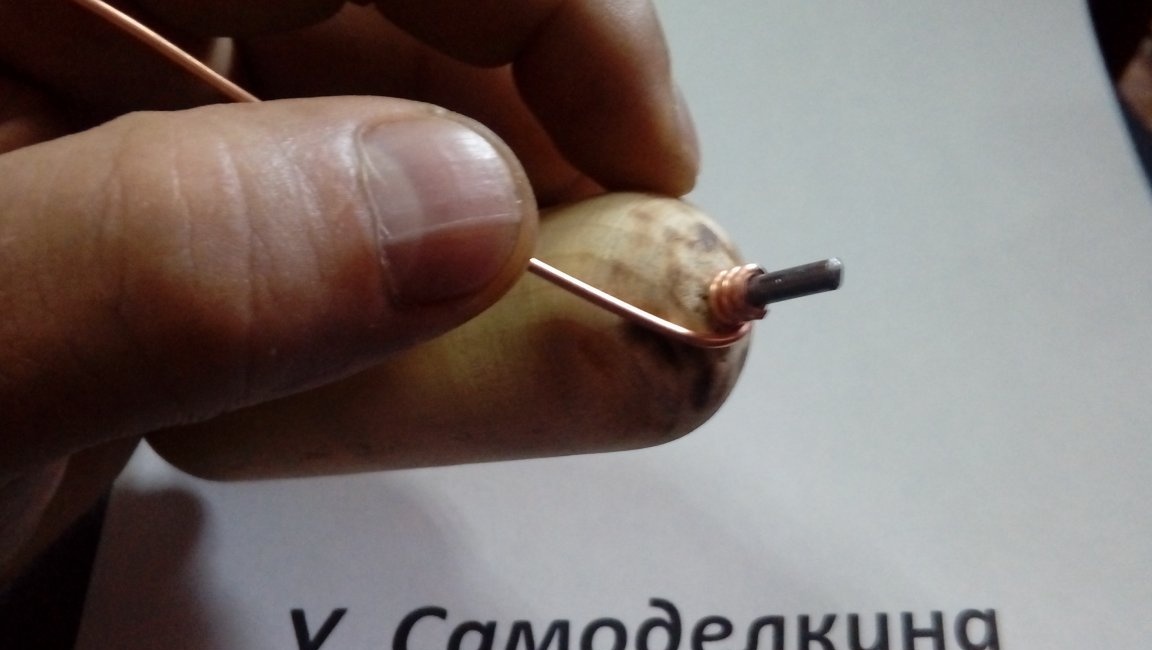
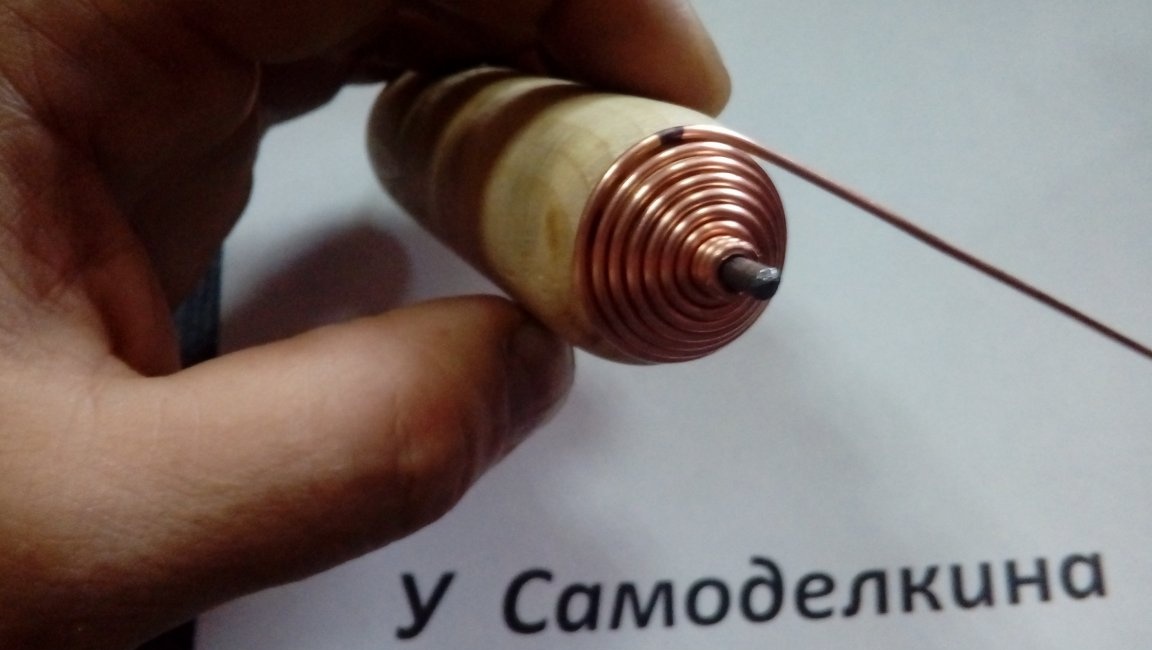
Then we shift the wire close to the handle and holding it with pliers we continue to wind the spiral to the middle of the wire.It should be like this ...
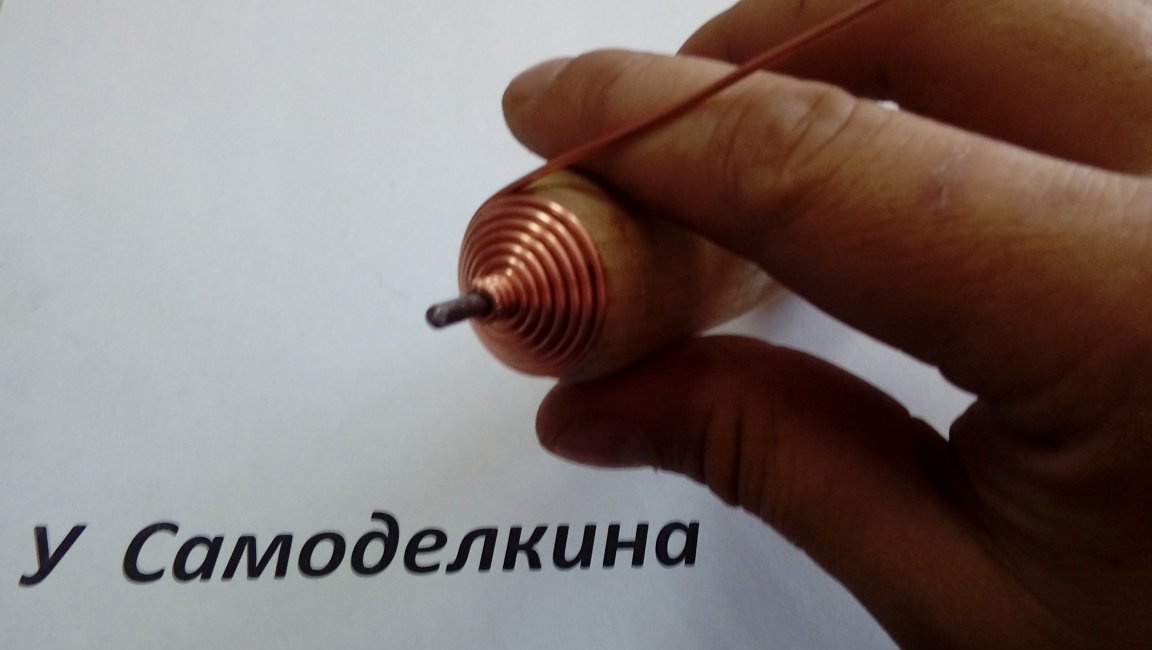
Then we remove the workpiece from the conductor and repeat the same on the second side of the wire. The most important thing here is that the wire must be laid on the conductor on the same side and in exactly the same way as on the first side (otherwise the spiral will turn out wrong).
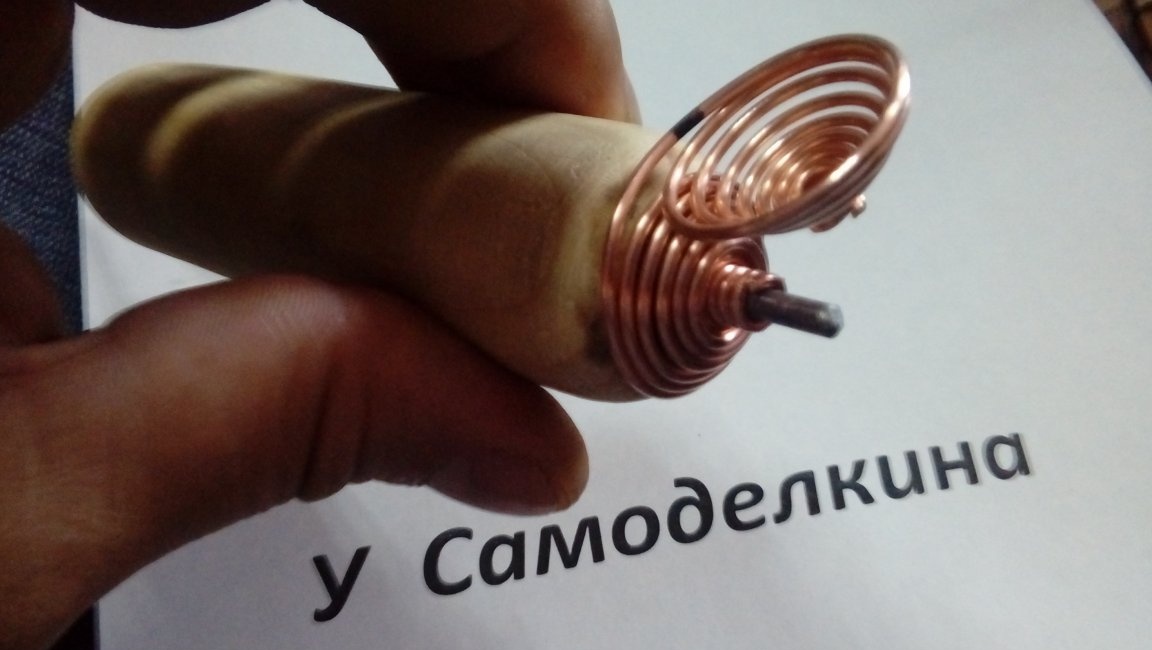
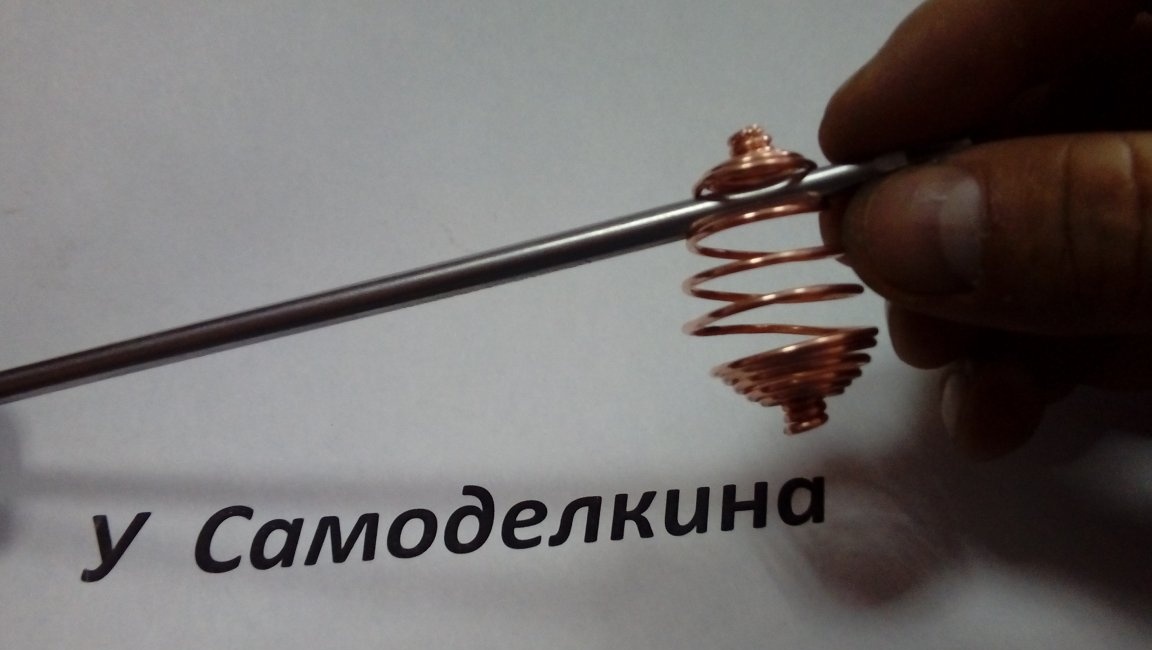
Next, remove the workpiece from the jig and combine the two halves.
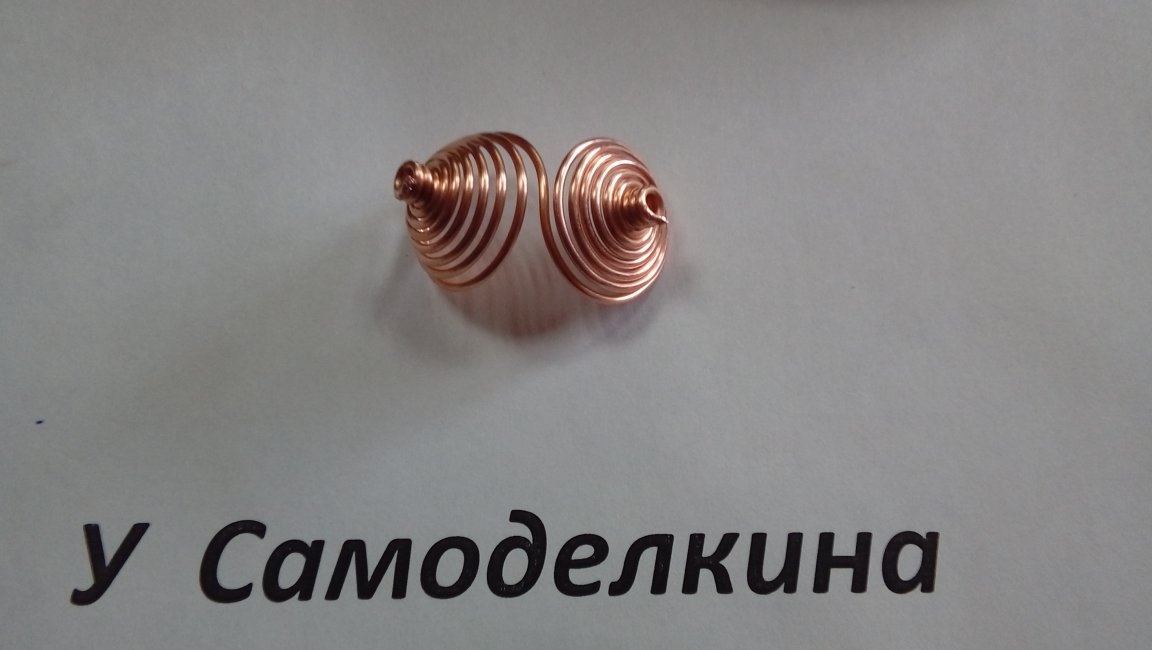

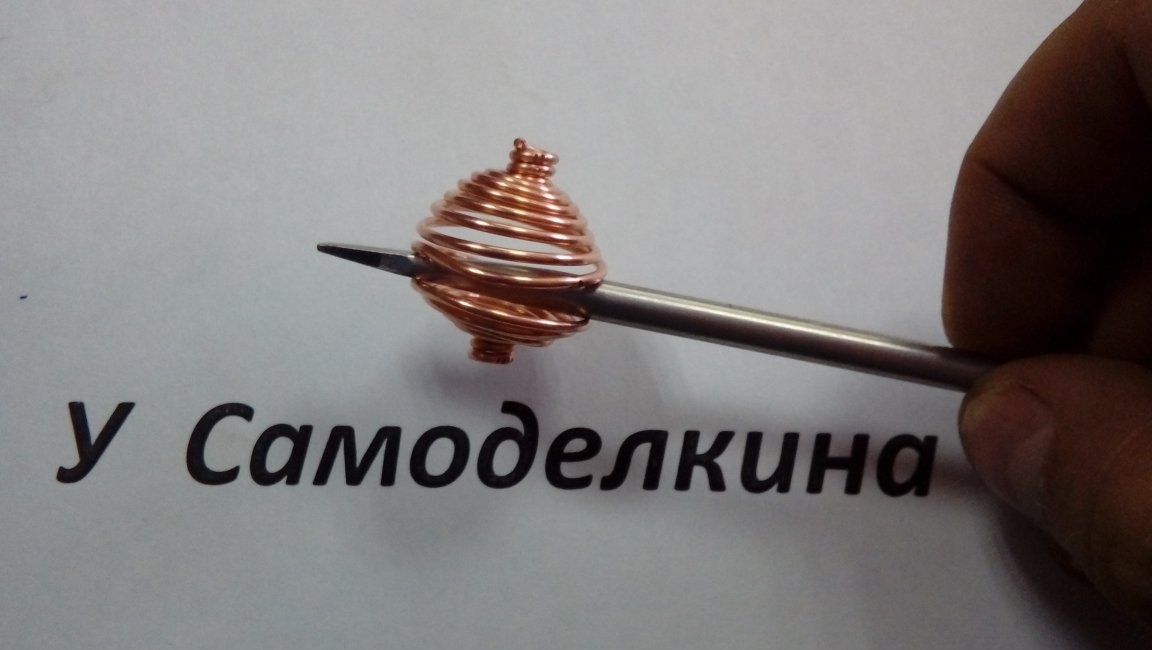
Now you need to evenly stretch the resulting workpiece. It is better to use a screwdriver or something similar for this (we insert between the turns and begin to turn).
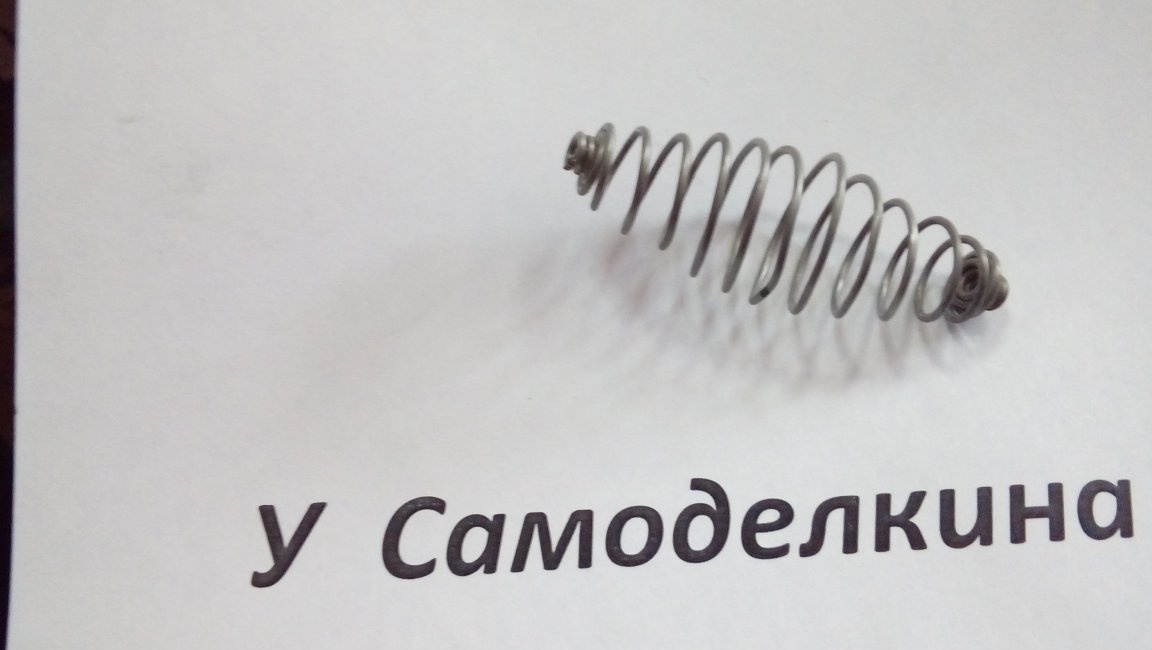
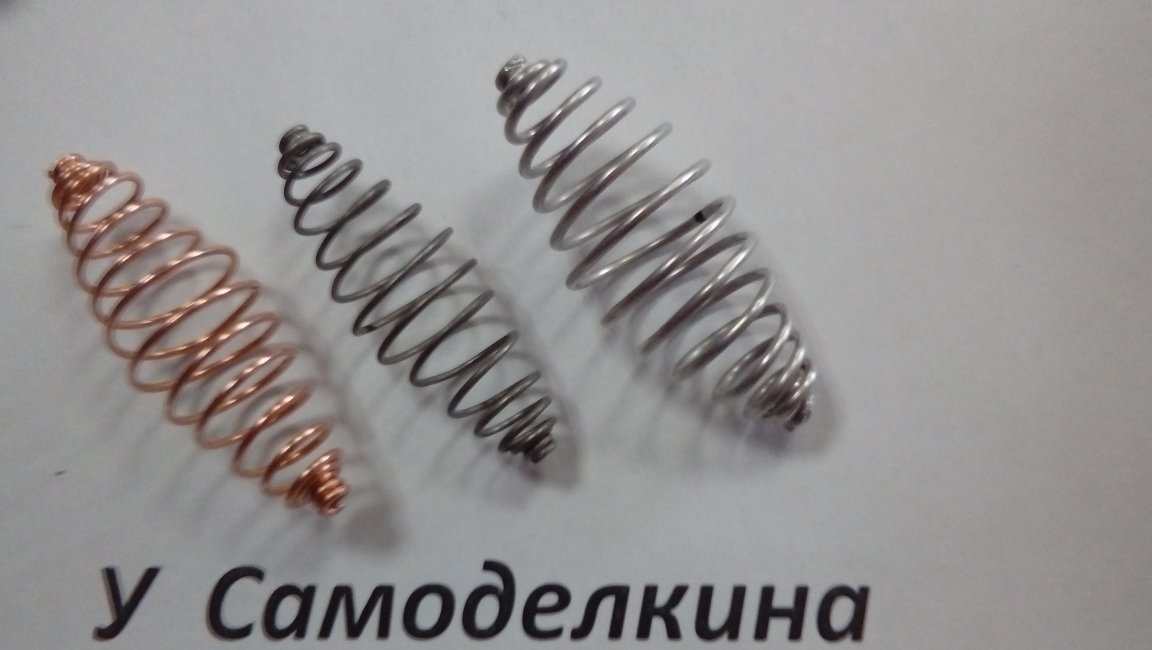
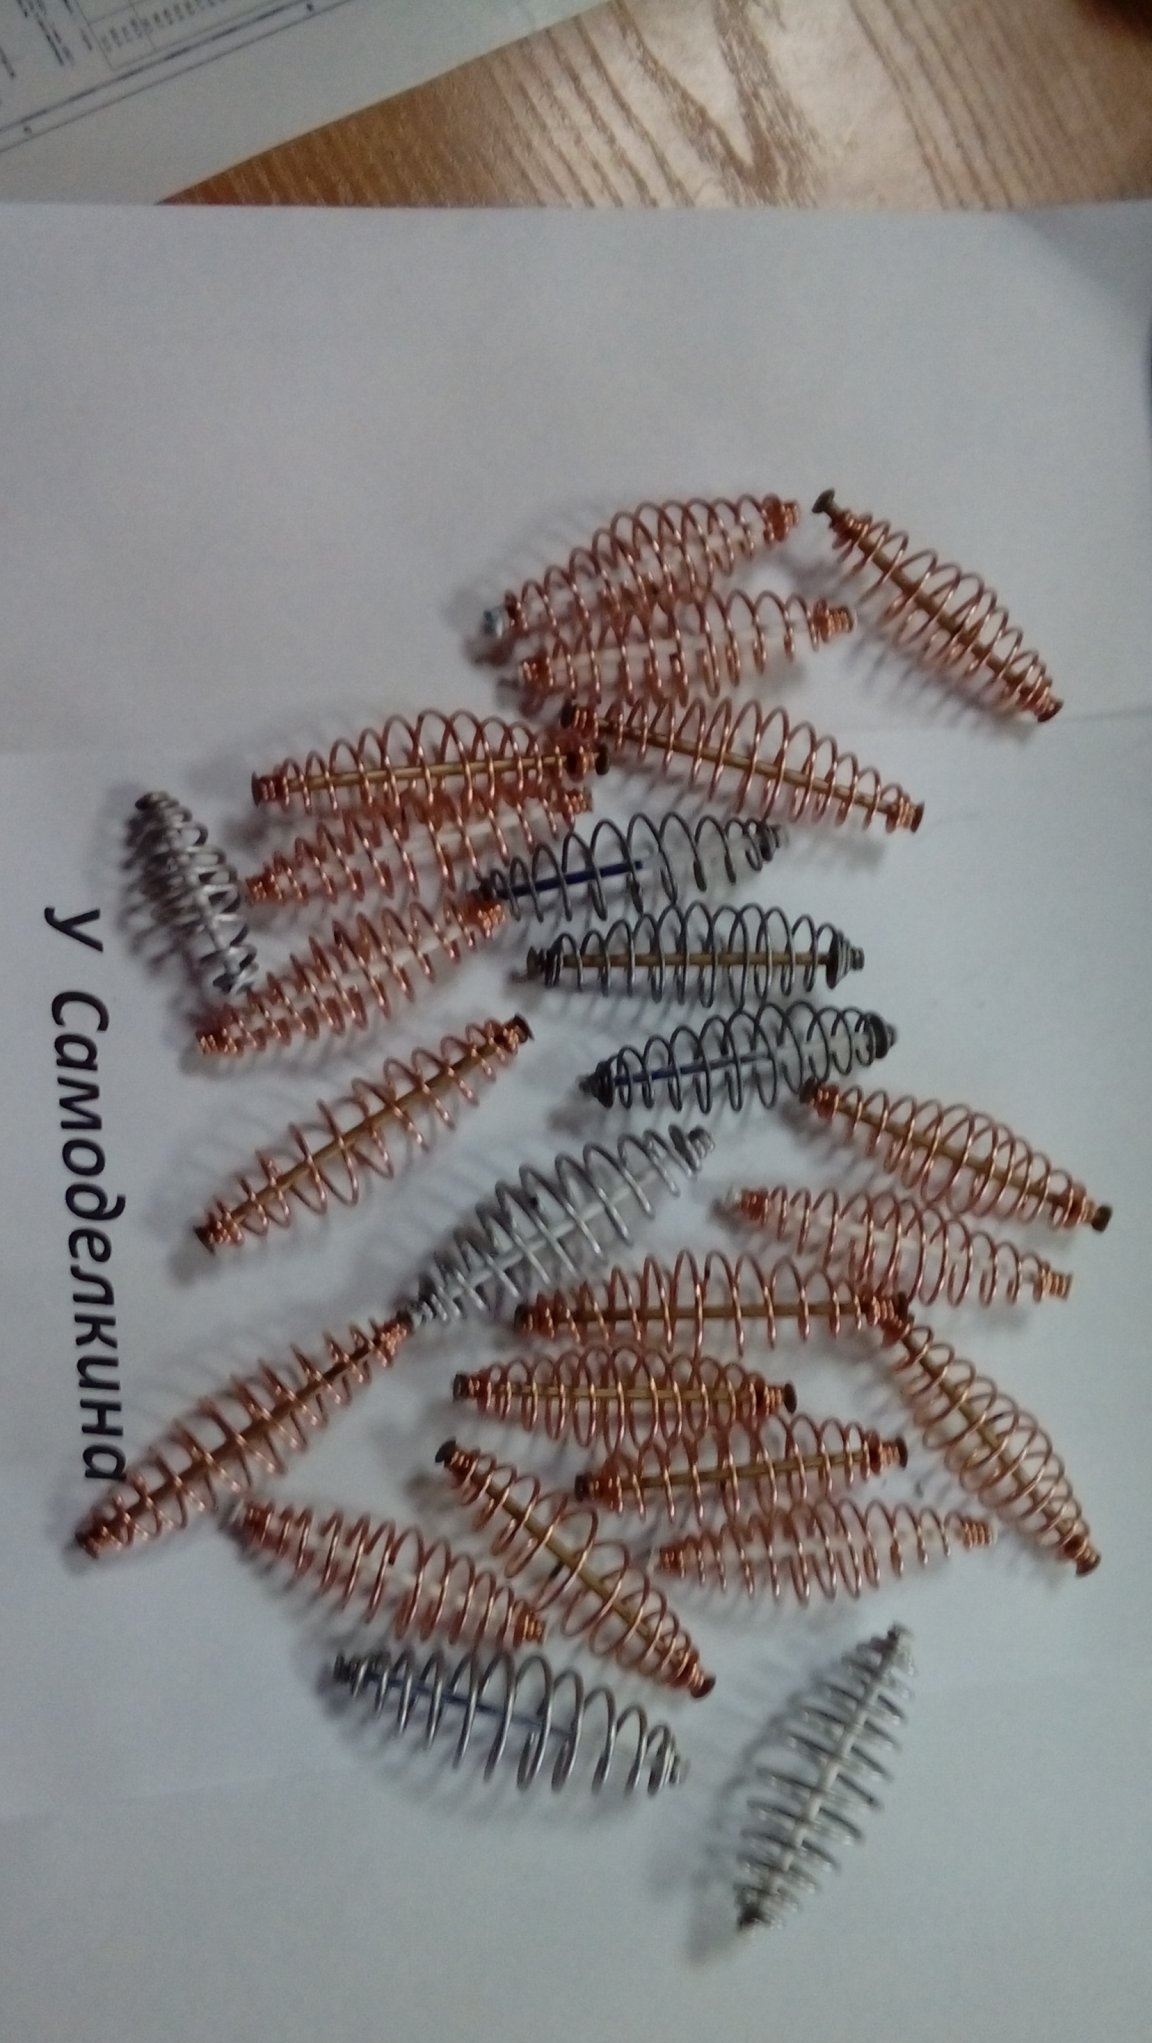
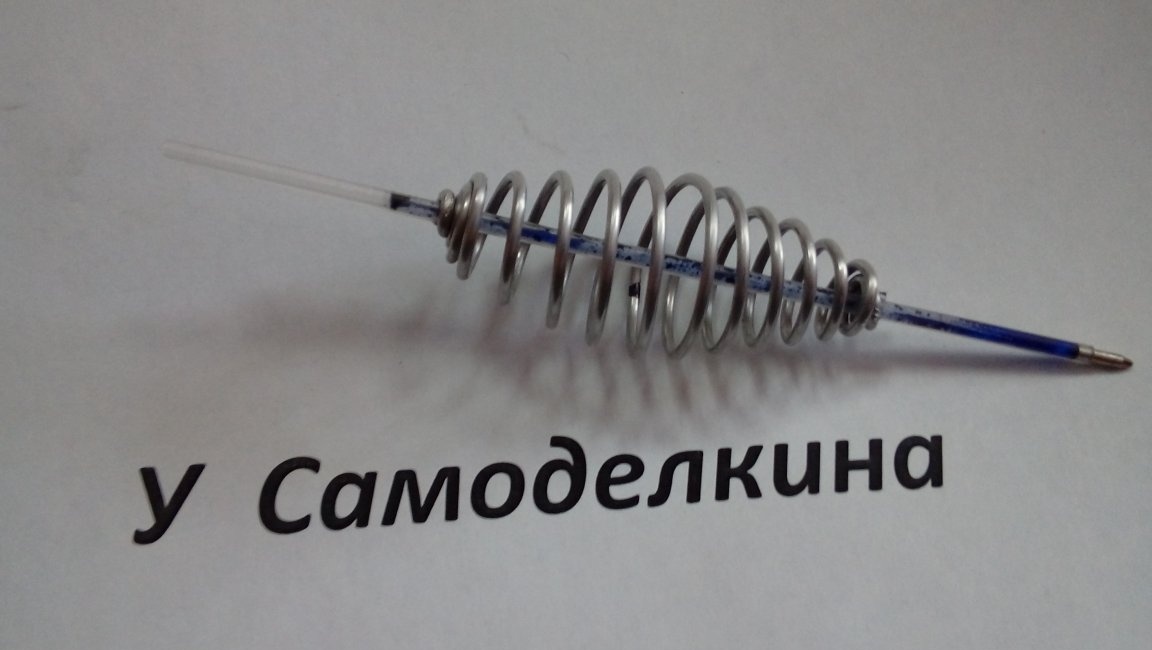
I tried to make of copper, knitting galvanized and aluminum wire (I liked the results very much). It remains to insert the paste from the handle and melt the edges with a match or lighter and roll them up.
I hope that this homemade product is useful to you.
All a good mood, good luck and a good bite!