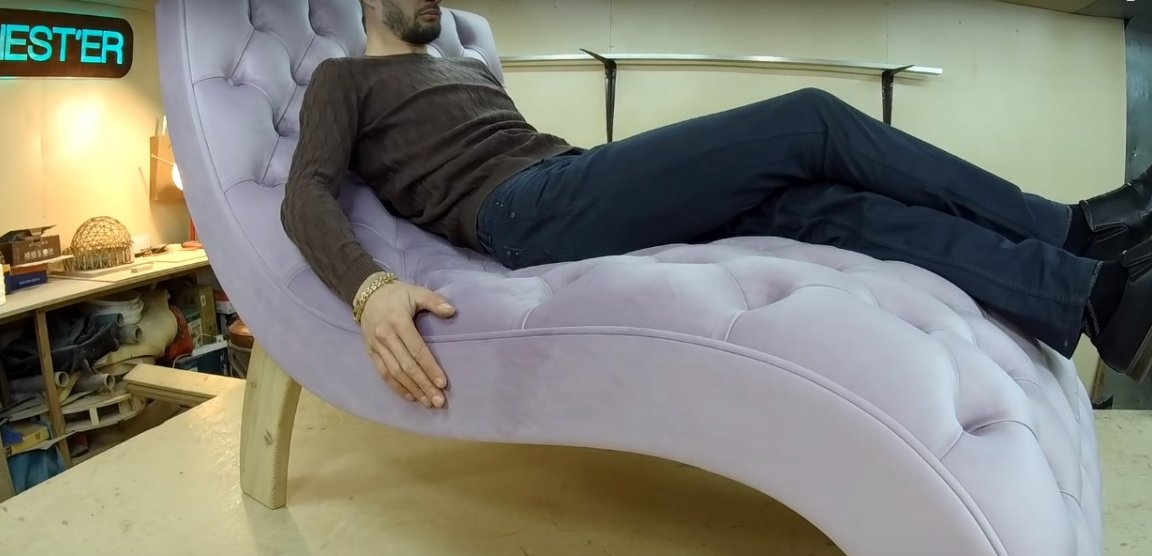
Production of furniture in home conditions - quite feasible occupation, which does not require expensive machines and sophisticated equipment. You can be convinced of this by the example of a master class, where the author shows in detail how to make a luxurious soft armchair do it yourself.
You will learn how to make a frame from plywood and wood, how to properly carry out a carriage screed and how to use a decorative furniture cord with piping.
In order to make a soft chair with a carriage screed with your own hands, you will need:
Materials:
- thick plywood for the manufacture of side parts with a thickness of at least 15 mm;
- Thin plywood for seating up to 5 mm thick;
- fiberboard or similar material for the manufacture of patterns;
- MDF for front side parts for upholstery;
- a bar with a section of 40 x 40 - 50 x 50 mm for the manufacture of a frame;
- two wooden squares 100 x 100 mm for the manufacture of front legs;
- board thickness 30 - 35 mm for the manufacture of rear legs;
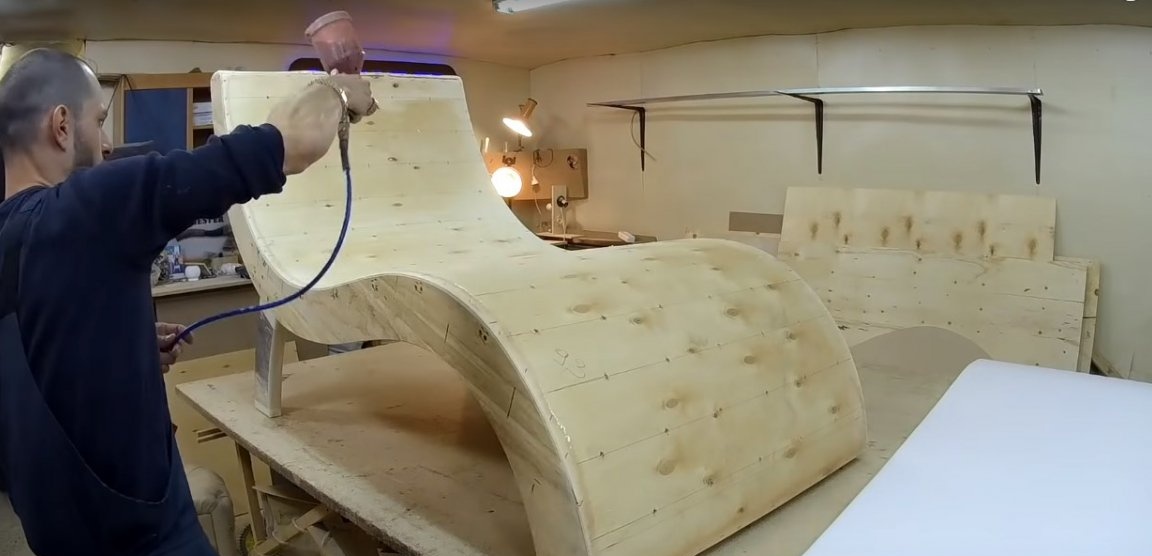
- acrylic varnish for processing natural wood;
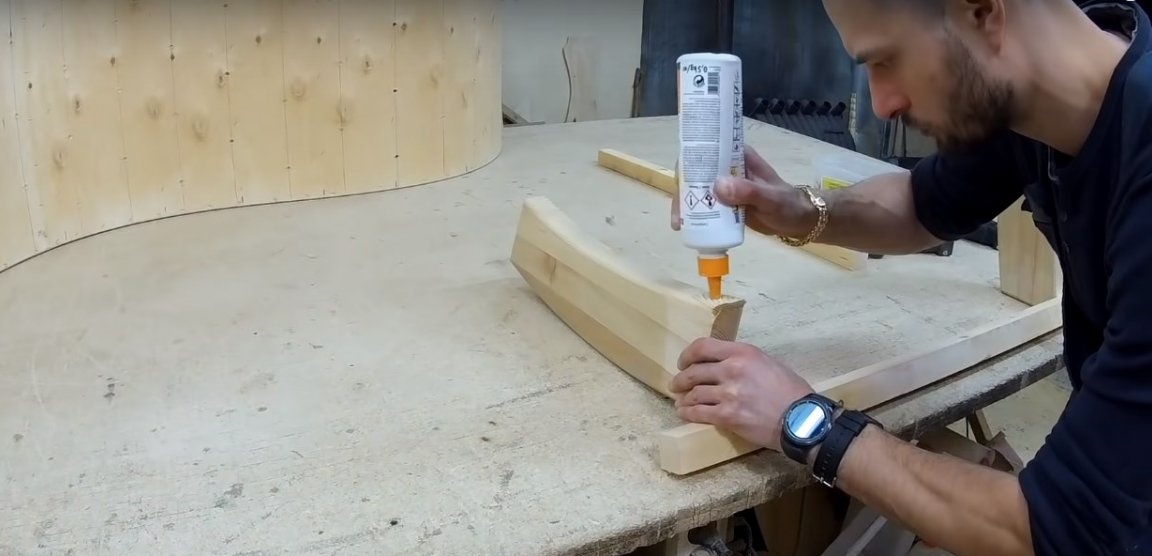
- furniture glue, as well as glue for foam rubber type PVA (universal);
- furniture foam 50 mm thick;
- fabric for a carriage coupler and the corresponding buttons;
- decorative furniture cord with edging;
- wood screws and screws, staples for furniture stapler;
- thick nylon thread for buttons;
- dowel-nail for fixing decorative side parts.
Instruments:
- jigsaw or manual circular;
- drill;
- screwdriver;
- grinder;
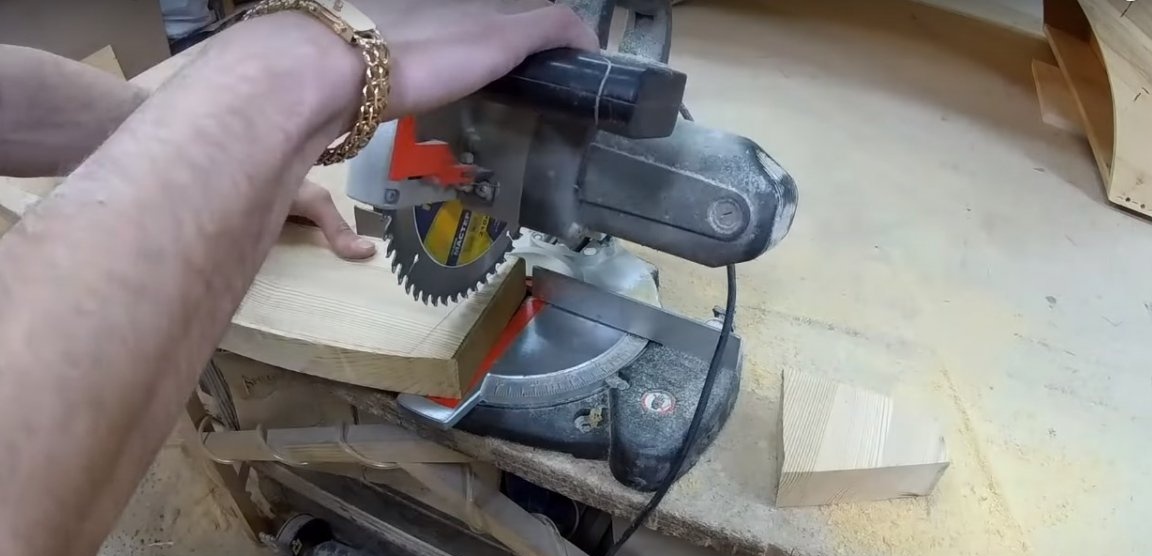
- Miter saw;
- a milling machine for straightening the edges of curly parts;
- circular;
- pneumatic nail gun;
- spray gun for glue;
- stationery knife;
- furniture stapler;
- painting supplies;
- construction tape measure, marker.
Manufacturing process:
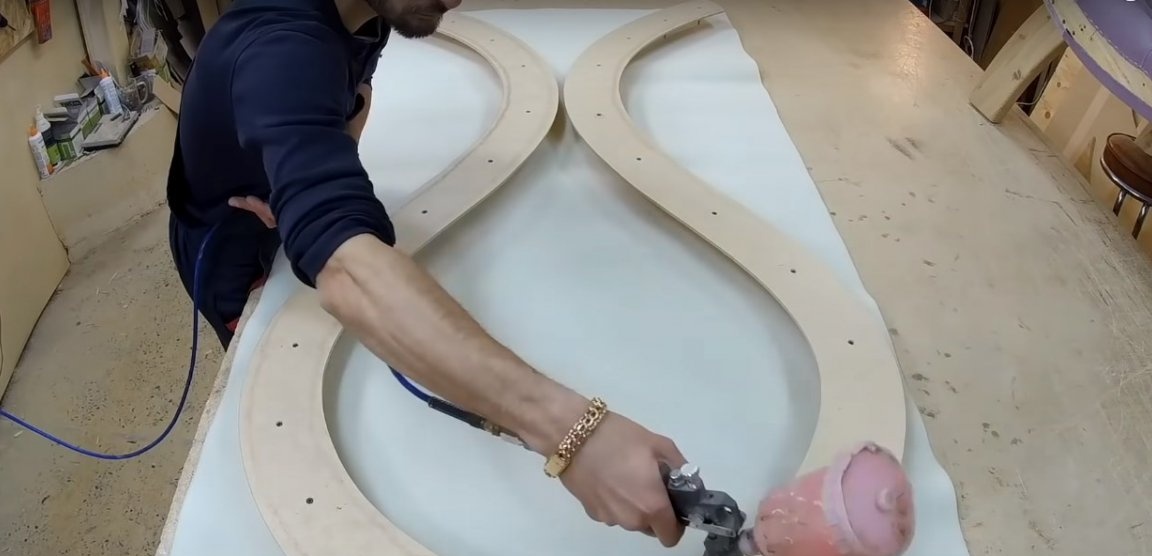
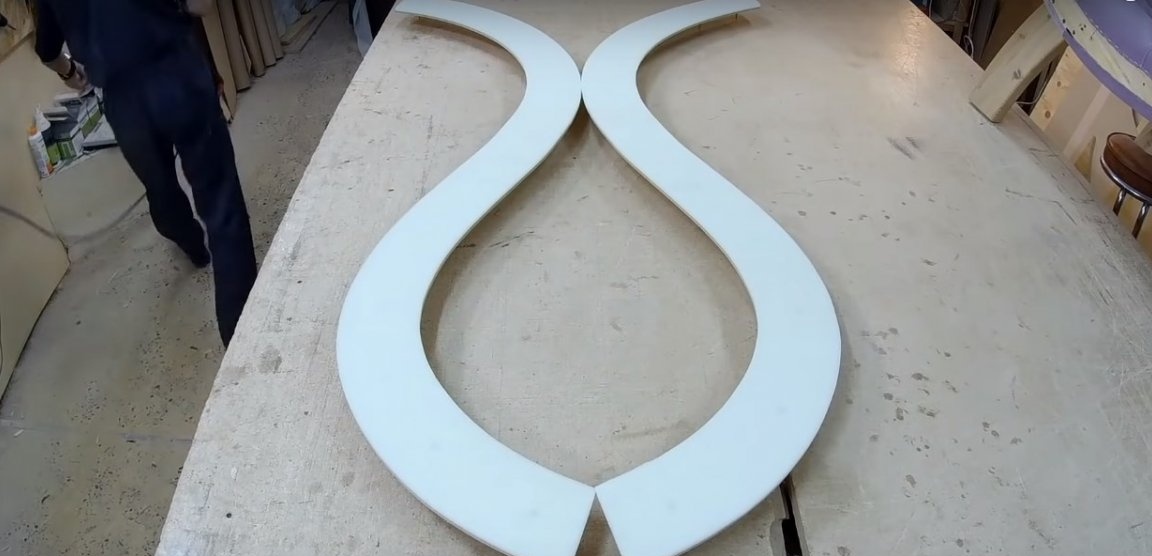
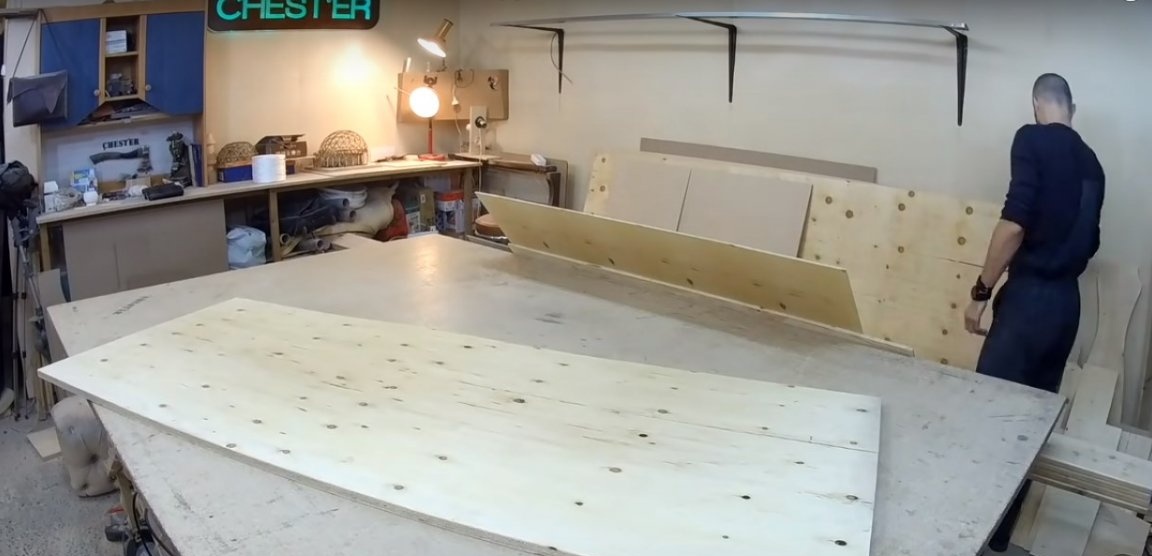
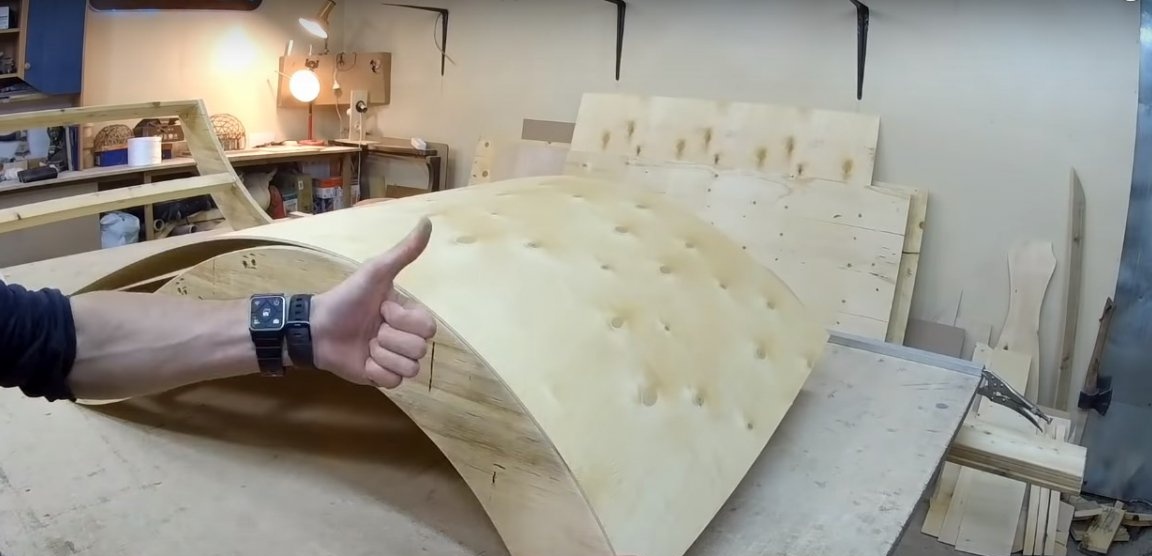
Step One: Making Curly Parts from Plywood and MDF
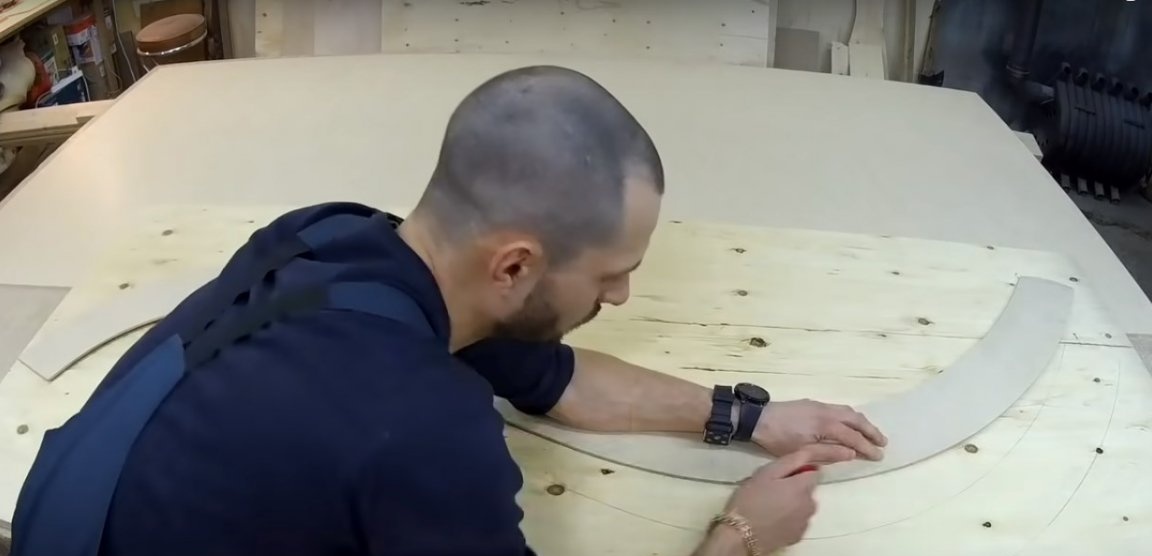
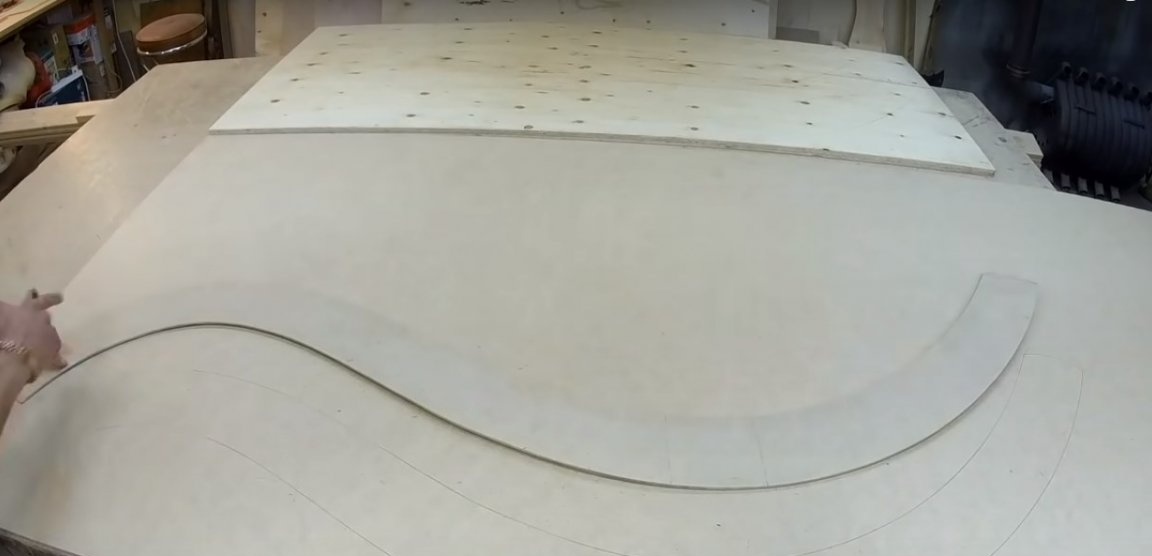
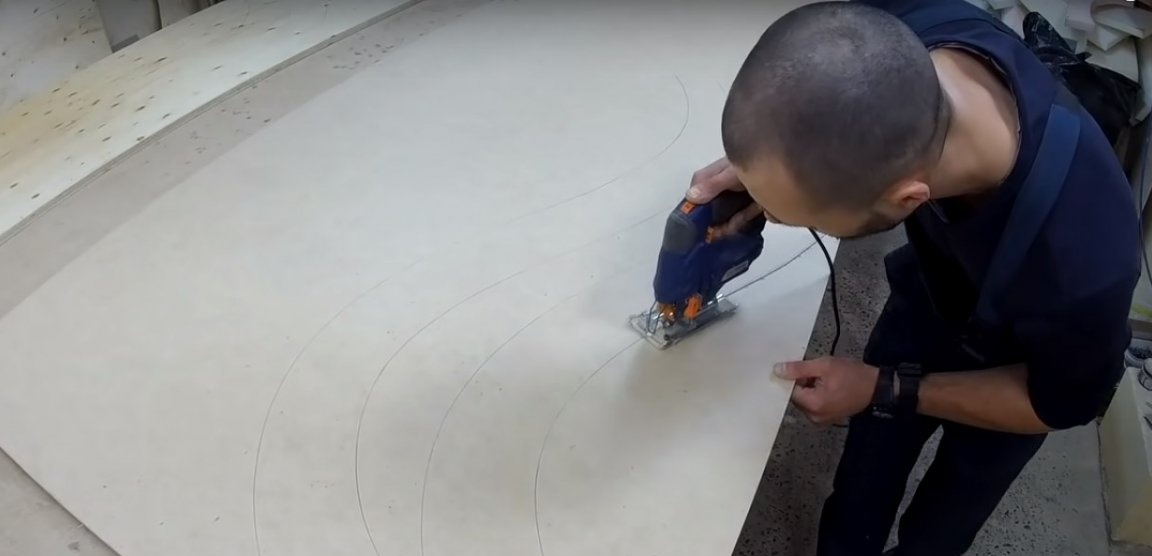
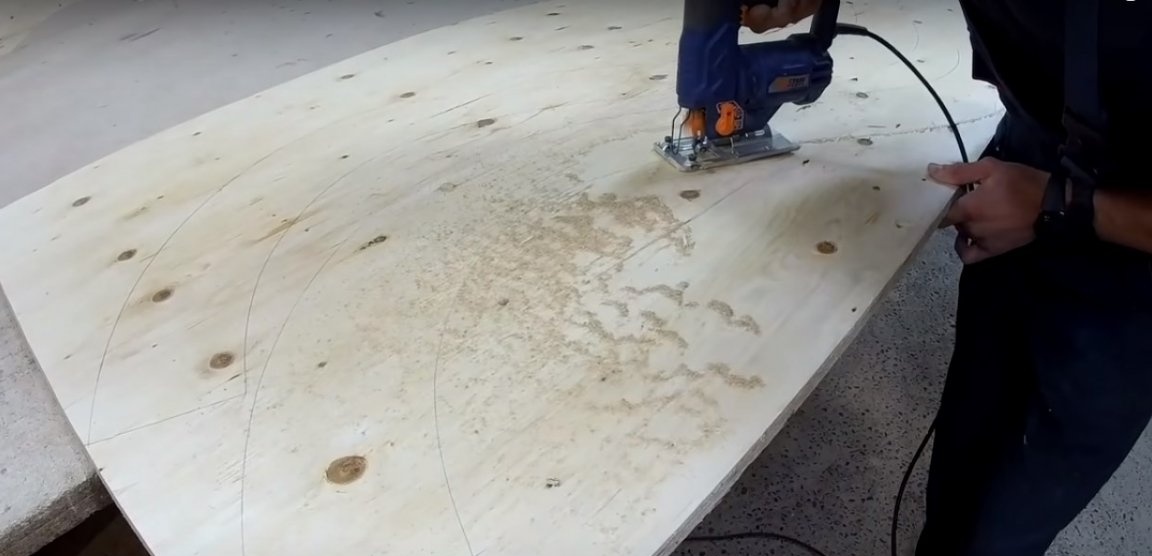
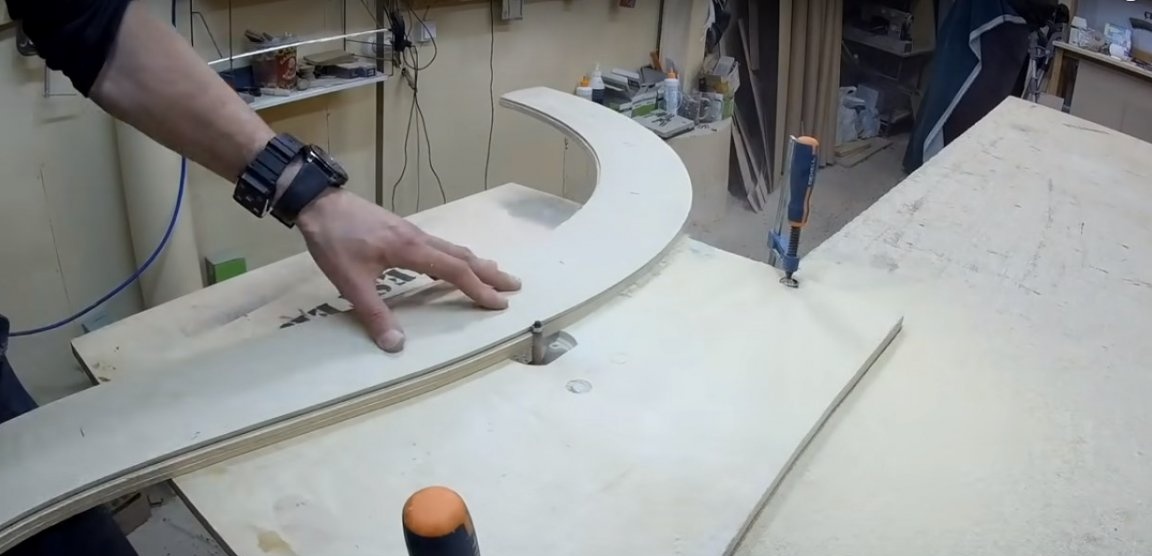
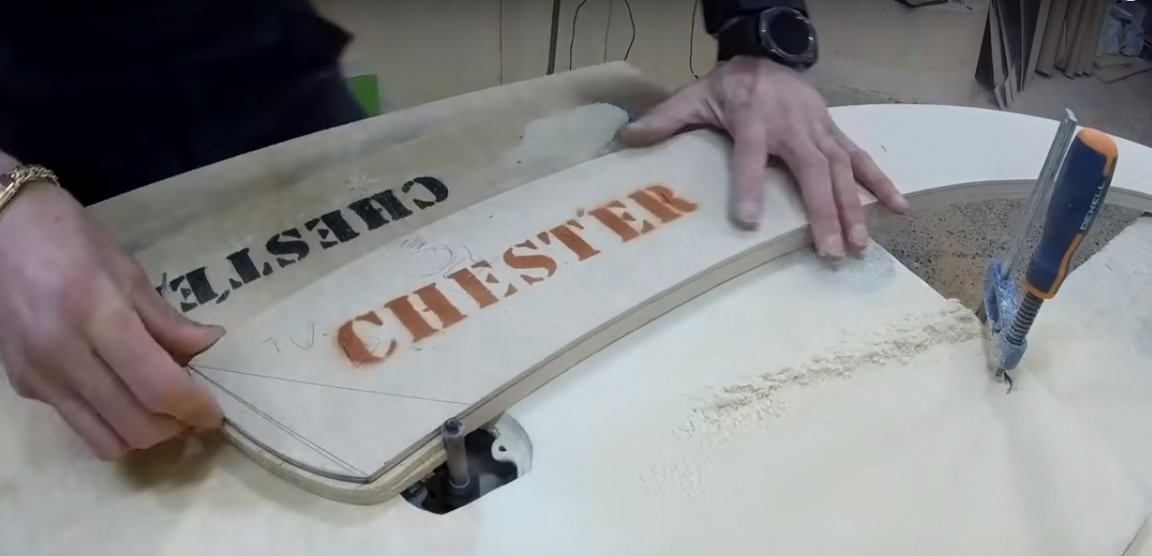
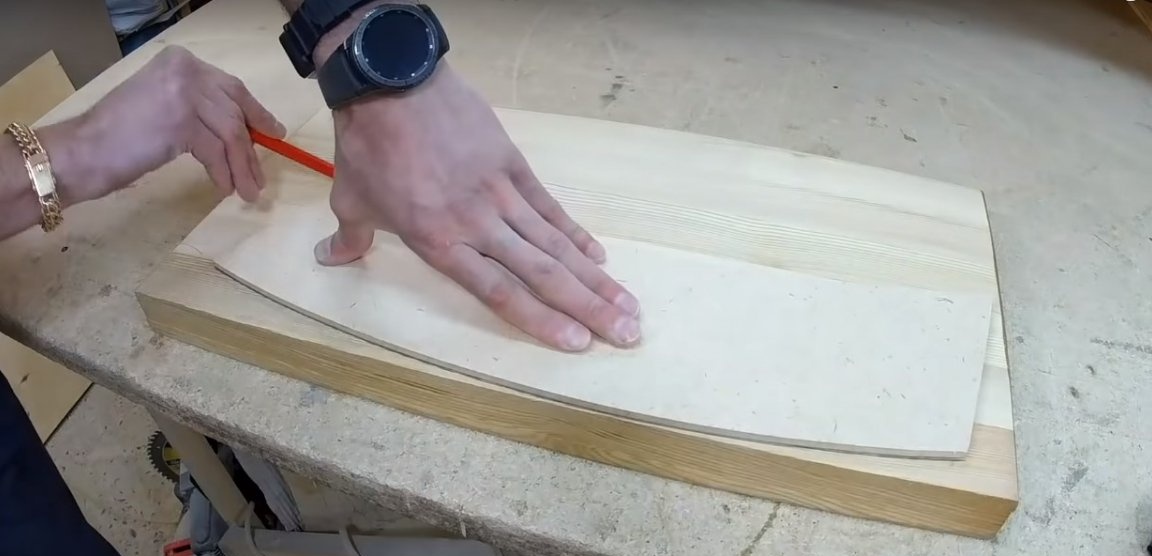
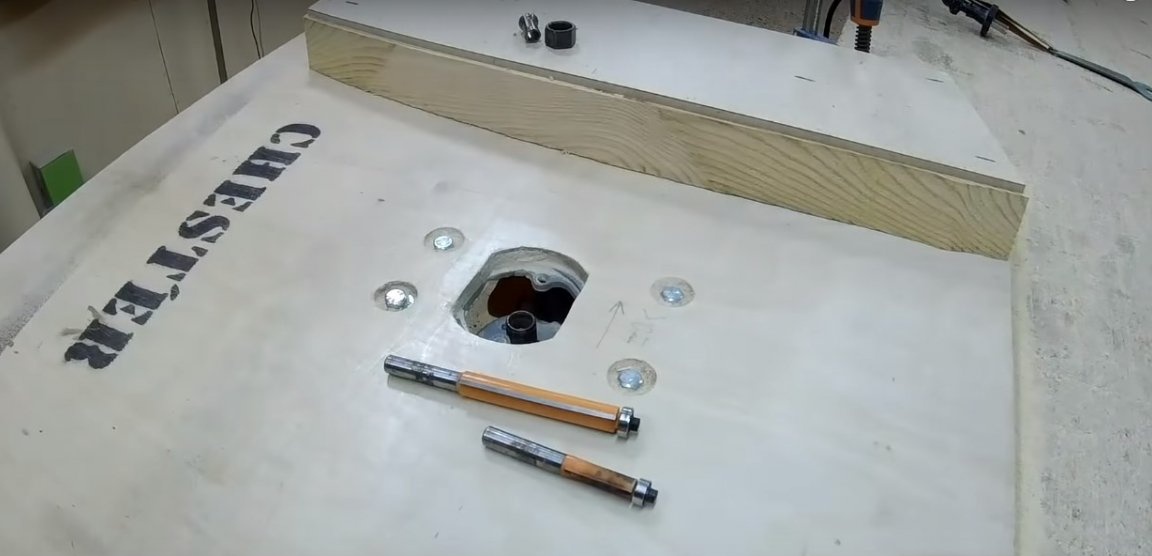
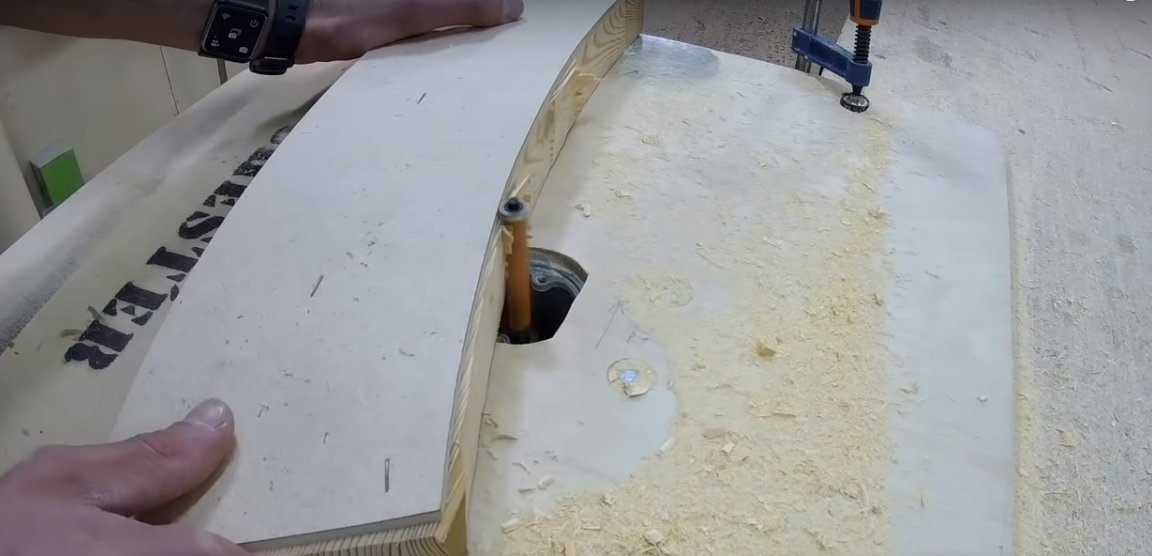
For marking parts from plywood and MDF, the author uses previously prepared patterns. If you do not plan to repeat model armchairs, it will be enough patterns from ordinary cardboard. In any other case, it is worth using something more durable - for example, fiberboard.
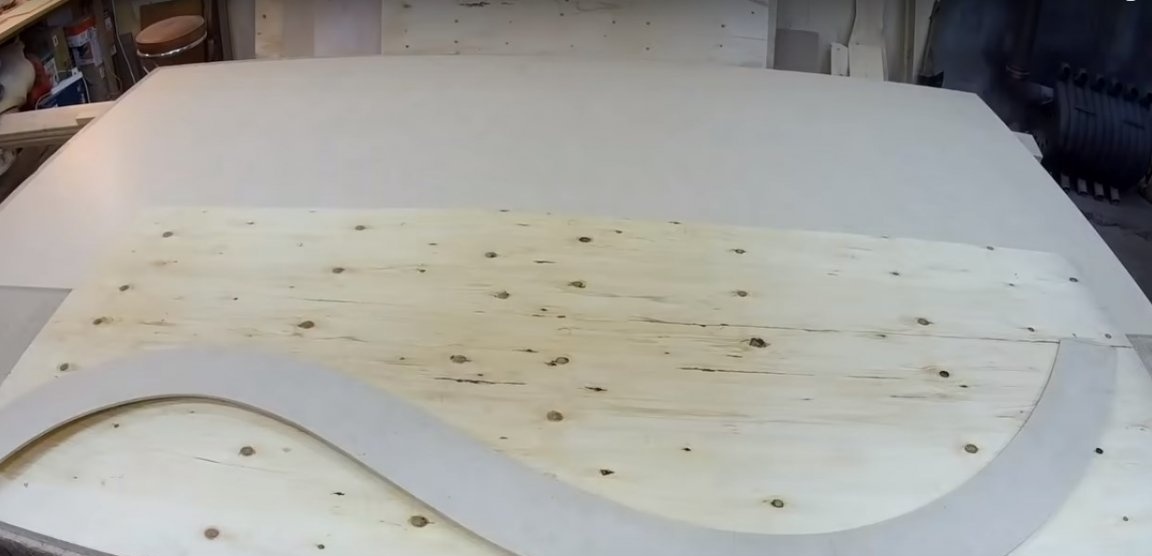
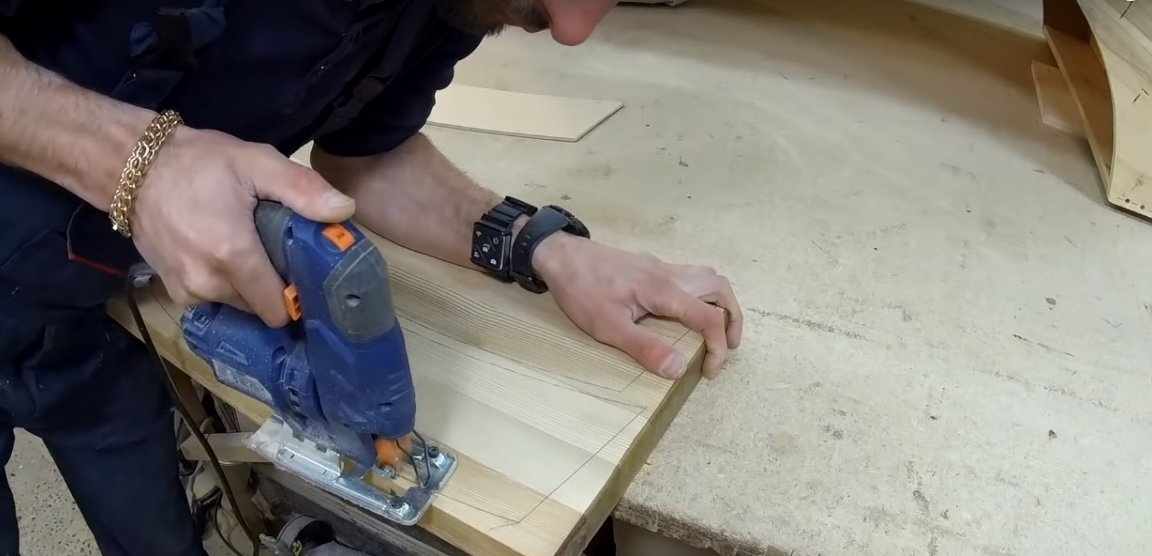
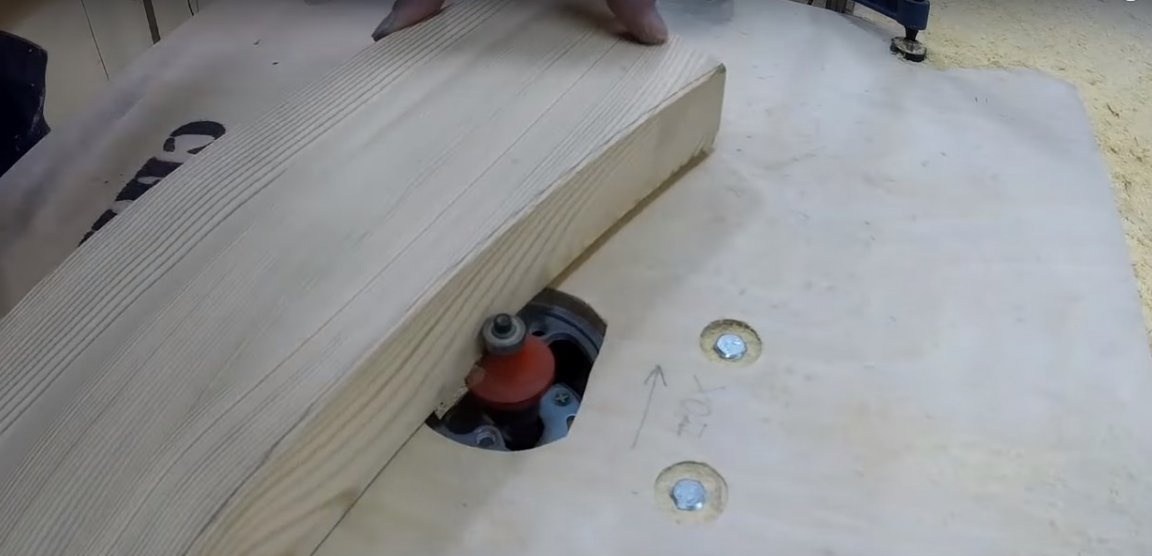
Mark and cut the workpieces with a jigsaw with milling allowance.
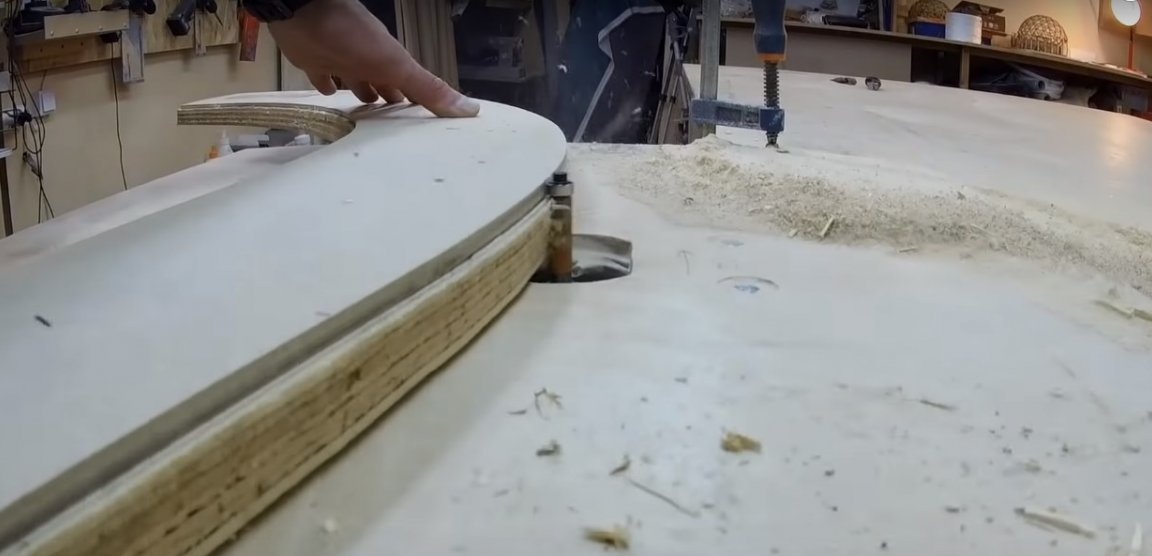
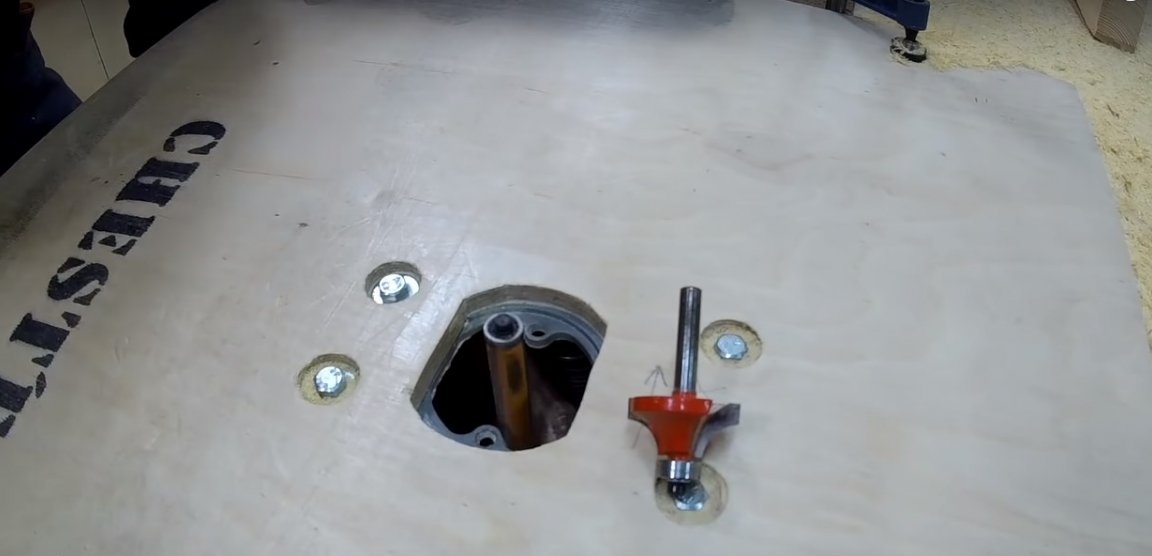
To correct the shape of the curly blanks, the author uses a home-made milling machine from a manual milling cutter installed under the work surface. The edge should be treated with a long cylindrical mill before marking.
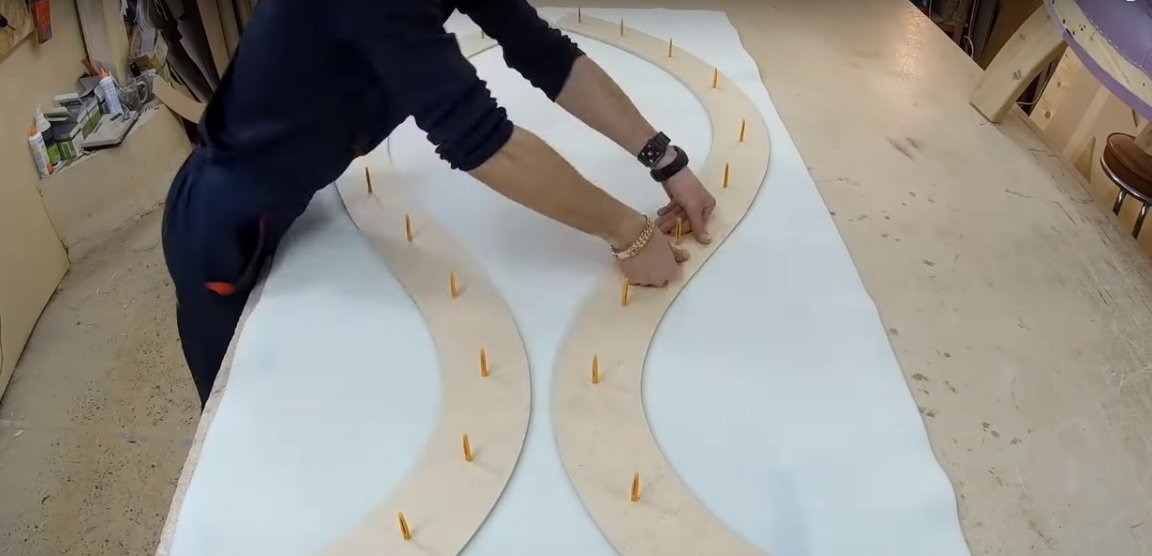
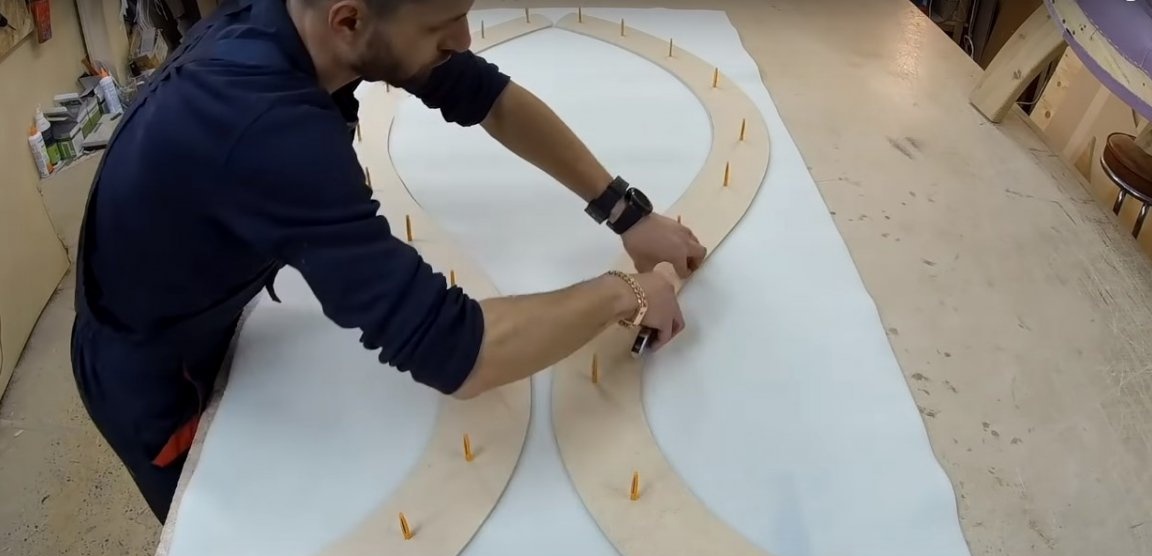
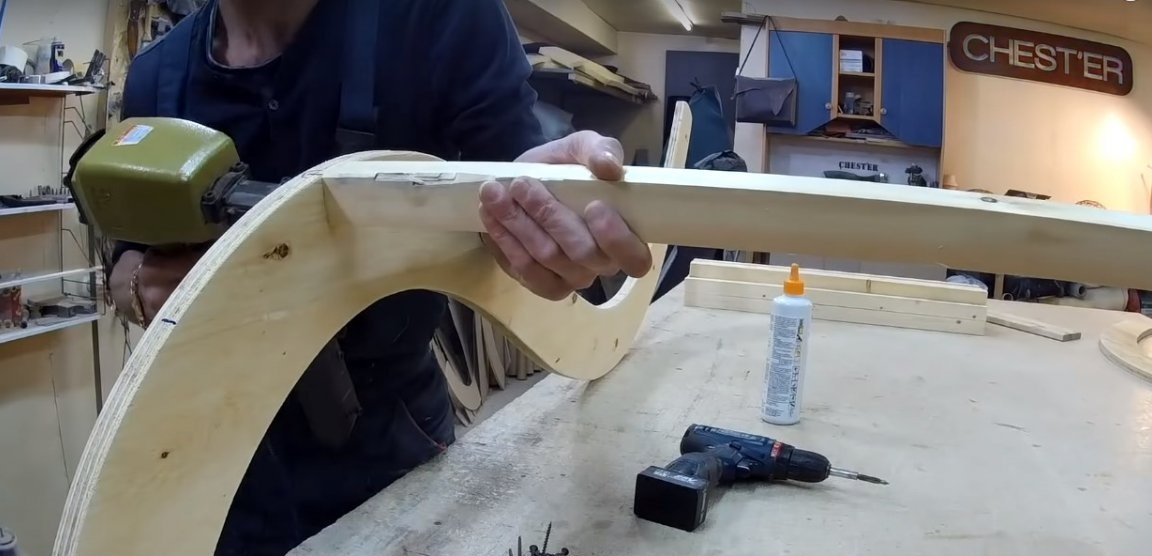
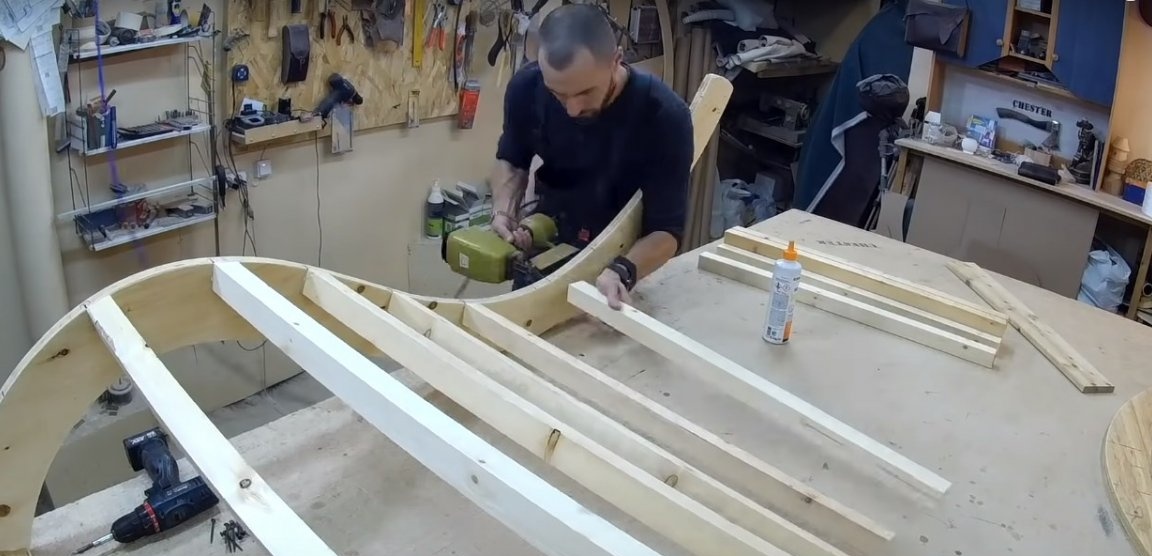
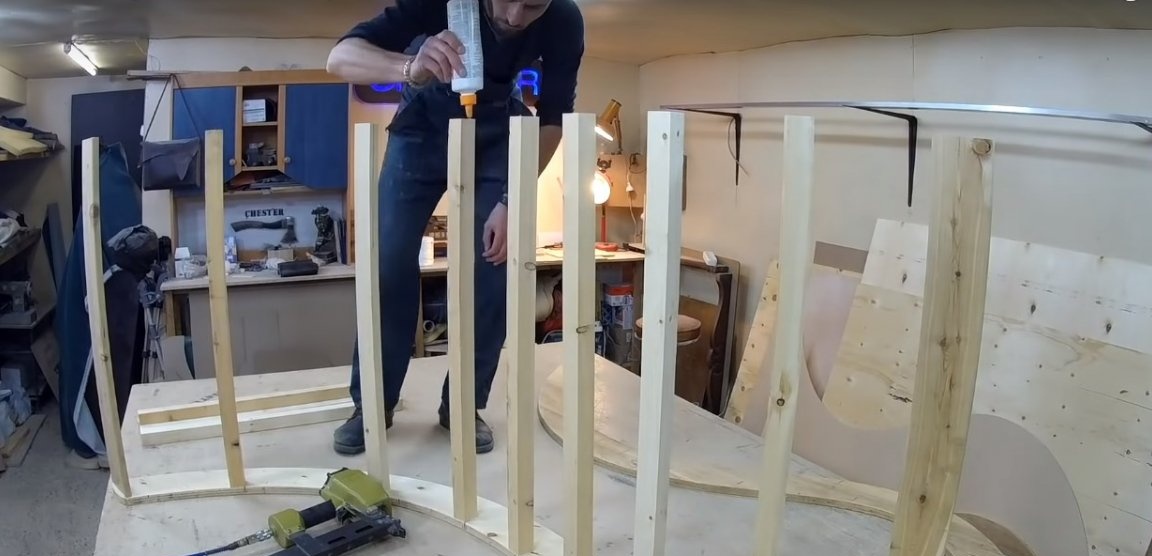
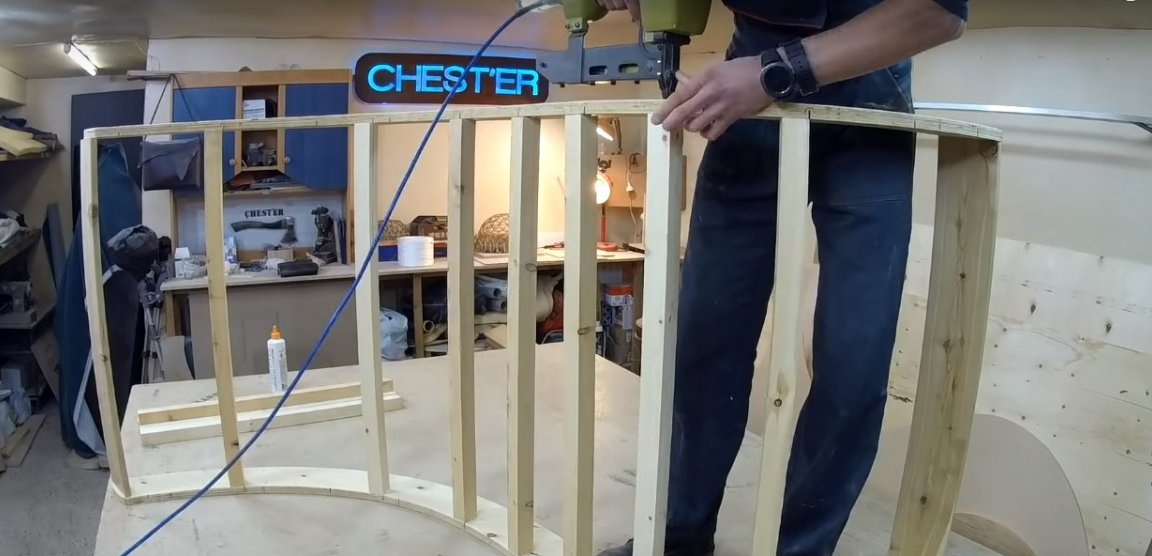
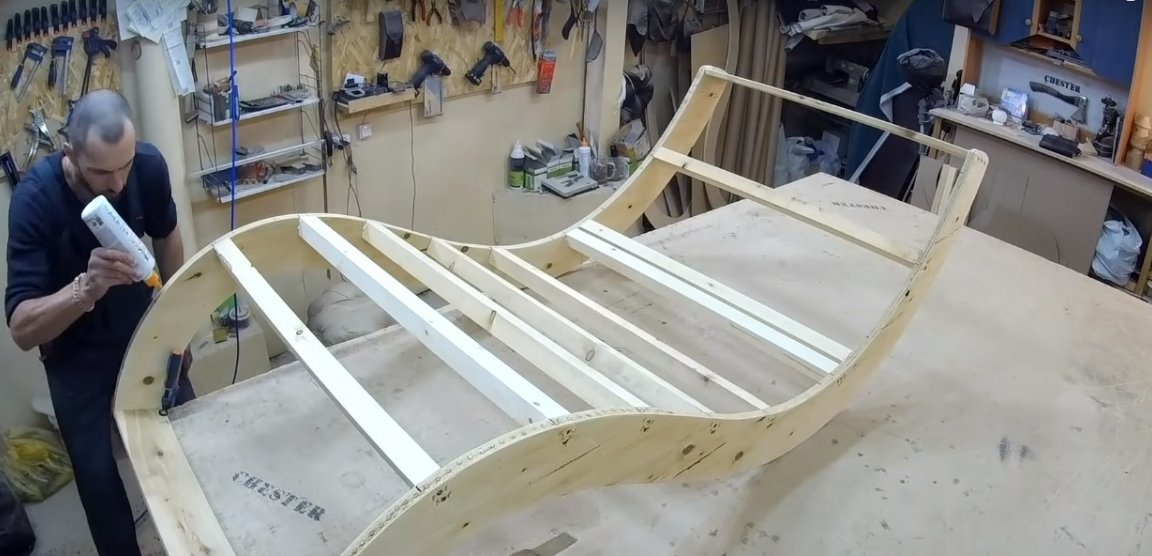
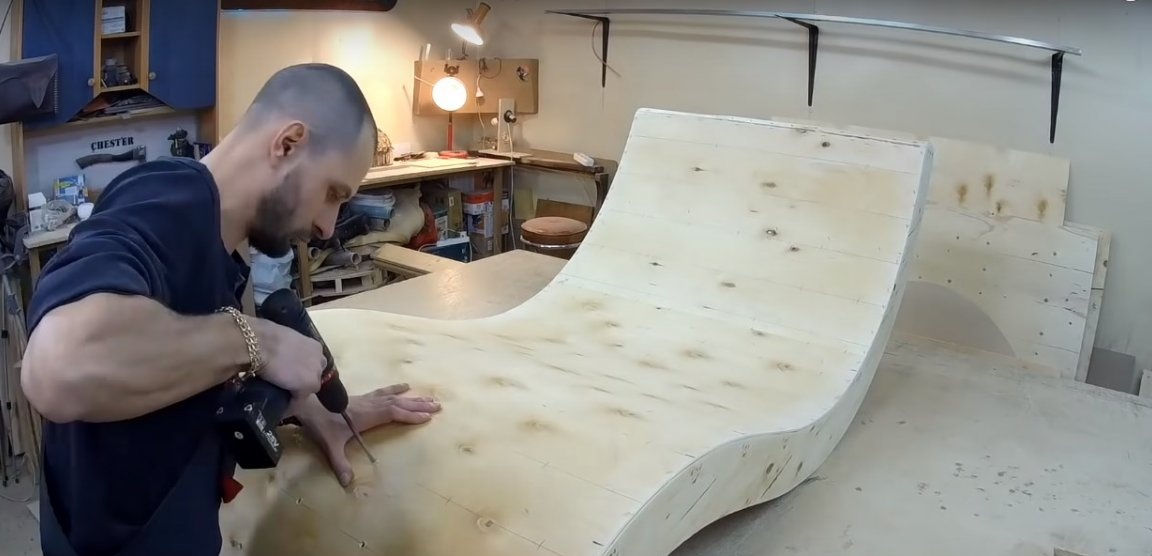
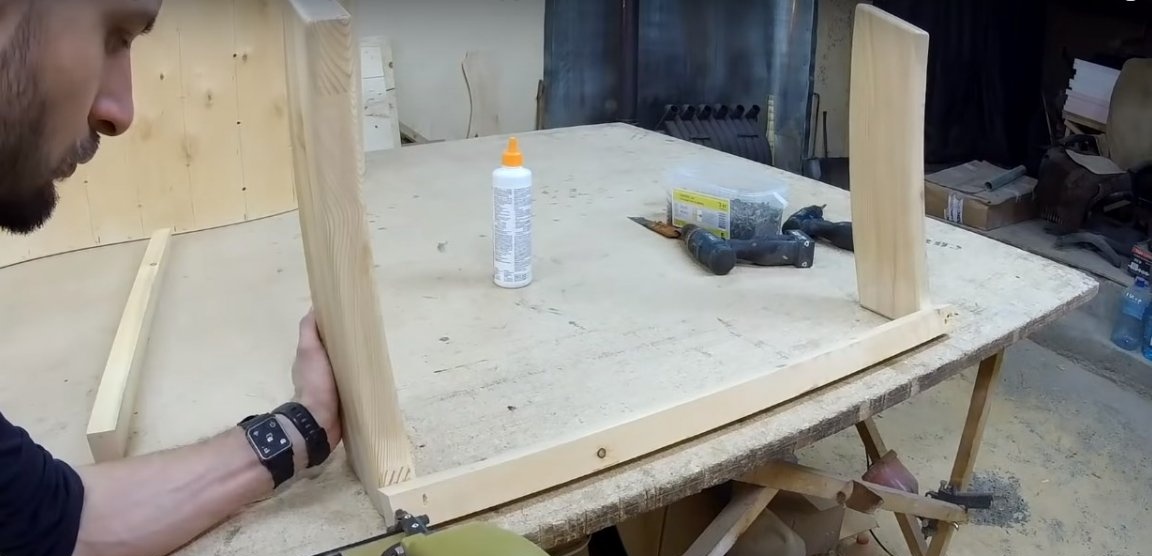
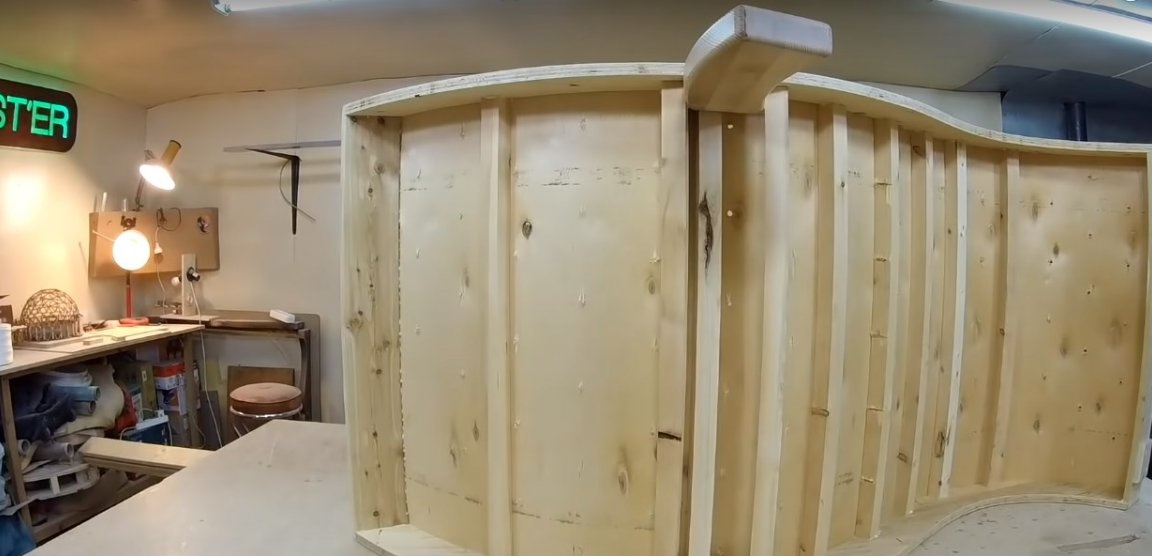
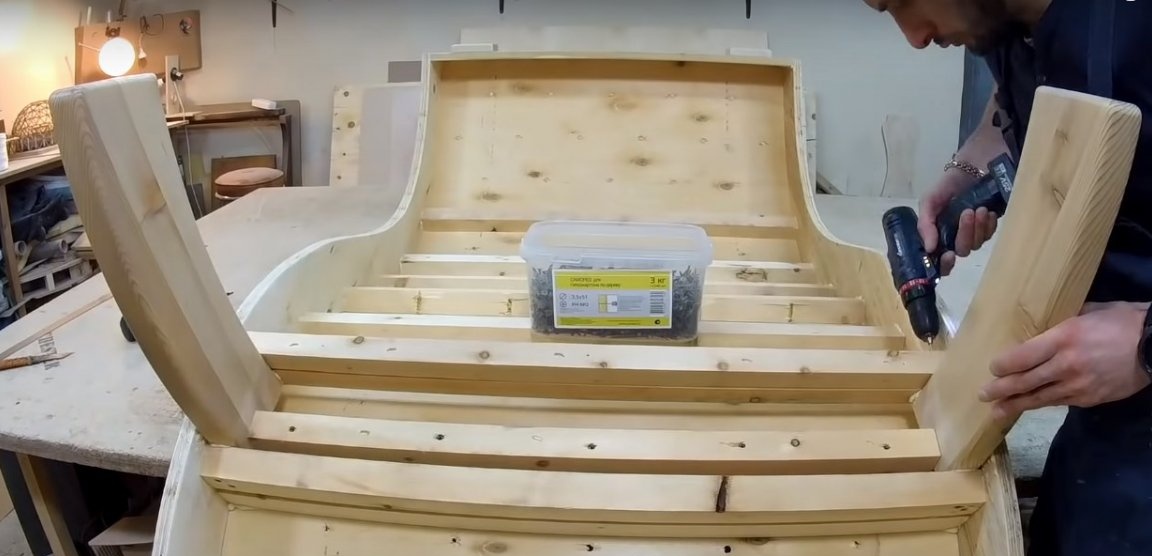
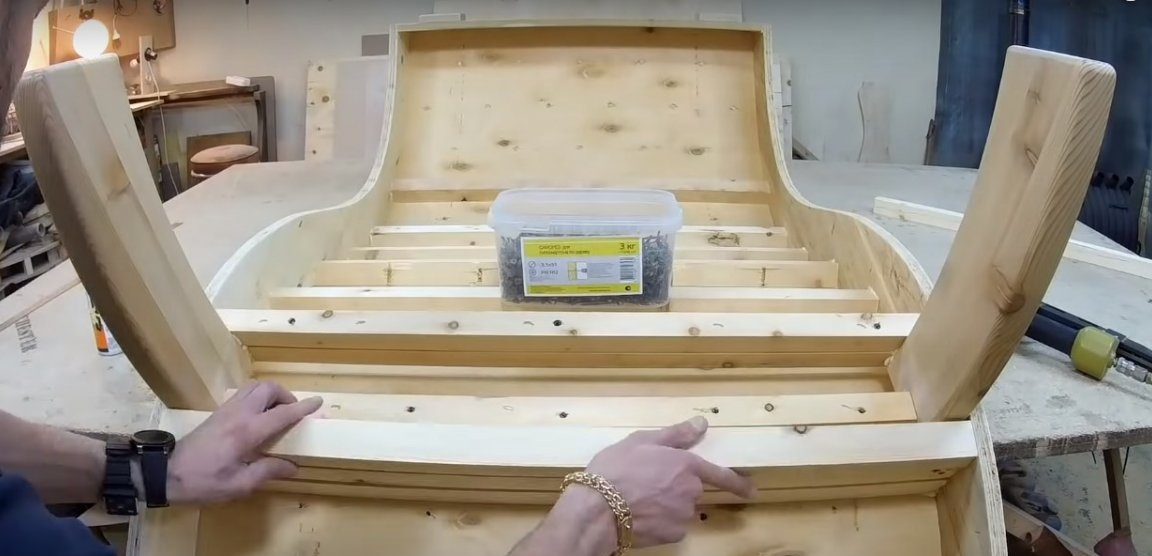
Step two: assembly of the main frame
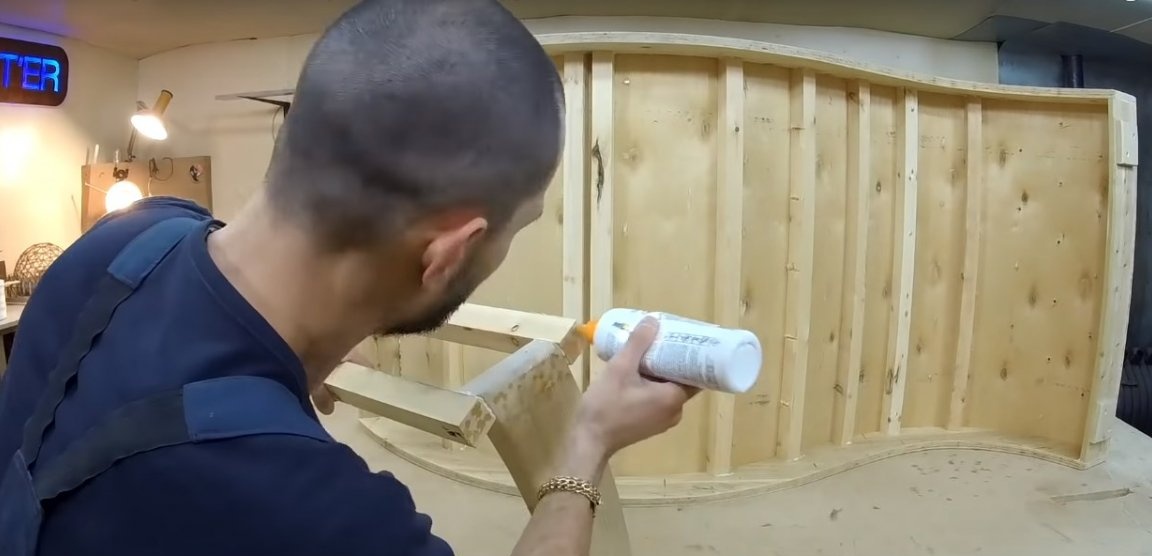
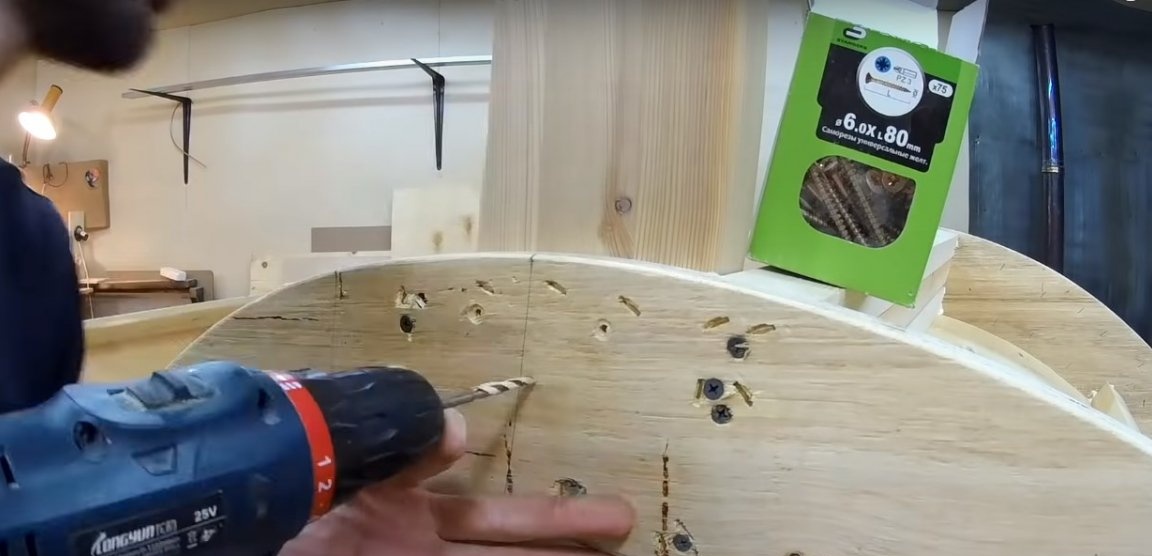
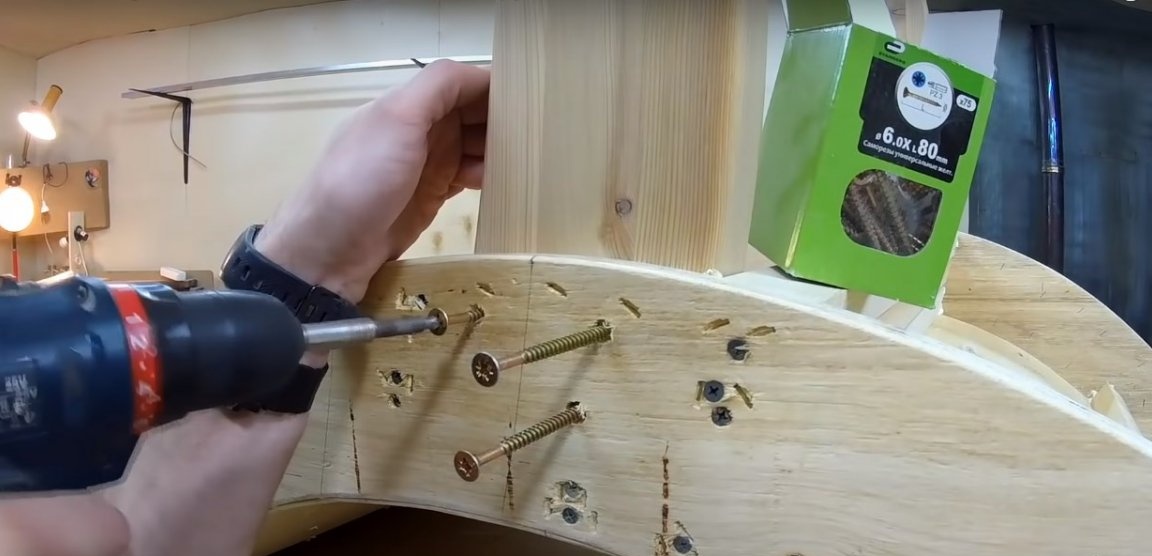
Prepare jumpers for the frame. The author uses a square bar 40-50 mm thick. Saw off the segments along the width of the seat and secure between the side parts of the frame on the screws. Place the joint first with glue.
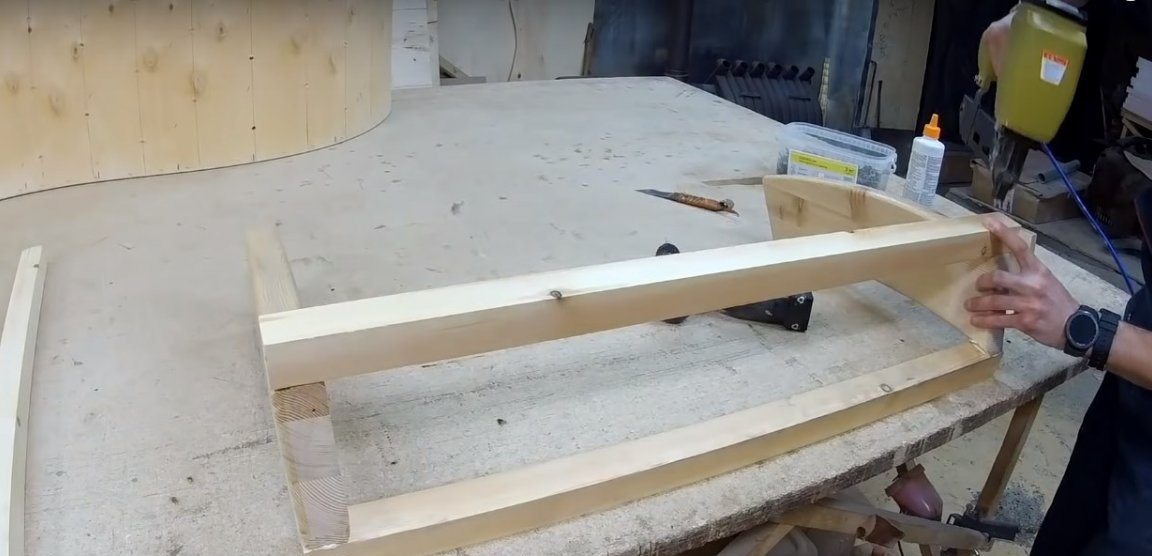
Cut a piece of thin plywood to fit the shape of the seat. If the part is docked in two or more parts, adjust the length of each segment so that the joint is at the center of the jumper.
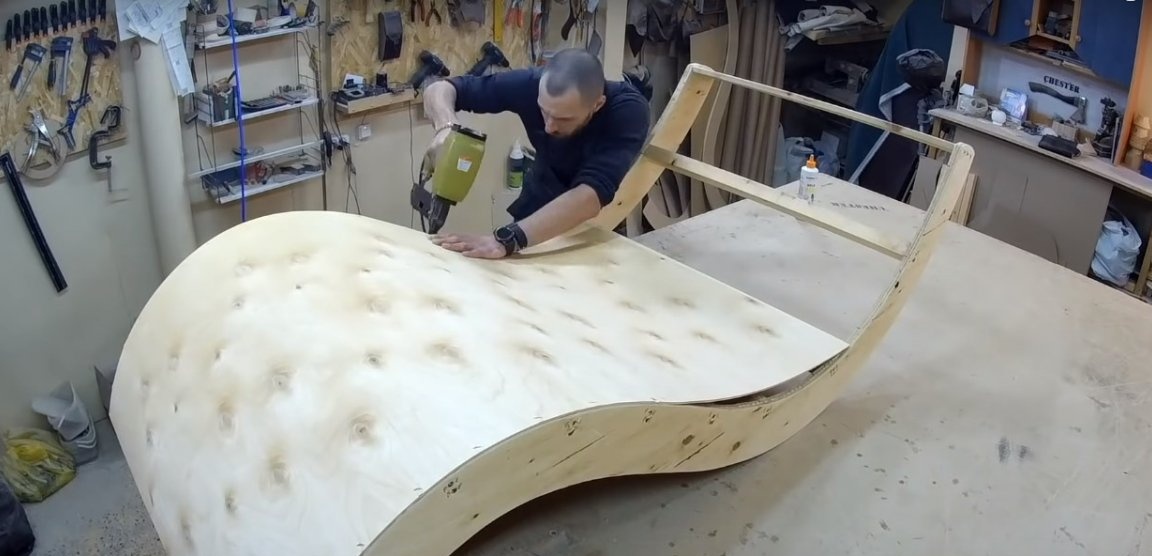
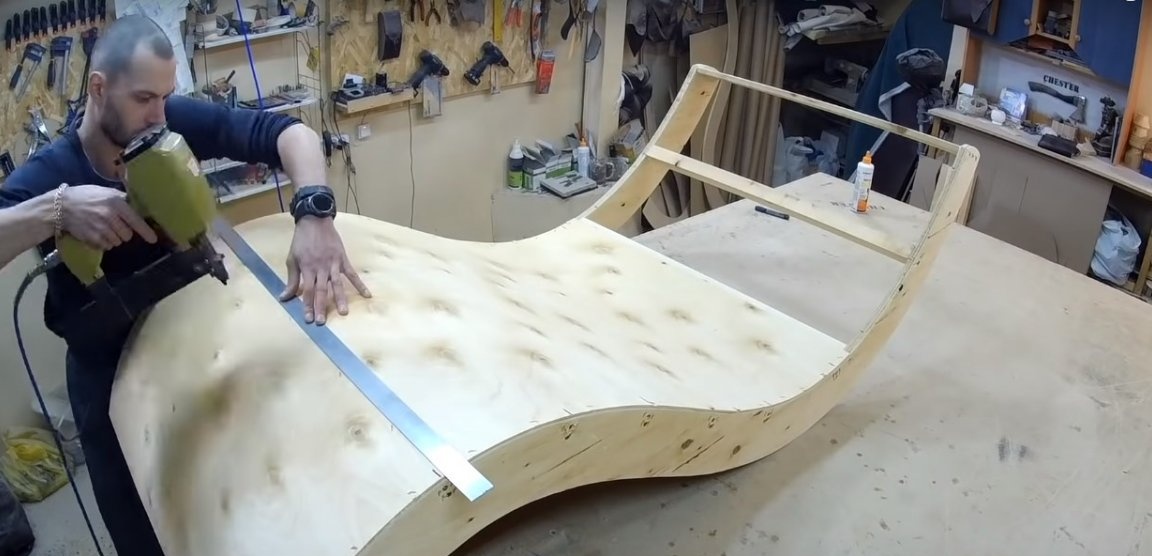
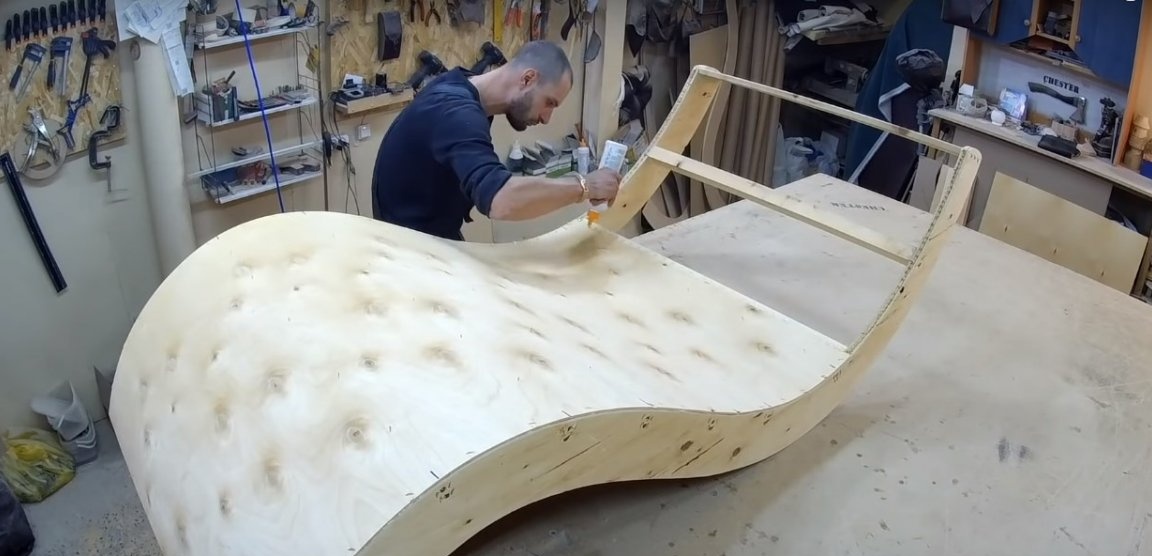
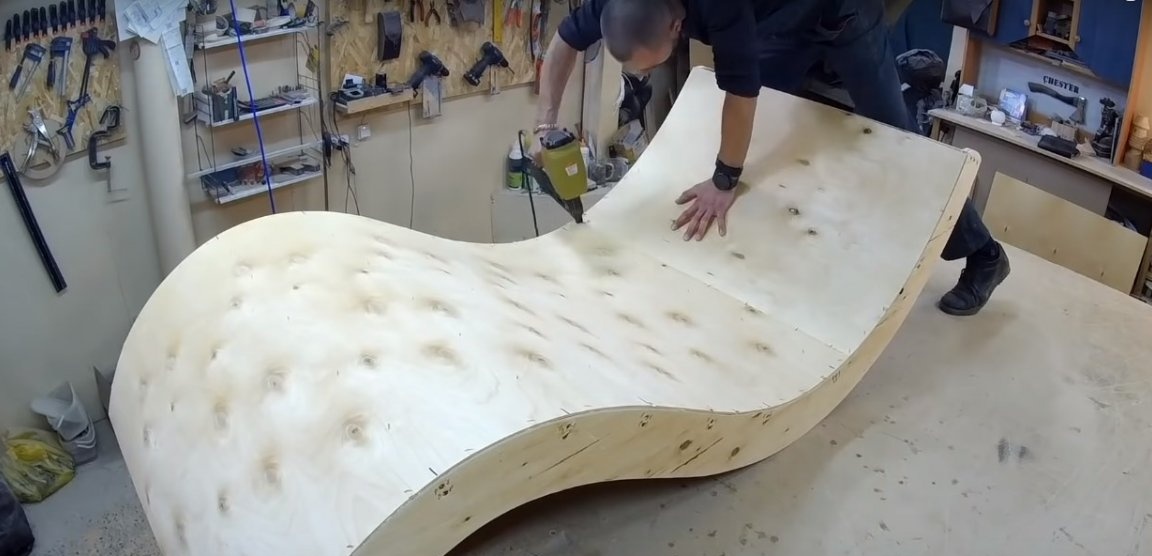
Apply glue to the edge of the frame frame, place a sheet of plywood and begin to fix the sheet, moving from bottom to top. The flooring is attached both around the perimeter of the frame and to the internal jumpers. The author used a pneumatic nail gun.
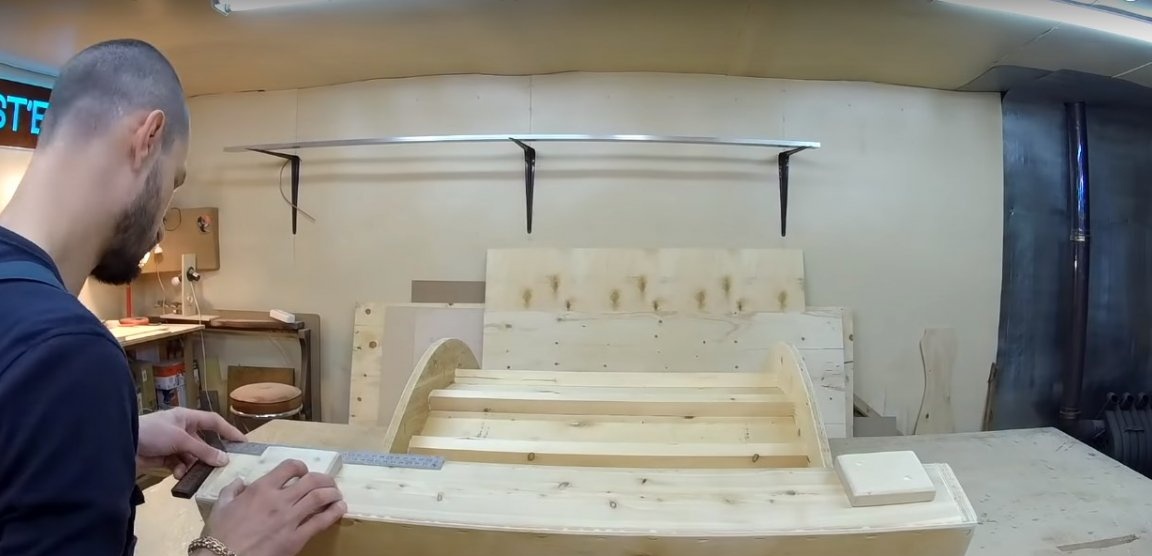
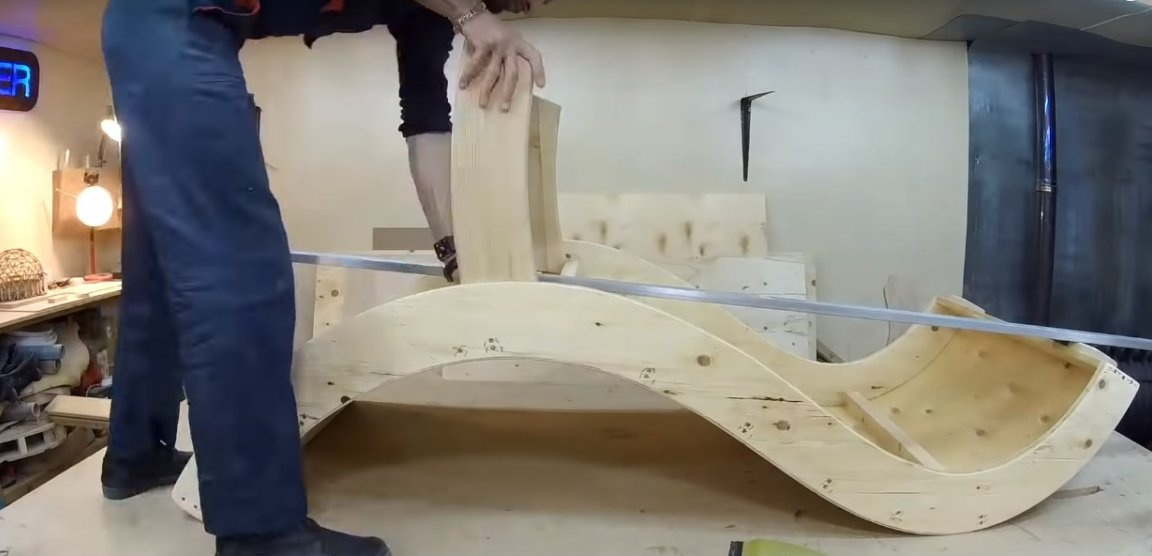
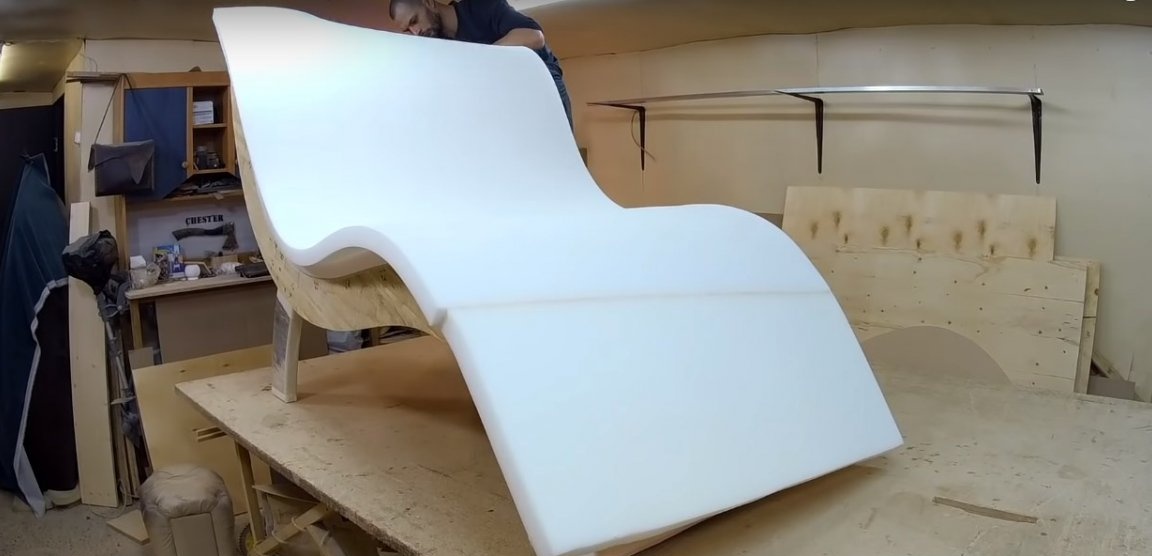
The author rounded the top of the back using small wooden overlays on the rib and a sheet of plywood (see photo).

Step Three: Making and Installing the Feet
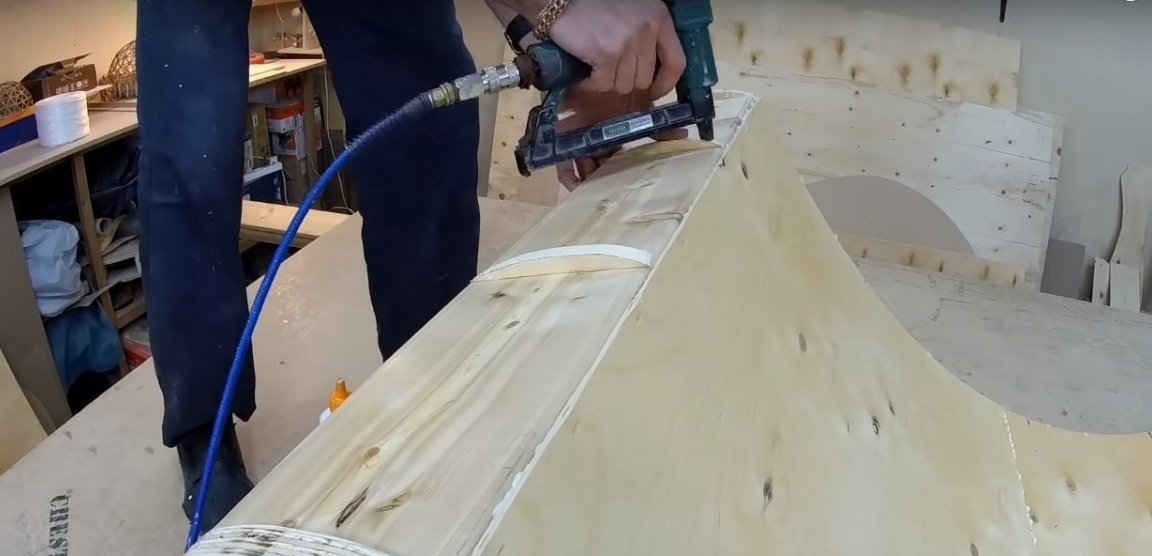
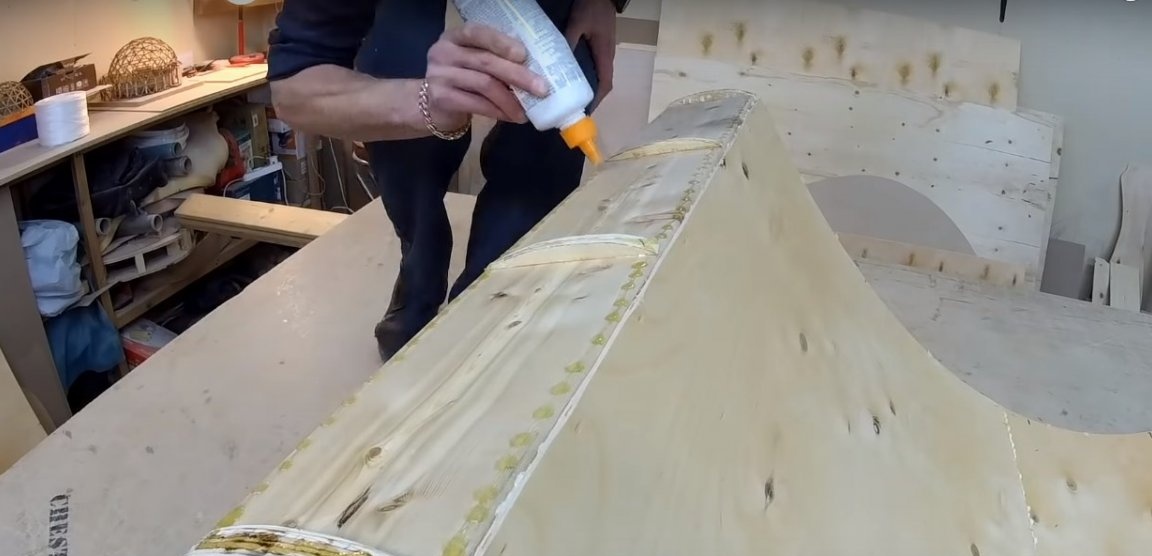
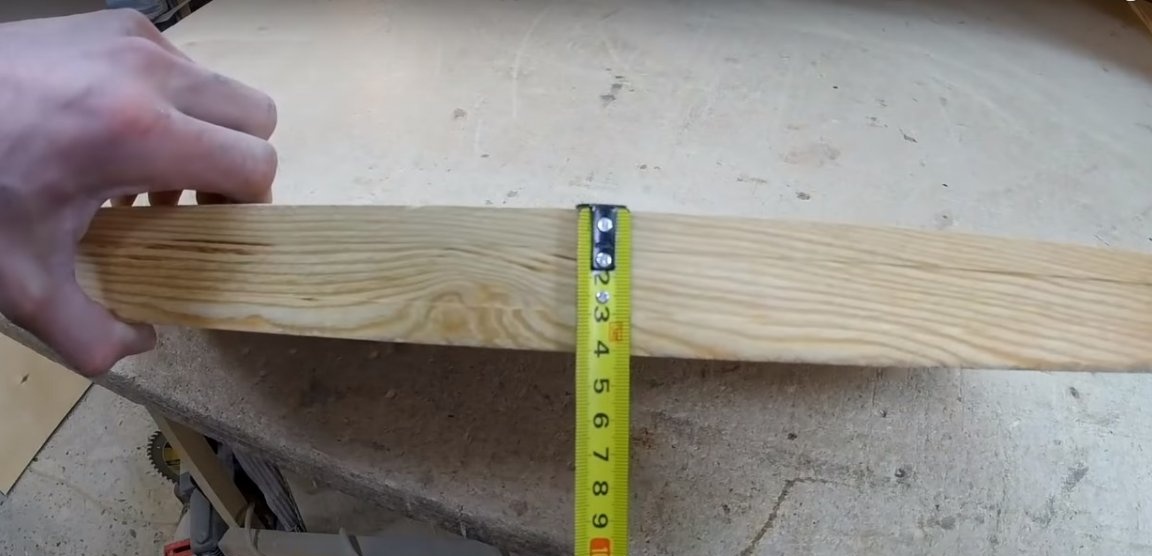
The back high legs of the chair are made of natural wood. The author used a thick furniture panel for their manufacture. The blanks were cut with a jigsaw and processed on a milling machine along the contour - to begin with a straight cylindrical mill, then an edge mill to round the edge.
The author fixed the legs in an upright position and painted with acrylic varnish using a paint brush.
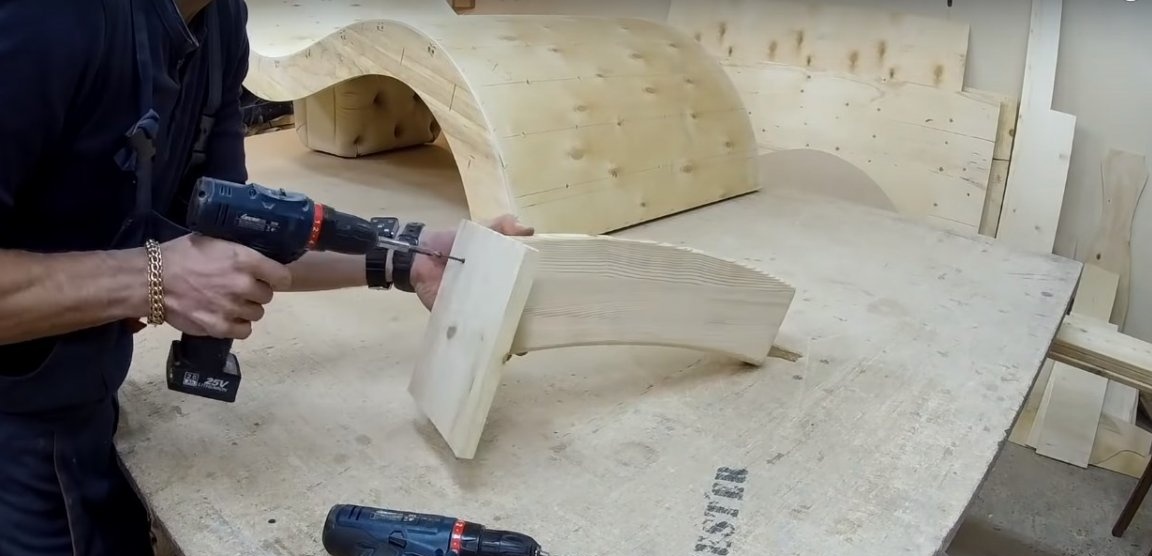
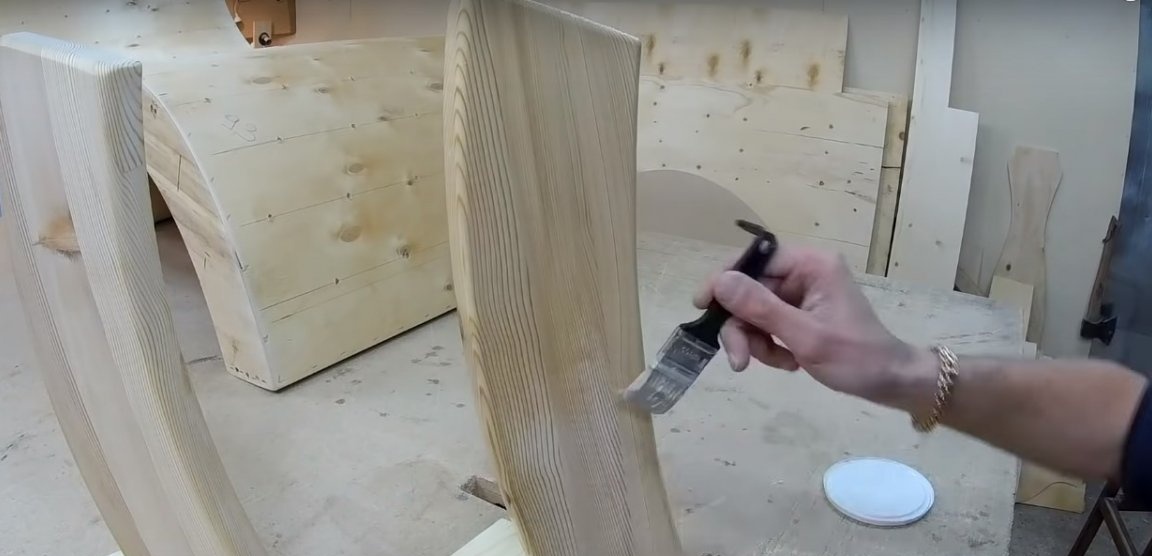
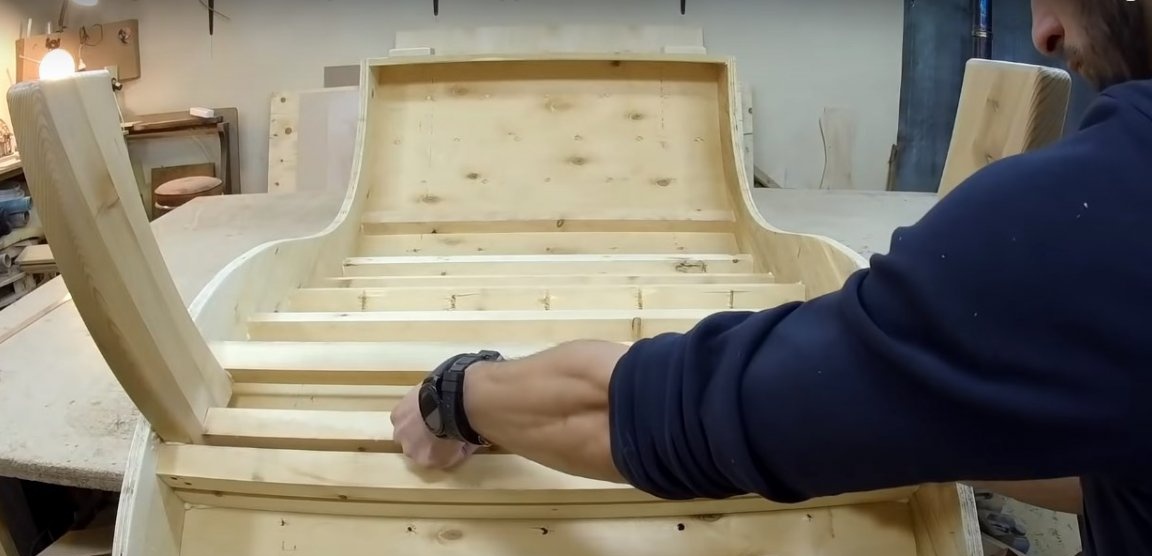
After the varnish hardens, connect the legs together with transverse trims as shown in the photo.
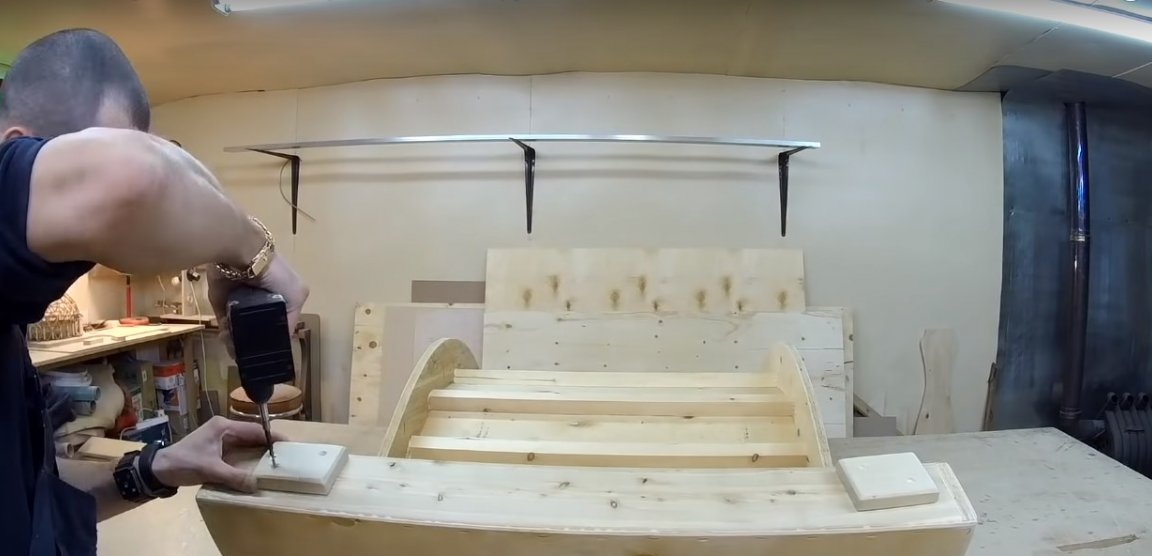
Prepare the front legs as well. To do this, saw off the squares from the board 100 x 100 mm. Round the edge with a milling cutter and fix the legs with self-tapping screws.
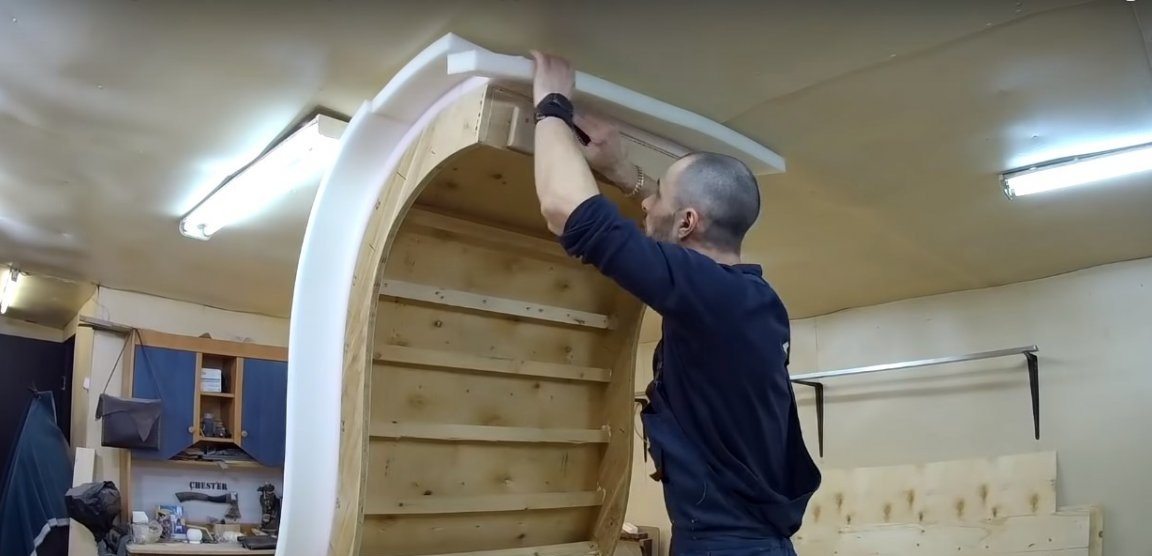
Set the high legs to the desired position. Fasten on the frame with several transverse bars as seen in the photo. Screw several furniture screws into the pre-drilled holes into the side of the side parts of the frame.

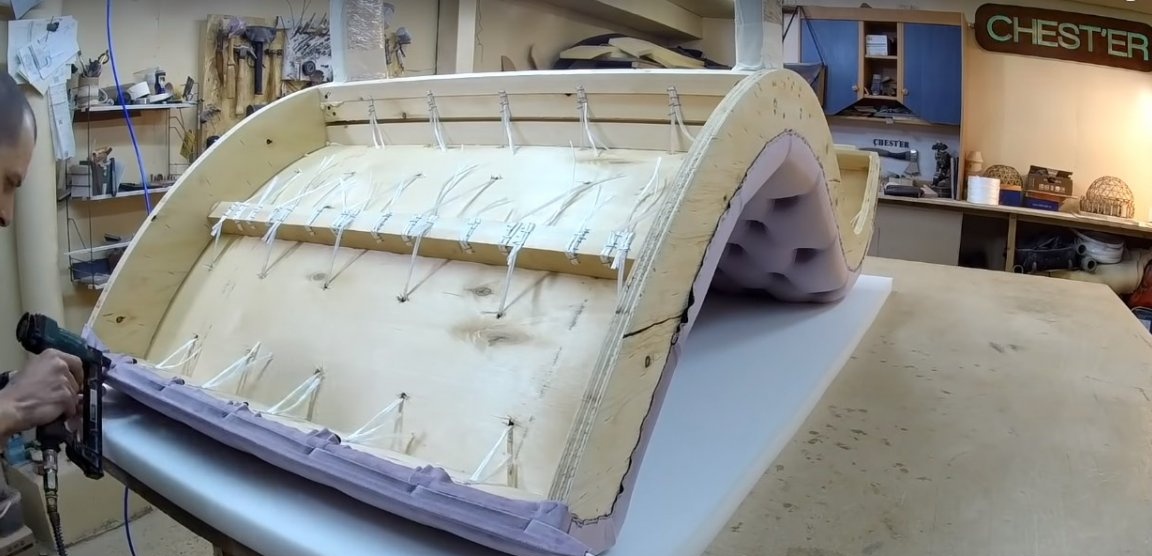
Fourth step: preparing the seat base for the carriage coupler
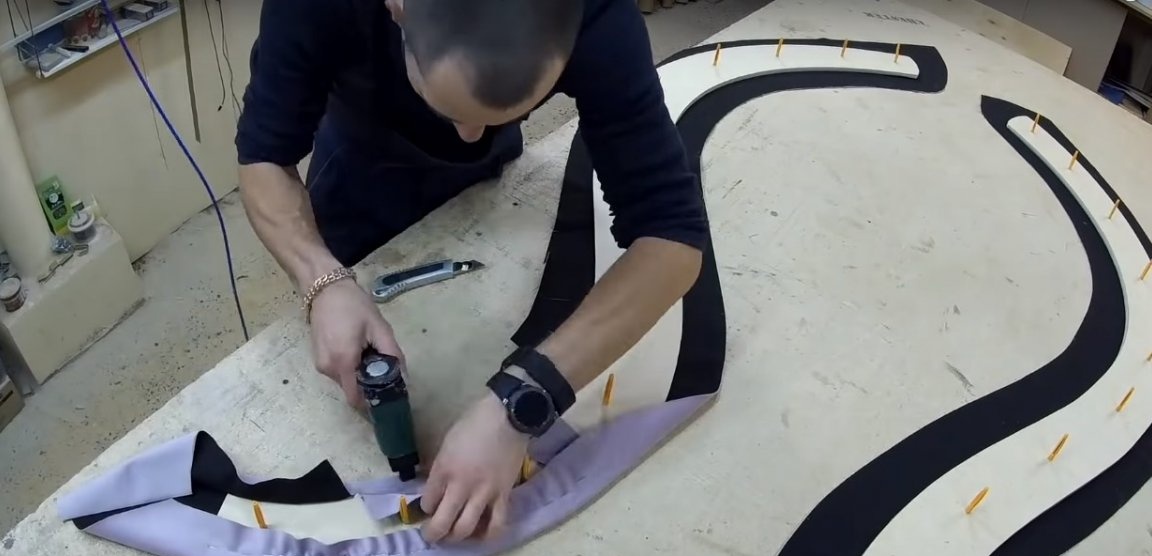
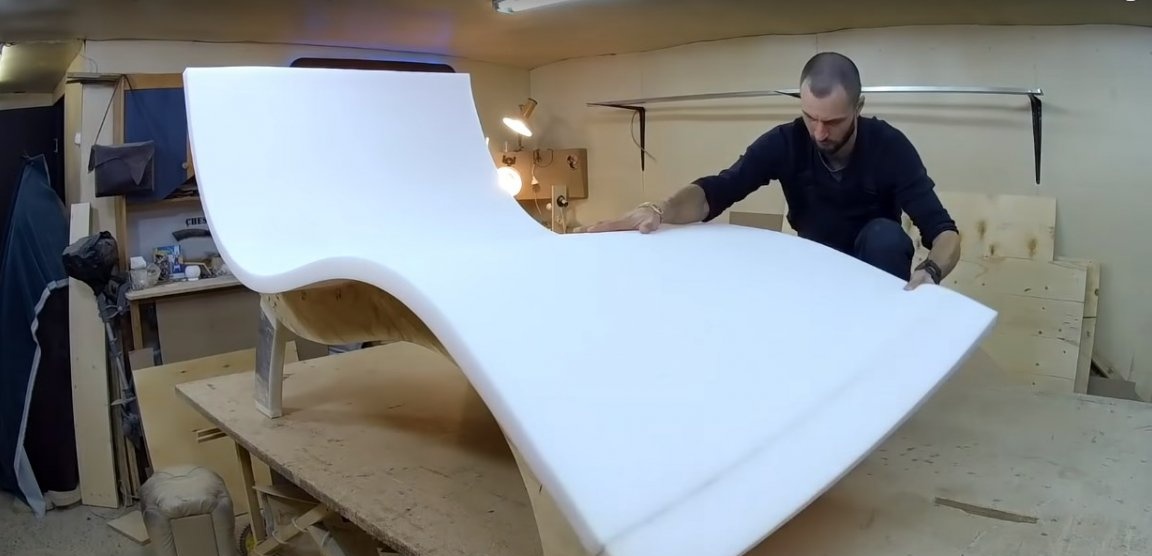
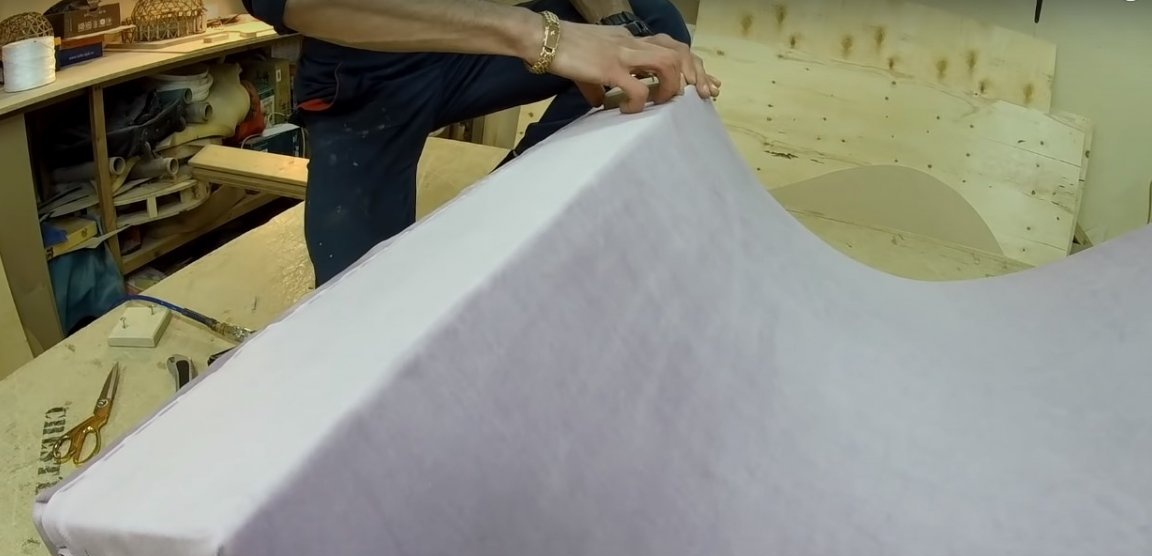
Evenly apply a thin layer of PVA glue (universal) to the base of the seat. To simplify the task, the author uses a spray gun. Lay on top the first layer of foam and firmly press it to the surface of the plywood. Remove excess foam with a clerical knife.
Apply a layer of glue on top of the first layer of foam rubber and lay the second layer on top. Cut off excess with a knife.
The author uses dense furniture foam for work. Plain foam is not suitable for furniture. He is too loose, does not have sufficient elasticity and wears out quickly, losing shape and crumbling. For the first layer, you can use more rigid foam, while for the second you can choose softer foam.
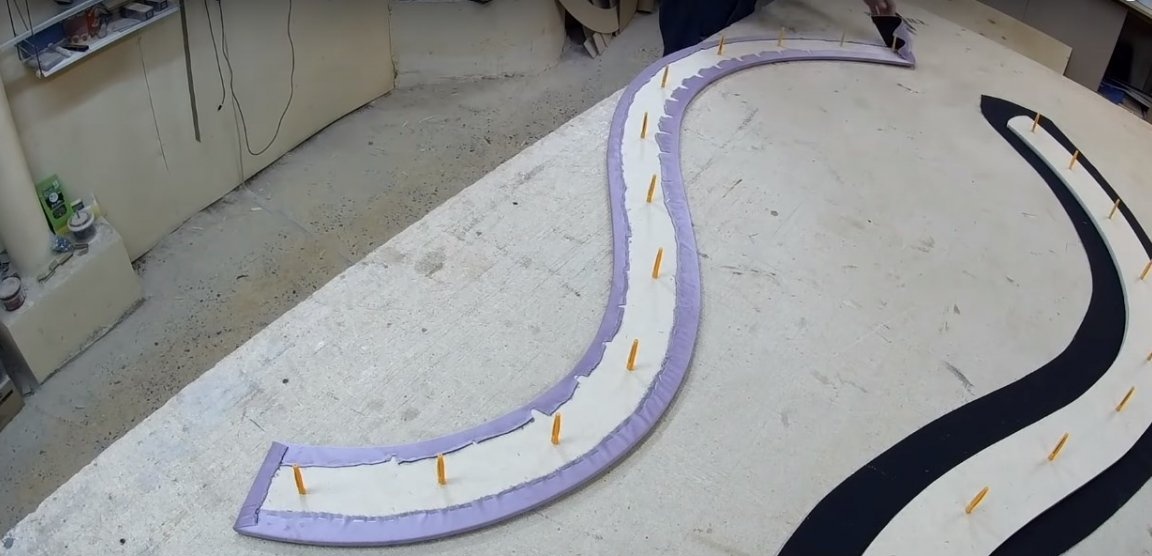
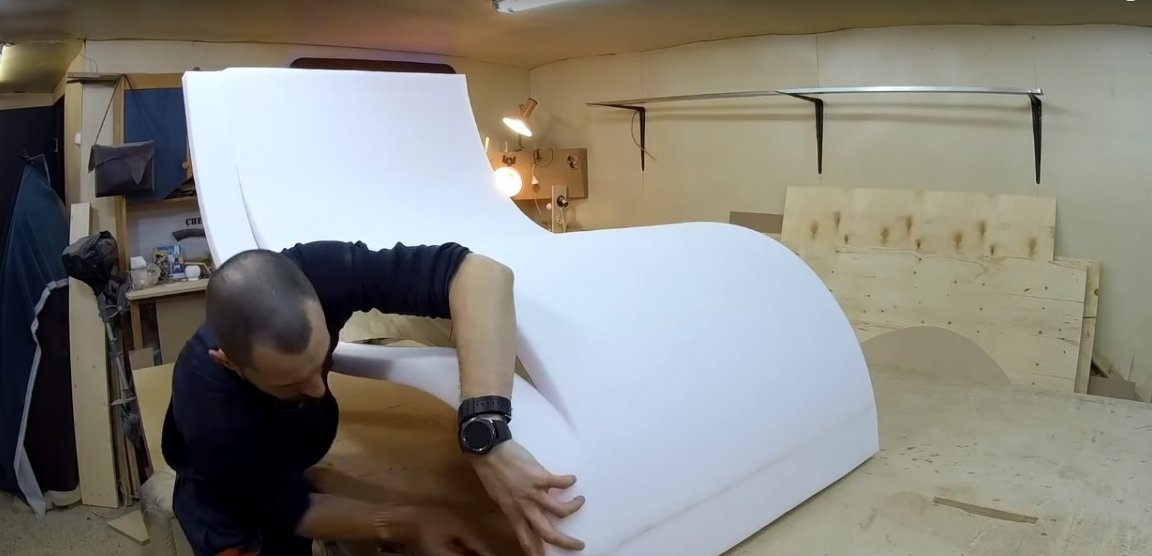
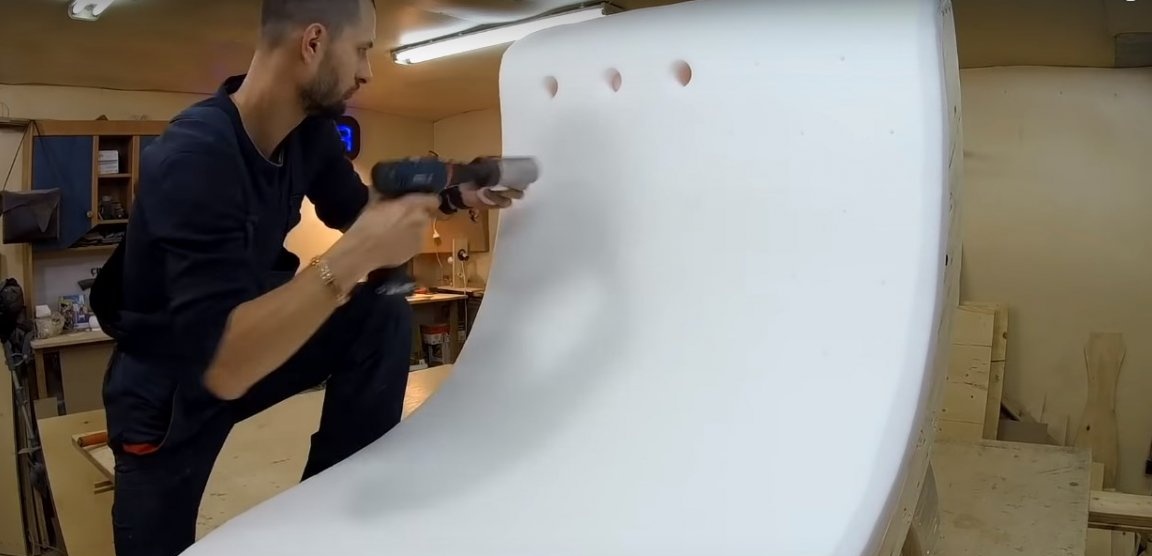
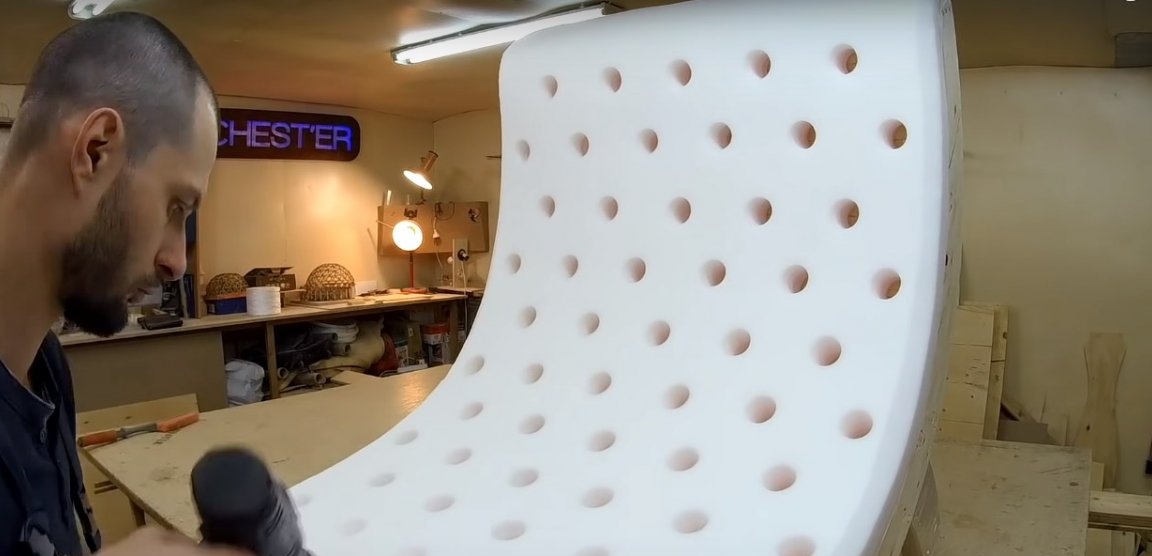
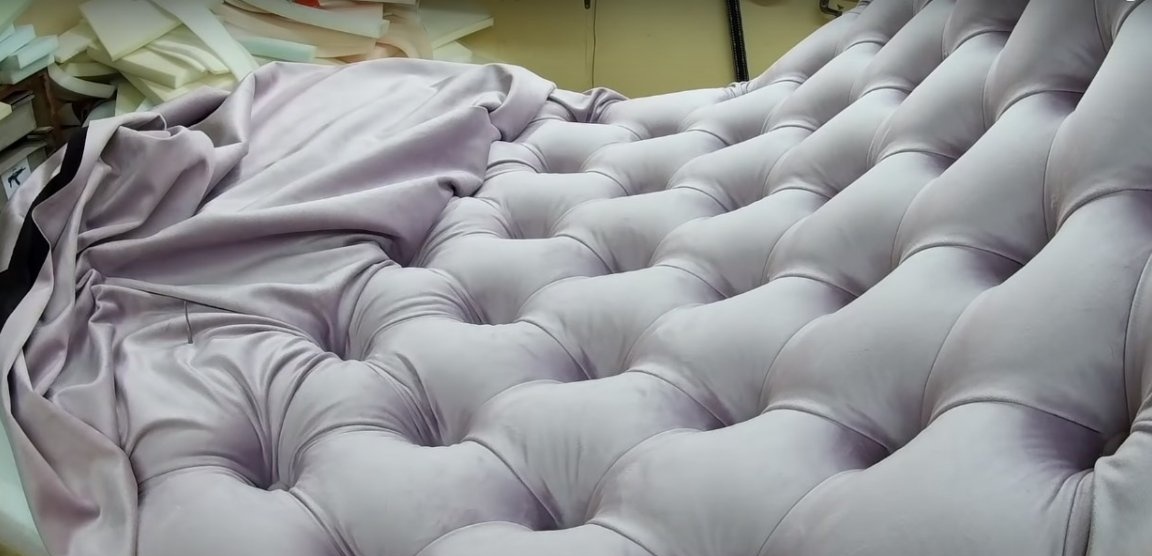
Using a drill and a drill bit suitable for diameter, make through holes in the seat by drilling two layers of foam and plywood. The screed holes are staggered. Thus, in each row an even and odd number of holes alternates.
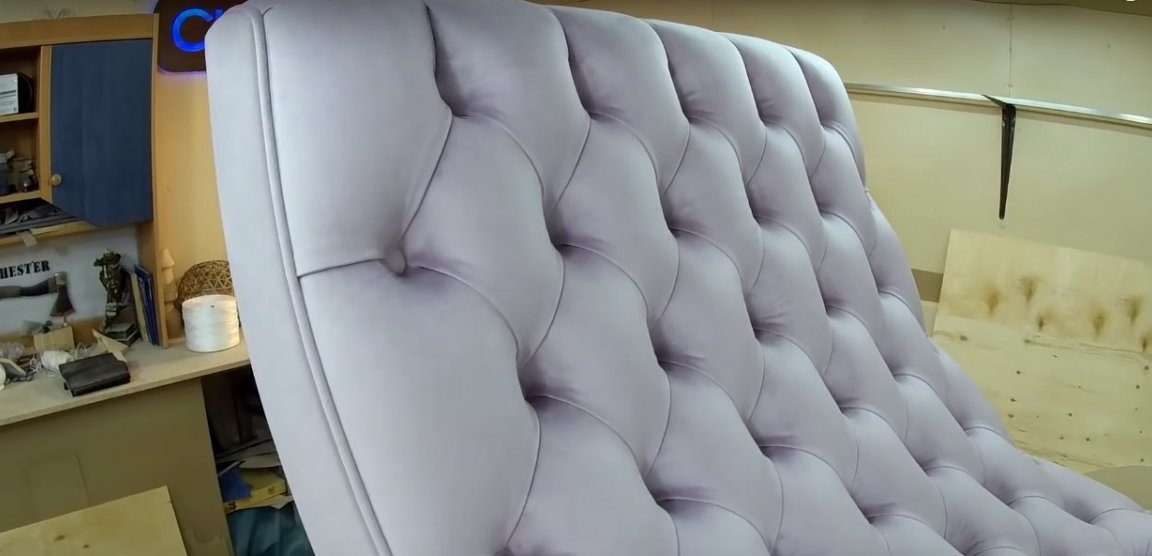
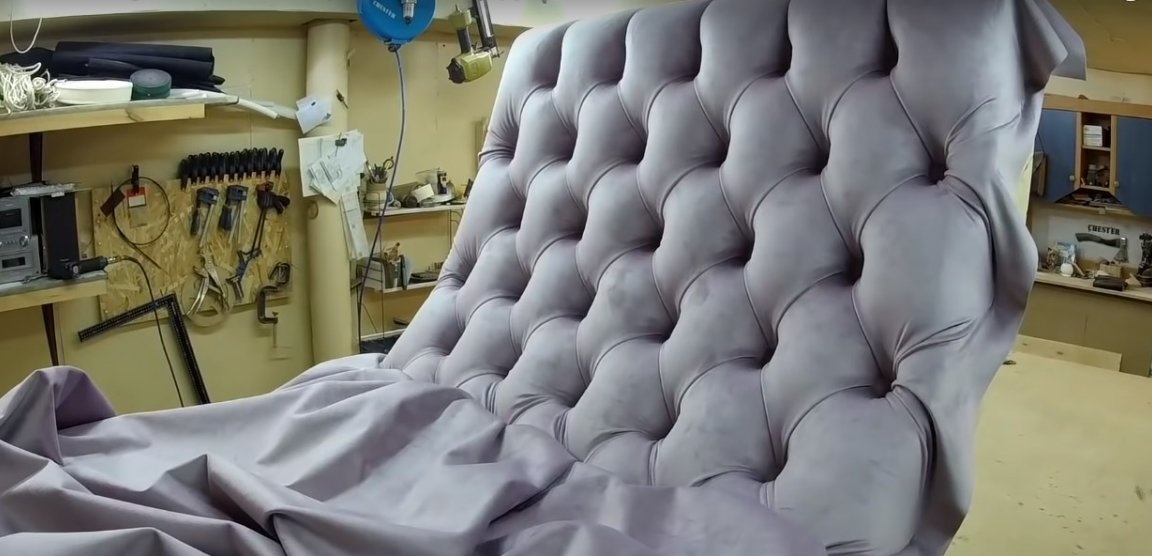
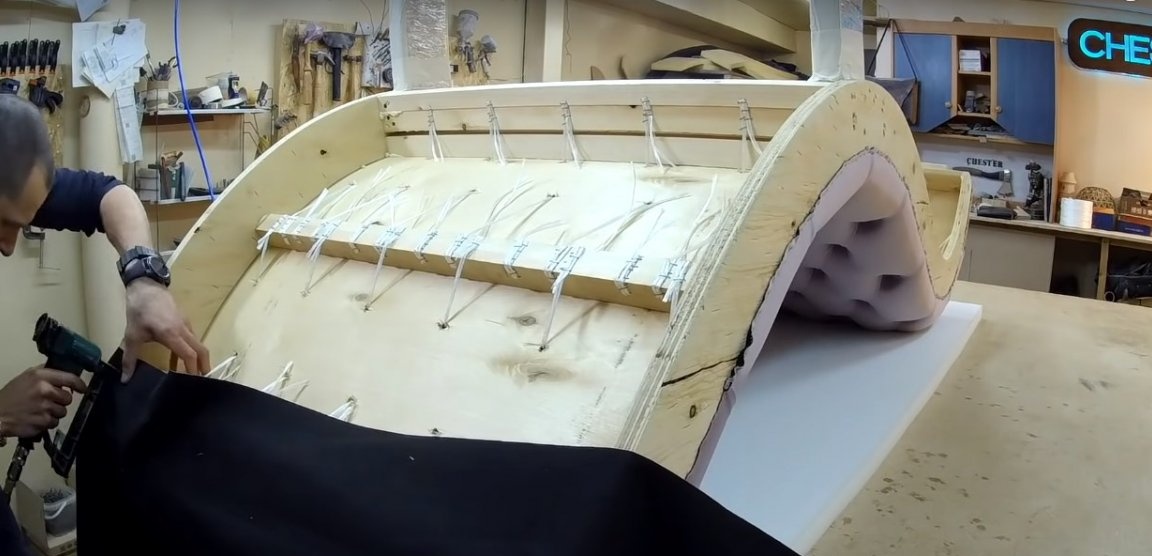
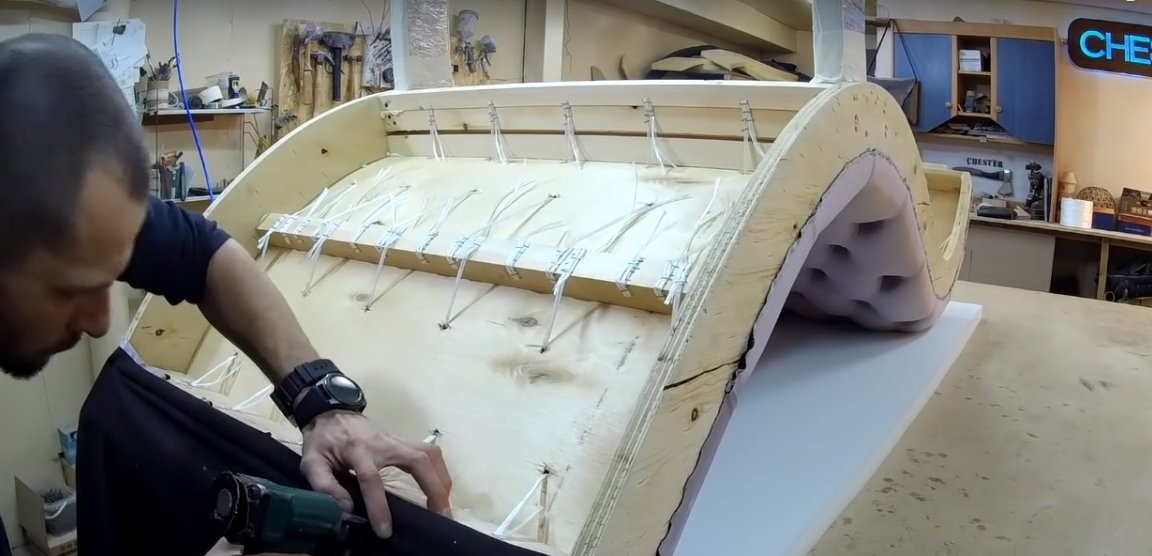
Step Five: Carriage Tie and Cord Trim
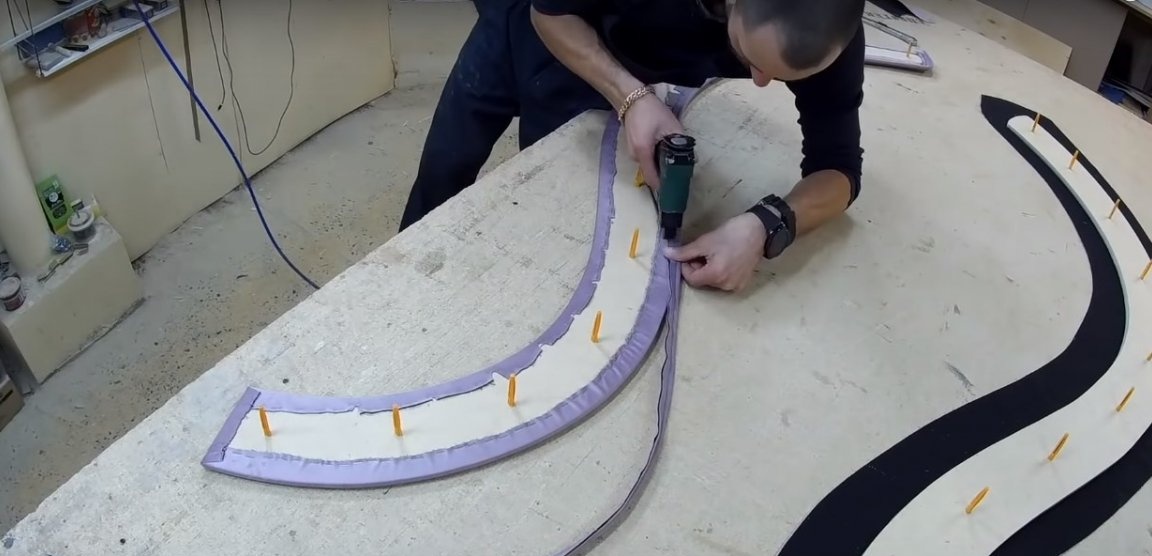
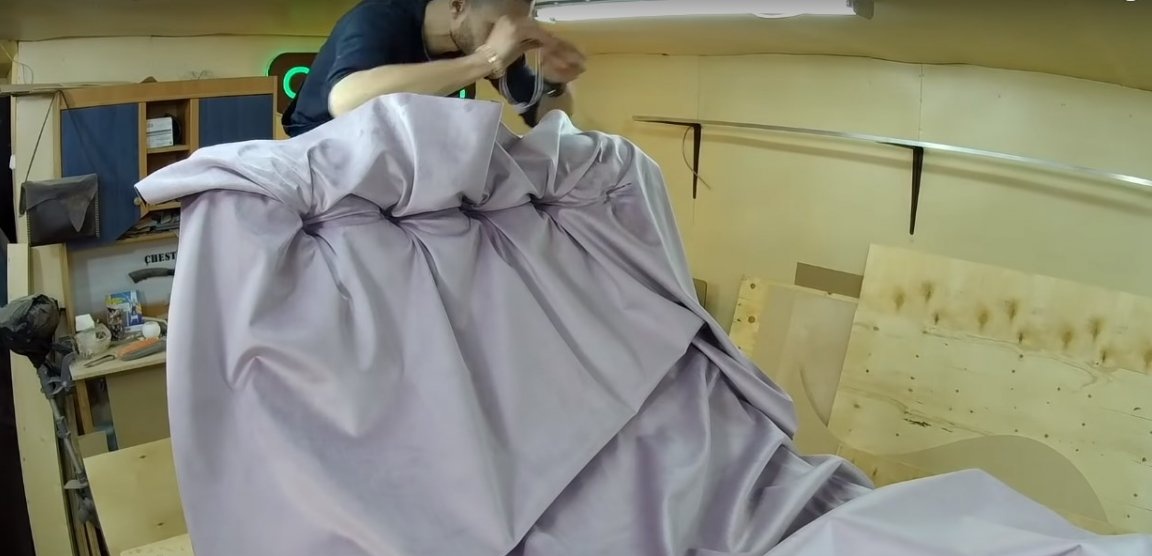
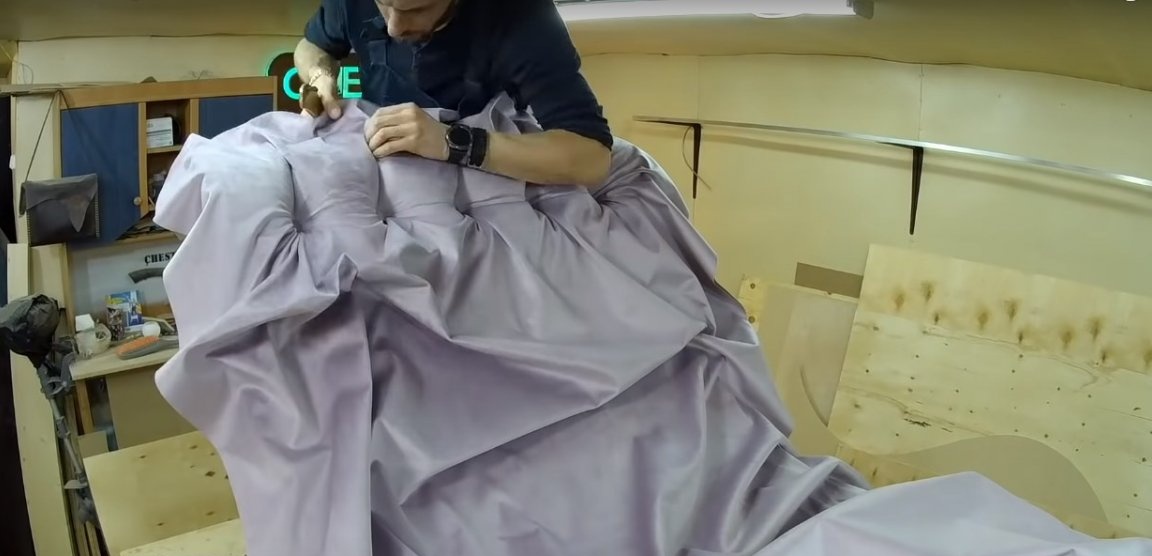
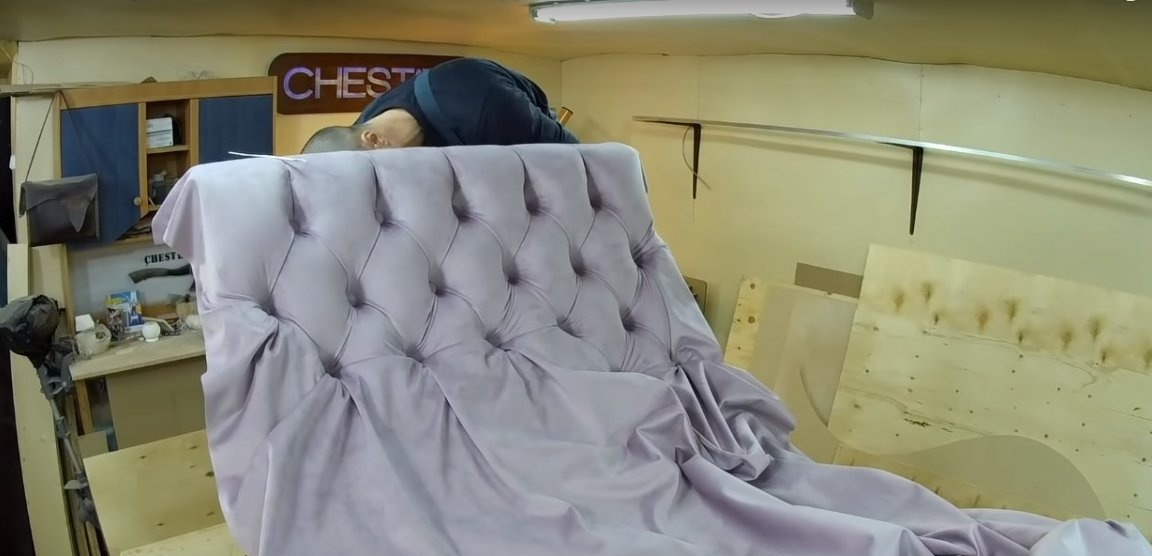
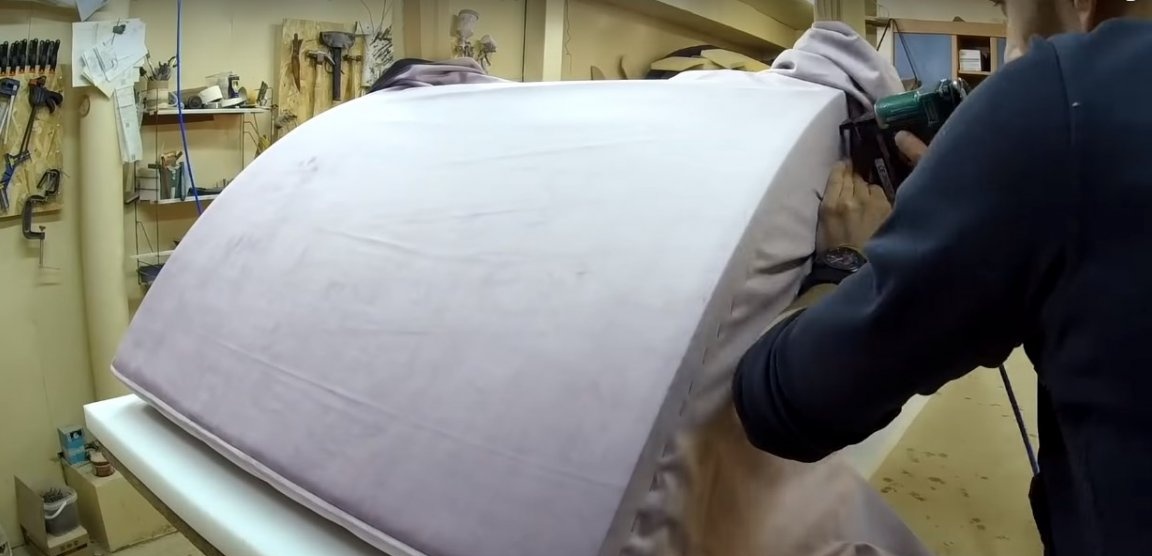
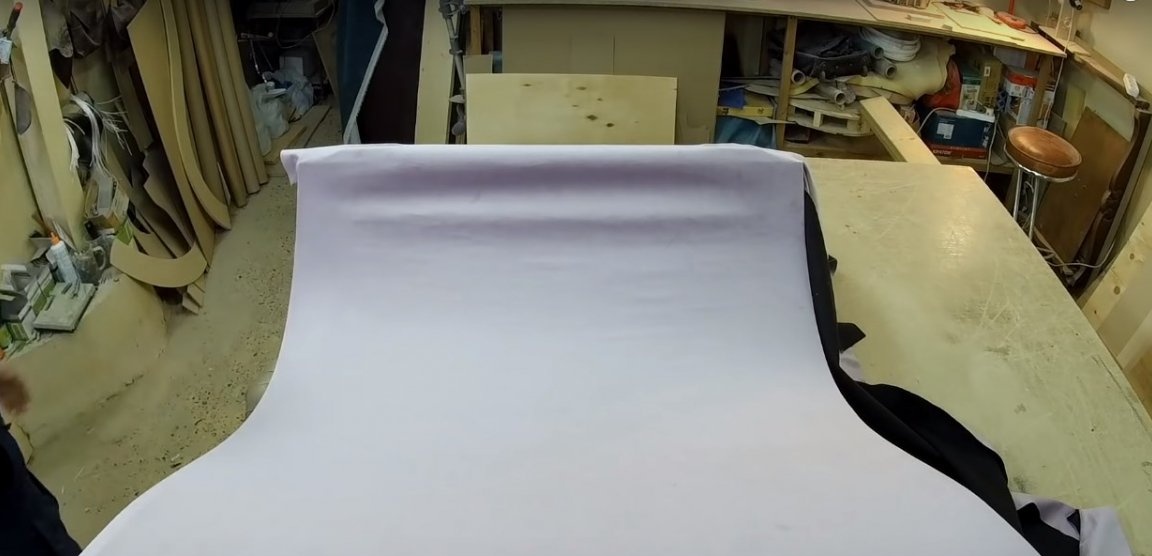
Start sewing from the top of the back, having previously unfolded the fabric on the seat and leveled it. To fix the screeds, the author uses the classical method with the use of buttons covered with fabric in tone of upholstery and a thick nylon thread.
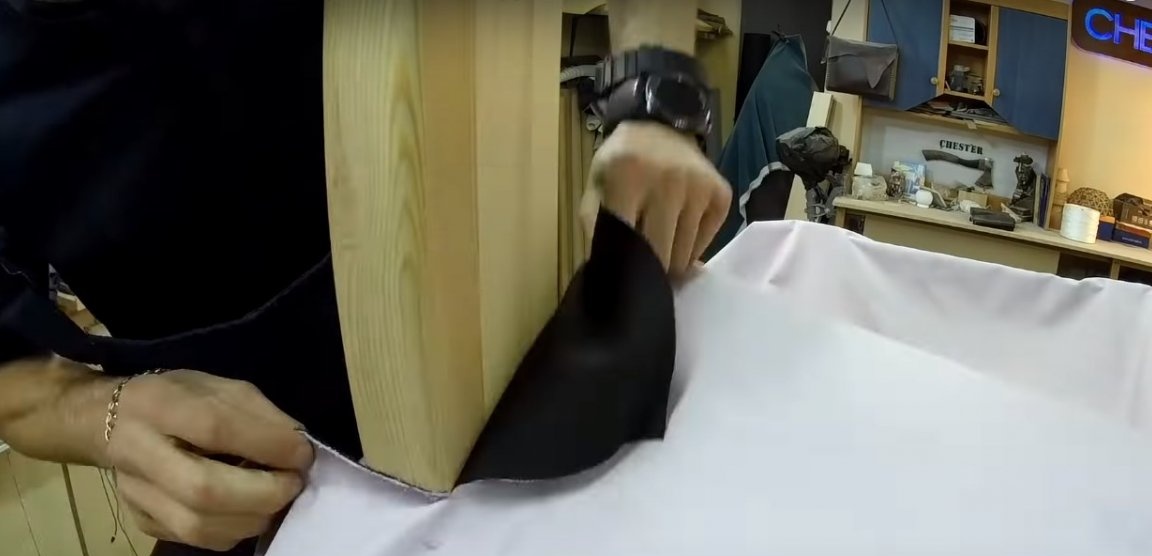
A needle with a button is threaded into the hole and fixed with brackets on the back. At the top, the author lays the fabric in folds and fastens the fabric from the back of the back with staples. So that the folds are light beautifully and do not move, he makes cuts of foam rubber with a knife. In the same way, the padding is fixed to the side parts of the frame. Excess tissue must be cut off.
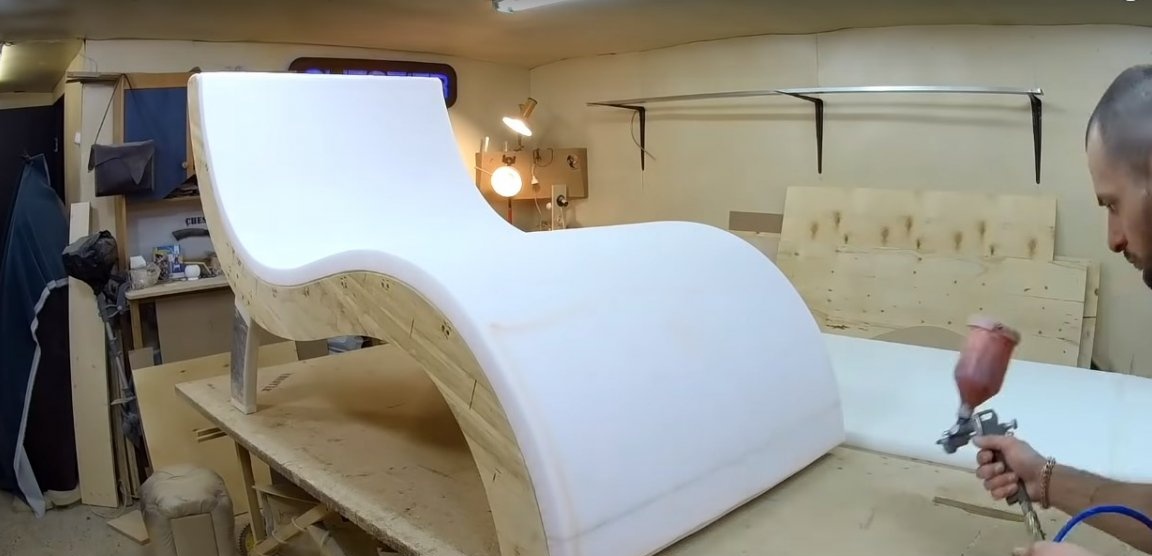
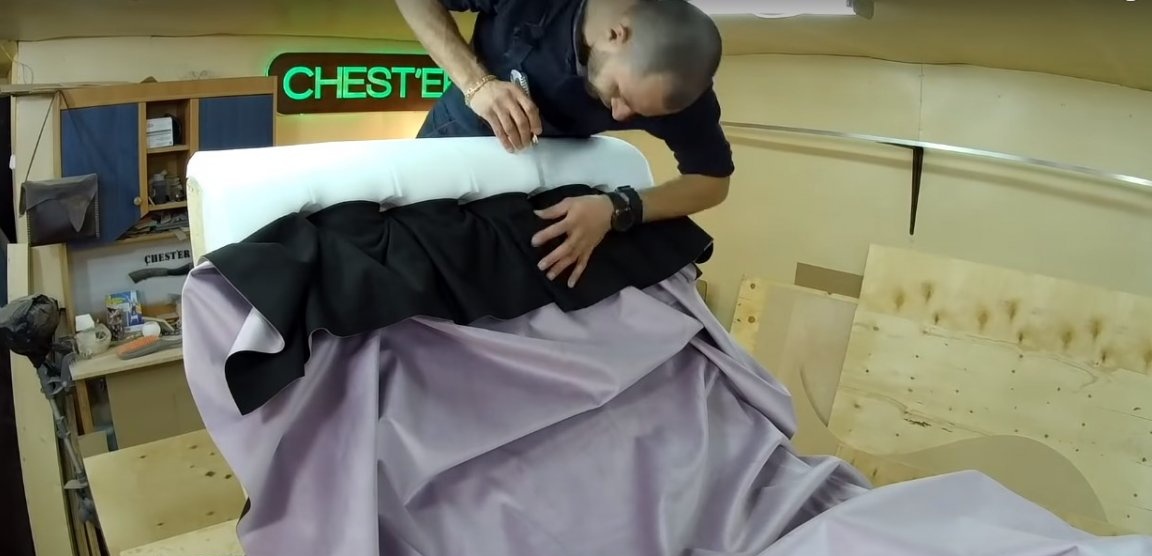
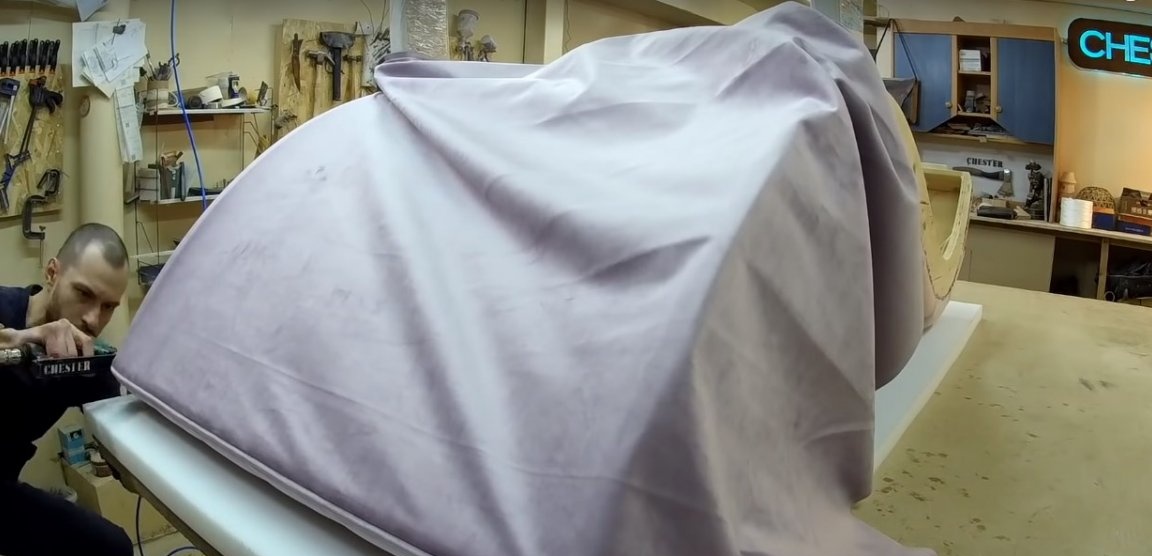
Turn the chair upside down and fix the lower part of the upholstery, hiding the cavity of the frame with ties. But first, fix the decorative cord with the piping.
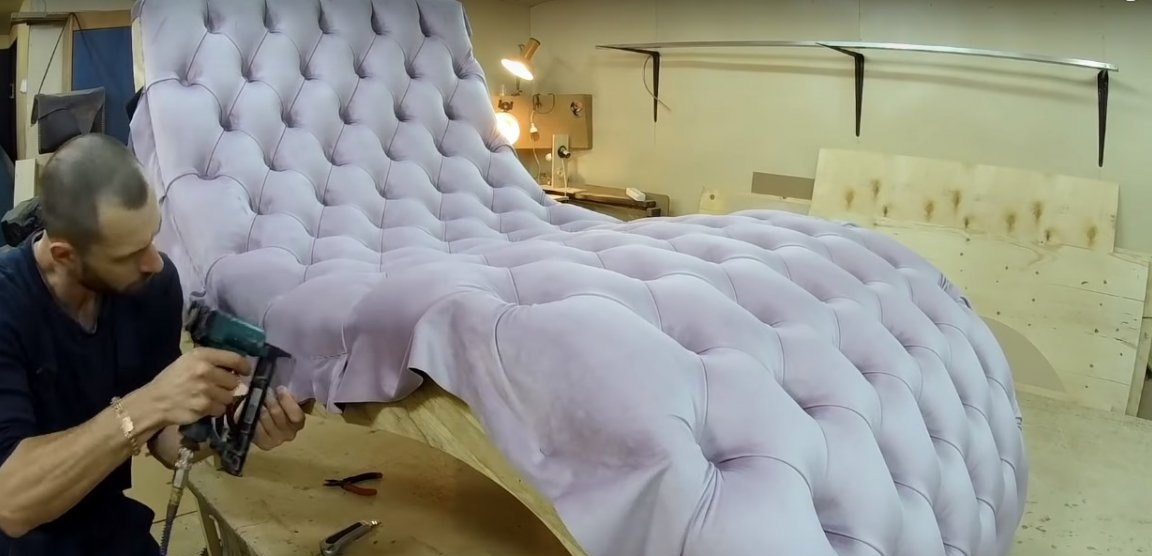
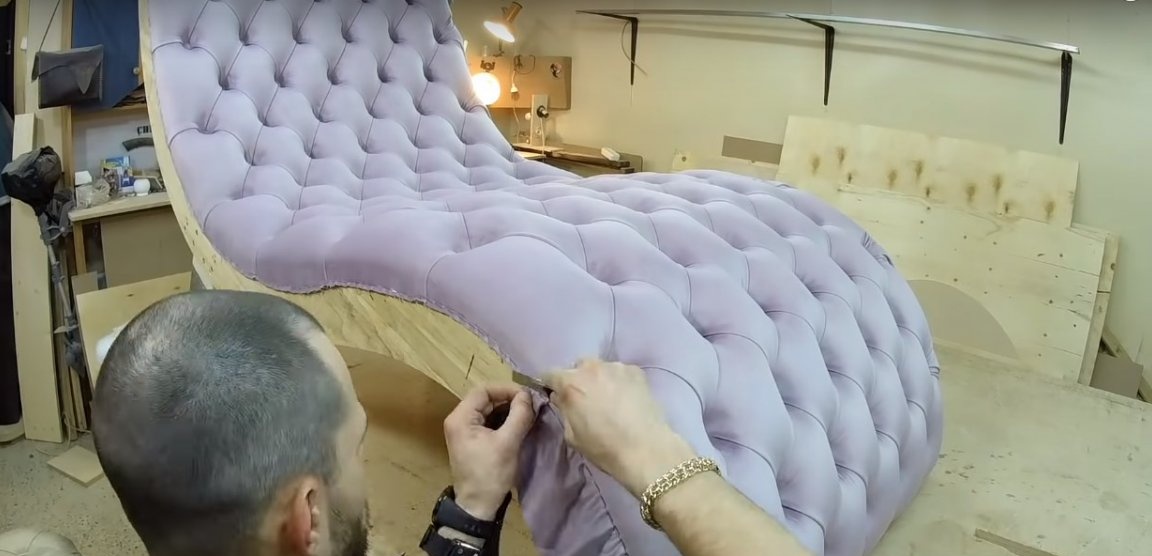


Step Six: Installing Front Side Parts
The seats for fastening the seat trim with staples must be hidden.For this, the author prepared two curly details on which he installed a dowel-nails. With their help, the installation of front side panels is carried out without unnecessary trouble.
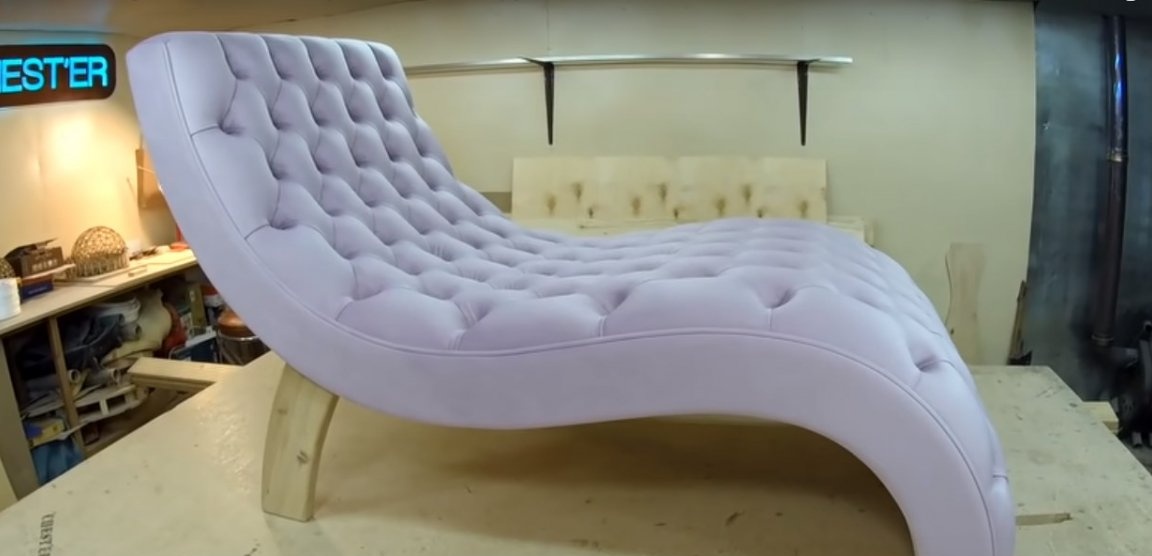
Glue thin foam on the front side of the panels. Place the prepared blanks on the upholstery fabric and wrap them, fixing the upholstery with staples. Fix also a decorative cord. It remains only to install the panel until it clicks - and the chaise lounge chair with a carriage coupler is ready!