

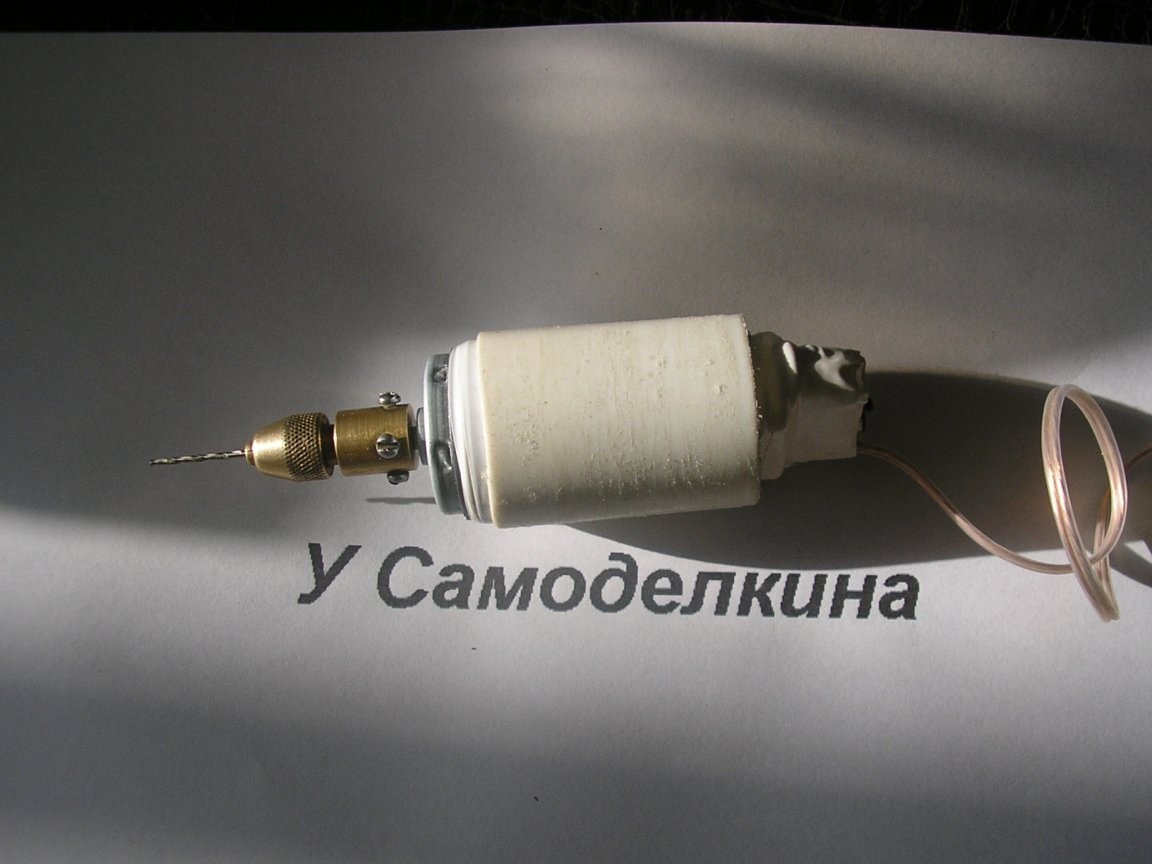
I decided to make a convenient mini micro drill.
This is not the first such construction I made, so first I started selecting the main components:
Electric motor
Cartridge
Button
I have accumulated a large number of different electric motors .. Also there are cartridges from mini drills that have become unusable.
First, it was necessary to decide which motor to choose (I have dozens of them).
I started from the power supply, from which the drill will work. This is a laboratory power supply with voltage regulation from 1.5 to 15 V, which will allow me to adjust the speed. The unit has overload protection, limiting the load current to 1 A.
Alternately connected the motors to the power supply, setting it to 8 V. The fingers gently clamping the motor shaft determined in this way the most powerful engines. He put a few suitable engines in a box.
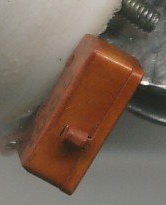
Now it’s time to find out which shaft will fit the existing cartridge. I have several collet chucks from a miniature drill that has fallen into disrepair. So far I have found only one. The main thing is that he, together with an unusable engine. I can measure the diameter of the motor shaft. Collet chuck - a good thing. Maybe not so fast when changing drills, but it clamps the drill well. Has a set of collets. Each collet can reliably clamp a pair of drills of different diameters, if the diameter does not vary much.
Took a caliper
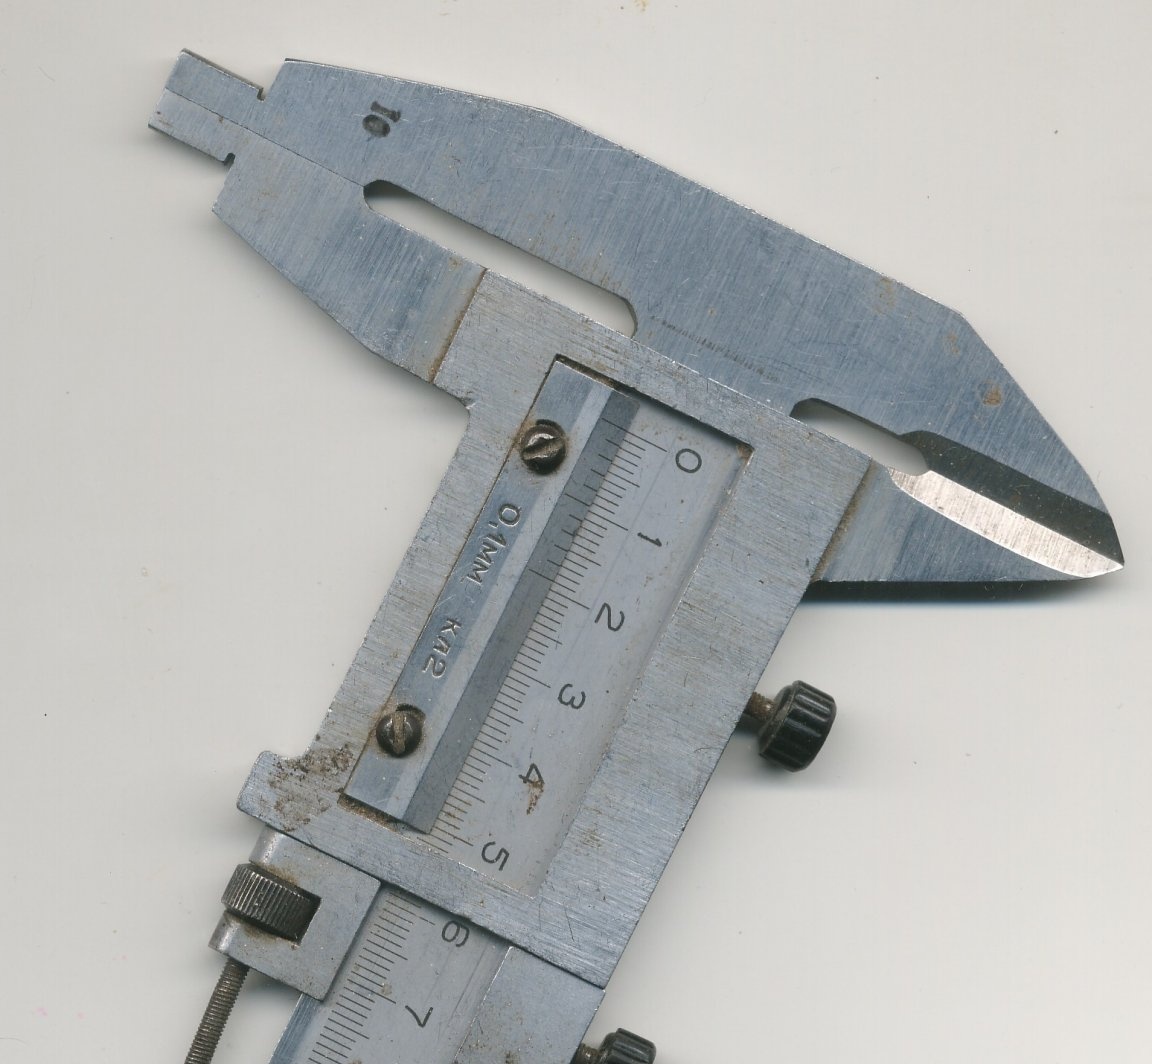
He measured the diameter of the shaft of a damaged engine, on which the cartridge used to stand. He checked the reading of the instrument and began to pick up motors with a suitable shaft diameter. More or less one came up, but a gear was pressed on his shaft. This engine is not from the printer, not from the old fax. Not the point.
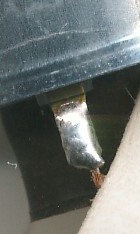
I melted the gear with a soldering iron, removed it from the shaft with small nippers and pliers. I put the cartridge on the shaft, I realized that the shaft is slightly smaller in diameter than necessary. I decided to slightly break the rules and at the same time complicate the terms of reference for this homemade. I pulled a suitable cambric onto the shaft, put on a cartridge and locked it with four regular screws.
The photograph shows that the cartridge does not sit very smoothly on the shaft.
I inserted a collet with a drill with a diameter of 0.5 mm into the chuck. He pressed the drill to the workpieces (fiberglass and pine block), and then turned on the power supply with a button. Despite the strongest beating of the drill, he successfully drilled about two dozen holes.
I put on a piece of rubber tube on the protruding part of the motor case (where the axis of the anchor). This is to ensure that during assembly and operation the housing does not move when pressed and does not damage the motor contacts.
Now the important question arose, which button to choose to turn on the engine. I want to note that I recently watched homemade products with mini drills. So, the authors either do not put the engine power button at all, or put a toggle switch. This suggests that they have never in their life drilled holes that require high precision, for example, in printed circuit boards. In order not to break the drill with a diameter of, for example, 0.5 mm, to drill in the right place, with the engine turned off, it is necessary to press the drill to the desired point and only then turn on the engine. If this is done when the drill rotates, especially at an angle, the drill usually starts to slide and damage the board or breaks. I'm not talking about drills of smaller diameter. I emphasize that we are not talking about a drilling machine, but about a hand held mini micro drill.
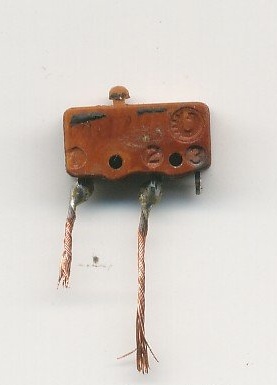
My choice fell on the MP7 - Sh microswitch (it was in my reserves). This is a miniature button with three pins. It works very clearly when pressed and released. The effort is minimal, almost like a sensor. The moment of pressing and releasing is tactile. Very reliable and durable. The content of drag metals:
Gold - 0.04791 g
Silver - 0.01666 g
Platinum group metals - 0.00913 g
I already had such a switch in a mini drill. After intensive work of the drill for several years, the engine failed forever, but the switch did not.
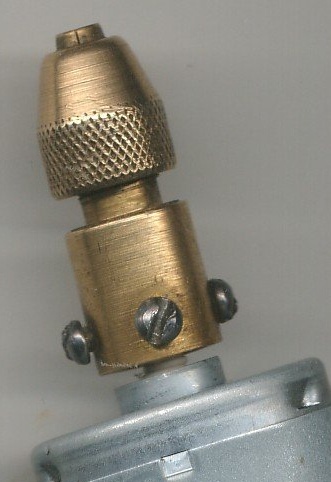
In this photo, I show which pin of the microswitch to solder the wires. The switch is included in the gap of any wire of the electric motor.
To mount the switch on the body of a mini drill, I made two corners of aluminum. To attach the corners to the case, I used M2 screws and nuts. Mounting the switch to the corners made steel wire from champagne.
What have I made a mini drill case from? I came across a plastic bottle of vitamins. I came to the conclusion that after some refinement it will do.
The finalization of the bubble was that I cut it with a hacksaw to the desired length and made several holes with different diameters in it.
My next step was the selection of the wire connecting the mini drill to the power supply. According to my requirements, this cord should be:
Flexible
Easy
Durable
Long-life (bending and stretching).
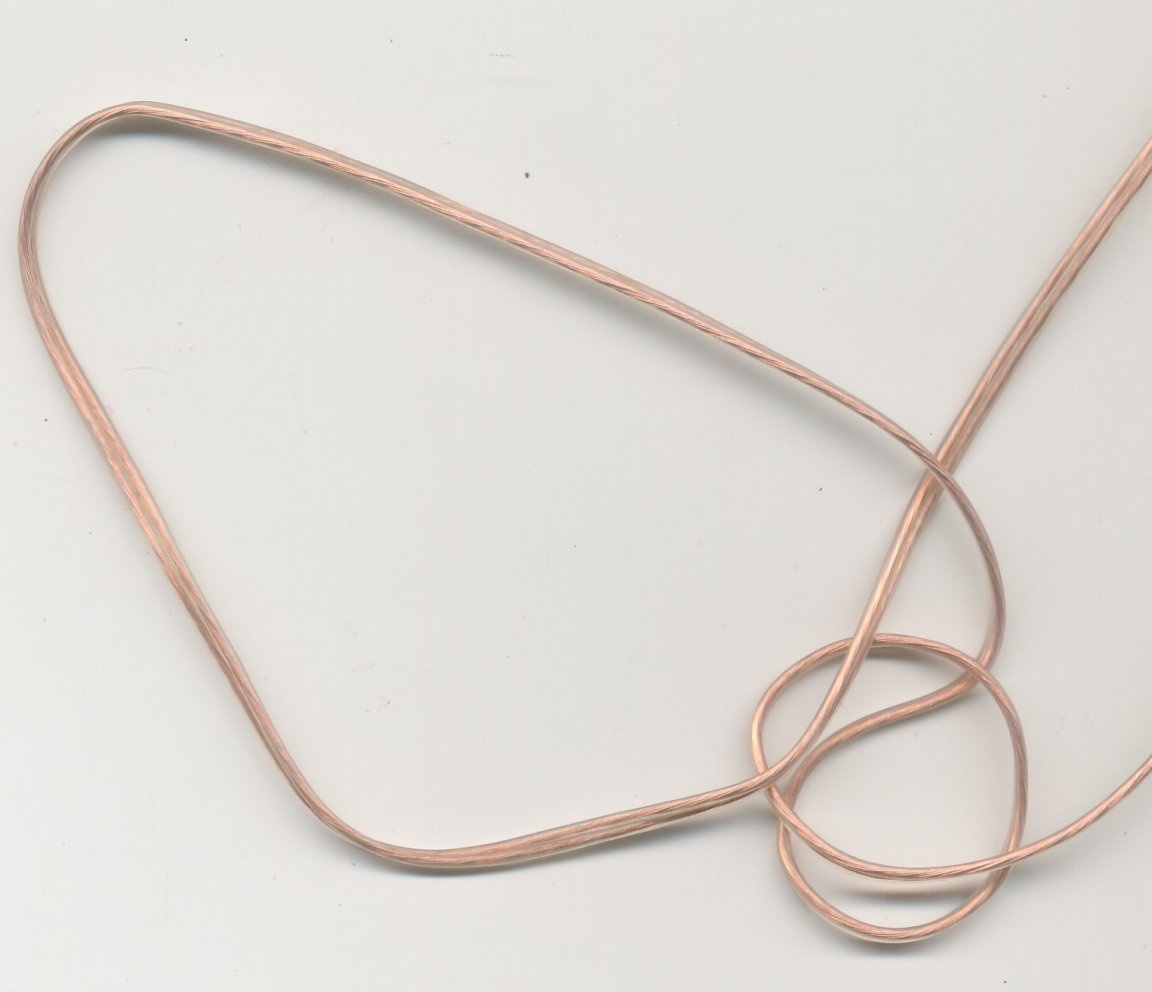
The choice fell on the wire antenna FM range of the music center. A long-worked and disassembled music center.
Here is this wire.
So I patched up the ends of the wire.
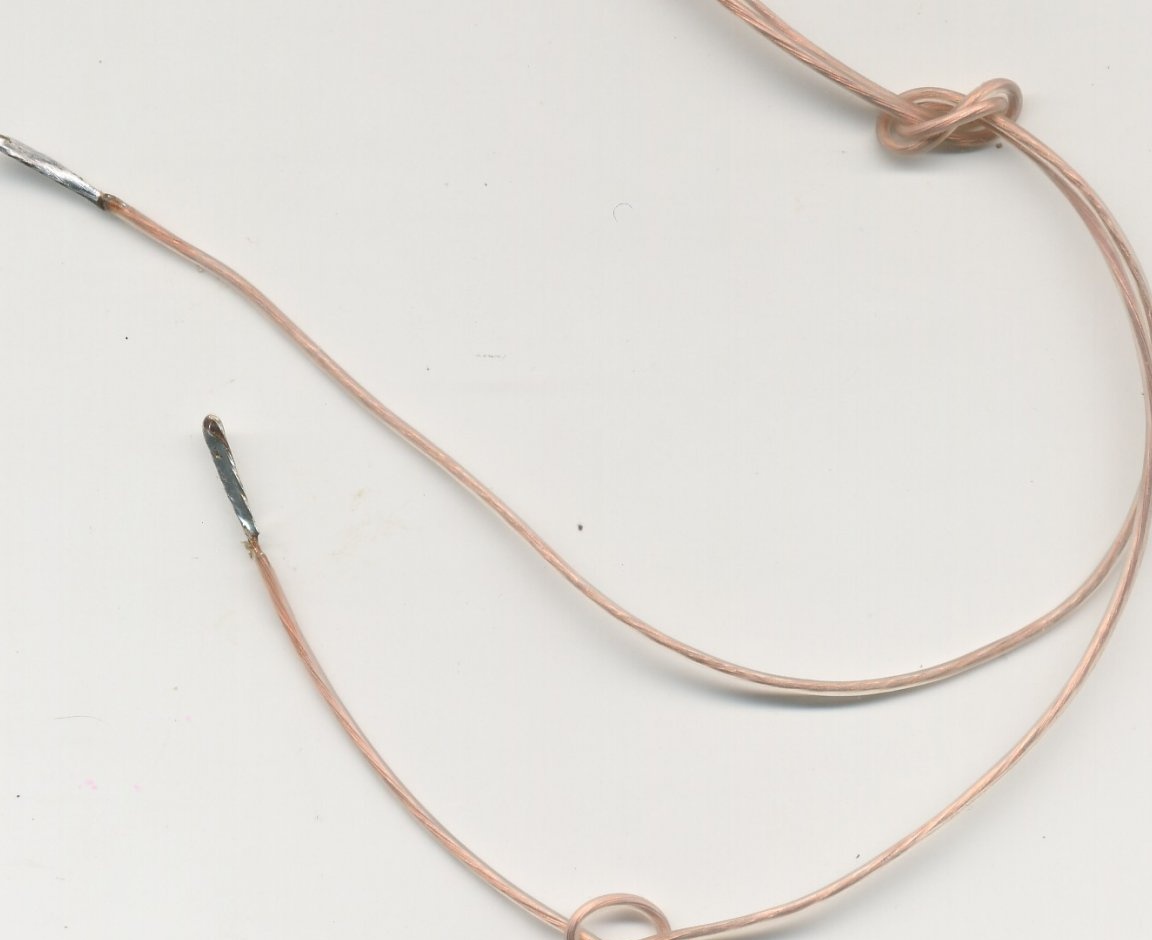
Plus, as usual, marked with a nodule. I looped the ends and looped them around (a cord with “crocodiles” at the ends was removed from my laboratory power supply).
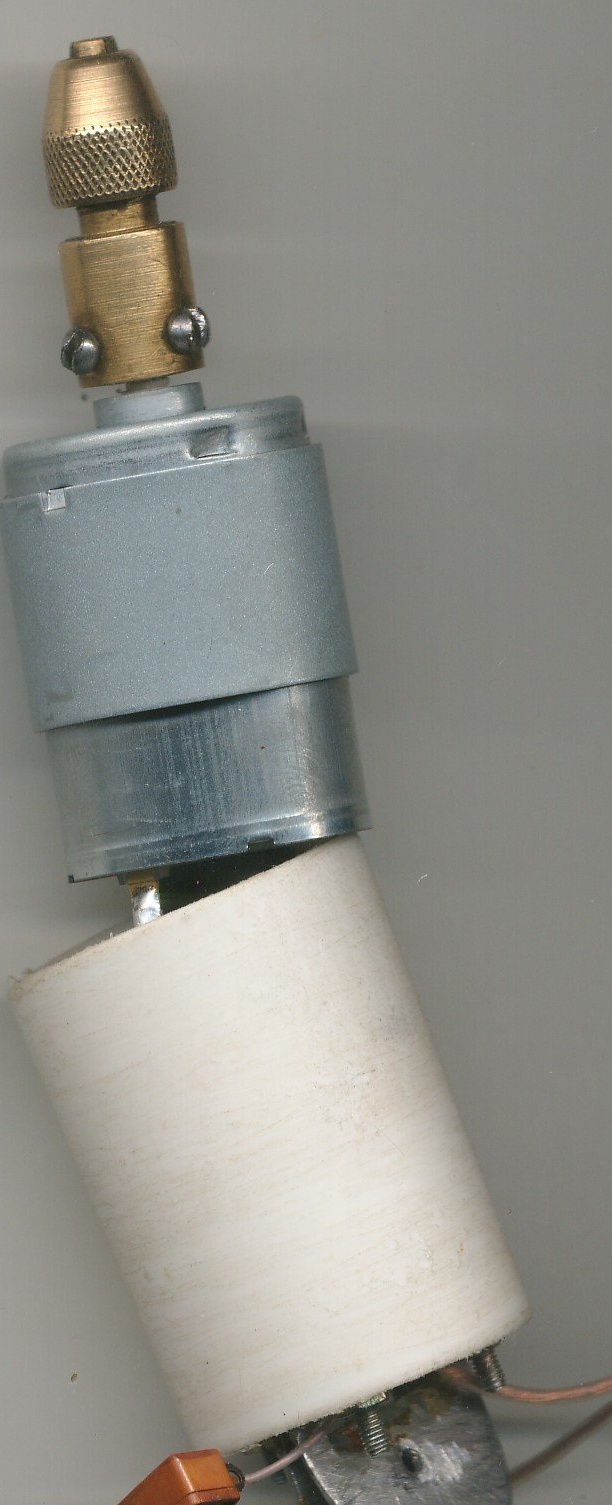
Assembly.
3 photos to understand the essence of the product design. At the assembly stages, a check was carried out by inclusion.
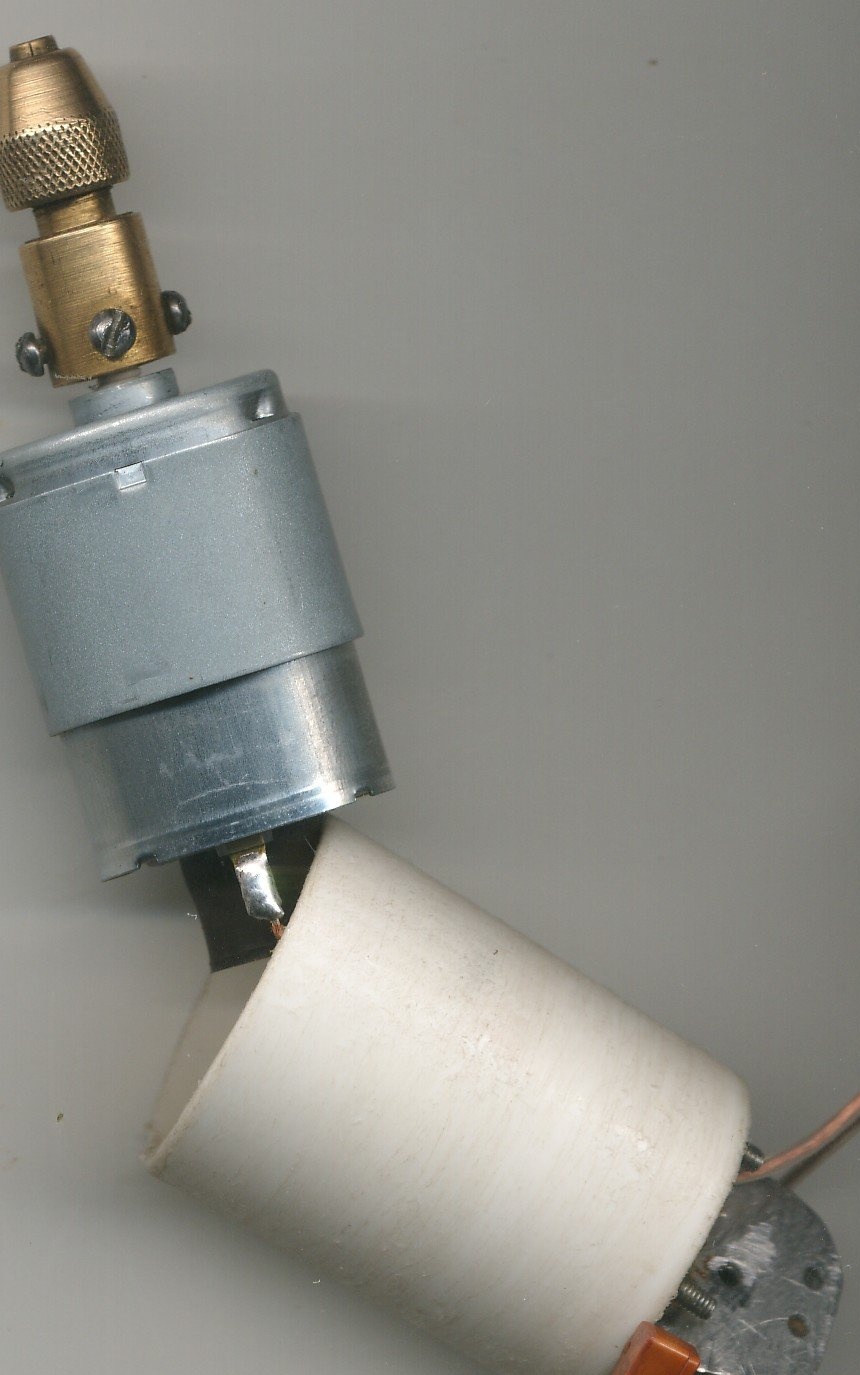

It can be seen that I soldered one of the wires of the power cord to the terminal of the microswitch and the second to the terminal of the motor.
The second conclusions of the motor and the switch connected by a piece of stranded wire.
Do not forget to correctly pass the wires into the housing.
Fastening the microswitch to the corners with champagne wire.

I wrapped several layers of electrical tape on the motor and inserted it into the case with effort.
I wrapped the casing with electrical tape in the part where the microswitch is installed.
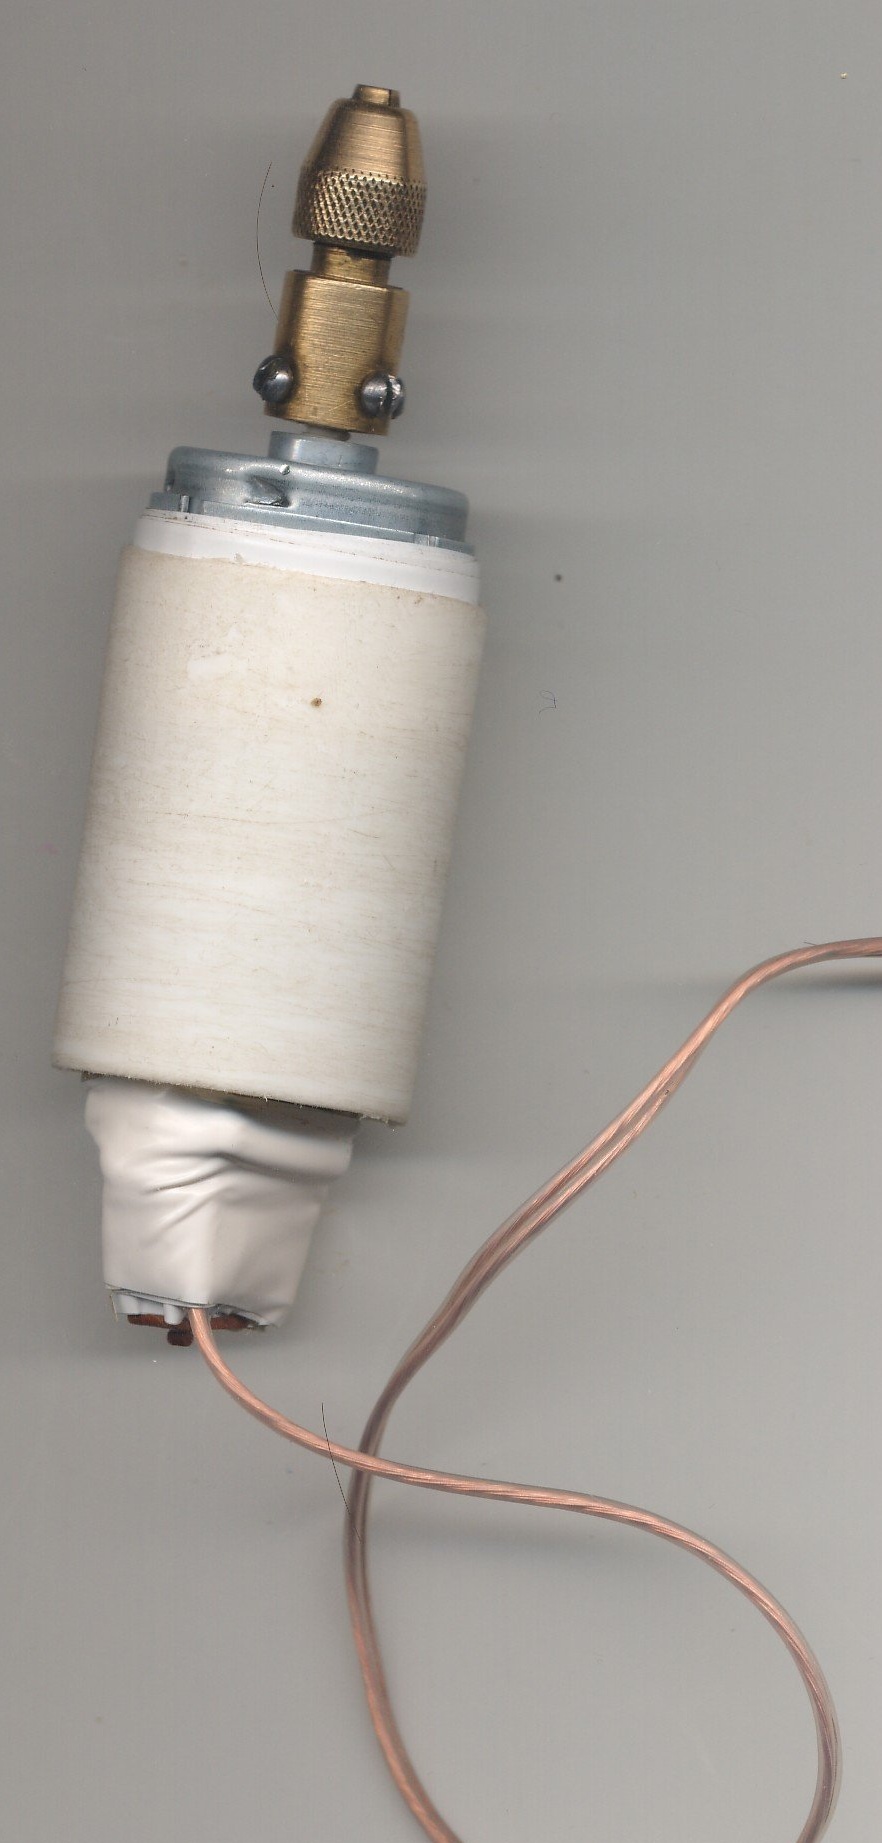
The product is ready.
"Funny" moments.
On the motor case, which I took for this homemade product, there was a thick red dot near one of the conclusions. The wire to it went blue, to the other terminal of the motor - black. By all indications, the conclusion is, where is the point nearby - is this a plus? It turned out, no. I understood this even at the stage of testing a homemade product without a case. And in the case it was easy to fix, just change the polarity of the power supply.
The bubble of vitamins, which I used as a body for homemade work, turned out to be made of some malleable material. Pierced, drilled a hole for the wiring, checked, the wiring passes. Measured, cut the wire, began to insert - does not climb, the hole was tightened. I got angry, made a hole in three !!! times the diameter of the wire. Only after that managed to push the postings.
Together with the selection of parts, it took me two days to assemble this drill. But I do not regret this time. I enjoy working with her. I found in my supplies a cartridge that fits exactly under the engine shaft. Cambrick threw it out, put the cartridge directly on the shaft. Drilled with drills with a diameter of 0.3 mm or less. I do not break the drill, I do not spoil the product being created. With a supply voltage of 12 V at idle, the consumption is 100 mA, and when drilling a pine block with a drill with a diameter of 1 mm, when the drill is immersed in a tree to a depth of 20 mm - 600 mA. The drill does not heat up at all during intensive work, especially since the motor only works when the button is pressed. According to these tests, it is clear that it will be able to work on batteries for a long time.
I think it would be nice to attach backlight to this drilling point to the drilling point on a bright LED. It will work continuously, without pressing the microswitch. That is, he just set the drill at the drilling point, pressed a mini micro drill and pressed the button ...
I hope this article will be useful to you and you will collect your mini micro drill in four hours.
Sincerely, author.