Iron itself is still peppy.
The cost of a new battery is commensurate with the cost of a new screwdriver.
She is possibly new at the time of purchase, but is no longer "young" and is ready to die ....
"Old Interskol"
What happened:
Another screwdriver was lying in the same condition ...
I decided to redo the Li batteries.
I calculated what it costs and was sad ... until I went to Ali Express.
On Ali, the cost of the necessary components is 2 times lower than ours.
Three years ago, reworking 2 screwdrivers with 2 charging kits cost me about 3,500 rubles.
One screwdriver - in the country, the other - at home.
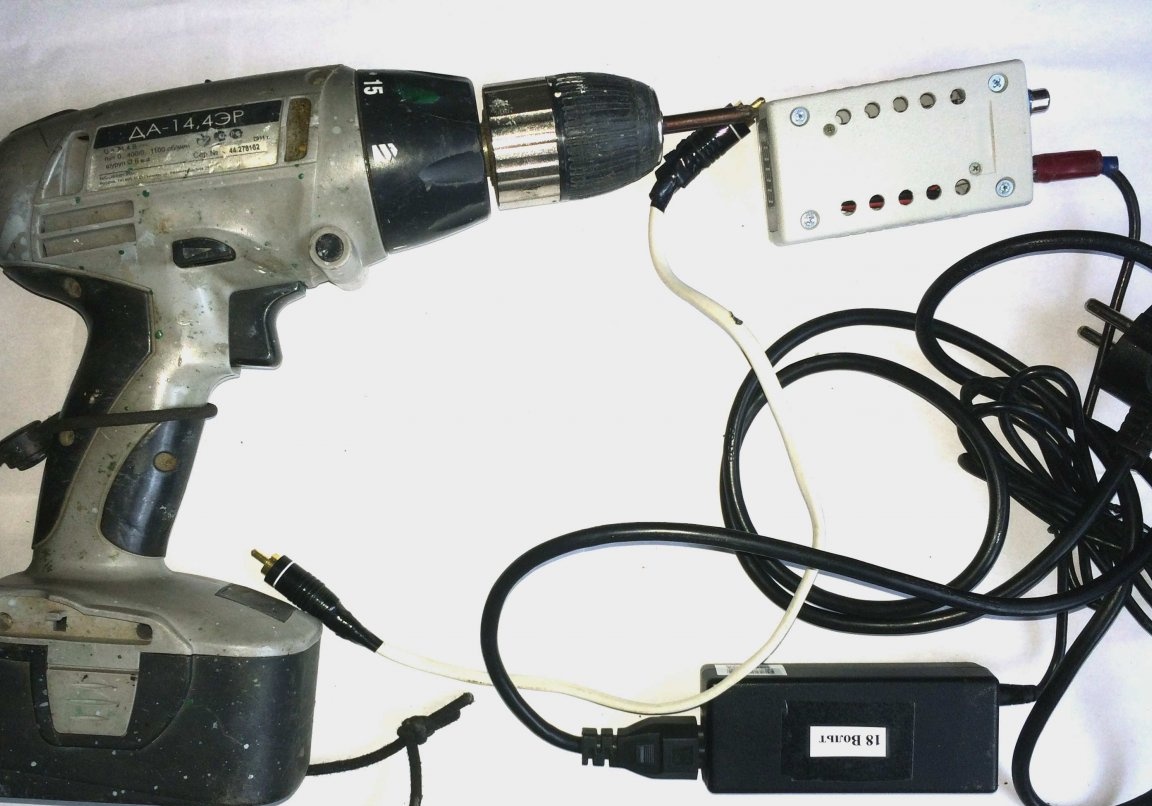
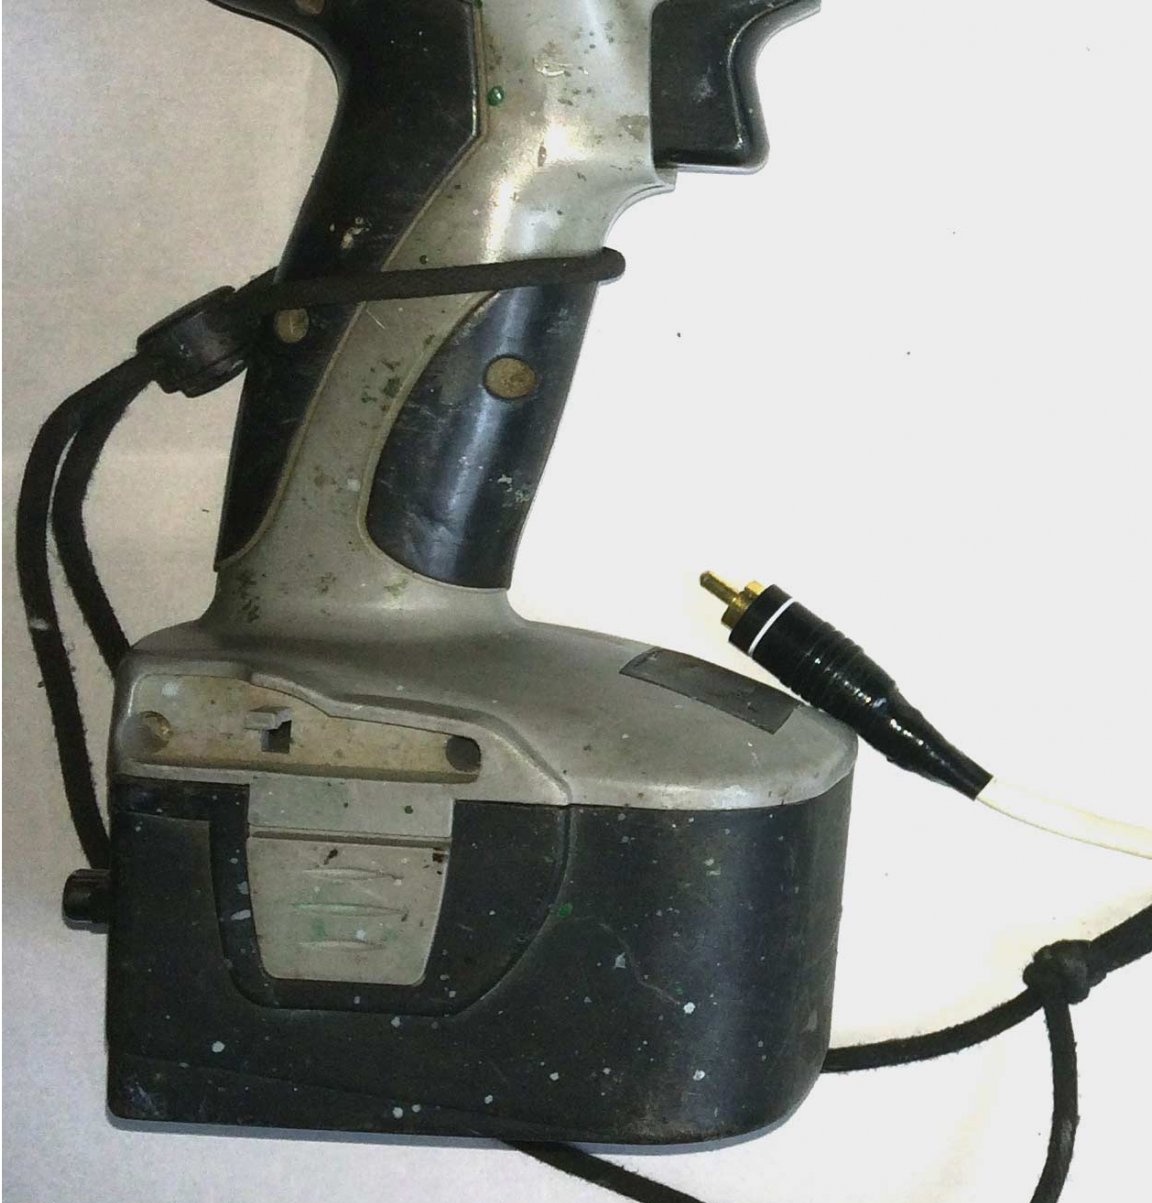
A cable in a white braid with audio plugs at the ends - for connecting the stabilization board unit to the cordless screwdriver unit when charging. For charging, the battery pack is removed from the screwdriver.
At the top is a light-colored box with a voltage and current stabilization board. Bottom right side of the power supply from the computer to 18 volts and wires.
Bit of theory
1 barrel of NiCd produces 1.2 V. For a 14-volt screwdriver, 12 pieces are needed.
Charging is carried out by low current (0.1 of the maximum discharge current).
When completely discharged, it forever fails.
It has a high self-discharge and a residual charge memory.
1 18650 (Li) battery Provides 2.4 to 4.3 V.
18 - diameter in mm 650 - length in mm
The charge current is of the order of 1C-2C (single or double value of the capacitance).
Otherwise, if the capacity is 2800 mA / h, the charge current is about 2.8 A
If it discharges less than 2.4 V, it will permanently fail.
If the voltage is exceeded, 4.3 V - may explode ....
To prevent this from happening - there are special CONTROLLERS that monitor the current and voltage of the charge and discharge.
Batteries based on the 18650 and with integrated controllers are sold.
Their length is several mm longer and another designation.
So, you need to power a screwdriver with an operating voltage of 14.4 Volts.
Take a 4-re Li battery: 4 pcs x 4.3 V = 17.2 Volts - this is the maximum value that cannot be exceeded when charging.
For a screwdriver
17.2 -14.4 = 2.8 V (excess) is not scary.
Each battery needs a separate controller.
It will monitor each battery separately.
To do this, the controllers combine several pieces on one board.
We need a controller board for 4 batteries.
Getting down
Materials (I do not quote prices, because I did it 3 years ago) for one set:
1. Batteries 18650 - 8 pcs (2 blocks)
2. 4 element controllers 18650 - 2 pcs.
3. The power supply from the computer (laptop) to 18 Volts - 1 pc.
4. Power stabilizer board - 1 pc.
5. Digital voltmeters 3 pcs.
6. sockets and wires (small things).
7. Housing for stabilizer board 1 pc.
8. Spot welding tape
Laptop power supply
(220 V network with 18 V DC output).The old charging unit will not work - it is low-current.
Why such a network power supply is required: - you need to generate a voltage of about 18 volts with a current of about 2 A - this is just a block from a laptop.
You can buy separately or dig into the bins of spare parts from old laptops.
I found in the bins (from friends). The connector (the instrument part) had to be bought at the radio store.
A lower voltage is not suitable, since there are input voltage limits for the stabilization board.
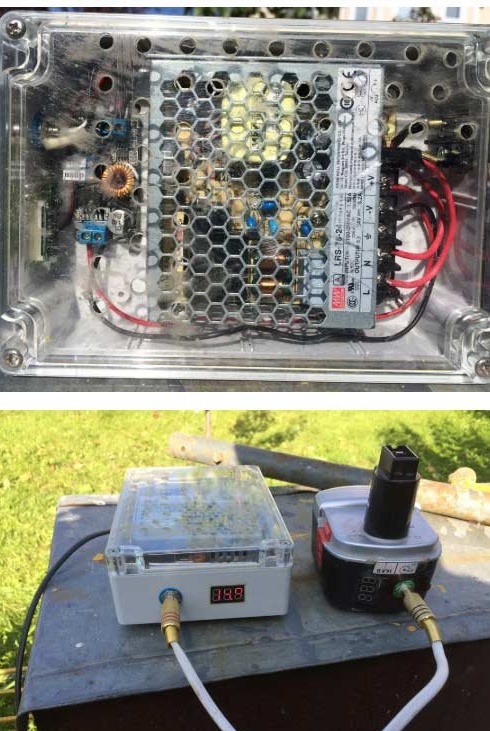
Stabilizer board block
(I bought the case at Chip and Dip). You can glue it yourself ....
Stabilizer board inside the unit.

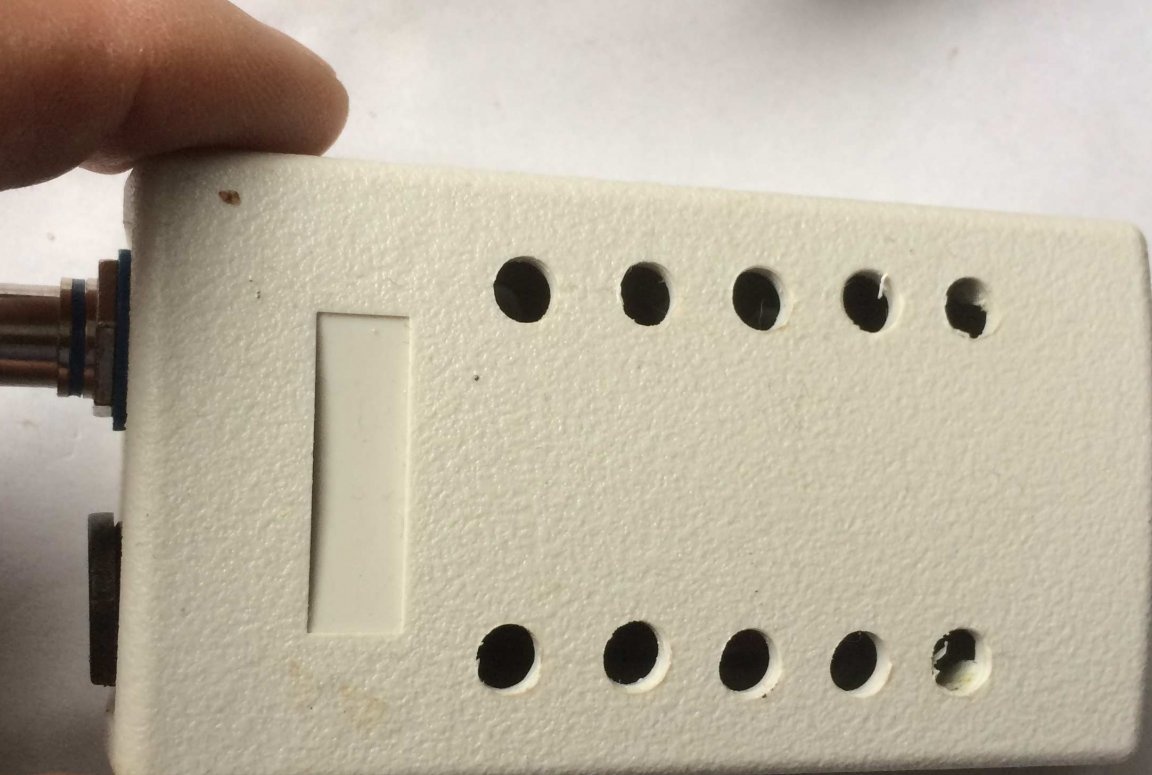
Drilled holes in the housing for ventilation.
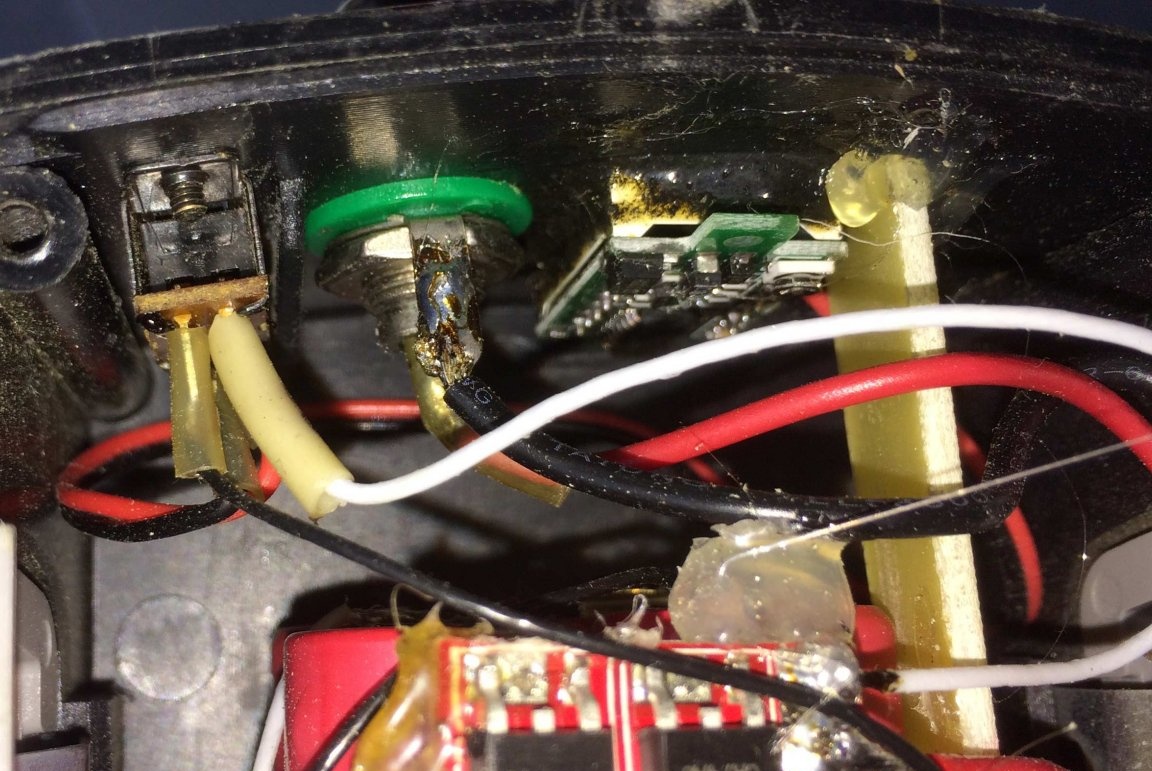
At the top left, the slot for connecting the battery pack of the screwdriver is from a regular audio input. Fastens with a "native" nut.
At the bottom left is the socket for connecting the network power supply. Fastens with a "native" nut.
On the right is a digital voltmeter.
A hole is cut out at the end, a digital voltmeter is inserted, which is fixed with hot-melt adhesive.
The red arrow marks the potentiometers that set the output current and output voltage (to the battery pack of the screwdriver). The inscriptions "I" and "U" made white paint myself.
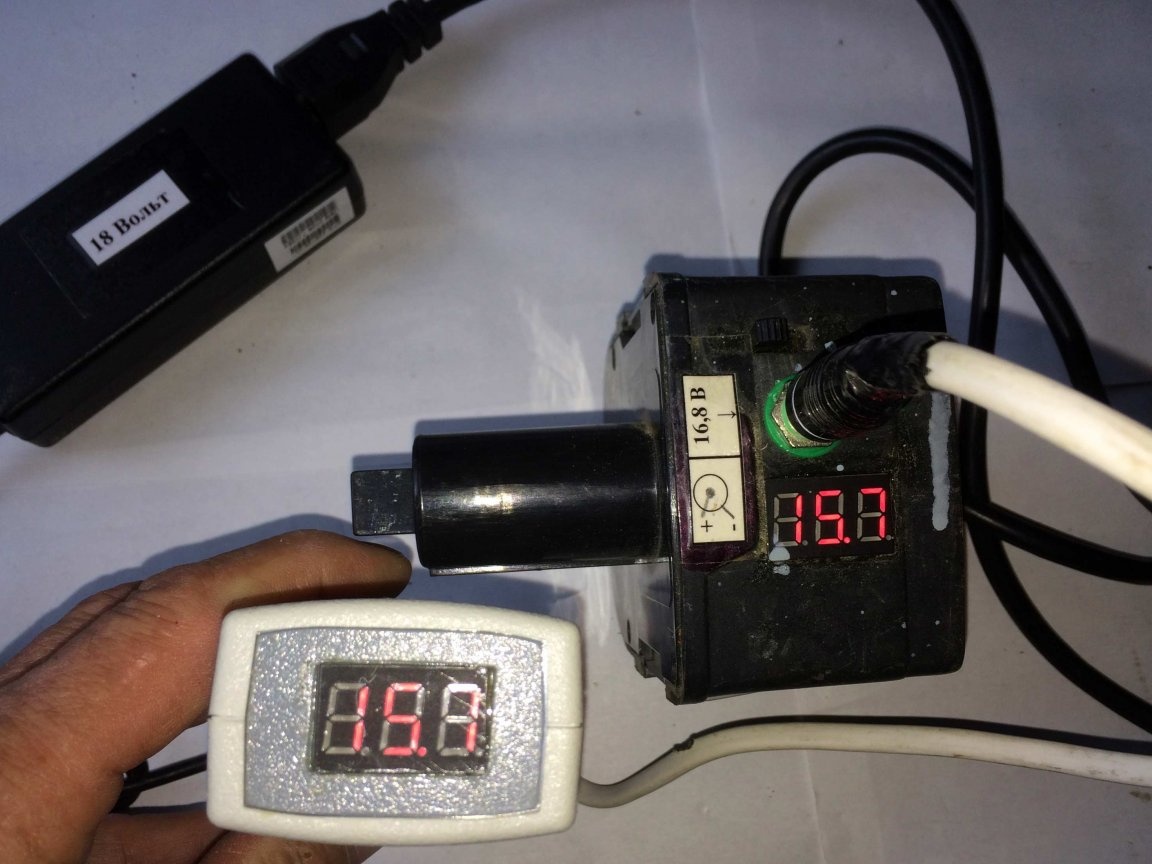
After installation, we connect the power supply and set the output voltage using a digital voltmeter.
I set 16.8 V, not 17.2 V (with a margin of 0.1 V per battery).
On the left is the slot for the charging unit (mains).
On the right is the jack for the wire going to the battery of the screwdriver.
On the stabilizer board block and the battery pack 15.7 V. The minimum discharge is still far.
Voltmeters on the stabilizer board block and the cordless screwdriver block allow you to evaluate the charging process. If somewhere in the wires or connector breakage - this will be visible immediately.
Once the soldering fell off. The voltmeter immediately showed an unacceptably low voltage.
It took 5 minutes to find the fault, taking into account the disassembly of the battery pack.
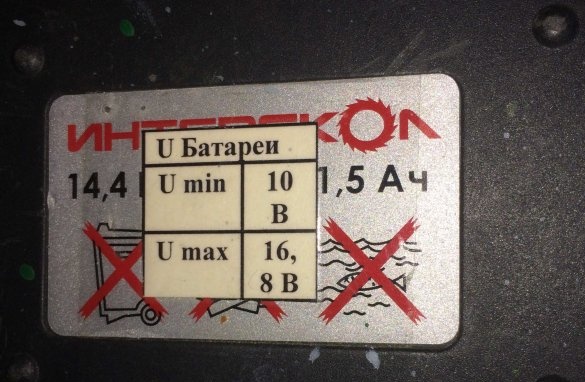
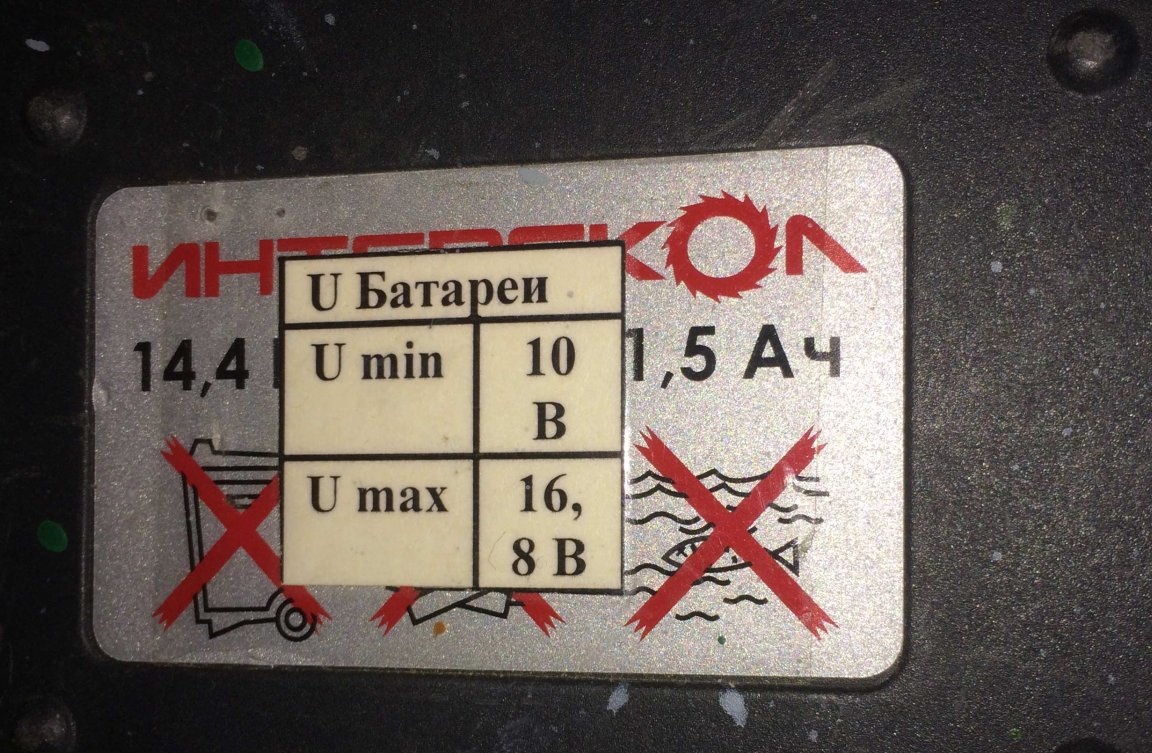
The voltage limit values on the battery pack are glued to the bottom of the battery pack of a screwdriver with tape.
A voltmeter on the battery pack allows you to assess the degree of charge. I usually put it on recharge when it's 11-12 volts
The inscription - so as not to forget ....
When we turn on the charging for the first time, you need to insert an ammeter into the wire section between the stabilizer board block and the battery pack of the screwdriver and set the required current on the stabilizer board with the "I" potentiometer (1-2 A, depending on the capacity of specific 18650 cells).
He set the current to 1 A with an old tester TL-4.
Cordless screwdriver unit (native housing)
On the battery pack is a control voltmeter, a socket for connecting charging and a voltmeter switch (poorly visible due to black color).

The inscriptions on the value of the voltage and the wiring of the connector are far from superfluous.
Need for repair.
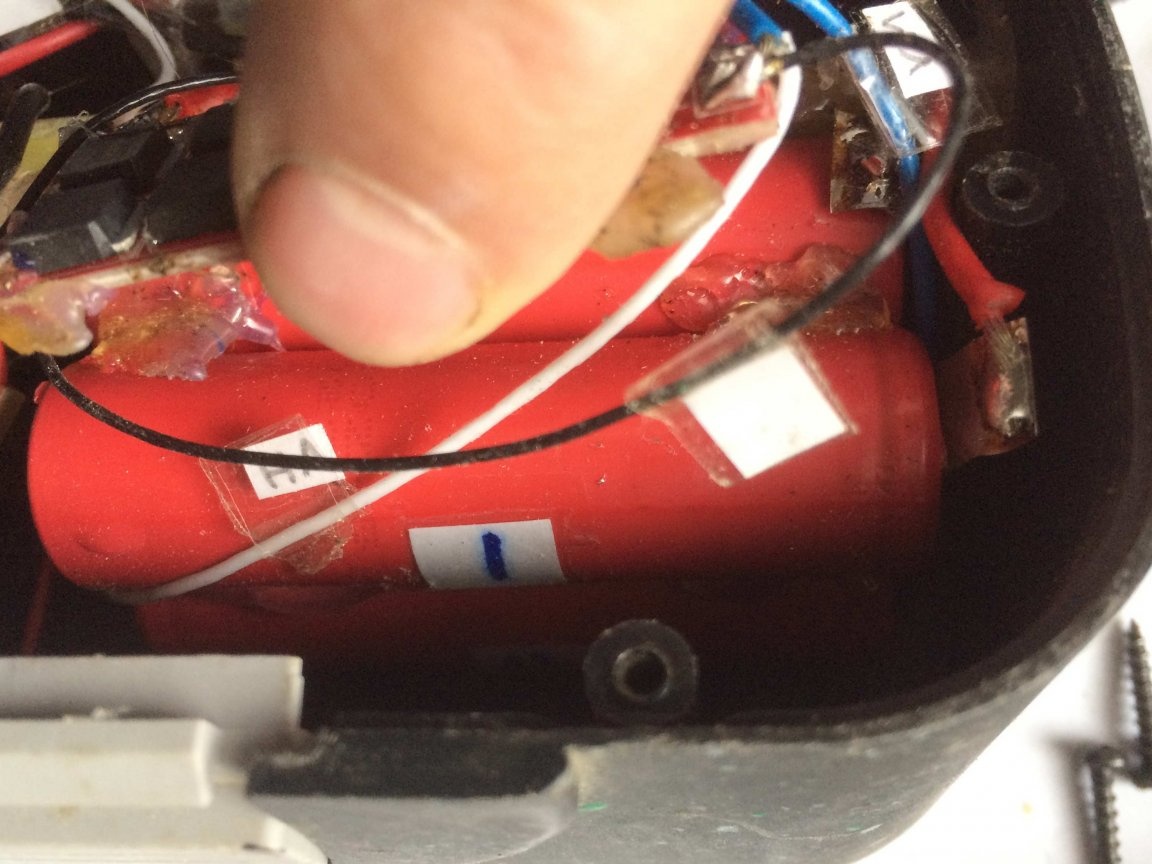
Battery pack inside.
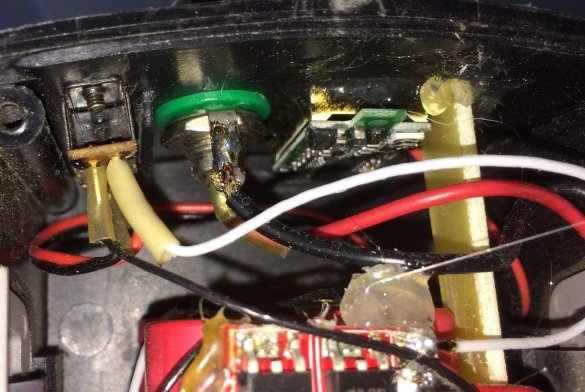
From left to right:
- voltmeter switch,
- a slot for a charge,
- digital voltmeter.
When the voltmeter is not needed - off. He is to assess the degree of discharge.
4 battery controller
 .
.
The controller must be taken with an output current of 15-16 A.
If it is less, the controller will disconnect the battery when the load is heavy or the screwdriver starts.
The installation is made with a thick wire, so the currents there are big!
The batteries are fastened together by hot-melt adhesive (the battery is turned out).
The battery is attached with hot-melt adhesive to the walls of the unit.
After unsoldering, the controller board is attached with hot-melt adhesive to the battery.


Technological nuances.
Lithium batteries are afraid of overheating.
If you disassembled the battery, you saw that the individual elements were fastened together by spot welding with a metal tape.
The tape is sold on Ali Express. Cooking it is not easy.
If you solder with a soldering iron, then you need to do this with powerful and short-term touches.
I did spot welding from a microwave transformer.
I trained in welding and everything worked out.
If old battery packs are available, serviceable batteries can be removed and used. Desirable - the same ... by type.
The validity condition of individual elements is at least 2.4 V per element.
The tape welded to the elements - do not peel off the body, but cut in the middle.
It is much easier to solder a thick wire to the scraps to form a new battery.
Three years I do not know the problems with Li batteries. The charge is about 1-1.5 hours.
They lie for months and do not lose capacity.
The battery pack is much lighter in weight.
Bonus
Either from the jacket, or from the bag there was a lace with an adjusting clip. He attached it to the handle of a screwdriver. If necessary, I hang by the cord a screwdriver in my hand. And you do not need to look for a place to put it .... for example, when working on the stairs ....
The second instance of the charging unit was made in one case.
Instead of a computer power supply, a converter was purchased from 220 to 24V and a current of 3A.